Transcripts
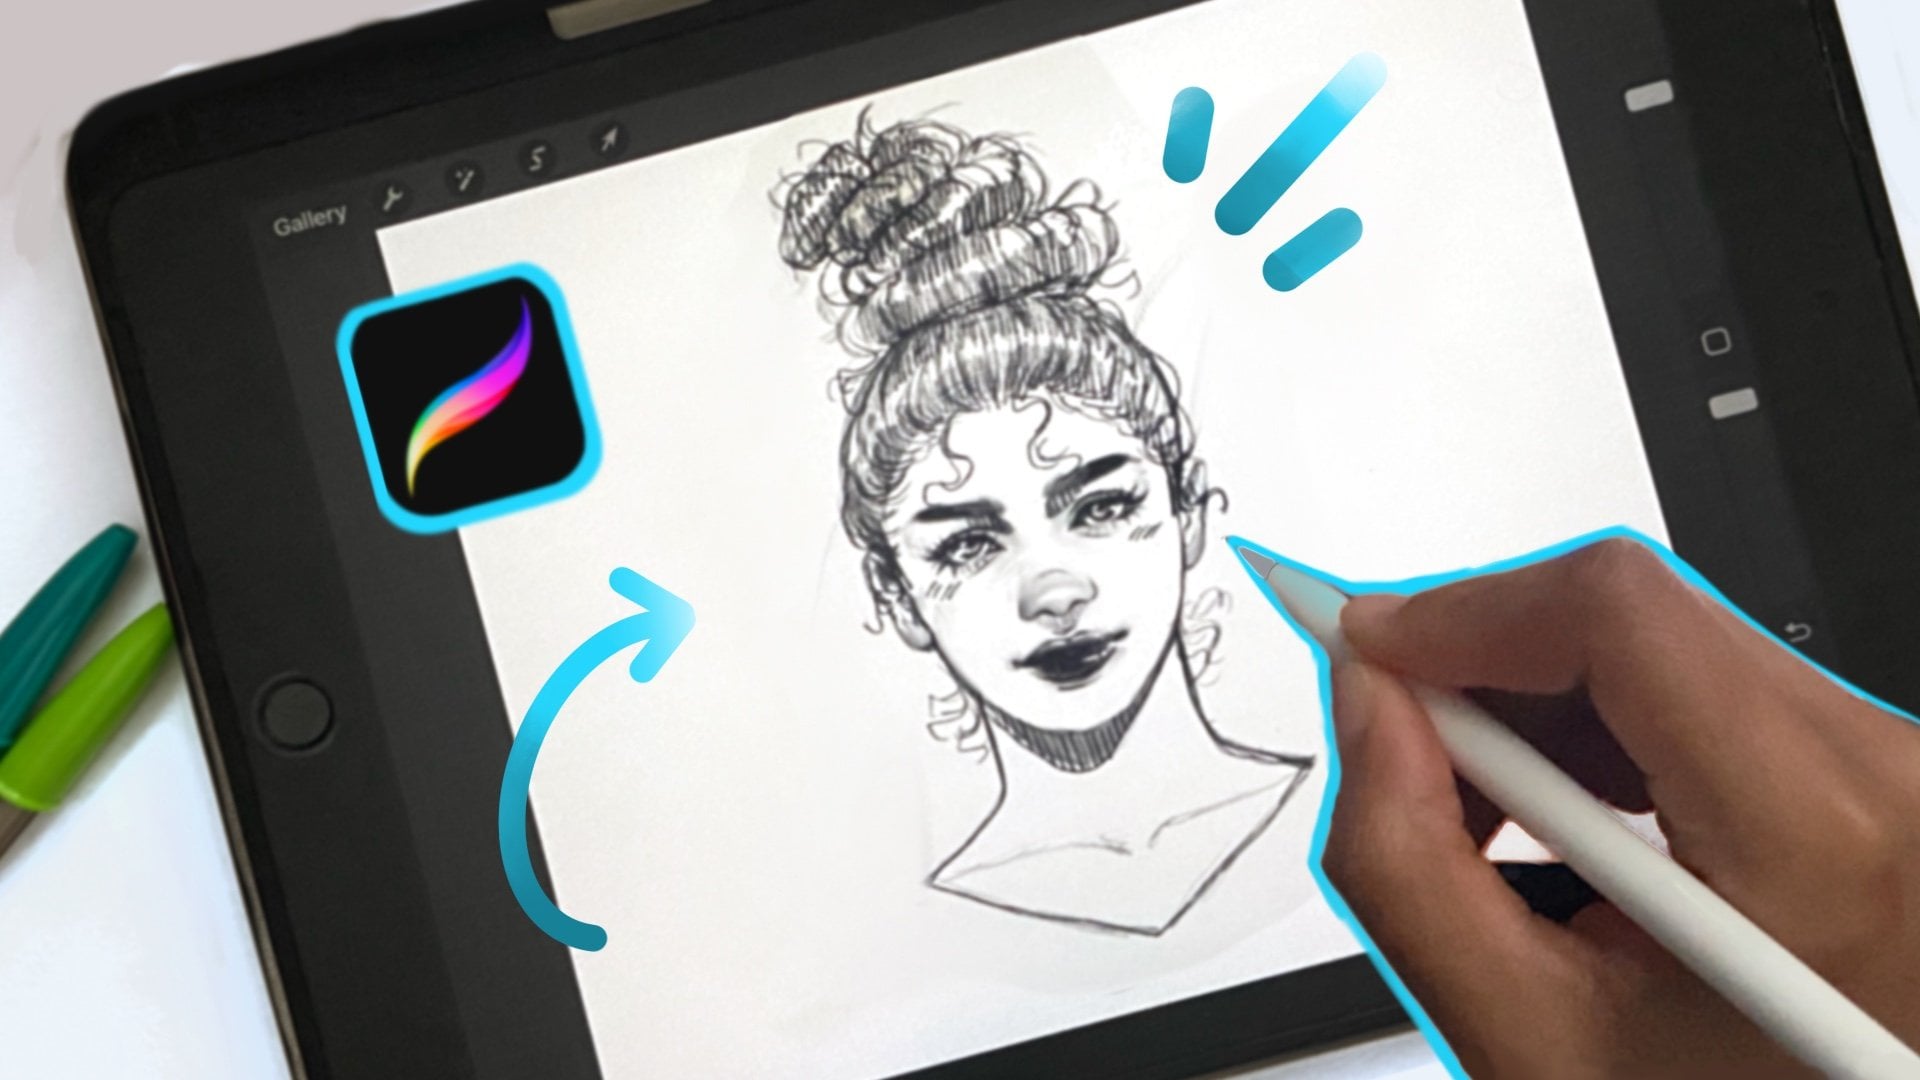
1. Intro Video: Hi. Have you ever wanted to set
up your digital portraits? Well, this class is going
to be above create. My name is looking like I'm a self-taught artist and I've been drawing
for a few years. And this is something
I've learned throughout my journey as an artist and something I'm very
passionate about. During this course,
I'm going to be teaching you how to shade. These are simple
staging techniques that I've learned using Procreate and other
digital programs. This course is going to be
for intermediate artists, people who already
know how to draw, how to get certain looks
to the faces they want to, our portraits, I should
say they want to achieve, if you're new to Procreate, this is the perfect class for you as well
because I'll be just walking you through some
brushes that I use, techniques that I use
and how I approach procreate and portraits like
I may be using references. And you can even do
this free, freehand. But for this class, definitely recommend
a reference and how to shade the face, add color as a bonus. And I hope that throughout
this course that these techniques will help you later on if
you're just doodling, if you artists practicing or if even if you have commissions, this definitely
will make it easier for you to go through
that process. And I hope that by
taking this class, you have fun, learn something. It's just gonna be
fun. So welcome to my class and let's
get some next steps.
2. Class Project: Hi, welcome to the class
project discussions. So for this class project, I would like you to
gather reference can be a selfie of anybody
else if you wanted to draw a friend or just do a self portrait for
yourselves, that'd be three. Um, so you just gather
a really nice photo, something that has
good lighting, good lighting, and we'll
be able to give you a good shadow value contrasts. That'll be, I'll show you in how to import
that into procreate. And you can just draw side-by-side if that
will be easier for you, which I have found is that after that you go
through your sketch, initial sketches,
something that you are comfortable with
and that you like. And after that, you'll
just go through getting, you're going through
the shading techniques that I haven't taught you. And you can just follow
along with me through that. And add color is an option
if you'd like at the end. So I just wanted this to be
a good simple class for you. So you can just do
a self portrait, just practice drawing yourself. And it's gonna be fun and
please follow along with me for the next steps and tricks or tips that I'll
be sharing with you.
4. My Go to Brushes: These are my go-to brushes. I'll be showing
you about four of them that I use on
a regular basis. So the first one
is the HB pencil. But you can find in the
sketching section in the brush. I love this because
it reminds me on using my pencil on paper. And I actually tried to get
the master color to use. So that's definitely my go-to. The second one is the ink. Inking is called technical pen in the ink section of brushes. Major use that too, and I really love
how smooth it is. The other one I use
is there brushes, that is my go-to everything. I used the ulcer for sketching, for painting enables me
to get a lot of traction. So I can get harder
surfaces like darker areas and I can
lighten it as well. And it just reminds me of like if you imagine a paintbrush. But this is definitely the
brush I like to use on here. If you change the size, you can get more calmer areas. You can lower the size and
it's just really cool. Really, really, really,
really love this brush. I also use the smudge tool. I used the watercolor
I'm sharing right now. That is what I use. England and I found that
the most, the best. Blending with that favors
watercolor really well too. So you can definitely
see how it works. And when he used that to shows you the circular motion of
I guess we're brushing. It looks like that's definitely my favorite
blending brush. So these are my go-to.
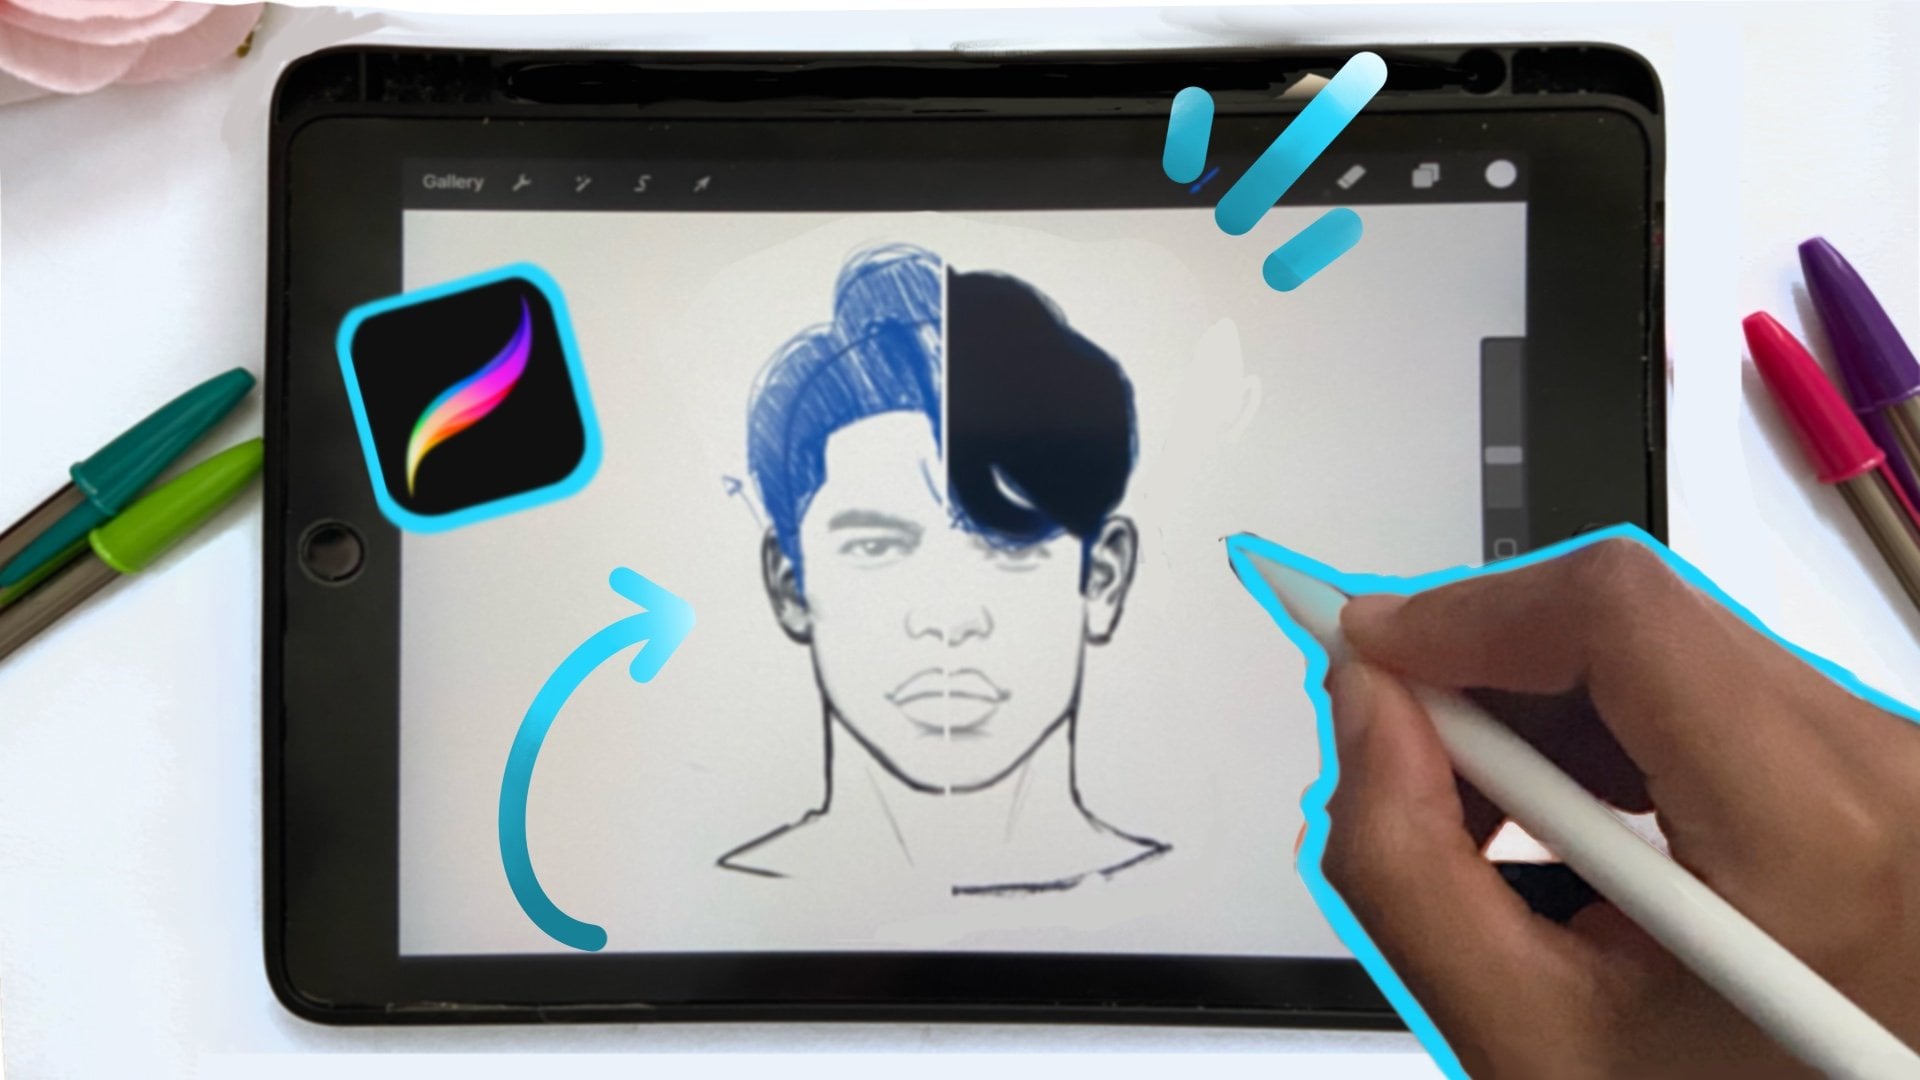
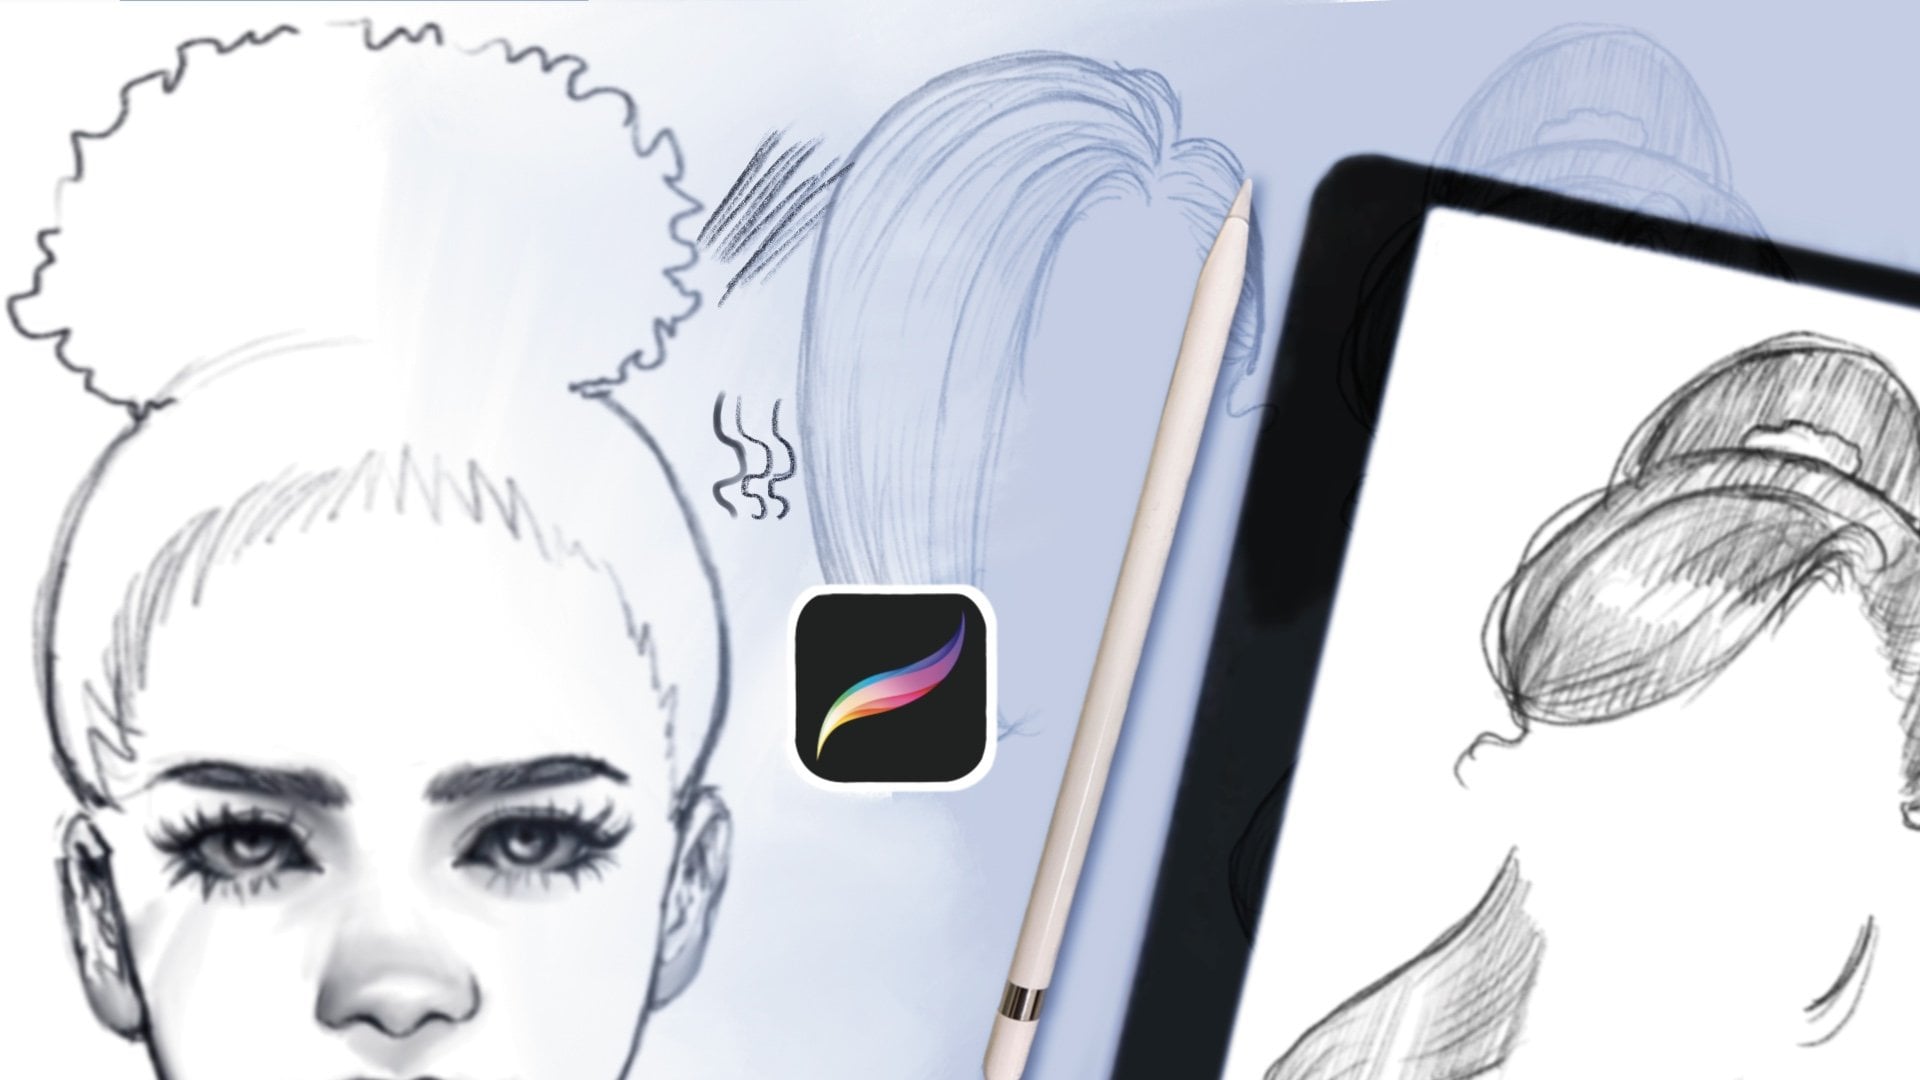
6. The Pencil Sketch: This pencil sketch, this
is gonna be the beginning. Right now, I'm
going to be guided through chest formatting where the hair and the eyes face resume grew through caucus and weren't
wearing the shadows. Basic form of the
hair right now and walking through the
basic shape of a face. I don't usually guidelines
when I do my initial sketches, I my, my eyes just follow the reference photo and then I just go through just shapes. I just land on. What shapes can I notice first? The shape I can notice
right now is just where the hair and where
the shadow is. It meets the almost
looks like it's the same color, but it's not. Also just map out the dark areas under their
neck, under the chin. I'm going to focus also on
the areas above the eyes. That noticeable shadow under
the right side of my face, also underneath the
mouth, my mouth. And just those things that you can just map out with
your eyes first. Those are what I'm focusing on. So if your photo also
has a nice contrast, as long as it's
going to help you to notice where the
shading needs to be. Most. Those areas aren't going to stand out too
much in your final piece. This is just your angel
sketch just to see if you have where you want your
proportions to be false. They are. You might
use a different style. You might not quantity
semi-metals and orally realism or
just want to do like a cartoony,
cartoony style soaking. Start off with the face, would start off with the shadows and mapping that out if that's
helpful for you, if your process is totally
different and that's okay too, with the initial sketch, you are able to follow about.
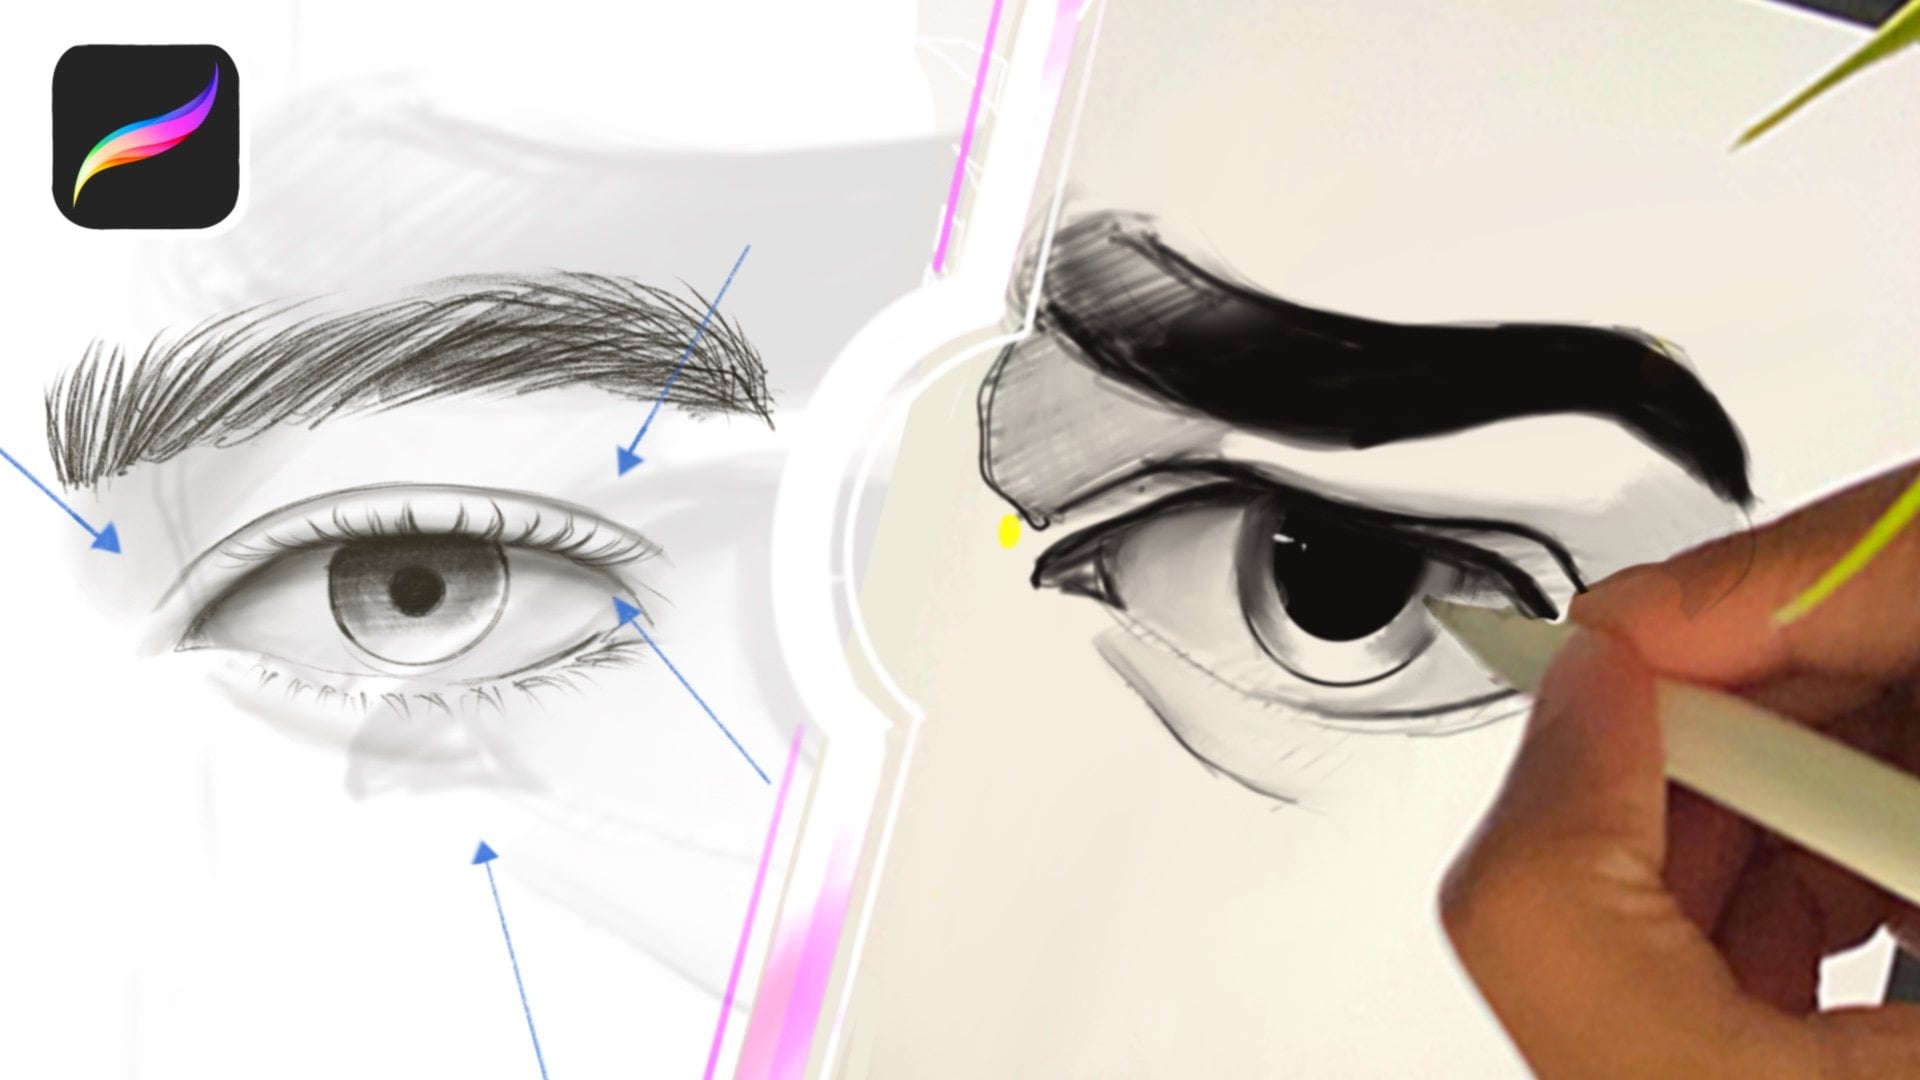
7. Drawing Facial Features: Right now I'll be
showing you how I draw the features on the face. Usually in this I
focused on the shape. Is there an under
drawing my eyes. I focus on the upper eyelid. The lower eyelid. Just do as best as I can. I would recommend
for quick thing on. You can start with
the eyes wherever feature space that
you prefer best. I just like to start with Alex because I was like my
favorite part to draw. I do that. I also I'll turn my eyes in the way that I
can make sure it's even. But you can always draw a line. Start with when I first draw a line connected
to the other eye. If you're not really
used to doing it without a base or something
to help guide you. Either we can use a guide. I just use freehand
and just look from the picture to my paper. I know it won't
exactly the same, but I usually just go like that. I start my sketches. Right now. I'm also trying to
refine certain areas. I usually see certain
nurse I went to refine and I usually just go
through that as well. I found it too. It's
helpful to have your reference right
here on the screen. Usually I don't do that, but I find that that's much
more helpful in getting, making sure that the proportions
are correct on the face. Drawing in the news, focusing on the shape, this focus on my nose shape, which is the nose area
is very circular. Just making sure that those
are coming out correctly. I'm not sharing
anything right now. I'm just focusing on getting making sure everything
is worried supposed to be the oral as I like it as closely as possible to
the reference photo. Just making sure everything
is in the correct place. The United very
helpful to do just focus on one area at a time. Remember, going back to the root and sometimes the shape
is hard to capture, so we're going to
refine later on, so don't get too caught
up on the details. Just make sure the base, what you have right
now is enough closer, closest to what you
have in your picture. And also it's good to draw with your favorite
picture, I think, because you know your face, you can capture
your face better. So it's definitely good to have. Use your favorite portrait if you'd like or somebody else. These tips will help. Right now, I am changing it. I noticed that certain
features or two weeks, I usually use the Lasso tool. I will shift in nature. We think we're supposed to be
also known as seven months, did not draw them
on the correct way. So definitely use those
tools at the top. I like what I have so far. I'm just making sure
everything is in place. Now. I'm doing the shading
for the shadows. From what I see right now, I
have a shadow on my rights. I was just drawing those in
during those like awesome. Identical on my left side. And I steal small indent on my right side and I will
be doing that as well. Also adding a drop shadow under my lips where the shadow
is under my news. And any other
shadow areas I see. I'm just going to shape those
in a focus on those areas. I'm just doing the shape of it. So if I see a curve
closer to my nose, I will just put the curve bear. I'm not blocking in
color at this point. Just sketching is placing.
Everything should be. Also get the shape, the line under the eye. And anywhere else you need. Also make sure that you
get shadow under her neck. If your if your photo
has a shadow in there, always try to erase
any of the lines. I think I'm not gonna
be inking this sketch. I'm just going to be sketching. Want to make sure my
hands are clean as possible. So that's
what I'm doing.
8. Shading Technique Part 1 : Hi, this is my shading part one. In this section, I will be
showing you how I shave. This section. I'm gonna be using hatching. This is going to be
referred vertical hatching. So I'm just gonna go back. I'm just going back
and forth very quickly and then just
filling in the values. So I'm going to use darkest.
I'm gonna fill that in. Wherever the shadow is always
warm feeling right in. I'm trying to do just create
where the values are. Using this technique
is just gonna be like if you're
sketching on paper, if that's where
you're comfortable. And then I really like this
method because it's just because I started off with
sketching on paper engines, doing that way with the pencil. That method I would use a
Q-tip to blend. This method. I'm just using the
same thing I did, which is just using
the pencil tool. Still. This section. I'm just going to
just go up and down. And I'm trying to also contour, which is to just get where
the shape of the face. I'm not just going up
and down randomly. I'm trying to make sure that the values match
and it will still show where the dark areas are
on my face and the portrait and still
developed a volume. I'm just going to
get under the eyes. Those are the key
areas here is in this photo that I've seen
are gonna be the eyes, the nose that aren't
yours and knows those. I'm going to try to get the
volume even if it's lighter. I'm doing that to make sure the shape of the
face is there and it's just not gonna
be a flat image. I also wanted tip, I always say as well is
to shading the eyes. Don't leave it white. Because when you blend it, it will create a better effect. Like that's something I've
learned recently and it's social very helpful and that's like my favorite
way to draw eyes. Now. I'm just blocking in
and right now too as well, the irises. Any shape I've seen that I know that needs to be blocked in. I'm just filling
that in as I go. I'm making sure to
reference my photo. I'm not doing this without
looking at my photo. Capturing within
the shadow as well. You can see that there's
different values in there under the ice and a little bit darker on the side of the mouth. On the right side is a
little bit darker as well. And thus capturing my dimple. Making sure that everything is valued in before
I do anything else. Making sure whatever it
was to be dark as dark. Whatever is supposed to be a little bit lighter is
a little bit lighter. I'm just building up my
Porsche at this point. And this technique is very easy to transfer from traditional art.
That's what I found. And also there's a, here's a tip as well. If you want to, you can just do a traditional BI and then
bringing it into Procreate. But that will be like
separate video or something. But that is also be a
pretty neat trick to do. And I love perfect because you can do that really
easily as well. But right here now I'm
going to be blending with the smudge tool. As you can see, I'm
doing some motions. Didn't start. Some of the motions I do when I'm doing this
is circular just to make sure that everything is
blended correctly and it's just you're not seeing
the lines again. If you want though, you can
keep the lines in there, just blend slightly for
certain areas like the edges. Then keep the lines just to have a nice texture to your,
to your portrait. Right now I'm just
blending in making sure everything is blended together. I'm trying not to. Well, as you can
see, but when you blend two or let
me just say this. When you blend is going to go lighter than
probably what you have put down with
the pencil brush. So you're going to
have to build and that's what I kind of like
above this just building. I'm used to just doing
that kind of technique, just building the
values are I know you can see the shape of the
face is there, it's limited. You're not seeing too
dark, too many dark areas. But you can still
see that the face is getting their noses
and look so flat. Around the eyes doesn't
look so flat either. Making sure to get
under the neck area where you can see the
the darkest area. And as you can see, I have two
absolute fill it in again, have to keep going in. And that's what I
keep doing that keep doing the same motion
up and down, up and down. And also with these strokes, it
doesn't have to be perfect. It doesn't have to be completely straight or anything like that. Just as long as you're
filling in with an even value and you can have to be
careful with your pressure, the pressure you put on your pin right here
for the lighter areas, I just kind of lightly do. Just think of how
you would do with your pencil on paper
just to make sure your values aren't too dark for the areas
you want to be light, you're going to have
to make sure you have light pressure on your pen. And for the dark areas just to, just press down harder. Then make sure to keep your
shapes so you don't want to go outside the shape
of either an ellipse, your nose, your eyes. Just make sure you
keep those in mind. Keep blocking in the darker
area since blending. You can see that it got
lighter than what I wanted. So I'm just gonna keep
blending to keep the shape. And I'm making sure as well
to keep referencing my photo. I am not leaving that out. One thing as well.
When you're adding in with the temple there, you can do a light sheet first, then go in with a darker shade. You want to keep the dark in the middle and not just spread
it out all the way out. So that gives the
effect that it's a depth to your,
to the impotent. This method, like I said, it is just a method that I
love to use on paper when I'm shading and I found that at first I didn't know I
could do it like this. And then I just
discovered this pencil. And I just knew I
loved the pencil. The pencil is like
my favorite feature now, I definitely recommend.
9. Shading Technique Part 2: Welcome to my shading technique. Part to this sexuality is showing you how I shade
using the airbrush. Sorry, now I'm going to do, I'm going to move a layer underneath the layer
with the sketch. I'm going to work through
that using gray tone. I'm going to mimic what
I've used using a pencil. But this time I'm going to
fill in with the gray tones. These values are gonna be
what I'll be using to block in the dark areas from my reference photo
into the drawing. And I'm making sure
that I'm getting any areas that needs to be dark. Make sure the values
are mixing together. To make sure that the nose is blocked in all the shapes that I put in the original sketch. I'm making sure that
that is together. Some blocking and also the
hair with the darker color. Again, you're just
thinking of values as you're doing this. This is, will be
similar to if you're coloring in with actual colors. Just to make sure the areas
that needs to be darker, darker and error study
to be lighter, lighter. And making sure that
each tone is there. Tsarina, and making sure
that the hair is blocked in. I'm just coloring
in with a pencil. I'm not going to fill in and use the lasso
tool and fill it in. I just call it in with
the Apple pencil. And making sure that I'm not overlapping it with
the areas of the face. Making sure that all the dark
areas include the pupils are in the shading for that, making sure the shading
for the both eyes there. Those are the key areas. When shading in a portrait. You want to make sure that
under the eye, above the eye, under the news, under the mouth, and any area under the neck. If you have any
shadows under there, you want to make sure
those are shaded in any values that you see. You don't have to shade
the whole skin in, but just make sure that
there's the lighter tones so that you can build
form on the face. And it's not gonna
be a flat image. And I'm going to do
the neck as well. I'm going to fill in the
color under the neck. And you can see now there's
a contrast in the photo. In the drawing that
is on the iPad. You're seeing that
there's forum, now, there's building and now when
you use the blending tool that I have to blend
in those areas, that needs to be a little
smoother because the dark, the straighter edges
are harder edges of the shadows that I have are
gonna Viewer under my eye, under the mouth and not under the neck
because you can see there's a straight, straight or shapes there or sharper shapes I
should see there. The shadows. I'm just making sure all of
those are filled in. Again, this is not
a complete drawing, but this is just a
way you can shade in your drawing if you don't
want to do the pencil, but I still offers
you the same value. This is just a one-step when
you're using the pencil is almost two or three
steps because you're shading using the
vertical hatching, then you're going to use
the smudge tool to blend. Then you're going
to keep hatching again just to make
sure the values are exactly what you
wanted to leave when you're using the airbrush, you can easily just
put the values in and then Blend,
and then that's it. You don't have to do
anything else because the airbrush just offers you a smooth surface or a
smooth like a paint, almost like your painting. And you just painting
with the color. She'd often do any motions
or anything like that. I'm going to make
sure that the hair has some strand there. Just looks a little
bit more realistic. But this video isn't about hair, It's just about the shading. But definitely if I was doing the heroin would
have more detail, just a little more
structured to help it out. And then when
you're adding color with this is gonna
be the same as I'll show you in my next
video and the bonus video. But this is how
it's going to be. I'm just going to keep making sure our takeoff the
lines for my sketch, just making sure that it has a little bit more realism to it. Making sure I get the details
that does show my face. Just making sure that the
highlights are there or I can differentiate between
highlights if I've dropped in the college and differentiate
between highlights, low lights and the
darker shadows on the face and portrait. Thank you for
watching this video.
10. Refining Your Portrait: Welcome to refining
your portrait. Then section I will
be just adding in what I didn't add in my
pencil sketch previously. Strand I'm just blocking
in the hair using the same vertical hatching
motion back and forth. I'm not going to be I
wouldn't recommend you to be too overly detailed on how the
lines are going right now. I noticed too that my
reference there is darker areas closer to
the face and outside. Is it lighter? But in this one,
I am not going to be really paying
attention to that. I'm just not focusing on
refining the shape of the hair, adding in what I would like. I'm not going to use the
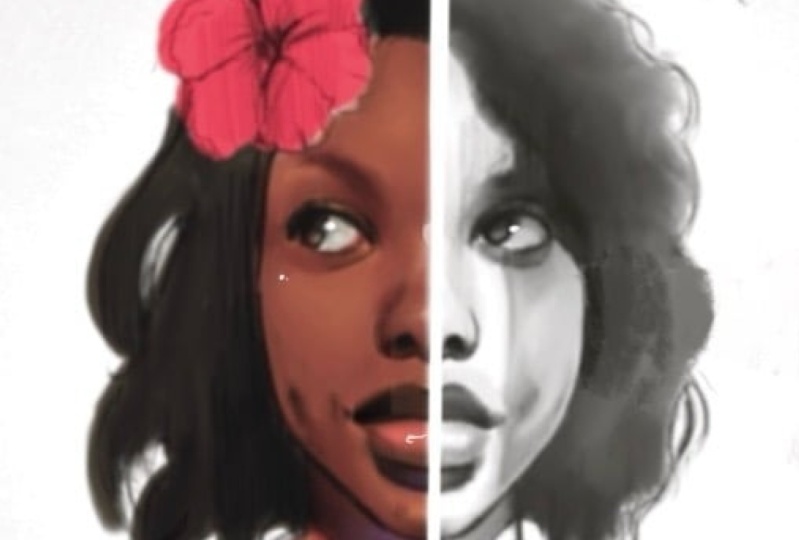
flowers in this reference. I'm just going to add a
single hibiscus flower. I'm just going during
normal motions here. I'll be adding some
hatching here as well. I recommend you to just add whatever you would like to add. This is your
portrait, it's 0 fun. Even though you're
drawing off of a selfie, you can add any
elements you want. If you want to add
some headphones. If you want to add your favorite
flower, if you want to. Just add anything basic
that is to your liking. Here I'm just going to
add in my eyebrows, even though they're
little faded encoder does adding that
section in there. And again, I'm
still building for finding the areas that could use just a little more shaping. And I'm getting as
close as possible to the shape of what I have
in the reference photo. I know that not every area because after I've looked over, notice certain areas could
use some changes that I didn't really come Exactly. I didn't really draw exactly
to the reference photo. But again, it doesn't have
to be the exact same things as long as you can review yourself in the
drawing that you drew. Again, any style is fine. I'm doing realism right now. Like I'm basing
off just a photo. But if you would like
to do your own style, when you do your project, that is totally up to you. You can still use
the same techniques that I'm doing right
now as I'm doing the up and down motion to get this here with the pencil
in Procreate. Before I forget, you just have to slot your
hand a little bit. That's what I'm doing. It's what I did to get that. As you can see, a slant in my hand a little
bit to get that. And then we press down. You can see the change that it does to your pencil right here. You can see the lines more
than when I'm doing the hair. I just press down with
the Apple Pencil. It does change. It just reminds me of using a pencil that I
would use on paper. Because when you change
the motion of a pencil, you can get that same look
that you see on the hair. But right here, one
thing issues are slightly turn your pen. Your app open. Here. I've already filled it
in and now I'm going to use the smudge tool again and just refining areas that I don't want to be darker. I think right here chose
to just try to get the dark edges close to fees. That's what I'm
doing at the moment. So again, refine your sketch
any way you would like, just make sure you keep the
shape that you already have. Air right now. I'm just blocking in areas
that I think could be darker, it could be a little lighter. Making sure I get
the details that would show my face from
this reference photo. I'm going to be changing a few things here as well because I've noticed that the face is a little too wide and I have too high in the face of
that will be later on. So this process refining is just doing the details that you would like to have
in your portrait. Again, this is using the same vertical
hatching motion and making sure I
get the eyelashes, the very details core to
the eyes, nose, and mouth. That would be able to identify. Photo. Again, you can see but
minimum book is still there. You're not seeing
too, too dark areas. There's still a slight contrast. I love contrast as well. I like photos that you can see where the dark
and light art, even if you don't have
the cheeks filled in, you can see with
the mouth, nose, and eyes, and even
with the hair. And the hair can be
just a single color. You do not have to really
focus on anything too complex. This sketch, just
making sure the details that I want to be
shown are visible. In the next video, I would definitely stick around so you can see how to add color.
11. Bonus: Adding Color to Portrait: I'll be adding color. I usually choose
the layer above, and then I think that we
are multiplying there. After that, I choose a brush, which is a heart your wish. But I usually like to use I fill the color next area that
I'm using colored in, I start with the skin tone. As you can notice that
when I fill it in, you can see the difference in the dark area and what
is light and dark. Most of showing you what
it looks like when I used this technique
on the airbrush. With this, I'm going to
be filling in the hair. Even when I filmed the hair
is supposed to be brown, but when you use the
multiplier layer, it will make it darker. So now you see that the hair, the color looks darker
than the brown that I've selected. That's how it looks. I liked this to me because I think takeaway from what
I've already sketched, I can already see where my dark areas are,
the shadows are, I should say, and where the lighter areas
are, the drawing. I'm just going to
continue filling in the hair for right now. Then, as you can
see, you can still, still need more structure
in terms of color, in terms of differentiating
what, what is what. I'm going to now
start with the eyes. Fill it goes in. You, I
don't keep over white. I'm going to be adding
in different colors now. Usually like to
use blue for the, for the whites of
the eyes or gray. Just to make sure the
tones of different agency, the shadow in the eyes. Also, make sure
that the lips are painting considered when
you put the flat color on, it's not going to show that you have to add different colors. I'm going to add
purple as well for the the darker shading
and adding purple. The shadow areas. Thank You. Just makes the drawing pop. Notice I'm just
going through that. Filling in what needs
to be a little darker. And then giving those
treatments there. I'm approaches as well as like I did with the friend associating, but now I'm just adding the
color in just so you can have more of a difference there. I'm just making sure I'm
building at the same time. I'm not just doing these randomly and just making sure
that everything building. And you can still see
what I've done before. Because I shaded out most of the lines,
you don't see those, but if you had this
sketch with the lines, you'd see it in the drawing when you're
coloring with the bonus poet. When I'm doing highlights, I don't use white here. I'm just going to use kind of
a gold, yellow, gold color. Then I just make sure
it's a blend that out. When I'm doing that, notice I'm not really
looking at my reference now. I'm just going by what I
have from her friends, but also from going
on with the shading, that's also from
the drawing itself. I'm doing that right now. Just make sure the
light areas are there. The lighting where you
would have more of the brighter colors or
they're just making, putting in more details
in my painting. This isn't a very good
technique to add color. Just pick your
colors, keep going. Make sure that also, because it's a multiply layer, it will change the color
that you add down, so you have to be
careful with that. But this is definitely
a good technique when you like the sketch and you don't want
anything to change, but you still want
to add a color and just make your
drawing pop even more. Make sure that you adjust
the colors as well, because sometimes the colors
will come down darker, so you can definitely
change the brightness of the hue in anything you want
to change in-between that. But this is a good start to just adding the
color to your drawing and making sure that your
shadings are still there. And it just keeps
everything there for you. Another note you can also,
instead of multiplying, we are both when
you're coloring, you can multiply
the sketch itself, then add your layer to
color underneath that, and that will be the
same effect ceramic. And notice that the
color layer is a bulge. My sketch. I'm going to address
the brightness. Thank you for watching
me bonus video.
12. Final Thoughts: Thank you for taking my class and just sticking
with me through all of the all of what
I've been teaching. What we covered with
everything from horses, sheep, shading techniques using vertical hatching and
the pencil brush. We also cover ******** to each using the air
brush in procreate. And also walk you
through how to add color to your art without their chips and
using procreate and how to approach your
portrait in simple ways, using shapes and structures. If there's one thing I hope you take away from this class, is this appropriate
or digital art in general is not
as tricky process. You just make sense
to get used to the program and what you
are doing after a while. It's gonna be very clear. After you get used to the
brushes and find your group. Don't forget to upload your project to the
project gallery on our class page so we can all have a look
at your progress. I'm just so excited
and hope everyone had a good time calling
along with me and cope what you learned
can be applied to your future projects practices for if you just want to start digital
art or your hobby work. So please leave any
reviews and follow my profile if you
liked this class. Also, you can follow me on
Instagram at designed to art, paper, art pencil. And you can also
follow my YouTube page outgrows G sketches. Thank you again and
see you next time.
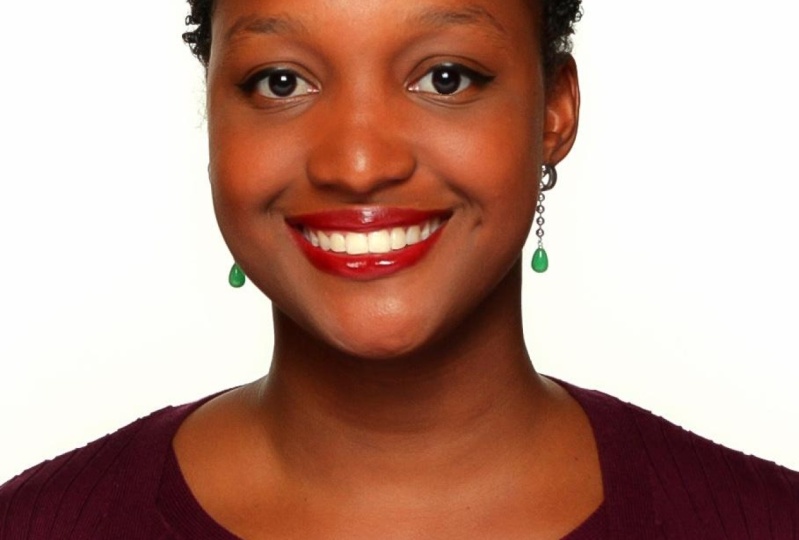
 Lakena G., Digital/Traditional Artist