Transcripts
1. Welcome to Class!: Have you ever watched
a child scribble? It doesn't matter
what their creating. There's this happy
to put pen to paper. And as we get older, we start to color inside
the lines and pay closer attention to what the
other kids are creating. And as adults were
driven less by what's inside us and more
by what we take in, but we can still create
from that place we did as a child because everybody
has a Scribble inside them. Hi there. I'm Joe Smigielski, an intuitive artist with a
degree in Art education. I've developed a method
degenerate imagery for my paintings
using scribbles. And I've been using this method
for the last 20 years as a way to break past that
blank canvas and black mind. So that intuitive marks and form a compositions and
inspire imagery. I'm sharing this technique by showing three
exercises that can be used alone or combined to
inspire your own creations. So what are scribble
prompts there? Visual prompts generated from your own scribbles
that can be used as inspiration for
illustrations, paintings, poems, stories, or just to get your creativity flowing because
the process is organic, the prompts are uniquely yours. Think of it as finding
shapes in clouds, but in this case, you are
also creating the clouds. So it's all intuitive
imagery from the marks in the scribbles to the prompts your mind creates
from the lines, will start with an
intuitive scribble. Don't worry, I've
got you covered. I'll give you tips and tricks on how to create your own scribble, as well as the best tools and methods for the most
productive scribbles. Then we'll dive into
our Three methods for developing prompts. In the first method will carve away lines revealing
our prompts. As lines disappear, the
Scribble itself evolves, and our second technique, but Color black to
build up our crops, any color can lead to fund surprises are finished with a third technique in which we draw it intentionally Outlining the parts of the
Scribble that inspire us. This class is for beginners
to seasoned artists. It's great for anyone who wants to break a creative block, work more mindfully and it might inspire your
next masterpiece. It's a class for
anybody who wants a stress-free
approach to creating without expectation and scribble prompts or just plain phon. I'll be using Procreate
with an Apple pencil. You can use any app
you're most comfortable with and desktop or iPad. And it does help to use a pressure sensitive stylus
while I am using Procreate. This isn't a Procreate
specific class, so it assumes some
familiarity with the app as we won't be
discussing the interface. So are you ready to Unlock
Your scribble prompts? If so, let's start scribbling
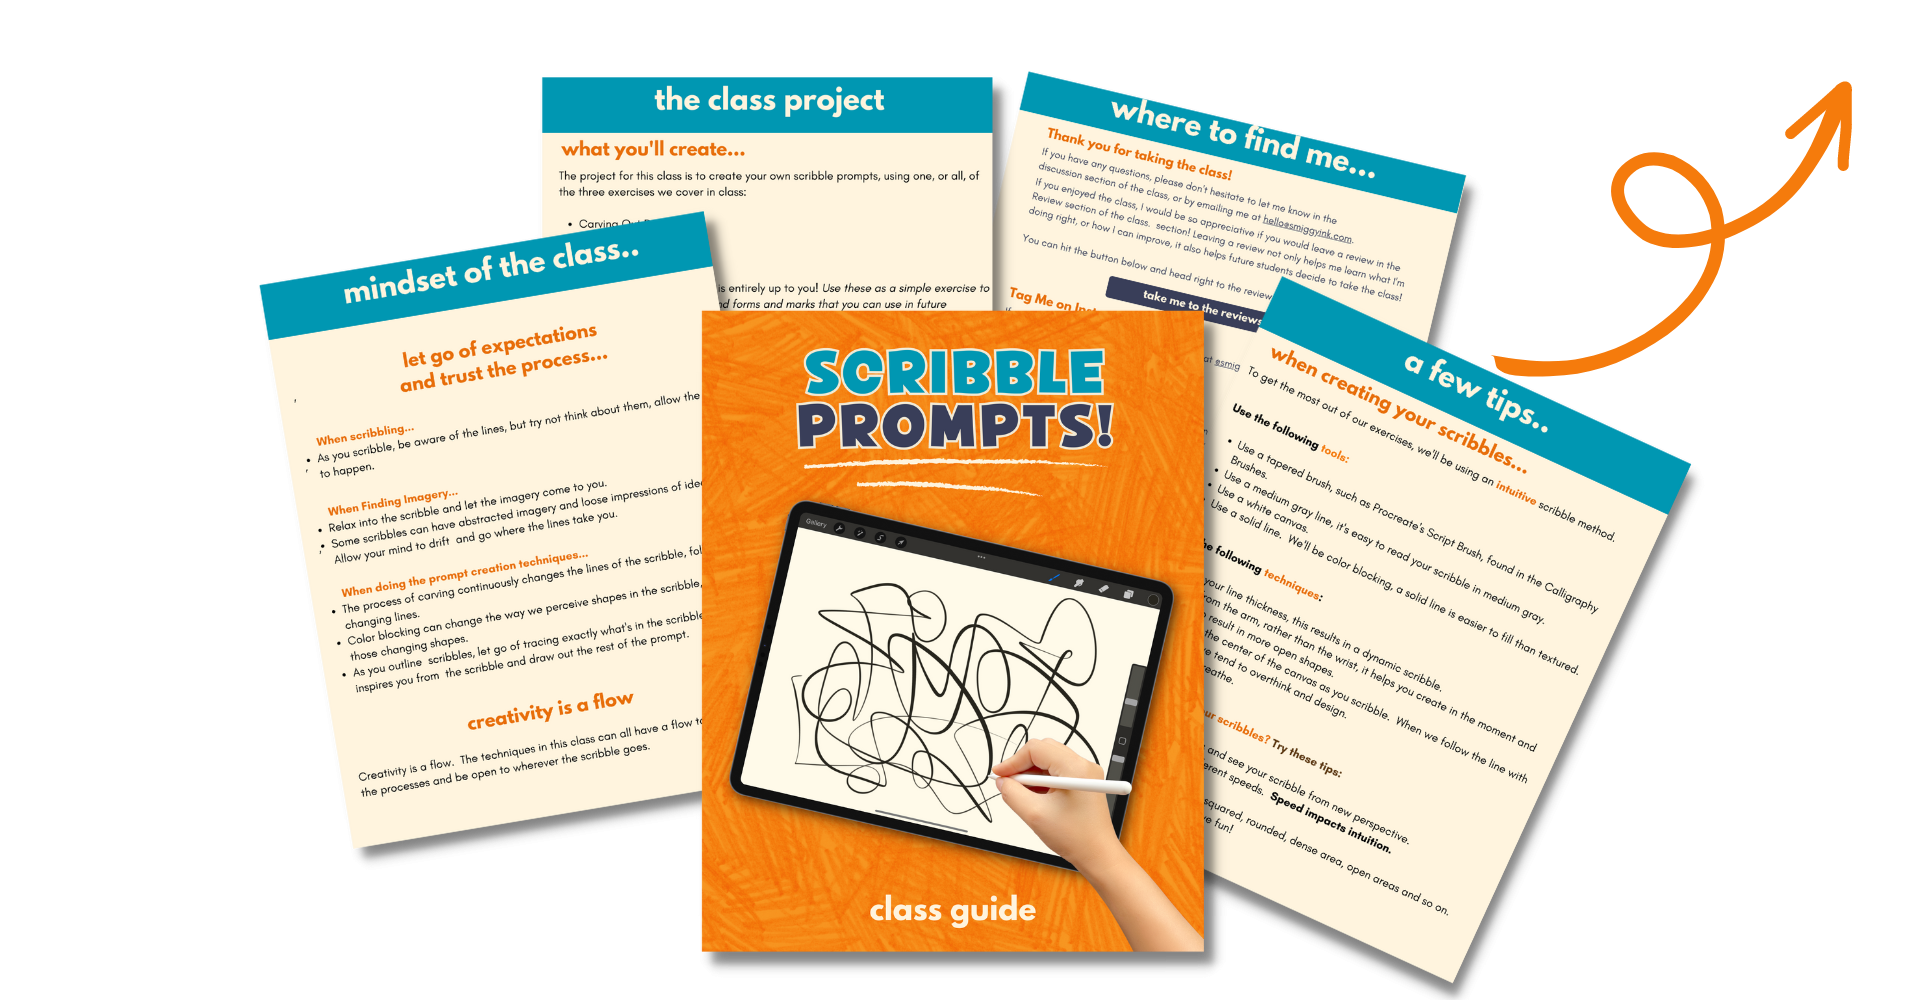
2. The Class Project: This class is about
scribbling and developing prompts
from the scribbles. It's not about any
specific app or tools and we aren't creating
an illustration together. It's about creating
the Scribble Prompts. And what you create from those
prompts, is it up to you? Our class project is to share the original scribble
and the prompt. And I'd love to see anything that prompts
inspired you to create. Be sure to include those
scribbles is spun to see both the scribble
and what it inspired. You can find instructions for sharing your project
to the class and a PDF which you can download from the Resources
section of the class. Next, we'll discuss an
intuitive scribbling technique that will help you get the
most from your scribbles. Meet me there
3. Scribble Basics: When we're tiny children, art wasn't about what
we were drawing, goes about the act of creating. It didn't matter the color of the Qur'an or if
it was on paper, the table or the wall. It was simply about
creating in the moment. And as we get older, we began to overthink
and creating less driven by expectation
and comparison, which we carried into adulthood. We're going to use
scribbles to connect with that place we
created from as children. Now, you may be
wondering why scribbles, the answer is simple. Because scribbles
are created without expectation of a final result
and without overthinking, we can intuitively create
those abstract lines, allowing us to find
our own organic forms, which we can use this prompts. Now, even though scribbling ZZ, there's an approach we'll
use in order to get the most benefit
from the exercises, I recommend using a salad tapered brush in whatever
app you're using. I'll be using
Procreate script brush set to a medium-size, in a medium gray, it's easier to read
scribbles and gray. You'll find the script brush
in the calligraphy brushes, the taper will produce
a very line thickness, resulting in a more
fluid dynamic scribble. A solid brush is ideal because
what we blocking in color and it's easier to fill in
solid lines than textured. There's technique to creating
the scribble itself. While you scribble, keep your eyes focused
on the center of the canvas rather than
following the line itself. Following the lines too closely
can lead to overthinking. And we began to design rather
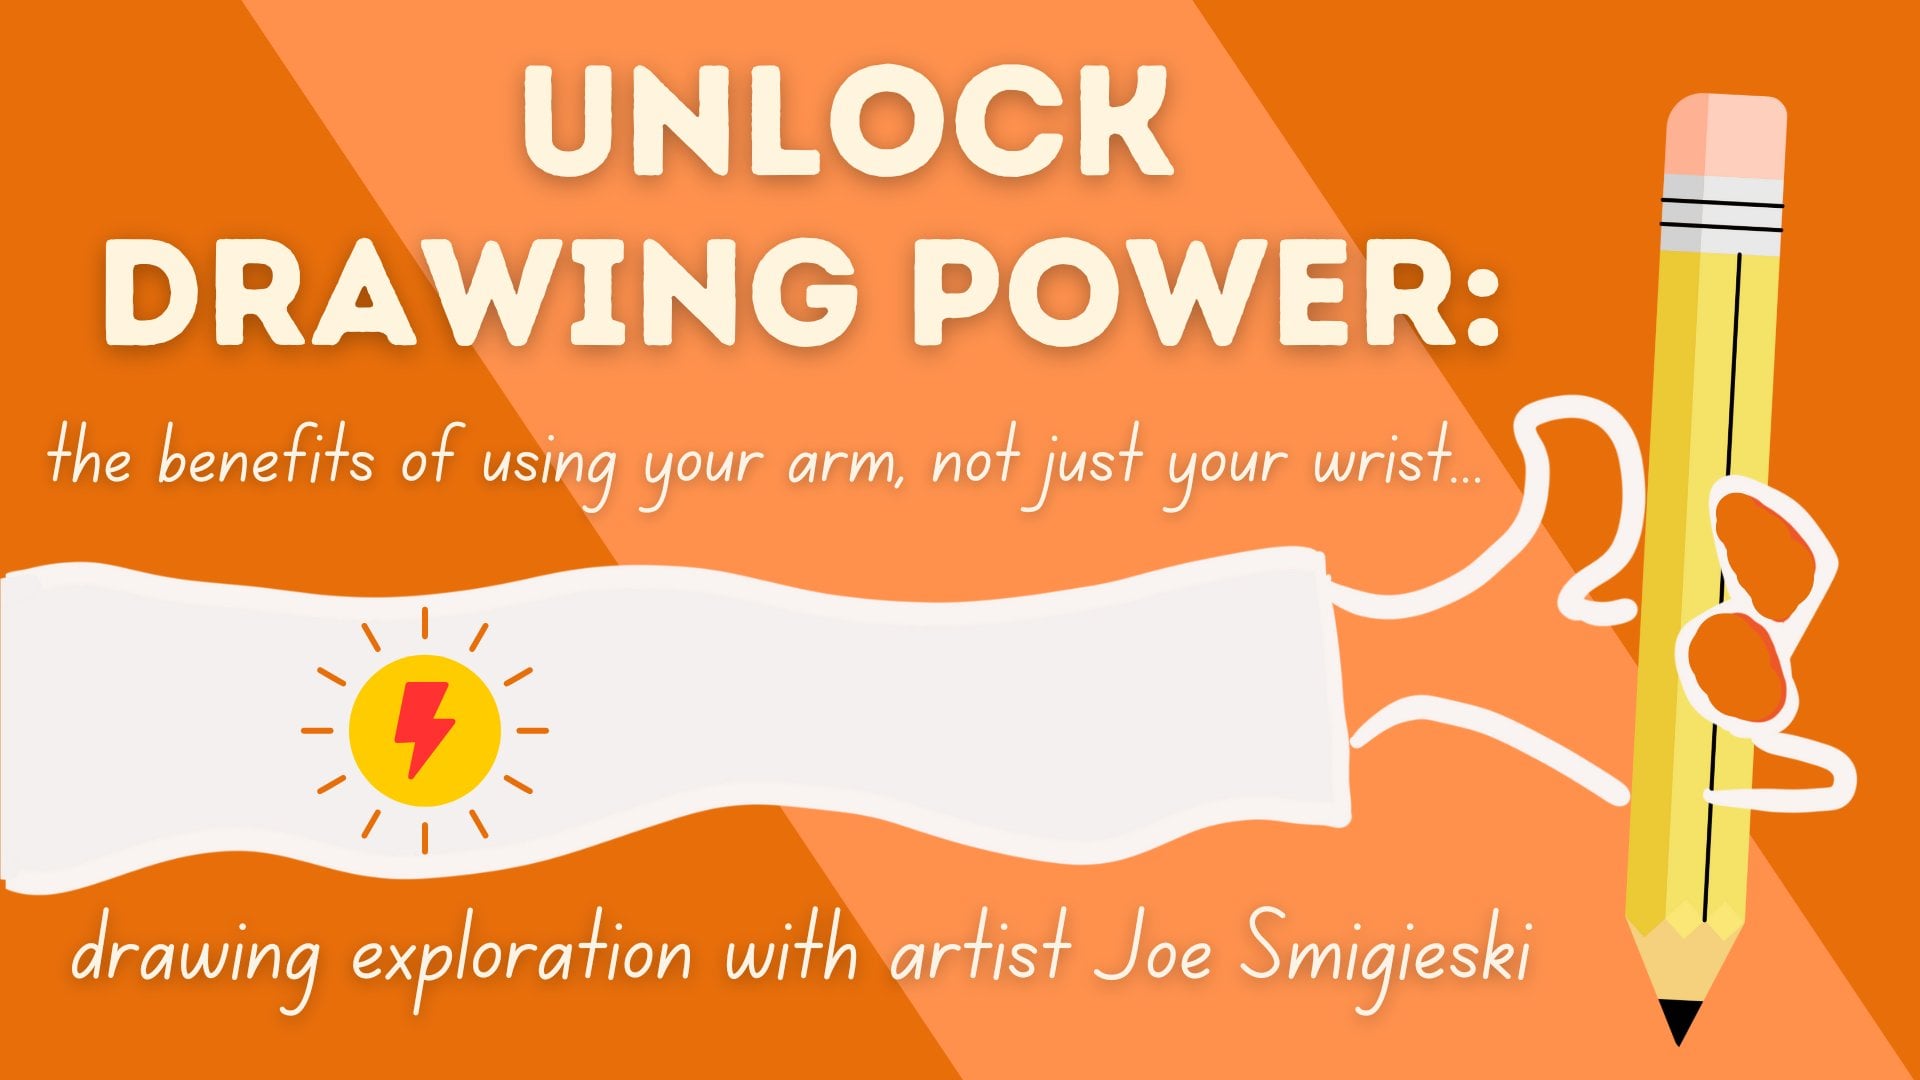
than create intuitively, use your entire arm to
create the scribble, not just your wrist. Using our whole arm allows us to be more present to
making the marks. And it also helps us create
larger, more open shapes. If you're not seeing
forums in your scribble, try rotating or Canvas. Sometimes seeing
something turned on its side will open up a
whole new world of shapes. You can even change the
kinds of scribbles you make. Try working at different speeds. Experiment with the
complexity of your lines. Change the forums, try
rounded square root ones, dense areas, open
areas and so on. You could even try
different brushes in short, experiment, play, and have fun when you scribble, take a moment to appreciate the intuitive beauty of those lines it instinctively
poured out of you. Sometimes the scribble itself
is a beautiful composition. Perhaps it's a place to reliance conversion, a beautiful way. Or maybe it's a form
that speaks to you. And finally, whether it's
creating this scribble or when finding the prompts
relaxed, don't force it. Let the imagery come to you. Follow me to the next chapter
where we're going to create some scribbles
together and we'll discover some prompts.
See you there.
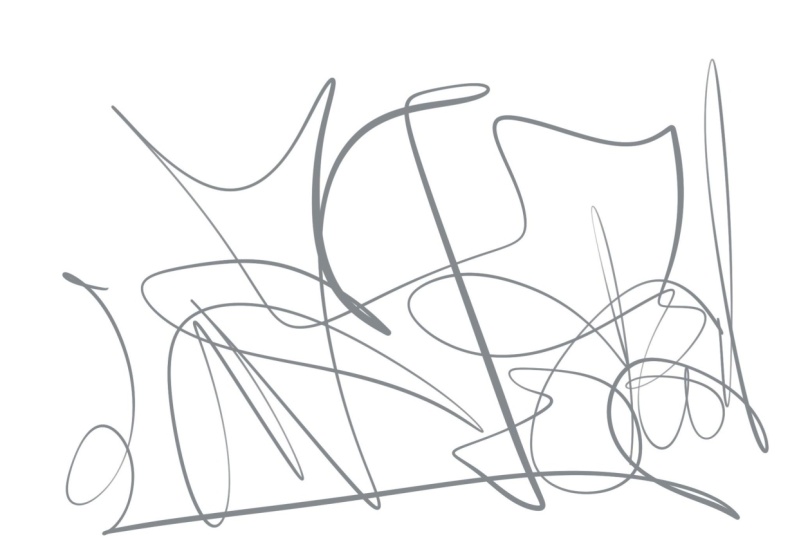
4. Method One: Carving Out Prompts: With this technique, we're like an archaeologist with
that little brush. They use clearing around
an artifact as it gradually emerges from the soil. And as our Prompt emerges
from the Scribble, that creativity
can begin to flow. I'll begin with a Scribble and we'll see where it takes us. Let it wander. I'm aware of the scribble, but I'm not thinking about it. I'm simply allowing
it to happen. When it feels finished. It's finished. Let's look into the Scribble, find some imagery and see if
there's a prompt in there. Now immediately, I see a goose and I see a lot of
birds and my scribbles. So unless the bird is driving a tractor or
something like that, I usually don't use birds. And here again, there's
a tall bird, long legs. And same thing. I'm
going to keep looking, see what else is there. And I'm not seeing
a lot right now. But if I rotate, Let's
see what happens. New point of view. And immediately I see a house
now that is interesting, that can go somewhere. And I'm seeing the pumpkin. And I see an elephant. Now this, I like, here's a trunk,
the ear, the body. That's great. That I can work with. The prompt is an
elephant and a house, and I'm not sure about the
pumpkin yet, Probably not. But this is something
that we can curve. First of all, we want a
copy of that scribble. So we'll go up to our layers, duplicate that scribble layer, and turn off the original. We want two copies of the
scribble because it's funded. Go back and compare your curved piece to what
you started with. And you might want to share your before and after Scribble
to the class projects. Now we begin the curving and there's many
ways we can do this, like masking a white brush. I'll be using an eraser. Use any tools or techniques
that you'd like to work with. The important thing is that we isolate our Prompts from
the rest of the Scribble. Swallow, grab my eraser. And I like to start by working close to the prompts
and then working my way out small start close to the house and then go
out close to this side. And as I'm erasing, I'm also careful
about what I erased because some of these things
I might want to keep, like the pumpkin
I'm not sure about. I may or may not want it. But something like this. I don't see you having a used for so I'll go ahead
and erase that. And I'll go inside the
house under the house. And that really
defines that house. Now that's in sharp focus. And here's the elephant's trunk. Go around, go around this side, work our way down. And the bottom is right there. And all of this, I know I'm not going
to need clean that up. And this, I don't know
what That's interesting. They're interesting marks. So for now I'll leave those be. You never know what something
like that can inspire. Back to the front
of the elephant. And let's go inside now. That's the ER. I saw either. And we don't need that. 12 legs. I'll add another leg later. So taking a look at what's
left is our interesting marks, but they're not really
inspiring anything. I don't see using
the pumpkin at all, so I'll just go ahead
and erase hold it. There, we have it.
This is our Prompt, an elephant and the house. And once you have your prompts, you can go in any
direction you'd like. You can stop there,
you can keep going. You can do something completely different with that inspiration. I'm going to make this an
illustration and I won't complete it now because this class isn't
about illustrations. It's all about the prompts
and how we get there. Some of us won't even make illustrations and
those of us who do, we'll have our own tools, apps, and techniques that
we'd like to work with. So I'm not at all going to get into how to illustrate these, but what I'll do is just kinda get the
Illustration laid out. And I think what I'll
do with it is just make the concept the elephants
house. It's simple as that. Put the two together. So what I'll do is erase
that and redraw it. And that I look sleepy. That looks like a moon. So there's a moon up there. And that's a lovely little idea. The elephant sleeps tonight. So let's see what
we started with because that's always
FUN to compare. So here's a original Scribble
which became the Prompt And this is how I finished it. I added elephant TO shingles
and I gave it a friend. In the last scribble,
the house and elephant, we're pretty easy to
see in the lines. And this next example, the prompt is more of an
impression or an abstract idea. So I'll draw as I curve to
help the imagery take shape. I've already done my scribble. So now let's find our Prompt. I see a snail here. And I love these circles
the way they bounce along. Just a very pleasing element. And if I use my imagination, I can see a person here. It's not very clear, but I can imagine
there's the face, the nose, the body. And I can even imagine
an arm reaching up. And maybe these
circles are apples. That's a person picking apples. Or maybe these are balloons. It's a person holding a big, beautiful bunch of balloons. Either of these would
be a good prompt. I'm going to choose the
person holding the balloons. And remember, before we carve, Let's start by copying
that scribble. Duplicate, turn
off the original. We want that copy
because we want to compare that Scribble
to what we end up with. It's a lot of PFK-1 swell
start by defining the person, by erasing all of the
unnecessary lines around them. So I'll start up here. There's our nose and
back of the body. We don't need that. The sooner you can eliminate
unnecessary lines, the sooner you start to
see this take shape. And that almost looks
like an arm back there. That's interesting. That Mark won't
work for the arm, but I might add that later. And let's go inside and
also clean up in there. Now, you might notice, I'm not being very precious
about leaving marks behind all these
little artifacts. And remember, this isn't
going to be a masterpiece. This is an exercise. We're finding the
prompts, so keep moving. It's very important also to keep moving because that keeps
your creativity flowing. And we'd like to think of Creativity is a thing
or a state of mine, which it is, but
creativity is a flow. So keep it moving. Keep it flowing. At this point, I'll go in
and draw a little bit. We define the person by
erasing as well as my drawing. It's like a conversation. We go back and forth
between erasing and Drawing and tweaking and
tightening things up. So I'll get that brush. And let's start with
a head up here. And maybe I will Art,
they had that arm. Go back to my eraser. And that's a little
wide. I like that. There we go. And there's some legs. Next, I'll start working
on the balloon area. Let's define that a little bit. Again. I'm eliminating anything. It doesn't read as a balloon. Don't need that. That's a
bit confusing up there. That's a nice balloon. Let's triangular,
but it says balloon. Don't need that or this. And we don't have any
balloons this low. So we can clean that up. You can really see it
start to take shape. Now. There's our
balloons or person. And now this reminds
me of a dog. That's interesting. We'll see maybe that dog can appear in our drawing somehow. And let's, let's
eliminate that as well. So the prompt is coming along. We definitely have
a person and we have some balloons
starting to take shapes. So I'll go back to my pencil
again, back to my brush. And let's work on the
balloons a little bit. Hand, if I was doing
an illustration, I'd be much more careful. But again, this is just a quick sketch to
establish our prompt. That looks good. And Let's refine that arm. Strings. Very good. And our dog, I'm still
very curious about this dog is an interesting,
interesting form here. I think what I'll do is have the dog watching
this whole scene. Which means we need to
draw it differently. And the scene it's
watching is interesting because our balloon
man is ceiling away. As her dog watching this
whole thing unfold. Beautiful and give them a
smile, He's enjoying it. This turned out to be
a FUN little prompt. If you think about
where are we started. That was quite an
abstract Scribble. To start with a
very abstract image of a person holding balloons. You really have to
use your imagination. You almost have
to dream into it. And in order to make that
into the prompt that we did, we have to let go
of expectations. We can't try to control
that type of imagery. We just have to work
with it, erasing, drawing back-and-forth, forming it almost like forming a piece of clay into
a little sculpture. Just let go of expectations
and let the process lead you. As we carved, the Scribble itself changed and
we follow that flow. In the next chapter, we'll use color to
define prompts, which is a different flow. Meet me there
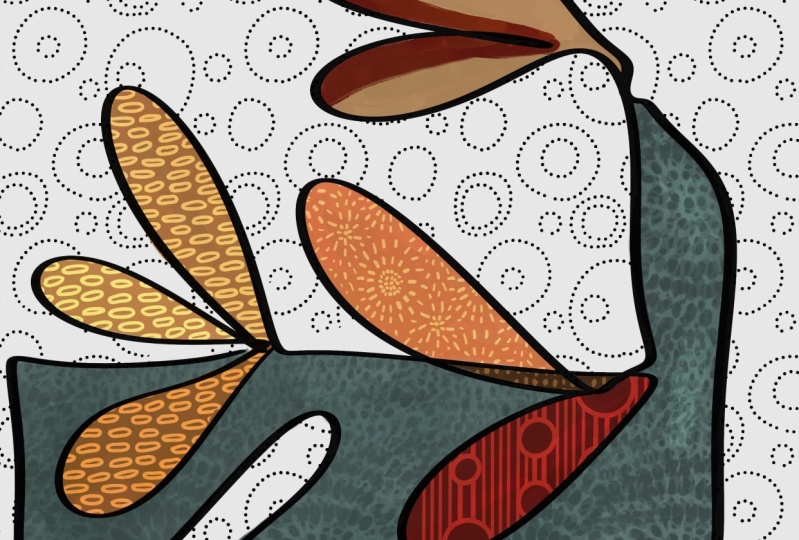
5. Method Two: Color Blocking: Now we'll use color to black
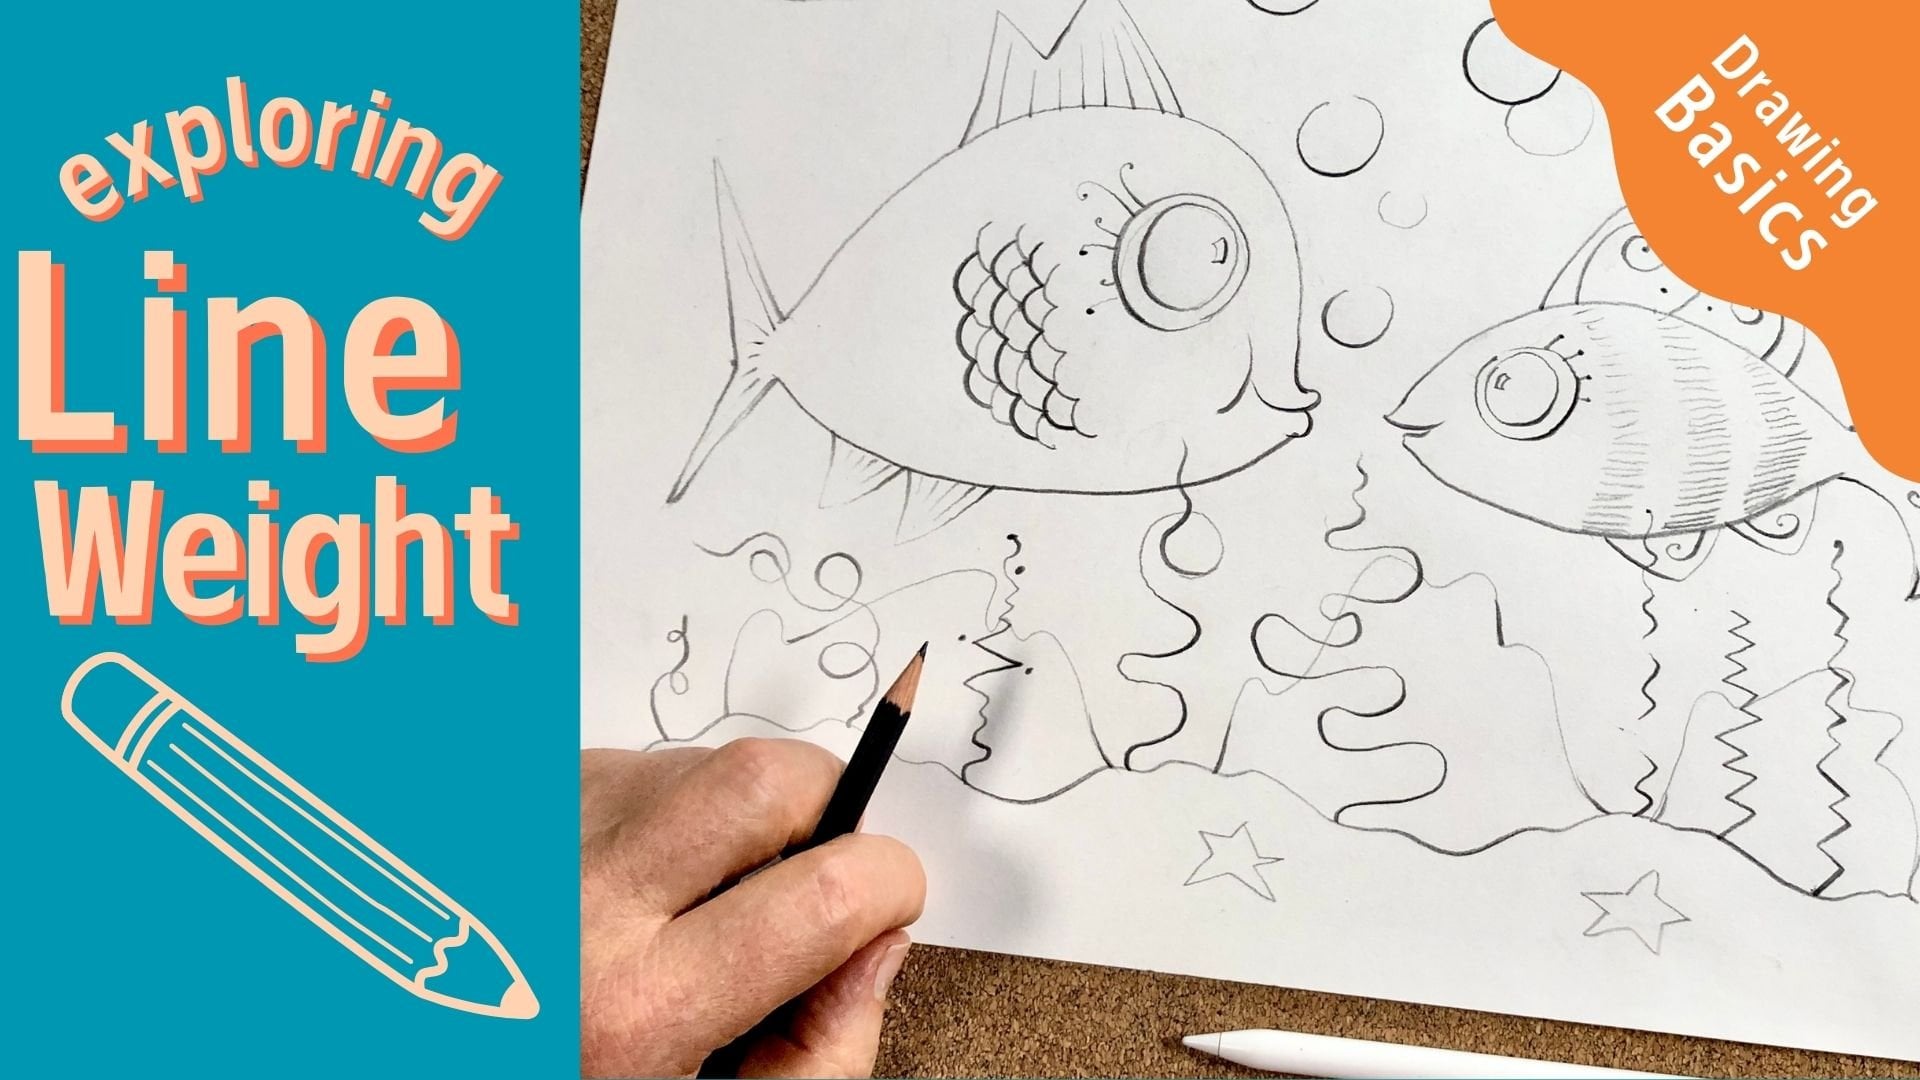
and areas of the Scribble. And as we do, our perception of the Scribble quickly changes. I'll do a quick scribble. And as I scribble, I'm changing my line pressure
because that gives us that nice dynamic
line that feels done. And immediately I see a fox. And sometimes prompts
work that way. Their immediate other times
you have to hunt around. But that one jumped right
out at us. There's the fox. And I also see a tree. And maybe, maybe there's
a tree here also. So a fox in the woods could
be a very interesting prompt. So let's see what
happens with that. But first, make that copy. We're not going to start
with Carving this time. We're going right into Color Blocking to
define that prompt. It's a different way to
bring out that imagery. So let's start with the fox. Drops some orange into that Fox. And as soon as we add
color, notice what happens. That scene pulls into
focus a little bit. It's subtle, see if you
can see the difference. Let's turn off
that orange layer. And notice how the
scene is less defined. The lines look more random and watch what happens
when we add that orange pulls together
much tighter. Especially the
ground. There's more of a sense of ground. Now. There's more foreground
and there's a background. It's layered, it's
more dimensional. Next, we'll drop some
color into our trees. Let's see light blue trees. And with that color, there's a little more definition happening in these forums. These are starting to emerge. That whole areas now
coming into focus. It's very powerful what
Color Blocking can do. And let's add, Let's
add some grass. Now. Let's go lighter
here, the other side. And we'll do one more. And with the grass in place, then inspires me
to make that into water. And that's
how these work. You'll notice as you
do the Color Blocking, it almost works like a
puzzle where the pieces appear as you add the color. It's really a FUN way to create. And we'll change up
or blue a little bit. Let's go a deep. Just to add a little more, more of a dynamic contrast. And I could keep going
and rarely finished this, but I don't want
to take the time right now because as I said, this is not a class
about illustration. But I can't resist adding
a little bit to this fox. Beautiful. The Prompts became a composition and that's okay. Well, not working
from a verbal prompt. We're working from
an organic process and it invites depth in detail. Let's see where we started. There's our scribble. There's
our fox in the woods. And I turned it into this. Alright, now that Fox was easy
to see, Let's color black, a Scribble that has abstracted imagery will also
do some Carving in conjunction with our Color Blocking to make that
imagery come along. I've already made her scribbles, so let's take a look inside. I almost see a wheel here, not quite as official
along with it, but that's not going to happen. I see buildings. There's kind of a dog's head that doesn't really go anywhere. But I am seeing wheels here. Those can be tires of a car. The car is not very clear, but we might be
able to work that out if we use our imaginations. And let's see if
there's a driver. I can almost see a driver here. With our balloon guy. Those balloons were hard to see. The balloon guy himself
was hard to see. But we'll use our
imagination and we use at Carving method to
pull it together. We were raised, we curved, we drew, we erase some more, and gradually it took shape Let's see if we can use Color Blocking to make this
Prompt also take shape. So again, make a copy. And let's begin with the car. And I will go ahead and speed
this process up for you. Now, when we worked
on that fox scribble, once we drop that
orange into that facts, the imagery tightened up. The same thing as
happening here. We dropped in that blue and you can see the imagery
start to emerge. You see the tires for sure. And this heavier line
is now more pronounced. It's very interesting
that brings it out. And because it brought
out that line, I'm seeing imagery here. This looks like a
firefighter little hat. There's the face and I'm eating. Seeing a roof of the fire truck. Sounds like a FUN prompt. A firefighter speeding
along and a fire engine. That'll be funny. So let's first start by
making that fire truck read. And while we're at it, add the hat and the top
of the fire engine. There we go. We'll lock in the firefighter. And let's Black those wheels. And now it's really
starting to take shape. Now with that balloon guy, you may recall that
we would curve, then add some details with the brush and then
carve away some more. And gradually that Prompt
began to take shape. We'll do the same thing here. Will carve away a little bit. We'll draw a little bit. We'll do some more
Color Blocking. And gradually this prompt will
also take shape in emerge. So let's grab the eraser and I need to turn off the original
scribble layer. There we go. And we'll eliminate
any unnecessary lines. Don't need this.
That's actually, you know, that looks like a dog. That could be interesting. Every firehouse needs a dog. So why don't we turn
that into a dog? That'll be phon that'll work. That looks great. And where are we? The siren? Let's make that blue because we have
so much red up there. And we can clean this up. We don't need this. Let's make that knows
a little smaller. And that's interesting, but
I don't think we need it. And let's go ahead and
add some more detail. See, can we add a windshield? Somewhere? Buildings? That looks great. Let's
give it a street. And I can't resist
doing some windows. And where are they going? They are rescuing a cat. That is where they're headed. And that's our Prompt. And once again, that
Prompt evolved into a whole story and
that's okay in color, change that story, color
change the creative process. And it changed the story. Then all we had to do is
let go of expectations. I let go of that carbon blue, turned everything
into a firefighter. And from there it just,
it just unfolded. Let go of expectations
as you do this, allow the Scribble, allow
the process to lead you. And it's also just a lot
of FUN working at way. Let's just take a quick look
at our before and after. There's our before,
quite a Scribble. And there's our after. Carving and Color
Blocking were about creating inside the scribble. Let's move on to our
last exercise now, which takes us outside
of the Scribble and more into the realm
of Drawing. Meet me there
6. Method Three: Outlining Prompts: In the spinal exercise, will outline parts of
the Scribble as Vidra using only elements we
want for inspiration, I'll go ahead and
create our scribble, and it works the same as
all of our scribbles. I'm focusing on the
center as I draw, trying with the whole arm. And I'm varying net line
thickness. Here we go. And I'm just observing
that scribble happening. I'm not thinking about
it, just watching it. And when it feels
done, it's done. So let's take a look, see what we have to work with. Might be a little rabbit here. Kind of a music note. This whole thing
feels like music. It's got a nice fluid
movement to it, but there's not enough
here to work with. So we rotate and
see what we get. I'm seeing a whale,
I do like that. And that same fluid movement, that musical movement looks
like the water spout. I love it. And there's even
fish swimming in their little fish dancing in the snake in the
Wales water spout. I love it. That is our prompt. That's what we're going with. The layers work a little bit differently with the
Outlining method. We go to our scribble and turn the opacity down about halfway. And then we make a new
layer on top of it. And that layer is
our Outlining layer. So we want that scribble layer to be very
faint so that when we outline it's lot easier to see what
we're working with, what our new drawing looks like. I'll begin by
outlining the wheel. And I'm not going to outline
that whale perfectly. I'm not going to
trace it exactly. I'm using the scribble
as a template. It's a guide, but I'm
also drawing here. I'm inspired by the scribble, but I'm making my own
drawing based on it. For example, this tail,
It's very triangular. And I'd rather have more of a traditional whale's tail that looks something like that. And I won't draw the spout
exactly as I see it here. But I'll use that movement, that beautiful musical fluid
movement as an inspiration. There we go. And again, I want some
of this movement. I like the spirit of
that original scribble, but I'm doing it in
my own way as I draw. Now, any of the details will be very hard to see
against that backdrop. So at this point, I will turn off the scribble layer and see
what we're working with. Once you turn off
the scribble layer, it's much easier to see all those little details
when you add them. All, add the whale's face. And let's add some fish. Let's do three fish. Beautiful. And let's add a little boat. There it is. That's our prompt. The whale with the
beautiful water spout and a little fish dancing
in the water spout. We traced it out there. We used our own drawing,
our own sensibility, but we based it on that organic, intuitive scribble, a blend
of the two. It's beautiful. Let's take a look at
what we started with. It's original Scribble. You can kinda see that, well. You can see the idea of the
fish and the water spout. And by tracing it, we use that wonderful organic, spontaneous movement, that
very intuitive movement. And we also blended
it with our drawing. That sensibility that we
bring to our Drawing. So blended the two,
it's beautiful. And this I brought to a full finished
illustration as well. Let's head into our
final Scribble, which is going to
be more abstract. I've already done this scribble and this one's
very hard to read, but believe it or not, there are jazz cats in here. Here's one JS cat
playing a bongo drum. And here's another one
playing a trumpet. Very tall cat. And you can't even
make out the trumpet. There's a suggestion
of a trumpet here. This one's very
loose, very abstract A good option for very abstract, very impressionistic image, very imaginative image
is to use Outlining. So once again, we'll
go up to the layers, drop the opacity to about 50% or so and
add a layer on top. And that layer is
our Outlining layer. I'll start with Bongo cat. And I love the way that little Paul rests on
top of the bongo drum. I want to be sure
to include that. I love that element. There's a pause down here. And body comes out that way. It's a seated bongo cat. And the head has it beautiful tilt and
love the tilt and that Scribble just hasn't
good, good attitude. And I won't add any details like the phase because
they'll get lost and all that scribbling that goes at the very end when we
turn off the scribble layer. And here's her bongo drum. Will add details to
that later as well. Now the cat who is
playing the trumpet is very tall and it has
this little foot. I love that element. It's one of my favorite
parts of that kit. So I'm sure to include
that little foot. Here's the ears. And the other foot steps out. I like that stance. And our trumpet
goes off this way. And that's about all the
detail I can add for now. Everything else will get
lost in that scribble. So let's go ahead and turn
the scribble layer off. So what we get There, they are. I like it. From this point. I'll add little details. And I can go in and
erase if I need to. Make his eyes closed. Feet on the drum. It's more detail. Back leg. Whoops. Like cats really
hitting the Heyne out there. There's the valves. I don't
want to fuss too much. And let's see, the
arm is going to come. It'll be this arm like that. Wait underbelly tail for
you and until for you. There they are, the jazz cats. And of course I could
keep going adding more details like a saxophone
playing cat and so on. But I won't do that for now. Let's take a quick
look at our Scribble, see where we started. Turn up that opacity. So there they are.
Jazz cats abstracted. And they became these two. It's a FUN process. Next up, let's wrap things
up with some final thoughts. Meet me there
7. One Last Thing...: Thank you for joining
me in this class. I hope you enjoyed
creating the scribbles and seeing where they
took us as much as I did. If you did enjoy the class, please leave a review. Not only help
sharpen my teaching, but they also help other
students discover the class. Also, share your projects. I love sharing discussion
and community. Be sure to follow me
here on Skillshare. So you always know when my
next class is published. You can also find me on Instagram and YouTube
X Omega, Inc. If you share on social media, remember to tag me and use
the hashtag scribble prompts. If you have any questions, feel free to reach out
in the class discussion. And remember, you have
a Scribble inside, you. See you in the next class
 Joe Smigielski, Intuitive Artist, Degree in Art Ed