Transcripts
1. Trailer Gesture Drawing Basics: Do you find your
reference drawings are a bit stiff or flat? In this class, I'll show
you a technique that I use to create more expressive
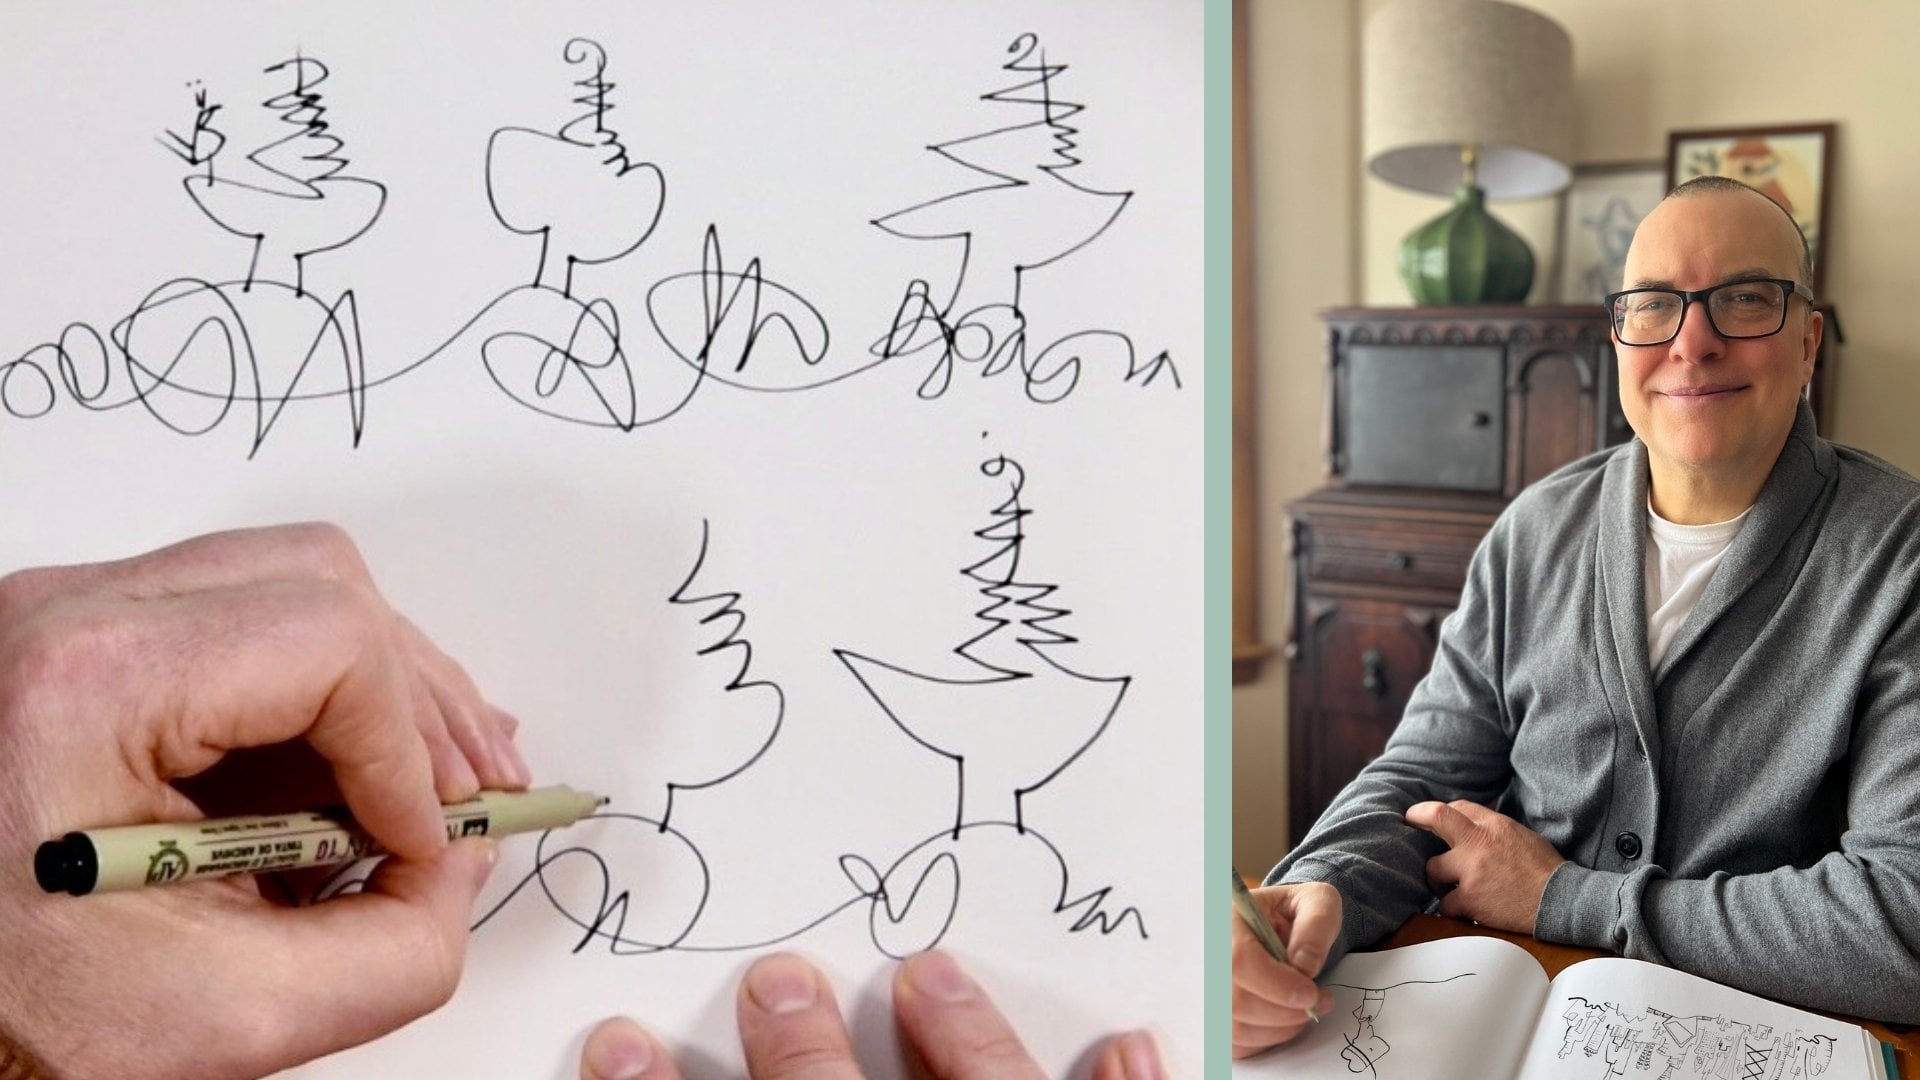
reference drawings. Hi, everyone. I'm
Josh Mighelski, a Chicago area artist and top
teacher here on Skillshare. Gesture drawing is a quick, dynamic way to capture
the essence of a subject. Artists have been using it for centuries to sharpen
their drawing skills. My degree is in art education. I taught art in schools
for several years before becoming a full
time artist in 2000. I've been happily creating and selling my work ever since. In addition to drawing, I'm also an accomplished
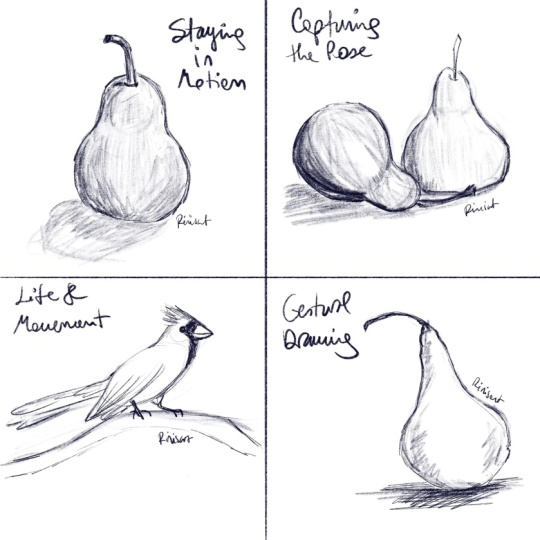
oil painter and a digital artist. In class, we'll look at
how staying in motion allows us to draw spontaneously
without overthinking. Then we'll explore how to break down the pose
of a reference. Next, we'll capture a reference with loose expressive marks. Finally, we'll capture
movement in life. This technique does
take time and practice as your brain and hand are
learning to synchronize. This class is
beginner friendly and is for digital as well
as traditional artists. Gesture drawing gives
you a new way of seeing, helping you break down forms. It sharpens your mark making and develops your natural voice. So are you ready to give your
references more expression? If so, grab a pencil
and join me in class. Let's get started.
2. Class Project and Materials : The class project is to create one or more sketches using the gesture drawing technique
that you learn in class. Share your project. I love
seeing what you create. Sharing your project
not only helps new students see what
the class is all about. It also helps new
students find the class. Thank you for
sharing your project and for leaving a quick review. They help a lot. The class is for both digital
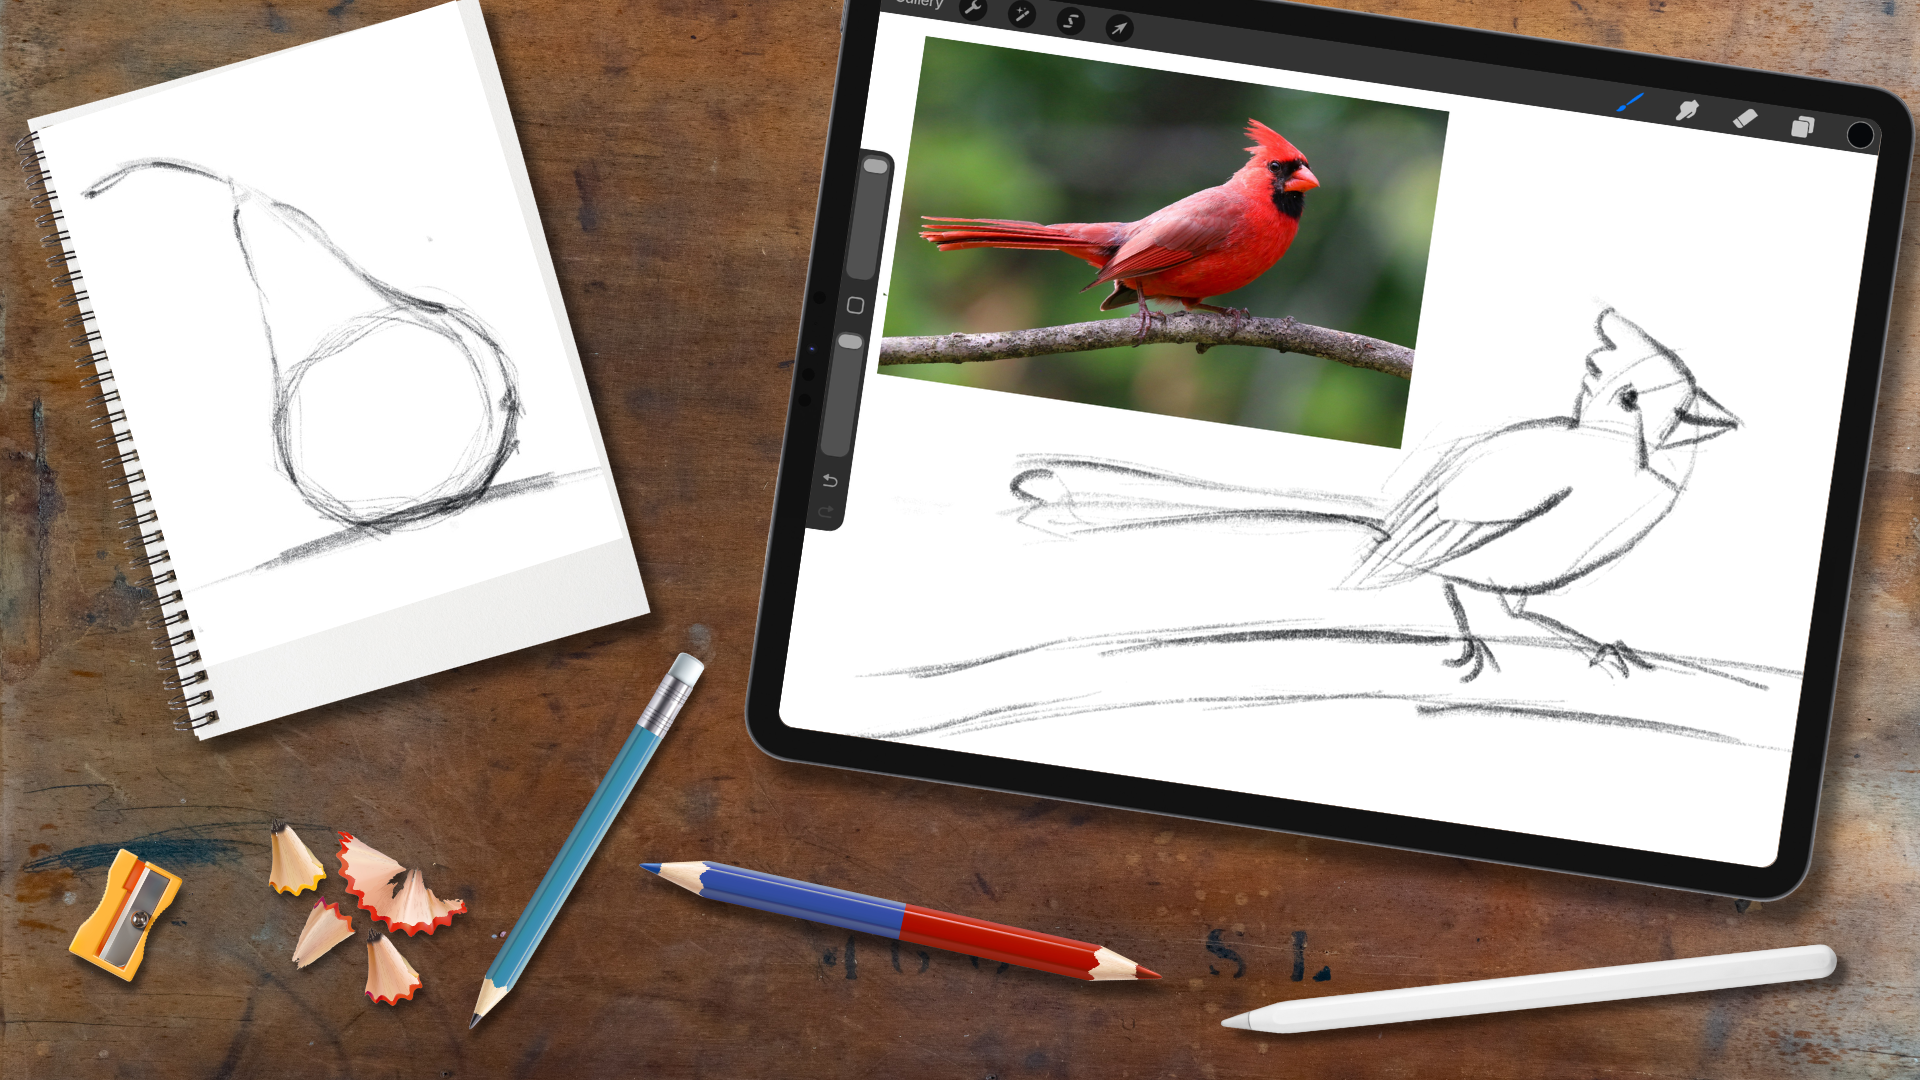
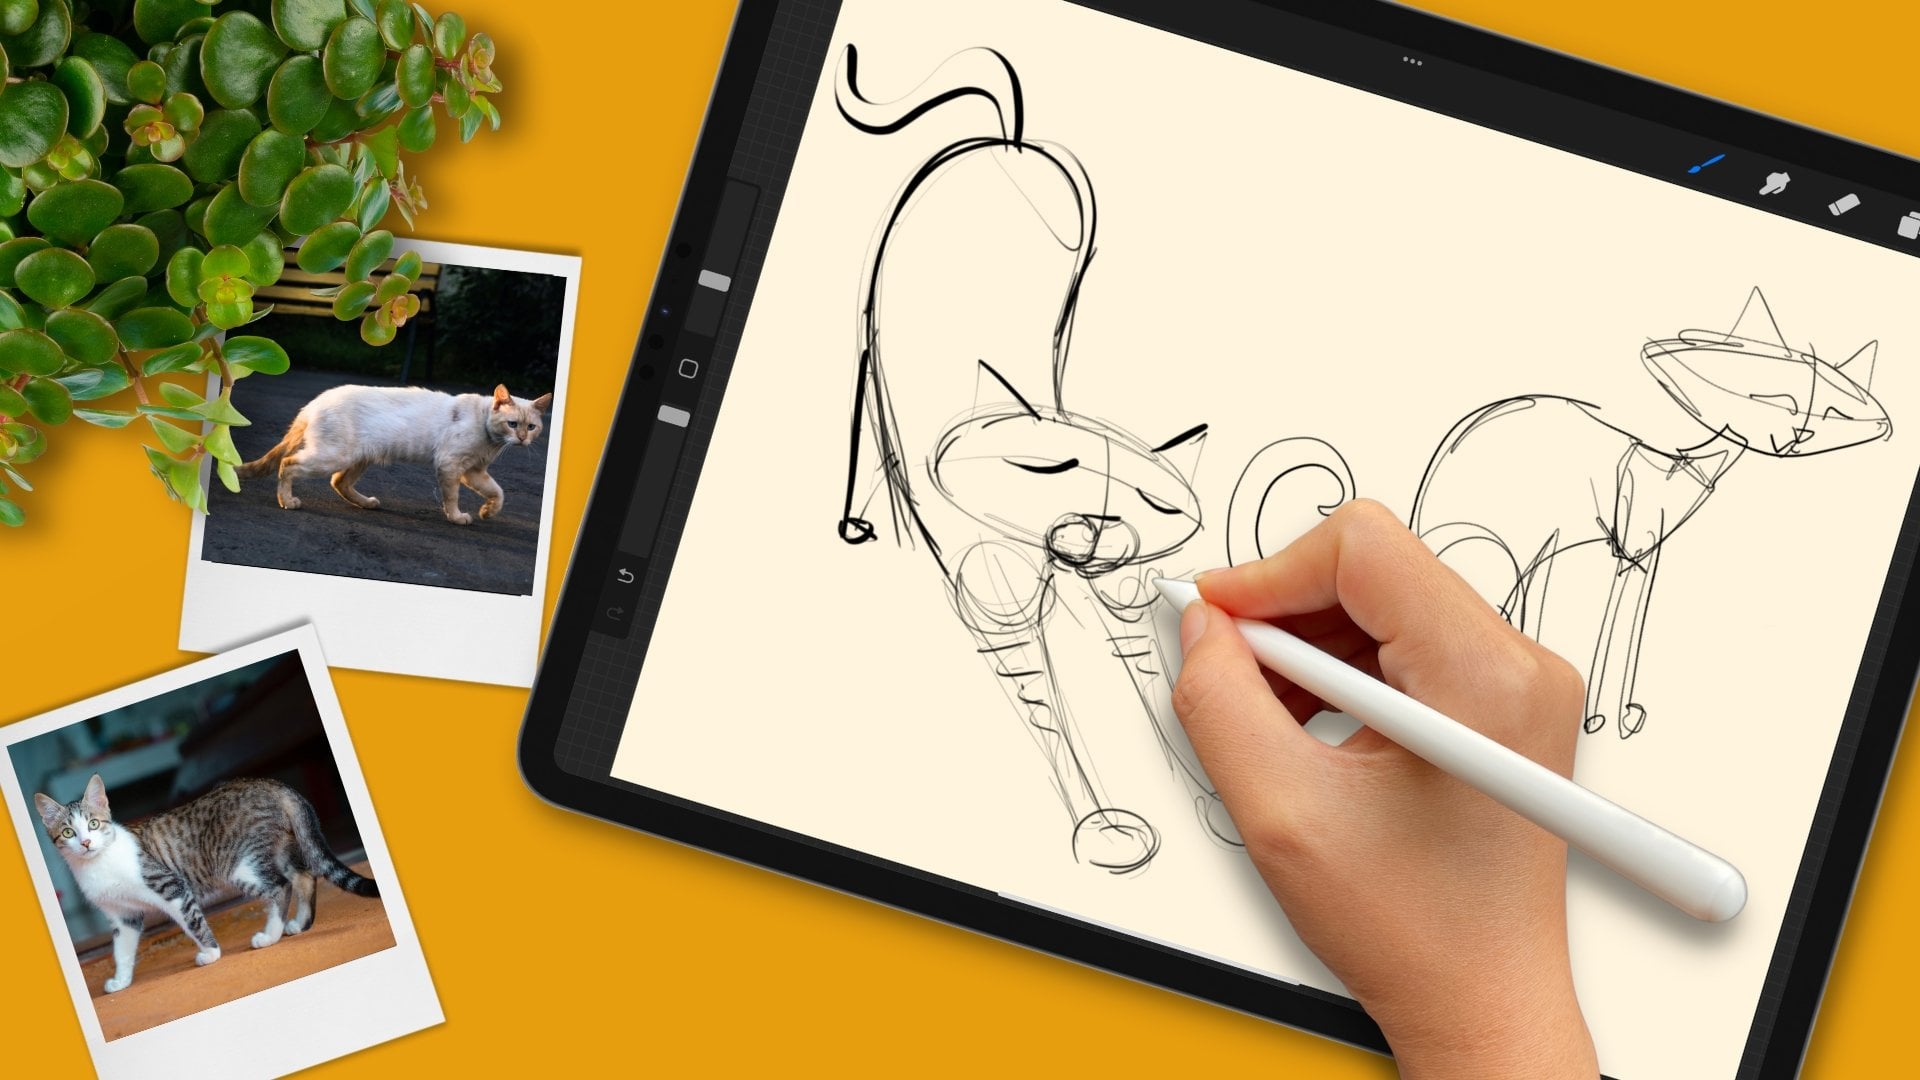
and traditional artists. If you're working digitally, you'll need any drawing app and a pressuus sensitive
stylus or brush. Using Procreate and the
Huntsman pencil brush. For traditional
artists, you can easily follow along with sketch
paper and pencil. Let's go to the next chapter and explore the first principle
of gesture drawing, which is keeping the
hand moving as you draw. Met me there.
3. Lesson One: Stay in Motion: Before we draw a
reference together, I'm going to show
you how gesture drawings develop so that you get an idea of how keeping the hand moving helps that
drawing to emerge. Just your drawings start
out with simple shapes. And then gradually, those shapes develop into more complex forms. Just drawings also start
out with very light marks. And then gradually, we build up those marks as those
forms develop, and keeping the hand
moving is part of the process because that
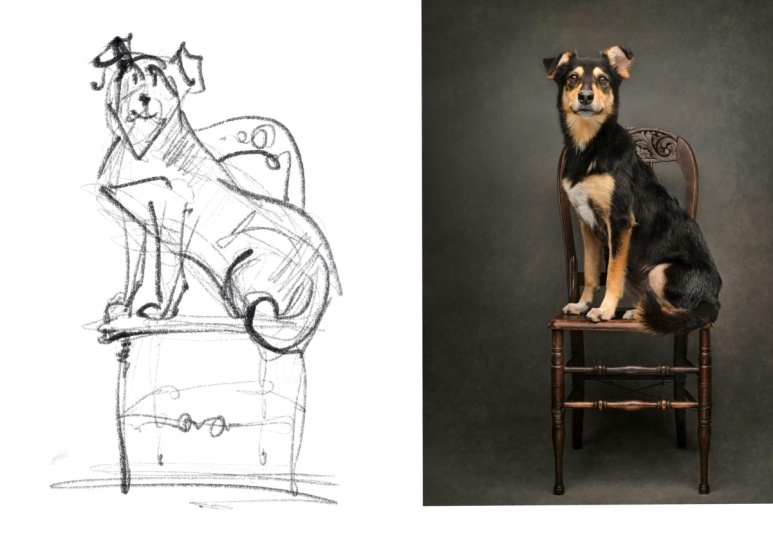
helps those forms to emerge. I'll draw a dog. And I'm going to keep
that hand moving. I want that dog running
towards that house. So I start with simple shapes.
Here's the body and head. And I might decide
that I want to stretch out that body,
have a little fun with it. So I'm staying in motion, deciding how long
that body should be. And because I'm in motion, my attention is down
here on the page. It's not up in my head. And when my attention is on the page, I'm
not overthinking. I'm thinking less and
I'm feeling more. So I'm feeling the shape of
the head as I develop it. Okay? I'm feeling the muzzle. I'm feeling the ears. How would those ears be
if that dog was running? How are they moving? How long should they be? What
angle are they? Is that tail down, or is it up? And as I stay in motion, I can feel the
movement of that tail. Staying in motion helps
us sculpt that dog. So let's take a look at
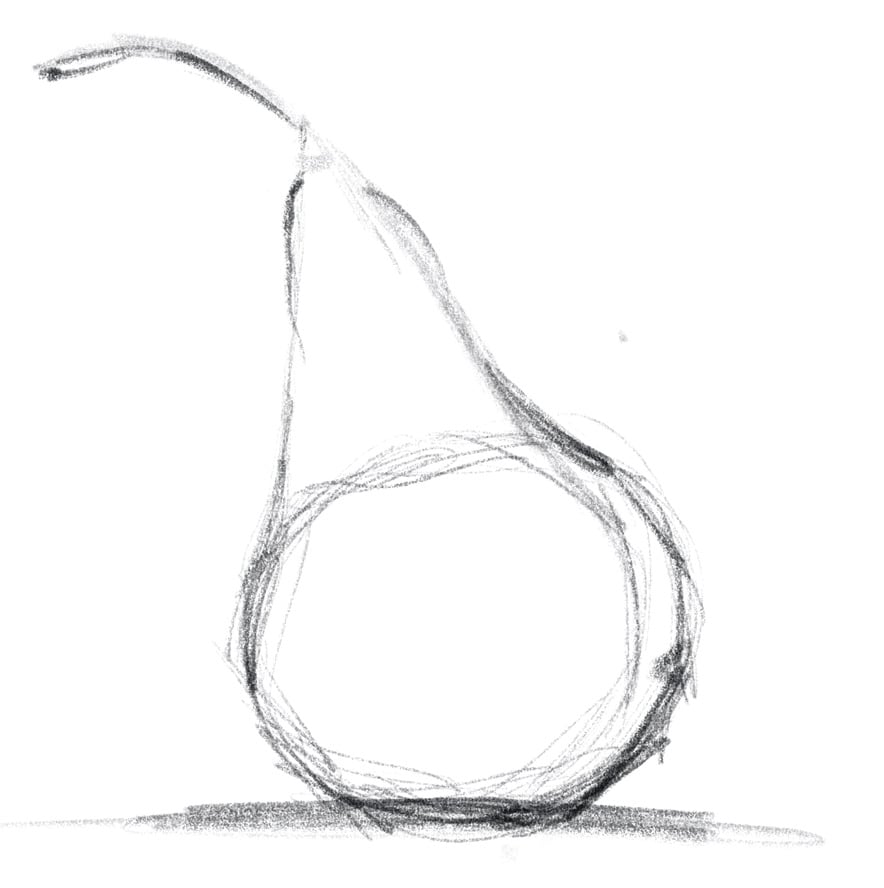
our first reference image. We are going to build a
drawing of this pair. We will start with basic shapes. We will draw them very lightly, and that will be a foundation to then develop the drawing. We'll build from there. When you look at this pair,
what shapes do you see? You might see a pear shape, a stem, and a shadow. But if you look into
the pear shape, you will see two circles, a large one and a smaller one. Let's begin with a large circle and let's draw
that very lightly. And as we keep the hand moving, we are refining the
edge of that circle. The small circle
overlaps the big one. So keep that hand moving, and develop that circle. Now we will merge the two and
that'll give us the pair. And as we keep that hand moving, we're thinking
about the contour. We're thinking about that edge. We'll do the same thing
on the other side. We start out very lightly, keep that hand moving and
gradually form that contour. You can make adjustments
along the way. This comes out a
little more than mine. So I'll pull out that
edge staying in motion. We'll draw the
stem the same way. You can see it overlaps the
top of the circle a bit. I start out very lightly, and I'm trying to
find the height. Once I think I have the height, then I can begin
to find the curve. And when I think I have it, I can use a little more
pressure to define that form. Just your drawings are
loose and expressive. This is careful and controlled. Strokes make a drawing loose. We'll work with strokes later, but I want to mention them
now as they go with motion. I'm making marks but not
thinking about each stroke. I'm staying in motion,
quickly laying them down. I keep that hand moving, laying down those marks. I'm not thinking about every
single mark as I draw them. I'm just laying
down some strokes. Staying in motion. Gesture
drawing is very physical. We could also use
strokes with shading. Here's a different
kind of stroke, more of a scrubbing motion. There's lots of different
ways to use strokes and a thing that
they all have in common when we're
gesture drawing, is that they're loose and
expressive. And they're fun. The next chapter will be careful
and controlled, as well. And then we'll loosen up later. We need to get the
foundations down first. Keeping the hand moving allows the drawing to unfold naturally. When you're in motion, you don't overthink and the work might be a little
more spontaneous. This does take some
getting used to, because your brain and hand
are learning to synchronize. Your results might be a little
awkward in the beginning. This is normal. It's okay. Keep practicing. It will click. Follow me to the next chapter, and we'll break down another
element of gesture drawing, which is capturing the
pose. Meet me there.
4. Lesson Two: Capturing the Pose: The next fundamental
is capturing the pose. The arrangement of
shapes creates the pose. In the previous lesson, we talked about how
shapes form an object. Part of gesture drawing is also capturing the
pose of an object. These two pairs have a
very different pose. This one is very
stable and vertical. Even the stem is vertical. Meanwhile, this pair
has a resting pose. And when we draw we want
the circles to be resting, as well, because that's what gives that pair
a resting feel. So let's go ahead and
draw that first pair, and we'll capture that pose. Both of these shapes
are circular. We will start with the big one. I'm starting out very lightly, and I'm staying in motion. There's the first one. The second circle, I'm
going to start down here. I'm not going to
start drawing it up here because if I do that, I don't have as much
control over the placement. You see the way it's
floating upwards. That doesn't feel
like it's resting. So instead, I'm going to start it where I know I
need to end up. Okay? That's the way to
place that one. Both of these
shapes are resting. So the pear is resting. I'll fill in the
pear shape around. The pair is in a resting pose. Let's take a closer look
at pair number two. We'll start with
this first shape. It's more of a potato shape, and it's going to overlap
just a little bit. The other thing to
look out for is the bottom edge is higher than the bottom
edge of this shape, okay? And the top edge is lower than the top
edge of that shape. So you can see the
way it's placed. It's right between the top
and bottom of the first pair, and it overlaps
just a little bit. Let's try it. So it's going
to overlap a little bit. And we know it's higher than that bottom and
lower than that top. Okay? So there's my overlap. We know it's a potato shape, so I'm stretching it
out a little bit. There it is. And then the top shape
is not really a circle. It's a bit of a circle
and a bit of a triangle. So this edge comes
in about there. We know it's quite a bit
taller than that edge. And I'm going very lightly and kind of scrubbing
out that shape. I'm sculpting it
because I'm feeling my way through this process
of where the height is, where it needs to
begin to curve, and so on, and what angle
this is going to be. Just feeling my way
through that shape. And as it comes into view, I can use a little more
pressure and firm it up. So that's pair number two. Let's take a look
at these stems. This is quite interesting.
Notice how high the stem is. It reaches way up there. This composition is a triangle. That's the top of the
triangle, comes down. There's our bottom.
There's the third side. So this stem is
an important part of that triangular composition. There's another thing
happening here. The other stem curves upward. You have a curve here, which follows along that line.
Which comes around here. And what's happening
is the energy of the piece is moving like that. The eye follows this curve
upward and back around again. So you have a
triangular composition, and you also have
this circular energy moving throughout the piece. So the placement
of these two stems is very important
and very powerful. So the first stem reaches up. And as I take a
look at my drawing, I can see that
triangular composition. And then we have the second
stem, which curves upward. And that's going to go
something like that. And there we have our two pairs. We broke the reference
image down into shapes and recreated
it using those shapes. And really, it's quite simple. There's four shapes and two
lines. That's all it is. The placement of
the shapes gave us the poses and how the shapes relate to each other helped us with
the composition. For example, the potato
shape overlapped the circle. And that overlap helped the
other shapes fall into place. So you build the
composition piece by piece. Now, this is still sketching. This is not gesture drawing. Let's move on to
the next chapter, and we get to finally do
some gesture drawing. That's where it all
comes together, and our drawings come to life. Meet me there.
5. Lesson Three: Let's Gesture Draw: And this now let's do
some gesture drawing. We'll work in strokes
as we capture the pose. Gesture drawing is a
quick, loose drawing. It captures the
essence of a subject. We're capturing the structure, the form, the pose,
the movement. The structure is a circle, triangle and that beautiful
stem. Let's look at the pose. This is interesting. Notice
this line here, this edge. It's vertical. The edge of
that triangle is vertical. That vertical element is
perpendicular to the ground. It's very square,
stable and powerful. And then you have this curve, very graceful curve going that way and curve going this way. They echo each other. It's a very beautiful
composition. Beautiful pose. Let's draw it. We will
begin with basic shapes. We'll start out lightly, and we'll stay in motion. But this time, it's
a gesture drawing, which is quick and loose. So when we do this circle, we're not sketching it
like we did last time, where we're trying to dial
that shape in and refine it and make a beautiful circle,
it's not about that. This is quick and loose. So I'll be working with
these little strokes. And I'm roughing out the
shape of the circle. Just lay down that
circle quickly. We're capturing that form,
and then we're moving on. Imagine this pair is striking a different pose
every 45 seconds, and we need to capture
that pose quickly. Next, we capture the triangle. Now, placement is
important here. We know that it's to the left. However, there's this
little shoulder here, so it's not all the
way to the left. We want to make sure we can
still see that shoulder because that shoulder gives
this pose a lot of character. So I might start about there, and I'm using these same
quick little marks. And as I do that, I'm
feeling my way along. I'm feeling the angle. I want it straight up and down, and I'm also feeling
the destination. And then I'll come
back down this side. And here we have a
different angle. So I need to be aware of
that angle as I make my way down so I start out lightly to make sure
I have a good angle, maybe make it a little wider. There we go. And then
from here, we can refine. For example, the
transition between the circle and the
triangle is smooth. This looks like an upside
down ice cream cone. That won't do. So I need to
smooth that out a little bit. But again, I'm using
these quick little moves. Same thing here. And then I can pause
and take a look. Did I capture this form? Not quite. The body of the pear has a little
more substance than mine. This almost looks like a
dinosaur that's walking along. That doesn't have that
same dinosaur feel. So I need to make
this a little bigger. Build that out a little bit. But I'm using these same
little marks to do that, give it some more substance. Gesture drawing can
be a little bit messy, and that's okay. Think of it as being expressive. These lines are very loose,
lively and expressive. Now I'll smooth that out again. Make that a little heavier. And now this has more
weight, more substance. It's closer to the
feel of the reference. That's more like a dinosaur and less like an
ice cream cone now. Next, I will add the stem. It has that nice,
graceful curve. So I need that graceful curve
that plays off this curve. So I'll go lightly at first
and then maybe firm it up. Gesture drawing doesn't
focus a lot on detail, but I'll add a few details that give this pair personality. One is that little divot. And I want to include
these little bumps. Those are nice
little moments that add character to the pair. And I want to bring
that into my drawing. So here's the divot. There's
a bump and another bump. And I'll finish with a shadow to ground the pear.
It gives it some weight. This feels complete. The essence of the
pair is there. Just your drawings are not intended to be copies
of the reference. They're quick, loose
interpretations of the reference. We captured the form, the pose, and the detail
that makes that pair unique. Now, you could do some
loose shading if you wanted to for some
added dimension. Everybody has a natural
artistic voice. It's simply part of you. We all make shapes
in our own way, and we make lines in our
own way. It's instinctive. When we stay in motion
and work in strokes, we think less and feel more, which allows that
voice to come out. It's one of the benefits
of gesture drawing. You get to know that voice, and you can develop that voice. Join me in the next chapter, and we'll use gesture
drawing with an animal. Gesture drawing is great for
capturing life and movement. Meet me there.
6. Lesson Four: Life and Movement: Just your drawings
capture life and motion. Let's draw a cardinal, capturing its unique
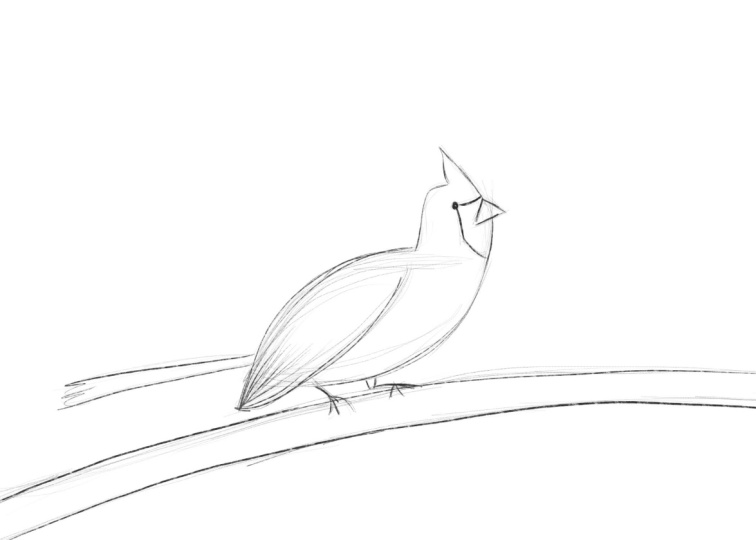
features and its movement. We are going to
capture this cardinal. This is no ordinary bird.
This is a cardinal. So we will capture those things that make it unique among birds. We'll also capture the life in motion that is
frozen in time. We will start with the branch, which has this gorgeous curve and then move into the body, which is a beautiful,
simple shape. Then we'll add the head shape. Once that's in place, the rest of the features
will follow very naturally. We will be capturing those things that make
the cardinal unique, like the shape of the beak, this beautiful marking the eye at the corner of that
marking and the crest. One of the important
things about that crest is this angle. That angle is distinctive. The Cardinal's tail is rather long and notice the angle
of the tail to the body. Cardinals often
strike this pose. If you spent any
time with cardinals, you could picture
that tail flicking. And then we have the
wings reaching down. If this were a silhouette, you'd still know
it was a cardinal because of these
characteristics. Later we'll talk about these
legs, which are fantastic. They also show us
that life and motion. Let's bring this
Cardinal to life. Let's begin with that branch. It's a gesture drawing,
so I'm working in these strokes, these
little segments. And as I do that, I'm thinking about the
direction of the line. I'm thinking about the
curve of the line. I'm watching that curve, and I'm feeling
that curve as I go. Just quick little marks. We're roughing in the
forms onto the body. Same approach. I'm
roughing out a shape. I'm getting the general
shape of the body, and I'm getting the
general placement of the body. That's all I need. Now, the head follows
the curve of the body. You see that way that's
one beautiful curve. So I'll follow that body
up and add the head. Then we have the
crest. We talked about that angle,
very distinctive. And we can add the face. We have this wonderful marking, the eye at the corner, and
then that distinctive beak. This angle is important. We'll start with that
beautiful marking. I'm doing this with
quick little lines. I'm not fussing over it. The beak comes in at that angle Let's add that tail.
We talked about the angle coming from the body, that angle, which is another very distinctive
thing about the cardinal. So I'll quickly lay
down that shape. And then there is the wing that extends beyond
the edge of the body. So I'll place that. So they're quick little marks. I'm capturing the
angle of the tail. I'm capturing the length. I'm suggesting what
the end looks like. I'm capturing the
wing in the same way, length, the angle,
the slight curve. Gesture drawing is laying down the very basic information. Let's take a closer
look at those legs. They are terrific. Leg number
one comes down like this. Leg number two,
comes out like that. It's a wonderful
part of the pose because it looks like
the cardinal came down, landed on that branch, and
it's about to fly off again. And we're capturing
it right at the paws. So here's the first one.
And then the second. It's a wonderful little pose. This could use a few details
to give it more life. Add some character or maybe
highlight a few marks. We captured the pose as well as the spirit
of the Cardinal. And some of your own
expression can come through because this is
such a loose way to draw. You work loosely,
keep the hand moving, and build up the marks. Those things help you be more spontaneous because
you're not overthinking. Meet me in the next chapter
for some closing thoughts.
7. Thank You!: Thank you for
joining me in class. Drawing from life is a great way to practice gesture
drawing, as well. Make it a daily practice to sharpen your skills and
develop your voice. If you enjoyed the class, thank you for leaving a review. They make me a
better teacher and help other students
discover the class. And share your drawings
to the class projects. I love to see what you create. Follow me here on
Skillshare so you'll always know when my
next class is released. You can also find me on
Instagram, YouTube, Pinterest. And if you're a digital artist, I invite you to join
the Crater collage, which is a friendly
online community for digital artists that I
host along with my wife, Skillshare top
teacher Tracy Capone. If you have any
questions or comments, feel free to reach out
in the class discussion. Remember, stay in motion. I'll see you in
the next class. H.
 Joe Smigielski, Intuitive Artist, Degree in Art Ed