Transcripts
1. Welcome to Class!: Reference images can be a great way to get yourself
started with a drawing, but sometimes they're
intimidating and you don't know where to start or
when you do draw it, it turns out awkward, stiff or not quite right, leaving you feeling frustrated. In this class, I'll show
you a quick technique to break down the reference
into simple shapes, which can then be used
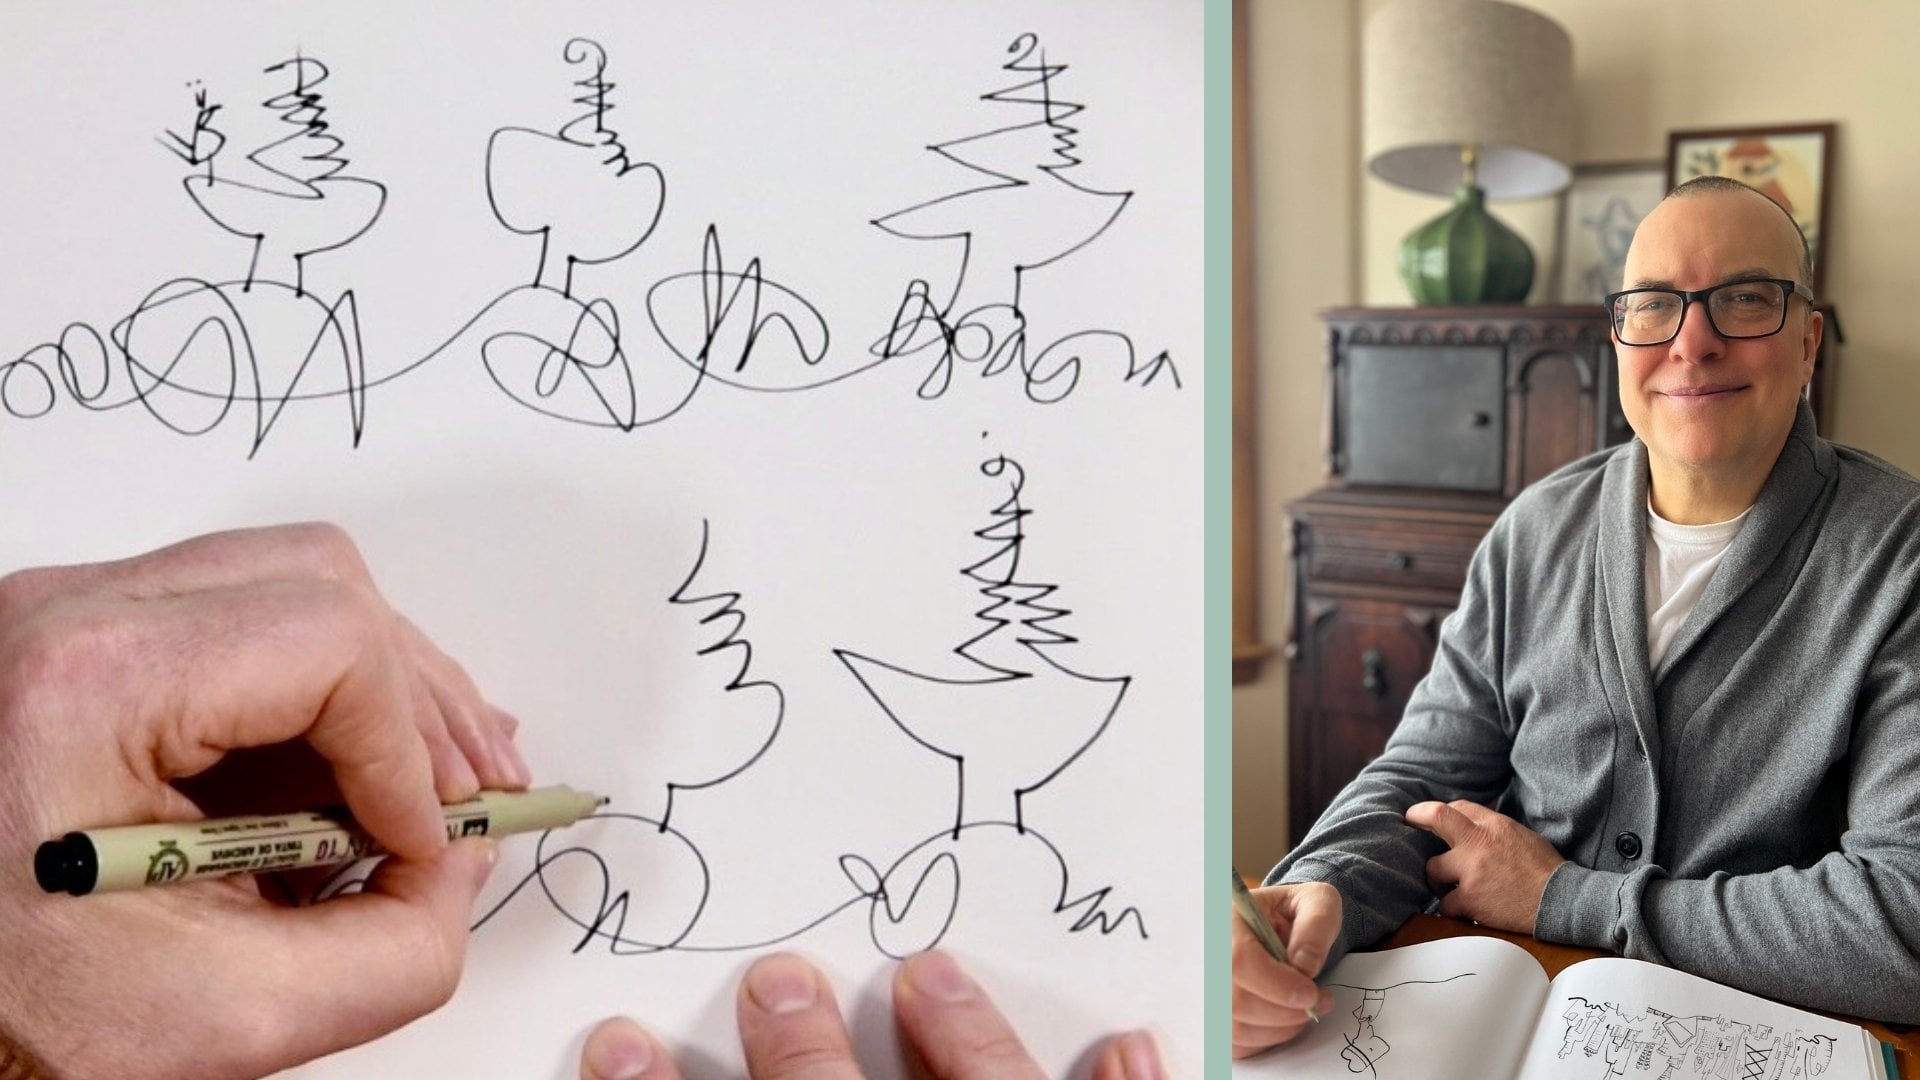
to draw the image. Hi, I'm Joe Smigielski, a painter and line artist with
a degree in art education. After several years
in the classroom, I became a full time artist and have been on that creative
journey since 2000. Though my style doesn't
lean towards realism, I use references to make
my subjects recognizable. And drawing references with
shapes allows me to use imagery I might not otherwise
be comfortable drawing. Sometimes we stick so closely
to the reference that the drawing can be forced stiff and not really
in our own voice. Breaking the reference
into shapes allows you to draw the image in a more
authentic, organic way. We'll begin by taking a look at reference images and define
the shapes that form them. Then we'll talk about
how best to reassemble those shapes and that becomes the structure for a
finished drawing. Next, we'll apply what
we learned and have some fun using our imagination
to alter the shapes. Taking the drawing
beyond what you see in the reference,
making it your own. During class, we'll explore two approaches for
drawing the shapes. One is more intentional, while the other is
more intuitive. You might find that one of these two approaches feels
more natural and comfortable. This class is beginner friendly, but created for any skill level. It's designed for anyone
who struggles with references or wants to move
beyond tracing imagery. While I am using procreate
and an apple pencil, you can use your favorite
digital illustration app and any pressure sensitive stylus
on either ipad or desktop. If you are using Procreate, some experience with
the app is needed, as this isn't an introduction to Procreate class. I'll provide the
references used in class, but you're welcome
to use your own. If you're more comfortable
with paper, feel free to use paper. Use pencil, starting
light and finishing dark. So are you ready to
learn how to use reference images to express yourself and create
in your own voice? If so, welcome to class.
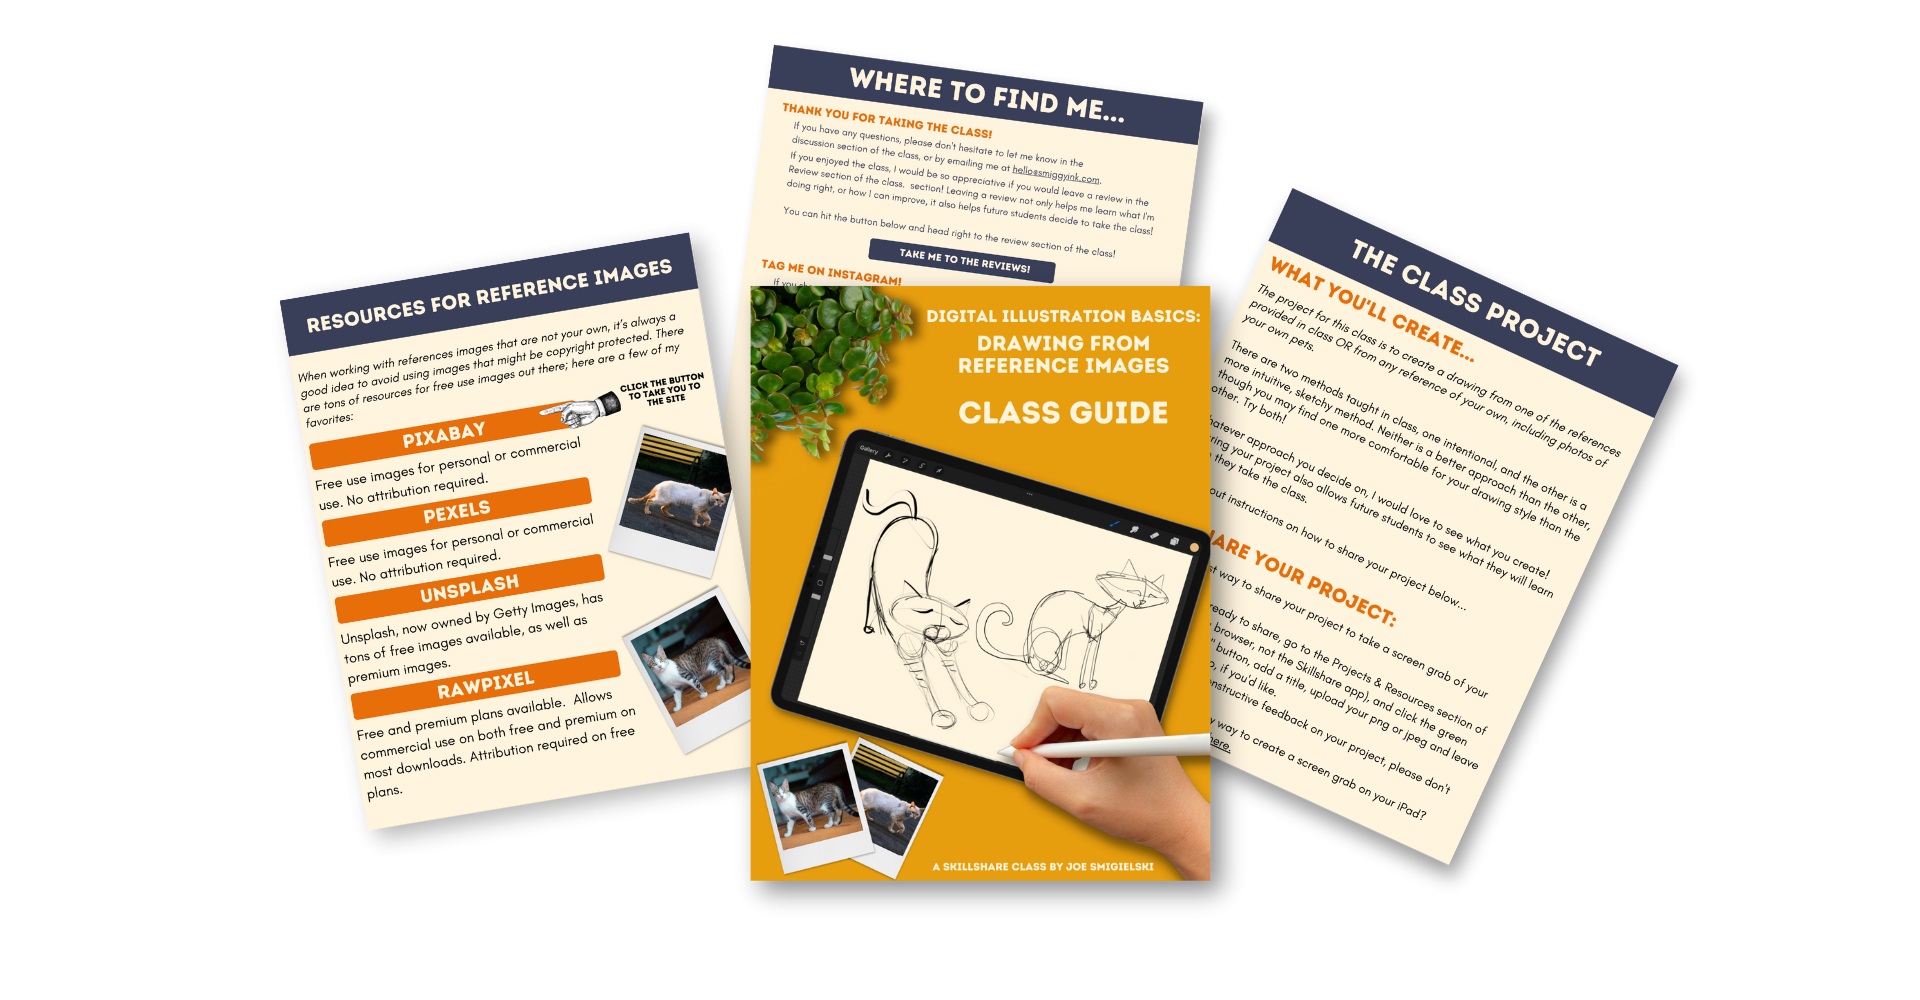
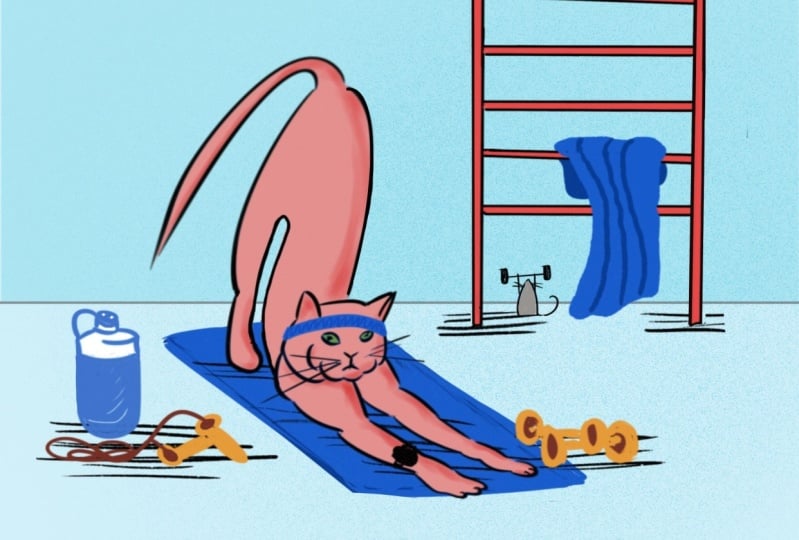
2. The Class Project: The project for this class is to create a
drawing from one of the references provided or from any reference
image of your own, including photos of your pets. I'd love to see what you create, so please share your
original reference photo and your final drawing to the
project section of the class. You can find instructions
for sharing your project in a PDF which can be downloaded from the resources
section of the class. Let's begin our first lesson. We'll break our reference
into shapes and build it back up into a
drawing. Meet me there.
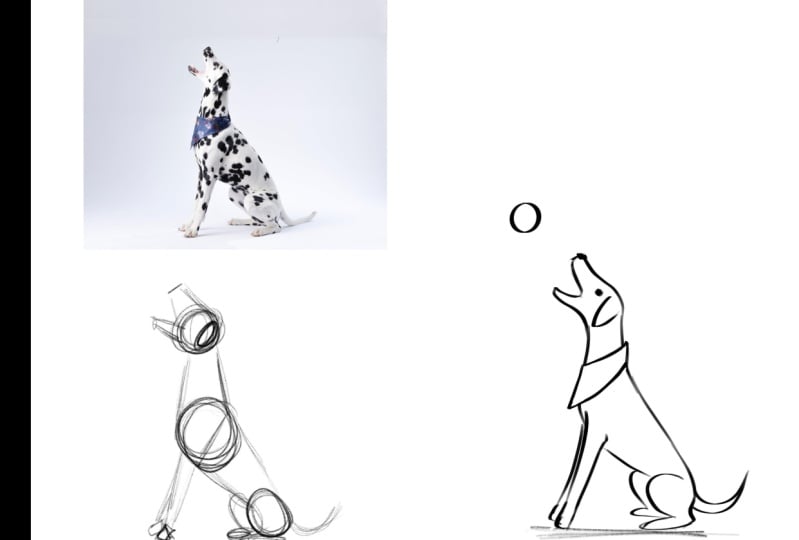
3. Drawing Intentional Shapes: For this drawing, we're taking
an intentional approach. It's great for artists who like structure. Shapes are
drawn simply and directly. The shapes are used like a
framework to build the drawing. So let's begin. Use any ordinary white
canvas, as long as it fills the entire screen and choose a pressure
sensitive brush. I'll be using the script brush, which is in the calligraphy
brushes down at the bottom. The size is about 10%. We will be using
black for the entire class. Let's go ahead and grab
our first reference. You'll find the references in the projects and resources
section of the class. I've already saved my
references to my photos. I'll click on the wrench icon. Go to Canvas, and that's
where we find the references. Toggle that, there's
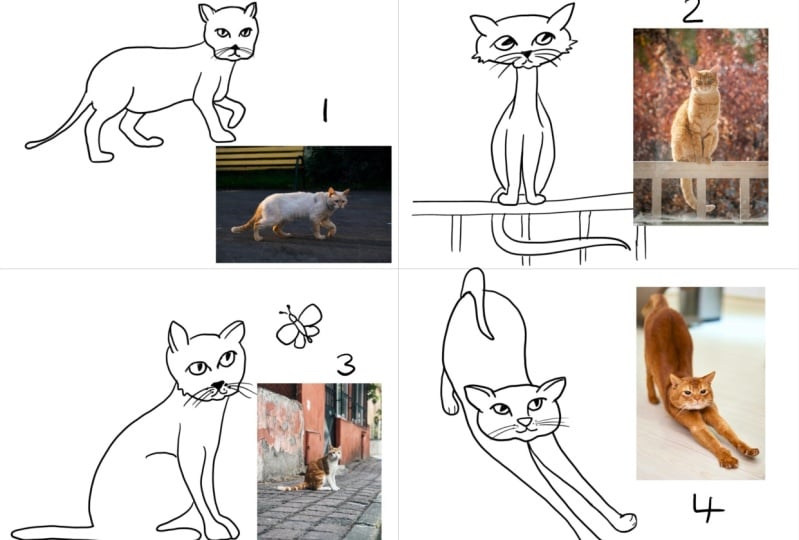
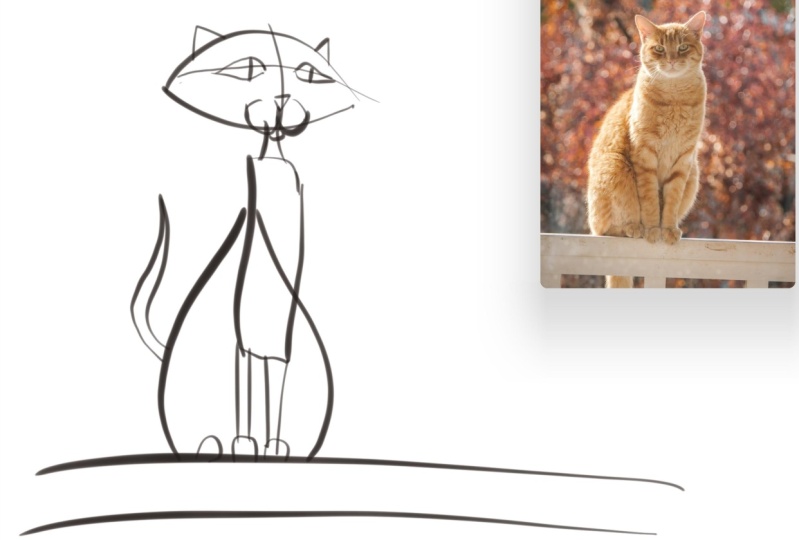
our reference window. I'll click on Image, and we'll import our first cat. That will be the
white and orange cat. You can use your
own reference and just follow along if you prefer. Just choose something
that's simple, which has underlying shapes
that you can pull out. Now let's make this
a little bigger, just so we can talk
about it for a moment. Now, forget everything
you know about cats, this is no longer a cat. See this as a form
made of shapes. For example, the
head is a circle. We have these little
circles here. Triangle, nose, triangle
ears, and so on. The rest of the body is
also made of shapes. There's this beautiful
rectangle right in the center. You can almost make out a circle here for
the hind quarters. Even the legs are made of
individual little segments. What we'll do is
break this cat down. Break those shapes down, and then reassemble those
shapes into our drawing. Don't try to draw the cat, Just draw the shapes you see and they will
become the cat. Just trust the process. When I draw from a
reference using shapes, I like to start with
an anchor shape. An anchor shape is a major piece that I can
attach other pieces into. For example, see that
rectangle in the middle, that makes a great anchor piece. It's large and these other
pieces branch off from there. Think of it as being a LEGO, as the first LEGO we start with, and then we click
other LEGOS onto it. Let's go ahead and draw
that first anchor shape. That rectangle, just
try to get it close. This doesn't have to be perfect. You can see that's not
a perfect rectangle. It's not about the
perfect shape, It's more about how all
these shapes fit together. We're just trying to get
proportion and placement down. In fact, this layer won't even be our final drawing layer. You don't have to fuss too
much with perfect shapes. What can we attach
to our rectangle? You can almost make out a circle if you use your
imagination a little bit. Let's go ahead and
add that circle. Make your shapes overlap, overlapping shapes show how the
body is actually structured. When we understand
the structure of the body, we have the ability to move those parts if we want to
change the pose later on. Now on the other side of the rectangle, we
have this shape. That shape is a little
bit harder to make out, but you can see the angle
of the chest there. That shape looks
something like that. Let's add that once again. I'm overlapping a little bit. That looks close enough. As I said, as we
draw these shapes, don't worry about
getting them perfect. Don't overthink it,
just get them close. We aren't trying to draw an
anatomically perfect cat. We're drawing our impression
of the reference. So let's add those legs. We have this thigh that starts at the circle and goes actually behind the cat. Then that part comes down. Then we have that little foot, the other hind leg, that's behind,
has an angle there. Then there's this
angle going that way. In fact, I like to use my
pencil to match my angles. We have a nice big
shoulder there. Then we have that front leg that comes down at
a slight angle. Once again, I'm making
my shapes overlap. There's a leg that comes out and we have a
little paw there. We won't worry about any
of these little details like the little toe beans
in the toes. That'll come later. That’s in our final drawing
layer. Now, onto the head. The head is a sphere with smaller shapes
attached to it. In fact, let's look at it
a little larger. I'll draw that sphere. It might
be a little bit squashed. That's too squashed.
That looks about right. There's a quick technique for
placing features on faces. This also works when drawing
people in other animals. Once we have the
basic head shape, which is our sphere, we can draw some guidelines
for the features. Our first guideline
is a vertical line, because we can see the way the facial features land on
either side of the face. We can draw a guideline the middle to separate
those features. That helps us with
our placement. But in this case, the cat is looking slightly off to the side. It's
looking that way. We'll make our
guideline also off to the side just slightly. The reason it's curved is
because it's on a sphere. The surface of the
sphere is curved. That line follows that
curve of the sphere. Next I'll draw a horizontal
guideline for the eyes. The eyes are about halfway
between the top and bottom. About halfway between
the top and the bottom. We have our line for the eyes, that's where we'll
draw the eyes. But the cat's head is ever
so slightly tilted downward. I'll give my eye line a slight
tilt downward once again, because the head is a sphere, it's a rounded surface. That line follows the
surface of the sphere. That's our guidelines to
map out the features. From here we have
these little circles. I go below the sphere, there's the chin triangle. Nose, we said the eyes would
be right on that eye line. The ears are a little
bit forward on the head, something like that. That's close enough. How
are we looking here? That looks good. All
we need is some tail. I believe this tail
was going downward. I think I'll change
it just for fun. That's all the detail
we need on this layer. All the other details
like the eyes and the toes will go on the drawing layer. Let's go ahead and do
that drawing layer. Our first step is to
take our shape layer, bring the opacity down. I'm going down about halfway. I want to make sure you can
still see my shape layer. You can go a little lower
than halfway if you need to. I'll add a new layer. And this is for
the drawing layer. Now, we're not tracing around the body. Don't think
of it that way. Imagine the shapes are a wooden structure and now
we're working with clay. As we add that clay, you can mold it and
shape that clay and build the body up
around that framework. Think of shapes as a pathway that gives us a
general direction to go on. As we draw, we'll
add the contours, muscle tone, and make
adjustments and so on. We'll bring this cat to life. Looking at my shape layer, these lines tend to
be very straight. I'll be looking at the
reference to bring in some of those contours.
Bring in some of that subtlety. I might start down here, I might give that
cat a little belly. I'll add a little
muscle tone to the leg. Earlier. I said that that leg was
a little bit too long. I'm going to shorten it here, while I'm doing
my final drawing, This goes
up a little bit. I'll make
my way to the tail. The tail might
be a little too wide. That looks almost
like a wildcat tail. I'll streamline
it, that's better. Moving along to the back, I'll give it a little dip just to give it some
fluid movement. Before we do the head, let's finish the legs. We'll do the head
at the very end. That leg can be a
little more solid, with a little more structure to it. I don't like the way
that foot turned out, but we can always erase
things when we're done. Then we have that nice
solid shoulder here. Let's give it powerful
shoulder, that looks good. Then we have the chest area. You can see I rounded that off. There is more of a flow,
a natural flow. We have our paw. We can worry about the toe
beans and the toes when we remove
the shape layer. Moving on to the head. Let’s
add a little texture here. Move up into the ears, mouth.
That’s too cartoonish. I'm going to make those a little wider. Let's do that again. That's better. Give it a chin. We'll add the eyes, then we'll add the rest
of the details, when we turn off
that shape layer. Let's go ahead and do that. I like this part. This
is like the reveal. We can see how that
cat turned out. This is always a
satisfying part of the drawing. I’ll drop that shape layer. Turn it off, and here we are. That looks pretty good. We just need to add a few details. Like the eyes and
add some whiskers. Whiskers give it personality. We mentioned adding the toe beans, and so on. And of course, we can
erase things too. I might decide that foot needs a little
bit of adjustment. That's better. And of course, once we add a little
shadow to the ground, suddenly the cat has weight. Now, does it look just
like the reference? No, that's not the point. The drawing is an interpretation
of the reference. The reference is simply inspiration. For example, the head is much
higher, does that matter? Not really, unless
I'm drawing a cat who's prowling or
sneaking along. But it looks like a cat. The legs are structured in a way a cat's legs
are structured. The face is more
or less organized the way a cat's
face is organized. The proportions are pretty
close, but not perfect. And that's okay. We transformed our reference into shapes, which became our final drawing. That is the power of shapes. We learned how to break a
reference into shapes and we know how to reassemble
those shapes as a foundation for a drawing. You've been drawing
shapes your whole life. It's as natural as writing. And because of that, your shapes have your own voice in them, and therefore so does your cat. What if we draw our shapes a little differently
from the reference? How would that
transform the cat? Let's find out in
the next chapter.
4. Altering Shapes: Let's have some fun
bending, stretching, and changing shapes, giving that reference even
more of our own voice. Let's begin by pulling in
reference cat number two. We'll go to our
reference window and we'll click Clear Import. That will pull up our
library of photos. Reference cat number two. Is this orange cat
sitting on a fence, there. It is beautiful. Let's take a closer look
at our orange cat, here. Now, that first cat we did, the walking cat, those
shapes were spread out. This time, the shapes
are stacked up. It's more layered. It's a
little bit different way to go about drawing with shapes, but the same principles apply. Let's begin by choosing
the anchor shape. To me, the anchor shape is
this body shape back here. It's big, there's other
shapes attached to it and it has substance
and weight to it. It's sitting right
on that fence. Maybe you have a different
anchor shape in mind. Maybe you thought the chest might be a better
shape to start with. That's fine too. Go
with your instincts. Let's go ahead and draw
that anchor shape. Let's move this back into place. That looks good. We can
go a little bigger here. It's a tear drop
shape, not quite, but let's draw the bottom of the fence that
goes straight up, then up into our tear drop. That one has a
tighter curve to it, then it goes up something like that and then
that's a tighter curve. That could be a
little straighter. I don't want to fuss too
much, but that's better. Then from there we have the chest shape that
is off to the side. It rises above the
top of the tear drop. The top of the anchor, probably right about there. It's a rounded rectangle and you can already see
I'm going way over. See the way that hip sticks out. There's no way I'll
be able to meet that. That means my rectangle
needs to move over as we're doing this. Watch how these
shapes work together. We're going for placement
and proportion. In fact, let's
start on this side. I guarantee I have a bit of, a little bit of hip
coming out there, maybe about that high, and we'll come down about there. That's probably not perfect, but it's close enough. We're not doing a
perfect copy of that. This is inspiring that. Let's then drop those legs down. They're long rectangle
shapes that lead to the little paw shapes. Slightly, a slight inward angle, very slight. That looks great. Then the head is a sphere
that comes in about there. Let's move in on that head
so we can see some detail. Now let's do those
guidelines again. The vertical and the
horizontal eye line. Our vertical might have a
bit of a little shift to it. The head is not quite
straight, looking at us, it's a little bit tipped, just slightly, maybe like that. The cat appears to be
looking down a bit. Just a bit, very slightly. We'll have that slightly
downward curving eye line again, because we're drawing
on a rounded surface. That line has a curve to it. Then from there we have these
beautiful mouth shapes. A little circular shape. That little chin goes down
there, triangle nose. Here's our eyes. And
how do our ears go? They go outward a little bit. Once again, they’re
are a bit forward on the front of the head, that's a little small, but I'm not going
to worry about it. I think that might be everything, but the back feet and the tail. Let's see how we
have our feet going. A foot tucked in here,
that foot is behind. I might add that, maybe not, then our tail will be
down here somewhere. We'll worry about
that when we do the final drawing layer. Okay, let's go ahead and
do that drawing layer. I think this looks good. Proportions are good,
placements good. Let's go ahead turn the capacity down about
halfway, add our new layer. Let's begin at the
bottom. Let's go up. I might tuck that line in just a little bit from
where I did my shape layer. There's the chest,
comes down to the leg. There's a little. Let's do
the other half of the chest. Down the paw, to the paw again. And then we add the
V to finish that off. That looks good. This
goes up like that. Then we have a little foot here. It's hard to see what's
going on with the back leg. I think I'll just
invent the shape. Then we have the head. I'm going to add just a
little texture there. There's not much texture on this cat into something I
like to do when I draw cats. Let's make that ear
slightly bigger. There's our eyes right
on that eye line. Let's add those and the chin. And how are we looking? I never did add the fence, did I? I might be too low. That's good enough, fence posts. I'd like to actually
do a brick wall, but I don't want to take
the time right now. So we'll just do fence posts. Tail up or down?
I actually like up, it's a little more playful. That looks good.
Okay, let's drop that shape layer
and see how we did. Oh, that beautiful. I like it. So we'll add a little detail, a little personality,
such as the eyes, the nose, that's better. That could be a little, that could be a little tighter there. I don't want to
play too much with this, but I can't resist. That's better.
That's more natural. We can add whiskers
like we did earlier on our walking cat and so on, stripes, whatever you
want to do from here. That looks like it's wearing
a shirt, that's better. Okay, you get the idea. We made that, just
by drawing shapes. Transferring these
shapes onto our canvas. We went from that
to this, not bad. Now, what would happen though
if we altered these shapes? How would our cat turn out? Let's find out now. I could alter the shapes
that I already drew. But I think what I'd
like to do is draw them. We're going to start over. The way I'm going to alter my shapes is by making them
a little bit more narrow. The body will be narrow. Going up the chest, same thing. More narrow, I think
I'll make the head wide. It'll have a bit of a
Mid Century feel to it. Maybe we'll see how it turns out. We’ll start by
doing the top of that fence. And the anchor shape
was a tear drop, but mine is going to be
narrow, something like that. Then we have the body
again off to the side. Let's make that a little
more sleek, narrow. Should I do a neck? I'm not sure about a neck. Let's try it. Here's
our neck shape. We said the head would be wide. Let's do that again.
I like that better. Let's add those paws, legs. Come down another foot here. Let's add our guidelines
for the face. We start with that horizontal
or that vertical line. Rather, this cat appears to be looking that
way a little bit. Do something like that. It might be slightly looking upward
at the moon or something. We'll give it just the
slightest little curve to it to make it appear
that it's gazing upward. Then from there, we can add
our features of the face. Let's put the nose right about
there. There's our mouth. Let's add some eyes.
Let's make them long. Since the head is long, maybe it's looking out that
way. That's beautiful. What ears do we do? Let's do some smallish ears. I think that looks great tail. Where's the tail? I think the tail should also be slender. There we go, I like it. That is our shape layer. I think that's
everything we need. Let's go ahead and drop
that opacity and then we'll build up that body
form on a new layer. Here we go. We'll
see what we get. We'll start at the
back of the body, move up to the chest area, the legs to the paws. It goes like that.
We have another foot there is that narrow neck, little nose again, that's beautiful that I didn't turn out just
the way I wanted it. That's better. And we have some ears and I think
we might have it. Once again, I forgot to
do the top of the fence. Okay, let's turn off
that shape layer and see how we did.
That's beautiful. I like it. It's a
charming little cat. And we can finish it off. That leg is not
very well defined. I'll just add something
that's better. That completes the cat. Let's take another look at our shape layer. That's
where we started. Just by changing a few shapes, we were able to
transform this reference into a cat that has a completely different
and unique look. We made that cat our own. That is the magic of shapes. In the next chapter,
we'll sketch with shapes. It's more of an
intuitive approach to working from references.
We'll see you there.
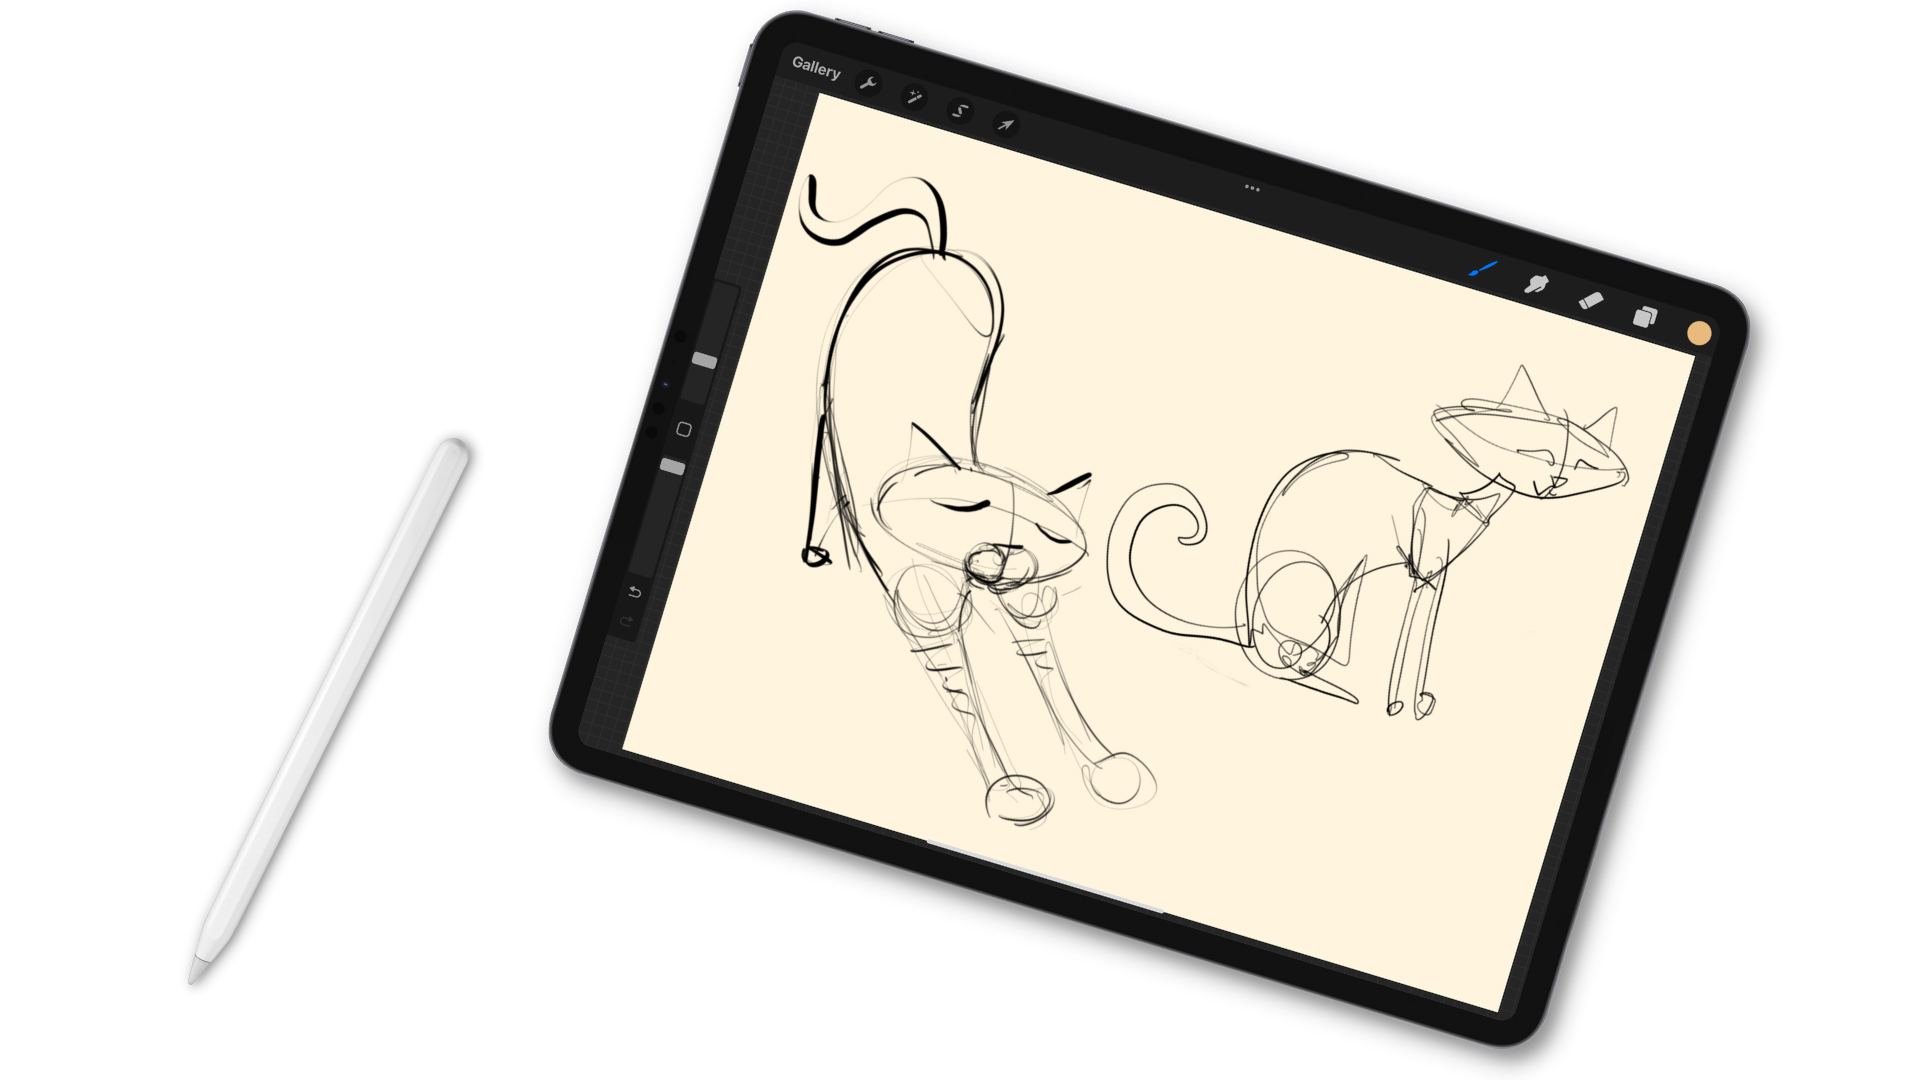
5. Drawing Sketchy Shapes: We've explored the
analytical approach with intentional shapes, Now we'll use a more intuitive method with sketchy shapes. One approach isn't
better than the other, though you'll likely
find that one of the two feels
more natural to you. It's a good idea to try both with the
intentional approach. We built the cat shape by shape, like building a house
brick by brick. The sketchy approach
is about gradually developing the shapes and
organically sculpting the cat. It is time for reference
cat number three. Let's go ahead and clear
orange cat on the fence and import referenced cat
number three which is this one, the seated cat on the street. Here, let's blow that
cat up a little bit. There we go. For
the first two cats, we use that drawing method
for the shapes in which we very carefully
drew out the shapes. For example, if I was
to draw this cat, I might start with
an anchor shape, which is a circular shape, and then I'd add this triangular
shape going up the back. Then we have a shape
here for the chest. Here's our head, at
our legs, and so on. Shape by shape by shape.
That works great. I love drawing that way. But let's explore
another method. This is the sketchy
shape method. The way this works is we just
sketch out those shapes. We know that's a round shape. We already said that I'm going to make that circle
when it feels right. Maybe I'll work my
way up the back. That looks about right. You can see I keep moving. I'm not overthinking things. I can go into my chest area, those legs come down like that, make sure I get that angle
right. That's a little better. I'm feeling my way through it. Do these legs look like
they could support weight? If I was a cat, would it feel like
that's enough support? Does the bottom look like
it has weight to it? If I put myself in the cat's body, you can almost feel the weight there. You can feel the street. You can feel the heaviness
of the bottom of the cat. Do I sense that in
the way I drew this? Let's move up to the head now. It's the same idea, we’re just feeling our way
through the shapes. It's looking off to the side. I'll put in that vertical line. It's slightly looking up. I'll do that from there. I'm just feeling
my way through it. That looks good lightly
with the eyes at first, then darken them up when I
think I have the right marks. That's better. Let's get some ears in there.
Work those out. Beautiful. How's
our tail like, that? Maybe I actually like it
straight this time? There it is. It needs
a nose, doesn't it? There's our shape layer. It's a very intuitive
way to draw. Instead of carefully
building it block by block, we're just sketching
out those shapes, working our way through the cat. Let's go ahead and
drop the opacity, add a new layer, and we
will draw that body. That body is already
pretty filled out from the first layer, from that sketchy method, but I might need to make
very subtle changes as I go. Like these arms for example, I'm not quite happy
with these front legs. That leg is fine, but this
one, that's a bit awkward. So I'll tuck it
back. That's better. Let's do that leg and
that tail is a bit flat. I'm not sure what
to do about that. Maybe that's okay. I did
like that line back there. Okay, who before we drop
that shape layer, we better. Okay, now let's turn
out the shape layer. See how we did, and
there's our cat. It needs a little adjustment. You can see there's
a mistake there. That's better. I like that
we can add eyes and so on. Whatever details we want to add and give it a little
more personality. By sketching out those shapes, we're able to get this
cat onto the canvas. Let's see how we
started with it, that's how we started out. This method is all about
placement in proportion to, it's getting an
accurate overall feel for the attitude of the body. How is that cat seated? How is the weight of
the cat distributed? Does it feel natural?
Does it feel comfortable? Is it convincing? We could keep going.
We could add some of the shading and even bring
out more of that definition, more of that contour, life, light, almost
sculpted feel. But that's for a
different class. When our cat was
sitting on the fence, we changed just a few shapes and that completely
changed our cat. Let's change a few shapes using
the sketchy shape method. I'll go ahead turn
off that layer, add a new layer, we'll sketch
out the shapes once again. But this time I'm going to
make the back more arched. It's almost going to
have a cartoonish feel, very exaggerated, a very
distinct curve on that back. That's the only change
I'm planning on now. If as I'm doing that
that inspires me to change the head somehow or
make the pause differently, then maybe we'll do that
once we see things unfold. But for now, that's the only
change I'm planning on. I'll start once again with that anchor shape, very lightly. It feels good, has some
substance to it, some weight. We said the back is
going to be arched. That's a pretty serious arch. I wasn't planning on
doing a narrow neck. But let's go for it. We're going to have to
do some long legs there. They'll end about there.
I'll do my endpoint. So I have something to aim for. Let's tuck that
one back there. Those are quite
long, aren't they? That's ridiculous.
Well, let's keep going. Now to me, it looks like
the cat's looking downward. I mean, it has to be, right? Let's draw that vertical line. And then the cat's
looking downwards, so this eye line bends downward. And then that nose, eyes and the ears might be
going back a little bit. The cat is looking downwards. What's it up to? Let's
think about that. It is looking at a mouse. Of course, it is. I could get a
reference drawing of a mouse, but I think I'll feel my way
through the mouse as well. It's not that tricky to draw,
the small feet, mouse tail. Speaking of tails,
let's do that one. Going like that this time,
because the cat is curious. That's a curious looking tail. I like it. I like
it, very cartoonish. Let's go ahead and drop
that opacity down. Add a new layer
and add the body. Here's arched back for sure. I want some texture
there. I love that stuff. Do I add texture? Do I have enough room?
The head's turned. I guess I could put a
little bit in there. Sure. I'm not happy
with these legs, but what are you going to do? Huh, I think what I'll do is bring
them in a little bit, we'll see how that turns out. Once we turn off
that shape layer, we can always adjust them. There's our tail to
add our little mouse. I think that's
everything for now. Let's go ahead and turn off the shape layer and
see how we did. Okay, not bad. You can see the legs are a
little bit awkward. I might have to fix those up. I don't want to take too much
time doing that right now. But let's see, that
might be in front, our foot is going
to go like that. It's a little
shading down there. You have our mouse
shadow our eyes. Let's make it, looking at
that mouse. Beautiful. Let's take a look at that first
layer. That's our shapes. That's where we started
just by changing one thing, the shape of the back, that made the head a
different position. Which made us think that
there must be a little mouse involved. By changing the back, it led to a whole story. When you're working
from references and you decide to change things, just keep an open mind. Change one or two things because never know
what's going to happen. In this lesson, we explored
the sketchy shape method. We stayed loose, we
stayed in motion. We gradually felt how each
shape would be formed and organically, those shapes
soon turned into the cat. Then just by altering
that one shape, the whole cat changed and
the drawing became a story. That too was an
intuitive process. Let's move on to our final cat where we'll take on a
more challenging pose. Drawing shapes will make
that pretty simple. It really will.
We'll see you there.
6. Working With Tricky Poses: What happens when
we have a reference that's more complex or
in a tricky position? The approach is the same. Break it into shapes. Draw the shapes, you see. We'll draw the first
intentionally. In the second, using
a sketchy method. We'll stretch our sketchy
shapes just a little bit this time, to bring out a feeling that's already in the reference. I've already gone ahead and pulled up our
final reference. Cat number four
is our stretchy cat. We've done the
side view of cats, we've done our
front view of cats. And now we're doing a three quarter view. And that appears a little
more tricky, right? It's going back into space. It's coming out into the room. and your mind might be
saying, you know what? This looks way too challenging, but that's because you are
looking at it, as a cat. Remember, this is not a cat, this is a collection of shapes. So don't worry. By breaking this reference into the shapes
and rebuilding them here, we'll be able to draw that
cat. Trust the process. It's very simple.
It's not a cat, it's not even a pose. It's just a bunch of
shapes for this cat. Let's go back to that
first method we used, where we drew the shapes, not the sketchy shapes, but those more carefully
drawn out shapes. Our anchor shape will be the
head. It's very central. We have the head, then we have a body shape going backwards. We have arm shapes. Going forward, we need to
leave room for the arm shapes. And we need to leave
for the body, the head. We're going to put
right about here. I'll carefully draw the head
shape, not quite as sphere. This time it's more
squat then the body. What shape is it? Draw
the shapes you see. Don't think of it as a body. Think of that as a shape. What shape is it?
It's almost an oval. Gets a little more narrow
towards the bottom. It's a little off to the side and a
little bit at an angle. It starts about midway there
from the top of the head, it comes back down,
something like that. We can almost break
these arm shapes up, so you can see a circle there. Why don't we try that.
Let's add that then. We can go ahead and add those rectangular arm shapes at an angle. They come way out. We'll just do circles
for the paws. Now that paw may go a little further out.
Something like that. Then we have this little
leg shape, very simple. It's a tiny little rectangle. Then we can add our
little paw down there. Draw the shapes. You see
we're not drawing a leg. We're drawing a
rectangle. Little circle. Same thing here. We're
not drawing front legs. We're drawing shapes
and more shapes. Add them all up and you have
a very fine looking cat leg. Now let's move on to the head, our vertical dividing
line for the features. I'd say the cat is looking
slightly that way. You can see there's
more head there, than there is here, slightly. In fact, if we imagine
a dividing line, you can see it
starts about there, it comes down somewhere
in that area. Once again, make it curve
because that's a sphere. Follow the curve of the head. The eyes, it's looking
straight ahead. We can begin to add
the other features. Here's the mouth, little nose, and those eyes are closed a bit. The ears are
a little bit forward on the head and outward. That looks pretty good. We'll add the details like
the little paws and the claws and all that later. The tail. I could go that way. I could go that way.
I like that actually. Why don't we try
that. That's fun. All right, we'll see how that goes. That's our shape layer. Let's go ahead drop that opacity down and add a new layer
so we can draw that body. Once again, think of it
as working with clay. And we'll fill out some
of these areas here. Let's start here. I like how you can
begin to see that hip. We didn't add that, so let's add that. Something like that. Comes back down some comes back up. Those are quite wide.
Actually, let's widen that out a little bit. That'll look more natural. More toes. I'm not going to
add all those toes right now. Back leg. Let's bring
this up a little bit. There's our nose. Make
that mouth a little wider like we did
with our other cats. You can always
improvise as you go change things around
on this layer. You know how I love
that? All right. I'm still not convinced
about that tie. Do I like that better? No,
I don't. Let's do this. Let's give it a
little more curve, we can add more detail, of course, once we turn
off the shape layer, in fact, let's go ahead and do that. Let's see how we did. That's a pretty
good looking cat. There's a few little
things we can adjust, but we won't worry
about that right now. We're able to do a
good version of this. We broke it down. We didn't
worry about trying to draw things in perspective and struggling with
angles and all that. We simply drew the
shapes we saw. Draw the reference
shape by shape. Why don't we play
with our shapes? Let's alter some of these shapes and exaggerate that stretching. Let's go ahead, turn off those layers and
start a new one. We will exaggerate the shapes using the sketchy shape method. This time we'll draw
that same pose, but we'll just exaggerate
things a little bit. Maybe the legs will
be a little longer, the paws a little bigger, face a little more blissful
looking, and so on. So we'll use that
sketchy shaped method, starting with our anchor shape. The head, we go very
lightly at first, just trying to feel
our way through that shape that
feels about right. It might be a little bit wider than that one,
but that's okay. We're doing it our own way. We'll do just the
guidelines for now. Once again, it's looking off, it's tilted a little
bit that way. There's more head
here than there. I want it a little higher. Let's exaggerate that motion. That's too high.
Maybe like that. That's the only details
we'll do for the head. At this time we're laying
out the head shape, the body shape, the arms, and then we'll go back
and add more detail. It's just a better way
to build a drawing. Start with bigger forms, then add the smaller forms,
then add the detail. I'm going to keep moving here, let's bring it up to the
body, something like that. I'm just feeling that,
forming the curve, feeling the motion, feeling
the dip of the back, I can almost feel that
sunlight hitting that cat. Then we're moving down
into the arms once again. Let's do those upper arms
as a separate shape then. See how I'm filling
out the width. Fill out the width a little bit. Let's put some big
old paws on there. Really feeling it. Then
we have our little leg. What I'm thinking about
here is does that leg. Does this leg feel like
it supports the weight? I would come down about like that and then anchor
it with a nice paw. Does that feel like it
would support the weight? And actually it doesn't. It feels like it's wobbly. I'm going to start
that one over. Let's give it a little
more substance. That's better. That's more
convincing. It's sturdy. And the tail, how
shall we do the tail? Like to go straight up
but I ran out of canvas. Let's just do some
luxurious curve. Yeah, that's not bad. I like it. Let's move on to the face. I'll sketch out the mouth
area again, very lightly. And then as you get it closer, you can press a little harder, give it some definition. That's why we're using
that script brush. That variable pressure, that pressure sensitive brush gives us that
varied line weight. We can go very lightly at first and then you can
bear down a little bit, give that line some
definition, some feeling. Now, that's a
surprised looking cat, isn't it? That's not blissful. There we go, That's better. It looks a little sad. I might fix that up
in our final layer. There's our ears, beautiful just by slowly and gradually
feeling out those shapes. We got the head and we
felt the sway of the back. That beautiful curve. Same thing with
the arms are just feeling the direction,
feeling the flow. It's about flow.
It's about movement. Very intuitive,
almost emotional. Then we added the
face the same way, feeling our way through it. This looks good.
For now, let's draw that body over that shape layer. We will turn our rapacity
down on the shape layer, add the body layer, and
let's start with this foot. We went up into the
back of the body there, that leads to our arms. Let's do some nice big paws. I wanted these legs
to be a little wider. This time I made them too thin
in my shape layer. Big paw. There we go, add that tail. Then we need to do the
head, that's better. Moving on to the head, I want to make that
mouth a little wider. Just a little bit. That makes the cat look a little more
pleased with that wide open, that wider face. That wider mouth. I said I
wanted to adjust the eyes. They were looking a little sad. I'm not sure how
that's going to turn out until we turn
off the shape layer. Okay, that looks great, lovely. We were able to take
a tricky pose and exaggerate and alter it just by changing one shape at a time. Going shape by shape
altering the shapes, that transformed the
reference into our own cat. In this chapter, we
learned that the brain sometimes sees things
as being complex forms, being very intimidating,
difficult, beyond our ability. Sometimes if you ignore your mind and just
follow the shapes, draw the shapes you see, let go of all those
other concerns, you find out that it's not
so difficult after all. That’s the power of shapes.
In the next chapter, let's wrap it up with some
quick closing thoughts. Meet me there.
7. One More Thing...: Thank you for drawing with me. I enjoyed having
you here in class. Remember, a reference
image is just information. You don't have to recreate it point by point and line by line. Find what feels like
a natural voice in how you interpret it
and then develop that. And drawing with shapes
isn't limited references. Their a good way to
build any drawing from a single subject to an
entire composition. If you can draw shapes, you can draw with shapes. If you enjoyed the class, please leave a review. They sharpen my teaching and help other students
discover the class. And again, please
share your project. If you have any
questions, please feel free to leave them in
the discussion below. Be sure to follow me
here on Skillshare. So you'll always know when
my next class is published. You can also find me on
Instagram, Youtube and Pinterest. And I invite you to join
the creator Collage, which is a friendly
online community for digital artists of all
skill levels that I host along with my wife and fellow
teacher, Tracy Capone. I look forward to seeing
you in the next class.
 Joe Smigielski, Intuitive Artist, Degree in Art Ed