Transcripts
1. Introduction: Hi. I'm Isa orda. Digital artist collaborated with globe brands like AdopPly Elish, Prime Video, prime Videos,
Lord of the Rings, rings of power series, the Sada series, and
the Valle time series. Also Wacom, Logitech,
and many global brands. In this class, you will
learn how to create stylish fashion
illustrations with dynamic poses and
realistic fabrics. We will build
elegant body poses, refine proportions, and give your characters
that high fashion look. Then you will
discover how to draw fabrics and natural
faults and movements. By the end, you will
be able to design confident poses and garments that feel alive
and professional. Open your karmas, and let's create stunning
illustrations together.
2. Drawing Quick Sketch: Welcome. In this part, we will sketch this
facial illustration. And at first, I created
an a dronive layer using a really
tiny sketch brush. And at first, you don't need to think over
the details so much. Just try to put the base
details of the sculpture, like structure of the body
and shapes and how it looks. Just try to define
the base shapes. Then after you make
sure about your shapes, you can place detail for it. For example, her hair and nose part and neck part, and maybe this chin can
be much more shorter. And let's paint the
arms just like this and you can make this much more tiny or make it much more
aesthetic, just like this. And the shape of the dress will be much more just like this. Like it have layers in it, and the feats are not visible
and basically like this, you can make the quick sketch
of dresses in minutes. With this quick
sketching method. And after you paint it, you can always zoom in and
put to details you wish. After you put all the
tails, it will be better. For example, the shape of the face and other details
are also important. Thanks a lot and see
you in the next video.
3. Drawing Basic Head: Welcome. In this part, I will show you how to paint facian portrait
with simple shapes. At first, paint circle and
find the rotation of the head. And with the corner
the tails and define the eyebrow line and collect the layers and
create a chin part. And after you describe
these details, this line gives
you the eyebrows. And this line is
forehead, just like this. And there will be ear and eye sockets will be like
this and nose will be here, and after you paint
this sketch like this, you can add eye
details like this. And for example, I will paint eye like this and eyebrow. And, of course,
there will be nose and lip it is easy when you describe all details just like this and should be
much more shorter, just like this and darker at this side,
it will be darker. And also this part is
darker, just like this. And I will add hair And after
you describe all details, you can delete these good lines, and you can define much more details over
the illustration. For example, you can define the shadows and highlights
and other details. Thanks a lot and see you
in the next tutorial.
4. Sketching Face Side: Welcome again. In this part, I will
show you how to paint Lomi's head from the left side. At first, start from
the circle again and define the rotation
of eye just like this. And define the ear point
and forehead point. And also this line will give us a place for nose and chin. And it will be three equal
size just like this. And you can paint neck
comes out from here, and nose will comes from here, and Let's paint the neck area and put the eye detail
just like this. And forehead will
come like this. And after you be sure
about your all details, you can select much
more visible brush and paint over the details. For example, I can make
the I look like this, and I can continue and add
nose part, just like this. And this part can be
looked like this. Yeah. And if you want to paint
much more feminine face, you can make the chin much
more Sutron and short. And also neck. And let's make curly hair, just like this. I don't like this. Yeah, like this. And maybe the upper part of lip can be much more
darker, just like this. And this part will be
much more darker again. Yep, just like this. And you can make hair
much more darker at this part and this part also like this and
finish the illustration. Thanks a lot and see
you in the next videos.
5. Stylized Figure Drawing: Welcome again. In this part, I will show you how to paint
quick sketch from left side. At first, you need to
create this sketch. For example, how she looks. For example, she have
some hat and looking at the right and how dressed
details will appear. At first, do not
think about details. Just think about how it
looks from the general. For example, how hand
and other details land and how the hand
starts and where it ends, all these singular
details will bring you to general look
of the illustration. And if you decide COVID look, and after this point, you can create much
more confident lines to describe the portrait and
adding details over it. And just like this, I'm adding some face here, and the other details
hand comes like this, and other hand comes
from this part, and this part will be like this. And like this. And if you want to paint
stylize it from front, you can describe it like basic shapes and paint
this thing like this, two opposite triangles for
define the woman's body. And if I take a line
brush and paint it, I will show you how I make
this connect for example, it adds much more
thinner like this. And like this. And
this body part will and thin and like this. And if you want to
describe the breast part, you can paint triangle
from the neck part. And these two sides will
be the breast place, and you can place
some extra volume here to define the shape of the. And you can paint the dress, the tail like this, and Kise comes from here. And hand comes from like
this and like this. If you want to paint much
more sliced portrait, your lines will be much
more confident and brave. For example, you
can paint portrait just like this and body will be really thin and really long and it is really
extreme level of stilization and you can use it in your own paintings
and fashion illustrations. And for example, I made it much more small and will distort like this and make the hands much
more confident and long. As hair will be like this. And if I want to add the tail
over it with a new layer, I will show you
much more clearly. Let's make her happy
and much more not real. In facial
illustrations, portrait is especially much more
strong and feminine. So I will make it much
more feminine like this and strong shape will appear
for the face details. And like this, I will bring the neck like this
and the tail will be. Let's paint some really
elegant dress here, just like this and some extra details
over here. Yeah. And you can add many
details as you can. And thanks a lot and
see you next video.
6. Basics of Sketching: Welcome. In this part, I will show you how to paint quick sketch of
Facionillustration. At first, you need to start from the simple line just like this and define the head. But you need to
make it much more small because the other
parts will be here. For example, if shoulder will
be like this or like this, you need to decide
how it will be look. I will do symmetrical and
here will be rib cage. And if you paint
triangle from lip cage, you can identify the breast
direction just like this. And at this part, I'm painting another
line for define this edge and legs. And if you think you are
making it like so fast, you need to change
details a bit much more. For example, how hair flows and how is the hairstyle and
placement of the face, for example, there
will be face like this and where the chin ends and the other
details is important. And after you describe
these details, you need to paint the hands. And in facial illustration, you can make the anatomy much more interesting,
for example, much more tiny and
long legs and hands, for example, I will make
it comes from here, and just like this. With a small detail
and effective result. And other part will be, for example, like this. And if you don't like the
result or you want to change, select this b tool
from selection tool, you can increase and
stilize the illustration. For example, legs
will be like this, and this part will be thinner. And if you play with you want to play with
the specific sites, select this unsure brush, and make this change
just like this. And after you finish
the oxy catch, you can take raised
opacity and zooming.
7. Basics of Sketching II: And you can start to edding de tails depending
on your choice. For example, I will make
the eye just like this. And you can put nose here, just like this and
lip the tail here. Yeah. And let's paint
the hair, the tail here, just like this with
quick sketching and complete the face part. Yeah. And these details
can be different. And it is totally depend on your choice to how you want
to see your illustration. For example, hands can be
much more tiny and like this. It is totally depends on
your choice, as I mentioned. And let's paint some
dress here like this. And if you wish, you can make it realistic
or much more silize. For example, we can
make the belly much more tiny and Like, will end like this here, and high hills will be here or we can add some dress or beg like here,
just like this. And it is pretty easy if you focus on what you want to create and put
accessories if you wish, depend on your choice. It is totally depends
on your style. For example, if I want to paint quick sketch for high hel, I can imagine high hel shape. For example, triangle
here comes like this and another shape here and another triangle and different kind of details
geometrically comes here. And after I be sure
about the details of it, I can place the outlines of it. For example, just like this. It will come like this, and the hair is a strong
shape here and here. And just like this. And for example, if I
want to paint some ring, again, I'm quick sketching. This technique is
important for create realistic illustrations because
you need to think simple. Then after you describe what you want to see
in your painting, you can put the details in it. For example, I'm making
some ring design. Or bracelet, we can make
quick shape like this, for example, Twister like. And after I make it, I can give a volume to it to create really impressive
bracelet design. And as you can see, everything should
be simple at first when you're creating something. Thanks a lot for
joining in this part.
8. Eye Anatomy: Hello. In this part, we will talk about how
to paint realistic eyes. At first, you need to start with the base shape of the eye. Then you need to
define how it looks, and I'm making it much more anatomically right
now, for example, we have some eye here like this and the other planes
will cover the eye. It is the skin, and it
will be, for example, you can think it is
like fish like fish, one fish, and it closed the eye. You can think of the basic shape of the
fish at this part, you need to make this
fish and like this, and this part will be like this. And the other part will be
and much more like this. And for eyebrows, every I mean, eyelashes, every lash
will follow the own pet. This pet will look like this, and this part will
be look like this will go on their own pet, not same pet and just like this. If you see thing
from the left side, it will look like this. And if we put skin
in it from the left, it will look like this. It is like covering the
inside and have some lashes, and these lashes
will come like this, and I will end like this. Also, this part
will end like this. Just like this, I hope you enjoy this process and see you
in the next process.
9. Portraits from Different Angles: Hello. In this part, I will
show you how to paint Lumi heat from the
different angles. For example, if you
paint circle here, and you want to make your portrait look
a bit up like this. And this middle section
will be eyebrow line, and this end of the
circle will be nose part, and we will place
eyes at this part. And this size will
be three equal size. So it will be like like this, and we will see the chin areas
under neck just like this. And we will see this line and lip can be looked
like this from the top, and the forehead
area will be less visible and nostrils will be really visible in this angle. Just like this.
And you can define the corners of the face. For example, it can
be here like this and much more maybe
smaller size for the neck, and we see some
shadows under it, and lip can be
much more defined. Also, these details
of the portrait. And for example, let's
paint some face, but this time it
looks this angle. And if we paint this angle like a bit and from here, again, I will put the I and
other details of the face and probably it
will look like this in this angle will end short at this point if we
paint much more bigger from this side and the
camera is around here. Again, thank you for
joining this part.
10. Drawing Expressions: Welcome. In this part, I will show you how
to paint expressions. For example, let's try
to paint happy face. If you want to paint happy face, and let's try to paint
from the mis heat again. For your example, I'm painting the propositions of the
face this nose area, and this will divide one, two, three, equal size. At expressions, you need to
think much more different. For example, if it is things simple like
smile, look like this, right, and said, Look like this and
angry, look like this. So you need to make these basic emotions turn
into much more detail. For example, if you
paint some a happy face. You can try to make eye much more closed because
it is smiling and muscles, like, for example, these corners
of the nose will be much more stretched because
the portrait is smiling. And let's paint the lip. And the details of the face. And of course, you
need to define the nose and the
different details much more confidently to make portrait much
more feminine. Otherwise, it will look a bit different, for
example, like this. And I will fix it just
like this with defining the shapes of the face much more and effectively and the
chin much more shorter. You need to define
the shapes much more better before putting
the tails over it. For example, nose can be
a bit much more shorter, and we need to put
some hair here. And for example, if you want
to paint really set face, you need to catch the emotion. For example, like this. It is really sad and mode will be upside
down, just like this. With basic shapes, you
can catch the emotion. And for example, at angry face, eyes will be much
more look like this, and eyebrows will be look up
and maybe some lines here, and Much will look
like this, simple. And it is the angry face. And if you want to
see how to paint, smiling, lip. At first, start from
the base shape and try to put a bit
smile into the face. I mean lip and put the
lips and teats under it. And you can see the top of the some teeth if it is
ing or smiling so much. For example, like this, This part will be
much more lighter. And if it is smiling so
much, just like this, you can put a really
good line over here, like for show the
emotion much more, and it will look
much more stretched. For example, from the
other part also like this, if it is gently smiling,
just like this, you can make this
place much more visible and strong
and from the left, it will look like this. And I said, it will
look like this. I totally depends on the angle. For example, if it is hocate, it will look like
this, like open mode, and you will see the teeth
and tongu and like this, it will be stretched, and we will see the dark parts inside of the moat
just like this. And other parts
will be like this, like shocked, something
happened and I shocked. And you can, for example, delay this part
or give it a much more like tongu betting
vibe to the painting. It is depending on your choice. You can, for example, make the lip much
more like this, like kiss face, make it
much more round like this, and the muscles will be
different at this part. And again, thank you for joining this video and see you
in the next videos.
11. Rendering Methods: Welcome again. In this part, I will show
you rendering techniques and you can use two different
rendering techniques in fashion illustrations. I will paint two circles
and will paint from under. For example, I will use red
color and we painted red. Also, this will be red. And first method, you can use
colors as a color blocks. For example, this
part can be darker and this part of the painting
will be much more darker. And this part,
much more lighter. And this part also lighter. And this is the most light part. And the other side, you can blend colors much more smooth with airbrush and
pressing lighter and lighter. And if you want to
paint sterilize it, you can use the first technique, and it is much more
easy to catch the light and shadows and make it look like much more
sterilize it like this. And for example,
for another method, you can paint with the paint early brushes or
paint early style. It means you will be much
more brave for rendering and put the really vibrant and detailed illustration
colors just like this. And you can increase the detail level by adding some small details over it
depending on your choice. Thanks again, and let's paint one realistic
example of rendering. For example, I have some
red circle like this, and I will apply Alpha look here and we'll start
to add shadows here. This part is the darkest
part of the illustration. And the lightest part
will be left top, this part, like this. And we'll add the color level of this part really
strong. Just like this. Yeah. And for example, I can add some highlights here. Just like this and like this. If this thing is glossy, you can add some highlights, or you can add some
yellowish color to pop up detail level of the illustration and make
it much more warm colors. And this blending
method will bring you much more natural
lighting, just like this. And you can also create much more reflected shadows
here from the background. And thanks a lot for
joining in this video. And this time, I will show
you two light source. At first, let's imagine we have one fabric just like this. And this fabric gets two lights, and one of them
is blue from left to and another light
is red from the right. The result will look
something like this. The middle point will
be shut off and you can imagine at your
facial illustrations using different kind of
hues in same illustration. For example, I can switch
some that color here, just like this for give
a much more volume. And you can use darker tones
at the shadows for making it much more confident and much more realistic.
Thanks a lot.
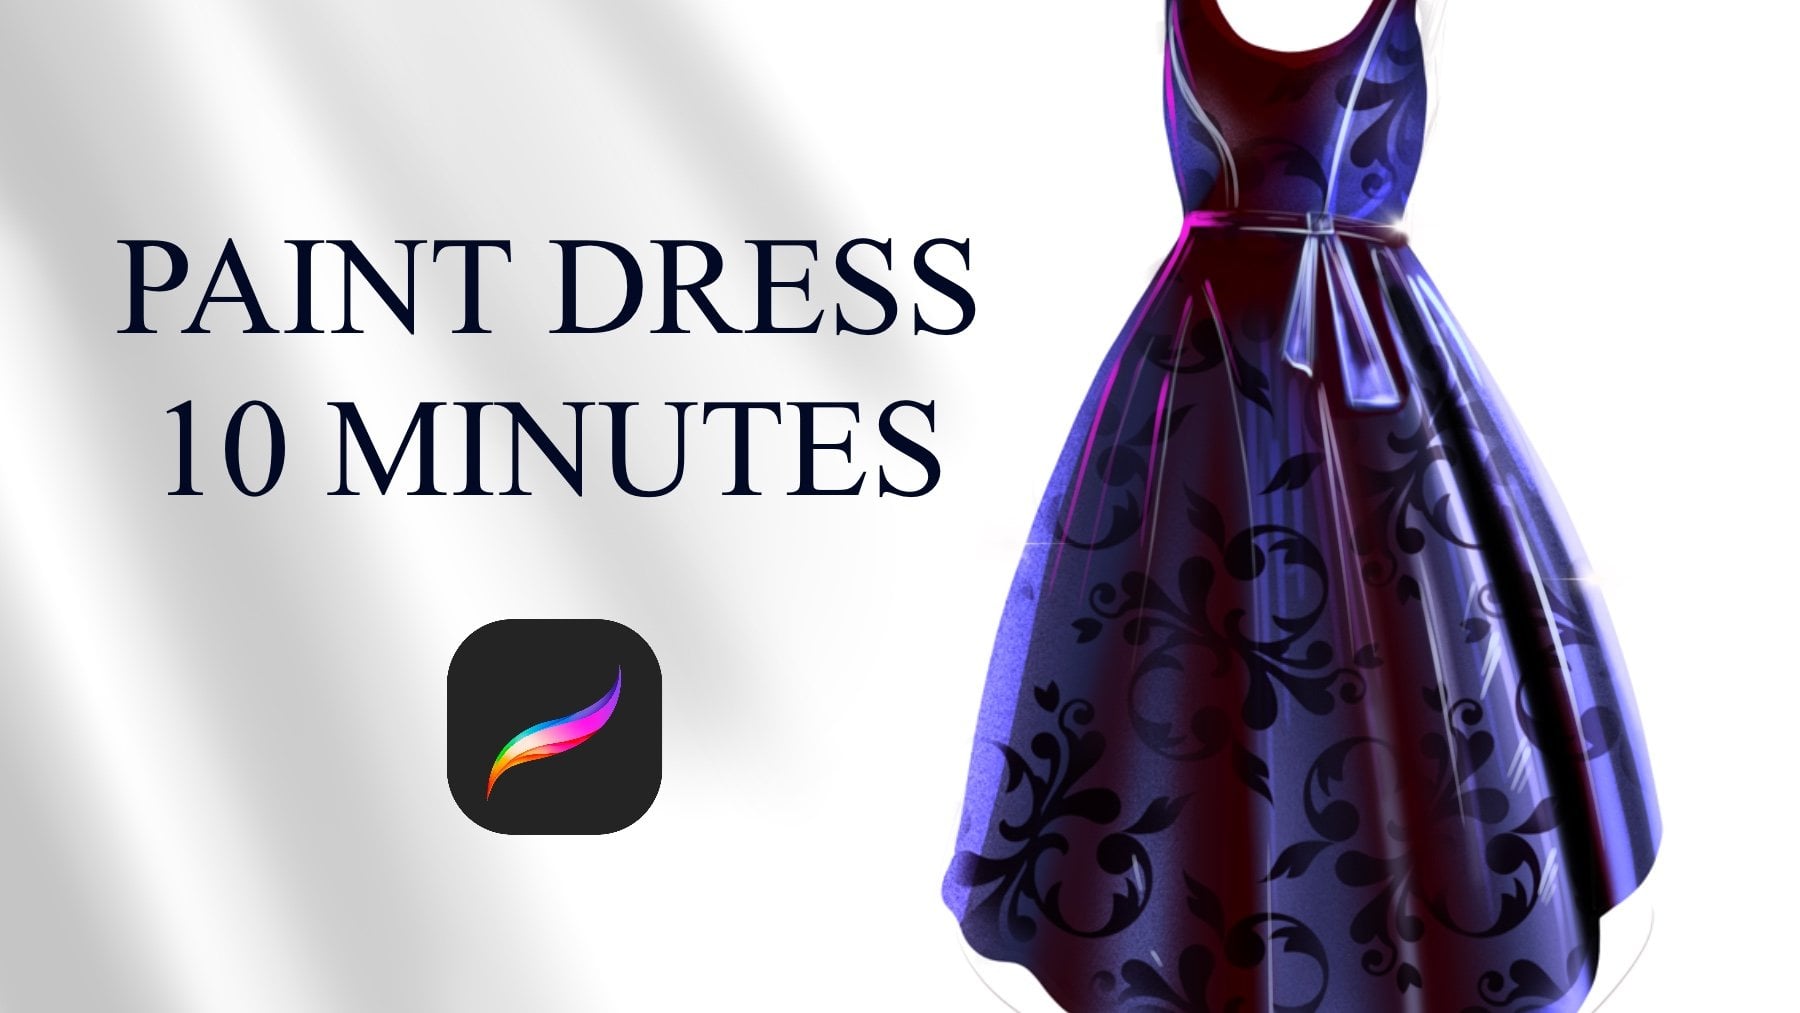
12. Painting Red Fabric: Hello. In this part, we will paint really
good dress detail and like folds and details. At first, I'm painting the
basic sketch of the dress. And after putting
these basic details, I will select red color and we'll paint here
just like this. Maybe we can open layer
under these lines. To keep lines will
help you to create the basic shapes and details. For example, it
will be like this and folds will follow this path. And I will make this
place much more lighter. And this place also will be
a bit much more lighter. Yeah. And select darker color
and apply here and here. At some parts, these details
can be much more detailed. For example, these parts like this a bit much more detailed and faults at some points
will be much more visible. And I will use
really black color. It is false. And you can dilate some parts of it just like this for make
it look much more layered. Just like this. And for example, if we have the
other parts of it, we can use darker
colors just like this. And make this much more darker. Yeah, basically like this. Thanks a lot for joining in this part and see you
in the next video.
13. White Fabric: Welcome again. In this part, we will paint really realistic looking
white silk folds. At first, paint the background to the gray color and start with the whiter color and paint some base shape just like this. And after you paint this shape, you need to add some
colored shadows for another basic
shadow definition. At this part, we are defining the color drops of
the shadows, basic. And after this, select much more darker color
and apply all over your strokes to make it much more visible and
detailed look for this. Let's continue and
make releasutron and effectively shape
just like this. Yeah. At some parts, you can make
it much more even darker and some parts will really dark depends on the
place of the surface, and light spots
will be in light. This is really basic way to create faults and thanks again and see you
in the next videos.
14. Painting Black Fabric: Welcome again. In this part, I will paint another fabric, but it will be black. At first, I will use free hand tool and I will
paint we shape like this. But it will be
something like this, and I will paint shape to the black and at
some light parts, I will use some slightly
black and in the blue color. And now I will add much more
light parts at the part, for example, especially here. And again, for folds, I will use airbrush and define the general
look of the faults. Some folds will be much more stronger and some
will be in shadows. Because if we make it
same for all folds, it will look much more boring. That's why I selected these
colors for creating folds. And just like this, these parts will be in dark. Maybe much more lights
will appear from this side and add some brand
look here, also here. At first, I started with black, but I'm increasing
the details here, just like this, a bit blue, and just like this. And we created really
good looking fabric, and we can increase these light parts and make these folds much
more sharpen here, just like this and like this. Yeah. Thanks again and see
you in the next videos.
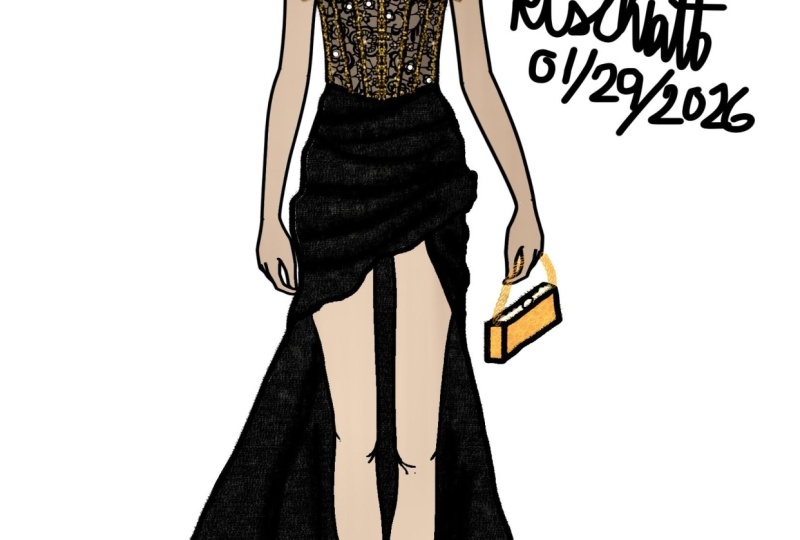
15. Painting Fashion Pose I: Vircom. In this class, we will paint this
Facion illustration. At first, open new layer
under the Facion scene. And after this, open another new layer and
select the base color for the skin tones and zoom in and paint the base
colors of the illustration. Do not think about the
small details at this part. This part we will just describe the general tones of
the illustration. I'm painting the base
colors of the skin. And you can use eraser for delete some
extra parts of the skin. If outlines go bigger, you can clean with the eraser to make it much more clean and
visually better. And after this, I will select some dark color and will
apply over the dress. Don't directly use black
because it will be so dark. Just use slightly black, not so much or not gray because I want to make
it just like this. I'm adding the basic
colors of the dress. Just like this. And for this part, I want to make it
transparent a bit. So if you want to make the illustration part
much more transparent, select the skin tone and
apply over this part. But don't overdo
it because it will look so transparent if you keep pressing so much harder and yeah, just like this. Maybe much more
saturated skin color here because it creates
shadow under skin. And for hair, I will select some yellow color and will
apply over it, just like this. And for extra parts, I will delate again, and these parts will be
also in golden color, and maybe these details
and this the tail and the hell the tail will be
golden color, just like this. Yeah. And I will make the
back much more darker. Just like this. Yeah. And now I will open
another new layer, and this time, I will add shadow and lights of the illustration. For example, for head, we have some shadows
over here and here. And here. And for shadows, you can
use some saturated colors for make it much more
darker and detailed. This part and this part and
this part and this part. Also, Ike can be much
more lighter inside. Yeah. And this one will
be maybe we can use brown color for eyes and some lipstick
color for hair. Yep. It is looking great. And let's keep at shadows
for our painting. I will add overall shadows
before I add extra details. These parts will be
darker. Also, this part. And this part will be lighter. After this, I will select much more darker colors here and here for increased detail
level here and here. Now, I will make this hair much more
darker here as a shadow. And here. Yeah, just like this. And after these details, you can go to do hue
and saturation and give it a bit much more saturation. Then open another new layer and select layer mode color
and some brand color, and this time, I will increase the detail level of the colors. If you use layer in color mode, you can add different kind of lightings in your painting
without losing the quality and adding extra details over your illustration to pop up your details and make it
much more interesting. Open another w layer,
and this time, we will add small details like detailing part
of the illustration. These parts can be
darker as makeup. And this part also. And top of the lip will
be much more darker and the neck area will be
really dark color, like this. And I will use much more saturated
dark color for the hair part like
this for shadows. And for lights, I will use much more lighter color
in it, just like this. And for the other part, I will apply just like this. And these parts will
be much more visible. And this part will
be much more visible and zooming and add some
small lights over nose, like glowing part and some lights here,
like glossy effect. And this parts like
highlighter maybe. And this part will
be like this again. Yeah, and earring
will be lighter, these parts will be darker. And these parts will be darker, and these parts of the top of the eye can be highlighted
again to pop up the shape. And it's looking
great right now. We can add these highlighters to the shoulders also to pop up it. And these bones also this breast
area, like this. And forehead can be
lighter, much more lighter.
16. Painting Fashion Pose II: And this nose area. And chin maybe like this. And at hands, I will add
extra lights all over, just like this and like this. And for feet, I will make
this part so much lighter. These kind of small details
add really good amount of detail to your
illustration and make your illustration
much more effective. And for this middle
part of the dress, I will make some lace details which make it much
more detailed. By the way, I'm using air brush, and you can access my il
brushes in the brush section. In my marketplace, and
these parts will be darker. Also this part will
be much more darker. Yeah, we are going great. And these parts will be golden
texture, just like this. Shiny and effective. Yeah. And for dress, you can
use really dark black, maybe pure black and brush it depends on howID
lens or flows. It is important because
we need to catch the shape of the dress
and COVID flows. We just need to define it. Just like this. This
part is darker. And maybe this part can
be even much more darker. And the end of the breast
area can be much more darker. Yeah, like this.
And I will select some textured brush and we open layer with the
overlay layer mod. And I will paint
over here maybe with a really lighter brush to create some shiny effect without
losing any detail. And for dress, you can
also use this to create some silk effect,
just like this. And you can apply really slow
and like this at some area, not all maybe here also. We can have some textures. And after this,
select smooth shading brush again and use
much more lighter color and at the highlights or light effects of the
dress like this. Yeah. Like this. And this can be lighter. Also, these details of bake can be lighter,
especially this side. And I will select
lime brush right now, and I will add some color
here to make it golden. Also, this part and
with this brush, you can add some lace texture. I will show you.
Really short but effective to look your
illustration, much more detailed. Yeah, it looks great right now. And I will add the
clock detail here, just like this and make
this a bit darker. Yeah, it's looking
great right now, and I want to increase the
detail level of the hair. I selected pure white or a bit yellowish
white to make it much more farmer and will
apply over it like this. And this place will be lighter. Maybe this part can
be much more brushed. And these connection points
can be much more darker, especially the near place to
the shadows and light place. I will add some shadows again, and I will select much
more lighter skin brush. And this time, I will add
some highlights overall at at the corners and breast to glow up the
body, just like this. And nose Cheeks. Yeah, it's looking great
right now. And arm. And the left point will be like this. Yeah. It is looking great right now, and I will add some
plaque nails to do feed and paint these parts, and heels can be much more golden colour,
white, like this. Yes, it is looking
great right now, and I can add some extra lights and
finish this illustration. I will add some glow effects and some lines here. Just like this. Yes. And I will paint
some square here. Or let's not make this. Just zoom in here and select
a really darker color for these details like shadows to
make it much more detailed. Again. And same for the halls, it can have extra colors
like shadows and yeah, hope you enjoy this process, and thank you for joining this illustration and see
you in the next videos.
 Yasar VURDEM, Creative Art Director