Transcripts
1. Class Introduction: If you've ever struggled to make your email designs look good, Canva just made that
problem disappear. The emails feature
lets you create beautiful clickable designs you can send through any platform. And yes, you can even test them and download them as
HTML. Let's take a look.
2. Starting a New email project: From the homepage, you will see this new icon that says email. If you click here, you
will create a new design which will take you to
a new Canva document. From here, you can start designing a new
email from scratch, or you can browse the
template library from here. What I would suggest is to do the following.
Let me close this. From the homepage, instead
of creating a new document, I would instead go to templates and then from
here, go to email. So you see now we have this
new Explore template section, and we have different
categories. So I'm just going to click here, and then I'm able to
browse through all the email templates
available in here. What I like about doing
it this way is that I can have an overview of
all the designs from here and then simply
select the one that I here you have a mix of
premium templates and free ones as well. For this example, I'm going
to go for a free template. So let me go for this one. I'm clicking on
the thumbnail and then customize this template, which is going to create
a new Canva design.
3. Costumize your email: Now this is how this
template looks like, and as you all know, you can customize
everything on this design. So let me show you what
you can do in here. On top of the design, we have
this section we just text. So let's say that I
want to talk about our future membership,
run the colab. Now, the banner that
we have in here, you cannot edit it right from
this section of the design, from this section of the editor, but you'll have to double click. You'll see that there
is a little message on top that says
double click to edit. So pretty simple simply
double click and this will open another Now we
have this editor, let's say, this editor
inside the editor from which you can
actually edit the banner. So W Connect Trip, I really like these keywords, but I think I'm going
to change the font. Let me see and maybe change
the size of the textboxes. I'm going to change the color of these textboxes and also
the color from the shapes. Let's see if this
combination works. Yeah, it's looking good. And now I'm simply going
to save this edit. And now that I'm back here
to this email design, I'm also going to
change the color of the title in here and I'm going to double
check if there are more button styles
that I can use. I really like this one because
it has a minimal style, but I also would
like to show you how to find and use
different buttons. So you're going to
go to elements, and then from here, you will see the
section called buttons. You also have headers in case that you don't like the
one that you have in here. You can find another header from here and insert it into
your email design. Let me go back. I'm
happy with what I have. I just want to see the different buttons that we have in here. I believe this one might be the same one as we
have already in here. Yeah. And then you have some
other buttons with borders, gradients, and so on. So let's try one with
a gradient. Why not? Let me delete this one here
and let's edit this button. You can change the
color from here, so let me try that out. I'm going to leave
this button as it is, is a simple, very
subtle gradient. And now, if I want to change
the color of the font, I'm simply going to
select the button and change it from this toolbar. Gonna use the same purple
I used on the title. Once you're done
with your edits, you're going to click Done and
your button will be ready. Now, let me change the font
on this button because I can see that we are
still using ARL. So let me come here and
change it for Montserrat. I think I'm happy
with this option, and I'm also going to
adjust the letter spacing. Now, what else can we
customize on this email? You can change the images, you can add animated elements. So let me show you
how to do that. So we have these two
images in here and let's say that you
want to replace them. You can either use the images
in the elements library, so you here, search for photos, search for anything
related to your business. So I'm going to search for coworking and see what do
we find in here and there. This is looking great. So I'm going to simply drag and drop the images to change
them on this email. If you want to use
your own images, you're going to go
to upload Fs and then search for your
files on your computer. Now let me show you
how to search and insert animated elements into
your email. Go to elements. From here, search for graphics, and then click CO and then you can search for anything
that you need. In my case, I would like
to use a light bulb. Let's see if we find
something like that. Perfect. I'm going to filter the
search results by animation. You can see here the option, and I'm going to select Animate. I think I'm going to use
this one right here. I'm going to drag
it into my design, and you will see a
purple line appearing. This will indicate you the
placement of the element. So I want to have it on top, and then I'm going
to reduce its size. I can see that I cannot
make it smaller enough, so I'm going to try
something different, and this is a tip that is
going to help you as well. I'm going to position this
element here to the left see. And now that I have
this element in here, you can see that once I start dragging this
alignment to the left, the element becomes smaller. And I think this is
already looking good. So I'm going to drag
this element on top. And this titling here, I'm going to align
it again to center. Now, something else that
I found interesting about this element is that I
can customize its colors. So I'm going to do that.
Use my branded colors. Now, let me show you an
extra tip that might help you design and
write your emails. In this case, we have this
pretty simple lining here, find community in
our coworking space. But let's say that
you want to give it a different writing style. You're going to select
the text that you want to adjust and then click
the Magic Write icon. It is dispensed right here, and then I'm going to
make this line more fun. So I'm going to
click here. Canva is giving me a different option. So instead of find community
in our coworking space, we have discovered your tribe
in our buzzing coworking. If you're happy with what
you have, click Replace. Perfect. I'm going to adjust a little bit more this
email right here, so I'm going to delete elements and sections that I
think I don't need. Now, you might have seen that there is a page breaking here. You can actually add your
own page breaks if you want, and I believe this
is a good way to deliver different
pieces of content in one so let's say that
we are talking here about how to access
the Randi Collab, and we have another
section in which we are talking about
our trip to London. I'm going to separate these
two sections in here by clicking on this plus icon
and then selecting Big brick. Now we have this section
separated from this one here. I have adjusted a
couple of things here on this email design, and I think I'm ready
to test this email.
4. Send test email: For this, you're going
to click on this button on top of the screen,
send test email. From here, you can
preview your emails. You're going to click
on this little button, and then from here, you'll have a desktop
preview and mobile preview. This is how it looks from
a desktop looks good. And then from a mobile device, I believe everything
looks good as well. So I'm going to change the
subject line this test email. This is not going to be
the final subject line, but it's just for you to
recognize this test email. I'm going to name it test email. And then this email
will be sent to the email address associated
to your Canva account. This one you won't
be able to change, so it is there by default. You will see where this test
email is going to be sent, and then simply click
Send Test email, the button that you see at
the bottom of the screen. This is going to take
a couple of minutes. So make sure that this bar is complete and then go
over to your inbox. Can take from a
couple of seconds to a couple of minutes depending
on how long your email is. This one actually was ready
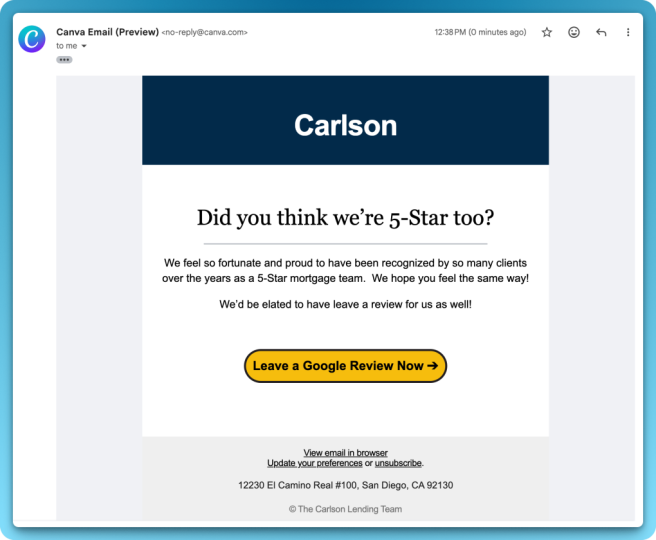
in a couple of seconds. I already have my email sent. So you can see here,
test sent completed. So I'm going over to my inbox. And here we have the email. It is sent from Canva. We have the subject line. It says preview, and then
the subject line provide it, and then you can see the description of the
email in here. So let's see how the email
looks. I'm going to open it. And as you can see, we
have the animated element here. It is moving. We have all the branded
colors here looking good, the banner, the buttons, let me see if they are working. So I'm clicking here. It is opening our website, so perfect. What else do we have in here? The images. This button should take us to our
Instagram account. It is working as well. Perfect.
And the email signature. Let me show you how the email
looks from a mobile device. We have exactly the same
email sent from Canva. This is the preview test email. Let me see how it
looks from here. We also have the
animated element and the content looks perfect
as well from mobile. Once you have tested your email and everything looks good, you'll be ready to
doload your HTML code.
5. Download html code: For this, click Share on top
of the screen, download, and then from here, by default, you will have the file
type HTML and images. If you don't see this file type, make sure to select it. And finally, click Download. My HTML code and
images are ready, and you will have a ZIP
file like this one. Now, I won't go into
detail on how to import this HTML code into your email platform because you all might be using
different email platform. And by the way,
I'm super curious to know which email
platform do you use, and do you like it? So I do suggest
you go and search online for something like how to import HTML email or
HTML email template two, and then you will add the
name of your platform. And then from here, you will see so many different resources that will guide you
on how to do that.
6. Final Thoughts: Been thinking of starting
our own email list. So this new feature is making me feel more comfortable to
finally start this new project. How about you? Do you already
have your own email list? Are you already sending emails or you are about
to start like us.
 Ronny Hermosa, Your Go-To Canva Guru