Transcripts
1. Introduction : Hi everyone. Today we're going to
learn how to create a digital planner using
Canva and Google Slides. If we have a look at Etsy, we can see that we look
for digital planner. We have nearly half
1 million results. And this is because digital
planners are a great way to make passive income
from places like Etsy. If we click on this seller here, that's got 5,116,
five-star rating. We can see that they
have got 80,000 cells. Click on the seller.
The majority of items that they sell
are digital planners, undated planners,
OneNote Planner, academic planners, all
sorts of plant-based items. And this is a really good
way to make passive income. Because once you create
these planners, Once, you can sell them multiple
times to multiple customers. So today we're going to learn how to create a digital planner. Whether you want to sell it
or you just want to create a planet for yourself
and be able to customize it to what
you're looking for. To create a digital planner will be using some free software, such as Google Slides
and free software. Canva. Canva is an amazing tool for people who are
graphic designers. It makes it extremely easy for us to build, create designs, whether it's templates
such as logos, business cards, or if
it's digital planners, flyers, that sort of thing. They have hundreds and
thousands of templates. His is an amazing
tool for anyone looking to get into
digital design. For this course, I'll
show you how to make a digital planner using
a free Canva account. All of the techniques that
we go through and all of the images and shapes and everything that
I use will be free. But I would suggest
if you did want to, you should sign up for Canva pro because you have a
lot more choice. You've got a lot more freedom
in how your designs look. And you can really
customize your planners. And you've got lots
more templates as well that you can use. If you would like to have a look at camera Pro
and get a free trial, I will leave a link in the description box
below of my course. So please do check it out. But like I said, we don't need a Canva pro account
for this course. But if you are planning
to create a lot of digital planners are a
lot of digital designs. I would suggest that you get it just for the fact that
you've got lots more choice, lots more options,
lots more photos. And I do think it's a
lot easier to work with. And I do have a free trial
if you do want to check out. So please do have a look at the About section of my course. Today we're going to
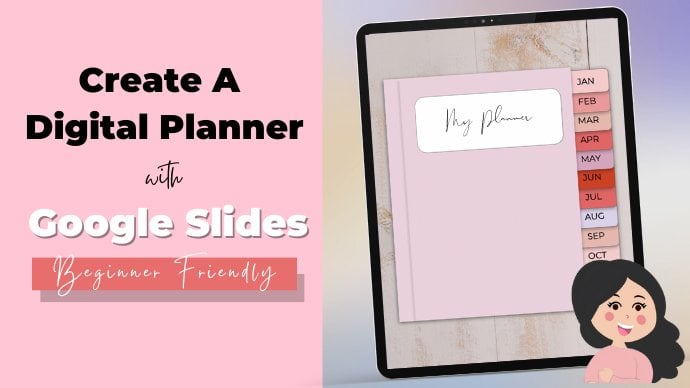
learn how to create this digital planner using Canva and Google slides are going to learn how to
create this cover page. How to add ring binders, how to create these tabs. I'm also going to learn how to create monthly template pages. Are going to learn how to
create daily planner pages. We're going to learn
how to hyperlink. And we're going to learn how to create different
sorts of templates. I just habit trackers,
grocery, Let's pages. I was going to learn how to get the most use out of Canada
and Google slides as well. I really hope you enjoyed
this course and thank you for taking the time out of
your day to watch this. If you have any feedback
after this course, please do. Feel free to leave
them. Thank you.
2. Canva Document Set Up: The first thing that
we're going to do is we're going to
open up Canvas. So we're just going
to go to canva.com. And as mentioned previously, conveys an amazing tool if you want to create
digital planners. Because we've got lots
of different templates and graphics that
we can work with. And what we're going
to do next is we're going to click Create a design. Here. I'm just
going to search for an A4 document because I want
my planner to be portray. So I'm just going
to click on this. If you want to create
a landscape planner, but you can do is in
the Create a design. You want to go into custom size. And I'm going to put these 2 mm. And I'm just going to write
297 and the height as to ten. Then click Create new design. This gives us a landscape
template to work with. But I want to be working
with a portrait planner. So I'm just going to delete this and go back into my
portrait panel here.
3. Thinking About & Designing Our Planner Cover: First thing I'm going to do is I'm going to
search for an image. And the reason I'm going
to search for an image is because we can add a
shadow to this image. If you use something
like a square shape, we can't add any
shadows to this shape, so it becomes a bit annoying
and problematic for us. So I'm going to do, is I'm
going to search for a image. And you can either
search for an image in Canva or you can go into
upload and add your own image. But I don't have one,
so I'm just going to go into floral background. I can go into photos. And where does a little crown? Right here. These images are only four members
who've got Canva Pro. But you do have
some free options as well without the crown sign, but they're very limited. So I would suggest
either getting them from online from someone like free pic.com or from
Google or somebody like that. If you really want, I would
subscribe to Canva Pro because it is really
useful tool to have. I'm going to click
on this image here. It's a free image. So I'm going to click
on this and I'm just going to adjust
it a little bit. And I need to make
sure that I've got enough space on the side
for my tabs as well. Like so. Then what
I want to do is I want to click on this image and go to Edit image up here. Then I can go into shadows,
are going to shadows. I can pick a shadow. I can click on this glow
shadow, this drop shadow, angle, curved page, lift, a backdrop, whichever
one you wish. But I'm going to go for this
glow shadow right here. For my planner. I'm
going to add a shadow. It just makes the
image a bit smaller, so you just need to
resize it again. I'm just going to
make it a bit bigger. What I'm going to
do is I want to add some ring
binders to the side. I'm going to go
back into elements and type in ring binder, and go into graphics appeal. And we've got a bunch
of ring binders. Again, you've got
the Pro options or you do have some
free ones as well. I'm going to go for this
free one right here. And I can change the colors
as well up here if I want. I'm just going to put one set here and have a look at that. I'm going to change the
colors a little bit. Just play around
with this shipper. Colors or to your liking, to be honest, like that, that looks pretty cute. Maybe not orange. With a lighter color like this. Maybe the black needs
to pay a bit like this. I think I like them. So what I'm going
to do is I'm going to click on this spring, find out that I've
just customized, going to click Command
C or Control C, depending on if you're using a MacBook or a Windows computer. So I'm using a MacBook, so I'm going to click Command C, and that copies the
sprint binder shape. And then I'm just going to click Command V That
pastes it as well. And again, if you're
using a Windows, you want to press Control V. I've just pasted this second ring binder
and I just want to adjust it so that it's
even on both sides. Then I can I think I'm going
to copy it again stake. And I think I'm going to crop this because I
only want one or two. If you double-click, you get
these little crop marks. So I can just crop it like so. Just keep these
two, put them here. I think that was one-to-many. So again, I'm just
going to double-click and just get rid of
that last one as well. I've got one extra
little one down here. I've got my ring binders, I've got my cover page, and I want to add a section
where I can put my name down. So I want to go into elements, just going to press exhale
and go into lines and shapes. And I'm going to click
on this square shape. And I'm just going
to turn this to a white color and position
it to the middle. What I want to do
is I want to add a bit of design to this pair. And I want to add a
rectangle outline here. Why I want to do is I want to go back to elements
and then go into my search box and click
rectangle outline. And if I go into graphics
and precede all. And I think I'm going to go for this little outline
here, Scott, tab lines. I'm going to click on this. And I'm just going to
make it slightly bigger. Position I to the
middle, like so. I'm just going to make this
a bit smaller like this. Then I can change the color
of these lines as well. Changing too pinky
color if I want. I want to add some
text in here as well. I'm going to go into text
and go at a heading. I'm just going to
try my planner. Then I'm just going
to double-click and go into font up here. And I'm just going to change the font again where
you see a little crown. Those are phones which are only available to Canva pro members. But we've got lots of different options for
free fonts as well. So you can just go
down and have a look. I think I'm going to click on this
form says thin font. I think it looks kind of nice
to make it a bit smaller. I'm just going to align
it to the middle. And as you can see, Canva has this snapping tool, shows you where the middle is. So this is my middle. You can see intersects like so. I'm just going to put my
text right here like this. I think I might change the font. Two more calligraphy. One, this is a pretty good font I like to use is
called moon time. And it's free and Tampa. And I'm just going
to make it bigger. I'm just going to
change the color, picker up to this a here
and change the color. You can change it to
whichever color you like. I think I will go for
a dark red color here.
4. Adding A Background to Planner: Well, I want to do
is I'm going to add a background to my
planner as well. So if I go into elements
and go into the search, I'm going to search
for a button, background, click See All. And I'm just going to
pick one of these. I like. They'll go for this one. I'm just going to align them and use this little tool here. Make it brighter. And it automatically just
snaps behind my planner.
5. Creating Monthly Planner Pages : When X1 to do is
I'm going to create my monthly planner pages. And for this, I want to
duplicate this page here. I just wanted to duplicate it. And I want to just
get rid of this, this and this bit. First thing I want
to do is I'm going to go into elements and I'm going to search
for a white square. The reason I'm doing
this is because I want to add a shadow to my page. So instead of going
into our shapes, I'm going to use a photo. I'm going to use this one. It's free. I'm just going to resize it. And I want this page to be
behind the spring binders. So what you want to do
is you want to click on this image here,
go into position. As soon as you click on it, the position button
should come up. And then I want to
click backwards. Click it again backwards, click it again backwards. Just takes my page behind
these ring binders. Then I went to click on
my shape and go into Edit image and add a shadow. I'm going to click
on this glow shadow. And again, I'm just
going to put this behind because every
time you add a shadow, you just resize it so it
makes it a bit funny. This is our blank page
for our monthly template. And good thing about
Canva is that we don't need to make
everything from scratch. You can if you want to. But there's lots of
designs already on campus which you can utilize and
use for your planners, which saves you a lot of time. So if you go into
design in Canva and such for a monthly planner, you can see you've got
lots and lots and lots of templates here that you
can use in your planner. You don't need to create
anything from scratch. E.g. we don't need to create all of these
boxes from scratch. We don't need to create these
to-do list from scratch, or we can just import one of these already created
templates into our planner. Again, you can see that
there's quite a few which are dressed
for PRO numbers, but we do have quite a
few which are blank. I think I'm going to go
for this design here. What I'm going to do
is I'm just going to create a new blank page. And I'm going to click
on this, like so. Just get rid of these
bits on the end. I'm just going to
press Command C. Go into my page. I'm just going to go back
into my monthly page here. And I'm going to
click on this element here that have gone on. I'm going to go into
this lock button here. I'm just going to lock it
so that nothing moves. I'm going to go to my
background and look this tooth. And then what I'm
going to do is I'm going to press paste. And it will just paste in this template
that I've got here. I'm just going to make
this a bit bigger and align it like so. And we can change the colors
of all of these as well. Say e.g. I want to change
this to a pinky color. I could do that as well. But I think I'm just
going to leave it as it is because it
looks pretty good. Here is our monthly
planner template. And we're going to use this
for all the month. So e.g. whichever day the
first full sun, e.g. in January 2023, the first falls on a wet it
fell on a Sunday. So we're going to
start 12345678. And we can do that for
every month that we've got. So we've got our monthly
plan a page here.
6. Designing Daily Planner Pages: And why next one to two
is I'm going to duplicate this page and I'm going to create some daily planner pages. I'm just going to get rid
of all of this that I've got here. Like so. And then just create a new page. In my designs. I'm going to look
for a daily planner. And we've got lots and
lots of designs here. And many of them
are free as well. So you don't need to have a premium account
for this at all. I'm just going to
pick one that I like. I like this one. This
one goes with my theme. I think it's the same. So I'm just going
to make this a bit smaller and get rid of this. And just press Command C. Go up here and press Command V, paste it into my planner. And just align it to
wherever I want. Like so. And just delete this. We're just going to make
this a bit to pick up. I'm just going to
put this to the top. Just move this
around a little bit, make it a bit bigger. I can put him go. Most important task. Today's tasks, we've cooked meals
and snacks section. I've got my mind as a notes, water intake, mood tracker. I'm just going to make these a bit more visible because we can't
see them at the moment. Just make these a bit visible, change the color. Like so. I think I'm pretty happy with this daily planner
template that we've gone. And that was really simple way that'd be created this planner. He didn't take any time at all. We just copied and pasted in this planet templates that
we already have in Canva. There's no point in
making your own designs because it just takes
a very long time. You can do if you want it, is if you like bits
of some templates, you could just copy and paste
the bits that you like from each template and
customize your own. Or you could create your own. Once again, you will take
you a very long time. And it's not really, it's not really useful doing
that because you've got so many templates here
already and a lot, a lot of them are free, e.g. this one is really
pretty, It's free. It's got this one here
which is free as well.
7. Creating Habit Tracker, Grocery List, Notes & Sticker Pages: So I've got my monthly planner
page, daily planner page. And I'm just going to
duplicate this and just get rid of everything here. Like so. And I'm going to
create a new page. And what I now want to add is
a wellness tracker as well, or maybe a habit tracker. I'm going to search
for a habit tracker. Like so. Again, we've got
lots of templates here. I'm just going to pick one. I think I like this one.
This one is nice and simple. I'm going to do is again, just going to
highlight all of this. Make the screen a bit smaller. All of this press
Command C or Control C, go to the top heel, press Command V and
make it a bit smaller. Just put it in like so. And just going to check
what font this is. And change this to want us. Well, thank you. It looks more professional when everything's a
bit more cohesive. So I've created a habit tracker. Again, very simple and
didn't take any time at all. The next thing I
want to create is a page where I can
just write notes, just blank pages,
blank lined pages. So I'm going to
delete all of this and create a new
blank page and just write lined notebook
pages perhaps. Got lots of pretty
much daily notes. Again, lots and lots of
pretty designs here. With that, we've got I think I'm going to
give for this one. I like this one. I'm just going to copy all
of this press commodity. Go into my page here, press Command V, and
just make it smaller. And I'm going to change this to our font that we've got above, and we've got a notes
space right here. The next thing I'm
going to add is a grocery shopping list. So I'm going to duplicate this. Just get rid of all of this. Create a new blank page, and just go into shopping list. Just pick one of these. I like this one. So I'm just going to go
to the background and just copy all of
this into my page. Yeah. Because smaller lineup in place, get rid of this and make
this a bit smaller. Change the font. Change the font of
all of these as well. Just increase the size. The last thing I
want to create is just a blank page so that I
can put all of my stickers. Just a blank page like this. So we've got our cover
page, monthly planner page. Now a daily planner page. I'll habit tracker on notes page out grocery shopping list, and a sticker page. I'm just going to
change the colors of these bit more uniform. The rest of the planet. I think that looks a lot better. Normal cohesive. So here
we've got our planet page, monthly, daily, happy, nuts, siri, and a blank page
for our stickers. We've got all of the pages
that we need for our planner.
8. What Is Google Slides?: Before we save our planet
into Google Drive, need to do is we need
to open up a new tab. And we need to go into Google. And we need to make
sure that we've signed in with our Gmail account. So please make sure that you've got a Gmail account or you make one before this course,
I joined this course. It's free and it only
takes a few seconds. So make sure you're signed
into your Gmail account. And then what we have is Google has a feature where if
you have a Gmail account, it create a Google
Drive for you, which is a Cloud-based DR. And you don't need any
computers or desktops or anything to store these files
is just on Google Drive. So this makes it really easy for us because what we
can do is we can just use their software on a web page and we don't
need to save it anywhere. Google will automatically
save it for us. So Google Slides, if we
go to google Slides, is sort of like sort
of like PowerPoint. Where, but instead of e.g. having a desktop app
like PowerPoint, we can just use this webpage
to create our slides. If I click, Go to slide. And again, make sure you're signed in with your
Gmail account. This is my Google Slide drive. And here any slides I make on Google Slides will be
saved into this folder. Or I can create new folders. And I can just really put all of my files into this drive here, and that will all be organized.
9. Exporting from Canva to Google Slides: I'm going to go
back into compound. And what you want to do is you want to click the share button, click Share, and then
go into more down here. I'm going to click
More. And then you just want to scroll down. And under the save, you want to click Google Drive. And I'm going to do
is I'm just going to save this into my Google Drive. And because I'm already
signed in via Gmail, automatically all my folders and my Google Drive
comes up here. And I'm just going to click
choose the file type. I want it to be a PowerPoint. And we're not going
to use PowerPoint, but we just need to save
it as a PowerPoint. All of my pages, I'm just going to click Save. I'm just going to exit this out. And then I'm just going to go
back into my Google slides. You can see here that that PowerPoint
presentation that I've just gotten from Canva has been automatically saved
in my Google Drive. This is a really useful feature of Google Drive and I
would really recommend everyone signing up
for a Gmail account so that they can use the
features of a Google Drive. Because you don't need any storage on your
laptop or anything. You can just store documents, PowerPoint presentations, your digital planners
on this drive. It will be available to you
everywhere around the world. Where you have to
do is just go into a web page and you'd
find it all there. So I'm going to do is I'm
going to click on it. Here is my planner
in Google Slides. And at the moment it's
a PowerPoint format. So I'm going to do is
I want to go into File and click Save as Google Slides. And it opens up a
new slide template, and now it's in Google Slides. And now I can edit it.
10. Creating Planner Tabs & Hyperlinks: Hey, we've got our
planet in Google Slides. And as you can see,
our background has just been tilted
a little bit. And sometimes what happens
is when you transfer a document from Canva to
something like Google Slides, it does mess up the
format a little bit. I'm just going to do is
I'm just going to delete the background for all of these pages. Just
gonna make it easy. If I do this, just
go in, delete. And then I'm just going to go
into Insert, go into image, and just upload
that same picture that I had for the background. I upload it to Canvas
to this document here. So I'm just going to click
Upload from computer. I've got my background
that I had in Canva. And what I'm going to do is I'm just going to click on this. I'm going to arrange, going to order and click Send to back so that it goes
behind my planner. Then I'm going to click on the background and
press Command C, go into the next page and press Command V. Then while
this is highlighted, go into Arrange, Send to Back. The same thing for the next one. Command V, arrange,
send to back, arrange, send to back, arrange, send to back Command V, Arrange, Send to Back. I've put in my background now. So we've got all of our
pages in Google Slides. Got our cover page, monthly planner page,
daily planner, habit, tracker, space,
grocery shopping list, and our blank sticker page. Sometimes the format
does get a bit mixed up when
you're transferring it from Canva to Google slides. So just have a look at anything that's kinda miss
formatted, e.g. like my text here as well. So just keep an
eye out for that. I'm going to change this and
make the font a bit smaller. Because what's sometimes it does is if it doesn't
recognize the font, Google slides, we'll just
put a default font on. If I just click on
this and go into font, just change it to one die, like make it a bit bigger. So here we've got
all of our pages. The next thing we want
to do is we want to add some tabs to our pages. And why I want to do
is I want to go into my cover page slide and
go into this button here, which is the shape button. Go into shapes. And
I'm going to on this, I think this shape here, Let's look curved, rectangular shape. And I'm just going to draw a
rectangle shape. Like sound. A bit smaller. What I'm going to do is I'm going to press
Command C, command V. And I create another one,
my underneath there. Again to that. Paste it. Now the one wire
underneath my underneath. I'm just going to do this
for 12 months that I've got I've got 12 of these now, I'm going to do is
I'm going to click on this one and click shift,
click on the second. Click on all of my tabs. And I'm just going to
make them a bit bigger. I've got enough space to just
make them slightly bigger. Like so. I want to do is I want January
to be right at the top. And I want this February tab. There's going to
be my January tab. This is my February,
March, April, so on I want this January we tapped to
always be at the top. I need to go into
my february tab, going to arrange
order and click Send Backwards and put it
underneath the January tab. I'm going to go into March, going to Arrange
Order, Send Backwards, Arrange, Send Backwards, and
send it behind February. And I'm going to do that
for all of the months. Backwards. Odorless
and backwards. Pivot, tedious process, which
is going to quickly do it. To this tab is as
the one before. Click on him, Arrange, Order, Send Backwards, backwards,
and just keep doing this. So we've got one a fellow
tabs in the right order. Now, what I want to do
is I want to click on the first one holding Shift
with my other finger, just clicking all of them. I want to go to Arrange
Send Backwards. And I want to put it
behind my cover page. Like so. What I now want to do is I want to change the
color of all of these tabs. So we click on the
tab and you go into this Fill button up here. You can change the colors. So I'm just going to change
the colors to fit my planet. Now that I've added
some color to our tabs, we want to do is we can write
some text in our tabs and I'll click on the shape you
can write inside this shape. So I'm just going
to find and Jan, and then I'm going to
click on February. I flip. It doesn't matter that
we can't see it. Yeah. I'm going to fix
this afterwards. May. June. And now what we're gonna do is I'm going to click on all of these tabs. So click on one click shift, and with the other finger, click on all of these tabs. I'm going to go into this
other line tool up here. So go to align and click
the center. Like so. And then I'm going to go into the size, increase the size. And then I can change
the font as well. Go back into line.
And in the center, some of them are
still a bit cutoff. So I'm going to click on this. I'm going to click on
this right-aligned one. That way they're just
more peeking out a little bit more and why
they still highlighted. I think I'm going to go
into a line again and just shift them all down by
clicking on this button here. They just go to the edge
of the tub shape here. We've got one of the
tabs for our months. And at the top here, I want to add some tabs
as well for all of our extra pages such as notes, habit tracker, and the
groceries and sticker page. What I want to do is I'm going
to go back into my shapes. Click on my rounded
rectangle again, and do the same thing. I'm just going to
copy, paste another, just put four here. And I want this one
to be at the top. So I'm going to go
to the second one. Go to arrange order sent backwards to the ice
behind the first one. Range order, sent backwards. Angel. Behind that one. Send backwards. From age order,
send it backwards. But I'm going to click on all of these and go into Arrange. Send Backwards, range order. Sent backwards, range
order backwards. And I want them to go
behind my cover page. I'm going to do this a few times that we've got
the tabs at the back. Then I'm going to click on
all of them and shift them up slightly. Like so. We now want to add some
color to these tabs as well. Go back into my
Fill Color button. And just add some color to
go with my color theme. Why I want to do is
I'm just going to again click on
each one of these. And right inside each of them. One is for a happy
one is for surgery, another is for notes, and another is for stickers. So I'm going to click on one
and then click on the rest. Go into my Align and
align it to the right. And to the top a little bit. I think this one here, I'm just gonna make this a
bit smaller so that we can see the writing. And the thing. I'm just going to move
this one to the middle, aligned this one to
the middle as well. So here we've created our
tabs for our planner. The next thing we want to
do is I want to go into my monthly planner page and I
want to create 12 of these. I'm going to click on. I'm going to right-click and
click, duplicate, slide, and click again and again. And I want to create
enough for the 12 months. So I've got 112-34-5678, 910-11-1212 of the East for
each of the months right now. But I'm going to do
is I'm going to move my notes page to go after
the grocery page, like so. So I'm just crazy 12 of these. And what we're now going to
do is we're going to link our planner and to go
into my cover page. And I'm going to
click on this tab. I'm going to right-click
and press link. And what I'm gonna
do is I'm going to go to slides in
this presentation. And I'm going to link this to slide number two because it's going to be our January
monthly page, like so. I'm going to go into February. Right-click crosslink. And I'm going to
link this to page number three, slide three. And then I'm going to go into
March going to insert link. And I'm going to link this to page number four
because that's how much monthly pages
going to go into April. Right-click link to slides in this presentation linked
list, page number five. Good to me. Insert link, go into slides in
this presentation. Slide number six, June. Link. Slides in this presentation. Slide seven, July. Insert link slides in
this presentation. Slide eight, August, August. Click on this tab, this tab, go to Insert, go into link here. And I'm just going to
zoom out slightly. Insert Link slides in
this presentation. I'm going to link this
to slide nine here. Because January,
February, March, April, May, June, July, August, August, this slide nine. And then go into September. Go to Insert Link slides in
this presentation. Slide ten. Tuba. Link slides in the presentation. Slide 11 November. Link slides in
this presentation. 12 December. Insert, Link its
license presentation. Slide to their team. So I've linked all of
these to my monthly pages. Now, what I want
to do is I need to link the tabs at the
top with the habit tab. If I go to I scroll down, I can see that the habit
tracker is on slide 15. So I'm going to
click on, Insert, click on link to slides
in this presentation, and select slide 15. If I go to grocery, I can see my groceries
are on page 16. If I click on the grocery tab, go to Insert Link slides
in this presentation. Go into slide 16. My notes on page
17, click on nodes, go to Insert Link slides
in this presentation. Slide 17, I'm a sticker
that read and slide 18. Insert link slides in
this presentation. Slide 18. So we've linked all of
our tabs right now. What we need to do is
we need to copy all of our tabs into
all of our pages. I'm going to click on one
of these ambush shift. Click on the next one,
the next one, extra one, and click on all of
my tabs. Like so. And then I want to press
Command C or Control C. Depending on
what you're using. Or you can just right-click
and press Copy. Then I'm going to go
into my second page, which is one of
my monthly pages. And I'm going to press
Command V or Control V, or right-click and press paste. Just going to paste that in. Now we've pasted that taps into our first monthly planner
page, which is January. What I want to do is while
this is all highlighted, I want to go into my Arrange
tool or PR good order. Click center back. So it goes right
behind and go to arrange order, bring forward. They just goes directly behind. I'm going to go into my
second monthly page. Press Command V or
Control V. Again, go to Arrange, Send to Back, Arrange Order, bring forward. And I'm going to do this
for the rest of the months. Arrange, Send to
Back range order, bring forward range order, sent it back, arrange,
Bring Forward. Arrange, send to
back, or forward. One last example, Arrange, Send to Back, Arrange
Order, put forward. I'm just going to do this
for the rest of the month. I'm gonna do the same thing
for my planner page template. They've got go to arrange, order, Send to Back,
arrange, bring forward. Same thing again to
my habit tracker. Press Command V or
Control V or click Paste. Going to arrange, Send to
Back, order, bring forward. And I'm going to do
this for my grocery, my notes and my sticker page. Range order, Send to
Back range order, bring forward, arrange, send
to back, up and forward. Last page. Range order, Send to
Back. Bring forward.
11. Arranging Pages Into Order: Now that we've added all of our tabs into all of our pages. What I want to do is now incorporate my daily
planner pages. I'm just going to
go down and look for my day get planet
page which is here. And I'm just going
to move it up right underneath the
January monthly page. So I've got my January
monthly planner page and then I've got the
daily planner page. And what I'm going
to do is because January has got a 31 days. I'm going to take this
daily planner page here and I'm going to
duplicate it 31 times. So what you want to
do is you can either just press right-click
and press Copy, and then right-click,
press Paste. Again. If you just click on this slide here,
the daily plan on. And you either press Command
C or Control C. I'm going to press Command C. And then if I press Command V or Control V, it's just going to
paste it underneath. And this method is a lot easier. So I'm just going
to paste in all of my pages for January. So I've got 31 of these daily
planner pages for January. And because our
hyperlinks are dynamic, what happens is
even though we've added all of these extra pages, our links are going to reference the new page bear
that link falls, e.g. March. March before
was on page four. It was referencing slide four. But because we've added 131
of these daily planner pages, March is now all the
way on page 35 here. So automatically
the links update so you don't need to
worry about any of that. I've got all of the
pages for January. And now what I'm going to do is I want to go in and look for the next monthly
page, which is here. And what I'm going to do is
I'm going to take one of these and copy this command C. I'm going to do is
I'm going to go into the February monthly page
and I'm just going to press Command V. And
you're just going to add a daily page underneath. What I want to do
is because this is the February tab and
this is a favorite tab. I want this February Tab to be in front of all of
the other tabs. So I'm going to click
on the February and then go into a range. Gotta bring forward. I just want this one to
come January as well. I'm just going to click
on January and just align the text so that we can see him. But because this is
the February page, I've just made sure that
the February is January. We've got a sort of page flipping effective.
You can see here. I'm going to do the same
thing to this one here. So this is the February
daily planner page. I'm going to go
into arrange going to order and bring forward and just go into this January
and align it to the top. This is my February daily page. What I'm going to do again is I'm just going to
duplicate this page 27 times because I believe
I Brie has got 28 days. I'm going to press
Command C and then press Command V.
Just duplicate it. Another one. I'm just
going to keep doing this all of the days. Well, I'm not going to do
is I'm going to go into the March monthly page. And what we want is, again, we want much to be at the
forefront of all of these tabs. So we're going to click
on March and going to arrange, go into order. Click bring forward. And they go into
February and just go to align and move it into
the middle a little bit. Like so much is now forward. Then I'm going to copy
this daily planner page, go into the monthly
page and just paste it. And I'm going to say this is going to be my
March daily planner page. Just going to click
on the Match tab, go into a rank order and
press bring forward. And then go into this February
tab and just move it up, go into the January and just move this one to
slowly up as well. It looks a bit more cohesive. And again, I'm going to go into my March daily planner pages and I'm just going
to duplicate it. So I'm going to
press Command C and control V. And it
just duplicates it. I'm just going to keep
doing this again, adding as many pages as I want. And I'm just going
to keep doing this for all of the month as well. So again, this is
going to be April. This is going to be the
April monthly planet page. So I wanted to go into
the April tab going to arrange going to order
and bring it forward and then go into the term
before it and just align it so that we can see
the labels a bit better. Like so. Then I'm going to go into one of these planner pages here, the daily ones, copier, go into my aprotic monthly
page and press Command V, and just pasted
directly underneath. And then again, go into the April daily planner page and move the April tab forward, Arrange Order, bring forward, range order to bring forward. And then again go into the tabs before and align it to the top. Like so. And then again, I'm
going to go back into my daily planner page for
April and press Command C, Command V. Just duplicate
it as many times as I want. So I'm just gonna do this
for all of the months. Now that I've added all of my pages on my
daily planner page, I can also duplicate
my habit tracker, my groceries and notes
pages and mastic pages. So I can just add as many
of these pages as I want. For my habit tracker, I think
I'm going to just duplicate it and add one more grocery. I think I'll add but
three more notes pages. I think I might add
four or five Command C, Control V. Go into
my sticker page, Command C Control V. And just add a few more pages. I'm just going to test
out my planner. Now. I'm going to go to view,
go into slide-show. I'm going to click on January,
January monthly page. And we've got my daily
planner pages for January going to go into April. And you can see the April
tab come straightforward. This is my April tab. I'm just going to go next. These are my april these are my April daily planner pages
going to go into February. And you can see
February comes forward. I'm just going to go next. And these are my daily
planner pages for February. Going to go into habit
a habit trackers, my grocery trackers
or notes, truckers.
12. Exporting Planner Into PDF Format : Now what we want to do is
we want to export this. So that'll be can import it into somewhere like GoodNotes. The way to do this is you
want to go into file if your planner isn't very big, I would say probably
about 50 or 60 pages. You can just go to
download and go into PDF. It will save it as
a PDF document, which you can import
into GoodNotes. But because our
planet is quite big, what we want to do is we
want to go to Download and then we went to click
on Microsoft PowerPoint. And it doesn't matter
if you don't have PowerPoint, you don't need it. We're just going to download it as a Microsoft PowerPoint. Like so. What you want to do is I
just want to save this somewhere either on your desktop or in your documents
wherever you want. We next want to do is
you want to go into a site called small pdf.com. This is a free tool and we're going to click on the
convert button up here. I'm going to click on this.
And then I'm going to choose my Microsoft PowerPoint
presentation that we've just converted. It, just going to convert
this to a PDF file. Now, what meant to do it? Once it's finished
converting into a PDF, I'm going to click on
the download button here and just download
it and save it.
13. Importing Planner to GoodNotes: What I want to do is
I want to go into GoodNotes and I want
to click on New. And then I want to
go into imports. And when I click Import, I just wanted to import that PDF file that
we just downloaded. And here we've got our
planet in GoodNotes. So I'm just going to
check the hyperlinks. If I click on habit, got my habit tracker, I go to my grocery, got my grocery list, my notes notes page my stickers. If I go into the March tab, got the March monthly planner, if I go into January, I've got my January
monthly planner, everything seems to be
working fine right now. What I can do is
if I just click on my pen tool and this is
the year for January. So I'm just going to
change the color of my pen and then I
can just write. And then if I know that
generally started on a Sunday, put it 123, and so on. And then I can just add
things to my to-do list. Once I finished a task,
just put a tick next to it. So I can just customize
my planner how I want.
14. Conclusion: I hope you've enjoyed this course and you've
learned a lot about how to create a digital planner using Canva and Google Slides. These two softwares can
be a really good tool to help you start on your
digital planning journey. And also be creating
some more courses among Google Slides. And be creating a more
advanced course for those of you who want to
learn a bit more, a few more tips and tricks
on what we can do with Google Slides and
with Canvas as well. If you would like some free
digital planning resources, please do sign up
to my newsletter. If you would like a
free Canva pro tried. Please have a look
at the above section is really good if
you want to create lots of digital planners in Canva and your access to more templates,
that sort of thing. So please do have a look. I really hope you've
enjoyed this course. Thank you for
watching and please, if you enjoyed this course, to leave a review, I'd be happy to listen
to any feedback, if you have any, please let me know what other courses
that you'd like as well. Thank you so much.
 Janna Uddin, GRAPHIC DESIGNER & DIGITAL ARTIST