Transcripts
1. Hello & Welcome to the Class: Sunrise and sunset, two timeless phenomena that mark the
beginning and end of each day, have inspired artists
for centuries. These magical moments are not just a transition
of day tonight, but a canvas filled with
emotions, warmth and serenity. Hello everyone and welcome
to my new skill, she class. I'm Maria Paria, a chartered accountant
and a creative artist. I love working with watercolor and quash and recently found love in creating thread cards
with different silo heads. If you want to know
more about me, make sure to follow me on
Instagram under the handle, Creating from the Heart. In this class, we
will delve into the artistic interpretation of the celestial events
of sunrise and sunset. Capturing their
essence with fluidity and transparency that
watercolor offers. The medium watercolor, known for its fluidity
and transparency, becomes the perfect
vessel for translating the delicate interplay of light in these
atmospheric scenes. Blue with its myrid shades symbolizes the calm
and cool serenity, while yellow radiates
the warmth and hope that accompanies the
first light of the day. I will first be diving deep into the materials that we'll
be needing for this class. Discussing the paper,
the watercolors, the different other
accessories that you would be needing throughout
this four day class. Before each class project, I will even be giving you a rough overview of the
painting for that day. Guiding you through the
various techniques details, the watercolor basics
that you would need to know before you dive deep
into the class projects. For each day, through the use of various
shades and techniques, we will create paintings that echo the beauty
of dawn and dusk, portraying the subtle shifts
in light and atmosphere. These colors not only symbolize
the sky's transition, but also evoke a sense of
tranquillity and hope. Whether you are a
seasoned artist or a pig, this class is designed to inspire and guide
you in capturing the ethereal beauty
of sunrise and sunset using the captivating
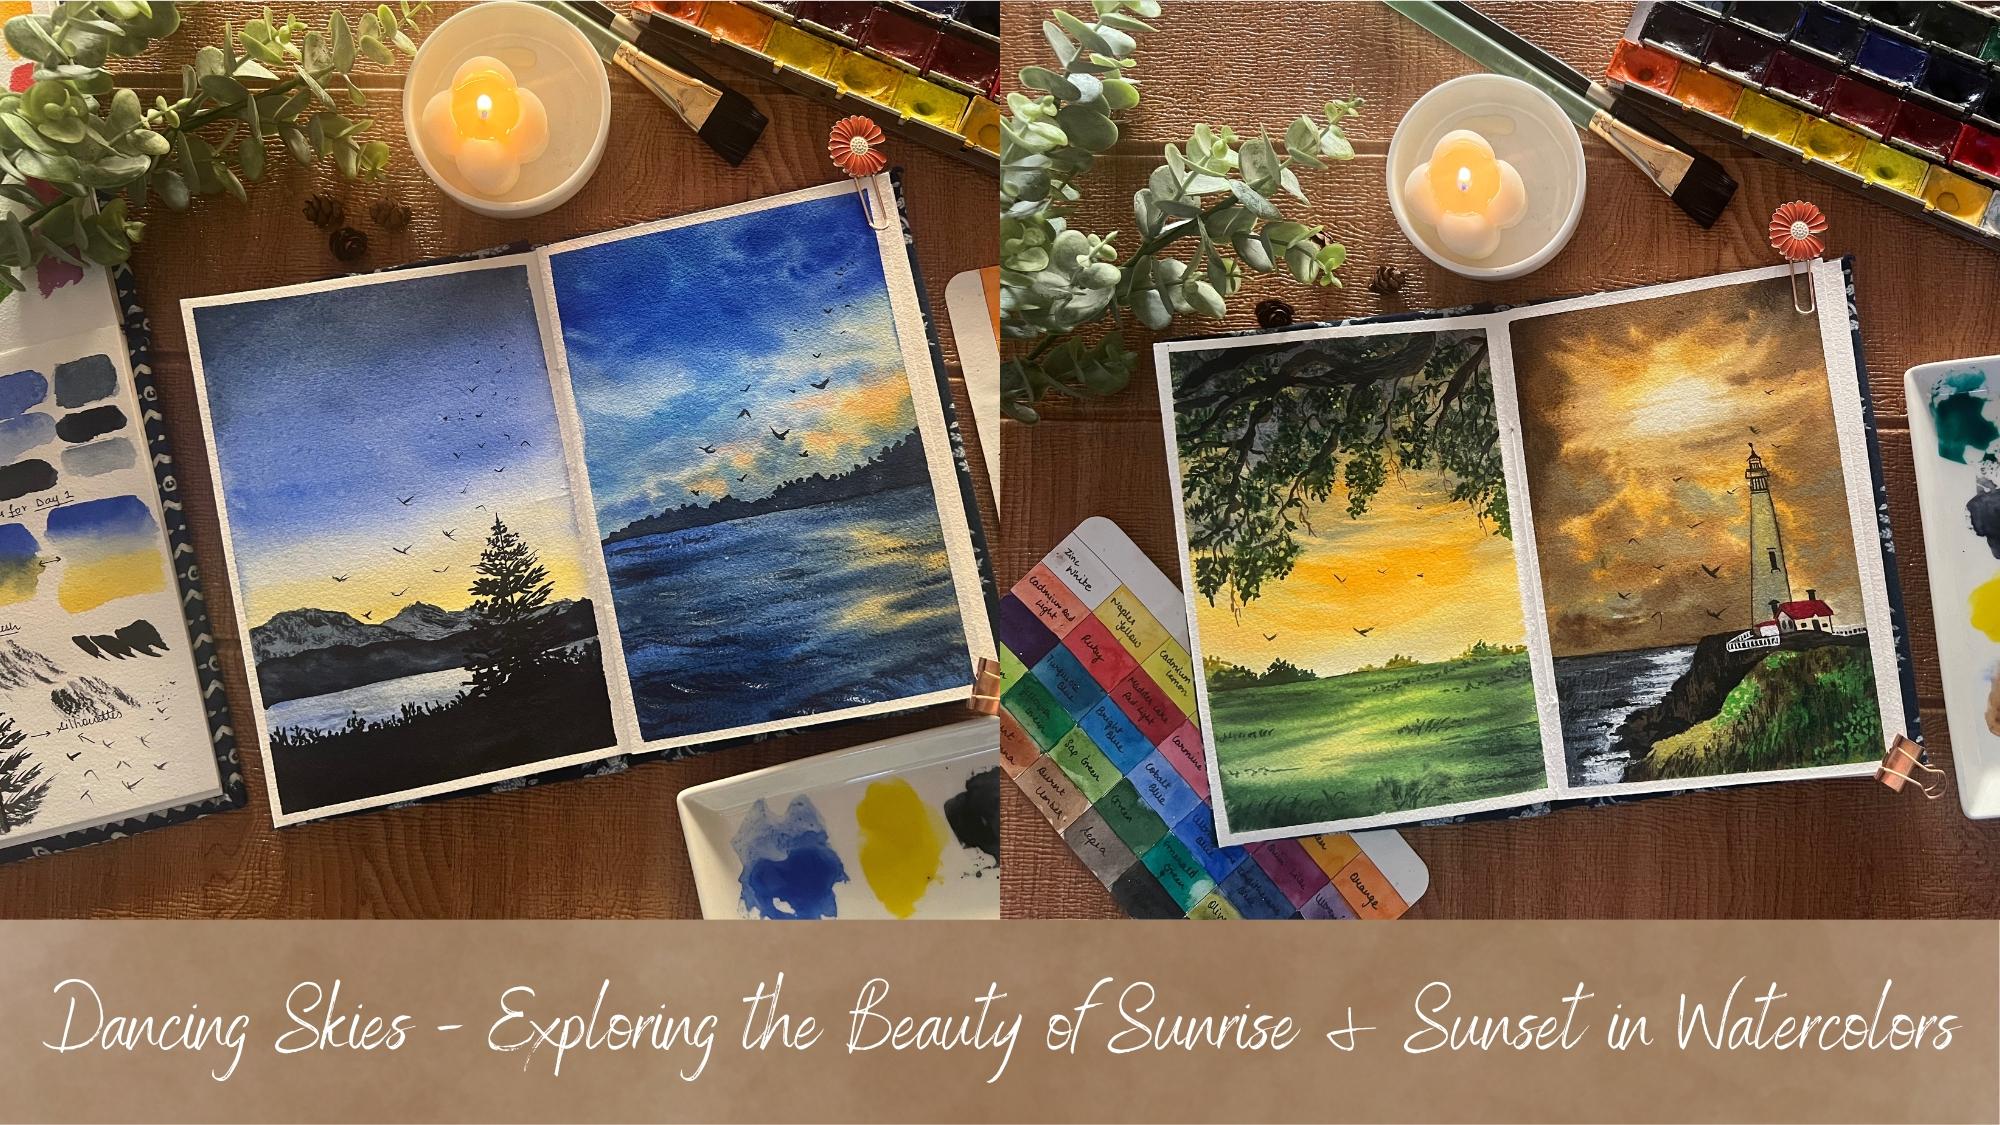
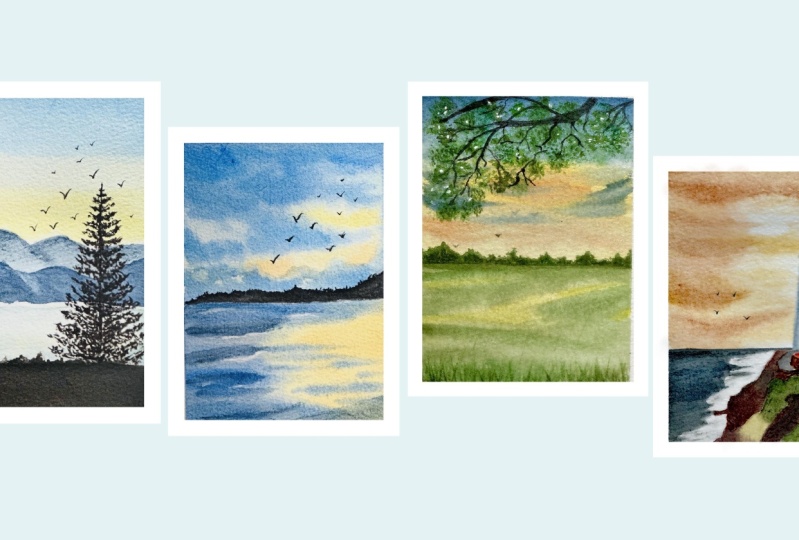
medium of water colors. So get ready to unlock your creativity and witness
the magic unfold on your canvas as we paint two stunning sunrises and
two mesmerizing sunsets, each telling a unique story
of sky's enchanting dance. So without a further ado, I will see you, kays, into the
next lesson of this class.
2. Materials Required: So before we dive into the
day one class project, let's have a look
at the materials. The first being the sketchbook
that I will be using. This is a handbound
sketchbook from my own brand. It is a 270 GSM, 100% cotton cold pressed paper. You can see this has a little
rough grain texture to it. This is the paper
that I will be using. This is the same sketchbook
in which I will be painting. The thickness is 270 GSM. It is 100% cotton paper, so it will hold enough
water to work layers on layers to create purify
sunrise and sunset paintings. For this class, you
can see I can use the paper on both the sides without the paper buckling up. So this is what I'll be
using for the paper, even for the techniques. I'm going to use
a sketchbook with the same paper for taping down. I'm going to use a masking
tape so that we can tape down the edges and
have clean edged look. Next. As I told you, even for the technique section, I will be using in the same
material paper sketchbook. So it's the same, 270 GSM, 100% cotton paper, but just in a smaller
sized sketchbook. I will be showing you all the basic techniques
for each class onto this sketch book before we dive into the class
project in detail. The next important thing
being the watercolors, I'm going to use this palette of watercolors from the
brand white nights. It has 35 shades. I have a swatch card of all the 35 shades that goes
inside my, this palette. It's a custom made palette
with the shades that I have selected for
myself and customized in. So the first line has
all the yellow oranges, second has the pinks, third has the blue,
then the greens, and then the brown
and the black tones. So that's how my
palette is organized. And I'm going to be using the colors majorly from
this palette only. And you know, to squeeze
out the colors from this, I'm going to quickly use a ceramic palette so
that I can wet my brush, pick up the color,
and dilute it into the right consistency on
my palette separately. So that's about the watercolors. You can use any watercolors
in tube format, in any brand as per
your availability and your convenience Coming next to the brushes I'm going to be using in some flat and
some round brushes. Majorly, these three brushes
that will go into use, that's the flat brush for giving in the background wash.
Then the silver brush, size eight for
adding in details. And then a detailer brush to
add in some pointed details. So you can go ahead
use in the mix of flat and round brushes that
is available with you. Apart from that, you
would be needing a pencil and eraser for some
basic pencil sketch. And next you would be
needing a rough cloth or some tissues to dab out
the excess water and pigment. Especially while working with the try brush technique
or cleaning your brushes. So make sure you have
one handy all the time. Next you would be needing white quash or
white acrylic color because watercolors will
not give you that opaque, transparent look that we will be creating in a few of
the class project. You can see the wave
detail that we've given. For these, you
would be needing in the white quash so as to get that opaque look of the
waves into the painting. Next you would be
kneading in a black and a white pen for adding in few of the details
into a painting. A 0.5 black and white pen, both for adding in
minute details into the painting like birds
or some silo had details. Lastly, you would be needing
in two jars of clean water. One for cleaning
your brushes and one for using in clean
water while picking up your paints so that
your paints do not get spoiled with molds later on. That is about all the supplies that you would be
needing for this class. Go grab all of them and
I'll see you guys into the technique section and then into the day one class
project for today.
3. Basics of Watercolor: The first technique is going to be the wet on wet technique. In the wet on wet technique, we have a clean layer
of water which is wet onto this wet layer. We are going to be
adding in paints, which is again going to be wet. This is called the
wet on wet technique, wherein the layer in the underneath a space is already wet onto that wet layer. You are adding in the wet
layer with the colors again. Now, wet on wet technique can
even be colored on color. Here we are adding
in the details wet on wet with or layer of water. I've just used in one
simple color of blue. Added it throughout to show in the wet on wet
technique out here. This is the first technique
which is very important, that's the wet on wet technique. Now the next technique is going to be wet on dry technique, where the base layer is dry, there is no water
or wet layer of color onto this
direct dry layer. We are going to be beginning
in with wet paint. Hence, it is wet on
dry just using in, going to add it completely. Now this technique is
used when there is a very small space to be painted in and not much detail
to be added in. And you want your space
to dry in quickly. If on larger surfaces you will try to use this
ton dry technique. You may get in sharp edges in between because
the paper will dry much sooner as compared
with the ton dry technique. This is only when adding in details or working
on small spaces. You can already see
the color differences coming in out here because
of the wet on dry technique, Because the paper was not wet evenly places it
began to dry in. I'm just running
a dam brush over it to make it even layer
throughout like this. That is why we will majorly be using ton wet for
bigger surfaces, only for detailing we will be using in the wet
on dry technique. Now next one we're going to
learn in different kind of wash. Let's begin with
a clean coat of water. As I told you, we are
going to be going ahead majorly with the
wet on wet technique. Let's begin with the
ton wet technique and begin with the first
type of wash out here. The first wash is
a gradient wash wherein we are just
going to be using in one color and we are going to be having a gradient
to this color. At the top, you can see
we have the darker tint, and at the bottom, the
tint has turned lighter. I have picked up the
same color again and just running from
top to bottom again. Now I just add the
color at the top. And using a dam brush, I just get a gradiation
till the bottom space, creating a gradient wash. Now, this gradient
wash can either be top to bottom
or bottom to top, depending on how you need it. Say if you need
it bottom to top, you can begin adding in the tint from the bottom
and move topwards. Now let's move into
the next wash. Again, I'm going on with the
wet on wet technique. First adding in a layer
of water out here. First, in with the blue
color at the top space, that is still the center
line of this box. I'm going to add in this
blue color from the bottom. I'm going to shift
into the next color. Now I'm going to use in a
darker tint of the blue color, almost all of an indigo
color of this set, which is more towards
the black side. All right, so this is
called a variegated wash, wherein you use in two colors blending them to each other. Now, these variegated wash can be of different
colors as well. Need not be just of
the same color family, but just according to the
colors that you pick up. The variegated wash will
vary a little depending on the color harmony of the
colors that you're using in. So you can see there
are two colors, both of them blending
well into each other. This is the variegated wash. The first one was
the gradiate wash, and the second one is
the variegated wash. Now let's shift into
the next one out here. Again, I'm going to begin
with a clean deer of water first and then begin
adding in the colors. Now here I'm using in the
indigo color from this set. This third wash is
nothing but a flat wash. It's just one color in a simple same color
tone throughout. In the gradiated wash, you will see that at
the top or the bottom, you will have darker tones moving from the darker
to the lighter color. But here in flat wash, you will have one
single color tone. Same throughout,
everywhere you can see. I'm trying to add in
an equal color tone onto the entire
space throughout, having in the perfect same
color spread throughout. This is known as a flat wash. These were the three
different washes. First, we learned about the wet on dry and
wet on wet technique. Now these were the
three different washes, that is, the gradated wash, variegated wash,
and the flat wash. Now let's move on to
the next technique for I'm going to go ahead with
a clean layer of water. Again, here I will show you a variegated wash with two different color tones of blending of which may
form in a third color. So how we can do that as well, I'm going to do in
a variegated wash with the blue and
the yellow color. Now we know when the blue and
the yellow mixed together, they will form a green
tone to avoid that. In between, we will leave
a little white cap and let both the colors blend
easily into each other. You can see I have added in
both the colors in between. I left a little white cap. Now using a dam brush, I will just blend from the bottom of the blue
till the yellow color. And you will see there is no
green color formed and there is a perfect flow happening
in between the colors. This is how you can achieve variegated wash with two colors, which may form in a third color by leaving in a white cap, you can get perfect
transition between the colors and go ahead
with the variegated wash. These worth the
different kind of wash. Now moving on to
the next technique. Again here I'm going to begin with a clean
layer of water. Now I would recommend
you to try out these basic technique first. If you are a complete
pigner practice these basic techniques will help you a lot in getting the
class projects much easily and this will also help you understand
where you go wrong. I recommend you to try out
these techniques and get a hang of these before moving on to the final class projects. Now here we are going to learn about adding
in the clouds. Again, this is wet
on wet technique, I have a wet layer of water. Now onto this, I'm going
to be adding in wet paint, but I'm going to add
in paints leaving in some wide gap for natural
clouds to act in. Just adding very simply
small patches of the blue color going to form in little cloud
shapes in between. Then onto this I will show you how we are going
to be adding in the wet on wet technique or using in another
color at top of this. For now you will see
how easily I've left in little spaces in between
to act as the cloud. Now onto this I'm going to
pick up the indigo color. I'm going to shift into
a smaller size brush. Now this space is still wet. Wet on wet. Again, I'm going
to add in the next layer. Now this darker tone, I'm going to add
in very little as compared to the blue
color that I added it. Because I want the
blue color as well to be visible so you can see how you can form
in the clouds as well onto these using the
wet on wet technique, creating in perfect depth. Now you can see three
colors coming into our sky, the white caps that you left in. Now when you add these
clouds, wet on wet, you need to make sure that
into this indigo color, you do not add much of water. You need to control the water. Otherwise, you will just
get one flat layer of the color and all the colors will blend and bleed
into each other. And you will not have any
color distinctions in between. Now, wherever I feel
the color is spreading. A little extra, I'm
just lifting it up with a dam brush and there we have got the perfect
kind of clouds. Now let's begin with the
next technique out here. Again, going ahead with a
clean layer of water first. Again, here as well, we are going to learn adding
in the clouds. This time I'm not going to
leave in any white gaps. I'm going to use in the
blue and pink color. This time I'm using in
the serene blue color. Next I'm going to be
picking up the opera, the quin rose color. In the quin rose color, I'm going to add
it completely now. When the blue and
pink mixed together, they will form a
little purple line. As you can see, if you do
not want that purple color, you can leave in
little white space and blend just as we blended
the yellow and the blue. These are different
ways that you need to understand about blending
in water colors. Whether you want the
third color to be formed or you do not want the
third color to be formed. Now I have picked up a little of the violet color and I've shifted to a smaller size brush. Now you will see just using
in the tip of my brush, I'm adding in this color, wet on wet forming in little
cloud shapes into the sky. Now in case if I will add in lot of water to
this violet color, the violet color will
spread a lot and give me a flat look
of the violet color. In retaining these cloud shapes that I'm trying to add in, it's very important
when you're working wet on wet with the
color layer on color, you need to make sure
that you control the water content because to maintain and
retain the shape. Now automatically these
cloud shapes will have a soft blending because
working wet on wet. But also they will
maintain the shape. Because I've tried to
control the water content and the liquidity of
these water colors. Out here, I have added in
the clouds using two colors, that's the red, violet
and the violet color. You can see these
cloud shapes are retained because I've
not added much water. Also, the clouds are in the form and all base
layer colors are visible. Here is the dried look
of the complete thing. Let's remove the masking teeth. These were the basic techniques for now. These were
the basic ones. Again, I would
recommend if you are a complete pigno
practice all of these, they will help you
a lot in overcoming your fears with
watercolors and help you get better with
your basic techniques. In the last one out here, you can see how beautiful the clouds are
looking wet on wet. Maintaining the tones as well, but maintaining
the shape as well. In this first technique session, we have learned wet
on wet, wet on dry, gradiatedh variegated
wash, flat wash, variegated wash with two colors. Which may form third
color avoiding. In the third color,
adding in clouds, leaving the white space, Adding clouds wet on wet with two colors forming
the third color. I would see you guys
into the next lesson.
4. Day 1 - Calming Blue Sky - Tecnhiques: Before we dive into the
class project for day one, let's have a look
at the colors and basic techniques
that you would need to know for this class project. I will first begin by swatching out the colors that I'm
going to be using in, and then begin with
some basic techniques that would help you in painting the class
projects easily. For the yellow I'm going to be using in the Naples
yellow color. It's a pastel yellow
shade, as you can see. For the blues, I'm
going to be in Altra, Marine blue, and Dico. If you want, you can add in a little bit of the
ditherin blue as well. In between for blending, the topmost is dico, the bottom is ultramarine blue, and center is a medium
mix of both the tones. And closer to the mountains, it's the Naples yellow. Now when the blue and
the white is mixing in, you can see there's
a little white space where I'll be using in little white paint
so that the blues and the yellow mixing together
do not form in the greens. Now I will watch out these
colors for you freshly. Again, for the Naples yellow, you can see it's a beautiful
pastel yellow color. If you do not have a direct
Naples yellow color, you can simply mix
in your cadmium yellow light with
a little bit of white to get this pastel yellow. Next watch is the
ultramarine blue. The third blue that I'm going to use is going to be
the indigo color. Now for the mountains, I'm going to be using in
this same indigo color. But you can see the
tonal variations of the color that I'm going to be using in the mountain ranges. It's going to be a light
dark and a medium tint. We've already swathed a medium
tone of the indigo color. Now I will swash
the indigo color in its thickest consistency and you will see an opaque
layer of the color. It is bold, dark. And you can see we've used this in the second
layer of mountain. For the first layer,
which is a light color, I'm just going to swatch it out. A very light tint of the indico color that
is more of water, very less of the pigment. So you can see by adjusting
in the water content, you can adjust the consistency and the color of the pigment. Dark light, medium,
as per your knee. We're going to have
the darkest one here, the medium in the sky, and the lightest one in
the first mountain range. That's about the tonal
variations for the C. Again, we're going to use in the Naples yellow and ultramarine blue only and use them in a
very light consistency. I will swatch these two tonal
variations as well for you. You can see how light it is, very little and more of water, it's a very transparent layer of the color that we'll
be adding in for the sea. By adjusting in
the water content, you can adjust the tonal
variations for the sea as well. You can see a very light layer that we're going
to add in to show the reflection for
the pine tree and the bush area we are going to be using in the
paint scray color. Or you can use in your
black color as well, but we're going to use it in its darkest consistency and have a bold effect for
the birds as well. We are going to be using in
the same pinscrey color, or you can go ahead using the indico color as
well for the birds. Now as I discussed for
the Naples yellow, you can simply mix in
your yellow tones, say cadmium yellow
medium, or Hansa yellow, along with a little
bit of white to get a similar looking
Naples yellow color mix in any medium tone of yellow with white to get
in Naples yellow. Next, ultramarine
blue, pinscrey and indico color are the different
tones that you can use. Now for the sky, let's
show in the blending. First, I've added in the
ultramarine blue swatch to this, I'm going to blend
in the yellow. And you will see when we do not leave in any white
gaps in between, you'll directly be getting in green tones when both
of these colors blend in. You can see that
muddy green color being formed at
the blending spot. That is the reason we
are going to leave in a little white gap
using a little wash off the white paint
so that we do not have this greenish effect
coming into a sky. And we are going to have a
beautiful transition between the yellows and the blues
happening in smoothly here. Now let's understand how we're going to leave in
that white space used in the white paint to
get in that transition again, beginning in with a layer of
ultramarine blue at the top. And I will leave in little
gap and add in the yellow. Now in between, you can
see we have a white space. We need to blend both of
these colors swiftly. So I'm going to quickly
pick up some white paint and begin blending
in between as well. Now you will see that because of the white
that we've added in, we get lighter
tones off the blue. And we'll also get lighter
tones off the yellow tone. And when both of these blend
with the help of white, you will not get in green
variations in between, you will see a smooth blend happening in between the
blues and the yellows. Without forming in any greens
and still not having in that white space and having in a soft transition happening
in between the colors. So it's very important to
avoid these green tones that happen because of the mixing
of the blues and the yellow. Now, for the mountain range, as we discuss the
tonal variation, it's going to be a light
barn on top of that. We are going to begin with
the try brush technique. Now you can see the movement of the try brush is diagonal
from left to right. You need to pick
up a damp brush. Just pick up some paint
and thick consistency and begin dragging it so as
to get this try brush effect. Let me give you a closer view. You can see my paper is rough
edge and because of that, it's becoming much easier for me to get in these
try brush detail. I'm using the same
paper book which I'm going to be using in for
the final class project. So both the papers are 270 GSM, 100% cotton coal press, but with a little rough texture. So always try all
the techniques on the paper that you're going
to paint your final painting, so that you can understand how your techniques will be
appearing on the required paper. Now, if your brush will be wet, you can see you get in
patches of the color. Instead of getting in
the dry brush detail, it's very important
that you pick up a damp dab off all
the excess paint and excess water from your
brush and then just swiftly begin dragging it so as to get this
dry brush detail, you need to pick up
the paint as well in thick consistency
so that you get in that bold effect and the details accordingly in the
movements that you want the flow of
the dry brush to be. You will move or drag
your brush accordingly. Now let's understand
the pine tree. For that I'm going to use in the smaller size round brush. And we're going to begin
with the pine tree. It's going to be a simple pine
tree that we'll be adding. You begin with a very thin stem pointed towards the top
and moving downwards, you can thicken the length
of the stem as well. Now if you notice the shape of the pine tree is triangular. After adding in
the foliage first, I'm just adding
in some branches. At the top you can
see the branches are smaller and as I'm
moving downwards, I'm increasing in the
length of these branches. Now just using, in
the tip of the brush, I'm randomly dabbing in
details here so as to get in simple effect onto the
foliage of the pine tree. You can simply go ahead
with simple lines to create in that foliage
effect if you want, you can directly go ahead without the branches
as well and get a triangular shape
just with the help of the tabbing technique
and the foliage. Now you can see as I'm moving more towards
the bottom side, I'm increasing in the
length of the foliage so that we maintain in
that triangular shape. I'm just pulling
out simple branches out there so as to
create in the foliage. As you move towards the end, you can just fill in by dabbing in without the help of
the branches as well. This is how we are
going to paint a simple pine tree for
this class project. And it's a pretty simple one, just using in the
paints gray color. Now the last detail that's
adding in the birds, we are going to go in
with simple silo hetes of the bird using in a smaller
size pointed tip brush. I'm just going to begin adding in the bird details With
the help of the brush, you can just see very simple
silohetes that I'm adding, moving in different directions,
different flight angles. If you notice towards the top, I have very tiny
brushes which are basically just
dabbing in the brush, creating in some minute
dots to trying to show in some birds very
far away in the flight. All right, so that is how we
are going to be adding in birds different shapes,
very simple silohates. You can see very simple
strokes that you have to add in to create in simple bird. But try to make it different
every time so that it looks like the difference in the angle of
the birds as well. That's about the colors and the basic techniques
for this class. I've shown you the
blending, the simple, basic techniques of tri brush and adding in the silohates. Now we'll begin with the class project in the next lesson.
5. Day 1 - Calming Blue Sky: Now let's begin with
our class project. This is the first class project that we are going to
be painting in this, I have my paper
taped down already. I have used 1 centimeter
masking tape. Now I'm just going to
use in this clean jar of water for laying out
the layer of water. We're going to begin with
a very rough pencil layout for the silo height and the diagram that
we'll be following. That is we'll be marking out the sky, the mountain ranges, and the sea area and the bottom bush space a little below the center line. I'm beginning out with
the mountain outline. This is the background
mountain range which is going to be of the
lighter indigo color. Now I'm marking out the
horizon line and on top of it I'm going to give
in the second mountain range, which is just below the first mountain
range and it's quite smaller as you can see. Next I'm going to mark out the bottom bush space between
the mountain and the bush, we have that little sea space. And towards the right end here, we are going to have in a
pine tree which is going to be a line between the
sea and the bush space, You're somewhere
in the right area. I'm just giving a very
rough pencil sketch for the pine tree because we'll directly be adding
in with pines. We'll first begin
in with the sky. For that, let's go ahead with a layer of water
only into the sky. I will not run the layer of water into the mountains though. It's going to be of a
darker tone later on. But avoid adding in any water or pins into the
mountain range as well. I'm just going ahead with an even layer of water
throughout into the sky. Make sure that you do not have any excess water on the edges. Your entire sky has an even layer of
water that even glaze because of the water
so that it does not begin to dry anywhere
while painting. Also make sure that
the excess water from the edges you lift
up with the help of tissue across the
mountain range. You can see I'm going ahead
very carefully marking out the outline of
the mountain range so that there is no water seeping
through the mountains as well as you can see, I'm running my brush
multiple times so that I have an even layer
of water throughout. From anywhere where
there is excess water, I have lifted the water
and given an even spread. Now I'm going to go ahead and begin with the
colors into the sky. As we discussed in the technique section
for this class project, we already know
the color shades, which is going to be shades
of altramarine blue, indico, and the
naples yellow color. We've also discussed the
tonal variations and the alternatives
that you can use if you do not have the
specific colors. If you have not visited the technique section
of this class, you can go visit in the technique for day
one class project. And accordingly, you can follow the color theory that
you want to use in. I'm first bringing
out a little bit of the altramarine blue
color on my palette. And I'm going to
begin with a layer of this altra marine blue
using in the flat brush. So I've taken the
ultramarine blue color till the half of the sky. And now I'm just going to
use a damp brush and give it a very light layer so that when we add the yellow
closer to the mountain, we do not have the blues and yellows creating in the greens. We already discussed
this as well in the color technique section
of this class project. So you know the details
and why leaving in that white space
is important while bending in the
yellow and the blue. Now picking up a little bit
of the naples yellow color, make sure you pick
in fresh water. Otherwise, when you pick up the yellow with the blue water, you may get in little
muddy green tones again. So I'm using clean water from the second jar of clean water. Now I'm going ahead adding in
the layer of Naples yellow, closer to the mountain range marking the outline
of the mountain. As you can see for this, I've used a smaller size brush because it's a small space
that we have to add in. Now, you can either use
white or like this. You can use a dam
brush and lighten up both the colors and get in the tonal variations to
blend both of them together. You can see the smooth blend
happening between the ulti, marine blue and the
naples yellow color. Now at the top, I'm
going to add in little indigo for darker
highlights into the sky. I'm picking up a little bit of the indigo color at
the top of the sky. I'm going to give in
little darker hints with this indigo color. Using a smaller size brush, you'll automatically
have a gradient into your blues as well. From dark at the top moving towards little lighter
tones in the center. Then quite lighter
towards the yellow, and then the yellow tones. Now while you're adding
in this indigo color, make sure that you do not
add in a lot of water. Otherwise, it will cover up the entire Altra
marine blue as well. Now to make the blending between the ultramarine and
the indigo simpler, I added again a layer of the ultramarine color so
that we have that blend. And now again,
using a damp brush, I blended it till
that meeting point of the yellows and the blues. So now I'm just going to add in little highlights
into the sky. Just using, in a smaller
size flat brush, just adding in little strokes. And I will blend
these, so wherever I feel that the colors may
dry a little lighter, I'm just adding in this
little highlighted spot, again, using a dam brush. Blending it till that yellow
space so that we do not have any harsh edge or harsh spots
of the colors anywhere. Also, remember, watercolors
always dry or tone lighter. So make sure that you know how your color will be
looking once it dries out. Now let's wait for
this entire sky to dry out completely,
then move further. Now that a sky is
completely dried, we'll begin with the
rest of the elements. We'll begin with the first mountain range in
the background. As we discussed, we are going to be using in the indigo color, but in a very light consistency. That is by adjusting in the tonal variation
of the indigo color. So I have a little tint of
the indigo on my palette. And I'm just going to remove
in a little more to this. I'm going to add in
a lot of water so that we get in the
right tonal variation. We have to use in a
very light consistency for the first layer of
the mountain range. On top of this,
we'll be adding in dry brush technique
once this dries out. So make sure you're using
a very light consistency of the indigo color for this
background mountain range. Now marking out the outline very carefully of
the mountain range, you can see I'm trying to
give it a very rough edge. And not giving in
simple straight lines so that it looks
natural. And real now, this technique
is the wet on dry technique that is
for the mountain range. We did not add in any layer
of water in the background. We are directly going ahead
with a layer of water. We are directly going
ahead with a layer of the paint onto the
mountain range. This is the wet
on dry technique. Now I'm just going to run in a darker hints at
certain places. And given little you can see, I'm not adding in these
darker spots completely. Just very little. Because once this tries out, I know it will give me a
very light tint effect on the top of the
first mountain range. Now till the first
mountain range dries out, we'll go ahead paint in the
sea area because we cannot paint the second mountain range until the first one dries out. Otherwise, they will
all get merged into each other for the sea as well, adding in a very light layer of the ultramarine
blue as you can see. As I told you again, the tonal variation that we discussed
in the technique section, a very light consistency, more of water, very
less of pigment. Onto this, I'm just
going to add in little yellow highlights
as well towards the right. Now, since this
ultramarine blue isn't such a light consistency
and even the yellow is going to be in
a very light consistency, it will hardly give
you any green tones. That is the reason
I did not leave white caps while painting
in the sea space. Now using in a smaller
size brush and a little one tone
darker consistency than the base layer of the sea, I'm just going to add a little ripple
effect into the sea. This, I'm doing wet on wet. My first layer of the paint
of the sea is still wet. On top of that, I'm going
ahead with the strokes, which is again wet. This is called wet on wet. While adding in the details for the first layer of the sea, we had gone ahead again
with the wet on dry detail. So this is how you can add in little highlights
and wave effect. I'm just using a little
hint of the indico as well to add little
effect into the sea. Some darker strokes, but
very little, not much of it. I will blend it quickly and I'm still adding this
while my sea is wet, so you will automatically see it all has a soft edge together. That is it for the C as well. Now we'll have to wait for
both of these paths to dry and then move ahead with
the rest of the details. The next detail that we'll be adding will be this
mountain range. Once all of this
dries out for that, we'll be using the indigo in its thickest consistency as
we discussed at the bottom. We'll be using paints
gray or you can use in any tone of
black if you wish to. I'll be using in the
pains gray color. Let's wait to dry now. Both these details are
dried. As you can see. We'll go ahead with
the second layer of the mountain range. For that. I'm going to use in
the indigo color, in its thickest consistency
and a bold effect. Because I want this layer of mountain to be visible
distinctively. Now beginning in here, giving in a very rough outline. Again, you can see it's
not a straight line. It's having in
those curvy twists and turns randomly at spots. Now I will quickly
fill in the rest of the space till the horizon
line very carefully. With this indigo color giving in a straight line towards
the horizon line. Make sure you do not add in
much below the sea line. Otherwise, the entire sea
may get hidden as well. Now that I've added
this layer of color, what I will quickly do
is using a damp brush, I will randomly lift off some spots from this
mountain range to given little tonal variations
just using a damp brush. And using in the
tip of the brush, you can see I'm lightly lifting up little
random strokes in diagonal manner so as to create little textures and effects
onto the mountain range. The edges, as you can see, is of a da color
and in the center, just given in a
very light effect. This is how you can lift up colors to create
little textures. While this is wet,
you need to do this lifting while the
paint is still wet. Otherwise you may get in patches of water
instead of getting in these tonal variation
texture effect. Now next I'm going
to go ahead with the paints gray color and fill in the bottom
space for the, the paints gray color. Also, I'm going
to be using it in a very thick consistency
and closer to the C space. You can see I'm going
to go with a outline and not a simple straight
line on top of that, we'll be adding little bush
details towards the space. But first, let's fill in this entire space with the
pains gray color at the bottom now shifting into a
smaller size brush which has a pointed tip. I'm going to pick up the
paints gray color again and begin adding in little bush
detail at the top here. My bottom bush space that be added is still wet and
on top of it here, I'm creating in
little bush effect. As you can see, I'm just
tapping in the tip of my brush. Adding in simple grass
like structures and simple strokes in
random directions to create in that bush
effect into this space. Make sure you do not cover
up the entire sea space. You let the little of the sea be visible in between these bushes, in between the mountain range. In the same way throughout
till the right edge. I'm just going to quickly
go ahead and add in this. Remember on the right side we are still going to be adding one big pine tree as well that will also be using
in the paints gray color. After that, we'll be left to add in little dry brush details on the mountain range and the
birth silotes into the sky. So I'm just giving in the
darker edges here as well. Wherever I feel that
the pains gray color at the bottom is light. Now using in the same pains gray color and the small
pointed tip brush, I'm going to go ahead add in the pine tree on the right here. I'm using the pains gray color in a very thick consistency and beginning in with a
very thin stem first. Now make sure you
can go ahead add in a further bigger
tree than this as well. But I'm going ahead with
a medium sized one, reaching till the meeting point of the yellows and the blues. Now we already discussed about adding in the pine tree
in the technique section, how it has to form
a triangular shape while reaching
towards the bottom. Towards the top pinning end with very small length of the
foliage and moving downwards. I will swiftly keep on
increasing the length of the foliage as we reach towards the bottomost
end closer to the bush. I'm going to just
keep on dabbing the brush and create
the foliage effect. You can see how I'm
just going ahead adding in very simple
foliage effect here. Now I'm going to
quickly go ahead add in like this
foliage and pull out these leaf strokes
completely till the bottom space to
create in the pine tree. After this, we'll be adding in the birth silotes
into the sky and we'll be ready with
our first project into this four project. You can see towards
the bottom how I have swiftly increased the
length with every branch. And towards the bottom, I'm simply pulling out just strokes. Instead of giving in that
branch, kind of a detail. Now we are left to add in the dry brush as well
onto the mountain range. Add that only when your mountain ranges are also completely dry. I'm just blending in the bush and the pine tree together with some dabbing and black
spots so that it looks perfectly coming
out from this bush space. Now, randomly where I
feel I need to give in little modifications
to this pine tree, I'm just going ahead adding in little more foliage effect
and little more details. I gave the tree a
beautiful pointed edge and we are ready with
the pine tree as well. Now let's move on to the rest of the details and then remove
in the masking tape. First, let's go ahead with the dry brush technique on
the mountain range here. That's the first mountain range. We already discussed
the dry brush technique as well in the
technique section. Make sure you're picking up the color in a very
medium consistency. Dab it onto a tissue
or a rough cloth so that you do not have any
excess paint onto your brush. Make sure your brush does
not have excess water. Now, keeping your hand
movement diagonal, begin adding in little
dry brush strokes. If your will have excess
water or pigment, you will get in
patches of the color. So make sure you
pick up the color in a thick consistency and keep tapping it onto the rough cloth or a tissue if you're using one. So that all of the
excess paint and water is absorbed by the
cloth or the tissue. And automatically
you will just get in dry brush strokes
onto your paper. You can see I've been
moving diagonally for these tribus strokes
so as to create movements as well onto
the mountain range. Now in between, you can see I've given a bold line so as to give little breaks as well
into the mountain and create sections into
the mountain as well. On top of the lighter
earth strokes of tri brush that we've given, just giving in little darker
strokes as well of the Trh. Now onto the next part
of the mountain range, Again giving in little strokes. You can see how I've divided the background mountain
also into two parts with the help of one fine
line in between the mountain ranges using
the dry brush technique. Now make sure that the dry
brush is not too dark or bold. Otherwise, it will cover up
all the lighter spaces that you've created in this
background mountain range. Also, it's very
important to make sure that you get in
these dry brush details. Otherwise, patches of the colors may make the mountain
effect go bad. Now just making this
transition line a little bold, which is dividing both the
mountains in the background. Actually, since my paper has a little rough green, it makes it much more easier for me to add in these
dry brush detail. And that is why always test onto a rough patch of the
paper that you're using. That whether you're
able to achieve in these drybrus strokes easily. Now using in a smaller
size round brush, which has a pointed tip, I'm going to quickly
go ahead add in some very simple
birth silo again, while adding in the
births as well. Make sure you're using
a very fine tip rush. You do not have excess paint. Make sure the paint
is in a medium to dark consistency
and not too dark. And as you add those birds which are far away from
the mountain ranges, make sure you add them in a little lighter consistency
so that you get in that effect of far look
of the birds as well. At the top you can see the birds are very tiny as they
are far away from our perspective and from our horizon line and closer to the mountain
and the horizon line, you can see these birds
are quite bigger and much better visible
towards the top end. I'm just going to dab in
little dots as well to create little birds
in far off motion. That is it. We are ready with our first class project into
this four project class. So let's remove in
the masking tape and see a final painting
with those clean edges. Now make sure before you begin removing in
the masking tape, your edges are completely dried. Always pull off the masking
tape against the paper so that it does not lift up the paint or tear
off your edges. It's very important to
go ahead very slowly. Make sure you've tested
your paper before, that it supports masking tape. And if you feel that
the masking tape is not coming out easily, you can use a hair dryer
over the masking tape to loosen up the gum off the masking tape and
then peel it off. So here's a closer look at our first painting
from this class. You can see the dry brush
technique, the bird details, the spots that I've
added with the paints, gray color for some
distant birds, and the complete look
of the painting. I hope you guys enjoyed painting this first
painting with me. I will see you guys into the next class project where we paint another
beautiful seascape.
6. Day 2 - Calming Seascape - Techniques: Hello everyone. Welcome back to day two of the sunrise
and sunset class. Today, we are going
to be painting this beautiful blue and
yellow sky for day two with a
beautiful seascape and a reflection of the
sky falling into the sea. Before we dive into
the class project, let's have a look at the colors that you would be
needing for this class. I will begin swatching down the colors and also share
the alternatives with you. The first color is going to
be the cereline blue color, or you can use in the
cobalt blue color. The next color is going to be a little of the
ultramarine blue color. You will notice the
cobalt blue and the ultramarine blue are
almost similar tones, just a very little difference. And this third shade is
the bright blue color from the white nights brand
closer to the mountain range. Here you can see
I've used a little of this bright blue
color in case, if you do not have
the bright blue, you can use the cereline
blue along with cobalt and the
ultramarine blue color. For the yellow, I'm going to use this beautiful pastel,
naples yellow color. You can mix in white along with your medium yellow to get a naples yellow or a
pastel yellow tint. And for the orange hue, I'm going to use
this golden color from the brand white
nights itself. Next, I'm going to use in a little bit of white
along with this golden to further dilute it to a little lighter
tone if needed. So you can see with white, how the color can
be lightened to a purifull yellowish orange
tint with a pastel hue in it, which will not create any muddy tones when
blended with blue. For the mountain range, I'm going to use in
the indico color. You can even use in the paints
gray color if you wish to. If you do not have the Indico color for the, we are going to use
the same basic colors to create the reflection. Apart from that, you can see the dry bra strokes that
we'll be adding to given little wave effect
that's going to be using in the pain scree
and the white quash. You can even use the
indigo color again if you do not wish to use
the pain scree color. Now if you see
yellow and blue are two colors which mixed together
create in green tones, as we discussed in
the last lesson, we need to go ahead with the blending carefully so that we do not form
in the greens. Even in the C space, you can see when the blue
and the yellow blending in together we've tried and avoided in any green
color forming in. So it's very important
for you to blend in in such a way that you do
not get in the green tones. That is why we'll be leaving
in little white caps around the yellows and let the blue and the yellow
blend in naturally. Now this time for
painting the sky, you can see we've created
so much depth into the sky. You can see the cloud details. The last one, we had a simple transition sky from
the blue to the yellow. And for this class project, we have a cloudy sky with
a lot of layers on layers. For this, we'll be working wet on wet and we need
to have wet on wet water control so as
to get in these details right and have the
right textures coming in for the
clouds as well. To understand the wet
on wet technique, I will first begin
with a layer of water, which is the wet layer. Onto this wet layer, we are already going
to begin adding in the first layer of
pains After that, when we still work wet on wet, we need to have control
over the pains that we add in so that we can get in those effects
into the clouds. In the first class project, it was a very simple
variegated wash that we had used of two colors, leaving in the white cap. Now, fosphus sky, we'll drop in the yellows randomly
and the orange use, that's the golden
color naturally. And you will see that the
colors will spread accordingly. Now, when you begin
adding in the blues, you have to leave
little white spaces closer to the yellow
and the orange, so that you do not
form any green tones. This is just the
first layer here. The wet on wet control
will not play much of a role from the
next layer onwards, when we'll begin adding in the details into the sky
creating in the cloud effect. That's the time when
you'll have to have in the wet on wet control
so that the colors do not just spread and retain
the shape and the angle in which you're trying to add them closer to the
yellow and the orange. For now you can
see I have kept in little white spaces that we do not get in
the green tones. Now, my paper is still wet. I'm going to begin with
the cloud details. Now, when I begin adding
wet on wet details, I need to have water control. I am not going to pick
up excess water and I'm also going to make sure that my brush does not
have excess pigment. It's retaining the shape
in which I'm adding them, despite the paper is wet. So it's retaining
the softness edges. Now if I do not have
the water control, you can see the color will
spread completely like this and it will not retain the shape in
which I try to add in. It will just create
a simple patch of the same color throughout rather than giving
us the detailed Shape of the clouds that
we're trying to add in. The strokes that we're trying
to achieve in when you begin adding in
the cloud details and the strokes for the clouds, you need to make sure
your brush does not have excess water or excess pigment. You need to go in very
light handedly using in majorly the tip of the brush
to create in the strokes. And given those cloud shape, you can see when
I have the water control the shapes and
the strokes that I'm adding are retaining their shape and staying at the place
that I want to add them. This is where wet on
wet water control plays a very important role while creating in details into the sky or the sea so as to
get those wet on wet structures right now. Next you can see
the tr brush effect that we have into the sea. We're going to use the same
wet on wet technique in the sea as well to maintain
those yellow highlights. Apart from that, we are going
to use in little tri brush to create some motions and
movements of the waves. Now if you notice closely, the waves are falling diagonally towards
the downward side. And one way diagonally from
up in a little upward curve. I'm going to show you both of these tri brush strokes
that we're going to use in. We already discussed the basic tribrush
technique of having in very limited paint on our
brush without any water. And then we need to drag in, the first stroke is going to be the inverted kind of a stroke. So we're just going to begin from the top and we
are going to have this inverted kind of a structure forming in
with our brush strokes, giving in the dry brush, trying to show the waterfall
effect onto the waves. This is one stroke that we're going to use
in for our waves. And the second one
is going to be like a normal, regular stroke. But you know, you can see a little flat stroke that
we're going to use in, let's check out that as well. So here it's going
to be like half C, just a little less curve. So you can see how
both look variations. That's the inverted A
stroke that we'll be using and the normal
stroke that we'll be using to show in motion into the waves and the
waterfall stroke as well. So these are the two dry
brush and apart from that, we're going to use in some
basic dry brush as well at the other places to create a little flow and
texture into the water. The basic dry brush
is going to be, as we discussed in the
previous lesson already, just dragging a brush, you can see my
brush does not have excess pigment or excess water, so I'm getting in those
dry brush effect. Lastly, we'll be adding
in the birth silhouettes as well in simple,
different angles. That is about the colors and the basic technique for
this class project, most important being
the dry bra stroke and the wet on wet
water control. Make sure to practice this on a rough sheet if you
are an absolute pigner. So that you have a
hang of these details, I'll seeks into the next lesson painting in
this class project.
7. Day 2 - Calming Seascape: Now let's begin with our
class project for day two. We've already discussed
all the basic techniques and colors for this
class project. Now picking in with a very
simple pencil sketch. First I'm marking out
the horizon line on top of which we are going to have that little mountain range. Just marking out that
mountain range as well. That is the only pencil
sketch that we need. The top area is
going to be the sky, then the mountain, and the
bottom will be the sea. Towards the left, I've taken the mountain range to
a very lower height. As you can see, I'm just getting rid of the extra pencil
lines that we have in. We'll begin with the sky first, then the mountains,
and then the sea. For the sky as we
discussed already, I'm going to be going in with ultramarine blue, cobalt blue. A little bit of the bright
blue as well to given little highlights and the
naples yellow and golden color. So these are the
colors that we're going to use in the sky and for the sea as well as
it's going to be a reflection of the same colors. Then using indigo color
for the mountain ranges, or you can even use endithrine blue or any darker blue
for the mountain range, or even the paint spray
color as you wish to. We'll first begin with a fresh layer of water
onto the entire sky. I will not be adding
in the layer of water into the mountain range. I'll try and mark that outline for the
mountain range as well. Carefully. It seems my brush
had a little bit of the blue from the previous project
because of which you can see the blue in
the water coming in. So I've just cleaned my brush again and now taken
a fresh water. Since the sky is
going to be blue, it won't make much
of a difference. But be a little
careful about this in case if you're working
with other colors I'm done with a layer of photo. Now, as we discussed in
the technique section, I will first be pinning with the yellow and the golden color. Then after adding
in these colors, we'll shift on to
the blue tones. Now make sure that you
are using a clean brush. And very carefully go ahead with little yellow and
golden color strokes towards the right side, at the bottom area of the sky. Now you can normal yellow mixed them with a little tint of white to get a naples yellow color. For the golden color you can use in a yellow
orange color, We've already discussed all of the color alternatives and color options in the
previous lesson. That's the techniques to this. In case, if you've skipped that, you can visit that for a detailed insight of all the color palette
for this class project, as well as the basic techniques. Now to the golden as well. Again, I'm adding
in a little bit of the white as you can see. And I will just add in closer to the yellow and create little
orange highlights as well. Now the orange you can see, I've added very carefully just using in the
tip of my brush, making sure that the yellow
and orange, both are visible. Now ping in with the
cobalt blue color. You can bright blue, cobalt blue mixed
together as well. But I'll first begin
with a little bit of the cobalt blue and then add in the bright
blue highlights. Later on I'm going with a
very light layer of the blue. As you can see.
Closer to the yellow, you will notice I'm leaving a little white gap between
the blue and the yellow, so that we do not get in any green or muddy tones
because of the orange color. I've added a base blue. Now we'll begin by adding depth with the
bright blue color. I'm just picking up a little bit of the bright blue color. I'm going to begin adding
in depth into the sky. At the bottom space, it's going to be more of
the bright blue. And towards the
top I'll be adding more of the ultramarine
blue later on. Now when you're working
with the wet on wet layers, you have to go in
very carefully, such that you're all yellow. And the blue mixed together
do not give you green tones. Now I'm lifting up a little
of the aultramarine blue separately and I will begin adding in the ultramarine
blue strokes. Now you can see
I'm going to take the strokes a little
diagonal from the top to the bottom side
and create in crowd textures. The previous
project, we had gone with a very simple
variegated wash sky. This time we are
creating textures into the sky to create
the cloud defect. You can see I'm using my
and dabbing in colors in different shapes and giving in those very different tones of the blues to create
in the cloud defect. Now using in the
tip of the brush, I'm just adding in
simple half a strokes to create the cloud defect. Now towards the
bottom space here, I'm going to use more of
the bright blue color. Towards the top is more of
the ultramline blue color. Now closer to the yellow, you can see how I'm
maintaining my strokes in such a way that the yellow is
also still visible clearly. Now just using in the
tip of my brush and with very little paint
I'm just pinning to add in strokes
towards the bottom side. You can see after every
paint that I pick up, I am dabbing my brush so that
I do not have excess water. This was the wet on
wet water control that we discussed in
the technique section. It's very important to make
sure that your brush does not have either excess
water or excess pigment. Otherwise, it will
spread completely in the entire space and give
you one flat color look. Instead of giving you
these strokes into the sky and creating in those beautiful
cloud movement effect, I'm going to go ahead
with further tints of the ultramarine blue and create a little more drama into
the clouds of the sky. You can see I'm just
creating in simple shapes. We are still working wet on wet. So it's very important
that you make sure that your paper supports
the wet on wet technique and stays wet for
enough time for you to work layers on layers to
create depth into your sky. Now even at the
bottom space here, you can see I'm trying to
create in little textures, giving in the depth and creating cloud effect over the yellow
and orange spaces as well. I'll even be adding in little more darker depths of the yellow and orange
highlights if needed. Because remember, watercolors
dry or tone lighter, you need to keep the
layers accordingly that after drying they
give you that bold, beautiful effect to
the yellow as well. You can see I'm just
using the tip of my brush tapping in
those blue clouds. But you can see
they're retaining the space in which
I'm adding them. They are not covering up the entire yellow space nor
forming in any green tones. This is very important
to have the wet on wet water control while working layers on layers,
adding in the depth. Otherwise, you will get in
simple flat colored look. I'm just adding in
little more textures and strokes into the
sky as you can see. Now using the white,
I'm just creating little lighter effects between the blues and the
yellow as well. Just dropping in very little
white paints randomly here and they're creating
in more depth as well into the clouds. It's been almost seven to
8 minutes that my paper is still wet and I can still
work a lot wet on wet, creating in more
texture into the sky. My paper is 270
GSM, 100% cotton. I have wet it the right way with the right
amount of water, making sure that it stays
wet for enough time. And you can see I'm
still able to add in the fourth layer of details
into the clouds wet on wet. And I'm still maintaining the water control and the
pigment control wet on wet. So that you can see the
shapes in which I'm adding. They are there, but
they are having all the soft edges because
of the wetness of the paper. So make sure that you test
your paper beforehand, whether it supports the
wet on wet technique, whether it crumbles
up or, you know, it makes it difficult for you to work for a longer
time, wet on wet. Now just adding in the
final layer of strokes in the center space and we
are ready with our sky. Now we'll wait for the
sky to dry completely. First I'll just add in little
orange highlights randomly, here and there in
between the yellows. Because you can see the orange
is completely got hidden. Just using the tip of
a smaller size brush, I'm just dropping in
little yellow highlights. That's the golden
color that I'm using. So the yellow orange highlights, you can see I'm making sure it's not blending
in with the blues. Otherwise, it may
give in muddy tones. Now that is for the sky.
We'll wait for it to dry and then move on to
the rest of the details. So now my sky is
completely tried. And I'll begin with the, as we discuss, the
sea is going to be a reflection of the
sky colors only. I'll first begin with
a layer of water onto the entire sea,
just as in the sky. We begin with the yellow
and the orange tones, similarly for the sea as well. We'll begin with the
reflections of the yellow and the orange tones and then begin adding
in the blue layers. You can see on the
left side a little of the blue color from the sky that has seeped into the sea area. That will all get
covered up when we begin adding in the
details in the sea, I'm not blending the
sky and the sea. I'm leaving a small thin gap. My mountain range is almost covered up with the
blue in the sky. I will be going with the color
directly there later on. First weakening with
the reflection of the yellow and orange tones
towards the right side. I'm pinging in with
the yellow color towards the right side. I'm adding the yellow tones completely till
the bottom right. They will get covered up
with the strokes of blue and indigo when we'll go ahead
with the details on the waves. Similarly, using
the golden color, I'm beginning to create
little highlights, making sure that the
yellow is still visible. You will notice as we begin adding in the details
in the waves, most of these
yellow, orange parts will get covered
up with the blues. We'll just have little
highlight just as in the sky reflecting
into the sea as well. We are done adding
in the layers of the yellow and orange
towards the right side. Now we will begin with the
blues in the sea space. For that, I'm first going to begin with the
bright blue color. Now make sure we're going
to work wet on wet, so your paper stays
wet for enough time to work with all the details
in the sea as well. Beginning in with the bright
blue on the right side. Going in carefully
so that the colors do not seep into the sky area. Now moving further with the
ultramarine blue color, I will begin wet on wet, having in water control, making sure that now we have different tone variations
of the blues coming in. Now closer to the yellow, I'm going in very carefully, just using in the
tip of the brush to overlay the blue tones
onto the yellow space. You can see because of the light hand motion
that I'm using, there are no green tones
being formed very carefully. I'm just laying out simple
strokes over the yellow color. And we are going to hide most of the yellow orange parts with
these strokes of the waves. And you will later on just have the highlights of the yellow
orange color visible. You can see I'm majorly using
in the tip of the brush, not having excess water
or excess pigment. Hence, I'm able to get
in these waves effect. They have a soft edge
and a blended look, but still having in
a distinctive shape. Now shifting to a
smaller size brush and using the color in a
further bold consistency. I'm adding in a little
tinge of the indico to my altumbine blue so that I get a little
darker blue color. And I will begin adding
in very thin waves so as to show some movement
and flow in the water. When you're adding this,
all of this is still wet, but you need to make
sure you do not have excess water or excess
pigment on your brush, otherwise you will not get in these waves effect
at the bottom. You know, we are going to go ahead with a little waterfall, an effect, just as we discussed
the dry brush technique. Same way even the waves, I'm giving the same inverted
sea movement at the top. Giving in simple
straight waves movement, making sure that the yellow orange little highlights
is still visible. You need to add these
effects in such a way that not all of the yellow
orange highlights get covered up completely. Up till now you can see
the effect and movement of the water waves having in
those thin waves effect. They are not blended into
the base layer completely. They're having in a
little distinctive look. Now picking up the indigo color, I will begin adding in
little more darker depths at the bottom space
where we are going to have in the dry brush
effect coming in later on, remember we're going to add in the dry brush at the
bottom in two movements, one being the inverted and
one being the half stroke. In the same manner, I'm adding
in these darker strokes so as to get in the flow into
the movement of the water. Now, giving in very little darker highlights
at the top as well. Make sure all of these
will dry. A tone lighter. You add the depth of
these colors accordingly how much ever you want it to
look as per after drying, Always watch your colors
and wait for it to dry on the same paper that
you're going to be painting, So that you have an idea
as to how your colors will be reflecting onto the
paper once they dry out. Now I'm just going to go ahead with darker depth at
the bottom space. Then we'll wait for the sea
to dry completely after this, we'll be left to
add in the details of the the birds and the
dry brush technique. Let's wait for the sea to dry
now and then move further. Now my C is completely
dried and I'm going to go ahead with the
details of the mountain. First, for that, I'm going
to use the indigo color, or you can use the paints
gray color as well. I'll go with an indigo
color so as to have that flow with the blue
tones into the painting. I'm going to go ahead with a medium consistency
of the indigo color. I'm first marking a
very rough outline, just using in the tip of the
brush towards the left side, you will notice it's too
much at a lower length. And as we move
towards the right, we'll increase the height of the mountain on the horizon line marking out a straight line. Now, since my paper is
into a sketch book, it's quite easy for
me to just rotate my sketchbook and
add in the details simply without having to
worry about the hand angle. It's easy to adjust the
book or the paper as per your hand if it is taped
down on a movable surface. Now you can see I'm trying to vary the height of
this completely. I'm not keeping it off the same length or a
simple straight line. I'm trying to give it a very
rough and abstract shape so that it looks natural. I'm not keeping it into
a straight line or a diagonal line because
that make it look natural. Now on top of it, I'm
just going to give in little bush detail as
well at certain spaces. I'm just using in
the tip of my brush, adding in these
little bush detail. Now, just as in the
previous class project, we lifted up a little of the indigo tones so as to create a little texture
on the mountain. Same way, just as we did here. I'm going to go
ahead here and lift up little colors while
this is still bare, that we have little
lighter tones creating in textures
on the mountain range, just using the tip of the
brush, lifting up the color, dabbing my brush
onto a rough cloth, and then again, going ahead
with the same movement. Now it's very important
that when you lift up the colors,
you have a flow. Or the stroke should be in such a way that
after it dries out, it does not look shabby. That is it. We're done with the mountain and the
bush detail as well. Now let's move on to the
try brush technique. For the try brush, I'm shifting into my smaller size four brush. I'm going to pick up
the indigo color in a very thick and
bold consistency. And I'm going to dab off the excess pigment or water
onto the cloth so that I have only little pigment
which will give me the try brush effect at
the top as we discussed, I'm going to go with
simple try brush and that to very little. Just on the darker
strokes that we added. That's where I'm giving
in the try brush majorly. Now fly here. I'm going ahead with
the normal strokes. As you can see, it's the
half strokes that we discussed in the techniques
section towards the bottom. We are going to go with
the inverted C strokes. You will see the
movement of the brush is in an inverted C. It's very important to have
the movement as well according to the flow
that you want to show. Otherwise, it will not give
in that realistic look. Now at other spots, I'm going
with simple dry strokes, but you need to make sure that these drybrastrokes should not cover up the entire sea area. You need to just add them
as highlights here and there so that you have that little flow of
water coming in. You can see over
the yellow as well. I added in little dry brush
but in such a way that the yellow is still visible
completely. It's not hidden. With the dry brush, we
have that highlight of the sky reflecting
into the sea as well. Now I'm just going
to go ahead with a little more strokes towards
the bottom space here. And then we'll almost be ready
with this class project. The last thing to add in would
be the birds into the sky here. I'm just adding in a little darker
strokes so as to show little reflection of
the top bush area or the mountain range
that we've added. So I'm just blending
this darker reflection, using a dam brush into
the sea and creating that little darker highlight spot majorly on the right side. Now, same way, I'm
just going to use in a little tint of the white quash and adding little
white highlights. It's going to be minimum, hardly 1% of what we added. In the same way as we went
ahead with the indigo color. Same way, going to pick up the white paint,
dab off the excess, and going to give
in the same kind of stroke highlights at the top. It was the normal at the bottom. Inverted C highlight
in the rest of the space is simple
strokes highlight. Now at this part, the white
course seems a little extra. So I'm quickly going
to pick up a little of the indigo color and overlap it onto the white so that we have very limited white
highlight there as well. So this is how you can
cover up the excess, again using in the indigo color, but try not to add much. Otherwise it will create
patchy spaces on the painting. Now lastly using in
the pinscrey color, let's begin adding
in the birds and then peel off the masking tape. You can use the indigo color or the pinscrey color
as you wish to. Now, the same way as we went ahead with the birds in
the first class project, I'm going to be adding in a
flock of birds here as well. You will notice the movement and the shape of the birds are very simple strokes towards the mountain range
or the bush area. The birds are more clear, visible with clear details. As we'll move more towards
the top of the sky, we'll begin
increasing the length of these birds and just create very minute strokes so as to
depict as the birds far off. I'm then adding in the birds. You can see how beautiful
they are looking, just with simple details
and simple strokes. Now let's remove in
the masking tape and see a final
painting for day two. Be very careful while peeling
off the masking tape. Always peel off the masking tape against your paper so that you do not lift up the colors or you do not tear
off the edges. A closer look at our
painting for day two. You can see the
strokes of the clouds, the water control that we did, the birds, the
shape of the birds, the dry brush details,
the flow of water. Everything looks so pretty with the highlights
of black and white. I hope you guys enjoyed painting this beautiful
seascape with me for day two of this four
day series class. I will see you guys soon into the day three
class project. Till then, make sure to applaud your class project and drop me a review if you like this class. I will see you guys soon into
the next lesson tomorrow.
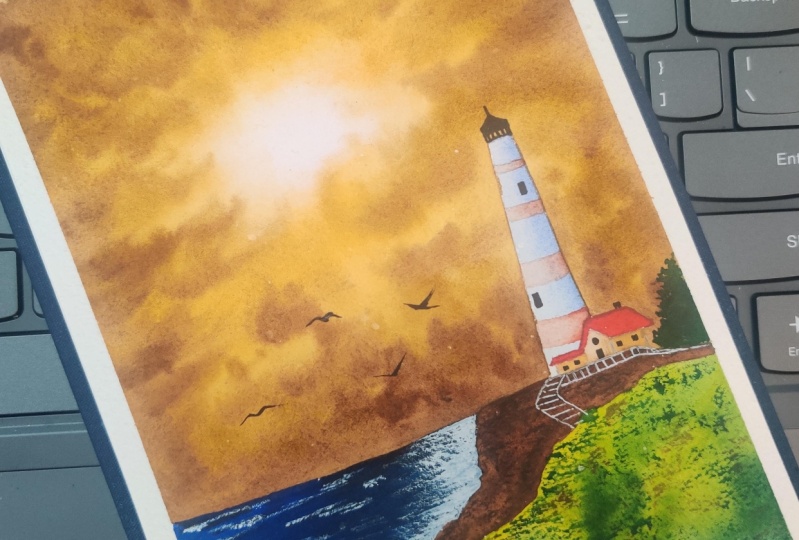
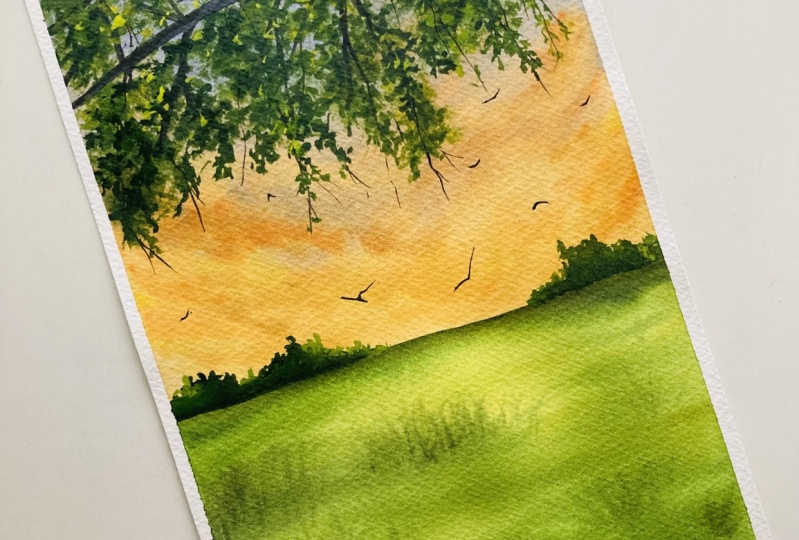
8. Day 3 - Bright Yellow Sunset - Techniques: Hello everyone.
Welcome to day three. Let's have a look at the colors and the techniques
for day three. The sky is going to be
a pretty yellow with little warm tones at the top as you can see from
behind the bush. And this bark of the tree, you can see the darker tones
of the night setting in. That's going to be a
sunset for day three. Just very simple details in the field space
as you can see. First, let's swatch out the colors and then move
on to the techniques. And then in the next lesson, move on to the painting
for the yellow, the lighter tone
that you can see, it's going to be Naples
yellow in a very light tone. Next I'm going to be
using the golden color, which is a yellowish
orange tone. You can see the Naples yellow, it's a pastel yellow. If you do not have
a pastel yellow, you can simply mix in
white along with yellow. And this golden color, you can see it's a
yellowish orange color. You can mix orange and naples yellow to
get a golden color. Or you can mix in
any other yellow to your orange color to get
orangish yellow color. Next, I'm going to
use the indigo color for the top of the sky. Just to, given that
perfect sunset effect, I'm going to go ahead
with these tones of indigo at the top of the sky, which will mostly get covered
up with the bush space. It's going to be a
very light tone, not such a bold tone as
you can see if you want. You can even use in
paints gray as well, mixing with indigo to get these highlights for
the sunset effect. Now for the park of the tree, it's going to be
the brown tones, so I'm going to use CP color and the burnt umber
color if you want to, or the burnt sienna color. I'm going to go for
the base layer of the bars of the branches that we are going to
be adding in for that. I'm going to go ahead
with the CPA color. Now, on top of that, you can see some lighter
highlights that I have created to given
that wooden texture to all of the stems
and branches. For that I'm going to mix in white quash along
with brown to get in that color so as to get those highlighted spaces and
they have that pole effect. Now next for the field space, we are going to go
with the greens. First is going to
be the green color, which is by the name green
color in this palette. Next is going to be a little
bit of the sap green color. And last I'm going to use
in the olive green color. So the first one was sap green, second was green, and the third
is the olive green color. So these are the
three greens along with a little bit of
the Naples yellow. Here you can see
the lighter effect to create that depth
into the field as well. You can even use
the may green color or any other lighter
green if you wish to. I'm going to use the
sap green green and the olive green if you want. You can even add in little
brown tones in your field. Lastly, we will be needing
the paints gray color for adding in the details of the
birds and other highlights. These are about the
colors even for the grass details or the
branch leaf details. We are going to go
with the same greens. We'll first be picking in
with the sky wet on wet, and then we'll move
on to the field. Just as we did the sky in
the last class project, we learned the wet on
wet water control. Same way we are going to have the water control
while adding in the strokes for the field. Let's look a small
snap of the field, how we are going to
paint it quickly. I've just read this
little space to which I've already added the
yellow in the center. Now I'm going to pick up green, and very carefully
from the edges, I will begin adding in
the green strokes in such a way that the yellow
is still visible in between. Now I'll keep on moving to
different tones of greens, and with every green tone, the strokes will be different and so that the previous
green is still visible. You can see I'm giving
a criss cross effect such that those lines are
crisscrossed to each other. And just going halfway
to the yellow spaces. This way we are going to create the base
layer for the field. Then once this dries out, we'll be adding in the details with some wet on dry technique. This is just the base layer for the field that we'll
be creating in, in a simple manner. We'll be using in
the Naples yellow, the olive green sap green,
and the green color. Now you can go ahead with the placements of the
greens as per your choice, but just make sure you add them in such a way that you have different tonal variations of the greens and yellows visible, creating in the depth
into the field. Now next for the branch detail, we are going to go in
with the CPA color. As I told you, we are going to go in with a very rough shape. As you can see, you can see the rough edges that
I'm trying to mark out. They are not completely in a single straight line or of
the same width or length. Now from this bigger branch, I'm going to pull out
smaller branches or stems to add in the
green leaves detail. For that, I'm just
using the pointed tip of my brush and adding
in these fine details. This way we're first
going to create in the entire branch layout. And then on top of this
we're going to go in with simple method to add
in the leaves quickly. Once this tries out completely, we'll shift on to a, a smaller size brush and add
in the other details still. Then you can see the
dry brush detail that I've added here
on the grass field. We'll be adding in these details
with the green color and some green grass strokes
wet on dry as we discussed. This will be once your
field space dries out, only then we'll be
adding these highlights and little bush detail
at the horizon line. So that will be once
your field dries out for the green
dry brush detail also it's going to be the same. I've picked up the green
color dabbing off the excess. And then you're just going to
simply drag your brush from the edges towards
little center space and create the tri brush
effect in the field, giving in more texture
to your field as well. You will be adding in
these tribrush detail once your field area
is completely dry. Just as we added the
tribrush in the previous, less in with the
paints gray color, it's the same technique, but just the color difference. Now, next to add in the
details of the leaves, we are going to go ahead
with this spoil round brush. I've not dipped the
brush into water, I'm directly picking up very thick consistency
of the paint. I'm just going to blend it
here on the palette so that I do not have any excess
water or pigment on my brush. Now you can see the
bristles of this brush. They're all separated, having
in those pointed edges. Now, holding it perpendicular, I'm just going to create in the base layer for these leaves, which will be quick
and easier to fill up the entire
space quickly. Now where I'm going
to add these, I'm going to make
sure to give in some shape layout as well to these bush spaces that I
want to add in for this, you can use in different
tones of greens. Make sure to dab off
the excess pigment and excess water from your
brush before you begin this. Otherwise, you may get
in simple patch of the color instead of getting
in this dry brush effect. Now on the lighter green, you can see I'm going ahead with some darker green detail as
well for this same technique. In this, say you can use the lighter green
in the base layer, then move on to darker green and then further darker green. And then lastly, on top, when we'll be adding in the
leaf highlights in detail, we'll be using more
different tones to create more
depth into the sky. Now on top of this space, we are going to quickly go ahead and add in little leaf details. So for adding in
the leaf details, you will see I'm just using
a very simple technique. Just using in the
tip of the brush, I'm creating simple leaf
like strokes together, creating a bunch of leaves together onto this dry brush
pattern that we've added, using the spoiled brush. On top of this, you'll go ahead with different
tones of greens and yellow to create detailed
leaf detail on top of it. You do not have to cover up
the entire dry brush space, just a little high leaf details so as to create more depth
and realistic effect. If you have a closer look here, you can see I have added in a little bit of these
leaf details and then some very light
yellow highlight leaves on top of the green leaves
to create the depth. That is how you're
going to paint that. Now lastly, I'm going to mix in white quash along with
my green or yellow to get some lighter
effects as I told you to create in those
bold color effect. Since if I use light water
color on top of dark shades, it will not give in
that opaque look here along with my CPA. And paints gray
color. I'm mixing in a little bit of
the white quash. Now you will see that this
color will look opaque even on this darker brown that we
have on this CPA color. I'm just going to use
the tip of the brush and create a little wooden
like texture for this. It's very important to mix
in white quash or acrylic, only then you will get
in this opaque look. Otherwise, once you add in
the paint and it dries out, it will have a very
dull effect and will not be visible completely. To have this light color being perfectly visible
on this darker tone, it's important to mix in
white quash to create in these highlight wooden
texture detail on the branches of this wooden lock that we're trying to create. I'll quickly show
you a little of the dry brush onto these grass space that we're
going to add in. So you can see using the
greens, just from the edges. I'm dragging my brush so as to create little texture
into the grass field. That is in detail
about the colors and the technique for class
project for day three, we've discussed the colors, the naples yellow, golden, indigo, green, green, olive
green, and the paints gray. We've discussed the
basic sky technique from the previous class project, wet on wet control that we're
going to follow then for the branches and the field
space we've already discussed. And lastly, we'll be
adding in the bird silo. So now I'll see you guys
into the next lesson, creating this beautiful sunset.
9. Day 3 - Bright Yellow Sunset: Now let's begin with our
class project for day three. We've already discussed the
basic colors and techniques. Let's begin with a very basic pencil sketch to mark
the horizon line. The bottom will be the field, the top will be the sky. In the sky, as we discussed, we'll be adding in a lot of branches and the
foliage of the leaves. I'm giving a very rough
outline just for an idea. It's going to be a very
natural looking shape for the main branch
that we'll be adding. Then from this
we'll be having in smaller branches coming out. All of these details
we'll majorly be adding in with
the panes directly. Try having very
minimal pencil sketch so that the charcoal
marks be nowhere visible. So first we'll
begin with the sky. Now, just a quick recap. We are going to use the
Naples yellow color along with the golden color. And then you can
either use Pinscray or Rico or mix both of
them and use in. So I'm going to be using in pinscray along with
a little tint of CPA later on if needed and naples yellow
and the golden color. So I'll go ahead with
a layer of water onto the entire sky space
including the branch space, because those are going
to be of a darker tint. So we can easily you work with darker tints on
the lighter sky shades. Make sure that you have an
even layer of water spread throughout so that
you can work wet on, wet enough to create in all
the details into the sky. You can see I'm running
my brush multiple times so that my paper stays
bed for enough time. I'm using both
sides of my paper, 270 GSM, 100% cotton paper, and ideal to use on both sides. I'm going to squeeze out a little bit of the
white quash and keep it ready because closer to the horizon line along
with the Naples yellow, I'm going to use in
little white to create much lighter tint and creating in that
beautiful sunset effect, picking up the Naples yellow, leaving a little space empty to the horizon line.
I've added the yellow. Now using the white, I will lighten up the
Naples yellow till the horizon line so that we get a little lighter tint
out there as well. You can see with the
help of white quash, how you can create a
simple lighter effect, giving in a gradient and
transition happening. Now picking up the golden color, I will just begin adding in from the top here over
the yellow space. Now the 34 top of the sky is going to be off the paints
gray color later on. Right now just going to add in little white along
with the golden as well to give little
lighter highlights at the top space. Now just to get
the blends right, I'm running with a little
bit of yellow again, so that we have that
soft transition happening in using the
yellow and the white tones. Again, getting a
perfect transition from the lighter tones to the
darker, yellow, orange tones. Now I've picked up a little
bit of the paints gray color, which I will begin
adding at the top. To which I'm just mixing
in a very little tint of the CPR color so that we get
that perfect sunset effect. Now using this color
mix here at the top, you can even use in a
little tint of the Indico to eight if you want a little
bluish effect as well. I'm just adding in a little
tint of the Indico color. You can see that little
bluish effect that comes in. Now, I'm going to
blend it well with the yellowish orange
tint that we've added, using the golden color,
Using a damp brush, I will get the blends between these two colors
happening in smoothly. Now, whenever for
blending, if you need, you can relift the colors
and go ahead and use in the same layer of colors
again so as to get the blend and the transition
happening in smoothly. Now, make sure and be
careful about one thing, that your paper
does not dry out. We still have to work
a lot wet on wet, giving in little details
of clouds into the sky. Your paper has to stay wet for enough time so that you
can work wet on wet. Or else you will
have to go ahead wait for it to dry
completely and very carefully use
the re wetting technique to get in
the details right. Now just very carefully, I've gone ahead
with one more layer of the blue mixed in
with the paint scray. Because you remember watercolors
dry or tone lighter. So make sure that you add
in the tint accordingly, such that after drying it
has that perfect effect. Now, adding little
highlights with this color onto the yellow orange
layers very carefully from the edges so as to create that transition and the
blends happening in smoothly. Now using a smaller size
brush and the golden color, I'm going to begin adding in some cloud strokes at the
bottom space of the sky. For this, make sure that you do not have excess pigment or water onto your brush or else you will not get in
these details right. The colors will begin
to spread completely and they will not retain the
shape in which you add them. Whenever working wet on wet
with some limited strokes, you need to be careful so as to maintain the shape
of the strokes. You need to make sure
that you do not have excess water or
pigment on your brush. Only then you'll be able to
get these details right. You can see I've
added the strokes at the lower part of the
sky very carefully, making sure that the colors stain the strokes that
I add them still having in that soft edge because of the water control that we are
having in now at the top, going ahead with a little bit of the indigo and the
pains gray mix, You can even use
different tones of blue if you wish to to mix in
with the pains gray color. Now these strokes as well, you can see I'm going very lightly and very light strokes. I'm making sure I do not have either excess water or excess
pigment onto my brush. Now, going ahead
with the mix of the golden and the white
as going to add in little strokes
at the top so as to get the transition
happening in smoothly. Now, in between the
lighter strokes, I'm going ahead with
little darker strokes of the golden color directly
with very little white. I'm just going to go ahead blend these in quickly so as to get little transition
and a soft blending happening in between the colors. My paper is still wet. I'm still working wet on wet. You can see all the
soft edges that I'm having in at the top
of the sky as well, just dropping in little lighter
highlights to be visible from between the leaves and the foliage that
we'll be adding in. Most of these will
get covered up with the branches and the leaves
that we'll be adding. Just a little space
that is there, creating in little cloud
effect there as well. So that from behind the leaves also we have beautiful
views coming in. Now lastly, to create the plans, adding in a little more of
the blue and the paints gray at the top and we're
almost through the sky. Just a little more touch up
before we let this to dry completely. That is it. We're almost through our sky. I'm just going to pick up
a little bold orange color and add in little bold
orange highlights as well. After this, we'll wait for
the sky to dry out completely and then paint in the
bottom space, the field. Also, we've already discussed
how we are going to be painting it now. My sky is almost dried
and I'm going to go ahead begin painting
in the field area. For that, I'm going to
go ahead with a layer of water first into the
entire field space. We are going to be using in a little bit of the yellow and the different tones
of greens that we discussed to begin painting
in the field space. A quick recap of the colors. It's going to be naples yellow, or you can use cadmium, lemon yellow, or medium
yellow sap, green, green. And a little tint of the olive
green first in the center. I'm dropping in a little bit of the lemon yellow color to have that bold yellow
effect coming in. You can even use naples yellow or your normal
cadmium yellow color, or any light yellow tone that's available
in your palette. Now I'm going to shift into the sap green color and begin
adding in from the edges. You will notice
that in the center we'll have the yellow highlight. And from the edges
and the bottom space we'll be having in the
green tones coming in. Now after the Sabrine, I'm beginning in
with the green tones and I'll begin adding
in from the edges. You can see I'm just using, in the tip of my brush to begin
adding in the taker tins. I'm adding them in
such a way that the lighter tones of yellow and sabrine are still visible. I'm working wet on wet so as
to get in the soft blend. And in the center you can see I'm maintaining in
the yellow highlight. Now I'll shift into
my smaller size and I'll begin with the
darker green tones. Further, I'm mixing
in a little bit of the green along with
the paints gray color so as to get a darker tint. And I'll begin adding them at the bottom spaces in the similar stroke that
we were adding in, in such a way that
the lighter strokes are still visible at places. So you can see very carefully, I'm just pulling out
these lighter strokes from the edges at
the horizon line. I've given a bold enough line
at the rest of the spaces. Just pulling out the lines from the edges so as to maintain soft blends but still having
that beautiful field effect. Now I'll just mix in little more darker tint and add in further little
darker highlights. You can even use
darker tint colors. You can in the Vandc green color or any darker green that's
available in your palette. Now, wet on wet, I'm dropping in little grass details just
using in this darker tint. You can see I'm using
just the pointed tip edge of my brush so that I get
in these fine details. I still have to water
control so that these shapes are retained in which I'm trying to add them. Still having in
the soft blend at the same time because of
the wetness of the paper. So water control and the pigment control on your
brush while working wet on wet plays a very major role while creating in the blends
and getting in the details. Right, I'm almost done with the base layer
of the field as well. Just last dark highlights
at the bottom right side. Now we'll wait for the
field to dry as well. Until then, once the sky is completely dried at
the top as well, I'll begin adding in
the branches there. Let's wait for the field to dry. Now, my field is completely dried and using in
the darker green, I'm going to work wet
on dry and add in little grass details
into the field space. It's going to be very
fine highlights. I'm using in a very
fine pointed tip brush so that I can get in
these fine details and just adding in little
highlights here and there to create in the
depth into the field. It's not going to be filling
in the entire field space, it's just going to be very minute highlights
here and there into the field to create little depth and highlighted space
in the field as well. I'm using very simple strokes, just in the tip of the brush, creating in some grass strokes
randomly At the top here, I'm just tabbing in
the tip of my brush, creating in a little
grass like structure. You can see I'm running diagonally left to
right, right to left. And just very simple strokes, we'll even be giving
in little dry brush effect that
we discussed in the techniques section to create little texture on
the field as well. At the bottom here,
you can see I'm going ahead with very
light dry brush with this darker green
tint in such a way that we have little texture
on the field as well, creating in more depth and
realistic effect to the field. We're almost ready with
the field as well. Now the details
left are to add in the branches and the foliage
in the top of the sky. Now for the branches
I'm using in this very dark mix of the green brown and
the paints gray color. And I'll begin adding in
the first main branch. I had already shown you a very rough outline of the same while doing in
the pencil sketch. So now you can see I'm
going very randomly, just creating in a
very rough outline of the branch that we're
going to add in mainly. Now from this main branch, I'll keep on pulling out the smaller branches
And even creating in those little tiny turnouts from the branch from
the bigger branch. Now you can see I'm pulling out the smaller branches and again, from those branches,
I'm trying to connect it in further,
more branches. You can see the shapes of the branches are
going very random, very crooked, so as to maintain the natural look
of these branches. I'm using in fine
strokes, thicker strokes. So it's a mix of all
different kind of strokes and further from
these branches as well, you can still pull out some
more thinner branches. Now at the right end here, I'm giving in one
more big branch from which I'm pulling out for
the smaller branches. Now after adding in
all of these branches, you know adding in the foliage
is going to be quite easy. As we've discussed
a quick technique in the technique section alday to create in the filling
space for the foliage. And then just simply using
in the brush to create in some highlighted stroke so as to create in that
highlighted effect. Now I'm pulling out
these branches, almost still the little
center below of the sky. But I'm making sure that when I add the foliage a little off, the gray part of
the sky is still visible to have that
beautiful sunset effect. I'm first going to pull
out all the branches and then we'll quickly go
ahead with the foliage so you can see to given
the natural effect, how I've given in little
intertwined branches as well and created in some thicker
and thinner strokes so as to get in
those details right now, let's quickly begin adding in the first layer
for the foliage. For that, I have picked up the green color using in
this foil round brush. I already discussed
this technique. In case, if you've skipped
the technique section, I would recommend you to just go and see this part so that it will be better and easier for you to create in the
foliage quickly. And then just simply adding
in the highlighting details. I'm even keeping a little
of the yellow color ready for creating in
little lighter highlights. Now, I've just cleaned my brush so that my brush does not have neither excess water or pigment so that I can
get in the dry strokes. Now make sure that your branches
are first almost tried. Otherwise these colors may not overlay well
onto each other. For the yellow highlights, I'm just creating in very
little yellow highlights. And then we'll move
on to the green ones. Just for the first layer, we've added in little
yellow highlights. Now let's wait for this to dry completely and
then move further. Now my branches and the little yellow highlights are
completely dried. I'll again begin with the same spoil brush and now moving ahead
with the green tones. I will quickly begin
adding in the foliage. Now I'm just picking up
the green color in a bowl. Consistency, make
sure you do not have excess water or
pigment or dab your brush. You can see I'm getting
little patches. So I've quickly realized
there is little excess water. I quickly tapped it onto the cloth so that I get
in these dry strokes. Now, when you're
adding in these, make sure you try to
retain the shapes that you want the foliage
to be visible in. You need to make
sure you've given that random look to it so that it has that natural effect. Now, after this
green color as well, we'll be going in with further darker green tones as
well on top of it. And we'll be adding in
some detailed strokes for the leaves that also we've discussed in the
technique section, so that it's easier
for you to understand the process after each step, you can see how quickly you can fill in the foliage,
given the details, and still having that
realistic effect for your trees or branches
in any kind of painting. Also, you can see at the top, I'm making sure that
little gray highlights from behind these branches
is still visible. Now I'm going ahead with a
darker green layer onto these. You can see I'm adding in
the darker green strokes, but in such a way that the lighter greens are
still visible. You can see I'm trying to give out shapes to these foliage. I'm not adding them in
a simple straight line or a simple diagonal line. I'm trying to give them
very random outcomes at spaces somewhere taller, somewhere shorter, so as to
have that natural effect. Now till the layer of foliage
dries on the horizon line. We are going to
quickly go ahead with a little bush detail for that. Again, you're going to
use in different tones of the greens and I'm using a
size two pointed tip brush. And just using in this I'm
going to give in little detail at the top and fill in with the greens at the bottom
till the horizon line. So I'm just dabbing the tip
of my brush creating in random bush spaces and going
to keep on filling these. Now for the greens as well, you can see I'm going ahead
with different tones of the green so as to have that
natural effect in front. I'm adding in some lighter
green, some darker greens. You can even go ahead
with some overlay. That is, add in a layer of
the lighter green bushes, then wait for it to dry. Then add in lit, overlapping
darker green tones as well, onto the entire space. I'm adding in these darker, the lighter green strokes with the olive green color
only on the left edge. You can see I've taken the
foliage a little taller. That's the bush area again, going ahead with
different green, filling it till
the horizon line. Now as I told you,
I'm overlaying the lighter green strokes with some darker green highlights. You can see I'm just using darker green on top of the
lighter green to create different total variations
of the greens to show the effect of the
light falling onto this bush area as
well creating in the lighter and darker
shade difference into the bush spaces. Now using in the tones of greens that we've
been using so far, I'm going to go ahead add in little detail leaves into
the foliage at the top. Again, I'm using the size two round brush and just using
in the tip of the brush, I'm going to add in
little leaf strokes randomly onto the foliage
that we've added. This will make
your painting look more realistic, more detail. Now a major space is
already covered up with the simple brush
technique that we use for filling in the foliage using
in the dry brush stroke. Now just adding in little details will
elevate your painting, as well as give it a
little more dimension. And give it a little
more in depth look. Just using the tip. You can see I'm adding in simple strokes to create
in little leaf structures closer to each of the
foliage that I've added. I'm going ahead with
little detail leaves, especially on the edges. You can skip adding these detail leaves
in each of the space. You can just add
them a little into random spaces just at the bottom space to create
the realistic effect there. Or just like me, you can
choose to add them to each of the foliage little by little
to have that detailed look. Now into this as well, you can see I'm going with
different tones of the greens, making sure that we have different variations
of the greens visible, trying to show the effect of the sunlight falling
onto these as well. After this, we'll be lastly
adding in little righter yellow or lighter green
highlights on top of these leaves so as to have some very different leaf effect. And then we'll lastly be adding in the birds
into the sky. And we'll be ready
with our painting for day three as well. On the left edge, you
can see I've taken the branches so close to the
horizon line in the center, I've kept it towards
the center line, almost towards the right. Again, only at the
rightmost edge. I've taken it till
the bottom side. In that way, our sky
is still visible and we still have the foliage
effect as well coming in. We'll even be adding in
little wooden details onto the branches that also we've discussed in the techniques
section already. Now mixing in a little of the
yellow and the white quash, I'll quickly add in little
yellow highlighted leaves so as to have little
lighter leaf effect. It's going to be very, very limited here and there. You just need to add them as the highlighted leaf part so as to show some lighter
leaf effect. Now lastly, let's quickly add in the highlights to the branches and then move on to the birds. So I've picked up a
little of the brown, adding in the white
quash to eight, creating in the
lighter brown tone. You can even add in a little
tint of the paints you need. And just going to
go ahead adding little wooden textures
onto the branches. This also we've already discussed in the
technique section, creating in these
highlighted spots. It's very important
to use in white quash for this so that these
lighter color highlights are visible onto the
darker stroke of the branches that we've added using in the
paints gray color. If you will use
white water color, they may not remain
opaque after drying out. So it's very important
that you use in white quash so that these
colors remain opaque. And given that
highlighted effect to each of the branches, you can see I'm adding a very thin stroke onto the bottom side edge
so as to create that highlighted
effect and show in the light and shadow effect falling in onto the main branch. I'm going to go ahead and
add in little strokes. You can even pull out
some fine strokes in between using this color
to show just some branches without the foliage onto the main branch. Just adding in some
smaller strokes as well to create little
wooden texture. We are almost through
this painting now. Just the last part to add in a few birds and then peel off
the masking tape together. Here's a closer view
of the branches, the details, the
highlights that we've added onto the branch
and the foliages. I'm just having it quickly with my fingertips so that it has
a beautiful blended effect. These are simple tricks
that you can use to create in those beautiful
depths into your painting. Now lastly using in
the paints gray color, let's quickly add in a few birds into the bottom
space of the sky. It's going to be the same
siloatee of the birds that we've been adding so far into
our previous two painting. Some very tiny dot
dot to create some of bird effects and
some closer bird look closer to the horizon line. Very simple silohetes. That is it. We are ready
with our painting. Let's peel off the masking tape. Make sure that your
edges are completely dried before you begin
peeling off the masking tape. And always peel off the
masking tape against your papers so that you do not lift up the colors or
tear off your paper. Here's our final painting. Let's give you a closer look first and then show
you the overall view. Here's the closer look
at the field with all the wet on dry
brush and dry details, the birds, the sky. Lastly, the foliage effect at the top here and the branch
details that we've added. I hope you guys enjoyed painting this beautiful painting
with me for day three. I will see you guys soon into
the day four class project. Thank you so much
for joining me into this class and painting
along with me. Make sure to drop me a review if you like this class
for whatsoever reason.
10. Day 4 - Warm Sunset - Techniques: Hello everyone. Welcome back to the class project
for day four. Today we are going to paint this beautiful lighthouse
sunset painting. Let's have a look
at the colors that we'll be needing for
this class project. Firstly, in the sky, you
can see we are going to maintain a glowing space along
with the tones of yellow, orange browns and a little
tint of the paints gray color. First, we'll begin with the lighter tones
that we'll be using. It's going to be the
Naples yellow color. Again, you can again create
the Naples yellow by creating a pastel yellow with
any light yellow tone that you have and
mixing in white. Next, you will need a
yellowish orange color. I'm using the golden
color from this set. Next, you would be
needing in the CPA color. The CPA color is a
dark brown tint. I'm even going to use in a
little of the lighter brown. The CPA brown is going to
be majorly on the edges. I'm going to use the burn sienna for giving in some
lighter brown details while blending in
and creating in the different shades
into the sky. Here you can see when the orange and the burned sienna
will mix in together, you'll get a medium
tone shade of the brown automatically
while blending in. Next I'm going to be kneading in a little bit of the
pain scray color. I'll be using the pain scray in a very light
consistency to add in these little cloud
highlights into the sky. For the water area
of this painting, I'm going to mix in the indigo along with the pain scray color. And then later on
we'll be giving in the dry brush effect
using in the white quash, you can see the dry
brush stroke to create the crashing wave
effect that we're going to show across the rock area. Now for the rock, you can see the base layer is again
going to be tones of brown. And then we're going to
add in dry brush using in a very tark consistency of the Spa and the
paints gray color. We're going to use
the CPR color in a bold consistency for
this bottom rock space. We're going to add in little
green highlights as well. For that you would need any medium yellow or
yellow occur color along with some lighter tones of the greens and some brown tones. After everything dries
out even onto that rock, we'll be adding in
little dry brush strokes to create texture of the rock. I'm going to use the may
green and the saprine color. And for the yellow you can use yellow occur or light yellow. And then we'll be adding some dry leaves detail using in the white quash to
get in that opaque layer. And lastly, again, using the pole consistency of
the paints gray color. You can see the tri bra strokes
that we'll be adding onto the mountains as well as
onto the rock space here. And onto the rock space
at the bottom as well. You'll be using the CPA
and the paints gray color. Now, for the small house that we'll be having in front
of the light house, the roof is going to be
of a bold red color. You can use carmine red
or any bowl shade of red that's available in your
palette for the lighthouse. You can see it's going to be the yellow and the paints
gray color to show the effect of the sky colors falling onto the
white lighthouse. Then the fence detail
I'll be using in the white hell pen
so that we can get in these fine
details easily. Lastly, for the birds, we'll be adding in
using the pains, gray color and white quash for adding in the
crashing wave effect. That's about the colors. Now coming to the techniques, we've already discussed
this glowing technique in the previous class
projects as well. And even in the previous
class for the field where we had maintained the glowing
yellow space, same way. Here we're going to maintain a very lightish yellow space. And we'll be working wet
on wet with a lot of water control creating in
the depth into the sky. The center is going to be a glowing sky and moving
towards the edges, we are going to keep
darkening up the color. So most important thing would be the water control while
working wet on wet. Next, I'm going to just quickly show you the
dry brush motion. This time we're going to add the dry brush technique
majorly onto the mountains. For that, we are going to go
with some simple strokes. This time a simple
vertical strokes that we are going
to be using in. So we're just going to drag
our brush from top to bottom, creating in the texture
onto the mountains. That is it for all the basic
techniques for this class. We've maturely
discussed the rest of the techniques in the
previous class projects. Just the colors and
the Dr Bra strokes. Now I'll see you guys
into the next lesson, painting this beautiful
painting together.
11. Day 4 - Warm Sunset: Now let's begin with
the pencil sketch. First, I'm going to
mark the horizon line, which you can see is much
below the center space, towards the right side. I'm going to begin marking
out the mountain range. This is going to be
the first bottom one, which is going to be of
the green and brown tones. And then in the
background of it, we're going to have in one more huge rock which
is going to be of the brown and the bra strokes that we've already seen
in the technique section. On top of this we are going
to place the lighthouse, the small house, and
the fence detail. I'll quickly just correct
the horizon line as well and the entire area
is going to be the sky. Now, with the help of a scale, I'm quickly going to
mark the lighthouse. This time we are going to use
the masking tape to cover up this lighthouse so that we do not p in the colors here. The rest of the details at
the top of the lighthouse will directly be adding in
with the black pen later on. Now quickly adding in a small house detail in
front of the lighthouse. Erase off all the extra
lines that's coming in because of the lighthouse that
we've already marked out. You can go ahead with any
silo het of your choice. You can even go ahead with two to three of these
if you wish to. The fence detail we'll be
adding in with the white pen. As we discussed in the
technique section, I'm almost through
the pencil sketch. I've just erased off
all the excess lines. Now in front again,
I've just added a small mini house, a detail. And that is it for
a pencil sketch. Now, we'll first begin using in the masking tape and mask
the lighthouse space. I'm using this half inch or
a 1 centimeter masking tape. I'm going to lay it down here. And a very small cutter, I'm going to cut the
extra outline part. But when you begin cutting in, you have to go in
very carefully. Because if you will add in, a lot of it may tear off the
underneath paper as well. So you need to go very light handedly to cut it out in shape, or you can first tape this
down on another surface, cut it into shape, and
then paste it here. Now at the bottom,
I'm just going to paste the extra that I've cut out so that I can cover up that little part
of the lighthouse again. Now for the house, we do not
need any masking tape there. The colors will be
white later on, so we'll keep that white. Now. Let's begin with the sky. I'm going to go ahead with a layer of water
onto the entire sky. Make sure that you
have an even layer of water throughout now. If the water runs onto the masking tape as well,
it's perfectly okay. But make sure that
your masking tape near the lighthouse
is perfectly taped down so that there is no way of water seeking through
the masking tape edges. Now make sure you have
an even layer of water and do not have excess water
collected on the edges. Rania brush multiple
times so that the layer of water
is even throughout A quick recap of the colors, I'm going to use white, yellow browns into the sky. And then we'll use in a
little bit of the paints, cray mixed in with indigo or indthrine blue as per the need. First, we'll begin with
the naples yellow. I'm just squeezing out a
little bit of the Naples yellow along with white
quash for this if you want, you can even use white
water color as you just need to dilute the color
to a light consistency. So I'm beginning in
with that glowing space that we're going
to maintain first. So just dropping in the yellow first into
the entire space, and you can see for
the glowing area, I've left in enough space into the entire
rest of the space. You can see I've added
a light layer of the Naples yellow color now, beginning with a white
quash in that center space. I'm just going to blend in a
little of the yellow there. And make sure that now, while adding in the
layer of colors, bet on bet, I maintain that glowing space by not
adding in any colors there. And whatever colors I add
closer to that space, I will try and maintain in
the consistency of the panes. Now, I've just added in a little bit of the
golden to the Naples yellow and beginning to add in little darker strokes
from the edges. So we've already discussed from the center
towards the edges. We are going to go
one color at a time. Now picking up a little
bit of the rociena color. Now in case if you do
not have a rociena, you can directly move on to the burn sienna color or you can even use the
yellow occur color. I guess I may have
missed to share the yellow occur or
this shade into the. Techniques section.
So if you wish to, you can directly move on
to the burnt sienna color. Now with every color
layer that I'm adding, you will notice one, I have the water control. The colors are staying in the space in which
I'm adding them. The strokes in which
I'm adding them, they are not moving
in as well as I'm trying to make sure that as
we're moving from the center, we have all the colors
visible in the center that we've added earlier
in the house space. You can see I've not added
the Rosana color because I just wanted to be in
that light yellow tone. And the roof, we'll be adding in with the red color later on. Now next, moving on to the burn Sienna
color. Now, same way. Burn Sienna will be
much lesser than the raw sienna that we've
added in to the burn Sienna. I've just added a little hint of the CPA color to
get the taker tint. Now you will notice that with every taker shape
that we move onto, the color will be
a lesser space as compared to the previous
color that we've added. So now you can see when we
are adding in the browns, we still have the
lighter yellow, the golden orange,
the raw sienna, all colors visible underneath. Because we are not adding the browns into
all of the spaces, we are adding it in such
a way that each color is still visible with
every color layer. You can see the water
control that is there. Only then it retains the shape and the space
in which you add them. If you do not have
the water control, the colors will spread completely and cover
up the entire space, leaving you with one flat color. Instead of getting
in all the colors visible into your sky. Now at the bottom space, you can see I've left
in a lot of spaces for the paints gray color
that we'll be adding in now for this glowing space, so as to have that blend
happening smoothly. I've just added little yellow
and white effect again, so that it blends with
all the colors across. That's the browns
that we've added. Now, lightly, I'm
just pulling out some brown strokes
overlaying onto the spaces. Now on the edges, going
ahead with the CPR tone, giving in the darker highlights
majorly onto the edges. Then we'll shift on to the
pinscrey color to add in little highlights with the
Pinscrey at the bottom space. When you add this highlight
over the glowing space, be careful that you do
not have excess water or pigment and just use
the tip of the brush. Now this darker layer, you can see it's much less than the burn siena
layer that we added. Now you also have the
burn sienna color visible along with this. In order to get in these
different color tones visible into your entire sky, it's important to
have water control. Darker shade would be less as compared to the
previous tone. Now mixing in the B and the blue to get in a
little bluish gray color. You can alternatively
mix in paints gray along with your blue to
get in the similar tone. Since I already had a
little brown on my palette, I just mixed it with a little
tint of the blue tone. Now very carefully, just trying in little highlights
of these masually. At the bottom area of the sky, you can see how beautiful
the shades of warmth, yellow and browns are coming in, creating in the perfect
sunset be giving in these darker tones of blue in the perfect
night view setting. In that is the reason
we've mixed in the brown and the blue to get a little pain screen effect. Now I'm just going to give in little darker
highlights with the browns at the bottom space because you can see
after the blue, the darker browns
are hardly visible. Just going to add in a
little highlight again. We are done with our sky. Now until our sky dries out, I'm going to go ahead and paint in this bottom
most rock here because that is not
connected to the sky and the colors will not
bleed into the sky. I'm beginning in with
the may green color. It's a very light green. As you can see, you can go
with any shades of green, yellow and browns for
these rock spaces. There's no specific color or
pattern to follow in here. I'm going ahead with a layer of the lighter green first
onto the entire space. Now on top of it, while
this is still wet, I'm going to go ahead with the darker tone details as well. This we are going wet
on dry because it's quite a small space
and we just need to add in quick
base layer for now. Now going ahead with a little
of the darker green tint and just adding it at
the bottom spaces, majorly at the top line, we are going to maintain
the lighter green and we'll add in
little yellow effect. Now you can see I'm
adding these greens in a very rough pattern so as to have that natural
effect coming in. We are working wet on wet. Again, it's very important to
have in that water control. Now pinning in with
the brown tones. Now again, I'll
add the browns in such a way that the
greens are still visible. Again, you can see here also, I'm just going ahead dropping in the panes by just
dabbing my brush. There's no specific blending
or spacing that you need. Everything will
look natural here, because as you know, rocks and mountains do not have a specific pattern
to be followed. Just make sure that
the greens are visible and especially the light
green at the top is visible. We'll still be
adding little wet on dry details later on now using little naples
yellow to reflect the light of the sky
falling onto the rock. Here, just a little bit of
the Naples yellow and I will quickly blend it
with the help of a dam brush with the
greens and the browns. We'll be adding in
a lot of wet on dry textures onto
this dry brush and some dabbing leaf
or bush details on top of it once these
dry out completely. Now I'm just going
to go ahead add in a little more detail at the
bottom of this rock here. And then we'll wait for
all of these to dry, and only then we can move on
to the rest of the details. Otherwise, the colors from one area will begin to
bleed into the other area. Now my sky is completely
dried and we are going to go ahead and
paint in the C space. First, I'm mixing
in the endithrine blue along with a little tint
of the paints gray color. And along with the browns
that's on my palette, that I get a grayish blue tint. Again, if you do not have
the endithrine blue, you can simply use indigo along with a little
tint of paints gray. Or the indigo simply in a
medium tone consistency. To get a similar looking tone, you need not have the
exact same shade as mine. You can just create a bluish
black or grayish tone. A bluish gray tone And adding as the base
layer for the sea, we'll be adding in the
crashing wave effect with the white quash later on along the rock side
for the sea area. I'm just dropping in
some darker tines. Wet on, wet into
the sea as well. Because remember, these
tones will dry a tone lighter and I want to have
a bold effect into the sea. Now, using a small size brush, I'm just adding in
little wave details. Wet on wet only so that
we have that soft wave look very much because you
can see the C area is. Just try keeping in
minimum details here because as soon as you'll be
adding in the dry strokes, you'll get a lot
of detail and look into the C area automatically. So I've just added some
wet on wet, dry waves. And now I'm just going to
lift up little tints so that we have that little
lighter tone effect on the left edges. Now next let's begin to peel off this area of lighthouse so that we can give
in the details here. Be very careful, make sure
your sky is completely dried. Here you can see
we've maintained the lighthouse completely
in the white look. Now if you want, you can let the White House be
completely white. But what I'm going to do
is I'm going to give it the effect of the sky colors reflecting onto the lighthouse. I'm just going to add in
little yellow highlight along with a little tint
of the brown so as to show that the color effect of the sky is reflecting
onto the lighthouse as well giving in these
stones falling onto the lighthouse
for the house area, we'll leave the
bottom space into that yellowish tint
and for the roof, we'll be adding in the red tone later on once the lighthouse
is completely dried. So I've given a light
layer of the yellow color. Now I'm just going to pick up little hints of the
blue along with the mix of brown and add
it a little onto the lighthouse so as to reflect. Because you can see
closer to the lighthouse, the sky has these blue tints. That is the reason just
adding in a little. Now, again, adding in
little yellow highlights onto the edges so
that we have both the yellow and the bluish gray tones visible reflecting
onto the lighthouse. Once this dries out, we'll give a border
to the lighthouse so that it has that
bold outline effect. You can even given little brown
highlights right now onto the outer side so
that it will have a little soft blended
look on the edges. Very fine detail. You need to make sure
that you do not have excess water or pigment or else it will
spread completely. I'm giving a very
fine outline so that it stands out distinctively
into the sky. I'm quickly lifting up the extra browns
that's spreading into the inside space now just adding in more yellow highlights
Again, onto the blue. I've mixed in a little
tint of white, gosh, along with the yellow
so that it lays over perfectly over the bluish gray
tone that we've added in. Now, just going ahead and we'll wait for this to
dry and then add in the rest of the details
on the lighthouse and into the house spaces that
we've left empty for now. Until then, let's go ahead paint in the second rock space. My C is completely dry, my first rock space
is completely dry. That is the reason I can go ahead onto the
second rock space. Here, I'm using a mix of the burnt sienna along
with the CPA color. You can see a beautiful
bold brown tone here. I'm adding it as the base
layer onto the edge. You can see I'm giving
a very rough shape even at the top and at
the bottom as well, so as to get in
that natural effect of the rock having
in that rough edges. If your lighthouse is still wet, be a little careful to
add in the paint there, otherwise you can see
it may spread a bit. You need to have control by
adding in this or wait for your lighthouse
to dry completely and then add in the detail. I'm quickly lifting
up the color that's spreading into the lighthouse
using the dam brush. So be a little careful
now until this is trying. What we'll quickly
do is go ahead with the tribrush detail
onto the first row. For that I'm going to
use in the brown color. We've already discussed
the tri brush technique. And this time the strokes
that we are going to follow, they are going to be
from top to bottom, creating in the texture onto the rock closer to the light
green and the yellow space. I'm not going to add in
these brown texture. You can see that space
I've left empty without the dry brush in the rest of the space is just going to
add in little dry brush. And then later on
with the greens, we'll add in little
effect as well, giving in some bush details. Be very careful while going ahead with the dry
brush technique. You need to make sure
your brush does not have excess pigment,
excess water. You need to make sure your brush drags through easily through
the paper so that you get in these dry brush pattern creating in that texture
effect onto the rocks, leaving the yellow and
the light green space. You can see I've added
this brown texture almost onto the entire space, but you can still see the greens visible
on the bottom side. Because of the dry brush
technique that we've used now using in a little
of the naples yellow, I'm just going to dap
the tip of my brush to create grass like
texture of yellow color. Similarly, we'll be creating some with different
tones of greens as well. To create that little bush or dried grass grass effect onto these or rock spaces
that we've created. You can even consider them as the algae formed
onto these rocks. Same way going ahead
with the lighter green. Also just using the
tip of my brush, tapping in some onto
the lighter spaces. In the same way using
this lighter green, I'm dabbing some bush effect at the bottom spaces as well. You can use different tones
of greens here as well. You need not stick
to the similar green or just one shade of green. You can give it as much
natural effect as possible. But make sure that you
have enough water control. You're using the colors in a bold consistency so that they give you an opaque
effect after drying, because the underneath
layer is a brown tone, which is a darker tint already. Now for the house area, I'm going ahead with
a bold red tone. This is the ruby color. It is a bold red color. From this palette, I'm
just going to paint the roof of the house
with this red tone. And the roof of
the smaller house also that we've added that also, I'm going to paint
it with a red color. Now that smaller
roof pencil sketch may not be visible to you now, but it's visible to me because it's very light
tone visible here. Now into the house.
I'm just giving in a small layer of white
quash wherever I feel that the darker
brown tones have covered the house space so
that we get that bold, yellowish, white effect
into the rest of the house. What you could do is before
red, if you wish to, you can just give
in that layer of white now until the layer
of the roof dries out. I'll quickly go ahead add
in the dry brush detail, crashing wave effect onto
the water space here. From the left towards
the right side, we're just going to
pull out some dry brush stroke across the mountain
into the water space, creating in the
dry brush texture. You can even add in some fine thin lines in between to give in
little more detail. You can see, again,
I'm just dragging my from the edge of
the rock towards the left side that's
into the water space, creating in that crashing
wave effect into the sea. Again, here you need
to make sure that your white quash does
not have excess water or excess pigment or else you will not be able to achieve
in these details and you may just get in patches of the white color instead of getting in this
crashing wave effect. Now using the tip of the brush, just adding little
white wave effect into the rest of the
sea space as well. Now similarly using a dark tint of the blue or the
paints gray color, I'm going to add in
dry brush effect into the rest of the sea, towards the left edge. Again, for the dry brush, make sure after
lifting up the color, you dab off the excess pigment
and water so that you just get in the simple brush strokes
creating in the texture. Now make sure you
do not cover up the entire sea with this dry
brush off the darker tint. Otherwise, the white strokes will get covered up completely. Now I will just go ahead with a little more strokes of these onto the left edge here so that we have
that bold white effect. After this, we'll be left to
add in the dry brush onto the brown rock space
that we've added and some details into the
lighthouse and the sky, and then finally, the
birds into the sky. And we'll be ready with
our class project, which is the final class project
for this four day series using a bold black tone. I'm adding in some rock effect as well into the water space. Very simple rock
details here and there. Now lastly using this bold
brown and pain scray mix, I'm going to add in the try
brush onto this rock as well. Again, it's from top to
bottom as you can see creating in the flow
onto the rock space. You can see the shapes of the rock is very
rough and random and it is not a typical
straight or a diagonal outline. After this, I'm going to use in bold pain scray color as well so as to give in
one more layer of the tri brush detail to create more color variations
onto this rock space. You're at this spot in
the pain scray color. I'm just giving in a
little bush detail onto the rock as well, trying to show in some
algae onto that as well. Now at the top,
again going to use the same pain scray
color and giving a little more dry brush onto the darker brown dry brush
that we've already added. You can see some random strokes
that I'm adding in now. You can see just with
such simple techniques, you can create such
realistic textures onto rocks and mountains, giving it a realistic effect. Now let's add the details
into the house here. So I'm just going
ahead adding in little details you can go and
create in your own details. It's no specific pattern or specific details that you
need to follow in after this. We are just left to add in some details into
the lighthouse. I'm going to give
a fine outline to the lighthouse so that it has that bold and
distinguished effect. And then we'll be adding
in the birds into the sky. Using the fine tip pen. I'm just adding in
some more details. And this is a 0.1 nip pen. It has a very fine tip
and it will help me adding in very fine details
into the lighthouse as well. Again, for the
lighthouse as well, you can either follow
along with the details at the top or you can create
in your own details in your own siluhate or your own imagination details that you want to add
in at the top space. Be careful about laying your hands onto the wet
panes of the rocks, otherwise it may be difficult to correct those details there. Very fine details
that I've added here, you can see we are
almost through it. Just two more windows that we'll be adding onto
the lighthouse. Using this fine nip
pen only I have given in a very fine outline as
well to the lighthouse. You can use in a very
fine liner brush along with a pinscrey color to give in such a fine outline. But using a pen makes
it much more easier. We are still left to add in the fence detail as well
using in the white shell pen, which we'll add in quickly once the brown rock
is completely dried. So to this small
house here as well, I've just given in
a white layer at the bottom so that it's
visible distinguishedly. Earlier it was a very
yellowish brown tone because of which it was
not visible that clearly. Now using in the
white shell pen, I'm going to quickly add in that little detail here
which is going to be a small fence detail
you can again use in your fine liner
brush and your white quash. But again, using
this pen makes it much more easier to
give in fine details. I'm just laying the fence again. There's no specific pattern, or a layout, or a silhouette
that you need to follow. You can have your own
layout for these as well. It's more about understanding the technique and the pattern to follow rather than just going ahead and copying
the same thing. It's about understanding
the techniques and then understanding how to
work with water colors. Now lastly ing in the
paints gray color, I'm adding in some bird siloetes into the sky to
complete the painting. Go ahead very carefully
so that you do not lay too much thicker patches because you need
very fine details. For the birds, it's again the simple siloetes
that we are adding which we've been following since the class project of day one, towards the top of the sky. It's just mini details
trying to show in far off bird details closer
to the horizon line. We have in the bigger
and bold bird effect trying to show in
closer to our view. That is it. We are ready with our class project for day four. Another puriful sunset
with that glowing sky at the top with rot of details
and the lighthouse. Now let's remove in
the masking tape and then see our final painting. Be very careful by peeling off the masking tape so that you
do not tear off the edges. And especially if you've painted on the other side as well, then you do not tear off
the other painting already. Be careful and remove
it against the paper. I hope you guys enjoy painting this beautiful painting with me today for day four
of this class. Thank you so much to
each one of you for joining me into this class
and painting along with me.
12. Thank you for Joining Me: Thank you so much to each one
of you for joining me into this class and painting along
with me for the four days. Two beautiful sunrise along with the yellow and blue tones. And two beautiful sunset in warm tones of yellow and browns. If you like this class
for whatsoever reason, make sure to drop
me a review so that it can help me reach
maximum students. If you've painted along with me, I would love to see
your class projects into the projects section. It would be great to share your work with others
as well as me, and learn from each other. I would see you guys soon into
my next skillshare class. Till then, happy painting.
 Umashree Taparia, Artist, Art Instructor, Entrepreneur