Transcripts
1. Welcome To The Class: They can't be anything
more beautiful than the beautiful dramatic skies
beat morning or the evening, or even the delayed. These beautiful
cotton candy clouds, the rainbow, the sun and
the moon, and the stars. They look so beautiful and so gorgeous that anybody
would want to paint them. You find it overwhelming. Doing buddy, we're not aiming
for a realistic skies. In this class. We are going to simplify all
the shapes and structures. And then with that
simplified approach, we will be painting for
beautiful and cute. Many get inverses of these
beautiful sky escapes. Look at that. This is what we are going to
paint in this class. Hello, and welcome back
to the third episode of many Canvas ad for
non-artists and beginners. Today we're going to paint
beautiful skyscraper. So let's get started.
2. Materials We Need: Welcome back. I'm so glad that
you're finally here. Let's quickly see what all
we need for this class. The materials are pretty simple. They are just like the
previous two classes. So we need mini Canvas boots, four of them for,
for class projects. You can also use many
canvas sheets or even mixed media paper or
take watercolor paper. Then we will need some brushes. So small flat brush and
a small round brush and a smaller brush like a fine detailing brush
or any brush you have. Alright, you can also use
acrylic markers for this class. That's totally up to you, but I will be using these liquid acrylic colors because we are creating skies. So we will be using
some pinks and blues. We don't have ping, so we will make things with
the help of red and white, or we will be making voided by mixing red,
blue, and white. These are all the
colors in the set. Of course we're not going
to use all of them. But yeah, these canvases are
going to be very colorful. So these four colors, or even neon colors. So let's see if we
can use these also. But you can use the colors
of your choice totally. It's up to you because we are not creating
realistic skies. Apart from these colors, I will also be using watered
down black acrylic color. It works just like acrylic ink. And if you happen to have acrylic ink or black
acrylic marker, you can use that also. You can see it's
very, very watery, but it's very vibrant and
works just like acrylic ink. It's easy to outline the artworks with this
watered-down paint. Apart from that, we will need some water to wash
off the brushes. Rough rack of cloth
like this one. Mixing palette. I'm using this ceramic plate
to mix my colors. And then for the practice, we will need a sketchbook, any kind of sketch book, a pencil and eraser. And with that, we will be
making our thumbnails. And that is all. That is all what we
need for this class. So just grab your art supplies and meet me in the next lesson, where we will do the thumbnails.
3. Thumbnails: Welcome to this lesson. In this lesson
we're going to make some companies which will help us simplify the subject, the complex subject,
and finalize the compensation for
our final project. So let us quickly make a box, because our canvases
are very small, so we are just making a small box representing
the Canvas. And here is the reference for the sun peeking
through the clouds. This is going to be
our first project. So simplify the shape, a circle for the sun and
some slanting lines. Just like that, just the way we used to make it
when we look Gibbs. So just simplify it. And then we will make
bubbles for the Cloud. This is how we are
going to paint all for class projects in a very childlike,
simplified manner. And yet you will see
that the canvas is, will look very pretty and cute. And here, I also want
to tell you that later on by the last episode
of the series, the fifth episode of the series, we will make realistic
sky scape also. And I assure you if
you practice with me, if you take all the
classes of the series, you will be able to make. So just stay tuned for that. This is the third episode. Food one will come. And in the fifth one, we're actually going to recreate the realistic skyscraper. Here. I'm going to add
some more clouds. And as you see, I removed
the overlapping lines. Once again, I'm going to erase
the overlapping lines like that so that we have one object, partly covering the other. We don't get confused
with so many lines. So here is the final position. Now I'm adding some features to the Sun that it's up to you. If you don't want the features, you can leave it like this. But I'd really like
it. The features. So I'm adding. Now for sun, you can, you can simplify
the sun in many ways. Here's another example
of that is have a look. So here I made the sun as a semicircle and I'm making
dotted lines for the race, but I don't like
this composition. Now. I like the first one. It's up to you. You can
choose any of these two. Now, it's time to finalize
our second composition, which is going to have
a moon and some clouds. So very simple. We are going to make bubbles for the clouds and a crescent
shape for the moon. And I'm also going to add
features in the moon. So just keep watching
how we do that. And then just a simple peg on the inner side of the crescent and it becomes
the nose of the Moon. But it totally up to you. If you want to make
the moon like this, or you want to make
just a simple grass and it's totally
up to you. Here. I am making the
third composition. Is this going to be the
rainbow Skype. Same way. Bubbles for the Cloud
and semi circular bands for the rainbow. Very, very simplified. Cheers. Here. I'm going to add a simple moon. They Sam, I'm not adding
any features to it because moon is not the highlight
of this composition. Rainbow is, I don't want to take away
the focus from that. And here I add
some simple stars. You can even add
some simple circles. Tiny circles are tiny
dots for the stars. It's totally up to you. Adding some styles
to this one also. And there we have it. Three compositions are ready. The last one is going
to be a mountain scape. And again, we will
simplify all the shapes. Triangular shape
for the mountains. Just like that, Very simple. And by rolling river like so. Make sure the lines
are parallel. It mostly roughly
parallel like that. And we will make
a sun in the sky. So again, that is one
way of making the sun like this one, right? But I don't like it here. So I will make semicircular sun peeking through the
mountains like that. It's even more simpler. So yeah, this is what I like. But you are free to experiment
and see what you like. Alright, so with this, our thumbnails are ready. Your class project
for this lesson is to ready your companies and
finalize your composition. Click a picture of the theme
and share it in the gallery. In the next lesson,
we will be painting our very first canvas.
See you there.
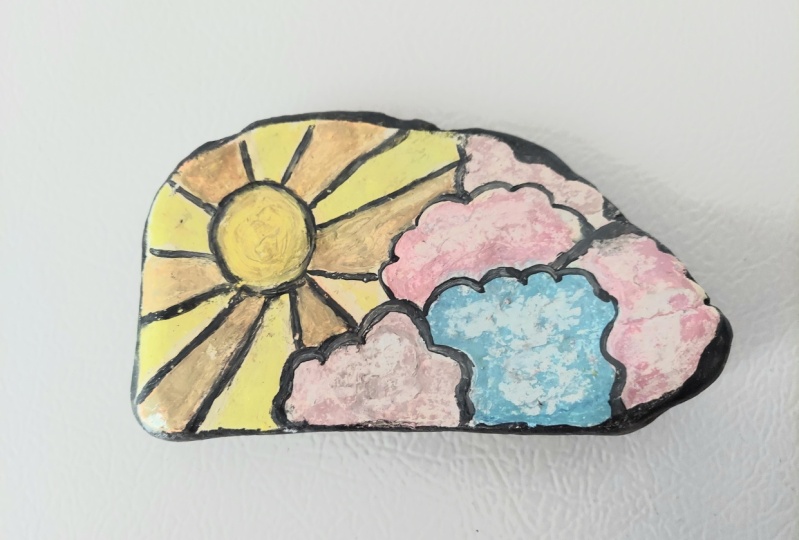
4. Project Sunny Sky: So let's begin our very
first class project. As the name suggests, we are going to make the sun painting that we
finalized in the thumbnail. So here's the sketch. I have transferred all the
sketches to my Canvas boots. You can do so by
using transfer paper or you can copy it
from your companies. Let's begin. A pro tip here is to keep your pencil lines
lighter and incase. You have made it God, please don't use eraser on the canvas because
that will completely ruin the whiteness of the
canvas and we don't want that. Now, let's see the colors
we're going to use. We will use yellow and
orange father-son obviously. And for this guy,
we will make light blue by using dark blue and white and a little bit of pink to make purple color if we want. And black will be
used for details. Now, I'm dipping my brush in
the water and drying it on the rag because we need to use a damp brush but not
wet brush on the canvas. Keeping it down makes it easy
to move it on the canvas. And just like any coloring book, I'm coloring the design we
have sketched on the canvas. I started with the
sun, yellow color. So here we go. Just go on coloring like we
used to do when we were kids. Here, I'm coloring the
alternate rays of sun, red, yellow, and the rest of the race will be
colored with orange. Now, let's color the rest
of the raised it orange. There's no color mixing
in this project as yet. So I'm using the colors
directly from the bottle. Or if you're using from
the tube, you can do that. And as I had said in
the materials lesson, that you can even use acrylic
markers for this class. If you're using acrylic markers, that is also fine. They're all part of
the sun is colored. Now, make sure you color the
edges of the canvas. Also. Another very important
tip here is to close your color bottles as soon
as you're done using them. And now we move on
to color mixing. I'm digging blue and paint
in small quantities. It's actually brilliant
purple, not pink. And lots of white. And little by little, I will add the
color to the white. Just didnt the white
with bad color. That way we will get
past few colors. As you see, I'm mixing very
little color in white. So this is how we created
light powder blue. And I'm adding a little bit of brilliant purple in it to give it a little
well-lit field. And these are the
colors of the Cloud. With this, we will
paint the clouds now. Now I will wash
my brush and I'll make some even lighter blue, lighter than the
one I used earlier. And with that, I will paint
the other side of clouds. Now, let's use some
Bessel think we have made and that the first layer
of this canvas is ready. Let's give cute blushes
to the sun right now. And we will wait for it to dry. Once it's dried completely, then we will add the
details with black. Then your project for
this lesson is you finish your first layer of the first Canvas and share the picture of it in
the project gallery. In the next lesson,
we will start working on the second canvas. See you there.
5. Project Moon Struck: Welcome back. Let's proceed with our second class project. And as the name suggests, this is going to be acute
and beautiful night sky. And here are all the
colors we're going to use. We're not using green. I kept it because I thought
I will be mixing my deal, but then I'm going to use
the premixed still only. So no green. We will be using yellow and orange to mix the
color for the moon. So that's that. Now, let us start with a clean, damp brush as usual. Starting with the
darkest part of the sky, I'm going hopefully over the outlines that
we have created. I don't want to paint the
clouds or to the moon, any of those elements. So just carefully go over the outline and then
fill in the color. Once again, don't forget to
paint the edges of the canvas carefully leave the
moon and the clouds. You don't have to paint with
this dark blue elements. You can go for a second coat. If you think the
color is patchy, the background is patchy, which I think it is. In my case, I am mixing and
blending the color mode. I'm going for a second coat
because we want and even sky, night, Apache sky, that
wouldn't look good. Now I'm chatting with
my pre-mixed deal carefully covering
over the edges. And now it's time for the lavender be mixed there. Now, let's mix that
color for the moon. So I've washed my brush and dry it completely and I
make small amount of yellow and orange
together to get that orange-ish yellow
or golden yellow. For my moon. Again, we have to mix the
colors little by little. I am also adding some white. And that's it. I think I like this color. Yes, This is perfect. So I'll go with this. Now quickly washing my
brush again and drying it. And with the tip of my brush, I gave a little
fleshy to the moon. I wanted the colors to
blend a little bit. That's fine. I was gouache here. And with this step, the first layer of
this canvas is ready. Your project for this
lesson is finished. Your second canvases,
first layer. And in the next project, we will be painting this
beautiful rainbow sky. See you there.
6. Project Rainbow Sky: All right, let's move
on to the third canvas. And this is the rain blue sky. So again, the colors
we use previously, we are going to use them. And in addition,
for the rainbow, we will be using
the rainbow colors. Alright, so let us
start with the deal. This is my favorite color. By the way. Again, damp, clean brush. To start with. I'm getting these steps again
and again so that you will repeat these steps.
Remember these steps? And this class is more
like fun coloring glass. In the next one, we will
go one step further. So first, let's just practice
our coloring exercise. Here. I decided to go with the
lavender first and I will keep changing the
value of lavender. I'll keep adding white or
I'll keep adding the magenta, brilliant purple just like that. And that different,
changing the values. I will all the clouds, that cluster of clouds here. So let's do that and finish
painting the clouds. This is not difficult at all. Just keep changing between the dark and light
colors and finished coloring or the clouds,
just like that. We've finished
coloring the clouds. Now, let us move on to the sky. And again, my favorite deal
with a damp, clean brush. I've watched it before. I deal in my brush. Just like that. Covering all the edges. Go over the outline and then
fill in the color, right? Make sure to paint
around the moon. We don't want to
color the moon in teal color, though it's acrylic. We can fix it later, but
we don't want to do that. That effect will not be as good as it will be when
we leave the moon. Right now it's time for the rainbow. Wash the brush
properly and giant. And then the tip
of your brush just give fine, gentle strokes. Try not to mix these
colors because if you mix them because
the sky is still wet, I'm going for the
rainbow right away because I want a tiny
bit of blending. But you don't do it. If you're not confident
about your strokes, let this guy dry completely. And then beyond the
rainbow over it. Doing painted right away. If you think you can go over and over again and merge
the colors because that will create mud
and we don't want a muddy range. Here. I'm using the colors
also for the rainbow. You're free to use
any color because removing look good
with any color at all. Any color palette
can be passed as it can be the proper rainbow, rainbow colors, it can be neons. But I think the brighter
the rainbow is, the better it will
look in this Canvas. Because the sky and the
clouds are best suicide. So the bright rainbow, there'll be the main
focus of this canvas. Now, let's paint the moon
in light yellow color. I think I should use the neon yellow on the
moon for extra shine. And yes, there we go. It looks perfect
with neon yellow. So these are the choices
we make right there. While painting. We don't go with a plan for each
and everything. Some things we just
observed that in there and decided to change this. We have finished
our mini Canvas, the first layer of it. And in the next
lesson we will be moving on to the final Canvas. But before that, your
project for this lesson is to finish the first
layer of your mini Canvas. And in the next lesson, we will be painting this
beautiful mountain scape. See you there.
7. Project Mountain River: Well then we have the stuff final mini canvas of this class. Of course we're painting
the first layer is only, and we will be detailing
all of them later. But it gives me a
joy to think that we have listed here and I'm so glad you joined me till here. So here are the
colors we're going to use for this canvas. Color palette is
pretty much the same. The only changing one or
do gallows here and dead, but it's mostly the
same. All right. So, okay. Let's begin with my
favorite deal with a damp, clean brush. Once again. Let's paint the sky first. By now, you must have
mastered this technique, going over the outlines and
then filling in the colors, gathering around the object
and not gathering them. So that's all we have been
doing throughout this class. And this is the last mini
Canvas using the same thing. And to not teach you get here
and mad at it is to make sure to follow all the
edges of the canvas. There. The sky is
done moving on to the river and I'm using the exact same color
for the river. Do reasons behind it. One, it gives us a mature
and painterly feel. When we combine the colors, we simplify it, and also
it looks harmonious. And the second reason being, obviously water has no color. It has a reflection of
the sky most of the time. So whatever sky color is, the same color goes. Why did? Before moving on, let's close the color bottle tightly
to avoid the stage. Now, wash your brush nicely
and dab it dry with a clean, damp brush again. We move on. The other elements
of the canvas. Here. Again, I'm mixing
the same colors, orange and yellow color
the sun like that. Here, I have kept
it more towards the orange or more towards the
darker yellow you can see. And now I'm mixing blue and this brilliant
purple to create this dark violet or purple sheet that I'm
going over the mountains. Again. For each
layer of mountain, we will be changing the
value of the colors. So we will be playing
between light and dark. And this is not a new technique, used it in the
previous canvases. So we just have to
keep adding white or blue in the mix to create
a light or dark mixture. Why what you have to keep
in mind is that a journey? Rule of thumb is that objects which are in the
foreground are the darkest and as we move towards the background, objects
become lighter. Your project for
this lesson, again, is to finish the first layer of your mini Canvas and share
it in the project gallery. In the next lesson, we will be detailing all our canvases. So see you there.
8. Final Details: We made it till here. This is the final, final lesson of
this class and all. The beautiful mini
Canvas is how dried. Let's begin with the first one. And I'm taking my fine brush. And in that I'm digging
this black acrylic color to outline all the shapes
we have been dead so far. It's not difficult. It's very simple. We have sketched
them, we have them. We know how to
outline them, right? Also, I'm using my water down, black acrylic color, which
works just like ink. But if you are not
confident with the brush, you can also use black
acrylic marker for this step. Time-to-time. Keep
turning the canvas according to your comfort. Comfort to be moving your hand. You can just keep turning
the Canvas that way. The most important tip here
to calm down and relax. Don't get scared. Don't think you will
spoil the Canvas. In case something happens, you can immediately wipe the color red brush and
using a tissue or a clot. Because the first layer
has dried completely and anything on top of
it can be washed. Then it's red. If it dries, then you
won't be able to do that. But if it's wet, you can still watch
it and remove it. So don't worry, don't panic. Just stick dread, believe
yourself, and go for it. Sure is a way to add
accent to the Cloud. So once we've finished
outlining them, we add these mocks inside the cloud to add
in like this only. I am going to finish the
entire canvas that I did. But you have the option to pause the video here
and finish with gangs. And once you're ready,
you can pay for it. While we paint. This can seem the latest
outline, all the objects. Again, adding those small
marks to the Cloud. So let's move on
to the next one. We have finished
with the outlining. Now add some
irregular marks over the mountain to depict the
crevices and the shadows. This one is not ready yet. We have to use white. So let's go now and keeping
it aside and I'm moving on to the rainbow Canvas and
white acrylic color. I'm going to outline
everything here. Because for this canvas, I thought that will
not look good. So I'm using bite. Again, you can use white
acrylic marker or this canvas. Now let's add some stars
here embedded randomly. Do we do it with a deck MS
Access just as the heat index. And that's it, you're done. But this cute little. Moving on to this spine, using some monks do bordeaux, the direction in which
the water is flowing. It just simply dash
marks like that. And using right for
the diesel that I will be alternating between
low and landing lines. Now, I'm using some deal
to create a uniform gap between the Sun and
raise just one stroke. Now, let's keep this Canvas site one more time and let's
add some beautiful stars. This canvas. Just using the tip of my brush. And now time to add
some bigger stars, like plus sign, like so. And now let's get back to our mountain
scape one more time. And now using some neon orange
on top of the white trees, you don't have neon orange. You can use simple
orange or you can, I didn't use the byte if you
like it. Totally up to you. And this deadly done bit, this class, this is the end
of this beautiful class. I am so happy to create these gorgeous mini
Canvas is with you. I can't wait to see
what you have created. Don't forget to share your artworks in
the project gallery for me and others to see. Thank you so much for taking my class and I will see
you in my next one.
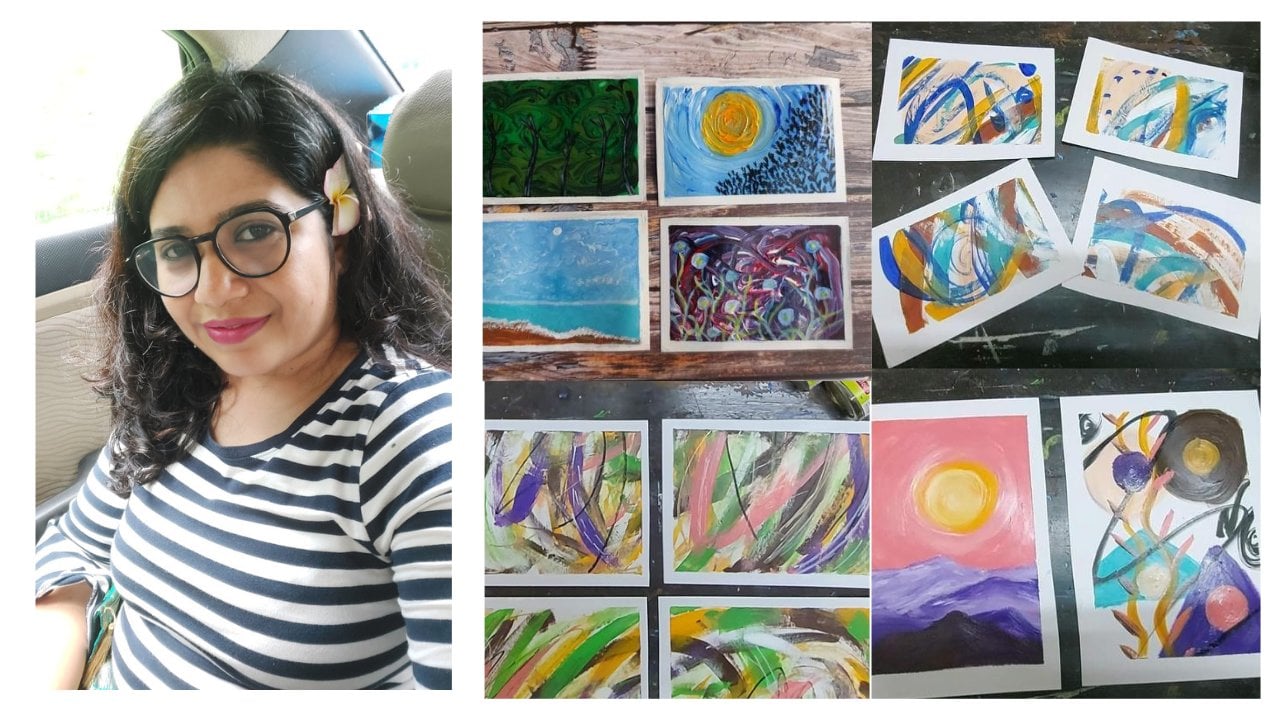
 Manishaa Shriivastava, Artist, Art Educator, Author