Transcripts
1. 00 Introduction: Hello everyone. I'm Sara. And in this course I'm going
to be teaching you how to make basic crochet
grainy square. Now, don't worry if you've never picked up a crochet
hook and your life, I'm going to be assuming for the purposes of this course that you've never crochet before. So you're in good
hands with this word. But granny squares are
my favorite thing to learn in crochet because they're basically
building blocks. You can put them together to make all sorts of
different kinds of things. Once you understand how to make a basic grainy
square like this, you can stitch them all
together to make a scarves, blankets, which is super simple. You can even get more
complex and make things like bags or dresses or hats. Like there are so many different
patterns that you can do just by stitching together
a bunch of granny squares. So it's super fun to
learn this small, easy project that
you can then make all of these more complex
things down the road. So I think it's a
great starting point for crochet because it opens up all of those avenues for you. So what I'm gonna be doing
this course isn't going to be to you how to do a chain stitch, which is one of the most
important stitches, I think in crochet, because you're gonna use
it in literally every pattern you've ever used. I'm going to be
teaching you how to do a double crochet stitch, which is what all of
these little clusters of stitches are on this work I'm going to tell you
to do is slip stitch, which is also super important. And of course, giving you
some help on how to work in the around to make
this square shape. I'm also going to put
a written version in the description of this
course if you want to have that as a
reference while going through the lessons, and hopefully it will be a nice reference later on
after you're done the course so that you can make a bunch of these and work on lots of
different kinds of projects. And if you do make a bunch of really fun projects to make
sure that you put them in the project part of this
course so that I can check them out along with any
questions that you might have. I'll do my best to help you
work through those issues. And with that, let's
get into the course.
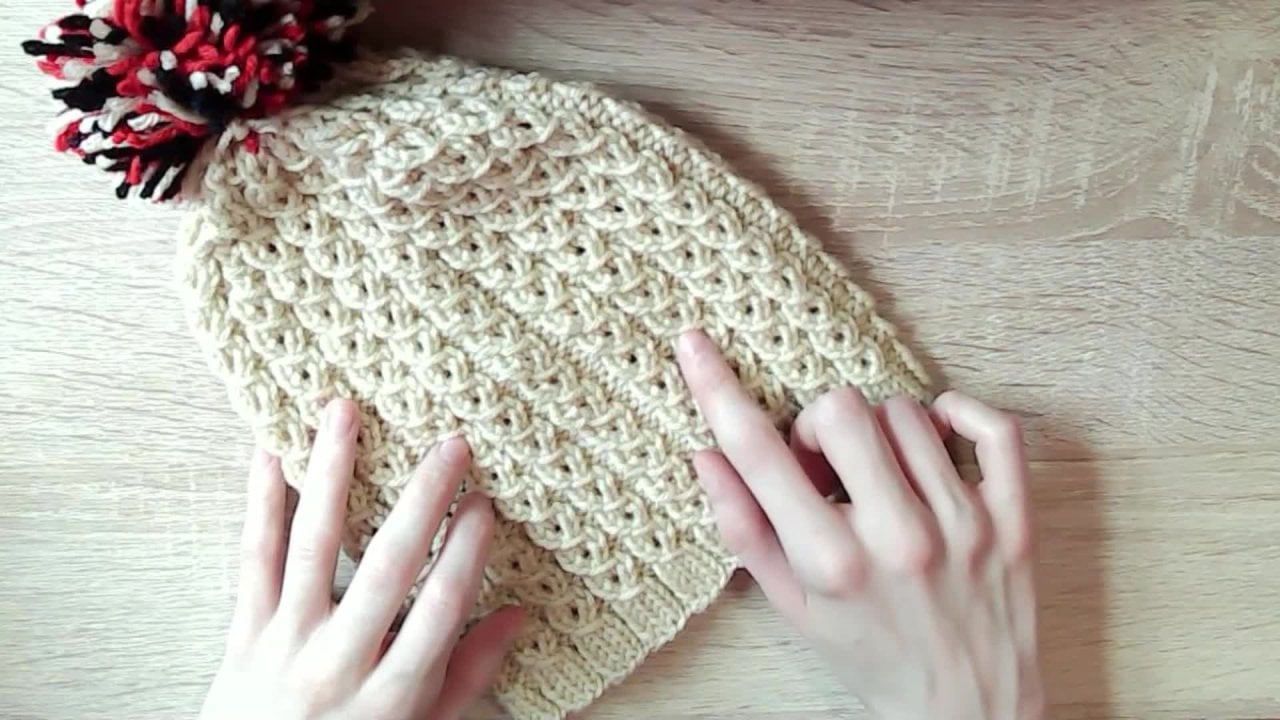
2. 01 Project Materials: For this course,
you're only going to need a few things
and I really wanted to keep it simple if this is your introduction to crochet, so you don't have
to go out and buy a bunch of fancy things. You're going to need
some scissors of some kind, a crochet hook. Of course, I'm using a
five millimeter one. I think just somewhere around
the five millimeter or 5.5. It's a nice medium sized hook. It's going to work with
most worsted weighted yarns or medium yarns, or it'll have a
four printed on it if you're out
shopping for yarns. So it's a nice middle
ground for different yarns. It's not too bulky and it's not too thin that it's gonna be a little bit difficult
to work with. And on the topic of yarn, I actually have a
couple of examples here because you don't want to just think about the
weight of your yarn. So yeah, pick something
that is a medium realm. I think that's a great place
to start with your crochet, but you also want to think
of how tightly woven it is. So what I mean by that is you're gonna be able to
see the strands of your yarn. You can see this is a
very loosely woven yarn because it's super
easy for me to twist this and see the two pieces so I can
quite easily pull it apart. You don't want that when
you're starting with crochet because that space in-between those two strands is where your hook
is most likely going to end up while you're trying to crochet your stitches. And there's nothing
more annoying than getting a split stitch
while you're crocheting. So just avoid, avoid anything that has a loose wave-like that. You want to get something
that's nice and tightly woven, which is why I have
this example for you. A lot harder for me to
untwist all of these strands. Now it has multiplies, which
just means that there are multiple pieces of yarn that are being twisted
together to make this. So that is going to
help with that too. But you can hopefully
see a bit of a difference with the way that these are two woven together. So pick something that is
not only a medium weight, but something that is
tightly woven together. Hook isn't going
to get in-between those strands while you're trying to learn how to crochet, because you want to make it the easiest for yourself.
You possibly can. But with that, we can get into actually learning how
to do a granny square.
3. 02 Starting a Granny Square: Now we have to get
our working yarn onto our crochet hook. This is very different
from a knitting. So if you're a knitter, Castile that knowledge
out of your head because that's not
going to help you here. But what we could do is make a loop that is going to
allow us to tighten it. I always just called
this a lasso loop. I really don't know what
the proper term for it is. One of the downfalls
of learning. All of my crochet from my
grandmother is that sometimes I just have random names for things that don't
really translate. So we're going to do is
take your two fingers and place the yarn over it. Then you're going to take
the working yarn and a rapid over your two fingers
to make shape that. I like to take that
working yarn and the tail, the loose end and pin it on my ring finger and my thumb
just to keep it in place. So you've got this odd
looking shape now, then turn your
hand over and take the loop that is closest to
the tips of your fingers, go under that, pick up the other strand and pull
it through and tighten. And you'll see that
there's a little knot there with a loop. Then you can take this loop, put your hook inside of it, and then just holding on
to the tail and pull on the working yarn part of your yarn and it'll
tighten it onto your hook. And that's all you need to
do to get your yarn onto your hook with first
loop so that we can actually get into
doing our chains to build the foundation
of our project.
4. 03 Chain Stitch: Now that you have your
first loop on your hook, we're going to learn
how to change. So chaining is the way that
you're going to start all of your crochet projects basically with very
few exceptions. Chaining is the very first thing on all the patterns
you're going to find. So it's a very
important thing to learn how to do
as a crochet air. And the great thing
about chaining is that you actually
don't need to use a hook. I learned to do it
just with my hands because that was how my
grandmother decided to teach me. So if you want to just practice it without getting
a hook in the way, I'll show you how
to do a chain with just your hands and loop so that you can
put that if you want. But I'm going to show you
what they hook first. Since eventually you're
going to have to learn that when you're holding
your hook to crochet, there are a couple of
things that you want to think about before
you get into that. So I have a nice grip on mine. I find that a lot
easier than just having a plain metal hook, but there's lots
of other kinds of hooks to that can kind of give you that
ergonomic shape to it. So it really depends on what
you're going to be using. Some a resin hooks have some really nice ergonomic built
into the shape of them. So you might want to
investigate that a little bit, but you're going
to hold your hook, however, ends up feeling
comfortable for you. You may have to try a few things before you really get it. So we're going to do is I like
to hold the tail-end from when I cast on in the same hand where I'm
using the working yarn, I just sort of keep it between my middle finger and
my thumb. I'm working. It's just a good way
to put a little bit of tightness on that
loop. Not too much. We're not pulling on that tail, we're just painting it in place. So that loop that we've cast on, our hook isn't going to be slipping around and
sliding up our hook. Then I like to hold the working yarn with my
index finger on that hand, you'll figure out how you
like to hold your hook. I'm not saying that the
best way or that it doesn't end up with hand
fatigue or anything like that. But this is what's
comfortable to me. So that's how I do it. You can find lots
of other people who will give you ideas of what works and figure out
what's gonna work best for your way of crocheting. To do our first chain, we're going to take our
working yarn and the loop it over our hook so
that we have to, now we have our loop
that we did with our first cast on and
then this yarn over. And then we're going to take yarn and hook it with a hook. At the end of our hook, we're going to turn our
crochet hook so that the hook part faces downwards. Hopefully you can
kind of see and keep that working yarn
hooked into it. That's just gonna make
sure that the hook slides nicely through
your first loop. And then you're just
going to pull your hook, keeping that loop stationary
by the tail and pull, you're working yarn all
the way through and it's going to create
your first chain. It's this V shape that
you'll get very used to. So I'll walk you through
how to do it again. So making sure that
you're keeping your tail from your
stitches in place. You're going to loop. You're working yarn over
the top of your hook. Make sure that you catch that working yarn with
the end of the hook. Twist the hook so it's
facing down and then pull the hook through your loop while keeping the rest
of it stationary. And that is how
you do your chain. Now, we're going to need three chains to start
our grainy square, kind of go into a
little bit more of that in the next lesson. But I want to show you
how to chain by hand, so I'll remove my hook and
go back to my first loop. So you're going to make your loop like you
normally would, like I've told you
in the last one. But you'll want to keep
your loop nice and big so that you can fit your fingers through
it like this. So you have your thumb, your index finger, and your
middle finger within a loop. And I like to pin the tail with my ring finger and my pinky just kind of
keep it out of the way. So you'll take your working yarn and you're just going to pull it through that loop and
then pull it tight. And this is also going
to give you that chain. Same concept, just
without the hook. It's gonna be a lot tighter depending on how
much you pull on it because the hook isn't going to dictate your attention
quite as much, but you just put your thumb and your two fingers
through the loop like this. That working yarn through
and pull it tight. And you'll have to figure out the size of your loop as you go. But it's a nice way
to learn how to chain and to get used to
how crocheting works. A little bit about
how the yarn works. If you don't want to be
using a hook and adding this extra unnatural limb to the way that
you're working yarn. So you can definitely
practice with that and get some of your
chaining down to kind of get used to
that and to kind of understand what the hook is doing while it's working with the yarn by
using your hands, having that tactile
connection to it. So in the next lesson, I'll go through how
to actually get into the proper stitches
that are going to be in the granny square. And we can start to
actually shape our project.
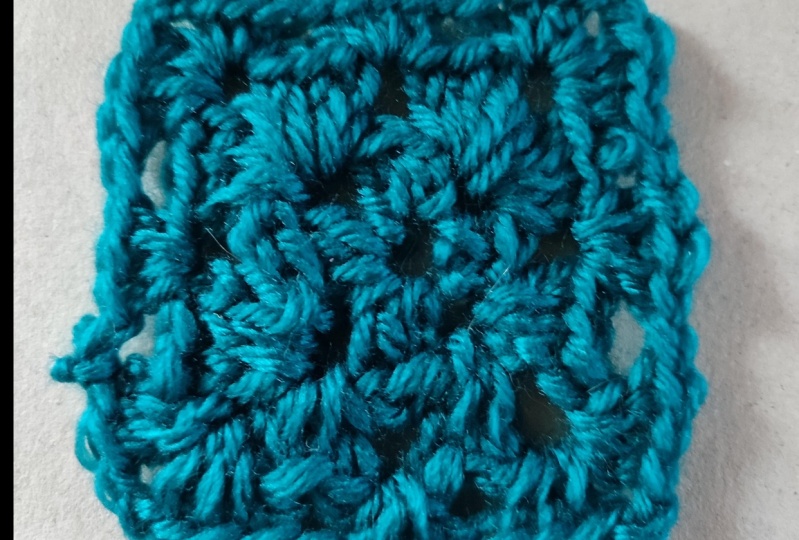
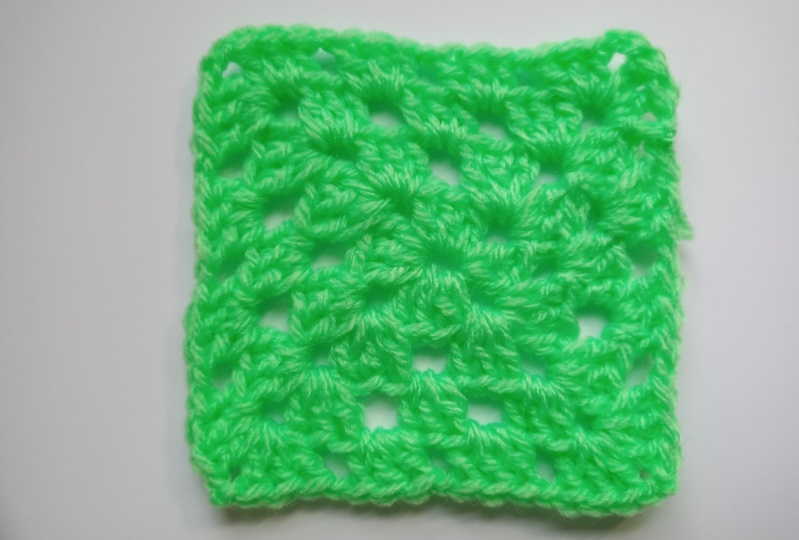
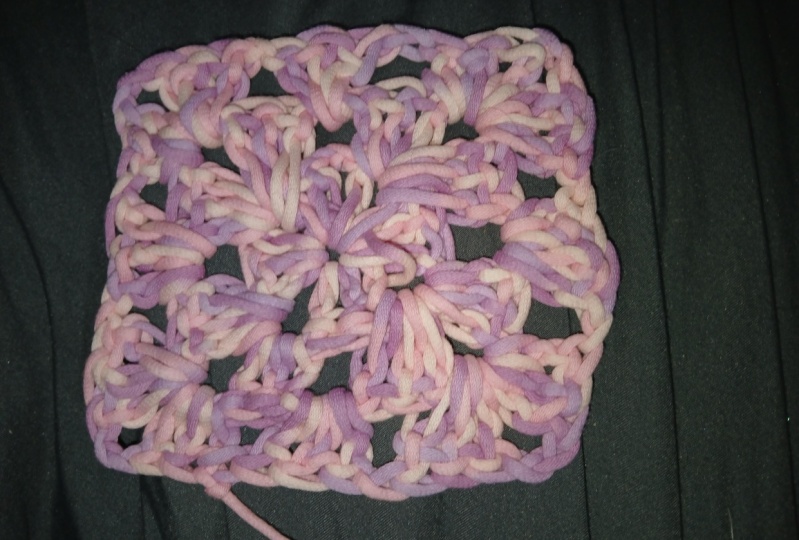
5. 04 Row 1 and Double Crochet Stitch: So now you have
your three chains to start our granny square. So what we're going to do for all of the stitches
and our granny square is a do what's called a
double crochet stitch. You may see it in patterns as
well as abbreviated to DC. So if you're going to be
looking at patterns after this, no, that DC is the stitch
I'm going to show you. So what we're going
to do is we're going to put our working
yarn over our hook, just like we were
doing with our chains. But we're not going to pull
it through the loop yet. So it's just going to sit
there and you'll want to keep some nice tension on
it with the working yarn. I like to use my index
finger and just make sure that it's not going to slip
off my hook as I'm working. So to start this off, we're going to do
our stitch into the first chain that you did. So ignore the first two
chains closest to your hook, just the one that is closest to that tail when we first
cast it on our yarn. That's because this
tool chain is going to act as a dummy stitch for us. So the double crochet stitch is quite a long stitch
and we want to make sure that we have some
kind of marker at the beginning of our rows
as we work in the round. That'll make a lot more
sense once you start to actually get in to the project. So just bear with me,
trust the process. So with some nice tension
on our working yarn, we're going to take our hook, insert it into that first
chain so that v-shape, we're going to go right
into the middle of it with our hook keeping. You might see that I
put my index finger on the stitch that I have and the working yarn
dyed looped over. So just pinning them
there so they're not going anywhere as I'm
working with my hook. So we have our hook
in that first chain, then we're going to
yarn over again. So pulling that you can go over and you can definitely keep your index finger on
those stitches to pin them in place so they
don't move around on you. So now we're going to do exactly like we were
doing for the chain, but only pulling
that first loop, that first yarn
over on our hook. So we're going to make sure that we haven't caught in our hook. We're going to turn our hook downwards and then
we're going to pull it through that
first chain that we did. And that's it. We're not going to pull
any of the other loops. So you should have three loops
on your hook after that. And then we're going
to yarn over again. Make sure that we
have are working yarn hooked at the hook, at the end. Turn our crochet hook downwards. Now we're going to pull
through two of these loops, 12 and not the last one, That's the only one
you're going to ignore. So you can put your
index finger on that to keep it out of the way. So with our hook turned down, we're going to pull
that working yarn through two of those loops. So 1.2 loops. So you should have two
on your hook at the end. And then to finish
off this stitch, we're going to yarn
over one more time. Make sure that we have the working yarn hooked
at the end of our hook, turn our hook downwards, and then pull it through both
of those final loops, 1.2. And that is going to finish off your double crochet stitch. And that's why it's
quite a tall stitch like I said before, because we're working through all of those stitches and
yarn overs to get there. So those are all of the steps. I'm going to walk you through
it again, don't worry. So we're going to yarn
over on our hook. Then we're going to take
our hook and put it into that first chain stitch, same as we did before. So use your index finger to
pin those stitches in place so they don't move
around on you as you go through that chain, then you're going
to yarn over again. So we have four
loops on our hook. We're going to make sure
we have the working yarn hooked at the end, turn I hooked downwards hole
through our first loop. So we have three left
than yarn over again. Make sure we have that
working your unhooked, turn our hook and
then pull it through two of those stitches. So we have two
loops on our hook. Then one more time, we're going to put our
working yarn over our hook, turn our hook downwards and pull through the
last two stitches. And that is going to give you that double crochet stitch
all into that one circle. It's going to act as the
center of our granny square. So now you have two of the stitches that we just
did, the double crochet. And that two chain
that is acting is kind of a dummy double
crochet stitch. So it's actually think of it as a group of three
double crochets. Then we're going to chain again. So just a simple chain like
we did at the beginning, where you're going to
put your yarn over, turn your hook downwards, and pull through that one loop that is already on our hook. So you're going to chain
one and then another one. So two chains afterwards. And that's going
to act as a space that we're going to be
using in the next row. Then we're going to do three
double crochets again. So back to that
stitch from before. So we're yearning over, we're going to write back to that loop of that first chain, just like we did with our
other double crochets, put our hook in, then we're going
to have yarn over. So we have our for
loops on our hook and then pull that working
yarn through the first one, yarn over again. Pull it through two more
and then urine over one more time and pull it
through those two as well. So you can see that we have this hole where those
two chains are, which is what we want
for our pattern. We're going to do another double crochet
into that same spot again. And don't worry if you have
to do this a couple of times, it's super easy to
read back your work. So if you see something
you've made a mistake, All you have to do is
pull your hook out of that loop and then pull
on the working yarn. And you can really easily take one of your
stitches and then just put your hook back into
that loop and try again. Crochet is really
forgiving when it comes to mistakes like that. So don't be afraid to pull back your work and start over again. If it gets super confusing, don't be afraid to practice
this a lot of times as well. It takes a little time
to kinda get used to the flow of crocheting, but once you get
into that rhythm, it becomes a lot easier. So now we have three
double crochets. So you have, are three
milkshakes at the beginning, our space with our
two chains that hold there and then three more. So we're going to
chain two again, this is how we're
building our squares. So each one of
these spaces where we're chaining is
acting like a corner. Those are going to
bend really easily into a square shape for us. So after you chain to again, we're going to do another set of three double crochets right back into that loop
that we've been doing. All of these double crochets n, So just three all over again. And then once you have those
three double crochets, we're going to chain to, to give ourselves
another corner. So you can kinda
see the boxy shape coming and we have 12 corners. Just did those two
chains for our next one. And then you might need to shift your stitches around a little
bit so that you have space. We're gonna do three
more double crochets to do our last side
of our square, right back into
that middle stitch that we've been using
for this whole time. And then once you have those
three double crochets, we're going to chain to, again to get our final corner. Now to attach this end, the beginning, because we've
been working in the round. You want it to not
be super bulky. We're not gonna do
another double crochet because that will be far
too bulky and we need it to connect with that first set of chain
stitches that we did. So that dummy stitch that we
had before to kinda help us mark the beginning of our
round is right there. So what you're going to
do is you're going to find the top of these stitches
where you have these V's, just like our chains. That's how you mark
out your stitches. So you're gonna take your hook and you're gonna put it through that top V so that it's
sitting on your hook. And that's how you pick
up a stitch in crochet. And then you're gonna
take your working yarn and you're going
to wrap it over, turn your hook like
you normally would. And this is what we
call a slip stitch. So we're not building up
any bulk on our project. So a slip stitch, we're just going to
pull through all of the loops on our hook. So those two loops from
the V and then also through the live stitch from
our chains from before. And that's just going to
close up this square shape. So you have all of these chain
2s acting as the corners, and that is the
beginning of our square. And that is going to
be a repeating pattern with the rest of
the granny square. I'm going to show you how to
set up the next level of it. But basically that
is the pattern. It's the three double crochets
followed by two chains. It's gonna be a little bit
different in the next row. So I'll walk you through that, but really work on getting
the double crochet stitch down before you start
to build out your square. And remember it's super, super easy to rip
back your work, just pull on that working
yarn and you can get rid of the stitches really
easily and just start back up right before
you had that mistake. So don't be afraid to start your project over
again and really get the practice in because
the double crochet is a super common stitch
and it's really, really useful for making all
different kinds of projects.
6. 05 Row 2: Now that we have aren't basic square for
our grainy square, we have to build up
to the next level. So remember that slip
stitch I showed you before as a way of connecting that change
at the beginning, we're gonna be
using that again to move our work stitch over. So for granny squares, you're only ever
going to be working into that chain space. So remember when we change to
and there's this big hole, that's where you're going
to be making all of your stitches for every single
one of the rows for this. But we're not at
a gap right now. It's behind us. We can't just flip our work
over and work in that way. It's going to look really
weird if we do that. So we have to somehow get from
this part of our work all the way over to this chain
gap over on the side. So the way to do that
is with a slip stitch, a way of moving our working yarn over without adding
bulk to our work. So you'll see at the edge of your square that
you have those V stitches like I
talked about before. We're going to use those to
slip stitch our way over. So you'll see one right
next to your hook. That is where we're
going to start. So we're going to take
our hook and put it into that V over picking up both of those loops that we're going
to put our working yarn over and then just pull that yarn through all three
of those loops. And now we've moved
over by one stitch. So now we're going to
go to the next V over, put our hook through both
of those loops for the V, and then pull our yarn through
all three of those loops. And we've moved it over again. Now, a little bit
different since we've gotten to that big space
that we want to stitch into, you're going to just
put your hook into the big gap that's there. And same thing, pull
through so it's underneath that chain and then
through that active loop. And now we're at that
big gap that where we want to actually work the
rest of our granny square. So remember that dummy double
crochet I talked about at the beginning of our
road before with the two chains, we're
gonna do that again. So we're going from our
new place at this big gap, we're going to chain two and that's going to act as
the beginning of our row. And our first double
crochet is that two chain. And then we're going
to double crochet two into this big gap that we have
where we change to before. So just double crochet twice, like you were doing at the
beginning of the previous row. So now we have our two
double crochets plus our chain two acting
as a double crochet. And then we're going
to chain two again. And then in that same gap, We're going to double
crochet three times. So you're always going
to be double crocheting in sets of three when you're
working this granny square, something to keep in mind. And that's going to act as
the new corner of our work. You can see that again, we have that two chain acting
as a corner to our square. And now we need to move over
to the next big gap to put our stitches n. So
what we're going to do is chain one and that's it, one chain this time. And then into that gap, we're going to double
crochet twice. So just skip all of these, move right over to that big gap. Then just start
double crocheting. And you're going to do
it in sets of three, just like you always do. So now you have that three
double crochet chain to make our corner. And then in the same gap again, we're going to
double crochet three times and that is
corner number two. And then moving over to
the next gap, chain one. And that's what you're
going to do for the other two chains as well. Same thing. You're going to
double crochet three times, chain two to get our new corner double crochet
three more times again, then move on to the next space. And then I'll tell you how to finish up your row
once we get there. So now you've done
your double crochets, chain 2.3 double
crochets into each one of those four spaces to
make all the corners. You can really start to
see the square shape now. And we're going to
need to connect this part of our work to
the beginning of our row. So you've changed one
just like you would to move to the next
spot and we're at that dummy double stitch
that we had before with that crochet,
those chains stitches. And it's just like we
did with the last one. So you're going to look
at the edge and find that e stitch at the top. You're going to put your
hook through that V on both of the loops and
then slip stitch. So just wrap your working yarn
over your hook and pull it through all three
of those stitches. And that connects your work altogether at the top,
making our square. So we have one more row that I'm going to work you through
where there's a little bit of a difference being in the pattern because you're
gonna have to figure out how to work with
these gaps that we have now that aren't
corner pieces. So we're not going to work
them the same way where we have these six double crochets with the two chain
in-between them, they're gonna be a
little bit different. So I want to work you through
that so that you know how to finish up
this granny square.
7. 06 Row 3 and Bind Off: We're at the beginning
of our granny square, rho again and you're gonna do the exact same thing that you
did for the previous row. So we're going to slip stitch. Are we over to this
gap on the corner? And then once we get there, we're going to chain to be that dummy double crochet at
the beginning of our row. And then we're going
to double crochet two into that gap that is at
the corner of our work. So now we have three
double crochets. If we count the impostor
and then chain to, again to act as our corner and then do three
double crochets. Again. This is normal for all of the corners that you're going to work for your granny square. It's always going
to be that same. Three double crochet, two chain, three double crochet
for each one of them. And then you're
going to chain one so that we can move
over to the next gap, like all the other times. But now the next big gap that we have is this side to our work. It's not a corner. So how do we work
that super simple, you're just going to double
crochet three times. So like I said, the double
crochet stitches are always in threes and you're just going to do it
into that chain, one gap that you mean until you have all three of
them like that. And then chain one so that
you can get to your next gap, which is this corner piece. And then just work
in the same way that you did with all
the other corners, where you double
crochet three times, chain to do another
three double crochets in the same spot, and then chain one to
move on to the next. So once you've worked
in other corner, the next gap again is that
side and you're just going to double crochet three
times into that gap, like so chain one and then
move on to the next corner. And you're just going to do that and work all the way around. And then you get back to
the beginning of your row. You're going to slip stitch into the beginning of that row
and then you're done. And that is how you work. A granny square. That's all of the basics. So working in the corners,
what do you get there? It's three double crochets, chain to three double crochets
all within that same gap, chain, one to move
over and then do that double crochet three times
into whatever gap is there. So you can see
that the next row, There's two of those gaps on the side in-between
the corners. You'll do the same thing.
Three double crochets here, chain 13 double crochets here, and then work your corner. You can make granny squares
as big as you want, do as many different rows. You can just continuously do this row after row and
make yourself a blanket. Or you can stop at, I usually do four rows because
I think it's a good size. And then I end up
stitching them together into lots of different
kinds of patterns. But you can do two rows, you can do three rows and stop
when you're done building up as many rows as you want
for your greenie square, you'll need to bind off. So getting rid of this working yarn and
finishing up your project. So it's super, super easy. I like to do is when
I get to the end, I like to do one chain. Then I cut my working
yarn off like this. And then I take my crochet hook and I just pull on it until that cut off and comes through the one chain that
I did pull it. So it's not too too tight. And that's how you cut
off the end of your work. And that is all of the basics
of making granny squares. Congratulations,
you're all done. And you can go on to make
as many as you want or practice or explore lots of other things in the
world of crochet.
8. 07 Final Thoughts: Congratulations on
learning crochet and finishing your
first granny square. It really will open up a lot of really fun projects for you. I highly recommend looking up patterns and different ideas of how to incorporate granny squares into making
lots of really fun things. And to be sure to post even just I finished
grading square that you've made in the project
section of this course so that I can check
it out along with any course that you might have
things that you want me to clarify so that I can help
you out as best I can. And of course you could
follow me here on Skillshare. I add new courses are regularly. I'm going to be doing a bunch of fun crochet projects coming up. So you can definitely check
those out and learn even more about this really
fun art of crochet. And I will see you
in the next course.
 Sarah Carswell, Fiber Artist