Transcripts
1. Intro: Hi. Welcome to my
crocheting class. I'm Lisa. I'm a professional tailor and worked at an opera
house in Germany, sewed the suits and costumes for the opera
singers and actors. For the last couple of years,
I lived in New Zealand, studied costume construction, and worked at a little
alteration place. In my free time, I do
other crafty stuff, like, for example, crocheting
these cute little flowers. In this class, I'll
explain step by step what tools and
materials you need, which stitches will be
used and how they work, how to crochet the
individual pieces, and how to assemble them. There's also a free PDF file you can download with the written
pattern to follow along. To complete the project, you should be able to crochet
even rows of stitches. I'll explain every
stitch you need, but if you've never
crocheted before, I'd recommend taking the
beginner's class or just practice the stitches with
my stitches used video. And once you've got comfortable, come back and start
your crochet flower. Now, grab your hook and yarn
and join me in this class.
2. Tools & Materials: To complete the project, you only need a few things. The tools you need
are a crochet hook. The one I'm using
is 3 millimeters. I would recommend using
2.5 to 3.5 millimeters. They come in a lot
of different sizes. Scissors or snips. And the tapestry needle
to weave in the ends. The materials you need
are crochet yarn, I use 100% cotton. The thickness of the
yarn should match your 2.5 to 3.5 hook. For the stem and
leaf are used green, brown for the soil,
black for the pot, and yellow and brown
for the flower. As I wanted a little sunflower. For stuffing the pot, I
use regular stuffing wool, small cut fabric scraps, and the yarn ends, I cut off. I also used a little bit of thin wire in the stem
to hold it upright. And if you want the pot to
be a little fridge magnet, you can insert a magnet into the pot before you
assemble everything.
3. Stitches used: In this lesson, I show you
the different stitches, the magic ring and increase. I won't go into detail too much, but I'll try to explain
them as best as I can. So the pattern for
the pot starts with eight single crochets
in the magic ring. The magic ring is almost every time the first move
for crocheting circles. Take your yarn like this and wind it around your
middle and index finger. You should have two
parallel lines of yarn. Now, with your hook, go
under the first one. Grab the other one, pull
through, and twist. The twisted loop
shouldn't be too tight, so try to keep
everything a bit loose. Then grab the same line of yarn, you twist it and pull
it through the loop. Congratulations. You've
created a magic circle. When you now stitch your single crochet stitches into the ring, you can tighten the ring
to get a neat circle. Okay. Next, I show you the
different stitches. First, we need a starting loop. Take your yarn like this and
loop it around your thumb. Hold the end with
your index finger. Then insert your hook from
underneath and grab the yarn. Pull it through the loop
while letting it slip off your thumb. Then pull tight. Next, I show you the
different stitches. First, the chain. It's
probably the easiest stitch. You just grab the yarn with your hook and pull it through
the loop on your hook. That's it. Grab and pull. M For the slip stitch, stick the hook through
the next stitch, wrap the yarn and
pull it through. Pull the first loop through the second one. That's
the slip stitch. As I started crocheting, I always made the slip
stitches way too tight, so keep in mind that
you let it loose. So the single crochet is probably the most common
crocheting stitch. It's easy, fast, and makes
a nice looking surface. Stick the hook through
the next stitch. Grab the yarn and
pull it through. Now you have two
loops on your hook. Sling the yarn around the hook and pull it through both loops. That's the single
crochet stitch. It can be a bit tricky to
crochet into slip stitches. If you want, just practice making single crochets
into the chain, skipping the slip stitch. And I always chain one at the end of a row before
I turn and crochet back. For the half double
crochet stitch, sling the yarn around your hook before you insert it
into the next stitch. When you now grab the
yarn and pull it through, you should have three
loops on your hook. Now sling the yarn around the hook and work it
through all three loops. So it's basically like
the single crochet, but with a third
loop on the hook. And another chain, then turn. The double crochet starts
like the half double crochet. Sling the yarn around the hook before you stick it
through the next stitch. Grab the yarn and pull it through to have three
loops on your hook. But now you go two, two. Sling the yarn around the hook and pull it through
the first two loops. Now you should have only two
loops left on your hook. Do the same again to have
only one loop on the hook. That's how you crochet a
double crochet stitch. And two, two. Okay. These are all the stitches
you need for this plant. There's the chain
stitch, slip stitch, single crochet, half double
crochet, and double crochet. But there are three more
abbreviations left. Ink, LO, and FLO. Ink is increase. To crochet a circle, you need to increase the
number of stitches each round. To do this, you simply make two stitches into one like this. So first stitch and into
the same the second stitch. FLO means front loop only. Make your stitch only in the
front loop of the stitch. Below is back loop only, so you make your stitch only in the back
loop of the stitch. Now you know the basics, so we can start
crocheting the pot. A
4. The Pot: We start with the magic ring. So again, wind the yarn around
your fingers and hold it. Then hook underneath the
first line, grab the second, pull through and twist, grab the same string, and pull it through the loop. Then into the magic circle, make eight single
crochet ditches. One, two, three, four, five, six, seven, eight. As we work in rounds, you should always
mark the first setch of new round to not lose track. Believe me, it works wonders. It's also pretty easy to
just crochet a little piece of a different colored yarn into the first stitch like this. For the second round,
increase each stitch. Like I explained in
the previous lesson, make two single crochet
stitches in one to double the number of stitches in this round till you
reach your marker. You should now
count 16 stitches. Again, place the
different colored yarn in the first stitch
of the round. This is one single prochet. Then increase the
following stitch. Then again, one
single crochet in the next stitch and
increase the following. Repeat to ichi marker. This makes 24 stitches
in the third. This makes 24 stitches
in the third round. Now we're done with
the bottom of the pot. For the next round, only stitch through the back loop
of your stitches. Make a single crochet
in each back loop. Don't go through
the full loop only through the back loop and
make single crochets. You can see that this helps the stitches to form the edge. Now make singer crochet rounds in the full loops
to like the height. I crochet about six
rounds for the walls. You can also do seven or eight. M to make a little rim at
the top of your pot, make one round of half double crochets only
in the front loop. This helps the last round to fold over to create that rim. Finish off the last round
with a slip stitch. Then cut the yarn and
pull out the loop. Then you can take
your tapestrndo and weave the end of
the yarn into the pot. I'd say there is no right
or wrong to do this, but it shouldn't be
visible from the outside. You can just leave the end
and hide it in the pot. Okay, let's move on to the soil.
5. The Soil: The soil is essentially the same pattern as for
the bottom of the pot. Start with the magic ring. So again, wind the yarn
around your fingers, the hook underneath
the first line, grab the second, pull
through and twist. Then grab the yarn and
pull it through the loop. Then into the magic circle, make eight single
crochet stitches. Don't tighten the magic
ring too much here, as you can put the
stem through the hole later on to secure
it to the soil. Now increase each stitch in the next round and don't
forget your marker. You should now have 16 stitches. Then make one single crochet in the next stitch and
increase the following. Repeat till you
reach your marker. This makes 24 stitches
in the third round, and your soil now
fits into the pot. Finish off with a slip stitch, cut the yarn, and pull
the loop through. Don't cut the end here. You
can use it later to sew the soil into the pot. M
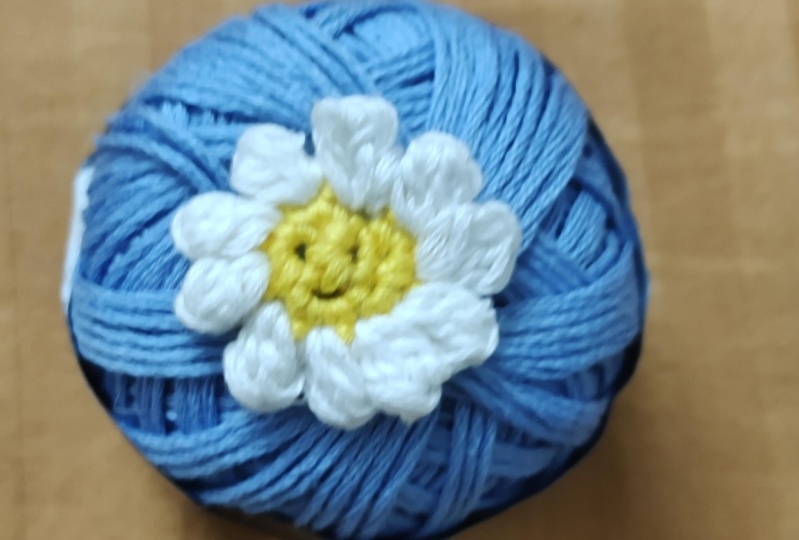
6. The Flower: To crochet the flour, we start with the inner part. If you want to make a daisy, use yellow for the inner part. But if you want to make a
sunflower like I do, use brown. But you might as well
use any color you like. Start with a magic ring and
make five single crochets. Then for the second round,
increase each stitch. So two sin crochets in each stitch to double
the amount of stitches. That makes ten stitches. I found out that if you do another single crochet
in the next stitch, the middle looks
rounder than if you won't. First step done. Now, get out the yarn you want to use for
the flower petals. White for a daisy, yellow
for the sunflower. To change the color,
go back one step. So pull out the yarn a little bit to have only two loops on your hook and use the new colored yarn to
pull the sling through. Then you can continue
with the new color. It's a bit of a weird
start as you have to make sure the new yarn
end won't slip through. Make one slip stitch
in the next stitch. Then two chain stitches. Two double crochet stitches in the same as the slip stitch. And one chain stitch. Then turn your flower
around and slip stitch in the front loop of
the first slip stitch. Take the loop of your hook and pull the loop
through the next stitch. That's one flower petal. Do this for every stitch of the inner part to end
up with ten petals. With taking the loop of your hook and pulling
it through the stitch, you made the first petal in. And with the slip stitch. Cut the yarn and
pull it through. Depending on how big your hook and how thick your yarn is, there can be some big holes in the inner part of your flour. If you don't like the look,
you can just take one of the yarn ends and stitch them
close from the backside. It makes a big difference. Knot the ends and
the same colour together, and cut
the ends short.
7. Stem & Leaf: To make the stem, start with
about 15 chain stitches. Then crochet back
14 slip stitches. Make a chain stitch, pull tight, and crochet back,
14 slip stitches. Turn around and do
the same again. It kind of doesn't really matter which loops you make
your slip stitches in as you will sew the stem close after you're done. That's it. Finish off with a chain stitch, cut the yarn, and pull
the loop through. Leave the end long enough to sew the whole length
of the stem together. Now cut a bit of wire to
the length of the stem. Thread your needle
with the longer end and sew the stem close, hiding the wire inside. I use the latter stitch because you can pull
the yarn after you've sewn a bit to make the
seam kind of invisible. Stitch only through the
loops, not just anywhere. This will make the
structure look neater. Don't cut the loose ends. We will use them to sew the stem to the
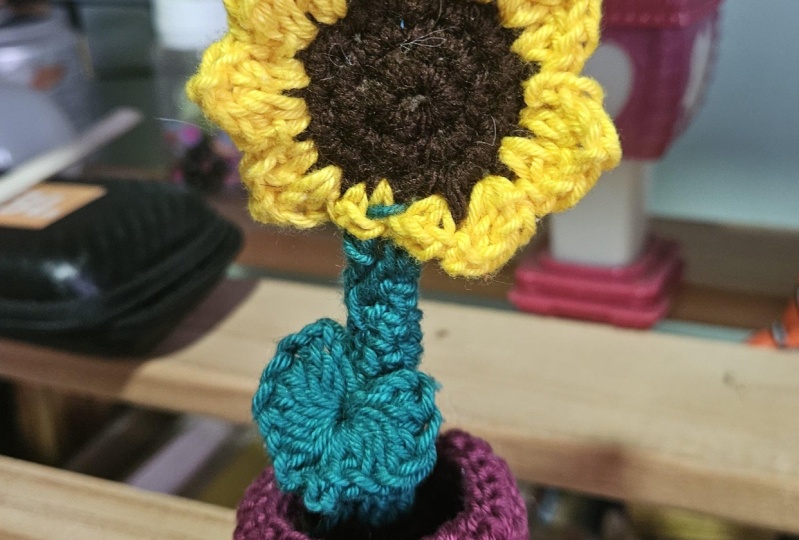
flour and the soil. For the leaf, you
can either make a basic leaf shape or choose one from my
other crochet videos. I'll show you now how to make a tiny basic leaf. Chain seven. Turn and slip stitch six. Then make one single crochet in the first one and
two double crochets. H. One half double crochet. One single crochet. Two slip stitches. One chain. Turn and crochet
back in the reverse order. Finish off with a slip stitch, cut the yarn, and
pull it through.
8. Assembling: Now that you've got all
the individual pieces, we can start assembling the
little flour in her pot. First, sew the
stem to the flour. Try to cover up the knots
you've made earlier. Can hide the ends somewhere in the underside of the flower. Now you can decide where you want your leaf to be positioned. Sew it to the stem and secure the ends somewhere in the
underside of the leaf. To connect the stem to the soil, you can pull a bit of the stem through the middle
of the magic circle. And then pull the
magic circle close. Use the end of the stem to sew it to the
underside of the soil. No need to cut the yarn here, as you can just hide
them in the pot. Now you can start
stuffing your pot. Make sure that the bottom
of your pot is stuffed very tight and even to ground a
good surface to stand on. Make sure that the bottom of your pot is stuffed very tight and even to ground a good
surface to stand on. Then place the soil in the pot and sew it
to the inside wall. If you want to insert a magnet, you can slide it in between the wall of the pot
and the stuffing. Then finish sewing
your soil to the pot. To compress the
stuffing a bit more, I stitch through the whole pot and tighten the wool inside. If you only stitch through the holes at the
bottom of the pot, you won't even see the stitches. Squish the pot around
in your fingers to distribute the
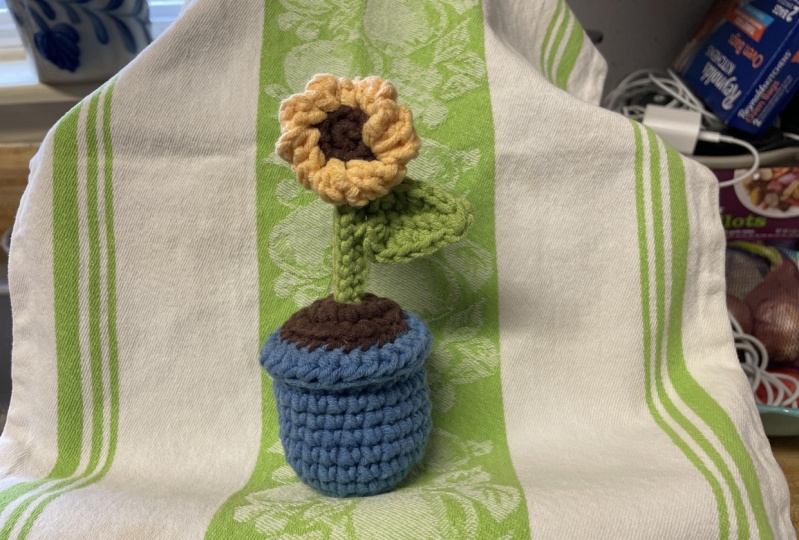
stuffing so it's got an even stand and looks neater. That's it. You finished your
little flour in a pot.
9. Thank you!: You did it. I hope you
were able to follow along, and you've now got a cute
little flower in a pot. Sunflower, daisy, or something
completely different. You can be super creative. Now you can try to crochet
different shapes of petals by finding out how to make them wider or pointy by
adding stitches. Either way, I'm excited
to see your work. Please take some photos
and share them with the A students and me in
the project gallery below, so we can all
appreciate your art. If you want, you
can also tag me on Instagram if you upload any
photos on your account. For any questions, open
a discussion under this class or just DM me, and I'll try to answer them all. And if you're interested in other crafty things,
check out my profile. I uploaded a few classes about sewing and some more
about crocheting. Alrighty. That's
all for this class. Thank you so much for
watching and happy stitching.
 Lisa Kahlhöfer, Bespoke Tailor & Crochet lover