Transcripts
1. Introduction: Hello lovely makers! And welcome to my Skillshare class, my name is Vania, and today I will be teaching you about crochet. I learned how to do crochet and out to knit with my sweet grandma. I'm really happy that I can share what I've learned with her with you guys. I started knitting and crochet to help me deal with stress and anxiety. When you are knitting and crochet, you are so focused on what you're doing, that you forget everything. It's also a really good skill to learn and you can build garments for yourself, You can build toys, you can build presents for your family and friends. Once upon a time, I used to work as a family doctor, but then I wanted to change my life. That's how I ended up working now in a makerspace in Abu Dhabi. I am responsible for the textiles department. I give sewing classes, knitting and crochet classes. And I also teach some classes with really cool machines, like laser machine and the 3D printer. I truly believe that learning new skills brings much joy to your daily life. It's such a pleasure and a good filling when you finish something that you made, I think it's really worth it to learn a new skill every day. It might be an ambitious goal to learn one skill every day, but I think it's really worth it to try it. This class is aimed for complete beginners, no need for any experience. I organized the class in a way that you can learn all the basics about crochet. We will start learning how to do the slip knot how to do the chain stitch, the single crochet, the double crochet, The half double crochet, the treble, and so on. And we will be practicing small samples like these ones here. Small samples, showing the effect that each stitch creates. So if you already know how to do crochet and you just want to do the project, you can jump straight away to the class project. And in the class project, we will be learning how to do a granny square. I really hope that you enjoy this class and that I can help you learning out to do crochet. Are you ready? Just grab your needles and let's get started.
2. Crochet nomenclatures: In crochet, there are different nomenclatures that are used. It's really good to know which one the pattern designer used. The one that I'm going to use is the US nomenclature. And I will put a chart with information about both nomenclatures for you to download. I think it's really useful to have that in mind. Because sometimes it can be a little bit confusing when you are reading a pattern, which nomenclature you are using. The names are similar, the stitches are different. And I hope that it helps you finding things less confusing. I also downloaded a document with the pattern for these lovely granny squares. Are you ready? Just grab your needles and let's get started.
3. Materials & Tools: For this class project, you will need yarn. Choose how many different colors you want. I recommend maybe start with three colors and make sure that you choose the same type of yarn. I recommend to start with a DK yarn. So for example here, you always should check the label of your yarn because usually it says the recommended size of the needles. So here you can see that we have the recommendation for the knitting needles and here the recommendation for a crochet hook. It's always good to check the information in the label. In my case, I will use three different colors of yarn. You can choose as many colors as you want. You will need crochet hooks. The size of the hook will depend on the yarn that you are using. Again, check the label of your yarn to see the recommended size of hook. You will also need a pair of scissors and a tapestry needle.
4. How to do a Slip Knot: Let's start with a video showing how to do slip knot. The slip knot is always the beginning of your work. There are different ways to do it. For example, you can place the tip of your yarn in the table. Do a loop like this. And then you just need to pass this tip of the yarn inside the loop. You see, and you just need to pull. And then if you push here, you can adjust the size of your slip knot again. Make a loop. Pass this tip of the yarn inside the loop and pull Hold both of the ends and pull Now just pull these ends and you will tighten the loop, the slip knot, where you are going to insert your hook. See? and now you are ready to start doing the chain. But first I want to show you another way that you can do this slip knot. Wrap around your finger, Make an "X". Pass the back loop in the top of the front loop Grab the front loop and pull Now just insert the hook inside the loop, pull the end to adjust the tension. And you are ready to start your work. Let's continue in the next video.
5. How to do a chain: And now we are ready to start learning the chain stitch. In the patterns, you will find it written like CH. It's the abbreviation for chain, CH. There are different ways that you can hold the yarn and your hook. There are no rights or wrongs. You just need to practice different ways and see what works best for you. For me, what works best is the yarn that is connected to the bowl, I wrap it around my pinky finger and my other fingers. And I place the rest of the yarn in the top of my index finger. So like this, I also like to hold my hook like I hold the pencil. When you have a pencil and you are writing, so I like to hold my hook like this, and you will adjust the tension of the yarn that is connected to the bowl with your left hand. Here, you see, yarn in the top of the index finger. And to do a chain, we need to do the yarn over. Our hook will go below the yarn and it stays in the top of our index finger. And then you just need to grab, You can see the hook grabbing the yarn and passing it through the slip knot that you have done. Can you see here? we have our first stitch. You can see here? One leg of the V and the other leg of the V. This is our first stitch. I've put the yarn that I'm working in top of my index finger. I hold this tip, the end of the yarn, with my right hand, the one that is holding the hook. And I will just go and do again another chain. We will do a yarn over hook, below the yarn that is in the top of our index finger. And we will pull the yarn through the chain we have done. And we just made another stitch. So now we have one, two "Vs". We did chain two. Again yarn over and pull through the loop. Yarn over and pull through two. So let's try and see how many chains I've already done. Here. I have one. You can see 1 v, 1, 2, 3, 4, 5, 6, 7, 8. So I need to do two more. Let's just insert our hook and do two more. Yarn over. Pull through the loop. One more yarn over, and pull through the loop. Here we have chain ten. To finish it, you just need to cut the end of the yarn that is connected to the ball and you just pull the thread. I think we could use a chain to do like a scarf for Minnie Mouse. She needs winter clothes, right? Quick recap for the chain. Do a yarn over. Grab the yarn and pull it through the chain. Always like that. Yarn over. Grab the yarn and pull it through the chain. Yarn over, grab the yarn and pull it through the chain. Well done. Let's now learn about doing the single crochet.
6. How to do a single crochet : In this video, we are going to learn how to do a single crochet. Single crochet is usually represented in the patterns by SC, single crochet. Let's start by doing what we have learned in the previous video. So we are going to do a slip knot and we are going to chain ten stitches. 1, 2, 3, 4, 5, 6, 7, 8, 9, 10. We have our chain 10. And now, to make the single crochet, what we are going to do, you will hold the chain with your left hand. To do the first single crochet we are going to skip this first chain here, and we will be working in the second chain. So insert your hook inside the second chain like this. So you grab like the upper leg of the V of the second chain. You will do a yarn over, so your hook will go below the yarn. You will grab the yarn and you will pull inside the loop. And you will have two loops in your hook. And now what you are going to do is again, do a yarn over, grab the yarn and pull it through both of two loops in your hook. And you just did a single crochet. And you can see hearing the top the V stitch. These chain will be the base to do the single crochet stitch that we are now practicing. Again. Insert your hook in the next chain. So in the next V, You can see that the next two v is this one here. You will insert to hook. Sorry, insert the hook like this. Now, you will yarn over, grab the yarn and pull it through the chain. You see? And you have two loops in your hook. Now, yarn over again and pull through both of the loops. Again, we are going to move to the other chain. The other chain is this one here. You see the V. We will insert the hook inside the chain. Do the yarn over and grab the yarn, pull it through the chain. We have two loops. We do a yarn over again, and we pulled through both loops. We will just continue to do these until the end of the 10 chains. Insert the hook inside the chain, yarn over and pull the yarn through the chain, yarn over and pull through both. Again. We are building single crochets in the top of our chain. As you can see here. If we do a close up, here, we have our chain, our "Vs". And then what we are building in the top is all these single crochets. Again, insert the hook inside the next chain. Yarn over and pull the yarn through the chain. You will have two loops in your hook. Yarn over again, sorry, yarn over again. And you will pull through both of the loops. Insert the hook in the next chain. Yarn over, pull through the chain. You will have two loops. Yarn over and pull through both of the loops. We are almost finishing the first row. It's easier for you to pass the yarn If the hook is facing you, instead of the hook being like this, you see? So yarn over and pull it through. We just made ten single crochets in top of the 10 chains we have made before. And we are going to build a sample to keep practicing these single crochets. And for you to see the final effect of this stitch. Every time you finish a row, you need to chain one, And you will turn your work so you can continue doing another row in the top of the row of single crochets that you have done before. So now, we need to insert, we will skip this one, that was the one that we did Chain 1 to go up. So we will insert our hook in the second V , in this one here. Grabbing both legs of the "Vs". And we do a yarn over, pull the yarn to the front, yarn over and pull through both loops. You need to keep repeating this until the end of the row. You need to find the next first stitch. It's here. You will insert the hook below both legs of the "V". You yarn over and grab the yarn and pull it to the front. You have two loops. Yarn over. And pull through both of the loops. Again. So the next "V" is here. So you need to insert the hook below both legs of the V. Yarn over, Pull it through, yarn over and pull through two loops. Next stitch is here. Insert the hook belowl both legs of the "V", grab the yarn, pull it to the front, yarn over and pull through two loops. So I am almost finishing row number 2. I will insert the hook below the next two legs of the "V", Yarn over and grab the yarn to the front, yarn over and pull through two. And now he have here, you can see here the final "V". We just insert the hook below both legs of the "V". Yarn over and pull it through. Yarn over And pull through both loops. Now we have two rows of single crochet. Keep going. When you finish one row, what you need to do is, again, chain one. Chain one, and turn your work. And you will be working now from right to left. So let's see here, the first "V", you will insert the hook below the first V. Grab your yarn, yarn over, and pull through two. So you just need to keep practicing these single crochets. You can do as many rows you want until you feel confident. Just to practice. I will probably do like ten rows.. And I will meet you in the end of the 10 rows, to show you how it looks. Remember that every time you reach the end of one row, like I'm doing now, you just need to chain one and turn. And then you just need to find the next "V". And you will continue working these single crochets. Meet you in some minutes and keep practicing the single crochet. So as you've seen, I've been growing my sample of single crochets. I will just finish this row. I am in the last stitch. So in the last single crochet. And to finish, I just chain one. And you will cut your thread and just pull the yarn.
7. How to do a double crochet: We have here our foundation chain. So we chained 10. And now, to do the double crochets, Let´s chain three more, 1, 2, 3. These will count as the first double crochet. And now to do the first real double crochet, we yarn over. And we will skip 1, 2, 3, the chain 3 that we did. And we will insert our hook into the chain 4, like this. Again, we did the yarn over. We skip the first, second, third chains and we will insert the hook into the fourth chain. Yarn over and pull the yarn to the front. Yarn over, pull through both loops. Yarn over, pull through both. Again. Yarn over, insert into the next chain. We are almost finishing row number one of the double crochets. We will do the last double crochet. We yarn over. Insert the yarn into the last chain. We yarn over and pull the yarn to the front. We yarn over and pull through two. And again yarn over and pull through two. Now, we chain one and we turn our work. You can see, that here It's the first stitch of the row below. And so we will keep continuing doing double crochets. Yarn over. Insert the hook into, below the next stitch. Pull the yarn to the front. Yarn over, pull through two, yarn over, pull through two again. And here you can see the first "V", the first stitch. Yarn over, insert again below the legs of the next stitch, yarn over and bring the yarn to the front. Yarn over, pull through two loops and yarn over, and pull through two loops again. Yarn over. Let's go below the next stitch. Yarn over and pull the yarn to the front, yarn over, pull through two, yarn over, pull through two. And let's just keep repeating this until the end of row number two. I will see you In the end of row number two. I'm almost finishing row number two. Yarn over below the next stitch. Yarn over, pull to the front. Yarn over, pull through both loops and yarn over again, pull through both loops. And here we have, you can see here, the last stitch from the row below. And we do a yarn over, we will insert below the stitch. Yarn over, pull to the front. Yarn over, pull through two, yarn over, pull through two and chain one. Turn. And we will start row number 3. Again. Yarn over Insert your hook into the first, you can see this hole here. This is the first stitch from the row below. So insert the hook inside, yarn over, pull the yarn to the front. Yarn over, pull through two, yarn over, pull through two. And so just keep repeating that and practice as many times as you need until you feel comfortable doing the double crochets. You can make a sample as big as you want. This is just to practice. And I will meet you in the end of my sample. So see you in a moment. I'm almost finishing my sample. I'm doing my last double crochet. You can see here the last "V", the last stitch of the row below. So yarn over, insert below that stitch, yarn over, pull the yarn to the front. Yarn over, pull through two loops, yarn over, pull through two loops. Let's chain one. Cut. Pull the thread. And we've just finished our sample of double crochets. So here we have our sample of double crochets. In the next video, I will teach you all about the half double crochet. Thank you for watching.
8. How to do a half double crochet: In this video, we will practice the half double crochet. And the half double crochet is represented in the patterns by HDC. Start by doing the slip knot, insert your hook inside the knot, And let's chain 10. So our foundation chain will have 10 chains, 1,2,3,4,5,6,7,8,9. 10, 10 chains for our foundation chain. And now we will practice in row number one, the half double crochet. We will chain one more. So we can go up. We skip the first chain, we skip the first chain, and we'll start working on the second chain. This one here. The second "V". To do the double crochet, you need to start by yarn over hook. So wrap the yarn around your hook, yarn over. And now you are going to insert the hook inside the second chain. Okay? You are going to yarn over and pull the yarn to the front. And we will have three loops on our hook. And now to proceed, we need to do a yarn over again. So wrap the yarn around your hook. And in this case, because it's a half double crochet, we are going to pull the yarn through all the three loops that are in our hook. So we are going to pull the yarn through all the three loops. And we just did our first half double crochet. Again. Let's do a yarn over, insert into the next chain. Yarn over, pull to the front. Yarn over again. And let's pull through all the three loops. So, it's really easy this one. Again, yarn over, insert into the next chain. Yarn over and pull the yarn to the front. And again, yarn over and pull through all the three loops. Yarn over, insert into the next chain. Yarn over and pull the yarn to the front. We have three loops on our hook. And now we do a yarn over and pull through all the three. See, we are just creating our half double crochets. Continue doing this until you reach the end of row number one. And I will meet you there. And the last one, yarn over, insert inside your hook, yarn over, pull to the front. Yarn over, pull through all the three loops. And we just ended the first row. And now to continue, we just chain one and turn. To continue, We do a yarn over again. We will insert in the last half double crochet that we did in the previous row. We pull the yarn to the front yarn over and pull through all the three loops. Again, yarn over, insert into the next stitch. You can see here the next "V". We will insert below the "V", yarn over, pull the yarn to the front. We have three loops. Yarn over and pull through all three loops. We just need to keep repeating this until the end of the row. And when you reach the end of the row, remember, you just chain one and turn. And you will keep continuing doing half double crochets in the top of the previous half double crochets, in the previous row. You just need to keep practicing. And when you feel more confident about half double crochets, you can finish your sample. I'm in the end of row number two. So here you can see my last stitch. I will do a yarn over, insert the hook below the both legs of the "V", yarn over, pull the yarn to the front. We have three loops. Yarn over and pull through all the loops. And again, to continue, we chain one and we turn our piece and we will just continue adding half double crochets. Yarn over. This is the first half double crochet from the previous row. So we will insert the hook below the "V" legs of our stitch. Yarn over. Pull the yarn to the front, yarn over and pull through all the three loops. Just continue to do that. And I will meet you when I have my sample finished. I am almost finishing my sample. So we are going to do the last half double crochet, and to finish chain one. And you just cut the thread. And you will pull the yarn. And you just have your sample of half double crochets.
9. How to do a treble: In this video, we are going to learn how to make the treble. Start by doing the slip knot again. Insert your hook inside the knot. And chain 10- That will be our foundation chain, 1, 2, 3, chain 10. Now chain one more. We will skip that chain that we just did the last one and we will be going to work the trebles. The trebles are a little bit more tricky because instead of doing the yarn over one time, you need to do it twice. We will stay with three loops on our hook. Again to make a treble, We yarn over one time, two times. And now we will insert the hook inside the second chain, counting from the right side of our foundation chain. And we do a yarn over and pull the yarn to the front. And we will stay with four loops in our needle. Again. Here it's the chain one that we did to go up. And here it's the second chain where we should start doing the treble. So yarn over 1, 2 times. Insert into the second chain, yarn over and pull the yarn to the front, and yarn over again. And you are going to pull through two loops of your hook. So 1, 2 loops and you keep three loops in your hook. And then you do again yarn over and pull again through 2, 1, 2. And you stay with two loops in our hook. And now again yarn over and pull through 1, 2. So you just need to keep repeating this. So another treble. Yarn over one, yarn over 2, right? Insert into the next chain the hook, yarn over and pull the yarn to the front. And we have now 1, 2, 3, 4 loops in our hook. Yarn over and pull the yarn through 2 loops, and we stay with 3 loops on our hook. Yarn over, pull through 2. And again, yarn over, pull through one, two. So you always pull through two. Yarn over, pull through two, yarn over, pull through two. So again, yarn over twice, insert into the next chain. Yarn over, pull to the front. We have 4 loops, yarn over, pull through 2, yarn over, pull through 2, yarn over, pull through one, two We just keep repeating this and we are making trebles. And we will do this until the end of the row. For this class project we will not need to use the trebles in our project, but I'm just showing you how to do it. So now I'm doing my last treble. Yarn over twice, insert into the last chain, yarn over, pull through the front. We have 4 loops, yarn over, pull through 1, 2 loops. And again yarn over, pull through two, yarn over, pull through two. Now chain one. And turn your piece. We will keep doing trebles in the top of each treble we just did in the row before. So yarn over twice, right? Here you can see this space. So this is the first treble. We will insert your hook inside the first treble of the previous row. Yarn over to the front. We have 4 loops, yarn over, pull through two, yarn over, pull through two, yarn over, pull through two. Keep practicing the trebles. And I will meet you when you finish your sample. I will also finish my sample. See you in a couple of minutes. I'm doing my last treble. Insert into the last previous treble. To finish, remember just chain one. Grab your scissors, cut, and then pull the yarn. And you just finished. your sample of trebles.
10. Class Project - Granny Square: This class project is the granny square, and we will be practicing the basic stitches that we have learned before. So for this project, you will need three different colors of yarn. Choose the colors that you would like to, and just make sure that it's the same quality of yarn. And that each ball of yarn recommends the same size of needle because you will be using the same needle. For example, you don't want to do one color using a very thick yarn and for another color, a very thin yarn. Because you could notice the differences between the two yarns. Use the same type of yarn. Different colors, play around with the colors and just enjoy. So let's start and pick the color that we want for the inside. In my case, I will use the purple color. And remember, to start, let's do a slip knot. And let's chain 5. So start by chaining 5. 1, 2, 3, 4, 5. The beginning is always tricky because we don't have a lot of yarn to hold. But I chained 5 and now I'm going to do a slip stitch. We want to join our chain 5 in a circle. Because we want to make these round here. Here is our first chain. We will insert the hook inside that first chain. Try not do it the first chain 5, don't put a lot of tension because it will be tricky to insert the hook and do the slip stitch. So now that you inserted the hook into the first chain, you need to do a yarn over. And you will pull the thread all the way through all the loops. And if you see, can you see here that it started to have a rounded shape and we just turned the chain 5 into something circular. Now we need to do the stitches inside the circle. We can see here we have an opening space, right? We will be working around these opening space. In this case, poor Minnie Mouse! Here, you can see everything is worked inside here and it will grow from the inside to the outside. In this pattern, you start by doing a chain 3, 1, 2, 3. These chain tree will count as the first double crochet. And now you need to do two more double crochets. So remember, to do the double crochet, we do a yarn over, insert our hook, in this case inside the ring that we just made. So it´s inside the ring, we yarn over and pull. You can see here the yarn over and pull through the ring. And we have three loops. We yarn over and pull through two loops. Yarn over and pull through two loops. And we just did our first double crochet. Now, we need to do one more double crochet. Yarn over, insert into the ring, yarn over, pull through the ring. And we've got three loops. Yarn over, pull through two loops, and yarn over, pull through two loops. We just did our first chain three. This one counts as a double crochet. And we need two more double crochets. And now, because we want... This is equivalent to do something like this side of the square. Now we need to do the other three sides. For that, You need to chain 3, yarn over, 1, chain 2, chain 3. Okay? We just created the chain. The chain is this part here that is hidden by the white yarn. So the chain 3 will create the space, this hole here. And now we need to do 3 double crochets. Yarn over, go inside the ring like this, grab the yarn, pull it through the ring to the front. And we have 3 loops. Yarn over, pull through two, yarn over, pull through two. Again, yarn over, insert inside the ring, yarn over and pull the yarn through the ring, yarn over, pull through two, yarn over, pull through two. And the last double crochet, yarn over, Insert the hook inside the ring, yarn over, pull the yarn to the front. Yarn over, pull through two. Yarn over, pull through two. We just did one more set of three double crochets. If you see here, this is the ring that we are working around the double crochets. This one is the first set that we did, of double crochets. Then we chained 3 that corresponds to this side. You can see if we put this on top. The chain 3 will create this opening space. We did one more set of double crochets, that is this one. And so now, we need to repeat again three more chains to create the space. And do another three double crochets, three chains and three double crochets. Let's continue. Let's chain 3 , 1, 2, 3 and do again a double crochet inside the ring. Yarn over to the front, Yarn over, pull through two, yarn over, pull through two. And again two more single crochets. So yarn over, insert inside the ring. Yarn over, pull the yarn to the front. Yarn over, pull through two, yarn over, pull through two. One more double crochet. Yarn over, insert inside the ring. Pull the yarn to the front, yarn over, pull through two, yarn over, pull through two. And as you can see, we almost have our square. So we have 1, 2, 3 sets of double crochets, three double crochets. Let's chain three more, 1 , chain 2, chain 3. And let's do the final set of double crochet. So insert again inside the ring. Yarn over, pull through two, yarn over pull through two 2. Again, one more double crochet, yarn over, pull through two, yarn over, pull through two. And the last double crochet. And now to finish, we need to join this side with this side. And we need to do chain tree to create the space, the opening space. Let's chain 3. 1, 2, 3. And finally, let's do a slip knot in the top of the first chain 3 that we did. So we go here to the top. We insert our hook inside. We yarn over and pull the yarn all the way through the loops. And just chain one and cut your thread. Pool your thread. And we just started the foundation, the square for our granny square. Now grab another color and let's continue with this part, with the second color. Continuing the project, I'm going to add a second color. And for that, we need to insert the color in the top of one of the double crochets that we did previously, choose one of the double crochets. For example, I will chose this double crochet. And here is the top of my double crochet. Okay? And I will, just to start, I will do a slip knot and I will insert the slip knot behind inside the hook. And then I will just pull the skip knot through The double crochet that I chose. See? So to start this next row, we need to chain 3, 1, chain 2, chain 3. And this one will count as the first double crochet. And now in the top of the next two double crochets, we will do one double crochet in each one. Yarn over, insert the hook in the top of the double crochet here, you see? yarn over, pull the yarn to the front. Yarn over, pull through two loops. And yarn over, pull again through two loops. And we just have our double crochet. These chain 3 will count as one double crochet. Then we have here the first double crochet, and let's do another one in the top of the last double crochet of this set of three double crochets. Again, yarn over, insert inside the double crochet of the previous round, yarn over, pull the yarn to the front. And we have three loops on our hook. Yarn over, pull through two, yarn over, pull through two again. See what we just did? The first set of double crochets of the second row. Now, we need to work inside the space that we created with the chain 3. And inside the space, you will always repeat the same thing. We will do. One double crochet into the space. So yarn over, insert to hook inside the space. You see? Grab the yarn. So yarn over and grab the yarn to the front. And we will do a double crochet, yarn over, pull through two. And again yarn over and pull through two. Okay? We just did our first double crochet inside the space. And now we need to chain 3, chain 1, 2, 3. And we will do another double crochet again inside the space. Yarn over. Insert your hook inside the space. Grab the yarn to the front. You see? And now yarn over, pull through two. And again, yarn over, pull through two. We just created the second corner. We worked inside the space. We did one double crochet, chain 3 and another double crochet. And now we just need to repeat this, all way around. In each double crochet of the previous round, in each one of this, we will do a double crochet in the top. And in the chain space, in here, in this hole, we will work one double crochet, chain 3 and one double crochet. Let´s continue. Double crochet. Yarn over. Insert the hook inside the top of the previous double crochet. Yarn over, pull the yarn to the front. Yarn over, pull through two. Yarn over, pull through two. We just did the first double crochet of this side. Now one more in the top of the second double crochet. Yarn over. Insert the hook inside, in the top of the second double crochet. Yarn over. Pull through two. Yarn over, pull through two. And one more. Yarn over, insert in the top of the previous double crochet. Yarn over, pull to the front. Yarn over, pull through two, yarn over, pull through two. And again, we have another space here. So let's do the same that we did in the first space, previously. Yarn over. Let's do one double crochet into the space. Yarn over, pull through two, yarn over, pull through two. Now chain 3, 1, 2, 3. And now another double crochet into this space. Yarn over, sorry, yarn over, pull to the front. Yarn over, pull through two. Yarn over, pull through two. And as you can see, we are just going around and we are just creating new corners and new holes, where you can continue in the next round, reshaping your square. Let's just keep repeating this pattern until the end, and I will meet you here. I'm now starting the last side of the square. I will continue doing one double crochet in the top of each double crochet of the previous round. 1, 2, 3. And now we will just work inside the last space. Yarn over. Let's do a double crochet inside the space. Then let's chain 3, 1, 2, 3 chains, and another double crochet inside the space. And now to close and finish our square, we just need to do a slip stitch. So in the top of the chain 3 that we did previously, we will insert the hook. Yarn over and pull the yarn all way through the loops. And we chain 1. And we cut. And we pull the yarn. We did the second row of our square. Now grab another color. I will use again, the purple. And let's continue, with row number three. I will start by doing a slip knot. We need to choose another double crochet from the previous round. I recommend to start in the beginning of a corner. Here we have one double crochet. We will insert in the top of the double crochet, right? And we will grab a new color. To the front. You see? We will work with the yarn that is connected to the ball. Don't forget that. The other tip is to hide when we finish our square. Now, we need to do the same thing as we did before. We need to chain 3, 1, 2, 3. This one will count as the first double crochet of the third row. Now he have here 1, 2, 3, 4 double crochets of the previous row. And what we need to do is, do one double crochet in the top of each one of these double crochets. Yarn over, insert the yarn in the top of the previous double crochet, yarn over, pull to the front. Yarn over, pull through two. Yarn over, pull through two. Okay? Now we need to do three more, 1, 2, 3 more double crochets. Yarn over, insert into the next double crochet of the previous round. And do another double crochet. One more double crochet. And we have here one more double crochet from the previous round. We just need to also do one double crochet in the top of that one. Okay? And we worked here a chain 3 to start that count as a one double crochet. And we did 1, 2, 3, 4 more double crochets. And now again, we have here an opening space and we will be working inside this hole, we are going to do two double crochets, chain 1, and two double crochets. Let me insert the hook. Two double crochets. Yarn over. Go inside the chain 3 space. Yarn over, pull the yarn to the front, yarn over pull through two, and yarn over, pull through two. Again. Yarn over, go inside the chain 3 space. Yarn over, pull the yarn to the front. Yarn over, pull through two, yarn over, pull through two. We just did two double crochets inside the space. Now we are going to chain one and we will do two more double crochets inside the same space. So yarn over, insert your hook inside the space, yarn over, pull the yarn to the front. Yarn over, pull through two. Yarn over, pull through two. And now again. Yarn over, inside the same space. And we will do the last double crochet in the space. You can see that we just created here, in this space, two double crochets, one chain and two double crochets. Now, we will move to another side of the square. And we will just repeat the same. We have 1, 2, 3, 4, 5. We will do five double crochets. One in the top of each of the double crochets of the previous round. Yarn over, go inside the previous double crochet. One double crochet. Let's do the second one. So let's do the next double crochet here. And we need to do one more double crochet. Let's do one more. Here. Insert inside the top of the double crochet. Yarn over, pull to the front, yarn over, pull through two, and yarn over, pull through two again. And again. If you see we just reached another corner, another hole. You just need to repeat inside each hole, two double crochets, chain one and two more double crochets. Let's do one double crochet. Two double crochets inside the same space. Now, chain one and another two double crochets inside the same space. We just did another side of our square. And we just need to repeat in this row, five double crochets in top of each one of the double crochets of the previous row. So 1, 2, 3, 4, 5 double crochets. And then again in the space, two double crochets, one chain and two double crochets. And then again five double crochets and into the space, two double crochets, one chain, two double crochets. And I will meet you when I'm almost finishing this row. And now, I'm working inside the last space two double crochets. 1, 2. Now chain 1 and do another two into the same space, two double crochets. And now we just need to do a slip stitch. Joining this corner to this side. Remember, we started with the three chain and we are going to insert our hook inside the trhree, the top of the trhee chain. And we do a yarn over and pull all way, our yarn. So we will close. And chain 1 and just cut the yarn. Let's cut it. Pull the yarn. And we just finished row number three. Now we are ready to do the last row, row number four and in row number 4. We will just work single crochets. Grab another color. You can use the same colors. I will choose another color. Now you could use the blue, for example again, or in my case, I will add a pink one. And that's the beauty of the granny squares. You can play with the colors and using the same pattern, you can obtain different effects. And it's really cool. I will grab a pink color and we will start doing row number four. I will start again by doing the slip kot. And you will choose any of the double crochets you have worked previously to start. I always like to start in the beginning of a side of the square. So I'm going to start here in this double crochet of the previous round. And I will insert the new color. So let me just make it smaller. Insert a new color. And now using the longer thread, the yarn that is connected to the ball. Do a chain One. Let's start with the single crochets. Insert the hook inside the next double crochet of the previous row. Grab the yarn, yarn over, grab the yarn to the front, yarn over and pull through two loops, the two loops. Again, let's continue and do another single crochet. You just keep repeating single crochets. You'll find the next double crochet from the previous round. Insert your hook, yarn over, and pull through both loops. See? 0ne single crochet in the top of each double crochet. I reached the first corner. Here we have the place where we did, in the previous row, the chain one stitch. So we have a small hole here. And here. Inside the small hole, we need to do three single crochets. Insert the hook inside the space, yarn over, pull the yarn to the front. Yarn over, pull through all loops. So one single crochet inside the hole, again, another one. This is the second one and 3, inside the chain one space. We just did the corner. And now let's continue doing one single crochet in the top of each double crochet of the previous row. Insert in the top of the next double crochet of the previous row. Yarn over. We'll continue doing single crochets. This row is pretty easy. It's just single crochets. And when you reach the corner where you did, in the previous row, the chain 1 and created this space, you just need to do three single crochets inside of that space. So 1, 2, 3 and continue. Next double crochet, we'll do a single crochet in the top. You just need to keep doing this all way around. And I will meet you when we reach the end. Here. I have here two more double crochets to do the single crochet in the top. 1, 2. Okay? And now I reached the chain one space of the previous row. So I will do three single crochets inside.1, 2, 3. And now I still have here two double crochets of the previous row. Then I need to do a single crochet in the top. I willl do one single crochet and one more single crochet. To finish insert the hook in the first chain you did to start the row number four. Yarn over and do a slip stitch all the way down, here. Now, I like to end, I like always to chain one. After chaining one, I cut and I just pull. Now we have here all these threads and we are going to hide them and make sure that they are not going anywhere. See you in the next video, where I show you how to weave in the ends.
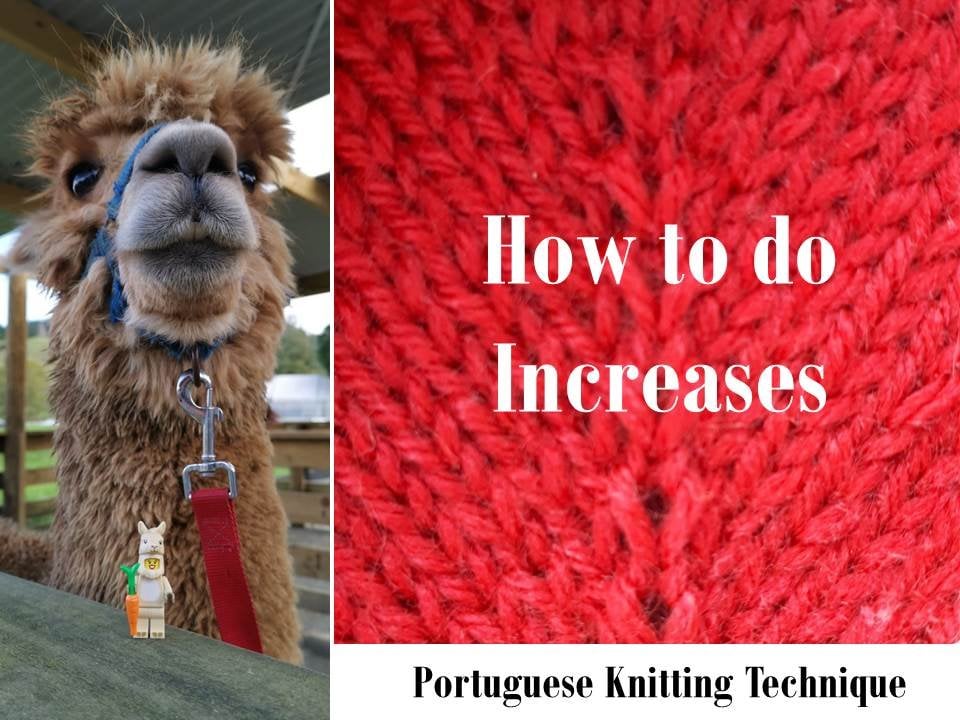
11. How to weave in the ends: To weave in the ends, you will need a tapestry needle. You just need to grab the end of your yarn. Thread the needle. And now, because we are using the blue thread, we need to hide inside the blue double crochets that we did. So I like to go inside, insert the needle inside the stitches that we have done. And you will pull the yarn inside. And because you are pulling inside the blue, you will not see the blue. Let's go here a little bit more, like this. You see? Blue inside the blue and you pull it. And you cannot see the thread. We just need to cut. And you cannot see that the thread was there. Now you just need to keep repeating, doing the same thing for each one of the ends. For example, now the purple one, thread the needle. And you cannot see that the thread is hidden and you just cut. Just do the same for each one of the threads. And I will meet you when you have hidden all your tips of yarn. So here, I'm just showing you the last chain that we did. And to finish the square, I like to hide it inside the next stitch. Like this. And then you can just continue to insert below the pink yarn. And you will cut. And now, because you just finished doing your square, it's not a flat piece. What I recommend is to block all of your squares. And for blocking your piece, I have a video in my previous class, if you go to the Portuguese knitting class, my first one, there's one section just explaining how to block your projects. And if you are not interested in knitting and you just want to crochet, you skip all the other parts of the video, but you have a section that is all about blocking your piece.
12. Well done :): Congratulations, you have finished your class. Well done. I hope you have enjoyed this class and that you have learned new skills. Please feel free to share your photos of your granny squares, of your samples, in the project gallery for this class, I would love to see them. Thank you for your time and for choosing my class. And I really hope to see you in a next class. Bye!
 Vania Infante