Transcripts
1. "A Christmas Bauble Per Month" - Welcome to my Crochet Class!: Hello beautiful makers. Welcome to my Skillshare class. My name is Vania, and that will be your teacher. I'm from Portugal, but
I live in Abu Dhabi. I learned to need to do crochet and so with my sweet grandma. And I'm so proud that these skills will
be with me forever. Every time I do some meeting, Crochet, Sewing, I'll
always remember my grandma. My, the way my
grandma's name is, I wasn't developed
a lot of classes, textiles related for
adults and kids. And today, I'll deliver
you this class. If you are passionate
about Christmas, you are in the right place. Why don't you try
and make every month one Christmas decoration
for your Christmas tree, like these cute Christmas ball. This way when December arrives, you don't need to rush making all the Christmas
tree decorations and all the handmade presents. So join me to make every month one Christmas
decoration for your tree. This is your crochet
month with Challenge. Christmas can be
whenever we want, right? So we can celebrate a little bit of
Christmas every month. In this class, you are
going to learn how to crochet a Christmas bauble. This is a very friendly project
for a complete beginner. So don't worry, if you
don't know how to crochet. We will start with
the Main body of the bauble and then we
will do the Topper to hand the bauble and then also
teach you how to sell Together the Topper to the
main body of your bauble. And Indian is some ideas, some little extra tips to decorate and make your
Baubles more Christmassy. The Christmas decorations
are only suggestions. You can just surprised me. We new ideas and
inspire each other. So that's the goal and to post each month one photo of
your Christmas Bauble. This class, the main
stitch that you are going to use is just the
Single Crochet. I will teach you how to
make the Single Crochet in a very easy and friendly way if you have never
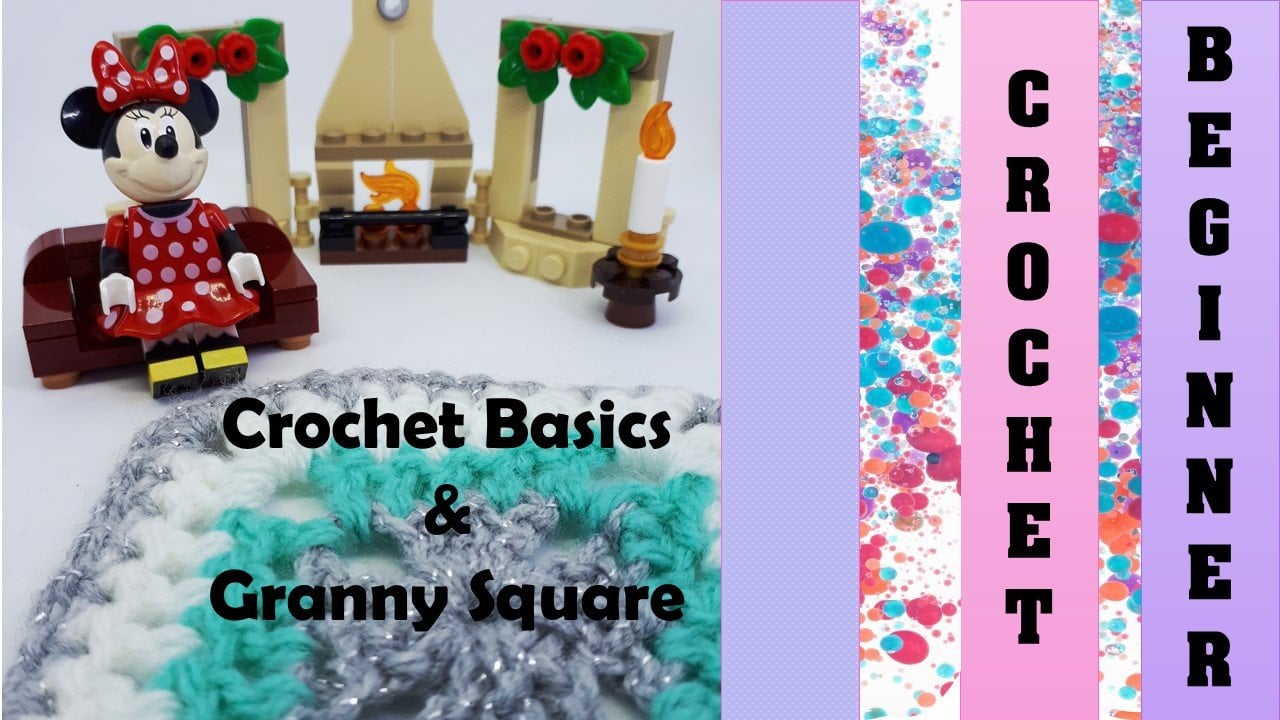
done it before. Might also want to check my previous class
on granny squares, where I go through all the grocery stitches and
you can practice each of the main basic crochet
stitches or this class, it will only be Single Crochet. You will also learn how to start your project by using the
Magic Ring technique. You will learn how to
place the stitch marker and count the stitches
all around your Round. You will also learn
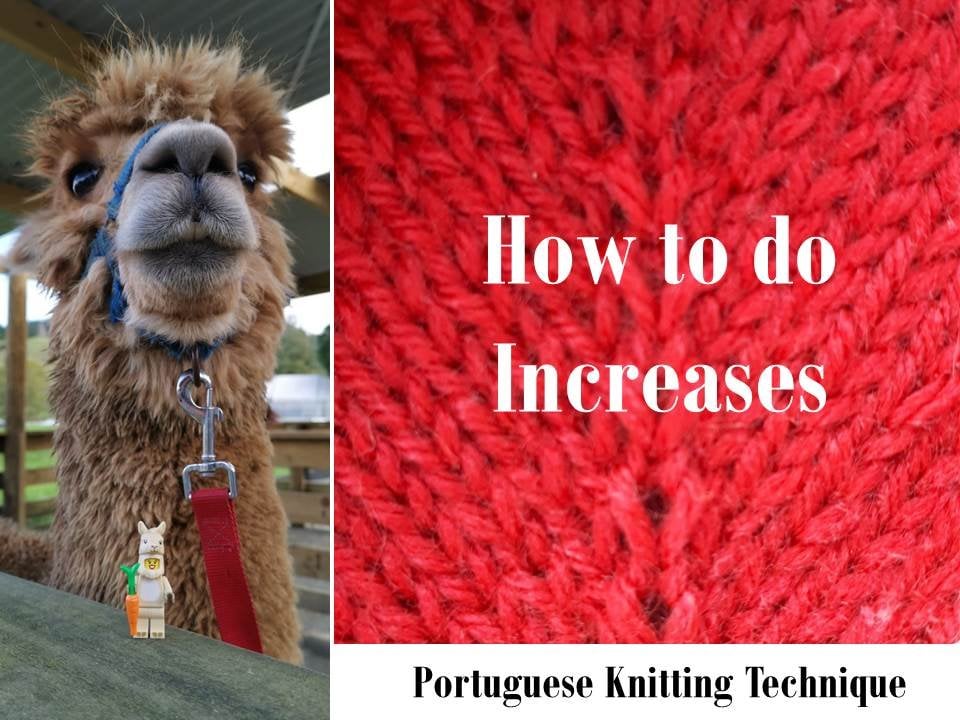
how to make increases. And now to make decreases. The increases and
decreases will allow you to create the
shape that you want. I'll also go through the
Crochet Nomenclatures and how to read the pattern
and keep yourself organized. In the class project page, you will find attached the Crochet
Nomenclatures document, a document with the Tips, and also the document with
the Pattern Instructions. You can also find a document
to Keep Track of your work. I also created show
notes where you can find a Timeline for each section of the project off the pattern. So if you want to review
a specific section, you don't need to
watch everything. You can jump straight away to the part that
you want to check. Are you ready for this class
and for this challenge? Let's have some FUN together and spread the joy of
Christmas all year long. Seaweed, my class, Bye
2. Christmas Bauble - Materials & Tools : For this class, you
will need some yarn. You can choose any
yarn you want. You will need one for the
main body of the bauble. And you'd need another one. For the top of the bauble. You will need one for this main part and the
other one for the top. Make sure that these
wanting to talk is less thick than the other one. This one here, you can
see on the label of your yarn which size of the
needles It's recommended. Here they recommended a 3.43, 0.5 size because I
want a bigger bubble. I don't mind using a
four millimeter hook. So I have here my
formula meter hook. I have this one here. Also we the label. And I'm going to use a
to 0.75 millimeter hook. Make sure that you just choose your hooks according to the yarn that you
are going to work. Wheat. It doesn't need
to be the same as me. Then you are going
to need pair of scissors, a stitch, marker. You can use something like
these, are like these ones. You can also use some
embroidery thread. If you want to do
some decorations in your final Christmas Bauble. You can also have some
bells to decorate. You can also have
some cute Decorations to stitch into your bauble. Or you can have pompoms. You will need the
Stuffing material. These one, you can just buy
stuffing material in bulk. Or if you want, you can
buy very cheap pillow and use the material inside to staff the
Christmas Bauble. You will need an Embroidery
needle. If you want. You can use some beads in any colors that you
want to decorate. You might also want to use some buttons for
the decorations. And you will need some
normal cotton trade. In case you are not varying
too and Sewing and stitching. You can use a Glue gun to attach the decorations to
your Christmas Bauble. Depending on the
decorations you want to do, You might also need
to use some Felt, green felt to make
the holly leaves. Some green embroidery thread
and a fabric scissors to cut the Felt. You might also need to find some beautiful red
beads like these ones. To complete your
Holly Decoration. Feel free to grab
felt in other colors depending on your
ideas for today, zines to decorate your
Christmas Baubles. Grab all your tools
and materials, and let's get started.
3. Tips & Tricks: As I always say in my classes, it's always good to keep
the labels of your Yarn. Don't throw them away. And you can even get a
little sample of the yarn and put some tape and
keep them in a diary. So you always know
the yarn that you use and its characteristics. The labels are very
important for you to see the hook size
there is recommended. This is a recommendation. Of course, if you use a
bigger or smaller hook, depending on the yarn
that you are using, you can end with a
bigger project if you use a bigger hook or
a smaller project. If you use a smaller hook, because we are doing a
Christmas Bauble this size, I think, at least for me, is not very important. In case you are doing something to where
that is important, the size of the hook, and you need to make a
sample to check the size. A fixed, correct. Because you need a good fitting for you to wear a garment. But this is just a decoration. I think it will be
okay if you have a bigger bubble or
a smaller bubble, depending on the size of the hook and on the
yarn that you use. Another tip to keep
yourself organized is to have a meeting
or Crochet diary. You can have any note book. I bought this beautiful wanting in acute shopping Aberdeen. And I just love it. I'm trying I'm still figuring
out how to organize myself. I like to write the name of
the pattern that I'm doing. The date of the cast on a when I have the
finished object, the hook that I'm using
an I write the name of the yarn and then I place
the label information. And I put a little bit of the yarn and I've
put with some tape. So I have here the
inflammation. That way. I keep everything in place
and it's really useful if one year later I want to
check which screen I used, on which hook I used. It's always good to keep track. Another important
thing is always keep track of the stitches
in the end of each row. For example, if you see
that in row number three, we need to have 28 stitches. You just need to count the stitches until you
reach the stitch marker. To make sure that
you have to 28. To count the stitches, you just need to count
the number of these. Here we have one V. Can you see that the trade is
drawing a V then to Vinny's 3456789
and finally ten. So we have ten, Wi's. Always remember
the stitch marker marks the first
stitch of each row. Every time you finish the row, it means that you reached again
the stitch marker and you need to remove it to
start a new Round. When you start a new round, you place it again in the
first stitch of that row. Another important tip when
you're doing crochet is the position of these
part of the hook. So this is called the throat of the hook, this groove here. And when you are working, it needs to face you. It shouldn't be
facing backwards. It should be facing you. I hope these are
good tips for you. You can also find
a document with these tips in the class page. If you have any teeth that
you think it should be added, please don't
hesitate and send me a message so we can improve
the class materials. But I think these ones
are the main tips that I keep in mind every time
I'm doing a crochet project, Let's continue our class. And I've been doing
our Christmas bubbles
4. Crochet Nomenclatures & Pattern Reading: Let's go to the
Crochet Nomenclatures. As I said in my previous class, there are different
Nomenclatures. You can find US or
UK Nomenclatures. And usually when you
start reading a pattern, that pattern should say in which Nomenclature
it is written. The one that I'm
going to teach you in this class is the
us Nomenclature. It can be a little
bit confusing, but don't worry with
these information here. You have everything you need. In this class. We're going
to use just single crochet, that's the abbreviation is S. If these pattern was written
using the UK Nomenclature, the Single Crochet would
be named a double crochet. With this chart, you
can always translate from one to another
nomenklatura. I also uploaded the
pattern for you and I tried to write the instructions as easy as possible to follow. The pattern starts
saying that we have the us Nomenclature and we
have the abbreviations. The main thing to have
in consideration is that the S C is the single crochet and
we are working in roles. You can see here, we will
start by doing the Magic Ring. And in the end of
the Magic Ring, we will have seven stitches. We just keep following row
number 12345 until we finish. And we need to make sure that in the end of each round we have those number of stitches to make sure that our
pattern is correct. Every time you see
these information, the information that
is written between the stars means that you need
to repeat that information. For example, here, in row number two,
in-between the stars, we have one single crochet
and one increase ink. I-n-c means increase means to do two single crochets inside the same stitch off
the previous rounds. And I will explain that better when we are
doing the project. Don't worry, you just
need to know now that ink is increase in
row number two, what we need to do
is we need to repeat one single crochet
and one increase. And then again do
one single crochet, wanting one single crochet, one increase until we finish the row and we have a
total of 21 stitches. That's how we read the pattern. These are the main
things that you need to know about reading the pattern. As we go through the project, you will become more comfortable reading it and you will
understand it better. I really hope the
pattern is clear. And please, if you
see that there is something that
is not very clear, just send me a message
and I can make it better. Now that we have gone
through the pattern. I also added in case
you want to keep track. I did a document where you can keep track of your progress. The challenge that
I set for myself is each month to do
one Christmas Bauble. Because sometimes we
are very busy and we don't have a lot of time
for our crafting life. And I think doing
just one Bauble, it's doable and it will give
us a sense of achievement. When Christmas arrives,
for each month, you have the numbers of
rows that you need to go through until you
finish the bauble. These are for the main
part of the bauble. And these ones are the rows for the top part of the bauble. You just need to keep these two papers while
you are doing your work. And as you finish one round, you just might mark a tick saying that
you finish that row. By doing that, if you stop working on your project
in the next day, you will always
know where you left your project and you will
not have any mistakes. Don't feel any pressure
with this chart. This is for you to
keep a sense of achievement and keep
yourself organized. All your feedback is
really important and thank you so much for
watching my class.
5. Christmas Bauble - Crochet Main Body: Let's start to Magic
Ring by wrapping around the yarn
around your fingers. By doing it next. Again, like that. Grab your hook. And let's insert to hook underneath the
first leg of the X. And the grabbed
the second leg and pass it underneath like that. Now let's do a yarn over
and pull through the loop. Now we can take your
fingers and we have Ring. To make it easier to work. You can pull the thread, the end of the yarn that is
not connected to the ball. You can pull it to reduce
the size of the ring. So it will be easier
for you to hold it. Now we need to do seven
Single Crochet is inside the ring as Per
Pattern Instructions, Let's go inside the ring, yarn over and pull the
yarn through the ring. We have two loops. Now we are now over
and we pull through two. Let's do again. Go inside the ring, yarn over and pull the
yarn through the ring. We have two loops, yarn over again and
pull through the tool. We have two single crochets. We need 734567. So we have seven Single Crochet is all done inside
the Magic Ring. The next step, close
the Magic Ring by pulling the end of the yarn. So we pull it and as we pull during will magically disappear. That's why it's called
the Magic Ring. And now we need to start
Round number one by finding the first VII
of the previous round. This part might be a bit tricky. Can you see there
that we have a V? This is the first VII
of the previous round. So let's insert our
hook underneath both legs of our first V. Now that we have grabbed both
legs off our feet, we need to do a
single crochet here. We are now over. We pull the yarn through
the V. We have two loops. We yarn over and we pull
again through both loops. And we just did the
first single crochet. Now, grab the stitch marker to place it where you have done
your first Single Crochet. So you don't lose track
of what you're doing. Here is our first V. And
we're going to place stitch marker grabbing
both legs of our V. Now we know this is the first stitch of
round number one. Let me explain with the
diagram the increase. We had the Magic Ring, right? And we did seven. Single Crochet is
around the Magic Ring, 12345677 single crochet. Now, to do an increase, what we need to do is we use the previous single crochet
from the previous rounds. And we need to do, on top of these one, we need to do two
single crochets. Then we move to the next V, and we go and do two
single crochets. And again, we move to
the next one and do to, do, to, do to and to. What we're doing is
we are transforming one single crochet into
two single crochets. I hope with these
drawing that it makes sense Are we do the increases. Because we are
doing the increase. It means that we
need to go again inside the same V of
the previous round. We go again underneath
the same very grab both legs of
the V. Yarn over, pull the yarn through the
V. We have two loops. Yarn over, pull through two. So we have just done
another single crochet. We did two single crochets inside the same V of
the previous round, and now we move into the
next V. So the next V, you can see that
it's this one here. Can you see both legs? Yarn over, pull the yarn through the V, yarn over,
pull through two. We did one single crochet. And now again we go inside
the same V yarn over, pull through the V yarn over,
pull through the tools. We just did another increase
in the next stitch. And now we just
need to go around. And in each V, we are going
to do two single crochets. By the end, we will
make seven increases. We will have a total
of 14 stitches. Now I reach the stitch marker, so I'm going to remove
the stitch marker. To start the next round. I remove the stitch
marker and I'm gonna do the first single crochet in that way where the stitch
marker was previously. Yarn over, pull the yarn
through the V is two loops, yarn over, pull
through the tool. And I'm going to grab
again the stitch marker, and I will place it in the first stitch or
frown number two. Let's say this is
Round number one. And we have the Single Crochet is that we have done right? And basically the
instructions for row number two is that we need to do
first one single crochet. So we do one single crochet on top of the Single Crochet
of the previous round. And then we do one increase. It means that we need to do two single crochets in
top of the next three. Then we do again just
one single crochet in top of the next three. And again, we move to
two single crochets. We keep alternating. One single crochet, two in the same V. One single crochet, two in the same V until we
reach the end of our row, until we reach the marker. I did one single crochet. Now I need to move to
the next one and due to inside the same V. So the
next week is this one here. Can you see the legs? I'm going to do
one increase here. Yarn over, pull the yarn to the yarn over, pull through two. Again, because it's an increase. I'm gonna go inside
the same V again, under both legs of
the V, yarn over, pull the yarn through the
V. We have two loops, yarn over and pull
to the tulips. And I just need one increase. Now, I'm going to
move to the next V, These one here, I'm gonna do one single crochet,
one single crochet. Grab both legs of
the V yarn over, pull the yarn through the V yarn over and
pull to the tulips. And now I keep alternating in the next V I need to
do to Single Crochet. So one increase, I'll go
underneath bootlegs of three. Yarn over, pull through, yarn over, pull
through both loops. I did one single crochet. Again. I'm gonna go again
inside the same V, yarn over, pull the yarn through the V and over and pull
through the tubes. I just need one increase
in row number two. We just need to keep
repeating one single crochet. Then in the next week, we do two single crochets in the same again inside the
assembly. And we do. And then we move
to the next week and we do one single crochet. And then again in the next week, we are gonna do an increase. So two single crochets
into the same way. Just keep repeating
this pattern. One, doing the same. You can see that I'm in the last V before
the stitch marker, and I'm gonna do two
in the same way. And then round number
two is finished. By the end of row number two, we should have 21 stitches. You can just go around
and count how many V's. We should have 21 VCE up. I'm just going to check
mine also check yours. 21. Yes. Now we're ready
to round number three. Let's think now about
row number three We have here row number two. We have done before. Round number three,
the instructions says that we need to
do one single crochet. This is randomly tree. So we do one single crochet, then we do again
another single crochet. Then we do want increase. So we do in the same one single crochet in the previous single crochet, another single crochet in
the previous single crochet. And then we do want increase to single crochet
using the same. And then you just need
to keep repeating that. You need one single crochet,
one single crochet. And then to, in the same,
Let's grab our hook. Let's remove the stitch
marker from our first stitch. And let's start
Round number three. So this is the first week. We are gonna go underneath both legs off the V and
we do one single crochet. So yarn over, pull
the yarn to Lizzy. You have to yarn over,
pull through two. Again, grabbed the
stitch marker, and let's mark the first
stitch, round number three. And now we do, so we
did one single crochet. Now we move to the next V and
do another single crochet. Then we need to do an increase. So in the next week, we need to do to in the same. So I did one and
now I'll go again inside the same increase. Now I moved to the next
three, the next phase here. And I don't want single crochet. Then I moved into the next V and I do another single crochet. Then I need to do in the
next week too, in the same. So I need to do the increase. Go and do one. And then I go inside the game, the first one, and I
do the second one. Just keep repeating. One single crochet and then another single
crochet in the next one. And then you do to in the same. Keep repeating that
until you reach the end, until you reach
your stitch marker. And by the end, you should count
the stitches and you should have 28 stitches. Now, I reached stitch marker and let's move to the next
round, round number four. Let's check our
Pattern Instructions. So we just do the
row number three. We have all our
row number three. And now we're gonna
do row number four. In row number four,
it says that we need to do one single crochet. So we do one on
top of these one. Another Single Crochet
on top of that one. Another Single Crochet
on top of that one. So we do tree single
crochet to each V. Then we need to
do one increase. We need to do two
single crochets in the same V of the
previous rounds. And then you keep
repeating that. You do 123 and then
show in the same, I'm sorry if my drawing
skills are not the best ones, but I hope these help you understand how to
do the increases. Let's grab our move the stitch marker and let's do the first single crochet. Here. You see there we do
one single crochet. And we grab our stitch
marker and we are going to place our first stitch
from Round number four. So we move to the next V and we do the second single crochet. And then we move
to the next week. There's one here. And we do
the third single crochet. Then we need to do an increase. In the next view we need
to do doing the same. So we go inside. You have two loops, yarn
over, pull through two. And then again we go
inside the same V. We do the second one. We just did 123 single crochet
and then two in the same. And keep repeating
that until you reach the end of the rope. Now you can see that I'm in the last stitch of round
number four and I need to do to increases in
here in the last one. And then go again
inside the same V. The last one And just count the stitches around and we should
have 35 stitches. I think for now you can see
a pattern that each round we are going to do one
extra single crochet, and then we do an increase
in row number two. We did one single
crochet, one increase. Once you will crochet
one increase, right? In row number three. We did, instead of one, we did two single crochets. One increase in row number four. We did three single crochets
and then wanted to increase. Now if you check your
pattern for row number five, it says that we need to do for single crochet and
then one increase. So basically this is
Round number four. In row number five, we need to do for
Single Crochet, one to 34 on top of each of
the previous single crochet, and then two in the same. Then we repeat
1,234.2 in the same. By doing that, we are increasing the size of our
Christmas Bauble. We are building the
bottom of our bauble. Round number five, we
remove the stitch marker. And let's do the first Single
Crochet. In the first week. Let's grab the stitch marker and mark our first stitch
from Round number five. Let's go to the next V here and do another
single crochet. Then let's move to
the next 13 crochet. Then let's move to the
next one, this one here. And let's do before
single crochet. Now, we need to do one increase, so two inside these one here. So let's do the first one. And then again go inside the
same and do this second one. Now keep repeating that 1234. And now we need to do
two single crochets into the same one to keep just repeating this until you reach
the stitch marker. I'll meet you there. I just reached the stitch marker and
we have 42 single crochets. Let's now move to
round number six, where we remove
the stitch marker. We need to do five
single crochet. Let's do the first one
into the first three. This one here. Let's place the stitch marker to mark the beginning of
round number six. We did one. We need four more. 11234, we need another 15
single crochets into each V of previous round. And now we move
to the next week. And we need to do an increase. We need to do to in
the same, right? The first one and
go again inside the same way and do
the second one. Again. Let's do five more. And then to win the same one. For now, we're gonna do
the next one in the same. Now, just repeat that until
you reach the stitch marker. Now let's start Round number
seven, rule number seven, we will remove our stitch
marker and row number seven. The instructions are to
make C-C single crochet. Let's do the first one will
go into the first week. I'll pay in the
first one is done. One. Then we go into the next V here 2 345-612-3456 V's. And now we're gonna do
into the next week, we are gonna do one increase
SO2 in the same one, then again, another
one in the same. And we will keep repeating
C-C single crochets. One increase that will meet
you in the end of this row. When you reach the
stitch marker. Bind the end of row seven, we should have 56 stitches. We are ready to move
to round number eight. Let's remove our stitch marker and insert your hook
inside the loop. The Dred to make it tighter. And then we are going to
do in row number eight, we need to do seven
Single Crochet. This is the first week. Here. You can see we will
do one single crochet. Let's put this
teach marker here, marking the first stitch. We need to continue until we
have seven single crochets, 1234671 in each of the Single Crochet is
of the previous round. And then in the next
one, these one here, we need to do to
inside the same 12. And now let's
continue and repeat. Let's do seven again. Now I'm moving to the next one, and I will do this one. Let's repeat that. I will see you in the
end of these row. I just finished
around eight and I add 63 stitches around. For the next eight rows, we just need to do one single crochet in
each of the stitches. So we'll just go
around and around The Round eight times
that we need to replace the stitch marker
at times to grow our piece. So basically, this
is just like that. And now we just need to
make it grow taller. So then we can start doing
the decreases for the top. In the end of row number eight, we will remove the
stitch marker. You Single Crochet in the
first V of round number nine. Now, one single crochet. In each stage. One Single Crochet. No need for more increases. We just do one on top of each Single Crochet of
the previous round. I'm finishing round number nine. I'll remove the stitch marker. I've done all my 63
single crochets. And now I will start
Round number ten. I will do the first
Single Crochet. I will place the stitch marker. And I will continue doing one
single crochet all around. In each Single Crochet
of the previous rounds. Keep repeating the same
until we finish row 16. Then on row 17, we will start doing
the decreases. Pause the video, and I will
meet you in the end of row, 168 rows later we will
have something like this. Don't forget to grab
some coffee or tea because Crochet always
asks for a coffee or tea. You can see that we already have the walls of our bubble growing. Now we're ready to learn the decreases
starting on Round 17. Our first decreased
starting row 17. And let's go through
the schematics of what does it mean
to do adequate. Here, we have our row 16 with all the V stitches
that we have done. And now we're gonna do row 17. The instructions are to
make seven single crochets, one on top of each of the V's. From the previous round. We will do one Single Crochet in top of the previous single
crochet, 2345671, single crochet on top of each
V from the previous round. And then the instructions say that we need
to do a decrease. And basically what we
need to do is we need to transform these two V's from row 16 into one V. So we
just transform two into one. We did a decrease. Then we start again
doing 1234567, single crochet, and then
we do another decrease. Keep alternating seven single
crochets and one decrease. That's what it means
to do a decrease. Now we now are piece. Let's remove the stitch marker. And I'm gonna do the
first Single Crochet. In the first thing. I did one, I place
the stitch marker. And now I'm gonna do six more. 2, 3, 4, 5 6, 7, 1, 2, 3, 4, 5, 6, 7, 7, V7 single crochets on top of each single crochet
from the previous round. And now I'm going to
transform these two next VCE, one and that one. I'm going to transform them into one V. I'm
gonna do a decrease. I'm gonna grab the back
leg of the first V. This is the, just the back leg. Here. I yarn over, pull the yarn
through the back leg, and I have to whoops. Then I move into the next
V and I grab both legs. Of the next week. I yarn over and pull the
yarn through both legs. And now I have three
loops on my hook. And now I yarn over, pull through all
the three loops. I just did a decrease. I transformed to
stitches into one. And I'm going to do again
seven Single Crochet, 1234567. And again, another decrease. Grabbed the back leg of the V, yarn over, pull
through that back leg. Now, moving to the
next V and grab both legs of the V. Yarn over, pull through both legs.
We have three, whoops. Yarn over, pull through
all of the three loops. We just need to keep repeating
seven single crochets. One decrease until
we reach the end of The Round and our stitch
marker. I will meet you there. Now. I mean the end
of the row, row 17, and I have my last
two stitches and I'm gonna do the last
decrease back leg, yarn over, pull through the back leg and then grab
both legs of the next week. Yarn over, pull to both legs. I have three loops, yarn over, pull through all the three. Now we need to start
row number 18. And in row number 18, they tell you to start
with six single crochets. So we remove the stitch marker. And let's do seek
single crochets. One single crochet. Let's place the stitch marker. Now let's continue six
single crochet, 23456. And now we're ready to
do again a decrease. Grab the back leg, yarn over, pull through the back leg, move into the next V and
grab both legs of the V, yarn over, pull through both legs off the V. We have
three loops in our hook, yarn over and pull
through all three loops. Now we're gonna do
six Single Crochet is now one decrease Just keep repeating
this until the end of round aching. I
will see you there. I'm gonna do the
last decrease Round. And now I'm going
to start Round 19. Remove the stitch marker. Do the first single
crochet and place again the stitch marker. And row 19, you need to do five Single Crochet
and one decreases. So I already did 12345 snow crochet. Now, I'm going to transform the next two
stitches into one lab. The first, the back leg
of the first three. Then go under both legs
of the next three, yarn over, pull through the V. We have three loops here, Nova and photo of them. And now we do again
five single crochet. And then another degrees. And just keep repeating. Five Single Crochet decrease until you reach
the end of row 19. I just finished Round 19. I'm going to remove
the stitch marker. And on row 20, we need to do for
Single Crochet. So I'm going to start the
first Single Crochet. Place again the stitch marker
to mark our first stitch, the beginning of round 20. And now I'm gonna do the
second Single Crochet, 1234. And now that I did the
force single crochet, our pattern says that we
need to do one degrees. Let's find the next V
here, the back leg. The next week, grab both legs, then yarn over and over. And now let's do
for single crochet. Now another decrease. Again for Single Crochet. Pause the video and
I will meet you in the beginning of round 21. I just started the
first Single Crochet of round 21 and I already
placed the stitch marker. And as you can see, because
we are doing the decreases, are Christmas Bauble
is taking shape. Continuing in round 21, we need to do three Single
Crochet is I already did one. I'm gonna do the second one. And now I'm gonna
do to decrease. Now tree single crochets again. And then other decrease. You can pause your video. And I will meet you in the
beginning of around 22. Around 22, we need to
do two single crochets. I already have done one. I will do the second one. Then we need to do a decrease. And again, I will do two single crochets. One degrees And you just keep repeating
that tells me to do 12. And then I think we will meet you now at the
beginning of around 23. To start Round 23, we need to do one single
crochet as the pattern. Since we place the
stitch marker. Then we need to
do one, decrease. The back leg here. Then grab both legs of the
next yarn over to all of them. Now we keep alternating
one single crochet. Read one decrease. I think at this point, we for you and Round 23, you can grab the
Stuffing material and we will start stuffing
our Christmas Bauble. So it will be easier for
us to finish around, wrap the Stuffing material, and let's just putting
inside our Christmas Bauble. You will be quite surprised
with the amount of Stuffing that you
can place it inside. It's taking shape. And now I'm just going to continue with the
pattern of Round 23. That is doing one
single crochet. One decrease, one
single crochet. Then one decrease another single crochet. And one decrease single crochet. And then other
degrees. Maybe Toby, easier for you to manage if you don't put a lot of stuffing. And then you will feel in the
end you will put the rest. One more single crochet. Now the last decrease
of round 23. And now we are
here in rounds 24. We removed the stitch marker. And row 24, we need to
do seven decreases. Basically, we are just, I removed the stitch marker and we just need to do
decreases around. I'm going to grab the first V, The back leg of the V, yarn over, pull through
the back leg of the V. Then I'm going to grab both
legs of the next yarn over, pull through both legs of DV. We have three,
whoops, yarn over, pull through all three and I
just did the first decrease. And I'm going to put
the stitch marker here. So I know that this one
is my first degrees. And I'm just going to go around just did the second one. Third decrease. That will meet you in
the end of this row. Before we finish round 24. You can see that we
have here to these, these two V's to do
the last decrease. Let's just insert the rest of
the Stuffing that we want. Once you are happy
with the Stuffing, You just need to do
the last decrease. I'm just going to grab
the last two stitches and do decrease. And I'm going to pass
these one inside the loop. You see, and we're
going to pool. Now, you can take
the stitch marker. And at this point you can
reshape better your bauble. And now we need to
even these ends. And for that, we're going
to grab our wool needle, or you can use a
tapestry needle. And basically what we need to
do is we need to go around. And let's grab the
back leg of each V. C, just going to go around grabbing the
back leg of a tree. And as you pull, you will see that the
whole will close. You just pull it. And then once you can do is you can just
insert your needle inside the bubble and
go out nanny place. Let, and then you
just cut the thread. And we have our Christmas
Bauble almost done?
6. Christmas Bauble - Crochet Topper: The second part of
our project is to make the Topper for
our Christmas Bauble. For these parts, you can use
any yarn you would like. I recommend that you only choose a less thick yarn compared to the one that you use for
the body of your bauble. I really like these shiny one. And at the beginning, I was thinking to do the
class with this one. But because it's so shiny, it's really tricky to have a good-quality image of
the stitches individual. I'm just going to
show you how to make the Topper by using these
acrylic yarn that I have. But feel free to
play around with any yarn that you would like to grab the instructions
of your pattern. And let's start by doing
the Magic Ring. Again. We will wrap around the yarn, around our fingers, making an X. Then we are going to
go and with our hook, I'm going to use a
smaller crochet hook because it's elastic yarn. I'm gonna go underneath
this leg of the X, grab the other one, and pull it through. Now I just need to
do a yarn over. So wrap your yarn around your hook and let's
pull through the loop. You can take your fingers. When we have our Ring done. If you want to make it
easier for you to work, you can pull these
end to make the ring smaller and it will be easier for you to hold it and to work. The instructions
says that we need to do seven single crochet
using the Magic Ring. So let's start and insert our hook inside the
ring, yarn over. So grab the yarn and pull
the yarn through the ring. We have two loops in our hook. Now, we yarn over again and pull the yarn
through both loops. And we just did the
first single crochet. Now let's do the
second one again. Go inside the ring, yarn over and pull the
yarn through the ring. We have to loops yarn
over, pull through both. Now we need to do five more. So now I have all my
seven single crochets. Then inside the Magic Ring. If you pull, the Ring
will start closing. Let's start row number one. We need to find the first way to start row number one, year. He's the first thing. You can see one leg, two legs off the vein. We need to insert our hook
underneath that tree. Here. Yarn over, pull through
the LEA. We have two loops. Yarn over, pull through both. We just did one single crochet. And now I'm going to place
the stitch marker in the first stitch we just done. And now we know that this one is the first stitch of
round number two, sorry, PRO number one. The pattern says to do one
increase in each stage. So we need to go again inside the same way, inside the singly. And we're gonna do the
second single crochet. Inside that V. The
increases will be the same as we did for
the main body of our bauble. Now we move to the
next single crochet and we're gonna do an increase inside these next V. We go here. We yarn over, pull through, yarn over, pull through two. We have done the first
single crochet and we go again inside the same
and we do the increase. And now we move to the next one. Next week, we will do the same. Now we move to the next one. We keep doing one increase
in each of our VCE. Until we reach the
stitch marker. When we reach the stitch marker, we should have 14
stiches, 14 weeks. Let's come to stitches. 123-45-6789, 101-112-1314. So now we can start
Round number two In row number two, the instructions to do two single crochets and
then one increases. And keep repeating
that until we have to last Single Crochet is to
do in the end of the rule. Let's remove the stitch marker. And we need to do the
first Single Crochet. Place the stitch marker. So we always know where is
the beginning of our row. Now, we move to the next V. And we do the second
Single Crochet. We just did two single crochets. And now the pattern says to do one increase in the
next Single Crochet. In the next V. Here, we need to do two
single crochets. Yarn over, pull
the yarn through, yarn over, pull through both. And again, let's do
the increase again in, into the same V. Yarn over, pull through, yarn over, pull through both loops. Okay? And we just did increase. Now we move to the next V, These one here, here. And we do one single crochet, one single crochet
also in the next V. And let's do an increase
in the next one. So two single crochets
inside the same. One, single crochet in the next. One, single crochet in the next. And then two single
crochets in the same. Now, one single
crochet in the next, another single
crochet in the next, and then two single
crochets in the same. And finally, we just have to
stitches left, two V's left, and we just need to do one
single crochet in each one. Then the last one. We just finished
round number two. By the end of round number two, we should have 18 stitches. All The Round round number tree we need to start removing
the stitch marker. Will do the first stage, the first Single Crochet
of round number three. And basically what
we need to do, Let's just place
the stitch marker. We just need to do one single
crochet in each stitch. All around. We will do a single crochets. Just go around, grab
both legs off the V, and just do a single crochet. You can pause the
video and I will meet you in the
end of row three. We, the Single Crochet. I just reached the end
of row number three. The instructions access to do one single crochet in the Back Loop of the
next stitch all around. What does it mean
by the Back Loop? The Back Loop is
the back leg of the V. Here we have our first week. These one here is
the front leg and that one there is the back leg. We just need to grab the back leg to do
the Single Crochet. Instead of grabbing
both legs of the VE. Until now, we have been
grabbing both legs off the V, but now we just need to
grab the Back one here. So let's remove
the stitch marker. Let's start Round number for my inserting our hook in
the back leg of the V. Not like these one. Just using the back leg. Yarn over, pull the yarn
through that back leg. We have to yarn over, pull through two loops. We just did the first
Single Crochet, place the stitch marker there. We just did the first
single crochet inside the back leg of our stitch. Now let's do a single crochet in each stitch just by
using the back leg. You can pause the
video and I will meet you when we finish these Round. For the last round, we just need to do a single
crochet in each stage. Let's remove the stitch marker and do the first Single Crochet. But this time is not
in the Back Loop, is just grabbing
both legs of the V, just a normal single crochet as we have been doing
for all these project. Place the stitch marker, so it places the first
one and then just keep doing Single
Crochet, all around. 18 single crochet. And I will meet you in the
end of row number five. Pause your video. I
reached the end of my row. I just need to do this sleep
stitch to close my work. And for that, we are going
to remove the stitch marker. And to make the slip stitch, we are going to go with
our hook and their needs. The V, where the stitch marker
was before, we yarn over. And we pull the yarn all way through that V
and through our loop. And that's it. We
grabbed our Scissors. We cut the yarn. And we need to pass the trend inside
that loop and pull. And we have just
done our Topper. You can clearly see
that there was where we did the Single Crochet
in the back leg. Let's grab the end of the yarn that is connected to the
center of our Magic Ring. These one here. Okay, Let's pull it to close the ring better. And then grab your wool needle
or your Tapestry needle. And we are going to pass that yarn in the middle
of our ring like that. And now we're gonna go
with the other end. We are going to also
train the needle. We are going to also
pass it inside. And we have both threads passing in the middle
of our Magic Ring. Now grabbed both ends
and just do a naught. And let's just cut to
make them both same size. And we have our topper. Now we just need to
put a little bit of stuffing inside and we will sew it on top of our
Christmas Bauble. It kinda looks like a tomato. I really wanted to
do these color, but for the video, I'm sorry, you can understand very
well the stitches. So let's go with a Christmas
to make your bauble
7. Christmas Bauble - Sewing Topper to Main Body: Now we need to attach, to sew them together. We can cut a small piece of trends and we can just
go here and their needs. And we can do a knot to
secure the thread properly. Just like that.
You can cut here. Then you grab since stuffing
material for this part, you don't need a lot. Just a little beat.
Put it inside there. Let's see where we would
like our Topper to be. At this point, you
can play something just to help you secure the Topper where
you would like it to be. We're just going to use our trend to do this teach
and the same all around. For that, what we need
to do is we need to grab a little leg of the V. And their needs are Topper here. You see, and then you grab a stitch underneath the
Topper in the red threat. Then you move, you can take the pin and you will grab
another green Stitch. And then you go
underneath and you grab a red one, green one. And then a red one. You just keep doing
that all around. That will meet you when you
finish the Sewing part. See you there. I've done
this teach all around. And now to finish, I'm just kinda go and
grab a green trait. I create a loop, right? And then I'm going to pass
the needle inside that loop. To make a note. I can hide it, I can put it inside and just
go all way through here. And then I cut. There you go. We have our Topper attached
to our Christmas Bauble. While with these two colors, it really looks like a tomato. But we'd some Decorations. It will definitely look
like a Christmas Bauble. Just experience and
try different yarns. In the next videos, we will go through some ideas
to decorate your Baubles. But you can have
like snowflakes, you can play speeds, you can do some hand embroidery
on the sky is the limit. See you in the next video?
8. Felt Holly Christmas Decoration: Let's think about some ideas for decorating our
Christmas bubbles. So when idea is to
try and draw a leaf, something like that,
then we can use these as a template to cut
in a piece of felt. And we have these two
beads here that we can use to look like little holly. These ones I bought in Amazon. Very cute. The paper
scissors to cut the shape. Let's place the template
on top of the Felt. You can use a pink to
secure it. If you want. You can draw around the felt or you can
just cut straight away by using a fabric scissors. I would cut two of these ones. Now that we have the two leads, we can just use some
embroidery thread. Choose the color of the
credit you would like. And I'm just grabbing three treads of the
Embroidery floss. So we told me a little bit more thick than using just one trend. Trading the needle. Just given not in the end of all the traits we
have are not there. Now what I'm gonna
do is I'm just going to draw doing a Backstitch. Yeah, I wanted to do like
a line in the center. So I'm just going
to start from here. To do the Backstitch. I'm going to move forward. Now I'm going to insert
my needle up from here. Try and make exactly the same
Lint of the previous teach. Pulling the needle up. Now, I need to go
down again exactly in the same hole that
we use before there. Then we need to move up again. And let's try and do
exactly the same size, the same length for the stitch. We go up and then we go
down, moving backwards. Again, up and forward. Then come down backwards. And I'm kind of
creating the middle, the center of my leaf. Just continue
drawing the pattern that you would
like. If you want. You can first draw with a pencil or pen and then
you just go on top of it. I'm just going freestyle.
Now in the bank. I'm just going to do a naught here to secure the Tricks. Now I'm going to do the
same in the other leaf. Even not Indians. Let's start going up and down. Then up again. Trying to make the same length. Then down and backwards
into the sinkhole. Moving forward and up. Now we have our two
weeks and we can just decide how to
place them together. Can place these ones, look how cute they
will look like. Very cute, right? I want to use these ones
here in our tomato. Thinking placing them like that. If we place them here, then the berries, they're, I think it will
look really nice. So now let's sew these two
felt pieces back here. If you want, if you are
not very into Sewing, you can use the Glue gun and
put a little bit of glue in the Back and just attach it in the place there that
you would like to. I'm going to stitch
them together. I'm just going to use
embroidery threads. I'm going to do a
knot in the Back. And I'll go here. I'm going to grab one leaf
and then the second one. And now I'm gonna go down. I can go up again just
to secure them properly. And then down again. Grabbing both
layers of the Felt. Please sit on the
place that I want. That will just grab on the
back here some red threads. You see? Now I grabbed the
back of the Felt. Like that. Describe a
little bit of Felt. You can do it again
in the red thread. Then again, grab a
little bit of the Felt. And because we
create these Loop, you can see the Loop here. Let's go inside the loop. To give you can do that again. Grab the red. We created the loop going inside the loop
to give the knots. And that's it. I will use this same trend to attach
these cute been very beads. And I'm gonna go and
put the needle back in the felt like that. You are going to grab
the berries. One very. And I will go down again. Here. And in the Back, I will grab some red thread. Now I'm going to move again up. And now I'm going to
grab my secondary. And I'm gonna go down again, grab some red thread
and pull the needle. To finalize. We go again and we grabbed the red trend
and the Green Belt. We go inside also, the Ring of the Beads. And then again, you can go down. Let's go under all our work. And they are going
to do a naught. We're gonna go and
grab some red trait. We create the loop. We go inside the loop. And we just made one naught. Let's just do another one. And then we will cut. It's not a tomato anymore. It's looks much better. Now, imagine if you use very shiny metallic
thread here on the top. It would look really nice
with the simple Decoration.
9. Snowflake Embroidery Decoration: Your'e up. Another
example where I can have created a snowflake
Embroidery with one beads. And then I put some dots
of metallic trend around. And then another snowflake. Going to grab these ones that I've done for my Christmas tree. To start, let's a tiny note
in the end of the thread. And now we're going to
insert our needle opposite from the side that we
want to do our snowflake. And let's grab the needle.
In the other side. Let's pull. Our Knot will be
either an Indian side. And now we need to do an
Embroidery Stitch going down, select how big you would
like your snowflake to be. I will say that I will
go until I reach here. I want these big and then we need to do the one
in the middle. I'm going to insert
the needle down here and up where I would like the horizontal part
of the snowflake to be. Now I'm gonna do the horizontal
part of the snowflake and I'm going to try and make
it the same the side year, the same size of the other side. I can see here that I have
like 12 crochet stitches. Here. I want to have 12 crochet stitches
in the other side. So I need to go down here. And I will put my needle now in the middle of these two
parts of the snowflake. And I will pull my needle. Just like now, I'm
gonna go down. I want to cross and
do these parts. So I will wanted
to go inside here. And I want to go up to these other quadrant of
the snowflake like this. And now I'm going to pull way. And now I want to go down and do the last side,
cross down here. So I wanted to go inside here. And I'm going to
put the needle in the middle. And
I'm going to pull. And I have my snowflake. Very cute. So now I'm going to
grab a bead and I'm just going to pass the
beat through the needle. I'm gonna go under and grab all the threads that is
passed to make the snowflake. And I will pull, make sure that I'm happy
with the place of my beads. So now I just need
to do the NADH. So I'm gonna go under again. And I have my Loop created here. And I'm going to pass inside the loop and pull and
I just made an OT. I just finished the
first snowflake. If you want to do another
embroidery design, you can continue
with the same trait. For example, I'm going
to show you how to make those little dots. I'm going to continue
with the same trend. If you don't want to do any more Embroidery
after doing the Knot, you can cut thread. But I'm gonna go all way down. And I'm gonna show you. I want to do a little
sparkling dots. There. I passed my trade to the place where I
want to do the dot. And now we're gonna do the French Knot
technique. For that. You grab the trends and make
it as straight as possible. You grab your needle, you put your needle close to your trend and you are going to wrap around the trend
around your needle. The more times you wrap
around the fluffier, it will be the dot. So now that I wrapped around, I'm gonna go all way down. You could move to the next
spot if you want to do any other embroidery or if it's the last design that
you want to embroider, you can just move the needle all the way
to the opposite side. And you just pull. And we just did these
cute little dot there. Be creative. And you can do
snowflakes and dots. You can just do one
with snowflakes, one just with dots. You can mix them together. You can just attach some beads, beads in different colors. Or if you want, you can
just leave the bauble. We no decorations
like a simple Bauble. It will also look very nice. You can also use some
glue in the dark yarn. I've bought one
from circle brand. I will put the name here
so you can take a look. And that is very cool because every time you switch
off the lights, your Christmas tree will be glowing in the dark.
It's quite nice.
10. Bells, Buttons & Mini Holly Decorations: Another idea to decorate our Christmas Baubles can be
just by using simple Bells. I bought this simple
bells on Amazon. You can also find
them on craft shops. And I'm just gonna go and grab a cotton thread
and I'm going to attach them
bells in my Bauble. Put all of them together. I'm gonna give will not. Now I'm going to go and
stitch them in my Bravo. I'm just going to grab this, teach a Single Crochet Stitch. And I'm just going to
go and pull the trend. And now I'm going
to pass the trade inside the bell in
the middle there. Then I'm gonna go again and grab the same single
crochet stitch. Now I'm going to grab again the same Single Crochet
Stitch and make a note. Go inside the loop
to make a note. Okay, now I can cut
the cotton trade. So simple, but still
beautiful and funds. Another idea to decorate your Christmas Bauble is to use cute little
Christmas buttons. I bought these ones
are Long time ago. I think I bought them online. They're very cute. Just going to rush and button. And I'm gonna go,
wait. Some trade. I'm going to insert my needle
in the back of the button. Now, I'm going to move from
the front to the Back. Again. I'm just going to give a sinful not
between these two ends. Now I'm gonna do a second, not just to secure
properly trained. Can even do a third
one if you want. Now we just need
to cut these here. I'm going to choose where I
want to place my button here. And I'm just going to grab in
the Back a single crochet. Then I'm going to insert
the needle in one hole. Now I'm gonna go down
the second hall. Again. I'm going to grab the
same Single Crochet. The back of the button. Grabbed the trend, wrap
around the button. I'm just gonna go
here in the Back, grabbed the same single crochet. And let's give a nod. So
we create a loop, right? And we just need to insert our needle inside
the loop and pull. Let's do that again. We can cut to tread and we
have our button attached. Another idea, it's to use
some Christmas decorations. These ones I bought on Amazon. And it came a bag full of them. They're really cute. And you can use the
Glue gun if you want to glue them in
your Christmas Bauble, or you can just use
some cotton thread. Give a little, not in the end. You're just going to
go in the Back and grab a little bit of the fabric. Let's grab a single crochet in the back of the Decoration. If you just told me
one-to-one Decoration, you would just give a Knot. But because I'm
going to continue to add some more around, I'm just gonna go and insert the needle inside the
Christmas Bauble. And I'm going to
go outside where I want to place
another Decoration. And I will just keep
repeating doing the same. So grab another Decoration I'm gonna go and grab the Single Crochet
under the decoration. Then I will do that again. I will just give a nod. I'm going to create the loop. And I'm going to pass the
needle inside the loop, give them the Knot. The trends. Again, you can do this
using the Glue gun, will calculate these looks like because I'm a very big fan
of Mickey Mouse, I thought, well, I can just do like a
cute Mickey Mouse decoration. Very subtle in my Bauble. I have these pompoms and I can create a Mickey Mouse head, right? That will be cute. I'm going to use some simple
cotton crave to attach it. I just did a not in
the end of my trend. I'm just going to grab the
end of my Mickey Mouse. Now I'm going to start
by attaching the ears. I'm gonna go inside the pompoms. And I'm going to grab one year. And I'm going to go inside here. And then I'm gonna
go inside the Main. And I will move to the next side where I
want to my ear to be. Now I'm going to
grab second year, grab the second pompoms, and I have a team place. See if you are happy with the location of your
Mickey Mouse ears. Let's go inside again,
the main pompoms, and let's meet the
place where we started and we have our Knot. You can see there. Now that we have
our Mickey Mouse, we can attach it, so it to our main Bauble,
Mickey Mouse Bauble. Let's put it in a place
that we would like, like it to me here. And I just gonna go
and grab some yarn. Now, I'm gonna grab, begin my pom, pom. I'm going to insert my
needle inside my pom pom. I'm gonna go again
and grab some trades, Yarn trends in the back
of our Mickey Mouse head. Now to end, I just
need to give the Knot the back of
the Mickey Mouse. And so let's grab a Crochet
Stitch and their needs, the Mickey Mouse head. Here. We create that loop here. And we put the needle
inside the loop pool. And we have a Mickey Mouse. And I think I've shown you creative techniques to decorate your
Christmas Baubles. Now, it's time for
you to surprise me. Make your Christmas Baubles, take photos and please post
them in our class page. So we can share ideas to
decorate more Christmas Baubles. We can have some FUN and enjoy the Christmas spirit
all year along. It would mean a lot to me
if you could please share those photos and
make a review of the class that will help
me continue to produce an place more classes on
the Skillshare platform. I would really appreciate that. Can't wait to see
your creations of PFK-1 and merry Christmas
all year along by
11. Share photos! Thank you for watching!: Thank you so much for
watching my class. It means a lot to me. It would be great if you could just do a quick
review of the class. It would really help
me to continue to produce more classes for
the Skillshare platform. Don't forget to take photos
of your Christmas Baubles and please post the photos on the project gallery
for this class. That way we can all
inspired each others. I'm sure that that
will be inspired with your ideas for
the decorations. And I really hope that this
class inspires you also. Thank you again. And merry
Christmas all year along
 Vania Infante