Transcripts
1. Creative Poster Design #002 Intro: Hello everyone. My name is Marcus and I'm a senior designer and
animator based in London. And today in this class, I will share with you
how to create history of typographic posters
inside Adobe Illustrator. On the first force that will create this discussion
tax effect. Then we'll add shadows and
to make a real nice layout, photo texts or even. On a second poster, we'll
learn how to create custom distortion seasoned
Illustrator pucker tool. We will start by
designing a few sketches. Then we'll choose one
to refine and make our final design
and layout pulsar. We will use this torsion
perspective tools to create a movement
in our design. After that, we are going to use the eraser tool for slice
architects into pieces. And to finish off that, we start heading some details using Illustrator
factual pressures. This class is for
all skill levels. I will explain each step in detail so we don't
miss anything. By the end of the
class, you will have a great understanding of
Illustrator distortion tools. You will be able
to create your own custom distortions
and learn how to use multiple tools to achieve an interesting visuals
for your posters. I will share all of that and some other cheeks and
dips during the process. As a class project, I
will invite you to design this trip posters using the
techniques learned in class. So let's get started. I'll see you in the first class.
2. L01 - Poster 01: Document Setup and Design: Welcome to the first lesson. So let's start. So
the first thing I'm going to share with you
is I'm using the workspace, essential classics,
which is like if we all use the same workspace
will be easier for you to find the
tools I'm using. And well, you can use
your own workspace, but I just want to be sure like if someone is new
to Illustrator, I'm using the workspace, Essential Classics
to make it easy. So the first thing
we're going to do is let's create
a new artboard. So let's go to New. And let's use this
resolution here. I'm using a tree
resolution for a poster, which is treat
other 600 by 5400. And I'm going to name
this file as poster 1988. Let's press Create,
and that's it. Actually, I need to drag to
the screen here and perfect. So the first thing you want to do is just let's get our
layers out of there. So because we are going
to be using them a lot, it's easier to have them
as quick as possible. So the first layer
I want to create, it's a background layer. Let's just name background
and less just create. Now let's just ties and
feeder, just background. Let's go to our shape tool here. Let's go to rectangle
tool and just create a really nice rectangle with the same size of the
art board like this. And I'm going to use
a really dark gray, maybe something like 101, something more like this. Perfect. And just going to
lock this for now. So next thing, let's
choose our member. And I used 1988 just because
it's my year I was born. So right now I'm just
sharing my age and well, yeah, I'm not I don't see
myself as old Burwell. And let's just select
a lighter color. Let's go to a light gray,
something like this. And let's say it's also a nice font I'm going to use
for Tura for this exercise. I think for tour is
a really nice font and it works really well, or this type of
typeface posters. And yeah, I think
it's a good choice. You can use any
other sensory font. I will recommend
using a sensory font because we use a font
like with serifs. He actually k1 head because
they come with more detail. I think the effects when you are distorting the detail
can run it a little bit, but just, you can use any, any other for the
ones just to be sure to think about that. Let's just select
it and let's just right-click and create outlines. And slightly again,
right-click and ungroup it. Let's create a really
nice composition here with the numbers, something like this, such
as group them so I can actually align them
a little bit less. Select them both. Object, Ungroup,
Object, ungroup them. So I'm going to select
them and the leg with the alignment tools here, just to be sure they
are perfectly aligned. And I'm going to scale this
down a little bit for now. And yeah, I think
even if we just leave the postal FDA's,
it looks really nice. I think the numbers and the font for today helps to create
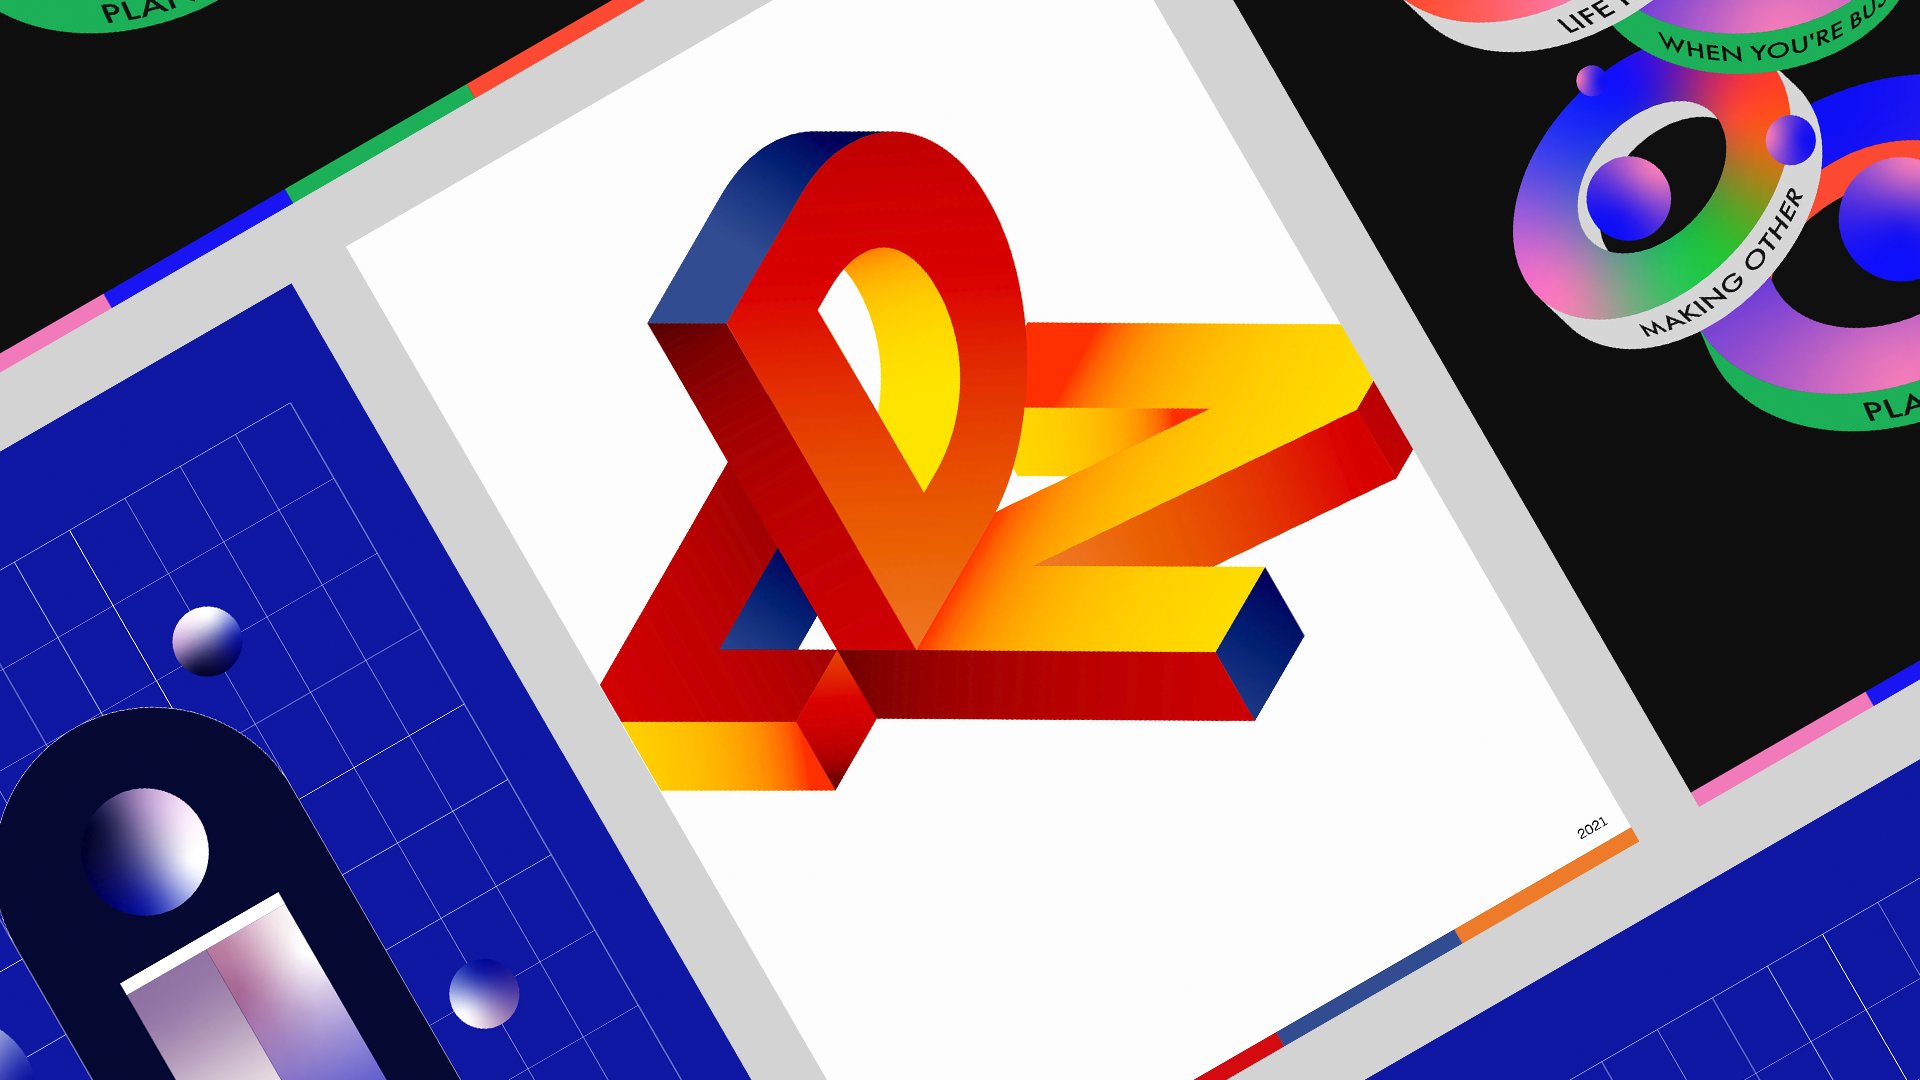
a really nice visual. But do we actually only class? We actually take
this a little bit further to let select it. And next time we're
going to do is just go into effects and Trudy and materials through the
classic and rotate classic. So here you converted
your files. Actually just cancel this. We need to be sure to group them before we do that actually, let's go to object ungroup, and then go back to today
and materials rotate. So what this tells, it gives you the possibility of rotating your graphic in
a three-dimensional axis. So you can just play
around with it. So you can to, as the angle you want, customize all can actually, there is some presets
here that you can use if you just like,
you know what you want. And here is a nice
place to find, like even isometric perspective,
which is really cool. And for this exercise
we're actually going to use an isometric top one. Then press OK and perfect, Let's just scale the
ice a little bit up. Somebody more or less like this. And less just go to Object
again and expand appearance. Now we're just going to ungroup this and
just going to delete this little clipping mask
that it was curated here, like right-click,
Release Clipping Mask, and select it and delete it. So yeah, it's even just
like this is very, even just the movement of
the perspective and the, and the numbers creates
such a nice visual when you have such high contrast that, that, that
actually cooled. See somebody like
a could actually have these hanging on my
or my room right now, which will be really cool. So yeah, this is for
the first lesson. On the second lesson, we're actually going to start to add some distortions and apply some really nice
shading effects on it. So yeah, I see you
in the next lesson.
3. L02 - Poster 01: Distortion and Shading: So the first thing we're
going to need to do, it looks just like this numbers. And let's name this
layer for 1988. And just so we have a little bit of organization
happening here. So let's select these numbers. Then go to Edit and go to
Copy and lock this layer and create a new layer
under the 988 layer. And let's paste in
place like this. So let's just actually just
turn the 1988, 1988 layer. Maybe I will change
this to color layer. So it's easy to say. And let's change these numbers
here to a darker color. So what is this going to do is creating these like
shading, like shade effect. Let's lock this shallow layer and less on love this
one, the color one. So let's ungroup these elements. We can just right-click, select them and
right-click and Ungroup. And let's go to
Object and Envelope, Distort and Distort
Make with Mesh. So here we can actually change the numbers of mesh
definition we want. So each point here
you can actually, it's a distortion point. So depending on what you want to start an homage, do you
want to distort it? You can increase or
decrease a number. I think for this exercise we can just go with length three. It will be enough
because it's not a very complex shape
and we don't want to go crazy in there
distortions anyway. So let just select our direct, direct selection tool here. And let's select these two
points from the number one. And let's just pull
it up just like this. See, it's already created
a really nice effect. So that layer, the shadow
layers creating like this fake shadow happening as if we had like some light
source here on the top. And let's do the same
thing for the number nine. Now, let's go to envelope, distort, make with mesh. Let's use three as well. Keep it simple. And just select the
points we want to pull. Something like maybe I will
just select a few of them and see how much distortion can
we head without damaging? Because we want to make
a nice distortion. What we don't want to
damage the shape of the number because
we still want to be able to read it and we're all still needs to be looked
nice in the end of the day. And well, if we, if we are not proud of
that design we've made we then we then we failed and call this one is
turned as well and see color. I like to keep this
shape a little bit like smooth so that distortion
doesn't affect. So it feels more natural, like a little sticker
coming out of a paper. And the shadows here
helps a lot correct, decide three-dimensionality
of the individual. Let's do the same thing
for the number eight. Let's just go to Object
Envelope Distort with mesh. Three, you'll be enough. I'm going to use the
direct selection tool. And just like selecting this, all these corners here, just something like this. Going to do the same
thing out, almost done. I don't for the for
the number nine there. Just like this. Okay. And let's just make the distortion a
little bit more soft. Like see these anchor points
actually like they need to follow the flow of the distortion if you,
if that makes sense. So that's like
this more or less. And yeah. Something like flowing,
following the flow. Otherwise he creates
like a little jam bit wonder on a design. And unlike here, so you see this edge
here doesn't look right. That's because of
the distortion point is still like very hard. And yeah, I don't
I don't want to go too crazy on this one. I think I will make this one
a little bit more dramatic, but I'm just going to lock this one so I don't move
them or change them. Just going to open here. And you see these ones when they have like this little
squares selected. It means they are
the layer selected. So it can just like
lock them easily. So there is no risk of
you moving at ones. And let's go to Object again. Let's go distort make with mesh. Let's keep it like that. Let's select all
these points here. Let's cut. This is like the
most close to you object. Let's make it a little
bit more dramatic if you if you let me let
just pull this up. Just using the rotation
as well here to create a really nice distortion
thing happening. So, yeah, definitely need
some adjustments here. Let's just do them. Let's just maybe
this one needs to be flowing a little bit better. And this is really the further. So you want to cut this
like really nice waves and just tried to make it match. The, the initial distortion
shows like this. So either soda
damage the design, as I said before, this, these letters is
like when you are working with others, people's phones, you will still want, you can distort them
as much as you want, but you still want to keep like some part of
their design if you just distorted
to a next level and there is nothing
left from the beginning, it's just creating
something new. So sometimes it's
nice to do that. If you, if you want that, you just want to experiment and, and use other people's phone
to create your own font. I think that's right. But in this case, I just wanted to, I wanted to keep the boldness
of the Futura font as well. So I'm just going to
move this one here. And yeah, just trying to
keep this flow happening. I think something is
odd is happening here. I think I probably need
to change something. I don't know, it's hard. I could move this may
be a little bit town to select this and make these distortion happening only with more smoother rabies. That's the social yet see,
sometimes you just need to, to experimental little
bit and see like what's, which anchor point
is actually creating that distortion and,
and play with it. Just tried to to understand its mission and
what is doing in the design. So I'm just going to, maybe we need to push
this a little bit up as well, like this. And then yeah, I think this is something
something's happening here. Call I think I like
it. I just worried about showing the
number 9 there. Maybe I want to push
this a little bit inside so I don't know if I'm interesting airing that shape there I don't think
is going to be. It's going to, it's
not going to look nice if you just have liked it. That pointy end of the
number nine there. So, so yeah, I think
this was said. And now let's just apply some really nice
gradients into this so we can actually
create like a Elijah, an effect of shading happening. So let's just lock this layer, the color layer for now, and let's just create
another layer, and let's call it
overlays shadows. Cool. So let's just select, actually unlocked this ones. And let's select them. And let's go to edit, copy. Lock this overlay shadows, Edit, Paste in Place. And let's go to Object, expand them so you
can actually see them as vectors and use
them for the next step. So next tablets,
actually quite easy. It's just, we're
going to use like a standard linear gradient. You can just right-click
here we have on our swatch library here. You can just click
on the middle and get the gradients happening. And using our gradient tool, just right-click on the toolbar. Let's just manipulate
the direction of these gradients, like this. Push this a little bit down. Maybe it is to just try to create a really
nice shading effect. Something, yeah,
sovereignty like this. Let's go to Slide 27,
gradient layer here. And let's just actually first, let's just go select
and let's go here on the side toolbar. And let's select the
color white here, and let's make it 0%. So we go from black
to transparent. So it creates like because we're going to overlay
other gradients over it. We don't want to be overlaying
like in another color, just seeing the
color of the shape. And let's just
select these layers. Again. Let's go to Edit
and Copy and Paste. Paste in place, sorry. And let's just change the direction of the
gradient like this, trying to get the effect
of shading there as well. And let's just maybe move
it a little bit further. And move the color like this. And perfect something
in the order of this. Let's do the same
thing for number nine. Let's just go to Edit, Copy and Paste in Place. Let's us use our
eye drop tool here just to copy the gradient and, you know, save those seconds. And just make it a
little bit like this. Let's play around with
the shading here. You can move it, see
how it looks better. So right now we actually
have number 8 here. It needs to move forward. Let's just selected and let's go to arrange and
bring to front. I just sorry, I didn't
explain that step. You just selected the
right-click and then you go to arrange and bring
to front like this. And let's just do
the same thing. Edit, copy, edit,
paste in place. Let's get our high drop
tool, the gradient. And let's just change the
direction of the gradient here. Tried to create a
really nice shading happening here as well. Maybe just move that
gradient a little bit. So you play with this. Yeah, it looks, it looks
really nice already. Let's just maybe I think is too, is not that dark
enough as the true. Maybe I should just create a
little bit of more shading, but that's probably
just a personal taste. And the 1741 Copy, Paste in Place,
get the gradient. And let's just play with this gradient situation here
as adding some shadows. They're kinda like it, kinda, kinda really happy
there, the result already. So this will be it
for this lesson. In the next lesson,
we're going to just do have some final details and finalize our layout
and play with it a little bit of the
scale of these elements. And then we'll be ready
for the next one. So I see you the next lesson.
4. L03 - Poster 01: Final Layout: So just for the sake
of transparency, this will be like this. Designers would probably
be a little bit different from the
platform before, because my new
straighter actually just crashed and I kind of lost it. So actually been using, now going to use
this as an example. This was a designer done
before for the pulsars. And just for the sake
of this exercise, we're just going to use our
old version array done. So there's probably
some slight differences on the distortions
and everything. So the first thing you
actually need to do now, it's like some sort of
composition with this type. So right now like this, I don't mind it.
I think looks up. Looks all right. But I think we can play
a little bit more. I like to play with
chaos in my designs. Although we only have
like these numbers here and we don't want to add anything else to on the designed to create
a sense of scale. So a good way to do that
when we don't have, like we just have a
word or something. And you want to show
a little bit of scale on the composition.
A good way to do it. You just scale it is just like, let's just group this first. It has to scale up to make it the lipid like bigger
than artboard. So this way it goes as
I left art board and this way it creates
like a sense of scale. Let's, this element is so big that doesn't fit the artboard. So this is a way
you can actually use to create some
sense of scale. So again, I'm just going
to copy the background. And then I'm going to edit and then I'm going
to paste in place. And yeah, so if it is still
behind all of your letters, you can just right-click
and bring it to front. But if it is not, well, let us select
them both like this. And let's just go to make a
clipping mask just like this. So yeah, I think this is
the main, the main design. So next, we're just going
to add some elements, like just add a bit
more information. Like if you want to like
I actually going to just copy the one
known I have open. So I just added like a
little bit more context. So this is like my year I was born and this is
the day I was born. So let's just maybe
I'll just do it 19. Let's just scale
this a little bit. Like make it white. 19 or forgoes. You can like put anything
related to your number. And I am just giving light given more information about it. So kids a little bit
of more contexts. So then I was pouring
some Paulo on planet art. And there you get
the UU getID, right? So sorry, let us go
into some Paulo. I like to make it into lines to crystallize a nice composition. Maybe actually, I'm
going to pull it like some power like this. And I'm going to write
Brazil in the bottom. And then planet hurt. And then if you want
to put the galaxy, he can just pull the
galaxy, the Milky Way. And let's just select them both. And then using the distribution
tools here to be sure it's actually aligned
in the center as well. And yeah, I think this is it. We can just duplicate it to make a little bit more elements
in a composition. But yeah, this is the
first poster done. See what's actually
really quick and it's a really nice effect. And like visually,
I really liked is the simplicity and the way
we play with contrast. And just we use a scale
in a different way. So yeah, let's go to
the next poster then, and I'll see you
in the next class.
5. L04 - Poster 02: Document setup & Inital Sketches: Hello everyone. The next poster. So we're going to use the
same resolution as before, 3600 or 5, 5400. And just press Create. The first thing I
want you to do, It's 200 order to really
like I'm going to use noaa, which is I think it's French. It's French for like a means black French or
something. It's dark. And I don't know, I
think it's a really, really romantic
and pretty words. So I wanted to use, I like to use like
keywords in my posters. Sorry, I choose a
word and next jus, just choose a nice font. I'm going to use again for Tura. I think for today's
such a good font and works really well in, in poster design exercises. So with our phones, decided an hour, well
ordered as well. Let's just so-called selected. And while holding Alt and
Shift and just drag it down so it can make a copy of it and select it
again, What of them? And make another copy. So in this way,
we're going to have 444 repetitions
of the same word. So that's selected. And let's just make a dish or
using the distribution tool here to a vertical
distribution like this. Perfect. Let's just go to Object now, and let's go to expand. And let's go fill and fill
an object. That's okay. Login to object, ungroup it. So what I want you
to do now is just like holding Alt again, just make a copy just
for safety here. And the next thing will be, let's just go to our toolbar here and select
our artboard tool. And again, let's
just drag or our port to the side here
and holding Alt again. Let's make a few copies
of our artboards. So these copies will help us to create three
different sketches. And from those, like
initial exercise sketches, we're going to choose
one that we're going to take to the next lesson, which will going to
finesse the design and end a little bit more refine to
the curves of the vectors. So let's just start layer
wanna subtleties first one. And let's go here to the
toolbar and tried to find the pucker tool here in
the distortion tools here, 30 S1 pucker tool. You can click twice to
adjust the size of it. I'm using a 600 by
600 and press Okay. And then from the top, top left corner of
our letters here, I'm going to start
in to this drag and doing this kind of
wave movement, not a font. See here where the critter
really nice visual. So this will be my first sketch. I'm going to do again. On the next one, I
will try to make a different movement to
make a different effect. So D like more like this, but beautiful and as well. Although I think I am feeling
maybe not on this one, but this one I'm
feeling I'm losing the capacity to understand
what's written there. Even though I do like
the visual, like, I think it's very botanical and the unthink
looks really nice, but you are just able
to IR, maybe a liquid. There is something
here happening. Maybe I can read the end
here and there all year. But depending on where
what you want to achieve, this one will be like a more abstract
version will be okay. And let's just go to
this last one there. Let's make like a simpler way. Remember just like
something more. Not too much, not too crazy. Maybe. Maybe I will try again. Something like this. Maybe actually it's really hard to actually to
decide because this yep, so this would be, let's try to have like a version when you go not too crazy machine, it will go a little
bit further to a point that gets a
little bit too abstract. And a version where you're
actually still readable. You can easily let the
definition of a few letters, which I think is cool because
helps us if depending on the function you want
to give to our design, helps us to keep the
meaning easy to understand. But sometimes like we are
designing for ourselves. So don't worry too
much at this point because the important thing when we are designing
for ourselves is just, is just to have fun and
not everything needs to be even to be ready to
be like for a client. So it's important is refine
and to learn something new. So yeah, so next thing
we're going to do, it's just save this project
as just align this. And let's just choose which one we're going to go in and take to the next lesson. I think actually, I kinda
like this version here. I think it's a little
bit from different from the example I've shown the beginning of a
trailer of the class. But I do like it. I do think it's going to
be a good example to show the techniques here
we're going to use next to refine the design. So actually I think I'm
going with this one. So in the next lesson, we're going to refine the vector shapes here
because as you can see, when we use these tools
actually creates this like not perfect distortions. And we're going to
finish the design. This next part will be
quite quick, I believe so. So yeah, don't go protocol now. So I'll see you in
the next lesson.
6. L05 - Poster 02: Final Design: Hello everyone and welcome
to the refine and detail, an infinite last lesson. So I've chosen my sketch already and I'm going just to get
this art boards here. You'll be able to
select these ones, leave them here just in case. And I'm going to do the
same thing with this one. Because along the demo
now heartburn right now. So let's let these two artboards and
let's just delete them. We don't need them anymore. So next, let's just maybe worked a little bit with the
scale of this element. I think it's always for now. So on one of the first things I'd like to do when I get like this kind of vectors
with a lot of thoughts. And like where the
proportions are not a sweet too much like vector dots and we need to
clean up a little bit it. So the first thing I
do is just selected and right-click. Go to simplify. I'll simplify here. You can actually reduce
the name or the number of vector points you have
on your illustration. As you can see, that
hadn't doing like here. You can have like all of them. And then you just can
reduce term until you see or until you don't feel is affecting way
too much your design. Then Alto Simplify, you can just see hotkey to what he does 216. But maybe I will try to make it a little less
points as possible. Great. I think this is a
starting point for it. Next, I'm going to do is just going to our pipe pipe window. Sorry. Let's go to pathfinder. I was trying to say the name of the tool before I said
where the tool was. So we do our design is selected. Let's just go to Shape Modes
and news that unite option. So this way, what we're
going to do is like this little overlaying of vector elements will be
collapsed to each other, which will help us to clean
up our designer little bit. So with this done, let's just find like
these little holes here. Let's using the direct
selection tool and delete it less just like here, there is something
like there is a lot of empty spaces here. So what I'm going to do is
just using our pen tool. I'm going to draw a
little shape here just to cover these holes here. And something rough. You don't need to be really precise with
this one because you just want to cover
desert those out, select all of them. Use the Pathfinder tool to collapse them
and make one shape. Let's have a look here, see something here
happening as well. I'll do the same thing. Doing Simon like feeling some holes here,
select them both. Collapse it and less. Just sorry, I fluctuate deleted. Let's just using
the tools and just delete some points as well. Let's just delete those two. And, and yeah, let's
just keep finding where we can see these little holes that
need to be covered first. And then let's
just do this ones. You can also delete
them by hand, although I think he's few, just need to find what
which one would be faster for you because you don't want to spend too
much time doing it. Otherwise you're going
to get probably port. And you know, sometimes
you just want to do a really quick exercise. You don't want to spend
too many hours doing it. So n here, I've probably going
to select again and go to right-click and
try to simplify it again after I've done it. Just to see how far, much more points can simplify actually
helped me taking away. I think this is like in
terms of little holes, there is a field
them happening here. Let's just, let's just
maybe create a shape here and close
those ones as well. Like something not fairy. Precise for sure. They're not trying to you can
go as precise as you want. I'm just trying to make it
as an AT very long class. So I just want to
be sure our explain every technique and before actually finish like
I don't differ, actually finished like
every little hole as well. So this is the way I'm
doing it for the holes, creating shapes and collapsing them together using
the Pathfinder tool. It's a tool I use
every day for sure. Select them and perfect, just going to delete the swans. Keep the design as
clean as possible. Something more like
this, perfect. And when we have like
this little shapes here, maybe I will just
delete this as well. I don't think it's adding
very much to the design tool. Let's just delete these points. So it's a combination
of creating shapes and deleting shapes. Let's maybe create
a new one for here. And just make sure
it covers that. That's finder. Cool. So the next thing we'll
just find dislike. You see like here you have least a rough edge here
like is very pointy. We can just, using the direct selection
tool can just select it and trying to make
the vector a little bit more rounded like this. The same thing is
happening here. When you select like this, you actually see this little, little circle here,
like a white one. You can adjust the
curvature of using the vector here, the handles. Or you can just use
this thing which will, this little circle, which
will run that corner for you. So now you want to
try to find where, like there is risk rough edges. Maybe use a circle to smooth
those edges a little bit. Like here at Dinka will need
to create a shape as well. There is a lot of
little holes here. So I'm just going to create a little shape here to
be sure that it covers. So when we use the
Pathfinder tool, it doesn't create
a very complex, it doesn't add more points. And it feels, it feels all these little gaps
we have now selected. Perfect day, some
gaps still here. Let's just use the
direct selection tool. Tried to delete them. Tonight is yeah. So yeah. So after that, Let's just
find those little corners deadening deliver smooth
smoothing happening there. Just try to find them. Just to try to make
our design like as give us much loved as we can. So it doesn't look just like
something automatically made with no much
much carrying on it. So like this here is actually, it's an odd shape
happening here. Maybe there is
another point here. Maybe we'll just
delete that point. And I'm going try to create
this sort of shape like this. Let's see what's happening here. Actually, I'll, so this
one discharge separated. So let's just maybe
connect them. In Paraguay, let's
just try to find a way to connect these
two objects together. And maybe you just
delete this one here. We don't need it anymore. And let's just play with
the handles and try to find less delete
this one as well. Try to find a nice
way to have this. And, and yeah, I think it's mostly the techniques are used for this type
of roof refining. It has tried to
find those points that need to be rounded. And tried to make the
curves a little bit. As far as you can. Delete the gaps that are
like just, you know, pair not adding
anything to our design so they don't need to be there. And, and reducer points
by hand as well. You can just use
a pen tool here. You can delete anchor
points like this and just, just try and test which one
is actually you can delete. Like there's a few of
them there. I believe. I believe we can delete. And maybe we use
this handle here to actually create
that wrong shape. So the same thing here. There is some anchor points here that I believe
we don't need. Maybe DS1 as well. If you just use the curvature
of this handle here. And let's just make it. Let's just make the
solium which rounded. Let's just delete this gap. Perfect. And you just keep doing this to keep trying to find
these little bits where you can run the corners and
delete a few handles if you, a few anchor points here, if you need to,
like this one here, maybe we can just work
with it a little bit more. Try to find a nice, nice like drop,
droplet shape for it. And like something like this. So today I will leave, you know, I don't I don't not want
to take your time of me doing every single thing because will take probably half an
hour for me to finish this. And I don't want to
take off an hour for you when you can just pause
the video now and do it, and then go to the next lesson, where we're just going to
add a few more elements and refine this
the final layout. So yeah, I see you
in the left lesson. I hope you like a
enjoyed this technique using the pucker tool,
I think is really cool. It's really cool to
create very interesting, very tracing
designers with words. So, yeah, I see you
in the next lesson. And yeah.
7. L06 - Poster 02: Details & Final Layout: Hello everyone and
welcome back to the last lesson of
the second poster. It's always, always tricky to say because I do three
posters in each class. Just I don't want to take a really short lesson where
you just learn your poster. There is like so many
techniques I wanted to share that It's nice
to make multiple. And then I get a
little bit confused when I'm starting a new lesson. Okay? So now what we want to do, I-I didn't end up finishing refining distinct because
I believe don't need to. I just wanted to share
with you what I've done after I finished. So this thing is we'll just create a background layer here, and I'm going to
name it background. And I will just make a rectangle using the
rectangle tool here. And I'm just going to make like art board size and change the color to I don't like I
don't like to use full white, although I like to do like
a little really light gray. Like I think he's full
wide sometimes is aids like there is enough when there isn't much
information, you know. I think when you use
like a light gray, it's better than just a
full wide QRS, full white. It's easier to notice is
full white, but light gray. Mix your designs, pop
a little bit more and make them a little bit more
more defined, I think so. So like a light gray like this is actually
what you will work. Let's scale this a little
bit down actually. And I'm just going to add
the little line using the line segment tool
here in the top, just to create a
little bit of air of a composition in
the poster as well. Just not be like
element in the center. Couldn't make it to. Let's just make it probably
for stroke for them. Then I will just write NWA her. So it's like a way actually to almost to sign your poster, all sorts of some sorts. You can make it Noir and then you can make your
name like design by, by so and so, so you feel free to write
anything you want here. I'm just going to write the different ways to say no
are in different languages. And maybe actually are going
to use like a light font, lighter phones, maybe light. And going to duplicate
this holding out. And I'm going to select
it, right-click, drop it. And then I'm going just to drag and drop to
the bottom here. And then yeah, I think it's, it's ready to go for print. If it's like a really
liked the main visual, I think it's, it's
quite interesting. I think you will not. Someone will see this and we
will stop to see it better. I think it's very
intrigue, visual. And yeah, I hope you liked learning techniques
for this poster. And yeah, the next pulsar
we're going to explore a little bit more distortion
techniques and how to use some Illustrator brushes to create really nice
effects as well. And that'll be it. I see you in the next
poster, Lesson 2.
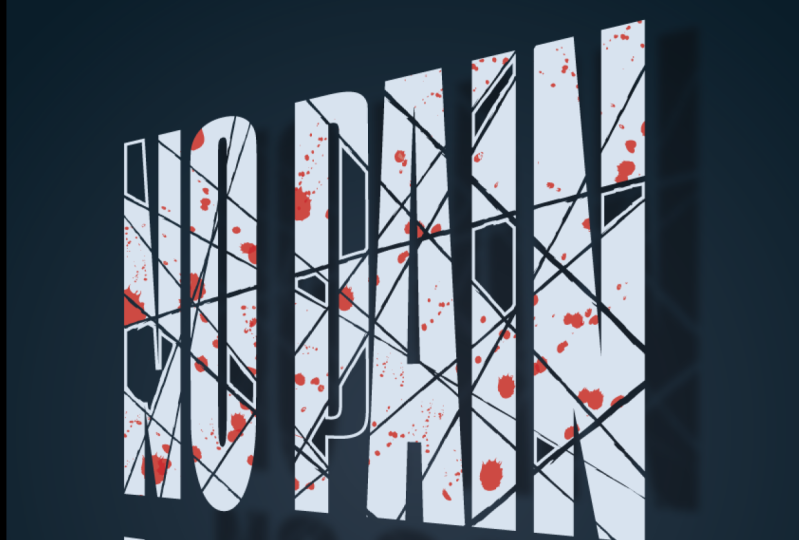
8. L07 - Poster 03: Starting with Design: Hello everyone and welcome to the third posture and Dulles
poster of this class. So let's start again. I'm using the same
resolution as before. And let us pass create. Ok. Now it just to
drag and drop here. So for this poster also used a repetition
technique of a word. So let's just choose
a world right now. I chose silver. And it's to realize what I was trying to play with when I was
designing these posters, always tried to play it
contrasts in words and visuals. So I was like trying
to find like, what's the best contrast
for a dark background. And that will be silver. Sorry, it's not white. But anyway, you can use
any order you want. So again, I'm going
to use for Tura for this exercise as well. And let's cool it down using the same
technique as before. We're going to just select this and holding Alt and Shift, drag it down like this, slanting again and drag
it down like this. Perfect. Let's go to our
distribution tools here and this, select them all. Let's go to Object and Expand. Expand the object. Perfect, Let's
right-click, ungroup it. So this first part
where they learned from the class before that
I said this before, but just repeating the
steps just to be sure you, you know, like you will not
get lost or what I'm doing. So it is selected. We actually going to do
some slices in this text. Let's just cohere and
using our Eraser tool, like this one here, we just going to actually
click twice over it, see the size of it. Maybe 10 points will be enough. Let's just press OK. We can change. If you just click over to Rick, actually change the
details of the tool and the options you home wanted,
angle and wrongness. And it's actually really, really mostly worked in almost
every tool in Illustrator. So if you ever
want to edit some, any other tool that we're using, you can just double-click and
it probably not 100% sure, but probably I'll tools have
options to be editable. So selecting our texts
using our error is a two left just while
again holding Shift. Let's just some
slices like this. It actually deletes
some shapes like that. And what we are doing
each slicing our texts. Now I stopped holding
Shift so I can go more organically on the slices. And and yeah, you want not to
go too crazy because well, it can go as, you know, I'm not going to stop you two
of doing too many slices. But you want to keep like a
nice balance of how much, how many cuts do
you have in this? You want to feel like a samurai
passed by these letters, but it didn't like
shredded into pieces. Let's just make sure every letter has at
least three slices. To be short. Like
we can play this with the design a
little bit later. And let's just to it like this maybe and
be like this I think, Oh, these are here is shy on slices and let's just
had a few of them there. I think this is I think I'm feeling I'm feeling
heavier it is. And now what we want to do is
just select a few of these. Let's just actually
select our text. And let's just ungroup this. And we want to do now is
select a few of these shapes. If you need to ungroup it
again, we probably do. So Let's just ungroup
every letter. Because what we're
going to do next, It's like a little
pieces like this, like random ones, like
here on the script again. Okay? Like this one, this
one just select a few random bits
of the letters, start to get one
from each letter. So all of them will have like
this next effect on them. Let's just do this
one, maybe here, here. And VDC is a big one. I want just inverted so
it was filled before. Now we just change the color
to the stroke, to the fill. And let's give it like
a two-point stroke maybe for actually. So yeah, if you're already
looks really cool like this. I think even like, even if we just stop
the class now will be, I'll be happy with this visual. But don't be, don't worry. You're not going to stop it now. And watch we're
going to do next, actually is select this. And let's just
change the color of the stroke here to white. And the color of the
fill to white to. And because we're actually
going to have a background, darker background on this, Let's create a new layer. And we're using the
rectangle tool here. Let's just create a
darker background. Maybe maybe something
like not too dark, not full black, but
a darker color. And yeah, perfect. So the next thing, this is a really cool technical
going to show it to you. You know, if you have like 0 and d are no need to
select all of these ones. And because I need to change
the color to white, right? So instead of just letting
one by one by one, like this will be here forever. So the way, the quick
way to do it is just select one shape
and then go here to select and select Same and
Fill and Stroke like this. Let's just take the stroke away. And let's make the
fill white like this. And let's see. Yeah, looks, looks really cool. Maybe I will just add
a little bit more of a stroke parts here. And T, This one
doesn't have any. So just because of
that, I went ahead. Couple of them. Just to be sure every
letter has the bits that are like stroke
and bits that aren't. To make a really nice
dynamic composition like this one stoned. And see actually easier to do when these like
inverted like this. So let's just find this. And this is, well, oh my God will actually
missed a few of them. Let's just be sure. And maybe here. This one. Not all of them. And, and yeah, I think this is, this is okay for
the next lesson. So in the next lesson, what we're going to do is
stored this a little bit, give it like a legal perspective
and start adding detail. So yeah, I see you
in the next lesson.
9. L08 - Poster 03: Design, distortin & Details: Welcome to the second lesson
of this third poster. Sorry. And so here actually, I'm going to at
least try to head a little bit more detail before we start with some distortions. So there are distortions we
got to make on this design. Actually really simple, so
you don't need to worry much. So let's just select our texts and right-click and go to group. Let's group it together. So here on the toolbar, we actually going to use
a free transform tool. And what do you use
free-form tool, it gives a district options. So as you can see, the C1 is a free transform which help us to do whatever we want here. And there is the
perspective distort and the Free Distort software, Free Distort lets
you to start every, every point like this. So there isn't like, you're not like you can do it. It's like a free distort, like a rapidly sort
from, from Photoshop. But the one we're going to do is actually perspective one. What we want to head to this text to make it a
little bit more dynamic, it too heavy, a little bit
of a perspective on it. Maybe something like this. And then maybe, so we can actually have the sensor for like a sort of a
scale happening here. And I'll just make this
a little bit picker. And let's just have a little
bit of free distortion then to make this perspective
even more evident. And there as you're
gonna see it. So this is already
looking really cool. Let's just select it again. Make sure it's grouped. Yes, it is. Let's scale this a
little bit like this. And maybe actually
going to ungroup it just because I want to make
destructively bit thicker. And using again the
selection tool here, let's same Sims stroke wave, and let's make it eight. Let's make a bigger stroke. And on the stroke tab, Let's just make it inside.
Something like this. Yeah, I think I think I was
filling the stroke before was a little bit too
thin for the Ketterle. A really nice contrast
on the visual. So with this tone, Let's just select it again
and just group it again, just so we move it
easily if you need to. Using the line segment tool. Let's just starting
drawing some lines, trying to follow our kits here. Maybe I will use a stroke, thinner, something like this. Maybe even thinner than four, maybe something like chew. Yeah. So this will be like
just little details that we're going to add
in our designs like this so we don't. So it feels like there's like some motion borough
left from the cut. Let's try to find the
places where the line cuts. And let's try to
add them like this. Tried to head a little bit of detail in art and
design in general. Just like if like, you know, when you like seeing like these
cartoons would summarize. And when they cut
something tastes like a huge line of the cat happening in the air seals like it
gets it gets the hair, and it's really close, creates a really nice effect. So some of my designs
is always influenced by by what I watched for sure. Unlike this is the thing like if I It's like when you see like us somewhere
I feel more salting. And if you see like anybody, if they influenced or
even that the game, the iPhone game
where you get fruit. I can't remember the
name. It's really it's really dressing game, a ticket. I played it for, for a while. Well, when was launched is equal to one of one of
the first iPhone games. So back to, back
to the tutorial. Yeah, just adding
in between like this article creates a
really nice details. Like it's and you can
add as many as you want. I'm just going to stop here
because I don't want to take much time to explain this. And and the next thing we're going to do is just
going to our window. And let's try to find these artistic brushes
from illustrator. So disparate has not
been updated CSR use illustrated like 15 years ago, but they still really good. Lets us find our
brush tool here. Let's use our right-click
if you don't sign it. And just with the paintbrush. So what we're going to
do is just select like the splatter brush here. And this white. Yeah, Unless just start heading. Let's just start
having that sum as if it was like a little
bit of like not bled, but something like close to it. Like just to add a bit more interesting
detail in the visual, like maybe not, maybe
not that distortion. And let's just try to head
a little bit of maybe just, if you just select a few
of these lines is actually and we go outside and
slightly slanted, just add the stroke into it. And maybe like so it
creates a little bit more. One more interesting line, maybe not movies like
needs to overlay. Let's just try again with this. It's true. It's just added something else. Lets us see something
more like this. So we just want to add more detail to our poster
to make it a little bit more more interesting
for the, for the viewer. Let's just add this at a
little bit splatters here. Gritty realized
better composition. Try to experiment with other
types of pressures as well. You just feel
limited just to use buttresses and stuff like that. Let's just have a look. In the brushes libraries. Maybe this one here
will be a good one. Yeah, just just adding and adding layers and
layers of detail. In the end of the
day, Let's just like something like
dislike in the potlatch. Lucky fuels like something
really fast happening here. And this test is flying in your direction of
some sorts like yeah, I like this one and many. I think I will stop here. Please feel free to
continue exploring this standard brushes from Illustrator. They're
really cool. I think they give, they take their design
to another level. And I think they're
really nice to play with. So they are going to stop here. On the next lesson,
we're just going to make our final layouts
for his posture. And that will be it federally. But yeah. I see you
in the next lesson.
10. L09 - Poster 03: Final Layout: Let's finish this. Pulsar them. So this is already
a lot going on. So the only thing
I want to do it is to be sure of the
scale of this element. I don't want to be too big. Well, I don't want to
be too small as well. So it needs to take a little bit of
space, but not too much. So we actually can have
like some breeding areas in the poster because
there is a lot of elements happening
and a lot of detail. You don't want to
overwhelm the viewer. We'd like a huge scale of these elements and these
elements overtake everything. You need to think about how much breathing space
you give to your designers. So, so to think, I'm more happy with
the scale now, and I'm just going to
add those little lines on the top and the bottom are going to make it like eight. As I know, hate is
a good stroke line. Like this. This helps the designed to
feel a little bit more. Looking like not so much
as a illustration only, but like as a proper poster. And let's just had some details. I'd like to sign my
posters as well. Normally sign my name or
just like the date of today. So I'm gonna put like
designed by MST, which means Marcus
Antonius silver tiers, which is my fullName. And let's just make it
white. Is it needs to. Sometimes it doesn't hold, quit illustrator
and make it medium. I really like to put it like
maybe on the side like this. Yeah, something like that. We have a little bit
smaller Arctic is taking second little bit of
space and it doesn't need to take that much pace. And here as well. And yeah, I think this is it. Yeah, I hope I hope you
enjoyed this class.
11. L10 - Class Conclusion: Final thoughts: This is a classical question. So I hope you enjoyed
doing this tree. These are posters,
a supremacists, three different techniques
that we just learned today. And three of them are
really different, which is called,
so don't forget, you can experiment more with these techniques
and try to apply these techniques you learned in two different exercises
in your day-to-day. And yeah, and if
you just enjoyed this class and if
you did the posters, please don't forget to
share your designs with me. Gets me so thrilled when I
see like a student sharing, like actually
watching the class, but also doing the exercise. It's really important for me. It gets me like tomb, inspires me to continue doing this type of content as well. So if you did the class
and you enjoy it, please also leave me a review. Let me know how I was still learning the ropes
of online teaching. It's it's taking a time-like
to me to adjust to be more comfortable doing
it and everything and yeah, just let me know if
you actually enjoyed this class and give me a review. Follow me if you want to get more classes coming
from coming next because how will try to as soon as I I
tried to make them, as soon as I do a really
nice poster writing. Oh, this is a nice technique. I shall share it with everyone. Yeah, so follow me and
I will try to post class like two clusters among
four, something like that. And if you enjoy it again, please leave me a review. And yeah, just don't forget to check my other
classes in my page. I have some water poster designs which are really cool as well. And hope you keep learning
and have fun today. And yeah, I assume
my next class. Bye. Thank you so much.
 Marcos Silva, Designer & Animator