Transcripts
1. Introduction: Have you ever started
the clouds and found the shapes and
greatest from them? Also have been drawn
some new faces from the drawing
in your textbook. It would be so fun at that time. Shall be stimulated the
greatest side of our brain. I will help you to
bring the object to lie along the greatest
shooting in our illustration, all you need is to be
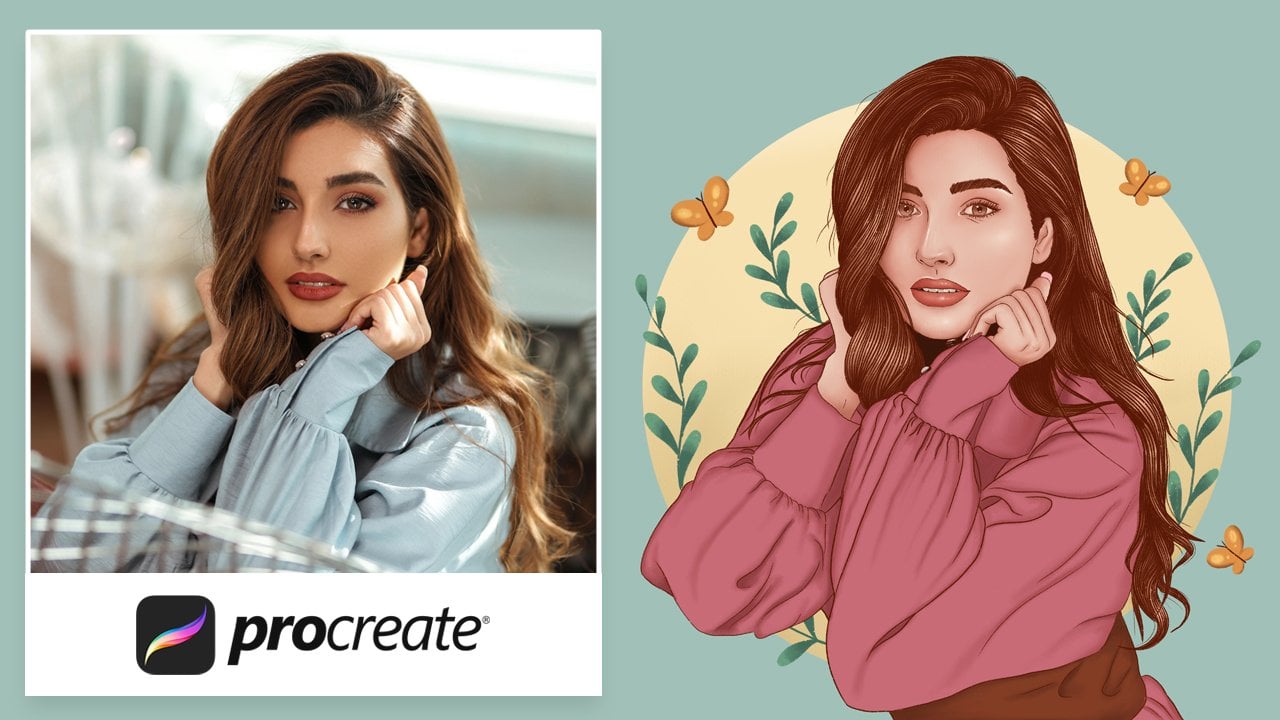
creative in your own way. Hi, I'm a freelance illustrator and a graphic
designer from India. I have divided the
core structure of this class into three parts. The dot decode of illustrations, sketch off radius, jury, detailed process from scratch. We will be looking at how we can compose the scene using
the reference image. We have taken the code
of illustrations. I will take all the illustration from the beginning
to the end so you will understand the
process we take carried out in the
finished illustrations, which have a story in depth
sketch of greatest journey. You will learn how to
create a story and connectivity on
seeing the images and how to make the
basic sketch from the choose an image along with embedding a sketch by taking another image
reference if needed. After the basic sketch, we will be doing the
detailed sketch from it. And also I will explain
you with more examples. Detailed process from scratch. I will be doing the entire
process of creating the creative story
illustration from the scratch. And also, I will show you how
I color the illustration. So you will have a clear idea of grading
a colorful story. Apart from the code
structure of this class, you also will learn
the variety of expressions that we can
use in the illustrations. The basic lighting concept for a better understanding of
the lighting and shadows, the basic color theory
for shading and lighting. I hope you are all very keen
to learn the techniques. I'm really excited to see where the imagination
takes you too. Let's move on.
2. Class Requirement: Before we start the class, we need to know about
the requirements needed to create the illustration
with a creative story. I have used, I bet. Apple Pencil and procreate app. Mainly, you need some
bit of drawing skills. Do you can use any
medium to drop? That is no need for
a particular medium. Even if it can be a
paper and pencil. One day, you have to be graded. In order to be more convenient. Search for plenty of reference immediate to create
an illustration. So far, you have gained the knowledge about the
requirements needed. In the upcoming lessons, we will be looking at the
decoding of illustrations.
3. Decode 01: Pizza: In this lesson, we're going
to see about the process we take carried out in creating the object to life illustration. We will be seeing three
illustrations in total. The first one will be
the pizza illustration, which conveys a story
by giving life doing. The other two will be
in upcoming lessons. Now, let's dive into creating
a bizarre illustration. I have chosen this
bizarre image. On seeing this image, what I get an idea as the two friends are
being separated, they are feeling really sad. I haven't decided that
they had been separator. I need to give a character unity between these two
pieces of pizza. What I'm going to do is let's add some cheese between
these two pieces. So it will represent
the activity. For instance, this is the main
theme for an illustration. And afterwards, I will
change the background to, because this image
background is that I will add some other background which matters the
existing sketch. I'm going to create
a sketch under Canvas in the field or shift. I'm starting with the circle. I'm going to use a full circle, but not as an existing
shape in the image. Now, I'm going to divide
the pizza into equal parts. I'm taking on the
Visa back as in the image and drawing
along with the hand. First, don't be too detailed
for drawing the sketch. Just do however you
can able to drop. After that, we can
make the final sketch. For the topping over the pizza. I'm going to use another
image for the detailing. I'm meeting the basic
sketch of the mushroom, chicken, olives, beans, carrots. Or whether B is a structure. I'm going to
concentrate only on to pieces by leaving other pieces. Because other pieces
don't make much sense. Let the emotions of the
two pieces be too sad. To make the connection
between these two. I will add cheese that
is being stretched to make the center of
attraction on these two pieces. I'm rotating this
sketch to the center. For the background
or fun illustration. I have to send another image and I will include the
background in this sketch. For that, let me draw the
towel on one side. Over that. I'm including the
tomatoes and spin edges. As in the image. We can't simply pays a
pizza or with a table. So I'm sketching the
plate under read. Next, I'm splattering the
leaves all over the table. After the basic sketch, I'm refining the sketch of
the phasor illustration. Now we have finished the sketch. Always we have to start the
coloring from the background. Once we have finished
the background, then the main
illustration coloring can be done with ease. Because for this type of illustration,
everything matters. That is, the main illustration will merge with the background. But for the fork
right time drawing, this is not the case. We can make any typos,
the background. This type of illustration
to background, also tell the story. We can't easily change
the background because both the background and the main illustration
can read the story. You feel change the background, it will affect this journey. Also. Make the background first and
then the main illustration. With the help of the sketch, do the refinement
in the expression. Once we have finished at
90 percentage of the work, we can make the enhancement
in the illustration, lake shadows
highlights except Dre. You can see how we change the image to this
illustration with a story. In the next lesson, we will
see what the other examples, illustration with
analyse journey.
4. Decode 02: Candles: In this lesson, I will create
a story for the candles with some of the macro that
gets embedded with a sketch. Finally, with color
to the sketch. Let's browser the
story to the candles. For that, I'm choosing
this cattle image. And let's recreate this
image with a story as the large candelas mocking the small candle for the
light went out from it. First, I'm sketching with these two candles along with
the bottle on its side. I don't like this background, so I'm choosing
some other image. And I include this
background to this sketch. For more thing, standing straight will not
be so efficient. So I'm making the candle to lean back and love or
with a small candle. In another layer. I'm refining the
sketch with our idea. I'm making the large
cantilever to lawful love. The small candle gets shocked on seeing the light
windowed from it. Now we have made the main sketch that represents our idea. As we have discussed in
the previous lesson, always start with
the background. I've done the basic coloring
for the candles bottles. And I mean the
shadings highlight along with the expressions. Also, I did the details for the background as in the image. In the next lesson, I will show you how
I made the orange to play with other oranges
in my illustration.
5. Decode 03: Oranges: What I will do in this
lesson is I will make an illustration of the orange
to play, hide and seek. Let's see how I made that. For that, I have chosen this on an image as the
main character. His orange has a long list with a reasonable
hiding it from others. That's why I made this
jewelry S hide and seek. For the background. I need some other oranges which
are running from behind. I have chosen another image
that suits our sketch. As I'm concentrating on to oranges behind the main orange, I have made the
expressions to be happy that the main sketch I colored
the background and the oranges along with
the shadows needed areas. In the next lesson, we will come to know over
the basic lighting concept and how light plays a major
role in a particular origin.
6. Basics Lighting: Everywhere. I don't s, we have lights that are with natural light
and artificial light. Light convinced the
mood to the objects. Just think of an illustration. Without light, it
will be so flat. One only because of light, we will come to know the shadows and highlights
on a particular thing. The shadows will see about
where the object is residing, whether it is tiny on the
floor or floating in the ad. It's the main thing
we have to consider. Let's understand the
concept of light on the object by using
a simple sphere. Different lights have
different types of intensity. It may be the bulb,
flames, torch, etc. When you bring the light closer, that particular object
will get brighter. When the lightest
farther away from it, then the lighting on the body
or object will be lighter. These are all the things
we have to consider. Let's assume the light is
coming from the source. Where already studied in school. That light always travel
in a straight line. We are demonstrating
an *** Yesterday line. Now that light
falls on this beer. The particular area
will be eliminated. Because of the light. That area is known as
the illuminated area. After that, 1, illuminated
area will end where light does not fall after that particular point
is known as Dominated. If the light falls on this PR, at one particular point, the shadows will be formed. Beyond that dominated point. That shadow is known
as code shadow. That is, the shadow is
formed on that object. It says the shadow will be
formed on another object. That is, this fear is a
reside on another object. What we have here is the floor. That spirit shadow will
be formed on the floor. We call the shadow
as guessed shadow, because the shadow of this sphere is
casting on the floor. It is called as cast shadow. The light travels
in a straight line. When the light
falls on something, that light will bounce back, that is, it reflects back. So what I'm trying to say is
this light reflected back to this bill and forms the
reflected light and also again, reflect on the floor. Those are contests,
reflected area. Last but not least, that is the highlight. The basic light is always on one particular area and informs on one particular
side of the object. It's farming based on the perspective we are
viewing that object. That bright part is
known as highlighted. Now we come to know how the light source affects the
appearance of one object. And also everything is all about how intensify delight is. In the next lesson, we will see it with expressions we can use in the illustration.
7. Emotions: Expressions are the thing that conveyed thoughts and feelings. We can understand the mood of any 11 link through
the expressions. The same applies to our illustrations to
expression will give the needed emotions to
the object that we are using is a maintenance
of the story. Without a week on
understand this jewelry, which we are trying to convey. Let's see about some of the expressions that we
can use in this lesson. Now, I'm starting to
smile expression. For that. I'm starting with two eyeballs
and with smiling ellipse. Now for the pupil, according to the
data section view, the pupil direction launch
of change in new York, the directions will not affect the expression
on the face. For now, I'm making
that view upward. Next I'm moving onto
the expression, happy. How the happy face will
be with a broad smile, which shows that the heat. Even though I bruce place
in the explanation, I'm making the position of the eyebrows in various places. Even it affects
the expression on the face for the happy face. And I'm Bruce will
meet at the top. Let's move on to
the expression cry. What I plan is crying silently. To do that lip, unlike with the eyebrows, will be cranky. I'm adding the stagnation
of deals in the ice. So it wouldn't be
like crying silently. Then what about crying? Luck. With the eyes closed, with a mouth open. It will represent
the loud screaming. The AI improves, should be
drawn downward on either side. Here, that's my tip for
drawing the expression. Make the expression
on your face. So based on that, in your mind, making
do come to your hand. Now for the winking eye, if I do it yourself, why do you absorb
on a winking one I, one part of the multiple will go up according to the wink. Apply it in the sketch. Back to the sketch. The drought, one eye to be winged and another
eye to be opened. What we have observed, the mount a goes upward
to be in a cartoon type, rather mouth a
little bit upwards. As usual, grow the teeth, tongue and darkened the
inner side of the mouth. Along with pupil. One of the I pose
will be cranky. Adult, will read normal. Next as a sort of full face. Make the expression in your
face while you're sorrowful. Implemented the sketch for the sad face. The phase will read them. Just concentrate on your
expression when you're sad. Just implemented. And also for the eyes. The eyelids will be
partially closed. Even the eyebrows will be done. Now for the angry
facial expression, the amount will be on one side. Make it like that. The ice will be
aggressive and let's make the eyelids it partially
closed on its site. As I said earlier, I press play a major role in the expression for
this angry face. If you make the eye blues like
these are born with good, both the eyebrows should be cranky in order to
express the angry face. Next, is it irritating face? How will you all
will get irritated by biting the teeth
with the eyes open. Just make it like that. Now the columns face. The calm fees will
be like by closing the eyes and with a light
smile on their face. The excited face, how you will keep your face while
you're getting excited. With their vote. Eyes
and mouth are wide open. Whatever the pupil, it will
be starting on something. Confused state I'm
looking at something. We will have a question
like what it is. Just make it as starting
with confusion. Be more precise. Add a question mark. Next. Whatever the funny face. We will put our tongue
out to be funny. For the codons, pupils
would like cranky. That is, each of the pupils
will read in and done. Next is shocking face on scene. It's something we will
be shocked like what happened you just
expressed in this sketch. The PT phase, the malt will look sac and the ice will like
a logging on something. However lowly, just
with a smiling face. And along with the
hearts in the ice. We have finished some
of the expressions which we are mainly using
enable illustration. Even you can try more
expressions for your practices. In the next lesson,
we will go into see how to find the greatest
Judy from an image. We are going to use a plenty of examples to understand
the concept. Let's more into that.
8. Sketch 01: Car & Cycle: With the knowledge
we have gained so far from the
previous lessons, let's see in detail how we can possibly bring
a real image to a life with a positive story by boring or imagination into it. With plenty of examples
I'm going to work on. You will get the idea to create a story in
your illustration. The first step you need
to carry out while sketching is choose
the perfect image. You will get plenty
of references in unsplash.com from it, choose your desired image. The second step is after
choosing the image, look at the image keenly. You will get some story in the image that is known to establish it
exactly in the Canvas. But at first, draw the main character
exactly on the canvas. Or you can alter a
little bit also. But always do the sketch. Acid is in the image. It will get some of the
ideas after I added. The third step is after
your basic sketch, meet a refinement on the
sketch based on his Jodi, you get in your mind. The fourth step is with
the help of sketch, make the detailed sketching
that conveys this Jody. These are all the
steps we have to consider while grading a sketch. Back to our lesson. First, I'm enabling the drawing
guide for the guidance of your sketch and adjusting the grid size
according to my Wish. I have taken the god photo
on seeing this image. What I have filled
is this car is having the wharf on the
road along with its frame. To start with, I'm sketching
the exact shape of this guy first would squash shape
and circles as a base. With this guide shift, I'm sketching the card
shaped as in the photo, in a new layer by
reducing the opacity, I'm spicing it up as
the card is having a conversation with
full of enthusiasm. So I am making the cut
to lean back slightly. What I have decided is to me, the friend glass as it ice. I rose, I'm sketching
like the shuttle. Now. I need to decide where the
goddess viewing on that. I made the arrow
for the direction. I'm drawing the pupil
according to that direction. The car is having a
conversation and the cycle, I'm growing the basic structure of the cycle, form
inconvenience. Want the next step is how the
God speaks with the cycle. It's not just smiling, it's having the conversation. I wanted to grow as it
is speaking the bicycle. It's not looking at when
the mouse is in the center. So I'm selecting the mouth
but moving into sine. With slight enlargement, the
car will have headlights. So I'm gonna drawing as a blush
on the cheeks of the gut. And I'm sketching the
remaining parts of the CO2. Let's move on to the
bicycle or trends. I have chosen this image as a reference with the eye
viewing direction of the cut. I'm sketching the
bicep constructor. It seemed very light when
come back to the car. And also the cycle will be a
little smaller than Dakar. So I'm reducing its sinks
and continuing to draw The handled board. I'm
marking it as it's ice in a new layer. Let's draw the detailed sketch. I'm doing the handlebar
as it's eyebrow, just beneath it, assets eyeball. If you're built to be
citing to the car. This bicycle has a broad smile
while speaking with a car. Now I'm making the
remaining structures of the cycle with battles,
tiles and seats. After finishing the
main characters in a new layer
background for it and withdrawn as they are walking. And I'm making this sketch by having the conversation
between these two. Let's design the
shadows for the object. First, understand where
the light is coming from. Undo the shadows based
on that lighting. Finally, let's make the trees, bushes in the background
with a grasses leaves. The friend. Now, we have made a story from
the photo we have chosen. In the next lesson, let's create a story with glass of tea.
9. Sketch 02: Tea & Samosa: Here is a second example
for another greatest Jody, which we will be
going to create. What I have chosen
is the image which has three glasses of
tea and a Somoza, which is designing the
table. Noticing it. What idea I get this? Somoza, a safe guarded
by these glasses off T. What do you feel
about my idea? I think it will come out well. At first we have to make the basic sketch to
implement our idea. Let's make this
sketch in the Canvas. First, always make the sketch
as it is in the photo. After that, we can recreate
that case to our imagination. I'm making the sketch
of three glasses of t on the table along
with the Somoza. In this end up adjusting
the size of the sketch to my requirement in order to
weigh look like the Somoza, I have chosen another
image of Somoza. Now I'm switching to some Moses, as in the image, you just laying on the plate. And I have a container. Does some authors asked to VIPs because the Samasource are safeguarded by the gliders of t. I'm considering the
Somoza us as we APs. I'm enlarging it to get
the attention on it. Now in a new layer, let's grow the detailed
sketch from the base sketch. I'm drawing the glass of
tea to look like the team. Just draw this full on dirty. Make it like a glass effect. Draw the fine lines
on the glass. I'm repeating the same
on other two glasses. Diving into the sketch
off someone's us. I'm drying the details
of the Somoza in the sketch along with this
railings and texture, same follows for
the second Somoza. Make the somos us as
VAP or a celebrity. I'm adding the sauce on it. So it will look like a
special VIP Somoza us. Let's bake the expression
for the sum Moses, as they are feeling
happy if I stay safe, guarded by this class of days. Now, I'm not happy
with the background. I'm choosing another
image for the background. Get the effective illustration. Always search for
more reference, that good margin with
the registration. Even we can match to our three immediately Frances
for the illustration. Here, I have chosen the image
that is with the table, and we knew I feel like it
will be sold all four over. Let's make the
background sketch. Acid is in the image
along with the table and the windows on
its side on fire. And I'm sketching the small, small thoughts and textured wall and also the hanging plant
on top of the window. In a new layer. Let's
draw the detail is sketch by reducing the
opacity of previous layer. Draw the leaves which
is hanging from the window when it
is in the frame, and the leaves, we bicker
farther back side of it. The leaves gets smaller
in our perspective. Fight behind. I'm sketching the two plant parts and
outside that window, let's make some sense. Back to the glass. If
I haven't decided. Those aren't body gods. So all the body goes, we'll have a keen eye
on the head boss. The direction of
the sun moves us. I say it off the body
goes will be there. This glass isn't the
front of the Somoza. So it looks at the Somoza, which is in the back, how we can make
the body got low. Professionalism. Let's give time to the body or they will be like
professional bodyguards. Now let's concentrate
on the lighting. The light source is
coming from the window and falling in the
glass and Somoza us. So according to the
direction of the light, that gas shadows will
be formed on the table. Finally, let's
make the touch ups on the windows on the table. Lost. We have created this judy
with glasses of thes and the Somoza by giving
the life to the object. In the next lesson, I will be using another food dish by broadening
our imagination on it.
10. Sketch 03: Sushi: And just simply choosing one image will not
give you ideas. One day on good
grooming the plenty of images under the one concept. You can either do
good creative ideas. If you see one image, you will get one perspective
on for that research, E11 simply needs to be
given a perfect idea. Now let's get back
to the lesson. Next example of
creative journey. I have chosen the
foot. In the Canvas. I'm sketching the
basic structure of the sushi with the help
of reference in each. Now what I get an idea
as one of the sushi is falling down and another sushi is trying to hold
it from falling. This concept, it needs legs
to Chan it from sliding. I'm drawing the
legs for the sushi. One of the sushi keep the legs on something
and it's slider. So how it can be represented by keeping one leg up or none
of the two we slided. Sushi is a hood. I'm drawing the plate. Read the sushi is outstanding. The source of the sushi
is kept on the plate. So it gets filled
out on the plate. While on keeping
the leg over it. The sushi gets lifted. The background, the scene
is happening in the hotel. I'm drawing the windows and then glass along with the
expression on the face. Let's make the detailed
sketch in another layer. While the expression in
the face of the sushi is the one which is holding, is seeing the other sushi. Finding sushi is viewing up. I'm drawing the hand that to
hold the following sushi. Falling, what we will do, dry our hands up. I'm representing it in our sketch. Whatever the amount. They both got an a
sharp mouth wide open. Now I'm drawing all of the things which I have
done in the basic sketch. That is my rainbow window, Chat and the glass. Finally, I have made the
fine cuny and the sketch. In the next lesson, we will be concentrating on the
children's play toy. Perfect creativity.
11. Sketch 04: Train: Anna, the reference
image we will be going to use is that
children play toy. That is, that toy train image. After doing the basic structure, let's decide what
concept a weekend make. Asked in the reference image. That drain is a toy. But let's make it
as a real train. On looking at the face
of the train weekend, notice that it has two
eyes, nose and mouth. I'm drawing the basic structure as it is in the image inch. Completing the remaining
part of the train. That is the compartment, rail track and windows
in the compartments. What a good idea is, the drain is traveling
over the rich. Let's make that a
presentation of the bridge. How the story is, the client has fear of falling down from the crack because it is
traveling over the bridge. Let's create this fear
expression on the face of the train. In a new layer. I'm starting the
detailed sketch. First. I'm doing the face
structure of the train. As the train is siting down. I need it as a field. Need to represent in it ice asked the
drain is getting 35. I'm drawing according to the terrified
expression for the Mt. Let's add a trained
numbers, true? I'm making the deep learning
to the compartment of the train drag and the wheels. I'm drawing the windows drop a bit too small
according to her pose. Back to next is the rich. For the background, I have
chosen another image which has large mountains along with the train gets densified
on seeing the levo. So I'm drawing the
river below the bridge. Next, I'm growing the
rocks on the bank of 30. Well, the basic structure
of the mountain anecdotal sites along
with dark clouds. The next lesson, let's see
over the final example going quite a while finding
creative stories section.
12. Sketch 05: Bottle & Insects: This is our last example for our creative sturdy lot I have chosen is a border that is partially submerged
in the sand. Let's draw the basic
structure of the garden, which is bascially open with the shape of a
rectangle and circle. I like this background. So I'm using this background
as in the reference image. There is the sun and the sunset. From the self-constructed. Let's draw the lid
off the bottom. Now, what I can get an
idea is the borderless trying to open itself to let the insects
come out from it. The modal is all well, obviously the bottle
has to look on, it's lit to open it really cautiously without
hurting the insects. So I did ask viewing
after this decision, I'm making the detail
sketching for this race. Don't read to lead them widely, we have to put our
imagination by doing the music
sketch. After that.
13. Class Project: The project for this
class is to create an illustration with
a possible story in an in-order to
start with that, you have to choose the
possible reference image as a mean by keeping
that as the main to some other sub images so that you can take
inspiration from these two images for your possible storage,
for your convenience. I will provide the resources
which I have used in this class under the Project
and Resources section, you can make use of it
for your practices. And now, after
choosing the images, make the basics image that you get while seeing
that if you need it, you can merge other
inspiration from another reference image with the help of the basic sketch. Do the detailing on the sketch after the completion
of this sketching, do the coloring which
suits the illustration. And also it should convey
the possible students. So what you have to shout
in the projects except our basic sketch, the sketch. And finally, finished
illustration. So I could able to
analyze your boss will transformation of an object to a character with a showing. I hope you all really
shy your adverb. I'm very excited to see your illustration with
their own surely.
14. Full Process: Sketch: In this lesson, I will show you the entire process
which I'm going to carry out on creating
his jewelry from an image by giving
life to the object. I get this mushroom
image as a reference. In this image, I'm going to use the mushroom as
a main character. That is giving life to this mushroom with the
expression on seeing the birth. It maybe the book is trying to make conversation
with the mushroom. Now, what I felt as I wanted
to change the mushroom type, this image, but I don't want this type of mushroom to
be in my illustration. I want to change its type. When I was playing with my
daughter in the play area, I said a mushroom time house. So I want to implement that type of motion
in my illustration. Now I get some of the
ideas to be implemented. Let's start to do the sketch. I'm using the grid
to find the center. But as I said earlier, I'm going to recreate
the mushroom type. Now I'm drawing the
circle on its top. Let's move to the bug part. Fought it does a
busy shape by using this alcohols and
start to refine it. Asked, we have decided already the bulb list making the
contact with the mushroom. In order to be in
a cartoon type. I'm making its eyes a
beaker with a smile on his face. A new layer. I will draw different types of expressions to the mushroom. And finally, we can decide
which suits the best. At first, I'm making
the mushroom to reset. The work goes crying
to console it. Based on that, I have
made this expression. Now in a new layer, Let's create another expression. What I'm going to draw, the mushroom gets shocked on
seeing the book on its head. Now for another expression, the mushroom is happy on
seeing the book on its head. I'm going to make it
as a female because this mushroom gets
the feeling of the buck decorating a head, somewhat like a clip on
one side of her head. We have finished the
three expressions. Let's go through one by one. I feel that last one seems
good because both feel happy. I'm choosing this
sketch in a new layer. I'm okay with this background. So I'm recreating this
background in setting. I'm going to drink
grasses, brush, glass, those and also the
background, the trees, etc. Finally, I have decided
everyday sketch I'm going to use in
the next lesson, leaving the scene or the
warm colors and cool colors, and how to choose colors
for shadows and lighting. Seeing you in the next lesson.
15. Full Process: Coloring & Color Theory: We're going to color
the background to our sketch and we'll
do the shading to the mushroom along with the simple color and
explanation in this lesson. Let's start to call it a sketch. Before that, create a new layer and drag it behind
the sketch layer. I have already created the base color palette
for the machine. The further shadows
and the lighting. I will create it from
the color wheel. Now let me show you. I'm going to apply this color in the sketch. For the head. I will use this red for the
stem, light brown color. I'm using the red for the head. So I have chosen the
blue shade for the buck. For the background. Obviously the grass will
have a green shade for the drying grasses and the soil will have
that brown shade. To choose the colors for
shadow and the lighting. Let's nowhere with a warm
colors and cool colors. A red, violet, red, red orange, orange and yellow orange
L0 order warm colors. While it blue islet,
blue, blue-green, green. I love green under cool colors. For choosing the
cutoff where shadows, the color should
be a darker color. On moving to the cool colors, the particular
follows get cooler. And asked in the same way. Moving towards the warm
color for the lighting, the particular
color gets warmer. Because for the lighting, the color should be brighter, so it needs to be warmer. In other words, let's
take an example. If I had orange as a main color, to choose the color
for the shadows, you need to come to red, orange, or red in the wheel. The orange color, that's cooler. I'm Lynn can choose
color from the value. In other part, for the
lighting on the object. For that, you need to go to
the lower energy the wheel, so that the orange
color gets warmer. That can be used for lighting. I'm Lynn can choose
color from the value. Now I'm renaming the layers
as Sketch and background. Even you can choose
the color from the image and do the
refinement afterwards. At first, let's make the
background for the illustration. I'm choosing the green
color for the grass. I play this color
to the background wherever the green shape
appears in the image. Now for the sign and
the right grasses, I'm choosing the brown color and applying it on all
possible areas. Again, I'm creating a new
layer and drag it behind their background layer and renaming it as main background. And I'm choosing the black
color for the background. Now I'm moving to the
Gaussian blur and adjusting it to 23%
for the blurry effect. For smudging in the background. I'm choosing the goal
wish brush from painting. And I'm doing this Mandela
effect in the background. Even in the middle needed color. Can we choose in an
adjusted with a background? In the image, we can
note the brighter grass. So the color to be
chosen for this grass. Choose a base color in the color wheel for
the brighter color, move towards the warm color. And just its brightness. Always are played on a canvas for the
conformation of the color. I helped Jews in the
color android and grass on one side of the canvas, even and applying it on
the inner city area. Again, in the new layer. I'm drawing them bright
drying rest over it. In the back sight, I could see the
grass with a list of opacity here by reducing
the opacity of the brush. I'm drawing the grasp as
it does in the image. Again, I'm using that
Gaussian blur in a new layer. Let me start to draw the stem and the handoff them my stroke. In the image, we know the
light source is coming from the left-hand side and falling over them much love from me. Try to analyze the
illuminated area, dominator under cold shadows. So foreshadows choose color by moving towards cool colors. Make the layer to alpha lock, and then starting to call it a mushroom stamp for the shadow. And I'm blending it. Even for more shadows, I'm choosing that color
would a less brightness. And again, I'm playing it on
a stem and I'm blending it. For the highlights, I'm moving
towards a warmer color. I'm choosing the color
with high brightness. I'm making the highlights on the stamp and I'm blending in. The light source will get
reflected back to the object. In that part, do we need to do the highlight with
the Alpha locus on? I'm coloring the inner
part of the mushroom too. I'm drawing the fine lines, which is that in the mushroom in a new layer, by enabling the clipping mask, I'm drawing the circles
over the handoff the mushroom has
with the same color. By enabling the lighthouse
guide with alpha lock is on. I'm making the shadow
part of them are strong. Even I'm using the
darker shade for the deep shadow. The lighting. I have chosen the one
color and I'm learning it. For the highlight, I'm choosing
further more warm color. Now I'm coloring
they're flipped it, but in the mushroom, we have finished the
main background shading to the mushroom head and
the steam in this lesson. And the next person
we will see with a father shading and the
expression for the mushroom.
16. Full Process: Expression: We have completed the background and the shading or the mushroom. In this lesson, we will be
giving the expression to the mushroom and we'll see how to make the
expression to be real. Now back to our illustration. The circles over the emotional also are affected by
the light source. So we need to do shadings
over the circles with the shadow form beyond
the dominated point. The illuminated area, I'm choosing the brighter
color of it. To make the circles In module with the head
of the mushroom, I'm blending the circles on its corner by using as much to even we have to cover
the reflected area in the circle with a bright
color of the base color. Now on enabling
the sketch layer, let's start to draw the eye for the mushroom and filling
it with the color. The dark shade, I'm moving
towards a cool colors. The shadow for the
eyeball is being colored. Ask this mushroom is a female. I'm making the
eyelashes or whether I want even the eyelashes, we'll have the lighting. So I'm making those
to the pupil. I'm drawing this so good and filling it with
a black color. Alpha lock for the
layer is switched on. Now I'm choosing the low on
and shade to draw or where the pupil have Jews and the darker shade for
the shadow in the pupil. Now I'm moving towards
the warm color for the right shape to be drawn
on the illuminated area. Even a reflective areas
should not be missed. For the highlight in the eye, I'm choosing the eyeball color. I'm drawing an ellipse
shape over the board. Now I'm duplicating the AI on by selecting
the existing one, as well as the pupil
for the eye, also, to be more realistic than darker shade of the
mushroom color is chosen. And I'm making the
shadow so that I bought will get ambushed. With the help of the sketch, the eyebrows on drawn. And also I'm drawing the smiling lips for
the mushroom face. I'm doing the blending for the much enhancement
to the lips. So finally we have finished the expression on the
face of the mushroom. In the next lesson,
we will be moving to the buck with
excretion on its face. Along with that coloring.
17. Full Process: Coloring Bug: I have completed
the Muslim drawing. Now I'm going to conjugate on the bug along with
its expression. I had chosen the blue shade from my color palette in order to be different from
the current of the mushroom. I have chosen a blue
shape for the book. By anything the sketch. I'm coloring the
majority of the book, aspirin for the leg
and the headboard. I have to Linda blockchain. I kinda able to cut
out the BCG head. Clearly, I have disabled
the background layer. I have finished this button. Draw the eyeballs off the bus by choosing
the color of them. My strong I bought. By enabling the alpha lock, I'm making the
sheets to die boys. I'm drawing the pupil
along with the highlight. Let's move on to the
body of the butt. With the darker shade
off the blue color, I'm making the
partition of the body, the shadow for the book. The farther shadow, and choosing the darker shade and
blending it as sweat. For the lighting. I'm choosing the bright shade
off the base color. Now for the highlights, I'm choosing the color
from the high brightness, but now I'm coloring
on the body, red light false,
particularly on the mug. And I'm blending all those
highlights in a new layer. I'm making the dots that
will be there on the book, and I'm making the
highlights on it. I have completed the
bug with a string. The book has all
of the mushroom. The shadow will be formed on the mushroom
because of them, but with a black color, the shadow is being created. I have completed the
coloring to the book. In the next lesson, I will complete the
illustration with a final lead dialing and
the lighting in the end. Let's see how to make
that in the illustration.
18. Full Process: Final Details: In this lesson, we're going to move on to the further
detailing in the background. The reason we have this needling part and
the last is because we could see in the image the grasses are
overlapping the mushroom. That's why we're doing it at the last with the share
of the mushroom stem, I'm making the dry grass
with just a list blurry. Now I'm moving this
layer to the top of the stem layer with the smudge
tool smudging it's both. And again, I'm blurring
it with Gaussian blur. In the image. I could see
the DOD, drying grasses. So I'm making those into Canvas. Again, blending it with the smudge tool
and Gaussian blur. Now I'm blending the bottom of the mushroom stamp so it
can merge with the grass. Let's concentrate on the
grass which is in the frame with a slight brighter shade
of the existing green color. Even the grass to have
them blurry effect. Now I'm doing the clear part of the dry grass which is
overlapping the mushroom. Enabling dal follow, just mocking the darker
part in the dry grass. If I'm disabling the Alpha Lock and drawing the folder grasses in a new layer. Let's grow the clear at
part of the fresh glass. I'm checking whether the color is suitable with the
existing illustration. Even you can choose the
color from the photo. I'm making those grasses
on the illustration. Giving the shadow
fought on the grass. Light of his falling
under grasp. So that part gets eliminated. The light shade of
the grass is chosen. And Ron, on the grass with a new layer, I'm drawing the friend part of the grass and I'm blending it. Now we're going to do
the light source effect. In the illustration. For that, I'm creating the layer
behind the mushroom lives. I'm choosing them
Blackburn brush from drawing with the color
off mushrooms step. I'm reducing the opacity of the brush and
creating the strokes Crump top left and to the modern bright
and the smudge tool, I'm blending all those strokes. Furthermore, I have used the Gaussian blur
for the effort. I'm using the monoline
brush from getting raphe for the sparkling
effort in the background. I'm duplicating this
layer with the help of gushing blood and
again blurring it. Let's complete it with the finalization of
the illustration, which needed refinement. Hooray. We have completed the
n-type process on grading the illustration with the story along with the expressions.
19. Conclustion: Congratulations, successfully you have
completed the class. Thank you for taking the time to learn with me in this class. I hope you gained
some ideas that you can take on further
in your practices. I can't wait to see your
van dabblers creation and don't forget to post your
creation in the project. And I will be
grateful if you leave a review and what you
liked in this class. If we have any questions
regarding this class, don't forget to ask me in the discussion panel
if we wanted to share your artwork
on social media, please tag me on Instagram. If you want to stay updated
on my upcoming classes, follow me on Instagram and Skillshare to learn
more from me. I have a couple of classes here, so you can learn from them. Thank you guys again, I will be looking forward to
seeing you in my next class.
 Jemsee, Webflow Designer & Digital Artist