Transcripts
1. Introduction Trailer: My name is Emil Sligas. I am a senior Tri
environment artist, and I will be your
instructor in this course. This course will be all about creating trim sheets for games, and we will be teaching
you this while also holding a little
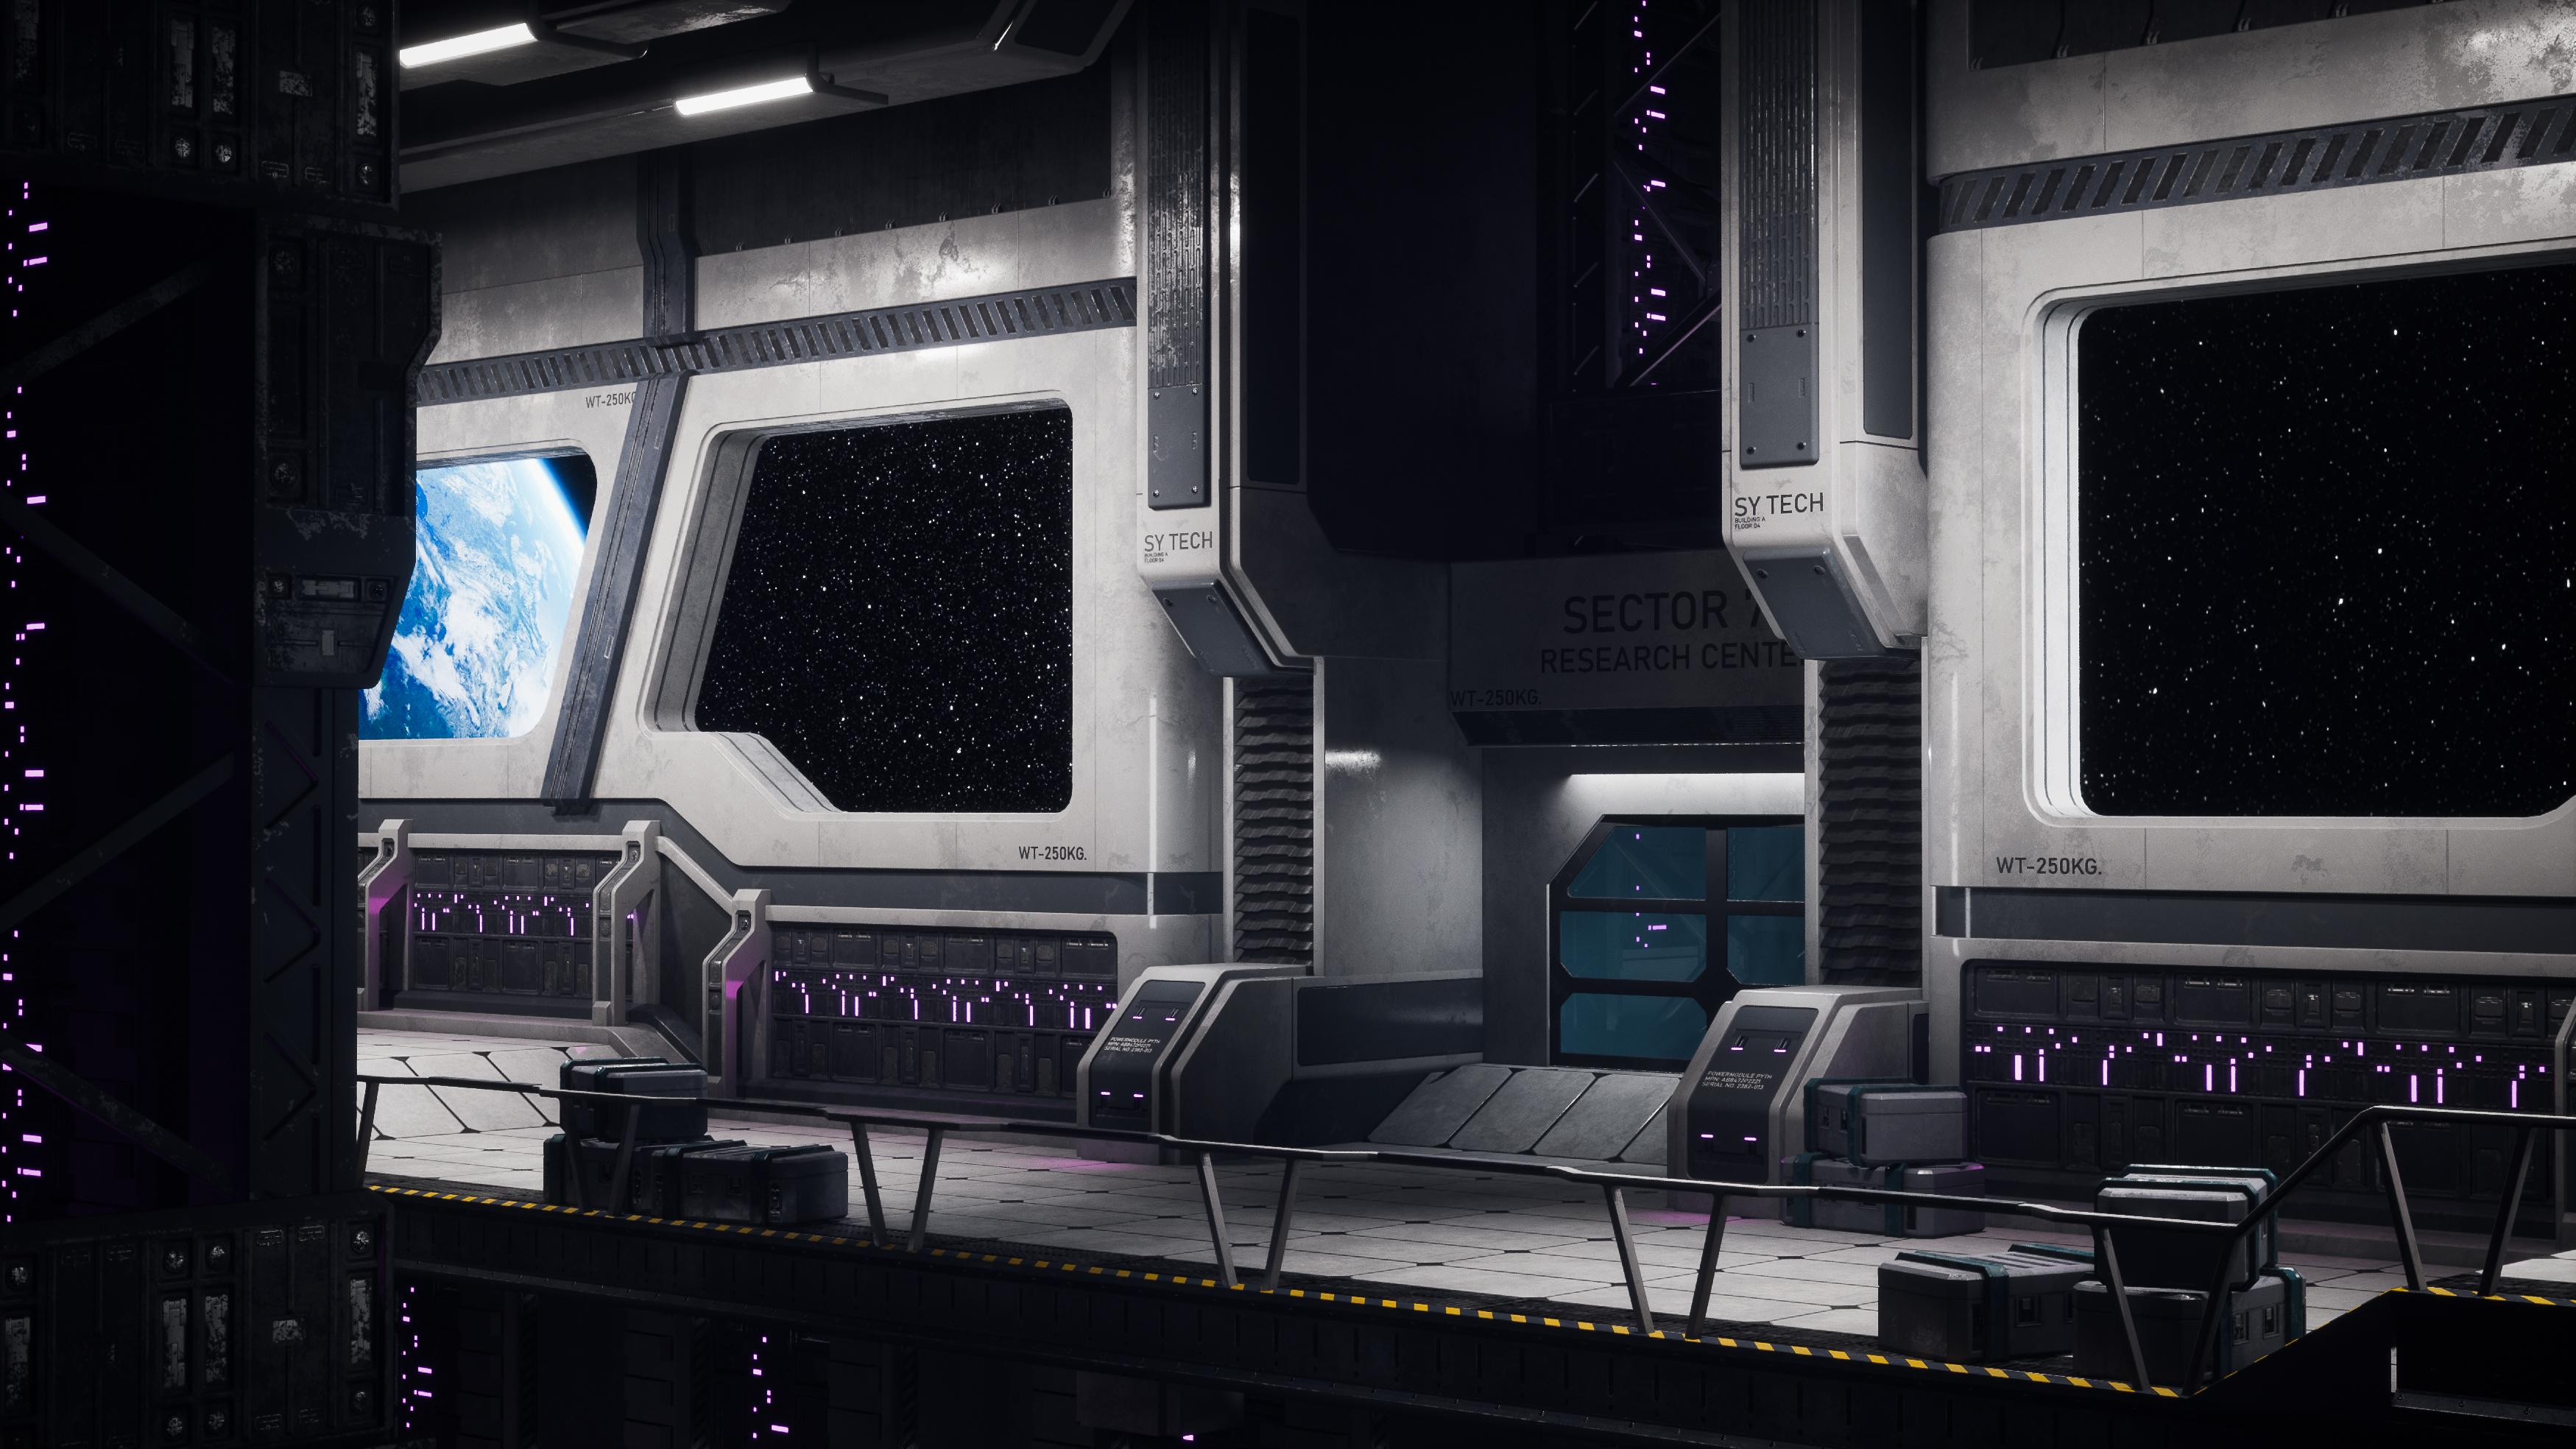
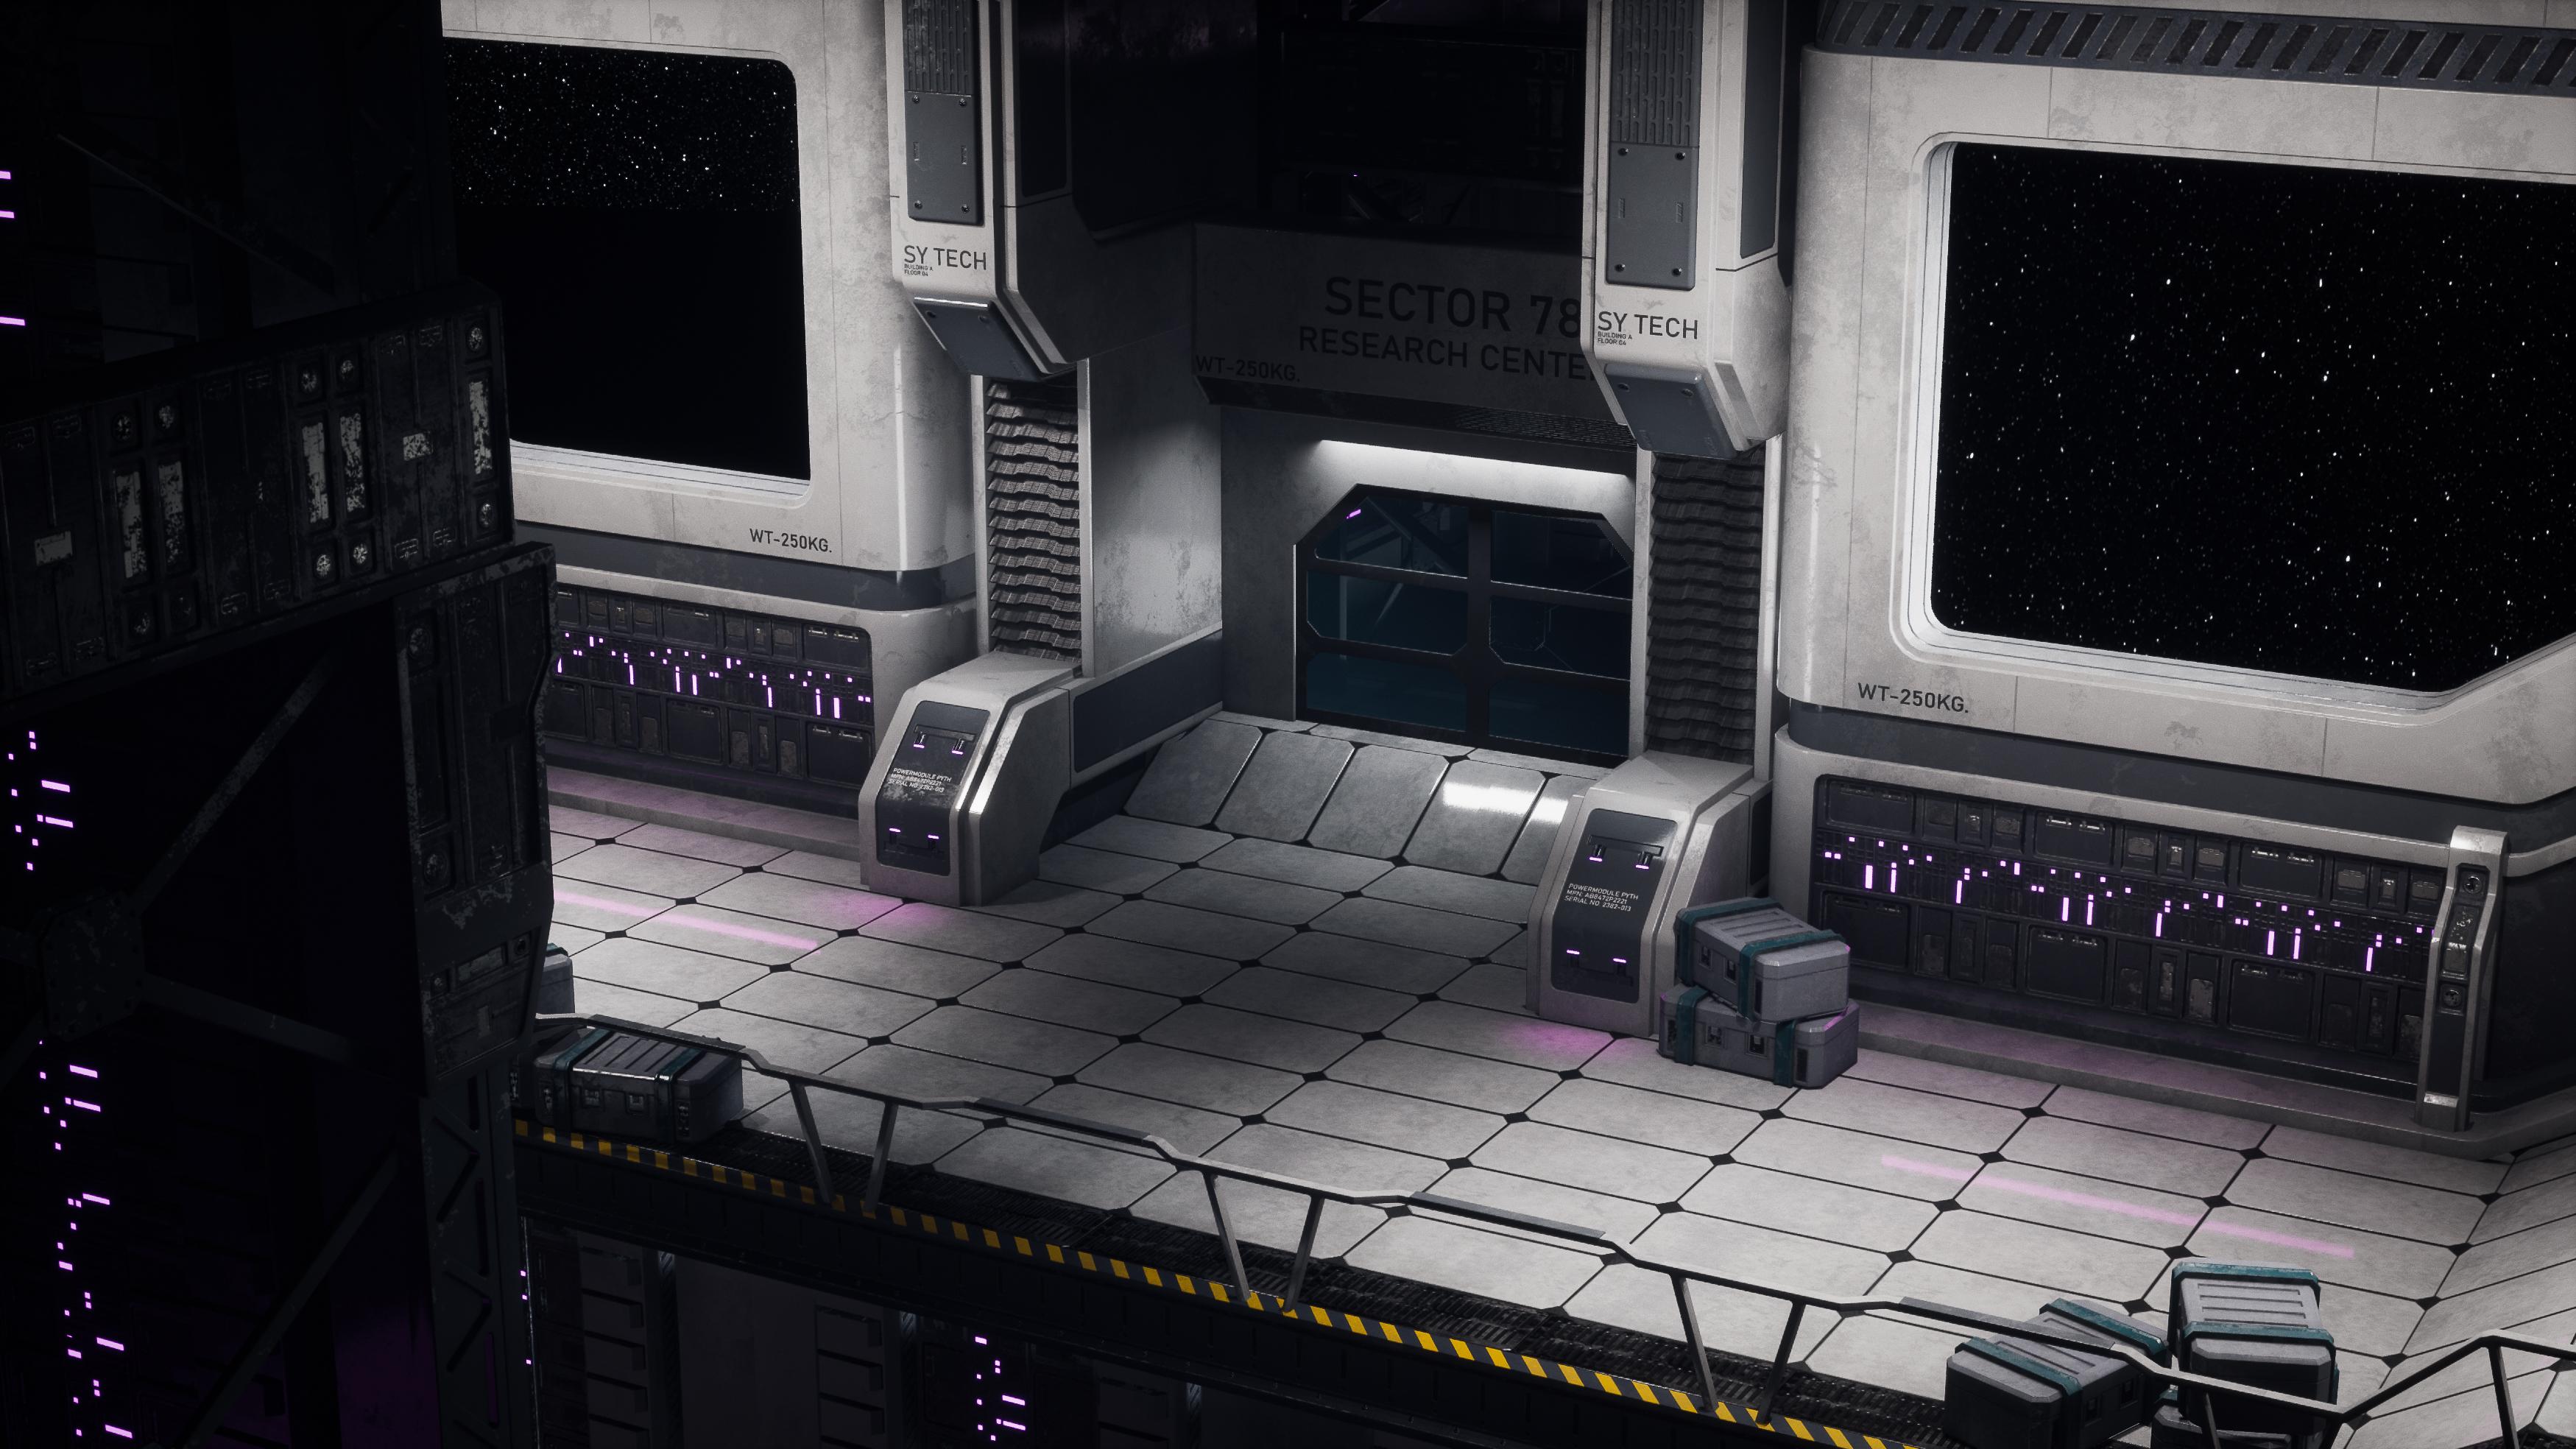
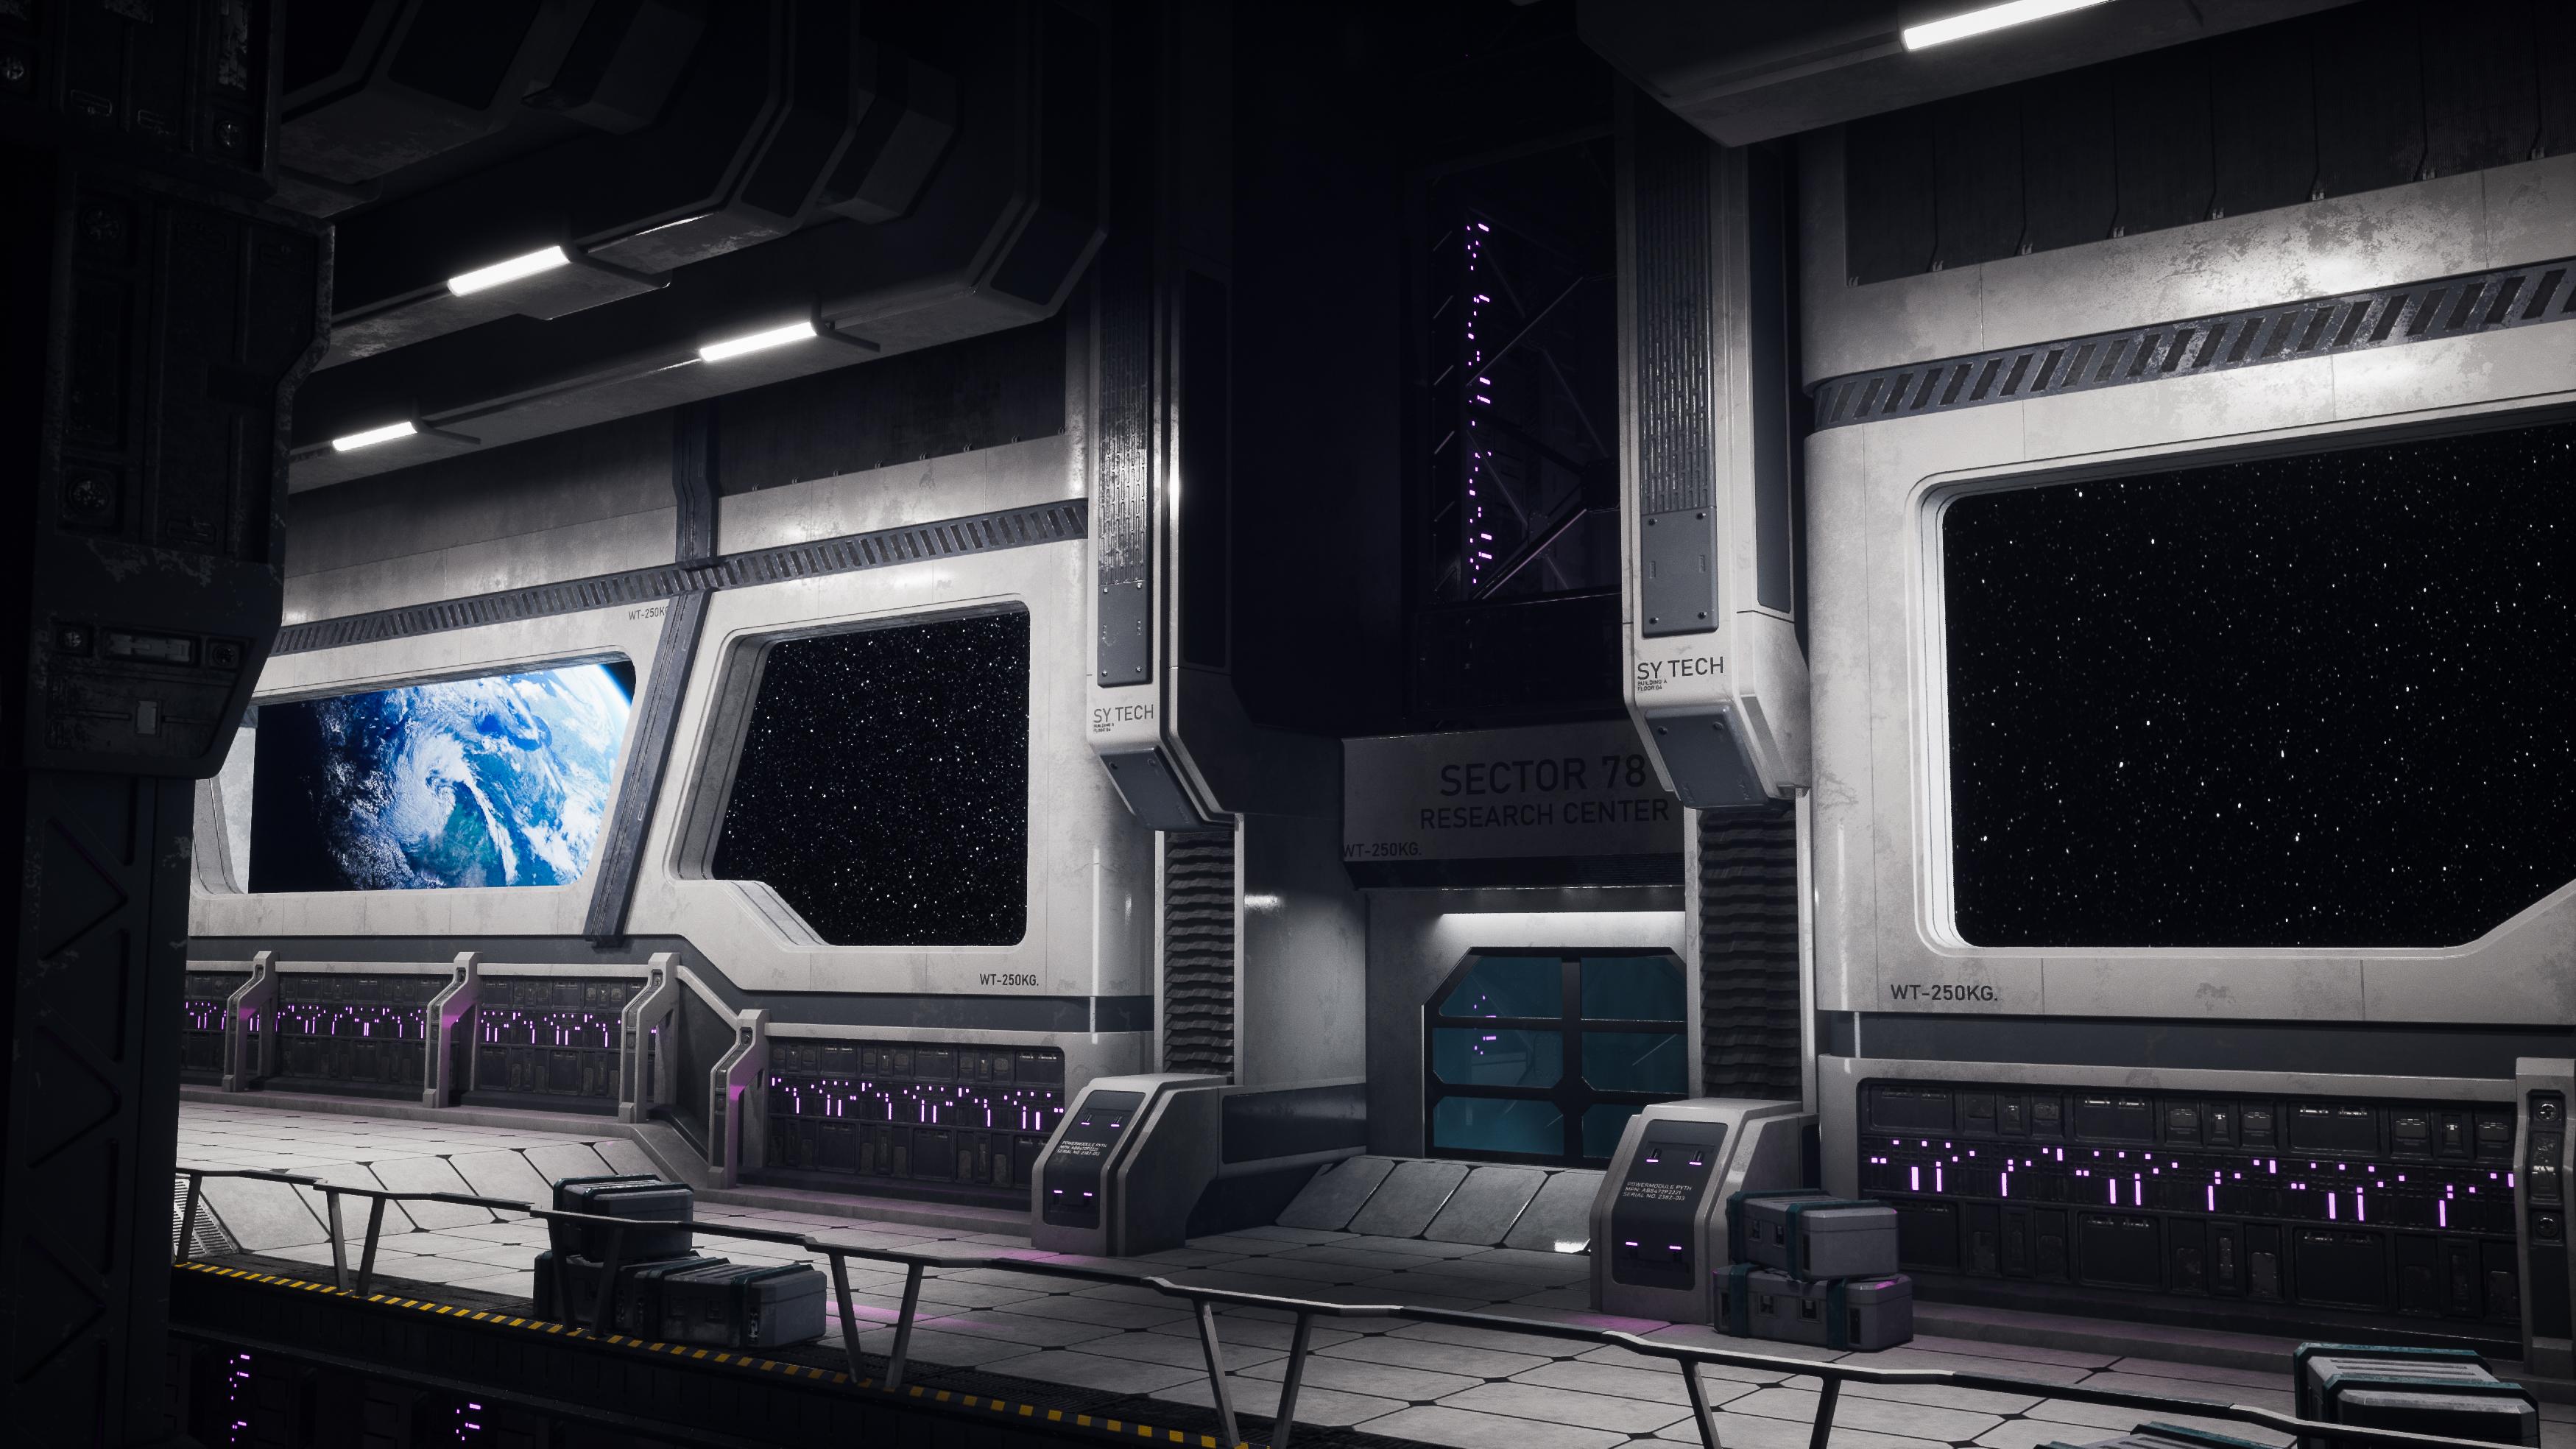
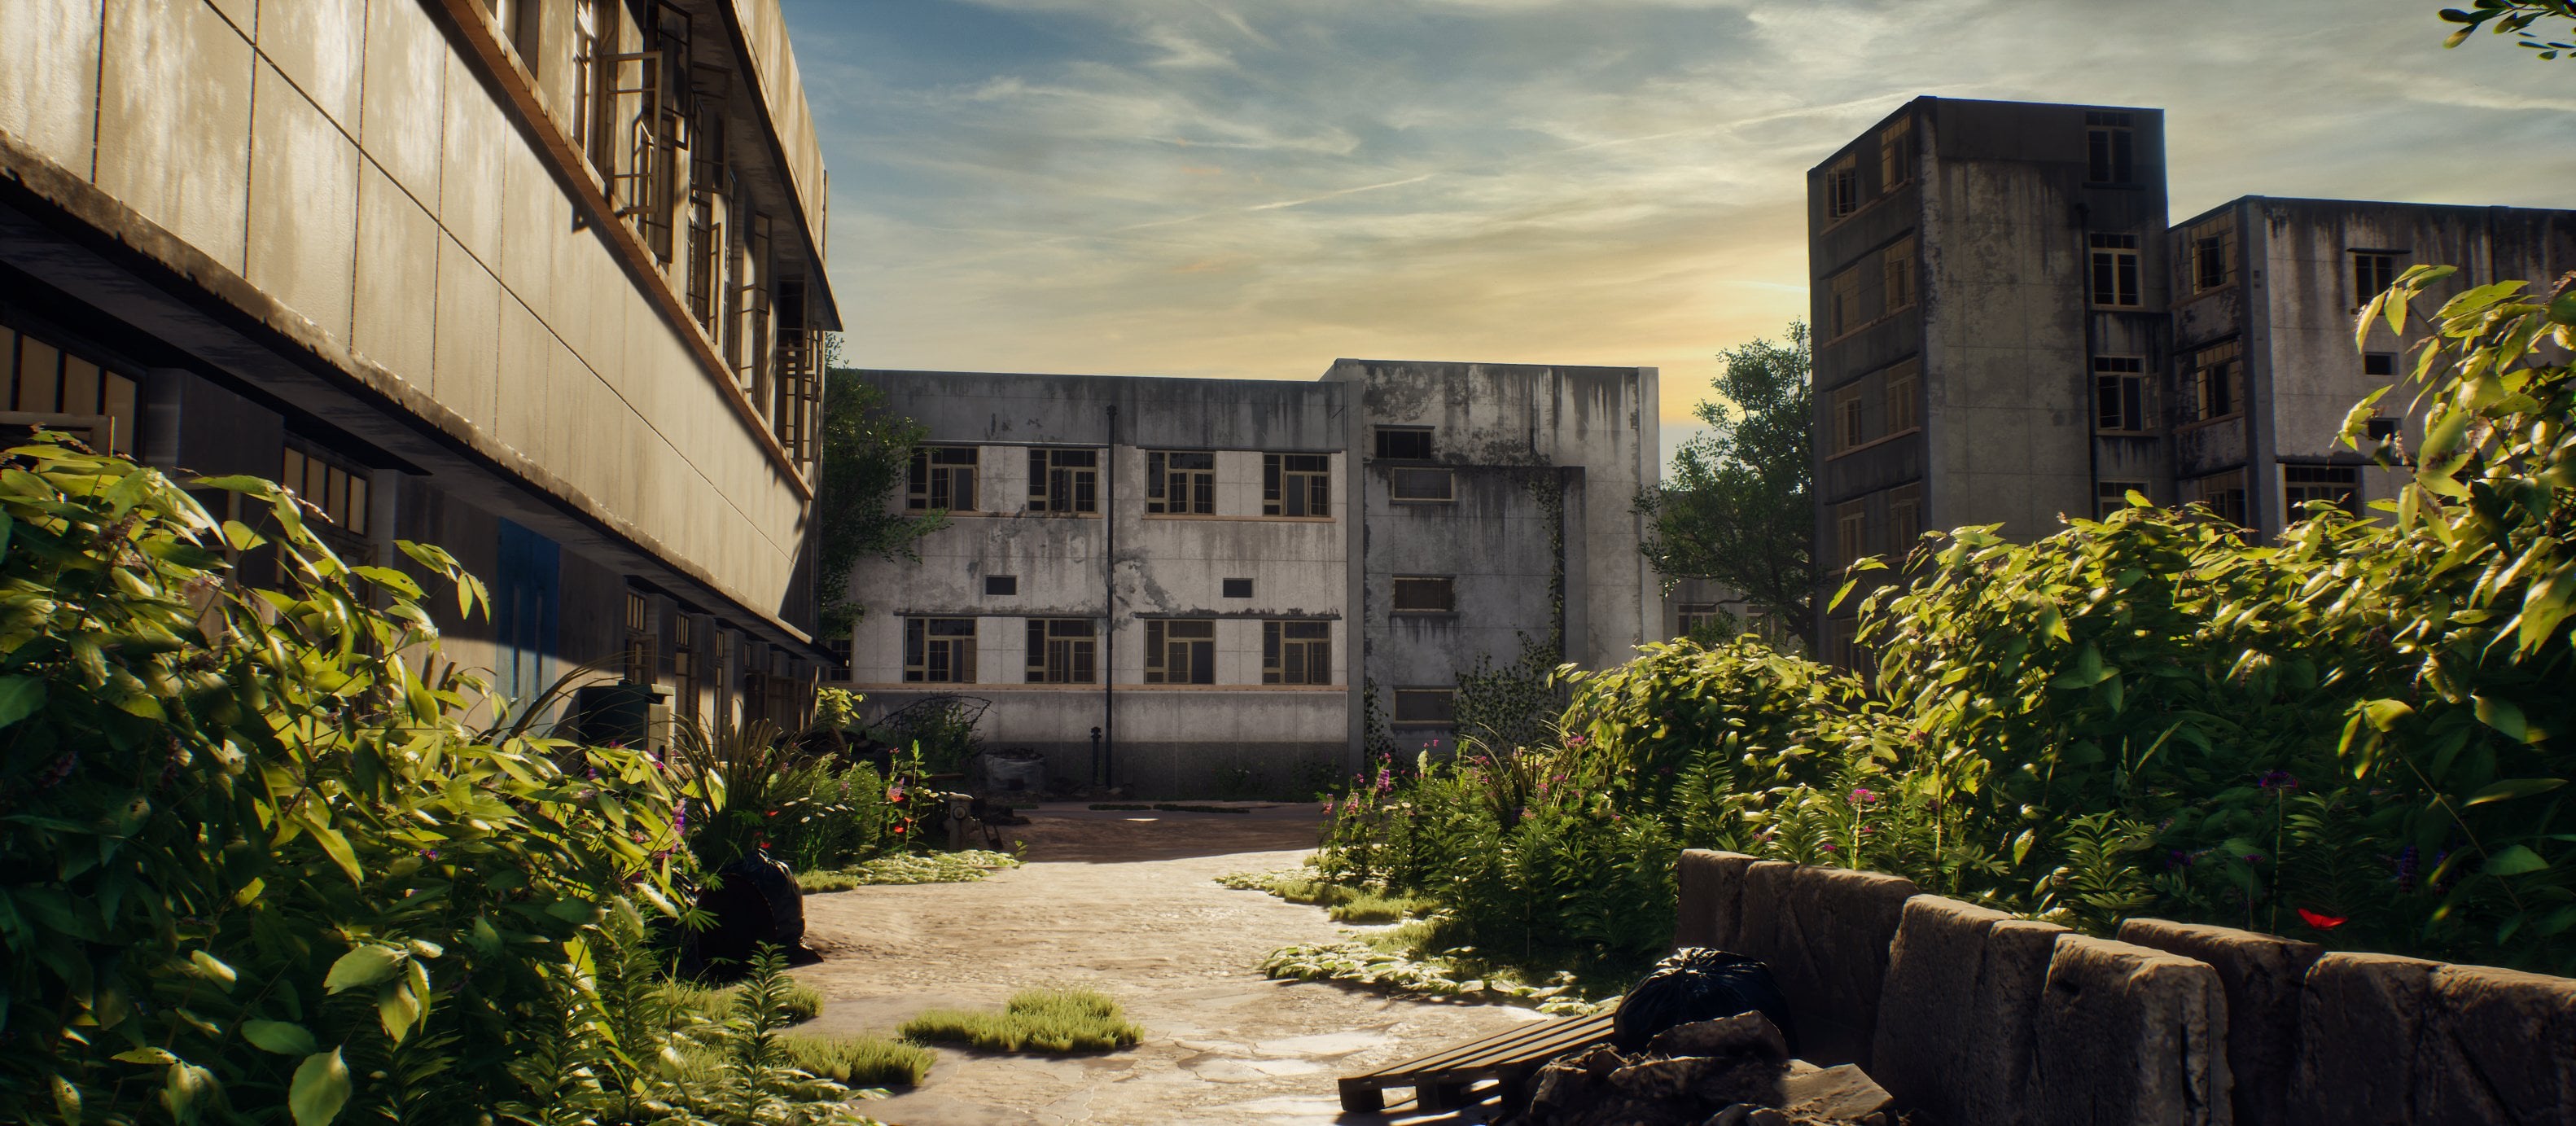
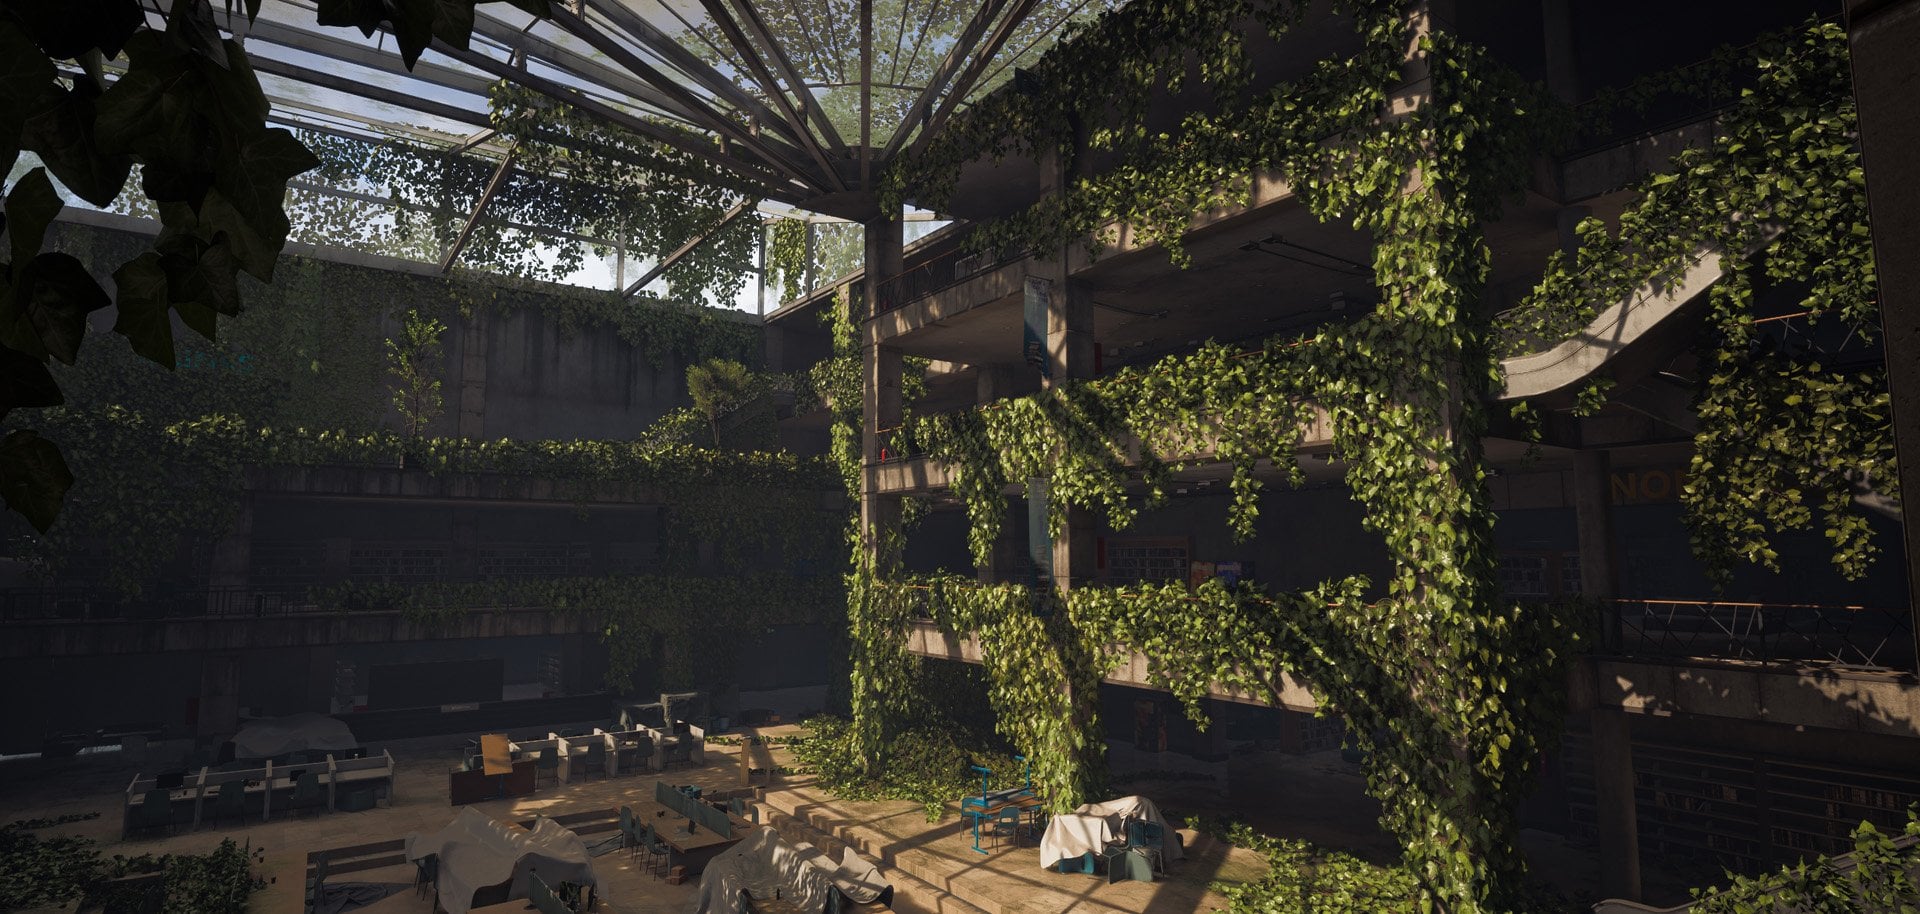
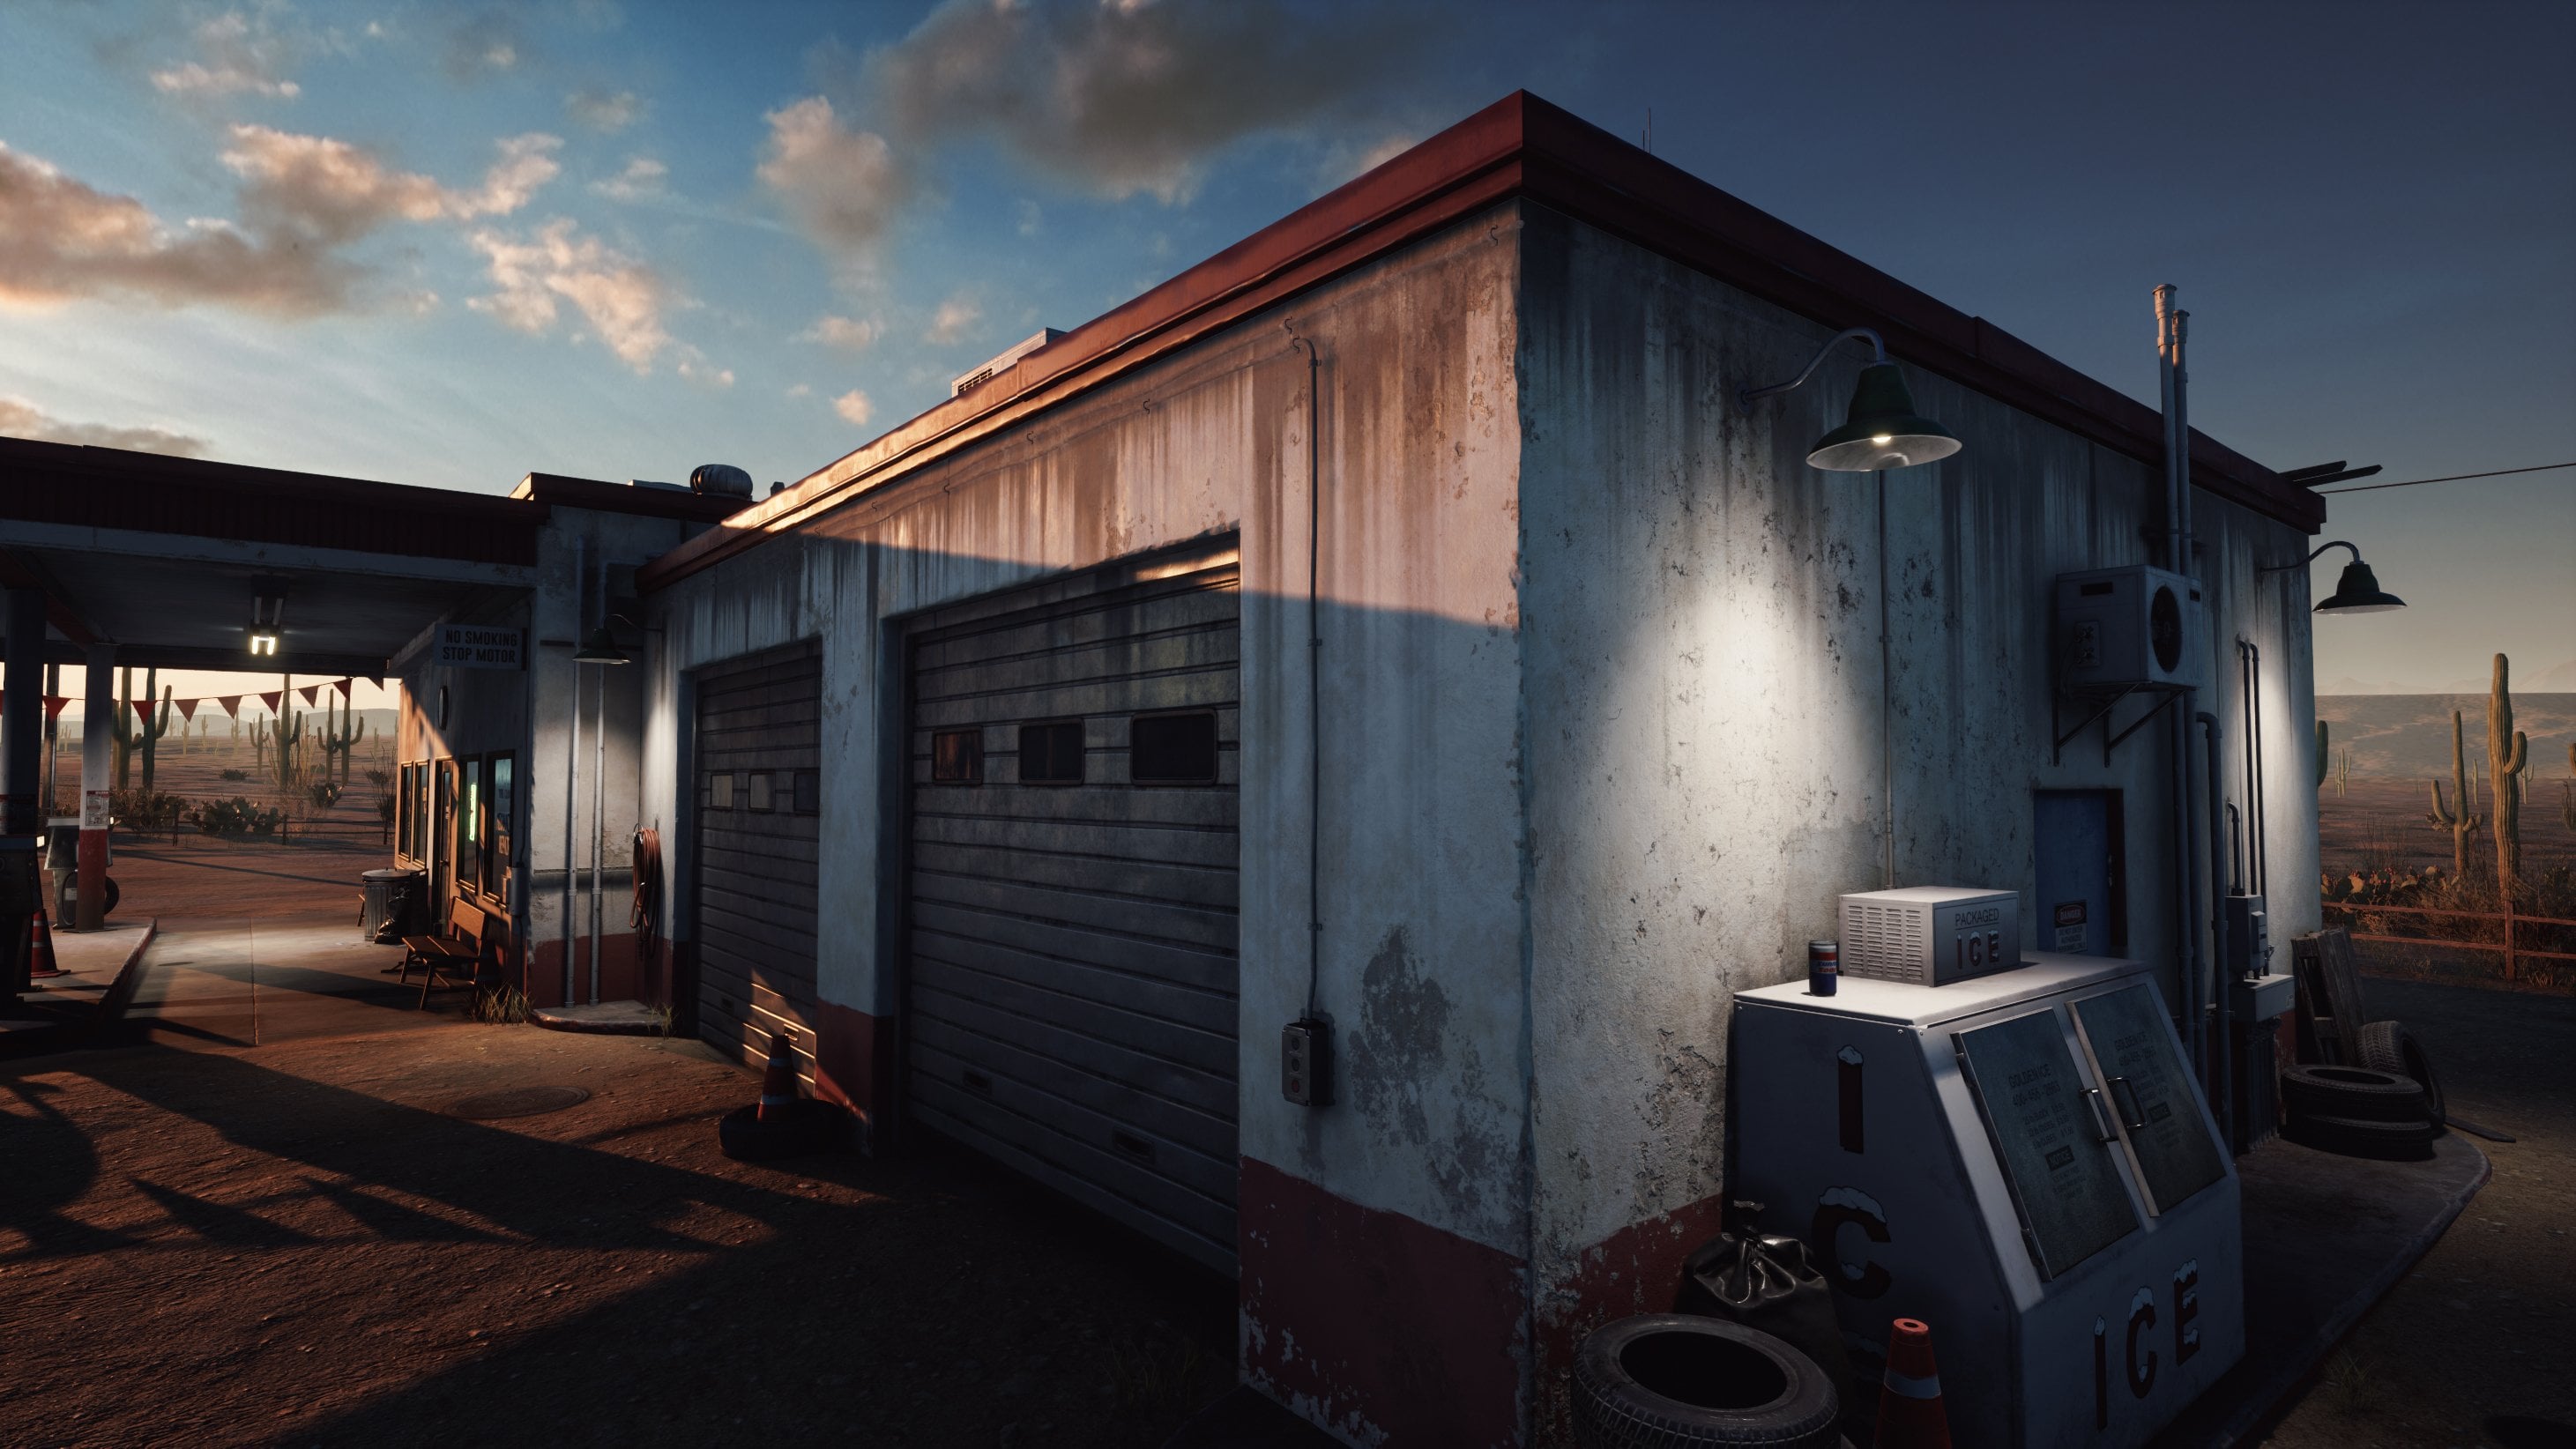
challenge for ourselves. What you will learn is how to create this entire environment you see here using one
single trim sheet texture. This means that this
entire environment uses one trim sheet, which includes a base color, a no map, and a special map
which combines our roughness, metallic, emissive
and crunch map. We will be using Maya for the
modeling in this tutorial, substance tree painter
and Photoshop for the texturing and Unrealizing five for the environment
building and setup. We will start this
tutorial off by going over the planning
for our environment, and then we will jump
right in and start by creating the blockout
for our environment. We will be using the
modular workflow for this. Then the real deal starts, which is our trim sheets. We will first go
over on how to do some detailed planning for
our trim sheet to make sure that we have
everything included and at a decent
texture resolution. After that, we will move
into Substance Painter, where we will be creating our final trim sheet ready
to be used on our models. We will then go back
into Maya and start by turning all of our
models into final geometry. During this time, we will also create a special
material inside of unual engine that has some special features like changing the colors
based on vertex colors, adding world space dirt
and grime, and of course, our usual controls like adding roughness,
missive, et cetera. For our models, we will be using weighted normal techniques
along with smart UV unwrapping to make
everything work with our trim sheet while still
having a high quality. Finally, we will be setting
up lighting in our scene, balancing our trims texture to make it look perfect
in our scene, and do some final polish to create the final
result you see here. Now this tutorial does have some small time lapses for
very repetitive functions. However, these time lapses are also included in real time, only they will simply not
have any narration under it. All of our source files are also included in this project. With a total of 14.5
hours of video content, I feel confident that at
the end of this course, you will have to
know how on how to create advanced
trimsets for games.
2. 01 Doing Our Planning: Okay. Welcome to
this toil course. So in this course, as
you probably know, we are going to go
over now to create trim sheets for video games. Now, our version is going to be a little
bit more advanced. And what we're going
to do just to push everything a little bit
to its limits is we are actually going to create
this entire environment out of one single trim sheet. Now, when I say a
single trim sheet, I do meant textures to be precise because we
will have the base color, the normal map, and
then we will have a special texture in which the RGB channels are
used for the roughness, metallic, and extra crunch maps. So that is the general
plan for this. Now, as you can see, so this is a concept art. This concept art
has been made by Stas urev and he was kind enough to let me use it
for this tutorial course. So he's a really
awesome concept artist, and you can find it over here. And yeah, definitely
give him a follow. And, oh, I can remember that they all some extra sketches, but I'm sure that on a way, these were, like, some
extra cool sketches. If you want to have,
like, extra inspiration, he has, like, a bunch
of sci fi stuff. So for this environment, I do have a few other
concept images. They are mostly just
other environments. I found an art station
or from games. Like this one is
from Star Citizen. This one also. And here, it's just some random concept.
I really like this stuff. This stuff looks really cool, but it would be way too
much work to create in tutorial and also it would not be very
logical for trim sheets. Yeah. So, in any case, this will be our main reference. Now, what we're going to
do in this chapter is we are going to get started
with the basics, which concrete planning
our environment, which includes planning the modular pieces
because we are going to use a modular
workflow for this. And after that, we
are going to get started by first
creating our blockout. So once we have
created our blockout, then what we will do is we
will just move modeling aside, and then we will focus on
the main topic of this soil, which will be our trim sheets. Okay, so here we
are in Photoshop. Now, as you can see over here, I'm going to keep
the modling limited because I want to go ahead and have most of the focus
on the trim sheets. So if you followed any
other tutorials of mine, you know exactly what to do here because I always do
the exact same thing. Very easy in order for us to basically see which models
we all need to create, which is good to do
some planning up front. I always go down here. I create a solid color and just make it
any color you want. Then click on a mask
and press Contra I. Now, once you've done that,
what you can do is you can go ahead and go up here to
the polygon ser tool. And if you have the ser tool, just click and hold and go
to the polygon ser tool, you basically want to
go ahead and just give it every piece that you're
going to make a color. So when I have a look at this, I would say like this
piece over here, as you can see, this piece
would then get a color. I'm just going to go ahead
and it can just be rough. So you basically
select this piece, and then you go ahead and press X to flip around the color so that the color is black,
and then just press delete. So what this will do is it
just fill your selection. At which point you can go to the opacity
slider and you can just tone it down if
you want to be able to still see your model behind it. So what are we going to do now? We're
going to do our planning. I can see that this one
I can also use here, I can use it over here and
I can use it over here. If you want, you can
even give all of them the same color just to give you a better idea of where
every piece is going to be. Those circular things I am
not going to actually create. So let me just Go ahead and, like, do this. There we go. And I will just do
this, quite neatly, just to show you the power
of using this type of planning because it's making
things so much easier. Sorry, for some
reason, I need to warm up my English a little bit, because I cannot seem
to speak properly. Like I feel like I'm kind
of stumbling over my words, so I do apologize for that. But I'm sure that it
will improve as always. So, okay, we have that one. Now what we're going to
do is we are going to just create a
selection over here. And by the way, you could have also done
this for the first one, but I wanted to show
you the concept. So often what I do is now
I just create a selection. Then I go down here and
create another solid color. And when you have
already a selection, it will just use
that as your mask. So you can tone down
the paste and we know, so this one will be
its own little piece. So we can just go ahead
and go down here. And then click on
your mask again in your layers, and
just press delete. Okay, so see, now
we have already created this entire
piece over here. Now what we can do
is we can say, Okay, so the door is going to be
a unique bespoke piece. It just has to be like this. And we can just go ahead and
solid color and let's say that we make this
one like this color. It it doesn't matter
what color you make it. So we can do that. Then what we will do is we
will have a floor. Now our floor will actually
have two different pieces. So we are going to
have a straight piece, and the floor is one where
I cannot really make the entire floor the
same color because then it does not
show what I mean. So if I make all of this, let's say that I make
this color over here, like around greenish,
yellow, greenish, now you understand that we will create a slab or
floor like this. But if I make everything green, we might forget that later on. So I will just
keep it like this. And then over here, what we're going to do is we are
also going to create another piece that's almost like a transition piece for a floor. That makes it go into, like, a higher level over here,
like a little ramp. So we can go down here and we can make this one
let's say orange. Okay, so we now
have these pieces. These pieces are very
once you have the floor, this one is very easy to create. Now, we have this
side piece over here. This one will actually
just be its entire here, this entire thing will just
become one piece over here. So it will still be modular, so we will have this piece. And let's go ahead and make it like like purple, for example. And then this piece will also
come back over here, see? So we can reuse it
also over here. Now we have this wall over here, so it is like a flat wall
that we're going to create. And I'm just going to go
ahead and also make that one. I already have a
pretty good idea of which pieces I'm going to make because I already create a little prototype
for this environment. The reason I do that
because normally, if you follow my tutorials, you know that I don't often
create full and prototypes. But in this case, it is
quite important because it's such a specific environment
in terms of the trim sheets. By the way, I'm also selecting the bottom over here because
all of these back walls, they can just be the same back wall that
you see over here. Okay, so this piece, the big window piece will
actually be the only piece that is pretty much
just one unique asset. So it's just going to
be a massive asset like this because I don't really feel the need
to make that modular. As I said before, this
focuses on trim sheets. I will go over the modeling, and I will go over
the level setup and just getting everything
together because I think it's important because
we do even the geometry and UVs need to go in a very specific way when
we create trim sheets. But I'm not going to go too
overboard when it comes to just creating
the final scene. We have this one, and that one will also
be used over here. Of course, there we go. Okay, so we got these one, so the floor is handled. Of course, yes, we
have the crate. And of course, this
piece over here, you could argue that
this piece is going to become we will reuse just the ramp and we will just
place the ramp over here. Now, for this piece over here, what I'm going to do is I'm
just going to go ahead and we will create one of these extra pillars just
because they are very, very long compared to the
shorter ones that we have. So we will create one
extra pillar like this. And at this point, you kind of run out of really strong colors. So you kind of like me to
change the colors around a bit and make
them a bit darker, just so that you can
see the difference. So we will have one of those, and that one will actually
also be used then over here, and we will just scale
it down a little bit. So at this point, we
are just going to cheat a little bit to save
some time. Same over here. You can just go ahead and let's see what does this look like? Well, I'm just going to do this. Yeah, I'm just going to make this entire thing. Green. We do have a ceiling over here, so the ceiling is just
going to be a plane, so I'm not really
going to connect that. And then we have this
transition piece over here, which is a piece that
we need to create. So this piece, we're
almost done here. So spare with me. There we go. Transition piece. And then you would also have
a light piece over here, which I can just go ahead
and just select over it. And then as long
as you have your field that you're
sitting on top, that should work totally fine. There you go. And
I think that's it. So, one, two, three, four, five, six, seven, eight, around nine pieces. And yes, we have the crates
that we are going to make. Oh, yeah, we are also going
to create the railings, but the railings are
super easy to create. And yeah, the crates that is going to be a little
bit more unique. In any case, you should
have a good idea of how we are going to
divide up our environment. So you can see that even though it might look
overwhelming at first, now that we've done
that planning, we can see that
we can just reuse elements and the modeling will actually not take too long. I think we will only spend maybe like a few hours
on the modeling. So having that done, what we can do now is
we can just go ahead and file and do save a copy. And let's save this
as a JPEG file. And let's call this modular
underscore planning. Go. And now, so over here, this program that I have,
it is called PUR Rv. Sorry, I forgot to say that. I always use Puref in tutorial. So it's a willy handy
program that allows you to basically drag in images. You can just move them
around. You can scale them. You can do whatever
you want, but they will always stay at
the same resolution. So you can just completely
zoom in and out and get full resolution
images all in one place. And the best thing about this is that it
is completely free. So you can just go to Google, type in PUR Rf and
get this environment. So here I'm dragging in
this one. I move it. I scale it down, and
then if you click away, you can see that you no
longer have it selected. Perfect. So this
planning is now done. So we will go ahead and do
the trim sheet planning, which will be sort
of similar to this. We will do that a little
bit later so that I have all of my trim sheet
creation all in one place. So what we're going to do in
the next chapter is we are going to go ahead and
we are going to get started by creating
our blockout, which is going to be some
simple blockout pieces that are actually already going to be
quite close to the final, but not completely like
you'll see what I mean. So let's go ahead and continue with this
in the next chapter.
3. 02 Creating Our Blockout Part1: Okay. So before we get started with our blockouts
we first need to set up a Miocene with the
correct metrics so that they are exactly the same as the ones that we use
in Unreal, which are meters. So what I have for you guys
is in the export folder, I have a scale reference, and the nice thing about
the scale reference, along with a quick picture for your grid settings in case
you want to copy it over. The nice thing about the
scale reference is that it is exactly the same scale as a normal human character
inside of Unreel engine. So all I need to do is
go to file and import. Oh, it's not ready here.
I cannot remember that. Oh, yeah, here, so it is
a different location. So then we want to
go ahead and just import our scale
reference over here. And as you can see,
it is quite big, but that is because we still
need to change our grid. So having this scale reference, if we now go ahead
and first of all, let's go to Bata Windows
settings preferences, preferences, settings and
then set this to meters. There we go save. And now you
can see that now it looks a little bit more
reasonable on our grid. And then if we go to
display and grid, h? Oh, I must have miss
clicked. Sorry about that. Click on the little
button next to it. And these are the settings. 121, one. So if we go 120, one, one, and press Apply. Okay, yeah, there we
go. So basically, what the length and width
do is they change it. I should have
actually showed you, but I don't think
I can reset it. Basically, these are just the
settings that I always use. The subdivisions basically
mean if I set this to two, it is the lines in between. So if I set this to one, this will be a one by 1
meter cube right now, and grid lines every 1 meter. So if I set them
every two meter, it would be four by four
right now. No, wait, 22. Sorry, yeah, two by
two. And the length and the width is just how far along do we want to
extend our grid? So, sure, you can
go to 50 if you want to make it a little bit
shorter or maybe even 20, and then you can
see here or see, so the grid becomes just
a little bit smaller. I tend to set it really high, but let's just set
it to like 50 then. Sure. Doesn't really matter. Okay, so now just
to test it out, we want to go ahead and
create a quick cube. So shift right click. And I realized I almost forgot
to turn on my over here. I have a little
keyboard registration, so I almost forgot
to turn it on. And now you can see that, yeah, this is one by 1
meter because if an average person
is about 1.81 0.8, you can see that that pretty
much fits 1 meter 80. And then the
character, because of the height of the ice in
the character in the wheel, it is slightly higher than this. But yeah, okay, so that
is all looking correct. And what you can do if you want, you can go ahead
and you have this scale reference over here, and we can go in and you can already export
that if you want. Well, actually, you
don't have to export it because you can
just import this one, and then you can later on
also import it into Unreal. So in my export folder, I will already create
a quick folder called to underscore Unreal over here. And let me just
here, there we go. So in the two unreal
export folder, we will just export all of
our meshes. Okay, perfect. Having that done, what
we're going to do is we are going to pretty much get started with
our first model, which will be let's just get started with
this model over here. So that's the first
one that we will do. So we will first build
up this area over here, along with our door over here. Or shall we do the floor first? Now, let's do that first
and then the floor. It doesn't really matter
what order you do. So let's go ahead and
create a cube. Over here. And I'm just going to move this up a little bit like this. And I want to go ahead
and set this cube, so the thickness is Oh, the thickness is
pretty much fine. And then I want to go ahead
and set the Y axis to five. No, no, let's set this so basically, it
needs to go around. So that's why I was
thinking of five, but I have a better
way of doing it. I will show you why I
was thinking of five. Yeah, this pretty much is like
the same thickness, right? So I think it's just one by one. And I don't know, we go
for like 10 meters, maybe. 10 meters feel a bit long. It might feel a little bit long, but we will go ahead and we
will just give it a twist. So if we go over here and we
set this around this area, now what you want to do is
you want to go ahead and I have my shelf over here that
just says a few things. Creating custom shelf
is quite basic, so I will not show
you how to do it. But you can also just use the poly modeling shelf if
you really want to, or you can use shortcuts. Honestly, it does
not really matter. But what I'm going to do is
I'm going to go ahead and press the split selected
edge ring over here, and I'm going to set this to around 1 meter because I want
to keep an even thickness. And then if I go to face
mode, and once again, I do expect that you have
a basic understanding of Maya so that you
know how to do this. But yeah, basically, shift
click and just set this down. And I don't know
exactly how far. The reason I want
to go this far down is because we are also
going to use it over here. So that's basically
what I'm thinking about because we are
using it over here. It will just be
clipping to the ground, but I need to make sure that, of course, it sits at,
like, a good level. I feel like, yeah,
that's far enough. We can always extend this out. So we got this one over here. That's pretty good.
And let's see. The thickness is yeah,
the thickness is fine. Do you feel like the width
could be a bit better. Okay. Now, at this point, what we're going to
do is we are going to use our target belt over here, which is the merge two vertices, and you just want to go
ahead and you want to merge these edges together. And the reason we do
that is that we can then go to edge mode and double
click on this edge. And then it's just a simple
matter of pressing Control B. Over here, and that
we add a bevel. So let's set the bevel to 0.3, and you can see over
here that we just create this bevel, 0.25 maybe. Yeah, I do want to
keep some space left. So 0.0 0.2 maybe. Now, I think 0.25
seems about fine. The only thing is
that the bevel up here does not feel as
strong in our reference. So you might want to push this back in a little
bit like that. Now what we're going
to do is we're just going to go ahead and
move this up a little bit until we get to a
point that there's still some empty space left. So we got this one over here. Now what we can do is
we can just set it in the center because this is
where the pivot point will be. Whenever you export to unreel, the pivot point will be
in the center over here. So we got this one,
and at this point, we are just going to
because it's a blockout, we're just going to give
it a generic shape. So let's go into our
tool settings and press reset to basically reset
our pivot into the center. I'm going to scale
this up a little bit. And then what I tend
to do is I tend to go to my Edge select, select all of these
edges over here, and then press the
connect button over here. You can find all these settings up here if you didn't know. And we are going to add
two segments to this, which once we press Enter, we can just go
ahead and push out, and then we can create like this extra height bits that
we have over here. So you push them out. Let's
go ahead and just Oops. Delete the back over
here. We don't need that. And then what I'm
going to do is, I'm just going to go
ahead and select these. Yeah, here. Let's also delete the bottom because that one
will be in the way later on. So here, let's select
these bits and then press Control E to extrude. And you just want to
go ahead and just move your blue arrow up. What this will do
is it will extrude, but it will extrude based upon the direction of your face, so it will nicely extrude
everything out evenly. So we got that stuff done. And now over here,
what I want to do is I probably want to go
ahead and because over here, you can see that there's sort
of like a cavity almost. We probably want to
go ahead and now scale this in a little bit more so that it becomes a little bit of like
a thicker area. And at this point, I'm going
to go ahead and let's delete this vase. Select these phases. So I'm still warming up because I just came from
three years Max, so warming up in Maya. And then just hold Shift
and extrude this out. And at this point,
you can just go ahead and quickly delete this phase. And if you want also this one, so that we just have like
this one slap over here. But we are basically
just going to go ahead and extrude
this to the very end. Once again, press delete. And now it's just a matter of selecting these two vertices. Hold Shift and merge
vertices to center. Here, merge verts,
merge into center. So basically the modeling is going to be very simple
for this environment. And all of the modeling you
will have already covered if you've followed any
basic tutorial in Maya. So we got this one, and now we can decide, and I can say, like, Okay, I want this to be a
little bit ticker over here, and just keep checking
with your guy. And yeah, because this is
a big Sci fi environment, so I'm fine with it being a
little bit ticker like this. So there we go. We already
have our first piece done. Now, all that we need
to do is we need to go ahead and save scene,
that would be handy. And I'm going to go ahead and let's go to
our saves folder, and I will just
go ahead and call this modular underscore pieces. There we go. Let's
save. And then what I also want
to do is I want to keep everything
nice and organized by going down here to layers, pressing the plus
button, clicking on it, right click Art selected Object to add this
object to our layer. And then just go ahead and
call this one I don't know, beam underscore 01, something
like that. Okay, perfect. So we got this one done, and we immediately have
four of them done. Of course, you want to play
around to it a little bit later on and just finalize it, I mean, sorry, not play around to it.
Finalize it later on. So for now, let's
go ahead and also create this piece over here. And that piece is actually quite easy because all we need to do, and by the way, if
you go up here, you can see your Y frame. But yeah, all we need to
do for this one is we just need to go ahead and scale it to be pretty much
the same width. So if we just go
to our let's see. If we just say 1.5, over here. You know what here. Let's
keep it an even number. So this one is going to be pretty much I'm
going to on purpose, make this a tiny bit bigger
so that this one kind of, like, gives me more
flexibility to sit on top. So 1.5 by, I don't
know, 3 meters. And the reason I say tree
is because if this is a guy and so this is
already 1 meter 80, then this is probably
like 2 meters, like, two, 3 meters,
something like that. So that's my logic behind it. Okay, so we got
something like that. And then it's just a matter
of, let's say that in game, it would be sitting around here. So let's now go
ahead. And let's push this a little bit further back to the point where it will
just go inside the val, so it will be connecting
with the door, which means that we
can no longer see it. So it's not our problem
anymore at that point. So we got this one over here, and then what I'm going to do is I'm just going to go
ahead and let's say, let's add an edge loop. Let's add one over here and another one over here
so that is just outside. And I don't know, maybe push one back up
until this point. Let's go ahead and
press the isolate button over here so that we can select these faces, delete them, and then just
double click on all of the border faces,
hold Control, Deselect horizontally so that we only have the
top and the bottom, and then just shift
click and bridge it to basically add some edges. And probably even though it's a blockout, you
can already do this, let's go ahead and
let's Here we go. Let's give it like a tingi. I don't know what it's called. Like a ventilator style thing. Just something to make it show that I feel like that here, see. Now that I make the ventilator,
I can see like, Okay, so we pushed it
probably too far back, which means that now I can just go in here and I
can just move it. And that's what the blockout
is mostly for just to get the generic or the
general measurements and also to just make sure
that everything fits. So then what we can do is we can just hold Shift
and move it down. And then it's just a matter
of pressing Shift D, which will repeat
your last action, and we can just move
it down like this. And at that point, it will be hitting the background,
C. Okay, perfect. So B one is done. Now move this nicely into
the center over here. Add a new layer, assign
selected objects to layer, Beam on the score of zero, two, because I don't know
what else to call it. A ventilation thingy,
something like that. And we now also
have that one done. Okay, so check, check, check. Now, let's go ahead and yeah, let's start by defining
our floors first because I don't know the
width of my door yet until I've placed this into unreal
and had, like, a good look. So for our floors, yeah, same with our
floors, actually. We first of all,
just need to have a quick look inside of unreal
before we know what to do. Floor, floor. Okay. Let's create a cube because that's pretty
much what this floor is. And I'm going to go
ahead and let's make this 4 meters, maybe five. I don't like uneven numbers, so let's keep it at four. Yeah, let's keep at four
and just have a few more. Like, I'm just not a
fan of uneven numbers. And 4 meters is actually
quite a big piece. It might not feel very large, but here it is still
quite a large piece. And then what we want to do is we want to set
the thickness of this for which I
guess maybe 0.8, like here, let's
not make it stick, and then probably the
most important one is going to be C scale,
which I'm going to make. If this one is four,
let's make it eight so that we just have
a perfect rectangle. Yeah, let's move
this up over here. So the idea is that this will be a floor piece that we
can then just reuse. I will set it into a
proper location later on. For now, let's
just very quickly. If you just click Hold Shift and just double click to select all of your edges around here. Let's do a double connect. Move it up a little bit
and then do contra B at like 0.2 to basically
split those edges into two. And then what you
can do is you can just kind of move this down. Here we go. So just
to give us that idea. Now, in order to have this
on a proper location, so we want to make this modular, but it is not modular like
this because it cannot snap. So we need to have
it exactly on 000. And the way that I like to
do that is I like to turn on my snapping to points and press dit pivot in our tool
settings and then simply move this down and turn
off AdditPivot again and then
snap only to grid. Because at this point, you can literally just
snap to the grid, and you can see
that if we snap it exactly here inside
of Unreal engine, if we set our
snapping to 1 meter, it will just nicely snap along. So we got this one. I believe that that's all we
need to do for now. So we can just go ahead and
assign selected object. Floor under score 01. And then what I'm going
to do is I'm just going to go ahead and press Shift D. Do not press Control C and Contra V because then it will
also copy over your layer. So Shift D if you do not want
to copy over your layer, then create a new layer, a sine selected object and call this floor under score 02. I do apologize if I go a
little bit fast. It's begasa. I really want to have
this tutorial focused on the trim sheets and not to
be like modeling tutorial. Just a nice extra
that you guys get. So for this one,
we are just going to give it like a raised
level. That's all it is. So we just need to figure out
the exact angle for that. So if we have floor number two, let's add a single connect. And because it is
a single connect, it will be exactly on 2 meters because we are
keeping even meters. And then if we go ahead and
add another single connect over here, there we go. That will be exactly on 1 meter. Now, for this one, if we go ahead and what
are we on the side? Okay, that's not a lot of help because it, it would
just snap over here. In that case, I'm just
going to go on feeling. It doesn't really matter. I'm just going to go on feeling. And once we are in real, I will just go for, like, a more precise measurement because I want to go
for something that, you can see that it
looks quite steep. So I don't just want
to go like, Oh, yeah, just go 45 degrees
or something like that. I want to kind of just make
sure based upon how it looks. So let's say that for now,
we have this one over here. Okay, floor number
two also done. What we will be doing in the next chapter is we are
going to go ahead and, at this point, we
probably want to already import it into reel in the next chapter so that we have a rough idea how big our
window is going to be. And once we know how big
our window is going to be, we know how big our
ceiling pieces are going to be and our door. So everything kind of,
like, falls into place. So let's go ahead and continue with this
in our next chapter.
4. 03 Creating Our Blockout Part2: Okay, so let's go
ahead and continue. So as I said before in
the previous chapter, now what we're going to do is we already going to go ahead
and just import this into un reel so
that we can already set up the basic scaling
and so that we know pretty much like all of our
dimensions because everything is based upon the door
and the floors over here. For this, we created a folder to unreel
over here, let's copy. Now what we are going to do
is we're just going to export selections and just name your models always the
same as your layer, then there will be no confusion. Let's go ahead and set
it soon FBX export. Floor underscore zero, two. Now, the triangulate option, this one is actually
something that we need to prepare for later on. So if you are having models
that you are baking down from high to low
poly which we will not be doing because we
are using trim sheets, then you want to
turn on triangulate. If you do not have that, I
recommend just leaving it off. The reason for that is
because we are later on going to use vertex colors as one of the ways to basically
change the colors of our trim sheet without
adding extra texture. Oh, sorry, my voice
broke up for a moment. See, because of
those vertex colors, if we add a triangulate
in Maya and then try to import those vertex colors into unreal, they tend to break. So keep that in mind. So we will not be
using trianate, but if you ever do high
pool to low pool baking, then I highly recommend
using triangulate. So floor two, export selection. I also don't care
about materials yet or anything like that. I just care about getting
these models into unreal. File, Export selection. This is Bam 02. Beam 01. There we go. Easy doesn't. Okay, so in Unual engine five, for this, I do once again expect that
you know the basics. So UnualEgen five, I already
set up very basic project. It has nothing in
it. It's just like a bare project over here
with the default map. And yeah, for the rest, if you are coming from
Unwel Agent four, it's fairly much the same. You might see that your
content browser is down here. So you just want to
click it and press Doc in layout to get it the same
way as Unreal Agent four. For the rest, we have
our world Outliner here, details, which are all
of our settings here. And those buttons about world
settings and everything, they all moved over here, see? World settings, project
settings and your engine scalability and your create
tabs and everything, you can find them over here. So throughout this project, you will get a know
UnwelEgent five. So let's go ahead and go
for our setup let's do a trim sheet environment. Let's create a new
folder like that. And then I'm going to
go ahead and in here, create a folder called assets. And I will already
also create a folder called materials for
all of our materials, another folder called textures for all of our textion maps, and another folder called saves for all of our
saved maps over here. Then the next thing that
I always tend to do is I tend to go ahead and
save this scene, and I want to save it into your saves folder
and just call it like I just tend to call it, like, main because it's
like the main environment. Unless I work on, like, a game, then we have specific
naming conventions that just really
describe everything. But for this, I
just call it main. Now, okay, in our scene, let's go ahead and let's get
rid of the players start. Um, you know what we can. No ways, we do not
need the floor. So now all we need to
do is go into assets, and we just want
to drag in all of those FBX files that we have. Now, do not yet press Import. What you want to
do is go to mesh, and down here, just
press combined meshes. What this will do is it
we'll just make sure that whenever we
import and mesh, it will not try to import every single mesh in there
as a separate thing. So it just combine into one. For RS, yeah, you can leave generate light maps
only if you want. We are not going to
actually use it. We are not using Nanite. The uniform scale, I believe
one should be correct. So file units are centimeters. Okay, so we might need
to set that to ten, but we'll see because the
file units are centimeters, but our myocin is meters. But we know soon
enough because all we need to do, see, here. So it is too small. Don't worry. That tends to happen, so it's
just the simple upscaling. So if we go ahead and just
upscale this to what is it? 100, I believe, and I
will show you later on. So that is really small.
So it's probably 100, although it might be just
ten Yeah, 100 looks more. Yeah, okay. So we had to
just scale up to 100. So don't worry. You can also set this on input. So later on, I don't
have to do this. It's just like this for these ones because I
already input them, I just need to set them
quickly to 100 as an upscale. And you can also test it out. So if we go ahead and
set this down here, we can simply go to create and
create an empty character. And here you can see, so this is a scale of
an empty character, which if you look at it, yeah, that looks pretty much
like the way that we had it because this was
a very large asset. So 100 is definitely correct. And if you want, you can also
input your scale reference. I will input it a
little bit later. So what I'm going to do now, rotate my sky a little bit is pretty much set this
up, I think, yeah. So let's get started
with, like, the floor. And then what we
can do is we can do like overe these pieces, and
we can take it from there. So for our floor, let's
get rid of that one. Square by floor. Let's
start it at 000. Whenever you have it off 000, you can use this little
arrow button to reset it. At that point over here, you
have your grid snapping, so 100 centimeter, so 1 meter. What you will see is
you can see that now the grid would be exactly
the same as in Maya. So you can see that we have
perfect four meter snapping. So at this point,
it is for us to decide much how long this area is and how long
the transition areas are. And it's a bit of
back and forth. So we are basically
just going to go ahead and mostly do it on feel. Yeah, maybe if I
just quickly input my scale reference,
might actually be fine. For this one, I'm not sure here, because this file unit is meter, so this one should
already be fine because the scale reference
is of course here. The scale reference
is, of course, specific to unreal, so it
already had the right scaling. These ones, I probably just accidentally set my scaling in here because you can
set your scaling. There is a place here, but I never use it because
I just use the upscaling. Anyway, there is like
a place here though. I'm having trouble
finding it here. Advanced Options, units here. Oh, that's interesting. So yeah, you can set it to meters here. You can set it to
whatever you want. It turns out for some reason, this time it decided to even
though we set it to meters, still input in centimeters. Honestly, it does not matter. So what we can do is
we have this one. Now, let's import our beam
one, and let's have a look. So our beam one is just
sitting on the tip over here. So what I'm going to do
is I'm going to turn off my snapping probably at
this point so that I can do like some more even. So it's sitting just
on the tip over here. Let's turn on our
snapping again up here. And let's see. So for our entrance, if the entrance is going to
be probably around here, then just have a
look at this guy. So if this guy would be
standing over here, Yeah, okay. So these things are
probably in our case, they are a little bit
bigger, but honestly, I don't I'm not too
worried about it. I'm just going to
go ahead and say, probably that looks like a
decent or maybe one less. It's a tricky one. But it
is a very important one, so that's why I'm still having,
like, a think about it. Okay, so yeah, that
should be pretty much fine if we do it this way. You know what? I
think I'm going to go this direction, yes. Yeah. Okay. Let's
do it this way. We can, of course, change
it later on if needed. So at this point, let's move this a bit more
into the center. So it looks like we
have a flat area, and then at this point, so that's quite a large flat area. You can go ahead and
you can just duplicate this piece and then simply drag onto your
static mesh your floor two. See? And now what
we can do is we can duplicate this again,
set this to floor one. And then over here, it becomes a little bit trickier where you
just need to go ahead, turn off snapping and
you just need to do a quick manual placement. You can try and hold V and
then snap to vertices, if you're the V button, but doing that from
that side over here, here, you can see
like it rarely works. It's not the best feature
inside of unreal. But if we just do this, you can often get it totally fine. At which point, you can
just go ahead and continue. And don't worry
about these things like we will not be
able to see them. Later on because we are
just going to hide them. And even if you can see them, all you need to do
then is just do this. And then we will make
it work like that. So we got this one. Seeing this, it might
actually be nice to have it a little
bit more even. And what I mean with
that is if we have our floor one and our
floor two over here, let's just quickly
duplicate floor one. Add it to floor two.
And the idea that I had is that if we have
a floor one over here. Sorry, I'm just
trying to make it. Oh, it's not very precise
because I'm on the wrong side. So we have it over here. Okay? We can even do, like, snapping to make it more
accurate because I can remember that we made our
floor a very specific, 0.8. So if we would go ahead
and set this one over here and we snap it
to the top like this, this one is exactly 0.8
that might actually help us because if we
now go export selection, floor 02, because
just like a tiny bit. And then if you go in here, click on floor 02 and reimport, then my idea is, let's just press height
temporarily on this one, is you grab using snapping here, you just grab like this one. But then you can
set your snapping, also to something more specific. So 0.8, which means that
if we set this to ten, we should arrive at 80. And hopefully I can
snap it exactly up. Ah, not ten, maybe five. One, maybe? Okay, fair enough. I guess that's strange that my plan does not work
the way I want it to. Does not matter. In that case, just delete this one plus
contra to unhight the old one and external snapping and just do like the
old way. There you go. And then for this
one, it should now still work that if we move this down or we just move
this one in 100. Hey, what's that? Did I lined it up incorrectly.
That's why it does not work. Oh, I probably got confused because of the
line over here, see? So I should have I should have duplicate this one up here. Okay, so yeah, we do need
to go a little bit steeper, and then it should work.
So that's probably it. So if I just assign this
to an off floor one, And then just move
it up and then snap it by moving
your mouse down here. Okay, so that is exactly double. And then if I just go ahead
and just go to Edge mode, maybe, oh, don't do snapping. Maybe, push it out a little bit more like this, give
it a bit more space. Okay, so that should work. I was just sitting one below it. Can happen. Let's go
ahead and tile it again, floor two. That was strange. But that's nice thing
about the mike, if something doesn't work exactly the way you
expected it to, there are so many
ways to just fix it. So let's go ahead
and set this to ten. So now if I go 80, it should exactly
line up perfectly. That's more what
I was expecting. And then we will, of course, make this
look nice later on. So we got these ones,
and if you want, you can just use like a
double one or a single one, and we are, Oh, set to 100, else it becomes really annoying. And at this point, you kind
of just want to snap this, and this is probably
where the window ends. So we will just figure out how big our window
is going to be later on. Now, we also want to snap
it over here on this side, which can sometimes be
a little bit annoying. So what I want to do is maybe
see if I can do no wait. I don't need to do multiple.
I can just do one. So you want to basically
rotate this 180. Move it forward. Do this. And then, of course,
we will make sure that that fits because we
only did it on one side, but that's just something
for the final to do. And now if we go
ahead and do this, we should be able to just
continue on like normal. There you go. And that's
the 100. Move these. So everything will just
slowly come together. We use all of the
models together to basically figure out exactly
the scale that you want. Now, the Window scale that one is a little bit tricky
because you kind of like, Well, you can kind of guess. So if this is the center of the window and we
will use symmetry, all we need to do
is we probably need to just have the center
of the window stop, probably, like, over here or maybe like in
the center of here. And then what we can do is
we can just do it symmetry, which means that this has
spent over one, two, three, four, so it would be like, one, two, three, four, and then around here, it would technically like go down again. So you then want to, like, probably grab these pieces
and do something like that. So it would just
transition down again. But that's something that
we will go a little bit more precisely later on. So we have this piece. I feel like the
scaling or scaling. The distance was a little bit too much.
Let's move it down. And now once we've
done these ones, what we can do is we
can duplicate them, rotate them 90 degrees, at this point, turn off snap. We want to basically
set these to be exactly on the right side. No, wait, looks a little It looks like these
ones are further back because else this
would hit exactly the same. So I assume that these
ones are sitting on this corner over here, and then you basically
move these up. And in order to know the
height, we have this one. So it all just kind
of comes together. So we got this one over here, which we just need to set
nicely in between here. And for this one, it's mostly just like guessing about how far back you
want this to be. So if I have a look over here, I can see that we have
a panel over here, although we will just
be using this one, so it will look a little
bit different most likely. Although we could throw
it on top. I don't know. We'll have a look at that.
So we have this one, and it looks like that it
has not a lot of space. So it'd probably be around
here so that there's not a lot of space for these. And at this point,
you just kind of like move this down
just like that. And there we go. Now
we have the size of our entrance. Also ready to go. See? Just like that. For the floor pieces,
what we can do is we can simply see. So they will have a metal thing, which means that we probably
want to go ahead and just rotate them 180 so that we do not have the metal
included, metal strip. So the metal strip will be here, but at that point, we
already have a door. So we got that stuff also
already done. That's great. So at this point, yeah, at this point, what we can do is we can
pretty much do this. We are going to
create some cubes, and these cubes we
will use as scaling. Let's save our scene. Let's go ahead and
create shapes in a cube. And basically, what you want to do is you want
to set this over here and it's a 3 meters, 6 meters, 55.5, I want to try and
keep even numbers. So 5.5 meters is fine. It looks like it ends
at the top over here. So what I can do is I can
just go ahead and scale this. And I have my snapping over
here turned on on my scaling. So just like the grid snapping, you can turn it off if you want. Yeah. So this is like 5 meters. So let's make it like
5 meters by 5 meters, and then they can always
sink it in a little bit, and the thickness
doesn't really matter. So just do this, and this one will basically
be sitting over here. Okay? So that is
going to be our door. And then what I can see is I can see that this
door is not square. This door feels very square. So based upon that, I can say that I feel like we would need to push it
out a little bit more. And just like that, we can also figure out the
exact scaling here. So I'm sure that
by this point, you kind of get how
everything works. Like you just basically
keep looking at a reference and
you keep trying to match up the general dimensions, and based upon that, you
are balancing everything. So we got this one over here.
Yeah, I'm fine with that. Then what I can do is we
have the elevator shaft, which we will make five by five. Well, this one would be like, oh, sorry, do you
mean to do that? Oh, in that case, 6.5 by 6.5
B 15 or something like that. So let's see. So it would have the elevator shaft
over here in the back. So this scaling is makes
it a little bit less. Let's make it six by six. So that's the
elevator shaft scale, and that one needs to go
up until it is below it, so this might actually be fine. Yeah, let's keep it at 6 meters. Okay? So we have that one. That's great. So
elevate the chef check. And then for our large window, as I said before, we want to end it roughly over here first, and then we will just mirror it, which means that
if I look at this, start with 10 meters, 15 meters. 15 meter seems Let's see. So I don't feel like I have a lot of
space here, to be honest. Yeah, it does not feel
like it would really give me very impressive
looking windows. But I'm not sure. Maybe Maybe we need to have a little bit
more space over here. I'm just having a t. Yeah. What if we make this 17 meters? Then this basically
becomes into the center. There's a center point here, there's a center point here,
and then it will transition. Let's do something
like over here, which means I just need
to quickly grab all of these pieces over here and push them a little
bit further back. Yeah, that does
mean that later on, once we have our window done, we just need to,
in our blockout, at least, we just need to
figure out how to place this. So we got this one now, and then when it
would be duplicated, it would be over
here, which means we probably just want to
go ahead and go one less. Snap this, and then over here, you can just transition
this normally. At which point you
cannot see it anymore because our camera
will be like this, so you can never look
beyond that point. Okay, so that is good. And then I had set
this one to 15 meters, which means that this one
probably also wants to be 15 meters. Okay, perfect. So we got those. So we've covered the elevator
shafts, the big windows. And, these ones. Okay, so that should be Fine, because we can do
these ones later on. Okay, perfect. So in
the next chapter, what we will do is we will just go ahead and
export these pieces, and then what we're going to do is just continue
creating our blockout. Oh, and quickly
rotate another one. You don't just want to move
it around because then it would mess up our tiles because
we have tiles over here. So do not just, like, move these to the side instead,
just add another one. Okay, let's go ahead and
continue with the rest.
5. 04 Creating Our Blockout Part3: Okay, so let's go
ahead and continue. So these models sofa, let's go ahead and
export them to Maya. Now, what you will see me do is and I'm doing
this on purpose, I'm exporting all of
them at the same time. This is because there
is a bug in Unreel. If you export them one by one, they will not actually
keep the scaling. So you want to select all three
of them at the same time, right click and convert actors to static mesh and
just press Save. And then what you can do here is you can just right click again, Asset actions, and
you can export this. And we are going to export
this new folder from Unreel and let's just call this block out on score 01
or something like that. And just turn everything
off except for well, actually, no, turn
everything off. And that's pass export. Perfect. So in Maya, what we can do is just
go ahead and input it. From in real import,
and there we go. There we have our
meshes. And if you want, you can just go ahead and
double click on them. Shift click, and then
just extract the faces, which will basically Oh, I don't know why it was so slow. Here we go. It will
just split it up. Oh, what am I doing? You can just press
separate meshes, also, as we'll also
split them up. Sorry, that's just
me not thinking. Okay, door. Let's get started with the door first. So let's turn this off. Let's go ahead and's got tool settings and
press reset on a pivot. And let's just have this one pretty much in the
center over here. Okay. And then these pieces, I can just temporarily
press H to hide them. New folder. Alright,
folder, new layer. Let's call this door. Okay.
So, D, let's have a look. If we look over here, here, it's pretty much like flat and then it's like a top area. It's just a blockout,
so all we need to do is we just need to go
ahead and create a cube. And I'm just going to
press added pivot, snap to points and then snap my pivot to
the point of cube, turn off added pivot and then
snap this one over here. There we go. At which point I can just go ahead
and I can just here snap this to
make it the same size because I know that we did like pretty
even sizes over here. There we go. At which point, I can select the gaman. Let me select this one over
here and just delete it. So our door, let's
turn off our snapping. Let's have a luce my side view, and I would say
that I will place a line probably around in the center of
this cube over here, which will control
this piece over here. Yeah, it should be
fine. And for our door, yeah, we don't really
need to make it back. I am going to make it probably
a little bit thinner, and I'm just going
to go ahead and I'm just going to
extrude this out. And I feel like this
far should be fine. Go to Edge mode,
press contre B. Oh, that's also really
fine. There we go. So that will just create that
shape that we have might need to let's have
this guy up here. So, we do have actually
a little bit more space, so we can move this
down a little bit more. So this door is going to be pretty close to
this guy over here. So I would say, Oh. Yeah, right now,
it does not look very nice, but we'll
figure that out. Let's go ahead and
just select all of these edges and add
a double connect. So connect with two segments
and scale it out of the way. This will just create
the outline of the door. And then I'm going to
also go ahead and create another outline over here. At which point I can
go ahead and I can just delete these faces. And then simply go ahead
and bridge these back. And the reason that I'm doing this is because it makes
it easier for me to create these corners by simply selecting these two
bits and moving them, setting them to
like two over here. And now when you
set them to two, so when you set it above one, it does tend to break because
it tends to, like, clip. At which point you just
need to go ahead and use your target belt to clean it up by looking on the
inside and in this case, just kind of moving it
out here, there we go. And that we'll just Come on. There we go. That's we'll
just clean this up. So pretty basic. And then it gives us a little
bit more free range to see how we want to fix this. By the way, this edge, it's not really doing anything
except for over here, so we can just press
control backspace. You guys do the same over here. If you merge one point to the center and another point
over here to like a center, this means that this edge
is no longer useful. So you can just
select these points, just press control backgspace. Okay, let's have a look at this because right now
this looks quite ugly. So I just want to see
if I can improve it. Let's get started by giving it a little bit more space up here. Because it looks like we need
a little bit more space. And then what I'm going to do is I'm also going to go
ahead and I'm going to give it a little bit of,
like, a wider range. Like that because that feels a little bit more logical to me. Maybe move it out a little bit. It doesn't need to be
exactly on the grid, so Okay, so wide space, we have something
sitting in between here, and then we have this piece, which it kind of feels like I'm tempted to go a little bit higher with
it, to be honest. So I might just do that. I might just go a little bit higher. I don't know exactly how high I need to go, but we'll see. And I'm just going to
grab a really quick cube that I throw in between, and this will just
block off the door. Because the door
that we are going to also later on create,
it will not open. It will just be a static asset. But if I do this and assign
everything to my layer, I can then go ahead
and export it as door. Go in here, go back to
assets, import my door. Oh, I forgot to Damn I forgot
to set this import scale. There we go. Okay,
so we have our door. Now, our door will actually
have a height difference. So that will probably also have already changed things up. So if I just temporarily
use this one, we will actually later
on grab a different one, but I will only do that
when we have our final. So temporarily use this one so that I can measure out how
high my door is going to be. Which is going to be
probably around here. And then I'm also
going to measure out how far away like this. Yeah, and then we
have elevator shaft. Okay, so knowing that my door is a little bit too
high, but that's no problem. Like we can just go
ahead and go in here. Move it down a bit. And right now I'm just kind of
like eyeballing it, so I'm not really
measuring properly. I just want to get it pretty
close to the top over here. That's pretty much all I
need to do all I care about. Yeah, like a tiny bit more. And yeah, some people might
think it's time consuming, but honestly, for
something that small, I don't really care too much. If I just need to go back and forth a little bit
instead of that, I need to go in and, like, create a cube
and then measure out the cube and then export
the cube and import it. And then this just becomes a bit more
tempting because here, it might not be perfect, although I was really close, actually, but that does not matter too much for
something like this. So we got our door done,
also, perfect, fine. If you want to get
rid of the flickering temporarily, you can
just kind of, like, move it down a tiny
bit like that. So door check. Let's go ahead and create
the window next. Save scene. So door spurs Oh,
I don't have it. In my shelf, let's spread
unhide all over here. And we're just gonna
go ahead and just high dose and just continue
with, like, my window. Okay, so if this is the window, how is it like on top
Yeah, pretty much. So we just want to go ahead
and we want to make sure that the windows sitting on top of the grid
point over here. And now all we need to do is so this shape, it's
pretty generic. We just need to go down here, down here and then move it up. So pretty much what I mean
with that is if we go ahead and create a plane, maybe. Yeah, I think a plane might actually be
easier in this case. Set these segments to zero. Hold J, if you want
to snap rotate. And I'm just going to
go ahead. I'm going to move this up over here. Let's move this out of the way. If you want, you can just
snap your pivot like that and then snap it in, like, zero, zero, zero.
Speck a little bit. Okay. So we got our little guy over here to kind of give us a
scale reference, and I'm basically just going to go ahead
and I'm just going to roughly make the shape
that you see over here. So just follow my lead and
then it should be fine. And we can then once we
have it into in reel, we can kind of, like, adjust it. So if I have a look at
this, it looks like this one needs to be quite a bit higher than the
person like this. It does have a quick
segment over here because it looks
like that it kind of it's like something
that's going out, and then I want it to go
out up until his heels. And over here, you can just go ahead and you can use
extrude if you want. So it looks like it does
something like that. And then when I've
done my extrude, I just delete those faces. You can also place two segments really close
together if you want, but yeah, I don't really care. Let's move this a
bit further back. Okay, so we got this one. Then it's just a matter
of going in here. And giving it like
that in between bit. I think that needs
to be quite thick. And then what you can do at this point is you
can snap two points, and then you can hold Shift, click, and then just
snap to this point. And here, that should measure
and just to double check. Yeah, you'll see, so that
should measure exactly. And now we have
quite a large one. At which point let's see. Now, you know what? I'm
going to just measure that out inside of unreal. So for now, let's just do this. So we have like
this large point, and then we basically
do the same thing where we push this back in. Out. Then again. Of
course, if you want, you can also make your entire
blockout inside of Maya, that does make these kind of
things a little bit easier, but then you would need
to do the extra step of then turning that blockout
into modular pieces. So in the end, I don't think there will
be a massive time save, but they are all options. So I'm going to do this. But now I'm just
going to basically extrude this out a
bit more like this. And then basically extrude
this again because then what I can do with
this one for the panels, I can simply move it back. And I feel like that
my measurements are quite a bit off right now. So what I'm going to
do is I'm just going to go ahead and set this, say like 5 meters from now, and I'm just going to
already export this. Main underscore window so that I can basically
move things up and down a little bit better before I start trying
to fix things. So import and this time set your uniform scale
to 100. There we go. I did not forget it this time. And now at this point,
I can hide this. I basically want to grab
this one. Yeah, here. So move it pretty much
in this location. Actually, if you want,
you can temporarily move it like this that you have a better view because we can use these points to
basically measure this. So here I can see, for example, that I was pretty much close enough where you can see
over here like the height. And you can also
see the thickness. So if I have a look
at this, I would say, and normally I would just have my unreal scene on
my other screen, but that does not
really work for Toil. So I would say, push this out
and it goes up, it's fine. It gives me, that's
a nice thickness. And then over here, I would say that this
one is way too far up, so I need to kind of, like, tone this piece down. Here, so, move it down until it arrives
roughly around this point. The thickness of this is, it's a little bit hard to
see because of the sun, maybe make it a little
bit thicker like that. And then it has another piece, which probably is it needs
to be a little bit thinner. And then it would have
quite a thin area. So here, this is why I
said that I felt like everything was a bit off
because I expect to have, like, a large slab basically of
nothingness here at the top, but we won't really see that because we have a roof
connecting over there. So we need that buffer
zone, basically. So if I now give
this another ty, it should work a
little bit better. So export the main window, re input this here, see. Um, this pretty much fine. I would only say that
this is a little bit too white still. So you probably want to go ahead and just set this like a little bit lower over here.
And there we go. So that should do the trick. Now, at this point,
so this piece is what's this an entire? I probably Oh, no, okay. So yeah, it was half the window, so I need to keep that in mind. So what I'm going to do is
I'm just going to go ahead and move this pretty much
up until this point. Then we do, of
course, have a place where we are raising it. So for that, what
we can do is see, let's grab our floor two, temporarily duplicate it,
and assign it to our door. Oh, sorry, not a door. Create a new layer, assign it to our new layer
and just call this layer main underscore
window. Like that. Also assign this one to it. And now at this point, let's just get rid
of a blockout. So basically, the
reason why we have this one is just so
that I know the angle. I don't have to know,
well, I can roughly see because this
is set to 1 meter. So I can roughly see
that I need to be a see, one, two, three, four, one, two, three, four, 5 meters, and then
it needs to start. So based upon that, I can say 1234 5 meters, and then this one
needs to start. And then I can just go in here. And now at this point,
it is just a matter. Oh, do move this down a little bit because else it
does not actually make sense. Now it is just a matter of
adding a segment over here, adding a segment over here. And at that point, you can
just go ahead and you want to move it up up until this point
and simply move this up. See? Easy, does it? And then you also have
to go around here, but that one is also not too difficult because all
you need to really do is select this side, and can we just do
like a 45 degrees? No, I was expecting
that to break. In that case, just
extrude this out. Set this to like 90 degrees
over here. Did I do that? Let's go to a top view
because I 90 degrees. And then we can just
select this one. And now, if we just move this, it's just a matter of
basically going in and giving it some
proper movements. Oh, why aren't you selecting
those bits? There we go. And I'm basically just
looking at the antsing on top of my edges to roughly
make this straight. Like, I will make this, of
course, properly later on. So for now, it's fine to just quickly do
something like this, just to get it's properly angled because then what I can do is I can
select this entire piece. And at this point,
I do like to often reset my history and
freeze my transforms. So the history, I'm
sure everyone knows, you can go here, delete
by type history. But the transforms one,
you want to go and modify, and then you want to go
to freeze transforms. This is because whenever we
make a movement like this, where we manipulate
all the rotations of our edges and
then try to bevel, it sometimes tends to break. Now once we have reset it, if we now press bevel and
we add some segments, you can see that
we can basically create very quickly
that round effect, and you can choose yourself how sharp you want
this round bit to be. But in this case, I can go
ahead and I can go in here, and I'm just going
to go ahead and just give this like an extra extrude, so that it goes far enough back that we don't
notice it anymore. And at this point, yeah, we can pretty much
probably delete that one, export this as our
main window once more. Go in here, re import. And now it's just
a matter of Oh, stir of our snapping because that might be a bit overkill. Yeah, that's nicely
placed into place. And I'm just going to
place it very close like this over here so that there will still
be a gap over here, but don't worry, we will
fix that gap later on. So we have this one. Is
that already correct, or is there I feel like
I'm missing something, but Oh, no, okay. Oh, no, wait. I was not missing
something. I was seeing if I had to move this
around a little bit. There we go. That's
what I was doing. And then what I can do at the end because there will
be a close off point, you basically just want to
grab a very quick cube. Just make it like a bit thin, and you will not see this, or most people will not
see this because it will be in such a
small dark area. But what we can do with this, basically move it over here. Let's go ahead and
move this back a little bit and
just move this up. There we go. And now at
this point, if you want, you can just go
ahead and combine these pieces, save them. What I'm going to
do is I'm going to duplicate it and then mirror it because I
do not want to have this piece to be part
of the other piece, because if we then do a
mirror, it would merge. But if I just do this, I can then simply
delete this side. And just temporarily
just move this and just clip it in here like that. Still get quite close, but it's not a real
mirror, pretty much. And there we go.
So we can now go ahead and have the
fill window exported. Of course, we still
need to create the holes for the window. I just remember that, but we are running a little
bit over time over here. So yeah, so here, so we will have this piece. And as you can see now there's no more empty space
in between here. The window is working
properly, and based upon that, I can see that I have to
move this 11 further. And then just these
ones, and there we go. So at that point, you will not see anything, so there will just
be a wall over here. But okay, so we got
these windows over here. That is pretty good. Now, I can definitely
see that we have not enough space
in between here, but what we will do is we will go ahead and pick this
up in the next chapter, and then we will really balance
out to balance this out, sorry, to make sure that we have enough space in our windows. So let's go ahead and continue with this
in our next chapter.
6. 05 Creating Our Blockout Part4: Okay, so let's go
ahead and continue. So as we said over here, we need to kind of balance
things out a little bit. So let's have a look. Well, you can just, like, if
you want to hide this one, I'm going to go
ahead and probably just move everything
up a little bit. So we need to kind of get this effect
that we get over here. And you know what
maybe what would be good is if we just go ahead
and create already a cube, and this cube will basically
represent the whole. So I'm just going to go
ahead and already do that. Just move it. Looks like they have only a little bit of space
left here and a little bit of space
left. Over here. So what I'm going to do is I'm going to move it like this. Then I'm going to basically
guess the width that I want to make it if I
had an ideal situation. And I can select these vertices and give
it a little angle. Okay, so yeah, that seems like
quite a good width to me. And based upon that,
I can go ahead and go in here and Hmm, that is quite a little space, but it should not be too bad. Nah, that should not be too bad. But, yeah, we kind of need to balance it out because
right now I do feel like I know something feels off. I don't know what it is.
It's just a feeling. So it's really hard for me
to describe what I mean. It just feels that everything
is a little bit too high. I think that Oh, no,
no, not too high, not high enough, I should
say. I don't know. Let me just this one
was already fine. So what we can do
is we can just grab this one and we can just go ahead and
also move it over here. So this one looks a
little bit different. So what I'm going to do
is, oh, you know what? Let's just select
this, scale it flat. So let's see. So this one
goes like, around here. Then it basically goes down. And then it ends
roughly around here, which means that we
want to go ahead and move one edge here, one edge around here. So let's see. So it
ends around there, but it gives me off
like a little slope. What I believe is that
this slope should end exactly on the same level
as the other windows. We have this exact
same level over here. Then we need to
definitely make this a bit more dramatic in terms of the shape because right now I don't really
like the look of it. Let's see, we push this
up, we push this out. And then over here,
we kind of like need to move this back. And maybe I'm just going to improvise it a
little bit and make it. Yeah, because there
is technically, it should be like this probably. No, actually, technically, it should be even further back, but then it doesn't
look as nice. So instead, we
will probably just move things up a little
bit to this area. And what I also want to do is just quickly
duplicate this. I want to make sure
that our angles are pretty much the
same like this. Make everything
fit a bit better. So let's say that we got something like this
to get started with. Now, if you just
go ahead and oh, sorry, select this
one, go to edges, and we are just going to select these two edges over here and press a quick Contra B,
give the few segments. Here we go. So we are
just going to use Booleans to basically
cut out our shape. So we got that one and then over here, it looks like that. These should except
for these two, should pretty much be the same. So if I just do Contra B
give the few segments. Maybe also, it allows
me to select it, do a contra B here. Mm. Yeah, this shape, I
don't like this shape. It's Undo, this temporarily. I feel like first of all, there is not enough space between this area and this area. So let's just see if we
can maybe move that back. Maybe make this a
little bit higher, and then we will just make this winter also a
little bit higher. I will make it nice
and precise later on, so I don't need to worry
too much about this stuff, but I do want to give, like, a general impression
of what we are actually going to
get near the end. First of all, just
do contra B on this. And now that do Control B
specifically on this one, just because it's on
quite a strong corner. And now Control B on this one. There we go. Okay, let's try
out something like this. So just make sure
that your shape is going straight through
the entire thing. And then for this one, what we often can do
is we can go mesh Booleans and go a difference,
and that's what cut it out. And then what you
basically want to do is, if you go to your
modeling toolkit, if you don't have it, you
can find it in Windows and I believe modeling editors. And what you can do in
here is you can set a selection constraint so you can select bi
angle, basically. So what we can do is we can
push it out like this to basically give it thickness
and then just delete. So that temporarily, it
will just look like this. This one, because
it is sitting near the end and it's
actually crossing over, you tend to want to use union
because Union in this case, when it crosses it over like that, it will just cut it out. So it will actually give
you a better result. And then if you just click Hold Contra Shift
and click down here, you can basically also
go ahead and in here. Just extrude it out. So we
now have something like this, and at this point, it would probably be good. On no way, we don't
need to triangulate. Unreal will triangulate for you, but it would be good to maybe just quickly connect some of these edges just to avoid
any extental problems. Same over here, just
to avoid any problems, connect like one
edge because else the system needs to
calculate the triangulation like so much of it that it might get confused about
where to actually place the edges to keep the shape
correct see because this is just one large piece. So that should do the twig. Let's quickly, first of all, just export this
as a single piece again because I need
to see how it looks. Reimport. Okay, so yeah, that gives me the nice large
window effect. It even is. Yeah, I can even probably, push it up a little bit over
here, and I don't know. No, it has enough maybe
tiny bit of space. So let's go ahead. Push
it up a little bit. Over here, and then
maybe give it like a tiny bit of space
more down here. I think that does a tick.
I think that will give us a decent looking window that is not too large
or anything like that. Yeah, that should do the twig. So at this point, let's go ahead and
show all Oh, God. That's just the height,
all of that stuff. And I'm just going to delete it. And yeah, okay, we can
just do a mirror here. Just make sure that you set your merged threshold to
zero and then push it out. And then you can also just go ahead and just press
the separate button. You need to then combine these two again, and
let's combine these two. There we go. So now we
have just separate it. And instead of already doing a merging mirror, we
just have this piece. Export, data main window. Okay. Yeah, this window is a little bit bigger than we have,
but that does not matter. So that is fine. And what we can do is we
can just go ahead and we can move this over here. Let's see how much space
do I have left? Not a lot. And here, I feel
like I would need to give it a bit more space. Oh, wait, actually, no, I
do not want to do that. I want to make sure
that over here it's. So actually, that's fine.
Let's leave it like that. And at this point, we just want to grab these pieces over here. Turn on snapping, and then I accidentally deselect
it. Here we go. So of course, you can
never ever see this point, but I think it is just nice. To have it over here, just to nicely end it. But yeah, we will have
a camera over here, so you will never ever see that. Okay, so that's already
looking pretty good. So we already got a pretty decent layout going
on over here. The next stop would
probably be to, probably let's create
the Ni You know what? Let's do the ceiling
first because that might be a
little bit easier. So for our ceiling,
what we're going to do is we are going
to go ahead and we are going to duplicate one of our beams or art this
to your main window. So let's turn it off. Let's grab our beam 01 because it's pretty
much the same thing. So we would like later
on just adjust it, but for now, we
can just leave it. So let's do a
control or control. Shift D. New layer. Call this ceiling
beam underscore 01. And I always say underscore 01, even when we only need one. And the next thing I would
need to do is pretty much Oh, God, what did we make this? Oh, yeah, of course, I
don't have. Oh, no, wait. I do have it. Was
it 17? Yeah, okay. So 17. So let's say like 34 meters to have
the double length. I do not have a length anymore. So what I'm going
to do for this one, I'm going to start by
deleting those faces, and you can either bridge
these back together or you can just use a target weld to basically weld it from
one side to the other. And then if you want, you
can even get rid of it, but it's a blockout, so I don't know why we
would be optimizing. Okay, so this one,
move it over here. What did I say 32 white? I need to go on this angle 32. And then just kind of like, it doesn't need to be
precise, as I said before. Like we can probably
even merge it back. Yeah, maybe we want to do that. Maybe we want to just invert it. No, yeah, I don't know. Honestly, it does not matter. You cannot see it. I'm just
going to leave it like this. I think I'm thinking
too difficult about this because I can
just grab this one. Export selection, call
this what do we call this sealing the score
beam underscore 01. And then if we just also
go ahead and just create a plane set us to
zero, zero, zero. Let's turn off sealing
beam one and just make this 117 by four. Oh, no, sorry, not that one. On the X x is by four
or five or something like that. Let's do five maybe. Then let's go ahead
and just snap the pivot to the
corner over here. And then we just want
to snap this over here, and this is going
to be our sealing. Assign this to new layer
ceiling on score 01, and let's also go
ahead and export this. Like that. And that's
all we pretty much need. Yeah, of course, we have
lights and everything, but I'm not going to
create those lights in the blockout. I don't
care about those. They are too small
and they don't really add any value
to the blockout. So we can just go ahead and
sealing beam and sealing one, import them, double check
your settings. Here we go. And then it is just a matter of grabbing. Start with this one. The reason why I wanted to
maybe make it smaller is because it is sometimes a
little bit annoying to manage. Oh. Oh, I accidentally
have to seal on us. It's sometimes a
little bit annoying to manage something this large, and that's basically the reason. So I can go ahead
and move this up here and it looks like
that I want to move it, turn it off a bit, probably
around this point, maybe a bit further down. And the first thing I
notice is that these ones, they look way bigger. But then again, that would
not make too much sense. 'cause we will probably
go for something like I will set
the camera angle, but it will probably
be one that is, like, a little bit thinner,
so we would just scale it. And it looks like we have another one probably
around here. Okay, let's go ahead and create the camera angle so that we can actually see what we're doing. So if we go ahead and just get roughly the camera angle
that you get over here. So let's say it's see, we got probably
around this point. Then you want to go down here, and you want to go ahead and
go to create camera here, and we want to create
a cinema camera. So cinema camera gives us
a little bit more control because what we can
do in here is we can go ahead and we can
set the film back, digital film that is fine. And then the lens settings, we want to, actually, let's leave the
lens settings also. If you now go down here to perspective and set this
to be your cinema camera. Okay, so that definitely feels
like far too much space. Our environment is bigger. That's the problem
with this one. Our environment is a lot bigger. So you can set your
focal length over here, which is like your field
of view, pretty much. And I'm just trying to see,
it set this to like 20. I'm just trying to see
if I can maybe get it to look a bit better
because what you can do with the
vocalcts you can almost make it feel like it is less big because you are from quite a distance,
and then you are zooming in. And I'm just trying to hit
this corner over here, and then over here
at that point. And it looks like that's
something like this over here. Yeah, it feels
like this would be probably the angle we want
to use. Probably this. Okay. So having this, what I can do now is with
that angle, if you want, you can go and go down here to Window viewpods and create a second viewpoard and
in this second viewpot, you can set this to be
your camera angle so that you can see it
while doing changes. And I would then,
for example, have it over to my other screen. And once I have this
over, I can go in here. And I can basically start
by moving this down. And based upon that, I can see that this one I probably want to make it
a little bit more beefy. So I would go in here.
And you know what? Just to make it more manageable, I am going to make it a little
bit less long over here. And then I'm going to
turn off my snapping. Here. Let's make it like
a little bit ticker. On all aspects like that. And then the way
that we are going to basically fix the length. So if we have this ceiling
beam 01, reimport RC. So now it looks a
lot more beefy. I'm looking as I said before, I am looking on my
other screen over here. I just cannot have all of these windows over
in one screen. That's why it's quite important and quite handy if you
have multiple screens. But what we can do with
this one is we can go ahead and we can do a 180 move it over here. And what I would need
to do is I would need to have this exactly
in the center. So if we reset our pivot and then snap this exactly
in the center over here, and then we can move it back. But the goal is, if I now export this because the PIV point
is exactly in the center, it should give us just
a simple rotation. So if we now rotate or
reimport here or see. So I have this one over here, which for some reason, BIV point on the way the
PivPoint is looking correct. I'm moving this to location I want based
upon my camera angle, which is roughly this location. And now I should be
able to duplicate this rotate this exactly here
or see on the axis, at which point, if we just
move this using snapping, it should snap properly,
and there you go. So we got these ones over here. And as you can
see, if I show you my viewpoint, There
you go. Here, see. So you can see that
we have this beam, and based upon that, we
can pretty much let's see. So right now, we are
hiding quite a bit of, like, the top part of our
window that should not happen. We should have this probably
a little bit higher. Like, it can hide a
little part of it, but not too much, which
means that we probably then want to go ahead
and go into our camera. Move it up a little
bit like this. See, now we have these ones, and we might want to
just make our windows and everything a
little bit larger. So we got this one. Then I
want to have another one, and I move it probably around here and just scale
it in a little bit more. Maybe it might be
better if I snap it because it will
give me an even look, one, two, three, scale in. And then we know for this
one, one, two, three, one, two, one, two, three. Okay, I think we need four. Is that? If you are not
sure if it's an even space, you can just go ahead
and go to create a cube, turn off your snapping and simply scale the cube
roughly to this scaling. So here I can see, okay, so this is the distance
between these two. And then if I move
the cube over here, I can just make sure that yes, okay, in this case,
distance is the same. It's just because of the length, it looks a little bit strange. But okay, so we got
these pieces over here. At this point, we can just
also grab a ceiling piece, rotate it 180,
move it over here. Maybe turn on our grid snapping and snap it into location. And, so we want to end this ceiling over
here because we will have a transition piece like that that will basically
just cover the rest. So let's just go ahead
and duplicate this. And at that point, you can
no longer see anything. So what we can do is we can
just go ahead and move this over here like this. Now, we should be able to
just select all of this. I don't know if Okay, so this one did not
measure correctly, which means that we
just need to go in, rotate this 180 and then
just quickly move it back into its correct location. Like that. And then it's
just a matter of moving this one roughly to a
point where we like, which is going to be probably
around here. There we go. So now in our camera angle, we can see part of the roof, but we can still see like
over here these panels. So yeah, we are
shifting everything around a little bit to
make it work for us. Now for this ceiling
bit over here, I would say that
we probably then want to make that one
a little bit longer. So we probably want to go
ahead and start with beam one. Select this side. Oh,
I did not snap that, but we can always
snap it. There we go. Let's make that a
little bit longer. Expot selection, beam 01. And now we have also figured out the official height
pretty much needed. There we go, see so that it
just goes all the way up. Then what we can do is
we can go ahead and also go to our main window, and we know from
our main window, we just need to
maybe go to, like, a side view, select this top, maybe make it like
2 meters long. And let's go ahead and
import that one main window. There we go. So just
to make sure that that one is going to
the top over there. I probably Okay, so we will have a wall over here that will basically take
care of the rest. Perfect. Okay. And
at this point, we are again at our time limits, but that's looking pretty good. So we already got
like a really decent what we're going to
do next chapter is we are going to go ahead and
just start with over here, the brain freeze elevator shaft, along with the shapes and everything that
we have in there. And we can also use those
components down here. And after we've done
that, I will just do some quick lighting
and everything just to get a basic scene together and we'll
take it from there. So let's go ahead and continue with this
in the next chapter.
7. 06 Creating Our Blockout Part5: Okay. So now that we have our
main window done over here, the last one that we
need to do is, yeah, pretty much elevator
heft because like these extra small props, we
can just do those later. I don't really care
about it. I just want to save some
time, in that case. So elevator heft. Oh, no, wait. Also the walls, I believe. Or did I already do those? No, I didn't some reason, I have it in my mind that
I did those. Okay, weird. Anyway, for the elevator shift, let's go ahead and
so I just need to, like, there we go. This
is the one that we need. I don't know what this is. This is like an
old one, I guess. Yeah, okay, so that
looks correct, so okay. Whoa. Hello. Let me just quickly hide this
stuff because for some reason, it's really large. Okay, so we have over
here elevator shaft. Let's go ahead and just reset the pivot and just
place it over here. So we need to yes, create the back walls that
you can see over here, and then we also
need to create the actual shaft over here. So for that, I guess that we
can just use a simple plane. Yeah, let's go ahead
and just create like a simple plane and set
your subdivisions to zero. Scales up a little bit. Hold J and rotate
this nine degrees. And let's just place here. And I will make this
properly later on. So for the width of this, I do probably want to go ahead and go a little bit larger. Let's do 7 meters on all sides. And the reason I want to do
that is because, of course, I need to have
some space between the elevator shaft and
the walls over here. So I feel like 7 meters would be fine because I don't think
that we need to really, like match this up with anything like the floor
or anything like that. That does not really matter in this case. So we got this one. Let's go ahead and
go to Edge mode, move this yeah, up until here. Once again, this one, it
doesn't need to be too precise. And then I'm just going to go ahead and temporarily hide this. And if I grab this one, let's snap two points, edit pivot and just snap
our pivot down here. Then let's go ahead and
just do like a rotation, and then let's just snap
this one to our grid. There we go. And as you can see, there is like these
bars sitting out of it. So with these ones,
what I'm going to do is I'm pretty
much just going to go ahead and there is
empty space here, but I think in our version, we probably just want to
have them in the center. That's probably the
most logical thing. So let's go ahead
and just create two of these bars, maybe, like, push them out a little bit more like this
using your scale tool. Then if we just do it like a Contra B and for some reason, it's frozen. There
we go, Contra B. Let's make it like
0.4. Let's do 0.35. There we go. And
then for this one, we are just going
to go ahead and we are going to extrude, oh, I still have snapping
on. Extrude this out. Probably like this.
Then you can go ahead and you can get rid of the top and the bottom faces. And then the last
thing I'm going to do is I'm just going to go
ahead and I already give this like a quick bevel and maybe like 0.3
again. There we go. So that's like a
wall, pretty basic. It doesn't need to
be anything special. And now for elevator shaft, what I'm going to
do is do we want to have a midpoint let me think. So the midpoint, basically, what I mean is we can create the entire length or we
can create only one half, and then we will basically just duplicate that half over
and over and over again. So that would be more modular. But I'm not sure. Yeah, that might be handy. So just in order to
find the midpoint, let's go ahead and place
like a single connect here, and we can use this
to our advantage. Oh, that feels like a really
small midpoint, but again. So first of all,
let's go ahead and assign this model to a new layer that we will call back
while underscore 01, for example,
something like that. And then if we just go
ahead and unhight this one, we want to go ahead and
make this length over here. So let's go ahead and
I think we can just create a cube that
matches this stuff. Let me just snap my
pivot down here. And let's snap this over here. Let's see. 5 meters, 6 meters, looks like. Yeah, okay, so we went
for exact measurements. So it's been like a few days since I worked on this
because I got distracted. So I just need to, like, have a quick refresher. Okay, we went, like, for eight. 7.5. In that case, I'm
just going to do eight. I'm not going to
go for a 7.5 that would just be annoying.
Let's hide this. Let's go ahead and move
this one over here. So this is going to
be the midpoint. So what I can do is I can
create another layer, call this one layer
elevator shaft. Then basically what
we want to do is we are going to keep
this very basic. We need a top piece like this and the stop piece will I always forget
to n on snapping. The stop piece will basically
just stand over there. Let me just quickly
put height because my cameras are being
annoying. It's really weird. I don't know how I managed to scale up my cameras in that way, but the stop piece
will be extruded out. Then we will go ahead and we will create a double connect. Scale these out and these bonds will be like the side bars. So we need to do
the same over here, double connect, scale these out. And I will make this like
super precise later on. So we have the side
bars over here, and that is pretty much it. So if I now go ahead
and let's see. So let's you know
what? Let's hear. Let's delete the bottom because that one will
probably be in our way. And then let's grab these
side bars over here. And let's just go ahead and
just extrude these in using your blue sliders so
you can push them in like that and delete those. Okay. And then for this one, we need to go ahead and
we need to extrude these out to indicate that
there will be a bar here. But if you extrude
this out like this, you do need to go in
and you need to scale this flat because the
extrusion along normal, it doesn't work around sharp
corners, most of the time. Sometimes it works, but not
yeah, there is a limit to it. Okay, so this one
will be pushed out, so there will be a you can even do like a
bevel just to indicate. So there will be a bevel here. Then we have these bars
sitting over here, and we do have something
sitting on top. That is just below it. That is like a shape
that we can use. But let's first of all, go ahead and for these bars,
you know what? Bridge them. It does not matter too much that they do not
look logical right now. I do need to make
sure that I select. Once again, I do need to make sure that I select
the right edges. They're a little bit
difficult to see. There we go. And I don't know. Can we just do like
a bridge here? And maybe then just do like
a double click and just fill these holes like that. Okay, so we got this one
over here that is fine. Then what I'm going to do is I'm just going to go ahead
and I'm going to create a cube over here, and this cube will be that
random shape that we have. So let me just make this
a little bit thinner. Push this over here, scale
it out a little bit, and let's go ahead and go
to probably vertex mode. And I'm just following
my reference over here. I'm just trying to
create the shape. So it looks like it's
basically pushed out. Then over here,
it's just above it. Then it has a loop over here, which means you can then
push this out a bit further. And then it has
another loop over here or to be exact push this out and then
maybe push this back in, push this one down a little bit. Something in that
direction over here. There we go. So we got this one, and if you want, you can go at it, you can,
like, mirror this. You know what? I'm just
going to selected. Sure, you can set an offset, but it's often just
faster to do this. And then you have this one, just reset your pivot again so
that it is in the center. And then maybe let's
mirror it once again on the Zaxs, I believe. Maybe direction in the plus. Now I'm going to push
this out. There we go. So yeah, it feels logical
if it is on four sides. And at this point, the
last thing that we need to do is we just need
to go ahead and create another cube
and this cube is basically going to be like a metal bar that you
have over here. And we basically rotate
this bar, I don't know, like 30 degrees, hold Shift
J and another 30 degrees. So it just becomes like a cross, and this one will become
the cross section. Let's first of all, scale
them out a little bit. Push them in like this.
And you know what? Even though it's a blockout, just to indicate, later, what I want to do
is this is quite a classical look that you can get from these kind of bars where they have
basically like a joint, which is just like a simple cube pretty much that is
sitting in between. Sometimes it's a
little bit longer, and it just has a
bunch of bolts. And basically, everything always then comes together
in this place. And once you have this,
you can, for example, combine this, and then
duplicate this up. And then just like
that, you can very quickly clone this over here. Collapse all of these, and then clone these and rotate
them 90 degrees. So yeah, sure, okay. So we have some
points sticking out. If you really want to, you
can just quickly go in. Don't know how I
didn't notice that, but there we go, see. So we can just
quickly go in and we can push these back a little
bit, and there we go. So that pretty much covers this. And it will give us the minimum amount of work because what we are going to do in real is
just place it like this. And just like that,
you can kind of just keep doing that and
make it as long as you want. But yeah, okay, so
we have this one over here that is fine. Let's remove history, and I think that we can
start exporting this. So let's just make sure
that everything is selected and added to our layer. And let's start with
the B wall over here. So let's go ahead and
file export selection. Exports to unreal FBX. Do we need to turn No, I don't need to turn
on triangulate. This is back WOW under score 01. And then I can also go
ahead and grab this one. File Export Selection. An elevator shaft over here. And now let's go ahead
and go into unreal. Let's go outside
of a camera mode, and then we can just
go ahead and add these assets and just
grabbing them over here. And let's press Import. Here we go. Okay, so
let's see our back wall. Oh, hey, it looks like I did not extend this out far enough, because, of course, I changed my size, so
I forgot about that. But that's no problem.
So we can just go ahead and at this point, I would recommend just placing this like very close
because you will not really be able to see
a lot of specific details, especially not because
it will be very dark, so this should be fine. I'm just going to go ahead
and I'm just going to go because that also means that our elevator chef probably needs to be
a little bit longer. But let's grab our main window. Let's move this up over here, and we will see how our
elevator shaft pays. Maybe we can just duplicate
it duplicate it up, sorry. But yeah, we'll see. So let's go ahead and just
re input this one. It's a look. Okay, fair enough. Looks like I need
to go even higher. It does not really
matter this one, so we can just stick
it out if we want to because it does not need to be repetitive or
anything like that. Technically, it doesn't
even have to be modular in a way. There we go. So now it's sticking out, which
means that at this point, I can go ahead and duplicate it. Rotate this 90 degrees
and move it over here. Duplicate this again,
rotate 90 degrees. And let's move this roughly
out here. There we go. And let's not forget that
you can also use these ones for the bottom walls over
here because we will just add some lights there to that. My English is not very good
today. Sorry about that. But yeah, what I can do is I
can just go ahead and I can get roughly this point. Yeah. I can go move it down here, and I believe that we
did do even numbers, so I should be able to
just snap it. There we go. And that will just
basically block off these walls that for our
camera, we cannot see it. There will be nothing else here except for later on that we will create some cubes that just block the light
and everything. But for the rest, this is
all that we really need. So we can just push this here. See? So now you can see just like the
bottom wall over here, and we can see that over here, everything is now
also properly placed. So at this point, we can go
in here and we can just grab our elevator shaft and
turn off our snapping. I think in here, I'm
going to place it this way because you cannot
see the flat pieces. And then in here, I'm just
going to rotate it 90 degrees. So for this one, I'm going
to probably let's see. Let's scale this down a
little bit over here. There it goes, that it does
fit, feel free to scale, especially because
this is almost like a concept environment, sort of. It's not really a
gameplay environment. In my case, it's
just to showcase, of course, the trim sheets. So I don't need to be
as picky about, oh, is the player going to use the elevator shaft and
all that kind of stuff? And that's also why over here, at this point, it will just
go into nothing, you see? So I'm not too worried
about whatever happens beyond that point. So that is looking
pretty much fine. Like, I'm not too worried about that. See here,
that's looking good. And then what we can do is
we can go ahead and we can select this one,
place it over here. And this one is a
bit more tricky. What I always do is I
always go ahead and create another viewboard and I set this viewboard to my camera so that I can match
it up with my reference. So if I set it to my camera
and I just need to move this over to my other screen,
I just want to kind of, like, block off part of my view because it's always nice if you have
something in the foreground. So I'm just basically going
to move this in a place. Yeah, it feels very
empty right now. We definitely need to make
this more beef here and more interesting. Let's see. I want to move this over here. Yeah, so I'm definitely
going to make this one a lot more thicker because
I do not want to Oh, yeah, of course, you guys
can see it because I do not want to have this
much empty space here. So what we most likely will
do is we will actually most likely just play some
valves in between here. So we would have, for
example, this one, and although it will
change a little bit, what I probably would want to do is grab a back wall like this. And basically place
it in between here. Now, that might not
make much sense, but it doesn't have to make
much sense, in this case, because we place it in
between here, but of course, we can argue that it is just
simply sitting on top of it. So if I do this and I push this out just upon this
point, here we go. Let's say, 1 second. I'm just looking at
my other screen. I'm just trying to,
like, match this up. Uh, feel like I would need to. Oh, yeah, that's tricky. I need to have a look and see. Because on my screen over here, you can see that we need to choose if we have it in
front of it or behind it. I think I'm going to
go in front of it, and then I'm going
to basically rotate this 90 degrees and
also move it over here. And honestly, this
is already fine. So if you have it like this, push this in front
a little bit more. So we have these bits over here, and then if you want, I would just place it over here. But if you want, we
can go ahead and we can gate this down in
case you can see it. The reason I do not want to move this properly like over here. Yeah, you can do it, but then you need to match up this line perfectly because right now there would be a split
exactly where the camera is. So that's what I'm a
little bit worried about, but I guess I might be worried for nothing because if
I just go very close, remember, I did not
make this in, like, a proper size, so that's
why I'm just a bit careful. But yeah, I'm sure that I
can make it close enough. So now that we got
something like this, it's just so that we have
something blocking of a camera, so that will look totally fine. Okay, so we pretty much now got everything
that we really need. All those small extra pops, we'll just go ahead and
we will create later on. So at this point, what
you would want to do? Let me just close that view. Well, first of all, save us in. And in the next chapter, I will just go ahead
and very quickly finalize this space
over here just by doing some basic lighting and
just by creating like some cubes around here so that it becomes
an enclosed space. And after we've done
that, we will go ahead and we will start by creating
our actual trim sheets.
8. 07 Creating Our Blockout Part6: Okay, so let's go
ahead and continue. So I just wanted to kind of
finish off this blockout and make it a little bit
more proper or better. So let's get started
by first of all, just cleaning up
our scene because right now it's quite messy. I'm just going to go ahead
and I'm going to just select everything except for,
like, the lights. So let's hold Control and
deselect and the camera, also, basically
every single mesh. And let's create a new
folder called assets, and it will just
automatically add your selection to this folder.
Now, let's have a look. Um, the light source
I don't need, but let's first place
my cubes because else I cannot see
anything anymore. So I'm just basically going
to create some fake walls. So they are going to be
these cubes over here, and we are going to use those to basically close everything off nicely and just make sure that there's no light bleeding or anything like that. So it's going to be
quite a big space, so let's just go
ahead and do this. Let's go, and I need
to be a little bit careful with my window
because if I move it too far, I might be able to see
it from a low angle. Okay, so that looks pretty good. It looks like we can move it. So if we can move it
just beyond that point, yeah, that would be nice.
Okay, so we got that one. And now it's just a matter
of duplicating this. Rotate this 90 degrees
and just move this one way further back like this. And then we can also go ahead
and just do it 90 degrees, move one over here. And if you want, you
can make this nice. It's just basically to
block the lighting. Because we will have
these really big windows, so there will be sort of
like light from the outside, but I do not want to have
any light in here because there are no windows or
at least in my story, there are no windows beyond
that large window point. So basically just go
ahead, make this. So now it will look
really dark in here. Of course, there would be
a little bit light here, you can see that it starts to the GI starts to basically work. So now that we have this, now what I'm going to do is
I'm going to get rid of my light source,
my sky sphere. My sky no, I probably want to leave my skylight
and my atmospheric fog. So now it is just like a
pitch dark scene pretty much. Now what I'm going to do is
I'm just going to go ahead and because you can still see some light coming from here. Let's see in our skylight. Yeah, we don't really
need to do much in here. So what I'm going to do is because there's still
some light bleeding. I'm not sure Okay, that definitely comes
from skylight over here. So let's turn off my
skylight for now. And now what I'm basically
going to do is, first of all, let's go into unlit
mode that we can actually see sort of
what we're doing. It's not the best because all
of our materials are plain, but we basically just want to go to lights and we want to
create a rectangle light. And often in order to know which direction
it is pointing, I just change my barn
door angle over here, and then I can see like, Okay, so I need to move
this 90 degrees. Now I can go into lit mode. And if I set my radius
a little bit higher and set my source height,
also a little bit larger. So this is roughly where
the lights will be. So we are basically
just going to place these lights to already light
up the scene a little bit. So maybe like an intensity
of, you know what? An intensity of eight
might actually be fine. So let's go
ahead and do this. And we can just keep it simple white colour that
doesn't really matter. I'm just going to place a
few of these over here. And then I'm just
going to select them also place them over here. You can do another
one here if you want. By the way, if you
get this problem over here with the cost, we just need to
make sure that we set our lights to be movable so that they are included
into the real time lighting. So at this point,
I'm also going to go ahead and just duplicate
all of these and move them to the
other side so that now we have a few
lights over here, and then let's go ahead
and just have one more. Let's set our radius
a bit lower for this and also our
height a bit lower. Rotate this a little
bit, so there will be one roughly in this
area over here. And of course, I
will make this look correct once we actually have our textures
and everything. So we got this one let's set
the radius a bit higher, but let's set the intensity
to maybe like two. And then what I'm going to
do is I'm going to have another one that is basically going to be
like a square almost. Oh, yeah. Our light, of course, does
not shine through. So what we need to
do is we need to set the radius a little bit
higher for this, yes. And let's move this down. And I just need to
quickly go inside this scene and just go ahead
and delete these two edges, because, of course, in our final here and
then bridge them. In our final, we
will, of course, have a hole over here. There we go. Let
you do the trick. Let's go ahead and export this. Here we go. And then if you
go in here, re import this, and then the light should
be able to shine all the way through.
There we go, see. Maybe set a bit
higher just so that you get a little bit
of lighting here. And if you want, you
can also do the same. Oh, it was not completely
rotated correctly. But yeah, you can do
the same over here. Just don't do it too
much on this one, because in our camera reactor, we just want to give it
a tiny bit of light. So that we can see
like the inside. But over here, now you can see, so we very quickly just
play some basic lights, and you can see that that
actually arts quite a bit. And now our environment is
just basically ready to go for our actual final models
and final trim sheets. I'm just having a think if there's anything
else I want to do. Let's first of all,
let's push this in so that there's no
space left over there. Okay? We got that one done. Oh, yeah, one thing
I probably want to Let's select these cubes. New folder and call this
folder Light block, for example, select all of
these lights over here. New folder, and
call this lighting. And then our skylight you can see our skylight does
not really work right now, so we will work on that
a little bit later. So we got those done
reflection capture, I just want to check, and I can see that we need to make them a little
bit larger for now, I'm just going to leave
it at one for now. Later on I will place
like a few more. So we got this one, and
if you get this message, you just need to go
to build and then build your reflection captures to get rid of that message. And then the last one that
I want to do, by the way, throw this into lighting
is I'm going to go to create visual effects and
at the post effect volume. Let's go to my camera. And what we can do with this is we can control basically all
of our post effects, which are effects
that are added to your camera after
everything else. So it's things like
bloom, exposure, pretty much the same stuff
that you also have when you take pictures
with the camera, color grading, all
that kind of stuff. But what I want
to do is for now, first of all, just scroll down and turn on infinite extent. And what this will do is
it will just make sure that wherever we
are in our level, the post effects
will be applied. And then if we go to the top, we can go ahead and
go to exposure, and we want to turn
on these three. So the minimum and
maximum brightness, basically what they do
is whenever you look at a very dark scene and then all of a sudden to light scene, you can see that it takes
a while for the light to for the scene to be lighter. This basically because it is
trying to mimic the way that your eyes work if you move from a dark room
to a light room, but we want to
have full control. So we are going to set
this to zero and zero, which will make it
very, very light. But then if we use our
exposure contrast over here, we can now just have fill
control and we can set this to -8.5 in this case. There we go. So now if
you save your seam. Now it does not matter
where you are moving. It will always be
the same lighting, so we know what to expect. And of course, after that,
we will do this later, but you can play
around with things like your bloom and
everything a little bit, or maybe you want to, like, go into your color grading
and in your shadows. If you turn on Gamma, what you can do in
here is you can always make your shadows
like a little bit bluish, see, which already gives a bit more like a cinematic
feel right away. It's small stuff
like that, but all of this stuff we will
work on later on. One thing I do want
to do is over here. So the post effects, you don't need to
do as much as you had to do in Unreal Agent four because in
Unreal Agent four, there were a lot more settings. But now with the
new lumen system, all we really have
to do is go into the global elimation and I
like to set this to two. And in the reflections quality, I like to set this
to two just to give it a lot more of
a better quality. Save scene, and that's
pretty much it. So our blockout scene
is done and it looks pretty similar to
what we have in our reference over here. So yeah, that's quite nice. Maybe over here like this panel, it's a little bit higher. But yeah, you can see that this is also
slightly different. It almost looks like a this in our reference
in our this high, and then these ones, it looks
like they are scaled up. So if I have a look at this, this feels almost
too long for me. But this then again,
feels like too short. Maybe, let's see. Let's do this as one last thing. Let's set this a little
bit higher like this. If you want, you
can scale these, but we will do
this in our model, maybe a tiny bit
higher, like this. And now let's go ahead and
just quickly change our model. So what is it Beam 02 over here? With this one, I'm just going
to combine all of this. Let's reset up pivot and
actually, let's set up pivot. If you just go ahead and press Add a pivot and
turn on snapping, you can snap it
down to the bottom. So we are pretty much
going to scale it in here. And the reason I
do it in here is because the scaling
does not really matter, especially not for a blockout, but I do want it later
on for the final, just to make sure that our
UVs are not stretched. I want to make sure that, of course, the
scaling is correct. So what I can do is I can export this. Re input this here. And yeah, that's
fine. Like if I just move this down a little
bit, there we go. So that looks already
like a little bit longer. And then the last thing I probably want to
do is I just want to re add this to your layer. And let's just go into our door and let's just make a guess. That's pretty much
what I'm doing now. I'm just making guess to see
how long it needs to be. Like, not everything has
to be absolutely perfect. Often, you just
want to get results quickly because in a
production environment, you don't have time to make
every single thing perfect. Even if it only
takes 30 seconds, between what I'm doing
and like the other one, in the end, all of the
time still adds up, while I can just
do this, and I can then move this down
like a tiny bit. There we go. Then it
looks totally fine. Okay, so pretty much
we got these pieces. The only thing is that, yeah, this one is a
little bit thicker. We can maybe work on that when we start creating our final. But for now, this seems
to be pretty much fine. Yeah, although for the
thickness, honestly, you probably don't
even need to do it for the final because all we really need to do it looks like it's going in
here and push this one out. And push this one down. It seems like this is the only thing that's
really different. So if we just go ahead and
export this to be beam 01, yeah, you can also
choose to just in the final work a little
bit more on this. You see, so I can do this.
But then, of course, you get the thing that, Oh, yeah, but now the
door is not right. So that's why sometimes it's just easier to wait
until you have your trim sheets and
everything because all of these models we
pretty much need to remake since we are going
to use trim sheets. Your door in pot. There you go. Good enough. There we go. Okay, perfect. So
let's save your scene. And for the people that have seen my editorials,
I always do this. I always go down here
to my screen percentage and set this to 200,
just to give you, like, a sharp result, just to make sure that everything
looks nice and crisp, and then you can just
basically have a look. But this is looking fine to me. So what we're going to do
now is in the next chapter, we are going to start with the planning of our trim sheet, which is pretty much the
same as the planning for a blockout and then we are actually going to
create our trim sheet. So this is one of
the few tutorials where I first completely
create all of the textures, which is one texture, one trim sheet, and
only after that, I'm going to turn
everything to vinyl. So let's go ahead and continue with this in our next chapter.
9. 08 Doing Our Trim Sheet Planning: Okay, so let's get start with actually
creating our trim sheet, which is probably what
most of you are here for. Now, the step that we
are going to take now, which is our planning
is super important. Probably one of the most
important steps that we are going to do
because the plan is to create this
entire environment using only one single texture. Now, of course, I'm pushing it like you don't have to do that. You can use multiple textures
to really push the quality. But in my case, I'm going to sacrifice some
quality to teach you how to go a little bit more in the extreme
lengths of this. So what we're going to do is we are going to go ahead
and we are going to use this image and use the same technique as
our modular planning to plan out exactly the
layout of our trim sheet. So for this, we need to have this image loaded
into Photoshop. And what we're going
to do is we are going to create a new image, and we are going to
make it 40 96 by 40 96. So, yeah, we are going
to go for four K, but you can always downscale
it later on if needed. But I feel like with the
extreme amount of stuff that we are going to push
into this trim sheet, we just want to go ahead and
go with something like this. Let's go ahead and press Create. Now what I want to do
is I kind of want to start dividing this template up into let's say 512 by 512 areas. So I'll show you what I mean. The first thing that
we need to need to do is we need to go to view, and we need to turn on
our rulers over here. And you also need
to go ahead and I believe that in extras, also turn on smart guides. Yeah, and I believe
that's about it. Yeah. So the reason we want
to do this is because if we would go ahead and click on our ruler and just
click and drag, what you can see is
you can actually drag in over here like a shape. And what it will do is it will try to snap to like the center. So right now it's snapping, and then you can see that we get this blue line over here. So we can do the same over here and try and
snap it over here. And now we know
that this is 2048, 248, 248, and 248. Just like that, we can also go ahead and we can go to 1024. This one is a little bit
more tricky to get right. Oh, this is actually
more tricky than I expected because it needs
to be in the center. Well, it doesn't need to be
perfectly in the center, but I do want to
try and get that. Normally it does
snap, so I'm not sure here, if you hold shift, it can try to snap, but it does not seem
to snap properly. But this is no problem. It's
a little bit more annoying, but what you can do is
you can go up to view, and this is called the guide. So we can create
a new guide over here and just set
this one, 1024. Although normally I don't have problems with
snapping like this. And I also get the guide here. We basically need to
go 2048 plus 1024. So if we go view
new guide because that is 30 72, there we go. So now we are splitting
this up just like that. And then we pretty
much need to do the same way for these areas. So view new guide, and we need to go
horizontal, 1024. Few new guides, horizontal, what was it? 30 72. There we go. So now we
have blocks of 1024. Yeah, that's actually
fine. You know what? 1024 is fine. I don't need to
go even smaller than this. So basically doing this, it will just make
it a little bit easier for us to evenly
divide everything up. Now that we've done
that, what we need to do is we need to go ahead
and look in this image, and we need to see every
single texture that we need in order to basically
create this entire scene. So the way that we're
going to do this is very simple because
we've done it before. We basically go ahead and
we create a solid color. Oh, actually, first create the selection and then
create a solid color. So let's say that's over here. This is probably the
most important one, and it is going to be
like this white stuff. Um actually, let's first do this one because I want to have this one on top. So let's go ahead and
first do this one. So basically, select it. We once again give the color, but it's important this time. The colors are very important. So we give it the red color, and you can just go ahead
and, like, tone it down. And the reason why it is
important is because we are immediately going to go
ahead and go to this canvas. And here we can see,
like, it's not too thick. So we can go to this canvas. We can make a selection,
and we can say, Okay, so I want this
one probably here. Don't have it taking
up too much space. So I'm basically just guessing the thickness,
which is fine. I only want to, like, end
on every cube over here. I'll show you what I mean, because it's a bit
annoying to show you. So what I mean is
that now, okay, we have this red, and it
corresponds with this red. And now let's say that we
want to have the white, and we know that
this white area, because it's being used
almost everywhere, it is the most important one. So for the white, this is basically what I mean
that I go up here and I basically make
my selection and I end my selection pretty much
on the line over here. And what this will do is
it will just give us, like, a nice division. So we can go ahead and
we can go in here. What did I made that green
white. Oh, no, wait. I did not. Wong button. Solid color. Let's
make it green. Here we go. So now
we have these too. So now we can see that now
we already have this area, which is like, 25% filled up. But it is an important area. Now, another one
that I want to do is we have these
lines over here. You can see them very often, like a construction
line here, here, here. It's just pretty
much everywhere. This is quite a classic, like it often happens in Sci Fi. So what I want to do is I'm going to go ahead and I'm going to create a solid color. For this line over
here, fine, like that. Okay. And then you know
what I'm going to do. Actually, you know what?
I'm still going to include that into
the top over here. Here, let's make it
like a very thin strip, and I made it like
bluish. There we go. So we are just going to have this very thin strip that
we are going to use. So that's totally fine.
Okay, so we've done those. Now let's go at, and I always like to transition
it a little bit and, like, have now a row that's,
like, smaller details. And then if needed, we can add some larger
details later on. So if we go ahead
and have a look, um, let's do these ones. These are quite typical. So we have one of these
pieces over here. It doesn't need to be precise. We just need to match
the colors that we know exactly later on when we
are going to create this, which detail needs to go where. So we can do this one, and this is quite an
important detail. It's quite large,
quite important. So what I want to do
is I probably want to go ahead and fill
my entire space, and you can see that this
selection nicely snaps to this, and I want to fill
my entire space with this detail over here. What we will do is we
will make this tlable. What we can do later
on with our U Vs is if we simply
place our UVs here, it will just transitional and it will just become
a tilable texture, even though it's a
tiny tilable texture. Now the next one would probably be like these ones over here, but I cannot see them there. Let's just do it over
here. These ones. So this is another
one of those details. So what we can do
is we can go ahead and make this I don't know, pink or something like that. And let's do that
for the next one. So here we go pink. There we go. That's basically how
we are going to do our planning until we have
finished everything up. And the nice thing
about that we can always move things around
if needed, of course. So it just kind of
depends how much we need for this or
scale things up. But if you do not do this
planning and you just dive right into modeling, you will
probably have a bad time. Like, you will probably
just end up with, like, missing some pieces or having too much wasted space
and stuff like that. So the next one, let's
do some combining. So we are going to
go ahead and we probably want to combine
these details over here, so we have these ones. And this one, as you can see, it's pretty much the same at the bottom as it is at the top. So all we will need to do is we just need to
create the top piece, and then we can reuse this by
simply flipping it around. So we got this one. There we go. Let's do this. Then
we can go in here, and I'm just going
to go ahead and I'm going to have this like halfway, which is around 512. So if we just go Yeah,
that's good enough. 513 is good enough. So we can go ahead
and we can make this. What did I make it? Oh,
God. I already forgot. I think it was this
color white. Yeah, okay. So we got that one.
Now, the next one that we need to do is so
we got this det. This detail because
we are re using this, this detail, kind of, is
not that important anymore. So I'm just going to go
ahead and I'm trying to find another detail
that I can use instead. So yeah, this stuff just
requires some thinking. I think I'm going
to go this one. I kind of wanted to combine
this one with this top one, but I'll probably
do that later then. So we got this one over here. Let's make it like I did
not do bright yellow yet. So let's do bright
yellow over here. And we can just stick
this one next to it. Here we go bright yellow. And then we have one more left. And for this one,
I'm probably going to go ahead and do some
flooring and stuff like that. So let's go ahead
and for these ones, once again, this is
pretty much a mirror. So what we can do
is to save space, we only need really
like half of one. So we don't need an entire
tile. We just need half of it. And then what we can
do is in our UVs, we can simply flip it around, and then we can just
reuse that all over here. So we got this one,
which I'm just going to go ahead and
I'm giving it like a more darker red color. And then we also have this
one which kind of belongs to the floor. Over here. And let's make this one a darker olive style color so that we can go in here and we can once
again split this up. And I'm just setting this
around 512 over here. So this one was going to
be the darker red color. And then we are simply
going to fill this up with the darker olive
color over here. Perfect. So now we already
have this entire row. So we are already able to
create most of these pieces. Now, let's do some
long pieces again. So we have some quite
important ones. We have this strip over here, just like a color strip that shouldn't be too
difficult to make, but we still need to include it. So Actually, we don't
have purple yet. And then we have another
strip over here, which is just going to
be like this side strip. And let's go ahead
and make that. It's always annoying
running out of colors. So we have orange
and we have purple. So let's go ahead
and go in here, and let's get hoops. Come on. Sorry, that's
annoying with my but I'm hiding it so that you guys have more of like
a screen to see. So this one can be quite
thin, I believe. Purple. So we can go ahead and just make this quite thin and
make it purple. Then below it, we need quite
a thicker one. Matches up. And then I want some space left because there's one more that I saw that I want to do. So quite a thicker one, this is going to be our
Wow. Am I dad forgetful? Orange orange. Don't judge me. We are working with
a lot of colors. And then over here,
we have this one, and I can already mark it. So let's just give
it like a marking. Just trying to, like, properly. There we go. So
we have this one. This one will take care
of most of the flooring, and then this one will gum
like a special detail. Let's make it like dark blue, and this special detail, it's this one over here, because this strip with all of the edge damages
and everything, that's not something we can just do by changing our color. One thing, however, to keep in mind is that this white color, because it is white,
we can actually change the color based
upon the vertex colors. So it doesn't require
any extra textures. It just requires a little
bit of shader work. So knowing that, you can imagine that whenever
you see this white color, you can see it over here and just in like a
bunch of other areas, like also even over
here, like this stuff, we can simply change
it around based upon the vertex color so we can
change that color around. So this one was going to
be a dark blue color. And if you're not
yet sure what I mean with the vertex colors and
everything, don't worry. It's something that
we will, of course, go over a little bit later. So we have the dark blue color. What do we have left? Okay,
we have a small area left. One area I need to leave
open for the crate, which is just going to be a
512 by 512 oh, oh, even 1024. We even have a 1024
by 1024 texture. So this one, I need
to leave open, and let's just make it
like this type of color. That's just going to be
like for this crate. Technically, I
guess that you can also combine this
with other stuff. Like, you don't technically need to have a unique texture, but it will just make
it a bit easier. And I think that we
have the space for that. So I'm not too worried. So okay, another important
one is going to be these two. So we have this
panel and we have this panel over here.
So let's go ahead. Start with this
panel. Let's make it like a very light orange. And then we can just go
ahead and go in here. 5514 is fine. I don't really care about
small stuff like that. So we have a light orange, and then we're going to go
ahead and do another panel. And this panel, I will just
make it like another color, maybe like a light
pink color over here, and that one will take care
of this panel down here. So, you basically
need to think about how are you going to construct? Like, what are all
the textures that you need to construct
this environment? And right now,
because this takes quite a lot of thinking work, I might not be
explaining too much, but you should see what I mean because you can see
that with this orange, we can create this entire strip. With this purple, we can
create this entire strip. W is green, we can create
this entire strip. With this red, we can
create the entire floor. The white we can
reuse everywhere. We can use the white here, here, on our windows, on our sides, on here, on our door, we
can use it everywhere. And we can also turn
the white into like a darker shade down here, on our door, down here, if you want to have
brackets down here, so you can use it everywhere. This one makes a lot of sense. This one is just a simple panel over here that we
are going to use, and we can reuse this panel here and we can reuse it here. This one we just need to
have on these strips. So just like that, we can
just create more and more and more. So we got these ones. Now, let's see because
I feel like I'm forgetting something,
we got this one, so we can create this strip.
What am I missing here? Let's see. So this strip, this strip, we can
create this, this. We have those extra lines. We can create this entire thing. This we can just take from here, we can create the
entire flooring. So we will need to have
a generic section. And this generic section
will have, for example, stuff like let's go over here and this is just going
to be a random color. It is not marked, but basically
what this color will be. If we just go ahead and create a text and let's make
it like white text. We can just call this
random normal details in case we need them. So these will just be a bunch of random no map details
that you can use. And then we probably
also want to go ahead and we need to have
text and everything, but I probably want to just
use this one for that. Sorry. There we go. We can probably just
use this entire thing. So if we use this
one, and if needed, we can always just
go ahead and like break it up to get more. So we first of all, want to
go ahead and just go for some text decals,
which are decals, like you can see over here or sector 78 and these
kind of serial numbers. So that kind of stuff we
can use for text decals. So let's go ahead and text
and decals and maybe like warning signs and all that kind of stuff we can just use in here. There we go. So we got that one, and now we have this last little bit left. So I just need to make
absolutely sure that there's nothing else or that
I have forgotten. The white basically takes care of 80% of the
entire environment. That's just the case for this. Technically, you will
have the ceiling, but I can remember that we
cannot even see our ceiling. Here, we cannot even see it. And else we can basically
combine, on one. Else we can basically go
ahead and we can combine our white like an
even lighter color or a darker color to
create that effect. A missive, I guess, is one that you can do, or you can just create,
like, a plain material that has no textures in it. This strip, we don't need. So yeah, this entire thing, we can already create
this entire thing, we can already create maybe like some construction panels, but I don't think for us, that would be a little
bit of overkill for just the tutorial because that
would take a lot of time. So I think that I'm
pretty much fine. So we have, this tiny bit
of space left over here. So let's say that this space, it's just empty
space. We can use it. If we forget something, we can just add it on top of it. And that is pretty much it
because from what I can see, I cannot specifically see, like, a lot of extra stuff. Like, maybe if you want to create these panels,
you can also do that, but because we are re
using these ones up here, it wouldn't work
as well with us. Or, actually, we can add one
on top. Nah, you know what? No. I'm probably not
going to do that. But I will leave it empty just in case we want to
change something around. So we got our planting
over here. That's perfect. So what we can do with this
one is we can do save a copy, and we can just go ahead and
just save it as a PSD and call this trim sheet. Planning, and that's safe. Okay. And now, what we're going to do is
we're also going to go ahead and in here to save on this and call this
trim sheet layout. And then let's also go ahead and then turn off your text over here and save a copy
and save it as a JPEG. And the reason I'm
doing this, so also just call it
trim sheet layout is because we can
actually use this also as a mask later on the inside
of substance painter, because we will be
using substance painter to basically turn
this into final. So we got over here our
mask, so that's also fine. Yeah. I think that's
pretty much it. So what we will be doing
in next chapter is we will go ahead and we will start by creating
our trim sheet. We are first going to go ahead and do all of the modeling work. So whenever it is needed,
we will go ahead and model, and after that, we
will bake it down, then in paint will,
we will just go ahead and complete
the rest of the work. So that's a plan. So
let's go ahead and continue with this
in our next chapter.
10. 09 Creating Our Trim Sheet Part1: Okay, so now that we've done our actual trim sheet planning, and I've added them over here to our perforce perforce
to our Pure rev, I mean, sorry, pure Rf. Perforce is a very
different program. We are going to go ahead and we are going to actually
create them. So for this, I do want
to go ahead and create a new scene just because
this one is very specific. And all we need to do to get started is we need
to create a plane. Let's set over here our
subdivisions to zero. And then we just
want to go ahead, everyone to scale this
up, let's say ten. Yeah, ten seems about
fine over here. Perfect. So now that we
have this plane over here, what I'm going to do this basically will be
our low poly plane. It will be everything that we are going to
create for a trim sheet, which is going to be baked down from high ply to low poly. I will basically be
on top of this plane. So what we can do is we can move this plane down a little
bit more like this. And then what I want to
do is let's go ahead and just create an assign
favorite material. Oh, I think it's out of saving just when I was there we go. Assign favorite
material, Lambert. And just call this trim sheet. And then what you want
to do is in the color. You want to go to file and you want to go ahead
and we are going to open that 496 by 496
map that we created. So let's look trim sheet
layout over here, this. Perfect. And then if
you go up here and just press show textitw, there we go. So now we have our trim sheet layout ready to go over here. So at this point, we can pretty much just do like
some basic modeling. So we are just going to go
ahead and whenever needed. So for the modeling, we probably
need to model this one. We will need to model this
one, this one over here. These ones we don't
really need to, okay, maybe we can do, like some basic
modeling for that. This one we need to model
over here, this one. But yeah, as you can see,
most of these pieces, we don't need to
do a lot because a lot we can do in
substance painter. So for example, let's get
start with the first one, which is this one over here. Yeah, it seems pretty
straightforward. So what you want to do is you want to go ahead and
create another plane. And what we can do is we
can go to our segments. Let's set to zero. And then what I tend
to do, in this case is I tend to just
snap the points, snap my pivot point
to the corner, and then we can just go ahead
and go for snap to grid, and we just snap it to
this grid over here. At which point, yeah, you
can snap it like this. But then this one,
of course, it's not even because it's not
just like one grid point. So at that point, you kind
of want to just go to the top turn on textured view and
just move this back until it is pretty much
over here. There we go. So now we know that,
okay, so this one, this is going to be that
specific shape that we have. So it is pretty much just
like a bunch of squares. Let's see if we can do
this all in one go. So let's go ahead and just
select these lines over here. And let's go up here and
just like a connect. And let's set this to like we actually need quite
a bit of them. So probably maybe like 15. Now, I think even more 20. Let's do 20 and
press Enter. Okay. And then what I want
to do is I just want to go ahead and I
want to press Control B, and this will just
add like a fraction. So let's do 0.4. So yeah, this will
just add like a bevel. 0.4, 0.35 maybe. I don't want to
make them to tick. I also feel like that
there isn't. Well, maybe. So basically what I want to do is I want to go ahead and go in here, and I
want to tilt this. But we do want to go ahead
and make this tilable. So right now we have too
much space over here, and I can see that everything
is a little bit too thin. So what I'm going to do is I'm just going to go
ahead and do this, and I'm going to just
do another reconnect. It's a little bit higher. So probably see probably like
30 or something like that. Might be too much,
but we'll see. And then I'm just going to
go ahead and do a fraction. 0.5, for example, and then basically go ahead and
just grab the top, move it back, and grab
the bottom over here, and move that back so that
it is tilted over here. Now, once we've done that, so it looks like that
there might still be a little bit of space left here. So we will have to
see. First of all, I just want to go ahead and finalize this before we do that. So let's go ahead and
just select this row down here and that's two
connect segments. Actually, you know what? There
might be better way to do this over here because else
we cannot properly move it. So let's go ahead and do place two of them by hand like this. And now what we can do is
we can basically just, like, select this stuff
and extrude this down. And yeah, the only thing
I am a little bit worried about here because there's
too much empty space, but that's something that we can work on after I've
already done this. So let's see if I look at this, yeah, looks a little bit. Maybe s is a little bit more even than the
one in our reference, but that doesn't really
matter too much. We just want to go ahead and create an interesting detail. We don't need to
follow our reference one to one, in this case. So you just want to select
every other one like this. There we go. And now, because we are
going to turn this into like a hypol there's a few things that we want to do while we are scaling this. The first thing I'm going
to do is I'm going to set my excess orientation
to components. And then what you can do
is you can kind of, like, scale it a little bit wider like this so that we can
make it a little bit wider. Let's then go back to objects. And now, basically what
we need in order to turn this into hypole we need something
called super loops. I'm sure many of
you already know. Basically, right now, if you
would go ahead and press three to turn this
into a hypole, Okay, it's a plane, so
it doesn't really work. I'll show you later on. But
you basically need to Oh, God, I lost my selection. There we go. You basically
need to go ahead and you need to add some
extra spot loops. However, if we need to do this after we've already
created this stuff, it will be very time consuming. So instead, what I'm going to do is I'm going to actually, let's go to
components once more, scale this out a
little bit more. So we scale this out
a little bit more, and the reason we
do that is so that now if we go ahead and press
I have it set to Control E, which is short extrude. I don't know what the
original Hot key is for this. So just go ahead
and go to extrude. And then in the offset, if
you set is to like 0.1. Okay, that's too much. 0.01, you can see that we can create
a little line around it. Now, once we've done
that, what we can do is we can go ahead and we can
actually do another extrude. So let's do contre E again. This time in this extrude, I'm going to set this
to 0.01, Okay, -0.01. And then I want to once
again set my offset to 0.01 so that I give it
like a small bevel. The reason I'm
giving it a bevel is because if we make it
completely straight down, even though in real life, it is completely straight down, when we are baking from
top to the bottom, you will not be
able to see it very well while if I do this, and if I would now go ahead and hold shift and
extrude this down, this far, and then
extrude this down again. And you can see that the
reason I do that is to place an edge here
and here again. Now what you can see
is what happened is we have added all of
these support loops. So I will go ahead and I will show you if we
now, first of all, do one last Control
E, 0.01, offset. So now if I press three, you can see that
everything collapses. However, these edges
do not collapse. The reason why the rest
collapses is because we have not yet placed any support loops around here around the corners. So that's basically
for the spot loops. I do expect that you
like basic understanding of how those type of
things work if you are following a trim sheet to oil
because trim sheets often come a little bit
later after you already know the
basic workflows. But what we can do now is
we can go ahead and we can go in here and we
can do, like a double. Actually, why why do
I keep doing that? I mean this one. It's because I
just came from Max and in Max it works a
little bit different. But now what you can see here, if I also place like
spot loops here, now you can see the
difference that it does stay over here you can see that
the edges are still too round because we have not yet
placed any support loops, but for the rest,
everything looks fine. So at this point, you kind
of want to go ahead and place these edges over here. So this might be
a little bit time consuming because we have
quite a few of them. But we can just go ahead
and we can do this. And after that, we just need to make sure that the
timing is correct. And for that, we might need to move some stuff around
or something like that. I kind of like need
to see because it is very important that
this one stays tilable because we need to reuse it over and over and over
again quite often. I think with most
of these pieces, it's quite important
that we keep it tilable. So let me just go ahead
and just continue doing this until all
of them are done. Here we go. That's now done. Now if you press three,
which is a Maya, in Mx, it is turbosmooth, and in blender, it
is multi resolution. So it just depends on whatever
program you are using. But now we can see that that
is working totally fine. So from the top, you can see
that we get this pattern. So the next thing
that I would need to do basically in order
to make sure that it is tilable and I
can see that it is not because you can see that
we have a lot of space. But normally what
I tend to do is I tend to go over here
and snap two points, and I then basically snap this. So here we can see that, yes, we are quite a bit
off in terms of, like, how to snap this one. Now, what we can do
in this instance is we can try to add
a mirror over here. So if we add the mirror and
we are not so much here, let's set the
exposition to object, we are not so much
adding the mirror. Oh, no, wait because
the mirror would, of course, flip it. In that case, I'm
going to do this a little bit different.
Let's Uo this. So it's morning for me. I'm
still warming up over here. Cause yeah, the mirror would
be a little bit different. So instead, what I
need to do clone this, I probably just need
to push this back. Oh, that's the object.
Turn off my snapping. So I'm going to go ahead and I'm going to push this back over here to make it a little
bit more precise. I and now my idea,
although let's see. So these follow the same. What I had in mind is to
just go ahead and select all of this and let's
go ahead and set our selection to like
a lesser selection. So I just wanted to
basically select one of these pieces over here
and then just shift, right click and extract pass Where are you?
There you are. Reset or pivot. So the idea was that we just
basically continue this one on and we wouldn't
need to merge this together. But I'm not sure how
well this will fit Yeah, I'm not sure how
well this will fit. But basically, the goal is to just go ahead and
extend this out. And then if we go
to our top view, all we want to do
is we just want to mark where it is hitting
the end over here. And the way that we can mark that we are not able to do
it using a split slack, but we should be able
to just use a cut. If you just click on this
end over here and drag it, that's just past it.
Let me just zoom in. There we go. It needs
to be quite precise. You can be off maybe like a
tiny bit, but if you do this, what it will do is it will
just place this cut over here as you can see, see? And the nice thing about it
is that now with this cut, I can just go ahead and I can
just go to the other side. Oh, I accidentally press Undo. I meant to say, go to the
other side over here. And then for this one, you kind of want to
do the same thing. So we are basically just
going to fit this together. So we have this one, and all I need to do is I just need
to place this on the cut. And then we know that
they will transition correctly because they
are on the same side. There we go. And
once that is done, all we need to do over
here is let's just go ahead and let's select
pretty much all of them. It's a little bit sensitive
all of a sudden zooming in. So let's just go ahead
and combine this. What I first tend to
do is I just tend to press Control Shift A to select everything and then just merge go to Merge
Vert C. Shift click. And then in the merge RTC step, just at a low level,
0.005, for example. Oh, here, C, that's still too much because it's
really sensitive. 0.001 and just press Apply. And once you've done that, well, for this one, here, we can see that this
one is not correct. So then we just shift click and we just want
to clean this up. It doesn't need to be
super clean because we are not going to use
the actual geometry. I just want to go ahead
and make it clean so that I know that
when I smooth this, it will smooth correctly. So we got, for
example, this one, and I can see over here that
I probably need to then push this further out to the
point where it is sticking. There we go, like that. And then if you press three, you can see over here
that that works. Only over here, I
can see that we have a double vertz let's
just move this back. There we go. S. So
that one now works, and then it shoot over here. All we should need to do is if you go ahead and use
your target weld, which all of these tools
you can find in here. So this one is just,
Oh, well, it's actually called Target Weld. We can go ahead and oops, make sure that you only
have one selected. Let's go ahead and
just simply weld this together over here. There we go. And if we just
pass three, there we go. So now this all
transitions properly, so that when we bake
this down on this plane, it will basically
transition from this one, and it will just go ahead
and continue on over here so you will not be able to see
the difference between it. And that's basically going to be the general gist of
this entire rim sheet. We are just going
to go ahead and for all the models
that we need to make, we can just use this.
So the last thing. So this one, this
green plane over here, for example, for this one, we do not need to actually
have anything there. Well, we need to have a
plane there, but I mean, we don't need to have
any actual geometry. So all we can do or all we need to do is we
need to create a plane. Go ahead and set this to zero. And then all you really
want to do is if we go, do we have Okay, so well, it doesn't
really matter. So we do have a
vertice over here. So what I tend to do is I
do tend to go ahead and just set my pivot point if
it allows me to over here. But as you can see, so we do not have it perfectly aligned. So just snap it to the top
and then simply move it. So just move it just
beyond this point. The reason it doesn't matter is because it's just going
to be a flat plane. The reason why we need
this flat plane, however, is because else the Baker does not register
it as geometry, and it will just
give us an arrow. Well, not an arrow,
but it will just look strange in case we are using padding or
anything like that. So just safe to do this. Then once this one is done, all we need to do turn on
snapping again, hold shift, and then clone and move
this down because, remember, we have
another one, which is just like this very thin strip. So we basically just clone it, and we move this one down. And for this one, if we
go to our site view, it's always a bit
annoying working with really long
meshes like this. All we need to do is we just
need to go ahead and select the top and the side over here. Oh, oops, didn't mean to press
mirror. Let's try again. Select these two edges and then go ahead
and go to Connect. Press Enter so that we have
these two connect here and then we can use the scale tool to basically scale this out. Then once again, select
these two edge over here. Enter another two,
scale them out, but this time, just move it in. Oh, turn off your snapping. Here we go, and we
just give this, like, basically a
ridge like this. And that is pretty
much all we need. So now we can just
go ahead and we can just add some edge
loops over here. One here, another few
over here. Like that. So that when we press T, you can see that now it
has just become like this little ridgi over
here. Okay, perfect. So we have 25% of
our trim sheet done. Now what we're going
to do next chapter is we are going to
go ahead and get started with the
more complicated modeling that we have over here. But it is actually still
quite easy modeling. So let's go ahead
and save sin and we just want to go ahead and
save this as trim sheet. Yeah, okay, that's
fine. Save. And let's go ahead and continue with
this in the next chapter.
11. 10 Creating Our Trim Sheet Part2: Okay, so let's go ahead
and just continue, and we are going to get
started with orange, which is this one over here. So yeah, we're basically
just going to create this. Now, I'm going to cheat a little bit just
to save some time. And these handles
and everything, I will not actually be
modeling those because I have some alphas that I can use
inside of substance painter. So yeah, we will only go for pretty much like
quite easy shapes. So for the rest, let's go ahead. And what I like to
do with these is I always like to
start with the plane. That's often the safest
way to get everything to work properly and still
have everything tilable. So we go ahead and
create a plane. Set once again,
subdivisions to zero. And if we just go
to the top, nice. So it's exactly on the corner, which means that all I
need to do is I need to snap the points and snap
to the corner of my plane, and then just simply
snap it over here and go ahead and Oh, I see. So at that point, we are
going off track again, so we just need to
turn off snapping. That doesn't really
matter. So it has nothing to do with tailb. It's just that I'm twining
to keep it nice and precise just so that it
looks clean, basically. But in the end of the day, those few centimeters or
millimeters that are different, it honestly does
not really matter. So I can just go ahead
and do this. There we go. And now for this one, so it looks like we have
Let's for our version, do, like, two large pieces. And like two of
these large pieces, then have like a centerpiece, and then just have like
this console in between. Now, in order to keep
everything even, all we really need
to do is we are going to start by selecting
these two at your rear. Let's turn on our
wire frame on shaded. And I'm going to go ahead
and get started with two simple connect
segments. Scale these out. See, so we will have the
gap sitting over here. So if I scale these out, and if I then go in and add
another double connect here, have this one pretty
much on the end. So there will be some space over here that's
quite important. And then if we go ahead and do another double connect,
this double connect. So we are going to go for
a more simplistic version. We will not have this effect
that you can see over here. So this double connect, it will be oh, that's actually, maybe we can make the bottom one
bigger than the top one. That would be a bit
more interesting. If we do that, do we have space? Let's see. If I make this a
little bit thinner and move this up yeah, it does feel like I
have space for this. Let's scale these in
a little bit more. So these would become the
first double connect. Actually, that means that
I need to scale this out. So this one would become
a double connect. This one would become
a double connect, and then if I go and maybe
play something in here, that's the center console. It does mean that we will have
quite a bit of space here. We might want to go in and do maybe something
interesting over there. What we can do is we can
have the handles there. So this one, this one, this one, this one,
this one, and this one, they will all go down here
and here, and here and here, we would have a handle
or some console, and these ones would also go down and they will also
include something. I think that's quite
an interesting plan if we go for
something like that. So I'm going to go ahead and
I'm going to get started by selecting. Yeah,
actually, you know what? I think we can pretty much just select everything over here. And I believe that in this case, we can just extrude this down. We don't need to do any bevels because I'm going
to add them after. So if I just extrude this
down quite a bit, Yeah. Because the reason I want
to do the bevels after is because else we would break our tiling and
I don't like that. Now, of course, what you
can do is you can scale things after the fact. But what I tend to do is I
tend to just go in here, select all of these, move
it out a little bit. And then also go in here, move this one out a little bit, and then just do the same
for this side and for the other side and that
should be everything. There's a little bit
of trouble selecting the edge I want because
I don't know why, just because Maya
sometimes does that. Okay, so we got this
stuff going on over here, so it goes nicely around there. Then what we're going to do is we are going to first of all, hold shift and scale this in to basically give also like
a flat area around here. Then what I want to do is I
probably want to go ahead and scale this down and then
or extrude it down, then let's scale it in again and then just have it go all the
way down like that. So what we can do
with this version, is we can go ahead
and we can have these little consoles
in between here, so that should be totally fine. So we got that one. Now, this
one I want to keep sharp. But over here, I want
to go ahead and yeah, I think we only
need to do it here. I was thinking of maybe
adding a bevel around it, but I don't think it will
really art that much. So I just want to go ahead
and select these few pieces, press contre B to
basically go to our bevel. And let's give it
a few segments, like I don't know, four. And let's just go
ahead and add this. So we got those pieces done. We got something in here that we can just make
something interesting. Am I happy with that, or do
I want to change anything? I don't know. It might
feel a little bit too simplistic if I do
something like this. So maybe I want to
just create one extra. Maybe I just want to
basically select this. Let's see. What if
I move this one? Oh, I don't know why
I'm selecting it like that when I can just select
all of these vertices. Yeah, that might
look nicer if we go for something like this. So it is like a
little bit thinner. Yeah, you know what? I
think I'm going to do that. It's not that much extra work. So let's go ahead
and just create these lines and then just double click on the line
and scale it flat to make sure that everything
is just completely flat. And then I'm just
going to go ahead and I'm going to roughly make it like the same size, and let's move this also
back over here and see. So that looks, that
looks about fine. So let's just go
ahead and move this down and let's scale this in
and then just grab this one, scale this in a little bit, and let's scale this
in a little bit. Also, if you want to go
more precise than me, you can go ahead
and you can go to your side view in which you can twin and see if
it's just both of them. I can then go to, like, CitroVew just to make sure that
everything is fine. Oh, wait, that's the
wrong side view. I think I need to go this one. Yeah, or C. And
then you can just basically match it up with the ones that are
sitting in front of it. So now we are sure
that is looking fine. Yeah, I think that this
works a little bit better. I'm not sure if we then
want to go ahead and maybe do another contro E and
then set the offset to 0.1. Um, that might be interesting, but just give it like
a very thin slip. So let's not make it as deep because then it just
becomes too generic. I do want to try and get
some variation in here. Now, most of the variation will come in substance painters, so we don't need to
worry about it too much. But let's say that we
now have a pretty base. Yeah. Like, that should
work totally fine. So what I can do is
I can already go ahead and turn this one
into, like, a hypol. So let's have a look. Let's
add some supporting loops. Yeah, these edges here are going to be a little
bit more annoying. So let's first of all,
add some simple loops. Around here. And same over here. So yeah, place it quite
close to the edge. So that's when we select three, then it will not just,
like, collapse into itself. So we got this one. Let's do only one over here. I think that's enough. This one, and just on all of these,
let's just go ahead nicely. Laser Edges, one over here, another two here, and here. Okay, so we got those done. Now for these pieces, let's
go ahead and first of all, let's go into our modeling
toolkit over here, which you can also
find I don't know, Windows modeling editors, and then here is your
modeling toolkit. But I'm sure most people
already know this because yeah, this tutorial is not about
the basics of modeling. So let's go ahead and
let's select these two. And let's do contra E again. Set the offset to 0.0. Okay, 0.05 weight 0.01. 0.015. There we go. That we just instantly create
a loop all the way around, which will save us some time. And then what we can do is
we can just go ahead and create a few more
loops over here. That's a nice thing about using symmetry or having a
symmetrical model, as you say, we didn't
actually use symmetry. But, yeah, it just
makes it easier for us to basically place
all of these loops. So we got these ones and they
will basically end up here, but that's totally fine because what we are going
to do in this one, oh, I forgot to
add the loop here. Did I add it over
here? Yeah, I did. Okay. For this one, let's go ahead and yeah, for this stuff, we can pretty much just do another insert. So we can just go Console E, 0.015 or something like that. But for this one, in order
to not make it collapse, we need to go ahead
and use a cut tool and we just need to
place another edge like this because if we do not do
that, you can see that here, it starts, go a little bit
too round while over here, you can see that it just
stays a little bit cleaner. So since this needs
to be tilable, I do think it is
best if we place this little extra cut here
and also on the other side. Come on. There we go. Okay. So we got those done.
So now if I press three. Oh, yeah, here, over
here, you kind of, like, had the same problem
where we just want to place a very quick cut. I believe I only need to
do it also on this side. Oh, no, wait. Also on the ends. Which means over here also. That might be a
little bit tedious, but it's still faster
than us trying to place a lot of custom
lines around the top. And what we can see
is we can see if this actually works the
way that I wanted to. And then I can just create
those center consoles, which we only need
to create one, and then we're just going to
duplicate it over and over. Okay, so here you
can see that you sometimes get this broken edge. That's once again something
you can fix just by placing another line over here and
then Oops Wong button. Another line over here,
and then it will be fixed a little bit better or if that still doesn't
do the trick, just place a line really
close by like this, and then it should be fine. We can have a little bit
of playing around with it. It doesn't need to
be as super precise. So I guess in this
case, we do need to go. Sometimes the snapping is
a little bit annoying. Yeah. We can just zoom in, but we don't have
to go crazy with, like, getting this
to work perfectly. Because you will never notice anyway. Okay, so we got those. Let's turn off our wire
frame so that I can see. Yeah, that looks
pretty much fine. Okay. So we got that
hypol over here. So now all we really need
to do is save our scene. Let's create a cube, and now we're just going to
create this console, which looks pretty basic. So it doesn't look like it
needs something very special. So let's go ahead
and go in here. Let's scale this and just have it kind of like
so these locations. Let's go in here, let's push
in to roughly match scale. Yeah, we will just have this
one on the end over here. And if I have a look at this, it pretty much looks like
something like this, like deleting the bottom face, selecting the tops,
and then doing a quick bevel all
around, maybe at 0.1. And then it looks like
it just basically has a bunch of little buttons, which I believe we
can also just create simply by going down here, so let's create an edge over
here and edge over here, another one over here and
over here just so that we are away from the ends. Then let's do another
one here, here and here. And here, so there will
be two gaps in here. Then let's go ahead
and do a double connect Triple connect maybe. Let's do triple connect. Control B them at like 0.1. So now we have some buttons
over here that are not completely straight or
square, I should say. So what I'm going to do is I'm just going to go ahead
and first of all, let's move this out so that it matches a little bit better. And then I'm just going to go ahead and grab these and just scale them until they are
a little bit more square. And what we can do is we can
simply move these oh, sorry. I forgot to do something
before doing that, and that is that we add an
extra quick line over here. And now we can just go
ahead and make this square and then move it out
of the way temporarily. Make this one bit square, and let's line this one up in the center of this thinner line. Let's try to do the
same over here. So it's roughly in the center, and if that does not fit, we can always go ahead and we can move this entire thing
out a little bit more. Okay, so we can push these down. We can push these down,
and then all that we have left is if we just go
ahead and select these, let's do like control E
at like 0.00 0.01, maybe. And then let's also go ahead and just make these a
little bit thinner. So that when we are done, we can select all of this stuff. So we have some bigger buttons. We have some smaller buttons. We have these ones over here, and then we can just
go ahead and we can extrude this
in or even better. Let's do Control E extrude. And let's push this in and
then also give it like a small offset of 0.01, maybe. Let's push it out
a little bit more. There we go, just to make it
read better on our norm map. So as you can see,
yeah, it's just like some random
different buttons, stuff like that, there's
nothing too special. Do I like? So over here, I will
need to select this, and I do want to make this
also properly square. Let's see, we have
these two over here, so I mean, from a
distance is fine. So this is a little bit
interesting that we have these smaller bits. I think one thing that I will
do is I will go ahead and I will delete these faces. And let me just turn this into by merging them into
a longer piece again, just to add a little
bit more variation. But we cannot go
too crazy because these pieces will be
repeated very often. So we just want to make sure
that this works correctly. So here, let's do
something like that. That looks fine. All we need
to do now is turn this into hypole let's go ahead and
just add some sporting loops. S, one here, let's do
just in case one down. I'm going to probably
leave my bevel to make it extra
smooth because if I just do not add an edge here, it will just smooth
that little bit extra. Then over here on the inside, we can also go ahead and
we can just place like a single Go a thing like this. Let's play a line here. Let's place another line here. Another one here, here. And, we already have that line, so we need another one
in the center here. So, this one is going to
be quite a smooth object. So that also makes it a little
bit simpler. Let's see. We kind of need a
line around here, but oh, no, wait, actually, we need to
have multiple lines. So that should be fine. If
we just run them along here, that should be totally fine. Et's not forget this side. So it might look a
little bit messy, but let's see, one more here and one
more here, I believe. But if we then press
three, here we go. So you just get like this
quite smooth looking console. I can see that over here. I just want to go ahead, use my cut tool to basically continue on this line
because it broke. And for the rest, that
seems pretty much fine. There we go. Yeah, that works. Let's for now just
press on that we do not have the smoothing turned on,
and then just hold Shift, move it over here, and
then just shift the it so that we basically
exclude it enough time. So let's see if
it is this large. Do I want to have one
less or one more? Let's have a look
from like the top. I probably want
to have one less. So let's make this a
little bit more clear. So what we're going
to do now is we're just going to go ahead
and select everything. And a nice thing
if you just want to go for very
precise movements, if you go to the form
and Lettuce lettuce, I don't, I don't
know how to say it. But basically, this
one, what you can do with this is you can go at a right click on now I feel self conscious
about how to say it. I'm just going to call it
lettuce, like the vegetable. So you can just go
ahead and select that the lettuce point. I know that I'm saying
this incorrectly, but sorry about that. So what I can do
with that is I can do some very precise
scaling like this, and it will scale
everything evenly, which sometimes works a little bit nicer compared
to just trying to use your gizmo or your
pivot point, I should say. Once that's done, if you
want to get rid of it, just simply clear your history. And then it's just a matter of pressing tree again on them, and that should be all good. So we got these pieces. And as you can see,
that's pretty much it. Because all of the handles
and everything will be done inside of
substance painter. All of these lights
and everything will also be done inside
of substance painter. So this is pretty much it. That's all we need
to do. Now what we can do is we
can save a scene. And in the next chapter,
we will just go ahead and we will continue on with
this one over here, which also has a lot of substance painter stuff
with all these things. And after that, it should be very easy to complete the rest. So let's go ahead and continue with this in the next chapter.
12. 11 Creating Our Trim Sheet Part3: Okay. So what we're going to
do now is we are going to go ahead and create like the
one that you see over here, but you can also see it
down here and over here. So it's like basically
this panel over here. And once again, we do
not need to create the handles or the in between
stuff and things like that. All of that stuff is taken care of inside of substance painter. So we are just going to go
for quite a simple pattern, and we're going to get started probably with
the simple plane again and set the
subdivisions to zero. Let's go ahead and just
snap our pivot to, like, a corner over here so
that we can snap this. There we go. Let's go to
our top. Here we are. And I'm just going to go
ahead and well, if you want, you can still hold
snapping on and do this, but it doesn't really matter because we need to go
off snapping anyway. So let's go ahead and
just zoom in and get it pretty close to what I want. Come on. That's not what I want. That's what I want.
Okay. And then if we just go ahead
and go over here. So yeah, basically, the
cut off will be here, and then whenever
we have a model, we will simply place an
edge for this model, and then we will just start
the UV again on this side. So it is tlable. It is almost like
a tillable texture inside of a much larger
tilable texture. Which is not completely tilable
but you get what I mean. So this one I'm just going to end here just nicely
in front of it, and that should be fine.
So we got this one. It will just end over there. And it looks like it is
like three gaps, space. Okay, yeah, it looks like a
weird thing, another one. Okay, so that's try because
we need to go even. So Oops didn't mean to do that. So let's go ahead
and start with like a double connect over here. And see this double
connect it will basically take care of the ends. So it will just be flat. Then another double connect. So this one will
be the three gaps. Oh, yeah, see, we don't have as much space as you would
want to have over here. Like over here, because
everything is long, there is a lot more space. Now, you can twice
fit that in here, but I feel like we don't really have enough space in our
trim sheet to do that, so I'm just going to improvise. Or if you want, you can, of course, create
two trim sheets. You can, for example,
create one that is only for long pieces and then have also these pieces as long pieces. And then you can have
one like small details, and maybe for the second one, if you want, you can make it
just like a lower resolution to still save a lot
of texture space. So that's all up to you. I'm going to do is I'm going
to probably leave mine here. Let's do contra B,
0.05, probably. So just give it some space. Okay, so that we'll take
care of those gaps. Now I'm going to actually, I need to make this a little bit wider. Going to have one here. And then I'll do
another double connect. So these ones will become
these bits over here, which means you would
have one thing left, but that feels like too
much space to have left. That's an interesting
one because I do want to, of course, have this handle
in between here, but that would become a very
large handle if I do that. So instead, maybe let's do a small connect also over here. Oh, yeah, I have an idea. I have an idea that we can do something that looks
hopefully interesting. Let's get started by first of all, we need to
go to this side, and we kind of need to do
the same where we just have a double connect to end. These ends over
here, that's fine. Now let's go ahead and have
another double connect. And this one will basically create like those squares that I have over here like that. And then what I had in mind
is so for these pieces, what we can do is so yeah, you can insert it, but I don't know if I
want to insert it. So you can do contra E, and then you can turn off,
keep phases together. And when you do that, if
we set it to like 0.1, you can see that it
will basically insert, but it will do it
all separately. I'm just worried that over here, I might create a little
bit too much space. Let's do 0.02. Now, I
need more space, 0.03. Yeah, know what? That
should probably work. So once we've done
that, we can go ahead and we can do
another contra E, push this down, and
then once again, give it an offset of 0.05, a little bit more, 0.1. That's too much. 0.06 maybe. And see, let's push it down. And then, of course,
we will make the corners round
again later on, just like you can
kind of see over here. So we got this one. Okay. Now, what I'm going
to do is I'm actually going to go ahead and
I'm going to make this a little bit thinner. Oops, I deselect it.
Let's try again. Let's make this a little
bit thinner carefully. So just create a
little bit more space because it also looks a little bit thinner
in our reference. And now, what I had in mind
over here was for me to place one loop in the center
or Galaxy, two loops. And what this will do is it will basically create an opening. And then I had the idea
that for this one, and let's see this one. And then for this one,
I only want to do this. So we have almost like
a different space. So as you can see, it just has
like a bevel near the end. So it would basically be
something like extruding this up not too far. I wouldn't go too far,
like this. And let's see. Let's give it a little
bit of a thinner scaling. And then my idea was to just
simply here, scale it in. But let's actually do this one and this one
at the same time. Let's give it a bit
of a thinner scaling, and now just grab these
and scale them in. And, of course, we
cannot do that with these ones because there
is a gap in between, so that it would just
mess up the scaling. But for this one,
that's no problem, we can just go ahead and
select them separately. Oh, hello, do I
have a double edge? Oh, no, I must have accidentally clicked something that
created the double edge. So I just undo that. Undo Define is your friend over
here. Here we go. We give it a little bit
of slope like that. Yeah, once again, the reason
that we bevel is that it is easier to see from the top and then it will
read a bit better. Now what we have is we
have enough space for some handles over here and over here and maybe an
interesting detail in here. But of course, that
stuff, once again, we will make it inside
of substance painter. Okay, so that is looking fine. Now, at this point, you
can kind of choose if you want to place your supporting
loops before or after. I think we have to
place them before because else we can no
longer bevel these corners. So I want to give these corners
like a nice round bevel. So that means that
we just need to do the insert technique that we also used in the other
in this piece over here. And this one probably does require a little bit
more manual work to get it all looking
correct in our hi pool. So let's get started
by just doing this. We do not have a lot of space. So let's just see
how far we can go. Okay, yeah, that's fine. Like, yeah, yeah,
I'm fine with that. And the nice thing is
because we have inserted it, the edges will
basically stop here, which means we are still able to place loops like that, see? So we can still quickly
place like some loops. So I'm just going to go
ahead and I'm going to place them on here. And just like near the side. So that should take care
of this loop. Over here. Over here, it should
not be needed, but just in case the
edges start to flare up, let's go ahead and just
do another one here. These loops are quite basic. You just want to go
ahead and do this. And then on the insides,
we are just going to select our faces and inset them. So this is probably the last difficult
thing we need to model, and it's definitely
not difficult. So it should be quite easy. Once we've done this, it should be a breeze to
get the rest done, and then we can just
go ahead and we can start baking everything. Yeah. And then everything
comes together. Wait, I think you already have a pretty good concept of
how the trim sheets work. So I'm sure many of you
that bought this story are probably not even
watching me anymore and just continuing on. But if you are watching, hello. Nice to see that
you're still here. So let's go ahead and, you know, 0.01 in the offset. B, we are just nicely going
to finish this all off. We need to place one loop here. Another loop over here. Oh, also, by the way, in between, another loop here. We also need to place
two loops near the end, and then we need to loop
them. Oh, this is nice. When I created my prototype, because I did do a prototype for this because as I said before, trim sheets create
a lot of planning. But when I create like
a quick prototype, I messed this part up
and I actually did a lot more effort into this specific model. I
can still remember that. But in this case, all that should be left is an
edge around here. But what I always like to do
is I always like to see if it's really needed
because often, it is already smooth,
it is quite smooth. So you can have a look at
the difference if you want. And what I recommend
to just very quickly do because yes,
you can insert it. Or what you can do is you
can just very quickly place a simple cut along these lines just to see if
it is worth the effort. Because this probably
would be the cleanest way of doing it here. So I basically just create this edge. So here you can see. So this one is a bit sharp, but you can see that it
also starts breaking, while this one is a bit
smoother and you can see, like I don't see enough difference for me to justify spending
the time on this. So I'm just going to do that, and I'm just going to
basically leave it like this. The only thing that I do
want to do is over here. If you ever have this kind
of stuff that it breaks, easiest method I found, it might not look very nice, but it is to simply
place a cut like that. So we just basically
create a circle, and that just kind of like holds up your geometry so
that it does not break. It looks like that we
need to do it probably on every one of these
corners over here. So we got this corner. And the last one is
going to be Well, not the last one, but the last side is
going to be one here. One here, and you do the trick. Yeah, that seems about fine. Okay, so this one is pretty much done. That's looking good. Great. So let's save our scene. And that actually
went really fast. So let's go ahead and just
have a look. What is it? Like, Okay, this stuff, and next to it is this stuff. This one, we can do
completely inside of painter. This one yeah, for this one, let's just go ahead and just
create like a quick model. So what I'm going to do is I'm just going to go
ahead and I'm going to create another plane. Oh, it's sometimes
annoying when you accidentally have an
object load selected. Here we go another plane,
and let's have a look. Is there a grid point? We can Okay, yeah, so we have a grid point, which means that I can just
snap my pivot to the corner. And then I can snap it to
this grid point over here. And for this one,
I do want to go ahead and just keep it
as two separate planes. It will make it easier
for organization. So let's turn off a snap but we can just reuse
this plane later on. So I'm just going to kind
of, like, leave it in here. I just don't really want to have a gap because if I create a gap, there will be a black line
when we start baking. And yeah, just that black line even though we will most
likely avoid it in our UVs. So trim sheets are
actually quite flexible. You never know that
it might still break or anything like
that. So I got this one. I'm going to just snap
once again to points, and I'm just going to hold Shift and I'm just
going to clone this. And then I just want
to make sure Oh, turn off snap to points. Yeah, okay, so that
is all totally fine. And actually, what I can
do is, you know what? I'm just going to
go ahead and also duplicate this two more times. Okay. And here I
can see it falls outside of the ring a
little bit too much. So let's just go ahead
and just push it back in. Yeah, that should be fine. So, oh, no way, that should not
be fine because I forgot that we need to go
very precise with our mask. And the reason we need
to go very precise, although this looks
very precise almost. The reason we need to do it is because we are going to use this mask later on in
painter to select stuff. So that's why I want to
just make sure that this is actually like it doesn't need
to be absolutely perfect, but just get it quite
close. Okay, great. So we got these pieces. I'm going to get
started with this one, which looks like it is just
like a weird random shape. So let's go ahead and see
what we can make out of it. Let's give it quite a bit
of space for the top. Let's not make it too thick. And then let's go ahead and just place like a double
connect selection, scale it out, contra be it. I don't know, like 0.3. And then maybe
like place another bit down here and another one over here that just kind of extends out of it. So that we have that general
shape that you can see. So I think that this one
scale this in a little bit. Let's make it a
little bit thinner. There we go. And once
we've done that, all we really need
to do is let's do Control E, extrude this down. Set it at offset of
zero pen 00.02, maybe. Here we go. So we
got that one done. And then you can see
that it has some little lights over here, we can pretty much also do that. So we've got this one done. For the lights, pretty much
just create like a cylinder. And let's just hold
J to snap rotate it. And let's just go ahead
and, you know what? Actually, I know better one. Let's create a sphere instead. Yeah. Let's do that. Let's go to our side view because with
the sphere, what I can do. See, let's probably rotate this. Yeah, it will look nice
if you rotate this. Just create a quarter like this. Control it I to invert your selection, just
delete everything else. Because what we can
do with this one is if we just go ahead and select this out end over
here, we can extrude this. And then if you just go
ahead and you want to mirror this on the Actually, set your merge threshold to
0.01 to make it quite low. Was it on the X axis? Maybe if we flip the direction. Wait, let's have a
look at it like this. Okay, not the X axis. YXs? No. Z xs. Yes, in the minus. There we go. Okay.
That's what I meant. So ZX is in the minus and
then you can just move your pivot until you
get the correct shape, get rid of that centerline, reset our pivot, and now it's just a matter
of scaling this down. Et's rotate this. There we go. So it's just like a
little light over here. And we are just gonna go ahead and we are
going to place this. Let's not make it too big. Let's move it out a little
bit using our frutss. And let's just move
it into our surface. If you want, you can press tree. It does not really matter
too much for the shape, but it might be nice to just have a little bit more geometry. So we've got this one.
So those are the lights. We can actually in our texture, we can make it light up
using an emissive channel. And for this one, honestly, all we need to do is just
place a support loop here, here, and on every
single corner, and then this will
work totally fine. Oh, more corners
than I expected. Oh, wait. Another one on the
outside. Let's not forget. But for us because it's a plane, it does it will not
really change, see? So the corners like they should stay pretty
much the same. It's just for this
stuff over here. Oh, forgot one more line. You can right away, see
if you forgot a line, so that's nice. There we go. So we got that one
done. That's also fine. The next one was going to be
all inside of subs painter. This one, it was like this Oh, okay, so that's the floor
and that's okay, those two. Because those two take
a little bit longer, what we will do is
we will pick this up in our next chapter
where we will be creating the floor and all of these long pieces,
and who knows? Maybe we will actually
already finish everything. So let's just go ahead and continue with this
in our next chapter.
13. 12 Creating Our Trim Sheet Part4: Okay, so let's go ahead
and just continue by creating over here,
starting with our floor. So you're basically going to
create like half the shape, and then it will basically
be used all over the floor. And then for this one, I'm going to show you
a new technique, which AS old school technique, but it will work great
for this kind of stuff. So let's keep that in mind. Oh, yeah, and there's, like, some spaces, so that's handy. Okay, so this one,
it's very simple. Let's go ahead and place. I don't know how much
space we need to have L half a thing, so probably like
this much space, just give yeah, that
should be fine. So remember, this will
become like a black line. See? So I just want to see, like, roughly how thick
those black lines are. This might actually be
a little bit too much. Let's move it down a
little bit. There we go. And if we then go ahead and
just select these sides, we can do a double connect, and let's this one
is going to be Well, it feels like it has
more space in between, but I also need to take into account how it looks
on the other side. Of course, you can just
create two tiles if you want. Technically, we would
have space for two tiles, but it would not really be
worth it for this environment. So that's something
you can choose yourself to plan
out. There we go. So we got this one over
here that is fine. And now all we
really need to do is we need to go ahead and
extrude this out, I believe. Yeah, so all we need to
do is just extrude this out. Not too tick. And then we need to
grab this corner, and the reason we do it now is because it's easier to bevel something when it
is already extruded out and do a contra B. And then at this point, if I set this higher than one, it means that it
will start clipping. But at least then I can go
for, like, a stronger bevel. Four yeah, let's do four. And now, basically what we
want to do is on this side, let's delete this point, and let's go ahead
and just isolate this because as you can
see, whenever you do that, it will extend the bevel
beyond our corner. So we just need to
go ahead and use the target well to
basically push it back in. See? Like that, and
then it's clean again. And what I'm going
to do in this case is I'm just going to
go ahead and give it a very slight movement. There's nothing too strong. There we go. So we got
a very slight movement. So that should all
be totally fine. At which point, it is probably time for us to just
turn this into hipoly. Let's place like one loop over here. That's
probably enough. Oh, this one is a
little bit annoying. We can actually fix some of this geometry by placing
a cut from here. Down to here. So when you do that, now
if you place a loop, you can see that the loop
does sort of go around it. Although over here, it's
kind of like breaks, so we probably
want to move this. Yeah, it goes around it
because now there is a connection in between.
So we have this one. This one, let's press three. Yeah, it does not matter, so we don't need to
do anything on that. Let's go ahead and
select the stop faces, Control E at like an offset
of 0.01. There we go. What that would do is it
would go over here and it would break
things a little bit, but we need to be here anyway because then we can just place a loop this NA loop like this. And the same over here, we just create one
here and here. And at this point, yeah, this one is a
little bit annoying. You know what? I'm just
going to do this by hand. So I just basically want
to place a loop around, and I'm actually going
to just place one here, and I'm also going
to place one here. And the reason I do that
is so first of all, I can just add a connection like this and like this far corners. But also because I feel like I need to just
select this one here, move it out a little bit because else I don't have enough space. And then we just basically
continue on to the end, Like, it looks like
an easy shape, but it's technically still a little bit annoying
to work with. But yeah, what we can
do is we can it now, just go ahead and place another circle around here
just to close off that corner. And then for this
one, we don't really need to do an entire circle. Yeah, but let's just connect
this because else it feels a little bit like
virtue is not working. Oh, yeah, we need to go in here. Just give it like a very
quick connect. Come on. There we go. Yeah, I'm fine with the corner
being a little bit bent. I am not fine with this, and it is most likely
because I oops. As I said, it's a bit
annoying to just select this. Come on. There we go. Because it's like
a long flat shape. Okay, so if it does this,
that is sometimes annoying. It might look messy, but just
go ahead and see if you can place a bit more geometry
that is a little bit longer. Let's try it again. Oh, it does not want to
place my edge here. That means that there
Oh, no, there we go. Sometimes that means that
there's like double vertices. But here, see, because it's
now a little bit longer, it just has a little
bit more space to catch up, and that's pretty much it. Oh, wait. We probably need
to do the same over here. So it was just like, a little
bit too long or too short. There we go. Looks totally fine, especially from distance. Now for this one, this one, it looks like here, it has like these
shapes over here. It has a dent. I'm not sure if I want to do. Yeah, I might want to do that. Yeah, I might want to make
this like an extension. So if I want to make it an
extension, we first of all, need to go ahead and almost create something
similar to this. So let's do it like
a double connect and give it a little
bit of space. Let's actually C. I want
to give a bit more space because Yeah, there we go. And now the question is, is one of these
panels long enough? Yeah, because they are
just as long as this. So they should be long enough, which means that
all I need to do is also just place double
connect over here. We basically extrude
this up and then we can make the corners. If we just go ahead
and extrude this up, this will just become one panel, and then we can also go ahead and we can
make the corners. If you just double click,
we'll just ring around. But let's not make
these too large. Let's do maybe
two, set them two. Then let's go a isolate this because we just need to
quickly fix this stuff. This might actually give
us cleaner geometry if we only normally I just
merge it all together, but after just doing
that last piece, I'm a little bit bored to
just do the same thing again. But this might clean our
geometry. Let's just see. So first of all, for this one, let's give it once again,
like a little bit of, like, a bevel like that. Let's see. Does
this? Okay, nice. So this follows the
geometry just fine. And then this one,
of course, broken, but that's no problem
because what we can do is we can just do Control E on this because we are not actually going to
have the shapes in here. We are going to
use something that I just call floating geometry, which is basically
we are going to fake our geometry in our baker. So in our Baker, our
baker will think as if that geometry is sitting
inside of our geometry, inside of our panel,
I should say. But in reality, it is just
floating on top of it, because it has a very thin
edge that is sticking out, I'll show you what
I mean with that. It will look as if it
is sitting inside, but it just makes
everything a bit easier. So we got this one here. See, that's a little
bit easier to already turn into high poli
so I'm fine with that. So for the floating yum tree, it looks like we
have like two rows. So what we need to
do is we need to go ahead and get
started by actually creating one of these
what do you call them? Tents. So I know there is an English word for
them. I just I forgot. Sorry. So I'm going to go ahead and just
create a simple cylinder. And for the cylinder, white way, just cut the bottom off and cut one of the
ends off like that? Grab this end and extrude this. It's very similar to
how we did the light. Let's reset our pivot, throw in a very quick mirror on the object in the plus
direction. There we go. Get rid of this center
line over here. And now, the first
thing that we need to do is let's reset
our pivot again, and we need to scale this down and place it somewhat
close to the location I want. Okay, let's go ahead and make it like the
width that we want. So that's looking pretty good. And then basically go ahead and select your rt
season and then make it roughly the size
that you want. So this size we still need to figure out a little
bit more later on. But the goal for this on how to make this
floating geometry, because right now it's
just like a plane, so the lowest level is a plane. If we go ahead and we select
this out of sight over here, and we would extrude this and give it a little bit of a bevel because else we will
not be able to see it. And so, you know what? Let's do this a
little bit further. I'm making this way too small. A little bit further
so that from the top, you can see like this bevel. And now the twig is that
if we now press CtraE, we want to basically
extrude this out, so this becomes flat. Now, as you can see, it's
not completely flat, so just select this
top and just scale it flat because from a top view, if I turn off my geometry, this is basically what
the Baker will see. And you can see
that it basically just blends into the background. So especially when
we turn this into a hypolet we'll do
that even more. So if we go in here and we add a spot loop, say, here, here. Let's also add one on the
ends over here and over here. And I believe well, I don't know if
that's really needed. Yeah, you know what?
Let's just leave that. I quite like that it
looks this smooth. And then if we place it
very close to our geometry, you can see over here that
it will look totally fine. So at this point, all we need to do is we need to go ahead and copy this over and give it like some little bit of space
like we have over here. And then we basically
if you want to scale them all as one object because right now they do this, if you go, it's at your
scale center to manip. What this will do is it will basically scale and treat
it all as one object. So we want to go ahead
and give it let's see. Let's give it some
space up here, and then we also want
to go ahead and give it some space to the sides. Push this out a little
bit more and just try and nicely place this
into the center. I think that looks about fine. So look at it from a distance. Feel like we need to go
a little bit more here. If you want, you can measure
it yes by placing a loop, like a single loop in here so that you know exactly
what the center point is. And then you could select
these and do that. Fine. See that makes it
a little bit easier. Yeah, often you will not really notice super small
differences like that. In any case, at this point, so this one we can just smooth, turn off the smoothing
by pressing one and just quickly collapse
this or combine it, which you can find
in mesh and combine. And now it is pretty much just a matter of shift
duplicated ones, and then just do a
Shift D. Ta, ta, and hopefully it arrives pretty close, which
I believe it does. Let's go and go ahead and let's go to our top and turn
off our iframe here, also. See? That goes pretty close. If it was not close enough, what you want to do is you basically just want
to select it and you just want to move this around a little bit so that
it is in the center. I'm just lucky
that it happens to be very close like this. So what I'm going
to select all of these and combine them
and then press three. And if you want, you can
also remove your history. So as you can see, that
very quickly creates all of these shapes without
us needing to do like crazy bullying or
something like that, which means basically
cutting out shapes because that would
just be a big mess. So we can now save our scene, and we can now go on with
our longer section again. So for our long pieces, the pink one or the purple one, sorry, I believe it's
this one over here, which means that
it becomes quite easy because all we need
to do is create a plane. Since that one will just be done inside of subs
painter because it's just some lines that don't actually have any
height map information. So basically anything that
does not have directly height map information
or it's just like a small detail
that we can easily paint the height map
inside of subs painter, all of those things we will just do in painter
because it will be much faster than
doing it in here. So let's just go ahead
and create a plane. Let's turn off our snapping
and just move this plane. Data. Over here, that's fine. And then the next one, it's
going to be down here, which is yeah, a little bit
more complicated to do. So for this one,
what we will do, not that complicated, though. Let's hold shift, and
let's just clone this. And let's go ahead and
grab the bottom and let's move this out
or down, not out. So I tend to say random words when I'm thinking when I need to think very fast in English, I just say the word that
comes into my mind, but sometimes it's not
completely as close, like out and down
and stuff like that. Like, it doesn't
really make sense. But what I noticed is
that you guys will still, of course, understand what I mean because you see we do it. So I hope it's not too annoying. But basically, in this case, what we're going to do
is we're just going to like this shape that
you have over here. So let's go ahead and place a double segment.
Let's move it out. So this one will be
like the flat area. Like this, let's place
another double segment. Move it out, and then this
one can be moved down, which will automatically
create the bevel. There we go. Let's not go too
large, something like this. And is that steep enough? Yeah, that's steep enough. And that's already
it for this one. Now, these shapes
will be floating, and this one we will just
need to create a small bolt. So what we can do with this
one is pretty much just place like a spot loop
around these corners. We don't need it on these ends because there is nothing there, so there's nothing to
sport. There we go. Now, we can probably go ahead
and steal one of these. So if we just go ahead
and duplicate this, select this one, control shift I and just delete
everything else. So this one we can steal for that center detail that
we have over here. There should be no problem. So let's nicely
just move it down until it's just above our shape. Let's go ahead and
rotate this 90 degrees. And yeah, I don't know yet exactly how far the
spacing needs to be. But what I can do is
I can just push it down a bit and then
let's go ahead and just scale it up a little bit more because it does
look a little bit bigger. So let's say that I
just leave my spacing at the very end,
and then over here, I'm going to see, I want to move this down, and I'm going to also
duplicate this because I want to create another
one just below it. That's pretty much
like a circle. For this one, I probably need
to go ahead and get rid of these sport loops and just move this very close
together like that. And then if you want, you
can also just go ahead and quickly merge these
vertices together. But there we go. Now it's
just like a cylinder again. At which point when I press
three, that's totally fine. So let's move this
one out a bit more. Yeah, that looks fine also. And then we have
this one sitting. We reset in here. Let's turn of edges. Yeah, that looks pretty much fine. Yeah, I'm fine with that. Move it maybe, move it into the center a little
bit more like this. And what I'm going to do now is I'm just going to combine these, press three, maybe
remove my history. And then it's just a matter
of, well, mostly guessing. So I'm just going to give
some spacing like this. And then I just shift
the and hopefully I end pretty close to the end. Wow, that's impressive. Okay, what I'm going to do with this last one, I'm just
going to delete it. I might want to just move some of these a
tiny bit forward, and it's just basically that
the spacing is not perfect, but it is so little
that you will never be able to actually notice when we
start tiling this. So we just tile this and it will just continue on
from here to here. So that's why there's, like,
some empty space in here so that it just
immediately continues on. Now that we've
done that one, all we need to do is we need
to create the bolt, and that's probably
the last thing that I will do in this chapter. So for the bolt, should
not be too difficult. Let's go ahead and
grab like a cylinder. And well, actually,
let's scale this down, but we need two cylinders. So let's start with
this one over here. And if we just start by grabbing the original one
because when you duplicate it, you
lose these settings. For the original one, set it to six sides so that it
becomes like a bolt. And because this one is just
going to be very basic, we are not even going to create the hole that is
sitting inside of it. We will just justify that as in that this bolt is basically sticking out of
it and that's causing it. So this will
actually be all just baked down. So we have this one. It scale it out a
little bit more. Like this. Probably
something like that. Let's go to our top
view so that Oh, I can see anything.
Let's isolate this. Turn on our edge and faces
so that I can sort of, like, here see because I can then
just match this one up, and for the rest,
it's just about matching it pretty
much into the center. So we got this one.
Now for this one, all I'm going to do is
I'm just going to select the bottom and delete it. And then from the top,
yeah, you know what? Let's give it like a
very small bevel, 0.1. And then from the top, I'm
just going to go ahead and give it like a
swift loop over here, and it's going to
muddling toolkit, angle constraint, and
just extrude this in. There we go. So that's that one. Now for this bolt, let's see. Normally, I would do it
a little bit different, but I have wanted
twice something. I'm going to just go ahead
and select every single edge, see if it works in this case. Yeah, so select
every single edge, and then just deselect
the centers like this. And I just wonder if I
do like a control B, but I just add like a few
more segments and make it very thin like this. And then if I press
three, there we go. Same basic concept. Of course, if you
do this for games, it might not always
work as well, but in this case, it
should work totally fine. And then down here, if
you really want to, you could do something very basic like
adding I don't know, ten selections, for example. And if I move these up a little bit so that they become
a little bit smaller, I can then press Contra B. And then if I just go ahead
and go in here and here, let's simply whoops. Come on, you can do it. So it sometimes gets
a little bit confused which direction I want
to go in. There we go. So what we can do is
we can just go Oh, God. I messed it up again. There we go. Contra it. Wow, it's really hard to move. There we go. And you can
also go ahead and you can use your scale tool over here so that you create
a shape like this. And now if you just
press three, it might look a little bit smooth. So if you want to spend
a bit of extra time, you can just place, for example, one sport loop or if you
want to spend a lot of time, you can also play sport
loops everywhere else. But for me because
this is going to be such a small thing,
here, we have this one. Now I basically just
go ahead and I combine these and I just
place them here, make them quite a bit smaller see because they are so small. That's why I don't
really want to spend too much time on it because
it will be very difficult to really make out any
large details in here. And it looks like the bolt is in between every single one. So if I just go ahead and
start over here, here, it's pretty much like in between this one and you can just
rotate it however you want. And this will also just be
back down just like that. It might be a large
detail, but it will work. So I can just go up here, rotate this a bit more
so that it fits nicely. Slack both of them
and combine them. And now at this point, if you
want, you can already press three and then just clone
them and shift thee. Oh, that's not exactly
perfect. So let's just go in. So it looks like that that's the thing like the more
time you do Chief D, the more time when you
are, like, a tiny bit off, it will start to just, like, move off more and more. So sometimes you
just want to go in, or you can try and redo it and see if you
get a better result. But I don't have that many, so for me to just quickly
move in here, here, you can see that we
are now getting close to it being fine
because it is less and less. Yeah, that's
pretty much it. There we go. S. Okay, so we got these pieces done. So now if you turn
off your mesh from the top I turn of
isolate in here. This is what you will
see. So you will see these bolts in here like that. So that's looking pretty good. Okay, great. In the next chapter,
we will just go ahead and continue
with this long one and then create these extra pieces and pretty much finalize it. The grate we will
do at the very end once most of the environment
is already done, so it's like a quick bonus. So that one we will
just leave empty, and the rest will
just be done partly in Photoshop and in painter. So let's go ahead and continue with this
in the next chapter.
14. 13 Creating Our Trim Sheet Part5: Okay, so let's go
ahead and continue. So the blue one, I believe it, it's this one, which is once
again, quite an easy one. I'm just going to go ahead
and steal this version. Let's turn on Snap to points. There we go, and let's just
quickly go to our top view and select the bottom,
and let's just move it. Is it on the grid line? Yeah, it is actually
on the grid line. So can I just,
like, snap to grid? Oh, no, it's not
on the grid line. Huh. Interesting. Okay, doesn't matter. Yeah, so let's just go ahead and
place it like this. That is fine. And now I'm
just going to go ahead and just give it a bit
of a pattern here. Doesn't need to be
anything special. So let's have a look. I'm
going to go ahead and go for, like, one here, and
then goes down a bit. Empty space goes up a bit. Flat space goes
down a bit again. Um, does this need
to be tilable? Yes, no. No, it does
not need to be tilable. And still still look totally
fine, probably. Let's see. So in that case, I
will go for, like, a flat space and go down again. So that means that
if we grab this one, Is that enough? Move it down. Oh, yeah, here, that's enough. Sorry, my first intention
was to actually do it the other way around and move
these up, but I figured, like, just to keep
these at the same size, it might just be handier to
do this. So that's fine. That's moving down. Maybe move it down a little
bit more like that. Okay, so we got that one. And at this point, well, if you want, you can already just place some support loops. So do one here, here, here. Let's go ahead and just
finish this off. There we go. And then what you can
see is you can just see these little extra details,
which we can also do. So let's just go ahead
and just select these. S, this is quite long, so I'm probably going to
actually go for three of those details just because it's a much longer area
than over here. So let's do three
of them like this. Contra B them at,
I don't know, 0.1. Yeah, 0.1 seems fine. And I'm just going to
keep this extra simple. I'm just going to go ahead
and place another loop here, another loop around here. And select one, two, and three. Control E it. It's always annoying working with
really long shapes. So let's push this down with
an offset of maybe zero, one, zero, one. There we go. And now let's just go
ahead and just place like two super loops here, one over here, one over
here, one over here. And one here. Oh, sorry, and also on the ends like this. So you can do the
same just like, here, here, here and here, and that's pretty much
all we need to do. And then this one is also done. That's it, white. Yeah.
There we go. Okay. That one is As done. Next one. The next one was, Oh,
yeah, that's stuff. So we got this one and what
is next to it. Oh, this one. Okay. Yeah, those are
not too difficult. They are basically just going to be like interesting surface. So let's go ahead and go
to our top view plane. Let's go ahead and set
our subdivisions to zero and just snap your
pivot to the corner. Move this down here. Let's turn off our snapping, and
let's just go ahead and, let's just turn on my show edges so that I can just kind
of like move this over here and move this one
pretty close. Like that. And once while we
are here, I mean, we can just as well
hold shift and also move it over here,
just like that. I believe that
that's the last one because the rest will
be non map details, open space, text details, and then it will be the crate. So yeah, these are the last two. Okay, so for this one, what we're going to do
is we are just going to give it an interesting pattern and you can sort of see
rigs pattern over here. So let's just see if we can
mimic something like that. And for that, I'm going
to probably go ahead and just grab a cube, in this case. Oh, turn off my
snapping. And let's see. So I grab this cube. I want to probably
make it like Oops. I accidentally scale
it incorrectly. I probably want to make
it like quite thin. So let's move it
like exactly on this and Let's go ahead and
select the top face, smooth down. Let's move this in. And yes, this will probably once again be quite annoying to work with just because it
is a thin, long shape. But my idea is to have
something like this and to then move this over here. And you know what? When I see this, I'm just going to go ahead and
I'm going to polymate. It's like a little bit
thicker. Like that. Okay, so we get those. And
now I just want to add a few segments here
and we're just going to push part of this model out. So let's say five. No, we probably want to go for, like, eight, no six. Let's go for six. Contra B, D six at point no, not 0.1 because that
would not work. Let's do 0.5 also. Let's see. So we have this one. So
now I would actually need to go in Sorry, it's a little bit confusing
because of I need to decide, like, what pieces I'm
going to push out. So we'll see. Let's go
ahead and select these, which is a little bit tedious
on such a thin shape. But, yeah, we are going to
basically we have this stuff. We probably want to go ahead and just scale it out a little bit because it's not
covering everything. And then if I do
0.1 on this one, that should do the trick. So now if I go in, let's do my front view because
that's probably easier. I was planning on grabbing
this and then every other one. H. Over here, and then push
it out to the side. So if we have this one, let's go ahead and
move it like that C, so we get this pattern. And then maybe it might be interesting if we
select this end. And then, oh, come on. I'm trying to. There we go. Select this end and
then maybe give it like a little angle so that we once again give
that bevel effect. Okay, so we got this one. That's fine. Now, once
again, maybe for this one, I can just do Control
B at like a bunch of segments Yeah, here, see. So that will save me some time. So let's reset my pivot, and now it's just a
matter of duplicating this and then shift the ining. See? And that's basically the pattern that I was going to go for. Oh, that's a lot of geometry. You can see it up here,
how quickly it raises. But that's no problem
because once we combine it, it should still be easy
to handle for Maya. So we got this one
now over here. I believe it is not. See,
so this one is at the end. So this one should
actually end up like this. So what we can do. Oh, God. This is quite annoying. We can just carefully move
this forward a little bit, and here you will
not really notice, especially not for
something this small. So I'm just moving it forward, but I'm not moving
it forward as much. So here I move it forward, less and less, I should say, until we get to
the point where it basically here covers
less and less space. Like that. Okay. So we got that one now done. Let's go ahead and
select all of them, and then just deselect if I can trying to
deselect that plane, which is a bit difficult. There we go. So that all we
have is only these details, and now we can just go
ahead and combine them. There we go. See, now it's
just one slap of detail. And if I just press three, yes, I do want to smooth this, or is it that much geometry
that it becomes let's see. Alright, you know what? No,
I'm not going to smooth it. I will just make my scene slower and it's
not really needed. The goal is that we
actually get almost that anti alysing effect
that you can see over here. That's actually
good in this case. Now, you could argue that
this one needs to be cut off. But yeah, actually, yeah, you could argue that that
one needs to be cut off. That is correct. So
what I'm going to do. Oh, and it also actually
needs to go in here. So let's have a look. Let's grab this one, and let's just extract
pass for this one. So that you only
have this one left? Now, first of all, I need
to duplicate this over here because else it
will just have a gap. So it will need to do
something like that. But then for this one, oh, God, it selected
the plane below it. I don't know. Can I just
you are transitioning over. Yeah, here. This one actually almost
needs to go like this. She's strange. So I must
have just miscalculated. Like exactly, Oh, no, wait. I did not miscalculate. It's because of that
corner over here. Oh, that is a little
bit annoying. In that case, what I'm
going to do is I'm just going to cheat a little bit. I'm going to grab
this one, and I'm just going to move
it forward over here so that it is not
intersecting with the old one. Now, the mask will still work, and honestly, this one, it's not that white anyway. So this should all
still be totally fine. Let's also just quickly
go in here and just move this out because I can
see that it was not even. So, okay, we got
this one over here. That's totally fine. Let's
go ahead and Sava scene, and we are just
going to go in and steal this one once again. And go set this to one so that we don't
have any smoothening. Only use one of those, rotate them, and as you can see, it's basically like
a zigzag pattern. So all I need to do
is for this one, I'm just going to create a
simple single connect in the center because that
makes it a little bit easier for me to basically
measure this up. So what I can do is I can
move this in the center. Sorry for my camera, it's a little bit sensitive sometimes. And I'm going to, let's see. I want to give it some
space on the end, and then we basically
duplicate one, and let's see, there is, there's a little bit of
space between them, and then we basically move
one of them like this. So that from a distance, if we just turn off,
yeah, see here. So that's enough space
in between them. You don't need when you do that, do not look at the
i because then it might look like there's less space than there
really is, as you can see. So we have these two. We then go ahead and just combine them, and then we basically
just, like, do this, and then shift D. Okay, that's pretty good. Maybe move a little
bit like this. Okay, so we got that one. If you want, you can also go ahead and combine this one now. And now we go in and see, I can just do that in this view, hold shift and just move it
and then shift this one. Now, let's see. Is this too large, maybe? You know what? No, it's
not too large because once we actually start repeating
this, it should be fine. So now what I'm
going to do is at this point is I'm just going
to select all of these. I'm going to go ahead
and combine them. And then if you want,
you can make it a little bit nicer because these ones are technically a little bit longer because they do not match,
they are not on the line. So what we can do is we can
just go ahead and deform. Lets let's point and just select like
the ends and just carefully move this
forward a little bit. There we go. And that should
still be the same over here. Yeah, like a tiny
bit, but that's fine. There's a tiny mismatch. So let's remove history. And at this point, let's
just go into face select and delete these faces over here. So that all that we have
left is just this pat one, which if we press three and turn off our
segment, here we go. Oh, wait, that's
the grid below it. Here, you can see that
that now also works. Okay, perfect. So
we got that one. Now, I believe that
the rest of this yeah, the rest of these
are just nor map details, empty space, text, and crate, which
means that all we need to do for this is we just need to create
a very simple plane, gets rid of our segments because we still need
to have something here. So let's add a pivot,
snap it to a point. And snap this one to our grid. And now it's just a matter of, first of all, let's
move it over here. So that nicely fits. And then just go ahead and
oops, all of this stuff. There we go. We can just
cover it up with the plane, and that should be
fine. There we go. Okay, perfect. So we got
all of that stuff done. Let's do a quick check
if everything is on the same level.
Perfect. As done. So as you can see, here we go. This is pretty much
going to be our shape. Great. Let's go ahead
and save scene. Now in next chapter, what we will do is we will
start with the baking, but we can already prepare it. So just grab your plane below, which is the plane we
base everything on. And we can just go ahead
and file export selection. And if we just go in and
let me just go Exports. Let's do trim sheets or
trim sheet. Here we go. We can just go ahead
and export it here. So let's go in, and
let's export this as a simple FBX file.
And call this LP. Yeah, if you want, you
can turn on triangulate, does not really matter
that much for a plane. Often, if you are baking
more complicated models, then it does matter,
but not for a plane. And then if we just put height. Now for this one, we can
unfortunately not just select it and then export it. What we need to do is we
need to first of all, convert these from this preview to an actual hypol because right now this
geometry that you can see, it's not actually baked in. So when we export it, it
will not bake that geometry. What I tend to do at
this point is I tend to select everything, do a shift D. Which might take a while because it's quite
a bit of geometry. This 3 million Polish. Add a new layer over here, assign or shift the selection.
So it is still selected. And just call this HP
underscore backup. Save it and then turn it off. So now we have a backup
because what we are going to do, it's
not reversible. So we are going to now bake down our geometry into
the actual jometry. So I'll show you what
you mean, what I mean. If we go to modify, convert, and let's just add
control shaft, our smooth mesh previewed
polygons up here. So that's what we
are going to do. We are basically going
to press this button. And what it will do
is it will turn on our smooth preview and actually have it down into Jome try. Now, we don't need to
do it for this one. Actually, I feel like
I'm missing something. Yeah, here, I'm missing a bottom plane on this
one, which is no problem. It just means that
I need to go in and clone this
version over here. Yeah, that should be it. I don't know if I
want to I think I needed to push this
one back a little bit. I must have accidentally
selected something else. Yeah, let's see. So
when we push this Oh, yeah, yeah, it's sticking over. But now that looks fine. So just leave it like
that. Should be fine. No, weight, not fine. No,
because the pivot has changed. Come on, select. I need to select this edge, and I need to actually snap
this one. There we go. Now it is fine because, of course, we made this smaller, so the pivot, the
pivot is different. But anyway, so we got that one. And now I just basically
want to go in here. I don't want to
do all of them at the same time because
if you do that, there is a chance that you
crash or that you time out. So I'm just going to go
ahead and I'm just going to basically seleck these
things and if you want, we can just hide just
by pressing H. Yeah, these ones, especially, are
quite, let's save cine. Definitely save vacine
because these are quite expensive or in terms of, like, just turning them
into final hypols. So I've had in the future
that I sometimes crash here. You can see that takes a second if I do too many
at the same time. So just to avoid that, I can go in here, and
I can just do this. Let's see, this one,
the one below it, this one also, this one
is just a normal plane. These need to also be turned. This one, this one. Oh, that's an expensive one. There we go. Let's see. This is a normal
plane and this one. So basically everything
that has smoothing, we just want to go
ahead and apply, and then we just want to unhide everything. And there we go. So now this is actual jomtre. You can see quite clearly
if you've forgotten one because you can see how
dense this geometry is. So this is all looking good because the rest are
just simple planes. Great. Now let's go ahead
and hide our low poly, select all of this, and
now we can go ahead and we can just export this. So let's call it
HP, press export, and that should then be done. Down here, you will see
when it is done exporting. There we go. Okay, perfect. So in the next
chapter, what we will do is we will go ahead and
we will start the baking. I will be using marmoset, but this baking is very easy, so you can also use substance
painter if you want. So let's go ahead and continue with this
in our next chapter.
15. 14 Baking Our Trimsheet And Setting Up Our Painter Project: Okay, so let's go ahead and
get started with our baking. So I will be using
MomsetTbFour for this. And what you can do is you can simply go up here and press a little bread icon because this stuff is going
to be very easy. You can, of course,
also use painter. You can use X normal. Just any type of baker will
pretty much do for this. So I'm just going to
drag in my high pool and low poly FBX directly into
Momoset and give it second. Here we go. And
then simply drag in your low poly under low
your high poly under high. And then a quick thing that you want to do is in your low, just quickly turn off out the bake because
else it will try to bake while we do not yet have
all of our settings set up. So now we can just go
ahead and go into the high and just turn on
the eye icons that we can see let's get rid of all of these extra materials
just by pressing the lid. And the only thing
that you need to do is over here, here,
you have your cage. You just basically
want to move it above your entire hypol. But just move it as
little above as possible. So you don't want to
just go like this, but just like just have
it above like this. And it will just make
sure that everything from our hypol is being
included because this cage will basically
dictate from which point on the baking will start
from which distance. So that is already it.
This now all working fine. Now all that we need to do
is go into our bake project, and I'm just going
to go ahead and go and let me make
this a bit smaller. Textures Trim sheet. Wow, normally my text
folder does not look this empty and then another
folder called Bags, and this is basically the folder in which I will save everything. All I need to do is I just need to go down here
into my output, and I just want to go
ahead and just go to our Bakes folder and just call this Trim sheet, for example. We only have one, so I don't
need to do anything special. Samples, I like to
set this to 16 bits. This will just give us a
slightly crisper result. Let's set the
resolution to four K. And now if you go into your
maps and press configure, we basically want to bake
the same maps that we want to use inside of
substance painter. So that's going to be
normal normal object space, which is your world space
normal, position, curvature. Thickness is not really needed, so we are just going to do ambient clusion and
we also do not need a material ID because we already have sort of created that
inside of Photoshop. So yeah, that's about it. All we really need to do now so just turn on your maps
over here like this. See, four k, we have
all of this stuff. That's all totally fine.
The only thing is that the position needs
to become 16 bits, so because a position
does always need 16 bit data. So,
yeah, we have this. Now what we can do is we
can just go ahead and press bake up here,
and that's it. I will just go ahead and bake. And after that, I should
probably save my scene. But as you can see over here, it will just nicely
bake all of our meshes. Emy dilution. Okay, that's all
done. So even now also just go ahead and
bake the position map, and for that one, simply
set your format to 16 bits. Do another bake. Now at this point,
what I will do is I will just quickly save my scene. Yeah, just save it in the
same folder where you bake. So just call this bake scene. And now, if you, of course,
want to preview it, what you can do is you
can turn off the high, and you can press this little
P button and that will just assign a
material. Oh, wait. That only works if you've
just baked these maps, but because we have, of course, baked our position,
it does not work. In that case, just create a new material and drag
it onto your low poly and simply dragging your normal into
the normal slot, maybe you like your occlusion
also into the AO slot. There we go. And now you can
see that now from the top, it has baked like this. And you can see that also all of these pieces as you hear, they are pretty much fake. Now, they do have
a slight outline. This sometimes happens when we bake our ambient occlusion, but it is often not
that noticeable, so you often don't really
need to worry about it. If it becomes too noticeable, what you can do is
you can always simply go ahead and go into
hot Shop and fix it. But yeah, this is looking
pretty much fine. So yeah, I don't really
think there's much just in case I will show you how to easily fix this
into Food shop. Here we go, because
I do understand some people might have, like, a more complicated model or
more complicated trim sheet. So basically, you just
kind of, like, select it, and often difference is so small that what you can
do is you can literally just use your levels over here and push it out and you would still have your ambient
clusion down here, but you already have your levels here because white
means nothing. So that's why we can
always just kind of, like, push this out
however far we want. So we can also do this because the background is often so dark, as you can see that even
if you push this out, it will still keep the
background C here. So it will still keep
those extra details. So that's a very
easy way to do this. A more difficult or
boring way would be that you go ahead and just use the clone stamp tool
at, like, a low level. Like over here. And then you would kind of just
twin and like, oh, I still have a selection. Yeah, you would kind of just
try and paint out like this, but that would often take far too long to do
something like that. So I do not recommend
doing that. But yeah, for rest, also with these ones, you can just
play around with it. I'm not going to do this one just because this one
is simply not needed. So we're just going
to go ahead and save a scene if you
want to do that. And now just to quickly set
up paint our scene already, we can go ahead and go in here, file and just
create a new scene. You can just set this to
PBR metallic roughness. Then in our mesh. Sorry, I'm just
navigating to the mesh. Here, in our mesh, we want to go to trim sheet and just
grab the low poly. Document resolution. Let's
just set this to four K. Nor map format, we baked in OpenGL. The only difference,
really between OpenGL and DirectX is that the green channel of your norm map is flipped.
So that's about it. So yeah, FRs we can just
go ahead and press. Oh, I've forgot to
input the bake maps. Wait, let me just quickly press new it's quickly selected. It's because they
changed the view. You now need to do this drop down in order to arch
your baked maps. So in here, you can
just go to textures, trim sheets, bakes and just
select all of these maps. And that's it. Who column
management is cool. So that's a new feature that
came out like two days ago, so I still need to
play around with it. I just noticed it.
So let's disregard this scene so that now we
have just the baked maps. And in order to
preview them, there's, like, a few small setups
that I want to do. I'm going to get started
by saving my scene. And I'm going to go
ahead and save it in our taxis folder trim sheets, and let's just go ahead
and save it here. Trim sheet underscoPainter, for example,
something like that. There we go. So give the second. Now, in your text set list, just make sure that this
is called Trimsheet. This is basically the name that you gave your material
inside of Maya. That's the name that we'll give. But you can double click and
you can change the name. And then if we go
ahead and go to our texture set
settings over here, we can scroll down and we can go ahead and
just click on non Mp, and here you can
see you're baked in maps or the maps that we
baked that we imported. So you can just go
ahead and select them and position map, and we don't have
a thickness map, but we don't really need it. And now, as soon as you
click on your viewpot, it will have applied those maps. See? And this is what I mean with the
ambient seclusion here. You can not really see the
ambit seclusion anymore, but this gives us a
really nice effect. See, I works really well. So this is all looking pretty
great, but pretty good. And over here, you can
also see the tiling. Pretty much like here, it now transitions properly
and stuff like that. So we will know soon enough
if I made a mistake, but I assume I did not. Another one that I'm
going to do is I'm just going to import resources, and I'm just going to go
ahead and I'm going to import my trim sheet
layout JBAG file. And you just want to input it as a texture and input
it into your project, which is this project over here. So when you do that,
you can simply go ahead and drag it
into your ID map. So right away, we
have an ID map, which is basically like a
mask based upon colors. So that's all looking really
good. We got that done. Now, if you want to make everything a little
bit more interesting, you can go down here to
your display settings. And for the environment
map, you can, for example, choose
a different map. I tend to do Temoco
and then Actually, you know what this is
fine, our environment. Texture, shadows does not
really matter in this case, no, because it's a flat plane. Scroll down, activate
post effects. Let's turn on some vignetting. Next, we can also turn
on the tone mapping. And I like to set
my tone mapping to sensitometri over here. And then I like to just
play around with a little bit more with
my exposure and Gamma to make it a little
bit lighter. Like this. So this will give me
a pretty good view. However, the final balancing
of this material will, of course, be done
inside of Unreal engine. So we don't really have
to worry about that. So we got this stuff ready to go. You can save your scene. And what we will be doing in the next chapter is we will start by
actually texturing this. So we will just give it already some base materials and just get everything pretty much
prepared and ready to go. And then once we feel confident that we got a very solid base, we are actually going
to start by already creating our first final model, and what are the way that we are going to work with this
is we make that model, we UV unwrap it,
get it into Unreal, and then we will
simply balance out this texture based upon
what we see in unreal. But we first need a
solid base in here. So let's go ahead and continue with this in our next chapter.
16. 15 Texturing Our Trim Sheet Part1: Okay, so let's go
ahead and continue. Inside of substance painter. So what I want to do
is I first of all, want to focus on just
adding our non map details, which are going to be the stuff like you can see over here. It's going to be
maybe like here, all of the handles and all
of that kind of stuff. So this is one of the few times that I'm actually
going to use a package. And this package,
it's quite common. It's from Jonas Ronegat
and it's really cool. It's basically just his
hard surface package. It's really cheap. Like
even now it's on sale, but normally it's only like $6. So this one is great,
and it will give you 390 of these Alphas, which would take many hours if we would need to
make them ourselves. So he also has a bunch of other stuff in here,
so it's really good. I will go ahead and I will leave a link to this
in, like, a text file. Let's say I will just go
ahead and leave it in here. I will just make it
like a text file in here that has,
like, the link in it. So just know that this is the
one that I will be using. It's really nice. So now let's go ahead and
just dive for it in. So in order to use this, you basically just want to go ahead and just go to the folder. Of course, I assume by this
point you have downloaded it. And if you haven't
downloaded it, you can always model these
details if you want to. So I'm just taking the shortcut. I'm just going to go in here and there is a bunch
of stuff in here. But if I just go to my
search and type in dot PSD, what I should do is it should
show every single PSD file, which is every single offer. And then all I need to do is
I need to go in substance, file and input resources. And then what you want to
do is you just want to go ahead and select
everything in this folder, as you can see over
here, drag it in here. Then once again, press Contra
A to select everything. And we are going to use
these as, let's do Alphas. Let's use them as Alphas. You can also use textures if you want, but let's do Alphas. And I'm going to just
input it to this project. For you, I recommend that you
input it into your library. Then it will always stay here, even if you close down painter. The reason I cannot do that
is because then I might get confused if I ever
make torial that has, like, only the
defaults of painter. So then I might accidentally use an Alpha that no one else has. So we're just going to
go ahead and do this, and then we simply press Import. And that should start by
importing everything nicely. So it might take a second, so
let me just pass the video. Here we go. So those are now all imported in here,
so that's looking good. And now what we can do is we can just go ahead and
start using them. So pretty much what I like to do for this is I like
to create a new folder. Excuse me. Okay. That seems like a bug. Let me just quickly
restart painter, because that's quite
strange. There we go. After restarting
it, it works again. That was quite strange.
Never had that before. But anyway, create
a folder and call it normal underscored details. And in here, I just like to go ahead and create a fill layer. So also make sure it's
in the safe folder. And this one, I'm
just going to go ahead and I'm going
to call it down. Down underscore normal. So the reason I do this is
because it just means that everything I paint in here
will be pointing downwards, and I'll show you what I mean. So we only need to
have a height map. So let's have a height map
on and just tone down. And the reason I say
underscore normal is because I sometimes want to also create
versions that are strong. So then I would call
them underscore strong. So having this, we simply go
ahead and add a black mask, and now we can get started
by just adding our shapes. So let's have a look. So this one doesn't
need anything. This one not, so
let's get started with this one. What
do we have here? We have some handles, maybe add some bolts and
stuff like that. I can then go ahead
and go in here. Scroll down, so I will
just use an Alpha. And then if we go
up here to Alphas, you should be able to find
the Alphas you just imported, even though I restarted, so there we go. And let's see. So let's start with, like, the most obvious one, which is going to
be some handles. So we got a few
panels over here, but we should also have
some handles. There we go. So this kind of stuff
will work quite well. Let's say this one
looks quite nice. So you can just double click and then automatically add it. And now here, if I,
for example, place it, you can see that it's
very handy to just quickly place one
of these handles, and you can just go ahead
and double click and you can just use whatever you
want, just like that. So that's why these
are really great. So yeah, on the one hand,
I do apologize that you need to pay a little bit extra just to have this stuff, but on the other hand, it's super useful to have it anyway. So what I'm going to do is
let's place one over here, and let's just place like
yeah, you know what? Let's do one there because this one is a little bit longer, so I'm not sure what I
want to do there yet. Now, over here, we
have a few more. Yeah, what does
this one look like? I then just set my
size a bit higher. I just rotate my camera to
make sure it is correct. Okay, so that one
looks like that, and I can just go
ahead and I can just play around to see here. You can see that this one
is actually inverted. So for this one, we
would need to go into the up instead of down. But for now, what I'm doing
is I'm just basically playing around with
things and just seeing whatever works nicest. Once I found
whatever works nice, then, let me know. Oh, I quite like that one.
That one looks quite nice. So let's go ahead and set
my camera quite straight. You can also go ahead and if you go up here to
autographic view, it often gives you a better you'll see,
like a better look. Oh, I can see that this one
is a little bit bigger. Looks like we didn't keep
it as even as I expected, but that's no problem.
Yeah, you'll see. So it's not as even
as we expected, but I don't think we
will really note here. I don't think you
will really notice. Sorry, I can't speak. So we got those ones. Now, let's scroll down because
I saw one other one, and it's these ones over here. Yeah, here, these
ones would be great. Let's see which ones we
have. Oh, I like that one. Let's go ahead and use this one. Because I think that will
actually work really well. There we go. So we
got one of these. And then down here, what
we can maybe do is let's see what does this look like? No, that's not too interesting.
This one also not. Maybe like a bigger one or should we just go for,
like, another handle? I'm just basically
playing around with it. Because I have not used
these Alphas too often. At least I've used them often, but not specifically
the handles, because those are
often quite specific. Yeah, this stuff is
also quite cool. You can kind of use it to
transition between pieces. But see, I'm just
basically double checking. I want to get something
that's quite long. Hm, that looks interesting. Here, let's grab just
something that looks quite long over here like that. So that's fine. So yeah, just basically add
some interest. That's pretty much it.
That's all we want to do. Just want to go ahead and just add some visual interest to things These ones
are from this side. So, let's see. So we got, some of those
pieces overlapping. Maybe for this one,
so you can see that this one goes
the opposite way. So what we want to do is
we just want to duplicate our layer and call this
up on the score normal. And then just go ahead and
add another black mask. And what that will do
is it will overwrite the original black mask. At which point, we can set our height a little bit higher. We can just like, Add something in here.
And now I see that. It's actually not as
nice as I expected, but I do want to get something
in here. Let's go down. Yeah, here, this one might work. So here, let's try to
keep it on one line. Maybe also over here
one and over here one. There we go. That looks
quite interesting. So we got one of those
pieces also done. And just like that,
we can pretty much just play around with
this and just keep going. So another thing that's quite cool is we have
these little screws. I don't know if we have
enough resolution for them. Oh, we do. But let's see. I think we need to go,
so we need to go down. So we have this one. This one feels a little bit more Sci Fi. Let's grab like this one. So let's have one
here, one here. I don't want to do it
too much because you can easily go too overboard with the screws and
everything like that. So let's also have just one
on these sites. I like that. And let's just go ahead
and just randomly place a few more in these areas. I like that. Yeah,
you can just play around with it and art
even more if you want. I like to also often just scroll through here
and just see if there's maybe anything else interesting that I can
use for something. I don't know what these
things are. Just another. That is an interesting handle. To maybe have two of those
on each side. Yeah, why not? I'm just trying to
add some details. So as you can see over here, that's already quite a bit
of extra detail that we just instantly created, and
that is quite nice. So I'm just having a look, see if there's anything else that I can maybe get Mm, I don't think there's
much stuff going on. Like, I was thinking
maybe there's something that we can do
on the consoles here. You even have little calculator. So technically, we
could have even done that only it
would not fit as well. Yeah, does not really
matter too much. Okay. You know what?
I think that is, this is pretty much fine if
we just keep it like this. So let's just go ahead and
just continue on to this one and this one has some handles
in between over here. So let's see what we
can do with that. Let's get started because I liked those long
ones that I found. These ones over
here, I quite like. So let's go ahead and try one of these, but
then quite large. Bit too large. And
yeah, here, see. That actually adds quite a lot. Okay, so we got those two. Then we can go ahead
and we can maybe do some smaller
handles over here. These ones feel more
like for fabric. So see these ones, we need to go up for these. Yeah, you know
what? It does have something these kind of handles. Let's go ahead and just
place two over here. Let's try to get them pretty
much on the same line, which is actually
quite tricky to do. There we go. And then
let's also place like two down here. Like that. And then if we just go
ahead and let's see, maybe like something in the center or maybe like
a detail or like a panel, just want something there. I don't know if like,
panels would look nice. No. Not that stuff. Ooh, interesting vents. Nah, let's not do that. So yeah, honestly, I'm just
playing around with it. That's pretty much it. It might look a
little bit boring, but it has to happen. Yeah, here, maybe
we can do something with these kind of
panels over here. Stone this one down a bit more. There we go. Let's have one
in the center over here. Let's see what are these?
Oh, needs going in the up I don't know. Can they do something here
or would that just be? On the one hand,
it does look cool. On the other hand, it might
be a little bit too much. No, you know what?
No, I actually think it looks quite cool.
Let's leave that. Let's see. We have
some more panels that we might be able to use. If I just get my camera
to rotate properly. N, you know what? I'm going
to leave that empty space. Okay, so we got those that's
also looking pretty good. Now, for this one, maybe give it just something
small in between here. I don't know if there's like
a little Yeah, here, see? We can just give it some
small detail like this, almost as if you can
still open this up, like it's a panel
that you can open up. So that's also fine. This one
is the floor that is fine. This one, maybe give it like some screws or
something like that. I don't know. Is
that? Now, let's go for something that's a
little bit more original. Yeah, let's do these
ones over here. And let's just give it,
like, a little screw. Here, here, here and here. Mm. That might look a
little bit too strong. Let's go ahead and
in the up normal, let's duplicate this
and just call this up underscore soft once again, add a black mask, and let's set our height a lot
lower for this one. So basically, as soon as
we place a few of them, you know, if we
go to our height, I just want these to
be not as strong. And also, at this point,
we don't really have the resolution to take
in a lot of detail, so just keep that in mind. So I will not do a lot. I'm just going to
leave it like this. Okay, so this entire row is already Oh, no,
wait, almost done. We have this detail over here, which if we go up normal, I believe that looks almost
the same as these ones. Yeah, it looks pretty
much the same. So what I might be
able to do, Oh, one thing that is a little
bit annoying at this point, let's go ahead and add a
quick fill layer over here. And just set the base color
and then in your base color, simply go ahead and
find your texture. So if I type in trim sheet, here this one so that we can
actually see the colors, and then you just
want to go ahead and set your opacity down. And this is just that I
can see what I'm doing. Now I can simply go in here and I can here
I just click once, hold Shift and try to create
like a straight line, and then before you click
another time, release Shift S? And then do it
again. And this way, it's an easy way to just
do some rough measuring. Then I can just go and go in here. Oh, yeah, that does not. Yeah, I need to just
try and kind of, like, get this to roughly line up. Oops. Sometimes a bit
tricky to get white. There we go. And now I just
need something in the center, just like you can see over here, just a tiny detail. So something very simple
is what I'm looking for. Mm. And, of course,
something that's, like, kind of straight. You
know, let's do this one. Set our scale a bit up, and what you can do
is in your angle. Simply set your
rotation angle to 90. And set my scale a
little bit down. Hold shift again.
There we go, see. Just something
simple, just so that there's some kind
of detail there. Okay, so those are now all done. These ones are going
to be stripes. These ones we already have
everything done also. These ones, we also
have everything done, these, these also. So the next one that we had is just some norm map details, and the text details, those are those I will
do inside a Photoshop. So for our norm map details, what I basically want to do is I just want to go
in and just grab some random stuff
from our Alphas that we might be able to
use in some way. So let's say like here,
we set our angle down. For example, we can use a
panel and stuff like that. Here, so like a panel, we can use like maybe one like this, one of these things we can use, maybe like another one of
these longer ones we can use. Yeah, why not? Let's
add one of these. And just like that, we
can basically just start by finding different
things that we might be able to have a use for and just place them
all in this one area. So we got one of these. Maybe let's do one of these
over here just in case, I probably don't
think we will need to use them, but we'll see. And I don't like
that one. Also not. Yeah, you know what? Yeah,
I can use that, maybe. I don't know yet, so we'll see. Let's see. Where
are all my bolts? Did I just went past them?
Oh, yeah, here they are. Let's go ahead and
just tone down. Let's do, like, one over
here. Maybe like a plus one. Another one, add them to
our list. So we got those. Maybe like, you know, if we
just set our rotation to 90, we can just add this
basic shape up here. Yeah honestly, I don't think
we even need this much, but it's just nice
to have a bunch of non map details that we can
place in this one area. And if want, we can
also just continue on placing them here if you
do not have enough space. Yeah, it gives a nice look. This stuff is probably
way over the top. Yeah, I know that there's, like, some exposed panels here, but we would need
to do those better if we want to have
something properly. So let's not do that. So anyway, we now have these
pieces all done, and I think we are ready to then get started
by doing our text. So what we'll be doing
in the next chapter is we will just go
ahead and quickly create our text in Photoshop. And once that is done, we can start by creating
our base materials. But as you can see,
this is already looking a lot more interesting, which you can even try, although I'm not sure if it will work because I did not
testilate my plane. If you go up here in
your shader settings, you can even try and just
set your displacement and set your subdivision
count up see here. So we would need to
go ahead and we would need to give it a
few more segments, but then we can actually have some displacement in here
if you really want to. We are not going to do
that unreal anyway, so we can just leave this off. But it is something if
you want to preview it. It would be cool to do. I anyway, or in any case, let's go ahead and
save, and let's continue to our next chapter.
17. 16 Texturing Our Trim Sheet Part2: Okay, so let's go ahead and get started by just
creating some text. And we can just go
ahead and do this in Photoshop that will by
far be the easiest. So what I'm going to do is
I'm just going to go ahead and we are just going to
overhear use a text layer. So let's see. I want to do this
one, WT 250 KG. Let's do something like this. I cannot really read
it, but I don't know. So yeah, you see, we can use it. Yeah, STech we can use
stuff like that also. Just some random text
bits that we can use, and you can always
add more later on. So let's click on our text and let's set our
color to white. And then what we need
to do is we need to go ahead and go, oops. I feel like this
would probably be a very basic font that they would use for
something like this. So let's go ahead
and just try it out. Let's first of all,
just start with Whoa, that's really large
WT 250 kg dot. So I'm just going to go ahead
and start by creating it. Then I go over here
to my rectangle tool, right click and Free
Transform and just place it into place over here
and just scale it down. So go ahead and get
started with this one, and let's see if we maybe have a nicer font
that we can use. So I'm just going to
go up here and just see there's something
just by simply moving. Oh, that looks quite nice. Yeah, let's do
something like this, a little bit more strong lines. But then what I like to do
is I might want to just, like, squash it a little bit,
like you can see over here. And the way that we can
do that is we can simply click over here on our settings. And then if we just
select this and then set the width over
here a little bit lower, you can see that we can
kind of just push it down. So let's do this
around 90% over here. And once you've done
that, you can just go up here to your Move tool, and then it's just a matter
of pressing Alt Shift, and then we can go
ahead and duplicate it. So let's go ahead and let's
duplicate this again. So let's get started
with this one over here. And this one we will just
use something like this. For all of these shapes
that you can see over here, we can just go ahead
and we can just use some shapes in
substance painter. Sorry, Brain freeze again. So we can just use some shapes in substance
painter for that. So let's go ahead and here, let's give it a little
bit more space. Scrab this, and this
one is going to be si tech and then
maybe with this one, what we can do so let's
move it over here. Let's go at an l
shift and then go in free transform and just make
this quite a bit smaller to have some small text below here. And yeah, you cannot really
read what is in here. So let's go ahead and
just say, floor four. Oh, by the way, I'm going sect. I'm going to go up here
and just like this. Floor four let's go
at No, you know what? Let's do this. Let's do
building a floor 04. Let's do something like
that, for example. Now what we can
do is once again, just use our rectangle tool and our free transform to kind
just place it in here. Let's place like quite close. And if you want to do
very precise movement, just go to your move tool and
just use your arrow keys to basically move it up and down a little bit. So we got that one. Now for this one, what
I'm going to do is, I'm just going to go
ahead and I can see, like, a little bit better, but I still need to, like, just make something
up, I believe. So let's just go
ahead and just say, um, Power module. Oh,
that's really annoying. I need to. It keeps
setting it in the center. Yeah, 1 second. Let me move it over here. So power module PYTHNpN not double dot, AB, and then just
some random numbers, P zero, zero, zero, one, I don't like the
zero, Let's do 222. Two, 26. No, 22, one. Yeah, let's do 222, one. And then below that, SILodt and let's just do 2000 2382
it doesn't really matter. I'm just thinking of some
random stuff like this. There we go. So we got
this stuff over here, and now if we just go ahead and just in our free transform, make it a little bit
smaller. There we go, see. We just got some more extra
interesting text over here. And yeah, you can pretty
much add whatever you want. For example, if you
want to just go ahead and do something like this, but I don't think we
really need that stuff. Yeah, I don't think, honestly, we will use a lot of text. We will just use it a
little bit here and there. So let's go ahead and
just leave it with this that will be
totally fine for now. And once that is done, all you need to do is
click on your background, go down here and add
a new solid color and simply make it black so that we have a black
and white mask. At which point, we can
do a save as copy, and we can go ahead and we can go to textures, trim sheets, and bags and then in here, simply as a PSD file, call this text, for example,
and just press Save. Yeah, the reason I do PSD
is that we can easily go back and substance painter
can simply import PSDs. So what we can do in here. So we got our non
map details here. Let's go ahead and
do another one that we will call base colors. And then in here, what
I can do is I can go to Import Resources and I can
simply import my text. So 1 second, I'm just
navigating to it. Here we go. Texture.
Project, input. And now in our pace colors
in order to ditext, let's go ahead and
let's start by adding a very simple fill layer over
here that we'll call text. Let's go ahead and
make this white, set the roughness
down quite a bit, and then simply add a
black mask over here. And once you've added
the black mask, you cannot just
drag in your text. What you need to do is you need to go ahead and
add a fill layer. On top of this black mask, whereas a fill
layer allows you to insert texture maps like
our text over here. See, and now it will only
have this text in here. And then what we can do is because we also need
a mask later on. So we basically need a mask
to mask out this text. And the way that we can do that is we can go ahead and go to our texture set settings
and simply in our channels, press the plus sign and
then go ahead and go to Unsupported by Shader and
click your opacity over here. Once you've done
that, in our text, it will have another
opacity slider over here so we can turn it on, and we can go ahead
and keep this white. And then if we just
go ahead and create another fill layer below it
and just call this base, what we can do with
this one is we can set the opacity to black. So nice thing about this
base is that it will just basically control the very base. So, we got something like this done now, so
that will work fine. If you go for
materials, for example, to a paste, you can see
that it is just this map. So, honestly, if
you want, you can even just import your text map. But the reason we are
doing it this way is because in order to use as little taxi
maps as possible, we are later going to combine
taxi maps in RGB channels. So just keep that in mind. So it's something that
is just an optimization. But for now, we just
want to go ahead and focus mostly on creating
our base colors. So let's go ahead and create our first and probably
most important one, which is going to be over
here like the white metal. And once you've done that one, we can derive everything
else from it, also. So for our white metal,
here we have our text. Let's do below our base. Let's go ahead and
just create something. If we go into our SMAC
materials over here, what we can see is
we have a lot of different steels over here
and metal and everything. So let's see if we can find
something that's quite nice. I think I want to go for,
like, a painted steel. Let's see if it is stained
that might be nice, although a clear coat, yeah, a clear coat is
more like for cars. So let's just go
ahead and that's a painted steel stained over here and simply
plug it below. And let's just go ahead and call this white underscore steel. So we got this one. Now, what I want to do because
we are going to just basically be reusing
this one very often, also in these areas, I want to keep it blue or,
like, dark for now. Let's keep it a bit
of a dark color for now so that I can
actually see what I'm doing because
once it is white, it will not show as
much as on these areas. As I said before, we are
going to use vertex colors to basically control
the color of most of these things. So
just keep that in mind. All of these, they will
use vertex colors to basically control how
everything looks. Oh, no, sorry, not this one
because this one has, like, these specific pieces in it, but like this one, for example. So what we're going to
do is we have this one. We are now going to go ahead
and let's see base paint, check our dirt,
let's get rid of it. Yeah, let's keep our AO dust. Surface details we can keep. Okay, so over here
we have our edges. I don't really like I like
our etches over here. But I don't know. They do not
feel as nice as I want to. So let's click on our Edges. And let's just go ahead and
get rid of those masks over here so that we can
go ahead and go to our smart masks here, and we can find something that might be a little bit nicer. So paint old small cracks. Let's have a look. Okay, now
that looks a bit too much. Let's go ahead and just
basically find something interesting that we
can use gun edges. Let's see if we
use the gun edges, but if we then go ahead and
go into our mask generator, let's see. Texture two. Okay, so texture two, we can
just remove to basically control that stuff,
and then texture one. Okay, so texture one
breaks up like this. Now, what you can do is over here you can
see your textures. So we can actually go
ahead and we can insert different crunches to basically
get a different effect. So I just want to go ahead and I just want to basically
play around with this. If we go up here
to our textures, we can use crunches. And what I will do is I
will actually use maybe, like, let's see, this one. No, I don't like that. This one. Mm. I'm just basically
trying out a few of them. This one is actually quite nice. Charcoal dirt scratched.
That's pretty good. This one is a bit more subtle. So yeah, as you can see Oh. Oh, okay, I like this one. What did we use? Grange dt
tin is the one that we used, and you can basically play around with your
balance to basically get it stronger or less
strong. But I quite like that. It's not too overwhelming. So it's not too intense, but it still has, like, some nice scratches. So once you have
these scratches, what you can do is
you can go ahead and also just go ahead and
play with your roughness, maybe set like your
color down a little bit. The metallic, I'm not sure. Yeah, I don't think the metallic will
actually look so good. So let's turn the
metallic to zero, set our roughness a little bit higher and then just play around with the
color a little bit, just to get some subtle scratch like you
can see over here. Now, another thing that I
don't like is that right now, our paint is looking a
little bit too soft. So if we go in
here, first of all, what we can do is we can
increase our roughness. And then I just want to
go with my fill layer. And let's see. So my fill layer. Okay, so that one
uses the color. Where are these
scratches come from? Not from our height, not from our no map. Oh, yeah, here for
our surface details. So in our surface details, let's go ahead and
set the height, very, very low to like 0.005. And then what we can do is we can play around
with our roughness. I'm going to make my roughness. So, you know what I'm going
to do is I'm going to set my scale probably
to like 0.5. Oh, one, one. Sorry, go in your
surface details. And then use see which one? I think it is this one where I want to set my
scale maybe to like two. Oh, no, it is this
one. Huh. That is not. Oh, no, wait, it is this
one over here, this fill. Let's set this to two. There
we go. That's what I wanted. Sorry about that. So we got this one A o dirt
surface details. I'm just getting familiar
with this texture over here. Okay, so we have our
surface details over here. They are too intense, however. I think I need to go
in my base color and maybe tone seen,
that's not the one. But I don't want to turn it off. So it's a bit annoying.
It's a roughness. So let's go ahead and go into our roughness and then in here. You know, I pass it
there we go, see, I just want to make it a
lot more subtle because we are going to use
it a lot of times. So we really do not want
to make this too strong. Here. So let's make it
super subtle like this. So we got our surface details, and then the last
thing I'm going to do is I'm going to
go ahead and add another fill layer and just call this roughness on
the score variation. And just turn on your roughness. Add a simple black mask
along with a fill layer. And let's go ahead and
just grab, for example, this cop web one
that I quite like. And the reason I quite like
it is because I made it, but you guys will also
have it included. And I just quite like
this that I can just add some very small
roughness variation, see. It's just like
something like this. But then, of course, you know, let's not make it
like too intense. So I think that this is a pretty good base
material like this. Now what I'm going to do is, so this is the white steel. So all we really need to
do now is we need to make this like quite white, something like
this, for example. Yeah, that's fine. So we can
still see some of the edges. And what we're going to do now so we have our steel
or white steel. We can go ahead and
duplicate this and call this blue steel, right click duplicate
this again and call this dark steel, for example. Yeah, that should be it. So we have white steel, blue
steel and dark steel. Okay. Now what we're going to do is let's start with
our dark steel. Let's go ahead and go into
our base paint, and this one, we just want to go
ahead and make it like very dark, like this. And I'm just going to go
ahead and I'm just going to mess around a bit more with
my roughness variation. And see and maybe also a little bit more like my fill while I'm still on my
roughness up here. So yeah, this is just
very dark steel. That's fine. Then
we have blue steel, and the blue steel kind of goes for these pieces over here. So what we can do with
this one is we can go over here and we
can set this to be like a slightly dark bluish steel like you
can see over here. Now, once we've done
these, simply go ahead and select them
and add a black mask. Like this. And then,
oh, black mask. Add a mask with color
selection, I mean, because then what
we can do is we can simply pick the
colors we want. So which ones of
these do we want to make White? Let's
pick the colors. Let's Excuse me, ID mask. There we go. So this
one I want to be White. This one I want to be white. This one is going to be dark. These ones will always be dark. It's basically if
you need to use the material for
both white and dark, then you need to go ahead
and you need to select it. These ones are quite dark. So what we can do with these
is we can just skip those. So this one will
be like metallic. This one, Yeah,
because for this one, in order to make
this entire thing, I will also need to use
this version over here. So what we can do for that
is we can go ahead and we can select this one and
I believe also this one. These two we need to
select and then over here, this needs to be dark. This one we also want to select. So yeah, we are
basically just selecting it so that we can later on, use it because we need to use it in conjunction with
specific things. Let's also do this
one down here. So whenever you have a
long piece like over here, you have this long flat piece. In order to get this color, we need to use this
long flat piece. But if we then
have it linked to, for example, a deta like this, of course, the colors
need to match up, but that's way too difficult if we need to match up
the colors in here. So what we will do instead
is use vertex colors. Over here we have this mask. Let's go ahead and art mask with color selection and
click on our ID map. So this one can be blue. Steel looks like this one
can be blue steel also. This one can be blue steel also. Do I want these to be blue or dark? Oh, that's
a good question. Blue or dark. Yeah,
you know what? I think I'm going
to make them blue. You know what I'm going to
do is I'm going to make, if we go to a dark steel, I'm going to make sorry
I didn't find my ID map. I'm going to make this one dark, just in case I can use that. This one over here,
that's blue steel again. So it looks like
we don't need dark as much as I thought we need. So this one is blue steel again, but then we will have
some stripes there. This one is going to be metal. This one is going to be marble
or like a granite style. This one over here is
going to be dark also. Oh, I need to tone down
my edges for that. Yeah, I think
that's pretty good. So for our dark steel, let's go ahead and
just set the edges. It's also to be like a
lot darker like this. Here we go. Okay, so
that is pretty good. For your dark steel,
if you want, you can also include these
edges over here, because technically they
are still included. You can just paint on
top of your dark steel. So you can just go ahead and now paint your mask and see?
Here, you can just paint in. So if we set the size quite low, we can go ahead and we can See? Simply paint this in
to make sure that everything fits like that. Okay, and at this point, we
are pretty much over time, so I'm going to go at
the save my scene. In the next chapter, we will
finish our base materials, and then we will
start by adding, like, small material variations in here and just a bunch
of stuff like that. But this is looking
pretty good. So let's go ahead and continue with
this in the next chapter.
18. 17 Texturing Our Trim Sheet Part3: Okay, so let's go ahead and just continue on with our texture. So let's go ahead and just go
from the top to the bottom. So this one is actually
pretty much fine because it's just a
very simple shape, as you can see over here. It might be a little bit dark, but that's something
that we will balance out inside of in real. This one is also fine. This type over here sofne
because I want to fill control. So let's get start
with this one. Now, as you can see, we now have a dark color, but we might want
to go ahead and just also paint in, like, something that's a little
bit more white on top of it, or maybe even something
that's a bit more metallic. So if we actually go to our smart materials
because I have aluminium, that's what I
actually had in mind. I'm not sure if this
one will look as nice, but let's just go ahead
and plug this above here. Might if we just let's see, scratches, base, there we go. So if we turn of
our brushed effect, that actually looks quite
closely to what I had in mind. Maybe if my roughness
is a little bit less. Yeah, there we go. Okay, so
that's quite interesting. So over here, what we can
do is we can just go ahead and call this aluminum. And let's go ahead and add a
black mask this time because what we're going to do
is we kind of just need to go in and paint this in, which is just a matter
of going in here with, like, your basic art brush, and it might be a little
bit boring to do, but let's say that
we have this one, you can click, and then
you simply hold Shift. And like that, just
kind of, like, fill in the shapes. The reason that I'm not
just using or copying my height mask is because these shapes
are often gray scale, so they do not actually or they will not
properly translate. But yeah, what we can do
is we can have this one, and then over here,
you can just go ahead and you can
just keep going. I think for these
type of things, you can just go ahead
and you can just overlap it over everything, like you can see over here. So yeah, you can basically
just go ahead and do this. Now, this is quite boring to do. So what I will do is I will see every material that
I need to do this step, and then I will just simply
time lapse it because it's literally just me doing this over and over
and over again. So let's see. So let's
finish this one Okay, so we have some
aluminum that you want to use here, here
and here and here. And maybe it would
be nice to just have something else
on top of that. Hm. Here, see, you can
see it over here also. Let's go for just like
some simple steel. So let's go in here
and let's also add some simple steel
or steel stained. Let's do steel
stained over here. And for that one, I can see that it's
actually really strong. Let's go ahead and let's see
our dirt I like the dirt, but let's make it a lot less
in our generator over here. And let's see our steel base. I can see that I don't
know. Is this the normal? Yeah, the normal map is
a little bit too strong. So let's also just reduce that. And let's go ahead and see. So our roughness value. Let's tone down our
roughness value. Yeah, then we also, of course, have a metallicness
in here, see? But that's one we
should probably keep. So here we have our steel so let's go ahead and add a black mass to this.
And I don't know. So this steel would
be quite nice to use in some very small areas. Well, I would not use it
for the bolts, actually. So maybe stuff like this would
actually be pretty good to use steel on if I do this. See? Yeah, that would be
quite interesting to use steel on that one. And just in general,
I'm just going to see maybe I want to
use it, for example, just simply on here just
by playing around with my breast size and doing
something like that. There you go. See, base what we will do is I will go ahead
and play around with this. I think these pieces over here
would like to make steel. Over here, what we can
do is we can also go in and maybe turn this to steel, just to add some more interest. And yeah, be quite precise, but you don't have
to go too insane because remember that these
are quite small details. So I will not do it as precise as I really should
just to save some time again. But yeah, it should be fine
if you just go ahead and keep doing something like
this. There we go. So we got this stuff over here. Yeah, let's paint it in.
See, and that I already looks a little bit more
interesting from a distance. Okay, so let's go ahead
and kick in the time labs, and then I will just
complete all of this, and I will mostly be
painting these panels and these details, these
details over here. For our steel, actually,
what we can do is we can actually, no, I'll do that later
on in real time. Also, maybe like
some of the bolts, we can turn to steel and maybe
also in here some details. So let's go ahead and continue
with this in our T naps.
19. 18 Texturing Our Trim Sheet Part4: Okay, so we now got a
nice base done over here. Although for the aluminum, I'm going to make it
a little bit darker, so let's just go
into our colour. Let's do something like this. There we go. A
little bit darker. But yeah, Verres, that
is looking pretty good. So let's go ahead and quickly continue on to these
two over here. So for these two, see, I need something like granite or marble or marble polished. It looks nice, but only, I do not want to get these
really strong veins. That's what I mean. I don't want to
get those because that will look a
little bit silly. So I'm hoping that I actually
have control over it. So let's first of all, te
black mask. I keep doing that. I mean, art a mask with
the color selection. Turn on our picker. There we go. Okay,
so let's see if we can get rid of those really
strange looking colors. So this one is some colored
edges. That's fine. Roughness refine is fine veins. Ah, perfect. Here we go. So here are our veins. I
wonder how they did that. Oh, they literally
just have a grunge. Okay. I'm going to probably
just go in here into actual mask over here and just
tone it down quite a bit. Wow, that's interesting.
It shows some blurriness. Oh, there we go. That's the one. Just turn off the one below it because it just
looks very blurry. And we can give it a
little bit of, like, some veins, but let's
make it very softly. So around ten,
something like that. So, the veins blurry. We can get rid of sharpen. Yeah, that's fine. Let's see. There is a specific noise I
want to try and get rid of. I think this is the one. Well, I do not want to get rid of it. Let's set the scale
a bit higher to like eight and then
just tone it down. Oops, didn't need to do that. Then tone it down
just completely. There we go to 30%. Okay,
so we got that one. So our roughness is
looking pretty good. Why am I rotating strange? Am I in orthographic
view or something? Oh, yeah, sorry. I was
in autographic view. That's why I was
rotating strange. Okay, so we have our
roughness over here. So this might actually be fine. Last thing I'm going to
just go into my color, and I'm actually going to
make this like a white color, like you can see over here. Instead of like a yellow
color. There we go. Okay, so that is
looking pretty good. Now, the last thing I want
to do is these outer edges, I actually want to go
ahead and make them dark. So what I can do in here is
so we have a metal polished. I'm just going to go ahead
and create a new filler, and I will just call
this darkening. Let's call it darkening. And let's have the roughness at around zero, like, quite low. It's 0.9 inch and let's have the color to
be not completely black, but have it quite dark, something like around this area. And now all that
we have to do is we have to add a quick mask. So, we can just make this dark and then we can immediately also make these
sides dark darker. I'm just going to go ahead
and I'm just going to go to my basic hard brush, and you can just paint
across it like this. It just matters that we
do not hit this shape. So here, just do what I do. Click Hold Shift click and simply shift again. There we go. Let's move
this down. Same over here. Just go ahead and do this because what we
can do is after this, we can just go ahead
and mask out the rest. There we go. And
while we are here, we can just as well
continue this Let's see. Oh, that's a little bit annoying
because it's on the end, it's a bit harder to register. So we just need to
make our brush a little bit smaller. There we go. And just go ahead
and keep doing this. Do try to get it
somewhat precisely. Here we go. And
then around here, I'm going to go ahead and let's make our brush even smaller. So that it mostly just
fits in between here. It's too big. Let's set a side smaller. Don't know if this. I want to be very
careful because else, what we will get is we will get a black stripe on our floor, and I do not want that, or at least there's
a bigger chance. Of course, inside of Maya, there are ways to avoid
it just using our EU Vs, but it is easier if I just try and get this as
precise as possible. Let's do something like this. And, it looks like
that over here. I actually have even
more space left, so I did not expect that. There we go. Okay, so
that's looking pretty good. And then what you can do is
you can just go ahead and if we go in here and oh, yeah, because we
don't have our UV. It's a little bit annoying, but what I tend to
do at that case is I tend to just create a quick
fill layer with a mask. Sorry, with a mask
with color selection. And anyway, actually, fine. And then you simply select
the colors around over here. Like this. And once
you've done that, what you can do is you
can go ahead and Oh, wait, what am I doing? So I'm doing this wrong
because I need to do it in a folder. Make a folder. I'm so focused on fill layers that I forgot
that folders exist. Create a folder, add
your darkening to this, and add a mask with
color selection in here, and then do it the opposite way. Just go ahead and select
these colors. There we go. For some reason,
I had it first in my mind that I would
just go ahead and, like, multiply the mask that
I just created on top, but of course, that would
not make any sense. So basically, now
if I do this, see, it will just end over
here and over here. And whenever I just need to add more darkening to other pieces, I can just go ahead and
use the same technique. For example, over here, I might want to also add some
darkening in here. But what I will
see is I will see if I can do it
using a generator. So this one is pretty much
going to be steel, I believe. I believe that we can
literally just go in here. Let's go in. Let's see if
I can just when I do this, it will most likely here, it gets rid of all
of the other values that I just had,
which I do not want. So in that case, what
I'm going to do is, I'm just going to go ahead and
just duplicate this layer. Just call this steel
underscore floor. What we want to do
is in this one, I'm going to add a mask
with color selection. I hope that in the future, substance arts like an option so that you can use your polygon select to also select
masks like that. Or, well, the option might
actually exist already. I just might not know about it. But in any case,
we got this one. So what I'm going to do
now is I want to add a filler and just call
this actually darkening, go ahead and once again, set your roughness quite low, your base color quite dark. And then if you add
a black master disc and then go down here and
add a generator, here, what you can do is you can find some generators that
do not actually exist in your library, and they generates like
ambient occlusion, although they might
exist in your library, but it just depends. So with the ambient
oclusion if I invert this, I can play around with
my balance and I can basically make this quite dark. It's not going exactly
the way I wanted to. Like it's sort of work. So yeah, okay,
it's sort of work. So if we do this,
then what I can do is I can then go ahead and I can
add a paint layer on top. And for this paint layer,
if I just press X, I can basically just
paint this out. So it will still be faster, although I did not really expect the ambient occlusion
to be so strong around these edges.
But that's no problem. So now you can see that
is a quick way to just generate some darkness in
here to get this effect. So we'll see how much of it we need or if we need
to reducee it or anything. But now this row is
also pretty much done. Except for maybe over
here, the lights. That's one thing
that I want to do. For your lights, what you
want to do is you want to go into your text set settings
and in the channels, just plus a plus and
a emissive channel. Then if we go back
to our layers, remember that very
base that we created, go ahead and turn on the essive and just make sure
that it is black. And then what we can
do is we can go ahead and somewhere on the
top of something, add another fill layer and
just call this emissive. And then for this one,
just turn everything off except for the emissive. Set the emissive to white. Add a black mask. And now what you can do
is you can once again just paint in wherever you
want to have the emissive, which in my case, is just
these two bits over here. And I probably
also want to paint it in these areas over here
just to get some extra light. We are going to
control the color inside of wheel engine, so
don't worry about that. So in here, to
control these lights, what you can try to do is to
go down to your Alpha with your basic card brush
and just turn it off because then what you will get you will get the square. So using that, you might
be able to now go in here. And for example, let's add some small emissives
here and there. So let me just make sure
that this is not too bright. So don't worry we make this like a little
bit nicer later on. Right now, I'm just going to add a few of these random
bits here and there, don't add too many
because remember that we will be repeating this. So I don't want to just
have it overwhelm. Let's do one over there. Let's
do another one down here. Let's get started with
something very easy like this. I know that there are
many more lights in here, but I feel like if we
do too many lights, then it will just
become overwhelming. Maybe do one here and one more over here or
something like that. Maybe like one here.
So with our MSF, what we can do now is we can go ahead and go down here
and add a filter, and I'm just going to give it a small like a slight
blur like this. And just double check over
here that the blur is not too intense. Now,
that's totally fine. Like, remember that we are looking at it from
a long distance, so you will not really be
able to notice that it is slightly overlapping on top of the edges and
everything like that. So we got this done. That's
looking pretty good. Let's see, this one is done, this one's
done this and this. We might want to later
on, add some dirt, but let's do that once
we actually are in reel. So the next stop is going to
be these lines over here. Yeah, that's going
to be next stop. So let's go ahead
and create a folder. Call it yellow score lines and then add a simple mask with a color
selection and select. Wow, that's really annoying.
Like, I have my ID map. Oh, no, I forgot. Huh? I swear I did that. So that's why it is not
working because normally, it will just outload
this ID map like this. What am I doing here? Okay. Strange. I don't
know why I did that. But anyway, so we
have a yellow lines. Let's add a fill
layer in here and just call this
yellow, for example. We want these to be just
try and match this color. If you want, you can
use your color picker, your color picker
actually works outside of your match I'm just
dragging it on here. Now, this is most of the
time not like perfect. So let's just go ahead and
adjust it a little bit more. And I only need my roughness, metallic and metal and just at the roughness to be
a little bit duller. And once we've done that, we can add a black mask to this, so we are going to mask it out. And then what we want
to do is we want to add a fill layer. So we've
done this before. It is so that we can insert
a simple mask over here. So once that is done, there is a generator that's
called stripes. Over here. And this one,
you can track it in. You actually have a
bunch of settings. So here, you can
already see it working. So if you go to your pattern, you can choose how
many stripes you want, and you can choose
the shift of them. So those are the two that you mostly need to, like, focus on. So you basically just play around with your stripe
amount and your shift, and then basically
sit like the width. So here, let's see, let's
say that I want to, like, tilt it a little bit more and this is also
tilable by the way, see? Here, it's perfectly tilable, so we don't need to
worry about that. Set our width, and there we go. So just like that, we
have these stripes, and you can also
play with your well, not so much your position, but maybe your contrast to
make them nice and sharp. That's a bit too sharp. Let's
go for something like this. Perfect. So that's already it. We now already have our
stripes ready to go, so we can just go ahead and
like Atos on here later on. Now, this one, it is
just some edge damages, and I already in my time laps, I already turned
these bolts to steel. If you want, you might want to make this a little
bit darker, I guess. Yeah, I guess that
we can do that. I remember that we have
our darkening here. So if we go into color
selection, pick this color, I wonder if my darkening does this do anything or
It works for that one, but I That's a strange
color, isn't it? Yeah. That is a strange it almost looks like it doesn't pick the right color. But to be honest,
I did expect oh, wait. No, never mind. I'm being stupid because I'm not looking at
the correct one. The one that I had
was this steel floor. This is the darkening
that I had over here. So that was really stupid. In that case, what
I'm going to do is I'm just going
to go ahead and I'm going to duplicate
this darkening, add it above this
darkening over here. And then with our ambient
occlusion, that's too bad. I guess, in this case,
it doesn't work. In that case, what we need to do is we need to do it by hand. It doesn't work always because
this is having a slope. It basically just doesn't
work in this case, because there's too
much oclusion going on. So when that happens, you just basically want to go ahead and just do this manually. It doesn't take too long, just
a little bit boring to do. And I always try to
avoid boring stuff. But, yeah, it's
just like you can't have insane fun on every single
aspect of an environment. So what I will do is I
will just go ahead and I will pass the video
until this one is done, and then we will go ahead
and continue. Here we go. Okay, so that darkening
has also been added. This one over here
is also pretty good. That's just some general
edge and everything. I would be careful with adding stuff like leaks and everything. You can add them, but of course, we will use this one sideways so it would not always work. Let's see. So if we go down, this one is dark, that's fine. This one will be controlled
by the color, that's fine. These ones already have color, that's fine, and
this one is fine. So I guess that we are pretty
much done with the base. Now, of course, once
we get to unreal, we do need to go ahead and play around with
this a lot more. But for now, we do have
a very solid base, and you can clearly
see, like what I mean. And now, once we are
going to work on the UVs and the final models, then you will really understand the power of trim
sheets like this. So what I'm going to do is
I'm going to save my scene. And now I want to show you
how we are going to do a special setup to save
even more textures. So if we go ahead and go
into our trim sheets, we can go ahead and create them we can create a
folic called final. Over here and just
use this folder. So we are going to
export this texture. Now, what do we have? We have a base color. You
can ignore the height. Roughness metallic, normal
opacity and emissive. So what we are going to do is we are going to have
three textures. One is going to be a base color, and then we have an Alpha
still left in our base color. So what we are going to
do is we are going to add the opacity to the Alpha
of our base color. Then we have a norm map. I do not like to
stick stuff into the Alpha of the
norm map personally. And then what we're going to
do is we are going to create a special map that will
include both our roughness, our metallic, our opacity, and our emissive all in one map. To do this, we need to set up a special export
preset, so custom one. So if you go to File
and Export textures, we can go up here to
output templates, and we can go ahead
and we can actually create our own custom
output template. What I like to do is, I like
to press plus sign over here and call this TrimsetUnderscore, Base, for example, here, wait. I will delete this one because, of course, I've made
trim sheets in the past. So trim sheet
underscore base. Okay. Base Color along
with an Alpha map. We know that the base color is RGB and the alpha map is an A. So we want to go up here
and press the RGB plus A. This means that we will have
an RGB map and an Alpha map. In terms of the naming,
just get rid of this name. Press the dollar
sign, and we are going to call this texture set, which is the same name
as your material. Underscore Base Color. Then what you want to do is you want to go ahead
and you want to drag in your base color into the RGB and simply set
it to RGB channels. And for the Alpha, you want
to drag in your Obaste and you set this to a great
channel like that. Perfect. That one is already done.
Next, we need a norm map, a norm map, we can
just use a simple RGB. So just go ahead and
call this once again text set, underscore normal. For this one, we are going to go ahead and we
are going to use a normal direct X. The
normal direct X. The difference between OpenGL
and direct X over here in your converted maps is basically that the green
channel is flipped. Now, because Unreal
engine uses direct X, we want to flip
the green channel. For example, Mamset now
substance painter uses both. But for example,
Mamset I believe also Maya and blender and
everything and Unity, I believe, also,
they all use OpenGL. So it all depends what you like. I personally prefer open GL, but we are going to go for
direct X in this case. Now, finally, we need the
R plus G plus B plus A. If it's like this one,
what you can see is we can control all the
channels separately. So we can say text
set, underscore mask, or let's do underscore
roughness, metallic. Oh, wait. We already have
the past. RME. Let's see. Base color, done, roughness,
metallic, emissive. Oh, yeah, okay, so we even have an Alpha map left if you
want to do something else. So what we're going to do RME, which means roughness
in the first one, metallic, in the second one, and then we have emissive
over here in the third one. And then, yeah, if you want, you can also add an Alpha map. I don't know if there's anything interesting we can
do with Alpha. Ah, no, I don't think. I think we will just
keep it nice and simple like this. So that's now done. Now all this we need to is we need to go ahead and go in
here for the output directory, set your folder that
we just created, and then the output
template simply scroll down to your
trim sheet base. Remember that when you
restart substance painter, it will be sorted alphabetically so then it will be up here. So trim sheet base, I always export as
target files, always. And I'm going to go
ahead and go for four k. I press Export and save. This is it. This will make up our entire environment
in terms of textures. Now, I will later on just import a very quick grunge map just
to add a little bit extra. But that's something
that I will show you. It's a little bit of cheating, but for now, this will basically make up
our entire environment. So in the next chapter, what we will do is we will start by turning our
models to vinyl, exporting them to unreal
with all of our textures, set up a special shader
to do all of our testing, and once that is done, we can start by just balancing everything out and then completing the
entire environment. So let's go ahead and continue
with this in the next
20. 19 Creating Our Final Models Part1: Okay, so let's start by taking
our first model to final, v unwrapping it,
applying a text, and getting it into unreal. See, this will be quite
an important model. So I just want to go over this, and once you know how
to do this process, it will be quite easy
to just do the rest. So I'm going to get started because we can just
use this blockout. Like, we made it precise
enough that we can pretty much just turn
this blockout into something else. Let see. This is maybe maybe
like a tiny bit to tin. So maybe we might want to make some small changes because, of course, I did do
this quite quickly. That's about it. Now
what I'm going to do is I'm going to go ahead and I'm going to use weighted normals. So weighted normals are
basically a way of faking a hypolo by smoothening
your bevels. So you basically do this.
You add some bevels. I have on my YouTube channel, I have a much more in
depth tutorial about this. So let's just keep this
easy. Yeah, here over here. We have a bevels, that's fine. Oh, no weight. I need another one here.
Oh, you know what? No, I want to do
something different there. Let's just do these. Basically, we add the
bevel. There we go to Kai. Don't tell it too
strong, like a 0.2. And now what this bevel
will do is it will act as a buffer when
we start smoothening. So if you go to mesh display, let's just add these
to my shelf and use a smooth or a softened edge. Over here, you can
see that these edges, they look very nice
and soft and hypole. Now, of course, it does
not work everywhere because I have not yet
done it everywhere, but that's what we
will focus on now. For this one, I have in
mind to maybe do, like, a more interesting baffle to maybe make the
bevel a bit bigger. So let's do like 0.3 and then add like a few
segments like this, just to add a little bit
more roundness to it. This one can just
become a simple Oops. Simple normal bevel, yeah. So over here, we can
just do contra B, make it like 0.1,
like a small bevel. And then over here, what you
can see is it is quite soft. So this one we kind of want
to do the same as over here where we just give it
like a few extra segments. So we just select
all of this stuff. I don't think I need to
have these last two edges, so let's just deselect them. And then what we can do
is set the friction to around zero point yes,
maybe 0.25. 0.25. And now, as you can
see, I just add like four segments just to make
it a little bit softer. Now, if I would smooth this
and turn off my edges, you can see that this now looks almost like a hypol model. Oh, delete that. Because if you do not add devils, then it
will just look wrong. But now, as you
can see, it almost looks like a nice hypol model, even though we have added
barely any jom tree. And for something this large, this kind of jom
tree, it's nothing. Like if we want, we can
throw in, like, 10,000, 20,000 polis in this
and would still not even make a
dent in our budget. So now what we need to do is we need to create
this font pedal. We will not be creating
this side parl, but I do want to do something interesting with that
just to show you. But first of all,
let's do the front pl. It looks like that the front
panel starts around here. And if we just add
like a loop over here, we want to scale this loop flat. And let's see, I think it
ends roughly over here. I do want to have it ending
just above my floor. Because right now I don't know if we aligned this to the grid. So for now, let's just
leave it like this, and then later we can just
move it up and down depending on where our floor is
in our actual level. So for this one,
click Control Shift, double click, just to
do a quick semi loop. And I'm going to get
started by doing Control E, setting the offset
to around five, maybe ten. Now, seven. Eight? No, I think actually we
do need to have ten. Yeah, it looks like we do
need to have ten just because the space is a little bit
bigger than I expected. And once you've done that, all you will need to do as
far as I can see is CtraE, push this in over
here like that. And now what I want to do
is, yeah, first of all, I'm going to make
these corners round, and then I'm actually
going to separate this panel from the rest so that I do not
need to bevel it. And I'll also show
you why I do that. So these are quite
common techniques, but I'll still show you
Control B reptal segments. Not too much, of course,
four. Yeah, that looks fine. Like the roundness, I don't
know if we the roundness, 0.4 for the roundness
is also fine. So right now, if I
would bevel this, which is totally fine, you
can just go ahead and give it like a small
bevel, maybe 0.3. Now if I would of
course smooth this, it will not look very
nice, as you can see here. So I would need to
place a bevel here. But if I do that, it will be annoying for me to
properly texture it. The other thing that I can do
is I can simply select it. Okay. I don't know why it
doesn't allow me to loop, select it, shift right
click and extract faces. So now because
these are separate, you can see that the
bevel just stops over here and it just
becomes a harsh line. And in this case,
that looks fine. It's about experience,
I would say, to, like, know when
to use this or not. It's just experience just from doing these kind of
techniques very often. So that's all I can really say. So what I'm going to
do is I'm going to go ahead and I'm going
to save my scene, and let's remove my history over here, and I
think that's it. I think we can now go ahead
and start by texturing this. I will also show you how to create a front panel like this. But let's first of all, start
with the texturing process. For our texturing process, let's go ahead and this one is going to be just
completely white. Now, the way that
we are going to basically do that
is we are going to create actually do we
already have material for this? Oh, I'm so forgetful. Oh, no, just like a basic material. So assign favorite
material Lambert, call this Trim sheet. And we will be using
this material non stop. So also on all of our
other models, sorry. So what I'm going
to do is I'm just going to click on
the base color. I'm going to art a
simple map over here. Final base color. Here we go. Oops. Now, what it will
most likely do is yeah, it will most likely
T transparency because that one is in Alpha. So we can just go
at the right click and just break that connection. And now, if I just go to
textion mode, there we go. So when you break
that connection, it will not show
your transparency. Else, you will not be able
to actually see this. Now in our UV editor, which I have over
here to the side, but, of course, you can also
find it here at the top. I do not have a lot
of space for this because I'm recording
in ten ATP. So this is great if you
have a four case screen. So if we go in here and we go
ahead, oh, that's annoying. Ah. Wait, I cannot remember if there is a way
to turn it off specifically. No. Is that it? No. To be very honest, I cannot think of a
way to turn it off, specifically with like my arm. Oh, uh. So so it did work. That is strange. Okay. I
don't trust that, but, okay? So, I thought I
knew about the way, then it didn't work,
and now it does work. Okay. Anyway, what
I'm going to do? Shumaia. I'm going to move these really messy
UVs out of the way. And now we on purpose, we kept this white
area here very flat. So we did that on purpose
because else we would need to work with our tiling, and
that would not look good. But it is still tilable from
this side and this side, just like the tops and
all of the other pieces. So we are basically going to fit all of these UVs in here. Now, this does mean that
your text identity for something like this will
be a little bit different. It will not be as nice. However, we will
always try to just make the difference as little as possible so that
you don't really notice. So what I'm going to do is I'm going to go ahead and, like, select this entire
thing over here. This strip, as you can see, it's roughly the same
size as this strip, so I cannot go any
lower than this. I then simply go ahead
and go to UV and do, like, a best play over here. And now you can see that
we have this strip. Now, we do need to go
ahead and just unfold it. Willie, I have manufold UVs.
You can just press Fix. I just don't know where. Oh, wait, they come
from over here. The reason why you get
that error is because we have this random vertice. Oh, here we turn off
angle constraint. We have this random vertice
just kind of like floating in midair and your UVs
do not like that. So let's just go
ahead and quickly merge that together like that. Just double click on
this and let's do once again UV and
like best play. Normally, I just have
this in my shelf. Over here and then just relax. And now you can see that now this is what we have over here. If you have any problems, like you can see
over here where it just does not work as
well, in this case, this is one of the few cases
that it is fine to have quite visible seams
because we made this texture specifically so you won't really notice those. So I can go in here and
I can go to my cut and stab and just cut it because now if I relax
it or unfold it, you can see that it
works better, see? So what I'm going to do is I'm going to go ahead and I'm
going to select both of these. I'm going to go to
modify and just do a quick align or orient
shells over here. And you can just overlap
the hell out of this. This is not a unique unwrap. You don't need unique
unwraps inside of a trim sheet unless we are
going to do the crate. So we basically just go
ahead and overlap it, and then we try to scale
it up as large as we can, because this is
quite a large model. So scale it up as
large as we can while still only having,
like, the white stuff. One thing we do need to keep
in mind is that we have, this trim below here. So I do like to always
give it a little bit of space in between.
But there we go. So that Oh, sorry, I do need to go ahead and
select everything if I'm doing that. There we go. So yeah, that's basically
now all working fine. You see? And you can see that resolution is
still quite good. Now what we can do is we can also do it over
here to the site, although the sites will probably be a little bit less forgiving. So let's go ahead and just do
it to this site over here. So I'm just going to now go in, and I'm going to just UV
unwrap and then I'm going to basically leave it for now. So I first of all I want
to just do everything. So here, just move
it up. This one I'm just going to
select by hand. There's quite a bit
of hand selecting here, but that's fine. Here we go. So we got
those pieces done. You can see this. That's
like those sites. Now, for these
sites, if you want, you can go ahead and
select them or you can just leave them until last because what you can also do is, first of all, do this
selection and try to get your UV somewhat nice or your seems somewhat
nice like this. It might not look
perfect, but it is fine. Same over here. Like this one, we cannot flatten it. Well, we can, but often
org will look bad, or it will be a lot of work. But if we just go ahead
and do it like this, and you should not really
be able to see anything, so this should be fine. And then over here,
this one will simply be a little bit smaller. Also, if you have a surface
that is far too white, like here, let's do this. I'll show you. Let's
first finish this off. See, surfaces like these
are far too white, so then what you might want to do is you might just
want to give it a few extra segments so that you can control all of that stuff. This one is interesting. I'm
going to, you know what? I'm going to end it
up until this point. Oh, that's not like that one. 1 second because there's
some overlapping. There we go. There was a little bit of
overlapping going on. So here, we can basically go
ahead and we get selected. This one is fine. Then let's go ahead and do work
better than expected. Normally, when I
do that technique, where I just like multi
loop select like that, it does not often register. That's why I'm just so
used to doing this by hand because I know that
half of the time it will not work, else. Yeah, for these, it
will work totally fine. So basically, we're
just splitting up our UVs however we want. These ones are already done. So now if we go here,
I need to once again, fix that. There we go. Yeah, that one's looking fine. She, this is not the
most interesting thing, but I am going to leave all
of my UVs in real time. And the reason I'm going to
do that is because it is such a big and important thing that is part of my trim sheet. So it might be oh, sorry, I've got to do this. So it might not be the
most interesting part, but it is something that
we will need to do. And what I will do is
I will just go ahead and do these models
one by one and not have all the modeling
in one chapter and all the vision one chapter just to make it a bit
more interesting. So, okay, so we got
these pieces now. Over here, as you can
see, we might just want to go ahead and just
add some very simple loops, and you can okay, not like that. But yeah, basically you can add these loops without
any problems. The reason why this loop is not working is because of
this bevel over here. But to be honest, I
don't think moving the bevel all the
way to the site will actually fix it properly. So Oh, God. I don't even have the
space to do that, I think. Okay, I just got
the space to do it. But it's quite difficult
to see what I'm. You'll see because
you guys need to have everything in the same
field of view to do this. Okay, so there we go. So now, can we maybe place a loop? Also, another thing
that you can try, you can try to add
like a connect because connects sometimes
work a little bit better, but also sometimes they
work absolutely not. So if we do like
a double connect, in this case, it looks like
that it worked totally fine. So now we just have a
slightly larger surface to work with or slightly
smaller surface, sorry, to work with. So we can go ahead and
we can select the stuff. And then we can once again simply unwrap these like this. And finally, what
we can do is we can go ahead and we can do
this last one over here. And because it's
a plane, it will be quite easy to unwrap. And then just go ahead and do the same thing on the
other side over here. And then what we will do is we will see if we've got something. So we got this one done. This one. Well, I know about the front one
that we sort of forgot, although I got it on purpose. This one. And now,
if you go down here and just select everything
that is remaining, all that we have
left is this, and it looks like we
have Oh, over here. This, let's delete that. We don't need it because
it's on the back. So let's see, I feel
like there's something else that is yeah, B so pivot point wouldn't
be in the center. Here, if I hold cotran
like deselect this CRC. So somewhere there is a phase, and I believe
somewhere over here, there's another phase
that we just need to fix. Oh, it's the inside also. Oh, I forgot I forgot
about the inside. Um Let's go ahead
and first of all, deselect, let's deselect half of this so that all we
have left is this one. So let's unwrap this one first. Select this Deselect, and also deselect the
stuff I cannot see. But I will, of course, figure
out what that stuff is. Maybe just like a
red edge that I forgot For this inside edge, I can be quite flexible. Like, I can just unwrap
this entire thing in one go because it
is such a thin edge that when I unfold it, see, it will just
look like that. And that is already more than
enough for what we need. So all that we have left
now is some of these edges. Let's select one
of these points. And it's plus F. Oh, okay, so it's like
that kind of stuff. So this one is leftover
this one is leftover. Is there anything
else that maybe is causing problems? Oh, I see. Here, it's just like these
few bits. There we go. So that fixes that.
Okay, perfect. So we now have all of our
UVs here ready to go. So now all that we
need to do is we need to basically
go in one by one. Yeah, so basically just
want to go ahead and select one of these doesn't matter which order,
place it in here. Select one of these
unfold, place it in here. And if it is this large,
you might want to scale it down a bit to keep the textile density
somewhat the same because else it might be
too over the top. So for the large pieces, like these really large pieces,
you know when it's large. For those, I never risk it, and I just try to make
them as large as possible. However, for the
more smaller piece, like you can see over here, I do try to go ahead and, like, make it a little bit
small or a little bit more the same all of them
in our textile density. And as you can see, I'm not doing this
precise at all. I'm just going to go ahead
and I'm just trying to get this all in here,
like this one here. See, I can scale
it up a little bit just because it's
such a large piece. Then we have like this site. This site, we just
want to make it as large as possible because
it's a large area. But of course, there's
only so much we can Oh, that's very close on the
edge, but still works. Here, we have another
one, and don't forget to always unfold it. If we do not unfold it, it will not look very good. And it's like a backside, so we can just go ahead
and also leave it in here. We can unfold this,
which is like, Okay, so this is a large piece, so let's just scale
this one up. This one. Also, if you feel like you
don't want to do the rotation, you can always go
to modify and do an orange shells over here and
that will just flatten it. So this one we want
to be quite large. This one, just make it
as large as possible, but there's only
so much we can do. So I'm just going to
go in here and just, like, nicely place it there. Same with like this side
is just the other side. Just make it as large
as you can. Like that. This one, let's go ahead and scale this up to make
it once again, very large. And that's why we like
that extra space that we have so that we can just go
ahead and add these pieces. This one, once again,
you can unfold it, even though unfolding doesn't really matter for
something that's flat. Oh, this one. This one, we
need to also go ahead and just let's do quick oren shells. So, as you can see, we are
basically just trying to match everything up and cam everything into this
very small area. Our UVN mapping will
become a little bit more interesting when we
do more complicated stuff. So, of course, this
one is quite easy. But for the first example, I think it is good to keep
something nice and simple. Here, let's scale
these up like that. This one probably doesn't
have to be scaled up. So just kind of keep it in here. This one can
actually go actually become quite a bit
smaller because else it will look too high resolution because that's why
you want to keep the taxa density like this. You want to do it so
that the resolutions do not feel very different. All of the resolutions feel
same not that you have one area that is all of a
sudden super high resolution, and then you have
another area that feels super low resolution. It's not really
something you want. Let's move this a bit
closer over here. But yeah, we are almost done. Then I will finish this chapter, and then in next
chapter, we'll just go ahead and finalize this model. Let's unfold this. And I just keeping track
of the fact that I do not want to have anything
on this edge over here, so just keep that in mind. So did this nine degrees unfold. Like this. And let's go ahead
and also grab this one. I over here. And finally the last one.
Oh, yeah, that's that one. Let's go ahead and
unfold that also. Okay, so we got those pieces done, as
you can see over here. So now we have just like
a nice white block. And now just to finalize
it for this one over here, what we're going to
do is let's reset. So we want to basically have
this on two sides, see? So we want to just
have it flipped, which means that I probably
want to go ahead and well, first of all, let's
isolate it over here. And the reason I'm isolating
it so that I can add a quick connect from
this side to this side, and I'm just going to go
ahead and I'm going to place a segment probably around here. This seems like
the midway point. Doesn't have to be
absolutely precise, but just try and get it there. And once you've done that,
you can go ahead and you can select everything, unfold it. Place start with the
top one interposition. So let's rotate this 180. So start replacing the top
one interposition over here. There we go. And then what we can do is we can simply
select the bottom piece. So I mean select the edge
where we need to cut it, cut it, and then select
the bottom piece. And for this one, we basically want to
go ahead and rotate this 180 again and just simply place this in place roughly around
here. There we go. And then what we will do
is we will, of course, make a system so
that we can change the color of this one
inside of Unreal. So for us right now, it
will look like this, so it will not look
very interesting. But in next chapter, we will go over on how to change
the color in this. But as you can see over here,
this is now UVnwp and you need to go very
close in order to even see that the seams
are transitioning. And if it is still too obvious, we can always go ahead
and go inside of Unreal engine or a
subpainter and improve it. So let's go ahead
and continue to our next chapter where we
will finalize this model.
21. 20 Creating Our Final Models Part2: Okay, so let's go
ahead and continue. So what we're going to
do in this chapter is, I think we are first
going to set this up inside of reel with our shader. Then we're going to just go
ahead and go back into Maya, do some vertex colors, and I'll show you
some other twigs. So this is, like, really a
prototype asset over here. So let's go ahead and select it. And if I go in my channel box, let's just reassign
everything to beam one because I had a feeling
like it was not all assigned. And then if we just go
at an export selection, we can export this just
as the same model. It's actually the goal to
export it as the same model. So to unreal FPX. Now, I'm not going to
turn on triangulate. The reason I'm not doing that is because I want to
use vertex colors. However, triangulate in Maya, it actually breaks
the vertex colors inside of unreal engine, so it's a little bit tricky. So let's go ahead and where
are you B one, let's export. Yes, I want to replace. And then if we go into unreal, So yeah, here we have our beams. I'm just going to go ahead and duplicate one so that I can properly preview it. Here we go. And all we need to
do is just right click and press reimport and then just reset to FBX. See? So that one
now already works. Yes, that's what
I was hoping for. It was just above the
ground like that. So I'm quite happy with that. So that's looking pretty good. Now, of course, we have pretty
**** lighting right now, so we will need to go ahead and, like, fix that later on. But for now, let's go ahead
and go into our textures, and let's make a folder called Trim sheet on the score 01. I know we only have one,
but you never know. So trim sheet on
score zero, one, and I'm just going to go
ahead and I'm going to import these three text
shove that we created. So let's go ahead and
import this. There we go. Yeah, that's all totally fine. Let's quickly check in my no map by double
clicking on it. Okay? That's in the
right direction. You know it is the
right direction because it looks like
the wrong direction. What I mean with that is like all of these
are denting in, but they feel like
they are standing out, and that's direct X. That's why I like OpenGL. If you are importing OpenGL, you can always go down here
to flip the green channel, and then you can see, See, that looks more like our normal. So that one is totally fine. And over here, I just
want to check my mask. So this is our mask. So if you just go ahead and
turn everything off, we have our red
channel, which is our roughness, I believe. Green channel, which is our
metallic and blue channel, which is our emissive. Perfect. So that
is also working. Now, let's go ahead and
create our master material. So this is the
material that we will be using for all of our models. So let's go into materials. Right click and
create the material, trim Sheet underscore Master. Let's go ahead and open it up over here, let's
move it up here. Let's get started
with the basics. Let's import our trim
sheets over here. Now, the thing with these is
they don't need any tiling. So we don't need to enter any UVs or anything because they will simply use sorry, I mean, all the UVs
are uniquely made. So all I need to do is throw
this into my base color, throw this into my normal
and throw this one. RMA so roughness. This one into metallic and
this one into emissive. See? We are just going to use these
channels individually. Now what I want to do
is I just want to go ahead and give it a
little bit of control. The way that we're
going to do that, we are going to
give control over our roughness and
over our emissive. Now, in order to
basically control that, you want to add a
scale parameter. I the saving. You can right click and you can type
in scale parameter here or you can just
press holds and just click once, then
you can create one. Let's call this roughness. Oh Roughness
underscores strength, and we are going to set this to one because one will be default. Now, when you multiply that, right click and add a multiply, when you multiply this
roughness strength with your actual roughness map, it will basically make
your map darker or lighter so you can basically
control the roughness. Now, from experience, I probably also want
to go ahead and a click and just create
a specular over here, and this can just
be a little bit extra handy if I want to
control some of the shine. So I'm just having this secular scale parameter just
to control this, but it is only for
very specific cases that I would change
the default value. Now, for our Emissive, we want to go ahead and
we want to do two things. The first one is we want
to right click and add a constant vector over here, and a constant vector is
basically like a plain color. So having that, I can now
go ahead and I can convert this to parameter so
that it is exposed, and I can call this a
missive score color. So we are converting stuff to parameters so that basically we can control the we can change
them in our instances. So if you go in here
in your material, when you right click, you can
create a material instance, which means that it's
like a cheaper version of your material that only
has parameters exposed. And I will just show you so that you know it's much
easier if I show you. So for our missive, what I'm going to do is I'm
going to multiply Oops. I'm going to multiply my emissive with this
emissive color. And it's set the color
to be like a default, let's go for like
a pinkish color to get started with or maybe
like a bit more purple. And now the reason
that I'm doing this is because it will basically change the color
of our emissive. That's what the
multiplier is also for. Because our emissive is white, it will multiply
this color on top and because multiplying
by white means nothing, it will simply
change the color to whatever we multiply on
top, which is this color. Then what we can do is we can
multiply this again using a scalar parameter
that we'll call emissive underscore
strength over here. And let's set the default
to zero and apply that. And then what we can do
is we can go ahead and just re add this to
our emissive color. So we now have control over the color and the
strength of our emissive. We have control over the
roughness strength over here. Now the next thing that I
want to do is I want to have control based upon vertex
colors over our colors. This is actually really easy. So what we want to do is we have our default
color over here. I'm going to add a
constant three vector, right click convert
to parameter, and just call this a
let's do color overlay. Let's underscore, overlay. And what we can
do with this one, if we set this to white, we can basically say that
right now our vertex colors, we can say like the red in our vertex colors is
always going to be white. But then if it is blue, for example, we
can say that then it becomes like a
different color. So what I'm going to
do is I'm going to go ahead and you need to add a lub. This is a linear interpolate. So the first one always
takes a bit of thinking. I want to go ahead and
everything that is red. Oh, yeah, so I'm
already doing this one. I need to call this B. You
can technically use this one, but I don't like to
use the first one. So what I can do is
I can right click and add a vertex Color note. This will basically read
our vertex color data. So what we can do is we can say everything that is red.
I just want to up. The reason I add this up
is in case I ever want to change this to be something
else because right now, if we would do
this, what it will do is it will say
everything that is red looks like this and
everything that is not red looks like whatever
this color is. But I do not actually want to do that because it will
just become confusing. Instead, what I'm going to do
is I'm going to lurp this, and then I want to
larp it again because now what I can say
is everything here, I can enter this into my green. Everything that
is red will stay. Then as soon as something
has a green vertex color, we want to go ahead and
give it a different color. Now we cannot just enter
this color because then we would replace
this with a flat color. Instead, we are going to multiply our texture
sample which our base with this color
and plug it in like this and then plug
this into your base color. So we are basically
lurping this with itself, meaning that nothing changes. The only reason I have
this is because you can technically just
do this if you want. But it's just preparation in case I want to change
my mind later on. But yeah, technically, if you
want, you can just do this. Doesn't really matter too much and just leave the red open because we are going to make
everything by default red. Then as soon as we
have why do I say B? It needs to be G.
Like green color. Then as soon as
we have something that in our vertex
calls as green, we will simply change
the color like this, and then we can do the same
for the blue, for the Alpha. And I really needed, we can also do it for
the opposite of red. But let's leave that for now. We got now the base done. Let's go ahead and
save our material. Then if we go in here, we can go ahead and in our
trim sheet master. We can right click, convert
this to material instance, and just call this
TrimsetUunc 01. By the way, if you want, you can also right click and convert these to
parameters over here. Bay color so that you can
change them out if you want to. Normal map RMA RME underscore mask over here. Something like that we can do. And then what you
will see is now everything that we
turned into a parameter. If we open up Trim sheet 01, you can see that now
those values are exposed, so we can change
them out however we want. And that's really nice. Like, that's what we are
going for over here. So what am I going to do now? I'm going to get started by
just opening up my beam 01, go to materials, select
your trim sheet 01, and then press this
little arrow button so that it will
apply trim sheet 01. Save it, and there we go. So we now have our
trim sheet on here. As you can see, we have
control over our emissive. So if we set our emissive
strength to one, see, you can see that
our missive starts show up, so maybe like 0.5. We have control over the color of our emissive just over here. So we can set it looks
like in our concept, it's like a green color. So we can simply
set this to green. And then our G color overlay
will not really work yet. Let's see, our roughness. Over here, we can
make stuff look very dull or like shiny, so that's looking pretty good. Although our roughness,
as you can see over here, it becomes too strong. So we do definitely want to,
like, play around with this. But I want to use this roughness only for
very small changes, big changes like you
can see over here, I rather do inside of
substance painter. Yes, if you're specular,
if you said to zero, you can see that everything
automatically becomes dull. It's very sensitive. So
if he said it's to 0.1, it becomes shiny again. So you will need to go like 0.02 in order to
slightly change it. Okay, perfect. What
we are going to do now is we are going to
set up our vertex colors. So let's go ahead
and go into Maya. And in order to set
up the vertex colors, it's not too difficult. There's two things that we need. If you go to mesh display, we have our apply vertex colors. We have our paint vertex colors, and we have a toggle
display colors. Those are the three
that we need. Let's go ahead and
let's add these to our over here to like our
shelf. Sorry, to our shelf. So the first one is going to be our toggle vertex color display. If we turn this on, we can basically toggle between
the vertex colors. And then if we go
to apply over here. Oh, sorry, actually, these ones. Let's delete them because I
cannot open up my settings. I actually need to go
up here into, like, the settings of my apply
color. There we go. And what I want to do is
I want to replace color, and I want to set my color
in this case, to red. So you can just click
on this red box and press Apply again. Um, See, I probably need to set this if I just go to mathspay because I cannot see
my color right now. Paint vertex color. This one is a little bit
more in depth. Ah, yeah. See? So let's set this one. Let's do it this way. And if you go to display, come
on, where are you? There we go. Click
on the red channel. So that's basically
what I wanted to do. I need to go ahead and
also need to go in here. And this one, I
want to be green. So this one can be completely
red, so that's fine. And then for this
one, what I want to do is I want to go
to Mesh display, and technically the applied
vertex colors does work, but I want to give you guys some visual feedback so that
you can see what I'm doing. So this one is going to
be green and press flood. And then over here, you can
see that in your channels. If you click on
the green channel, you can see your map in here. So this is now working. Now,
this also works with faces. So you can also just select
faces and do it that way. And I will give you an example
of that in a little bit. First of all, what I'm
going to do now is if you want to not see your
vertex colors anymore, press the toggle display
colors over here. That way you can basically
toggle between vertex or not. But as you can see, it's a
little bit buggy in terms of, like, how we want to
showcase everything. But that's no problem.
Like, we only need to set this once,
and then it's fine. So in this case, we don't need
to do much in depth work. But what we can do
now is we can export. And export this as beam 01. Now, if you go into reel, we most likely do not
have the correct setting. So if we open up beam 01, we most likely need to go
ahead and we need to go into our import settings. And then on our mesh, we want to set the vertex
color import option over white or not over white to replace
and then press reimport. When you do that, it should have changed the vertex colors. Can I show them in here? Show verte colors
over here, see? So now it looks the
same as in Maya. So it is simply red and green. So if we go ahead
and now go in here, we should be able to click on our Trim sheet
material over here. Let's move it down here. And then as soon as
we change the color, it should change the
color of just our panel. So if we go into our
green color and make it like a slightly, like, blue, dark bluish, Oh, it looks like that, I need
to turn these two around. So let's already set the color. And it looks like that,
that's a little bit too blue. There we go. See, it looks like that all
I need to do is go into my trim sheet master and flip these two around
over here like that. And then as soon as we
save this, there we go. And just like that, we can control the full color of our shapes over here,
using vertex colors. So that's a really nice way to basically save a lot
of texture space. By but still have a lot of color information.
So we got this one. Now what we are going
to do is I'm going to just show you an
example of how to create a panel in here using
the line that we had and also just add
some visual interest. So let's go ahead and
go back into Maya. Save a scene, by the way. And let's add like a nice
panel to the side over here. So we want to get
started probably with creating a plane over here, set of segments to zero. And this is basically
going to be like a little line that we are
going to just place on top. So I'll show you,
like what I mean. So first of all, let's
make this quite thin. So remember that extra little
strip that we created. This is basically the type of things that we
can use it for. So let's go actually, let's make this a
little bit less white. Let's see, thickness, thickness. Let's go a little
bit thicker, maybe. Let's move it
somewhere over here. Let's say that we have this
one, what I'm going to do is I'm now going to go ahead and I'm going to let's
probably first of all, just give it an angle. If we just go ahead
and move this down. Basically, what I'm
trying to do over here is I'm going to move this
down and then for this one, you know, just scale this
out a little bit so that it becomes square and then
just do like a contra B. So, ooh, that looks
something is still Wong. Let's see. Is it like
that this one is a lot thicker? I think
that's the case. I think this one is it's a
bit difficult to see with, like, really thin
strips like this. But yeah, basically, I
just want to go ahead and create, something like that. If it is not perfect,
like over here, you can see, like the thickness
is a little bit strange. What we can do is we can always just go in and see
if we can maybe, like, fix it, like
moving this one up and this one out see. And then it just it still
lines up pretty well. It doesn't need to be perfect. But we are going to
basically mirror this here. We only need to get it
up until this point, U Von wrap it, and then we can just go ahead
and mirror it. So actually, you know what? Yeah, let's move it a bit. You know what? Actually,
This is quite long. Yeah. Let me just leave it. So we got basically
this shape over here. We can assign existing gel
and assign our trim sheet. And all we need to do for
this one is we need to go ahead if we go ahead and
open up our UV editor. Let's start by just
going into UV, we just want to go ahead and do a bass plane or something like that so that we have this shape. Once that is done, we want to go ahead and rotate this flat. Let's go modify Orient shells. That does not work.
That's no problem. Basically, I'm just
going to go ahead and I'm going to move this main area over here
over my straight line. Now, you do have a
straightening UV, but I can try it out, but it rarely works
for me, basically. If we grab this piece over here and just
move it like that, that's what we
need to do anyway. But then there is a
straightening UV where you select this and you
press straighten UV, and it will try and
straighten it out. But honestly, yeah, it works
like not all the time. But what we can do is
we can go ahead and we can basically move this, and all I care about in
this case is just to check. Yeah, so we need to
check all the ends. So this end over
here seems fine. Over here, this one also
seems fine like this. And then over here, you can see that we now go to the site. So we just want to go ahead and move this up a
little bit or down. Same over here, like
Let's move it like this. Now one thing that I
do notice is that I most likely need to
go ahead and create a mask over here because it is easier for me to
line this up when I have a mask compared
to trying to cut it off exactly on
the point that I want. So this is actually looking pretty good over here already. So, yeah, it's not
too difficult. Just make sure that
you get the line straight and then simply
place it on here. And I will show you the
mask support after this. So first things first is, we are going to use a mirror, which you can find in mesh, and here you have a mirror, OS or simply I have it
over here in my shelf. Damn. I keepgetting that. So I'm going to set
my axis to object. Let's set the
direction to the plus. Oh no, maybe we do
need to be minus. Maybe I need to
be on the Y axis. No, it's not a Y axis. C? Oh, wait, merge. Set the merge to 0.1.
There we go, see? And then we need to set this
in the plus. There we go. I don't know why it's
so sensitive in terms of, like, this object. That's a little bit
annoying. Look at that. Damn. But Bounding box, maybe? No, bounding box,
also. Okay, fair enough. Let's just do objects. I probably just forgot
to center my pivot. But what we can do
is we can press W L this is already fine.
So let's have this one. Looks like that I just
need to move this up, and honestly, don't worry
too much about stretching. You can stretch this
a bit and then just simply merge these vertices
together like that. It will still keep
our UVs intact. And this time, go
to tool settings and just reset your FBX. And if you delete the history and also freeze the
transforms over here, delete history, I'm
sure you all know, you can find in edit,
delete by type history. But the free freeze transforms
you can find in modify, and here you have
freeze transforms. What this will do is it will
often just improve the way that we do our mirror or any functions that have
to do with transform. So let's go ahead and grab
our mirror over here. Oh. Don't know what
happened there. Let's try again. Mirror. Where are my settings? Hello. I am selecting
mirror, white? Let's try it over
here. Okay, now it works. That's strange. For some reason, my
button didn't work. Any case, mirror. Now here, see, something
is going wrong. Something is going
wrong over here. Let's go to I don't
know what is happening. I must have accidentally
pressed something. Let's delete that piece because I don't
know what that is. Once again, reset my pivot and
just to remove my history. So let's just do a bit of debugging to see
what's going on. Okay, so that now
all looks correct. So now if I mirror,
it should work. A mirror or let's say the
merchandise halted like 0.1. Mirror on the Y, ZX. Okay, on ZXs we need a mirror. And we can make this
a little bit longer. You can make this as
long as you want. There we go. So now that works, and let's move this
forward a bit. Strange, I don't know
why it was so difficult, okay, so we now got this line over here,
that's pretty good. All you need to do for this line is you need to
go ahead and just move it as close as possible to your mesh without clipping it inside of your mesh like that. And what we can do is we can also go ahead and
we can clone this. And if you just hold J and just rotate this a nice 180 degrees. Might be a little bit too close. Let's move the bit
forward again. There we go. From a distance, you will see that it's
clipping a little bit, but don't worry too
much about that. So we got this one now. Now what I'm going to do is I'm just going
to go ahead and I need to place some
lines over here. However, it might be a
little bit annoying to do that without changing our UVs, because if I place
a line over here, you can see that
it will not work. So instead, what I'm going to do is I'm going to do
some manual work. I'm going to go ahead
and I'm going to place an edge or a cut
using my knife tool, probably from over here. I don't know why
that's not working. Let's try again. Place
a cut from over here. There we go. Now, it works. Down here, and just press
Enter when you're done. For some reason, everything is beaving a little bit strange. So I'm just going to do this
in some shorter variations. So we got this one you see, for some reason, it's
not working as well. I don't know why it is
deciding to behave like this. And once you've
done this, you can make very small
adjustments like this. But you basically want
to have this edge over our line over here. See? So we have it over our line, and here, I'm just making, like, very small adjustments. Then what I want
to do is I want to go ahead and do the
same over here. So for this one,
you know what here. I'm just going to can I
place like a loop? Oh, okay. So for this one, now
that we have a cut, I am able to place a
loop like this because I now have a nice
straight cut over there. The only thing is that this
loop does not continue. So we now have this
loose vertzi which we just want to go ahead
and just use a knife tool. Here we go. To place a
quick cut like this. Don't really have to worry
too much about the geometry. It's not that much. I
rather just keep it. You can optimize it if you want, but just know that
if you optimize it, you will most likely
need to redo your UVs. There is an option here, but it does not work very often. It is here. Preserve UVs. You can find it in
your tool settings, which if you turn it on, it will try to preserve
the UVs over here, but you can see that it
still does some movement. So it depends if you
want to use it or not. I'm just not going
to use it for now, maybe a little bit later on. What I'm going to
do is I'm going to go ahead and
place another cut. And this cut just simply
goes along this line, and let's then just
have it end over here. And we need to do the same over here have end like that, which means that now we can just later on,
place a simple cut. For this one, you might want preserve your vs to
move it down a bit. So that we place like a
simple cut in between those pieces. Uh oh. What's going on
over here. Oh, see, that's our UV, so we just
need to kind of move it. But yeah, what I mean
is so now we can just place like a
simple cut like this. And then these virtues, they are floating, yes. However, you, you
can connect them, but you can probably
get away with just having unreal fix
the problems for you. Because if you keep them
floating like this, what will happen is
unreal will triangulate. But the unreal triangulation, it happens automatically if you do not triangulate
your model in Maya. The unreal triangulation does not break your vertex colors. So you can twine just leave it like this
to save some time, or you can just go
ahead and connect it. I know it's like I'm going back and forth
a little bit here. It's more like if you want to save time, you
don't have to connect it. If you want to do it absolutely perfect, you can connect them. That's basically what
I'm saying here. In my case, I can use to
save some time, of course, because I don't want
to just have you guys watching me connect
some ertzes non stop. But yeah, this is one of the few times we will
use these panels. For the rest, I probably don't
think we need them a lot. But here you can
see that I'm just now placing these connections. Like this. The only reason I'm doing all of this
is so that I can select this specific phase, and I can add vertex
colors to it. Like that. So we
got that one done. Turn off your preserve vs. So now what we can do is we
can select these phases. If we go to mesh display,
paint vertex colors. Oh, wow, 30 minutes
already for this. Sorry that it takes so long. Oh, paint vertex colors. This is one of the
few times that we actually need to go in here. We need to go to mesh
display, apply colors. And we want to go
at and we want to apply a green color
to this, press apply. But then what we need to do is I do want to just double check by going into my paint
vertex color stool. And then in the
display, I just want to see red and green. See? I just want to make
double sure that everything is properly painted so that in the green, you can
see these colors. That's why I often
have this window open. Then we can just go ahead
and toggle the display, and at this point, this is done. So we can right click
assign this to our layer, export this beam 01. Let's go in here and
that's reimport beam 01. Then what you will
see happening is that now we have this nice panel over here and we have our
shape over here here. You can see it a little bit better with our
lighting in here. And now at this point, what we can do is we can go
ahead and we can add some masking in here. So that's the next
thing that we'll do. But this chapter has been going on for a
little bit too long. So in the next chapter,
we will finish off with the masking and add some text over here, like you
can see over here. And once we've done that, everything is done in terms
of the setup for now, and then we can just go ahead and we can dive in by making all of these models and
turning them all to final. So let's save a scene, and let's continue with this
in the next chapter.
22. 21 Creating Our Final Models Part3: Okay, so now that we have
done most of this stuff, what we're going to do is
just quickly go into painter, and I just want to
create a quick mask for, like, this stuff over here. So if I go let's
see my base colds, I think I can just do this
in the text layer, right? Oh, no, wait, because
the text layer also has, like, all these other things. In that case, I'm just going
to create a new fill layer. It's called this mask only. Turn everything off except
for the obste over here, and then add like a
simple black mask. Temporarily just add like a base color that's red just so that I can
see what I'm doing. And then what I'm going to do is I'm just going
to go ahead and I'm going to click here. And if I just quickly
go in here and then hold Shift, Oh, yeah, okay. That's unfortunate, so it
does not go that long. In that case, let's zoom
out as far as we can. Click here, Hold
Shift. There we go. That's number one. Click here. Hold Shift. Number two. Just try to get it
quite precise so that it's just beyond our bevel, and then this will
just be masked out so we don't have to worry about any extra stuff. I do know that this is
actually the opposite, so I just need to quickly
check because right now, if I turn off my collar
and go into my opacity. Oh, no, wait, no,
wait, this is fine. This should be fine, actually. Yes, yes, this should be fine. Although we might want to
invert it, but I'm not sure. Let's just go ahead and
save it because we can also just invert this
inside of unreal engine, so it should not really
matter too much. I don't know why saving
takes so long, but come on. Finish saving. Okay,
why the saving? I don't know why
it's taking so long. Maybe it crashed or something. Let's go into Trimsetmster, and the only thing that
we need to do is if we go in our trim sheet
master like the main block, let's go into the
blending mode and simply set it to be masked like this. Then you most likely want to add a one minus one minus
just means invert, and then we just plug in our Alpha channel
of our base color, we invert and add it
to our obste mask. Now it should basically
have I'm saying it wrong, here, because now it
cuts out the text, but I do not want it
to cut out the text. The reason why I want it normal is because then we
will have the text, but that will not work unless
we actually use the text, which means that I need to
probably create two versions. I probably need
to go in here and basically add a static
switch parameter, it is called. Here we go. And I will just call this
invert underscore mask. This means if we have a material instance that
is just for our text, we can simply use the
one without the invert. And if we have one
with the text, we can use the one
with the invert. So let's say this the
true. And let's set the default to be
true over here. There we go. So that
should do the trick. So now we can just go ahead and we can simply switch around our mask like that.
So we got this one. How is my saving doing? Okay, there we go. So let's go ahead and see if
this actually works. So let's export
our texture again. And if we go in here, we just want to go
ahead and what the reimport this. Let's see. That looks like it works. It has now some weird problem over here that I've not
encountered before. Maybe it is just a
little bit too close. No, wait, it is cutting it out. Yeah, it is cutting it out. Am I thinking wrong here? I probably am. Let's see. Because if I invert mask. Okay, so if I invert mask, it will add the mask, which means that I would need to invert
it in different ways. I need to go in here. So if I want to invert my mask, this would need to be
black and everything else would need to be
white around it. Am I saying that correctly? So right now it is white
and it becomes black. So instead, if I go in
and let's do a duplicate, instead, I want my
mask to be let's see, this one, I want to be black. And then this mask let's call this mask underscore
BG for background. So this mask, I want the art and masket
color selection and select everything outside of it. Yeah, so now I am
cutting this out. I still do not feel confident
that this is correct, but let's you see because I'm probably just thinking
about it the one way around. I tend to do that sometimes. So let's go ahead and
export this and see if that actually does anything. So let's re import. Oh, sorry. Oh, no way,
this is the right one. So does that cut it out? Yes.
Okay, so that cuts it out. And then when we have a text, we need to just simply
flip this switch. I hope I'm saying
that correctly, yes. Our metallic is also
really dark here, but let's wait until
we do our lighting before we start working with that because it
might just be that our lighting is a little
bit messed up right now. But, okay, so we got that
mask done. We got that done. So now let's just go ahead and try out the text
as the last thing, and then we can also try if everything works in our system. So for our text,
let's create a plane, and we are going to just
remove all of our segments. Just want to move
this. Let's see. Let's scale this
down a little bit. Just having to look at my text. I know that the text is
over here in the reference, but I just want to
have it down here. So what I'm going to do
is I'm just going to have this text roughly
around this point. Now I'm just going to already
add my trim sheet material. Now, if I select this, it should just be a simple
plane, which is fine. And then what I can
do is I can use this text and just already place it into position
properly like this. And then all I need to
do, we can turn off our UVa is I need to just add a quick segment in between over here and just
delete the top. See? So now we have this one, and if you want, you can maybe move it
a little bit higher. That we get like
this one version. Okay? So let's go ahead and
do one more export. Beam 01. Yeah, that's the
one that I want. So let's go in here.
Beam 01, reimport. And then we most likely need
to have yeah as expected, we need to go ahead and we need to add a new
material to this one. Right click Assign
favorite material Lambert and just call this text. So this one will be
specifically for the text, and that will be our material instance that you flip around. So we will still use, of course, same text
and everything. We will not change that. It's just that we flip
around some settings. So let's re input
this and press done. And now in our
materials, we have trim sheet 01, duplicate it. Call it text, and for this one, simply turn off our invert mask. And now if we go into
Beam one over here, we should be able
to simply select our text and then apply it
to the second one, see? And now that one shows the
text properly, which is good. That's what I want. The reason
why you want to place it so close is because else you might be able
to see shadows. Now, this one, it also
depends on distance. Like, if you have
this willy close, you might want to try and
place it even closer. But from a distance,
this looks pretty good. I would say that in Tren
sheet 01, I probably want to, like, just make the color a
little bit darker, like this. But perfect. Okay, everything is now finally done
with our setup. We can delete this
one as you can see, these ones are
working totally fine, so they work on all areas. So what we are going to do in next chapter is we are
just going to go ahead and get started by just basically
modeling all of our pieces. So we got this one,
so we will just go ahead and continue
on with this one. And I think in the beginning, I was thinking of
doing it one by one and then balancing my material, but I feel like that might
not be that good of an idea. So I'm first going to just
do all of my modeling. I also like all of
my UVN wrapping. And then I will just
go ahead and set it all up in one go in Unreal, because we will
probably need to do quite a bit of
balancing inside of Substance Painter and Unreal to get exactly the
look that we want. So let's go ahead
and just continue with this in our next chapter.
23. 22 Creating Our Final Models Part4: Okay, so let's start by
turning our models into final. So we got this one over here. Now, what I'm going to do is I'm just going
to go ahead and delete all of these center bits over here. We don't need those. We also never really
need the backs, let's delete that one, too. Yeah, honestly, we never need
the top or the bottom also, so we can pretty much just
get rid of those also. It will just be
less UVon rep work, and it will also, of course,
be more optimization. So pretty much this
is all we need. These edges over here, just go ahead and control backspace
then because once again, they don't do anything.
And I think that's it. So for this one, this one is actually really easy
because all we really need to do is add a quick bevel
for our weighted normals, maybe like 0.2 or
something and smooth it. That's it. So that
one is already done. And then for, like, the panels, those are a little
bit different but should still be quite simple. Let's say you've seen looks like it's pretty much
just like a cube, and we are going I'm just going to basically make
the shape over here. So yeah, let's go
ahead and like, push this cube in something
like this should be fine, like this size so that it is still clipping in a little bit. And if we have a look at this, what I'm going to do is
I'm going to get started by placing actually, wait. I first of all I want
to make sure that my thickness is correct, yes. So I'm going to start by placing a double edge connect like this. And let's go ahead
and just push this, um probably around
this space over here, and then let's do Control B at 0.2 or something
so that we can basically go ahead and we can increase the size of
this ring over here. So I can now just go ahead
and I can scale this in or scale this out
and then move this out. I'm going to maybe
select these two and scale them a
little bit closer so that we basically,
have a shape like this. Scale this one out
a little bit more. There we go. And then looks
at it just as a little gap. And for that one, all we
need to do is we just need to once again place
like a double connect, maybe scale it out a little bit, and then do another Control B at probably 0.1 and then select the center face
and move it back. That's pretty much all that
we need, something like this. Now what I'm going to do
is, I'm just going to go ahead and going to scale
this in a little bit more. There we go. And once we've
done that, let's see. I only will need a
front over here. Then I can pass Control
Shift I and delete everything else because yeah,
that's all we really need. If you want, you can
go ahead and you can optimized by merging some of these vertices
together over here. It's not that much, but
we are going to copy this like 20 times or something
so that it might be nice. And lastly, I'm just going to go ahead and
select these sides. Let's do CtolB. That's fine. And I'm just going to go
ahead and select the corners because we still need to add
something to our corners. But what I'm going to
do is I'm just going to deselect the long
areas over here. Control B at like
0.2, like that. So now we have some weighted normals
that if we smooth it, it will still look
pretty decent. This one is on the limit of that you need
weighted normals. Just because it is quite big, I want to add weighted normals, but you can sort of get away with just not doing
it if you want to. So, oh, yeah, let's
also later on, I also need to add an
extra panel to the top, but that's something
we can do later. So we got this stuff over
here that's all fine. I made the mistake of over here, like I made a mistake here because I should have
just pushed this out. I think the easiest
way for me to fix that mistake is to
quickly delete, and then becomes a
little bit annoying because we have these really
small bits over here. See, this is my fault. You can
also try and, like, do it, but I think at this point, we are so far along that
I'm just going to delete. Yeah, I need to be
careful for that. Let me just delete this stuff. And then I'm just
going to re do it. You can also use your
knife tool, probably, but I didn't really
have a lot of confidence in this specific
case because we have a bevel. So instead, let's just go
ahead and do it this way. So, I see see there's often many ways that you can
do the same thing. So let's just go ahead
and select this. And if you want,
you can deselect sites because we technically
do not need those. So yeah, I did my optimization, and now I changed my
mind, and now I'm just going to leave
it like this again. So sorry about that. I guess you can do the optimization
for these bits over here. If you want to, just
not on these ones because s it just does
not flow correctly. Anyway, it doesn't
really matter. What we are going to do is we are going to go
ahead and give it a slight tilt to make sure that the length
is looking correct. Looks like that I
want to give it another slide tilt over here. Yeah, this is
probably the length I want to go for
so then I can just go to my edges, push this out. And now before we start
duplicating this, I already want to texture it because if we
start duplicating it, I would need to texture
every single one. But if I just go ahead and assign my trim sheet
material to this one, I want to use this
layering stuff over here. I think that will
look quite nice. So let's just go ahead
and let's just create one complete UV because
as soon as we unfold it, you can see that that should
work pretty decently. I'm just going to go ahead
and I'm going to oh, looks like it is unfolding
in the wrong direction. If you ever have that the vis
looks strange or something, I recommend to just remove your history and to
freeze your transforms, and that often already
fixes everything. So now let's see if
that fixed it, unfold. Yeah, see now that fixed it. Now what I'm going to
do because right now, this one is taking
up too much space, I'm going to just
go ahead and select one of the edges and cut them so that all that we
have left is this top one, which we can just
go ahead and we can kind of move over here. And finally, we
have this one left, if you just scale it down, I
do want to try and give it as much space as
possible. There we go. And that should look okay, it's a little bit
difficult to see in Maya. But yeah, as you can see,
that does look totally fine. Now, for this one, what
we are going to do is, let's just go ahead and
assign our trim sheet. I'm going to probably go in and place a single
connect in here. There we go, so that
I can go ahead and I can basically do like
a bass plane on these. And then all that is
left is this side. So if we just go ahead and
see, let's hold Control, I think we can just do
one single bass plane on all of these over here. There we go. Let's go ahead and for these ones that
are standing upwards, let's move them out of the way, select them, and then just
hold J and rotate them. And let's just place everything
on top of each other because that makes it easier for us to then
select everything. And we are just going
to use our white again. So we are going to select
everything and just nicely move it in here. There
we go. That's it. Easy, does it? So, we
got that one done. Now, all that we need
to do for this one is let's look at
it from the front. Holed Shift and probably
around this point, and let's do just like a shift D to just repeat our action
up until, like, the bottom. Yeah, up until this
bottom is totally fine. So that's all looking good, and we are ready to reassign this to our layer
in case we risk something. Save scene. And what I'm
going to do for this one is we need to still
set our vertex colors. So let's go mesh display. Let's apply colors, and
they just need to be red. All of them need to
be red, so we can just go ahead and
press Apply on this. Then simply go in here and like, Oh, that's always there we go. You sometimes need it
like double select because else your
display does not work. So sometimes if you just select
once and it doesn't work, then you need to
just click away, select again so that it's a little bit fiddly Vertex
scholars in my, I should say. Personally, if I want to
work with Verticolars, I do prefer tres Max myself, but every program can do it, and we don't need that much
for it. So that one is done. Floor 01 and floor 02 is
like a duplicate of it. Oh, this one is going to
actually be quite interesting. So what I'm going to do is
I'm going to for floor 01, get rid of these edges. There we go so that it just
becomes like a simple cube. And now, as you can see, it basically comes
in part four parts. We have this one,
we have the side, and then we have these
trims over here. So what I'm going
to do is I'm going to start by probably doing
some rough blockout. So it looks like there's like
over here for the lines. Then we have another line that
is just like for our fans or I forgot the
English word for it. Sorry, drains drains. I think that's the English word. And then this stuff over here, it will start to
become these panels, but we cannot yet
do that because we need to do something
specific for it. So let's go ahead
and let's start by applying our trim
sheet over here. And now the reason I will already do the unwrapping
is so that I can actually move these shapes
based upon my trim sheet. So if I go in here, I can
go ahead and give it like an unwrap let's move everything else out
of the way for now. And then for this
one, what I basically want to do is I want
to go ahead and I want to make sure that
I have this like, nicely set in between. I feel like that
is too much space. Maybe if we go to our UV, then we do not have that
phase selection, look. Let's see. If I do this, does that feel like too much space? I don't think so. I think
that is enough space. In terms of the tiling, that one is a little
bit annoying. What I would recommend. Or you can try to stretch
it, but then here, it doesn't work, so because we would then need to go
for, like, a longer version, even if we scale it up or
just make sure that you set your points on a flat
area so that the ends, they do not have any
details on them, see? So they are kind of flat. And try to then set them
quite closely to the bolt. So here you can see that
I'm setting this just before the bolt,
and then over here, I'm setting this
just after the bolt so that in terms of the
tiling from a distance, you will not really
notice anything. So we got those ones done. All of these sites, I
am going to keep them, but we do not actually
need to use them, so we can just leave them by default, doesn't really matter. This one over here, what
I want to do is I want to already unwrap it so that I know if my
thickness is correct. It looks pretty much correct. So if we just go ahead
and scale this down, it might actually look
pretty perfect. There we go. And it will also have perfect tiling because
it is a square, so it literally just
ends on both sides. If it does not end, simply use snapping to
snap it to the end. Now, this one's going to
be a little bit different. So for this one, we
are going to decide the amount of tiles that we are going to have
because as you can see, it's the same size
as our white tile. So if we go ahead and
do an auto here we go, like an auto Best plane. Sorry, best plane, I mean. What I'm going to do is, I'm just going to
go ahead and I'm going to scale this down until it nicely fits within one panel. I think that works. Then what I'm going to do is I'm going to move it. So that over here. It is also like sitting
on the end of one panel. Just be careful. Come on. There we go. That
looks pretty good. And now all I need
to do is I need to add a segment every single time. We have a new panel,
so we can do this. Then if we go to our UV tooket, we can select the top piece, cut, select it again, and once you've cut it, you can just go ahead and you
can move it down again. And now we get into
trouble over here. So right now it is
like sitting halfway, but I do not want
to have it halfway. I think that will
not look very good. So let's see. That is
not a lot of space. We might want to actually try to do some stretching instead. So what we might want
to do is we might want to go to our UVs
and grab the top, move this down, so we are
stretching this down and then grab this piece and
make sure that you do not have preserved
UVs turned. Actually, let's only do it
on Oh, that's annoying. Let's do it. You know
what? Here's a cheat. If you just places like an edge really
close together like this and then
select these lines, you can see that it is almost like a dead zone where you can just move this around. So I want to basically
go ahead and move this, and this also means
that it will become two tiles when we have our
white tiles over here. Okay, so let's see. We have this one pretty
much in center now. I think that should
work. Do I want to maybe make it a bit
larger? I don't know. I think I'm going to
leave it like this. Yeah, I think that
this is pretty good. So now that we've done this one, we know that this is basically going to be like our tiles. For our tiles, we do have
quite a unique unwrap. So what we're going to do
is we will place probably like one extra line over here. And then delete these three now let's only delete these two over
here. Delete those. And for these pieces,
what I'm going to do is I'm going to
Shift click and I'm going to extract the
faces so that I do not have to worry about
whatever is along it. We do not need to place
bevels on these ends anyway, because if we place bevels, it will no longer be tilable. We do need to place
bevels on these ends, so we do want to
keep those intact. But let's get started with
this. So I'm going to now do a best plane
on these two, and as you can see, oh, no, wait, they are not
perfectly in the center, which means that I need
to just move one of them slightly down just
to make sure that it exactly lines up
with the other one. Well, not exactly, but super
super close. Then select it. Let's go ahead and rotate this. Place into position, and we are going to place
this where our tile is. So first things first is I want to go ahead
and I want to scale this until it's
pretty much perfect. I can see that as a
little bit of a fading. So that might be just
like a resolution thing, but there's something we
need to keep in mind. So let's do this.
And now what I can see is I want to move
these pieces to the side, but then I might want
to just move here, let's end this one
over here, I believe. So we do need to end
it on a proper end. What I'm talking about is
that I might want to go ahead to move these out a little bit to make
them a bit bigger. Anyway, so we now have this
piece here ready to go. If we reset it,
what we can do now is we can use a mirror to
basically flip it around. So we are going to use our
mirror on our by the way, the merge threshold to 0.1. Set the axis position
to object. There we go. So on the Z axis in objects and now you
can see that now we can basically choose how white do
we want to have our tiles? So I'm just going to go and get started with
something like this. The reason I'm just going to
be quite flexible is because we most likely will not
actually hit the ends properly, so we might need to just go ahead and do some
overall stretching. So let's go ahead
and hold Shift and move this nicely so that
it is just clipping press CevD is it clipping in
front of it or yeah, it is. So shift D. Oh, God. Now I messed up. 1
second. That's my fault. It's a bit difficult to
see because it's dark. Shift, shifty, shifty,
shift D. Shift D. Okay, so now we have these
pieces over here. And now what I'm going to
do is I'm going to decide, do I want to make them
longer or less long? And the way that
we are going to do this is simply go to surfaces. I mean, the form, lettuce
or lettuce, latte. I still don't know. And then
just grab the lettuce point. And you can choose, do you
want to have a half tile? Do you want to have
a whole tile or do you want to have them
a little bit larger? I feel like I want to have them probably a
little bit larger. So we basically set
this to this point. We then delete our
history and then just delete this one, I don't
know what this is. Hello. Delete. It did not allow me to delete
for some reason. Anyway, so now we have these all setting up and
then when we duplicate it, it would simply tile because
it ends on a black line. You will not be
able to notice that it's not tilable or anything. Now, on this point, we want to go ahead
and place a loop. It's a bit difficult to
see here, here, here, and here so that we can select
this site push it back in. So now it will basically flow
along with our trim sheet. So we push it back in like this. And then what we want to do is we just want to go
ahead and we want to select these sites.
Or, you know what? I'm actually going to
delete the sites anyway, because else we
will have a lot of extra geometry
that's not needed. But let's do contra B 0.2
ish, something like that. And for this one, if we go
to our modeling toolkit, set our selection constraint
to five with the angle, and let's delete all of
this stuff over here. No, I do not want to delete
the bottom, actually. But for the bottom, what
you can do for cleanup, you can go ahead and
just simply select these edges and just get rid of them because they
do not do anything. But okay, so now we
have some nice bevels, and this should still
work if I smooth this, turn off my edges and
faces. Yeah, there we go. Okay, so that's basically
like a flow piece. So we have this floor piece, and that is looking pretty good. At this point, what I will
do is in the next chapter, I will go ahead and first export these two pieces to unreel because I need to make sure that this all works before
I duplicate it an artist to become this specific flow piece
that you can see over here. So let's go ahead
and just continue with this in our next chapter.
24. 23 Creating Our Final Models Part5: Okay, so let's continue. So with this one, last thing
that we had to do that I almost forgot is to quickly
go to our mesh display, apply colors, and let's
just apply some red colors. And then once again, oh, this time it almost
work this time. This time we just
need to only re select this one and
click on it once. So as you see, it's really unpredictable
how it actually works. But okay, we can save our scene artists to our
layers, so that's all done. Yes. So let's go
ahead and go file, and let's export this stuff. So this one is floor 01. And we also had beam 02 done, so we can just as well export
selection beam 02, also. And let's just go ahead
and see how this looks. So inside of unreal, I'm just going to go at
and immediately like, open up beam 02, and I'm going to open up
floor 01.'s get rid of this. And the reason I need
to do that is because we probably need to
go in our settings and set the vertex calls to be replaced and then
press reimport. And just reset it to the
FVX. Same over here. We can just go ahead and replace
and then press reimport. Perfect. And now if we just
quickly go to our materials, select our trim sheet 01, we can go ahead and we can
just apply this in here. That has no color. Because we did something
with the emissive. Strange. Why is it white? That is really
strange. I don't know. I need to check it out. But okay, so for
our general floor, let's have a look.
Yeah, you know what? That is a pretty good size. Like, over here, they
are also quite big. So I quite like the size
of my floor panels here. And yeah, you can see, like, the nice reflections
and everything, although we still need to balance those out
a little bit more. But that's looking pretty good. Over here, this is way too dark, so that's something that
we all need to fix. But that is no
problem. Like, I just need to make sure
that it all works. Over here, it also seems
to all work totally fine. So, great. That means that I can turn this one into, like,
a pop up panel. The only problem is that I
probably need to, like yeah. I don't know how
we are going to. Let's have a L. So
for the floor 02, the problem is that
over here, the panel. See? Oh, no, wait, it's not that big
of a difference, so it doesn't matter, but I
do have a flat area here. So instead of having
a flat area here, we will most likely just end up connecting immediately
to this point over here. I think that will be
the best technique. So let's go ahead
and have a floor 01. So yeah, you are totally fine, so let's go ahead and shifted. Right click and artist
selection to your floor 02. 40. Display, show all or
is it in a group? Looks like that
it is in a group. If it is in a group,
just go ahead and undo what you just did over here. And what I want to do with this, actually,
let's delete it. A group basically
means that if you go in your outliner,
it's really annoying. It sometimes randomly happens. Well, I probably just
press something wrong. But over here, you can see
that it's ld to a group, and when it is in a group, it does not properly duplicate. So I just need to go to
Edit and press ungroup. I believe that now here if
they are separate meshes, you can do the same
over here if you want. Normally, I just have this
ungroup button in here. Se so that I can just quickly
click on that, like that. But yeah, that
should do the trick. Now if I just go ahead
and select this, shift the again, add it to
my floor 02. That's fine. It also breaks your layer, so you do need to go in floor 01 and re art this selection. See so now that all works. Okay. Now for this one, let's temporarily hide this. So I need to probably go ahead
and let's combine these. Actually, oh, this is one piece. Let's combine these
and let's then select these pass and then extract them so that they
become all separate. For this one, I just want
to go ahead and also extract faces on this one. Yeah, this piece we
will cover later on. Actually, just to make
it look extra nice, let's also go ahead and extract this one because else
it feels a little bit strange that we just have
that random piece connected. Okay, so we have
these. I'm going to go ahead and I'm
going to first of all, let's go tool settings
and reset my pivot. And now if we press Show A, I thought I deleted.'s height, select again because I cannot select them
at the same time. Here we go. Let's go
ahead and now show A, and then all I need to
do is I need to snap two points and then snap it
to this point over here. Okay, so we know that this is exactly on the
line that we need to be because we measured this out painfully when we
did our blockout. So we know that. So now
if we hide our blockout, all I need to do now is
I need to, for example, combine all of these pieces, select these vertices over here, and snap those back
down like this, so that they are just
basically connecting here. So even though it might
look quite strange, just having open
space and everything, this should work totally fine. Now, for this one, what I'm going to do
is I'm going to go ahead and let's go. I have a feeling
that if I would grab this line over here and turn off preserve Vs that it
probably doesn't work. But and that we like snap it to this point over
No, it does not snap. Let's then turn
off the snapping. Ah, yeah, actually,
you know what? I think that still
looks correct. I'm just a bit worried that
I made a small mistake here, and it ended up
just like breaking, but it looks correct. Yeah, okay, so that looks
like it is working. As I said before, I
don't really trust it. Let's just deselect that really long lines that I
can go in here and I can really just go
up close and, okay. So let's just say that
that will hopefully work. And then what I want
to do is I want to go ahead and for this piece, this piece will be flat, which means that I want
to extract these phases. Yeah, that means that I want
to extract these phases. I want to grab these vertss and I want to go
ahead and I want to once again, turn
on Snap points. Oh, turn off preserve
vise. There we go. Is this bevel still correct? Yes, this bevel
is still cracked. Oh, no, I did not properly
align the way I wanted to. But it doesn't
matter, I can just do this. No one will notice. If I do that and if I also
over here, here we go. Just to make sure that
everything properly aligns there like there is an edge over here
that is not correct. It's on my edge and faces, so o, so we got that one. And let's just go ahead and
quickly select this one, and I just want to move this
up. Come on, you can do it. No, here, there is, like,
Oh, that's interesting. What is this? Oh, I
know what this is. This is that thin line
that I created to cheat. I totally forgot about it. But is this line now not
connecting properly, or is it there we go. Now it is connecting properly. See, I used that light to cheat. I don't need it anymore, so let's just go ahead
and just merge down. It's still there, but
this should be fine. So we now got this piece done. Now all that we need
to do is we need to create a connection between
here and between here. And the way that I'm going
to do that is very simple. So, that's all good. I'm going to turn off
my snap the points, hold extrude, and
then go to vertices, turn on my snap the points again because I want to
keep this separately, it will just make
my life easier, and I'll simply
snap it like this. There we go. And then
for this flat area, we are going to go
ahead and go into our UVs and separately
unwrap this. And this one, yeah, we cannot really
place it in here. So instead, what we will do is we will simply
make this white, but we will match it up with
the darkening later on, which means that I
probably want to make this blue so that I have, another color to
just make sure that the darkening is exactly the same. But yeah, so
we have this one. So at this point, what
we can do is we can go ahead and go to
our mesh display. First of all, make
everything red. Let's go ahead and
press apply color. And then what I'm
going to do is, I'm just going to go ahead
and select this one, mesh display, apply color, and this one will become
blue, in this case. There we go. You will not know that or you will not
notice it because we did not do the trick
where we went into our paint vertex color tool, but it will be there
like it is there, so we can be confident of that. So that's looking pretty good. Let's go ahead and assign
this floor to over here, save our scene, and let's just go ahead and export this and
see if it actually worked. So we can go ahead
and go in here. Assets here. So these models
are actually quite simple to make. So
that's quite nice. Oh, yeah, I forgot I need to um, replace and I did
something wrong, didn't I? Because I did not import,
export selection. Oh, I probably did
like Beam two. Yeah, I probably
did like Beam two, so I just want to
quickly go in here. Just reexport this as Beam two. At least that's
what I feel like I must have clicked
something wong. So let's just press reimport
again, reset to FVX, select our trim sheet 01 and
apply it to the material. Yeah, see, here that
works pretty good. Okay, so we got that
one done. There you go. And now all I'm going to do is, I'm just going to go in
my trim sheet master, add another lurpPbably
need to go this direction. So B needs to be this one. Then just go ahead and simply
multiply this and just call this B underscore cool. And you just want to go
ahead and use it like this, assigning our vertex colors into the Alpha number B. Yeah, it's just the exact same thing, just a different color
and just save it. Here you go here you
can see what I did. So now if I go ahead
and go in here, I can grab my trim sheet 01, and it should work totally fine. So if I go to my B color, I should be able to just
make this color here. If I go to unlit mode, I should be able to make
this color and line it up. There we go. To be like this. It doesn't need to be perfect, but it just needs to
be quite close to. There you go, see? That looks to me very close to
our final color. And especially with
the dark lighting, you will never
really notice that. And also, like the
transition you have over here, it does
not really matter. Like, you won't really notice
not in our environment. In your environment,
you might want to, like, create some more pieces. Also, we now need to, like,
adjust this shape over here, but it is what it is. We can still clearly see over here that there's some angling. It might not be as sharp, but this should still work. Yeah, I'm not going
to change it in any other way because then
it might just look strange. So I'm quite happy with that. I might want to move
this forward one. That's something that
I might want to do. I might want to just go ahead
and delete Oops, this one. And if I just snap this forward, let's see how that looks
from my camera angle. Yeah. You know what? That
does look better, but that would cause
problems with our window. So let's just instead
change the camera angle. Okay, so that is our floor. That's looking pretty
good. We've got that one. This one over here,
we need to do, like, a different thing for, but I will do that later
on. The white stuff. Why is it White, do I have an emissive
on here or I can check by setting my emissive
strength to zero? Oh, no. That is strange. If you just go
ahead and press C, you can swap between
your channels, so you can see where
the problem is. Roughness or roughness
might be the problem. So let's go in here
and art where are you? Stripes stripes here
we go, yellow stripes. Let's set our roughness
to be quite dull. If I just swap around, Yeah, that looks all fine now. So let's try and re export that. Maybe that caused the problem. And else it would
be really strange. Then I don't really know yet what is causing the problem.
So let's reimport this. Huh. That is interesting because over here it
is looking here, see? It's looking totally fine, so that's really interesting
why it is white. I'm quite curious about that. So our textures are fine. Let's have a look inside of, like, our trim sheet master. Yeah, here, that's also
yellow. That's also fine. Huh. I will need to check this off camera because
out the top of my head, this makes absolutely no
sense why it is yellow, because what I check is I check if it is yellow in
here, which is fine. I check if it is yellow
in here, which is fine, which means that theoretically it should also be
yellow in here. But that's where we go wong. And I don't know
if I go to my trim sheet master here or see. It doesn't matter if I apply different material to this.
It still does not work. Maybe it has
something to do with the lighting, but
that's strange. So I'll check this
off camera later on. Let's for now, first of all, just focus on creating or
turning our models to final. So that's what we will
be doing. Next chapter, we will just go ahead and
continue. You know what? Let's actually start
with our main window first because that's a big one. So let's start the next
chapter by creating this one.
25. 24 Creating Our Final Models Part6: Okay, so what we're
going to work on now is we are going to work
on a large window. So let's start deleting
the symmetry pt, and we can just separate to separate this cube from
this piece over here. Okay, so yeah, this is by
far, our largest model. Now, the first thing I want to do is I just
need to figure out. Oh, yeah, like over
here, I need to figure out this
because personally, I quite like the
steepness over here, so I kind of miss
that right now. So I think I do want
to actually change my floor just to give
it like a better look. Also, I might want to go ahead and go a little bit closer
with my camera like this. It does mean that
over here, things get cut off a little bit faster. But what we will
do is we will do something slightly different
for this one over here. So for now, just
go ahead and just duplicate this over here, and I will show you
what we're going to do. So let's get started by
going into floor two. And I think what I'm going to do is the easiest thing
will probably just select everything over here, it does not There we go. Sometimes the multi edit
doesn't really work as well. And I'm going to just go ahead and I'm going
to carefully. Oh, hello. Come on. Everything. Okay, now I got
everything selected. Yeah, I'm going to
basically move this up a little bit like this, so I'm going to make it
quite a bit steeper. But I'm only going to move it towards the right so that
it does become steeper, but we do not accidentally
change anything else. So let's say we got
something like this. And what I'm going to
do then is for now, let's just go ahead
and export this because I just want
to see how it looks, and then we will
actually fix it. So let's go ahead and go into our exports folder over
here to unreal FBX. Floor 02. There we go. And if we go in here, let's just right
click and reimport. Okay, let's see how that
looks from my camera angle. Yeah, see here, that
does look a lot nicer. So what I'm going to
do is for this case, let's see, we already
have it all lined up. So I think it is
better if I just go ahead and simply select
this floor over here, and then I will show you how we are going to handle the rest. I basically select
this floor over here, and I just carefully,
let's turn off our snap. Move it closer
together like this. Okay, that's a
little bit too much. Let's do this over here. The fact that we have a tiny bit still left so what
I'm going to do. Just to make it easy for myself, I'm going to go ahead
and go to Vertex Select. You, once again, I forgot
to select that one. Okay. And I'm just
going to give it like a tiny nuch towards the left like this. And
that should do the trick. So yes, I am going
to go away a little bit more from the modular
flow for this one, but it does not really
matter in this case. Like, if you want, you can
do this properly where you basically just
merge this back and you extend this out
and everything. But in this case, this
should be totally fine because once
we've done this one, see, so that's now
more to my liking. The next thing that we can do
is we basically want to go ahead and let's
double check to make sure that this is not here, see. That's what I mean. Want to
go ahead and ungroup this. Wow. Let's just go ahead
and just press combine because then it also
ungroups automatically. And then what I'm going to do is I'm going to go ahead and
press Shift to duplicate it, create a new layer,
and I'm going to call this layer,
floor underscore. Tilt on the scope piece,
something like that. I'm just going to
go ahead and assign my duplicate because
what we're going to do with this floor tilt piece
is we are going to go ahead and mostly just let's see
if we need to rotate this. Yeah, we probably just
want to do a symmetry, although I'm not
sure how that will, that probably won't hold
up nicely over here. So maybe we can just
do it without a panel. Basically, what I'm thinking
about is I'm going to select these bits over here. Control shift I and
delete everything else. But what I'm worried about
is I need to see if I want to swap this around
on the other end. Yeah, that might be better. I might want to just
swap this around on the other end so that it
all flows over correctly. So let's go ahead and
extract these phases. Let's go ahead and just
recombine this over here. So I want to duplicate this. I could have just done a mirror because I need to
do a mirror anyway, so I don't know why
I did it this way, but, 0.1 mirror object
space on the Zaxs. There we go. Sorry,
just delete this one. Basically, I just want to have this side over here, and
that should do the trick. If I move this, and
I can just snap the points I mean, add a pivot, snap the points, and then move it over here,
and then snap the points. There we go. S. So we got
this one. That's fine. Now if I'm just
going to go ahead and I'm going to
combine all of this, add a pivot, snap my pivot
to the corner over here, and then to the grid over here. So that should do the
twig, right? I hope. Let's just see. I'm making
this up as I go along, so we'll see how it goes. So this one will be
floor underscore, tilt underscore piece. Let's export. And
a we go in here, we can simply import this
Yeah, that's all correct. Where are you? There you are. Let's go ahead and assign our trim sheet 01
material to this. And basically, my idea for this. Oh, it's too dark, it's
because I didn't make it red, is that we can always just go ahead and
rotate this stuff, and then we can just
go ahead and kind of, like, place it wherever we want. So what I can do is I
should be able to go here. And if I hold V, I
can snap to Wertzs. Now, it does not
always work perfectly. But it does often
work quite well. Let's quickly turn these
pieces into mesh display, apply colors, set this
to red and press Apply. So I lost my There we go. My tool but because
I've got to save it after I left Maya. So now what we can do is we
can go ahead and we can re export that. Let
you do the trick? Or not? That's strange. Yeah, it should be fine. That is interesting. Maybe
that No, it is not flipped. Here, it is looking
totally fine. Remove our history,
so that's also fine. Let's just quickly have a
look at our verte scholars. And go into display and red. Yeah, here, so it is red. Oh, wait. I know I
know what it is. We need to go ahead
and we need to go back in here because I forgot to set my vertex
color to replace. There you go. See? That was it. So anyway, we now
have this piece, and what we can do is we can just move it wherever
we want, basically. And then it is just a
matter of carefully moving these extra pieces
on top of it again. So we have a little
bit more flexibility. And if you want to do like
really precise movements, you can always just go
in here or you can, snap it or do whatever you want. It doesn't really matter. In anyway, in any
case, this works now. So if I go ahead and I go
quickly finish this off, and then we can
properly start with our window because this was
bothering me a little bit. So we got this
one, and honestly, at this point, you
cannot see it. So why would I bother are the extra bits when
I can just do this. And what I'm going to
do is, I'm just going to duplicate this one over here just to at least give it something on
this side, still. You can try and snap
it, but honestly, I'm just going to not do that
because I don't have to, since you can easily just
see it over here working. Here, we have this one,
this one, and this one. See? So now, basically, it doesn't matter which
way we rotate because we have this panel over here. On both sides, it
will always work. And now what we can also do
is we can also go in here, delete that one, and then
simply grab this piece. Duplicated and rotated
90 degrees, see? And that will then become a nice transition
piece that we can use. So we basically just
move it like that. It doesn't really matter that it is not lined up correctly. That's something that I'm
willing to take piece with because else we would need to create quite a few extra pieces. And then when we have this one, what we can do is we can go
ahead and duplicate these three move them correctly over here. And there we go. So that should be fine. We might want to like improve it a little bit more later on. But for now, this will
all work totally fine. And for my camera angle, here, see, so now we have
a strong angle here. Over here, I do want
to move that angle, probably a little bit closer, but that's something that we
can work on later on with our camera just to get
it all working properly. So for now, what I'm going to do is I'm just going to go in my window.'s get out of
this view over here. Main window over here. And I just want to go
ahead and I want to grab. Let's see up until this point. Turn off snapping. Move it forward a little bit. I think
that's all we need to do. For the rest of the angle
is pretty much fine, so let's go ahead and
export this main window, and let's give this
a try. Oh, close. I think, yeah, move it forward a tiny bit more and
then move the top forward a little bit
further even than that. So tiny bit more, and then grab only this side and
move it a little bit further even like that. I just need to get this wide so that I don't make
mistakes later on. So let's try this. There we go. Good
enough for now. So what we're going
to do now is we are going to turn
this into final mesh. As you can see over here, I am going to make
some small changes, but the general
shape and the height and everything is already here. So I'm quite happy with that. And also the roundness
over here is also round enough for
me to work with. So let's have a look at
this shape over here. What am I going to do? I want to make this
panel a little bit more interesting. See how far. So right now it is not
sticking out very far. So let's go ahead and let's stick this out a bit further and then probably also make it quite
a bit thicker. And the way to stick
it out further is just to select this side. We don't want to stick this
one out further because then the bend does not work. So we want to go ahead and just push it out a
little bit further. And I also want to probably
go in here and also do the same thing to this one. So let's push it out
a bit. There we go. And what I'm going to do
is I'm just going to go ahead and I'm going
to probably select. You know what? I think I
actually need to select all of this stuff if I want to make
it a little bit thicker. So I could have done the
selection a lot better, but I was already halfway. So, let's make this a
little bit thicker. So this one is going to be like this white panel over here. Then over here, you see
some weird black panels. We are going to
make that a little bit more simplistic like this, although we might want to change the drought a little
bit more later on. Then what we have is we
have the center panels. So let's go ahead and just
move this up a tiny bit. Over here so that we have
a little bit more space. And then in here, I basically want to end
it at this point. So if we go for this one, we want to give it like
something that goes inwards. So I forgot the
English word for it. So let's give it a little
bit of spacing from the top And then these ones can pretty much just be extruded
in as far as I can see. So we can just extrude this in and delete that
phase at the end. There we go. So we give it some spacing at the top
and here at the end. Now what we need to do
is we do need to go at and add some
extra smoothening. But that's first of all, just
see like this one is fine. Our windows already fine, although we do need to
add some extra details. Yeah, okay. So let's just focus
mostly on this one first. I'm going to go ahead and just quickly move this so that
it looks a bit more even. I'm going to get
started by just making this transition
over here around. And we probably want
to go ahead and end it at this point. We do need to do quite a
bit of geometry cleanup. But let's go ahead and start
with making this round. Let's add a few segments with
the contra B to bevel it. Here we go. That gives
a bit of a softer look. If you want, we can already
cleaned up a little bit simply by target welding, these vertices over here. I do need to make this
a lot nicer later on. But okay, so we have this
that goes nice and round. Then what we have is we
have this piece over here, which I just want to go
ahead and let's say, on all these three sites, I want to just give
the small bevel, maybe like 0.3 inch just so that we have our weighted normals
working on those. Then we have our
insight over here. What I'm going to do
is I'm just going to make this panel a little
bit wider over here. And then I think I just
want to go ahead and, like, bevel most of this stuff,
as far as I can see. Maybe also make this not
extending inwards as much. So let's do something like this. Yeah, let's go ahead and
I want to probably go in and bevel this entire loop, which seems to not work. Yeah, it looks like that the geometry is a
little bit broken. So I want to bevel this one in, but I do not want to
bevel this one in. Sorry, let me just extract
these pass over here. So this one I just want
to keep sharp because it will have the specific
UV details in here. And if we have an extra bevel, it will just make
it more annoying. Then I actually, first of all, want to go in here and round
the corners over here. So let's set the fraction to one and maybe set the segments
to like three segments. So we are just giving
our corners like a nice ending like that, which will still work
with our panel behind it. This is definitely interesting. I've never seen it
transition like this, so let's go ahead and just merge this into each
other like that, just to make it look a
little bit more logical. There we go. Okay, so we got that done. Now we are just going to
go ahead and we are going to add a bevel all
the way around here. And now it all of a sudden loops around perfectly,
so that's interesting. That's nice. Let's go
ahead and set this to 0.2. Let's give it like a small
bevel all the way around. That is fine. Now in here, what we need to
do is once again, I'm probably just going
to go ahead and I'm going to extract pass for this one, and while I'm here, I'm probably also going
to do the same over here so that we do not need
to bevel those extra details. So let's see. So
we got this one. So we do want to go
ahead and just add a nice bevel all the
way around here. And while we are here, we can also do it all
the way around there. Let's do 0.2 again, probably. There we go. So we give
it like a nice bevel. So the bottom layer
is pretty much done. It's not too
difficult. We're just going to go for quite
a simple shape. Now, in here, now we have
arrived at our window. So our window geometry, well, first of all, we
want to create these lines in between here, but also our general
window geometry does not look very
good right now, so we kind of just want
to work with that. Also, you can see, like a
little trim around here. These pieces are don pieces, so we don't need to
really worry about that. These are also don pieces, so we don't need to
worry about that. So that is the plan. So for our windows, let's get started by
selecting all of them. Okay. Then what I'm going to
do is I'm going to do Control E to go to extrude mode. Set the extrude to maybe five. Yes. And then what I want
to do is I just press W to go outside
of extrude mode, Control E again and
this time push it in like this that we give it a little trim
round like this. Then what I'm going to do is I'm going to do one more contra E at a high value
like 2020 is good. Yeah, 20 is good. Then double click on the center
edges over here, because what we can
do now is we can do a contra B on these edges
to split them into two, and give them a nice thickness, zero point do we do 0.1? Yeah, let's do 0.1. And then when you
select the edges, we can do one last Control E, and that's basically
how we are going to create those interesting
trims in between. Like, you can use the
one on your trim sheet, but that would be a pain to do to guide it all
the way around here, while if I just
go ahead and just add some extra geometry, what I can do is I
can simply go in here and I can go Control E. I can then, Oh, let's not do Contra E
because apparently, I've got to select these bits. I broke my loop, so I
need to do this menu. There we go. Now it's working. That one is also working.
Let's try again, contra I. I want
to push this in. I also want to go
ahead and give it a little bevel by scaling this in like that. That's working. Then maybe I do want to probably add
weight and normal to this. Let's give it a very
small Bevel over here. 0.5 is actually fine. Now, over here, this one is this is strange. Like,
why did it do this? I don't know, but it is something that we can
just fix by simply deleting these bits over here because we are going
to symmetry anyway, and also deleting these bits
over here and this one. And then you just
want to go ahead and you want to go in and scale this flat and realign it
nicely like this. And the way that I can see if it is aligned properly is simply by looking at the
antialising that you can see the jacket line. So I just move it
until the line is no longer jagged like that. Even if we are a few
millimeters apart, because we are going
to symmetry it, it does not really matter. So over here, I need
to do the same thing. I need to go ahead and
select all of these bits. Give the quick to Bi. That's also looking good
now. Yeah, that's fine. Now, let's also
go ahead and give the Contra B on this center
line over here and this one. The other one we cannot do yet because we need to
probably connect this. So let's do 0.2. Now, let's
do 0.3 for this bevel. Okay, so that's now Alco done. So now what we can do
is we can start by just cleaning up the
outside of our windows. So we got now, like,
a pretty nice look. So in our next chapter, what
we will do is we will go ahead and we will just
start by connecting this. Or actually, I can probably
even just show you. I'm basically just
going to do this. Here you see? I'm just going to
nicely connect all of these third seats that
are loose like that. It is a little bit
time consuming. You can also do stuff
like this over here where you basically
connect it into a point, but I don't want to have too many points
that are like this, so just try and get
it quite clean. And you know what?
I will do this off camera because this is just
boring and time consuming. And in the next chapter,
this will be done, and then we can just
go ahead and we can finish off the
modeling for our window. Yes, you can see this
basically what I will be doing off camera,
this kind of stuff. So let's go ahead and continue with this
in our next chapter.
26. 25 Creating Our Final Models Part7: Okay, so let's go
ahead and continue. So I went ahead and I just connected all
of these vertices, as you can see over here,
nothing too special. So now let's go ahead and
just add a bevel on this end. So we just want to
go ahead and double click and make sure
that everything is selected because
we sometimes have over here like two etches
connecting to one verts, which breaks your loop,
which no problem. It just means that we need to make sure that
we have everything properly selected. Here we go. And now let's go ahead
and do Contra B. And this Contra B,
it is quite low. Let's set this to like two. Okay, I need to go
even more like four. And then normally
it is only this low because somewhere
along the line, there was a vertzi that is too close together.
There we go. Or it was like a
duplicate verte. I think this is the one that
is causing the problems. But that's no problem
because let's do a target belt. Let's see. So that did not work. It's
a target belt from over here. This one is confusing. So I want to probably go in. Target Oh, God. I
didn't mean to do that. Make sure that you do not have any other vertices selected. So target well, this one, and then te connect over here. And once we've done that,
select this line and press Control
backspace. There we go. Manual fixing. Let's go ahead and it's a little bit sensitive with my movement
again. There we go. And now I just want
to also, of course, double check the other one, just make sure that this one is correct because you never know if there were two problems. Okay, so that's all
looking good also. So now what I'm going to do is I'm just going to
go ahead and add a bevel over here because
we already did this stuff. So bevel here and also
a bevel up there. Okay, let's do contra B 0.2
or something like that. Then for this one, now, this one is actually going to
be a little bit interesting because what I want to do is I want to art
something really cool. I want to art an
actual live video as like a little bonus
inside of unreal engine. So that's when you
play the game, you would have a
big screen here, and that screen actually has a video on it that's playing. It does mean that we
don't really need to make any of these details. We do need to make
the ones over here, but we will have this
vision over here, which is going to
be a separate mesh. So knowing that, I might want to some
construction lines later on. So that's something
that I can add. But anyway, let's see,
because we have this, I do want to probably go ahead and just
make this a little bit deeper like this. And I think that's actually it. I can also just go ahead
and if I want to go in here, do the same. I'm just going to battle
it because we will have these add on
objects on top of this. So let's go ahead and
select this stuff. Schtrabt at 0.3 or something. There we go. Okay, so this
is looking pretty good. I think if I would smooth this now, Hey, where's my smooth? Did I also forgot to
add that? There we go. If I would smooth
this now and turn off my edges just to make sure
that everything looks correct. Yeah, that is
looking pretty good. Seems to all work.
Looks like that we have only one smoothing
problem over here. This one, but we can just go ahead and we can select
this and delete it. It's probably like a leftover
from our extrusions. So delete this and then
like a very quick bevel. Over here, maybe like 0.2 again. And let's re smooth. There we go. That
one is also working. That one is working.
Okay, perfect. So we got that stuff done. That's pretty good. By the way, if this anti alizing
over here bothers you, you can always go leave few
0.2 over here at the top, and then ana alysing. Oh, wait, actually, in Maya, this actually works really
badly because if I go at the turn on my anti
alysing as soon as I go to my, I
forgot about that. Like my wire frame, then also antalyss and
becomes really big. I keep forgetting about that. That's always a
little bit annoying. Although you can also actually find your antialising
somewhere here, but I've got Oh,
yeah, here, see? So we can basically
turn it on and off here if you want to have
a nice preview. And yeah, same screen space
AO, if you want to add that. It's not perfect, but it is something that you
can just turn on. But okay, in anyway,
in any case, let's go ahead and save scene. And what we're going to
do now is we are going to probably start by just creating
these panels over here. Now, remember, we
created something specific in our trim
sheet for these panels. So what we are going to
do is we are going to go ahead and keep
the shapes quite simple at the beginning. So let's go ahead and
just grab a cube. Let's make it a
little bit thinner. And let's move this
cube down here. Let's have it extending
out a little bit more. Yes, I'm just
following the shape, by the way, just so you know. Then what I want to
do is I want to go ahead and move this cube all the way up and then carefully move it sideways until it hits roughly
the same angle, as you can see on your windows, and then move this,
like in center. And maybe what I'm going
to do is I'm just going to, I meant to select this one. I'm going to make this a
little bit wider over here. Okay, there we go.
So we got that one. Then let's go ahead and select the top edges and bottom edges. It feels like the bevel
is a little bit wrong. If you feel like the
bevel is not correct, try to delete your history
and freeze your transforms again because once again,
that sometimes helps. In that case, okay, in this case, it did not help, and then the bevel
must be correct. So let's do, like,
a bevel of 0.4. And then finally, I'm just going to go ahead
and I'm just going to delete the backside
because I don't need it. So we got the backside.
The sides over here, yeah, we will probably make
those white because we have the B color in our in our vertex colors. I don't know why I
need so much time to think to speak in English today, maybe because it's
morning for me. But anyway, so we have
this one done over here. Now, what I'm going to
do is I'm going to go ahead and I'm going to probably
already UV unwrap this. So let's go ahead and assign our trim sheet because once
we have UV unwrapped it, then we can go ahead
and, like, change the look of it a
little bit more. So let's go ahead and
we have this one. I'm going to start by just
moving this out of the way. Oh, we have this problem
again with our RGB. So just click on the RGB twice, for some reason, then it works. I think because it
is cycling through different modes instead of just turning on
and off the Apha. So I'm just going to go
ahead and I'm going to go to UV and just do like a
best plane on here. Unfolded. And it is this one. So what I'm going to do is I'm going to go
ahead and I'm going to hold J, and let's modify. Let's do a quick Orient shells. And you basically just want
to go ahead and select your UV and then flatten it like this. Same over here, see? And we probably
can even do this. We can probably already
straighten it out. But the goal is that we
have a nice flat piece, which we can then scale down
and I need to scale it down, let's see, up until
probably this point. There we go. So
we scale it down. Okay, it looks like
that we did not want to straighten this out. So here, let's carefully, like, move it a
little bit like that. And then what I want to do is I just want to make
sure that the top and the bottom are pretty much
in the center like this. See? So we now got these shapes over here,
so that's totally fine. Now for these shapes,
let's just do a quick plane over here. And you know what I
can do with these? I can actually
probably fit them in here because we have
some empty space here, so I can actually just do this. Yeah, that should work. So if I go ahead and also
for this one, just do, like, a quick oran shell,
move this in here. There we go. So no one will
be the wiser for this. Okay, so we got this
stuff over here. Now, what I'm going to do
is I'm going to go ahead and I'm going to start
adding some bevels, so we want to add two
edges here, two here. S two here and two here. So what am I going
to push out here? Oh, no, wait. I probably
want to push in. I probably want to
go ahead and push. Uh push this one in
and this one in. Yeah, that looks correct. So let's push this one in over here and then also at the top. Let's just make this a
little bit nicer like that. Okay, so that will
create that shape. Along with the map, the no map will just make it even stronger. So we got that one. Then I
probably want to also go in, give it a small bevel on the ends because we still want to add some
weighted normals to this. Sorry, I accidentally diet that. Ah, now I lost my selection. I think I accidently unhight unhid something or I
don't know what I did, but on a weight, I think I accidentally
duplicated my mesh. So let's go ahead and do Contra
B. At quite a low level. Like, we don't want
to break our UVs for this one. So
we got that one. And then also let's do
Contra B on these corners. Once again, quite a low
level like 0.1 even. And let's then smooth this. So that should work
correctly now. Yeah. Okay, so that
works correctly. And then what we can do with this one is we can
just go ahead and duplicate it up and then maybe, move it around a little
bit. So we got this. Let's go ahead and
duplicate this up. I do feel like I might want to make things a little bit wider, but let's just have a
look at that later on. And for this one, we can
later on just change the UVs. So first of all,
let's just go ahead and move this over here, and I'm just going to move it
probably down a little bit. Like this. And then if I just go ahead and go to my site view, over here and just
move this back. There we go. Okay.
So we got this one. I still need to change my
UVs, but first of all, what I want to do
is I want to create a panel so that
this looks correct. So we got this one over here. Let's move this back. So
before we change our UVs, make this look a bit nicer. And it looks like that I want to go ahead
and I want to place a connect actually two of them. Yeah, let's place two connects.
One of them over here. Oh, let's turn on Preserve UVs just to make this a bit easier
for ourselves later on. So one connect over
here, one connect. Let's scale this flat.
Actually, this one also, let's make sure that it is flat. One connect over here. And then if we add
another two connects, we can start by
creating a bevel. So this one goes probably
up until this point. Goes down a little bit. And then it looks like
that in our reference, we just need to
grab all of this, and now turn off preserve UVs. Grab all of this and just
push it back. See, like that. So we are pushing this back and that will immediately
also create the shape of a panel that we are going to create
on top of this. So we are pushing this back. Then what we are going
to do is give it again, a couple of bevels,
maybe like 0.1. There we go. And now what we need to do is
we just need to quickly go into our UVs and
see how bad it. A I think for this one, I kind of like want to just
Oh, yikes, let's not do that. Let's not unfold it like that because that will really
break everything. Instead, let's go ahead
and let's see if I can 1 second because now these pieces are in the way. So you can
see what I'm doing. So let's move these.
Okay, let's have a look. Let's move
this one also. Because it is still
quite intact. It's just like these pieces over here I kind
of want to change. So it looks like that is over over here, I believe. Yes. So I need to
just go ahead and probably move this
to be straight. I know the UVs might
look very bad, but all I care about is how it looks
in tray in this case, because I don't need
to have any light, my PVs and everything else, I would just change my
light UVs, of course. So save over here. So yeah, we basically just need to straighten out
most of these UVs. I can see that there's,
like, a problem over here, but I don't think the
problem is really big enough to care about, see? Yeah, it's not really
You can't really see it, so let's move this back. And then the same over here. Here we go. Okay, so
we got those done. So, yeah, now you can see that your UVs are looking
pretty much fine. You might want to,
like, move this up a little bit that we only have these cubes in these two
sides. But there we go. So we still save quite a bit of time just by
doing it this way. So let's save acne. Let's see. So those
are now done. Those are done, so we
have our panels done. So now what we can do
is we can probably start by creating these
panels over here, which are actually very simple. So I realized before we
can create those panels, we do need to have a point
where they actually stop. So let's go ahead and use
this as a point over here. Yeah, I think, if we make that stop over
here, it should be fine. I don't know. It might be nice to actually keep
a little bevel here, but I'm not sure if it will
translate as well as I think. So let's just play it safe
and just go ahead and delete these lines over here. I do think we probably want
to go in and yeah, here. I think I'm going
to just straighten out this stuff over here simply by doing this with
my scale tool over here. I don't know why
I said like that. Let's go ahead and let's delete basically
this trim over here, and then I can also go ahead
and delete this trim over here so that I can now just double
click the centra bit and just delete it completely. So let's go ahead and let's see. I'm going to go in here. I'm going to bridge
these pieces. And now for this one,
you might need to do, a little bit more fiddly work in order to get the bevels
to work properly. So let's start by bridging this. Like that? Oh. That bevel works
surprisingly well. For some reason, I thought
that would not work like that. And then just move
this bevel back. Okay, fair enough, so that
works better than expected. For these ones, just give them a small bevel. They
don't need to be round. We just need to give
them like a 0.1 bevel because we will have these panel sitting against it anyway. Let's double check to see
if when we smooth it, it still works correctly. Yeah, that works fine. Okay, perfect. So we
got that one done. Let's go ahead and go
outside of isolation mode. Save scene, and let's
create a quick cube. And this cube will
become our panel. So we can just go
ahead and go in here. So, let's just go in
and delete the back away. And let's see. So let's make this a
little bit thinner. Just make this a little
bit larger over here. Maybe a little bit wider. And then what we can do is we
can basically move it here, and then we can simply
align our edges with the bevels of the
component next to it, select these vertes,
move them out, see? And maybe, select
the bottom vertices and move those
back a little bit. There we go. So that will
create a nice shape. And then if we just give this like a slight
tilt over here, that should do the
trick. Let's see. I think I want to
maybe make it a little bit less white over here. And now what I can do
is I can just already quickly unwrap this because we are going to duplicate
this multiple times. So it will just save time
if we unwrap this one now. So I'm going to start
by unwrapping the font, and you know which
one we are going to use in our trim sheet. It's the bottom one over
here. There we go. See? That one works great.
And let's just do Control Shift I inside
of my UVNrap mode. And let's see. So these
are the ones that we have left. You know what? Let's quickly go
into isolation mode because I can basically
get rid of this one, this one, this one,
this one and this one. So these are like
the only ones left that you might potentially see. Most likely, you will
not see them anyway. So let's just go
ahead and scale this down and just throw
this in here also. It will be so difficult to
see that it doesn't matter. And that's kind of
like the thing with trim sheets very often. Most time it's just like it will be so difficult
to see most things, and that's why we
don't really need to worry too much about our UVs. So at this point, I
can just go ahead and I can move this
forward a little bit. Like that. It's looking fine.
Maybe for the last one, carefully push it
back a little bit like that so that it is
not clipping outside. And there we go. So just like
that, we have some panels. Ours are a little bit smaller, but I feel like that might look nice anyway when
we go over here. Yeah, so I feel like
that would look good. So we now got this stuff done. I believe that that is it
for, like, the main shape. So in our next chapter, we will go ahead
and we will start with the UV unwrapping. Then we will add some details like some construction lines and everything and
just make sure that everything properly works. So let's go ahead and continue with this in our next chapter.
27. 26 Creating Our Final Models Part8: Okay, so let's go
ahead and continue. So, let's have a look at
your UVs because they are going to be quite
something with this match, because, of course,
as you can see, there's so much stuff going on, and there are so
many large surfaces, but it should still be doable. So if I have a look over here, I already know that
I probably like Montrt like a segment over here and here
just to break that up. So you basically
just want to try and get this all split up. Into, like, smaller
segments like this. Maybe like another one here, so that it all kind of fits in. Okay, perfect. So we got those smaller segments
now. Oh, wait. Sorry. What's this? What's going on? Huh? Do we have a
duplicate somehow? Okay. Strange. Let's
isolate. Okay. Okay, fair enough.
I don't know how, but oh, wait, and then this duplicate does
not work. Of course. That makes me wonder
if the one that I just deleted is any different. Oh, yeah, see, so
this is the old one. So let's just delete that. So this is the new one because
we like that extra bit. I don't know how I managed
to get this duplicate, but no pam because we can also just do like
a connection here. And then if we just do
like a double connect, it basically does
the same thing. We can also go over here, do like a single connect. This one is another one,
and then over here, what we can do is we can
just go ahead and do another three or actually
maybe let's do Yeah, here, like three, maybe
like a single here. That should be fine. Okay, let's go ahead and unwrap this. So this entire thing
is going to be simply white because like these extra bits that we
have in between here, we already separate them. So let's right
click Assign sorry, assign existing
material, trim sheet. And let's get this
thing started. So UV unwrap over here. Let's go ahead and just
throw everything away. Where's my trim sheet?
Sign. Trim sheet? There we go. Here it is. And now what I'm going to
do is I'm going to get started probably with
this base over here. So I feel like here, we just do this. I'm just going to
once again, split everything up into
different pieces, and then I will apply them. So let's say that we have
like this one over here also. Then we have one
of these pieces. Let's do B play over here, and I'm just moving
them out of the way. When I have them done, this one, and this
one over here. Okay. And then what we
can do is we can go ahead and we can basically, select the back and then just hold control like the select. Everything that we have
already unwrapped. So here we go. We got this one. Hold Control again so that
we have left is this piece. Oh, let's actually
also get rid of this. Over here, et's
do this one also. And now at this point, I'm probably going to go
ahead and just by hand, make this selection over here. So let's end it up
until this point. And I think we have enough
space to also already go around here and else
we will just kind of, like, move this in our
UVs to make it fit. Up until probably up until
this point, should be fine. Let's go ahead and just
do like loop around here. And then what I'm going
to do is I'm going to go ahead and I'm going
to select these bits. And then for this one, I'm also going to go ahead and select these extras over
here. Here we go. Et's do another best plane, and this best plane
is going to be, probably around here
should be fine. And then one more best plane, which is going to
be around the top, except for this piece like this. So just like the top plus that little bit of
extra over here. So we've got that one
also out of the way. Then this is basically just going to be some
simple top pieces. Don't need to do anything
special for those. It's not select that
one. There we go. And then over here, Okay, so that covers basically
the first piece over here. Let's at this point,
let's already start just applying this to our mesh. So if we go ahead and just
select everything and just do a quick unfold on all
of them, here we go. And actually, let's
also select all of them and do a quick modify and just do like an orient
shell so that we already have something pretty
basic ready to go. And now for these
pieces, basically, just make them as
big as possible within the white
space over here. Because these are
very large pieces, so we can really
use the resolution. And I'm now just
going to go ahead and focus on placing this. Like this one, of course, we do want to scale it down so that it becomes as large as the piece below it over here. But, all of the stuff this
should work totally fine. Sometimes we just want to
rotate some pieces around. And then once again,
nicely fit them in here. Like that, see? So as long
as you go for long strips, this should be quite
easy to actually UVNrap. Maybe the windows are going to be a little bit more tricky, but in the end, you can always fix it simply by splitting
up your mesh more. Of course, you want
to tie and not split your mesh up
too much because else you will be able to see
seems a little bit easier. But we are going to make the white metal or
whatever we call it. I think it is just
like painted metal. We are going to make the white painted metal very forgiving. So that is one of
the few ones that we don't really have
to worry about tiling, and we can even cut it
like halfway through. So let's just go ahead and
continue with this stuff. Yeah, it is like a random
piece over here that I can just scale
down a little bit. Ah, yes, this one. Let's go at a rotate and just
places a place. Might sometimes become a
little bit overwhelming just seeing so many UVs on
top of each other, but you kind get used
to it after a while. Here we go. Oh,
yeah, that's one. These are quite thin
so we don't need to do that much stuff on it. Let's go ahead and just
nicely rotate this. This one is going to be, oh, this one is the one around here. It's tight just scaled
up as much as we can, but we won't have that large of a scaling
because as you can see, because it goes a
little bit round. But here, that should be fine. Let's see, this is
a really small one. So that one does not
have to be this large. We can just scale it down a little bit and just kind
of move it in here. Then we have this one over here. Scale this one up a little bit, just because it is
quite a long piece. And finally, we have
this one over here. Here we go. See? And just like that, we have unwrapped a
very large piece, but still within
like a tiny space in our trim sheet. So
that's pretty good. So let's go ahead and
just continue with this. I'm going to get started by, let's see, probably
up until this point. Yeah, I'm probably going
to cut this one out. So lets you start by
selecting it and moving it. Yeah, we will probably
just have a seam on this point and should be fine. So we have this one, see if I
can make this a bit bigger. This one, and for this one, let's include, like,
the top bit over here. Here we go. Okay, so this is quite a
straightforward piece. It's just going to be like
a selection like this. Then over here, we might be
able to get away with here, if I just select these bits. So this is another just
basic straight piece. And then I had the idea that we might be able
to get away with just selecting this entire
block and just deselecting everything except
for this part over here. It might be a little
bit too thick if it is a little bit too white, we will just place like
a cut in between here. But for now, let's go ahead
and see if this works. So let's just move it over here. This one, I'm going to
probably go for let's see, up until this point. Yeah, that looks correct. So up until this point
and then of course, de select stuff that we
have already unwrapped. Yeah, it might be a little
bit too white, but we'll see. Then over here, let's
just do an easy one. So we have this straight
point over here, and then we also have
this one. So that's fine. And then we are left with this random block that
you can see over here. For this block, I'm going to
go ahead and I'm going to start with this bottom
side over here. I think it's better if I
split it up like this. So we have this bottom
side over here. Let's quickly unfold it. Oh, yeah, we probably need to add some cuts in order
to make it work. Then we have this
center bit over here. But and then what we have is we have this top bit over here. That's why I also
want to unwrap. And yeah, these ones
are a little bit trickier because we
have such a white area, so we will just need to play
around with it a little bit. So let's go ahead and now
first unwrap this half, and then we will
do the last half. So that's quite nice
that we split up into three, makes
it more manageable. So I have relaxed
everything or unfolded. I'm going to go ahead and, like, let's place a well, let's double click on
this edge and cut it. So we are going
to just cut these two because else
they will never fit. There we go. So those will
be cut. And let's see. Let's do another cut, probably around here inside of,
like, one of our loops. Here we go, so that
one is cut into two. This is a very large one. Let's leave that one for now. Let's just see how that goes. So let's get start with
this top bit over here. Oh, wait, by the way, let's
quickly select everything. Modify and just do quick
orient shells. There we go. Makes my life a little
bit easier when I start rotating and moving
your stuff around. Also, by the way, if
you want, you can just quickly grab this piece
and just carefully move it to the side over here
if you want to make it a little bit more space
for the second part. It doesn't matter
because it's tiling, so it will just
continue on forever. And I know that there
is a way that you can also preview this
image all the way around, so like in every box, but
then it will become really annoying to just be able
to see what you're doing. So that's why I always like
to just leave it at one box. So I got this one, let's see. Oh, this is just one of
those panels. I don't know. Is this too white? Let's see. Let's have a look up close if it feels low resolution
when I look at it? No, I think it's just
the edge of it that it does not feel
too low resolution. Because that's
basically the goal. We just want to
make sure that it does not feel low resolution, but that you still
only have one texture. Because, sure, if
you want, you can push massive environments
in one texture. But if everything just
looks like a blurry mess, then of course, it will
be very interesting. Yeah, you know what? For these ones, I am
actually going to because that feels
just way too white. While if I just play a quick cut using some edges
and then scale it. You'll see that looks already
like a little bit better. Yeah, I guess then if
I do it for that one, I should also do it for like these ones where
I just place like a random cut on one of
the edges and scale this. Let's see. What's
this? Oh, that's like a small piece that
I can just kind of, like, scale down and just
kind of, like, move here. It's no problem. Oh,
yeah, this centerpiece. Okay. This centerpiece
actually still small enough, so I can just scale it down. That should be fine. It's
more like the other one, this one over here that
I'm worried about. First of all, move this stuff over here a little bit closer. This, another round piece
that I can just kind of, like, throw in here. Oh, yeah, this is this one. It's wily wed shape, so I hope that we
will not be able to see any seams because this one is a little bit too obvious, maybe, but it's just something that we will need
to wait and see. This one is just like, again, one of those corner pieces, and then this one is probably also one of those corner pieces. So that one does
not really matter. I do try to somewhat
keep the shape the same, but I'm not going
to go too crazy. I mean, the scale
of the shape, same. But yeah, I will
not go too crazy. So we got this one over here. Let's just go ahead
and scale this down. And you know what? I'm going to then just also
place a cut over here because these pieces are on a
natural edge anyway, so you will not be able
to see the seam on there. At least it will be even
more difficult to see a seam on actual geometry edge. Then this one, yeah, this one, we just need to
make it a little bit smaller. Let's try and still make
it as big as we can. Just to squeeze out
every bit of resolution. There we go. That
works quite well. Let's see you.
What have we left? These few pieces over here. This one, I will go
ahead and once again, just place a random
cut somewhere. Like that? Same over here, just like place a random cut. Move this into place. Oh, I have a tickle
in my throat, so that feels annoying. Especially when you
need to talk a lot. So I think I'm just getting
in cold or something. So let's hope that
I still finish this tutorial course before
that becomes too bad. And for this one, I'm just going to go
ahead and I'm going to place a quick cut over here so that we have
like this piece separately. O And this piece. Okay. So that's looking pretty good. Let's go ahead and save our seen before we lose any progress. See, that's looking great.
I'm happy with that. Maybe later on I decide to actually turn this into
like a dark color, but I can do that also using my vertex color, so it
does not really matter. And I do apologize if
I say the word m a little bit too often
today. I don't know why. For some reason, just
one of those days. Anyway, I'm just going to
move this out of the way. And now what I'm going to
do is I'm going to start by Uv unwrapping these pieces. Now, these ones, they are
pretty much straight, so we probably can go for a
really long piece over here. I think this one
we just want to do something like this and just do like Here we go to
that one and this one. Okay, so that's fine. Let's see, we got these pieces also. And you know what? For this one before we forget those extra bit
of segments over here. Extra bit of faces.
Over here also, just add those else I will just end up
forgetting about them. There we go. So
this one is really nicely divided into
just straight pieces. For the top, I'm just going to go ahead and
select it like this so that we also have that
bottom piece along with it. Here we go. And then for the site, I'm
just going to go ahead and I'm just going to
manually select this one. There we go. Same over here, because I never trust unfolding with a
band like this in Maya. I know that we have
the straighten UVs, but those rarely
seem to work for me. So instead, I'm just doing it with one extra split to make sure that everything
stays straight. And then we have this last one, and I believe that that's it. Yeah, that's it. So with these pieces, they're all
pretty much straight. We can just go ahead and
unfold, modify orient shells, and now we can just
go ahead and get started because these
are really large pieces, we once again just want to try and scale these up
as much as we can. And I always like to start with one very straight pieces like the beginning because then
once I've scaled it up, I can pretty much
match everything based upon that wire frame, like you can see me
doing over here. A like this. Okay, so yeah, once
we've done this one, there is a little bit of modeling I still
need to do because I forgot to create these
random pieces over here. But that's something that
we can do at the end because they are more
like an dom object, but I will just embed
them into this shape. Well, let's first do this stuff. And then we will close
off this chapter. So in the next chapter,
we will just go ahead and continue
with our UVNwrapping, and I believe that
the next chapter will be the very final one
for the window at least. So then we don't have to worry about this huge piece over here, because all of the other pieces there are a lot easier to make. This is like the only one that's a little bit tricky because of all of the large faces. Scale this one up. Okay. Yeah, I think that's it. See? Because, yeah, we only need to have
white on everything, so that's looking pretty good. Okay, awesome. Let's go
ahead and save Acne. Let's go outside
of isolation mode. See here, in the next chapter, we will just go ahead and
finish off this and this. This can just become
a plain colour, so we can just leave it because it's just going to be
a plain black color. It does not need any textures
or anything like that. So let's go ahead and
just continue with our UV unwraps and a little bit of modeling in our next chapter.
28. 27 Creating Our Final Models Part9: Okay, so let's go ahead
and continue with our UVR rep. And we are going to get started
with this one. This one is a little
bit interesting. So the way that we
are going to do this, oh, God, do we have a duplicate? Yeah, here we have a duplicate. 1 second because that would mean that we probably also have
a duplicate here, yes. And that would mean we also
have a duplicate here. Okay. I don't know
how many do that. I probably just miss clicked. Anyway. So this piece, we are going to go
ahead and add one of our more detailed
patterns to this. And the way that we are
going to do that is, let's go ahead and isolate it. It is not going to
be too difficult. So assign our trim
sheet material. And basically, what you want to do is you want to go
ahead and let's get started by just doing
like an auto over here. Alright keep forgetting
about scaled. Best plane, do a best plane. And then what we can do is we
can already move this down. This area, just ignore it, because we want to basically
go ahead and place this end over here correctly
on our shape. So if we go ahead and I'm going to start
in like the center. So this one is the first one because we are going to make
this perfectly straight. So we start with like
center over here. Something like
this, for example. Now, once we've done that,
what we can do is we can go ahead where you can
move this back here, and now you can just go
ahead and go a bit close. So basically, what you
want to do is you want to place your edge just in
front of it like this, and now you can see that this
panel over here is correct. Then all we need to
do is we need to add a simple segment
over here like this, which means that in here, what we can do is we
can go ahead and we can simply select it and
press cut and then simply double click
and then place this one further like this. Is this the easiest
way of doing it? I might want to just go
ahead and already cut this piece off so
that this one we can go back to later
on. There we go. That will make it a
little bit easier. Now, another thing that
you can do is you can go up here to
transform and just set the pivot to be on the corner so that we can do a little
bit more precise placement. But now you can see that now
it flows over correctly. So all we need to do now
is we need to go ahead, once again, place a
segment over here. Select this panel again, and then just go ahead
and go down and press cut again so that we can select it and we can
move it forward again. And then I tend to just go
to my transform and just set my pivot because I do
want to do this manually. I do not want to really do
any snapping in this case. I like to have a bit
more control like this. But, yeah. So this is
probably the last oh, no, almost the last piece. That one is a bit annoying
because as you can see, even in here, it looks bad. So even in the concept
art, it looks bad. So let's go ahead and
just figure it out. So let's cut this select it, pivoted, and we will
figure out how that we are going to
transition this properly. So now we just want
to go ahead and place like another
edge over here. And now you can see
that C. It is just perfectly tiling,
just like that. So for this one, ah,
that's interesting. So this panel, we can
just do something, but I think I'm just going
to give this empty space. And shall we use this as empty? Oh, no, wait. We can use the blue and we can use
this as empty space. Yeah, that will be
better. So let's go ahead and cut this piece out. This piece is going to
be slightly different. So we are going to
tie it like this. But we just want to
go ahead and end it on like a nice area. So if we just select this, and probably going
to end it nicely in front of, let's see. So it's like in the center. That's annoying that I did not take care of that because sa wanted to
end it like this, but that, of course,
does not work. So instead, let's just
go ahead and twine end it let's do here. Let's end it over here. It
well like a little bit, but you will not really notice. Then we will have
these areas over here. And what I'm going
to do with these ones is I'm going to just do another Best plane, and I'm just going to
leave this in here, and we will just give it a blue vertex color so that we can make this pretty much like the
same color as the rest. And at this point, we are
back again with this one, which is already
properly scaled. So all we need to do? Oh, no, or is it not properly scaled? Yeah, yeah, it is. I
just need to kind of, like, move it a bit better. So we got this one over here, and what I'm going to do with that is I first want to
decide if I want to, like, start it in, like, a better location,
maybe like this. Now, that would just be a mess. Let's just do it like this. And then let's go ahead and
place a edge over here, select it cut, select it again because after I cut it
unselect or deselect, and then place it over here. Let's place another
cut. There we go. And we can once again
move this one over here. And then this one is a
little bit annoying. So let's place a loop here, and we will just do the same thing as
before where we just basically select this phase. We cut it, set a pivot, and then let's see. Let's start it over here, and then let's go ahead and set the UV Probably something
like I don't know. That feels a little
bit too stretchy. But if I don't do that, it
might look a little bit silly. So we might want
to just do this, but then if we just
select this edge over here, let's try this. Sorry, the UV is always
a bit annoying because I need to try and move it, it does not work.
Now, you know what? I'm going to leave it
like this because else I feel like I will
just mess it up. We got this one over here,
that's totally fine. Now for the top one, I believe that all we really
need to do is first of all, of course, assign our
trim sheet material. Now let's just do a quick best
plane on the entire thing. Let's go ahead and
just unfold it. You can unfold along, but it does not really. See, most of these unfold
tools, they don't work, the straight in UV, you can see what was it
straighten cell? Yeah, What I tend to do is I tend to then just
move this down by hand, and that seems to always give me a much better effect.
Anyway, any case. So what I'm going to
do for this one is I'm just going to go
ahead and going to scale it up over here
in our white area. There we go. Double check because it's such a large shape. I'm not sure if I accidentally
did something wrong. Okay? That looks good.
So that one will once again be like a
vertex color thing. And then this one
is going to be, we do another bass plane one of our unique details
that we created. So we want to go ahead
and unfold this. Let's modify, and let's
do orange shells. Oh, nice. That one is
really nicely unfolded. So let's go ahead and add a
trim sheet material to this. And all we really need to do for this one is we just need
to go and use this. So just go ahead and scale
it up as far as you can. Like that. Maybe just in case, select the bottom half
and just scale it flat, and then also select the
top half and scale it flat, and then just double
check again to make sure that it is
within the lines. And it is, so there we go. That is also looking
good right now. So in here, there
will be a screen, so we don't need to
worry about that. We will add some brackets later on and like a
screen, stuff like that. So that's pretty good. This one will be a unique material. So this one, done, this
one, done, this one, this one, these piece
is done over here. So all I really need to do is I just need to
go ahead and add like this strange
detail over here. Yeah, that should
be it. So let's go ahead and save scene. And now for this strange detail, what we can do is let's
use this area over here just to already like
art ones so that I can measure it all out. I'm just going to
basically make this. So just give me a second here. Let's scale this in. And I don't really need to care about the
details behind it. This will just be
sitting on top. So let's figure out like
a thickness that we like. And once you have
this thickness, let's go ahead and just set our face higher until
around this point, selecting my back face and
just move it back over here. And then it looks like
that this one basically ends roughly in the
center over here. And what it does
is it has a drop. So let's see. So it goes flat. Then it has like
a drop like that. And then it has like a cut, but this feels like I need
more space, to be honest. So I'm just going to give it a little bit more
space just to make it work for what I want to do. So we got this one over
here that is fine. I'm now going to
go ahead and I'm going to already
move this down to roughly the slope
I want over here. And all I need to do now
is if I just very quickly, place an extra loop really
close together, there we go. And I will just clean
this up later on. So that I get a quick shape.
Okay, so that's pretty good. And then I immediately
notice that it is too thick, so I just want to scale it
in a little bit. Let's see. So flat down, down, this will be nice around. Down, this will be nice
around and down again. So if we now just go
ahead and isolate this, get rid of some of these
segments over here. And then what I'm going to do is I'm going to go ahead
and I'm just going to place a cut from
here to the end. And also from here to the end. And then simply press Control Shift A to select everything, go to merge vertices, and then in the merge
vertices down here, we can merge it on
quite a low level so that it will just automatically
collapse everything. So that means that we can do a proper bevel here and here. But before we do this bevel, I just want to go ahead and
already create a proper cut. So I want to have this cut
sitting probably around no, that's actually, yes, we probably have around
this point over here, maybe a little bit forward. Let's do that? Yes. Okay,
so we have this cut. Then what will happen is
we will have another one that goes up here. And for this one,
we want to go ahead and just going to scale it flat. And then I'm going to add
another loop around here. So I'm basically just going
to go ahead and create like a hole over here like that. Once I've done that, I can
just go ahead and I can start by bridging
these pieces already. And then in here, if we just go quickly into isolate again, what I can do is if I merge
my vertices together, it will make it easier for
me to give this an angle. So I'm going to bridge this, go outside of isolation mode, and then pretty much just go in here and just move this up, and that will give it
automatically like a nice angle. And then it is more just a
matter of playing around with the thickness of these
builders and just seeing whatever works best. So if I do this, Um, maybe move this a
little bit forward, and then we do need to
quickly move this up a bit more because se the
angle doesn't work again. I'm going to make this like
a little bit thinner still. Yeah, I think something
like that looks quite good. So now what we can do is
we can just go ahead and select this edge and this one. Do a contra B with a
bunch of segments. So like five or
something or four, maybe. Yeah, let's do four. There we go so that it
looks nice and round now. So that's also fine.
We have this one. So over here, I just want
to go ahead and give it like I don't know. Segments or bevel. Let's do
some segments like this. That looks really ugly, I know. So that's something
that we will fix also. Before we fix it, however, let's go ahead and let's Oh, looks like that we
already need to fix it because everything
is already broken. So in that case, let's just go ahead and quickly
fix this stuff. I'm going to fix this mostly just by doing some target wells, say one like over here.
Oh, you know what? Actually, this will be better if we just go
ahead and select them, press control backspace and then simply cut them and then basically connect
them like this. See? That will make your
geometry a lot cleaner and we have almost the same
amount of segments anyway. So we can just go
ahead and's do this, and then just connect these
two together like that. And then this one, what
we can do is we can just go ahead and
connect it over here. Yeah, yeah, that
will already give us slightly nicer geometry. Let's do the same over here. Okay, so we are connecting this. We still need to, of course, give everything a little bevel. Over here, this one
looks quite ugly. What I tend to do is
just select everything, merge vertices, and then
merge them all to center. Maybe, like, move these
pieces up a little bit to make it a bit cleaner. Then over here, I need
to do the same thing, so we just merge
them all to center. Okay, so we got that one done. I know that you have quite
a bit of waste geometry, but let's first of all, focus
on just finishing this. So the first thing
I want to do is, I just want to create
this this piece over here and then
this gap in between. So I'm going to go ahead
and does this now work? Okay? So this now works. So let's select an edge or
place an edge over here. And then I also want
to go ahead and just select the entire site
over here and just play a double
connect. Like that. Scale it out a bit. Then let's get started by first of all, just extruding this out
and moving this down. There we go. So that we just create
something interesting there. And then what I can do is I can simply go ahead and
from this point up until let's place
an extra edge here. See, from this phase up
until like the bottom, we can just do Control E, and we can push this
in here you go. This one can stay square, but it looks like in
our reference that the top has a bevel to it again. But it looks like it's
one of these bevels. It's not so much
like a round bevel, but more like a strong
bevel like that. So we now got this done. Now what we want to do is let's first of all,
do some cleanup, and then we will just
go ahead and add some actual bevels for
our weighted normals. So for the cleanup,
you can pretty much just do this kind of stuff. Yeah, all of these
can basically just be merged to the site, and then you can even merge these sites also
together like that. This I don't really like that never ends well if you just
have it floating like that. So let's just go ahead
and connect all this. Yeah, because I do we still
want to make this game ready, even though it's not
as important for this specific tutorial or for this environment because
this environment is not a game
environment per se. It's more like a
concept environment. It still nice to just do
some clean topology and optimization like
this here because we are saving a lot of space. Same for these ones, they do not really add
any value to our shape, so we can just go ahead
and we can just merge them together like this. And then over here, same deal, you can just merge
these and then also merge them over
here. And here. And honestly, these lines,
they do not add anything, so you can just press
Control backspace on them, see, to get rid of them. And there we go.
Now it is instantly a lot more optimized. So at this point, normally, what you can try to do,
but it will not work. I know it will not work is
you can select your faces, and then if you
control click and then merge them or two edges
and then press two edges. Yeah, that doesn't work.
Sometimes, what was it like two continuous
edges might sometimes work? On the way to edge
parameter. There we go. So yeah, I guess that can work. So let's see if we can
save some time with our selection because we
cannot just double click. So let's set a
selection constraint to angle with an angle
of five like this, and then two edges
to edge parameters. I don't use this
technique often. I don't know why I don't
because it seems to actually work better
than expected. Only these bottom edge
over here we don't need, so we can get rid of those. Okay, there we go. So we
save some time already. Let's do these one
separately from the rest. So let's do Contra B Yeah, let's make these ones 0.7, something like that,
a little bit bigger. And in these ones,
we should be able to double click most of it, at least. Here we go. So we can just double click those ends. And you know what? We can also go ahead and also immediately just
grab this shape. Control B it, 0.5. Yeah, 0.5 is fine. And then we just want to
go ahead and we just want to select this size and just hold Control
and like the select. Most of that and just make
this very small, like 0.1. It's just so that it
will work whenever we start adding our
smoothening to this. Just quickly merge these
few small vertices together because that always bothers me when it
looks like that. And then what we can do is we can just go ahead and smooth it. Turn off our edges and just
make sure that it works. I can see that I still have like a few small poms over here. So I will go ahead and Oh, and I have a face over here. So yeah, these few
small problems, I don't know how bad it is. Yeah, I can see it a little bit. So if you want to fix these kind of poms that you can see here, here, it's a little
bit difficult to see, but you can see these
smoothing poems and these lines and everything. What I tend to do is I have
this school script that you can get for free if you go
ahead and go over here. So if you go to Gumroad
or you can copy the link, his name is Voltin Nadulu
I hope I say it correctly. But basically, this script
is completely free, so you can just go
ahead and use it. It's really handy. He will
tell you how to install it. You just need to drag it
into your scripts folder. The only thing that you
really care about that I just tend to write down
is this one because I have not yet
actually added it to a button because I don't
actually need this too often. This is one of the few times. But basically, if you
copy this command, all you will need to
do is you need to go ahead and with
your problem faces. So let's do a selection
constraint angle. So, this one is a problem
face and this one, and yeah, I think this one is not too
bad, but you can if you want, you can also select
these bits over here. But basically, once you
have selected the faces that you think, sorry, are causing problems, you can go ahead and just go down here
and just copy that command, which is VR and normal. I will map this to a
proper button later on because I believe
we can also go in, it's been a long time
since I've done this, so please bear with me. So we are in custom, and then what we can do is we
can do like a shelf content that has like a Oh, I remember that you can do
like a command over here, but Okay, then yeah, it's been too long
since I've done this. So in that case, then
let's not do that right now because I don't want
to embarrass myself. But basically, I just use the command down here in the mail. I just basically paste it in. Press Enter. And then
give the second. It's not the fastest
thing to have, but once it is done with this, it should have fixed all of
those problems. There we go. So now you can see that
now it is perfectly nice and flat. There you go. So this is sort of similar to the tools
that we use in Tres Max. You have an extra
weight enormous modifier and also in Blender. So I have no idea
why in Maya 2022, they still do not have just
a proper modifier for this. At least I cannot find it. I just want to have a
simple button that I can press that will just
calculate all my normals, just like all the
other programs. But hopefully it will come soon. Anyway, we now have this
piece over here also done. This piece will
basically be only twice, so it will have one
sitting over here, which we can just
find a nice location. If we place this one here, let's do a location, maybe like here on
top of these pieces. Yeah, I can even do this. See? Yeah, actually, if I
also place one here, it will actually do a nice
cut off point. There we go. So it's like win
win. So it does like a nice cut off point,
so we have these ones. And then this one, I just want to go ahead and
I also want to place one probably like
roughly around here. I don't know if I want
to, like, place it. I think I want to place on
top of one of these details. So yeah, that's kind of like
how it would be placed. Now, of course, we first
need to U Von wrap it. So let's just go ahead and assign existing material and just do like a
trim sheet material. Save my seem because
for some reason, my scene is a little bit slow. So having this one, I'm
going to go ahead and make everything white and then just add like one centle detail. That's pretty much
it. So what I can do with this is I can
go ahead and well, let's first of all, just
quickly select this Come on. So it does not want me to. It does not allow
me to properly loop it around this time,
sometimes does that. In that case, I just
selected quickly by hand. So we got this one over here. Let's go ahead and now I need to re art my shelf pieces
because I once again forgot to save I cannot save the
way that you guys save because I have a bug. By the way, over here, I can see that my UVs are not correct. So I'm just going to quickly remove my history and
freeze my transforms. And then I'm just going
to do a best plane again. And see now I can see that my UVs are correct because
it's a lot longer. So we got this one.
I'm going to go ahead and let's do a quick
select by angle. Let's do this angle.
So you are going to be just like a flat white plane. You are going to be
a flat white plane. I'm going to go ahead
and I'm going to just grab you and I'm
actually going to also here because I can
then just separate them. So this one is going to
be a flat white plane. And this one, does it work? No, it does not work completely. It looks like that we need
to place a break point. Let's place one down here. So let's do a simple cut. And then if we unfold it, it should look a
little bit better. Okay, that's not really better. In that case, I'm just
going to go ahead and place I want to cut
it all the way along. There we go. In that case, I'm just going to
separate these pieces. Because I do not want
to have it like that. So we can also cut this one
and we can cut this one. There we go. Okay, so
those pieces are done. Click on your RGB two times that we can see
what we're doing. And now for most
of these pieces, if we just actually
select all of them, modify and just orient them. At this point, I should not really need to tell you
anymore how to do this. It's really basic stuff. So let's just nicely
place this into place. These are all going to
be simple white pieces. Scaling them up a little bit. Make sure that they
have enough resolution. And let's go ahead and
place this one also here. Try to give as much
resolution as you can, because this one is cutting,
it's close to being too big. But it's an annoying shape, so same over here. There we go. And then
this final one over here, as you can see, it
pretty much looks like one of these details
that we have down here. So we can probably
just grab those. We can just scale this down. Scale this up a little bit. It's nice you place
it like this, and then we can just reuse
one of these details. So we got this one over
here that is fine. And then it looks
like that I just need to go ahead
and I need to place a loop over here and
then cut this piece off. And for this piece,
you know what? I'm just going, I think I can just scale down a bit and just have it
like height here so that you don't
really notice, see? So you don't really notice that. Yeah, that looks
pretty much good. Good enough, at least
for what I'm going for. So we have this one. I'm
just going to replace it. I really have trouble
speaking today. I really do apologize. But if I do not
record this today, because I'm recording
this when it is almost Christmas for the
people that are wondering. So that's why I cannot
just, like, wait, because if I wait
now with recording just because I have a bit of trouble speaking
for some reason, you guys will not get it until January or something
like end of January. And I do want to release
this one still in 2021. For the people that are
maybe watching this in 2025, God knows what the world
looks like back then, if you remember what 2021
and 2022 were like, or 2020. But anyway, we got all
those details done. Yeah, we got all those details
done. Let's save scene. Now I'm going to go ahead
and cut the chapter off here because we are already
working 30 minutes on this. In the next chapter, we will
prepare our vertex scholars. We will go ahead and do the symmetry and just get
this all into the engine.
29. 28 Creating Our Final Models Part10: Okay, so let's go ahead
and continue with this. Now, let's make this easy. Let's get started by just
selecting everything, and I just need to
reassign this to my let's see, apply color. So I'm just applying
my vertee color. Sorry, I should say
that. So I'm just applying a red color to
everything right now. There we go. So I just
want to delete this one. So here with this one, I can
talk a little on and off, but let's not do that just
yet. So let's have a look. That's all white. I
want to make Oh, no, wait, this is also
white. Only one trim. Let's make this trim over here, green, and I need to make
this center bit also green. But everything else, I believe is already
the correct color. Oh, no, wait, I might want to also do these bits over here. So let's go ahead and
let's just select this. And for this one I am going
to go ahead and I'm going to just it's a bit difficult
to see when it's black. So if you want, you
can quickly just swap out the color again. Here we go. Let's isolate the rest. So up until let's say
this point. There we go. Just shift, double clicking it. And then I will just go
ahead and over here. I will finalize it by hand. And I want to go
ahead and I want to not have it here
or do have it here. No, I do want to have it here. Yeah, let's just have it
go all the way around. I think that might actually
look quite interesting. So, we got this one over here. Let's go ahead and once again, mesh display, apply color. So this one is going to be
green and let's press Apply. Then I also want to go
in here and I want to just Select. Let's see. If I select the center
one and also over here, I should be able to go to select and then just press
the grow button over here. Let's try it again. Grow.
Come on, please work. Grow. That's weird. Like
I should just work. So select grow
Here, now it works. For some reason, the button
doesn't work if I do this. Where is this on my
keyboard? There we go. Shift and then dot.
Shift and dot. That's the one that
I was looking for. And then just go ahead
and press Apply. So shift, dot. So I
never use this shortcut. I'm the kind of guy that
just likes to use buttons, which is actually very handy for tutorials because it's
easier for you to see. But it's not so handy when
the buttons don't work. So let's go ahead and also here, so shift and grow, press Apply. Shift and grow oops. That did not work. Try again. Shift and grow. Press apply. Okay? So we know that
those are green. You cannot see it, but we do
know that they are green, and that's pretty much all
that we really need to do as far as I can see. Yeah, if I just go ahead
and select everything and then just swap around the color, yeah, so we got that
one. Now in here. I was just going to go
ahead and I was going to select this and I was
going to make this blue, I believe, because it
needs to be even darker. So let's make this one blue. There we go, and
then you can just swap the color preview again. And then this one was going to be also just a normal green. So we can just press Apply on this and once again,
swap the color preview. Okay, so that should
do the twig right now. If you want, you can just
double check by going into your mesh display and your
paint vertex colors stool, and then in the display, we can go ahead
and go to the red. So we can see everything that is currently red, that's fine. Green, we can see
everything that's currently green and blue so that
we can see that too. And that's all working
totally fine as expected. So having that done, let's go ahead and first of all, export it to actually make sure that everything
looks correct. And don't forget do not have triangulates on when we do this. So we are just going
to go ahead and go for main window over
here, yes, export it. And let's check this thing out. So if we go into
our main window, we just want to go
ahead and first of all, scroll down and make sure
that our vertex scler is set to replace and
then press reimport. And just reset it to
FBX. Nicely like that. There we go. We can save scene. Now, let's just immediately
go into materials, and we have our trim
sheets at the other one. It's just like this plane, so I just need to create a
plain material for this. But the goal is that
this one is dark, which works, and this one is
blue, and this one is blue. Perfect. So even with
our default material, I don't need to change
anything unless I want to, like, change the colors of my lights, which might be nice. But as you can see, this is
all working really well. And also over here, see,
that works totally fine, except that I need to balance out the colors a little bit. But I am happy with
that, so that's great. That's also good over here. And over here, that's also good. Yeah. Nice. No problems. That's what I like to see. So we can later on art glass in
here, but it is space. So only if you want to have
dirty glass, we can add it. I'm not sure if I
will even art glass. You can just do it by creating a plain like a transparent
material, basically. Now what I'm going to do is I'm going to go ahead
and I'm going to, I want to keep
this all separate. So what I'm going to do is I'm going to duplicate this stuff. There was a visual bug there. Then I'm going to just
combine everything. Yeah. Okay. Let's go into our layer editor and our
outliner. That's fine. I know that these
pieces are probably, these are still in poly surface, but that should not matter. We got this one. Now I'm going to go ahead and
I'm going to mirror it. On the set the
position to object, push it out like this, and then I'm going to just
delete everything else. This one will become
one big chunk of mesh, but the other one,
it will still stay separately in case we want to do some drastic changes later on. Also, one thing that I
forgot to make that I just realized is like these
little things over here. So I might want to
just quickly those. Let's first of all,
just press Add a pivot, and I'm going to snap my pivot to just one
of these points over here so that I can
then go in and I can then a snap it
properly against our mesh. Oh, yes. Okay, so for these
bits, it's just like a cube. It doesn't even need to
have weighted normals. So it basically just looks like we don't even have
a lot of space for this, but okay, see what we can do just to get
something in here. So let's select face mode. It looks like it's basically
like a cube like this. That is mostly on the outside, so that we actually
have some space. Yeah, the back panel just
kind of like layers in here. And then it looks
like that we just want to go ahead
and press Contra B. And then maybe
just go ahead and, like, add two segments in here. And I'm going to let's
see, let's isolate this. I'm going to place
a segment here. It's really sensitive
and another one here. Then I'm just going
to go ahead and quickly extrude this
down like that. That should already be
it. I don't really care about anything else
because as I said before, it's a super tiny detail. All I care about is
to have this in here and then we can even
for our UV unwrap, let's go ahead and assign
our trim sheet texture. But I'm literally just
going to go ahead and go to UVs and just do an
automatic unwrap on this. Then I'm just going to
place this in here. You know, and just make
sure that it still is inside of all the white areas. There we go, see? So that now if I go ahead and
just duplicate it, reset my pivot to make
it in the center. Here we go. We can just go ahead and duplicate this again. And this time in our rotates, we want to set the
rotate center to object so that when we do a snap
rotate by holding J, every object will be rotated
separately, as you can see. Then when you move it up,
see, that still works. So that's just a very
quick small detail that I just wanted to
art before I forget. And because we don't really need to have a
mirror in this case, we can just go ahead
and combine this and we can just simply
duplicate this over here. And all we need to do is
just move it to this side. See? Easy does it. Save scene Let's go ahead
and export all of this. Main window. Yes, I want Export. I want the lead. So that's probably what happened
like a while ago. So art selected objects. Oh, God. I did
something really bad. I must have accidentally
duplicated my entire scene. In that case, let me just quickly simply fix
it by activating everything that says pasted and just deleting it first deleting the mesh and
then deleting the layer. If you only delete a layer, it will not actually
delete the mesh itself. So that's Awkward. No idea
when I did this, but okay. So always a little bit annoying when stuff like this happens.
Yeah, we're almost done. So this one, delete, and finally this one. Delete. Yeah, that looks good. Okay? That's more organized. So we can go ahead and we can save our scene and
let's go into reel, select our window, right click and just press
R and pot over here. And I should add this
window on both sides now. Perfect. Look at that.
Okay, so that's great. Now what I'm going to do
is, I'm just going to very quickly go
into my materials. I'm going to create a
very quick material that I will just call black. And all I want to do in
this material is add a constant three
vector and just leave the color to default
black and add a well, it doesn't even
need to be scalrem, just a constant that is set
to one and arts to roughness, which will make it perfectly
dull black basically, which if we open up our window we can simply
assign that over here, and then you can see that
these just become black, which is what I wanted
because I just wanted that if you look in here that you just cannot really see anything, and that's where
these pieces come in. So that's all looking good.
So we got all of that stuff ready to go. That's
our main window. Cool. So in our next chapter, we will go ahead
and we will just continue mostly with
our ceiling beam, which is just going to be
a copy of our normal beam. And yeah, basically
everything else. Like the ceiling, we don't
really need to do anything for except for maybe Uvinwp. But yeah, let's
just go ahead and continue with this
in the next chapter.
30. 29 Creating Our Final Models Part11: Okay, so let's go
ahead and continue. I was going to actually
first do the door over here because we do not have
anything for that yet. So our door seems pretty basic. Oh, I forgot to make these
details. That's a bummer. Did I even Oh, because I
did not even add them. Well, actually, I'm
sure that we have some space left in
our trim sheet, right, to do
something like that. I'm not sure. Do
we have anything? Oh, I don't have my
trim sheet open. Let's just go ahead
and look at it. In here, Um, I don't really see
any proper detail, so we might just
want to go ahead and add some extra
detail to that. But let's first
of all, focus on, like, the actual modeling
of these things. So if we go ahead and actually
look in side of real, I just want to make sure
that this all looks Fine. Yeah, that looks
like a decent size. I'm not too worried about that, maybe make the top
a little bit lower. So let's go in here. Yeah, most of this
just looks fine. I'm just going to make the
top a little bit lower. Then as you can see, we do actually have these
events over here, which we can actually probably reuse whatever we have here, whatever we have over here, we can probably reuse
that on this corner. That would be quite
cool. Let's see how much of this we can use. Let's leave that open. Squad and just delete the back,
so we don't need to back. We also do not need to sit
because as far as I can see, yeah, all the sides are covered. And of course, we then also do not need the bottom over here. Squat and just delete our cube. So this is what we
are going to use. I'm going to go ahead and
get rid of that line. I'm going to add a very quick, simple bevel at like
0.05 on this line. So it's like slightly bigger. And then over here, if we
just go ahead and let's move this back a little bit
and it up a little bit, just to make it like
a little bit bigger. I want to go ahead
and I'm going to Um shall we just insert it? Yeah, let's do that. Let's
just go ahead and do a Control E as an
offset of one or maybe two and then do another Control
E and then basically push it in like this and we can
kind just leave it like this. There will be a specific
texture in here. And then if we just
go to edge mode, so around here, we would
then add a quick bevel. Actually, this one, we can just go ahead and we can extract the faces so that it becomes separate from
everything else. So let's see. So we
have a bevel here, a bevel here, a bevel here, a bevel here and here. Another one here
and here, Zuctre B. Let's make it like
0.8. There we go. That should be
fine. Okay, so now we have arrived at the
actual door over here. And for the actual door, I
just want to have a look. It looks pretty much
like a flat area that has like a gap
going inside of it. So let's go ahead and move
this a little bit back. And then let's go ahead and I think we can just go
ahead and we can place two edges here so that we can select these top bits
and just scale them out. And then select the top
bit over here or sorry, side bits and scale them
out and then select the top bit and move this up. And once we then also place
like a bevel over here, so like a slightly larger one. So 0.2 or something. And then like two
small ones over here, 0.2 Yeah, so that goes inside, and then we will basically have a door sitting in front of it, but our door will be closed. And the glass will also
not be see through most likely unless I
like it see through, but that's something
that we will see. So only thing that we now
need to do is go over here, and I think we want
to these these edges. Just go ahead and
make this like a 0.05 that's still too much 0.02. There we go, just give it
like a very small bit, and then we can just go
ahead and we can select this piece and also
this one over here. Okay, so that seems like
a pretty basic door that if I would now, are
they gone again. How often do I restart
Maya that it just keeps getting rid
of my shelf pieces? Okay, 0.05. Let's do that. And then if I just
quickly zoom in here because this looks
like a mess right now, let's select all of this and just merge them and then just carefully move it
forward because else, yeah, this looks a little
bit too messy for me. And I can handle quite a bit of messy or I can
ignore, I should say, quite a bit of messy
looking stuff often just to get through
things a bit faster. But, yeah. Okay, so that one works fine. We've got that done. Now for our door, we can just go ahead and
we can just go for, like, a more interesting look. So let's see if we can just
create like a random look. It does not really have
to be too precise. So let's go ahead and
just create a cube. Just make it a
little bit thinner. Place this up let's move
this one out. This one out. Let's see, this one we want
to have just in front. This one, let's make it
a little bit thinner. Then if we go over here, we can now go ahead
and just hold Shift and just
already extrude this and scale it in so that
it will actually follow the same contour as
that we have before. And we can pretty
much just get rid of everything except for
the front plane over here. Now, as you can see, it
basically looks like an insert that's also down the center
and also down this center. So knowing that, we
basically want to go ahead and we want to Let's see. Let's first of all,
start by placing a simple CtraE offset
like excuse me. I know that it does
that sometimes I just did not expect it. Temporarily, do this,
because else it gets confused when we
do a console E, see? So temporarily, just go
ahead and extrude this out. It's again, like one
of those things. You get used to that
kind of small stuff. There we go and then move
it down a little bit. Maybe scaled in a little bit more just to
give it a bit more of an even spacing. Here we go. And now we are just going to basically set all
of these lines, and then all we need to do is extrude the windows in. That's
all we really need to do. So we can go ahead and
we can just start like a simple single
connect over here. And turn it into a
double connect at 0.1, most likely. Yeah, that is fine. And then we have a top window
over here and let's see. So this one will most
likely maybe if we, no, we do not want to do that. Instead, let's just go ahead
and create a new line. Select the line and
flatten it out. And I'm going to go ahead and I basically want to just
create like center bit. But I want to change our
door a little bit more. So I'm just having a tink while moving around these edges. Displays another connect
over here and scale it flat. What if we do Um, just
give me a moment here. I'm just trying out some stuff because I do
quite like how this looks, but I don't like just
like the massive piece of metal in the font
because we don't have a lot of details to
just place on that. So I quite like to have
these as two details. But then over here, I'm just wondering what kind of details
we can give it in here. So what if I do like
a contra B L 0.1, maybe, like, a
little bit bigger? So like these two, they will be extruded in.
That's no problem. And then for these, I
want to go at it and I want to try and maybe give it an interesting bevel
on both sides. And if I go in and
place an edge, actually, let's
place an edge here. And let's place an
edge over here. Another one here and
another one here. Okay. All I care about is that these
pieces of here are flat. So you just want to go
ahead and you want to select them and scale these flat to make sure that we do not run into
problems with it. And then if we select
this this and this edge, we should be able to basically
scale this up here we go. Let's see. Is this already
interesting enough? Yeah, that looks
quite interesting if we keep one of them sharp. Yeah, that looks
quite interesting. So like a door like that, yeah, let's do that. Let's
do a door like this. But then over here, I do want
to go ahead and I want to add a bit more smooth edges. So mainly just on this side, I want to go ahead and do
like contra B and then just give it like a few
segment C. So we are making those quite smooth. And let's keep these quite sharp down here, so
that should be fine. Now, the last thing
I want to do is I just want to go
ahead and I want to select these pieces over
here because this door, like, yes, it is in the center, but it is also quite far away. So I'm not going to just spend too much time in
something like this. It's just not really needed. So let's just go ahead
and extrude this out. Let's then just delete
it. There we go. So that we are going to place the glass on top after
we've done this. So over here, the same,
give it like a little trim, extrude this out
again, delete it. Because then what
we can do is we can select these outer
trims that we've just created and we
can extrude those out, and then along with the bevel, it will give us the effect as if the metal basically
ends earlier. I I now do a ControE and I
basically push this in Okay, doesn't look I do need to do some cleanup
because it does not really behaves correctly
around these corners, but it does do the trick. So we basically go ahead. Slack these pieces over here. And you know what? I'm only going to go
ahead and just like, grab these two, move them down. These two, move them
up. Oh, and over here. Here we go. It's twice
the same over here. Let's do the same up here. Okay. I think that we are ready to start adding all
of our bevels to this. Yeah, I think I'm
ready for that. So let's go ahead and
let's have a look. I'm going to, first of all, get rid of this
loop around here. Then what we can do is we
can go ahead and go into our mudding toolkit
and just select like this font angle and then
do the same thing that we did before where we just go two edges and two edge
parameters like this. And once that is done,
do I already want to? Yeah, I think I also want to
just go ahead and already select these out or edges, and then the corners
I will do separately. So I also select these
out redchs over here. I then do, like, a
quick Control B, give them quite a
bit of a bevel. It's 20.8. And now we need to go through the tedious work
of selecting all of these Wi small
corners over here and also give those a bevel. Of course, these do
not need the bevel. It's just like the
sharp corners. Oh, yeah, this
might take a while. Hey, once this is done, we can just go ahead and maybe do some small optimization, although I will probably just say that you can do the
optimization if you want, because it's not really
needed for me for a tutorial. Because, yeah, really, the focus for this
toil is all about, like, the trim sheet. It's not so much a
modeling tutorial, anything like that, else, I would go for something
much more interesting in, also a little bit more
complicated than this. But, of course, I
still want to give you the total package where you just see like
everything that I'm doing. So let's say that
we have this one. If we now smooth this. Seems like I forgot
one over here. 0.02, maybe. Oh, and I forgot Jesus,
how many did I forget? Don't know how I
managed to get so many. 0.3, I mean, there we
go. Smooth this again. Okay, don't think I've
cut anything this time. I guess that these edges over here are a
little bit sharp. Although what you can
also do is you can also at this point,
to be honest, just select them and just do a simple hardened
edge like this. See? And that should already be
fine for something like that. Okay, so we pretty much
got that one also done, and this one is also
already ready to go. So if we now just go ahead and although one last change
I want to make is I just want to go ahead
and go to my front view, and I'm going to select these bevels and
I'm going to make them a little bit sharper. Like that. Now I'm just going to go
ahead and I'm going to add a plane set this to be zero, rotate it 90 degrees and
just move it in front offer, and this will basically
become our glass. So all we need to do is we just need to go
ahead and make this cover our door because yeah, our door does not need to open, so we can keep it really simple. And then for this, we are going to go ahead and assign a
new favorite material, just a lamb material
that we will call glass. If you want, you
can just give it a quick blue collar just
so that you can see what when we are using glass
like that, here we go. And now all we need to do is we just need to go
ahead and we need to UV unwrap those
pieces over here. So yeah, let's get
started with this one. This one needs to be white, so that's quite simple. So let's go ahead and just
add our trim sheet to this. Most of this is going
to be super basic. It's going to be about
creating this step over here. That's unfolded. There we go. That one is easy.
This one, yeah, let's give it an extra segment
in between because else, it becomes really large. So one segment in between, and we can just
nicely move this up. Another segment. Let's
actually do this along with all of these
little bits over here. Here we go. So we have that one. Down here, we have another one. Okay. And now for the bottom piece, let's just go ahead and
select all of this. And then these like
these bits and also these like these bits
so that all that we have left is just this slab
of geometry over here, which we can then do a
best plane and unfold. Huh. I'm going to probably do this one Actually, let's first unwrap
that because I'm not yet sure the best way
to split this up. I probably want to
just unwrap this also, even though it looks very sharp, stuff can kill you pokes you. But let's go ahead
and same over here. Oh, looks like there's
like some leftover stuff. Oh, okay, that's those bits. So I probably just need to
go ahead and add them to this one. Yeah, I like that. And these bits are actually, these bits, they need to be
added to this one, I believe. There we go. So now
it is all one piece. Okay, let's have a look. I think what I'm
going to do is I'm just going to go ahead and cut it along here so that
we have the inside, which is not too difficult. And this way we can
give the outside a little bit more space because that one is
actually quite large. There we go. So let's just give that a little bit more space. And let's just go ahead
and do this with all of the other pieces also.
So you have the inside. And then the outside, maybe you want to just go at
oriented shells. We can simply scale
this down over here. This one let's also go
at oriented shells. I just need to make sure
that I select everything. Here we go. That one is done. This one, which is really sharp. Let's go ahead and just
grab this piece and just try and make
the best of it. Okay, yeah, I guess that fits. Yeah, this is just
like the inside, so it doesn't matter too much. You cannot really see
it that well, anyway. Then lastly, we have
this one left. It's cut. Let's place this one in here. And finally, we have
the last one in here. Yeah, it seems to work. Let's go outside
of isolation mode. Now for this one, let's go ahead and let's
also assign our trim sheet. I need to take a
break after this. I'm getting really
tired all of a sudden. This one, we just want
to go ahead and we want to basically place it over here and do the same techniques
that we've used before where we place
this nicely like this, and then you can just
go into your transform. Move this down over
here. Here we are. And then it's just
a matter of adding a segment like over here, selecting this, cut,
select it again. Honestly, at this point, yeah, we might just want to snap it. This one is a little
bit easier to snap so it might go a
little bit quicker. So once again, we
can just go in here. We can cut, select it, and then snap it to the top, which there we go.
Place another segment. Or what you can do is you
can just do one segment, delete everything else, and then just duplicate your model. Of course, that's another
way that you can do this. Because I do realize
now that these are a lot more segments
than I expected. Cut. Move pivot. Okay we go. We already arrived at the end. And then for this one, I'm just going to go
ahead and I'm just going to nicely move it around here. There we go. That should be no
problem. So finally, the one that we have left
is this one over here. So I know that we are a
little bit over time, but let's just go
ahead and finish this off. So we
have a trim sheet. And I'm just going to go in and let's see what's the
easiest way for this? This is just going
to be again, white, but then we just change
the vertex colors. Let's go in here and just
select this entire thing. Let's see if that
is too much or not. So that's unfold.
Okay, that seems fine. So we got that one. Let's see if this one is too much or not, so we can oops. You can go ahead and select
this piece over here. I know that it is
giving me some arrows. I just don't really care
about them, to be honest. Then they are not that big of an arrow or something for
something this small. Means that sometimes it can
not be folded correctly. So here you can see, it's
not folded correctly. What you can try and
do is just once again, delete history and
freeze your transforms, and then try to unfold. Or what we can do is we can
try and press always fix. Yeah, so here, it seems like it says clean the match
before unfolding, which probably means that if I go in here, yeah, I see here. So it is actually broken. I think the problem is
these bits over here. That's most likely
the cause of this. So if you connect this a little bit better, that
would work better. And also press Control Shift A, and just do a very
quick merge verts on quite a low level. Oh, I think that was
actually too much. Yeah, Control Shift A. Oh, Merge verts, I mean,
not control shift A. Let's do 0.001 and press Apply. Here we go. And let's just
see. Does it now work? Still does not work. Then we will just go ahead
and we will fix this after we have already
sorted everything. So let's first of
all, just sort all of these pieces because that
just makes it easier for me. If I just go ahead
and here we go. Those are also done. So
I've done those pieces. Let's go and try these first which are causing me quite a bit of
trouble all of a sudden. Yeah, I think by the
time that I have this, I'll text it, we will be
another 10 minutes further. So what I'm going
to do is I'm just going to go ahead and I'm going to cut this
chapter short over here. And in next chapter, we
will just go ahead and we'll keep splitting
these pieces up, then we'll just clean up and make sure that the unfold works, and after that's done,
we will just quickly texture it and just
get it into unreal. So let's go ahead and continue with this
in the next chapter.
31. 30 Creating Our Final Models Part12: Okay, let's continue. Sorry for the quick cut off. This door is taking a lot
longer than expected. But what I need to do just to make sure that
everything basically works is just go ahead and clean up your
geometry a little bit. And you can do this
in multiple ways like merging it together like
this over here, see. So yeah, we just want
to see if we can do some sort of like a
decent cleanup this fine, if you want, you
can quickly just add a amber one
material because else, it might be a little
bit difficult to properly see
what we're doing. And sometimes if I have this, I like to just place like
a center cut over here. And then, yeah, actually,
then we can just get rid of that one.
Yeah, it should be fine. So this one is really
complaining a lot. Like, normally, it
does not complain this much about manufolt UVs
or anything like that, so that's quite interesting. But there we go. That
should work over there. It's probably just
these bevels over here. I don't know why they
are causing problems, but that's what
you often get when working with bevels in this way. Let's see. Let's
do it like this. These all look fine. These look fine. Go
ahead and do these. Oh, yeah, let's not forget, I'm just going to
merge these like this so that they just
become like a single line. Just don't want to have these loose floating wordss basically. Okay, so that should
do the trick. If I now remove my history
and freeze my transforms, I can go in and let you
still leave off the shape, so I just want to go ahead
and see if it works. So if I now select this piece
and I do another best line. So if I now let's go to
my UV, press unfold. Clean up mesh before
using unfold. Okay, wow. At this point, basically, it is not reacting the way it
should be reacting. Now, there's a few things
that we can try to do. The first one that
we can try to do. So I want to go a little
bit more into debugging because even though I never encountered this
problem, we can still, have a look and or if I can really not
figure it out on camera, I will just do it
off camera, but I like to do this
stuff on camera. So first of all, what I'm trying to do
is I'm trying to, like, separate the big front
panel from the rest. And if I then go ahead and just, for example, select,
the side panels, I wonder if we can
get away with just doing just selecting
the side panels and if we didn't do a
best plane over here. So, it will probably
Okay, so yeah, there is definitely an
arrow into the mesh. You can also see it over here. So let's see. Whenever
I have arrows, there's always a few
things that I do. So first of all,
of course, I look around and I already
tried to fix it. Does not seem to
really work like that. No, because everything
seems to be fine. Control Shift A, merge verts, and just merge them
like a low level. But we already did that.
That also does not work. Let's have a look
at the outliner. Yeah, outline. It's fine. It doesn't have anything
strange in here. Another thing that you can
try to do is you can try to just move it or duplicate it, I mean, and then you can try to see if that makes
any difference. Sometimes it does, not
often, but sometimes. So let's just try that. And if that does not work,
see, it doesn't work. At this point, I feel
like that this is a bug or it's something
that should not happen because as you can see, we do not really have
special geometry. I do not even see non
manifold UVs because non manifold geometry often only refers to those floating
vertices that we see. And if we go into vertex mode, this one does not count
because it's on the end. So if I go into vertex mode, I do not see any random double floating vertices
as far as I can see. No, that stuff also
does not matter. So another trick that people don't often know
about that you can try, it's a little bit messy, but we can try to do an
export selection. And then if we just create a
quick fold that we will call TEMP we can try and export this door
underscore temp in here, just without trying
late like that. And then if we go to
outside of isolation mode, then we can delete this and we can try and re import this. And sometimes for some reason that does work a little bit. So if we just go
ahead and I'm just navigating to my export folder, we got and if that doesn't work, I will need to go
ahead and off camera, I will need to check, because then it just does not
make sense to me anymore. So let's see. We have this one. Also, let's do a UV and let's do automatic unwrap first,
just for the fun of it. And now we can try and
see if this works. So, this should work if I select this because
I just want to unwrap it same way as
that we've done before. Okay, so I have this piece. Now, are you going to
give me an error or see? Now it works. So as you can see, it was some random,
weird problem. Honestly, I cannot tell
you what the problem was, but I am kind of glad of this problem because
now I got to show you how I do like a bunch of
my debugging because I feel most tutorials
do not actually show mistakes because
no one is perfect. I'm definitely not perfect. Like, I make plenty of mistakes. It's just the goal is if
you can fix those mistakes. That's what is important. So now, of course, we do need
to quickly just redo UVs. So I'm just doing
this one, unfold C. So this stuff now seems
to all work totally fine. Perfect. At this point, I'm going to go ahead and see. So we want to unfold
this and maybe wedding arts are trim
sheet material on here. So I was going to also
unfold this piece over here. Yeah, yeah, now this
at least works. And then if we just go ahead
and deselect these bits, we can also unfold this one
over here. It's also fine. Over here, I probably
want to go ahead and just make these separate also. Here we go. Let's see this one. I probably want to go
ahead and let's see. Select this then deselect
whatever we don't need. Oh, wai, did we not
do the centi bit yet. Oh, sorry, we did not
do the centi biit yet. In that case, I'm going to select the centi bit and then deselect everything
I don't need. So the reason I do
this way is I want to make sure that I include
any bevels I might need. So let's also select these
few bevels over here. Et's diselect this
panel, probably. Yeah, let's deselect that panel. There we go. Let's unfold. Okay. And now what we can
do is we can now just go ahead and select most
like what is leftover. So let's deselect
these bits over here and the select
these out sides. Let's unfold this. I probably do not actually want this panel. I probably want to go ahead
and unfold it like this. Actually, let's also add
those extra bits. Here we go. Okay, that is good. So this one we already unfolded. So over here, this one, I'm going to probably
just do, like, a corner. I feel like that would
work best if we just have this little corner over
here that we unfold. See? And then also on this side, Oh, yeah, because there's
no segment here, but that doesn't matter
because we already have it partly done. Oh, wait. No, I don't like
that because over here, as you can see, it is separated. So in this case, I'm
just going to add a very quick cut like that. Here we go. See? That will
give us a nicer effect. There we go. So at least now
it looks a little bit same. And then we have these
pieces over here. See, is that all that's left? Yes. Okay. Nice. That's all that's left.
And we got this one. Okay, cool. So
that's now all done. Now what we can do is we can just go ahead
and select it all, modify and oring shells. Also, if it is very far
apart and you want to do some better texture scaling
so like the textile density, if you simply press
layout over here, it will scale your models based upon a correct text idensity, meaning that the very
large models over here are larger than the smaller models or the smaller pieces over here. So this is like
an instant way to basically fix your textile
density if you want. Of course, with trim sheets, I'm still going to go
ahead and do this stuff. But it is also good practice. I always do it also for my other models if
they use unique texts, for example, because, yeah, it will just the
system will decide the texadnsity for
me instead of me trying to figure it out myself. So it's a really
good way. And that's why I hear a lot of people often say about taxadnsiy how difficult it
is in everything. But honestly, it is super, super easy because
all you need to do is just use
your auto packing. In Maya and in Blender, I believe it's
also just like the normal Autopacking and in Max what was it? I Max? In Max you have also Autopackx. Yeah, they're all
Oopeckers and they all fix your text identity to make sure that your models
are properly scaled, and then you can just
take it from there. That was a messy explanation. Just use the outopecker in whatever tri program
you use before you start UvNwrapping and just make sure that the scale
setting is turned on. That's it. That is an
easier explanation for you. So we are going to go ahead
and, for these pieces, they are a little bit awkward
in terms of the shape, but should still be doable. Got this one. Scale it down. This one. Here we go. Okay. Finally, you are done. So now if we go outside of isolation mode, that
should do the trick. Okay, so we got
these pieces done. Now, let's have a look
at our reference. So we can make everything white except for these panels and
the actual door, which means that
all of this stuff, we can just go ahead and
just do a mesh display, apply color, and we
can just make this all like a red color
and press Apply. And then this one needs
to be blue color. Apply. And these ones also
need to be blue colour. And the glass, of course, does not matter because we do not, have any vertex
coals on the glass or any vertex coll or
supporting our shaders. So that should pretty
much be it for our door. So let's go ahead
and export this. Let's go to unreal. Door. Yes, I want to export. And let's go in here
and let's have look. Okay, our door, first
of all, open it up. Go down here. I should have done this when I
first imported it, but I just simply
forgot about it. Reset the FBX. Here we go. And after we go
into our materials, we can go ahead and just
add our trim sheet master, and our glass, we will just
go ahead and create later. But this already is working, although the roughness is a little bit strong
on these areas, so let's also later on fix that. See, the glass, we will cycle back to a little
bit later, so that's good. Okay. Now, I think that's what we can do is we can just go ahead and continue
on to the next one. So if we have a
look, the next one, oh, let's re art
this to our door. It's going to be
our sealing beam, but our sealing beam is
basically like a beam one. Yeah, it's basically
like this one with a much longer version of this. That is just completely gray. So if we just go ahead
and well, first of all, just double check
and make sure that it is not accidentally
in a group. And now what we can
do is just shift the art this to our
ceiling beam over here. Et's move this into place. It is a bit wider, but I think that we can
literally just do this. Yeah, that does not really
make much difference. I want to try and
see if I can avoid, needing to change a lot of the UVs because that would
just be a bit of a pain. So let's select Cs, and let's just go ahead
and select this. And you can see that on purpose, I did not like that site
window or whatever or that site panel that we created because it is
just not needed here. So I just moved this
down a little bit. Doesn't need to be
exactly aligned, but that's already pretty good. And once we've done
that one for this one, let's go ahead and well, actually, let's first hide this because I probably want to make this a little bit wider, which means I do need to change my UVs a little bit over here. Yeah, here, because I want
to probably make this. Only on this side, I
want to make it wider. So we don't need to
change too many UVs, but let's go ahead
and just deselect the side UVs so that we
don't need to change those. And let's move this down. And once you have
arrived at this point, select it again,
deselect the side UVs. Move it down. Oh, actually, honestly, that's
probably already enough. So we got that stuff done. Then quickly go into our
UVs before I forget. Oh, God. That's a little bit
difficult to select. But let's grab this piece. I should have probably done, I did not do preserve
vs. That's unfortunate. In that case, just grab this piece and we're
just going to go ahead and rescale this in here. There go, doesn't need
to be too perfect. These pieces will probably
be a bit tricky to select, but try your best. So here, unfold that, see? And that will automatically
fix any stretching on there. And sometimes if something is in the way, you
might want to, like, Oh, God, there's a lot
in the way in this case. Come on, let me I
will try to select, but it looks like that you have so many overlapping
pieces that in this case, we just need to, like, move
them out of the way if we want to be able to
select my mesh. Or I can, of course, do a manual selection,
but the thing is, I forgot like up until
what point I selected. I believe this point because I can see my seams over here. So I guess that I
can try to do like a manual selection and
just see if that works. For some reason,
zooming in is very sensitive again. Here we go. See, does that work? Just
by wiggling it around. You can see if you did
not forget anything. But, okay, so that also
works. That's fine. So we got that one,
and then for this one, all I need to do is I'm
going to move this down. And this entire piece, we can change the UV off
so we can actually do a new UV like this and
then go ahead and, like, rotate this we are just going to place
it in here with a different vertex color because it doesn't
need any details. It just needs to be
like a slap color. Okay, perfect. So we
got these pieces. Let's go ahead and reapply. Also like this end piece, because instead
of us needing to, like, change the
UVs and everything, if we now just go ahead and
let's go Show over here. The first thing that we can try to do is just select this. Add a preserve vise and
then move it like this. But I just want to see. Oh, yeah, so that is far enough. If you feel like
that, that might not be far enough, you
can also do a mirror. That's basically what
I was thinking about. But it looks like
that I already did sort of like a mirror
inside of unreal, so I don't need to do that
inside of T is Max over here. Tres Max Maya. This piece, I can delete. Yeah,
I don't need that. This piece, I can also delete. So the only thing that I need to do for this one is I just need to go ahead and we can probably apply mesh
display, apply color. We can probably set all of
this to red to get start with, and then simply select this
and set this to be green. I know you cannot
see the colors, but should be fine. So we got these
ones also done now. Yeah, there might be some
extra geometry here. If you want, you
can get rid of it, but I'm just going to
leave it like this. So that's already it. I'm going to go ahead
and save my scene, assign this to my
correct layer over here, and then I'm going to go
ahead and export this to be sealing beam 01. That should already
do the trick. So if I now go in
here, open it up, set up vertex colors
to replace and re import this and just
reset it to the FBX, and then simply
assign a trim sheet. See? Works totally fine. So we are just
reusing some stuff. Now over here we
have our sealing. We will later on also
create these models. But first of all, let's finish all the models that
we already have. So I'm going to for my sealing, basically just grab
this slab over here. I'm going to just give it a few connection segments,
maybe like two. And then it is just a matter for me of assigning our trim sheet, doing a bass play
on every section. And it's typical that this one
version over here decides, no, I do not want to be in the same direction
as the rest. There we go. Oh, no, wait. It was the other version
that decided that. Let's just go ahead and
just move this over here. And now we can just go ahead
and we can Scale this. Here we go. And that should
already be totally fine. So we got this one. Let's make this one probably dark or not. Now, okay, let's leave
it light for now. So let's just go
ahead and just export this as our ceiling 01. If you go in here,
we have ceiling 01. Oh, yeah, wait. So I do need
to then quickly go in here. Apply colours and even if I don't want to
change the color, I still need to give it
like a red color over here. Ceiling 01, replace
my vertex colours and reset it to the FBX. And then add the trim
sheet. There we go. Easy does it, so that
one is now also done, and we can always change
the color later on. So that's all looking good. I think at this point, I
will close of this chapter. So what we will
be focusing on on the next chapter is going to be our Bwall and our
elevator heft over here. Beck wall will take
a lot of time. Elevator heft maybe
like a little bit more. And once that is done,
we will first of all, complete these extra
models that we have over here like the lights and
these panels over here. And after that, we
can start by doing the balancing and really
finalizing our environment. So we are slowly getting closer. So let's go ahead and continue with this in the next chapter.
32. 31 Creating Our Final Models Part13: Okay, so let's go
ahead and continue. So let's get started with
this wall over here, and this wall is actually
pretty good already. Like, at least the base shape of it, if I just
have a quick look. Yeah, it's even
difficult to see. Okay, so this wall,
as you can see here, the base shape is there, it
has these blocks over here, and that is something
that we can create. So let's go ahead and let's see. For this one, what I'm going
to do is I'm just going to get rid of this center
line. I don't need it. And I'm just going to
actually select all of these edges over here and still give it like a quick
bevel just for some weighted normals.
There we go, 0.1. Should do the trick
so that if we smooth this, that
will look fine. Okay, so for these blocks, let's see, so it is,
like, pretty basic shape. On the side, it does have
something interesting. I don't know if there's
something that we can use for that. Oh, you know what,
we might be able to use these bits over here. So let's try that out.
Let's already unwrap this. So let's go ahead and assign an existing material trim sheet. And let's go ahead
and make most of this a simple white except
for maybe I don't know, this side or this side. I think I don't have
enough space on this side, so let's
do it for this side. So let's first of all, just
unwrap this bit over here. Let's do the same over here. Same here and same. Over here, so it's a little bit annoying on such a large
shape to select this. There we go. Then everything
that we basically have left, we can go ahead and
we can UV unwrap. So it looks like
I can just select all of them and do
a basic unwraps. So all I need to do now is just move this all on
top of each other, make it as large as possible. Here we go. Same for this one. Honestly, this is so hidden, it does not really need to
have a lot of geometry. And then for these
bits over here, I'm just going to go
ahead and I'm going to move them nicely
on top of each other. Like that. And then we can basically scale these
up a little bit. Over here. See, so that also works. Okay. Great. So this one, it will probably all be
if we go to mesh display, blue, most likely, because
I just want everything Oh, no, wait, except for these bits. So let's set
everything to green. I don't mean blue. I mean, like the blue colour,
not the blue vertex. So let's set
everything to green. And then let's go into our
vertex colors and select these bits and set these
to be red over here? Or do I want to make those
dearest blue after all, because it is a
little bit darker. Let's see how it works.
So we got this one. Now, all that we need to do is just go ahead and create a cube, and this is going to
be for these blocks over here that are
sitting on top of it. So what I can do
with this is I can go ahead and I can scale this in over here. Let's move it into
place, delete the back. Let's move this down
in. There we go. So we're just going
to basically recreate this block, something like this, maybe give it like a
nice strong bevel on the end and maybe, like, scale it back
in a little bit more. Here we go. Okay, easy, does it? So, yeah for this one,
all we need to do is we just need to
go ahead and again, first of all, UVNwrap it
before we do anything else. Bess playing. Let's unfold this. And just place it in here. And then we also have
the top and the bottom. Which we can place in here. There we go. So we
got that one done. That's a reset, and
this one is most likely just going to already
be apply vertex colors. So this one will be green, apply, and then swap it around. And now it's just a
matter of basically duplicating it up until like a distance that we
like. I mean, distance. And then just press CFD to
basically continue this on up until this point, and I'm just going
to delete that end, you will not be able
to see it anyway. You can, of course, go
up here and then use a lattice to basically move
it up and stuff like that. Or what we can do is we can just carefully move it up like this. Here we go. So let's go
ahead and combine this. Let's move this out. Perfect. Okay, so that one
is already done. So I do not need weighted normals on
these because there are so many of them
that it would add a lot of geometry and that
will simply not be worded. Let's just go ahead and
export selection on these, and it's going to be a Bwill 01. Here we go. Sine
selected to our layer. And now we can
simply go in here. Bwill 01. Replace it and just press reimport
and reset it to FBX. And now we can just go ahead
and assign our trim sheet. Yeah, yeah, see
the color is fine. I'm happy with that
color. There we go. So we got those Btalsa done. Easy doesn't to be
anything special. We might want to later on to art like one of these consoles over here because I want
to use this back wroll down here and you can see that
it has, like, some lights. So that is something that
we want to actually do. So let's go ahead and
select this panel, and let's just go in and let's, let's extract the faces. And then for this one, I'm going to go ahead
and I'm going to probably just rotate it, I'm guessing and
move it over here. Now, wait. If I
rotate it this way, it will probably not work, or it will not transition properly. So this one will be on its side, but it should not
really matter too much. So let's go ahead and
just place this one over here on its side. And let's go into a UV toolkit, transform and just set our
pivot to the very end. So that we can go in
here. Here we go. And then all I need to
do is I need to add a quick segment up until
this point over here. And this is one of the
few cases where I'm just going to delete everything else, and I'm just going
to grab this one. I'm going to edit my pivot and snap it to one of
these vertices over here. Oh, 01. I'm going to snap it to
this bottom one over here. And then I'm just
going to hold Shift, move it up, and then Shift D it. Because in this case, because it does not need to be as accurate, it's a little bit faster. And then up here,
we can just simply cut it off because you will never be able to
see this high up anyway. There we go. That
should do the trick. Artist to our back
wall. Like that. So now there should all of a
sudden be a bunch of lights. See? Everywhere. Okay, great. And then, of course,
we will just do some balancing out to make sure
that everything looks correct. But we already got
some lights in here so that is
working totally fine. Perfect. You cannot even see the lights on this side,
but that's no problem. So what we're going
to do now is we are going to start working
on our elevator shaft, which is our last large model, I should say, this
one over here. And it is basically split
up into three pieces. We are going to like
the side piece. Then we need to create
these brackets, and then we are going to
create the centerpiece. Oh, four pieces. And this ardon we also have so creating this
should be quite easy. If we have a look,
we are just going to focus first on
creating this shape. So this is just going to be a simple rectangle that we can
reuse over and over again. So, for example, we are going to just recreate
the shape, in this case. I'm going to move this, see, am I happy with
all the proportions? Probably want to
make it a little bit thicker. So let's go
ahead and move this. Oh, turn off my snap. I'm just going to
move this out a little bit like this, see? And then I'm going to move this be a little bit less
thick over here. And for this one, it is
probably easier if we just basically create
like a small bit and then just duplicate that
bit over and over again. So if I have a look, I'm just
going to go ahead and use my grip snapping to basically snap it to like a
specific point like this. And then all I need
to do is I basically just need to go ahead
and turn this bit into, like, a final bit,
and then I can duplicate it over
and over again. So if I go ahead, so let's go ahead and do a
double connect on here. So we are basically
just going to create this shape that
you can see over here. It doesn't look too difficult. So it's basically like a double connect, roughly like this. And then what we need to decide is how many of
these bars we want. So let's go ahead and
do let's do three. Let's go ahead and do three. And then the first
thing I need to check is I want to go ahead
and set one side up. Oh, don't have snapping on. One side roughly up here, the other side
roughly down here. Then we might want
to just go ahead and go for, like,
four, probably. Yeah, we might want
to go ahead and go for four. So let's
get rid of this. Before we do that, we
can just quickly go to, like, a site view because
we do want to make this. Oh, no way, we don't
care about that. We only need to care
about this centre bit. So yeah, we can just do four. So if we do another
two, up here. I want to go ahead and I want to get started by, let's see. So this one goes that way. So let's do another
one that goes the opposite way like this. And then we have another
one that goes like this. Oh, it looks like that I
need to, like, try and, like, balance this out a
little bit more so that it does fit a bit better. Over here, do leave
some space because we are going to give it a
little bit of thickness. So now that we have these bits, what we can do is we
can go ahead and we can select them or if you want, you can actually just
select all the way around press control B. That does not look correct. So let's undo that. Let's
see if we just like these. Okay, see that looks better. So contra be it over here. And now all that we
have left is here, we can just basically
extrude this stuff in here. So if we delete this stuff,
which we do not need, we do need probably
the backside, although we will most
likely just Mar. No, no, I want to keep backside. So basically,
extrude this in like this and delete like
these back faces, okay? So that is looking correct. And then I do want to
give this some roundness. Do I want to give it No, I do not want to give
it roundness there. I just want to
give it roundness. Oh, hello. That's not good. Let's go ahead and extrude. Let's just see. What I sometimes like to do is I
sometimes like to go ahead and go just back
into Y frame mode over here so that I can
properly see what I'm doing. Let's extrude these bits. And actually, you
know what? Let's then also extrude these
bits over here. And also over here, just
to keep it all consistent. Okay, that's correct.
So this one, this one. Yeah, you know what?
Let's also do that one. And this one, let's all
make this nice around. So this one we have this one. This this. Okay. Now if we do contra B, give a few segments over here. There we go. That should
also work. That is good. Let's see. So these bits over
here they are just going to be like flat angles, so we don't need to do
any beveling on those, but I do want to do beveling
on everywhere else. So if I just go ahead
and I'm going to go in my mulling toolkit and just
select the font angle and then do the whole control right click to edges
to edge parameter. And I believe that
that is already fine. Like if we Oh, no, wait. Turn off. Let's also go ahead and
do these two over here. And now if we do
contra B, here we go. So we can give quite
a large bevel. So what we're going to
do is we are going to go ahead and smooth everything and then select these centerface
over here and just do like a harsh edge like this so that the smoothing does
not work on that one. And once again, if you
want, oh, wait, over here. I forgot to add some
edges over here, so we do need to do that. But after that, if you want, what you can do is you can go ahead and you can use
that script that's we used before just to
clean up this stuff. So first of all, let's
make this bit bigger. Give it a few loops
around like this. So over here, we
do have some quite messy details to fix this, let's get rid of these
back etches over here. And honestly, for this one, what you can try to do first is just to do a simple merged
center for all of these. And just make sure
that you do not accidentally do what I did, which is accidentally
selecting back faces. So let's try that
again. Here we go. I just keep checking if I did not accidentally select
anything from the back. Same over here. Yeah. So very quick cleaning up geometry. And once you've done that,
what you can do is you can do a target weld and
we can just make this a little bit more
cleaner just by simply welding some of these
pieces to the ends. You can see over
here. Here we go. Okay, so we got that done.
Let's just try another smooth. It's like these bits over
here and just hard face. Yeah, here we go. So we definitely need
to use the script. So I'm just going
to use my command. Oh, first, I need to
select this font, use the command and press Enter, that you do the
trick. Here we go. Okay, good enough. So
that one is now done. And then what we can do with
this one is, of course, we can just go ahead and duplicate this over
and over again. So let's move this one
probably up around here. I'm just going to first of
all, I need to isolate this. I need to tool settings, add a pivot, snap my pivot to, like, one of the
corners over here. And then it's just a
matter of holding shift. Shiv DA a bunch of times and then go outside of
isolation mode and just delete. There we go up until
this point. Let's hide. Oh, hey, look at that.
That's really perfect. Okay, so we got this one over here and
now what we can do. Most likely, if I combine this. Oh, sorry about that. One, two, three,
four, why would I be doing this if I have
not unwrapped it yet? Almost forgot about that
because else it would just take a lot
longer to unwrap. So let's actually
quickly grab this piece. Oh, unwrapping. For this piece to unwrap, I think the easiest
thing that we can do is, first of all, let's
select the font B faces. Over here. Yeah, let's move this out of
the way, actually. Select the font
backfaces over here. Then I want to go
ahead and I want to Let's go to my top view. Here, actually, let's go
ahead and also my top view, I also need isolated,
which allows me to. There we go. Select
the backside. Like that. Just go ahead and
unfold this. There we go. So that's the
backside also done. And then all that we have
left is we have Oh, wait, I can already place this in here. Here we go. So now we have this font site, and I'm just going
to try and see if I unwrap this in one go, how bad it will be or
if it will be doable. You know what? That's doable? Like, I will just be like a dark color, so I'm
not worried about that, so I'm just going to go ahead
and I'm going to move this here. There we go. That's totally fine for me. And I'm now just going to
go ahead and save my scene. And now what we can do is we needed it four times,
so hold shift. One, two, three. There we go one, two,
three, because that's four. And now I'm just going to go ahead and I'm going to
select all of them, and I'm going to combine them. And it looks like the normal
stay intact, so that's nice. Now what I'm going
to do is I'm just going to go ahead and I'm going to clone it and
rotate it 90 degrees. Turn off my snapping.
And just nicely um, snap this to the side over here. I'm just going to line it up. Like that. Here we go. Yeah, that's totally fine. So
that's basically one panel. So what you can do is you can go ahead and you can combine this. Then if we go ahead
and just unhide, we can go ahead and we can start by let's do a
mirror, actually. Or will a mirror? Oh, no, wait, let's not do a mirror because mirror
breaks are normal. So instead, let's
just go ahead and do a simple duplicate and just rotate it 90 degrees that
should also be fine. Duplicate rotate 90 degrees. Let's line this up because
it looks like it's not perfect. Here we go. So let's line this
up. Save over here, duplicate, rotate 90
degrees, line it up. And then simply
move it over here. And a few millimeters or even a centimeter does not
really matter in this case. So we got these two
bits over here that should be all correct. We can just quickly test out, and then we will close
off this chapter. So if we go ahead
and isolate this, I just want to go
in and to test out, I'm just going to create a
large cube and just see if this cube properly fits
in between these pieces. So over here and here, it fits. Over here, it pretty
much also fits, although let's just
move this out a little bit more. It's just
like this one. We need to go ahead and just
give it a bit more movement. Yeah, there we go, see?
So now that all fits, so we are sure that this is just like a perfect
square over here. So we don't need to
worry about that. Let's save us scene, and let's continue with this
in our next chapter.
33. 32 Creating Our Final Models Part14: Okay, so let's go
ahead and continue. So we now already got these
corners done over here. So now I first of all, want to just focus
on this big panel. And one thing I did notice
is that it is really thin, as you can see over here. So what I most likely want
to do is for our version, I just want to go ahead and make it a bit thicker
because over here, you can also see like it looks
like quite a tick pedal. So let's go ahead
and work on that. And to do this, I'm
going to probably just do we need to do one side? No, I'm just going
to use a cube. I'm just deciding if
I want to use a cube or if I just do
one side and then copy it over to all four sides, but that would just be
annoying on our corners. So instead, let's go ahead and just grab this cube over here. And I'm just going to this time, make it a little bit longer,
like you can see over here. And then it is just a
matter of placing this into the same position as our
blockout. Like this. And then I can just
go ahead and I can for like the old version, if I can select it,
just put height on it. Let's put height on these. So let's have a look and see. How far away it is
sticking out from every side because we
are going to insert it. So basically what
we're going to do now, in this case, we are
going to insert it. So we are going to start most likely just by selecting
the top and the bottom. Do CtraE and give it
like a ten, no, more 20. Yeah, let's do like an insert of 20 and then just
press the lead. Now, once we've
done that, let's go ahead and just move
this down a little bit because the first thing
that we need to do is we need to make sure that
it is not clipping too much. So just have it sitting in front of our square pillars over here. Roughly like this. Okay.
So we got those done. Now, next thing
that we're going to do is let's go ahead and start by adding or
bridging our faces. Like this. Oh. I don't know why just add this
random segment in between, but now next thing is we want
to just go ahead and bevel contra B those top and
bottom bits, let's do 0.15. So I do want to give
quite a large bevel. And then let's go
ahead and just bevel the corners over here to give them also like
an interesting look. And for that, I'm
just going to go outside of isolation mode. So I'm going to give
that one a bevel at quite a low level, like 0.05 or
something like that. And once you've done
that, you can see, once again, like there is
a little bit of clipping, so we just need to once again, move this a little bit forward. Just to avoid the clipping. I think something
like that is fine. Like, I don't mind having, like, a little bit of clipping. I just don't want to have
it too over the top. But I also don't want
to have this stuff, like, floating almost. There we go. That
should do the trick. Like you won't really notice that tiny bit
of clipping in here. Okay, so that is all good. So we got these
side panels down, so now all we need to do is make place for the details
that you can see in here. And for that, I'm going
to You know what I'm probably going to go
ahead and just make this a little bit thicker even more. And then going to
place this roughly. Yeah, let's give it a little bit of headway in the top
so that we can just, like, kind of sink in
the bottom in here so that you never
see the transition. And now that we've done that, we are just going to
select these faces. Hello. I didn't mean to do that. Let's move this
back. There we go. Let's try again. So
we are going to go ahead and select these phases. Then I'm going to do Control E, and I'm going to give it
an offset of maybe five. That's maybe a bit too
much. Let's do three. And then another Control
E and this time, push it in like this. And this is where
basically all of our extra things will happen. So the only thing that
we need to do now for this panel is we just
need to go ahead and give it some bevels in order to properly At our
weighted normals. Let's start with these ones. Just gonna do contra B at quite a low level,
maybe like 0.1. And then for these
bits over here, I'm going to also give
them a very small bevel. So let's see, let's
do 0.1 again. And these panels over here, we are just going to go
ahead and we are going to temporarily extract them. There we go so that we
don't need to worry about that. And let's see. Now I need to add a bevel, have a look, one
bevel over here, and also in the corners,
I need to add bevel. So this might be a
little bit tedious to select There we go. So we basically end up
doing that and just 0.5 bevel is fine and just go ahead and do this on
every single side. Here we go. 0.5 also done. Same over here. And
finally, the last one. Make sure you select the
correct things. Here we go. Okay, let should do
the trick. So if I now go at a smoothies, I yeah, that looks all correct. Great. Okay. So we
got that also done. So we only need to
UV unwrap this one. And for that, let's go ahead and just do
that right now. Why not? So let's start by just UV
unwrapping this piece. Let's go ahead and add
our trim sheet to this. And I will, first
of all, UV unwrap. Let's see. Let's go
from here to here. Box Map or Best plane. Oh, this is really annoying
with these bevels over here. Let's do from here to here. All right. Here to here. And
finally, the last one. There we go. So that's the
backside already sorted out. So now all that we have
is pretty much like the front side for which
we can just go ahead and if we select this and then delete then unselect
the backside, we can do like an immediate
unfold for all of these bits. And if we do that
for all of them, then all that is left
is like the corners, which we can then, of
course, also unwrap. Let's just keep doing this. Here we go. So then all that
is left are these bits, which we can just do one
quick unfold like that, and that should do the trick. So let's go ahead and
select everything, modify orient shells,
modify and do a quick layout so that
I can easily move them. And these are once
again just going to be in our white area. But of course, we will
make these blue using our green vertex color this is just a
matter of placement. So I will try to do
this quite quickly. And in these last
bits over here, we can just go ahead and just rotate them all in
the same direction, overlap them, and
then do some scale. Like that. Here we go. And now all that is left is we have these panels over here, for which we can
pretty much only do one and then we can just
duplicate it over again. Although that might
be a little bit more annoying because it
is so specific on here, but we'll see how it goes. So let's just go
ahead and assign our trim sheet to this one. Let's do a bass plane.
Pivoting the top, and this one is going to
be this variant over here. Like that. And then
same technique, we basically just add a loop. We then select this corner and
we go ahead and we cut it. You can, if you want,
just do like snap the points. We got this one. Add a loop. Cut it, snap the points. Oh, yeah, we have
enough space left. Add another loop. This is why I want
to probably just copy this over
because else I would need to do this for
all four sites, and that might be
a little bit slow. One last loop, and let's see
if we can make this work. So let's see if I snap this, I just want to see if
I can make this work by setting this Yeah, let's just do this
on center over here. That should be fine.
Okay, so as you can see, we have this one done over here. So all we really need to do
now is we just need to go ahead and delete these three. Go to tool settings and reset
our Pivot and just start by applying this one. So the height should
be fine. So we just need to basically
move it forward to a place where you can no longer see
behind these edges. So we got these two now if we select these two and
just combine them. I will place your pivot into the center, and
then if you rotate it, it should give us a
pretty good result. Maybe you want to select your vertices just to make
sure that you push them slightly into your jom
tree so that there's no leftover stuff
renting. But there we go. That one is now also done. Okay, so now all that is left is going to be these cross bars
that you can see over here, for which we once again
only need to create one, and then we can just go ahead
and create everything else. So for these cross bars, what I'm going to
do is, let's see, can I re use I think I can actually reuse
these cubes over here. So let's just go
ahead and select only these two and then
extract faces from them. Okay, let's see. First of all, let's just reset my pivot. And I'm just going
to go ahead and I'm just going to hide
everything else. So if I have a look at this, I'm going to go ahead
and I'm going to see, let's move this in a little bit, make them a little
bit less thick. You know, skill them
flat a little bit more, place them to the
sides over here. And if we just go ahead and
just select this model. Come on, just let me select it. There we go. I'm just going
to have it, floating here. Like I don't really mind
too much about that. As I said before,
if I can see it, I'm not too worried about it. And all I'm going to do for these bits is I'm just
going to go ahead and say let's start by
selecting these faces, Bras contro Shifti and delete everything
that you cannot see. Like that. Then what we can do is we can
just go ahead and do a quick contro B 0.3
ish level over here. Do the same over
here, Control B, 0.3. So that for these
ones, we can already ta weighted normals, like that. And then all that we need is we need something in the center. And for that, what I'm
going to do is I'm going to just recreate a cube. And I probably want to keep
this square exactly square. Scale this up a little
bit. Like this. And then what I'm
going to do is I'm just going to go ahead
and I'm going to move this I push this back in. And then if we just select
this entire loop around here and just add a
double connect like this, push this out, get this to be the thickness
of our panels. Now what we can do is we
can just do contre E, and we can basically extrude
this in like this so that it looks like there's
like a gap going inwards. And we basically just place
it like this over here. Let's see. At this point,
I'm going to probably give it like a nice
bevel on the corners. I don't know how large yet.
Oh, that's actually fine. I'm actually going to
just leave it this size. And now for this
one, we can already just turn this into
weighted normals. So let's select the
font and the back. Control click to
Edges, Edge perimeter, and then just go ahead and
select Everything else. What am I doing? I can
just press entree. I didn't realize
that I literally need to bevel every single edge. So like that. And then
if we smooth this, that one will also
be taken care of. And finally, what I'm
going to do just to give it like something
interesting, like some bolts, we are just going to go ahead
and we are going to add a sphere and set
segments quite load, like six, no, maybe a
little bit more 12. That's too much. Let's do eight. And then what we can do is
we can go ahead and we can delete half of this reset it, and then scale this down
and you can already just smooth everything so that it basically
looks like a bolt. So, we basically want to just
scale this down over here. And I'm going to
place, let's see, three here, Tree over here. Let's combine this and also place them on the
other sides like this. Oh, they're floating. Scot these in. Let's
combine this again. Duplicate it, and then also
just go ahead and place it on this side over here. And if you want, you
can once again just select these faces
and these faces. So I'm trying to select them. There we go. And
then if you just press Contrave or not Contrave, but basically just
use your command to flatten those
edges or the button, whatever you have set up, and
that's looking pretty good. So we got these pieces now. All that we need to
do is we just need to unwrap them, and that's it. So I can just go
ahead and go in here. Assign my trim sheet. I'm going to just
unwrap this entire bit over here if it allows
me to Here we go. Because what I can
do is if I unwrap it entirely and then
just select one edge, and if I then just cut
this edge and then unfold, it will nicely just unfold
into a bar, as you can see. So we can do the same over here. We can just go ahead and do
a best plain on all of this. Select the back, cut it,
unfold, and there we go. That's that one. Now we
have this one over here. And for this one, I'm
going to, let's see. It's probably up until you're going to isolate it
also over here. There we go. Let's just select this side. Here we go. Select
the other side. Like that. And then
for the inner side, we might be able
to get away with doing a full unwrap like this. And then basically doing the same technique as
we did with our Oh, yeah, we do need to
manual selecting. Same technique as we did
with that metal bar, where we just select
like one side, and we place a simple cut. And then we basically
unfold this. There we go, see, and
that seems to also work. So for this one, we can just
go ahead so we can noway, we don't need to
actually place it yet, but honestly, it
doesn't really matter. So let's just place it. I
know I'm very undecisive. So let's go ahead
and also over here. And here, so we got
that one unwrapped. While we are here,
I can just as well also grab these two, modify or in shells, place them on top of each other and simply
unwrap these also. Like that. And then
finally, we have our bolts. And for our bolts, all we really need to do
is we just need to do one single large unwrap like
this or bass play like this. And if you want, there
is a tool over here. If you go to not
align and slap snap, but arrange and layout. You can go ahead and you
can press stack cells, and that will just
stack them all on top, which if you have a lot of them, it's a little bit easier to do, especially when they are
all the same like this, and then the same over here. So in the end, it does not really take
that much extra time. So we can just go ahead
and unfold stack cells and just throw them simply
in here. Like that. Okay. So that's now unwrap. So with this one, what we can do is we can go ahead and
we can combine it. And then it's probably
just a matter of duplicating this over here. We should be able to
use it from both sides, so we can now just go
ahead and grab this one. And if we then go ahead and
just combine this again, shift J and clone this and rotate this
90 degrees like this. There we go. Okay,
so that is now done. It is UV unwrapped. So in the next
chapter, what we do is we will go ahead and finalize this and get it into the engine. And then what we will
do is we will start by creating these extra
additional assets over here. So let's go ahead and continue with this in our next chapter.
34. 33 Creating Our Final Models Part15: Okay, so let's go ahead and continue so we can
finalize this. So everything in here
needs to be blue. No, sorry, not green,
except for these bits. So if we select everything, de select these
planes over here. So all of this stuff, we can just go ahead and
we can apply color. So this one needs to
be green, that's fine. And then these ones over here, they need to be red. Yeah, I'm saying that
correctly. Yes, I am. So now if I just
swap this round, that should do the
trick, as far as I know. So let's go ahead and save sin. Let's go and add this
to our layer over here. And then what we can do is we can just go ahead and export it. I feel like I'm
forgetting something, but we will know soon
enough if I did. So let's go ahead and export. In here, we can go
ahead and open up mesh, replace vertex colors,
and re import them, and reset to FBX. Apply our trim sheet. And why can I not move? For some reason, it does
not allow me to move, which is strange?
Can I move in here? Oh, yeah, I can
move in here, okay? That was weird. Let's go ahead and
just do unlit mode. Okay, so the colors
do make sense. We have almost no
lighting right now, so that's what is
making it a little bit difficult to even see
what I'm doing over here. But I can see in here that everything is working
totally fine. See? Oh, now I can move. Okay. Say here, I can see that this is all working
the way that I wanted to. This is looking really nice
with all of these round bits. And looking at this,
I just realized that we could have
also used the boolean actually to just cut this out. I didn't really
think about that. But now, this is looking great. So we have this one done. I will later on move
it around a little bit to get a better composition
from this point on, but let's first of
all, do some lighting. So we are now going to first start by actually
creating the light, so that would be nice to do. After that, we will also
to create this piece, and then I believe
that's where it is. Like, okay, you have to
create, but the crates, we will do in like a time laps, so that does not really matter. But I believe that that's the
last thing that we need to do in here before we can start by actually just
turning this into a decent looking level because right now it still
looks really bad. So let's go ahead and
continue with that. Let's get started with like a simple light that we
will place around the top. So later on we will
probably also want to move things around a bit. Oh, no, wait, wait, no wait. I forgot to make these
panels over here, which is pretty basic, but I still need to
do it, of course. So if we go ahead
and just unhight and these are the
panels. You know what? I'm going to just go
ahead and delete it. And I'm going to also delete this because it's
just our blockout. Yeah, so let's just go
ahead and do that first. Let's create a cube. And
as far as I can see, we had to place it on the side. So let's go ahead and
just move this forward. And move this up. So, I'm going to once again keep this quite simple. So
we got this one. Yeah, this looks at
quite a decent height. And then what I'm going to do is I'm going to go ahead and I'm going to once again, place an edge over here so
that I can move this out and create like a little
bit of like a bevel. Let's do this. And then I want to go ahead
and I want to create another two edges roughly around here to basically move this out. Let's see, let's move this down a little bit. You know what? I'm going to push
this back because right now my version
is just too thick, so we are going to slightly
change our version around. Let's reset my pivot so
that I can properly, scale it a little bit thinner. Okay, so that's
looking pretty good. So we got that stuff done. And now for like the
insights over here, what I'm going to do is I'm just going to go
ahead and I'm going to probably place one
etche over here. And then these faces over here, I'm just going to do contra
E. We like an offset of ten. Okay, maybe less, maybe like eight so that we can
then extrude this in, and this will become
that extra shape. And then all I need
to do is over here, I need to go ahead
and let's see. This one I want to bend. So give the few segments. There we go. This one, I'm just going to
add a simple bevel. 0.05, so quite a small one, actually. And let's see. For these bits, we
also just want to go ahead and just add
the simple bevel. Because they don't
really need to be anything special. 0.1. Yeah, 0.1 seems fine. Then we also want
to go ahead and add the bevel here and also add the bevel around this area, Contra B. Oh, I
forgot to select one. Let's try it again,
Contra B. Yeah, that is looking also fine. No, wait, that's a
little bit too big. Let's do 0.3. And then all that we have left is we also just have the back. So if I go ahead and
just do select bi angle, to edge to edge perimeters. At this point, I assume that you know how
to do the modeling. So I'm not really going
to explain much anymore. So we got this stuff also ready to go. That
should be fine. Yeah, just like a basic panel, so that should be totally fine. Let's go ahead, assign
existing material trim sheet. And then what I'm going
to do is I'm going to get started by on this, I know that you can
optimized if you want. I'm not going to because I
just want to get this over with because I've
been spending way too much on modeling already. Looks like that, I
just want to quickly move my history and freeze my transforms because it was
not really looking as nice. Okay, so, we got
this one. Let's do best plane for this
one over here. And let's just leave
these pieces to the side. And basically all these pieces, they can just become,
let's turn off set Bangle. These pieces, they can just
become something simple like Oh, no, wait. Actually, we first
of all, need to select the back
also. Do that first. So let's just select the back, move it over here, and now we can go ahead and
we can do this. So I was going to
select this angle. Deselect some of
these pieces so that we have one long
angle over here. Unfolded. There we go. I was going to
select this angle. These these pieces over here, and I was going to
do a quick unfold. For this one, I was going to do the same probably for
this entire area over here. There we go. And I
was going to do the same for this area over
here. So let's unfold that. There we go. I do apologize. If you hear a little bit of
humming in the background, they are working on
the street right now, and I can hear that they
are just making some noise, but as far as I know, the noise should not really
be picked up that much by my camera or
by my microphone. So now what we can
do is we can just go ahead and place
this into place. Same thing as always.
Just go ahead and, like, move it over here.
Same for this one. And this one. This
like the back side, you can never, ever or
never really see it. So we can just make
it quite small. We don't need to
split d or renting. It's a fun side, same thing. You can just kind of
place it in here. Okay. So now that we have left is this piece and
this bottom piece. Let's start with, like,
the bottom piece. And that one is going to be a little bit more interesting. So we kind of need to decide how we are going to cut this. Even in here, you can see that they just kind of cut along it. So I'm just going to
see if I can find a nice area that I can maybe, like, place this along. I just needs to give
me some random detail. So let's do something like
this and let's then go to UV and maybe push this in. Yeah. Let's do something like that, that
looks fine to me. And then this piece,
this piece is going to be probably a
little bit trickier. Let's see. How are we going to make this piece
look interesting? Let's go in here. Okay, so I can scale this
down until this point. Well, you know what? That
actually works quite well. If I just go ahead and just
like this entire side, maybe push it back a
little bit like this. That works spicing well. Maybe that's like this point. The only thing is
that down here, you can see that we have a piece that is a little bit cut off. But what you can do if
you really want to, you can try and just
place like an edge. Well, that's maybe a
little bit overkill. Let's do it using the
cut or a knife tool. It's placed like
an edge over here. And here. And then
you can kind of just quickly grab this piece
and just move it like that. Like, you can even go this far. It might not look very nice, but you won't
really notice here, you can see a tiny seam, but for the rest, you
won't really notice. So doing this, you
can now go ahead and smooth this
surface over here. And once you've done that, it's just a matter of going
in here and doing a mirror object on the
Xaxis in the plus. Here we go. Now let's go ahead and do again another mirror on objects on the YXs Like that. There we go. So
that's now also done. Sorry about that. I forgot that. That took again a
little bit longer, so let's go ahead
and just elevator. Let's export this. And then we can go in here and
we can just add this. Here you go. Oh. What's
up with the material? Oh, it still has my blockout
in it. That's what's up. Let's go ahead and select it. Delete the block out that I accidentally
exported with it. Let's twyt again. Reimport. And then I just need to reassign my
trim sheet one to this. Over here, there we go. So now it looks more correct. And then, of course,
as I said before, we just need to fix our
materials and everything. But okay, so that one
is now also done. So yeah, we're going
to work on our light. We can still do that
in this chapter. Let's assign this to
our elevator shaft. And what I want to do
is I want to turn on my ceiling beam because I
need it for measurements. Now this light should
not be very difficult. So let's go ahead and just
create a simple cube, and we will basically use
this for our measurement. So we place this cube on here and just make it look
like that, basically. So it's a very simple shape. I'm going to make this
roughly like the center. I'm going to push this
down a little bit. And then in here, what I'm
going to do is I'm going to extrude this to get
roughly the same thickness. Then push this down again. Up until, see, I only need to push it down
a little bit like this. Extend this out a bit further, and I'm actually going to make
this a little bit thinner. Like this, okay? So that's all looking fine. You know what? No, I feel
like this is still to tick. I probably want to go ahead and make this a
bit thinner even. And that means that
we also need to make this side a bit thinner. There we go. So we got
that sticking out. Let's extend this out
a little bit more. And then in order to
like a pop a bevel here, we first need to do a target
belt like this so that it becomes one single
four to five degree edge, at which point, we can just
go ahead and add a bevel with a few segments and see how
far do I want to rotate it? Yeah, like this. I'm just
looking at it from distance. This looks pretty good.
You might want to just go ahead and just move this
forward a little bit more. Just to avoid a little bit of clipping. But this
is looking fine. Then you can go
ahead and you can decide on the width of it. So let's go for
something like this that looks quite nice. Then lastly, before we
start adding our bevels, because the bevels
are quite big here, I think I'm going
to go ahead and I'm going to grab this corner, do a console E on it with an
offset of five, for example. Then it looks like
that we do need to go ahead because these pieces
are too close together. We need to merge these together. Doesn't really want to merge. There we go. Now what we can do is we can select
these bits over here. Contrae them like this. S, let's give them a
little bit of, like, a bevo, you can see over here. And this is going to be
basically our light. So all we need to do for this
one is we need to go ahead and we need to maybe extract it. Now, let's not
extract it just yet. Let's first of all, just
grab these corners. Give them a bevel.
You know what? Let's make them round. I
think round looks quite nice. You can, once again, you can
optimize this if you want. I'm not going to. Just
to save some time. I'm going to add, like
a quick bevel here. And then finally, over here, I do want to go ahead and
add some quite large bevels. So if I just do Control B, let's make them as
large as we can. Yeah, as I said before, you can optimize this area.
But for me, this is fine. So what I'm going to
do is I'm now going to select this side. Let's do actually, let's
select invert your selection. Let's smooth this
stuff over here. And I can see that I've
got 0.1, maybe. No 0.03. There we go. Try it again, so smooth this. Yeah,
that's looking fine. And then for this
corner over here, you want to go to
the mesh display, and you want to use a
soften and hardened edge. The reason you
want to do that is because if you go
for a hard edge, because this is round, it will
show all of our segments. So the soften and hardened edge will just based upon angle, it will sharpen it, but it will not do like
a full smoothening. So now that we have this
piece over here done, we can create a new
layer that we will call sealing underscore light. Then what we can do is we can
go ahead and we can reset our pivot and just set all
of our translates to 000. Let's move this properly
in location to be on our grid point on the 000
point, bit like this. And all that we need to
do is, first of all, we need to go ahead
and let's assign a trim sheet material,
except for this one. For this one, we want
to go ahead and do we already have
something? No, we don't. Then we want to assign a
favorite material, a Lambert. And then in here, first of all, remove my history because
else I cannot see it. Okay. In here, I'm going
to go ahead and call this light like that. And all that we need to
do is we just need to do a simple UV unwrap
just like always. So the UV unwrap for this, I'm going to oh, I can already see that my camera is being a little bit
annoying for this one. I'm going to go ahead and
unwrap this site over here. I'm going to go ahead
and I'm going to unwrap this entire site over here that should actually
work just fine. I said, at this point,
I'm no longer picky. I do recommend that you are, but I'm just going
to finish this off in order to save some time. Let's see. So this is
what we have left. Let's just unwrap it. See if it works. Let's add a quick cut over
here, and this one is fine. So if we go ahead
and for this one, scale this in and just
place this over here. This one, we can
do the same thing, scale it in. Same for this one. There we go. And then finally, we have these extra
bits over here. And that should really weird. And we can just give
this a red vertex color because we just want
to keep this white. So we want to go
ahead and go in here. I'm going to give this one. It's apply colours, a red color. And I believe that that is it. I don't think I need to
do anything else to this. No, I think that's it. So I can just go ahead and
I can export this. Sealing underscore, light
and then if you go in here, we can go ahead
and we can import. And let's go ahead
and import it. This time, finally set your vertex colors to replace
and then press Import. And now we can just go ahead
and we can open this up, apply a trim sheet. And for our light,
what I'm going to do is I'm going to
go ahead and I'm going to actually
use my black over here because it is
not a big stretch. Just duplicate over here your color so we
can right click, convert this to parameter
and call this color. We can go ahead and do
a scalar parameter that will call roughness,
set this to one. And then we can do another right click convert the
parameter color that we call emissive nscore color. And for this emissive color, if you go ahead and
just simply once again, multiply it like we've done before with a scalar
perimeter that we call, a missive strength like this and throw this into
your missive color. That should already,
take care of that. And then all we really need
to do is I'm just going to go ahead and right click and rename this to be plain underscore master
so that then I can, create a new material instance
that I will call light. And this light will just have a simple the color of this
light will just be white. Same for the emissive color, it will just be a white color
with like emissive tank of maybe like zoo three for now. And then we should be able
to simply open up our mesh, which is a ceiling
light over here. And then we can add
our trim sheet, 01 and our light. Here we go. Let's try this
out. So let's go in here. Assets, sealing light.
It seems to work. It's a little bit strong,
but it does work. So we can now go
ahead and we can simply place this into location. Over here, maybe go
into our light and set this strength to one
for now after all. And then it is just a
matter of going in here. Maybe placing four
of them like this. Then the center will have also the lights because
as you can see over here, you can see that they use
these type of lights, but we are just going to go
for something a bit more simpler because you cannot
really see the center anyway. Let's get started by,
let's not do that. Let's get started by just doing one of these and
rotating them 180, maybe we can get away with just literally clipping
them into each other. H if you move this one
like a tiny bit higher, you can see that now, you
won't really notice that. So, let's delete this for now, because if I now go in, duplicate this and
move it over here, I can then just go ahead and
I can select these four. And then from a distance, I
can simply duplicate them, give them a decent distance
from each other like this. Then all I need to
do is I need to grab my ceiling lights over here and duplicate
them again and this time place them over here. And then just double check that it is on the right location. Maybe we need to move it a
tiny bit here and there, but for the rest, that's
looking pretty good. So now we have our
ceiling lights over here, so you can definitely see them. Yeah, okay, maybe set your
light to like 0.2 for now, but we will simply work on that to make sure that
everything looks correct. Okay, in our next chapter, we will finalize by adding
this last model over here. After I've done that, I will do a little bit of polishing, things like maybe adding an
extra panel over here for these bits and just
playing around with things a little bit more to make sure that everything
looks correct. And after that,
what we can do is we can start doing
a lighting pass, and then we can finally start
by balancing our materials. So let's go ahead and continue with this in our next chapter.
35. 34 Creating Our Final Models Part16: Okay, so let's go ahead and finish off our modeling paths, and we are going
to get started by just finishing this
one off over here. So for that one,
what I'm going to do is I'm just going
to go ahead and I think I don't really need any reference for this if we
just go ahead and hide this. Although, no, wait, we can use
this angle as a reference. So we can use our ceiling
beam one and then use a cube. And that's what we can
use as a reference. So let's just see if we
can recreate the shape. So it's not going to be to
tick I'm probably going to go ahead and this
is a bit confusing, but let's see how this works. So this is the bottom side, yes, so this one
needs to be shot. Then at this point, it basically goes Oh,
that's interesting. Oh, it's because I'm setting to object to you always
need to go to default back. So over here, what I'm going to do is I'm
going to go ahead and I'm going to rotate
this 90 degrees exactly, probably up until this point, and then extrude this out. Okay. And now if I go
in here, let's see. This one needs to be
probably 45 degrees, something like
that, then we just need to make some adjustments. Let's do the same over here,
like 45 degrees like this. Then I need to go in
and let's get started by just making this
quite a bit thinner. Let's move this down
and just kind of, like, make sure that everything
is aligned. Let's see. Am I doing this correctly? The length, we kind need
to just figure out when we actually import this
into Unreal engine. So let's see if this is so this one it is
like this, basically, which means that in unreal, it would basically go
I believe like this. So, this is how it would
look like in unreal. That is correct. Okay.
Yeah, so that should work. Okay, so that should work.
So what I'm going to do is I'm going to now turn
off my ceiling beam. I'm just going to
go ahead and I'm going to place this roughly in the center of our
grid over here. And then if I look at this, it basically has
three components. The first component is a
double connect that is broken. Sometimes if your double
connect is broken, it can help to just remove your history and freeze
your transforms. And if that does not work, which it does not seem to work, then what I tend to do
is I tend to just go ahead and u actually, we can just do this by hand. We can go in here and
just do this by hand. It is a bit strange why the
double connect sometimes breaks because it doesn't
work like that in Max. I know that the
systems are different, but you would think that if
it works in three years, Max totally fine always, that the same would
happen in here. So if I try this, see, and now all of a sudden
it does work, so it's just this
random thing again. Let's go ahead and just scale this one in roughly over here. And then it looks
like that these ends. So if we select the
center control shift I, the ends are going
inwards like this. And then this piece over
here is going out like this. And then we might
want to just go ahead and scale this flat because it is not
always perfect. Same over here, scale
it flat. There we go. And that's basically
the shape that we are going to go for. Easy does it. And then we're just going
to make this one like a different color from
these bits over here, and I will probably just
go for like two colors. So at this point,
all I will need to do is I need to go in
and let's first of all, add a bevel on the very
thin pieces over here. Contra B like that, just
like a really small one. And then I'm just going to go ahead and I'm going to double click over here
and I'm going to, I think I want to just go
ahead and select everything. So also these corners over here, so just select like every
large bevel you want to add. I think this is it, so
let's do Contra B again. And let's set this to
like 0.3, probably. So slightly larger. But if we now smooth this here, it should still
work totally fine. Yeah, these sites over
here, if you want, you can go ahead and
you can select them, and you can then go
ahead and go down here. Oh, let me just quickly
find my shot coat. Of course, mean my mail
command line over here. And what I will do is
after this tutorial, I will just properly,
dit in my shelf, and I will try to fix myself because it's just a
random bug that I have, and I've tried to fix it. People gave me tips on it, but I still cannot
seem to fix it. So anyway, we have this one. Let's go ahead and just
do a quick unwrap on this because it's not
really anything special. Let's art our trim sheet. Let's get started by just like unwrapping the center over here, and all I need to do is
I just need to do, like, a on like this and then
probably just go in here and just do like a double
click and then just deselect whatever
is in here and cut. And let's see if this
unfolds properly. Yeah, pretty close. So
it unfolds pretty close. It's a bit strange why we
have a double connect, probably because the way that
this is stitched together. But you can just go at a
slack like these lines, and if we then go
ahead and press stitch together over here and then do another unfold, there we go. Now it is back into one line. So that's number one.
Then what I'm going to do is I'm just
going to go ahead and I'm going to
grab this piece. Unfold, number two. This piece, unfold. There we go. And I'm just also going to go
ahead and I'm just going to select these center bits
over here. Unfold those. Let me just first finish
selecting them like this. And these bits,
they can also just use a simple cut over here. And also a simple cut over
here, and it's unfolded. Yikes. That one is not working. That's unfortunate, so
that one we will fix. But before we fix
that, let's also just select the centre
bits over here. Do a best play on those. And for these, we just
need to place like one single cut down here and let's just
go ahead and unfold. There we go. So those
are working also. Let's go ahead and
let's place like a cut in between here, wherever we have these breaks. And now we just go ahead
and select everything, orient shells and
do a quick layout. We can then go ahead and we
can start by placing these. As you can see I'm doing
this really fast right now. Just get this done. Here we go. Scale this up. And the last piece. Here we go. Okay, so that's also done. Then if we just go
ahead and go into our mesh display, apply colors, we can go ahead and apply red to everything and then
simply select actually, select everything and de
select these center bits. And these bits, I'm
just going to go at and I'm going to
make them green. There we go. And that's it. So that's one we can
go at and we can just call this sealing underscore transition
and save like that. And then what we can do is we can just go ahead
and export this. So export selection.
Ceiling score. Transition. There we go, and that's going into real. Gama There we go. Assets. Import open it up, assign our trim sheet over
here, and there you go. So it looks quite simple,
but this is basically it. And then we can go
ahead and we can just go in here
and we can add it. And then all we need to do is
we just need to measure out roughly the actual transition that we need to make later
on. So we have this one. So I probably want to just
rotate this over here. Here, this is what
I mean. See? So I made it a little bit of white, so that's what
we're going to fix. But in this case,
it's already just try and place it roughly
into location like this. And then all I need
to do is I need to go back in here and say, Okay, so let's make geese. And I don't mind the tiny bit
of stretching that we have, although we could then
also do the scaling here. Let's actually do the
scaling into real after I've imported it
if it's not correct yet. But it does not really
make much of a difference. Yeah, I can just do this, see? And then we can just go ahead
and we can duplicate this. And now you can no longer see that the ceiling basically
ends at that point. And then we can go ahead
and duplicate this again. Rotate these around and
place them over here. There we go. Okay, so
that is also done. Great. So let's have
a look at this. Railings. That's another thing
that we do need to create. We need to create some railings that you can see over here. But what I'm going to do
is, do I, first of all, just want to go ahead
and, like, Yeah, I need to add these dons. So let's actually do
those probably first. Let's add the dons first, and then we will
do the railings. So to create these
done components, it's not very difficult. Let's add this to our
sealing transition. We just need to open up our beam 01 and basically just place
them on top. That's it. So let's just go ahead
and create like a cube. And then with this
cube, we first of all, want to like the side
on the thickness. So it's not that thick. So let's go for, like,
something like this. Place it on top, move it down. And then this one basically
ends just in front of it. Something like this is
where I want to end it. And then this will just
be something that we can place on top of everything. That's why we are also going to actually export it
in this position. I'll show you why
we are going to export it in this position. So let's just go ahead and
have this go all the way to the end probably to
something like over here. And it basically looks like it has round corners
all the way around. So if we just delete the bottom, and if we then just go
ahead and select yeah, let me guess it's
probably more annoying. I really don't understand
why I cannot just do, why the isolate is
on every single you. I'm sure that there's like
a button where you can, sync the views up or
something like that, but honestly, I
need to look into that because I never
really looked into it. One of those things that
I don't use that often, so I just keep getting
to look into it. But basically, let's go
ahead and just press Contra B and just give it
like three segments and just make it like a nice
round panel like you can see over here. Like that. Then the last thing that
we need to do is because it transitions from
this panel to this one, we need to basically
just go ahead and create a panel roughly around this point to
make a transition. And then over here,
if you want, you can also add something extra on top. I'm not sure if it is needed because I don't
really have this one, but we could do that. We could duplicate this. And let's go ahead
and like here, make this a lot smaller, get rid of this center
line, reset my pivot. And let's just try
and match this up. Let's scale it out a
little bit to make it a little bit wider so that
we have a bit more space. And then we can basically
just place this on top of everything here. Let's scale this out a little
bit so that it is actually placed over everything else. Something like, something
like this should be fine. And then let's go
ahead and go in here and I'm going to go in and like two segments that I can nicely rotate this and nicely
place this around here. Maybe move it up a little bit. There you go. Actually,
you know what? One segment should
be fine because what I can do is I can rotate
the segment a bit and then press Control
B and give it like a few divisions. There you go. So here you can create
one of these panels, for example, or you can do
some construction lines. I think what I will do is
at the end of this course, I will do timelaps
which is polishing. And this timelaps it will just add some random
construction lines here and there just to finalize the environment because
stuff like that, it's so easy, but it's so
time consuming to do that. That's something that I just
need to remember to do and not forget because I tend
to forget stuff like that. In any case, let's go ahead and just assign our trim
sheet material to this. It's also smooth everything. And then we can get started. So, let's get started
with this one. I'm going to, we are
going to match it up. So what I can do is I can
just grab these pieces. So if we do like a best
plane for this one, so I basically grab this piece. I grab a best plane
for this one, and then later on I just need to UV unwrap that one properly. And then if I just go
ahead and first of all, Grab the front. Let's then also grab the back. And now all that we need to
do select everything and then deselect one side and just grab this side over here and
grab another side over here. Okay, so we got these done. Let's go ahead and just
give them quick unfold. And for these pieces, we can already just go
ahead and we can just throw them in here. They are very small,
so I'm not too worried about the scaling. I'm just going to throw
this one on top of this, rotate it, give it a
slightly larger scaling, and just throw that in here. Okay, and now we get to the
ones that actually matter, which are going to be this one. Let's go ahead and
scale it down. Because we made this piece
over here for a reason. Okay, then I can
see that it does feel a little bit too white, but that should not
really be a problem. We should be able
to just move this, and a little bit of
squashing should be fine. Although what we can try and do because the other one
will also be white is just reset your pivot and just scale it back
in a little bit. There you go. And
then for this one, you need to go up here. So transform that set you down into this corner.
Oh, no, you know what? We can simply select
these ends over here, and we can just basically
stop it in one center. So we don't actually
need to squash the renting. We
can just do this. And all we need to
do for this one is we need to add some loops. Cut. And let's just snap the points and snap it
over here to this point. And then we just without
needing to look very closely, we can just go ahead
and go over here. If you have a four case screen, this will be a lot
easier because you don't need to scroll up
and down like I do. So I do recommend when
you are modeling, I always just
recommend using four. It's just so much
easier. Or, well, not four k. Four k is a
little bit too small. The one that I use
is 2560 by 14 40. So it's like semi four K almost. So 3.5, I believe,
that we just call it. But yeah, anyway,
or in any case, over here, that
is now also done. And then for this
one, we kind of, just want to yeah just
give it like something. Be this is, of
course, a lot wider. Let's go ahead and just start by selecting maybe these ends. Unfolding them. Actually,
let's first of all, do this one else it's
annoying to select stuff. Unfold this one. Trow
it in the same place. Unfold this one. Just
also tow it on top. And this one, okay? Let's move this out of the way. Excuse me. Now what we're
going to do is we are just going to move it
over here and see. So for the top, this one will
be a little bit stretched, so we'll see how it will go. Let's first of all, unfold. Rotate it. Scale it down and
let's try and make it maybe one large panel. Then maybe tell us
another stretch if we make it like a
large panel like this. And then just select
these UVs and maybe push them out
a little bit more. Yeah, there we go, see? That actually works
surprisingly well. So we got these
pieces also done. Great. All we need to do
for these pieces is we need to go to our mesh
display, apply colors, and just apply a
green color to them, and then we can just
select them and just turn off our
vertex colors again. At which point for this one, if you want, you can just
throw this into Beam one, or you can create a
new layer that we'll call beam underscore
01 underscore dons. Save acne. And now, if we turn off Beam one, we are just going to export this one like it is right now. Because that will make the placement a bit easier because this placement
is very specific. So all I need to do
now is I need to go ahead and input it. Here we go and then just assign
our material. Like that. Yeah, and then this
is a perfect time to place like one of
those construction lines. But now, if we import it, all we will need to
do is let's input it. Let's rotate it 90 degrees and then simply
select your beam. Go to location, right
click and press copy on just the empty space within the location and then
select your beam, right, click, and press
Paste, and that's it. Now you can just go ahead
and duplicate this. You can go in here,
location, copy, select, right click,
location paste. And that will just very quickly add these pieces
on top like that. That's a nice way to just add some extra details on top
without changing our mesh. See and that this working
already quite a bit better. I do feel like maybe scaling
up a little bit more. So I'm just going to give
them a little bit more width because else it feels
a little bit thin. And let's reexport that. And that is where I'm going
to leave this chapter off. There we go. Let's save Racine.
In our next chapter, because I want to
go ahead and I want to finalize everything
quite quickly. What I'm going to do is our
next chapter is going to be a time lapse chapter
where I will be creating these extra pieces. I will be just doing
some general polish, and I'm going to add some construction lines
and stuff like that. So it's just going
to be simple stuff, but it will be in a time laps. I will not be narrating over it. It's just like
some extra ardens. And the reason I do this
is because after that, what we can do is we can
focus on just adding lighting and then getting some proper materials
in here and, like, proper balancing
within our trim sheet. So let's go ahead and continue with this in the next chapter.
36. 35 Creating Our Final Models Part17 Timelapse: D things like that.
37. 36 Doing Our First Lighting Pass: Okay, so we are now done
with the basic modeling, except for, of
course, the grades, but we got a really
solid base right now. So what I want to do is before we are going to start
balancing out our materials, we need some proper lighting because the lighting
that we got right now, it's just yeah, it's
not really good. So that's what I'm
going to focus on. This chapter, we are just going
to focus on the lighting. So I'm going to get started with just cleaning up
my scene a little bit by placing
these extra assets that we added over here, except for Post fax, camera, and I think that's it. Yeah, all of these, just throw them into assets like this. There we go. That's
a little bit better. Okay, now, next, what I'm going to do is
I'm just going to go into my camera over here and I'm
going to have a look and see. I'm not going to match
my reference because I feel like every time I
try to match my reference, I just do not really get
the result that I want. So instead, I'm just going
to wing it a little bit. And I'm going to go in here. Let's see. Universal Zoom. Yeah, I think we can
use Universal Zoom, and then let's see
if I just go to 35 millimeters and just see
if that works a bit better. You'll see. So that gives
me a little bit of, like, a close up feeling, which I think looks
a little bit nicer. So we got this right now. It does mean that we need
to go ahead and we need to change these elevator
sets over here. So for that, I'm just going to temporarily add another
viewport over here. You guys will not
be able to see it, but I'm basically
adding this viewport in here on my other screen so
that I can actually see what I'm doing s
is just simply too difficult for me
to properly see. Over here, I'm just going to
select all of these bits, and I'm just going to basically turn off snapping.
I don't need that. I'm going to move this to a location that is sitting
really close to my camera. That's interesting. Right now it is blocking quite
a bit of my view. Let's just set it
probably roughly here. It is blocking a
little bit of my view. Maybe if I then
go ahead and just move a little bit more towards
the site like this, here. See that gives me a
much better result if I do this and then maybe move my Elevators a
little bit out like this. Yeah. Okay, so that's already a lot better. So we
got that one done. Perfect. Now what
I'm going to do is I'm actually going to go
and instead of green, I think I want to go for, like, a purplish or pinkish color. So I'm going to go
in here and I'm just going to make
my emissive color. Oh, I quite like this,
a little bit of purple, like a dark purple color. Like this. Okay, so that one
we have also done. Great. So with that stuff done, let's go ahead and
let's just delete basically all of our lighting, and then we are going
to start from scratch. So let's go ahead and let's get rid of all of these
lights over here. That's no problem. Our
reflection capture we can keep, our post effects we can keep. And I do not even have
a skylight in here. Okay? That's impressive.
So we got this stuff. Let's save our scene.
And now what we can do is we can just properly
work on our lights. Now, for this, I actually
have a sky over here, an HR image, and we need
this for our skylight. So in our textures,
just type in HDR. Now, this image, I got
this one. I am over here. It is included in your
textures and then in sky and I found this on plehaven.com.
I have it over here. And you can basically go to HRs. And this is basically like
an environment um Wow. By freeze. Like an
environment lighting setup. It's an HRI. I don't know
how to explain it to you. It's something that you
use in paint you use it in Mm set, you can
use it everywhere. So yeah, it's just
an HDR map that will basically take the lighting from this map and apply
it to your environment. So you can just
download it for free, whatever you want. I d one. What I often do is I just download like ten or 15 of them. In this case, I went for, like, indoor in here, and then you can just,
like, try them all out. So I will show you
how to try them out. Wow, that was
difficult to explain. I don't know why. Anyway, so
this, in order to use this, we want to go ahead and
want to go to create, and then we go to our lights, and we want to add a
skylight over here. Now in your skylights,
you have an option. You can do real time capture. You can do offline
or Based capture. Or what you can do is you
can go from the source type to an SLS specified cube map, and this is an HR map. So then if you dragon
your HGR in here, what you will see is
it will instantly light up your scene
based upon this HR map. It's almost like the sky. This HCR map acts like the sky and it is reflecting based upon
the sky like that. So now if we would, for example, go ahead and go into our camera
actor you can go in here. Let's set our cube member
resolution to 256. And basically, first of all, just go ahead and play
around with your rotation and to get something you like. Here, C sir, you can already get some really interesting lighting with justice if you want to. I think it makes you
happy with zero, and you can also set your
intensity if you want. I'm going to set this to one because once we start adding
all of our other lights, this will, of
course, become a lot more bright this scene. Now, another thing is that
you can see a haze over here, and I also want to create that. So we can create it using
just some for most likely. I don't know if it will look
good, but let's just see. So if we go into visual effects, exponential height
four over here. And then what you want
to do is first of all, go down to volumetric
four, turn it on. And then we want to go
ahead and let's see, set our view distance. Actually, we can probably keep that to, like, around 5,000. I want to go down here and set my density like a lot lower. And I want to set
my star distance and my cut off distance higher. The reason I do my cut
off is so that the outside stays dark over here. So that's why I do my cutoff
and my star distance, we can use to basically if we want to like Ft Fox start further away
from the camera. But because we are
zoomed in with our camera so much, right now, it doesn't really do much, so
it doesn't matter, really. But if we have
something like this, let's go for maybe like a very slight yellowish
color or reddish color. Let's see. You know what? I think we just want
to go for white. And then you can
also go down here your volumetric
light, and in here, you can basically control the view distance of
your volumetric light, but also your extinction scale. Let's see. I don't really, we do need it, but I don't
really like the effect. The reason why this can
be, this is the reason. That the effect can be
like that is because it is hitting against our planes. A silly way to fix it is to
simply duplicate your planes. And then move them
out like this. And the reason you want to do that is because then the fog hits these planes
first and it will not actually interact
with anything else. So we basically do
this over here. And hopefully, when we do this, when we go back in, where is
my environment? There we go. Okay, so it is hitting
still quite strongly. So I'm not sure if this is
actually going to work out. It is not very important. So we might want to revisit
this a little bit later on, because my view distance is acting up a little bit strange. It's at the cut off
distance to like 400. Nah, see here, that
does not matter because volumetric light sort of
overwrites things a little bit. So it looks like
that, in this case. Yeah, in this case,
I do not like this. Let's go ahead and
just temporarily get rid of it and just
leave it for now. I do want to probably revisit this later on, but for
now, let's just do this. Let's get started
by first of all, just placing some normal lights. I think that is a
good way to get this started because
it's the stuff we have over here. By
the way, these ones. Yeah, I know that I duplicate
it, but that's no problem. Like, we just want to
go ahead and make sure that they do not extend
out this far. Here we go. Okay, so the reason
that this is so light is because of our skylight. So what I'm going to do is, I'm just going to go
ahead and I'm going to add black colors to this so that they are not interacting with our lights because that would just make it
more annoying, see? So now that it is black color, actually, now that
it is black color, it might actually work
a lot better with our fog and everything, but let's try it out later. Let's first of all,
go in here and we are going to go ahead and
create a rectangle light. And just rotate
it the right way. And we are going to
just nicely have this rectangle light
sitting in here. So let's rotate
it also sideways. Oh. Oh, that's strange
which way it goes, Okay. It always shines
from both sides. So we got this one. Now if we go ahead and
just go into our settings, we can set our source width, which we can set quite low, our source height, which in this case is just like the size. Then we have a barn door angle, which if we set is lower, you can see that the
light is shining forward instead of just hitting
all of the other areas. And now, last thing that
we need to do, here, let's set this a little bit lower is we need
to set our radius a little bit higher that we are actually hitting
the ground below, but then set the
intensity a bit lower. Let's set the intensity
to probably around three. Having this. Oh, and sorry, also go ahead and
set this to movable. If you do not set
this to movable, once we have a lot of light, it could give us arrows
with the shadows. That's why we need to
set this to movable. And then over here, we
can just go ahead and we can rotate this one up here. And hopefully, if we then do one last one over here,
and for this one, we can just set it nicely
in the center like this and just set our source width
a little bit higher, see? That should hopefully
create enough color. So that's when we
start enough light, so that when we start
duplicating all of these, it will all of a
sudden just become quite a bit of light that
gets added to our scene. So we have these ones over
here. They are quite typical. We just want to go
ahead and realistically light our scene based upon
the lights that we placed. And then what we're
going to do is we are going to fake
it a little bit. So we got these bits
over here that is fine. You can see that already starts adding quite
a bit of light. Then I want to have a light
that comes from down here. So we can just go ahead and
we can fake that using one of these lights over here.
So let's duplicate this. Throw this down here. Sets a little bit lower or
a little bit higher, and then let's see, let's move it somewhere
along this point. And then what I'm going to
do is I'm going to go at set the width, oh,
sorry, not the width, my height out so that it
just hits this entire barn. Let's set the bar or
angle maybe a little bit more angles like this and then move this up so that the
light really seems like it is coming from this
point on over here. At that point, let's set
the intensity a lot lower. Let's set to one and
then set the radius also a little bit lower
so that this Wi only hits these areas over here. Let's see, our shadows. I'm not sure if our shadows
are working correctly. It kind of depends
on Oh, no, yeah. They are maybe move this
forward a little bit. No, I do not want to move forward because it's not
giving me the result I want. Now let's leave it like this. Maybe do an intensity
of 0.5 or one. It's to 0.7. So we are giving it an intensity
like that, that is no problem. And then what I'm
going to do is I'm just going to fake some lighting inside of here because else we will never be able to see it. So we are going to fake some
lighting in here by pushing this up here we go. And then this light, I'm just going to go ahead and
I'm going to probably turn off cast shadows so that
this is truly a fake light. It is just here in
order to light up this elevator shaft a little
bit. So we have this one. We can go ahead and we
can set our radius, probably, I don't know, let's see how far the
light stretches out. Okay, so it stretches
out a little bit. So let's set our
radius a little bit higher and our
intensity maybe to 02. And then let's go ahead
and just open this up and open this. Wow, I really can't speak. Let's go ahead and
duplicate this so that we have some
lights in here. And you know what I'm going
to do with these lights? I'm going to set
them back to 0.5 so that it is just
like a soft light. Now, at this point, it might be better if we do
some organization. Let's select these lights
in out of folder and call them elevator lights. Then we can go ahead
and we can select all of these lights
except for last one, call them ceiling underscore. Lights. And then if we go ahead and select
this last one over here and just call this done lights because we will add some more
in that one later on. So now let's go ahead and go
into our elevator lights. Let's go ahead and duplicate
them and also add them in here up until this point, and just nicely place
them in the center. So I'm on purpose placing them
behind these bars that you do not see the transition
that is happening over here. But from the site, you can see that we definitely have some extra
lighting in here. So we now got our
core lights placed. The next thing that
I'm going to do is I'm going to duplicate,
let's say, this light, and I'm going to play some additional
lights that are just here in order to make the scene look a little bit
more like this, so to make it look a little
bit more interesting. For example, one of
the lights is going to be a light that we
place over here so that we can actually
see because right now it is just
sitting in darkness. It is so that we can see
over here these areas. Most likely, I also once again want to turn off the car shadow. The reason I want to
turn it off is because these lights technically
do not exist. And we said it's quite
low to like 0.2. And let's set the source
height over here. A little bit more.
I'm on purpose, not placing my light
here because I know that I still need to fix it and because the transition
is not as nice. Instead, I'm placing
my lights like this so that it looks here, looks like this from our front, and then I just want to
set this a lot lower. 0.1, maybe 0.05. It's going to just
be a lot lower. Maybe move it further back. Remember that our reflections
are currently not correct, so it might look a lot brighter, but it actually is
not that bright. Then another thing
that I want to do is I want to
duplicate this light. Rotate it, make it a bit wider, and this light is
going to basically lit up or light up these
areas over here. So let's set this to like 0.6. Let's set our radius
a bit higher. Let's do something like this, and then we are going
to give our color a slight pink color. Also, let's set our height a
little bit higher over here. And maybe also actually
set our width even more. So we have a slight color. Let's set this to, I don't
know, maybe like one. No, let's not do one. Let's keep it at 0.6, because as soon as we start
duplicating these lights, you can see that we
basically start to light up this back scene, and I'm just going to
make these lights so soft that you can
only just see it. Over here, so that once we
finally go into a camera, here, see, we can slightly
see those lights down there. But as you can see,
these small changes in our environment is already
looking very different. The only thing is that over
here, this is not very nice. Now, I might be able to just fix it by going into my
trim sheet master. And I can't believe I
have not done this yet, set it to two sided over here. Completely forgot about that. And else we just need to give it a little hull around
our elevator. Okay, it looks like
that we need to give the little hull around our
elevator. Oh, no, wait. Um, where is this
light coming from? It's probably like our
skylight, I think. If we go or somewhere there's light
bleeding, but I don't think so. So if I go in my skylight
and set this to zero, yeah, see. So it is my skylight. Here you can see
the effect without skylight and with the skylight. So it is quite a big difference. I think the poem is also that
our cubes on the outside, they are still here, see. I'm just going to delete
them these ones over here. So another thing
that I'm going to do is let's have a look
at our skylight, and let's just play around a little bit more
with our rotation. You have to do 100
or maybe like 60, 60 gives us a bit more of
like orange 150, no, 200. See, 200 is close. 190 maybe a little bit less. Let's try hound. Okay, so we have 0180, which is this or zero, which is a little bit colder. I don't know. I
still I feel like if I just said zero
to maybe like ten, Yeah, actually,
that might do it. Just set it to ten
so that we hit a little bit more of that
warmth in our rotation, but that it still looks
quite cool like this. So we got these
lights over here. That's all looking pretty good. One thing that we do want to
do is we probably want to go ahead and just add some
quick glass in this. And the way that you can do
that is let's just go ahead and make material called
glass underscore. Master, and it's the last thing that we will do in this chapter. After that, we will go ahead and start balancing
out our materials. And for this, let's
do this very quickly. In your glass master, go ahead and click over your material and set the
blend mode to translucent, and let's set this to two sided. And now all you want to do is add a constant three vector, convert it to a pemterGlass
underscore color. Add a scalar pemter
called opacity. I'm going to make the most
simple glass you know, so I'm not going to add anything very difficult. Sets to 0.7. And what I'm going to
do is I'm going to add another scala premter called roughness and maybe like
another one called metallic. And let's just already
drag these in here. Now, as you can see,
these are grade out. This is because we need to
go into our glass master, and we need to set our decal, not a Dig response. Let's see. Where
are you? Oh, no, wait, maybe this our Digo
response? Color roughness? No. Oh, yeah, here we are. Lighting mode. In
our lighting mode, we need to go for what was it? Volumetric? No. I always
forget surface there we go. Surface forward shading.
Sorry about that. I always forget which one is. And then if we just
save our Okay, that takes longer than
expected or save our material. Let's right click create material instance,
glass underscore 01, and then open up your
door and we can finally apply glass 01 to this one. And then it is
mostly metal here. You can already see
that it is citr. So we are just going
to give it a bit more like a color.
So let's go in here. Set the color to be a bluish like a very dark
bluish color Yeah, something like that
looks quite interesting. Let's set our roughness
maybe to like 0.2, 0.51. That's interesting.
Normally, the roughness also gets affected. Let's do 0.5 and set our
opacity to zero point, let's see, six, eight, nine. Actually, you know what?
I quite like seven. Only I want to make probably
my glass color a little bit, set it dark, but make it a
little bit more colorful. So it's hard to get there we go. Yeah, something like
that to get started with should be totally
fine. Okay, great. So we got some basic
lighting here. In our next chapter, we are
going to go ahead and sorry, I just side this light over
here. It is not working. There we go. Don't
know how managed it. Let's just move it in front. Let's just not take
risk. Here we go. S. That works a lot better. Maybe it said to
like 0.5, like that. Okay. So in our next chapter, we are going to balance
out our materials. We are later on also going to, like, a planet
here, but for that, I have downloaded something, a package from the
unreal marketplace that will look
quite interesting. And for the rest, I'm
going to have a look. Yeah, so balancing
materials, doing that. And let's just take
it from there. So then we will just, like, do some more balancing. I will show you a
few extra tricks. We still need to add, like some cool screens
with live video on it. So all of that stuff will
come a little bit later. So let's go ahead and
continue to our next chapter.
38. 37 Balancing Our Material Part1: Okay, so what we're
going to do in this chapter is we are finally going to go ahead and do some balancing on our
actual trim sheet. So if I have a look at
this, basically, yeah, we just want to go ahead
and do a bunch of stuff like work on our
reflections and, like, over here roughness, balance out the colors because
some of them are really dark and they are just not really nicely defined
and all that kind of stuff. So that's what we're
going to work with. Now, the way that I tend
to do this is I tend to open up over here
Sampson's painter, and I basically once
again go from, like, top to the bottom with all of the changes that
we are going to make. So we are going to go ahead
and let's get started. Let's see. So how is this one? For this one, I think,
like the roughness, it's all, a little
bit too shiny. As you can see over
here, also, like, it's not that shiny
this environment, actually, even though it
is very tempting to do. Most of the shine is
coming from the floor. So we are just going to
tone it down a little bit. It will also be less
buggy if we do that. Now, there is a what was called specular
slider on our material. Let me just open up
our material while we um here we go while we
are working with this. So we do have a spectral slider, although I do not
want to use it. It is like a last
case resort where I am able to use it if
it is really needed. But let's first of all, try and play around with
our actual roughness. So we go in here. Oh, it's out of saving.
Give the second. That's Aqua timing. There we go. Okay, so we go in
here and we basically just find our what is
this one, Blue Steel. Yeah. Okay, so this
is the blue steel. So in our blue steel, I just want to go ahead and I want to go in my base paint, and maybe let's go
to our roughness that I can actually
see what I'm doing. So here we have our base paint, and I'm going to go ahead
and I'm going to set this quite a bit duller over
here. You can see. And let's just go
ahead and export, and we will just
see how it looks, and we are just going to
basically find, like, a nice perfect point where where we are
happy with everything. So let's go to our trim
sheets and I only need to really import our mask. Here we go see. So now the roughness is
a little bit duller. And you can also see them
lights things up a little bit. So that's actually really good. Yeah, what I got over here. I think I want to go for a slightly more bluish and
maybe tiny bit lighter color. So if we go ahead
and go in our base, let's make it here a little bit lighter and a little bit more blue, like this. Let's try that out, see if that does something. Right, click, reimport. Um, I want to go a
little bit more blue. Let's go a bit
more. There we go. Let's go a little
bit more extreme. See if that works.
Oh, that's Maya. I don't need Maya.
Right, click, reimport. Oh, wait, it's because I'm reimporting the Wong
map, of course. Although even with the map, it's not that, let's see. Yeah, that is quite blue, but still over here. Yeah, that's interesting,
that it is not as blue as I expected it to be. Yeah, I'm going to push it even more because I still want
to get like that blue. Maybe if I make it a
little bit lighter, it's interesting that it can handle so much because
we most likely here, see, we are using this
for a lot of stuff, so I'm really surprised that
it does not Look as blue. So let's go ahead and. Okay, I think Festa it
must be like the lighting. The lighting is
causing some problems. Although this might be
the same problem as what we have over here,
like the whiteness. Because if I have
a look at this, this seems totally fine. Here, SRGB is on, which is something that you
want to have on over here. We do not have anything
done in the saturation. So right now that is
quite interesting. Let's do a quick test because
this is really strange. It says strange behavior. So to do a test, let's
go ahead and let's add let's do like a fill layer
and just make it like red. And then let's go ahead and add a mask and just simply do this. Paint a little bit here and there because I want to
see this is pure red. I want to see what kind of color arrives inside of here we go. I want to see what kind of color arrives inside of unreal engine. So if we go ahead and we
now re import this Okay, that's unfair because
that's because of our mask because I hear, let's turn off our mask and just only have our
color. There we go. Let's try again. And then, yeah, let's see what
is exactly causing it. Maybe it is our mask or something I've never had
this problem before. That's the interesting
thing about this. Here, see? It seems like that the colors they are just
getting washed out, which is very interesting. Now, unfortunately, I do not
know what is causing this, so I actually need
to pass the video, and I need to see because this theoretically does
not make sense, and I cannot really run
you through my problem solving because I don't know
where to start with this. So let me just go ahead
and figure it out. Okay, I found the problem. As always, it's just
like a silly problem. I accidentally had
the red channel plugged in like this
instead of the RGB channel. That's literally it.
That's all I did. You guys probably won't
even have this problem. So because of that, it just basically ignored
everything that was red, which automatically
also ignores everything that is yellow because it
is in the same spectrum. So now you can see that
now everything is working. Wow, that is a rookie
mistake of me. But agay, it is now fixed. So I just went ahead
and I just basically looked at my material because everything
else seemed fine. Like, you can see in
every texture, the color. And basically, the thing
that threw me off was that even in my material
view over here, it was still looking
red, even if I do this. For some reason, it
still looks red. And that's why it was so
confusing. But, okay. If you happen to
have this problem, just double check where
you plugged everything in. For the rest, I did not change
anything. I just did that. So what we can do now
is we can go back here. And now you can also see that this is now a lot more blue, and now it is actually
even too blue. Here, I go to my
camera act so that I can see from which
angle we will work. So it does mean that
I just need to go ahead and I need to push
this back because it wasn't really strange that
it held up that well. So let's go ahead
and re export this. And let's go ahead and go into textis and let's just
reimport all of this. Okay, so we are back. I'm going to make these
pieces a little bit duller and maybe a
tiny bit less blue. Yeah, let's make a
tiny bit less blue. And then also we have over here these insights that I just want to make like a
little bit darker. So first of all, let's tone down my roughness. And then what I want
to do is I want to go ahead and go at a fill layer. Call it darkening, and
we should be able, oops, darkening, and we
should be able to pretty much do the
same effect here. If we set our roughness
really low and just turn everything else
off and set this to black, we should be able to do the
same effect that we did over here where we add a black mask. On top of this, we
add a generator, and this generator will be our ambient occlusion generator. You like a global invert and just play around
your balance. Here we go see. And then we can also play around
a little bit more like our color just to
make it not too dark. But this now really gives
a good fake effect that this is really deep in
terms of the goofs. And then all I need
to do is just add a very quick layer
that I'll call AO underscore masking
or a very quick folder. And in here, let's
add a black mask and then just only paint it in over here because this is the only one where we need
this specific mask. Perfect. So let's just go
ahead and export this. Let's see how that looks. So that it will read a bit
better from the distance. Here, see, that reads
already like a lot better. Okay, so we got that one done. Let's go ahead and move
down to the next one, and the next one is going
to be our white bits. Let's actually stay
in this camera. I quite like the
roughness on them, but it's just simply like the
tiling of it is too strong. So if we go ahead and
have a look, here, see. So let's see what kind
of roughness do we have? Because I think we
have two of them. It's just okay, so
it's all in here. Yeah, so it's this
roughness variation. It's simply too strong. You can, of course,
set the balance, but I think what we
need to do is we just simply set the
opacity down a lot. Like a tiny bit of
roughness variation I can handle. That's no pum. But what we will do is we will later on use the Alpha of one of our masks to basically add some roughness on
top of everything. So I will show you
how to do that. But first, it means that we just need to go
ahead and balance it. So we will basically add an extra layer of
roughness on top of this. Like over here right now, it just looks like a
tile bomb material, even though it's like
a willy tin slip, so we cannot really
see anything anymore. But then what we're
going to do is we are going to and we can
probably already do this. All I really want to do is this. I want to create like
you're above everything. Let's create a folder
that we'll call grunge. And did I use this
technique before? For some reason, I'm feeling
like I used this before. But anyway, so we
have our grunge, and then what I'm going
to do is I'm going to add a two fill layers. One is called BG.
One is called white, for example, or just
call it grunge. And then if you go into
your texture set settings, you want to go ahead and you
want to add a new channel, go to user channels and
grab a user channel zero. This is basically
a custom channel. It does not have
anything specific. It's just something
that you can enter, and we can just call it grunge. So now if we go into our layers, all we need to do is go down here into the grunge channel
and set this one to black. And then for this one,
do the same thing, turn everything off except for the grunge channel and
set this one to one. And then it will not show up in here because the grunge or the user zero never shows up in here because
it doesn't have any data. But what we can do with this
is we can add a black mask, along with a fill over here. And once we have this fill, we can go ahead and
we can go down to our textures and grab the same one that we used on our white
because I quite like it. Maybe because I made it, but let's go ahead and
grab that one. So we now have this grunge
map just sitting in here. And now if we go
and save our scene, first of all, Okay, takes long. And then if we go
export textures, we can go into output templates and go back into our
trim sheet base, and you can see that we still
have an Alpha channel left. So if you scroll down,
you can see use zero, and you simply want to
drag this and set it to be the grade channel
and then export. So we are now using this Alpha. So the cool thing about this is that we can just
use this as like a tiling texture so that if we go in here
and just re import this. So if we now go to our
material over here, now what we want to
do is we want to go ahead and we have
this map over here. In here, yeah,
that's all working. I know I just checked,
but I just checked again. And what I have is I
have in my materials. I have this note, which is
called the material function. Now, this I just
found it online, so you will find this
in your project, or you can simply go
to Google and type in something like Unreal engine, triplanar projection
mapping, and then you will also be able to
find a lot of information. The reason that I'm not going to go over is because I
don't understand this. This is too complex
for what I am used to because I'm just
not that good at Shados inside of Unreal engine. So basically what this does is it will allow us to
do triplanar mapping. Now, many people might say, why don't you use a world
aligned texture over here, which basically does
the same thing. The reason for this is because a world aligned texture only allows for a texture
object, which is this one. Oh, wait, the texture object, which I will show you. Here, if you just have your
map and you right click, you can convert this
to a texture object. But as you can see, we
need the Alpha map, and this does not work because a texture object basically
compresses everything down, so we no longer
have an Alpha map. And even though this
one plugs in here, if you try to do it
with your Alpha, you can see that
it's not compatible. That is why we use this work
around, which is this one. Now, for this, what I want
to do is I want to duplicate my RME mask because I do not
want to share the same UVs. But when I duplicate this, it will still use the
same mask here. You can even see in
the preview that it now gives us these weird UVs. But the goal is that if we now
have this Alpha over here, it will basically be
using WorldSpace UVs, and I'll show you how
this is going to work. So we have our roughness
strength over here. All right then I want to go
ahead and I want to add, I believe a Up. Let's add a lub and let's larp this and then just duplicate your
roughness strength and call this roughness on the score overlay
underscore strength. And for this one, I want
to use my Alpha map. So we are basically controlling the strength of our grunge map. And we are then lurping that together using an Alpha and then have another
scale pemeter that we'll call grunge Grunge roughness
strength, if I'm correct. Yes, like this. So
let's have a look. I just need to double check.
So what did I just do? We have our overall normal
roughness over here, and we then lurp this roughness with another roughness strength, and this roughness strength, the shape of it comes
from our Alpha, which is a world space. I believe that that should work. Let's just quickly check
it out just to make sure. So if we save our scene, Okay, looks like it works. Now, if you go to show, you can go to visualize. No, not visualize, let's
see where are you? I need to have the roughness. Maybe it is in lit visualizers. Sorry, I always
forget where it is. Ah, here we go buffer
visualization, roughness. Okay, so you can see that it
is working. So that is good. Now, the way that we can
control basically the tiling for this is by going
into our texture object, and then I believe we need to go I think it was actually
this one or this one. No, I think it is
this one over here. If we set this from 1024 to, for example, the higher
we go, the bigger. So if we said it like 600, it should become smaller. So if I save this you'll see, then you can see that the
UV tiling becomes smaller. So this is just an overall we are basically splattering this grunge over our
entire environment, but it doesn't care
about our object UVs. It will just basically
do triplanar UVs, which means that they are
based upon the world. So we got this stuff. Now let's see if we can
actually play around with this. So if we go into our trim, I can go in here and I can see. So we have a grunge
roughs overlay strength. This one, which I
can see that this is not working exactly
the way that I want. No, this is not
working the way that I want to because
if I go in here, it is basically
replacing my roughness, which is not Yeah,
that's not what I want. So let's go ahead and go into our roughness
overview over here. So first of all, just because else
I keep forgetting, let's first of all, just
use our original roughness. And the reason I do this is
so that I can actually see. Okay, so this is what our
original roughness looks like. So we want to basically
overlay this on top. So what I can do is I can take a very quick screenshot
over here. Like this. And I will just have
this on my other screen over here so that I know that I need to overlay
on top of this. So if we go back
into our material, in order to overlay
this, let's have a look. I might be thinking
too difficult. I might not need my
lurp and instead, I can just multiply because I'm multiplying
a black and white mask, so I'm not so much
using the Alpha. So yeah, I think that this should actually
work where I just basically multiply our
roughness overlay strength on top Yes, see? So if I now go roughness
overlay strength. It's not perfect yet. We are getting there,
so we have this. It's just that now I
have, almost no control. So it is multiplying it on top, which sort of works. But then I do not
have control over the actual intensity
of my Alpha, which is arriving over here. Maybe what we can do is instead of multiply, let's do an art. So we are only adding it on top. An artist just like, Oh, God. In Photoshop. I think it's like a
linear, something. Sorry, I don't know anymore. I forgot. But yeah, basically in artist we'll
just basically add it on top. So let's see if we save this. And now if we go
ahead and play with our roughness, see here. So we are adding this
on top, so that's good. That is good. That's
what I wanted. Now I want to just go ahead and balance out my
tiling a tiny bit, so let's go ahead and
set this to maybe 850 instead so that it
is a little bit bigger. Okay, so now it is a
little bit bigger. We don't want to go too big
because if we go too big, it will of course
look a little bit blurry. But let's see. So now if we go to lid mode, we should have
control over this. So we're adding this on top, so we are it's not
looking very nice. It's not looking the way that I wanted it to look. Oh, hello. I can move. Let's see if we can also art this
to our base colors that we have a better
representation. So if we go ahead
and for this one, we do need to add a erb. So linear interpolate over here. I know that we were
balancing everything out, but we need to do this anyway, so it
does not really matter. So if we add our let's
start with just this Alpha. Let's add this Alpha
and then just add a constant and just call this dirt underscore don and make it like a bit of a
dark gray color, something like, okay, maybe actually go a little
bit more like a bluish. There we go. At this to the top. So we are lurping this,
which as you can see here, it should give us, like
a pretty decent effect. Let's go ahead and save a scene. Okay, so just trying to, I need to restart
my unhel engine because I think I have a bug
that I cannot move anymore. But as you can see
here, it is working. So let me just quickly
save my scene and restart the engine because
I can no longer move. Here we go. I can move,
again. I don't know. I think it is like some kind of a bug that happens
in nuLEngineFive, or I do something because
I normally don't have it. But as you can see here.
So this is now being splattered all over the
place, so that's fine. The only thing
that we need to do now is we need to first of all, have control over the color, which we should have in here. There we go, dirt done. We have control over the color, and then we want to have
control over the intensity. Then I will just go ahead
and revisit the roughness. We can have some
control over the color, and it's sometimes a bit tricky, and the reason it is tricky
is because, of course, we have both metallic surfaces
and non metallic surfaces. We need to balance
everything out. If we go in here, we
can go ahead and we can just add another
multiply and call this don Dt strength. Because basically what I want to do is I just want
to go ahead and control the intensity
of my Alpha. That's all I really care about. So I add this into my Alpha, and let's just take
this step by step because it's not going exactly
the way that I want to, even though I've
done this before. Stuff like that happens. So
we have don Dr strength. So if I now, oh, it's invernt. One to bet it, maybe. Lex see. Let's try. Let's do one minus. Know if I need to
do this before or after the multiplier,
I always forget. Let's save that. I have a feeling that
because it is a larp, if we now go on dirt
st, there we go. Okay, so that will give
us control over this, which is exactly what
I want because you can see if we make
this very subtle, it is just like a
nice extra effect that will just improve
our general scene. Now that we've got this, I do feel like after all
that I need to lurk this, but maybe in a slightly
different way. So let's have a look. So we have a roughness
dirt overlay. I want to lurp it with a color. Yeah. So, let's lurp this
again. Let's try this again. So we have our normal, and then we need
to do one minus, so we have a normal we
need to do one minus, so we need to invert this. I think that might
be the problem the first time because it's really hard to see
in your roughness. That's why I chose
to do the color. So we are lurping this
and we want to go ahead and larp this using our roughness over the strength, and maybe we can
already add this one. It kind of depends. So it
is a black and white mass. So theoretically it
should translate into a roughness instead of us
needing to use a value, but that would not
really make any sense because we are already
using it in our Alpha. So let's instead play
it safe and just add another overlay dirt, roughness to
something like that. And I will clean this up
a little bit later, also. I always like to just first
have everything working before I make everything
perfectly clean, just because I'm still
playing around with it. So let's have a
look at this. Okay. So we have our overlay
dt strength also, which I feel like I feel like that we should be
able to just simply use this one over here. Let's see if that works better
because else it would just be like an extra note that
I need to play around with. Okay, so now I can see my dirt, and it looks like that wherever there is dirt, it is dull, which is exactly what I wanted, which means that is our
arden dirt strength. That's one we can increase it, and then we have our
overlay dirt roughness. There we go. That's
what I was looking for. And our overlay dirt roughness, we can basically control
the roughness mount. The only thing is
that right now it is basically zero all or nothing. It does not take the roughness
behind it into account, which becomes a problem
because we have different types of roughness
mounts all over the place. So instead of doing this, what I might want to do is
I might want to go ahead and multiply this based upon
our original roughness map. I know that might sound strange, but then what I hopefully can do is with this value over here, I can control the
roughness amounts based upon the colors that
we used in the first place. So with that, I mean that now I have my
overall dirt roughness. If I make this dull,
it will look duller on here compared to
something that is more shiny like you
can see on here. See, this is still really shiny because it was
shiny in the first place. I would likely to push this really far if I
want to make this dull, and then this would
be completely dull. That is the idea that I had. Now if I go ahead
and go to distance, and you can immediately
make this look like a post ecalyptic
style environment, we are going to set our
overlay dirt amount quite low. So I want this to
be quite subtle. So I'm going to go 0.5 maybe and then our
overlay dirt roughness. Let's go probably for
like four or maybe five. Okay, I like that.
That's looking good. Let's leave it like
it is right now, see? So we are just adding
some overall dirt, and it really adds something like that extra bit of grime. That's why I just wanted to
get this out of the way. So took a bit longer
than expected, but let's go ahead
and just continue on. If we go ahead and go into
Substance Painter again. So this one is now
also sorted out. So we have arrived at
these pieces over here. Let's have a look and see what we need to
change for this. Oh, but we are quite
a bit over time. So I will go ahead and I will continue with this
in our next chapter.
39. 38 Balancing Our Material Part2: Okay, so let's just
go ahead and continue on with balancing
out our trim sheet. So if we go out and have a
look, so we end up with, like, doing all of our
dirt, and now we are going to just continue
on with these pieces. The first thing I notice is that it is a little bit too dark, and my metallicness over here
is a little bit too strong. So that's something that
we're going to work on. Now, the darkness is easy. The metallicness is sometimes
a little bit annoying. And the reason for this
is because a metallic map is always zero or one, if you want to have it accurate, but I sometimes tend to stray
away from the acudness. Okay, so we have our
blue steel over here, which is causing some problems
because it is too dark, but we are also using
our blue steel over here where it is light enough. And that is let's have
a look from our view. Yeah, that is something
that I need to fix. What I'm going to do is
I'm just going to go ahead and duplicate
my blue steel. Over here. And then if we go
into our color selection, orange and pink are the colors. So actually, yeah,
you know what? Let's just go ahead and get rid of all of these so
that I can just do, like, a new selection. And it does mean that
in this blue steel, Oh, is that not a one? Let's try again. Let's turn
off the original blue steel. No, that's one, and
that's one. There we go. Okay, so blue steel light.
Let's call it like that. So that now in this blue steel, we just have full control
over our extra color, and we can just go in here and we can just make this
quite a bit brighter. Now, on top of this, we also had our extra metallic pieces, which is, I believe is
aluminum, yes, over here. And for aluminum,
I'm going to go ahead and set the roughness
a little bit lower. I set my base color quite
a bit higher over here. So hopefully cancel out
the metallic shine. Worst case scenario, we can go and simply set our
metallic a little bit lower. Now, it will not be as
accurate in terms of, like, the material response, but we are more going for, like, a very specific look anyway
with this environment. So we don't need to be
absolutely accurate. It's not like we are working on a professional AA game here. We are just creating
some dream sheets. So we can go ahead and we
can save that and let's re import and just look
at it from a distance first because this
is our main view, and all of my marketing material
will be from this view. I, of course, want
to make sure that it looks correct from here. I'm going to make
this a bit more. So let's go in and first of all, let's make it a little bit
less blue and also won one. I need this one. Here we go. Less blue and just also like a little bit
lighter over here. Next, our metalliness.
Okay, right now, the roughness seems
really strong. Yeah. That is a bit strange that my
roughness is so strong. Let's have a look over here. If we go into our roughness. Okay, maybe if we go
into our metallic, then it must probably be like the overlays that we just added, which I just need to have
a look, and let's see. I'm going to make this one. Yeah, here, it is the overlay. We might want to go
ahead and also create a material that
just does not have the roughness overlay to basically get rid
of that balance. Let's for now export what I just added because I made it
a little bit lighter, and then we will
just balance out those extra bits of
roughness after. So let's reimport this. So yeah, we are making
this quite a bit lighter. Also over here, we
are making it quite a bit lighter so
that it is a lot easier to see from sightsee, everything is now a
lot easier to see. Over here, everything is
also a bit easier to see. So that's quite good.
So we got that one. I also don't really like
this stripe over here that we have because right
now it is just too obvious, because there's only one. So if we go ahead and where
is our emissive over here, I'm going to go in
and once again, just get rid of your Alpha so that you only
have a square left. And I probably just
want to go ahead and add a bit more emissive. Here and maybe like
another one here. And that's export Det. And we can just only reimport
this map over here. Okay, so see now we have a
little bit more missive, so that does look already
a little bit better. Let's see. What else
do I want to do? I want to make these details
maybe a little bit lighter. So let's go into our steel. So yeah, we are basically
just jumping back and forth here to get everything working. So let's go into our medium, I mean, not steel or medium. And maybe also boost up
my roughness a little bit more here we go. Okay, then we have our
steel sitting next to it. And for that one, I
just need to quickly check. Oh, I see here. This is the steel,
so you can see that it is way too dark steel. So let's go into our steel
steel base, basic parameters. The steel base does not
have any extra values. In that case, we just
need to go in here and just set the luminosity up and maybe set the roughness
a little bit down also. Let's try that out. Let's export. Okay, so that's already looking better. All of a sudden, this one
is again, really shiny. Is there like some
kind of a threshold? I feel like that there's
just like one point where it basically
flips around going from really shiny to Wi dull
because of our roughness. Now, I'm just going to go ahead and I have over
here my sketches. I'm just going to
turn those off and see if I can have a little
bit more control like this. Yeah, let's re
import because maybe my scratch are just adding
stringe roughness over here. Okay, so that's already
quite a bit better. So I'm just going
to go for something like this and maybe make it like a tiny bit duller in here. So we made that a
tiny bit duller. Then we have these
pieces over here. Let's also immediately
have a look at those, and all I really care about
is that I probably want to or make them a little bit lighter or add some extra light. So we have a bee collar. Let's see if we can Oh, our B color doesn't
really do anything. It's a G color. Oh, yeah, okay. That is the one. Let's see. So it's a little bit lighter. FR I will just probably add some extra lights
on top of this. Yeah, that's probably
what I will do. I will grab one of these lights, rotate them like this and set them very low to
like 0.2 or something. And then just turn
off your shadows, tone down your radius. That is very low, 0.1 even. And then just basically place these lights here so
that from a distance, everything is just lit
up a little bit better, as you can see. And when we do that,
I can even go a little bit darker again
with my green colour. Over here. Okay. So we
have that one done. Let's go ahead and continue
on to the next one. Our floor and our
metallic panel. Our floor is pretty good, actually. I quite like it. Super shiny like this, maybe a tiny bit less. So let's go into our
marble polished. And I believe that we
need to go all the way down to our base
color over here. Let's going into our roughness. Let's see. I don't know
where this is happening. Roughness refine. The roughness refine really doesn't do much. Let's just tone this down
a bit more over here. And then we also have
this panel over here, which is most likely
also steel or not. On the way, the steel
floor over here. And for our steel floor, we
can go ahead and we can go in basic perimeters
set the lightness up and the roughness value down. Here we go and
let's try that out. See balancing this out,
it doesn't take too long. It's just like a bit
of back and forth. And that's always like with
environments near the end, you are just going
back and forth so often with,
like, many things. It might seem a
little bit messy, but there is some
structure in it. So I just did like my floor. Yeah, that's looking
really nice. And also these metal panels, which are now also
looking pretty good. Like they are no
longer too dark. I might even want to
make them slightly here, let's go ahead and make
them slightly shinier, but then also make
them slightly lighter. So the lightness kind of
cancels out the metallicness, which, in turn, it
brings in some shine, but it does not bring that really dark look that you have. Next, over here, we
have these pieces. Honestly, this one is fine. This one is honestly also fine. I think we just need to play around a little bit more
with our roughness. I don't know. Do I want
to keep it this dull? Yeah, I probably do, actually. Yeah, I probably also just
want to keep this lightness, because, yeah, it
looks pretty close. So let's just go
ahead and do that. I'm just going to go
ahead and maybe make my yellow stripes a little bit more like
a lighter yellow. Here we have yellow lines,
so let's make this, like a bit more of like a Yeah, like a slightly lighter
yellow instead of orange. So we got those done. See
these side panels over here. I feel like these side
panels over here, they have almost no
visible scratches. Like you can see a tiny bit, but it's not as much as I want. I feel like that's overall. It's not as much as I want. So we go into our blue steel, and here we have our edges. Let's go ahead and
make this space color quite a bit lighter. And let's just see
if that already works to bring out some of those edge damages
that we added, else it would be shame
if we don't use those. Okay, so those bring
out pretty well. Of course, from a distance,
it's a bit harder to see. But in general, they
do work quite well. So I'm just going to make
them probably a little bit lighter over here just
to really push them out. And that's pretty much fine. Now, over here, we
have this dark steel, which is way too dark
also in scene, see? And also, the roughness
is a little bit messy. So let's just go ahead and
go into our dark steel. And I'm going to
start by just making this quite a bit brighter. And let's go also into our
roughness and see if we can make this roughness
a bit less intense. Here. Let's get rid of
our roughness variation. Yeah, that should already
improve quite a bit, because we are now adding the roughness
variation basically in our shader with
that large overlay. So let's see if that
improves things. Okay, it's still far too shiny, so we still need to go ahead and just toe this roughness down quite a bit. Let's try again. Oh, still, it's
probably looking very shiny because of all
the tiny little details over here. That's
most likely it. So let's have a look. So
we have our eat dirt. Yeah, that is fine. W no way
here, we have our edges. That's it. Stone those down. I think those are
causing the problems. Didn't realize that. And port Okay, okay. We're getting there. I'm going to turn off
the color of my edges. Oh, no, you know what? I
want to actually keep it. Um, Metallicness is fine, so I just want to
I guess tone down my roughness Lully lot like I guess it needs
to be almost plain, and else I'm just going
to get rid of my etches if I cannot get
this to work right. Because, of course,
some of the roughness also comes from our overlay, so I do need to
keep that in mind. There we go. See, and the
rest comes from my overlays. That should be quite
fine. I forgot to add vertex colors
to these things. I just remembered that I need to go in here and
just quickly select these, mesh display, apply color, and just make it red. Same for this one, apply color. And then, of course, just
go ahead and flip around. There we go. And just
quickly react by this. Yeah, let's just go ahead and just play around
with all of this, and we're just going to slowly
finalize our environment. Let's re input my
taxes because I don't know if I
already did that. And now I want to go in
here and I'm just going to re input in my main window. And do that. Okay. So that one is working. That is also already looking
better here. You can see that now
it's already starting to really come
together a lot better, if you remember
what we had before. So I quite like that. I do feel like my
roughness details are a little bit too blurry, so that's something
I need to fix. What else do we have left here? So yeah, the rest that we
have left does not really matter because it's just
not so much included. So let's go ahead and
let's see if I can go in my triplanar. 850. I think we want to
go for maybe, like, 700. Let's make it like a bit smaller just so that it
is not as blurry. It's amazing that we still
only use one material. You can just create
multiple instances of this to balance things out, but this is pretty good. Is it just me that everything
just got a lot darker? That is strange.
That's very strange. Oh, it's because I once again there is this weird bug
that I can no longer move. Maybe if I switch between
real time and off, Yeah, this is a really
strange problem. It happens when I save my
material or save my output. I wonder, is there any way
Oh, and now it's working in. Okay. Fair enough. So that is basically messing around with our
colors and everything. Strange. Let's see. So our dark colors over here, they are far too dark now, so let's go ahead
and set a bee color. A lot brighter, which
will also probably, no, it's Bill Kant's
work for these. So these are quite
dark right now. Mm. Honestly, they feel
even darker than Yeah, they do feel even darker. I don't know if I just want to go ahead and just set my
light and just make it, like, a little bit less. See, will that be too obvious
that there's a light there? No, I don't think it
will be too obvious. So let's just grab this one and then also use it over here. Okay, so we got that stuff
done. That is pretty good. So yeah, we got that nicely balanced. Everything
seems quite fine. Let's go ahead and just
set our screen resolution to 200 so that I can really see that the full resolution
that I wanted Okay, let's get rid of this guy. I don't need it
anymore. Don't worry about the flickering
reflections. That's something that we
can fix a little bit later. Most of the time, the
reason that is is because lumen is
still quite new. And if you have these really strong
flickering reflections, one way that I found
that we can fix it is by going into reflections and
setting it from lumen to, for example, screen space
or rate racing, even. It might not look as nice, but it does often
see fix the problem. But we will go back to
that a little bit later. For now, it does not
really matter too much. What I want to do now is I
just want to have a look, and I think I'm going to
start working on the Basky in my next chapter because for the rest,
everything looks fine. I also want to maybe make these lights a little
bit less strong. So let's do 0.05. Because they do feel a
little bit too intense, open 05 over here. Also, this light over here, let's do 0.3 maybe to
also just tone that down. Okay, so in our next chapter, we will just go ahead and
we will work on the B sky, which will have a planet. After that, we will go ahead and we will do a little
bit more balancing and also work on our lighting to get our scene a little
bit closer to this. We are not going to
go for exactly this because we are too limited with our textures and everything to get
the exact look, but we do want to go ahead and try and get
quite close to it. So let's go ahead and continue with this in the next chapter.
40. 39 Polishing Our Environment Part1: Okay, so what we're going to
do in the next few chapters is pretty much going
to be like polishing. Like we are going to Asmxar
features a little bit later, but for now, it's pretty much
just going to be polished. So I'm going to get started, and I want to show you
two techniques on how to art like a sky like a planet. Now, the most basic
technique, which involves, free stuff, is to go ahead
and find online some images. Like I have this image
of some stars over here. Which I downloaded from like
a copyright free website, and I have an image of
this Earth over here. So that's one way
that you can go ahead and you can see here the stars are actually made
from the Earth. It is one way that you can
go ahead and art images. So I will show you
this technique, but then I'm also
going to show you a technique on how to get
a more realistic effect. However, this effect does
involve some paid resources. So let's go ahead
and go in textures. And just make a folder
called BG, like background. And I do not count this
as being textures that we add to our environment
because they're, they're like the outside.
There is a limit. So when you have
this, all you will need to do, and it's like, the most easiest thing, go ahead and create
like a plane, and let's go ahead and
rotate it 90 degrees. And for this plane, we basically just
want to go ahead and scale it up a little bit. Over here, and we should
be able to go and, let's just go ahead and
create a material like this. Just create the
material and just go ahead and call this BG. And then in here, it will
automatically add this texture. The only thing that
I need to do is I need to right click and convert to perimeter and
just call this texture, and then also go ahead
and add a constant. So so there's a comment, constant that is set to one
for our roughness. Oh, wait. I can actually just use our
plain yeah, no, no, wait. I cannot use my plain text ship because that one does not
actually have that applied. So when you apply this material, you can see that
you basically get this and you just
kind of want to scale this up
correctly over here. And then it is literally just a matter of placing
this outside. And you might want to give this, like, a little bit
of, like, a rotation. But the thing with
this is that it is very limited to, like, a specific location
and rotation. Like, I cannot just go ahead and keep rotating it and everything. Now, another thing
is that over here, it seems like that we have some problems with, like, our light. So the way that we
can basically fix that, if you have
those problems, first of all, I just want
to see if I can give this, like, an interesting position. Let's try something like
this. So another way that we can do this
is first of all, go down to lighting and
turn off cast shadows. And then if you go all the way
down to lighting channels, you can go ahead
and turn it off. So that should not anymore
be affected by any lights. I do find it strange
that it is still it is probably just
using my skylight, which is something
that I believe I cannot actually turn off. So that's a little bit annoying. But basically, what
I want to show is that if you go
into your material, you can also use this texture
to basically add emissive. So if you multiply, and you want to go ahead and add probably two
multiplies. One of them. Oh, no, wait, just
one. One multiply with a scale premeter that we call a missive strength. An artist to your missive color and maybe set this to like 0.1, you can give it a
little bit of a glow, which actually feels
really realistic because it Earth's
in outer space. It has all these stars,
so there would be quite a little glow
coming off them. Now, right now, it's probably like the
skylight here, see? So here, without the skylight, it would actually work
really well like this. You can see that you can just
get something quite nice. But with the skylight, it is a little bit
more annoying. So what I'm going to do
is I'm going to start a scaling this up a little bit and just give it
like a slightly more interesting location,
something like this. So one thing we can do is we can go ahead and twy and
go into our material. Add another constant,
sets to zero, and artist to our specular. So that we basically just
remove any specular we have, which will hopefully make sure that all of the
reflections go away. I try to do that
with our roughness, but sometimes you here, see? Sometimes you just need to
push it a little bit more. So now you can see
that works quite well. You can go ahead and
if you want, you can create the material
instance and goes. Earth and apply
this that you can open it up and you can set the misses strength,
maybe to like here. C0c. So there's a
little glow, 0.05. It will just give you
that nice little glow. And then basically
what you can do. So this is great
for like one angle. Basically what you
then can do is you can go ahead and
you can duplicate this and maybe place it
like roughly over here. And then just duplicate
your Earth and just call this stars Okay, stars on square
instant because I already have a
taxi called stars. And then all I will need
to do is I just need to go ahead and insert my
stars over here. And now you can imagine that all we will need
to do is just go ahead and duplicate
this over over here. And then from my camera angle, we will just see
like a star field along with our Earth like that. Only thing, I'm not
sure about my elevator, but I don't know if
there's a good way here. There isn't really
a good way that we can really properly
get rid of that. So it will just be there. So maybe what we can
do is we can just make the outside using cube
a little bit nicer. Yeah, that's
something that I can figure out a little bit later. But anyway, like
this, you can see, so you get the Earth, you
get the sky and everything, and you can still move your
camera like a little bit, and you won't really
notice too much. Now, I was actually
planning on using a Tweety planet
and like a skybox, but I actually really
like the look of this, so I don't think it is needed, and it would not really add any value for you guys, anyway, because it would
be something I'm downloading from the
Unreal marketplace. So I think I will actually
use it like this. So I'm just going
to go ahead and I'm going to do a bit
more polishing. First of all, okay, so
our screen percentage is already to 200,
so that's good. Actually, yeah,
let's see if we can maybe go in here and
let's see if I can, like, create a What if I
make it like a black cube? I wonder how that looks. It might look completely warm or it might actually look
surprisingly good. And else what we'll do
is we will just give this cube like a generic color, just something to basically make this look a
little bit nicer. So first of all,
make sure that you do not extend this
out further than our elevator because then it would lose the point
of why we are doing this. And also, just make
sure that you are not atently like this,
clipping it in here. Here we go. Let's try
something like that. So if we go ahead and let's use our plane master here,
let's see if that. Okay, so our play master
is giving us reflections. Now, by the way, just to
see if it is quite ironic, let's see if we can
actually use our stars. Okay, that is almost weird
how well that works. This was just a pure guess. It was literally just a
guess if that would work. Oh, sorry, I love
that kind of stuff. Like, we are basically
just faking it. Like, it will be very
difficult to even see. So I'm totally fine with that. Let's see if when I
move, like, forward, yeah, you can see the tiny bit, but I will just play
around to that. Okay, that's amazing.
I like that. So that's pretty good. Now, we have fixed
that, I guess. Let's go ahead and let's just
have a quick look and see. Yeah, I quite like
if I can maybe get a little bit more
of my elevator here. I don't know, or
do we want to go like I quite like having a
sideways thing like this. Maybe give it a little bit
more of my ceiling also. I can't really do that probably. Maybe let's go
back a little bit. So I'm just messing out
basically. Yeah, let's do this. Now, I want to have some
of my ceiling here. But it's annoying
because I cannot really get my ceiling without
going very far away. But if I go very far away, it will just not look as
interesting. Let's go. Let's do this. Okay,
the first thing that I see is on
my elevator shift. I just want to make that detail over there a little bit bigger. So let's go ahead and go, Oh, make sure to add these
bits to your main window. Let's go to our elevator. Okay, yeah, I placed
it like this. So what I'm going to do is I'm probably just
going to go ahead and select like this one and then delete
everything else first. And I'm just going to scale
this one up basically. Here we go. I feel like that se, it just looks a
little bit too small, and I don't really like that. So now we can just go
ahead and we can try another mirror
object space here. Let's just do whatever axes we get first because we need to have them on both X anyway. And now let's just go ahead
and reset a pivot and let's do another
mirror again this time on the let's see
Zaxs in the plus object. Here we go. So we
got that stuff. File export selection. And I'm just going to go ahead, and this is the
elevator shaft over here. Let's see if that works. If that looks a little better. See, most of this is polishing. If you just wanted to know
how to create trim sheets, you can now we like
long before this, you could have already
stopped the toil. But I'm just basically playing around with this
stuff over here. I can see. So that is
actually causing a problem. Over here, the
scaling is incorrect. See? It's probably because I used my scaling for this one. So that's why it felt
a little bit squashed. I was already thinking like,
even though I scaled it up, it felt a little bit off. Here, see, yeah, that does look quite a bit better.
So we got that one. I'm going to then,
well, first of all, we need to of course here, let's redo these
shapes over here. Et's move the stuff back. Just get it to work. Let's
see, let's move this here. Okay, so that already
that blocks it off. And then I'm probably going to go ahead
and I'm just going to select the entire
thing over here. And I'm going to just
quickly create once again, like a new viewport
that has our camera selected so that I can at least properly go
in here and I can just, like, carefully Move this
around a little bit, Let's do something like this. Yeah, something like
this looks quite good. And then maybe, like, place my earth a little bit
closer like that. There we go. So
yeah, that should be fine if we just go for
something like this. Okay, so the next thing
that we're going to do is I just want to
go ahead and play around a little bit
more with my lighting. And then once we've done that, we are going to work
on my color grading, and our color grading
will actually art a huge amount of detail. First of all, light
this light over here, why is it yellowish? Is that because of our skylight? Most likely. That's
what it tends to be. Yeah, because this is white. So it's most likely that
our skylight is just giving me a slight yellow tone. So let's go into my skylight. Last time, because I already
made a quick prototype of this sort of before
starting this tutorial, just make sure that
everything worked. The skylight, it basically
was not this strong. It did not have this big of
an effect on our environment. Okay, so yeah, now
the skylight also starts not have that
big of an effect. Also, by the way, I can
remember that we do not have our mesh distant
fields turned on. I can remember seeing that. If we go into rendering
and scroll down, Oh, no way, they are turned on. Okay. Yeah. That's weird because I was looking
at my skylight and Isn't feel amen
clusionF some reason, it just did not really apply, but maybe it is not applying because lumen sort
of takes over, so that's most likely
then the case. So, okay, so we have
a pretty good base. Let's just go ahead and
start on my color grading, and then we will
leave it with that. First of all, let's see. So all of this stuff is fine. For now, our reflections
are also fine. Yeah, I'm not too picky
with most of this stuff. This embot occlusion,
everything doesn't really matter here or
see it no longer works, so we don't need to
do anything with it. So I guess that we are just going to get started
with our color green. Although it might also
be nice to just add like a tiny bit of grain to arsine. Arsene is definitely
a little bit darker, but that's something that
we can also work with. If you want to add some grain, I don't know how it will look, but let's go in our
grain jetter over here. And you can set
that up. And then when you set up your intensity, here, you can give
it a little bit of, like, a grainy look. You can make it really
bad if you want. But I'm going to set
this like really low, like 0.05 maybe, just to give it a little bit
of that fuzziness to it. Once we've done that,
I think what I'm going to do is now
I'm just going to start with my color grading. So for this, let's
go at First of all, we need to have a screenshot. By the way, I can also see that my glass is no longer
working properly, so it's something that
we also need to fix. Let's set the screen
sense to 200, and then you want
to go ahead and create a high
resolution screenshot. Now, just a warning
in UnwelEngine five, this feature is
still very buggy, even more so way more than in
UnreelEngint four, I mean, so I never tend to go
higher than two in my multiplier because nine out of ten times unreal engine
even crashes then. And trust me, I
have a powerful PC. So the whole that it might be crashing because my PC is not powerful enough that
it is bulls yet. Like, I should be
able to go up to six, and it should still
work totally fine. So let's go ahead and just
take a screenshot on two, and then you can
quickly click here. You can find these screenshots
in your saved folder. So in your Unreal engine folder, and then if you go to
saved screenshots. And in here, you can now find a high resolution screenshot
of your environment, which, for some reason
looks really blurry. Oh, yeah, this blurry.
That is interesting. Is it because of our Do I
have anything turned on in my camera actor that is causing like some depth of field, maybe? Focus settings,
let's do disable? Does that work? I don't
know if that works. Well, let's try and make
another screenshot and just see if that does anything. So before it works a tiny bit, but yeah, there is
still some blurins, but okay, does not matter. I'm getting too
distracted again. So we will go ahead and just figure out the blurins
a little bit later. For now, let's go
ahead and save scene. And now what you want
to do is you want to open up this image in Photoshop. So we are going to
use something that is called a Color Lookup table, also known as a ut. If you go ahead and
you need to go, well, I have it over here, of course, in this project. But if you want
to create a Lute, what you need to do
is go to Google and just type in Unreal engine Lute, for example, or
Color Lookup table, and then you get
this documentation page always at the top. If you scroll down, you
want to go ahead and you want to grab this texture,
so you want to click on it, right click and press Vs. And it is basically
this texture, which I also have
included for you guys. So what this texture is is
it is color information. When you drag it in, it is this interesting bar over here, and you can see that this bar
uses a bunch of RGB colors. Now, what you can do is you can just place it
somewhere down here. So all of these RGB colors, they hold color information. And what we have right
now are neutral colors, which means that
nothing gets changed. However, if we are
changes to our image, and these are global changes, so they are things
like brightness, contrast, color correcting,
all that kind of stuff, that data will also
be included in here. And then what we can do is
we can input this into real, and the same color changes
that we art in here will then be also included in
our real time scene, and you will just
see how it works. So what I like to do is I
like to go to my image, and this is another
technique that I recently learned if I want to do very quick color grading. If you want to do very in depth and detailed
color grading, I recommend using
DaVinci Resolve, which is a free program that's also used by the film industry. However, I just want to very quickly create something so I can go ahead and click on my image layer,
then go to filter. And then I just want
to go ahead and press a camera raw filter over here. And that will open up
a window for me that has a bunch of different see
exposure and everything. Now remember, only
global changes. If you paint in a color, it will not actually
work, of course, because as soon as you
would move the camera, nothing changes. So
I can go in here. I can have this on
my other screen, and I can just go ahead and start by playing
around with this. So let's go with the
basics. Let's see. Here, we can make it, maybe a bit colder or
give it like a tint. So yeah, you can play
around with this. I'm not going to actually
change this color too much. I do want to go ahead and let's
set my exposure a bit up. Let's make my shadows
a bit darker. Maybe let's play around a little bit more with my
contrast and give me also, a little bit more highlights. Here, so I'm basically
just making my scene a little bit lighter.
You can see over here. Let's see. So the texture and
everything and the clarity, they do not work, Dehaze
also does not work. Vibrance does work.
Vibrance does work. I don't know if I
want to go for, like, um, yeah, it's a bit tricky to just
get something interesting. Also, the curve,
actually, the curve also, I often even like the curve
more than my exposure. So let's set this a bit back, and let's first of all,
actually play with my curve. I forgot about that.
Because with the curve, what I can do is I
can just basically click and I can add some
points based upon my gradient. They updated it. I'm
not used to it looking like this. Yeah,
actually, you know what? I don't really like
that because the curve no longer works the way
that I'm used to it, and it's a bit more annoying. In that case, it doesn't matter. Let's go ahead and you just want to basically get
the image that you like. Yeah, let's, let's not
give too much contrast, give it a bit more shadows, a little bit more exposure. Mm, it is definitely
missing something. Detail does not work. Color mixer. Color
mixer does work. So we can maybe in here, we can find something that will make everything a
bit more interesting. So let's see in our hue, yeah, I think we are mostly like the blue and
the purples if we want to, like, change the general color. So let's say that
you want to, like, change the general blue color
to, like, a different tone. We can actually do that in here, even to this extreme,
and it will work. But I'm just trying to figure
out what I actually want. Yeah, let's go for, like, maybe, like, a more bluish tone. See, my aquas don't
really do much. My magentas. Yeah, so it's
really like in the purples where All the colors are Let's go for
something like this. You even have color
grading if you want. For example, you can
set your shadow color, which is always very sensitive in here, so I'm not
going to do that. I'm going to do this inan wheel. But yeah, you can do, general
color grading also in here. Optics, I don't care, Geometry, I don't care effects.
I don't care. Calibration sometimes also works a little bit where you can give it like you can give your
shadows like a tint. And you can do the
primary colors. You can, for example,
make all the blue colors a little bit more
stronger saturated. Same with the red colors, you can give it, more
or less saturation. So let's say
something like this. I'm not really happy
about it ios yet, but I think for
the color grading, it's a pretty good start, except for my planet over here, but we can work with that. So basically, where
you are happy with it, what you can do is you can
go ahead and press Okay. You can see what we had
before and what we had after. Oh, sorry, merge this together, and then filter and press. Okay. There we go. So we need to merge
this together. Normally it adds
it to this layer, but I just updated Photoshop, and now it no longer works. Then what I want
to do is I want to go ahead and I want
to just select exactly my little
shape over here. And then all I need to
do is, first of all, let's go ahead and
just save our scene. So if we go file and
do saves I just want to go ahead and save
this as a PSD and just call this Lut
underscore 01. Okay. And then wit is selected, go to image and cop and then
do file into a save as copy. And this time, very important, save it as a PNG. I also just call it Lute 01. You need to have it as a PNG, most of the time because that
is the only one that has, like the correct color
range for unwel to read. Now, inside of UnwelEengine, if we go to our textures, we can create a new
folder that we'll call Lute and in this folder, if you just input
your Lut 01 in here, one important thing you
want to double click on it, and then what you
want to do is you want to go ahead
and you want to set your texture group over
here to color lookup table. If you do not do that,
it will not work. So when you've done
that, all you need to do is go into your post effects. Scroll down to Misk and here you will have a
slot for your lute, and as soon as you drag this in, you can see that the
lute will happen. Now, it's not exactly the same, but it is often quite close. I'm going to set this
actually a little bit less to probably 0.6. I also want to just
go ahead and go into my Earth and tone this
intensity down a little bit. Oh, it seems like that
one is really dark, so we might want to play around with our actual texture
a little bit more. Oh, sorry, that's
not the texture. This is the texture. Yeah, here, so it's quite light. And I think if I set
my brightness down, I don't think if that's bill Oh, yeah, it works a little bit. 0.2 but it takes away my stars, which might be not very nice. So I'm going to still play
around with that a little bit. In any case. So we now have
this color grading over here, and I'm still not happy with it. So there's still
a bunch of stuff that I want to go ahead and fix. The reflections are definitely, quite a big problem. So that's something that
we are going to fix. And I will finish off
with fixing that. But first of all, let's
go ahead and let's see. So our bloom actually, our Bloom setting it to
one is already fine. I'm going to go ahead
because we have this nice volumetric light in here. I do want
to capture that. So for that, I will
most likely, after all, go to visual effects and
try to once again create an exponential height four
and see if this works. So if we go ahead and
turn on volumetric four, let's set our density way down, and we definitely need to
set our cut off distance also at like 100 or something like
that so that it does not include our sky, and I might need to move
my sky back a little bit. So setting the cut off
distance to like 100, or maybe even less,
maybe like 50. It should not include the sky, but we should still get this
haze that we have over here. And it is a little bit, I need all set my
volumetric distance lower to maybe like 1,000. This is a little bit annoying. So we basically need
to find the balance. So I'm going to
give my volumetric for like a slight orange color. And the annoying thing here is that I need to find
a balance between my volumetric four and between my exponential
height four. So if I go ahead and also give this like a bit
of a yellow core, I can go over here and
I can set my density. Oh, that's really blue. Hmm. Maybe I need to push this into much
more stronger yellow. It can be blue because of our
color grading. Here we go. So we are pushing
this way further. And now I want to
go ahead and let's set my fork density
a little bit up. But my max opacity. Okay, that does not work.
Then we need to go ahead. Yeah, see, it's really
annoying to get this right, to be honest. Because with the volumetric and the Height vog you have two
different types of scaling. Also, your static light
scattering is basically how much your lights will
amplify your fogginess. So if you set this
to like zero point, that does not seem to do much. Let's keep it to one. Yeah, this is going to be a bit tricky. So please bear with me. I just want to give
it a general haze, and that's what I'm
basically going to go for. Normally, what I would also
do is I would also just use maybe some volumetric
lights that I got from the
unreal marketplace. But because it is a tutorial, I'm not really going to do that. What we will do is we will go
ahead and let's set this to probably 0.01 in
our fork density. If you make the color of your
fork a little bit darker, it will also actually improve hers so you can have even
more control over it. Let's do something like this. And we have now gotten to a point where the
environment is looking okay. I'm still definitely
not happy with it. Like, I still need to add
quite a bit of changes. But these are all so many back and forth
and small changes that it could take me an hour before I get to
something I like. So what I will be doing
is in the next chapter, we will go ahead and
we will basically time lapse that and I will narrate over it,
and I will tell you, everything that I'm doing
in order to basically add small change to this environment and just really improve it, and hopefully also
get it a little bit closer to what we
have over here. So let's go ahead and just dive it into that chapter
because right now you can see like there's too far of a
difference between these two. So let's continue with
that in our next chapter.
41. 40 Polishing Our Environment Part2 Timelapse: Okay, so I kicked in
a quick time lapse. And this will just be
some general polish. I will just be jumping
back and forth between many different things in here just to see
whatever works best. Like over here, I'm trying
to play with the glass, but I notice that it is mostly my environment that is causing that the glass
is not looking so nice. So what I actually
will be doing in the next few minutes is I'm just going to go back to HT HR. Yeah, it is called HR Haven, but the website
is polyhaven.com. I showed you before, and I
will basically go ahead and download a bunch of
different HR maps and just see whatever
one works best. And that's basically what
I will be doing with this. So yeah, I'm just
going to go ahead and I'm going to quickly cut along to the point where I've just found a few
interesting maps. Here we go, and I just
imported them into unreal. And now I'm just
dragging them in to see which one works best. And I think I end
up going for a map that is called studio
Underscore small underscore 08, because I quite like that one if we then rotated around a bit. It just gave me the we
amount of darkness as soon as I set my intensity
scale a little bit lower. So I'm just basically just
tweaking all the settings. And that's basically what
you'll be seeing me doing here. It's always a bit tricky because so many small little things that I just very quickly
want to change. And if I need to go ahead and I need to explain
every single thing, something that takes like
half an hour will immediately take 2 hours just for
some small changes. And that's where this
time lapse comes in. So right here, I'm just playing around with, like,
the light color, and I end up setting
my lights to be a slightly warmer tone. And Feres, you often also see me playing around with settings that actually don't do anything, but that's the goal of them
to see if they do anything. So over here, you can
see that I'm just playing around with
AF and I'm going to make it a little bit
more white instead of orange just because yeah,
it just felt a bit better. And now I'm going
into my post effects, and I'm just giving it
some global color grading, like playing around
with the gamma and the contrast of my shadows
and just the global. I'm doing this on top
of a color grading, just to see if
everything works nicely. Now, over here, I'm going to go ahead and I can see
over there that it doesn't look very nice how we transition from white
to something dark. So I'm simply giving
this bottom piece green colors that it will
use the dark vertex colors. And then here you can
see the difference. So it actually makes
quite a big difference. There you go, see? So
it just feels like the transition is a lot better and a little
bit more logical. For the rest, I'm also just playing around
with my lights, toning them down to add a little bit of contrast
in the center so that your eyes do
not really get drawn to that area until the very end. And over here, same thing. I'm just toning down my lights because they are all a
little bit too strong. I just wanted to have
everything a bit too bright. So now I'm just going
to balance that out. With these ones, I'm
basically just slacking them and seeing if I can play
around with the color. But in the end, I end up just
not really doing anything. I just set it like
a little bit less orange and also tone down
the intensity again, just to see if everything works. And over here, once again, I'm just messing around
with my settings. Right now I'm just playing
around with my dirt settings, and what I'm going to do
is I'm going to increase the tiling a little
bit to set it to well, I sent to 5,000,
but I meant 1,200, so that the tiling is
a little bit smaller. And as you can see here, that
works a little bit better. Play around a little bit
more with your dirt. Don't have it like too intense, because then it
will look unlogical because it is a laboratory, so it needs to be, quite
a sterile environment. But of course, I do
want to add, like, a little bit of dirt just to
make it more interesting. And I'm also on my grunch. I'm just adding a little
bit more contrast to hopefully make the
dirt a little bit sharper whenever we have it. Like that. And then I just once again go back in and
do some balancing. So, you can see, like me just jumping back and
forth like crazy. So over here, I'm just
generally playing around. Often, even if I think
something is fine, I still like to just play
around with it just to see if I find something
that is actually better. So if it just coincidentally
find it, then it's great. Over here, what I'm going to
do is I'm going to just make those center consoles
a little bit darker. Because in our reference, it
is also a little bit darker. So it will add like
a nice division between the top and the bottom, and then the center consoles
because they are darker, they kind of like
stand out a bit more. So I'm basically just going
and painting them to be dark, not this dark, of
course, go ahead and, like, tone down the
intensity of them. But then what you can see
is when I re import this, there you go, see, so
it's a little bit darker, and now it's just a matter
of balancing it out. Over here. And then you
will slowly get like, see, quite a nice division. Just really small
tweaks like that. Often they really
make the environment, just doing small
stuff like that. And especially with
this environment, because we only have one
texture to work with, which is actually
quite a drastic thing to work with that you
only have one texture. It is something that we just
need to play around with a little bit more just to get
something that we like. And I will also, of course, give you my thoughts at the Outro, which will come after
two videos, I believe. So after this video, we
will be creating our crate. And after that, the
tutorial is done. And then I will
also just give you my opinion on using trim
sheets and stuff like that. Over here, I am just duplicating
my trim sheet material, and I'm just
basically toning down my dirt to make the
floor a lot cleaner because I felt like
I just did not really give off the
correct response. So making it cleaner and then
just dragging this one in, it will just immediately
here, give us, like, a nice floor, and we
do not actually use more textures for
this because we are just using a
material instance. It's just a simple change. So all we are doing
is just adding a little bit more
coat to our scene. Over here, you see,
it's a little bit cleaner that works just
like a little bit better, and I just in
general, I like it. And then for the
rest, what I'm doing now is I'm playing
with my camera, and I'm just trying to get some text and
everything in here. So I'm going to go
into Photoshop, just the same files we
used before for our text. And I'm just adding
some extra texts that I saw in my reference, which is like Sector 78. And okay, I tried to show
you, but, of course, I do not always think about how fast I'm actually
speeding this up. But yeah, I'm just adding some extra text that I
can add on the door. And for the rest
of the other text, we will also actually use that. And the way that we do that
is, first of all, in here, just find your text file
and then just reload it. Just right click
and press reload, and then just drag it on again, and then you will be able to add it on here and export it. And then what we're going
to do in Maya is we are simply going to
create a few planes, and these planes will
have the text on them. So here you can see that
I add my trim sheet, and then I basically just
cut out my text like that. There you go. Extract the faces. Now these text pieces, we can just go ahead and
import them as models, and then all we really need to do is we just need
to place them. And what I'm also later on
going to do is I'm going to change the color
to be dark color, and the way that we do that is simply using vertex colors. So we are basically going to give these a blue vertex color. I'm not doing that now, but just be prepared that
we are doing that. Right now I'm just exporting
them all individually to naming that is very
easy to remember. After that, we are going to
go ahead and place them, set the vertex colors to blue, and then changing the
color a little bit in our material to make sure
that it's, like, darker. And then it is
done, pretty much. So that's already
it for this one. So over here, yeah, you just
seem like playing around a little bit.
Assigning my message. In the beginning, I
assigned my trim sheet, but then I forgot
that we, of course, have a specific text material, so I just had to
reassign that again. And another thing
that I forgot to is to re import my
actual texture. So here you can see me being confused on why do
I not see my text? It is because I simply forgot to re import also my texture, but I figured that
out pretty soon. So I'm just doing a quick check, and then I notice
it after a while. Oh, no, wait. I'm already applying my vertical
colors here. But yeah, I'm just
basically debugging. So that's a little bit silly
that I just forgot about it. But it doesn't really matter. In reality, this seems
long, but in reality, this only took like a minute
or 2 minutes of debugging. So now hopefully at this point, yeah, and there we
go. I realized. So, there we go. And now I just need to go ahead
and scale this up, places into the center. And after that point, you can
just go ahead and you can keep duplicating
this specific plane, and then you can just replace the mesh with a
different one and simply just give that like a nice location and
just keep doing that. Just wherever you want,
just place the text. And after that, what
we're going to do is we are just going to replace
the color as I said before. Over here, I'm just trying
to follow my reference, but I'm not going to go
too overboard with it. Like, I just need to
have some generic text here just to make it feel
less like a trim sheet also, because that's what text is also good for to just
make things feel like they are more unique when we have
text decails like this, compared to just having only
plain colors pretty much. Over here you can see
me now just duplicating my materials so that we do not accidentally change
the white color. And then it is just a matter of assigning a correct
vertex color, and I went for the blue,
and then of course, assigning the correct layer. Now, over here,
what you can see me doing is I'm actually replacing the vertex color in here to blue inside of my
import settings. So if you set this over white,
you can set them to blue, and then you just
avoid needing to go in real or into
May doing it all. So that's what you
see me doing here, and then I just need
to go ahead and assign my correct material. So you can see me
first trying to do it on the original text, but then I realized I had
one that has to be white. So now you can see
me just assigning it new material to
all of this text, and then it instantly becomes
blue or becomes dark, and then we can just play
around with color free. And there we go. For rest, I'm just going to select
all of these planes, and I'm just turning
off cast shadows because these are
stamped on the wall. I do not want to accidentally cast my shadows or
anything like that. And now for rest,
I'm just in general, playing around with some
lights, and over here, what I notice is I really wanted to see my ceiling
because it would have been a shame if we
spent all this time creating these top bits and that we can just
never see them. So what I'm doing
here is I'm basically going and straying
away from my concept, and I'm just selecting
everything over here and I'm just
basically moving it down. And because I'm moving it down, we no longer have
place for our screen. Like I said that I
wanted to create a screen that has
like a video playing. So we no longer have place for that, but that's no problem. If you want to know how
to do that, you can simply go to YouTube and just type in Unreel Engine five or Unreal engine four, how to play a video in engine. And then you are able to
also know how to do that. So it is a very
easy thing to do. It's just like a quick
setting, pretty much. So over here, you can see me basically nicely
moving this down. And I'm trying to just move it roughly on the
same level so that we can just see our ceiling
from our main view. And that's what I
want to see, so that I can see, a little
bit of the lights, a little bit of the ceiling, and that already just
looks a lot nicer. Now, over here, I'm just
again, small changes, playing around with
my lights a bit, maybe making them a little bit more intense or a
little bit less. For the rest, in my post effect, what I did over here
is I set my method from lumen to rate racing to
get rid of the flickering. Now, if you do not see
anything happening, what you can try to do is go
into settings and then in your project
settings, I believe. And then if you go
down to rendering, you can turn on support
hardware rate racing. And as soon as you turn it on, it will also be able
to use rate racing. But often you don't
even need to do that. Now over here, again,
small balancing. I'm just balancing out
and just increasing my edge damage so that
you can hopefully see it a little bit better,
stuff like that. And we are now slowly
nearing the end. So about one more minute, and then we are pretty
much done with this. So at this point, I forgot everything that I
did on top of this. Yeah, just general material
balancing, I guess. It's nothing too
interesting, honestly. So I'm just looking around, maybe like changing
the intensity of these lights a tiny bit, just to give it a
little bit more of a darkening stuff like that. And maybe making these
panels a little bit lighter just so that we can
see them a little bit better. Yeah, so everything is slowly just coming
together like this. And once we have
done our crates, the crates actually add a lot. So once we've done those, then everything really just came
together quite quickly, and we end up with quite a nice environment for something that is so optimized. If you want, you can even
optimize geometry also, and then you would be able to get almost the exact same look while having a mobile
environment, pretty much. Over here, I was trying
to, like, art some glass, but I did not like
it, so I end up just removing it. And
that is about it. So yeah. Let's go ahead and continue on to the next chapter
where we will have a time naps on how
we are creating our crates that we will be
placing in the foreground. Oh
42. 41 Creating Our Crate Part1 Timelapse: I I and a
43. 42 Creating Our Crate Part2 And Tutorial Outro: Okay. So most of the
polishing is now done, and I've also created my crate. Now, as you can see,
the reason that I already imported
the crate in here, along with I on purpose, did it in like a temp folder. This is simply so that I could make sure that
everything is correct because it's a pain
if you need to change this after we place
it into our trim sheet. So just test it out, make sure that it is correct. And when it is
correct, what you want to do is there are two ways. We can do this manually or we can do this or we can
ty this in painter. And I say twi because it might sometimes be a bit
trickier to do in painter. But I hear this. So this is
like a really basic texture. That's no problem. Now
if we go ahead and we open up our trim
sheet in painter, what we can do is we can import the textures
that we just exported. So if I just navigate to it on my other
screen while this is loading. So yeah, you can see that we
have these texts over here. So what I'm going to try now
is I'm going to try and add a folder because I've actually
never done zine painter. I normally just do
this in Photoshop. But the reason I
want to do it in painter this time
is because we are packing everything
specifically in our mask, in our R&B mask, and that makes it a little bit more annoying to do
it in Photoshop. So that's why I'm
trying it in here. So I'm just making a folder
called crate and I want to create a simple fill layer in here that I will
also call crate. Now, if I go to Import
resources, let's try import. Over here just select
everything in set to texture. Import our base color metallic
normal and roughness. Those are the only
ones we need and just import it into
this project over here. Now that we've done that,
what we are going to do is we are going to go ahead and we are going to dragon our base color. We
don't need our height. We need to drag
in our roughness, metallic, our normal, and for rest we don't
need anything else, I believe, like that. Okay. So now we have this
weird texture over here. And then what I
basically want to do is I want to go
ahead and I want to go in my UVNwp and
set this to none, which basically means
that it will not repeat. And then I want to set
this to 0.25, I believe. Oh, wait, that's
large, of course. I need to go four. There we go. Four. White? One,
two, three, four. Yeah, Because this
texture is 512 by 512, but we have it on a
96 by 40 96 plane, so it should be four. And then what you
can do is you can basically play around
with your offset. Zero point well, 0.38. 0.37. Okay, so that's an
interesting offset, 0.375. And then this one
probably needs to go. A 0.375. Yeah, here. This one is minus -0.375, and that should basically
place it in here. So that's the general
goal for this to place it into this
block over here. And because we have our base color roughness and
metallic and normal, you can see that it will
simply place all of our maps in one go
in this location. And that's exactly what we
want. So having that done, we can also even double
check with, like, this layer over here. See? Perfect. Okay. So
having that done, we can just go ahead
and we can just do a normal export like always. So save and come on, fine and then do
export textures, and we are just going
to export this. Now what we need
to do is we just need to go ahead and
we need to adjust our UVs in here and
also before I forget, mesh display apply color and just apply a red
vertex color to this. Now I'm going to
assign my trimset. I don't know if it okay,
so it out updated. And then if I just
select this.Th is our texture over here. And if we go ahead and we
just select everything, go into our UV toolkit. I can go to Transform and if
I set my pivot down here, it should scale down like this. And then if I set my
scaling down here, oh, God. So you need to scale by four, so 0.5 And then press
this button over here. Okay, 0.25, I believe.
Let's try that again. So 0.25. There we go. And then it should perfectly
align with the stuff that we have in here because
we are placing it exactly in the same
scaling like this. So that's why it's
handy to always have this in a corner
and not have it, floating in the center because then you would need to
line it up by hand, and that can just be a pain. So if now just have
a quick look Okay, maybe this is not the
best place to look at it, but I can see from the
dirt that it is lining up pretty much correctly, yes. It's just like our normal map, yeah, you cannot see it here. So if we now would go
ahead and save our scene and then export our
crate 01 over here, we can then go ahead
and go in here, and all we will need to do is
here we have our crate 01. Let's press reimport,
reset the FBX. And then what I want to do
is I just want to add in our normal trim
sheet 01. Save it. Go in here and just
press the revert button, which is the arrow
on our materials. And then all we need to
do is we need to go into our trim sheet and re
import this one also. And hopefully, that should
all work correctly. Perfect. Okay. And
there are crates. So let's have a look. We have a tree here and like
another view over here. So all we need to do
now is just hoops. Let's duplicate this. And I'm just going to go in
my camera view because we, of course, have a
slightly different view. Yeah, let's do over
here, see? And it does add like quite a bit, having just some random
crates sitting here. So I can just go ahead
and turn off my rotation. And here, I'm just
going to, like, nicely place these over here and then just place another one on the
top and just give it again, like a small rotation. Let's make sure that it
does not clip or anything. There we go. And maybe also have another crate just
like sitting in here. I think that would be nice. Maybe give it a little
angle. You know what? I think it could actually use another crate just
sitting on top. I know. Yeah, there we go. That works. Okay, so we
got our crates over here, so that's also
looking pretty good. And, if you want to
do very small changes to the general color. So let's say that we like what make this a
little bit lighter, you are able to do that in here because you can
go into your crate, assign a color selection, and then just pick
this one color. So then you have your crate,
and then you are able to, for example, add a Oh, we don't even need to do the color selection
because we can just add a not a filter, add a levels over here. And then in your levels, if you said this to be luminosity, you'll see you can make
everything a little bit lighter. And because we add the levels
only in our base color, that should only show
up in our base color. Right, click and reimport. And here we go. So that's now a bit lighter. Okay, perfect. So
that is an sodon, which means that all
the modding and all of our texturing work is done. And this is also pretty much like where I'm going to
leave off the polish, except for that I forgot
to assign a over here. I just need to go in and
just set this to text black. And I forgot to just, there we go. Move it a
little bit forward. Let's do the same over here, text black. Like that. And that's about it.
Yeah, that's about it. That one is also working.
That one is working. Okay, perfect. So that is
about it for this environment. And yeah, I do hope that you
enjoyed the tutorial course. So as a quick little
recap what we went over, the main things that
you went over is, of course, creating a blockout and doing some modular modeling. But the main focus of
this course was to create trim sheets and how
to UV unwrap for them. And for the rest
for the modeling, we did all the
modeling, although we breezed through
it quite quickly. And also, yeah, we went
over on how to, like, will do all the planning for your environment and for your
trim sheets to make sure that you do not forget
anything and you do not lose any extra space. Now, I was planning
later on to, like, also, like a screen, but I don't have space anymore because I
moved my ceiling down. So it's not really worth
it anymore for me. If you want to
have a screen here or here and you want to even
have a video file on it, all you need to do is go
to YouTube and just type in playing video
files in real engine, and then you will
be able to just follow along with ten
different tutorials. So it is not really something that is really
important for this. And yeah, of course, I would recommend,
play around with it. Now, what I thought for this? Oh, yeah, we did, of
course, lighting. What I thought of this is that creating trim sheets,
it's really cool. You can also actually save
quite a bit of time doing it. But what we did with only having one trim sheet for
our entire environment, we are really pushing it, and you can see that the quality suffers a little bit from it. While normally if for example, use multiple trim sheets, then we can definitely
push the quality a bit more and get it a little bit
more into this direction. But for only one single
texture that we use over here, I must say this is
a pretty good look. If you just think about it, that this is all one texture, one normal map, one base
color, and one special map. And for the rest, it's
just like some lighting and just some basic modeling
with weighted normals, not even high poly
to low poly baking. So it is great if you want
to do some quick concepting, get some environments really
quickly, or of course, if you make environments
for, for example, VR or mobile games where you really need to do
a lot of optimization. If you are working on AAA games, you will be using trim sheets, but they are often
for specific details. You would not use
trim sheets for stuff like these really
large window or these really large white areas or the gray areas or the
flooring or everything. Most of the time,
you would simply use dilable material because
you can handle the expense. And you can push in
a bit more detail. Okay, I'm going to
stop talking now. I do hope that you enjoy
this tutorial course. If you did, please leave a good rating that really helps me out. And if you have any problems, just go ahead and contact me
or on ArtStation, Fl nos. Or what you can do is we have our own discord
channel where you can also just join in
with our community. We are currently around
600 strong and growing. And yeah, you can just
talk around to people, and you can also get
direct help from me. So I hope to see you next time in our next tutorial,
whatever it may be.
 FastTrackTutorials, Premium 3D Art Education