Transcripts
1. Introduction Trailer: My name is Emil
Sligas and I will be your instructor
for this course. The thought behind
this course was to create an interior
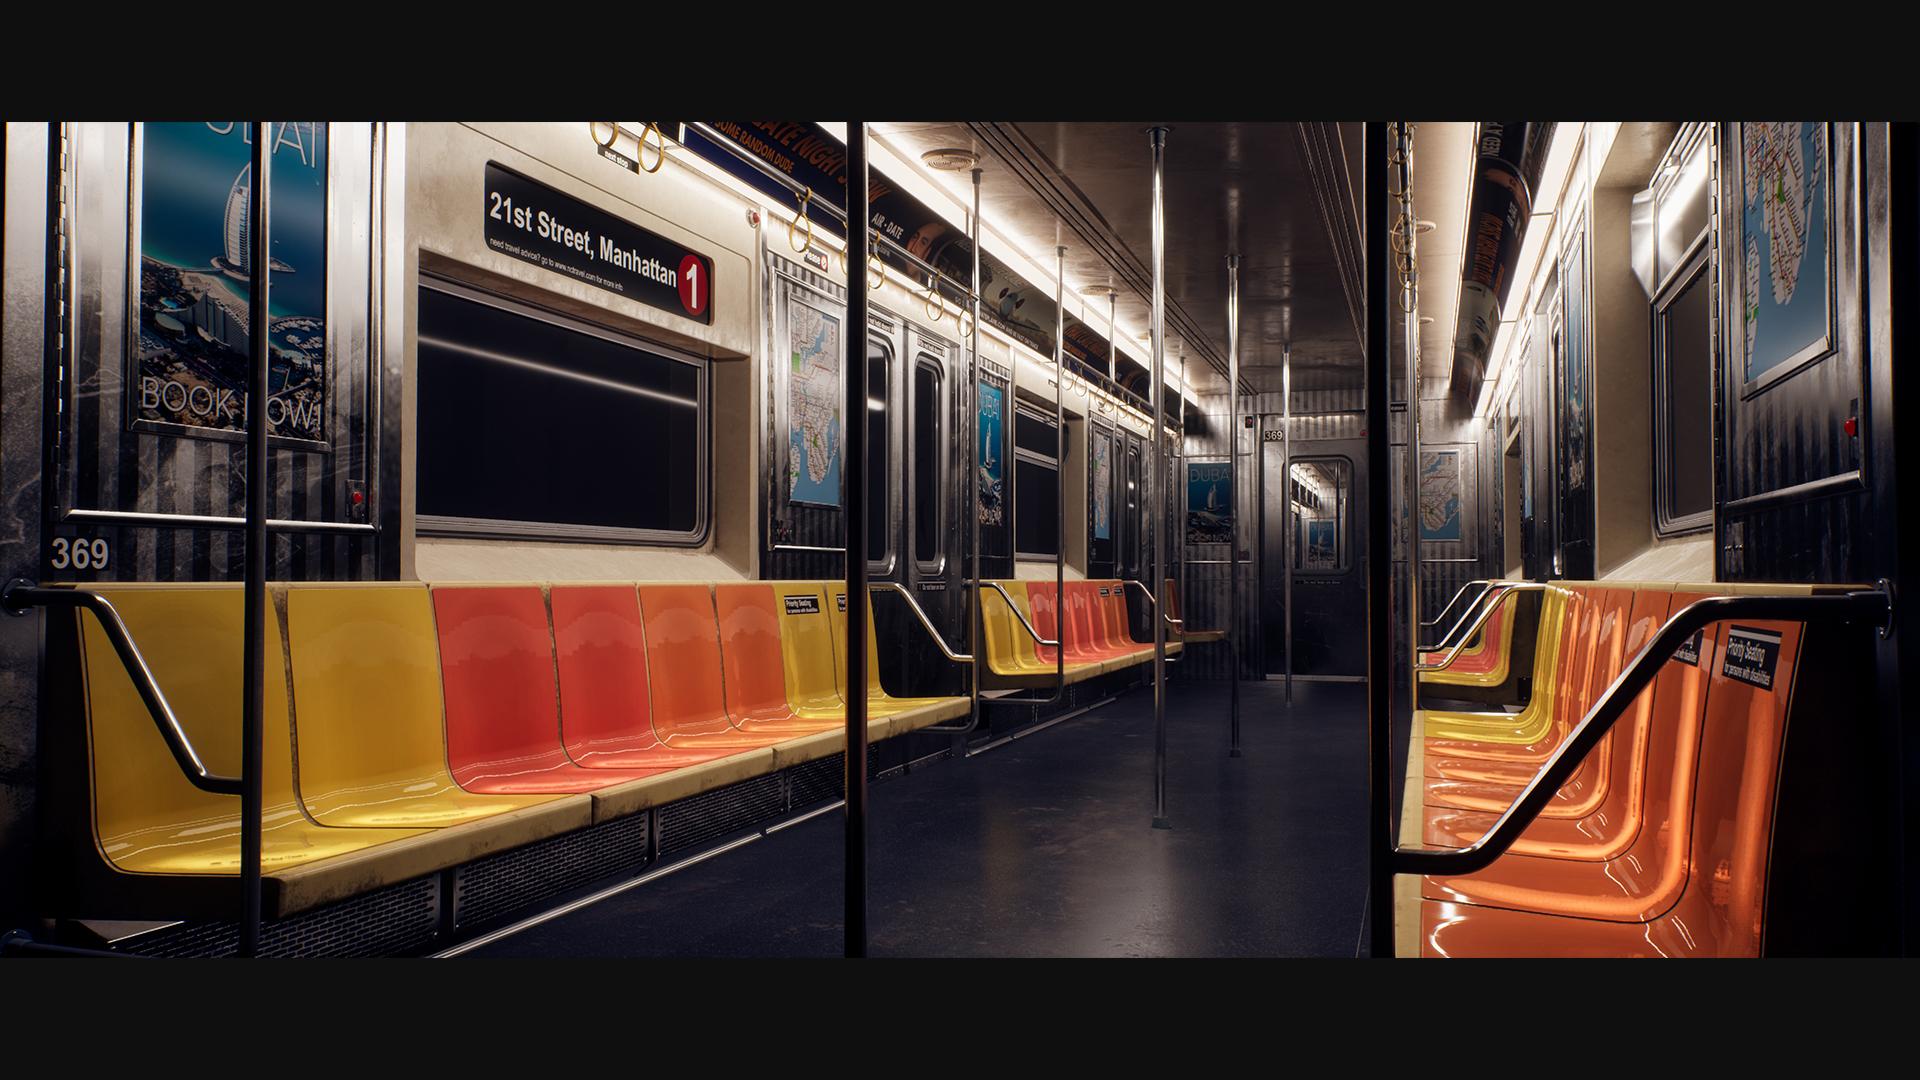
environment in UnualEngine five while using the new Nanite and
lumen systems. That's what we will be
doing in this course. It might not be a
basic house interior, but I will take you through
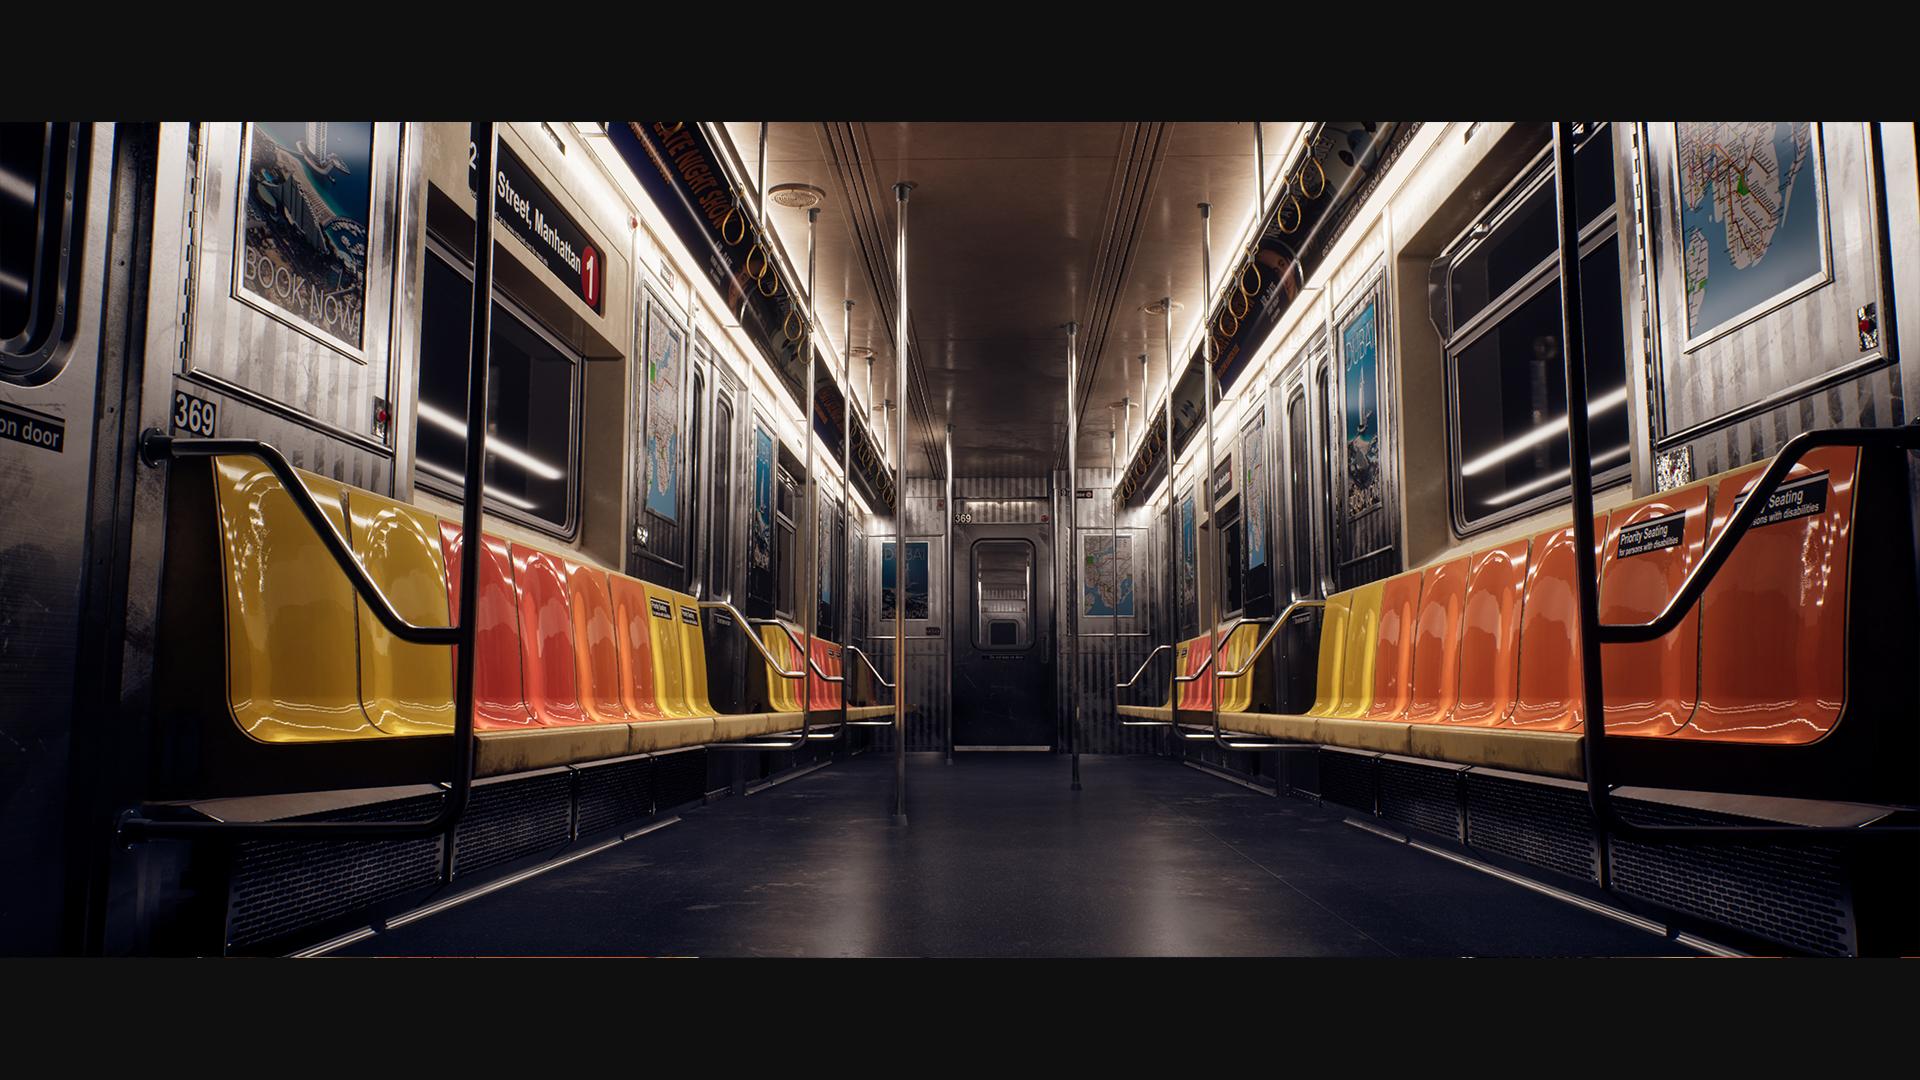
how to create a New York style metro train interior
from start to finish. The key topics of this
course are as follows. We will go over now to create hipole models and we push
the quality of them in Maya. Thanks to the new Nanid
systems in unreal, we do not even
have to bake these down from high pool to low poly. We will also go over
on how to create easy but powerful
procedural materials and also how to create
unique textures. We will go over on how to
input all of our models, set up Nanite and
build our level. And next to this,
we will also create some flexible shaders
in Unreal Engine five that give us control over every texture map along with adding variation
controls in, for example, the roughness
and base color using a mask. And as a bonus, some of these shaders
don't even need UVs. After this, we will
take a break from Unreal and we will
go over on how to create realistic branding and advertisements for our metro. This will include everything
from advertisements to warning labels and
even norm map details. Most of these will be
created in Photoshop. Finally, we will cover on how to do the lighting
and post effects, including how to use
the new Lumen system, and I will go over how to properly polish our
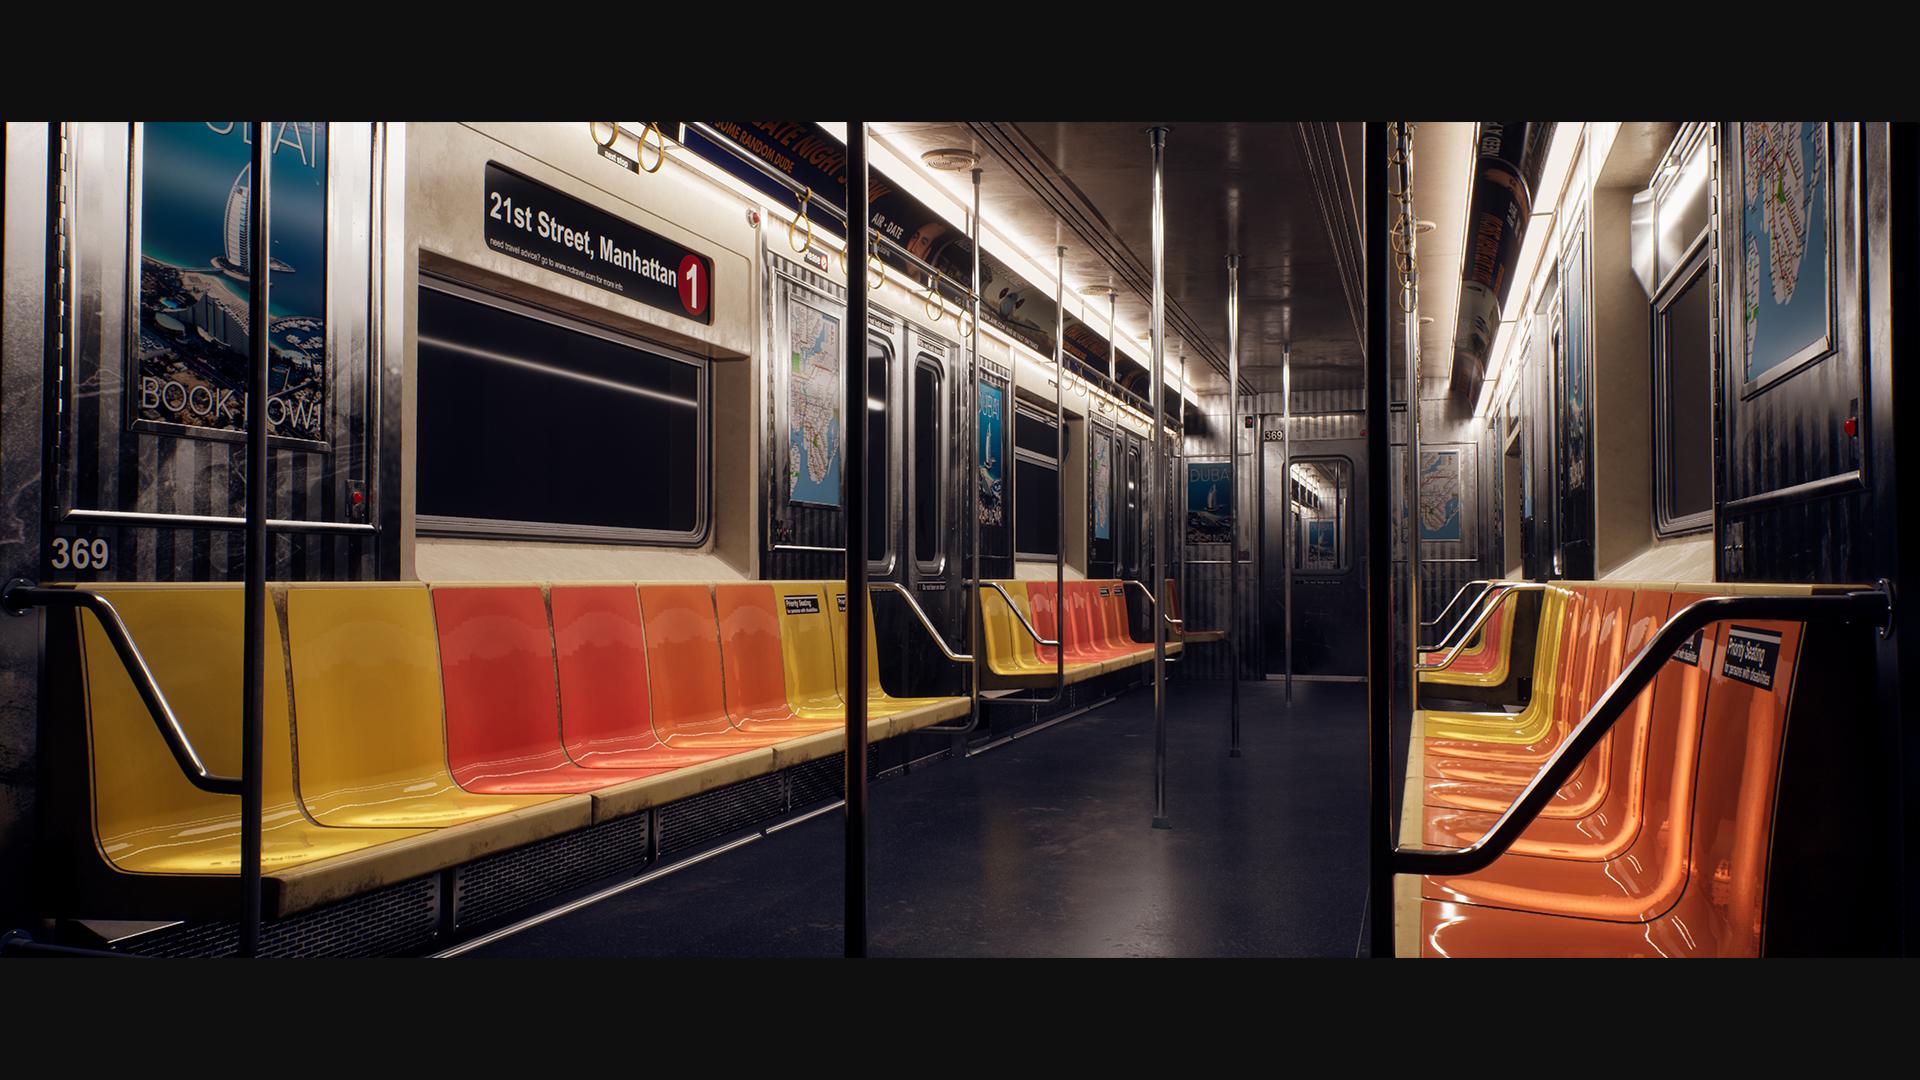
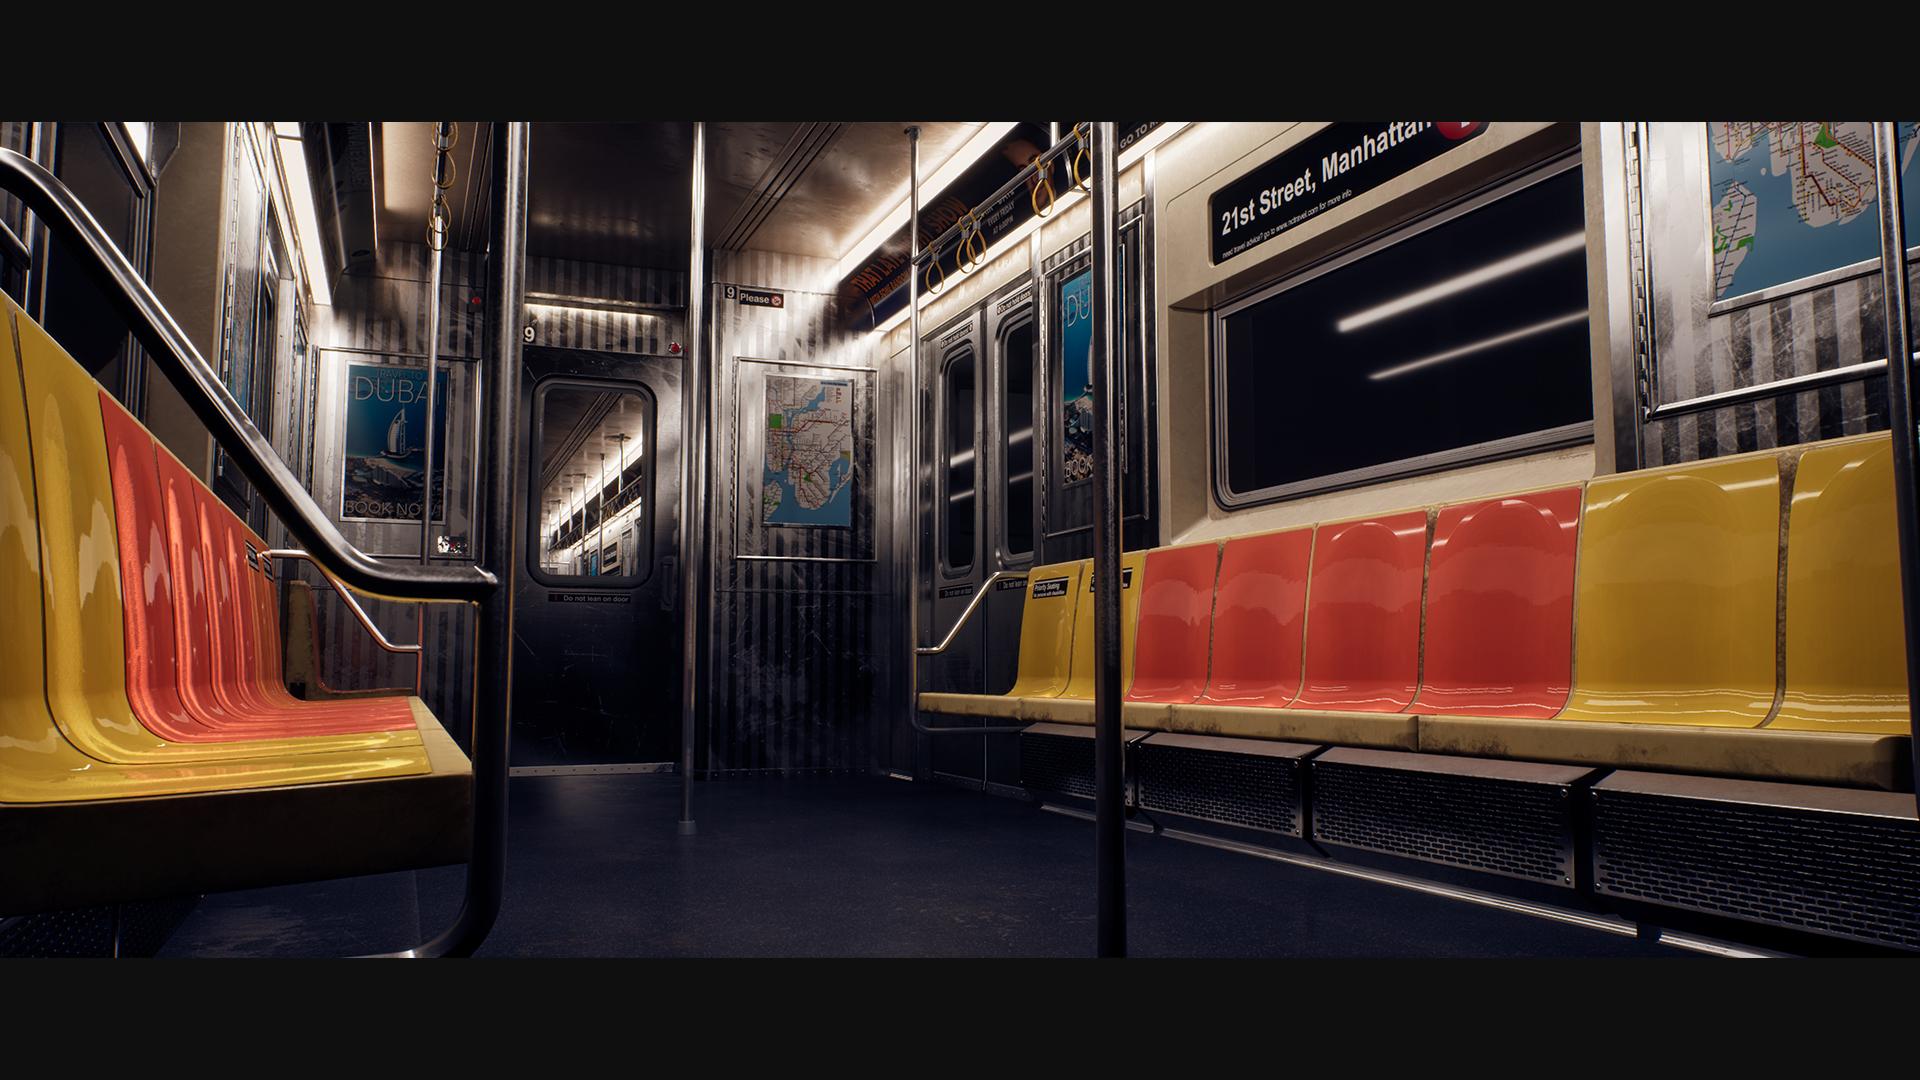
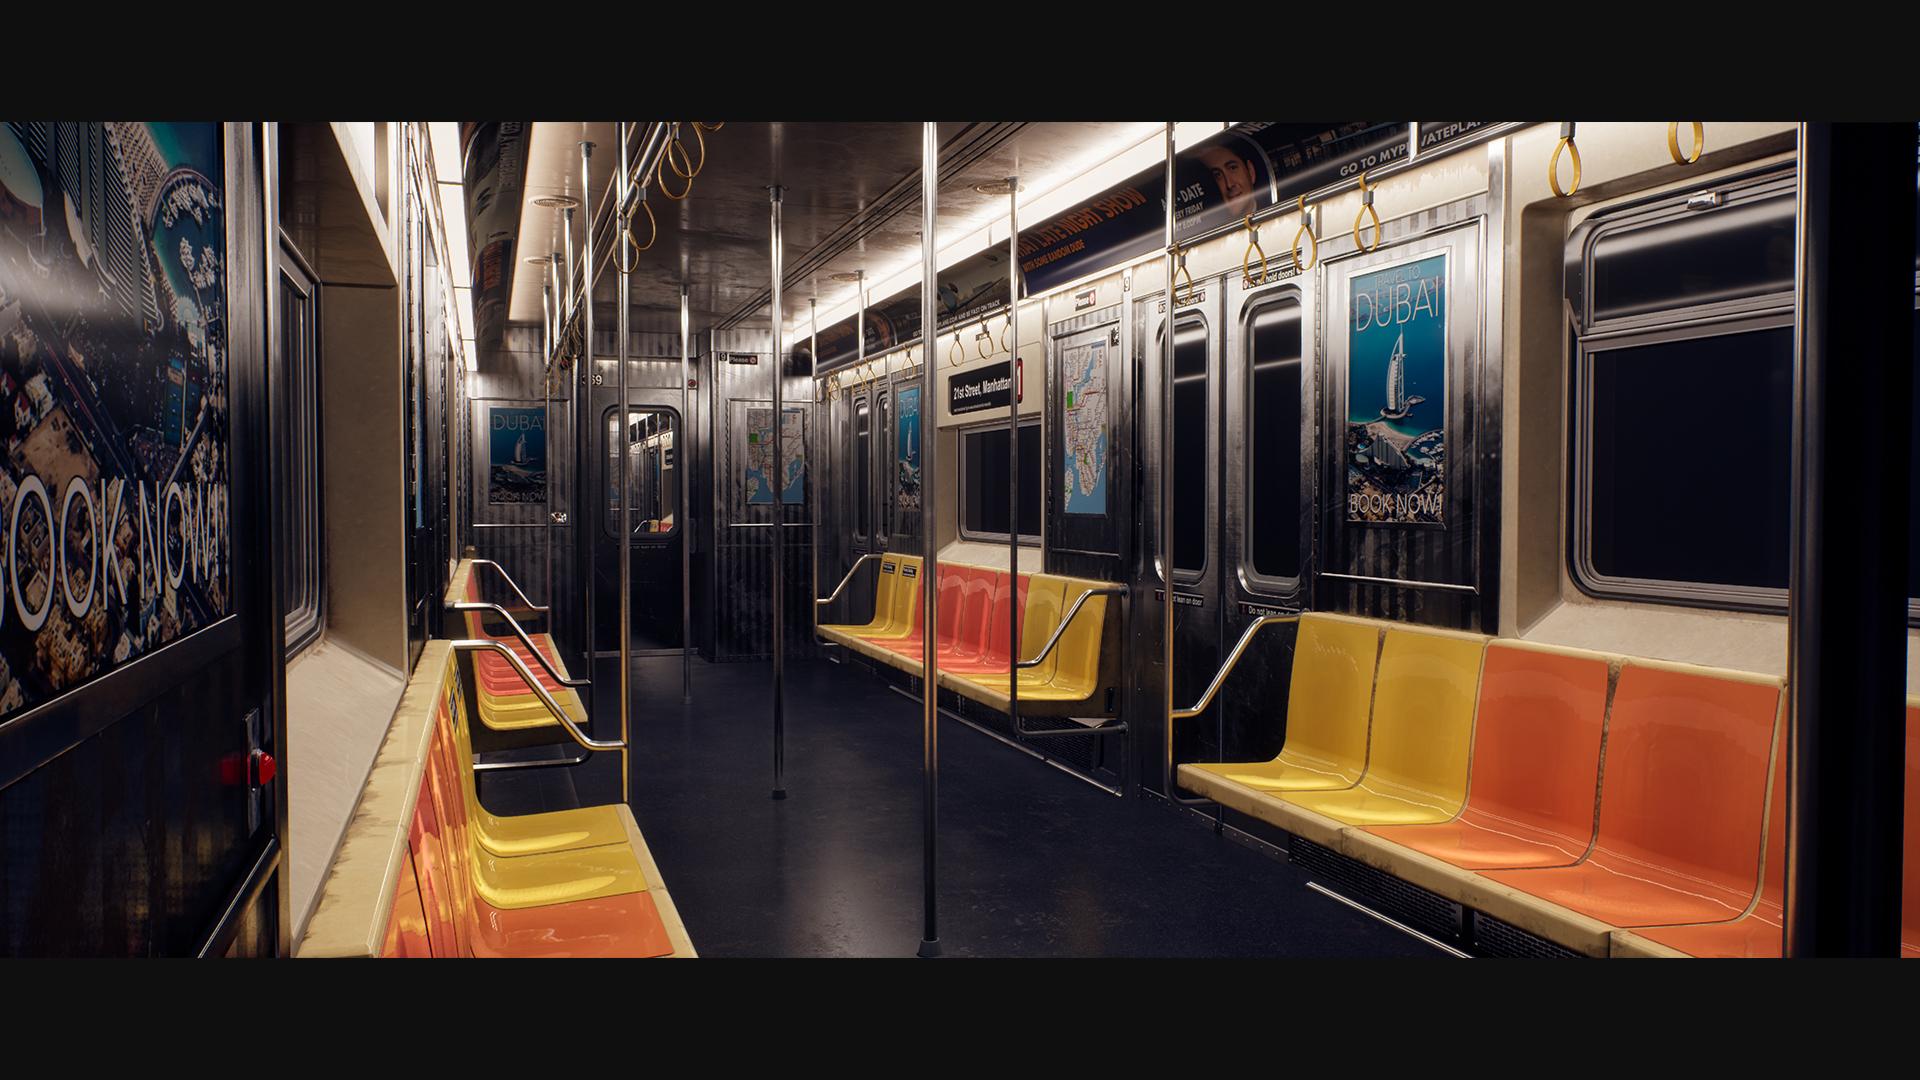
scene to final. In the end, you
will be left with an amazing looking scene
like the one you see here. This course is targeted towards beginners and
intermediate artists. However, it might not be a good fit for
absolute beginners. If you are an absolute beginner, I recommend that you first watch some introduction videos on
the softwares that we use. This course will be
almost 19 hours long, and all the source
files will be provided. So I hope that you are excited for this course, and I
hope to see you soon.
2. 01 Going Over Our Reference And Setting Up Maya: Okay, so let's get started with our reference and planning
for this environment. Now, this environment is
going to be, of course, a little bit different than, for example, an exterior
environment. So I got a bunch of
reference images here. I got these reference images
just simply from Google. I just typed in New York, Metro Train, Metro,
Cat, stuff like that. And then you can find
these type of references. Just to note that
these references, you will need to download
something called PUR Rv. Because of Oops, I can show you. Because of copyright, I'm not actually allowed to give
you all of these images, but I am allowed to
give you a PureRv file which will have these
images included. So go ahead and go to
Google and type in PureRv. It's a very common
program used by artists, and then you can go ahead
and you can download it. But in any case, this
is our reference. Now, one thing that
we will always need to keep in mind for
this specific project, something that I also still need to get used to is that we are going to use Nant inside of
nul eng and five for this. This basically
means that geometry wise, we are not very limited. We are going to push
most of the geometry. This is our main
reference over here. We are going to push most of
the geometry that we see, and it's just going
to be real geometry. It's not going to be any high polym low poly baking
or anything like that. So that's something we
want to keep in mind. I do maybe want to make a
norm map here and there, and the reason for that is
because it might actually be faster to do the
norm map rather than going in and trying to
get geometry in those places. But mostly it will all
be just pure geometry, and we can take it from there. Now, another thing to
remember that this is not to say that
we can just go ahead and push in
1 million polis per object because then we
would not have the power to actually UVN wrap and texture the object
because just because nanite inside of unreal can
handle 1 billion polygons, doesn't mean Maya and substance painter and everything
can or substance signer. So this is our main reference. If we have a look, we
have a few main elements. We are going to do this in
a modular way to save time. So we have a floor piece. We have a door piece,
we have a window piece. We have a seating piece, although I will most likely
just do per two seats, as you can see, and
then per two seats, we can also go
ahead and later on, make a single seat, for
example, like that. We have one of these poles, one of these side poles. On top, we do have
this, but this can probably just be included partly inside of our door mesh. We have this advertisement sign, which also controls
the lighting. We have a ceiling piece,
which you can almost literally see the lines on how it is constructed together. So literally this train is
modular even in real life. You can see it everywhere.
The lines coming back everywhere,
which is quite nice. And for us we have some small
stuff like smoke detectors, and we have a back piece, which is actually
not that small, you can see over here with
like a door. Let's see. Yeah, there is maybe
some stuff here, but let's just have a look. So I'm going to run
through the reference, and I'm going to just point
out the stuff that I see. So in this stuff, the most stuff that I see is general
shapes and I can see exactly where I want to have my modular
pieces end and begin. We go it over here. This one, this is actually T D render. I forgot who the artist was. Yeah, sorry, I'm not
sure who the artist is, so c it to that artist. But basically, with
this three D render, the thing that I will like is just the shininess
and the cleanliness. I think we are going
to incorporate that, and we are going to keep
ours also a little bit cleaner in terms of
just the general feel. Over here, the thing
that I like is the door. I can see very clearly how
the door frame over here works and that the
door works over here. Next to this, we do
have some little bits and pieces which could
be cool to art later on. And also one thing to
keep in mind with all of these pieces is we are going to create an atlas for
everything like, please don't smoke, these maps, all of this advertisement,
everything. I do want to spend quite
a bit of time just doing some really cool
looking advertisements, even if it means that, yeah, we need to dive into
Photoshop and everything for that. Let's see over here. So this one I did mostly
for the advertisement. Also, it's quite nice to just see how these rings
and everything work. Of course, they are
slightly different here, but I think I like this
one actually more, so we can see how we're
going to do that. This one, once
again, the window, you can see the
little screws over here sitting inside
of the window, which is always really cool. I'm not sure if I'm going
to do that in geometry, because doing this is
most likely quicker to do using norm maps because else I would
need to first of all, grab my window, extrude this in, and then grab a bolt
and then set it on top. While with a norm map, I only need to just
create a quick norm map, and I can just
duplicate it around. So those techniques they
are not lost. Let's see. Over here, we go over here. So yeah, this door, I
find quite interesting. I think we're going to
go something more in the direction of this
for the ending just to make it feel less flat
if we have an extension going out or something like
that. So that's quite cool. Over here. This is
pretty nice that we have some priority seating and you can see that it's
like ripped off. So that's something
we're going to do. And we can also here get a closer look at the vent
and just in general, how those things look.'s see. Here's another one where we can just have a look at the
color and everything. The doors are slightly different here because these doors, they have a little angle, while our original doors, they are just
perfectly straight. So do keep that in mind. We're going to go for straight mostly because it is easier. And for tutorial, easier means often also that
just saves a bit of time. Over here, yeah, it's
just a general image. Over here, this is quite cool. If you can maybe do
something like these bars. I don't know. Oh, here. So we also have the
bars over here. And maybe it would be
good that I actually add some of those
subway straps to them. Can I see them? No, I
don't have a reference, but I'm sure that, you
know, it just like those yellow straps
that you need to hold in order
to not fall over. Over here, also a
pretty good reference. This one kind of shows
more of the lighting that the lighting is actually
a little bit more neutral and not so over the top. So that's something that's
quite nice to capture. Also, it does show us like a little trim over here
from like a window. Over here, it's quite
nice because we can see how the bottom of
these pieces look. Although, of course,
we are going to flip because we're not going
to have an extension out. Let's see. So over here, yeah, it's mostly like just the
door, interesting to see. I don't know. Maybe I don't think we personally will do
something with a window. I don't think we really
have the space for that because it would mean
making an entire new piece. But just in general,
as you can see, we have some pretty
nice reference. So those are the things
that I notice mostly. What we are now going to
do is we are going to, first of all, create a blockout. Now, normally, when I create
an environment blockout, I would already set it up
completely in Reel engine five. However, for this specific case, because there are
not too many pieces and because it's a very
small environment, I'm actually going
to just set up the blockout inside of Maya, make sure that everything fits together and snaps together, and then what we
can do is we can go at and we can turn this to inl. Now, before we get started
with our blockout, I just want to do
some basic setup. So over here we are in Maya. I do expect that
you already have a basic understanding of
Maya so that you know your way around all
the windows and how to move around and do
some basic modeling. Just to show you my layout, I have my outliner, my tool settings, and my modeling toolkit
on the left side, and I have my channel box, layer editor, attribute editor, and my UV toolkit, along with my UV editor
on the right side. If you cannot find
any of these windows, of course, you can
always go to Windows. And here you can find,
for example, in general, editorial tool
settings, you can find your outliner and your
modeling toolkits, et cetera. I do have a custom toolbar over here that just has
some basic stuff, but I have this
really annoying bug inside of Maya that
for some reason, even though my files are set to be able to read and write, it can actually save my files. It's a bit annoying just
means that for my too bar, every time that I restart
Tres Max, I Tres Max. Every time we need
to restart Maya, I need to go in here and I
need art a few settings. But that's just me. You will not have that problem. Hopefully. In any case, I have for us, wow, sorry, I said
that really loud. I have for us a scale reference, and the scale reference is
basically a character that is as big as the one
inside of Unreal engine. So if you go to vile
and Import and just import this character,
this is what we will get. Now, I can see that I most likely still have
my old settings. Sorry about that. Just
to go for a better one. If you go to Window settings and preferences and
go to preferences, you want to go to settings
and you want to make sure that we are
working in centimeters. We can work in meters. However, meters, if you want
to do very precise work, like with bevels and everything, which we need to
do, it's a pain. So I like to go for centimeters. Now, the old settings that
I'm talking about is that I still have my grid
set to the settings. Your grid is supposed to
be looking like this. So this is what you will
get, and what you will notice that your grid
is incredibly small. Now, don't really
worry about that. So this is our scale
reference, yes. However, you can see that it has quite an interesting
scale over here. Now, you can go ahead
and try and go to modify and freeze
your transformations, just make sure that
everything is fine. It didn't do anything now, but that doesn't really matter. And I'm going to set
my translates to zero, zero, zero, just to have
this in the center. Now, the main focus for this
one is actually a scale. So for a scale, I want to scale it down in
increments of ten. So if we have 2.54, I can go 0.254, and that makes it a lot smaller, as you can see over here. Now that I have this
one, I can now go to my display and to my grid, and I want to set the length and the width a little bit more. So let's do 24 and press Apply. See, so that can make our grid points a little bit larger. We can also set our
grid lines larger by setting them to ten,
and based upon that, if we do 48, based upon this, we can balance it out
because I always like to have a grid around
my main model. So we got our scale
reference over here. Now that this is done and
we have everything set up, we can work in centimeters. We have this one, and
we just know that when we go into Unreal engine, we simply need to
set the scale to ten instead of one,
which is no problem. That's just a basic metrics. It's very easy to do
inside of Unreal. But now what we can
do is we can go file and we can save our scene, and I am going to
save it for you. So this will be the
scene that you will be using all the time in saves and final on
the score Metro. That's what I'm
going to call it. Even though we are now
going to create a blockout, I will just have my blockout in a specific layer in our
layer editor down here. So let's go ahead and continue
to create our blockout.
3. 02 Creating Our Blockout Part1: Okay, so let's go ahead and get started with our blockout. So if we have a look over
here with our reference, we can see this person. Now, our reference over here, this is a male and I assume
that he is 1 meter 80. So that's like the default
standard that I always go for because I
myself am also 180, so it's easiest way
for me to guess. This guy over here
actually looks really tall compared to, for
example, this guy. So what I assume is that if
that person is 1 meter 80, the doors will
probably be 2 meters. The reason I say this is
because when I'm in a Metro, I can remember that
I never have to duck to actually go in the
doors. They are very close. So maybe they are 1 meter 90 but sometimes just doing 2
meters is a little bit easier. Then we probably have,
if we have this, this is probably 30
centimeters from the ground, which means that this
is probably also 30 centimeters, and
then we have the end. So that's the general idea
that we're going to go for. Now to create our blockout, let's get started with
probably the most important one or the
easiest one for measuring, I should say, which is
our door over here. Just for the people
that don't know, a blockout is a very, very basic model that
will just show you the general shape and general scale of whatever
you're going to turn it into. So you really just
need to see it as just cubes, basically. So shift, mouse button, right mouse button, sorry, and go ahead and create a cube. Now, because we are
working in centimeters, our cube is actually
quite small over here. So 1 centimeter, if we do 100, we know that this is 1 meter. Over here. No, wait, sorry, that is incorrect.
That is my fault. It is not 1 meter, because
if that is 1 meter, if I go for 180, you can see that that
is double over here. Now, I do trust that this
piece is 180 centimeters. What I do not trust
is that this guy. So over here, I think something went wrong with our scaling. Now, this is not
really a problem. Like, I'm not going to
bother too much with it. Let's set the scaling to one. So if this is 180
centimeters here, so I think the scaling somehow
messed up with my input. That is my fault,
but it honestly does not matter because we can
change this inside of reel. People are often very
specific with their metrics. It kind of depends.
If you're doing Tre D printing,
yes, be specific. But if you're importing
to game engine, you can simply just
scale the model upon import and make sure that
it is to correct scaling. So if this is one,
it's still yeah, I guess that you could
see if it is like an FBS game that the
eyes are around 180. But what I'm going to
do is I'm actually going to go ahead and
I'm going to scale this down and I'm going to make this guy 180
centimeters like this. And then I'm just going to use my door as my main reference. So knowing my door, my door
will most likely be here, if I like this, I
quite like having it quite small, so let's do 190. Like that. Okay,
then for my scaling, this is probably like 15
centimeters on the X axis, or sorry on Z axis. So if I do 15 Yeah,
it feels about right. And then for my scale scale
is actually quite important. This takes a bit
of time. You want to make sure that
this one is correct. So if this is one person and one of these
grids is two seats, that means that we
will probably have two, three, four, five, five seats for one entire
door frame, I would guess. And the seats 1 second. Okay, so I took a
literal tape measure, and I measured myself and the
seat that I'm sitting on. And I assume that these seats because they need
to be quite a bit smaller, I assume that they are
around 40 centimeters, 40-50 centimeters. So what we can say is then five times 40
centimeters is 200, so it's probably 2 meters. Here we go. It's
probably going to be 2 meters per door
frame with extra piece. And that's a general
idea for that. Once we have this done, and if the scale does not feel right, then we can, of course, move it. But here, you can see two, now, okay, so there is a
little bit of space here. So 200 of 200 feels really nice. I'm going to go for 200. I feel like that would
be the best one. So we got something like this. I don't know if 10
centimeters might be yeah, I think 10 centimeters
might be nicer. It does not really
matter too much because we're going to have a
door in between here. But the general idea is
that now that we have this piece over here,
that's all looking good. What we can go ahead
and do is first of all, let's go to our site
view over here. Whoa, that's really zoomed out. And just like nicely placed
on the grid like this. And now what we need to do is
we need to divide this up. So as I said before, it was most likely going to be 80
centimeters per side. So what we are going to do is right click and go to Edge Mode, and in here, we can go
ahead and first of all, we actually want to
go and set a line at the top because let's see
how far am I doing this? No, wait, if I set
a line at the top, if I am moving it up
until this point, I probably want to
actually give it a tiny bit more scaling, so I'm actually going
to extrude the line. So right now, we go to
our side view over here, these grids are also sometimes a bit more annoying, but okay. What we can do is
we can actually turn on grid snapping over here. This basically
allows you to snap your model C to the grid. So we are now at 190,
white. Double check. Oh, no, wait. Sorry,
we are at Yeah, yeah, we are at 190. I assume that I need 10
centimeters on top of that. So if there is one
centimeters, one, two, three, four, five, six, seven, eight, nine, ten. So that's what you can do. You can hold Shift and you
can move your cursor up. And then with your
grid snapping, you can set exactly
10 centimeters on top of that like this. And now I know that my
door is going to be here. However, my door frame will
most likely be two down, which means that I'm
going to go up here, I'm going to select my
split selected edge ring. Now, just to go through some of these that
I will often be using that are in my toolbar,
you can find them here. Combine and separate.
You can find here. You will hear me calling them
out whenever I use them. So combine and separate,
I will use here. We have R over here. Most of these are
actually just shortcuts. You actually, you know
what all of these are, I'm using shortcuts for these. So we actually don't need
to do anything for that. In your mesh tools,
your connect is here, your target belt is here, your offset edge loop is here, your multi cut is here, and your inset
edge loop is here. Keep those in mind because those are the ones that I
will often be calling out. For example, now I'm going to call out an Insert Edge loop. You can also match your icons. Insert Edge loop
basically allows me to add a very simple
edge wherever I want, so I can click and I can drag to add an edge wherever I want. So this is quite
handy. Now, I have a general measurement
of my door. Now what I need to do is
I want to go ahead and I want to select all
of these center lines. And if you press space, you can go ahead and
switch between views. So you can see that all
of this is selected. Knowing that this is going
to be roughly around 480, around 80 centimeters, 160. No, sorry, I'm
saying that Wong we need to be at 280
because it is two seats. So 280 because 40, one, two, three, four, five, six, it is seven seats,
not five seats. So we need to be at
280. That's no problem. We can just go in
here, set this to 280. Okay, there we go. So now I need to create two
lines that are exactly at 80. The way that I do that
is I go up here to connect and you can find this
in Mesh tools and Connect. And when you do that,
in your tool settings, you will get this menu. In this menu, what
you can do is you can basically set
your segments to two, which will place two exact lines for you that are evenly spaced. Then what you can
do is you can go ahead and you can
just press Enter, and then you can
basically scale this out. So if we need to be for
80 centimeters, okay, this is a bit of pain when
I'm working with, like, a grid like this, we need to
go ahead and match it up. Now, I could go in
and move my grid, but I'm a bit worried
that I mess this up. So grid lines every ten units. I hope that I'm not
messing this up. Ten units? No, no, ten units. Ten units is one centimeters. So if I do 100 units, it should be 1 meter? One, two? No, no,
that's not correct. I am already messing up. That is not very smart of me. However, I'm not
messing up too much. The only thing that
I'm messing up. So I'm not messing up my
actual let's back to ten. This what I mean, I am not
messing up these values. These values are static. They do mean centimeters. What I might be messing up is how much I'm placing in between. I can test this out, so I'm showing you a
trick to fix this or how to make sure
that everything is correct by creating
another cube. And for this cube, we can
go ahead and, for example, on the X axis over here, we can go ahead and
we can set this, so this needs to be like 80. So if we know that
this is going to be 80 centimeters,
turn off your grid. We can, of course, do
some measurements. So we can basically move this
over here and we can say, Okay, so that is
80, and this is 80. So that's one measurement, and then the measurement
that I was thinking. So I was thinking
that over here, go ahead and hold J. And if you hold J during
rotate, it will snap rotate. You can change this rotation also in your grid
settings over here. Where are you? Huh? Did I
miss click? I miss clicked. Sorry. Here we go. You can set it into
your Where are you? You axis. I can't find for a moment.
Don't worry about it. In any case, what we can do is now we can go
ahead and we can measure. So let's say that
I want to be if that is 1 centimeter,
I messed up, see? I accidentally made these
blocks 2 centimeters wide, so it's 2 centimeters
most likely per block. So that is literally
me messing up, and that's my fault that
I set this one to ten. It is supposed to
be five. It's just because I'm not thinking white. So because when I think five, I'm thinking like
half a centimeter because it feels like ten
would be 1 centimeter. But in any case, so
we need to keep it to five if we do 1 centimeter. Which means that we
need to keep it to 50 if we want to
do 10 centimeters. So let's do 50, and there we go. So that problem is
fixed. So now we know that this is
like 50 centimeters, and then we also know
that this one over here is so I wanted this one to
be 10 centimeters, right. So if I do ten, you can see that I way undershot it over here. I wanted this No, wait.
I wanted this to be ten. Yeah, see? I wanted
this to be ten. Right now it is 20, and I want it below my
door to be two. So over here, what we need to do now is we
just need to do this. We need to go ahead
and if we go in and to get started by just moving
this grid line down, turning on my snapping,
and you know what? I'm just going to
snap it like this. I'm not too worried, so this is already enough because
if we have a door, here, we can see that
this is now ten, see? And for our door, our
door is what? Like five? Sorry, five. Now, it's four. But I don't really like
having uneven numbers, so I'm going to
select this edge, and I'm going to go ahead
and I'm going to simply move it down a little bit like this. It does not need to be
perfect on the millimeter, but it is good to
have it like this. Okay. That is a little bit ******
that we already have a problem this quickly, but no problem
because we fixed it. And I think it's
good for you to also know metrics are sometimes a pain to work
with, to be honest. I never really like doing it, but sometimes you have to. In any case, we know that
these are 80 and 80. So what I can do is I can
go ahead and I can just move using and scaling those two lines that
we have created. Now, I know that
this block is 80, this block is 80, so I know that this is 80 and this is 80. It's perfect. Now, I
can see that over here. I do actually want to have
a little bit of space. So what I'm going to do is I'm probably going to go
ahead and I'm now going to go in and maybe scale it in
a little bit more like this. Blockouts need to be
correct right away. So we do want to actually
spend the time on this. But now that we have this piece, we can go up here, turn on grid. We can, for example, delete this to indicate that this
is going to be the door. And then if you want
to fill up these holes because when you delete
it, you create holes, shift click and add a bridge.
I don't know why it froze. Shift, right click
and add a bridge. And the same over here, Shift, right, click, and art bridge. Perfect. So now we have
our correct doorway. We have the person that
just fits under it, and we have the side bars over here that's
all looking good. Okay, that is great. So for a blockout,
that's already fine. The only thing that you
might want to do for the blockout is to very
quickly add a cube. And then just go
ahead and scale it in and just make this indicate that there are actual doors
here because we will have our Metro closed because we don't have an actual metro
environment behind it. Although I might be
able to just quick. If I do real, I literally made
one for the Oh, no, wait. I did that in unity. Never mind. I was thinking like, I made a Metro, but
I did that in unity. I made a metro environment. So I'm not going
to port it over. Maybe I can just download something just for
like presentation. But in any case, door
check, these pieces check. For now, I'm just going to press ControJ while having
both of them selected. Not Contra J, that is combine
sorry, CtraJsblender. That's a struggle
of when you use three different modding
programs within the same week. And now that we
have a door done, we can go ahead and we can go
down here into our layers, and this is your layer option. And you just want to simply
press the plus button. Now, double click on
your layer and call this blockout pieces. Safe. And then we can nicely move
this one to the side and we can go ahead and we can right click and art the
selected object. Now, with blockout pieces,
because they are modular, what I do like to do is I like to go ahead and
press Add a pivot. And then when I've
edited my pivot, I like to go up here
and snap to points. The reason I want to do this
is because I want to snap my pivot to the very
corner over here. There is a very specific reason for this because now if I go outside of Add a pivot
and go to grid snapping, I can very easily snap
this to my grid over here. You will not be able to Is that correct snapping? Yeah,
it is correct snapping. It's just that this
grid point over here is probably
still won or not. 50? No, no, that's fine. It just looks a
little bit strange. In any case, we are now
properly snapping to the grid, and that's how you can later on very quickly, for example, hold Shift, just like that, you have perfectly
matching up pieces. And that's the goal
of modular workflows that they are all
perfectly matching up. Okay, second piece is going
to be over here our window. We know that this
is 40 centimeters, so we can go ahead and just 160 centimeters for our window, and then we will include those
little plates over there. Knowing that, we can go
ahead and create a cube. We can make this
160 centimeters. This one, oh, sorry, the X ten again. I mistyped ten again. And for the Y axis, yeah, you know what
at this point, we can just well measure. So 200, let me just turn
on grid snapping 1 second. So add a pivot, snap like this little point, turn off added pivot and
snap the grid. There we go. Okay, so 200 was
not too far off. No, wait, 200 is perfect. Yeah. Yeah, yeah, yeah, no, no. Of course, that makes
sense. That makes sense. The only thing is that I specifically did not just type it because I wanted
to do the door. That's why it makes
sense. Okay. I am having a brain freeze, no problem. For our window. So this is our window,
but it is halfway. That feels a bit logic. But I can remember
seeing you know, like these windows
probably look cooler. Oh, yeah, here, see. They look a little bit different,
all of them. There's another thing in here. So, there we go. See?
Here, we can see. So this is almost like
a little extra block that they sometimes
place on top, apparently, just
to measure that. In that case, we
are going to use this window as a
reference mostly, or we can just go
ahead and we can find. Yeah, I probably shouldn't
go from that one. I should use my original
reference for the blockout. I'm lost. There I am. Okay. So for this window, if I go ahead and at this point, I need to decide how high
our chairs are going to be. We can pretty much guess
if we have a look at this. So if this is what was it
two meter, 1 meter 90. If this is 1 meter 90, that means that over here, it is probably like 95, which means it's
probably going to be like like 1 meter 90. Probably 1 meter? Let's give this a go. Let's
just try it out. At this point, we
need to guess mostly. So on the Y axis, let's say
this just like to 20 and 20. And then on the Y axis, let's start with 100. Now, based upon this 100, I'm going to once again add a pivot and just snap
it back to the grid. Yeah, you can actually do this really quickly if you
don't have to say it, and then I'm going to go ahead and I'm going
to move this, and I'm going to
basically look at my reference and have
a guess over here. So 100 is not enough. It's too much. I think
80 is a nice value. So we have 80, and
then based upon that, we can fit whatever
we have in here. Can also have a look like
over here, like a door. So yeah, I feel like
80 would be logical. Sorry if I just take my
time for this important. Because if we can still
move it later on, but it's going to
be a bit of pain. This is actually a
really good reference. I'm going to use this one. Okay, so if this
is going to be 80, we can go ahead and
we can basically say, for this one, let's add a loop and let's add this
loop exactly on the 80 line. If you want, you can
do grid snapping, and then when you
place your loop, you can place it and then
snap it to the grid. If you really want
to be precise. And then at the top,
it looks like it comes down probably around 10
centimeters from the top, which means that I'm
going to place my loop. Let's see if this is my top, I'm going to probably place it. I don't know. This feels maybe like I know what this could
work. This could work. Let's do this. And now we know about our
scaling for this one. So I'm just going to give
a little trim around it. So I'm going to
select these two. I'm going to go ahead
and art connect and it's still set to the
original settings. So let's art connect like this and then go ahead
and just hold J. And with J, you can do
some snapping sometimes. You can see it
over here, like it snaps with 1 meter increments. So what I can do
is I can hold J, set this to 0.1, and that should mean
that it just does like in 10 centimeters or
something like that. And I'm just doing
some even snapping. Probably this one. This
probably looks correct. Now, at this point, we have over here our window. I'm
going to delete it. I'm going to shift click and add some bridge
points over here. So just select your edges. At those bridge points. And knowing that, I also know that now our doors and
everything are not going to be wide enough because
that's the kind of stuff that you can notice when you start
adding more props. But what I'm going to
also do is I'm going to go in and angle this one up. So I'm first of all, going
to change the width, and I'm going to set the
width to probably 15. Let's except for this one, let's shift click, and
let's go ahead and detach, not detach, extract phases. And what this basically
does is it will just separate this one. So I want to I lost I lost all of my transformers.
That's a bit of pain. In that case, set
this one to like 15. Is that a right scaling? Maybe even 20? No, let's do 15. I'm not sure. I'm not sure. I kind of want to do like
uneven numbers like 18 or 17. But I'm not sure if
that would make sense. Yeah, let's just do 17. I think 17 feels better. And I'm just moving this up to indicate that this
is the window. And then for this piece,
because we lost all of our unfortunate points, we can go ahead and we can
just do some easy movement, and I'm just moving
it like this. I'm not too worried
on the outside because we will most likely literally remove the backside because we only have an inside. So we now have a window
over here, so that's fine. That's already enough for our blockout to have
something like this. And then what we can do
is in our next chapter, we can start at just
doing our chairs, very, basically, and then the top
bit, and then we, of course, need to decide on the
actual width of our metro. So let's go ahead and continue with that in our next chapter.
4. 03 Creating Our Blockout Part2: Okay, so let's go ahead and
continue with our blockout. So we now got our window done. Now what I'm going to focus
on is over here our chairs, and we are going to do them with two pieces
at the same time. But for the blockout, it's
going to be very easy. So first of all, we kind of need to guess the
height of our chairs. For this, what I like to do
is I like to edit my pivot, turn on point snapping and simply snap my pivot to the top. Because this way, whenever
I scale to like 60, it scales it from the
bottom because it always scales from the
point of your pivot, at least when you are in
your world mode over here. So based upon that,
we need to have some space over here for
grid, and it was 80, so I assume 50 because that means it's hanging 30
centimeters from the ground, which should be about fine. I can literally have a
measurement again here. See, my chair,
which of course is an office chair is 40
centimeters from the ground. So it makes sense
that this is a little bit lower because they
need to conserve space. And 30 centimeters
feels logical to me. See? It just feels like
it's a bit more logical. Now, next to this, we can go ahead and we can
move this over here, and we want our X axis to be 80. It feels very low. Oh, wait, it's four of them, but we are only going to
make two, of course. So 80. Yeah, yeah, that
makes absolute sense. So 80 will be two of them. And now I'm just going to
like a general shape of my chair over here by selecting
this face. Let's see. I'm basically just creating
this shape over here. So I'm selecting my face. I'm going to decide the
thickness of things. I don't know if we can
do that on the grid probably not because this
is probably too thick, so I can try and
sell it to a grid. But I think I'm just going to go a little bit more old school
and just go off grid. So let's do something like this. Let's move this
forward. So let's see, we are moving this forward
just like in our reference. Up until this point, and then we are
moving it out and we need to decide how far out, but I will go ahead and do
that a little bit later. Now what I want to do is I want to move this down a little bit. And let's just click on this
face and press Control B. Because if you do Control
B, basically means bevel, and we can just very quickly
add some segments like this, just to indicate that
this really is over here, see, that this is our chair
or seating or whatever. Now, for the extension out, Tata have look it's over here. So if you look at thigh, so they're probably midway
from this point of your leg. And if you do not want
to measure yourself, you can literally go ahead
and you can grab this guy. You can hold J and
rotate him 90 degrees. And then roughly where
his *** is supposed to be on the chair, you
can say, like, Okay, so if this is here, I might want to go ahead and, like, push it out a bit further. So that when your
knees are rotating, which, of course, I
cannot do because this is not a rigged character. But where your
knees are rotating, it can be fairly comfortable. But yeah, you can see over here that it's even overshooting. So you can see that
they will conserve as much space as possible
with this kind of stuff. So this looks about white. Great. We have a vent below it, and the vent, I'm just
going to go at and again, use a basic cube. For this cube, I do not need to have any very specific
measurements. I think the x is
going to be cavity. Yeah, yeah, see? So like 70. And for the rest, at this point, I'm not in the mood to do any
very specific measurements, so I'm just going
to select my faces, and I'm just going to move this. So there's a little
trim down here, which is going to be
on our actual door. And then it looks
like it has, like, a little bit over here, and then maybe like
quick edge over here, and then it moves this out. And then at the top, it looks like it
does the same where it grabs this and
just moves it down. Et's move this. And
I will, of course, do this nice and precise
later on right now. Here, this is not
even close to even, but that does not matter. It's just that this is
going to be like our yes, this is going to be
like our venting. The vents are
actually really close together when I look at that. I do not know if I have any
other reference for this. I don't think so. In that case, whenever I don't have
a proper reference, I'm just going to guess,
and I'm just going to guess that these events are
actually closer together. But then over here,
they just made it a little bit shorter
or something like that. So instead, what I'm
going to do is from 70, I'm going to go to
probably like 80 Well, let's do it like
76, for example. And also, just make sure that
you placed it in center. So 76 should be fine. Let's try like nice
places into the center. There we go. That
should do the trick. Okay, so that's our
seating ready to go. Now what we are going
to work on is we are going to just figure out well, actually, yeah, let's first
of all, figure out the width, and then we can do, like
the top piece later on. So for our wit that is
actually a tricky one. I'm going to have a
look online and see if I happen to
find some metrics, and else we can
guess, over here. We can guess like 40, 80, so 16240? Yeah, maybe. Yeah, so that feels
like 2 meters 40. Let's try and create a
simple plane over here. And I said it's to
240 by 240 by 240. Here we go. Let's get rid of
our subdivision segments. And let's have a look.
Doesn't make sense. Kind of makes
sense. So it's just going to be like a
nice little square. And then the square, yeah, we just place the square. It might be a little bit uneven, but we are just going
to place the square. And if I go ahead and, like, temporarily just like
place it like this, and the only reason I'm
doing this is because I want to move this guy like over here, like he's waiting for the door. I want to go ahead,
grab all of this, hold Shift and clone. And then I just want to go
ahead and I want to press, let's grab these pieces over here and press
combine and you can find your combine in the
mesh and the combine. And let's grab
these pieces and do combine and the rotate
them 180, exactly. They should still fit into
place because when we combine, or not, in that case, reset your PIV point. I expected when we combine it that they are in the center. Oh, wait, they are
in the center, but because of the chair, I will need to move it
back. That's no problem. See? So because the chair,
it moves the center point, so we need to move it back, but the rotation will be exact. Now what I'm going to do is I'm going to move this one over here to basically have a guess and see if we would have another space because
this still feels like there's too much space in here. But actually, who knows? If I go ahead and I will
just temporarily do this, where I just go
ahead and clone it, and then I'm just doing a um, do a shift D because
oh, I messed it up. So basically, right
after you move it, right after the old shift and clone press Shift D
because what it does, it will basically
repeat the function. So with that, what we can
do is we can, for example, very quickly move this around, and this is great for just
doing some measuring. I just double click, shift right mouse button and extract these faces in order
to separate them. Go in tool settings, and reset your pivot and now you
can also go in here, clone and do a quick
Shift D like this. And then we can also do some measuring and just make
sure that everything fits. So here, it looks
like we might want to move some small stuff
around later on, but for now, this
should be fine. So we got these
pieces over here, and then I'm just going
to go ahead and shift. Sorry, you do not have
anything selected, shift click and
create a cylinder. And I'm just going to
create a cylinder as like a general measurement
tool almost. So we have this and then go
ahead and hold Shift and duplicate your planes,
rotate them 180. Okay, so we need to go
ahead and we need to, of course, make
this a bit larger. But what I'm more
focused on is I want to see if we truly have
this much space here. Or if we maybe want to move this on top of a
plane like this, like this to just make it
feel a little bit closer. I think I want to do this. It makes it feel a
little bit close, a little bit more
claustrophobic, and I quite like that. It gives an interesting feeling. So let's do something like this. And now that we have this, now
what we can do is for now, let's just remove this
pole and everything. We can get started with
the top piece over here. So let's delete
all of this stuff. I don't need it right now. Say for these pieces, I'm going to do some proper
measurements for those later on. Same over here. So we have our floor
piece now ready to go, which I don't think it
does not really have anything special on it.
It's just a floor piece. Yeah, literally does not
have anything special on it. Maybe it's cool if we just add some lines to make
it less straight. So we can do something
like that later on. So for now, select all of this stuff
and just throw it into your blockout pieces. And for the top
bit, I assume that the top bit is going to be
roughly around 30 centimeters. Now, what I want to show you is I think it would be cool
if I show you, like, a little spline tool technique that we can also use
for the modeling. And let's see. Do we have a better
reference for this stuff? Now, I guess that was the
best reference that we got because over here, it looks like it goes inward. So I feel like I
think it goes in, out, and then it
creates that splint. So just to show you, if
we go ahead and go to our site view over here,
something like this. And then if we go ahead
and go to our grid points, so let's do display and grid and set our
grid lines to be five. So that is one centimeters. What do or do we want to go
for like 10 centimeters? 550, 50 is too large. Let's do ten. So just keep in mind that
it is every two cent means, and I will just move
my window over here. So for a spline modeling,
it is quite nice. So we can use a Bezier spline. You can find it in Create. And in here, you will have curve tools and you will have
a Basier curve tool. And the cool thing
about this is that we can just draw out the
shape that you want. So I can go ahead
and click on this. I can then turn on my
grid snapping and I can say something like,
Okay, over here, we want to have it go let's see, we want to have it go out, and it will just
snap to our grid. Then we want to have it go down. Then we want to give it
like a straight piece. And now I can go,
Okay, so I need to be this straight piece
is two, four, five, six, so we are 6 centimeters and then
also six at the top, which means that we
are at 12 centimeters, and that means that we need another 18 centimeters to reach to reach 30
roughly like that. So 18 centimeters, one, two, three, four, five, or, sorry, two, four, six, eight, ten, 12, 14, 16, 18. This means that we need to go over here and then
we need to decide roughly how far
out we want to go. Let's go not too far out. And then when you click
and when you drag, you get basically this
effect. Like this. And if I just quickly press W and press control vertex here and now I can
I can still move this and I can basically decide how strong I want my
curve like this to be. And that's why this kind of stuff is sometimes handy to use. I actually IT yes Max, I use it all the
time, but in here, I sometimes need to mess around with it a
bit more because yeah, in three yes Max,
these spline tools are really, really powerful. Inside of Maya, they are good. Like, they're okay.
They are usable. In any case, what
we can now do is we can go up here and we can
set the snap to curves. When you set snap to
curves and you go back to your Bazier
curve, which by the way, I have over here,
what it will do is it will snap to this curve and it will basically
continue it. If you once you clicked,
go back to grid. We can now go ahead and set these three points up
here that we have. And now what you can see
what will happen is it will try to make it smooth because that's how
the Basier works, but we can remove that later on. At this point, this
piece is pretty much over because this is where the ceiling
is going to be, but just in case, give
it a little extra space. So to make this straight, what you can do is you can right click and you can go ahead and you can go to your
Control vertex. So over here, you basically
have these points. Right now, what is happening
is if I move this one, it will basically move
the other one also. However, if I just
go ahead and shift click and press break
anchor tangents, what it will do is it will
basically allow me to move these pieces individually, like they see so they will no longer try to match
themselves up. So this is often called a Bezier corner where it will just go ahead and
now we can move this, and I can set this to be
simply straight down. And when I do this, this is
what we will have left with. So we now have this basic shape. And this shape is probably actually already good enough to also later on turn
into a actual hypole. So having this shape now, what I can do now is
I just want to go ahead and turn this
into an actual mesh. Often for this, we first need to go ahead and press reset, and now we can also
see like over here, if we have guessed white
would like the scaling. So sometimes I will
first create a mesh, and then I might mess around with the scaling
a little bit more, and to create a mesh, I'm using a tool
that is quite new. It has been here since
May 2021, I believe, and it is if you go to create
and create a sweet mesh. A sweet mesh basically
allows you to turn a spline into like a shape. Over here, by default,
it creates like a cylinder because it thinks
you want to create cables. However, if you turn into line, it should give you
a line like this. Now, for this line, we
don't need to do too much. What I'm going to
do is, by the way, you can also over here, press
optimize and that we'll get rid of some of those
segments on straight pieces. But what I'm going to do is
I'm literally just going to select this now and
remove my history. You can remove your history
by going up here to edit, delete by type and then
history, this one over here. So this history, when
you remove your history, it will basically no longer reference the spine
that you can edit this mesh like this without it actually being
linked to the spine. That's nice thing about this. So now I can just edit this. I can get started by needing
to flip my faces because right now you can see here that the faces
are in the wrong way. So you can shift click and
you can go ahead and in here. Oh, wait. No, sorry,
mesh display, and in here, you can go
reverse, select your mesh. And that will basically
just flip all of your faces around like this. Now, there's a few things
that I want to do. First of all, it looks like that I need to just
quickly go in here, turn on grid snapping
and holding shift. And just adding a very
quick snapping like this that it actually
probably works. And just in case, let's
also snap once to the side, just in case we ever
need to move it down. Now, having this, I
can go at scale this. And then when I scale it, I have a better sense of if this is going
to be large enough. If I go ahead and temporarily just scale this up quite a bit, I can then go ahead and
I can compare it with my reference to see if
this is large enough. And then what I can
see is that it does not feel large enough. Let's turn off our grid faces. Here, it feels too small. I feel like it needs to be more. If I go ahead and just do like a general scaling over here. Okay, that might be a
little bit too much. I feel like maybe something like this would look
better. You see, yeah. So scale like this. So
if we go 50 or sorry, 0.1 0.15 in our
scaling over here, I feel like that looks
a little bit better. And for this scaling, it doesn't actually
have a proper scale, so we cannot just set
this to 80 because the transforms have been messed up because it's from spline. Splines, they do not really like the way that
the transforms work. So in that case, we are just going to go
ahead and we are going to guess and we are going to pretty much do
this by going in here. It's going to sit
view over here. And I'm just going to
go to my vertex mode, select all of these vertss,
go to grid snapping. I'm going to snap
this over here, and it is often 80, right? So if we do, like, Yeah, because we do increments.
It doesn't really matter. I just need to make
sure that I have enough space for my advertising, and you can see that the
advertising is actually longer than this piece.
And that's the thing. I feel like it's almost like it's like
one piece and a door, which is a bit of an
interesting metric to use, but I guess that
we can use that. So it is going to be
one piece and a door. So I guess here, yeah, we can always change
it later on if needed. And now what I can do is I can also go quickly to my side view. And in here, just turn
off my grid snapping. I want to start by just
moving this in like a fairly decent
position like this. And then for the top bit, I just want to go ahead
and I just want to move this on
the god like that. And by the way,
we can get rid of this little line by
pressing Control Backspace. Delete will get rid
of, in this case, it got rid of the line, but it will not get rid of
your vertices over here. However, Control Backspace,
it will get rid of both your line and
your vertices. So always just use
Control Backspace. Okay, that one took a little
bit longer than expected. But okay, that one is also done. It means that now for the top, we can go ahead and we
can use this plane, who J rotate it. So if this is going to be
the top plane over here, then the only thing that I
need to do is I need to go in and add a double loop, so a connect loop over here. Oh, that's actually
pretty perfect. Maybe I'm going to scale
it out a little bit more. So go ahead and press Enter. Sorry, try it again. Enter. Scale this out
a little bit more. And I don't know
exactly what they are. But they do. Oh, having
lights in between here that could help us quite
well with the lighting. Oh, so that's why
they do this stuff. I will have a think about that. This could actually
help quite well with our lighting to give us some
more interesting lighting. So we might use
something like that, but I'm not sure yet. We can always add it later on. In any case, for those pieces, what you can do is you
probably know about bevels. So bevels, you can
split the corner into two to give it basically
soft the corner. However, the bevels, if you do Contra B and do them
on a flat surface, they will simply split
your line into two, which means that you can set the fraction and you
can send to like 0.15, for example, or that's
a bit too much, 0.12. And if you then go
ahead and press W, you have now split
your line into two, ready to do a quick
extrude, for example, which I do to indicate that there is
something here at the back. And then I just remove the rest. So here you can see,
simple extrude, and now we also have a ceiling. Now, in our next chapter, what we will do is
we will go ahead and we will just create
these little poles. And I think once that's done, we will just like
create overweight. We need to create the backside, and then we will just set
up like a blockout level inside of Maya just to make
sure that everything fits, and based upon that,
we can tmax our fixes. So as you can see,
not too many pieces. Let's go ahead and save sin
and let's continue with that.
5. 04 Creating Our Blockout Part3: Okay, so this
should hopefully be our final chapter
about blockout. So I'm going to go
ahead and I'm going to so we've done this
stuff, this stuff. I'm going to create all the
poles to get started with. Now, this one, I want to
create a base like this, but I don't really like
the tops that we have. I like this top over here. So yeah, let's actually, let's replicate it from
this one over here. Think it'll look a little
bit more interesting. So this one can just
be a simple cylinder. It's a very small cylinder, but let's just scale it up
a bit more. There we go. Oh, how am I going to figure out exactly
the thickness I want? I guess I'm just gonna guess. Let's turn off my wife ring because else it becomes a
bit difficult to guess. So if I go for
thickness like this, I don't know two,
thickness of two. That feels pretty good. Two centimeter
diameter? Let's do 1.8. 1.8 centimeter diameter. Yeah, that should
do the trick. Okay. So this one, we
don't need to give it any details yet. We
can do that later on. So for now, just
move it like this. There we go. It doesn't even need to be exactly
in the center yet. It just needs to be a pole. Now, next this, I
was going to go ahead and I wanted
to make two more, we have a side one over here, and we have a top
one that basically goes in between them. So these ones are a
little bit interesting. We also have, however,
these ones over here, which might also be interesting, and it's more of
like a larger flow, but it just doesn't
have a side one. So okay, I guess I will do
this one, then in that case, merging it together here is only going to be a bit interesting because it means that this pop will become a
little bit more bespoke, so it will be a little bit more unique because we need
to have it always in, like, a specific location. In any case, for this stuff, do I have to by any
coincidence, a better image? Of exactly how this goes, Okay, goes down and then goes
down here, then goes up. We are going to use
splints for this, so we can go ahead and if we let's get rid of this
guys get start with, let's go to, like,
our side view. Here we go. Okay, so
this is our side view. I'm going to go to my
display and my grid. It's really annoying that
it sometimes just does not register that I'm actually
selecting the settings. Let's do two
centimeter incumbens. Yeah, 2 centimeters should
do the trick. 1 second. I accidentally closed my
reference on my other screen. Okay, let's do
this. Basier curve. The curve is going to be. One of them is going to be here, but I'm going to start
with the lower one, which is just on the level of my off
this piece over here. Let's do grid snapping. Actually, Bezier curve. Sorry, let's delete the curve
that I accidentally place. I'm just going to move it here, and then I will move
it back later on. So it looks like it goes here. Then here we want to give
it maybe like a tree by tree nice rotation like this. And then this one it's a tricky You know what I'm
going to do is I'm going to this one will
only move up, right? Yeah, this one
will only move up. So what I'm going to do is
I'm going to place it here. And then I'm just
going to press W, and then I'm just
going to move this all the way to the
top because else, it's a bit tricky for me to see exactly where I need it to end. So here we go. So
we are moving this probably somewhere
along here to the top. S, little bit higher looks like. There we go. So one more. Okay, so we got that one
that goes like this, and then we want to
have another one, and that one goes just
above our seating. It goes a little bit straight. Then it has a slight curve. I don't know if this is enough. No. Let's go ahead
and press backspace. Backspace reset
your positioning. Let's go and do this, and then it will go sideways. I will fix this later
on. It goes like this. Okay, so this is very bad, but that's what we're
going to fix now. So this one, I need
to move one back. And this one I just
need to simply rotate a little bit that it is
a bit more straight. And over here, I'm just going to turn this into a Basier corner. If you shift right mouse
button, then Bezier Corner. I will allow you to turn this
back into a Basier corner, which you can then go ahead. Oh, turn off snapping and move it to basically give it a bit more of like a movement. Same over here, I
can go in here. I can shift click Basier corner. And then I can move this around. To make sure that
everything just nicely fit. There we go. That should
do the trick for now. So we got this shape over here. That is totally fine.
That should work. And the shape is basically
going to be how long? One, two, three, four, five, six, seven, eight, eight long. So pretty much
pretty much window and two quarters of a door. So if we go ahead and go
over here, we have a window. And what I'm going
to do is I'm going to slack my door and
just move it over here. And we'll see how
long we are actually going to make this. This
is just a blockout. But basically, for these pieces, what we can do is we can
go ahead and we can set this to create sweep
mesh over here. Looks like that we want to set our scale profile a little bit thicker to
match up with this poem. So yeah, there you can
see that we can very quickly just create
this base shape. And then what I
wanted to do is I wanted to reset my pivot, and this one is going
to be at the Oh, make sure that after you've
selected it, do two things. One of them that I
almost forgot is go into your sweet mesh creator over here when you
have them selected, turn on optimize, and
the second one is to remove your history so that we can
properly move it down. So one of them is
going to be here, and the other one is going to be over here at this end. Yes. So we have those two pieces. And then the lines of
these lines over here, I'm actually going to
create a folder or a layer. I'm going to carve
backup back up. Okay, and assign the
selected splines. Also this old one over here. This way, we can save because
we can most likely use those later on for
our other pieces. So now, this one is
just going to be a cylinder with some extra
splines around here. Because that one is
going to be merged down, what we are going to do is we're just going to go ahead and simply grab this cylinder over here because it's
just a blockout. I'm going to hold
J and rotate this. Then I will most
likely notice that it is still too
thick, which it is. But that's no problem.
As I said before, it's just a blockout, so I'm going to scale this
down a little bit. So it sort of fits here. And it's mostly going to be about finding like
a nice height. So I think, if I go
for like a side view, I think a height
like this, which is roughly the same
height as the door. Yeah, that should be enough for people to hold their hands. On it, and then they
can hold themselves. So you basically move this down, and then you can see that
there are three or no, sorry, there are two poles in between, for which I can just
go to my Etche mode, select these etches and just
go ahead and to connect. That is two. And this means
that it is perfectly divided. Once I've done those two, I
can go ahead and I can press Contra B and give the very
small fraction of 0.0, not even five, 0.03 maybe. Even lower, actually, 0.015. Let's do something like that. Then just a matter of
selecting, for example, this side and holding shift and selecting this side
because since it's a blockout, it does not even
need to be round. I just need to have
something here to indicate where the pipes are going to be, as you
can see over there. So that one is going to be
a little bit more unique as you can see, but it will fit. So that will take care of
those pieces over here. Now, next this, let's see. So we've done this. We've done
the ceiling, those pieces. We are going to do the backpiece and we just need to go
ahead and we need to, the backpiece, we have
the floor piece done. So for the backpiece, I
was going to change it. I was going to use
something that's like this. And this is done more
in the UK, I think, while this one is
more in the US, although these ones
look a bit like the UK. But I quite like that look. So they will be next to a door, which means I'm
going to temporarily move my floor over here. I will also move
this one over here. By the way, what
you can do is you can go ahead and you can copy over your actual what was it? Zaxs, I believe, and paste it in so that you
get the exact same positions. So just Control C on the ZX and control and then Contra
V on the other Z axis. In any case, this one, we're going to go
for a que because, as I said before, I want to give this
like a little change. First things first
that I'm going to do. I'm going to grab this cube, and this one I'm going
to make pretty much as large as the door like this. The reason for that is because
I want to have one short, but one that sticks out longer and that
actually hits the door. I know that over
here there's like a slight offset in the doors, but I do not see this offset anywhere else in
the actual metros. So I do not want to give it that offset because it
would mean a lot of rework to get everything
to work properly in the end. So instead, I'm, first of all, fitting this one and this
one just basically will replace Oh, here we go. So this one will replace
the actual seating. I'm having a bit of
trouble speaking today. I will try to speak
a bit slower. But yeah, blockouts are often the easiest thing
to do, just a bit boring. And this one I'm going to,
I'm going to stick out. And I think I will stick
it out if I go over here. Yeah, I think I need to
go ahead and make that a little bit further like this. Now what I want to do is I want to go ahead and duplicate this. For this one, I want to go
ahead and move this one back. And now it is a
matter of me deciding how big I want to have
the door in between, and I do want to have this
door a little bit bigger. And the easiest way
that I think to measure this is to go ahead
and grab another cube, look at it from this side, and simply scale the
cube up a little bit until I get the
thickness of the door and then move these
pieces carefully back. Because this way I don't need to do any type of weird scaling. I can just go ahead and do this. I can even reuse this cube. To move it back all the
way up until this point. So this will be
the door later on. And this door is going to be not until the very top
would not make sense. I think I want to have the
same scale as over here. I can just quickly
move my door over here and then set the scaling. So it will have the same
scaling as over here. The width can actually
be a little bit less. And then for these pieces, what we can do is for
these two, move them back. And then for this one over here, just add a very quick spline, and what we will do is we will figure it out in our final where we will have this
nicely extruded over. So that gives us
a look like this. And then, of course, don't
forget that you get this piece over here and it will
all nicely fit together. Okay, I think those are all the pieces
that we really need. There might be some
very small extra pieces like those extra tiny props
over here that we will add. But for now, they should
be doing the trick. So what I'm going to
do is I'm going to go ahead and re grab these pieces, add them to my blockout pieces. And now what I want
to do is I want to go ahead and I want
to press Shift D, which will basically duplicate
your pieces into place. And then I want to
add another layer, right click and
art these layers, and just call this blockout underscore setup and press Okay. So we have a backup of
our blockout pieces. But now, what we're
going to do is we are going to actually set
up our environment. Now, this does not have
to be very difficult. First of all, I will
breeze over this quite quickly because it's all
reusing the same techniques. Add a pivot, throw on our snapping and snap this to
the very corner over here. Now once we've done that,
if this is the end, we can go ahead and we
can hold Shift and we can turn on snapping
to your grid, sorry, and then hold shift. Why does it not allow
me to snap to my grid? Is it because my grid is? Oh, it's because
I'm probably off grid and my grid
is also too small. That might be it. Yeah,
I think that is it. So let me just quickly go back on the grid
simply by moving this. There we go. So we
are now on the grid, so everything just kind of like needs to fit on this grid. And then if I hold shift,
I could snap again. And I want to be
one, two, three. Let's do four doors. So if we go ahead and
do something like this, so let's do one more. Where is my door, actually? Let's go back into
my blockout pieces. For some reason, the
door did not duplicate. Let's try it again, shifty. Okay. We now have door assign
it to our blockout setup. Hello, look at our outliner and see exactly why
this is happening. It looks like that
for some reason, it has grouped these
meshes together. I do not want to have
it grouped together. So what I can do is I can
select all of this stuff, and I can go to
edit and ungroup. Oh, sorry, let's just
select the top, dit. Ungroup, there we go. So
we need to select the top. These are just transforms, so I don't know what
those are doing. For these pieces, let's
also just do an it ungroup. I sometimes accidentally
press this, but this can actually
cause some problems. Here, see now, it should work. So we have our original, okay? And we have our blockout
setup, there we go. Now that does work.
That can happen. So window door. I'm just going to press
combine on this door. I'm going to go ahead and
go up here to isolate, and that will basically isolate your selections that we can now very easily do
an added pivot, and then we can snap
the pivot to points, and then we can snap this thing. Well, it should already
be on the grid. So what we can do now is
we can go ahead and hold Shift and clone
this out like this. We have this piece, so one, two, you actually know what, let's only do three
doors because SA becomes a very large piece. Three. Let's go ahead on hold
shift. Do this one also. Now over here, we
have this piece, which we can also go
ahead and combine and then reset your pivot to make sure that it
is in the center. For this combination, I am going to actually grab
these back pieces and just turn off my grid snapping and move
them back like this, just to make sure
that that all fits. And then this one I'm
going to duplicate. I'm going to hold J,
and I'm going to rotate this exactly 180 degrees and then move it a little bit so that it probably fits back. A And I think I will just move it up
until this point like this, although we do have
the flexibility to move this back if we want, but that will probably
cause problems over here. Okay, so we got this piece
over here ready to go. Now what I want to do is
I'm just going to go ahead and move this one over here, and then I'm going to once again isolate just move
the pivot point to this point over here,
here at the very tip. Turn on grid snapping, wiggle it around to make sure
that you are on the grid. I am now, and then I'm
going to hold Shift, and I'm going to just go
ahead and I'm going to duplicate this over and
over and over again. So that should not
really be a problem. These are also ones that we
can very handily change. And we will also then
one of the pieces will just not have
any advertisements, and it will just be able to, like, snap like this,
and then later on, we can add some
extra pieces to make it really nicely fit together. Now that we've done that, over here, we have our splines. And for splines, we actually
don't need we don't need these two
because we are going to duplicate this
again over and over. No, wait, sorry,
we do need these two because we have
a door in between. So let's go ahead
and hold Clone. I think what we need to
do is we just need to go ahead and combine this, reset my pivot like this, turn off snapping this time. Okay, so this one is
going to be on this side. Let's see. Door door door. You know, roughly door. Okay, so that one is going
to be on those sides. So we have two of those pieces, and then we have just
the doors in between. And then later on what we can do is we can go ahead and we can just like clip one
in here like this, and then we'll just
make something to basically keep it probably fit. Now over here, these two pieces, I'm just going to go ahead and I'm going to A claps those, and I'm going to have them
sitting nicely on here. So if we have this
one, I'm going to just hold shift
and move them, and then I do a
shifty four times. So it basically all needs to
fit in between this point. And if it doesn't,
then we know that we need to move some stuff. So over here, see, we do not
really have a lot of space. Now, the easiest thing that
we can do for this is instead of changing all of these pieces over here, we can
also just, like, make the width of our
seating a tiny bit less by just simply scaling it
to like 0.95, for example. So it's a tiny bit less
and that will just give us some general space everywhere
where now if I hold Shift, Shift D, Shift D. Okay, that actually adds a lot. So let's do 0.98 because
over the course of four, it adds a lot. Try it again. Shift D, shift D. There we go. And now we can select
these and we can nicely place them
into the center. Over here, this one will
most likely be cut in half, so we'll just have a
single one on that side. And for the rest, it will just be a
simple matter of copy pasting these pieces around because just like
you can see here, they just re use the same models even in real life over
and over and over again, and maybe we will have some special things
around the windows, just the art on top of that. But in general, that
looks pretty good. So if I now go ahead and,
if I also go in here, snap the points at a pivot, snap it to the top,
snap the grid, and then first of all, do the first movement
and then hold shift and just duplicate this
a bunch of times, and I will just leave
one of the sites open so that we can look through it. And then what we have is we have a center point over here, and the center point
is two per view, which means that it's
most likely going to be probably like one over
here, one over here. And then same over here. See? And then if we have a
look at it like this, for example, we now have our
metro station ready to go. And then, of course, we would have the
other side over here. But in general, that is
looking pretty good. So that all seems
to fit just fine, at least to a point where
we can easily change it into our final mesh if needed. So I'm going to save my scene. So now we have our
blockout setup. Let's go ahead and just
add all of that to this. And then we just
know that over here, all we need to do
is for the seating, I'm going to scale
this down a tiny bit. So what was it? I'm
going to do like 78. And this 17654, 74 over here to also
make it a bit smaller. And that should
just do the trick. And else, we can
always just scale it a little bit more later on. Perfect. I'm going
to save my scene. What we will get started
with in the next chapter is we will get
started by turning these models into
the final models. That will be a very important
chapter because this time, we actually want to go
ahead and go all out with the modding since
we are using Nant, so we can really push
like the polygons. So we are just going
to go ahead and we're going to start with
the door and we're going to make it nice and hi poly and just look
very interesting. So let's go ahead and continue with that in our next chapter.
6. 05 Creating Our Final Door Part1: Okay, so we are now going to get started by turning our
models into final models. Now, a few key points to
keep in mind with this, and that is how we
are actually going to set them up inside
of Unreal Engine. As I said before, I want to get a bit of,
like, a clean look. By the way, I really
like this detail, so I'm going to add that
because it looks really cool. But in any case, I want to
get a bit of a clean look. Because of that, I
need to have a tink. Am I going to make a unique texture for
every single model? Or am I going to do some
special shaded work inside of Unreal engine to save me a lot of time and basically use tilable textures
along with that. Now, when I look
at this, because I want to go for
quite a clean look, I think it is actually
easier for me to do some shader work
because I don't think there will be much of a difference
in terms of quality between me creating
unique textures in sub spainter
which by the way, will take two or three times
as long or me creating some tilable materials where even the metal probably barely even has to be
a tilable material. And doing this shadow
inside of real engine. So knowing that, the main goal for us is to just make
it look like real life. Just make the actual mesh, look as close to real
life as possible. That is just a general idea
we need to keep in mind. We don't really need to create any shortcuts anymore
because, of course, we are using Nanite and forsia. So it's just going to be
like adding some extra mesh. So if we see this
kind of stuff, like, it's really cool and I quite like just going
for something clean, not this clean,
so we're going to go a little bit less clean, adding some extra general
dirt and everything. Of course, we are going to make our textures feel a
little bit more defined. But for the rest, it is quite a good idea to go
something in this direction. We are going to get
started. With our door. So for our door, I do have
a few references over here that we can use just
to in general have it. Our door, we only pretty
much need to make one side because the other
side is just a duplicate. So let's go ahead and
just jump right in. So over here we have all
of our blockout pieces, and basically all I need
to do is I need to grab. Let's just grab
like a doorframe. I'm going to go ahead and
press ChevD to duplicate it, and I'm going to
create a new layer to which I add this duplicate. This duplicate will
be called door. And this way, we can
have full focus on just this piece over
here that we have. Now, with our door, I
am going to go ahead very quickly edit my pivot
and set it to the corner, and this is just
that I can properly set this on the grid like that, and even at 000. So for our door, let's have an actual look at this,
how we're going to do it. I want to create a frame
like this because it will create a nice divider
between the two pieces. Yeah, you can even see
the frame over here, and then we have a metal
piece sitting over here. Now, I want to see how often that metal piece comes back
because it feels like that is the only train in which I avoid here I see
also like a metal piece. Okay. So yeah, so we
have a lot of metallic. I am curious if rate racing
will look better than lumen, but we'll see because
rate racing is sort of deprecated
in null engine five. But okay, so we're going to
go for, like, a metal piece. So let's get started just
by focusing on the door. So for that piece that
we can see over here, this piece looks quite easy. We are basically
going to go ahead and we are going to grab a cube, scale it up a little bit
and just move it over here. So yeah, as I said
before, remember, we are going to go ahead and we are just going to add geometry. Now, we are going to
use a technique in which well, it's not
really technique, but basically, inside of Maya, if you press three, you can automatically smooth
your mesh 1-3. So we are going to
use that technique, and we're going to use it
in a way that we actually can unwrap just our
low poly is model. And then once we start exporting, we can
set this to three, convert it to our high polymsh
and then we can export it to get all of the glory
of the resolution. Anyway, in this case, what I'm going to do is I
have this piece. I'm going to pretty
much move it down, and I want to go ahead and
I want to first of all, decide on this side, how far, I want to stick this
out, and I'm just going to follow my
reference over here. So if I have a look and make sure to just have
a look from a distance, also, I feel like
something like this. And yeah, so just having like a thin strip sitting on top,
that looks pretty good. I'm not going to
make it too thin because if I make
it too thin in TD, it will be difficult
to even see it. After that, we have a strip, and then we have basically
a piece that goes inside. So we do need to keep that in
mind that we have a strip, and then we have a corner. The way that we can do that
is we could go ahead and make this very precise tool just for this one piece by
adding another cube, pressing F to zoom in and just simply scaling
this cube up to this side to this
size over here. And then I move it
over to this size, and that way I can
make sure that this side is exactly the same. And for the rest for outside, I'm just eyeballing
it a little bit. So we're going to
do this. And then we have our main mesh later on, which I will most likely,
I think we can use it. I don't think I need to remake, but in our main mesh, we will go ahead and we will
extrude this inwards. So having this piece, what I'm going to do
now is Eggs over here, so it looks like that
it extrudes out, and then it basically
has a little rubber bit on the end and that's
where the door is behind. So what I'm going to do is I'm going to go
ahead and I'm going to add a edge loop over
here, a split edge loop. I'm going to add it roughly just behind the
corner like this. Then we have this
piece over here. And what I'm going to
do is I'm going to add another quick edge loop, probably, let's say,
like over here. And I'm going to extrude, holding Shift, extrude this out. So this is the
general shape that we have because then what we can do over here is we can
go ahead and we can give it like a
little rubber thing. Now, if I have a look at this, I'm not sure if I
even need this if you can still see
this part over here, because if I'm going
to go ahead and I'm going to add like
a rubber bit here, yeah, I can just as
well get rid of this. Let's go ahead and get rid of this piece over here
by pressing the lead. And I'm going to
go ahead and just going to extrude this
out a little bit more to give it like that little rubber piece
that we have over here. Okay, at this point, let's
go ahead and isolate. Delete this backface, and let's select these two
edges which we can then go ahead and we can
bridge them together. So this is like the general
shape of this piece. Now what we're going to do
is we want to go ahead and we want to turn this into
like a hi poly mesh. Now we can decide to
do this in two ways, or we can actually make
it like a round edge, or we can use the technique
that I just told you. It kind of depends on our model. So for this model, I think
it is actually easier if we just go for a round edge
because this model, it does not technically need a top and it does not
technically need a bottom. So if I just go ahead
and get rid of that, what I can do is I can go
ahead and I can select, for example, let's start with
these two pieces over here, and I can press Contra B and
just add some more segments. So this way, adding some more segments like four, for example. And if I have a close look, let's go fraction of 0.15, I think, to make
it a bit larger, that will look a bit nicer. Now, then for this
piece, what I'm going to do is I'm going
to go ahead and do another contra B and
just do it like this. 0.5. Over here, however, one thing that I do notice is that I want to
actually push it back. The way that I can very
easily do this very quickly is by adding
a loop and moving the loop all the way to the
side over here until it is just in front and then just
move it pretty much on top. It's a bit of a cheety way
of doing it, but this way, you can just move this back, and often you will not really
notice the difference. If you actually manage to
notice the difference, you can always go ahead
and select this face, go to scaling and scale it flat. That way it is perfectly flat. Now over here, what
I can do is I can go ahead and I can add let's see, another few loops on this
side, segment three. And then here at the end,
I can go ahead and add a slightly larger loop to make that look a bit
more round like this. Double check that
you do not have a duplicate vertice here. No, you do not. And now we
basically have the shape. At which point, we ourselves can just go ahead and we can move the shape out, and the shape needs
to go up until if we go to block out pieces, Yeah, I need to go up until the very top because that's
where the advertisement. Oh, wait. Now, if I make
it up until the very top, it will not look very nice because it needs to
go up until the door. In that case, I'm going
to go up until the door. If we go and have a look
at our blockout pieces. Let's quickly double check. Yeah, see, so our
advertisements are a bit lower. We don't really need
to change anything for that because we can do is we can just go ahead
and we can move our advertisements a
bit lower like this. And let's make it a
little bit higher. Just go ahead and
go to our door. So over here we have our door. If we just have a quick
look at where are you? There you are. Okay, so
here we have our door. So if we just go
ahead and create a small extrusion plane that we can move up that
should do the trick. So keep that in mind that we
will do something like that. So we have out of
frame. So yeah, it might seem like a lot of
work for an out of frame. But if I go outside
of my edge mode and I, for example, select this, I can always go ahead and
just press Shade Smooth, which you can find in mesh
display and soften edge. Here we go now it's shade it
smooth and now you can see that geometry really
comes out and we just have a nice high
resolution geometry. For one, we can even
now press three, and that way we go in
even more geometry. But in this specific case, we do not really need that. Yeah, because it does not really add any value to our scene. Okay, so we got this one. I'm going to go ahead
and I'm going to reset, and then I'm going to mirror it. The way I can do
this is I tend to, first of all, remove my history, and then I go to mesh, and then I go to mirror, and I just press
the mirror button because it will
show some settings. Now, because I do not want
to merge this together, I want to just mirror
this to the other side. I'm going to turn
off my cat geometry, and for my axis, I'm going to set
this to the X axis with a direction in the plus. Because doing this, I can literally just move
this over here. Now I can just
press W and I need to select it because I
need to move a little bit closer to properly move a little bit closer to
properly move this in here. And just double check that it is roughly the same,
which it is now. And there we go. Now
we have two pieces. If you want, you can go at
it and you can immediately, extract the faces of this piece, if you like to keep everything
separate like I do. Okay, so that is this piece. Now what I want to do is
I want to make sure that the transition going to the
window, how that dead looks. So over here, it looks like
just a thin metal plate. Do I happen to have some slightly better
reference of this? Because these pieces, it's a bit tricky to sometimes
find reference because who is making pictures of the walls and everything. Okay, over here. So
this is pretty cool. So this is like the frame
that is hanging around it. And then over here, we have,
just a simple metal piece. This metal piece, it just
kind of like ends here. So it ends like a
very simple shape, which, yeah, could be useful. We can actually
reuse this probably. If we grab this piece over
here and we go ahead and we delete This phase
and this phase. Once we do that, we
can double click on the back and we can
just delete all of it. And now we can just go ahead and we can
move this in here. Move this very close, something like this, and I think we want to move
this actually back. So you know what? Let's also get rid
of these faces. So this is just going to be a very thin little strip that is basically
sitting on top, and that's just going to
be our transition strip. This strip, we can move
all the way to the top. Don't forget to sometimes
just press F to zoom in. So all the way to the top,
and then we select the sides. And I want to make sure that
I do not make it too thick or too thin. This is no help. It feels sort of the same, but I feel like I don't
have I don't know, thinner. Yeah, let's make it
a tiny bit thinner. I feel like that difference, it actually adds something
quite interesting to it. So we're making it
a tiny bit thinner, and now we can go
ahead and we can also move this over
to the other side. I know that you only
need to make half of it, but technically, you can
literally just only do half, split it in half, and
then symmetry it. But there's not a lot of difference between this
way and the previous way. Now what I want to do is so this can just stay pretty
much like a whale. Over here, we still have the doors which we
need to work on. And for the doors, you
can see they just have a gutter and then on the
side, they have something. These gutters, you will
not see most of them. I just want to make it in case you accidentally see something. So if we have this, we have the gutter, and we
are going to, like, turn one of these pieces
a little bit out, which causes another problem. If we extrude this out, we will get problems
with our window because then we would also need to
extrude out our window. Because I do not
like those problems, I want to avoid them. It is a tricky one.
It is a tricky one. Let's go back to our
blockout pieces. And if I go ahead and just
press heights on my door. Okay, so if I have this piece, let's just move this over here. Okay, so this could work. So we have a little
gutter thing in here. So what if we push this
piece up into the gutter, I wonder if that
will looks strange. If that looks strange, we
can always move this down, and then it will just be
like just above the door. But if it does not look
strange, it's a win win. So let's grab this
piece over here. And basically, let's only grab, that's the thing with more
geometry that we do need to do some more precise
selecting because I only want to grab these
few pieces over here. And I just want to push
these up like that. Of course, you can just
move everything up, but I feel like it would look nicer if I do
something like this. And then maybe what I can
do here is I can give it, sort of like a transition that
it does not just clip in, but it Act has like an ending. And if I do that, I can just as well, do
a re mirror later on. So if I go ahead and grab
these pieces over here, I have this shape. And what I want to
do is I want to add a edge loop on this side. And I don't need to
add an edge loop on that side because
we only on this side, we are going to,
like, create a cut. And let's see if I cut this, I would go ahead and I
will probably move this down let's see. Let's
move it down here. I would get rid of this phase, and I would just give
it a little space so that I can then go
in and I can then, like a bevel or something
in that direction. Let's have a look.
So if we have this, I'm now going to go ahead
and I'm going to, let's see. Let's move this back
to get started. And once I've moved it back, I can select these two and
I can just bridge them. It makes it easier for me to
bridge this stuff over here. So if I have this shape, I'm going to go ahead and I'm
going to art probably like a loop down here. Yes, because if I try
to art a face here, it will just mess
things up a bit more. Let's go ahead and art
and loop over here. And we're probably going to
use this flat area over here to kind of transition it so
that now if we move it back, see, we still keep
some space left. But then in here,
it makes it feel like it's actually
going in somewhere. I'm doing this. I know that
I'm pushing the backside out. So then with the backside, what I'm going to do is I'm going to go ahead and up
until probably this point, I a quick contre B bevel, set this to like 0.1. And then I want to start by moving if I go to my top view. Sorry, select only this verts because the top verts
seems to be still correct. I want to push this back until this line becomes straight. And when I do that, we get
a little like a bevel here. And then it's just a matter of, well, at this
point, you can kind of decide what you want to do. For me, it is too
small of a detail, so I'm just going to push this
out so that at this point, when we have the
reflection sketching it, it will just look
like this, see? And then we have this tiny
bevel over here where you can decide really what you
want to do with it because, for example, with this piece, this piece over here, you
probably do not need. So if you want, you can, try and maybe merge
it together using a target belt which you can find in your mesh
tools and target belt. Yeah, you can try and
merge this together and maybe also merge
these two together. I guess that that is a
little bit cleaner if we do it that way. But
yeah, there we go. Okay, so we have this piece, so we know that we don't
need it on that side. This piece is now completely
done, I hope, yes. Those bolts over here, we can go ahead
and I don't know, those are actual bolts. So I wonder if that is let
me just quickly check. Yeah, might be nice if we
add that as actual geometry. Yeah. Okay, so these bolts, I will add as actual geometry. For that, what I'm going
to do is I'm going to go ahead and I'm going to
simply add a simple, like a probably like a
sphere should be fine. Move it over here. Now, I
am not going to go for 20. Even though we use
nanite I feel that it's a bit overkill,
let's go for, like, 12 or something
because if we need to add adjustments to this or
if we need to unwrap this, you still want to twine and
keep things fairly low. Now at this point,
I'm actually going to cut my sphere like
this and not the other way around
because else you have that sharp point that
is very visible. Then can press contra
shift I to invert my selection and
delete that invert. And at this point, I
can go ahead and I can push this in to
make it a little bit flatter and I can scale
this in and by the way, just do like a
soft select on it. And then you can choose where
you want to place this. Now, since we have enough
Jome tree that we can use, we can, for example,
see here one, two, three, four, five,
six, seven, eight, something like nine and has some extra bits
at the bottom. So what I can do is I
can simply go in here, select all of these edges, and I can try to
add a connection. Now, for more difficult jometry, the connection does
not always work, but if I go ahead and set this
to nine feels a bit high, let's set this to
eight and press Enter. This way, I literally have an instant measurement tool for myself because I
don't need to worry anymore about this
type of geometry. So I can simply now move this
do shifty, shifty, shifty, shifty, shifty, shift D. Now you can see that the shifte often goes like a tiny bit off. This is because we did not
place it completely perfect. But we can basically
move this up. Wow, we are already at 21
minutes. Time goes by fast. And then down here, what
I can do is I can do a double to make it look a
little bit more interesting. There we go. I will copy this over to this side,
but first of all, I just want to make sure that the centers and
everything are correct. The way that I can do
this is for this one, place a connection over here. That's just like a one, just to make sure it's
exactly in the center. Select these faces, Shift
click and let's go ahead and extract the pass so that now
it is its own little piece. This way, when I mirror this, I should be able to
just do a perfect flip. And the reason I'm doing this is because now I'm going
to extrude this in. And after that, I will probably move on to
the next chapter. So if I go ahead and
extrude this in, I will extrude this in up until something like this
point because remember, the backside does not matter. We are not going to
make a backside. So I'm going to go ahead and the bottom side
also does not matter. So let's delete that. Ii
will only be in our way. Now, select these two pieces, and we want to go ahead
and want to extrude this. So for this, we want
to go ahead and press Control E because we want to extrude this on
the local normal. If you do shift, you know this, if I hold shift, it will
not extrude properly. It will only extrude
properly on one side. However, if you do Control E, which is the extrude
settings and then move it, it will extrude it based upon
the direction of your face, which means you get this effect. So at this point, I can
move this quite far back, and I move it far enough
back until basically I know that my lighting will just show black inside of here, because then we will do
is we will later on, of course, have a door in here. I'm scaling this face
flat and I'm scaling this face flat just to make sure that it is properly flat. And I'm deleting these side faces because we
don't need those. We are going to
mirror this soon. So that's pretty much
it for this shape. Because the shape is
hidden behind here, we do not need to give it
any special treatment. The only special treatment
is probably at the top, where over here, you
have this flat area. But in our case, we
just have it straight. So we probably want to grab
this edge and want to give it a quick contra B at quite a low level with a
few segments like this. So then it at least does not
look like a very sharp edge. And because the
door will be behind here, it should do the trick, although I guess you can try and add another
contra B over here. Like, once again, low level in the event that we
see it like a tiny bit. Let's do 0.14. Over here, see? So
just in case that we can see the tiny bit,
you can see those edges. Okay, so let's have a quick
look over here at this side. So this frame is
going to be separate. So I'm pretty much
sure that over here. The only thing is that we have
a little trim around here, and I think that will look quite cool if we have that trim. It's a bit hard to see, so
I'm going to improvise, and I'm basically
going to do this. I'm going to grab a
cube, move it up here. And I have this idea.
I'm going to move this back let's start by just
moving this into place. And as soon as I move this to this site over
here, I delete it. So I delete the phase that I'm moving because I can no
longer see the face, so it would be wasted geometry, which I guess is a bit ironic because
we are using nanite, but it will also just make your life a little bit simpler. Now, over here, what you want
to do is you want to move this quite close to the edge. The same over here. So
this is going to be like a metallic edge.
Let's delete this. Let's delete our back face. Is that we only have pretty
much two faces left. This one over here,
which we can move back a bit and the other one. Now at this point, we want
to move this quite far back, yes, and then we're
just going to go ahead and we're going to
add an extra edge here. Let's isolate this,
and let's place this edge roughly a little bit higher,
something like this. You then want to push this
out, delete the sides. Et's get rid of this edge
down here, Control Backspace, and then do simple
contra B and push it as far as you can and
add a bunch of segments. So that will give us
a shape like this. Se a nice round shape. At this point, it might be a little bit
oversticking over here. I guess that in that case, it would be good if we just move this forward a little bit. So then I feel like here, if we go to our top view,
it's easier to see. Let's move this forward just
like a tiny bit like this. Grab these two back faces and hold shift and
move them back. There we go. So when I turn off my edges so
that you cannot see, that is at least
covered, and this will just be like a metal piece. So we have this metal piece. I'm not sure how
it will look if we also move this metal
piece over here. Pretty good, actually. So what I'm going to do is I'm actually going to just cut this metal
piece all the way across. Yeah, you know what? Let's do it literally
all the way across from here to here. Up
until this point. And now, of course, once again, I just
need to re art this. So sometimes I do this.
But I don't know. I like to keep
everything separate. I could, of course,
go ahead and, like, do it in a different way. But for now, we can delete this. We can do a quick mirror because it should be
exactly in the center, so we can do a quick mirror. On the X axis with a plus like this and set a
merged threshold to 0.01. In any case, something very, very low so that it does not accidentally merge the wong things at
the center here. You can test if it merged
correctly by pressing Control backspace and if it properly got rid of that line, then everything is all good. This piece we have now replaced
these pieces over here, we can select all
of them, hold shift and deselect the
backside, collapse this. Remove your history.
You will get used to that, removing history. As soon as you see a
lot of stuff here, you just automatically do it. And we can once
again do a mirror. No cutting on the X
axis in the plus. Move it out, press okay. Select all of it, and
you can go ahead and do an extract phases. What it will most likely
do is it will also separate also separate
all of the bolts. At which case, I'm
just going to go ahead and I'm going to very quickly select
all of this stuff, combine it again so that
the bolts are included. And now it's just a matter
of me going in here, moving this nice and close lead together a little bit
further out like that. Okay, so that's already
getting a pretty solid start. So now that we have all of
these pieces over here done, what we're going to
do next is we are going to go ahead
and work on a door. Then we'll go ahead and work on these picture frames over here, which ironically have
probably the most detail. And yeah, some of those
really small bits and pieces. I'm actually going to
do those separately, and I'm going to go ahead and, like, art those
separately on top. This is also actually
quite cool that we have a door thing, but I don't think we have
something like that. And there's a really
creepy guy laughing at us. But okay, let's go ahead and save sin, and let's
continue with that.
7. 06 Creating Our Final Door Part2: Okay, so let's go ahead and
continue with our door. I'm going to get just
finishing off the side panel. We're going to go ahead and
work on something like this. Now, this inside over
here is quite easy because it is a little clip, only the top part
you need to work on. This one over here, however, it's a little bit
more interesting to create something like this. What I have in mind is I have a mind to go ahead and
let's do this way. Let's go in here and let's grab a start with like a
cylinder over here. Yeah. Okay, so
that's a cylinder. I'm not going to make
it 20 faces more like 14 because then it's easier for me to manage
the geometry amount. Now, one thing I do need
to know is I need to know how high these
pieces are over here. So I'm just going to go
ahead and I'm going to clonee them and quickly
add them to my door. And the only reason
I'm doing that is that I can, do
some measurements. So I can see that it is pretty, this one is actually
really tall. That's interesting
that it is so tall. But okay, so in any case, this piece is almost
like separate. So this piece goes around here, and then you have like this little bar over here
that connects to it. So it is actually
quite detailed for us to do something like
that, but should be fine. Let's go ahead and first
of all, scale this out, and we're just going to
go ahead and make, like, a fairly decent oops,
fairly decent thickness. And I just want to,
have a look and then, make sure that from a distance, I can still sort of see it. So I think I'm going to
go a little bit bigger, just so that I can see it a
little bit better like this. And then once you're
happy with it, well first going to go
ahead and we're going to work on some of the scaling. And if I have a look at
this, it looks like it comes quite close to the chair. So let's do roughly
around this point. I'm not too picky about it. And then here at the top, I do want to give it
a bit more space. So I'm going to go for
probably around this point. Now at this point, we
can go to isolate. Oh, sorry, Isolate
only works per view. So let's go to isolate
to the top view, delete over here like the backside and then
double click on your faces. This Double click will just
select your entire border. At which point we
can push this out. And now we can go outside of isolate view, and now we can, like, we can move this out, and this will give us a little bit more space to work with. So let's go for
something like this. Okay, so now what we need to do is we kind of need to figure out how to create these pieces. Now, I was thinking of
that we could probably use sort of like a boolean for this to
kind of cut it out. That would probably be the
easiest way of doing this. Or we can go ahead and
we can make this as one small piece and
then just duplicate it over and over and over again. That could also be that might actually be easier because
it will resolve things. So if we go in one, two, three, four, five, six, seven, eight, nine, ten, 11, 12, 13. Let's say 15. Let's
say we go for like 15. We can go ahead
and we can select this. We can do connect. Oh, wait, connects
only work until ten. Oh, no, wait, they
do work until 15. They work until 100. That's it. They work until 100. So let's go ahead and go for like 15. Let's try it again.
15, Enter. Thank you. Okay, so here you can
see that I messed up. So let's try that again, again. Connect. Enter. Ah, that sucks. Remember how I said
that sometimes to connect does not properly
work with your edges. There isn't a lot that I found
that I can fix with this. I can remove my history and go to modify and try
to freeze my transforms. But often it doesn't
seem to matter. I don't know exactly
why it does this, here see you can see that
it still does not work. So I'm not exactly sure
why that it does this. It is a bit of a pain. So if this is the case, I'm going to turn
it more into like a guessing game where I
basically select these faces. I go to my connect and I just basically check roughly where
the last connect will be. And then I can just
go ahead and press W, and then I can go to a Swift loop and roughly place
it in the same location. Oh, hey, it's broken. Oh, wait, it's broken
because of our connect. So U make sure to Undo twice. If you don't Undo
twice, come on. Three times? How many
times do I need to do? There we go. It must have still had the
old connect on it. Try that again. Come on. This is a known bug. So at least as far as I know,
well, it is a bug. Like, if it doesn't
work like this, then clearly something is wrong. So if we see it then over there, that means that over
here, There we go. Finally. Okay, so you need to do quite a few times to just
get rid of the connect. Let's go ahead and
delete this, I believe. So over here, yeah, that should be a fine piece. You know what I'm going to
actually make it a little bit larger over here. So we're going to
delete the back. Now that we have this piece, we basically want to cut
out a boolean over here. And then what we'll
do is we will place a cylinder in there and
that cylinder we will connect again to our metal beam. For this, it might be cool if
we can use some sebush Nah, that would be overkill because that would be the
only time that we use sebush because this
specific environment, it just doesn't eat a lot of seabush because
it's hard surface. So let's instead just do this. I'm going to go ahead. And
although you know what? I don't even need a
boolean for this, I can just hope that connect
does work this time. Let's remove my history to,
like, a double connect. Et's try it again.
Now it does work. Okay, fair enough.
So double connect, and that does seem to work. And then I'm going
to place another swift loop just behind here. This is basically just to
create a little bit more space, at which point we can
delete these sites. And now we can just go
ahead and we can do, like, a shift click bridge on here. Double click on here, and then
you want to hold Control. You want to deselect
these two pieces because else the bridge does not work.'s do another bridge like this and then
same over here. Select this, Control,
Deselect those pieces, and another bridge like this.
Okay, having this piece. Now what I'm going to do
is I'm going to wide away, start adding some bevels, just to make this look
a little bit higher pole the contre B. Maybe give it even a few more segments over here
so that we do not need to turn it into a fill
on hypol. There we go. And now, this one, it looks like that
transitions perfectly, which means that we would only
want to add it on the top, but we will go ahead
and add it later. So how this will look in a bit is I will go ahead
and I have this piece. And then this piece down here will basically move down
so that this will happen. See? That's what I'm
going to go for, which does mean that over here at the top piece,
we don't need it. Now, you can go ahead
and you can try to select it like this, but
that's quite annoying. So what you can else do is
go to modeling Toolkit, go to selection constraints
and simply set it at an angle and give it like a five degree angle because
then everything that is flat, it will just select, at which point you can go ahead
and you can delete it. See? And now we have this
funny looking piece over here. Kind looks like a coffee
machine or something like that. So we got this one.
Now, over here, of course, we cannot
really see too much of it, so I'm just going to improvise, and I'm going to have
this as a cylinder, and I want the cylinder to
basically transition into, like, our square bit over here. So the way that I'm going to do that is I'm going
to go ahead and Shift click create a
cylinder over here. And then for the cylinder, just going to turn
on my wire rim. For the cylinder, try to
nicely fit it in here. And I think what I'm going to do is I want this to be
like a fill cylinder pretty much like this so that it feels like it can actually properly rotate and everything. You basically move
this over here. I don't know. Do I need 20? No. I think I'm going
to go for 14 again. I'm going to go ahead
and move this up. Then, first of all, I'm going to select all of these faces, press contro heft I to invert my selection and delete
any faces I cannot see. Now my idea for this was that I was going
to go ahead and I was going to grab these three
faces and extrude them down. Give that a bit more space. Let's go ahead and let's
do a double connect. Let's move this up.
Placed in the center. Here we go so that we have
a little bit more space. And now let's turn off
your angle select. And now we can go
ahead and hold shift, and we can hopefully
move this down. And my idea was to then see, I want to properly
move this down, I don't know, like over here. And then it would
need to transition into like a metal piece. And that's what I said, like for Zebras
because in zebras, I can quickly jump
in and I can just smooth it all out and I can make it look like a metal piece. However, in this case, I do not think that
that will look or that will be a bit overkill for what we want to
do for one piece. So instead, I'm just
going to go ahead and I'm going to say
move this over here. Maybe give it like
a bunch of, like, segments and then like a
bevel. There we go, see. And then by that point, we get to the metal piece. So by this point, I
will flatten this out. I will delete the backside
also we flatten that out. Now over here, just
carefully move these little bit out so that
the geometry is a little bit cleaner in that
direction. There we go. Let's see, from a distance,
that should work. If we now go ahead and
add a bevel on the rest, if we add one here, one here and one here, you like a contra B? Oh, also transition it on this side over
here and over here. If I do that, the jom tree will flow a little bit
cleaner as you can see. So let's do that. Let's
not make it too big. Maybe I'll like one extra
segment so that when I smooth this and I turn
off my edge and vases, it will just look like
a nice smooth piece that is sitting in between here. Perfect. So we got
this piece done. Even if you press three, you can see that it already will just smooth just fine. So we
got this piece done. Now what we're going
to do is we're basically going to
copy this down. And then the only
tricky thing is that because we need to
turn this into, like, a plate, I'm going to do that in a slightly different way to basically make it easier for us. For now, first of all, go ahead and just hold Clone
I can see what I'm doing. Let's turn on my
edges and faces. Yeah, that's fine. We can
even go at and we can even collapse this
temporarily, Clone. Move it very close. Zoom
out, shifty, shifty, shifty, and just do that until we get pretty much to the end so that now it will look like the C, and it looks very similar
to what we have over here. Okay. So what I'm going to
do is I'm going to just have that metal plate
sitting against it instead of trying
to move it out. At this point, I'm actually going to go ahead
and I'm going to, first of all, select
all of these pieces. Mong buttons, sorry, hold control so that only
these are selected. I'm going to collapse them. And then what I want
to do is I want to go into my vertex mode, press Control Shift A to
select all of your vertices. And I basically want
to hold Shift click, merge vertices, and then in the merge vertices
in the setting step. Let it loose because we want to merge these on a very
low level like 0.0, zero, five, for example. And press Apply and also
double check over here in your numbers that if you press
apply, they become less. The goal is that now that transition
that we had over here, for example, it has
now become one piece. So all of this has
now become one piece. And now if I go ahead
and go to the top, I feel like I also need to move this straight because we
now have a different plan. So we can just
select all of them, move them nicely straight,
and there we go. Finally, all we need to
do to finalize this one is go ahead and select
the top Bridget. Double click, hold Control, to remove those two, bridge it. Select them Contra B, bunch of segments like that, and do the same over here
where I can just top, bridge it, double
click hold Control, bridge it, select all of these. In this case, I might want
to just go ahead and give it like one last transition piece, and then do like Contra B. Give it some jom try, and now you can just go ahead
and you can smooth this. And then what you
will see is now it will have a very
nice transition. Okay, see, not too difficult. This frame looks like a
solid chunk of metal. It will most likely have
some welds here and there. Those welds, we can go ahead and we can probably make them. I think we can actually just
make them inside of Maya, at least we can give it the effect that there
are welds over there. So if we go ahead
and go for a cube, let's turn on my frame. Now for this cube, I want to
get started by scaling it up and I want to give it
the thickness of our metal. So if we go ahead
and go against this, let's say that metal, our metal is not going
to be too thick, probably like a
thickness like this. We move this back, we delete
the backface et's see, does it perfectly, here, so it perfectly hits the ends. So it means that I'm going
to have an end here. I'm going to have
an end over here. And now what I'm going to do is I'm going to start by moving this out to roughly, pretty much like the very far
out to the end like this, double check how
your thickness and everything looks, and
if it looks correct, you basically want to
select the inside, and you want to do CtraE
which is the extrude. However, if you extrude at zero and you just set
an offset of 0.1, that's very low one, you can see that it will do like an even offset on every side. So if I set this to looking
at my reference two, maybe 2.5 Let's do two. Yeah, let's do two over here. And now that I have this piece, what I can do is I can
then push this back in, and then I can press delete. So because it will just be
hidden behind our wall, so it doesn't need
an actual backside. Now that we have this piece,
as I said before, I want to, like, create some kind of like a transition piece over here. I'm going to do that first, and then I'm going to add my bevels. The way that I'm going
to do this is very easy. I'm going to double
click on every side. I'm going to give it a tiny
bevel, 0.01, for example. Oh, that's pretty spot on. Now, still too large, 0.005. Let's do that. Then you want
to go ahead and actually just control shift A
select everything and then hold Control and then
deselect as a case like this. Do Oh, does contra R. Sorry, do a control E. You want to
push this back in over here. Like that. I don't know what I have no idea
what I just pressed, but to go. Let's try it again. Luckily, undo exist. Let's save my CNC see.
It's been a while. Now I'm going to, first of all, give the edges a
very nice bevel with multiple segments and make it
nice and round. Like this. And this is probably
one of the few pieces where I am actually going to use a technique where we
are going to smooth it because these back faces, it's a bit too annoying for me to give them like proper bevels. So for very, very large shapes or just large shapes in
general, it's easy to do that. However, the smaller you go
with your shapes and like, really fiddly details,
I should say, the more annoying it becomes. So how are we going
to smooth this? If we want to smooth this
now by pressing three, you can see that it kind of
collapses into each other. Very simple. We need to add something called
supporting loops. They are very simple edges that we place
around these rings, and the only reason we place
them is to tell the system. Actually, we don't even
need that one, probably, to tell the system
that it needs to stop smoothing at those areas. So if you can see this, you
can see that over here, there's like a few areas where we need to tell to
stop smoothing, maybe at the end, and for the rest that like these
little corners over here. So I'm going to place two
support loops at the very end. And for, you just
want to place them like not too far away, but also not too close, because the closer
you place them, the sharper your edge looks, and there will be a point
where it will simply look so sharp that
it is no point. This is also what you would be doing with hi poly modeling. So with hi poly moodeling,
you would do this, and then you would
keep your old shape, and you would keep this
shape without the segments. And that's basically how they do the high poly to low poly mooding and then you would like, bake your textire maps,
which is a common technique. For this technique, although we will not be using
it in this course, I've used it in
many other courses. So you can just go ahead and wherever you got
this tutorial from, you can probably find
many more courses. For example, I made a course
about an aircon unit. Although it is in blender,
the course does showcase, like doing vari vanc props with high pole to low poly modeling
and all that fancy stuff. In any case, now that
I've done placing this, that should
look pretty good. Sometimes, when you
have very long shapes, it is beneficial to just add a few extra
segments in between. And the reason for this is
that they do not try to smooth all the way from one
side to the other side, and they have a little
buffer zones in between. This is just for very
long shapes, however. So here I'm placing a few
of them, pressing three. And now if I go outside
of my segment mode, you can see that now we have this cool looking transition over here, which is pretty good. Okay, so that's pretty good. I do feel like that
I actually want to add one extra loop over here, and I actually want
to use this loop to push things out a little bit, because I feel like
that once I've smoothed this and I push it out, it will give me that bulge effect that you often see
in this type of metal. We will also get this
effect later on, but here you can see it will just give you that
effect as if there is a little bulge sitting
inside the metal and as that it has an
inside over here. I would say if you want,
yeah, you know what? It might be nice
if I just isolate this if I press
control backspace on that edge and move this edge
just in front of our shape. Like this and then go
back into isolate. And then if I do
Control E on this edge, it might be nice if I
just push this edge out over here using you almost always need to
have the blue slider and then do like a Contra B. We like a few segments. I have a feeling that what this will do is it will give us a little bit more of like an depth effect because you can see, like going behind
something like that, there's actually
something behind and that it is not just
clipping in the wall. That's quite important
when doing these type of things for the wall clipping. Now we are already quite long, so I think I will
transition to next chapter. One thing I find quite
annoying is that I have a lot of Wily jacket
edges over here. I'm just going to go in my
render and in my VewPor 2.0, just go into your settings, and I think I forgot to turn on anti Aalizing. Oh
yeah, here, see. So if you turn on multi
sample anti alizing, you can see that it immediately
improves everything. And for the count, depending on how strong
your computer is, my computer can handle
ten times more than this, so it should not
really be a problem. We can just go ahead and
we can increase that. Is there maybe some
ambientocclusion in here, screen set pace
ambient eclusion? I always like that
because it just gives you a little bit of AO, and it just makes everything
read a little bit better. Set the samples up a bit more. I'll see, let's just
leave it at the setting. So around one like this. Let's close. Yeah I think just having a
little bit of that AO, it does give me a nice effect. So that reads quite
well. Okay, cool. So we'll fix that. Save your scene. In
the next chapter, we will finish this thing off, which means that we only need to create the insight over here because this is now all nicely transitioning against
each other, yes. It might be a little bit
too sharp over here. Oh, wow. I think
alizing my wire frame. Oh, no, huh? That is strange that it
all of a sudden gives me this wireframe color. Is that because
of the occlusion? Sorry, give me 1 second. No. Multi sampling for some reason, a multi sampling
breaks my wireframe. That is very strange. Okay, in any case, if I want to make the smooter, I can probably just
move this out, and then if I press
smooth again, see, it will give me
a smooter effect. That's the last thing that
I will do in this chapter because I move them a
little bit too close. So I'm going to go ahead
and move these out. Like this? Because, yeah, in this tutorial, we
are really going to be quite perfectionist
when it comes to modeling. And then when you just
want to preview it, then I will just turn
on anteralyzing. It's a bit strange that it shows that it shows me the Y frame
like that, but I will. Okay, let's continue
to the next chapter.
8. 07 Creating Our Final Door Part3: Okay, so let's go
ahead and continue. So we're now just going to go ahead and work on these ones. These pieces, they
often they hang like as a flap on top of them. So I kind of like know in my head what they will look like. So let's just twin
and replicate that. And then we also do need to make probably just like a
plane on the inside, so that should be
fine. Yeah, let's see. Can we reuse this? No,
I don't think we can. I think I'm just
going to go ahead and go still on my edges. Let's create a brand new cube, scale it up a little bit out. I let's make it not too thick. So let's see. I'm gonna so I'm just
having a look at my reference right
now to see roughly how long and everything I
need these things to be. You'll see because there's quite a bit of space left for that, but there's also
quite a bit of space left here, so it's
an interesting one. I think I'm going to leave
it up until this point. Let's go ahead and scale
this in a bit more. Over here, let's
go to face mode. Why is it not showing my Oh
wa, it is showing my etches. For a moment there, I
thought I didn't see them. Okay, so let's see. Probably a little bit thinner. Yeah, I think
something like this. And then what I'm going to do is I'm just going to go
ahead and I'm going to grab the top and the
bottom vertices over here. I'm going to scale these down to give them like
this little point, like you can see over here. And now for these pieces, I need to have a quick look. So the backside we're just going to because this is going to be like the
inner central side. So for the backside, I'm just
going to go ahead and I'm going to bend that down. And then from the front side, I probably want to give it
a little bit more debt. So I'm going to add
another loop around here, and then we'll add
another loop here. This is mostly so
that if I go to my isolate mode,
sorry, isolate mode, that I can select these
piece over here and also the backside actually
because we can just remove that and delete it. So now all that we have left
is this piece, this piece. This and this, and we can
just bridge that together. See? That will give me a
little bit of like an X. So yeah, that's a nice
thing about using Nanite. We can literally just make
it like this in real life. We don't need to
make shortcuts to basically fake how it looks. So at this point, this etch of, I'm going to just push it
back a little bit more. And the reason that
I'm doing that is that I can actually create a large enough bevel that I
want to have on this side. So create your fraction or create your bevel and
ArterFranko around 0.7. Then select the sides, create another fraction,
two segments at 0.5, that should be
fine. There we go. So now that we got this one, I'm going to go ahead
and I'm going to do quickly and isolate to
make my life a bit easier. I'm going to go
in and let's see. So I'm just pressing
F so that I can see. Yeah, I think I just
need to kind of go around these areas over here, let's go ahead and select them. I could have done this selection better with my molding
toolkit, but we. So we got this one, so
I'm going to go ahead and do Control B, and
I'm going to see. So it looks like that it is withholding me from
going very close, and that's because we have
two small edges over here. So if you just shift click, merge vertss and press
merge at center, it will just move these
vertices and merge them together at
the very center. And you can often do
this quite quickly. And now you know what I'm going to do is
I'm actually going to press Control Shift
A to select everything, hold Control, deselect the rest. And then I do need
to go in here, and I just need to deselect
these few edges here. And now I can press Contra B and have a look at both the
top and the bottom. See, let's make my
segments a bit larger. It's really hard to
rotate around it now. And maybe like add an
extra segment here. And finally, just have a
quick close up look. Wow. See, that's the problem.
Imagine if we had to work in meters and we had to do
this type of precise stuff. So for this point, I'm
just going to move it down, select the bottom side, and press F. The bottom side is working a lot better than
the top side, actually. So that should do the twig. If I now go ahead and just do like a shade smooth on this. Oh, no, wait, it has a back. If it has a back, then you don't want to
do a shade smooth, you can very simply go into mesh display and do a
soft and hardened edge. What that will do is
it will basically smooth your mesh based
upon a specific angle, and this angle is
often 30 degrees. So we got this piece over here. Now my goal is to then remove
my history and clone it, hold J, and rotate this round, and this piece will basically
overlap on top of it. So we have this piece. We're going to first of all, move my vertices a bit
further back in because we do need to adjust the original shape
a little bit more, and that's because I want
to have this overlaying. I'm going to have
this over here. And then what I want to do is I want to push this stuff back, and I want to push
all of this forward. Let's see if we can
go to our side view, where are it's typical. I need to go into,
like, isolate mode. Over here to push this out. Select the top. Push
this over a little bit. And then what I want
to do is I want to push this out a
little bit like this. Let's hold shift and move
this down a bit more. And see. I then
want to go ahead. Let's push this out a bit more, but we want to place a
edge loop in between here and want to push
this edge loop out. I don't know exactly
why they do it, but it's like an effect
that they often do. Now we're going to
push it out quite far, and the reason we
do that is because then we can double
click on this edge. We can press Control B and we can give it an extra segment. Or actually, maybe a few more
segments just because this is just needs a bit more
geometry. And there it goes. Now we have this.
Now, over here, it does not have a perfect
transition, I would say. I can go ahead and I can
use my mult cut tool, which you can also find in
your mesh tools and ult cut. And basically, what
you can do with this is if you switch to Vertex mode, you can use it to
customly add extra loops. So I could go ahead and, like, add these extra loops
here to basically compensate for the fact that it goes backwards a little bit. I don't need to do it a lot, and the reason I
don't need to do it a lot is because we don't
have a lot of geometry here. But I'm just going to do this. And then all of these verties that are not
connected down here, I will make sure that
the out triangulation that you get when
you export or import into real that will
fix those things. So it's like a little
cheat because basically, normally, when you are doing high poly to low poly modeling, you want to make sure that those verts that every vertze is connected because else you get an uncertainty that
something might go wrong. However, with this
type of technique, we don't really need
to do that as much. So what we can do is we can go ahead and we can
just upon export, select a specific setting, and that will often
take care of it. Having this piece now,
I'm going to go to mesh, and I'm going to mirror this. I want to mirror this
on the x axis at a very low 0.005 welding. And I think we need to
set the direction into the plus and then move this in just press W. Now, you can go ahead
and you can double click on this center and just press Control backspace
to get rid of it. And now it's just a matter
of grabbing this piece, resetting your pivot
point, holding J, rotating it 180
and moving this in the same location that this is basically the same distance
away from each other. And upon that point, you can go ahead and you
can grab this piece and you can move it on top of it. See? You do that, you clone it, you reset your
pivot again just to be sure you rotate it 180, and you move this down over here. And that
should do the trick. If we now go ahead and later on, just like place a
plane in two planes, one plane for the graphics, one plane for the plastic, that should do the
trick for those pieces. So that is now ready to go. I know that it was quite a bit of work for something to small, but, yeah, it looks nice. It will look nice when
we actually have, our antiysing turned
on. There you go, see? So that looks good. Okay, cool. So we have done those things. That is all fine.
So what I'm going to do now is turn
off my anti alysing. Let's get rid over here of my seating because it
will be distraction. The duplication to
the other side, I will do later on after we've done Alva texturing
and everything. So we're now going to go ahead and start working on our door. So for our door, over here, you can
see, a little bit, but I think it's best if we go for something in this direction
but then just straight. Let's have a look. So, we also still need to do
something with the floor, but we can do that
on the floor itself. For our door, we have the
insights ready to go. So I'm going to get started, and I'm going to get started
by just creating a cube. Let's do that. Let's
create a cube, and we're basically
going to divide this cube into two times so that we know exactly
where our door is. So let's move this down. Let's move this
just behind here. Here. So we want to
make sure that we cannot see the bags. And then this door, I'm going to go ahead
and I'm going to make it roughly
the thickness that I think the glass
windows will be, because it's like a
double glass window. However, our glass
windows will kind of have this effect where
they will be dark and they will just reflect the entire environment
back so that we don't need to make
anything behind it. If I think that that
does not look good, I will have a time lapse chapter where I will just
very quickly build a tiny bit of like
a metro station behind it using
assets I already own. So yes. Actually, yeah, this
glass over here, it looks very thin,
but I do want to get the more thicker look.
So where is this look? Mm, it does look
very thin, actually. I think it's just like
single sided glass and because it goes inwards. Yeah, because it goes inwards,
it's single sided glass. In that case, I'm just going
to guess my thickness, so I'm going to move this I'm going to move this
one all the way up. Make sure to move
it a little bit inside like this so that
you cannot see through it. And now I'm going
to go ahead and I'm going to move this up here. At this point, we can select these etches and we can just
place a single connect. Here one connect in the center. And then we know, Okay, so this is going
to be the center. So now I only need to create one door and I can
take it from there. So we do need to have that little rubber bit in the center over here.
But that's rubber bit. I'm probably just going
to go ahead and I'll add it to one of the
doors that when they close because it's
just a little bit, that is like a little
flap that sits along it. Knowing that we have this, let's go ahead and select these edges over here
and just bridge them. It feels a little bit thin, so let's go ahead and make
it a little bit thicker. I don't know, do you want
to make it dis stick? No, probably not probably
like this stick. And now we need to
decide exactly where our piece is going to be. But that's quite handy because
here it's all on one line. So what I can do
is I can go ahead. Let's go to my front view
or something like that, and place a single
loop on this line. Maybe just for
consistency's sake, we can move it down a
little bit to Yeah, let's move down a little
bit, just to give it keep it on the grid. You can even snap to the
grid if you really want to. There we go. So this is where
our window is going to be. It's going to be
between this piece, and it's going to just have
a little edge at the top, which means that we are going to place one extra loop around here and go to grid point. I want to place this loop just like with a little
edge around the top, and that little edge will
give us the option to add, like a little sticker here,
that should do the twig. I keep losing this
image for some reason. The next thing that I'm going
to do is I'm going to go ahead and I'm going to
select these edges. I'm a little bit worried that the inside over here,
because it goes inside, I'm a bit worried
that it will give me an uneven feeling while this feels very
does it feel even? No, actually, you know what?
No, it does not feel even, so that should not
actually matter. I'm going to go ahead and
I'm going to do double connect. So two segments. Press Enter, scale it out. So yeah, turn off grid snapping. So we're going to make
this not feel as even. We're just going
to roughly guess the distance between our
window and our door over here. And then based upon
that, we can guess the scale probably something
like this should work, okay. Once we've done that,
we can go ahead and we can delete these centerfaces. We can bridge these pieces because this will go a lot
easier if we bridge it. So just bridge all of them. And now that you've done
that, you can basically select these sites and we can add some very large bevels to them to give them
the round effect, and based upon
that, we can start with all the extrusions. And then for the
extrusions, I will, have a look here and just make sure that it
looks very precise. So first of all, let's go
ahead and press Contra B. Set is larger, and let's
add a bunch of segments. Let's do like 912 maybe
even. Now let's go for nine. Let's do ten, ten. Okay, so we have ten, so we have some
quite nice friction. We can always go in the friction and set is higher if you want. It will just sometimes
break a little bit. But actually, this is one
of the cases that I think it's fine. Maybe 1.2. Let's do 1.2 and press Okay. And it just means
that over here. We often need to fix some
stuff that has happened. I can't really see exactly
where the fix needs to happen. Oh, wait here, it
needs to happen. These verses need to be
pushed back like this. Same over here. You
know what? I'm going to do this in a different way. I'm going to use the target welt because using the target welt, I can immediately, like,
weld them together, as you can see over
here and here. Makes a bit easier. This backside I will
most likely mirror. I will most likely just
focus on the front side, but it just depends
because I think I can actually do them both
at the same time. As I said before, I don't really care about how clean
the jom tree looks. Now that I have this, all I need to do is I need
to look over here, and I'm basically
going to mimic. I do like this profile more. I'm going to mimic,
like this little trim. And for the rest, I'm
going to use this profile because I like the more
beefy looking profile. So it's going in with the bevel. Then it is having, like, a tiny little space then
goes out in out up down, up, down, up, down. That's basically
how it will look. So just fall on my lead.
We can get started. Click Shift, double click to select all of these
inner sits over here. For this, I'm going
to hold Shift and I'm going to basically.
No, you know what? No, I'm going to
do extrude because extrude in this case
is more accurate. You can hold Shift and
then scale it down and then scale it in,
but it's less accurate. So let's do contre E,
Extrude, Extrude is out. And then Extrude this in
using the scale button. That will push it in on both
sides at the same time. So we can do that,
and then we can still move around and just see roughly how precise we want
this to be over here. Let's do this. Press W,
extrude this out again. Contra E. This time, I'm just going to extrude this probably sideways like this. I think that is easier for me. So move it sideways
very carefully. Oh, never mind. It is breaking some stuff. Why is it giving me
this edge over here? Let's press Control backspace on this edge. I don't
need this edge. This one also, that's
a strange edge for me to have created. Try this again. Shift double click Control E, and now if I do it, A. Okay, fair enough. It gives
me a little bit of trouble, but that is no problem
because what I can do is I can go ahead and I
can just move this out again, and then it will not
give me as much trouble. And when I move this out, I'm just having a look at
my reference here. I then need to grab this shape
and just for good measure. Control shift. Also
grab this one, extrude this out
again. Like this. So that will be like this
tiny little lip over here. And then what we need to
do is we need to push this in and then extrude this out again and take it from there, I believe. So we got this one. That's double click on
the inner lines because these lines no longer serve a purpose and will
only be in the way. So we press contrabgspace. You know what, at this
point, I'm going to remove my history because it's
getting really long. Let's see. I'm going
to extrude this. So we got this one control E. I still find strange
that this breaks so much. But that's no
problem. Then we'll just do it like the
long way around. So I'm going to move this down, and this will be the width. So make sure that the width
is correct because this is where your pieces will be, your bolts and everything. So you're going to
move this down. Like this. Same thing.
Select this side. Control Shift, double
click, se like that side, Control E. Move this out to, like, how far you
want to move it out. I'm not going to do it
too far myself over here. And then we can actually
reuse these pieces that we have here because we are now going to make
this very thin. And for that, we're just
going to simply scale it. So click Shift click Go to your scale and
scale this very thin. Like here, and then later on we will just push
the glass in here. So if we have this, I'm going to not make it as
thin as you would think. You do this. You do a contra
E on it, you push it out. Then during this push out, you then scale it in a
little bit more. Then you do another contra E, and this time, you just
scale it flatter like this. Unfortunately, that breaks it. In that case, you just go ahead and you basically do Contra E, and then you just use your scale tool to basically scale it in. Because if you're
doing contra E, without scaling it in,
it will still extrude, but it will extrude
into its own place. D one last contra E
and push this in. There we go. Window. Here we go. Okay, at this point,
I'm just going to press Control Shift
A and select all of my vertices and just do a very quick merge verticies
at a very low level, just to make sure I do not accidentally have
anything duplicated. This mesh, I will most likely turn into a hypol's one
of those meshes again where it's just a pain
if I want to go ahead and do this like yeah, do this I just like
hypo you meshes. So I'm going to go
ahead and do that. Before I do that, I
need to make sure. So these flaps are separate. This pin, can I can
probably just do that here. I can probably do
that in this mesh, where I want to go ahead and select these few meshes
and just do a single connect. That's the nice
thing about connect. When your Swift
Loop does not work, the connect will most of
the time work just fine. You then scale disconnect
flat. You move it down here. And what I'm doing,
what I'm going to do is I'm going to select this
piece. And you know what? Because we've been doing
this the entire time, it's du contre E, and I'm basically going to push
this out a little bit. And then I'm going
to move this out, a tiny bit also, just to give it an interesting
looking profile. Then later on what
we will also do is we will also go
ahead and we will use, first of all, let's move
this back a little bit more. Here we go. Later on, in our floor, we
are going to make our floor look a lot
more interesting. I have decided, so that
will also look nice. Okay, so the flap will overlap, which means that
we do not need to do anything with
those edges there. So although we are sitting quite a bit
over time right now, I can go ahead and I
can, for example, here, I can isolate this and
I can already quickly turn this into hypol means
this will be a larger chapter. If I have a look at this, if you delete this, technically, you will not see
any of those faces and they will only
be in the way. So you can go ahead
and delete that. You can do the same
over here where we just because there will
be a flap in between. I do recommend that, of course, if you want to have
these open or closed, you probably do not want
to delete the centers because then you
would need to make something just like
overlap on top of this. I can do that later
on if I want, because you can technically
just open this or close this. However, because this is a tutorial for our
specific purposes, we're not going to
actually do that. Just because it takes a
lot of time or a lot, it takes more time than needed. Okay, so now that
we have done this, if we press three,
Y frame? No, three. You can see that these outages,
this completely breaks. I know that. But these
outreaches are fine. Now, after doing
all of this work, I think that we probably still need to symmetrize this a little bit,
but we'll see. First of all, let's add
some supporting loops. Let's go to our Swift
loops At one here, Add one here, and then this one will most likely be broken. Yeah, I see here. I'm
going to I'm going to actually click Shift click like this and that
will do like a ring. And I'm going to place a single connect here and press Enter. Click Shift click
on the outside, and press delete and
delete the other side. I thought that I could do it, but it looks like it will just become a pain if I also want
to turn this into hipoly. So now at this point,
let's go ahead and do a single connect over here, scale it flat, move
it down. Like this. And then if you would
press three, see this just becomes
like a soft loop. You can see over here that
it is a little bit stretchy. So what you can do is you
can add a few more connects, like three of them or something. Press Enter. That
will get rid of the tiny bit of stretchiness
that you can see over here. Maybe move one of these
connects a little bit closer together like this. Now around this edge, the only one that's a
bit annoying is this outer edge
because we do not need to worry too much about
clean geometry in this case, I'm going to hold Control
Shift and I'm going to select all of these
outer faces over here. Like this. And then what I'm going to do
is I'm going to do contra E and only use my
offset at a very low level, like zero point see, 0.1. Okay, slightly higher
level than normal. Let's do 0.5, and that will just place a loop
automatically around here. And because there are
no faces behind here, they will not affect the rest. So it will look quite ugly, but it will keep
my edge just fine. And all of these
edges are perfect. All of these edges
perfectly loop around. So it's just a
matter of us going in here and nicely
placing our loops. However many we want,
like over here, this edge, I probably
want to do like two. Then here I want to
keep it quite smooth. So I'm going to make this
a little bit further away. This one further away, this one. And then over here, we
can loop this around. And then on the other
side, we can also now and it's way easier
to also now connect. And now if we press three,
we will have this look. The only thing that I do
not like this look is fine. This look. You see, it is not going as straight. So I think we could
fix this if we just control shift and just move this up a little bit.
Let's go into three. Then if we go into
three, we can still move our pieces
around a little bit. So that must have been
that line that I removed. Never move this out. Okay, yeah, so that does work better. If I go ahead, control shift, move this down a little bit, and then move this one out to
basically make it straight. And then if I turn off my wife, I do not like the look of that. By the way, we broke
this because we are at our segments, but that's okay. So in that case, I'm going
to undo this on both sides. And then what I'm going
to do is I'm going to add another loop over here. And hopefully this loop will give me a bit
more space in between this area so that I can move
this one out a little bit. Probably you need
to do this for all of them for consistency. So we move this one
out a little bit, and now it becomes a
little bit rounder. Yeah, here, see that works
a little bit better. So to do the same over
here, we just add a simple loop roughly down here. We then select all of these Virtss and we give this like a
slightly smoother fallow so that it does not have
such a strong ring. And now, by the way,
to fix this kind of stuff over here that
we have created, simply do a target
welt and target weld these areas to the edge. What I will also do is
I will do some cleanup, which is just going to be
me doing this, basically. This is just because this does not really have a
very specific reason, only that I like to have my
jom tree look fairly clean. Even when I know that
we can just go ahead, go crazy with it, pretty much. Yeah, it's a force of habit. When you learn to always make your models
nice and optimized, it's a little bit
hard to then all of a sudden turn that
function off in your head and that you can just basically waste as many
polies as you want on it. I just don't like
the look of that. You also get to
know your geometry better if you do
this kind of stuff, if you do the cleanup,
might sound a bit strange, but it does work. And now that has fixed that. We have a nice high poly
mesh sitting around here, for which we can later on
like add our little bolts. And for our bolts, yeah, I said that I was going to
do that using Where are you? Do I not have any good reference for that? I said,
Oh, yeah, here. Oh, yeah. So for these bots, I said I was going to go
ahead and I was doing, like that as a norm map. Yes, that plan has not changed. I'm going to do
that as a norm map. It will look nicer, actually, as norm map than compared to geometry because geometry I
need to do a lot of work for. In any case, we
have this. Let's go ahead and just do
one final reset. Let's do a very quick
mesh and a mirror. Turn off isolate so that
we can have a look. Yeah, see here, this
mirror just fine, and just make sure that
we set a merge value to 0.01 so that it is very low. And then we can just
press W, and now it should fit nicely and perfectly. See? So we got, this really nice looking
door that is nice and hipoly all working together. Everything is nicely fitting, that's perfect. Let's save cin. Let's double check over here. So this is all looking final, so it actually adds a
really nice looking edge like that, so that's perfect. And in our next
chapter, what we'll do is we will go ahead and do some small finalization. All these norm map details
we will do at the very end, so don't worry about it now. It will just be making sure that everything just
looks correct and else, maybe I'll have some details, and then we are going to
move on to our window. So let's go ahead
and let's continue with that in our next chapter.
9. 08 Creating Our Final Door Part4: Okay, so in this chapter, I would like to
finish off our door. So we pretty much have
quite a large part done. One thing that I wanted to
do that I forgot to do in the last chapter is to grab
one of these bolts over here. Here, I'm just going
to select them, Shift click and just do like
an extract phases from it. And then you always
need to reset your pivot because it's
not in the right location. But I think this is like one of the few locations
where I do want to have an actual jom tree bolt, while on the top of our window, we are going to go ahead
and we are going to go for, like, a more non map type just
because it's easier to do. But yeah, for here. Oh, wow,
that's not in the center. Let's try it again. There we go. So for here, we can just
do something like this. And actually, you know what? Let's start over
here because it's easier for me to do
this and then do like a shift D. Oh, excuse me. Shift Shift D, right? Am I just having a brain
freeze or, that's a. Shift D. So it is going fine. I just don't know why
it does not work. It duplicates it in
place for some reason. It's a bit awkward.
Shift D. Now, it works. Okay, fair enough. Bit strange. But in any case, we
can just go ahead and place these bolts over
here. I'm not too picky. I'm going to do, one last one, probably in the center
there just in case. And there we go. So we
have those things done. We technically don't
really need it back. So for now, I'm just
going to leave that, and let's just
have a quick look. So here you see. So that's why I
wanted to do those. Oh, yeah, the black
strip, we need to do. So for our black
strip, you know what? I do have actually an
idea what we can do. So I had this idea yesterday because it's
already new day today. And that is that if I
make the black strip slightly different on this
side than on this side, we can pretty much, rotate our door around. If we do that, however,
it does mean that we after all need to
add these pieces. So let me just quickly, select one of them. I'm not able to select
that one. There we go. And I'm just going to go ahead and I'm going to rotate these. And because these
are small pieces, I can just nicely,
rotate them like this. Move them out a bit
more. Here we go. Okay. So for the rotation, it basically goes like this. I'm going to go ahead and I
have this strip over here. So one of the strips
will be straight, and the other strip will be up and then it will
kind of be overlapping. So with that piece, I think it's easier if
I actually just grab a cube instead of
doing this with like a spline or
something like that. You basically grab
a cube like this. You placed over here,
and you even have this little trim over here. No, you want to do
it over the trim, so I will go ahead and, like,
move that later on too. And I'm going to start
with the straight piece, which goes roughly over here. We then scale this cube in let's turn on our
edges and faces. So let's scale this cube in
over here and then move this back to roughly, I think,
something like this. And then I will first
make the shape. So the shape idea
that I have here, let's move this out in a little bit is we
have a little bit of, like, a straight piece, and then we just have a little flap. So it almost goes, let's move
it back a bit, hold Shift. We basically do this and
then do another shifty. So it's just going to be
something very simple like that. And then what you want
to do in this case is, since we have the geometry, we are going to make this with
like a bunch of segments. A little bit like this over here so that it here just kind of flows over from one
side to the other. I don't know, maybe it's cool if we add a little trim here. Let's add one edge over here and just move
this back like this. Then maybe it would
be nice if we also replicate that
by adding one edge here and moving this
back. There we go. Okay. So now if we go to phases, we can go ahead and we can
select our bottom pass. And for this, I think I will need to move
this up a little bit. And then I'm just
going to go ahead and I'm going to transition this over here and then just
carefully move this down. And move it into place,
something like this. You can always just this
bolt, move it a little bit. For this stuff, what
we can do is we can maybe add one extra
segment in between, which we can then go
ahead and we can, carefully sort of
select like this. Here we go. And then if
we select these three, it doesn't need to
be too precise. I just here. It
just needs to give the idea as if there
is something going on. And if you really want to make sure that you cannot see through it because you want to have
your camera, for example, very close to this area, just do this because then no
way from a distance, if I smooth is, Okay. Sorry, I I do a mesh display
and do a soft and hard edge, smoothening does
not always work. And like this, here, see,
all you see is this. So we got this piece
over here ready to go. Select the bottom side
and let you delete that. Select the top side over here. First of all, we are
going to move this all the way like this. Actually a little bit more
like this, delete it. Now, I do want to maybe give
it a little bit variation. The way that we
can give variation to a very long asset like this is we can go ahead
and we can give it a few random segments like
you can see over here. And then in this case, just grab the ends and move the
ends around a little bit. So this will just
in general give some interesting variation
from a distance. It might not be as intense up
close, but from a distance, you will just here if I
turn off my selection mode, it might be a bit difficulty, but believe me, in the engine, you will be able to
see that there's a little variation going on, and it's not something that
people will notice actively, but it's more something that it will just tie in
the scene together, and it will make everything feel a little bit more interesting. So that's why I like to
always do that when I have very long assets that are not like perfect
metal or something, but that are a little bit
more organic like this one. Okay, so we got this
piece over here, and now my idea was that I place this on the other
side because then if I rotate my door around, the other side, it will
basically slot nicely in here. Since we moved this out, we should have some space in between here that we can use. I'm going to go ahead and I'm going to probably reuse this. So let's hold Shift and
try and reuse this. And let's see. For this piece, how do I want to reuse? I think I just want
to flip it around, and then I'm just going
to extrude this out. So if I go in here, actually, we could have
just done a mirror. I do a mirror and I just
turn off my cart geometry. This is how I often
just tend to flip things around because
I can then just, like, delete this
one, and there we go. There's probably a better way, but this is for some reason, I'm stubborn, then this is
the way that I always use. So over here, I can now go in and I can push this
out like this. And a little bit,
it's always annoying, working with such a long shape. Let's go ahead and
do an isolate, and I need to get rid of
these pieces, I believe. Let's turn off isolate here. Yeah, see here, I need to
get rid of these pieces. And then for these
ones over here, Let's go ahead and we
can get rid of Sorry, Maya is acting a
little bit strange. We can get there we go. We can get rid of those segments and these ones over here. And now it's just a matter of me pushing this out up until
let's say this point. So we don't want to
push it out too far, like a little bit less
far than the rest. And then you should be able
to just do a simple bridge because all the selection
tools are the same. You go. And just in case for these ends, we might want to just
give them some geometry. However, we can actually
just go ahead and turn them into a hypol I think.
I think that would be nice. So over here, it's a bit yikes. It's really hard to move around. I'm going to go ahead and
add some supporting loops. I'm going to add one in here, one in here, one here, one here, one there, and then one at the bottom. Finally. Okay, so now
we have a press three. Looks like it does some
pretty good geometry. So we can now easily
just switch 1-3 for these pieces when we do
our UV unwrapping because, of course, we're not
going to UV unwrap on the tree button, but
the read on the one. Over here, I'm going
to go ahead and I'm going to select this, and then I do want to select
this one edge and carefully move it back again. Like that. And now it's once
again just a matter of me adding some
supporting loops, one here, one here, here, here. Here, here, here and here. So, look, perfect. Okay. See? So now we have like this little trim over
here, also ready to go. You know what? I will
just keep my viewpoint open on the other side
so that I can sometimes just turn on the antiising so that I can have a bit
of, like, an easier look. But that is looking pretty good. So okay, let's see if we
missed anything accidentally. So sorry, I need to go ahead
and here, let's do this. Okay, so for our door, we've done the bottom strip,
we've done the metal strip. We are going to later
on do these pieces, and the glass we are also
going to do later on. Same for, like, the
glass over here because the glass needs specific
branding and everything. So for that, we first need
to create some textures. It's just a plane, so
it's easier to do that. This outside trim, yes, okay. So it has something like a tiny little detail over
here, but that detail, it's not visible enough, and I do not really know
what to make up out of it, so I will just keep it easy. And we also have some bolts, just like kind of how
you see over here. We, that kind of stuff
is also quite nice, but this is a very
different looking top, so that's why we probably don't have the space for that stuff. Although we can
go and I can add, like, some small
pieces later on. Let's see, over here. We have this case. It goes
all the way around. We have a nice looking
locking mechanism, and then we have the
inside, which also has an overlapping
locking mechanism. And then we have the side trims. These side trims over
here, what I have in mind, so as you can see over here, whenever you transition
a modular piece, there's always a chance that
there's going to be a seam. So for these side trims,
what I want to do is I want to move them
tiny bit further like this because my idea is that if we then snap it
to this corner over here, we will never be able
to see the seam anyway. So it will give us a really
nice looking transition. And the same will
happen over here, if I just move this a
little bit further. Maybe if I look at
it from the bottom, I can do more precise
movements because the closer your camera
is to the pivot point, the more precise
your movements are. Make sure that
they do over here, still transition
into, which they do. There we go. So this will give
us a bit of a better look. Then over here, we
have this metal trim, and yeah I will most
likely make this metal, but I am actually tempted to, they do like the
more stripy metal. I might change my mind my mind and I might make it
more like a plastic look. And else I will give it like the stripy feel that
you get over here. That's something we'll have to see how we're
going to do that. And for the rest,
there isn't much going on over here
because the seating, that seating will be separate. So I think that we can
finally call this done. As you notice, I'm not yet
adding the other door in here. You can do it for
testing purposes. However, because we are going to UV Nwrap all of this stuff, and then we're going to, like, play some extra pieces, it's overkill for me to now also copy this over
to the other side. But if you want, we can quickly clone this, set it back to one, do a very quick
collapse and a reset on our it. There we go. And then we can, like,
rotate this round. Which mostly serves the
purpose of trying to make sure that everything
nicely fits together. That if I now press three Hmm. So it does not fit
together. That's great. Like, I wanted to
have it go inwards. So maybe this one I need to, like, push it in after all. So maybe over here, I need to add a segment at this point, and then also at the other point because we have it like that. And then if we go
ahead and go to, like, our top view, this
view over here, maybe if we move this down, and then give it
like a Control B with a few more segments. Not too much over here. Yeah, I think that might
work a little bit better, C. So that's why it's good
to just test things out, even though I personally
almost forgot to test it out. But okay, so we have
now this piece. Now if we do Control
J and rotate this around, yeah, see here. So now if you would
push this in, it would like it would give the feeling like
it's just sitting low. Tiny bits of clipping
does not matter. What matters is that you can see that there's like a
transition between them. See? So that's what we wanted that's what
I wanted to get. So that's perfect. So I can now delete this and I can
call the door done. Select everything and add it to your door layer over here. And then we can save our scene. Now, what we'll be doing
in the next chapter is we will most likely just
continue on with our window, and our window is actually
going to look like this. However, I will go
ahead and I will find some better reference
because over here, I don't have enough reference of how the actual window looks. The actual outside of
it looks pretty easy. And then over here,
what we can do is we can later on just like an extra module on top that has something like this
that is no problem. Yeah, that might
look interesting, it might break up
the modular flow. So I quite like that just to give it a little
bit of variation. So for this for now, let's go into your
blockout pieces. Grab your Shift D and
duplicate your window. And we can go ahead and
we can add this in here, call it window underscore A, in case you want to
do that extra piece. Go ahead and turn on snapping and just
snap this nicely to, like, zero, 00 on your grid. There you go. Okay, perfect. Save scene, and we will in the next chapter continue
on with our window.
10. 09 Creating Our Final Window Part1: Okay, so let's go ahead and
continue with our window. Now, I went ahead and I found a few more
references over here. So, this one is a little bit
too modern, as you can see, but I still want to grab it.
Here, I got another one. This one I grabbed
because I here, it's like the best reference I could find of the
top piece over here. And then over here, this is like a pretty good
reference where we can just see how that the
actual window looks. So what we're going
to do is we're going to get started with, like, the base shape and
getting that ready, and then we can get started by just doing the window frame, which will mostly be
most of the work. I also found this
one, by the way, which is pretty cool for,
like, our transition door, like the back door over here,
especially because, like, it has, like, this
really cool handle, and I think it can make stuff look a little bit
more interesting. And also for to show
how we can, like, implant these things
like the backsides over here and stuff like
that. In any case. So for our window, if we have this, so this is the current
window that we have. I know that those metal
plates on the side, they will always transition
from a door piece. So I don't need to
worry about that. What I'm going to do is I'm going to go ahead and
let's see if I grab this. So this one is already fine. I think we can just
use this blockout. Let's turn of our
entra lsing over here. I'm doing that on my
screen, by the way. So over here, if you
look at your window, you can see that it
has distilled a bit, and then it goes straight
because it needs to basically flatten out in
order for the window to fit. So what I'm going to do is if I have this
piece, first of all, I want to decide once again
how large I want this to be. So let's do something
like over here. I think that looks pretty good. Yeah, I think that
is not too sharp. And then what we will do
is we will go ahead and add some extra geometry there. If I now go ahead and I just select the back side over here, I'm going to move the
backside back a little bit. Maybe it's good if
I like my door. Let's move it back a little bit and then hold shift and then extrude this back in again so that we have this
little flat piece. Let's see. If we have this, if I now double click on this line, I can now very easily move this back and forth
however I want. Yeah, let's do
something like this. So that should be pretty good. Now, what I'm hoping
is that when I already extrude this out and I start
to make this piece round, that this piece will automatically
also go extra round, but we'll have to
see how that works. So if I go ahead and shift double click to
select all of these pieces, I'm going to go ahead and press Contra E so that I
can push this out. And I'm going to push
it out up until, let's say, this point. I already have a feeling
it's not going to work the way I want
it to, but we'll see. Let's go ahead and let's select these corner edges over here. Press contra B. Yeah, or C. So I don't
think it will give me a big enough bevel. If that is the case that it will not give me a big enough bevel, I'm going to only select
this one over here. Then I will need to do
it in separate passes. I will select this one as
number one, press Contra B, and give it a couple
segments and just make it look a little bit
round like that. Yeah, maybe let's do open six. And then for these insights. Hm, that is a tricky one. So it's interesting because
it's almost like it adds an extra bit of
space in between here. But unfortunately, I
cannot really do that. If I do that with my fraction, you see, it just
basically blocks it. I can set it to like five. So then it does sort of work. It does mean that we
need to do quite a bit of cleanup, however. Let's see how bad it go. Oh, sorry. That was weird. I don't
know what I pressed, but again, in any case, as I was saying, and now my selection mode is
completely messed up. Let's remove my history and let's freeze my transformation. Sometimes that breaks your
selection mode. There we go. See now my selection
mode is back again. Any case, what I was
talking about is if I set my fraction to five and I
add a bunch of segments, I basically want to see how bad my geometry ends up
being in those areas. I feel like I actually
need to set my fraction to seven because I just need to try and capture
that area. See, no what? No. Let's do a Yeah, I think five is actually fine. Okay, so that looks manageable. Yeah, I'm going to clean it up. So for now Undo it, select these sites over
here on all of them. And then we're going to
evenly give them a bevel. Here we go. So
select both of them. And then it just means clean up. So we're going to give the
bevel five in the fraction, and let's give it a
segment divider of round eight like this and
then press W. Yeah, see here so that works, that is around, and then we
can place our window in here. And now it just means
that over here, I just need to have a look
and see exactly, there we go. See, this is what I
expected to happen, that it just completely breaks, but it should not be
as bad as you can see. So we can basically
just go on the inside, move it around, and then
just place it like that. And although it's not like
the nice bit of geometry, if you want to make this
really clean jom tree, what you would do is
you would do this. I think I actually want
to do that because it just makes everything
look a little bit nice. I would then press
Contrabacspad on these pieces, then go into my Etche mode and then start connecting
them like this. And then over here, you
can pinch them together. But as you can see,
this will give you much cleaner geometry than doing it the other
way around over here. And then for these ones, I don't really care because
you cannot really see it. I will probably just
remove the backside. But in any case, I think that is quite nice if we go for
something like that. I'm just going to go
ahead and I'm going to select these two,
move them back. Select these two.
Move them back. And the final two.
Move them back. Okay. Now what I will do is I will
just quickly pass the camera because I don't think
you guys need to see me doing this four times. So I'll pass the camera, and then I will
just go ahead and use the same technique
where I will just go ahead and connect all of
these pieces together. Here we go. So that's
now Also done. If you want overhe, you
can also do some cleanup, but we will do that a bit later. And for the backside, just
make our lives a bit easier. Let's go ahead and go
into our modeling tools. Turn on selection
constraint by angle, select the back and delete it because we cannot
see it anyway. So there we go. We got our
base window frame done. This window will just
be sitting on top, so I'm not worried about that. So all I need to do is I
just need to make sure I'm going to smooth
all of these pieces, but I just need
to make sure that it looks correct everywhere. So where was our main reference? Here is our main
reference. Okay, so our main reference does not show much this stuff.
I just need to ignore. It has like a little
thing at the top. I think that looks quite nice if we do
something like that. Let's turn off
selection constraint. Let's grab this top piece and just hold Shift
and extrude this in. And then what we
need to do is we just need to go
ahead and we need to do like a quick target weld where we just weld
these pieces together. And then just to make sure
that everything is flat, select your
individual etches and just use your scaling to
basically scale them flat. And now at this point, if I just have a look
at my reference, I think I just want
to make this this thin little thing that's just kind of like sitting
here in the center. I don't know. I don't
know exactly what this. Maybe it's like a
vent or something. But I think it will
look quite nice. So let's go ahead and add that, hold shift, and throw this in. Okay, so let's see,
at this point, I need to decide or I need
to decide if I'm going to go for actual geometry or if I'm going to go for using
the pressing tree method. I think I will actually
go for actual geometry just because it's a large piece. So for these pieces, if
we do actual geometry, it's just going to
be a simple matter of selecting this corner. This will ironically have
quite a bit of geometry, tre B, giving it like a
bunch of segments like that. Yeah, the reason that
the actual jom try, you need to be a
little bit careful with is for large
pieces, it's fine, but if you do it for a
lot of small pieces, your UV unwrapping will become a pain if you want
to properly do that. Now, give it like a bunch of
segments over here and just, like, a nice soft
corner like that. And now over here, what we can do is so this out of sight, this out of sight
will have our window, which means we don't need to do anything because it
will be overlapping. However, this side over here, we do need to give
it some nice look. See now I can just double click. And although it doesn't
transition perfectly because we have some merging over
here with our edges, it is a lot easier than
if we would have left it with something like the old way. So over here, I
can just go ahead and I can add some
more segments. And then if I just
go to D select, I can do mesh displays,
soft and hardened edges. Oh, you know what?
Let's do mesh display. Go into our soft and
hard and edges settings, and set the angle to like
20 degrees and pass apply. Oh, sorry, 40, 40
degrees and pass apply. The higher the softer the
angle like this. There we go. So that will give us a
nice soft angle going on. So that's all looking good. We've got that stuff
also ready to go. On our door, did I Okay, I left the side panels
in here, so that's fine. So I can do the same over here. See, I think that will
work pretty well. If I go ahead over here, I have one extra phase, but it looks like I got
some geometry errors. Here, yeah, I see. That does not look very good. Let's have a look. So
what has happened? This one needs to be
moving down Yikes, this is not looking very nice. Let's go ahead and do,
like, a target weld over here. Let's move. It's like a round bit. Oh, wait, this one
is pushed back. That could also be the case. It's a bit annoying. I think it's easier for
us if we just try to fix it now than trying
to redo this part. I should have seen that
earlier, but I did not. So now I'm just going to
need to fix my mistake. And I do that just by
moving this one forward. Moving this one forward.
And then over here, I'm just going to go ahead
and I'm just going to delete these bits over here. To make it easier for me. And if I go ahead and add
a multi cut tool, I feel like it would be nicer if we add some segments over here so that I can then
also move this one forward. It does not need to be
perfect because it's such a small piece, but I do want it to
sort of, like, work. Okay, so that one
moves over there, which means I just need
to delete these two. I need to move this one back in. Over here, I need
to move this back. So, yeah, hopefully you do not make the same mistake as I did, and you will
be able to see it. And now over here just to make my life again a bit easier, I'm going to place a
connect from here to here, to the back and then press Enter and
do the same over here, connect here to the top
and then to the back. Because this way, I can just
do some easier bridges. If I now go to Edge Select, I can see, here we go. Is there a double edge here? Looks like there's
a double edge here. If you suspect a double edge, just press Control Shift
A, and then shift click, merge vertss and then just merge them at
a very low level, and that does sometimes fix it. So if we now try and
bridge this, see here. So the bridge is won. So that means that we somehow, we somehow managed to
get a double edge. So let's delete that phase. So you just move it up
and you try to find that duplicate phase that
you find that is there. And once you found it,
you can delete it. And now if we bridge it,
now it will work fine. And that means that
if we go here. And actually, pretty good
thing that for these pieces, bridging is a little
bit of a pain. What you can do is
you can just double click to select the border. Shift click and press fill hole. After you've done
fill hole, this only really works on straight pieces. On band pieces, it will
look a lot messier. But after you've
done the fill hole, you can go at and you
can use your cut tool to basically cut it all up and just make sure that
everything looks correct. And we can do the same
over here where we can select it, fill hole, go back to our ertzes do this. And now if we do one
last mesh display, hard and soften edges. Let's force this edge
to be hard over here. Actually, let's
force all of them. So let's go ahead and just select all of these. I do this. If I do this over here, I can just drag select and just make sure that there's
nothing on the outside. And then I'm just going to hold control and like these pieces. And for these pieces, what I'm going to do is
these like those and let's soften edge. We go see. So then we just force it to
become soften edge like this. And that should do the trick for our outer frame over here. So at this point, we can go
ahead and save our scene. And now what we can do is we can go ahead and we can move
on to the inner frame, starting with probably like the rubber band
that is around it. So if I have a look
at the construction. So the construction
is a little bit different based upon
what reference. But this reference, as you
can see from the chairs, is from the actual train. So we're going to
create a rubber band, and in that rubber band, we will place two frames. We will place the bottom frame and we'll place the top frame. The bottom and top frame, they will kind of well,
so we will go for, like, roughly this design, or
we will kind of like mimic the design that we
have over here in our doors. And for the bottom frames quite easy if I have a look at this. Let's see. So it looks like that this frame actually transitions all the way around, does it? And that is a tricky one. So if it transitions
all the way around, then the window is
placed slightly on top. You need to think about
the construction here. So if this window is
placed all the way around, so it has one frame around, then it will have a
center frame in between here and the center frame
will have our actual window, and then there's like a rotating mechanism in between
the center frame. You can see a tiny
bit over here that there's a rotating mechanism. So that would take care
of the glass over here, and then it would rotate
you would basically lock or unlock these two at the same time by
pulling them down. When you pull them
down, there will be a little slot that will go
open over here most likely. And then you are able
to push this out. And this piece over
here, the metal piece, which are quite like
it is basically here, I believe to here see? It is here to prevent the window from being
pushed out too far. I think that is the plan
that we want to go for. So let's actually go
ahead and I will just do the rubber frame right now and then in the next chapter,
we will do the rest. So for these pieces over
here, doing the rubber frame, what we can try and do is we can actually try and
convert this to a spline. If we double click on
this edge over here, and then if we go ahead
and go up to modify, convert polygon edges to curve. Yeah, that's one. Ooh.
Let's delete that. Let's do a quick reset history and freeze transformations, just to make sure and
else we need to clean up. Or what we can do is then we
can just make one ourselves. Polygon edges to curve and Oh, select your edge, modify, convert polygon edges to curve. Let's press isolate.
Let's see you. Yikes. That is not looking good. I don't think. Yeah, I don't think this
is one that I can fix. That's unfortunate. So that one does not
transition very well. In that case, what we're
going to do is we're going to simply go to
our side view over here, and I'm simply going to draw out a spine because
I think that's a little bit easier instead of placing a cylinder
extruding it. So I'm going to go ahead
and click once there. It doesn't need to
be too precise. I click here. I click
and drag over here. I then go ahead and go
all the way down here, click and drag over here. Go here. Click and
drag over here. And we can, of course, just
make this look a little bit better once the
spline is done. Click here. And then if we do like a quick click and drag over
here because we do need to close the spline off to make it one spline over here, Oops. And the way that we can do that, actually, we can just
stay in object mode. We can go to curves.
Oh, God, where are you? A touch. Let's try it again. Select Curves. Actually, it's not a touch. It is curves, and it is the open close function.
Sorry about that. And then the open
close function, we need to go in over here, let's push this back a little bit because now we
have a Basie corner. So if we shift click and go to the Basie corner over here, which basically allows me to now select them
individually like this, I can now focus on first of all, making this one pretty much like a straight piece like this. And as I said before, it does not need to be
absolutely perfect. Just try and get it very close. Then over here, I'm going
to go and turn this also into Bezier corners so that
I can select this piece, and I can basically use these two to rotate quite
closely around, and this is where the
rubber piece will happen. Oh, over here, make sure that this one is pointed straight. And then this one also so that it is like a nice straight line. Over here, this one
is not a Baje corner, so let's break the
anchor tangent so that I can just go
ahead and select this. So you can convert
the entire thing into a Baje corner or what you
can do like over here, I would do a shift
click, Baje corner, or you can go ahead and select the outer side and then
break the tangent anchor. So there are multiple
ways to do this. It just depends on how you are currently
having your selection. And depending on that, you can choose which one is easier. Now, if I go ahead
and over here, I have a really
long anchor point, does not really matter. I just need to move this one up and this one up so
that that is straight. Here we go. Now, I'm just going to break this
angle point, once again, I do that because if
I do Bezier Corner, this one will most likely reset, and it means that
I would need to redo the placement again. But in this case, I'm going
to move this out over here. Move this down. And here I will need to do a Basie corner because I need to push
all of this stuff around, and then that should
do the trick. So if we do this, there
we go, I think that, that should be good
enough for us now go into our Why remote. If we go ahead and just reset my pivot so that
I can select it. Okay, so now that I
have this spline, what I'm planning to do because it's pretty much like a cylinder is I'm going to go to
create sweep mesh, and now you can see that it just adds like a nice little
cylinder around this. And with the cylinder, what
I can do is first of all, I can choose how
many sides I want. So I'm at eight. Et's go at the sets to like 12. And once that is done, I'm basically going
to push it in and then I'm going
to extrude this out. So let's first of all, decide
on the thickness of this. And if I have a look at
it from a distance here, it is actually quite a
tick looking rubber band. So let's do 0.65. And for the rest, just turn on optimize and turning
on optimize, we'll just make sure that we
do not have an overkill of polygons that are
hard to manage. Now at this point, selected. Let's go ahead and do a remove history, resetting a pivot. I'm just going to look
at it from below, and I'm going to basically
push it back as far as I want. And once I've pushed this back, I can then go in
here and I can say, if that is the spine, shift, double click, go
around here, delete. And I'm going to go, see, so if I have it here, I
want to do it straight. So shift double click over here, delete, and then we can just
double click on the ends. At which point, we can just move or we can just double
click on all of this, and we can basically
move it back over here. And we don't need to really do anything else because this is
where the window will sit, so you will not be able
to see past this point. Now with these points, over
here at the transition, it sometimes breaks
a little bit, so that is something
that we can also quickly fix or that
we will have to fix. And that is that, let's see,
over here, what does it do? Like it does not always
know what to do at the end. So what I tend to do is
I tend to just delete this And then I tend to
select all of these pieces, hold control, and deselect the rest and just
do a simple bridge. And that often
tends to the trick. Now, at this point, what I'm going to do
is I'm going to add some supporting loops
because I'm going to turn this into hipolymsh. So I'm adding one
here, one here, one here, and just
for good measure, A one on the inside. And then we just like on
every transition piece over here, here, and also on the other side, we want to go ahead and add an extra piece or
an extra edge loop. And then, hopefully,
if we now press three, it gives us a nice soft
result, as you can see. Okay, so that was
not too difficult. Just a new technique
of using the splines. In the next ship what we'll
do is we will start focusing on adding this actual
trim over here, and we'll see how it goes. Maybe we can rip
something off from our door to basically save
some time, but we'll see. So let's continue with
that in our next chapter.
11. 10 Creating Our Final Window Part2: Okay, so let's go ahead and
continue with our window. So for the planning,
as you can see, so what we're going to
do is we're going to have one full window frame, and then we're
almost going to have one extra window frame
layered on top of it. So you can see, kind of
like the effect over here. And knowing that, I was thinking if I can
maybe if I look at this, I can maybe steal
something from my door. Oh, no, wait. You know
what? No, I cannot. No, that does not look
anything like what we need, so in that case, we're just gonna go at them, we
are going to recate. Although actually,
no, you know what? No, that does look
like something I need. Now I look at it. Yeah.
Yeah, you know what? Sorry. That does look
like something I need. So what I'm going to do
is I'm just going to hold Shift and just cloe my door and just throw it into
my window layer, and press one because I only need a specific part of this, and that is that I need C.
Let's start by selecting this. Press Control Shift I to invert your selection and
delete everything else. Let's delete that
also, and let's see I need them probably up until this point. There we go. Let's delete that also. And what I'm going to do is I will most likely Delete this face so that I can also
delete this side so that we only have one
side to worry about. Okay, so having a side there was one thing that I wanted
to do is I wanted to add an extra loop to this
or an extra little bit. And the way that I'm
going to do that is I'm going to add like a swift loop from here to probably over here,
something like that. And then delete these two. Let's just go ahead and hold
shift, extrude this out. Hold shift and extrude
this one out over here. Something like that
should be fine. And then we can just go ahead
and we can bevel there. So we can select
these two vertices. Shift click, move Merge
vert Cs to center. We can go ahead and do
the same over here, select them, merge
Virts to center. And now for this one, I'm just going to go ahead
and see if I see this, I will most likely want
to make this a little bit larger Press contra B to
give it a nice little bevel. You know what? I
think, maybe giving it quite a large bevel
might actually be nice. And then we can just
go ahead and we can re art our supporting
loops over here. Like that? Press three. And there we go. So that already looks like a little
bit more interesting. Okay, perfect. So if
we now go ahead and scale the top and
scale the bottom flat, now we just have this
chunk of mesh over here. So we are going to
place this chunk of mesh all the way around here, and then over here, what I need to do is
I think I will go ahead and I will make a custom. Like I will pay use this stuff, but I will make a custom
trim around here. And for this trim,
how does it look? It kind of sucks that I
don't have any better, reference for that,
but I really I looked for quite a while.
Okay, so over here. So that trim, it looks
like that what we will do is we will end it here, and then we will just have
another mesh sitting on top, and this mesh is going
to be our top window, and then we can create the rest. Next that. That's the plan. So I'm going to hold Shift, and I'm just going
to duplicate this. I J, rotate this and just
move this down and move this into place to make sure that
everything looks correct. If we move this down here, first of all, just guess. If we have a thick enough window and it looks like
this is thick enough. I don't need to make a ticker or tinder or anything like that. Next this, we can later on just push it back for
now, let's do this. And then yeah, over here, we
do need to, like, of course, do a little bit of work just
making this nice round. There's a few ways
that we can do this. If we go ahead and return
on our edge and faces, one way is that we can literally move this to this point and
then, extrude this out, and then at that point,
we can just like mirror it this point
and then mirror it up. Another way is that we
can simply select this. Oh, sorry, do it like this
way. So select the sides. Hold Shift, go to rotate, hold J, and rotate this 90 degrees and
then move it over here. And if you then
already move this up, and then what we would be able to do is we would be able to, like, add some segments in here. So you can extrude it down
or you can do it this way. It all just kind of depends. What I'm going to do is I
think I'm just going to go this way and
that I'm just going to basically place one Oh, yeah, I do not like that. Another way is we could also turn this
into a single spine. So we could do this
where we basically get almost like we get rid of this
piece. We move this down. I'm not sure if this is going to work. It's very specific. And we rotate it 45 degrees, and then we add like
segments to it. Like this. So I'm not sure if it will work because it has always a little bit of warping
now that you look at it. So maybe I'm just going
to Undo this and, I'm just going to
go for this way. Doing this way just
means that we need to do a little bit more manual
work that I did not expect. But let's focus first on getting the points to touch
these areas over here. I think that's a good one. If we just do that one
by one, and by the way, let's set this
also to just don't press three on that stuff
on the rubber band, sorry, I mean, so that I can
do like a proper movement. And once I've done that,
I will do some rotating. I only need to do this once, and then we can just use
the symmetry for it. So that's why I don't mind doing a little
bit more manual work. But over here, it's surprisingly it gets surprisingly deformed, which is a bit I'm a bit curious about
how this one works. So we'll see where exactly
that it goes exactly deformed. So let's add one more over
here. Then we can have a look. Okay. So over here, this stuff, it seems to go deformed
quite quickly already. Like, I would almost like
need to move this all down. Over here to basically
get the correct effect, and then over here, I
would need to go in, and I would also need
to do the same thing, which I don't really like, but we could do that, where
we do some more manual work. It's just a bit of a pain
to get white because I'm not completely sure exactly
how I want to place. This one needs to go
a bit further back. This one needs to go
here. But then over here, it does not feel correct. A way that we can measure this out is we can add a cylinder. If we go ahead and we add like a very quick cylinder over here, we can use the cylinder
as a measurement tool. We can basically hold J, rotate this 90 degree,
move this in here. And then just scale
this so that you get one quarter here
and one quarter over here. Like this. And then you know
that we are way off basically off the mark
because then what we can do is we can go ahead and
we can just make sure that roughly all of these sites
are touching the cylinder, and then technically it should become like a nice round bit. And then what we will do is we will just
move the cylinder down a little bit and
then move it like that. Like, you don't
need to be exactly on the segments of
cylinder because I did not bother
adding more segments. But I do want to go in here. And now if I would like
to move the cylinder, it still looks bad. Let's move this one
down a little bit. And else we can try
doing segments, one, two, three, four,
five, six, seven, eight, nine, which means one, two, three, four, five, six, 24, one, two, three, four, five, six, seven, 28, 32, one, two, three, four, five, 6789. There we go. If Maya
wants to be like this, then we are just going to
work a little bit more accurately in order to get exactly what we want.
Sorry about this. I did not expect this
to be so difficult, but it's because we
are re using a mesh. If I would be recreating
this mesh from scratch, it would be a little bit easier, but it would probably still
take around the same time. Although maybe by this point, we would
have saved some time, but of course, I
don't know that when I start doing this stuff. So now what I'm going to do is I'm going to scale this up. And then I basically want
to go ahead and I want to hit it also over
here on this side. So I'm scaling this up,
and now I go over here, and then the should be pretty much the last
ones that I have to do, where I just move this down, place this into place over here. Hopefully, everything
fits nicely. And if that doesn't do it, then I will just throw away this footage and I
will start over. So that's a little
behind the scenes that there is a point where if
it still does not work, it's not logical for me to
continue because then I just made a mistake and
I need to, like, fix it. But, okay, so let's see. Yeah, I think once
I press three, so once I rotate this,
this is pretty doable. Owing things over here,
there seems to be like I need to add an extra
edge probably over here, so that when I rotate this
and I do the same over here, turn off my edge and
faces, it needs to, of course, keep in
touch with the ends. Let's do the same
over here where we need to place like an edge, probably over here and maybe
then move this a little bit further back just to make
sure that it is clipping. See, because it kind of pushes itself back when we turn
this into a hypoly. But, in any case, I can live with that.
That's looking fine. The only thing that
I would want to do now is I just need to go
ahead and go in here. So I go back to one. You want to go in here and you just
want to make this straight. And the way that you can
pretty much tell if this is straight is just
look at the edges. This is the one time that
antializing actually is a benefit because based
upon the antialising, we can see when something is straight or when
it is not straight because then it will show
us these jagged edges. So if it's pretty
much straight like this, you should be fine. And then over here,
what I want to do is, I'm just going to temporarily
move this back quite a bit, which I guess we can also do at the top just to double check, and then just make sure
that this stuff over here is all nice and straight, and then we can just
move it further back at which point that
we are going to mirror it. The same over here,
and then let's see. So I was close. Let's move this out
a little bit more. But this one over here feels like it's not completely
straight also. Yeah, so at this point,
that should be fine. Okay, there we go. We've
got that stuff done. We can now go ahead and
get rid of our cylinder, and now it's just a matter
of mirroring this stuff. So let's remove our
history and let's save seen before we need to
go through this again. Mash, quick mirror, mirror it on the x
axis. I think, yes. Set the merge
threshold like quite low, 0.05, for example. Just move this
back. And hopefully I can move it
correctly, right away. Let's do this. Let's quickly go into Vertex mode
just to make sure that I did not push it too
far in or too far out. Let's press three just to
double check our work. Yeah, that's looking
fine. What you can do is over here
this center segment, go ahead and select it,
and I always like to get rid of it to make sure
that my mirror went correctly. And now, so this one needs to go all the way through the top. And then what we'll
do is we'll place something that basically
slots in between here. So for this, let's
reset our pivot. Mesh and do another mirror this time on the y axis with
the direction in the plus, and once again, a merge
of 0.05 or something like that, and move this down. Let's press W, select the top. Once again, just make sure that it all nicely fits together, and then we can go ahead and
also like the side etches, okay so those remove correctly. That is all looking good. So if we now press three,
this one will also be done. There we go. We now do have a really nice looking
mirror frame. Okay, so now what we're going to do is we're going
to first of all, build this piece on top, and then we're going to go ahead and build the actual
window in it. For that, I'm going to
mostly divert to this. So it looks like this piece
comes out until the rubber, and it is actually
round at the tip. So I think what we'll do is
we'll create a cylinder, which will then extrude in and then give it
a little profile. And then at the top bit,
we will just extrude it flat because we will have
another frame sitting on top. And this frame I will most
likely if I look at this, it looks pretty much
like the same design. So I will partly use it or I will just use
the entire thing of it. So it looks like we want to
go for something like this. We want to grab a
cylinder over here. 20. Let's do 14 segments for now just to make it
a bit more manageable. Rotate this. And
if I look at it, so it is sitting next to
your rubber piece over here. And then if I have a
look, it is smaller. I'm just following, I'm just
trying to capture this. I think you can I
was able to show you somewhere else. I forgot. There was a window where I
was able to actually show you how the rubber piece
is sitting together. Okay, I already had that
image. It's a duplicate image. Doesn't really matter, but Huh? Okay, I guess I lost
the image that I was able to show you exactly
how it fits together. I know that I had it, so that is a little bit strange, but I cannot find it right now, and I don't want to
spend too much time trying to find an image. In any case, it does not matter. I know roughly in my head I can make up and design,
I should say it like that. So this piece is going to be like this in
front of the rubber. Let's scale it. And only reason I'm scaling
it is because I want to get a sense for
how large it is. And seeing this, it's
still too large, so let's make it a bit smaller. There we go, see, that looks
a little bit more logical. Now I want to go ahead and
give it like a height. I'm not too picky about that. We can still move it later on. And now what we're going
to do is we're going to make the profile
in a small scale, and then we can just
extrude this out. So starting this profile, we want to have
just overshooting it a little bit over here. No wait, we do not
want to have it. We want to have it over here
because else it becomes a pain for me to do
anything about it. And then what I'm going to
do is I'm going to see, I think we want to get rid
of these areas over here. Yeah, I know that I'm doing
this very unoptimized, but it was because
I was figuring out I was not thinking
about how to select it. So we got this area over here. Let's go ahead and start
by extruding this out. And this extrusion will
basically happen up until let's say this point. Well, I will just push it out because I will just
make something here. So let's see if I
have this, actually, let's focus on the bottom
first. Select the bottom edge. So if we have this, we go out, then we extrude this sideways to probably around this point. Then I will move it
down a little bit. Oh, let's move this
a bit forward. See, I move it
down a little bit, and then I move it in, and then it will sit over here. That will mean that it has
some clipping going on. However, that clipping, we can probably fix a bit later on. So have ending on
the other side, it basically just moves
all the way in like this. And yeah, I think we want to end it up
until this point over here. I don't think we want
to move it any further. Okay, so we got
something like this. Let's go to our
modeling toolkit, turn on angle constraints, so that we can just
very quickly delete the sides and turn it off again. And now what we can do is we can have a look
and see how we can make this look very nice around here so
that it kind of cuts out. I think what I'm going to do is I will cut out square pieces, so I will move like an edge over here and then delete this. So, oh, wow, that's actually really simple
doing it this way. And then we're just going
to fill in those pass. Then we are going to bevel it, or we're going to make
it at least look hypol. I think that's the
best way of doing it. And then down here, I will
just keep it straight, even though this
one is flowing off because I think I mean, we could try to like art
and etche over here, but I wonder if it will give me any inconsistencies later on. Here we go. Let's move it like that. Let's
see if that works. Cool. So now, knowing
this, isolate this. Let's go ahead and let's see. I want to that is a
bit of a tricky one. How am I going to So this one I can just extrude
out to bevel it. But this one I feel like I almost need a little
extra bit of space. That's how it feels like because there's no way for
me to actually properly bevel this
like it is right now, and extruding it up
does not really matter. So let's give this
a bit more space. Let's push this
out a bit further. Let's go ahead and let's just add a segment roughly around here and then extrude this out. Select these end
vert season just go ahead and merge ties to center. So now I do have a little bevel, which now I can extrude this up, and then you will not be able to see anything beyond that point. So we are extruding this
up, and then over here, we are just going
to merge this flat. So if we have this,
let's move it down here. Let's add a bridge over here. So we've done those two pieces. These two pieces
we can pretty much leave floating into mid air. And then over here,
what I'm going to do is, Oh, no, you know what? These two pieces, we can
just bridge like this. I completely forgot about that, that we, of course, have the
exact same thing at the top. I'm going to go in and add a quick segment over here that I have a nice
bridge like this. And then I can start by
just bridging these pieces. And at this point, we can
just double click and we can deselect these two sites and we can bridge
this. There we go. I think that yeah, that should flow off
everywhere like that nicely. Now that we have
done that stuff, now what we can do is we can
go ahead and we can just add support loop here, another one here, one over
here, another one here. And then we also need
to add them here. So what we are going to do now is just add those loops that we can nicely for this. So we do need to support loops also
over here and over here. It's also do one
here because else it will just look too soft. And then over here, I
think what is better is if I actually go ahead
and do an angle select, and I basically select
all of these angles. Except for this area
over here because this area is too small for
me to do like an insert. And then what I'm going to
do is CtraE, offset 0.1. Yeah, 0.1 actually works. Maybe some very close verts, just quickly merge
these two together. One thing that will
most likely happen is that this etche
over here might break. So let's see. Oh, no, it's not too bad.
Over here, it breaks. And when you have that, so this because it doesn't have a
supporting loop ending here, we can simply fix it by
adding a multi cut like this. See, and that kind fixes that. And for the rest, this all
seems to be looking fine. So now that we've
got this piece, now what we're going to
do is we're going to go ahead and just reset our pivot, remove our history
and you know it, do a quick mirror on
the X axis in the plus, 0.01 in terms of the
merge threshold. And let's press W and then just get rid of the center line. And now we can finally
select this and we can just move it all
the way over to this side. And I know like ding on variation, I talked
about that stuff. I think for now, I don't
want to do that until everything else is done.
So we got this one. Let's just select this site and let's move it a
little bit closer. Don't know then this site I probably need to
also do that, here. Select this just a little bit
closer. Let's press three. There we go. Not too difficult, but yeah, it just has
like this little trim. And the only thing that I feel like that is missing now is that this stuff needs to go down a little bit.
So let's select this. As compared to my reference, I feel like it is just
a little bit too thin. There we go. That
should do the trick. Okay, let's say acin and the next step to what
we'll do is we'll just work on the smaller window and the locking mechanism. So
let's continue with that.
12. 11 Creating Our Final Window Part3: Okay, so let's go ahead and
continue with our window. Now, I think I'm going to
mostly look at this reference. This window is
actually very easy. It's just a little almost
like the same trim over here, but then a little bit more
simplistic sitting on top. And then these
pieces, they are just going to be a plane or
something like that. Oh, no, no, wait. I do
want to make it as a cube. I need to remember, it needs to be filled on geometry
and not optimized. That's why I kept this
one on purpose over here. So I kept this piece, but
now that I think of it, I might be able to
actually use this piece. Let's see if I have
this. I don't know. This stuff, I might be able to, let's just redo it. But I'm not really in
the mood to do that. Basically, I'm thinking
of doing this here. Let's just duplicate this one. And basically, what I
want to do is I want to get rid of this
trim over here, and I want to just push this back and also get
rid of this trim. That's what I'm thinking
for something like this. And then maybe I'll push
it back in a little bit. But if I do that, it does mean, it's better if I just redo this stuff because else it will take quite a while to
just properly redo that. So let's just go ahead and
select only this side, press control shift I
delete everything else. Let you see if we can
get this to work. So my idea is to get rid
of this stuff over here. So we're basically just
going to simplify it. Here we go. We get
rid of that stuff. We also get rid of
this one over here. Let's also get rid
of this extra line. Double click on this, and then I wanted to push this all back. It's like a little
bridge in between. Um let's see. So this one is this straight. We can flatten it to make
sure that it is straight. Yeah, you see it's not straight. Now it is straight.
But it looks like that I need to probably slack
this one and flatten. Because now the
thing is that over here, of course, this piece, if we just go ahead and
go into isolation mode, and let's make this a lot smaller because you
can already see that it's really annoying to
just rotate around it. I basically want to make
sure that over here, so I keep pressing
the Wong button. There we go. I want to make
sure that in this case, it's just going to be straight. So I'm just going to
flatten this out like this because it's a little
bit more manageable. And then this piece
is going to go up. So we're going to
make less Tick. I'm going to go ahead and
I'm just going to get rid of all my spotting loops on
the top and bottom side. Let's press control backspace on that so that now I can
actually, you know what? Let's also get rid of that one, so that now I can go
ahead and I can push this back I can select this final
piece, push this back. And then I most likely just
want to push it up and out. But I'm not 100% sure. I just need to see
how it all fits. So let's see if
this piece is going to be on the top of it, I think if we make it fit over
here, this would be good. So let's press J and
rotate this 180. What I'm thinking, so this piece is going to be like
somewhere along here, Yeah, I want to give it
a little trim around it. Knowing that, it does mean that we can get rid of this one, and maybe we can move this
a little bit in over here. We have a little
trim around this, we go out, and then we go in. For these sites, we
can flatten them. And then it looks
like over here, we need to go for a
corner and then we need to go for a round
piece for the rest. If we have this, how does
that look? Let's see. If we just scale this just to make sure that the
thickness is correct. Um, let's undo that, and let's make it
a tiny bit bigger, a general thing, make
everything a little bit bigger. And let's take it up
until this point. There we go. I think this
should be pretty good. So now, the first
thing that I want to do is I'm going to
just very quickly add some more supporting loops again, just to bring those back. Like that, and I
have a press tree. There we go, so that will
give us a nice look. And then I first of all
I want to go ahead and I want to go in here and just
do like a proper corner. This one is actually very easy. But the reason that I
need to make sure that it works is because we, of course, want to fit
this nicely together. So I think what I'm going
to do is I'm going to here. This fits actually really nice. So let's just fit it
together like this and maybe scale it flatter a tiny bit just so that we
can push it out a bit more. And now we have some
space still for a glass that we can just place and then
we'll take it from there. Okay, so to turn this
into a nice corner, that is very easy
because what we can do is we can
just go to mesh. And while I'm saying this,
I actually have an idea. I should have done
this last time. This idea is to set
your xs to the X, set it to the plus, and just set your merge threshold
to 0.01, for example. And this idea, I
should have done this last time because I
can actually rotate this, and now it becomes
a perfect corner. And now I could go
ahead and do it like a Control B and
then make it round. So I think that will actually work totally fine
if we do that way. So for this one, it's basically going to
sit in here nicely. And I'm going to try that out. So that is just an
oversight for me, but there are so
many ways often to do something that yeah, there can be times that
you just forget about it, and then you notice later on. So don't worry about
if you don't have the perfect way wide way that's
very normal in modeling, and sometimes you just need to mess around with some stuff. So let's push this
out. So now is the moment of truth that
if I get rid of this line, if I select this one
and do contre B, I'm hoping that with like a bunch of
segments and just doing like here doing
like a general 0.5. It does have a tiny
bit of warping, but it might work fine
if I press three. Yeah, so if we go
now and let's see. I think that if I art like
an extra segment over here, an extra segment over here, and don't forget that over here. You also need art segments, but art them very close
together so that they, they just become a nice corner. Okay, so almost. So
this almost works, but at least it works
to a point that I can now just use my
cylinder technique. So I do save a
little bit of time. It's not as perfect
as I want it to be. And because we are so focused
on modeling in this case, I am going to go ahead
and I'm just going to, like, make it all perfect. Oh, sorry, let's go out
to the violation mode and grab your cylinder
that I've just created. I can go ahead and in here, I just scale it down. Hold J rotated 90 degrees. Now if I just go ahead
and go in this side, what did we say 32, I believe. I don't
know how many. I have one, two, three, four, five, six, seven, eight. So then we are probably at 28, one, two, three, four, five, six, seven,
eight. There you go. So just multiplying. And I'm really bad at math, but even I can still manage
to get this sort of correct. And then I'm just going to go ahead and I'm going
to scale this. Neatly and just
place the corners, and now that should
do the trick. So if I now go ahead
and go in here, like, pushes out a tiny bit. There we go. And now I just
kind of move this over here. In this case, because of the way that we
are placing this, it is still the same. So actually, you know what,
this looks pretty good. Only over here,
it just needs to, like, move a tiny bit. For us, it looks pretty spot on. So I think we can delete this,
and now if we press three. Hm, it does feel sorry, let me just go to this view. It does feel thicker
for some reason. Like here, see, it does
not feel as round. So I don't know. That
is a bit of a shame. Like, it works over there. Maybe it's that the thickness over here is not
working as well. Let's press Uo until I
get my cylinder back. Let's go to my side view, grab these two pieces over
here and just give it to go. So that one is working. This one is working. Now, wait, you know
what the problem is? The problem is that
we most likely here this is supposed to expect to be like
a straight line, and this one is supposed to expect to be like
a straight line. So over here, it kind it expects to flow like
this, like this. And then over here, it expects to flow a bit
more in this direction. And then as soon as you do that, you can see that there's
actually a massive difference between the two, where if you would now fit
these together properly, you would most likely see that there's quite a difference. So if I now go ahead,
and Twin here, it's even difficult
for me to even fit this. Correctly, let's do this. Here, let's do
something like this. Now if I go at and I
do like X ray mode, which you can do up
here, you can go into X ray mode. There we go, see. So that's most likely the
problem that we have. And I guess that at this point, we can leave them like this and we just need to kind
of move them out, or you can select all of them and try to move
them out and then, try to do some rotations. The tricky thing
with this that later on, we need to move them back. So because of those reasons, go outside of X ray mode, I'm going to move it up until here because
this is straight, even though the lines look
like they are tilted, they should still be straight
in the extra geometry. So in the end, I guess that this was still not a
better way or something. I guess you can save a
bit of time this way, but it's still a
bit of a pain to do this kind of stuff.
So we got this one. Now what I wanted to do is I wanted to go outside
of X ray mode. I wanted to scale
this out carefully. And then based upon that,
I wanted to go in here and let's Yeah, this one
is a bit tricky. Let's move this
down a little bit. But I was going to go
in and then also fit this one to be a proper
cylinder around here. Must be an easier
way of doing this. I must be I just know that there is an
easier way of doing this. I just don't know. At
least, it's like a feeling. Like, I feel that I am
doing it the long way around while it will most likely have a much easier
way to actually do this. A move this one
back a little bit. Then we'll just have to
be careful that over there it is looking correct. And now if we go
ahead and actually the scale is up once
more over here, now we can see that
there's actually a massive difference
between them, and I think we got to the
point where I need to, like really deform this, which means that we
will most likely overshoot our original
frame a little bit. And if we happen to do that, we just need to compensate
for that stuff. Yeah, because this
stuff here needs to, like, go up here and then go, like, down here, and then this one needs to
probably also move up. But hopefully, that
now does look round. See, that looks a lot rounder. So now that we have this one, now what we need to
do is we need to just try and make
everything work. So first of all, I'm just
going to make my ome try a bit cleaner. Over here. Okay, let's have a look. How are we going
to make this work? Start by just moving all of these pieces forward
a little bit, so that we have that
shape over there. And then we can see
that over here that we probably want to move these
a bit closer together. I'm, if I'm going to go ahead and move these
close together, it's just going to be a
little bit of pushing. So at this point,
let's carefully twine, push these closer
together like this that might work if I just
set this one back to, like, our original shapes. Yeah, I push the
bit close together, see, let's move this one here. Let's move this one over here. Let's move this one straight. I know I know it looks
really messy right now, but I hope that
that will resolve itself as soon as that we've placed these pieces
over here and this one. Let's say, over here. Okay, so we do need to still
redo the outer side. But if I go ahead and add an extra segment over here just to turn it
into nine segments. Let's see. Let's
go to this side. So if I press three, it does look a little bit
better. I I press three. Just on the outer side,
we now just need to redo once more the
cylinder trick. Let's scale down our cylinder. Let's set this to 32 so that we have enough
segments over here. There we go. Okay.
Hopefully this fix it. Messy, messy, messy butter well. As long as in the end, it
works, it's totally fine. And I know that if
this was three as max, I would have used two
splines. That technique. You can do that
technique over here, but I was too stubborn to remake my entire shape over here. Now, at this point, what
you can do is if you want, you can just try and clean
this up a little bit more just by moving some of
these edges close together. And this is just doing
eyeballing it a little bit. Let's see if I press
three on both of these. Yeah, that does not
look too bad anymore. Let's go in here. Yeah, see? The only thing that
is that over here, there is a little I don't know. It just feels like a little
nick or something like that. Maybe it's that this one is not completely around anymore, so we kind of need to rotate it. So we're rotating this around, maybe moving this
one up a little bit, and maybe adding
then another loop this time around here and
another loop around here. And hopefully that. There we go. Finally, Jesus.
Okay, that does it. So we can go ahead and
we can move this out. One. Check over here that
everything is working fine. But yeah, yeah, that looks
like a nice looking frame. So now that we have this
one, now what we can, of course, do is we
can reset a pivot. I'll just quickly
breeze through this. So it's just going to be
a mirror on the x axis. 0.01, merging, press
Enter or press W, get rid of the center segment, and then I can see that I have not done the
merging correctly. Don't worry about it too much because what you can do
is you can select it and you can press merge vertices and then merge them like that. And now you can see that the
merging has gone correctly. I don't know why I
didn't do it first time. Maybe I made a typo
in my merge settings, you'll see there are
still some tiny verses, there's control
bag space on them. Or the lead. Also good.
Just press the lead. Just end up with not
having any edges there. At which point that
we can push this back over here. Press three. Finally. Okay. We
got the window. Cool. So that's that
window frame over here. Now, basically, for this piece,
as you can see over here, it kind of just sits, and I believe it
sits on this edge. It sits on this tiny edge over here because it makes sure
that the window cannot open. So because this window
technically would still open, and you can even test it out by doing added pivot and moving
the pivot roughly like here. So when this window would open, it would basically block it
from opening any further. Of course, the window
would look a lot thicker, but that's something that
we will not work on. So for this piece, I
am going to go ahead, and I think this time I
am going to use a spine. I'm going to place
a spine over here, and then I'm going to extrude
this, and then over here, I'm going to just
reduce the extrusion. So if we have this piece over here, let's go
to our side view. Turn on X ray mode
and make life a bit easier and turn
on a Bazier corner. Now we want to have
this one, let's see, from up here to up
here, click and rotate. You know what? I'm just
going to, like, end it. I'm just going to end it
somewhere along here. And once we've done that, let's
have a look in the spine. Okay, so this is my spine. Let's see. So the points,
I need to first of all, let's go back to my
side view. 1 second. I just want to move it closer to my mesh that I can actually be sure that it is sitting
on the edge of my mesh. Here's a move just very
close to your mesh. Just press Control ertzes and just try and move
this a little bit. Give it a little bit
of space in between. For this one over here, we want to go ahead and just break the tangents for this one, Shift click, break
anchor tangents. And now we should
be able to just make this one nice and
straight like here. So that will just
be a straight line. Over here, you can grab this tangent and just
carefully move it around. This one, we can turn into a
Baje corner and do the same. We just want to
basically carefully have a strip going around here. Like that looks pretty good. And let's see then it
goes around here and then maybe move this
out a bit further. And then at this point,
before or after. So before this point, we want to go ahead and want
to give it like a little lo so let's say something
like that is good enough that we can now
just turn it into a mesh. So for this one, we're going
to once again go to create, and we're going to
use our sweet mesh. But this time we want to go
ahead and we want to use a rectangle sweet
mesh over here, which is basically just
going to be like a cube. Looks like it has some
problems down there, but that's no problem because
we can fix it later on. And then for our wit, we can, for example, turn
on atg and faces. We can give this specific width, and we're going to
make this quite thin, like you can
see over here. Let's turn on
optimize to just make it a little bit easier
later on to optimize this. And then what we
want to do is we do want to go ahead and set the precision higher so that we add a little bit more
geometry around these ends. But remember, we
will, of course, go ahead and we will move this. Now that we know this and we have decided
on our thickness, we can go in and we can select our spine and go to
the control vertex, and we can still go ahead and we can move our spine around. Now, we don't really need
to do this for most areas, maybe move this one a bit. And this one a bit. Here we go. Maybe move out a tiny bit. There we go. That
should do the trick. Maybe over here, move it
out a little bit more. So it's just going to be close
to the corner like that. Once that is done, I think
that we are ready to go to e this definitely the
thickness I want to go for. Maybe turn on antializ
no, you know what? I'm going to go for a
little bit thinner. So if I go and select my mesh, I can just go to the
sweep mesh creator. And I said it's a
little bit thinner. Zero point let's do 0.1. Even number. It's always nice. Okay, let's go ahead
and remove the history, which means that now this has
become its own little mesh. I can go ahead and select the phases here at the
bottom, hold Control. Deselect these phases
and just press the lead. This will basically give
me a clean cut over here, which we can then
later on extrude. For now, what we're going to do is we're going to go ahead and having this cut I'm going to get started by adding let's
add a bridge on this side, and let's add a
bridge on this side. And the reason that
we do that is that my loops will go
all the way around. I will just make things a
bit easier because I want to add a loop roughly over here. I want to select this piece, and I want to basically
push this up. And then what I want to do is
I want to also add a loop. Let's see. Let's
add a loop roughly around this point over here. And now, finally,
what we can do is we can go ahead and we can
go to our top view, for example, turn on isolate, select all of these
vertices over here. And then what we
can do is we can go ahead and we can
just push this out, which will create that shape. So first of all, we just push it out roughly how far I think that we need to go. Just go something like this far. Then I can just move this up until it looks a
little bit better. And then over here, what I
can do is I can just move this out like that. And then it just becomes
quite a thin trim, so maybe even thinner than this. So maybe even select this. Just make this very thin. So just going to
have a small trim, and that trim will later
on also hold the lock. So the locking mechanism
will sit on top. And then this stuff it will just be like a little block with a spring that is
just sitting here. That's what I'm going to create something
in that direction. But we will do that
in the next chapter. So having this piece over here, that is looking pretty good. What I'm going to do now is I'm just going to turn
this into hi poly. Because we are going
to do a mirror here, it should be fine, but just in case I am going
to actually delete bridge these faces over here,
I'm going to leave those. And I'm going to also delete
these ones and then do a control shift and delete all the backside because
we simply don't need it. Now, at this point, here we have a little bit of geometry that you could make
cleaner if you want. I'm not going to do so though, because it's not really needed. I'm just going to place a
simple cut going from here to here and another cut
going from here to here. There we go. And
now we can start by just adding a
sport loop over here. We can add two sports
loop over here, another one over here. This one, we don't
need sport loop. S. So we got those ones, another spot loop in the center just to contain the shape, another one here and another one that is unfortunately
broken over here, but with this one, I'm just going to use a
simple multi connect. The reason I cannot
just use a connect, but I need to use
like a multi cut, I mean, is because
it is at an angle. If you do a multi cut, well, I guess you can move it up and down. So I
guess it would work. Like we can give the go
like selecting these edges, you can try to do the cut. Set this to one, and then you
would need to go into slide and mess around with
this to set it to 00.02, for example, and then I guess you can press Enter,
and that would also work. So it just depends how much
effort you want to put in it, or you can just use,
like, a quick multi cut. In any case, that stuff is done. And now for this
stuff over here, I'm going to place a
loop around this area. This needs to be
quite sharp because this is quite a thin
piece of metal. So a loop around this area, which will most likely
mess things up over here. You can see that because it's trying to merge it
down at the we point. So what we can do is
press Control backspace, go to our vertex mode and we can then go in and just
do a multi cut from this point
down to this point. Same over here, this point
to this point. There we go. And that should
give us a nice cut. And then over here. Over
here, it did not mess up. I just placed it
really close together, and then it will
become too sharp. So instead, I'm going
to slack these pieces, and I'm just going to simply
move this down a little bit. So yeah, you just want
to make sure that your sporting loops
are not too close together to your mesh
because then of course, it will not look very good because it will
be way too sharp, and then you kind of lose the whole goal of having
a hipoly looking mesh. Spress three. Yeah,
that looks pretty good. Okay, perfect. So what we can do now is we can just go
ahead and mirror it. Reset your pivot point, throw on a very quick mirror on the X axis with a merge
threshold of 0.01, and just press W. Go into the edge and
just like the check, double click on the edge, press Control backspace. That works. And the edge also
sometimes the forms. You could see that. And now you can
just go ahead and you can select this site, move it into location,
and there we go. Plus three. Turn on
multi enteroysing, and there you can
see that now we have this quite hypol nice
looking window going on. It feels like there is still a backside for some
reason. There is not. Oh, no, wait, that's
the ambient occlusion being ambien occlusion that has a lot of trouble with this type of wily tin stuff. Okay, in any case,
what we're going to do next chapter is we're going to work on the locking mechanism, and I will also go ahead
and I totally forgot to, like, extrude this out.
But we are way over time. So extruding that
out, we can just go ahead and it will just be this. It will just selecting
these edges over here. And extruding them. And then
like adding another loop. I will just do a re mirror. I will show you how to do this because it's just very quick. So we do this one,
and then we can I want to add another
edge loop around here. And then around here,
you would need to maybe like a multicud from this point to
this point like this. Press three, have a look at it. It's a little bit softer
around those areas, but it's not too bad. Like maybe add like a few more
segments in between here, just to make it look
a little bit cleaner. See? There we go. I will do a mirror
a re mirror on this off camera just
to get it done. And then in next chapter,
we will hopefully finish our entire window. So
let's continue with that.
13. 12 Creating Our Final Window Part4: Okay, so let's go ahead and
continue with our window. And luckily, for the logs
that we're going to make, we only need to make one, and then we can
just copy it over. I'm going to make this one quite easy, but I
still, of course, want to add some
detail because if we can add this much geometry, then of course, it would be
Wa, didn't know the data. Then of course, it
would be nice for us, just add, like a little bit of extra detail here and there. So let's have a look. For these locks,
I was thinking of having the base mechanism
below the metal bar, and then around
the top metal bar, have the actual lock, and it's pretty much
going to be something. Oh, wow, we have a
lot of geometry at this point. Let's move this out. I'm just going to turn off
my multi sampling so that I can see things a bit
better. Let's see. I mostly I'm just focused on, like, the length of things. Okay, let's turn on etches. It's a bit tricky to see. You can try multi
sampling, which it works. Oh, now it does work
quite decently. Just when you haven't
selected, it's a pain. So yeah, okay, I think
I can work with this. I do want to make sure
that my length is correct now because it's a pain
to change this one later on because
we're going to use booleans in order to basically
cut out some cylinders. So basically, I'm going
to select the back, and most of this is just going
to be me making stuff up. Let's delete the
back, by the way. And the reason for that
is because I don't have enough resolution to really go in detail in
what I want to do. So I'm going to push
this all the way up over here. I'm going
to push this out. And then my idea is that this is being pushed
out, and then over here, it has a little gap and
that gap has, like, a little slot in which
things get like here. So it's basically this
one would be locked, so we can, for
example, extrude this. We can scale this flat
and move it over here. And then have quite a small
little gap like this. Actually, no wait. Sorry, this gap is going to
actually be a little bit bigger like this. We go inside. Then we go ahead and hold shift and we scale it back down. And then we would
like extrude this up. And this would be basically
meaning that it is locked. And then I have a
lever sort of thing. So I'm going to create
a bit of a lever, and that lever has an extra
little slot in between, and you basically need
to push down on that and then it will release or at least it will
retract this piece, and then you can, open it. So you kind of need
to think about the workings of this thing. So if I go for
something like this, from a distance, here, it will look quite bulky, but
then we are going to, like, add some extra holes
here and there, and I think we can make
it look quite nice. So for now, I'm just going
to very quickly undo this. And the only reason
I am undoing this is because I need to already
add some supporting loops here because it's a pain
for me if I need to try and reach these
areas. Without. And then what I'm
going to do is I'm going to extrude this
up a little bit, and then I'm going to
extrude this up again because this time
this way, I mean, I automatically create
some supporting loops, and then I just extrude
this up again, like that. Okay, so for the bar
here at the bottom, what I want to do
is I want to go ahead and I want to let's say, let's grab a simple
etche over here. And now I guess
that I can just do connect down this way because we need to have supporting
loops here anyway. So if you just do like
a double connect, so two of them, press Enter. And once that is done, we can go ahead and we can select
these two to start with. And we just want to kind
of scale those down. And I hope that they are not
too actually, you know what? We can start by
just moving this. So part of this we will
use as a supporting loop. And the other part
now we are going to scale this out up until probably like
this point over here. And then what I want to do is
I want to extrude this out. A little bit,
probably around here. And looking at my
reference, I want to then. Let's see. Let's
extrude this out. I'm going to make it around. So it might be nice
if I extrude this out a little bit more and then extrude
this up a little bit. Like this, let's have a
look at it from a distance, go to object mode, maybe turn off your wire ribs so
that you can really see. Okay, then based upon that, I can see that I probably
want to push this out a little bit more to get
that mechanism working. Then another trick
that you can do for these cases, for example, if we go ahead and move this
up a little bit more and then push it out a little bit and maybe give it
a bit of a rotation, we can then go ahead and we
can start by just over here, like scaling these down. Then if we go to our target belt and make sure that you do
not have any vert selected. It's sometimes a bit of a pain. But if you go ahead and just don't have
any vert selected, go then to your target belt, you basically want to
weld these pieces over here together because this way, you have a free range that you can double
click on this one, two Contra B and give
it a bunch of segments. So we have this piece. I'm going to go ahead and I'm going to move this one
back a little bit more, and this is just to basically
even out the scaling. Here, we can go ahead
and there we go. We do something like that,
and now if I press Contra B, hopefully, I can give it an
interesting look like that. I can select the tips and I can also give those like some
roundness like this. And then before you
know it, you just have this really subtle
looking piece. At which point, we can
grab this piece over here. We can hold Shift and
we can extrude this in, and we can basically move this down up until this
piece over here. And then we can kind of
extrude this let's see. Let's make it a
little bit thinner. And this will be basically like the handle that
you're pushing down. So if I extrude this
like here, this, and then I just kind of like don't have it crossing the tip, but you kind just want
to grab like here, these two edges and then move them up a little bit and then do another contra B where like a bunch of
segments over here. I no. You know what?
Let's Undo that. Let's first of all, just go ahead and let's
scale this in to kind of get the same
pattern. Let's try it again. Over here, and then over here, we can just go ahead
and we can add a bunch more segments
again like that. So it's like a double click. So you kind of click it around. Over here, I do regret that I did not properly
extrude this in. So that means that we now
just need to select it, press Control E and do a zero point offset of 0.05 or something like that,
and then extrude this in. I forgot to do that, but I
do want to extrude this in. And then once it's over here, I'm going to extrude
this in once more just to add a
supporting loop. And at these points, I can add another loop roughly over
here, and this is what I mean. This is why it is so why you should actually do this in the beginning because else, it's really difficult
to just even select these loops. But
okay, let's see. So the mechanism like this, I think that will work quite well if we do like
something like this. And then if we go
ahead and actually, let's make it a bit more bulky
by pushing this back in. Then what we're going to
do is we are just going to have two little cylinders that are going
inwards at this area. Maybe I'm also going
to actually select the top and I'm going
to just try and scale the top in a little bit more maybe push it out a bit more. Yeah, from the
distance, because, of course, we look at this, probably not very close up, but I do want to make
this environment as if that I'm going, very close to most of
the meshes in order to, for presentation
shots or something. So I do want to make it
look nice, but yeah, it doesn't need to be absolutely perfect. So we got this stuff. Now, we're going
to show Booleans, which I don't think
I've showed you before. Basically, first of
all, what I want to do is I want to
clean my geometry. Booleans, they have a tendency
to break your geometry. So you want to twin Boolean and geometry that is
as clean as possible. Also, over here, I'm not at all happy with how this stuff works, so I'm just going to double
click and just press Control Backspace
and get rid of it. And now let's go
into isolate mode. So what do we need for booleans? We need a cylinder. And basically what a
boolean is very simply, it's cutting one mesh
out of another mesh. You can do more
with it, like you can merge two meshes together
and stuff like that. But what we are going to do is just cut one mesh
out of another. We want to make this quite low, so I'm going to go for probably
like nine subdivisions. And the reason I do this
because I know that I can press three to basically
add my subdivisions. If I set this to like 20, it means that I need to
connect 20 different edges, which is just going to be time consuming and it's a
bit of a pain to do. So instead, I do nine I
just place this here. You can, if you want, you can
do, like, a mirror on this. I don't know if
that's useful for us. Yeah, I guess we can select
all of this and do, like, a single connect and
just scale it flat. Yeah, that should work. Let's
just delete half it and then maybe I can even reach all the areas that
will save some time. In any case, we have this. We place it into location like this and let's
delete your history on your main mesh and what
you want to do is you want to go ahead and you want to
select your main mesh, hold Shift and then
select your cylinder. The order matters. Then if you go to mesh Booleans, you want to simply
press difference. What that will do is it
will basically just cut out that one mesh
out of another mesh. As you can see,
this means that now none of these fd
seas are connected. And this is why we need
to use, for example, a target belt to
connect these pieces. And next this, we
also need to use a cut because if these
are not connected, basically our smooth
mesh preview, which is number three by
pressing number three, it will just collapse into each other and it
will just break. And we do not want that.
So we simply now do this, and this is why it
was so important to have not as many segments. Now it is connected.
Now let's go ahead and let's get started by adding some very simple support loops, holding Shift and scaling
one to do one there. Let's do two on the outside. And now for these outside, we can just do a multi cut, and we can just nicely
place it around here. I think I want to do
some more manual work here instead of trying to, like, do an offset extrude, just because I want to make sure that all of this
stuff is correct. So we do that. Now
here at the top, what we can do is we can pretty much also use a multi cut. There is a twig that
I can show you, but I don't know where I
want to show it to you. Yeah. Okay, I guess
I don't really have a place but I can show
it. Basically, it's this. You can use your cut
tool to click and drag and place a cut like that. So I guess you
could have done it on this area, maybe here. So if you would do this
from like a side view, maybe go to Object mode, isolate and press F. Anyway, if you do this from a side view, it is quite nice because you
can just cut along here, which can add a very
quick edge like that. So just so you know that it's handy to just do
stuff like that sometimes. Over here, we have some stuff merging together,
which I do not want. So I'm going to go
ahead and press Control Backspace on these. And then what I will
do is I will just simply add my multi cut whoops, one button, try it again to make sure that you
snap it correctly like this. And now because we are mirroring it, that's why it's handy. We can just end all of
these pieces over there. Same over here like on this end, although it's
probably not needed, just in case we can
just go ahead and we can continue this on
over here and press Enter, just like that. Okay. Can I do like a supo
loop over here? Yeah, pretty much. I don't
know exactly where it ends. Okay, so this one
ends over here, which means at this point, I can just connect. And the other one
ends over here, at which point I can move it down and I will connect it
like that. There we go. These pieces should
just be able to handle spok loops like this. You know what I'm going to make these a little bit softer. I'm just going to place
one support loop to basically bring out the
softness of these shapes. And yeah, then these
piece over here, they are a bit of pain. So I guess what we can do is we can go ahead
and select this Contra E. I'll settle
0.05, for example. Do the same over here, Contra E, offset 0.05, and then I
will clean up the rest. Then over here we will
also do the same.The up until here, Contra E. 0.05. Bit tricky to get this one. Control E, 0.05. Yeah, that should do
trick and then over here, of course, because
this is a corner. You just want to go ahead
and just place like a very quick cut like that
so that it is all connected. And then over here,
what I tend to do is I tend to just place
a cut like this and then just go around it
because that technically do does the sporting loop
just fine like that. Even though it might
look a little bit messy in this specific case, I'm not too worried
about that messy look. This one I can go
ahead and I can, like, place a cut like
that, and then over here, I just need to, like, grab this and cut it from over here, and then another one
that I cut from here. Here, and then we can just
kind of end it like that. And let's just see
how this looks. If I press three, let's
see where it breaks. It seems to break on this area. This is because we do
not have a cut here. So now you can clearly see why it is so important to place all of these etches and why we spend so
much time on them. So this one I'm just going
to go ahead and place here. The only difference is that, of course, this time, this
is what will end up in game. So I'm trying to
keep it quite clean. However, for this mesh, because it is so small, I'm a little bit less
say worried about it. Oh, here we have
like pass shift. Let's merge these words
to center. There we go. Okay, so we have
a cut like that. Now I want to have another. Cut over here. Okay, so
that fixes that one. This one does not
connect and it does not connect because probably
this area over here. See, I just need
to connect that. And at this point,
I can just give it a little loop around. Yeah, that does the trick. I could, of course,
start hiding faces. You can just select faces
and press H to hide them. However, if I can see it, I tend to just not do that. Oh, yeah, and then over
here, I need to do the same where I
just connect it like this and then just
move it to the center. Yeah, okay, so that
does give me a bit of a messy loop around here. This loop we can fix. Let's see. Yeah, this loop we can fix. Often, This is quite
a nasty technique, but you can literally just
do this if you often to just fix this loop see if that
works this time, see? So, yeah, it's just
one of those things that it does not look nice, but it is a very quick way to just fix those type of areas. Let's see. There we go. So yeah, there's one that looks fine. This one now looks
nice and round. So if I just turn
off my geometry so that I do not need
to look at that mass, it does look totally
fine, except over here. Over here, it can use, let's say, it can use
another cut down here. And it can also use some kind of like I don't
know what's going on here. It is giving me this really weird looking,
let's push this back. I think something went wrong in that area or
something like that. But in any case, it can use a support loop here
and a sport loop here, which we happen to be able to
just simply move like that. Let's try that again.
Almost. We're almost there. We want to go ahead
and do one last. Let's move this cut over here. There we go. Yeah,
let you do the trick. Okay, cool. At this point, reset your history, also
reset your Pivot point, and just do a very
simple mirror on this on the X axis in the plus with a 0.01 merge border, and just push it back until
it nicely merges together. Select the center and just
press Control Backspace. Have a look, press three and make sure that
everything looks correct. And if it looks correct, which yeah, it pretty much does. Don't know if we maybe want to make it a little bit larger, actually, and just mean like scaling it like
this as in larger. But this is the time to do it. If you want to scale it, this
is the time to fix that. Yeah, see here. I think
that looks a bit better. I'm not too worried that
it floats a little bit. It's just like they
just screwed it on overhead there in that point. Maybe if you want,
what you can even do, you can even go to, like, your
site view, you can, like, select this and this cylinder, move it down a little bit
to kind of like indicate that this is where they
screwed everything together. Then if you press
three, here see. So they screwed it
together over there, we can even place
like a little screw in here that we're going
to place on our door. And then around
here for this area, it's just going to
be probably like a simple because yeah, I cannot really
see anything here. So I'm just going to improvise it and I'm
going to keep it simple with like a little bar that is just sitting around it. So it's basically
just going to be like a cube and I move like this. I, let's say, let's
scale it down. Let's do something like that. Because I want to make
sure that this bar is exactly the same
thickness on both sides, you can, of course, just
place like a loop here. Or what you can do
is you can just do a very quick mirror on this, and then you can go ahead and, like, rotate this
set this into the plus all J, and
just rotate this. There you go. And now we will just place this bar
around here like this. Now at this point, I'm
going to get started by selecting these faces and press controlshift I to
basically invert my selection. And I want to first of all, bevel these areas contra B, maybe give it like an
extra segment over here, and I do not want to have
it completely round. I just want to give it just
like a nice roundness to it. And then for this one, I
do want to go ahead and, like, probably make
this quite round. Oh, God. Never mind. I don't really like that. In that case, I'm
just going to go for, like, more sharper stylists. Lo something like yeah, something like this
because you'll barely be able to see anything like
this most of the time. And finally, one
last thing that I want to do is I'm going to
move this up a little bit. I'm going to add
one final segment probably around this point and then just select this phase and press contra E because you want to extrude this
out a little bit. And then maybe it select
this edge and then maybe, like, push it back a little bit, just to give it like
something that it is attached and that it is
not just clipping in. At which point, we can
just go ahead and we can overhear We can add
these segments, so now that if we press three, maybe also add a few
more segments over here just to retain the
shape a bit more. There we go, see? And
now it's just once again a matter of going into mesh. You know
what the mirror tool? I'm just going to add,
Oh, wait, I have it here. I just keep forgetting
that I have it there. So on the x axis, with a merging of 0.01, move it a bit that we only
have one segment over here. Or, actually, it's moved
a bit more like this. And then just these edges
over here that we have. Just go ahead the press Control
backspace and get rid of them. There we go. Press three. Looks pretty good. I think the last thing is
that I just move this one a little bit higher to make
it stick out a bit more. And that's it. That
does the trick. So we will, of course,
later on, duplicate this. But for now, just to
see that this works, It's a very quick duplication
like this. And there we go. If I turn on my multi sampling, there is our locking mechanism. Okay, so yeah, it's a little bit smaller than our reference, but it should still show up
and should be totally fine. As you know, I have
already extruded this out, and I just mirrored this
in my other chapter. I don't know if they can
maybe go a little bit further in extruding like this
and maybe over here also. So now we're just going
to do some balancing. And then what I want to do is I just want to add some bolts, because I feel like that. Oh, no, wait. You know what? These look more like the
normal map versions. So I think we will just use the norm map versions for those. Yeah, I see some stronger
bolts in between here, which is a bit interesting
because I don't know. I think it is because this
window is layered on top. So I guess that
they more like have the metal going around here instead of just having
the metal sticking in here. So I do want to capture
this as real life, but I don't know if
that is going to be such an amount of rework that it's just not worth the detail. It's basically going
to be let's see if we just double
click on this edge, I want to just deselect
up until this point, and hopefully it will
just nicely flow around and deselect
up until this point. So this arrow that we have over here actually
happens to save us. And then I want to do control E, but I don't think it is
even in the right location. Push it up, but
then at this point, I just need to very quickly
move this forward a bit more. Yeah, so this is more like
what it is looking like. Ah, it seems like
this is flipped. We can always go to mesh
display in reverse. Okay, let's see. So yeah,
I guess that could work. If I now go ahead and just
do some very quick cleanup. So as I said before, I want to not I do not mind
cutting a few corners, but I don't want to overdo it, and I still want to capture
this like a very nice look. So let's also do the
cleanup over here, which I think I forgot to do. I've just turned off my angle select select like this
face. I don't know exactly. Oh, it has like a flat face or something like
that. Bit strange. I don't know, let's go
outside of isolation mode. Yeah, so at this point, you cannot it's a bit
strange that it did this. I'm not sure why. But honestly, you cannot really see it
anyway at this point. So I'm not too
worried about this. Maybe just like maybe do like a bridge over here,
just to connect that. And then if I just go ahead and go ahead to the other side, I can probably do the same
thing where I just delete a bunch of these random faces. Probably like this, and then I'm just going to
select these two. I will do a bridge.
And then in here, we, of course, need to add
some more supporting loops. So let's add one loop in here. One loop around these areas. And then most likely
we can do like a cuts Indo D. Let's see
a cut going from here. Come on, it does not
want me to do the cut. There's also, by
the way, there's another loop, probably
around there. So I don't really like this jom treat works
fine around those areas, but I feel like it's
breaking quite a bit down here at the bottom. Just because it has
that extra loop in between and this loop over here, we do not need that loop. So what I'm going to
do is, you know what? I'm just going to delete it. I'm going to get rid of this, this Click Shift DoubleClick
all the way around. Let's see, can I Okay. Delete delete this, delete this. Double click on this side face, and we can also delete this. And over here, what
I'm going to do is because it has one extra edge that is still
being a little bit messy. But let's just see how this
looks when I press three because if it does not
show up as being one, when I press three, I rather
just leave it like this. Yeah, here. So the only loop that I'm missing is over here, and I think that's
about so you know what? I'm not going to mess with something that small
that you will never, ever be able to see if
it works fine like this. Okay, so we got these
messages over here. That's pretty good. Now that we have these messages, and now that we have
this metal across here, it does mean that we
need to do, like, a tiny adjustment, which
is moving this forward, maybe moving it
down a little bit. Same over here,
moving this forward and moving it down a little bit. And the second adjustment
is that I want to have some actual bolts in this area. So I think I like this
that we did this. This will look nice. So if we just very quickly
select everything, assign it to our window A layer, and then quickly go
into our door and just go ahead and do a shift
D on one of the bolts. Add those to my window layer. And now I can go ahead and I can just place this
into position. So here we have our bolts. I can move this in, scale it down a little
bit, move it in. I think the rotation here, let's do -90 in the
rotation that you can see in transforms down there just to make
sure that it fits. And I will, of course, keep
them a little bit larger. Yeah, so we have one phase down there that I
will probably fix, scale down a little
bit more though. So I will fix that
phase later on. But basically, let's
do like a shift D Shift D and one more shift D. Hey,
that fits really nicely. And then what I'm going to do is I'm going to have one more over here because
I don't see any, I don't see any bolts
going around that area. Shifty, shift, shift,
Shift D. You know what? In these areas,
maybe it would be nice to have two
bolts like this. Do one more, shifty, shifty, shift D. Keep that going. Over here, once again, do like just two bolts
sitting next to each other. So I don't think I moved
that one far enough. There we go. Shift, shift, shift D. Let's move this
one a little bit closer, and then just move all of them a little bit up so that you don't really see the
difference in distance. And then we can
do, one more here. And you can just duplicate this from the other
side if you want. I think I accidentally did
like a double connect. Yes, I did. There we go. Yeah, at this point,
you know what? I'm just going to
do it manually. Here we go. Okay,
bolts are placed. That's all looking good. It's done on our anti alysing and there we go.
So we got that done. So I would say that our window
is now officially done. I'm going to go ahead
and save my scene. In the next chapter,
what we will do is if we go back to
our blockout pieces. So door done, window done. Let's go ahead and let's focus on our chair
with, like, the bottom van. It's not going to be too
difficult, that shape. This kind of stuff is
pretty cool, though, so I do want to try and
capture that stuff. So going to do a chair, then we will do the bars. Then we will do this backside, then we'll do the
floor and the top. And then this side, I will go ahead and do
that in time labs, and I will also do those
really small pieces like these random pieces. I will also do those in time labs just because at that point, you know every technique that you need to know
for the modeling. And yeah, then it's
just a matter of just finishing that
last little bit done. So let's go ahead and
continue on with our chair.
14. 13 Creating Our Final Seating Part1: Okay, so let's go ahead and
continue on with our chairs. So over here, our chairs,
they come into parts, so it should not take too long because the shapes
are quite simplistic. I'm going to go ahead, press
Shift D, create a new layer. Whoa, that was a lag. Odds are shaped to our layer, and now we can go
ahead and we can call this I know chair
on the score A, for example, just in case we ever want to create also a chair that's like a single one. But these pieces, it almost feels like the stuff
is painted on here. See, like, there's probably a tiny little trim around here. We also want to create
this trim because it will make our lives easier when
we texture this stuff. And this might
actually be one of the few ones that I will go
ahead and I will actually do, like, unique materials for
this? Yeah, I think so. And the reason for that is mostly because of,
like, the gradients. Like, I can mess around with the gradients and
everything, but this one, I think is actually easier
if I just go ahead and do a unique texture for it
inside of substance painter. But that should
not be a problem. We can then go ahead
and have I don't know, maybe something with like
the priority seating, although, yeah, I don't know. We'll see what
we're going to do. So knowing this, we already
pretty much like here, we already pretty much did
this correctly over here. So if I have a look at this, what do I want to do? I think I'm just going
to go to my side view. Oops, that's not my side
view. This is my side view. And I'm just going to select,
like the bottom piece. And I just want to
see, oh, wait, Taxi, you know what, let's select
the top piece. Let's see. Over here, this
is a bit thinner, so I'm going to push this
back a little bit more. Then it is actually quite thick, as you can see over here. So that is quite thick. So I think I want to
actually leave this. Yeah, then over
here, I don't know. There is a small
fall of going on. So if I have this, it
looks like that there's like so it's like
pushing up a little bit. I think it is pushing up a
little bit so that you can, comfortably sit back and that you do not
like, glide off it. So basically just
push up a little bit, and then these sides
are going to be round. This side is going to be
round, and then over here, I just want to go
in grab this piece, and I want to push this
down a bit more like this, and I will compensate
this stuff later on. So that pretty much looks fine. Then on the edges, we are just going to bevel
out the edges, which, in turn, will give us the
nice transition effect. This stuff over here,
we will add on top. But yeah, I think for the
rest, that should be fine. So having this piece over here, now what we can do
is we can start by just selecting the edges. Actually, you know what? I'm
going to remove my history, and I'm going to modify and
freeze my transformations. This is good because sometimes the bevels break a little bit, and I'm just not even in
the mood to try it out. Because this is a focal point, I'm going to give it
quite a few segments. And then I'm just going to go
ahead and I'm going to make this nice round like
we have over here. Now, for the side pieces, as I said before,
we were just going to go ahead and do like a bevel. These pieces, they
are not very round, but what I can do is I can
turn this into hi pool. Yeah, that will make
it nice and round. And then we have
these side pieces. So let's start by
adding a let's see. Let's start by
adding another bevel over here with a
bunch of segments, but not as large as that one. So this one is going
to be a bit smaller. And then over here, I'm going
to go ahead and you know what I should have
done both of these at the same time
because I think I'm actually going to add the same. It's th 0.2. No way it's 0.1. Yeah, that should do the trick. So we got those pieces. So
those are nice and round. And then down here,
once we get down there, I assume that they
will actually also just have a round bit just because they probably use like a mold in order to create this. So it will just have a small
round bit, and there we go. Okay, now what I
want to do is I want to actually focus on my chairs. So over here, is it
just me or do I see, like a tiny bit of, like, a bulge going on, like there? I'm not sure. It might be that the gradient
I might be that it's just like you know, because you do have that also
over here. I'm not sure. Like it might be an optical
illusion kind of thing. But it does feel like there's
like the tiniest bit of, like, something going on, and then yeah, we will
have the outer edges. They also do stand
out a tiny bit, and then we have the center. So you know what? I think it is safe if I just go ahead and add one single
connect over here. Press Enter, select this piece, move it out a little
bit like this, and then do like a contra B where like a bunch of segments. Here, that's a
little bit too much. So let's move this
back a little bit. Punch your segments. Yeah, here, that should do the trick. So we give it like
a tiny bit of, like, a shape like that. Okay, and now for
the center bit where we are going to turn
this into two pieces, for that one, I want
to use this version because I can nicely
see what I'm doing. And I'm going to get started by just splitting
this up into two. So just add a single connect
like this and press Enter. Now with this connect, I'm just going to
go ahead and press contra B so that I can
perfectly split it up into two. And I'm going to have
this at 0.00 0.02. Okay. 0.02 looks quite good. So let's do 0.02. Let's add one segment over here, which is the top end like that. So we have 1 second segment
here at the top end, and then the bottom
end is actually a little bit further
along, it looks like. So we're going to make it a
little bit further along. And then once we've done that, we also do need to go in, and we have over here,
we have the shape. If I just go in and
create a u cube, turn on my edges and faces. The only reason I really create this cube is so that
I can measure this out here we go. And then based upon
this, so if this scaling is one point let's
say 1.5, 1.55, Yeah, so 1.55, which
means 0.75 ish, 0.752 or whatever,
something like that. Knowing that, we can go
ahead and we can place one of these cubes over
here on this side. It doesn't need to be
absolutely perfect, but it's still nice if
you just get it white. And one of them on this side, and that will basically cause the transition piece to happen. So if we do this, I
can go ahead and I can place one here. And one here. And this basically means that it will not have a double
length transition, but when we place them together, it will have a pretty normal
transition between them. And that's kind of
like what I want. This is a specific
chair that happens to have three seats, but we
are going to go for two. And then, actually, by
the way, the corners. You know what? I quite
like the corners. I think I'm going to
actually add those. But I'm only going to
add them at this piece. Oh, that's a pain to turn that into a corner.
I'll do that later on. I'll do that later,
because that's a real pain to turn
those into corners. Now, you can see that over here, they are a little bit
unlike the edges, but it feels like they are
only on the edges on one side. So it feels like
only on this side, we want to scale
this out quite far, and then this one scale this in a little bit more like this. There we go. So if I now go ahead and I'm going
to extrude this bit out. Yeah, I'm going to
extrude this out, and then I'm going to
rotate the corners, and that should do the trick, although it does feel like
it feels a bit large. Mm. Just having a think
if this is maybe No, that should be xy enough.
Yeah, that should be enough. The only thing I'm
going to do, sorry, is I'm going to scale this
one out also a little bit. Then we go to give it
like a smooth transition. And then the pass they will just remember that we
have those selected. So now we can press CtraE and I'm going to go
ahead and I'm going to push these out a
little bit like this. And then what I can do is
I can select the corners, and I can turn these
into round corners. And I will do them separately.
So I will do these first. Give them a bunch of segments,
make them bit larger. Ah, yeah, actually, you
know what that's fine. And then over here, I
want to do the same. Contle B, given
bunch of segments. Because these ones,
of course, they can go a little bit
larger, but I think, if we do 0.9, I think that will give
me quite a nice flow. So let's go for
something like that, and then maybe going here like scale this
up a tiny bit more. There we go, just
to transition that. And then when we
turn this into hi poly, this should look nice. Now, for these corners, yes, I said that I wanted to
do a corner like that, which now I think of it is actually going to
be a bit of a pain, but on the other hand, we
could also see it as practice. So doing a corner like this, if we have this over here,
this is why it is tricky. So we kind want to
just cut this out, but I'm not sure
how the transition will perfectly happen
around this corner. One thing we can try for this, although it will require a bit of cleanup is using a boolean, and it basically means that
we are just going to go ahead and we are going to
grab a cylinder, and we'll just give this a try. So we'll grab a cylinder. Well, J rotated 90 degrees. You basically want to
go ahead and you want to grab this part over here. Press contle shift on, get
rid of everything else. Now if we just go
to a site view, do tool settings and
reset our pivot. Et's move this forward so that
I can see what I'm doing. Yeah, this is basically
what I'm thinking of. So what it will do, so we
will place this a little bit above the range like this that these pieces
stick out a tiny bit. And once we do that, we
should be able to go in extrude an edge here, extrude another one
here, another one here, and then select these
to embridge them. At this point, Booleans, they really hate
open pass like this. So what you want
to do is you want to fill hole this phase, fill whole this phase. And then finally just go to your mesh display and
reverse everything. See? And then we basically
get a shape like this, which we should be able to then use to cut out a
part of that shape. Now, having this
shape, I'm going to reset my pivot point, and I'm going to clone this,
and I'm going to hold J, and I'm just going
to rotate this. See, yeah, that's
still a nice location. And I want to
actually do I Yeah, well, I guess I
could do symmetry. If I also want to
do the front bit, it might actually be easier
if I just do a symmetry. And I keep forgetting that, but that's just a
little quirk I have. I keep forgetting that we
actually have a tool called symmetry or mirror or
whatever you want to call it. In any case, what I'm then
going to do is I'm going to go ahead and in here, place a simple
connect like this, scale flat, and I'm
just going to go ahead and I'm going
to go to my top you, and I'm just going to basically delete half of this chair. There we go. Then I immediately can also turn
this into like a hi poly. I should have done this
earlier. That's my fault. But I well, doesn't
matter too much. I can now go ahead and
I can just copy this. I'm going to hold J and
rotate this nine degrees. And I think if I go
to, like, my tofu, turn on my edge and faces,
Do something like this. Okay, let's. Let's
see how this works. Remove history, save scene, grab this piece. Mash
Booleans difference. That one works pretty
well. Do it again. So click this select this
Mash Booleans difference. Yeah, you know
what? Once this is turned into a hipoly
I can live with this. Now, the only thing that
I was worried about is cleanup because this often requires quite a bit of cleanup. So what I'm going to do is you will just see me doing
some cleanup for a while, and it's just me, like, merging some verties together like this. If we have like, single vertzs like
this, Oh, wait. We cannot just move those back. I need to be very
careful with that. I'm going to just go ahead and
I'm going to connect them. If we have pieces
like over here, we can just connect all of these vertices and then
move them close together. Over here, there
is, like, something going on on the
inside it looks like. I don't know exactly what it is. It's like a double
phase, something. Oh, wow, let's undo this. I think, see, I
must have messed up a welding accidentally.
That can happen sometimes. Twilight again.
Okay, now it works. Yeah, let's leave
those separately. And then over here, what
we can do is we can go ahead and let's
see, at this point, we can just merge this
down, merge this down. It is the stuff
that I don't like that it might look
nice over here, but then over here at the top, it looks a bit ****,
so we kind of want to try and give it
like a nicer flow of. And that's the thing with, like, in Tri D we need to, of course, have a
think about it in both sides. I'm going
to connect this one. I'm going to connect
this one. And I'm going to go ahead and I'm
going to connect one of these. I do not want to connect too many because if I
connect too many, what will happen is that it will no longer look round when
we smooth this down. So that's why I'm
just doing that. Then over here, this
one is a little bit tricky what I'm going to
do with those. Let's see. Can I maybe merge these
two together over here? Maybe like move this
down a little bit and out just to keep
it into location? And for this one, I think what I can do is I can just
select it and press Control Backspace so
that it's no longer my problem because it's on the back and then
when we smooth it, it will hopefully transition
a bit better, there we go. That fixes those pieces. I guess that we can after
all merge this one down. So that fixes those. It's
nice to go around here. We just need to do
some manual work in order to make this
smooth properly. Wow, over here we
do have a lot of pieces that are all over the place. Several looks. Let's press F. So from the
top and from the side, I think from the side, I want to move these a little bit forward. See it moves forward like
that, and then over here, let's move this one
also. A little bit more. Although, actually, this
one, just press Control, oh, that's too bad. I cannot do control backspace because it's attached to a line. In that case, just do Control backspace on the entire line. Same over here on this one. Just do control
backspace on that. Okay, now let's see
if we can replicate this at the bottom, where
we select this one. This one, This one, then we have one
connection there, which means one of those, we probably press
Control Backspace on. I already forgot which one Bol, we merge this together, and then having this flow nicely and also having
it flow nicely here, we can then go ahead and
we can do a multi cattle, connect this one together, and I think that does the trick. Yeah, so I think now if I go
ahead and turn off my faces, it should have a nice
transition piece. Great. So we got these pieces now. Now it's just going to be
a matter of just doing a little bit of cleanup
and then turning it into hipolon then what we
can do is we already ready to basically mirror this
and then it's done. So this one was
not too difficult. It's a little bit
fiddly at the sides, but for the rest should be fine. So over here, I'm just
also going to, like, do a little bit of
cleanup by simply moving these pieces close
together like this. Maybe I'll go ahead and
get rid of this one. At this point, like,
most of these pieces, we cannot do, like
an automated edge. We need to do it by hand. But oh, well, it's not too bad. So Oh, here, over here we
have a double vertice. Just to make sure that we do not have any double vertices. What I'm going to
do is I'm going to press Control Shift A, and then I'm just going
to merge my vertices at a very low level
and press apply, just to make sure
that that is clean. And once that is done now, we can start by
saving our scene, and we can turn on or we can start by adding
our supporting loops. This one over here
is quite easy. Although this piece over here might cause a small problem, but we'll see because it
is very close to our bend. In any case, for here, Contra E, 0.05 Okay, no 0.1. 0.2. Let's do that one, 0.2. Then let's add a quick
support loop over here. I can already add two
over here and over here, and then wherever
they did not add, I can just go ahead and
continue them using a multi cut because we need to have these nicely along
this entire part. Here we go. I like that. And this part, let's
see, it goes from there. It ends pretty much over here. So let's do this. And then over here, we can
just go ahead and connect these pieces like this, which will create a new part
for me that I can go along, and I need to merge these
pieces together anyway, because these ones
are a little bit. When these pieces
are on the edge, it's often not as forgiving as when they
are on a flat area. But in any case, I can now go ahead and I can just
continue this part. Nice long here. It's presentu because it does not want
me to place it anymore. There we go. Okay, so
we got that one done. Now, there is a part over
here that we need to follow, and it's basically going to be only one single
edge on this end. But of course, this edge,
it does not flow as well. So let's see where does it
end? It ends over there. But if I go ahead
and at this point, I can I p vertex. S, let's also do one over here. Oh, no, wait, sorry. On this side, I need
to have two edges. So I'm gonna have two of
them. Go to the vertex node. I know this takes quite a while. So we might want to
continue this onto next chapter because we need to create our ventilation anyway. And I'm going to basically
move this one down to this low one and then this
higher one over here. I'm basically just going
to transition it like this, end it over there, and then here at the
back, continue it on and quickly add this
one and add this one. Here we go. And just like
nicely, continue this. This one does take
a bit longer to do. Sometimes when you have a
really long line like this, just sometimes press
Enter because if you accidentally miss click and
you click away from it, you actually lose all
of that work you did. So sometimes it's good to
just press Enter a few more times to get it done. And this style of modeling where it's a little
bit more forgiving, that's only because we
are doing our hypol. That's why it is nice to model like this
because as I said, yeah, as I said,
it's more forgiving. Over here, let's just
merge this one like this. And then over here,
just merge this one. And I just need to
end this somewhere. So let's just go
ahead and, like, end it somewhere over there
or something like that. And then over here, we can,
nicely go around it again. This might still cause problems, even though we are doing this properly and we are
nicely going around it, but that's something that we
will need to wait and see. And then this one over here, I don't really need to
continue it because there's nothing there
to support it, anyway. Okay, at this point, let's press T and let you see
how this works. Surn off my edge and
faces so that I can see. Okay, so over here, it has a little bit of
stretchiness going on. It looks like that
is because there is a let's go into X ray mode. Just want to see, Let's
merge these two center. It looks like there's
like a double edge. Was that already it? No, because over here, just Oh, over here, it turns
into a single edge. I think I need to
select this one and just press
Control Backspace. Let's go outside of X ray moote here that does look
a little bit better. The only thing that I do
not like is that over here, it's press control back space, and let's instead connect
this one down here. I think that will give us a
better geometry flow, see? Okay, so it goes around here, not the most perfect edge, but it's fine, except
that over here, there's like a tiny
little problem, and this problem we can solve using the old technique that I've already showed you where we just make a circle around this, and it should do the trick. Yes. Over here, Same technique. Multi catol et's do that. Okay. And then over here, that transitions, not
absolutely perfect, but it's fine for
this transition. And this like nice smoothly
does the same thing, which is a characteristic
that I can see in real life. Over here, we go nicely around. And then here, these edges are also quite nice and around. And then over here,
let's have a look. Same deal where it's just
like we need to merge some of these verses together in order to get a nicer effect. Like that. Maybe also over
here that we can go ahead and, like, I know, merge this
together. There we go. So that gives me a nicer flow. Perfect. Okay, finally,
remove our history, save our scene, reset our pivot, and then we can go
ahead and we can do a mirror over here. And set the mirror
on the X axis in the plus 0.05 in the merging. And I think that
already does the trick. It's already nicely
in the center. And you can, of course,
double check by selecting. Now, this one, I expect
that one breaks. But for the rest,
it does work well, only I think this edge is one of the few times that
I want to keep it because I think it will actually give me a
good transition. So if I turn off or
turn on antializing, you can see that now over here, that does a pretty good job. Only over here, it seems
to still be a bit messy. If we press F, we could
maybe try, sorry, I just need to go into Xray
mode because in Xray mode, at least I can make
sure that they do not accidentally select
anything at the back. What we could try is we
could try to merge all of these pieces to
center at both of them. Go outside of X ray mode. First of all, check now. And then if it still
does not work, we can then merge this one to the center over here and then merge these ones to
the center over here. So now they don't really
have anywhere to go, and then see it will
give us a smooer effect. Okay, perfect. So
we got those pieces ready to go. Let's
save my scene. And now in the next
chapter, what we will do is we will mostly just
focus on the Airco or the vent over here and
just make sure that we did not forget anything in
here, but it should be fine. So this looks pretty
straightforward. So let's go ahead and continue with that in our next chapter.
15. 14 Creating Our Final Seating Part2: Okay, so now let's go ahead
and finish of our chairs, which should not be too difficult because the
only thing that we need to do is we need to create this little
plate over here, and we need to create
the actual vent. So for this plate, I'm going
to keep it quite simple. I'm not exactly sure. Like, on the inside,
that looks a bit weird, but I'm just going
to go in and create a very simple cube over here. Oh, actually, over here. There we go, nice and small. And let's go ahead and
just scale it up roughly to the size of that plate that we have let's see, something like I
don't know this. I'm just having a look at
my reference over here. Yeah, let's place it a little bit lower. Let's
place it over here. And at that point, you
can go ahead and you can get started by, well, turning off multi sampling, deleting the bag, moving
it into our shape. Making the font a lot
smaller like this. Say like this over here. Click and then shift
Do click over here, which we'll just do a
nice little ring round. At which point we
can do Control B, and we can just give
it some bevels, and I'm going to
keep it quite low. So probably something like this. And then we will go ahead
and we will turn this into a final mesh or into a hipolymsh we can do that
by just selecting this side. Control E as an offset of 0.1, probably, and then like
a quick loop over here. There you go, see? That
should do the trick. Okay, so for the bolts, because we are going to
also place the bolts down here below it, where are you? Oh, God. There you are. So because we're also going to place the bolts below here, I'm just going to go ahead
and I'm not yet going to do that now because I first
want to create this shape. This shape is actually
going to be super easy. The reason for
that is because we are going to actually
use, once again, like a norm map like
we're going to do with these screws over here. We're also going to
do that for the grid because doing this in geometry is a pain while doing this
just like a norm map, it's just going to be a simple plane that we place on top. So I will go ahead
and I will do that. So it's just going to be the
main shape with some bolts. So for this, we have
this piece over here. Now, one thing I'm curious about is why it is so far back. I would assume that it is going to be around
this area, but. The base over here, I know that that one is
already at the correct base, which means that I just
want to go ahead and grab the top and I want to move
the top down like this. Now, if I go in and I go
to my site view over here, I want to push this
out a little bit more. Roughly over here. And then I just want to go ahead and I want to maybe, like, make just a little
bit less that we have a little bit more space for that event later on. Here we go. So let's not make it
like two over the top. I don't know. Something
like this, maybe. Yeah, I think that feels
that feels quite natural. Okay, so we got this now. I almost feels like that
this one is less tilted, but I don't think I have any other reference
that I can base this on. So it would just
be like a guess. Oh, wait. Yeah, here, see? It feels like that that
one is a lot less tilted, so that this one, wants to
go up a little bit more. Probably like this. There we go. And it will also add some
interest to our shape. So we got this stuff over here. Now we can pretty much just
turn this into a hipoly. I think for this, what
I'm going to do is I'm actually going to turn
this into actual geometry. So let's delete the base. And then for these pieces,
I can just go ahead and I can grab all of these over here. Actually, this one also, and
then just press Contra B. And just like a
bunch of segments, do something like this to make it nice and smooth right away. At which point that
we can just do like a shade smooth.
There we go, see. So we don't need to do
well, by this point, you can probably
just press three, but it's not really needed. So for our bolts, we are just going to
grab, for example, here, let's just quickly
grab the window. Scrap one of these balls, clone them and move
them over here, and then add selected
objects to chair number A. At which point, we can go ahead and we can just
place in the position. Starting with these
ones over here, Scull up, snap rotate it a
little bit, move it in here. And now I turn on my edge and face so that I can
see things a bit better. This looks like a nice size. Let's start with
this one over here. We want to have quite close to the edge and then in the center. Then the other one
is also going to be quite close to the
edge like that. Now for these bots,
they are basically going to be just
like on either side, I'm just going to
have a little bit. I'm going to move
this one down here. J, rotate this. There we go. Let's go ahead and
let's move it. I'm going to move this one, probably something along
here. Another one along here. Yeah, I quite like
that they stay nice and big because that's where you can see them very obviously. Then what we will do is we will create the grid and
you can see that there's the tiniest little
holes also here at the bottom, and I also want to just do
those in the actual norm map. Also, a really cool detail, as you can see over
here that I did not notice is that there is an actual bar and
that makes sense. There's an actual bar that is holding up over here the chairs. But I also find interesting
that over here, it seems like they
literally just welded this stuff into the
rest of the mesh. Although that is interesting, I'm not sure if
we're going to do it exactly that way
because for us to do that, we need to make this all
into one solid chunk, but we have modular pieces. In any case, at this point, I would call my chairs
over here done, so I can save them, re arts. And now, if we go back to our
block our pieces over here, we can press height on those
pieces and also on this one. And what I'm going to
do is, you know what? I think I first want to
actually do this one. And then all of these
bars and everything, I will then do them all at
the same time later on. But yeah, they should
not be too difficult. The only thing is that now
I know that there will also be along here. I'm just doing this already in my blog out here that
I do not forget. Along here, roughly,
there will be another C, there will be just
like another bar. So just so I just need
to keep that in mind. But okay, so for this one, let's go ahead and
let's press ChevD. Add the new one,
assign selected, and just call this like top
advertisement on the score A. And now we can turn off
our blockout pieces, and there we go. So now we can go ahead and we can start working with this. In which case, we can just
start by moving this down. We will do this in a new chapter just to keep things organized. However, this thing is
already pretty good. So I don't think we need
to do too much on it. We just need to give it
some nice looking trims, some round bits at the corners and give it some place for,
like, some lights. So let's go ahead and continue with that in the next chapter.
16. 15 Creating Our Final Advertisement Panel: Okay, so we're going
to get started with our advertisements,
which is pretty easy. So basically, it's
just like some metal, although the metal is
quite like, bulgy. I think I guess that's the word. And then for the rest, we do have some round
bits over here that are actually round bits that are almost like cylinders
that are sitting on top. So it might be nice if we simply literally just grab a cylinder
and we just place that. And for the rest, because
the metal is being extruded, everything else kind of
just falls into place. So if we have a look
at this, let's see, I'm going to get started
with just doing, probably, like, one side, and
then I will just mirror it. So if I go over here, let's grab a simple here
we go, like a simple edge. And let's see. So
there's going to be a cylinder on this side, there's going to be a
cylinder on this side. So for the rest, up
until this point, I will probably leave it because it is up
until this point, what I'm actually
going to do is I'm already on purpose, going
to place an edge here. The reason I do this
is because it's easier for me to then reach it. And it does not really make
that much of a difference. So I can click,
Shift double click, and then just hold Control like these are like these
bits over here. At this point, we can
just do like a contra E and we can extrude this out a little bit more to the point where we want to have
it extruded out. Actually, it's quite the original extrusion is
actually quite thin. Now, here these bits because
they are on the corner, they do not always
extrude out properly. So sometimes you just
want to scale these flat and you just want to, like, move this down a little bit until the thickness
has evened out. Over here, same thing. We can just go ahead
and scale this flat. And then maybe for this
single one over here, just scale it out a flat and move it out a little bit more. You know, let's move this
down just like compensate for the fact that you are losing
some thickness around the corner. Just like that. Okay, so for these pieces, we are going to, like, make
them stand out a bit more. Over here, I actually
want to keep this line over here because
then I can bevel it, although I do not need,
like, the top line. So to make this stand
out a little bit more, what we can do is we can
add an edge loop over here, and we can set this edge
loop here in the center. And then if we go over here in our channel box and go
into our actual settings, I'll set this to 0.5 to get started with so that's
exactly the center, this rarely works for me, but I do want to show
you if you go to your profile curve input offset, you can actually push this out, and that will already give
you the original push. And it often does it by the
local normal only yeah, well, actually, it
worked quite well. It's just that over here
on these areas, of course, we did not need to have that. So what if we do this again? What if we undo this stuff? Oh, no, wait, sorry,
we cannot undo this. So let's just press Y again. We cannot Uo this because
it's a default placed edge. In that case, for
these pieces over here, up until, let's say, this point, I'm going to press Control black space and
literally just get rid of them. And then here this last one let's go ahead and
how does this look? This one needs to
be pushed back, I see. There we go. And then this vertzi over
here needs to be pushed up. I think that's about correct. Yeah. Okay, yeah,
that should work. So once we've done
that, we can go ahead and we can just select it, and then we can do a Contra B, where we can add a few segments. Or what you can do is you
can just smooth it out. I think I will actually
smooth it out. So this is quite good. And then I will
just turn this into like a high pony mesh
or something like that. That should not be a problem. So we have that metal
piece ready to go. That's nice going router. Now, as you can see over here,
we might need to later on, just like push some
stuff out a little bit more because we are now
going to add like a cylinder. So first of all, let's
add the cylinder. Let's make it, start with 14, just to make it a
little bit more manageable. Move it over here. There we go. Hold J and
rotate it 90 degrees. And then if we just place
nicely in the center here, we can see that we need
to just scale this, like in a little bit more
and if I scale this out, just to have a look
at how ticket looks, I want to make it a
little bit thinner. So I'm just picking my
green scaling so that I do not scale it on every
single axis at the same time. Here, this looks quite nice. So let's go ahead and start
with something like this. I'm just going to actually, you know what I'm just
going to leave it there. So if I push this out over here, and then for this
piece over here, what I'm thinking is that
I can do like contra B. Let's see, because that goes
straight, let's undo that. Let's go and isolate, and then we just want to go
ahead and let's double click. But then hold Ctran just get
rid of all of those pieces. So because this is hidden, if we now go outside
of isolation mode, I can now give it
like a few segments. Let's make it a
little bit smaller. And then based upon
that, I can add, let's say, one extra
segment here at the top. And then I can double click
and I can push this stuff out except for these
pieces. 1 second here. Let's maybe it's easier if
we just use our X ray mode. No, not very easy. Maybe a little bit
easier for selecting. But basically, just push
this out a little bit more. Let's go back into Xray mode. Twin and select this,
D select these pieces. Just do the same over
here. Oh, sorry. I'm in isolate mode,
not in X ray mode. And then it will try to isolate these few edge that
I've selected. But the goal is that I
grab some of this stuff, and I just push it out
just to give it like the feel as if that It has a little
like it goes around it. Something like that. Let's see. So that one goes
around there. So I will clean it up a
little bit more. Maybe I will make this one a
little bit more around it. Yeah, I don't want
to, like, overdo it. So maybe, like, push it out a little bit more and
then just follow it along this range. Here we go. And then I will
just like slowly Okay. Make it come in like that. Now we go. That should be fine. And then when we transition
this in here, Yeah, that should all be
fine because it also transitions in here
like that, as you can see. So for now, I'm fine
with doing that. Maybe I want to scale it in a little bit more just
by going into my scaling. Here, we're going to
scale it down a little bit more just to make
it fit a bit better, push it up a little bit more, and then maybe just move
some of these verses in. And then what we can do
is we can actually give this a better transition so that we can actually
extrude this out. So if I go ahead and
push this one down, over here. Actually,
you know what? We don't have the
space for that. I was basically thinking of
just doing random extrusion. However, it might be easier if we simply do like
a boolean for that. So let's just duplicate
this cylinder over here. Let's push it down here. And yeah, you know, let's go ahead and just
make it like a bit smaller. When I do the boolean, it
will also cut this out. I'm just having a
think if that would be a problem or if I can
just go ahead and I can, like, select this, mesh boolean, or if I can just clean it up. So it will cut all
of this stuff out. And you will need to, like,
select all of this stuff and, like, delete it and everything. That's not really a problem.
I'm just having a tink if it is annoying for me to then clean all of
this stuff up or not. But I guess now
that I'm doing it, I can just well finish it. Okay, so now we
have these pieces. They do not look very good,
so let's do some cleanup. Let's push all of
this stuff out. Let's get rid of these few
faces over here, the lead. Let's do another target weld. There we go. So
that's now one piece. And let's merge
this one together. Let's merge this one together, and then carefully also
move this one together. And at this point, we
will have the silnes sitting around it, so I don't need to really worry
about that stuff anymore. The only thing that I do
want to do is I want to add a multi cut and see if I
can just like place a Wow, why does this multicutnet work? Multi cut. There we go. Okay. So the reason
that does not work is because it's most likely
not connected or is it? Oh, no, wait, it is connected. In that case, it probably just
like a remove history and, like, modify freeze
transformations. And maybe that
will do the trick. Also, by the way,
let's just quickly merge these pieces
together over here. The other stuff is just
some general cleanup. It doesn't need to
be very precise because this is
such a small area. I just need to basically
get something that looks like it is going inwards. So for second day, I thought I had, like,
duplicate faces. But in any case, so
we got this stuff over here. Twilight again. Can I cut this,
please? Thank you. I can cut this. Okay. Now
if I double click on this, it should just select
all the way around. Yikes. It looks like it has decided to keep some
of these edges here, which I do not want to keep. So I'm going to go ahead and
I'm going to Delitos and I will make that look
a lot better soon. Yes, because all I need
to do is I just need to double click this side and
I need to push it out. And then when we turn
this into a hypol, we just fit this one in here. We scale this down a
tiny bit more just to make it really look
like you can go inside. And then on the
other side, because you can never even
look through it, what we will do is we will
just have a simple face. So it will just be like
grabbing these faces over here, doing a control E extrude,
extruding these out. Here we go. We move this in, and then we just basically do some small manual work where we grab these eedges and we just kind of
rotate them down. Something like that.
And then maybe grab these two vertices and move
them like that. There we go. Okay, so we turn this into hypoly because this
one is sitting here, you will not be able
to see anything else. So I believe that
covers that piece, that covers it
down over Oh, God. I forgot that we also need
to do it on the other side. On the bottom side. Can I I can steal this w. Like, if I grab This stuff over here and then hold
chtron deselect this stuff. I can press extract pass, reset this and maybe I can save some time by just
moving this down here. If we turn on our edge
and faces, let's see. If I can move this
down, then I can just place it roughly into position because it should be pretty close to the same thing. Only over here, we need to move this up again. Scale this flat. Yeah, move this in. Yeah,
that should be fine. If I'm now adding a
simple edge over here, it might not be the nicest
way of solving this, but it is a way of solving it. So now if I isolate this, I can just go ahead and, like, slack these pieces
and delete them. Go outside of isolation mode, grab these pieces, just move
them down a little bit. And here, move them down because what we're going to do is we are just going to go to vertex mode. Oh, sorry, select them
first and press combine and you can find your
combine up here and mesh and combine in
case you didn't know. Now just Target Weld mode
and just weld all of these pieces together like this. Maybe going like Xray mode. This is already
taking way longer than I expected and
for some reason, I'm not able to do a target
welt on those pieces, which is a bit strange. You see? Let's try
and reset my history. That is very strange that
it does not allow me to do a target welt on this. I've never seen that
before. But in that case, there are many ways
that we can do this. I can also go in, just move this closer together, and then I will just
do a merchant center. But it's very strange
that it does not allow me to do just
a simple target weld in this area.
Here, so I can do this. And I can even
select all of them, and I can even then do merge vertices and set this
at a lower level. So like 0.1 and press Apply. And then you can
see that now all of them are merged together. Which means that
the last thing that we have is we have over here. Here, see you have this box. So if I go ahead and
delete this shape, can I now please do
like a Target Weld? First of all, before I
actually do a target welt, let's do multi cut
from here to here. And now I can do a target welt. There we go. This time,
it does also work. Let's do a target weld here. Let's grab these two pieces and just carefully move
them closer together, make it once again easier for me to then do another
target weld or just, like, merge at center. Okay, finally. See? Let's save some time doing it that way. So now I can go ahead and I can grab this piece over here. I can go in and I can move
it down here and just like I like to always just move my pivot closer so that I can do some more precise work. And I'm just going
to move this into location. Roughly like this. At which point all we
need to do now is we need to turn this one into
hipoly because all of this, it's just like texturing. Yeah, so it's just me
changing my textures. Over here, we have a light, so it will then do the
same, and then down here. I guess what you might want
to do is you might want to add another corner over here. However, I think for this corner because it's so far back
that it will not be noticeable if we just do not do the same thing over here
and just leave it like this. So that's just me using
a quick shortcut. And then for these
pieces over here, yeah, we can now just go ahead
and turn those into hypols, which is not actually going
to be that easy for this one. So let's save my scene. This area over here is quite
easy because it's just me placing a simple
supergo but over here, what you can see, it's
already breaking. So we will most likely
need to do quite a bit of manual multi cut tool pieces like that to get this to work. Now, over here, it's
quite interesting. So these faces we cannot see. It's easier for me
to just remove them. These two pass for some reason, are missing, so I can
basically just bridge them. And this is probably why the multi cut doesn't
work because we have some random vertices that
are now not used anymore, so we can press
Contrabagspace on them. So let's add another loop here. Let's add another loop here.
Let's add another loop here. For this corner,
let's do a quick give a quick few segments like that so that at least it will look round when
we do our cylinder. Doing these segments also
if I now press three, here or see it should not
give me a very intense look, maybe because I could see
some darkening, add one here. Add another one here,
and now we get to the annoying parts
which are over here. These ones, we can just add like a double
segment in between. Oh, God. I made a mistake. Didn't I. I moved it and I
was not thinking about it. I will go ahead and I
will do that piece off camera because it just means that I need to
move this back again. That's totally my fault. I did not duplicate.
I just moved. I did not duplicate. Okay, here we go as if nothing
ever happened. You know, you guys could
have told me that I was making this mistake.
Just kidding. In any case, loop around here, just make sure that this
one actually does continue. And when it continues, it does mean also that we
have done a good job. And then the loop around here, we can place it, and
then it will almost Oh, no, wait. It sort of works. However, this is a little
bit too close to the edge, so I'm just going to, like,
do a target belt over here. And then at this point, this is the only more annoying point at which we can
just go ahead and, like, do some custom
cutting like this. We just want to cut around here. I can see that some of my faces are messed up. It looks like. Let's have a look at that soon. If I go ahead and over
here I extend it like a double ertz let's see. This face over here looks a bit. Almost like I don't know. Let's do control backspace. Maybe we can get
rid of that one and delete this Delete this. Okay, so that one works. And then over here, I
think what we need to do is we just need to
place a little cut. See, as I said before, this can be a little bit messy. Okay, so that phase is fine. So that one now continues. So we have loops
around here, we have loops around here
going all the way around. That should be fine. Maybe we want to have another
loop here, but we will see. First of all, let's also
actually place a quick loop Oh, wow, this area is
completely broken also. Like, we can place
a loop around here, and then at this point, we need to once again go in with our multi cut and
just do some custom cutting. But what we can also
dare at this point is just press three and
switch between it and just make sure
that these pieces over here are okay ish or at
least fairly decent. I'm going to place
a loop here and a loop over actually,
you know what? No, I don't even care about that because it will have a cylinder. So I do not care about all of this stuff over here because
we cannot see it anyway. As I said before, over here, it does look like
we want a loop, but I think it just
needs to be like a multi cut connected over here. And I think for the rest,
it does not actually, it does not make too
much of a difference. Yeah, so if you turn this off, nah, it looks like one of these pieces is
getting really far. You can kind of see it if
you look at your geometry that one of these pieces gets shut up all the way over there. And that can sometimes just
be a simple case of just adding another loop around
here and maybe like a few loops because
remember how I told you about the fact that they do
not like properly transition. By the way, before
we add that loop, we need to also fix this
one. Here, continue it. Add another loop here. Maybe a few more over here
at this point. There we go. Okay, so where were we? I was checking, so
let's press three. This stuff is all
working good enough. Over here, we need
to done, of course. Yeah, it doesn't actually
matter too much, does it? Let's see. Yeah, I guess it has a slightly nicer curve to it at that point. Okay, maybe this
one is too intense. So for this one, I will
need to add some loops. But I think for this one here, it already has some of
these loops ready to go. So I think this one was better
intact than the other one. So what I'm going to
do is I'm just going to go ahead and I'm
going to place a cut from here down to there. And also, by the way, from
here, down this point. These loops over here I
will do a little bit later. Oh, yeah, that does flow
quite strongly at this point. Let's just go ahead and let's place a multi cut from here, like down there, something
like that. I don't know. And then for the
rest, if we want, we can choose like
Ara loop over here, just for this one, to make
it a little bit safer. Okay, so at this point, what I'm going to do is I'm going to go ahead and I'm going to
place a cut down here. I know that this will look very nasty in terms of geometry. However, I honestly do not
really care right now. I just want to get a quick loop here and just for consistency, let's also place a quick loop, sorry, I cannot loop that far. I need to then go in here and do it in, like, shorter bits. So let's do one here, one here. See, now I'm going back to
my old ways of creating hi polis which is a little bit less clean in
terms of geometry. However, it is a
little bit faster. And for this kind of like a
mess at such a small area, I am willing to make that
sacrifice in cleanliness, because most of the cleanliness, honestly, when we get to unreal, it is just me and my pride that I want to
make it look very clean. Technically, if we
are using Nanite, it does not matter too much as long as we don't
get any problems, I will just look fine
in the game engine. In any case, let's press three. It's a fun final look, and
it looks like that is fixed. Okay, great. So having this piece, what I'm going to do now
is I'm going to go ahead and then I'm going
to do a reset, and I'm going to do a mirror. Let's set this back to one,
mesh, and do a mirror, and we are going to mirror
it on the X axis in the plus and we are going to set the
axis position this time to object because if
we do it in object, it will basically set
it on the PivoPoint and because the pivot point
was already in the center, it will not add any extra
length to our object. Set the merge threshold to
like 0.05 or something, and now if we press three and maybe turn on multi
enter alysing, you can see that that
looks quite good. And if we go outside
of isolation mode, you see we can have
look over here. Oh, what's that? Seriously. I'm not even going to comment that
apparently, I did still have it. I just didn't see it
because of isolation mode. The joys of working late at night when you are
not completely flexible. In any case, I'm just
going to, like, hide that. Does not matter.
It's good practice. Just I hope that you
guys, of course, save my mistake and that
you did not try to follow along with exactly the
same mistake that I made. In any case, we have this one. Let's go ahead and
go in here and I'll say for this one,
let's push it down, and that should
look totally fine up close to the camera when
we are looking at this. You see, you will be able to, like, see the gap, and I was going to go in,
and I was going to add an extra cylinder, which
we have over here. So I already added that one. And for this one,
I'm just going to, like, kind of move it in here. I'm going to move it
down there. Here we go. Ta da, I know it looked like
a simple shape at first, but when I really got into it, especially this, this
just took a long time. But at least now we
have the detail, and I think it's
nice that we just have that extra bit of detail. So for all of these pieces, we can right click and add to the selected object, and
we can call this done. In our next chapter,
what we will do is we will go ahead and we will start with the metal bars. And then there's only
a few more pieces left. And you know what? Uh yeah, I think I will just go ahead and do those pieces
as like a time labs. I do really like this, but we do not have this
design over here. So that's why we cannot really work with
something like this. But yeah, then I will just probably kick in the time labs, and I will do the rest
because the rest is just very basic modeling and reusing assets that we already have. So let's go ahead and continue to that in the next chapter.
17. 16 Creating Our Metal Handles Part1: Okay, so now what we're going to do is we're going
to get started with, like, all of these
bowls over here. So for this stuff, let's just do all of them in the
same layer, shall we? So let's grab this, shift the throat into a
brand new layer. Oh, a little leg. There we go. And now I can turn off my
blockout pieces and this layer. Um, metal handles or
something like that. I feel like they
are guard handles. What we're going to do is I'm going to get started
with this one over here for this
one, I had a look, I would like the base over here, but then I want to implant the top that we
have over here just because it looks
a little bit more interesting. That's
basically going to be it. And then for the thickness, that one is a little bit tricky because I
don't think yeah, there's no real proper reference to exactly know how
thick it's going to be. So I guess that we are
going to use the blockout, but I felt like this one
was a little bit too thick, so I think I'm
going to just tone it down a little
bit more like this, St off on multi sampling, and let's go ahead and get
started with this one. So I will first of all, do them, and then I will
move them to the site. Although we most likely will actually split them
up into two layers. The reason we need to
split them up into two layers is because we
need to keep everything at 000 in order to
when we export it to Unilngin that the pivot point will be in the correct location. Okay, so in any case, we have this piece over here. Now, for the base, the
base looks pretty simple. It looks like that. We just want to scroll all the way down. It's a bit annoying
to work with this. If you want, what you can do is you can temporarily
duplicate this one. And then for this
piece, just go ahead and grab the top and move
it all the way down. Because this way, we only need to create the
top and the bottom, and then everything
should be fine. So if we go ahead and move this, still feels very thick, but I can scale
this in if needed. So knowing this,
I'm going to add a loop probably
around over here. Let's first of all, get rid of the bottom because that one will just be in our way. And
then select all of this. This time we need to do
Control E again because we need to extrude this
based upon the normals, and we're going to extrude
this out a little bit. Mm, there is almost like
a little edge in there. So what I'm actually
going to do is I'm going to let's see. I'm going to extrude
this out up until this, and then I'm going to
do another extrude out. So this will be like that edge, and then we kind
of go down in it. So it will be like
this. So this one, let's go ahead and do just a
shift extrude with this one. I'm going to move down once because remember,
supporting loops, move down again and move down again so that
now we automatically, as you can see in
here, have placed all of our supporting loops. The only thing is that
I probably want to get rid of this supporting loop because I want to
make this round. Over here, it will have
created some extra pass. So let's delete them. Let's go to edge mode and
then for this one, just on your green scaling, scale out a little
bit. There we go. So that should do the trick. Now, go ahead and let's get
rid of control B space, get rid of that
edge so that we can select these two and make
them nice and round. Do like a Control
B. Maybe actually, yeah, you know what I'm going to do this as actual jomtry. Let's just give it some
segments over here. Like that. I don't know. We don't actually
have to do it as jom try because we have
Added ta sporting loops. So it depends if I just add
some supporting loops here. Yeah, this might
actually look nicer if I just, sorry, not that one. This one for some reason
is really sensitive. There we go. And one
here. Yeah, see here. So now that that goes inwards, that looks a little bit nicer. Okay, and then for
the top part, what we're going to do is we are going to mimic this
one over here, which looks like the base, we can actually reuse the
stuff that we have over here. So what we can do is we
can reset our pivot. Let's also get rid
of our history, and let's do a very
quick mirror on the Y axis in the plus. With, like, a border merge of 0.05 or something like that.
Yeah, let's move this down. And then for this
one, let's get rid of this top piece over here, because this one goes inward, so that's already, kind
of what I'm looking for. I'm going to scale this flat, because this one
is a flat design, it's a little bit longer. It will have some holes in here. And then for this
piece over here, what I'm going to do is I
feel like that, let's see, if this is a corner, it feels like that if I select these few pieces over
impress control backspace, I can actually set a
fraction higher for this. Hmm. I kind of want to go I want to
actually go even higher. So what I want to do is
I want to go like this, and then I want to grab this one and I want to actually move it up so that it really
becomes like a corner. Maybe if we then scale this
out a little bit more, just to enhance that look I like a Control B with
a few segments in here. And that will immediately
also become like a sporting loop here, see? So it gives us that
more round feeling that we get with this stuff. At the top face, top face doesn't have anything,
so that's good. What I'm going to do
is this top face. We're basically just
going to fake it. It will probably just go
inside the actual metal, but what we're going to do is we are just going to go ahead
and we're going to move this. At this point, we're
going to move this out, hold shift and extrude
this out. Like this. Move it down, maybe
give it like a tiny bit of like a scaling to make it
a little bit like beveled. Then we're going to move it
out quite a bit further, and then we're going
to move it up. Here we go. So this will
be sitting against it. And then for this
piece and this piece, I'm just going to go contre B, give the bunch of segments. And then maybe over here, what I can do is I could
add another loop inwards. And then what I'm hoping
is that at that point, the shadows will take over, so you cannot actually
look inside it, and else there are
a few more tricks that I can do to
fake it, of course. But those tricks, of
course, take more work, so I just hope that
the shadows will be fine because that's the thing you kind of need to justify. So I have this way more than
you guys that I need to make sure that every minute that I spent on this is correct. And that's why something's a bit better that I like to
just talk and ramble. But even in Treti, you need to learn
that, see, that works. You kind of need to
learn that you need to justify your time spent. And if you are going to spend 1 hour on like a tiny ring
up here while you could, in the same time, create an
entire bench, for example, it's not really logical
because this piece, it will be very, very small. In any case, we
have this piece now all that we need to do is just create some booleans in here. And those booleans,
they will kind of, like, do that stuff. So if I go ahead and
remove my history again, I'm going to grab
a simple cylinder, and I'm going to make
this quite low. Like 12. You might notice
that at this point, I am going quite quickly because all of this
stuff we've already covered it just to let you know which techniques
I'm using where. But in any case, we place this boolean I think
something like this. I'm going to make it a little
bit bigger than real life, and the reason for that is
just so that we can properly see it. Let's do this height. Let's extrude is
also out over here. Select both of them,
press combine, and then just hold Shivj and nice to clone
them like this. And then we can select both
of them again, press combine. And now select your main
mesh, select your Booleans. And let's go Booleans and do a simple difference. Here we go. Now, with this difference, let's go ahead and just
do a bit of cleanup. So I'm going to see if I can
do this one a bit quicker. But booleans on
cylinders are often even messier than booleans
on, like simple squares. So because of that,
I might need to actually put in quite a bit of work just to get the jom
tree to flow correctly. If we do not have the
jom tree flow correctly, what will happen is it
will no longer look like a cylinder because it will
look like it has jagged edges. And that's not something
we want because then yeah, it just ruins the entire look. So because of that, we cannot just go ahead and
we cannot just do cuts. Well, we can do
probably a cut like this will most likely
not break your shape, and a cut like this will most likely not
break your shape. However, for these pieces, I would recommend
that you cut them in this direction
because you can cut cylinders around without
affecting the shape at all. So I think doing this
It's a little bit better, and then over here, we can
do something like this, and then later on what
we will of course do is we will just add
some supporting loops. Oh, so, try it again. Later on, what we will do
is we will, of course, add some supporting
loops to this, and yeah, that should
all look fine. Oh, yeah, yeah, it doesn't
take too long to do this. I'm still a bit worried about
these pieces over here, but I think this will add
more support than also doing those really top
pieces to the side, but we will see I
can just remove them if that's not the case. However, normally,
from my experience, this does not show up too much. The only reason why
I'm a bit uncertain is because we have a
soft bend below it, and that soft bend could
also start affecting things. Everything can affect
everything pretty much. But that's the fun
of it. So let's go ahead and select this one, last one. Same over here. Oh, you know that,
make sure that you do. Select the correct. I've heard seen that it's snapping works. Okay. And now, all
we need to do is we just need to give it like two supporting loops
probably in here. Same in here. And
of course, in here. Now, it would most likely also need a spotting
loop around, but I will see because
that is not always needed, most of the time
it is, but maybe that we can get away
with it because it's such a small shape. So I'm going to select
these insights, press CtraE and just
give it an offset of 0.0 0.06, something like that. Now let's see if it
works. Here you see. So this is one of
those times where technically you can see a
tiny bit of the forming, but deforming is not bad
enough for me to go in, see, you can see the tiniest bit that it is twined
scale like that. And then we do not
need to go around, but I do want to quickly
do a test that if I set the cutting
method like this, if it will give me
a better result because this is
metal, it's shiny, so you will most
likely be able to see really large incorrections. You see, here you can see
the difference between if we clamp it down or
if we run it across. So what I will be doing
is just off camera. I'm going to go ahead
and I'm going to get rid of these pieces and then I'm just going
to reconnect them. And once that is done,
I will get back to you. Here we go. Only took me
a minute, there we go. That's now all looking
good. Now we have arrived at the point where
all that we need to do is move this a
little bit closer. Sets back to one. Let's get rid of the mirror edge over here. And we can go ahead and
we can move this up. To like roughly that point. And then if we press
three, there we go. See, when it is so long, it does feel a little bit
thinner, as you can see. So I don't know, maybe I want to make this a
little bit longer like that, but that's something
that we can also adjust a little bit
more inside of unreal. So that's looking pretty
good. So we got, like, a nice looking bowl
sitting over here, so I'm not too
worried about that. I will just keep it straight. I don't really want to add
incorrectis here where I like, move it around a bit
because it's solid metal. You probably won't
even be able to notice in real life if there
are any incorrections. So this one, I'm going to call let's start a new layer and assign this metal center pole. There we go. For later
on when we go to unreel, it will make my life easier
if I add it like this, and then I can turn it
off, get rid of this one. And now we have
arrived at this one. So this one, it has a slightly different
connection point. As you can see over here, most of these pieces are
welded together. Now, this is actually
not difficult to do. It's basically just
doing a booleon and then extruding it out
and then connecting it. That's one of the ways
that you can do it. You can also use a cut tool
to basically cut around the I'll show you both
of them, probably. I don't know. We'll see. And then, just like
where it enters, so here this I quite like this. Look, but I do need to
just double check to see because that is a
very gamy fide look here. Oh, yeah. So where
at entles over here, they did not really
do a nice job of it. Well, in real life, it makes sense, but not for us. So that's something
that we want to fix. And over here, what
I'm going to do is I'm actually going to
make this not round, but I think I'm going to make this like square to add, like, a mechanism where it, like nicely sits around it. So yeah, that's the
general idea for this. Let's get started with this one, which is probably the most
important one for this. See the metal rod we
will do later on. So what I'm going
to do is for now, let's pass height on this. I did actually now
I think of it, I have my splines
in here, backup. There we go. I have my splines. Let's do Shift and add these to our metal handles. There we go. Okay, so I got my
splines in here. So I can already just
work on getting this white because I feel like
these pieces over here, they already do they
have a decent flow. It feels like this one is a
little bit longer over here, but that's just
like a preference how far you want
to stick it out. And in my case, if I go to
my chair and I go up here, let's see, so if
that is my chair, yeah, I guess that I want to actually make it
stick out a bit more. Let's grab a very quick cube. Scale it out and scale it long. And the reason that I want
to do this is because I want to use it in order to then go in here and just simply go to Control
vertex and grab this one. Let's push this one out.
And let's also go in here, Control vertex,
push this one out. And these are straight. I want them to be straight,
right? Yes, here. So they are perfectly
straight while the chairs are at an angle.
This one is a bit longer. So now we actually have
a really accurate look of how things look. And then at the
top, where are you? At the top. It will
most likely sit in the ceiling like
a lock like this, which in our case, is
going to be like this one, here, see. So we will do that. Yes, so we'll do a
tinging at the side, and then maybe at this
side, I don't know. What I'm thinking about
is this looks cool, having a metal bar like this with really thick
bolts or something. However, logically, they would most likely do
something like this. They would most likely just
grab the exact same piece, and then they would
just, like, extend this out and then
add some screws. So we will most likely
just reuse our piece. Sorry, I knocked
against my desk. We will most likely
just reuse our piece, and it will save us some time. So having this shape over here, I can turn off my chair. I just want to go ahead and
quickly go to my center pole, and then I want to grab
this piece and once again, just do a Sweep modifier. So mesh, sorry
create sweep mesh. Let's make it like
12 because what I am interested about Am
I moving everything? I need to be very careful about the movement because
they're ERC. That's why I need to
be careful. But if I select just my splines, the movement should go better. If I just do the
splines and move those, ERC the mesh follows. So I'm temporarily just
moving this into the center. It doesn't need to be perfect
in terms of the scaling. But the reason I want
to have the same scale is because I need to
reuse elements for it. So having this
sweet mesh creator, I can now go to
my scale profile, and it looks like that 1.45
seems to be a nice value. So at this point, let's
turn off our Center pole. Yeah, here, 1.45 seems like a pretty decent
value to work with. So this almost
does look thinner. This does look a little bit
thinner than these pieces. Yeah, let's do that. Just
in case because they do feel a bit thinner and I'm
more of going on feeling. So let's do 1.3, in
that case. There we go. They are a little bit thinner
than the center poles. Maybe they need less
structural integrity, and that's why they do
something like this. So over here, you can see that
this is how it now looks. Now having these two pieces over here, I'm going to go ahead. Oh, turn on optimize.
That's quite important. Turn on optimize, and
now just remove history, and we can go ahead and we
can do it like an isolate. There's a few ways that
we can fix this stuff. So the ends, we are
just going to go ahead and we are going to do the technique that I showed you. What I'm more focused
on with these type of pieces is how we are
going to connect it. Now, you can go
ahead and you can connect it in multiple ways. If I go over here,
you can see it quite nicely because all of
the jom tree is the same. It's quite nicely fits. So I think the cleanest way to do it, you can try a boolean. You can twy and
duplicate this shape, just extract phases,
duplicate it, and then cut out a boleon. However, I think it
is just as easy for us to simply use a
multi cut and to place the multi cut exactly on where the cylinder
meets like this. I can see that the mult card
is breaking a little bit. I don't know exactly why. Now it's working again. So
we'll see how far it went. But if I do this
and press Enter, here it just plays like
a cut around here. Now, this multicud
as I said before, I felt like it was
breaking and it is. So let's merge ertzes, merge those at center, maybe do another isolate
just to make sure. You basically want
to just get rid of these faces over here, and that makes it
easier for me to then select this and just do a merge a little bit closer to make sure that there are only
a few vertzes here. And then at this point,
yeah, if you want, or you can just connect it
how we are going to do it, or you can extrude this
out and make it flat. So it kind of depends if I extrude this out
and make it flat, it's the exact same concept where I move this out like this. And then, for example, I grab this piece and just
move it over here. But of course, you
can also just merge these Verses over
here. It just depends. I think in this case,
if I do it this way, it might actually be easier
for me to the press combine. So it might be a
tiny bit quicker for me to the press combine, select all of them and
do a merge closest. And then just do a double
click to make sure that every single thing is
merged, which it is. And now comes the magic moment. First of all, this is something that you after doing
it many times, you will learn is to place
like a simple cut along here. It will just make everything
feel a little bit better, so that it still
has some jumtre, not some floating verti. And then we can press Contra B. Add a bunch of segments
here. Like this. And then what you can see
is it will look a bit more like it has been welded. Might not look perfect now, but as soon as we turn this
into hypol which we can do already pretty much
over here, here, see. That's why I added that
little edge and now we can do a quick loop. And because all of
these pieces are going to also be nice and round, those pieces are
going to be nice and round if I now go
ahead and press three. Turn off my edge faces, you can see that looks very
much like what you have here, especially when we turn
this into metal because then the shine will
catch on those areas. So we got this
piece ready to go. Now, if we grab our
metal center pole, here we go and let's steal this one and add it back
to our metal handles, we are going to use we are
going to use the top bits. So we're going to
use the top bits, and then we might want to just
adjust them a little bit. So let's start by just deleting
all of the bottom bits. Let's go to the tool
settings and reset. Oh, we are a little bit
over time by this point. So I might, I will
place this into place, and then we will see. So if we have this one, I
think we want to go for, like, a more simplistic
shape for this. I think that will
look a bit nicer. So what I'm actually going to
do, even though we did like really hard work is I'm
going to on purpose, get rid of all of these,
still keep this up, get rid of all of these
booleans, scale this flat. Move it forward a little bit
of flex scaling like that, and then just go ahead
and scale this and do the classic merge erzes. And it looks like it did not
merge all of them because it has a few stranglers
in terms of erzes. Yeah, let's get rid
of those. They must have been leftover
from the Booleans. But if I do this,
and let's try again, select everything,
merge, double click. Way you're still not working. You are merged together,
so I'm quite curious why you are not doing exactly
what I want you to do. Let's keep that in
mind. If I press three, here, geometry is a little
bit bad, so that's something. But if I place an
extra loop over here, and then I just double
click on this loop, maybe if I then get
rid of this loop, it will automatically
fix itself. And the logic
behind that is that sometimes the mesh is just
being a pain here, see? And then it has duplicate
pass or something like that. So let me just try and just
get rid of all of this junk. Over here so that I'm just basically sweeping
all of this stuff clean. Like this. And then I
just select this edge, this edge, and I just bridge it. And now it must be, see,
now it must be clean. Okay, so it took a bit
longer than expected. But basically, I'm going to
make these ones a little bit smaller with the idea that if I make these smaller
and make the outsides a little bit larger
for the bolts, it will look different
enough that it feels like we created
this specially. And in terms of,
like, real life, it will basically just look like it's just like a V
two model or something. It's like a slightly different
model from the first one, but it comes from
the same factory and in the same design, they just simply change
it a little bit, see? And then what I will do in
the next chapter is I will just although you can probably you don't even
need to really connect it, but I will do that just to make sure that
everything looks nice. Here, we can just nicely
place into place. And then before you know it, we will have a nice looking
transition piece. So let's go ahead and continue with that stuff in
the next chapter.
18. 17 Creating Our Metal Handles Part2: Okay, so let's go ahead and
continue with these poles. Now, one thing I decided
is that it is way easier for me to just
close up this hole because you will not really
notice the difference. And then we're just going to, like, place metal in it. So if I go ahead and let's see, at this point, select
this edge over here, hold shift, scale down. Oh, wait. No, no, no, no, it has some leftovers over
here from the old cylinder. So let's get rid of those first. There we go. Is this everything? Yeah, so this is everything. So let's do one more she just to keep that
supporting look there. And then at this point,
you can actually also just collapse all
of this to the center, which will just
give us this look. Now if I press three, here, see, that will
look a lot easier, and it's a lot easier for us
also to place this around, especially since
we need to place this around quite a
bit, most likely. So we got this one. We can now see how simple it is compared to trying to
merge everything together. Let's also have one over here. And then at the top, we are
going to go like the big one, which will be if we go
into metal over here, let's shift the, add this
one to the metal handles. And then I can go
ahead and I can see, delete all of this
stuff over here. And this one I can just do the same technique
where I go in. Let's go isolate mode, get rid of those
leftover pieces. Let's press one. Just go
into our unsubdivd mode. Yeah, so I can get rid of
those leftover pieces. Come on. It's a bit annoying
to select. There we go. Scale this in,
collapse at center. Because yeah, the reason why
these were here was because we immediately
modeled this out of our cylinder in the beginning. However, now we can
just go ahead and we can also scale this down. You can kind of choose, or you can do like an overall scaling, which I will do,
or you can scale only on the axiom
Y axis like this. But I'm going to go for
an overall scaling. It feels a little bit more logic for me that if this
pole is thinner, it will also have a smaller here we are round it like this. And this one, we want to then move up a little
bit, and that's about it. Now if we press three, see? And you can never ever
see beyond that point. Okay, so that's the site.
That's pretty good. Now, these sites are
being connected over here in certain locations, as you can see, and then the bottom location is going
to be slightly different. So let's start with
the top location. For our top location, what I'm going to
do is I'm going to go ahead and I'm
going to grab this piece and I'm going to nicely
move it over here. And, first of all, we just
want to try and move it into position like this, and then I just want
to move it backwards a little bit because we made
this a little bit larger. And now we can just go ahead
and get rid of the old one. So we got these pieces. Let's also by the
way, get rid of this. And then the first thing that
we need to do is over here, we need to merge. However, I'm pretty sure
that we can just reuse this. If I press one, I can just
grab this piece over here. Actually, you know
what? I do need to Oh, yikes. What is that? That edges very, very
close together over here. But it seems to compensate
itself. I do not like that. In slness that's really
dangerous to do. So instead, I'm
going to carefully move this back over here.
Let's pass zoom in. And if I move this back,
I will just hopefully give it a bit more space to
get it back to the original. Because else here see, else
you get like this thin line. Remember this is metal metal. I know that you might not realize now if you've
never done metal before, at least in metal cylinders, but they are very sensitive to smart changes because
they are reflective, you can immediately
often see it. But okay, that's better. So
we got this piece over here. Let's reset my pivot, and I'm just going
to duplicate this. And I'm going to let's see, let's place one loop over here. Scrap this loop and
just make it nice and straight like this. The other loop we
have over here, nice and straight like this. And then we have
another loop over here. Which also works so that we
can now just reuse this. So we can select
this control shift I, delete everything else. And now we just have
this little joint, which we can now just go ahead and reuse wherever we want. So I can go in here
and I can say, Okay, so it needs
to go that way. So I can rotate this 90 degrees. I can nicely move
it into location. Let's move this to the site that I have the correct
height for this stuff. Like over here. You'll see that I'll do a pretty good job. Now what I'm going to do is
I'm just going to go ahead and so this one
will be a mirror, but I'm just going to move this one over here because I will most likely
need it later on. And for now I can
just isolate this, grab our original and add a very quick loop
here and a loop here. See, let's move this
down. Another loop here. Let's move this up. And
then we can go at them. We can get rid of
these faces over here. We can start to
combine this stuff. So here we go. Let's combine it. If this a little
bit closer, Yeah, I think we will need to
do a little bit of work, but I think we can
get this working. If we do a merge
vertss let's 0.1. Yeah, here, 0.1 is close enough. And then over here, I
just need to once again, move this down a little bit and, like, move some of these
pieces up a little bit because those do change often. Try it again, select
it, apply 0.1. There we go. That does a trick. And now, if you
want, you can even get rid of these
pieces over here, but I like to just keep them
because when I press three, Tad, we have our loop, and everything's now also
in the same thickness. So at this point, we can go
outside of isolation mode. We can go ahead and we can basically move this
one up until here. And then what we will do is we will go ahead and I'm just going to I want to keep a copy of that because it's
just a handy piece to have. But in any case,
I'm going to now go in Let's press isolate. Add one of these
joints over here. And once that is done,
we can immediately also create this area over here. So let's go ahead and
let's select both of them. Let's press Combine. Let's see how far do they
get if I do merge furses? Oh, I think perfect already. Yeah. Here we go. So
if I press three. Yeah, that has a nice
looking transition. And then at this point,
it's just a matter of me moving this exactly
where I want it to be. And then you can see,
like, from the back. What I can do is I'm just
going to extrude this out up until this
point over here. And then it's just a matter of grabbing one of these pieces
and moving them up here. And let's put height temporarily on like a blockout piece. We just want to
kind of move this one and keep it at the
same height level. Move it around. And
then for this piece, just press Shade Smooth, which you can find in
display and soften edge. Makes it a bit easier for
us to see what we're doing. Like that and press three
and double check your work. Almost done. I think I want to just extrude this out so
that it is in the center. For the rest, that
looks pretty good. Yeah, I think that
will work just fine. So now it's just a matter
of mirroring this stuff. So we got this one over here, and I'm just going to go ahead and press Show All over here, which you can find in Oh God. Where do I always find this? Display, show, and then Al. So that's one I just added to my tool now that we know this, what I can do is I can just
very quickly add one line. If I select this one, add
one line here in the center, just a simple connect. This way, it will make it
easier when I do the mirroring. When I set this mirror
exactly on this line, and then later on, of
course, we can move it around a little bit to make
sure that everything fits. But this should be the only
piece that we need to mirror. If I go ahead and I press
add a pivot and I'm just snapping my pivot to the very end over here
to one of these points, does not matter which point. Yeah, so the rest we
can just copy over. So let's do a very quick
remove history, mesh, mirror, set the
mirror at object, and this time, set it on
the X axis in the plus. Yeah, see, we're pretty spot on. Maybe a tiny bit off, but that's something that we
need to change anyway when we start to actually fit this altogether.
So that's no problem. So for now, let's press
W, and now we can select the d one and
delete that one. And we can go in here and select the blockout one
and delete that one also. So now all we have
left is this one mesh. At which point for these pieces, we can go ahead
and we can whoops, turn off snap We can
neatly place this one. I'm not sure if I change
this one in any way, so let's just grab
this one over here. Oh, no, I didn't change it
in anyway. There we go. And then over here,
we have a few one. I know that I did forget
to add the bolts, and that is something
I also need to do, but I can technically
just copy those over. Here we go. So let's do this.
Okay, so for our bolts, it is quite cool that they
have a little thing in here. But then, of course,
these boots, they are also going
inside of it, which I can do, but I will do that most
likely with a norm map, and it's going to be tiny
details if I feel like it. In any case, let's
get rid of the cube. Let's grab this little
piece and just throw this into our backup folder. Save sin first, and now
if we grab, for example, our window, and I just need to steal one of
these pieces over here. There we go and just add
those to our metal handles. Turn off window. Et's
move them over here, so they are really small. Let's make them a bit larger. And then what I wanted
to do is I wanted to cut something in it. Now, normally that works easier
if you have, for example, this is one of the few types that works easier if you have your round piece of
your sphere over here. It's up to you how
you want to do that. I myself, I think
I am just going to then re make a sphere. Because I forgot about that
which direction I did it to. So let's remake the
sphere over here. Let's make it in 12 segments. Hold J, rotate this time,
rotate this to the front. Grab the back and remove it, scale this a bit flat. First of all, move and
scale this into positions that we roughly know
what we need to do. Over here, I'm just going to nicely placed in
like the center. And then just click
and drag this piece, which I'm going to then
make a little bit larger. And because this is so small, all we will need to
do is just shift a few times just to add immediately like those
supporting loops. Then hold scale, and then
just scale it in with shift. And then finally just add like one supporting
loop at the end. See? And that will just
show something like this. And honestly, we don't need much more of that because
we simply cannot see much more of that unless our camera is
going insanely close, but it most likely will
never be disclosed. So what I'm going
to do is later on, I will most likely use a
norm data that's just like a tiny norm P trim
to make it feel like it's actually going
inside of the mesh, and that will once
again just be like a timesaver compared to
needing to do it in geometry. Be else we would need to boolean
all of these meshes out, and we need to push it all out, and then add all of our supporting loops
and all that stuff. I would just be a
little bit much. Now for these pieces, I'm also going to go ahead and
move them over here. And for the top pieces, the top pieces, they are
connected differently. So I can remember seeing
that they do not have any bolts sitting
there, no here. So they have a slightly
different connection, and I do want to just leave that because I think it
will be nice if we have a slight difference and
not that everything is just bolded shut like that. So if we go ahead
and turn it off, I think we are pretty much ready to go with all
of these pieces. So let's save acine make sure to select everything and just add it to our metal handles. So we got the metal handles, and we got the pole ready to go. Which means that over here, all of this stuff is also done. Okay, we have arrived at
the time lapse part of this course because
these two are very easy, and then we have the back. And it's also perfect timing because I feel like
I'm getting a cold. So for the time labs, a few rules that I will
follow. It will be time laps. I I don't think I need to
narrate over everything. If there's anything important,
I will narrate over it, and I will also include the time maps without
the sped up footage. So it is the unsped
up footage of the time labs that I will
include in the special folder. And this footage will simply
it will not have any audio. So it's just like if you
want to follow in real time, but without me speaking,
you can do that. For the rest, some of the key
focus points on the floor, the floor is going
to be very easy, but I quite like having
something like this. So I will most likely
create an effect like this that you
can see over here. I don't know if we maybe want to add something extra
to the door for that, but we already have these trims. So it most likely would just be overkill if I tried to add
something extra to this. Maybe over here, I will add like a little metal strip or
something like that. So that is our floor. Our floor
is going to be very easy. Our ceiling, we are going to mimic this, and it's
just going to be, I do need to make sure to see I think these pieces
are here to basically have, like the yellow bits
that you can hold on. So I'm going to have a look. And yeah, here, you
see them everywhere. So I am going to recreate
those pieces over there. And for the rest, I will also create this
little center line over here, so we will just make this
modular. That is that one. And then for the back piece, the backpiece what I want to
do is I'm pretty much going to mimic the stuff
that we see over here. Our door style will most
likely be I don't know. No, I think we want to
go for this door style, but maybe we will
make the window a little bit thinner and
a little bit longer. I'll have a look. So we will basically here.
This is a good image. So you can basically
that we will just reuse part of the door. Once again, we will also
like out those strips. And then for these panels,
these are metal panels. However, I also want to go
ahead and here you can see, some copy pasting
that we can do. But next to these metal panels, I also want to add, like, something
like this in here. So that's most likely
something I will also do. And I'm going to add like a handle like you
can see over here, just so that you can kind of see it here so you
can properly open it. So yeah, you see the handles, and we'll take it from there. Maybe we do something
with a vent or something. And then finally,
when that is done, there will just be
another chapter, and that chapter is very easy. It's just going to be
all these small pieces. I just going to be me
making the speaker system. It's going to be like
adding some like these emercy brakes and like little buttons
and everything. It's just like, very,
very basic modeling. But that modeling in the end, it will actually add
quite a bit to it. You can see like this one
doesn't even have that much. So yeah, here this
kind of stuff. So it's just going
to be a bunch of that really small random stuff that we're also going to create. So that's the planning.
So let's go ahead and continue with our time laps.
19. 18 Creating The Left Over Pieces Part1 Timelapse: A. A. B. Do Do Do the I I.
20. 19 Creating The Left Over Pieces Part2 Timelapse: I, I. Oh
21. 20 Preparing Our Assets For Export: Okay, so the time
lapses are done, and most of our core models
are now ready to go. So what I'm going to do
is before we move on to the texturing part
of our tutorial course, I just want to make
sure that everything is placed nicely in position. So something that I said before that you
need to keep in mind, when you export your
models to unreel, they will be placed or the Pivot points will
be placed on 000, which is where these thick
lines come together. So when you drag something in, you want to make sure that, of course, it drags incorrectly. For example, if I have this,
I always want to push this in a little bit so that
when I drag it on the wall, it will be slightly pushed
inside of the wall. It's small stuff like that. And for the rest, yeah, placing it in the center
for stuff like this, it's not too bad, but it's just something
to keep in mind. So this one does not have
anything specific over here. The small lox, we
can once again. Okay, so the small
x is also fine. So for most of these, I will
have already done this. But it's just doing a
quick double check. And I wanted to do
this in real time, just make sure that
everything is correct. The speakers move it down
a little bit so that it is not so far sticking in
and it should be fine. Then for ceiling, these are the pieces where
it is important. So if we have a ceiling because
we want to do snapping, we want to have a
general direction in which all of
the snapping goes. I want to have all of my snapping go basically
in this direction, going to the top
right, I should say. Just make sure that
you snap all of this stuff neatly here on the corner and that
is all looking correct, and then everything
should be fine. Here we have, for
example, floor, a B over here. So what I might want to do is
I might want to grab this, let's see, it's
one model, right? Yes, it's one model.
Go to Snap by points, set the point snapping on
this very corner over here, and then snap to
the grid and then snap this nicely back
to the grid at 000. I know it's a very large
asset, but there we go. And that's what just make
your life easier when you actually get
to unreal engine. This one is a little
bit trickier, and the reason why
it is a bit trickier is because the Pivot point, of course, we don't
really have a point where we can properly snap this. Hmm. As you can see over here, what we could try and do is we can try to snap here
I do snap by points. Let's add a pivot
and let's snap it. Oh, God, it's really
annoying to move this. Snap it to this very
top point over here. Then just do a snap to grid, move this piece and then snap it back to the grid over here. Sometimes just go
ahead and go in your top view because we are
only moving one of the axis, so we're only moving the
oh, God, I don't know. Z axis. We are only
moving the Z axis. It will not try to
accidentally have the floor lower or higher and it should still be in place. Our BwaO back wall
is very specific, so this is actually fine. I'm
not too worried about that. Maybe you want to, like,
turn off snapping, maybe you want to move this
a bit closer like this. But for the rest, yeah, you
don't need to worry about that one because it's
a very bespoke asset. This one is already pretty
much in the center. The metal handles are once
again something very specific. So I don't know. You know what? Maybe it is better, actually, for these type of pieces,
turn off isolation. Actually have the Pivot point
in one corner over here. It will just make my
placement a bit easier, and then we can also go
ahead and move this down, something like that. That
should do the trick. So at least that will make
things a little bit nicer. And as for the height, let's just move this down
a little bit so that the PIV point is here,
and then in unreal, I can use this location to
basically move everything around. So we have
done that one. Advertising advertising, I want to go ahead and I also
want to do some snapping. And see how or where am
I going to snap that? It is a tricky one.
This point maybe. If I go ahead and
here, let's do add a pivot point snapping. Snap this up over
here to this point. Here we go. I think that
will work just fine. Is this one still
working? Yes, it is. And then I'm just going to go ahead and just to make
my life a bit easier, I'm going to select all
of these models for now. And by the way, these models, let me just double check, see, look good that I check. So I do not want to give them ends because you cannot
actually see the ends. So that would just
be waste geometry, which I guess does
not really matter, but it also means
wasted UV space, and it can cause more problems
later on. I called Shifti. So let's just remove that. And now we can just go ahead and go Where's my tab,
there's my tab. Now we can just go ahead
and we can grab all of this stuff and we
can press collapse. Once again, edit
your pivot and just snap this to this
point over here. Like the very end, there we go. And then snap this to grid, and I'm going to snap
this one to the grid. There we go. Let
you do the trick. Oh, and re add this to your layer because
when you combine stuff, it does not add it to the layer. These pieces are a
little bit trickier. So for these pieces, let's
turn off my grid snapping. I'm just going to
go ahead and I'm going to move it to the site, but I will not have actual,
very precise snapping. I just want to move
it basically around. Actually, you know what,
let's do around this point. So that will just make
it easier for me to move really close by and nicely
set them next to each other. So for us, I'm not too picky
about this because yeah, we are going to build
this environment just completely inside the fn wheel. We will not build the
final environment in here. The door and window are fine, and the rest is just going
to be blockout setups. So yeah, once we are in real, it will look a little
bit like that, and then we have some backups
and we have a blockout. Perfect. So all of that
stuff is now done. Now what we're going to do
is in the next chapter, I will just break chap up here. We will have a
chapter where it will all be about creating materials. Now, creating the materials for these pieces are actually
not too difficult. So I will go ahead
and I will tell you exactly what materials
we are going to create. We will be using
substance Zina for this, and then we can
just jump right in. We can start creating materials. Once we have our base materials, we will do the UV unwrapping. And then this will
be more of a back and forth between
going into unreal, setting it up, polishing
our materials, improving our shaders, and it will just be like
a back and forth. But first, let's go ahead and actually create our materials.
22. 21 Creating Our Floor Material Part1: Okay, so what we're going
to do in this chapter or in the next few chapters is we are going to
work on our materials. So if we have a look
at this, the materials are actually fairly simple. The materials itself, but the material response
needs to be spot on. So what do we have over here? We have a floor
material, which is one that is very specific that
we are going to create. We have a metal material, and within this metal material, because we are using
substance designer, we will, of course, create all of our materials
procedurally, sorry. And because they are procedural, it means that we can create multiple different metal
materials in one thing. So we will create
the metal material. That can support
basically everything from this plain metal that
we see over here. To, like, the stripy
metal that you see over here to also more like the duller and darker
metal that you can see, for example, on these
bits over here. So there is quite a
difference between it. And the third main material
that we will be creating is going to be our
plastic over here. So we will create our plastic. We will also reuse our
plastic for, like, the rubber and just slightly change the properties
of our material. Those are the main
focus ones for, like, the large
pieces of materials. Of course, next to this, we have some smaller stuff like
these pieces over here, but we will do things
like the seating. We will do, for example,
in substance painter. We will probably do a
bunch of very small bits. We will also do in
substance painter. And then later on we, of
course, have all the branding. So let's go ahead and
let's get started by doing probably let's start with our ground material just
to get started with. So here we are in
substance designer. I'm going to go ahead and
I'm going to go to File, New package, and I want to create a new substance
graph to get started. As always, I do
expect that you have a basic understanding
of substance. So this one will be
metro underscore floor. And then just go ahead and
sell it to metallic roughness, which is often by default. And yeah, we can just do four k because we have so
little textures, we can just go all out
with like a resolution, and we can always lower it
later on in the engine. So over here, we now
have substancesgner. We have our base
color over here. We have our Treaty
view over here, and then I have my
graph in the center. Your layout might look
a little bit different, but you can just move
everything around. I personally will not actually
be using my Treaty view. And the reason for
this is because I always use Mama set
for the previewing, and I have a premade scene
that I will give you guys that you can use to preview Mm set just
because scene, if you type in Fast Track
tutorials in YouTube, you can actually find
the free tutorial on how to set up the scene. And for the rest,
it's just going to be like a quick preview. So I don't really want to
spend half an hour setting up a scene when we're never going to use it beyond the previewing. So as you can see over here, now, that's the thing with
these type of materials. It is that there is almost
no norm map information. There's maybe like
the tiniest bit of some dents and maybe some
random specs here and there. But especially in
this reflection, you can see that there's almost
no norm map information. Never mind height
map information. We have pretty much no height
map materials in here. The reason I say this is because I always
create materials, going from the height map to the norm map to the base
color roughness map. So it's like that's my workflow, but I think it's the
workflow for many people. So we are going to get
started with just, like, a very, very
basic norm map. Over here, we get
some default outputs. Let's select the metallic and get rid of it. We don't need it. Ambient eclusion in height,
we also don't need. We only pretty much
need the base color, normal and roughness.
So form norm map. It's very hard to
see, but I'm going to give the tiniest bit of, like, dense,
something like that. And the way that I
can do that is I can go in my library over here. And if I just grab, for example, what's the directional noise? No. Let's do like a crystals
over here, a crystals noise. Then what I'm going to do is I'm going to press space
and pressing space. You basically get access to everything that's
in your library, and you can start typing, and I'm going to type in HIS
to get a histogram scan. With the Hiscom
scan, what we can do is if we move
the position up, it will basically slowly
start showing the contrast, and as you can see
what it will do it will give us some
very small bumps. Now you can press space
to basically show the tiling view to make
sure that it is correct. And the way that you should see norm map information is the same way as height
map information. White means up,
Black means down. So when something is white, it will mean like it stands out. Now, it does depend on
your norm map format. So if we press space and
type in normal over here, and that is the open GL here. So I always work in open GL. You can see that it has some
very subtle going upwards. So we need to add
some changes to this. First of all, let's
select this line, and whenever you select a
line and you press space, it will just place
a node in between. So we can type invert and
get an invert grayscale. You can just use your arrow
keys to switch between them. That's an input. I try
to say invert grayscale. And now you can see
that over here, it will now go inward. It's very tricky to see. Another thing is that
it is way too sharp. I want this to be
very, very subtle. So what I'm going to do is I'm
going to then go ahead and add a blur high
quality gray scale. Just type in BLU and then
you can already find it. In this blur, start by setting the intensity
all the way down. Then click Double click on your normal and then click
once on your blur. Doing this will basically keep your normal map shown over here, but it allows you to change
the settings of your blur, and then if I move my
settings, here you go, see, you can see that you
get this very soft effect, and I can then just make
it as soft as I want to in order to get something
that looks nice. So let's go for 2.5. Now in our norm map, we can
also set the intensity here. So as I said, I'm going to
make this very, very subtle. Okay, so we have
something like that. Now, FRS, I guess I could
see a few small specs. So maybe we can
do something like some really small random specs. And the way that we can
do this is we can grab, for example, a
dirt to over here. We can add a histogram
scan to this and make sure that you only select like a few of them like this. See? So just like a few
very, very small specs. And then you can actually
duplicate your blur, high quality gray skull and your norm map and plug
this one in here. So with this one, if we
set the intensity of a blur down, here we go. You just want to make this,
very, very soft blur. Let's do 0.05 even. So as I said, really soft. And then what you
can do is you can go into your normap and just like nicely nicely move this down. Something like this. So
that's even too strong. Let's do 0.02 or
something like that. So it's just going to
be like some very, very subtle specs that
you can barely even see, and you will only
really be able to see them when the light hits it, like over here, you can see
that the light hits it, and then you can
start seeing it. So we have these two norm
map elements over here. If we want to combine these, there's a very easy node, and if you press space, it
is called normal combine. So you basically use this node, and in the technique, you
set it to high quality. And then when you do that and you plug in these two norm maps, you get that these two norm
maps are now combined, see? It is subtle, but they are
now combined. And that's it. That's all that's to
it. So for norm map, we can plug this into our final normal output so
that when we export it, it will export this norm map. Now, what do we have left? We have left our base
color and our roughness. In this material,
most of the detail will come into the roughness.
You can see it over here. Like there is some
really cool detail in this roughness that we can use. And what we might also do is actually inside of UnwelEngine, we will use some
cool shaded tricks to basically blend between different roughness maps to
give it even more variation. So for our base color, it basically looks like
a white specs thing. Let's see, um, well, actually, they are all a little
bit different here, see? So it looks like white specks. And these white specks
look very similar to what we have with the dirt.
They look like we have. So if I go over here, it looks like we have
a uniform color, and a uniform color is
just a plain color. And the cool thing
that you can do with uniform colors is you can
color pick if you want. You can, for example,
Grab over here, you can move this
down and you can grab this little picker button, and then you can click and
you can pick the color. Now, the color will not
always be very accurate, especially not with
random images like this. But based upon this, I
can then, for example, tone this down a little bit, and it's a little bit yellowish. So let's go ahead
and set this more in the direction of
like a bluish color. Here we go. Make
it nice and dark. Now, for our specs, before we want to
do that, we want to add some variation to this. It's just going to be very
subtle color variation. And the way that
I tend to do that is I tend to press Contra C and Contra V in order to basically
duplicate this piece. Then I just go into
this output color and I just make it the tiniest bit stronger
over here, see? All right, tiny bit lighter,
not stronger, lighter. Now, if I blend these colors together using a mask,
they will softly blend. So if I go ahead and
add a blend note, which basically just blends
two things together, I can have my foreground
and my background. And now to blend these
two colors together, we need to have
something in the mask for which we want to have
something that is quite soft. So maybe like a cloud too. Plug this in and then here, see? It's so subtle, you
can barely see it, but it will actually show up. So it's just like
this really nice subtlety between the colors. If you want, you can
really see it by doing this, then you can see it. But yeah, it's just
really nice and subtle. So I quite like that. Now, for our specs, we
basically copy, once again, our uniform color and
set it to be very white. And then we basically want
to blend this white color. And for our specs, I think our specs are all
over the place, and for the rest, they have
just big and small specs. So here, yeah, you
can kind of see it happening pretty
much everywhere. Some are a bit
rougher than others. Mm, maybe do something with
those line. I'm not sure. I'll see if I if I will art
something with those lines. Let's wait with that until we actually are inside of unreal. Oh, wait. Actually,
over here, there are also lines.
Yeah, you know what? We are going to add those lines. But first, the specs. For the specs, I'm going to grab probably a
dirt one this time. A dirt one just has,
like, a bunch more specs. And then if you add
a histogram scan to this you can basically, poise them around, and then
we get, something like this. Now, one thing I do
not like is that it is if we just going
into our dirt one, is that it is quite obvious where there are specks and
where there are no specks. Why, I want to have it a
little bit more gradual. Let's see, dirt tree over here. It's too soft, dirt
five over here. Here, see dirt five works
a bit better because it has more evened out
specks like this. And then if I go
into my HCRm scan, I do need to, like, mess
around with it, see. Yeah, I think that will work. So let's start by just adding this and just see how it works. Yeah. So it does give me, these really small little specs. The taxi that might
just work just fine. Let's go into a uniform
color and set this even whiter like this. And what you can also do
is you can also go in your HCRm scan and mess
around a little bit with the contrast to basically get these specks to be a little
bit more clear like this. Now, the cool thing about this blend because it's
just sitting on top is we can use the opacity in our
blend to basically control how many specks that we or how intense we want
our specks to be. So that's pretty cool.
Now, as I said before, these lines over here,
they actually look quite cool where we
have this flow over. So I do want to
go ahead and grab something like that and
just place it in here. We will only do this
detail inside of a no map. And I have in mind if
we go to our patterns, I think what we can
just use is we can just use an inverted gradient. So it looks something like this. Let's go in and let's grab a gradient linear two or three. Gradient linear three
actually works better. Set the rotation to 90 degrees. And then what you can do is
if you set the position, Oh, no, sorry, not the position, add a transform to this, and a transform note allows you to basically move some stuff around and then set the
offset over here to 0.5. So then we get this effect. So we get this really thin line. And if we then just place
this line all the way across and we do it like
twice or like two times, we will just like
place this across. It will give us quite
hopefully a nice effect. So we have this one. A few ways that we can scatter this across. One of them is to grab
a tile generator. And this note, basically what allows you to do
is input a pattern, in this case, this shape. And then in your
pattern down here, it allows you to
say, like, Okay, image input, and now you can see that you can
scatter this across. Now, if I go ahead and make
this very thin over here, what I can then later
do is I can just decide exactly which one I want
to use for my pattern. So if I do this, and if I then go ahead, oh, I do not have control over
a mask. That's too bad. You have a checker mask over here, but that
doesn't really work. That is unfortunate.
In that case, I need to use the
slightly larger node, which is our tile sampler node. Tile sampler might look a
little bit more overwhelming, but same basic concept. You plug in a pattern, you set the pattern to
a pattern input. On the Y amount, just go
ahead and set this to zero. And then, by the way,
go to your scaling and in your scale Y,
set it to like two. What this will do is it
will basically stretch it out and it will
still be tilable. And once we've done that,
we can go on our X amount and we can either set over here, we can set how many we want or we can, of
course, scale it down. I'm just going to go
ahead and set over here. So let's do like 64. For the background,
because we want to have a background white that
it nicely transitions, we can scroll all the way down, and over here, we will
have our background color. And in our background color, just use the slider to
basically change the luminosity to white. Let's see. Blending mode, I subtract. Okay, so setting the
background color to white might I need to do this in a
slightly different way. Basically, what I'm going to
do now is I'm just going to mask out which pattern I want. In order to mask it out, you go ahead and you can
grab like in pattern, just grab a Yeah, this is quite custom work, so I'm just going to do this easy. Grab a simple shape, set the X quite low like this. And then what you can do
is you can basically add a transform to this and you
can move this up and down. Now, the way that
this works is if you plug this into your
mask map input, you can use this as a mask. To activate this mask, you scroll all the
way down and in your mask map
threshold, turn it on. And at this point, you can use your transform to basically see. Yeah, you can almost, like,
select which one you want. I'm going to go for let's see, one that's quite on the
outside. See one over here. And in order to basically have this
also on the other side, what we can do is we can
add a mirror gray scale. And let's see, Mirror
Oh, no, sorry, Mirror X axis and turn off
invert. There we go, see. And now we have it exactly
on the other side. So, okay, so we got these two. The only thing that I was a bit disappointed about is that the background
decided to also here, see, it decided
to also push this out, which I do not really like. However, the way that we can pretty much fix that is we can simply add a blend over here
and plug in our same mask. And then set this to be
like okay, so first of all, we need to make our
shape on the X xs, a little bit wider until
it covers everything. Let's see, 0.150 0.015. And sorry, use this
into your opacity, not in your top, and then add a uniform color that
is completely white. So you can just set
this to grayscale up here and then move that slider
again to completely white. And if you do that, sets to copy I think we need to invert. L et's select this line, do an invert gray scale. And the cool trick
is just press D and D will basically dock it. It will just minimize
it, but it will still be here. There we go. Now, I just need to, like, do some very final adjustments, 0.01, two, there we go. See. And now we only have
it on two sides. I know that was
quite a bit of work. But no, the setup is
not too difficult. So once you have
this, you just add a norm map node.
Set is the OpenGL. And then what we can do here, so we can see like
in the norm map, you can see that
it's not perfect, but you can art a blur. Sometimes it is easier
to just art a blur. Here to basically increase that than to do anything
else to just quickly fix it. Another thing is that it's
most likely a little bit too thin. To tick. If it is too thick, you can
try to do the easy way, which is adding a
simple transform and setting this to minus two, but it will most likely here, see it will most likely do this. Oh, now I think of this. It depends how we are
tiling this, actually. It depends how we
are tiling this, but for now, it might actually
be nice if we hold shift, and shift basically
allows you to copy this note like this. For now, it might
actually be nice to just have one because this way, we can also just do like
a minus two over here, and then we can have two
that are a lot thinner, see? And this way, now that
they are so thin, we can go ahead and do like
a normal combine over here. Set is at high quality. And we can nice, plug these in together and maybe tone down
the intensity quite a bit. Here we go. See? So that's another trick.
So this one for now, you can just press
the lead probably, and we can leave it like this. Okay, so now the normal
map is hopefully done. Let's go ahead and actually save scene. That would be nice to do. And in our source files
and taxis folder, I will create a new
folder called the floor, and in here, I can just
go ahead and press Save. So what we'll continue
on in the next chapter, we will go ahead and we
will just finalize MTO. We will work mostly
on the roughness. We will open up Mom set
and, like, render it. But we already got a
really good process, so that's looking nice. So let's go ahead and continue with that in the next chapter.
23. 22 Creating Our Floor Material Part2: Okay, so let's go ahead and
finish our floor material. So we left off with this
very basic base color, but I think that actually
already does the trick. As I said before, most
of this detail will be in our actual roughness. So what we can do
with this is we can plug this into
our base color slot, and now we can start
focusing on our roughness. For the roughness, when something is white,
it will look dull. When something is black, it will look shiny. Keep that in mind. This time, it does not change, unlike the norm map
where you can switch between direct X and OpenGL. So we are going
to go ahead and I always like to do a
gray scale conversion, where I plug in the very
base colors over here. With this gray scale conversion, what I can then do is I
can add a histogram range. And with the Hcm range, if I set my range all the way
up, I can basically here. I see I can make this
darker or brighter. Now, I don't know exactly, because this is a
very specific here, like softness that you can see. So let's start with something
like this around 0.5. Let's stay around that area, and we'll see how shiny this. It's probably way too shiny. Let's make it maybe a little
bit more, but we'll see. Then what I want to do is
I want to add a blend, and these specks, I want to have these specks stand
out a tiny bit. So I'm going to grab
my specks over here, just a mask because
this is all grayscale. A roughness map is
all in gray scale, so I can just grab a mask. I have no point in
adding in color. And if I set this
mask to be subtract, remember, black means shiny. I can just tone down the
opacity of my mask and here, make it stand out a tiny bit to give it some random specs. Now at this point, we are
basically going to add some general dirt and
grime and everything. Let me just move this over here. Substance painter
actually has really nice grime textures for
stuff like this. So I'm not sure. I might actually export those because we can
use those later on, and they will be very nice. Yeah, let's just do that. I will show you how to do this now. I was expected to actually show you how to do this way later, but let's go ahead
and do this now. Let's open up Substance
Painter this time. Okay, so here we are
in substance painter. Now, I will go more in
depth in this later on, but this is my layout. I have my assets and
everything on the left side. I have a really large
viewport in the center, and then I have my
layers, text set list, and text set settings, along with my properties
on the right side. All these windows, if you
cannot find any of them, you can always go to Window use and in here, you can find them. So this is going
to be very basic. That's why I'm not
really going to do an introduction to
substance painter. I'm just going to go file and
new and substance painter, so it's still set to
the wrong template. Just set your template to, I don't know, PBR
metal roughnes. It does not matter
what template you use. Basically, it needs something. Substance painter
needs a three file. So what we are going
to do is we are going to grab a plane over here in May and we can just go ahead and go File
Export selection, and then we can go in and we can simply export this plane, and I'm going to export it
into exports and just call it plane and export it
as like an FBX file. Just press Export.
That's all you need. It just needs a
very basic plane. In which point, we can now go ahead and we can go in here. We can import the plane. So yes, select plane, document
resolution, go four K, and the rest I don't really care about because I'm just going to basically rip off
some of the grunge maps. The way that I
tend to do this is if we go ahead and
we can go in here, we can delete this layer one, and we basically want to grab a fill layer up here just
by pressing this button. And then on this fill layer, you want to go ahead and
you want to go down here, and you want to basically
grab a black mask. Now in this black mask, what we can do is we can
later on assign a grunge map. In order to assign a grunge
map to an actual mask, you do need to go down here and you need to press Art fill. This basically what it
does is the black mask, you can paint in the black mask, but you cannot assign textures. The fill layer is almost like using a texture
slot in order to apply a texture to this mask. So why
are we doing this? We are doing this because
if we go up here, let's see which one they
recently changed these icons, so I always need
to get used to it. Oh, yeah, over here,
the texture step. In a taxi stab, if
you scroll down, you can see that we
have a lot of textures, but we also have really
cool grunge maps. So we should have really
cool grunge maps in here. It Takes a second to load. So let's see where are they? A here, see? And these
are the ones that I mean. They have really cool, wiping and like fingerprints
and everything. And I think these can
be very useful for us also to use inside of
Unreal Engine five. So we are going to export this. And what we're going to
do is we are going to export multiple and we will already export them so
that we can use them later on inside of nalgenFV
inside of our shaders. So the way that I
do this is I grab my grunge map and I throw it into my fill layer over here. Now, because this
is a fill layer, this means that now this mask
is using this fill layer. Normally, what you can do is you can actually right click on your mask and you can
press Export mask to file. And if we then go ahead and pasted in our
grunge map location, we can call this grunge, underscore is underscore A, and then we will just go
at the set this to be a JBC file and save. See if that worked.
First of all, I want to just right click and I want to double
check that it is set to four k in details, four k. And then I just
want to open it up. Perfect, C. And now
we have a grunge map sitting here. And that's it. Now what we're going to do
is we're just going to go ahead and let's see
what else do we want? Smudge is heavy. Let's
also do that one. Right click Export Master File, grunge wipes underscore B, JPEC and you can see that we
can do this very quickly. Okay, let's see what else? No, I don't really
crunch wipe dusty. Dusty might actually
look really cool also. So we're just going to
try this out inside of substance designer
and see whatever works. So let's export Master File. Crunch nscore dusty,
JPK over here. Let's see what else do we have? So those are all a
little bit too strong. So I don't want to do
something that is too intense. But often, like
this stuff leaks. Let's do those also just in case we can use it for
something later on. Let's go ahead and export. Grunge leaks underscore
A. JPEG's export. Okay, let's see. What
else do we have? We have some spots. I don't really care
too much about spots. We have some rust going on. I don't really care
too much about rust. Here we have some
critic cool leaking. Oh, yeah, here, these are ones
are often quite cool also. Let's do here,
let's do this one, and let's just call
this Leaks too. So we can now go at an export, and this is crunch
leaks underscore B. And then I saw another one, which is like these
fingerprints, which I think are really cool. And I think, especially
for this stuff, especially on these
pods and everything, fingerprints will be
perfect for us to art. So let's go in here, file
export you know what? Fingerprints on square.
You know what we could even do I
inside of realism, we could literally
give the option to paint in the fingerprints.
That would be pretty cool. That I can literally paint
them in in certain locations. And why that is cool
is because, of course, having them all over the
place would be a bit strange, but having them localized, that could give us a
really nice effect. So let's keep that idea
in mind. It's very easy. Vertex painting. So it's a very quick shade or
setup to actually do. This one, I would just
call this like dirt. So let's go ahead
and export file, crunch dirt score A. And I think that's
about it. Like we have some scratchy stuff and some other random stuff still here. So, of course, you can just look around, play around with it. But just in general, we now have these maps over
here, and that's cool. What I can do now is I can go ahead and I can go
back to designer. And now, in these maps, we want to go for something
that is actually quite soft. So I'm going to go for wipes. I'm going to try those out, and I'm going to probably
try out like dusty. And it's dot A let's just
import all of those. And I'm just going to
do Import resource. Input resource will copy
and paste these maps. Import linked will mean that it will link
to this location. The reason I cannot
do Linked is because your location will be different when you download my files. So that's why I'm
going to go for this and give the
second to Import, even though it's JPEX, they are still quite big
because they are in four K. That's why I cannot move my window because
they are importing, and there we go. Cool. So now we have these maps. So what we can do is
we can basically add a blend and we can
just do like a tryout. So for all of these, what we can do is we can just
plug it in here. And then set this to be art. So we want these to be dollar. Set these to be art, play around with your paste and just throw this into
your roughness. And then what we
will do is we will first balance everything
out a little bit. And then what we can
do is we can just experiment with which
crunch map will work best. Just to keep
everything organized, what you can do is, for example, this
is your norm map. You can select all
of your notes, right click and Ara frame. This will nicely frame
it and allow you to move everything around
and you can name it. For example, normal
underscore map. You can do the same
over here, art frame, name this base underscore color. And I can do the same
over here. Art frame. Roughness map, and
finally these three. Cool trick up here,
you see these notes. If you want to have
everything perfectly aligned, just press this note and it will perfectly align your pieces. And it does that
with everything. Iver I do this, I can parase this one and it'll perfectly align everything horizontally. Just so I know, it's
one of those things that you can still make
your material without it, but it's a cool thing to know.
Let's call this outputs. Okay, we are ready to
export this to Mamset. So the way that
we're going to do this is we are first
of all going to save sin and then you want to go to your Metro floor,
the one below it. And if you right click on this, you can export
outputs as bitmap. Now, when you do that, it
will give you a location. Our location, what I'm going
to do is I'm going to create another folder that I will
call final and in this foldo, I'm going to export
all of my textures, and for my format, I'm
going to go for TGA. I did recently learn
that with rate racing, you will have a better effect on your height map if
you are using PNG, just for your height
map, however, but it really depends
on the material. Like, yeah. So for now, we are just going to use TJ
because we do not really use any extensive height
maps for this project. For the rest, just
leave everything same. Just turn on automatic
export when outputs change. Turning this on basically
what it will do is it will make sure that
whenever we make a change, it will automatically export and we don't need to go
to this window again. We can press Export,
we can close. And now to add it to Masat, I have this scene over
here, and this scene, basically what it is,
is it's a sphere. Rate racing is
turned on over here, and it has three lights. It has one big light coming from the right and then
two small lights, one coming from the left, top and one from the left bottom. The first light is quite
neutral. It's white. Second light is a
little bit yellow, and the third light
is a little bit blue. It will just add
some contrast and some interesting changes so that I can see my roughness and
everything. That's about it. This scene will be included. It's in your texture folder. If you want to know
how to create a scene, you can simply go to YouTube and type in Fast Tractorials. And then you can
find it in there. It's very obvious. It's called
scene material creation. And yeah, so that's about it. There's a lot of free stuff there, so make
sure to subscribe. But in any case, what I'm
going to do is because we are going to use this for previewing all of our materials, I'm going to create
a new material up here by pressing
the plus sign. Click once on the name
and call it floor. So our floor has a norm map, an albedo map, which is your base color map,
and a roughness map. So that means that we can now
go ahead and we can go in here and we can go to floor. Turn on why my scene is so slow. Final, I want to get
those SSDs that have a 7,000 MB per
second wide speed. I think that will
really speed things up. But in any case, over here, we can now go and I'm just
going to drag in these maps. So I'm going to drag
in my norm map. I'm going to drag
in my base color, and I'm going to drag
in my roughness. What you see over here it's just your rate racing because we
have rate racing turn on. I then drag this on here,
and this is what we get. Now, first of all, what I
tend to do is I tend to go to texture and I'm
setting my tiling to two. See it makes it a little
bit more manageable. Now the darkness of your
scene is a tricky one, because I never know
exactly how dark it is, I can go to my sky and I can
set it a bit brighter here, but we kind need to
decide for ourselves if our original is too dark. If I have a look over here, this is more like experience. If I have a look over here, I think what I want to do is
I want to make this slightly brighter like this
and make this one. Slightly brighter so over here. So I'm giving it a little bit
of brightness and the rest, I will compensate in
here. See how it updated. As soon as I switch to Mm
set, it will just update. And then in here in my
sky, if I, for example, set this to three,
I can roughly, guess how I need to make this. By the way, you can also
go in your texture and use your offset U to basically rotate around
where those lines will be. Okay, so the first thing that
I'm not really happy about is the line placement and also
the light line intensity. Our roughness is pretty good. If we hold shift, we can
rotate our sky around, and you can see
that the roughness, slightly changes
based upon that. Also, to get rid of this grain, if we go ahead and
go into render, just to make sure that you
have denoising turned on, and I'm going to, you know what? That grain that might just be let's just wait for this slide. I just want to make
sure that this grain. Okay, yeah, so let's set the denoise strength
a little bit higher. Maybe that will work
a little bit better. Yeah, okay, it is a
little bit better. In any case, the
general glare is there. Like, that is pretty good. I still I'm not 100%
sure how it will look. But let's start with
the first problem. The first problem is
that these lines, I think that they are too
dark or they are too strong, so let's tone down
the intensity. To 0.5. And I feel like that I do not
want to have two of them. And what I can do is I can add a very simple blend behind it, plug in my white color
at the top and then grab a shape at the bottom, which we can scale
on the X axis like this and add the
transform to it. This way, I can use the shape
as like a very large mask. So having this, I can go ahead and go to my transform and
move it down, see. So now we only have one line
left that is very thin. And now if I have a look
in Mm set, you'll see, we just get this very thin line, and that's more
like what I wanted. I just wanted to get
this subtle line that we can see
running down here. I also feel like my line is
a little bit too perfect. It's like perfectly straight. The way that we can fix this
is we can go into our line. Let's make our box a bit
larger, move this around, and we can add something
called an sorry, non a multi directional
blur grayscale. This one, multi deer warp yeah, multi directional
warp, gray scale. Sorry. So many nodes. When you have this note,
if you plug in like a noise like a purlin
noise over here, a purlin noise is just
like really soft shapes, and you can change
the scaling to see how many shapes you want. If you plug this into
your intensity input and set your mode to minimum, meaning that it will only affect the black and your
directions to one, meaning that it will
only have one direction, you can see that now I can
mess around with my scaling, and I can also mess around
with the intensity of the warping to basically warp
around my line a tiny bit. Doing this, it might be
sometimes a bit hard to see, so sometimes you want to
set a bit more tense. But doing this, it will
give you the option that your line just does
not look as perfect. Yeah, here. It's probably a
little bit tricky to see. Yeah, you can see it like a
tiny bit, but it will work, of course, on a flat
surface inside of unreal. So we got that stuff done. Now, if I look at my
reflections over here, I can basically decide how strong I want everything to be. First things first is my spots. I'm going to go in. I'm going to make my spots a
little bit less intense. And I want to go
into these spots, and I want to add a
transform note behind them and press minus two to
make them a lot smaller. See? And maybe add like
a few more of them. So maybe go into your
Hcam scan and push up the position a little bit more so that we have
a bunch more of them. There we go. That starts to
look a little bit better. I think I can even go into
my sky and set it to like two and then press enter
to make it a bit darker. Okay, so we've done our spots. That's all looking good. We got these tiny norm map
specs here and there. Maybe we can make them
a little bit stronger. These nor map specs here, let's set them to 0.03. And also maybe make our larger warps a
little bit stronger. Oh, see, that's too strong. Let's tone it down
a little bit more. 0.64. Maybe turning down
a little bit more. 0.56. Let's do 0.5. I might have
just already had 0.5. Okay, so 0.5 C. You can see some very small deformation and now you can start
seeing those specs. Okay, the rest is going to be
focusing on our roughness. If I have a look
at my roughness, I'm just going to make my
specks a little bit more noticeable by going in here and making them a little
bit more stand out or make them stand
out a bit more like this. Yeah, it might be a bit tricky
to see, but I do see it. And then I'm just going to
go ahead and I'm going to work mostly on, and by the way, you can turn off your
airessing if you want to have different look at
things and make everything run a bit faster. I'm going to work more on
the smudges over here. First of all, if I
go ahead and I would like increase my opacity, I can also add a histogram scan in between here
to basically push around my contrast and my position to get this to
look stronger or less strong. When I do this, you
should be able to see maybe if I go and grab my
light and make my light, I'm just pressing E to basically
rotate a bit the same. Let's see. It's a bit tricky
to just see the roughness. I'm surprised by how
difficult it is to see that. Yeah, I can see the
ripes a little bit, but I expected them
to be a lot stronger. Let's just mess around with a few. Let's plug in this one. This one is very obvious, so
you will most likely here's. For this one, it
is very obvious, but it actually does
look quite nice. I'm just going to, first of all, drag all of them in to make sure that I know which
one I want to work with. I think the vibes are just
a little bit too subtle. This one is also too subtle. And finally, I have this one, which is really, really strong. Here's. You can see how much
of a difference that makes. Now we are also going
to go ahead and we are going to also work with this inside of
unreal engine to add even more roughness on for now, I think that this one
over here is the winner. So the other three, we
can just delete for now, and we are going to stick
with this note over here. So having that, let's go
into our Hirscrm scan. I just want to play around a
little bit more my position, and then I just want to tone
down the roughness amount to around 0.5. Okay? That's not enough. 0.7 maybe. Oh, yeah, yeah. So yeah, you can see it
like a little bit. Let's do zero point, you
know what let's do 0.5, because I know that
inside of unreal, it will look a lot stronger. And let's grab a
base Hcrum Range, and let's make it a
little bit darker, just a tiny bit. Here, see? So we get that nice shine
going on over here. So we are making it a little bit shinier than it is in real life. But then for the
rest, I want to just balance this out inside
of Unreal engine. That's looking pretty
good. We got that stuff. I think I'm going to once
again go to my sky and actually set this back to one to make it a little
bit darker here, that stands out a bit more. You can press E on
your darker light over here just to
mess around with it, and then you can really
see the roughness, intensity, and all that stuff. You can play around with that. But in general, I think that
is looking pretty good. I can hold Shift and once again, rotate my sky around a bit more. Just to play around to this, maybe I'm going to make my scrumrne a little
bit less dark, just a tiny bit,
and then maybe make my specs a little bit more
obvious using the obs. Yeah, okay. I think
this is a solid base. It might not look a lot
like this, but this is, of course, because lighting
difference over here. But I think we have a pretty
close look to what I want, and then we can
take it from there once we are inside
of UnwelEngine. So that's it for our floor. We can save sine. We
can also go ahead and we can save our substance
design sine over here. And in our next chapter,
what we will work on is we will start
working on our metal. So let's go ahead and continue with that in our next chapter.
24. 23 Creating Our Metal Material: Okay. So now that we have
our floor done, now, what we're going to focus
on is just our metal, which will have a
few variations. And once again, the metal
within unual engine, it will get even
more variations. So creating the base
of the metal is actually very easy
because it has almost no base color except for when we are doing
this kind of stuff. And for the rest, it's all
just a roughness play. This metal is so smooth, it will not have any norm map information or
anything like that. This is because that's
the goal of this metal. The goal is to make
it very, very smooth. So let's go ahead and create
a new substance graph, and let's just call this metal. And we can take it from here. We can just give it other names for the
different types of metal. So for now, just
press. Once again, get rid of our tree view. Let's get rid of our height. Let's get rid of our
ambient occlusion. And for our normal,
just press space and type in normal to get the
normal color over here. So that's just like
a plain normal color that we can input. Base color, our base color
is going to be probably, actually, you know what
gray might be fine. So it might be more
towards white because then I can make the metal feel
a little bit more lighter. But for the rest,
that should be it. So most of our focus is
going to be towards these. The first one is
a metallic note. Metallic basically means saying if something is metallic or not. Now, there is sometimes a
misconception about this. Something is metallic
when it is pure metal, like you can see over here. However, even this
stuff over here, I don't think that this
stuff would even be metal, so we will, of course, have
a switch between them. However, all of these actual
bars, they are pure metal. As soon as something is rusted
or it is painted metal, it's no longer metallic
because the actual paint and the actual rust itself
is, of course, not metallic. So we are going to go
ahead and we are going to set this to
white, and later on, I will show you how to
set up something called a switch in which we can just switch between
different types. So as you can see, most of our focus is going to be
towards the roughness. So for roughness, because
this is really shiny metal, we want to just set it
completely to black. This way, it will just look
like very shiny metal. And then what we can
do is we can add something that will just
break up this roughness. Now, I'm going to
do this by adding a very simple blend to this. And remember how we created
all of those grunge maps. If we just go ahead and
textures grunge maps over here.'s set my
icons like large. I think I'm going to
try out the wipes, the leaks, and the fingerprints. I think those three are really soft because we want to
go for quite soft stuff. And let's just go ahead
and press input on those. Here we go. Oops, I didn't mean to do that. So I have a pretty good feeling about our fingerprints
over here. So what I'm going to do is I'm going to grab
my fingerprints, add a very simple
histogram scan to it, I said, This is going to be
very easy doing the metal. It's just the shader
set up inside of unreal is going to maybe
be like a bit more complex. Let's just push this
down a little bit in our position and throw
this into the top, and we can set
this to be an art. So when we set this
to art, we can, of course, work with our paste. And that way, we will hopefully get some metal and
that the metal is looking nice and just
like spotty and yeah, like, dirty, like you can see over here, this kind of stuff. So let's just go ahead
and already export this. This is going to be the most
basic metal that we have, which will be the metal for
our poles and everything. So let's go ahead
and press Save, first of all, we're going
to save this into textures. Metal. And in here,
just press Save. And then what we can
do is we can right click Export outputs as Bitmap. And let's go ahead
and export this. Let's create a
folder called final. And in here, we can
select this folder. TGA is fine turn an automatic export and just
export it. Easy does it. So now if we go into the wheel, we can go ahead and
we can just create a new material that I will
call metal underscore A. So we will have multiple
different metals. Let's go ahead and throw this on here, and let's have a look. So nomap albedo roughness metal. Yeah, that's all we need. So now if we go to
our folder over here, metal and final, I will drag
this over to my screen, and I'm going to drain
in our base color. Our normal roughness, and now it comes as soon
as I drag in the metal, which is now a white map, but technically, you can
just use your slider. You can see that
this will happen. So our metal, it is very, very dark right now. However, that could
most likely also just be the simple brightness
of our environment. If I set this to five, you can see that it is not as dark. What I'm going to do
is, first of all, let's go ahead and set
my color to be white just to maybe compensate
a bit for that darkness. Here we go. So let's
just fill white. Then if I go back,
there we go, see. So now it looks a
little bit better. The next thing that I'm
going to do is I want to set my actual reflection
a little bit down because it is
not this reflective. So I can go ahead and go back to subzger and just in
your base roughness, set it a little bit less black, and then you will see here see. So you will very quickly
see like changes. So you can kind of,
like, guess Yeah, this looks like a nice, this looks like a nice
reflectiveness over here. And then the next thing
would be that, of course, we have our roughness
details over here, which I can see them
like a little bit. So they look quite cool. Let's just see I do
feel that lately the reflections don't work as well on this one
as I would want. Yeah, let's just switch to my. Yeah. It's a bit tricky because now, of
course, we can see vine. By the way, up here
in main camera, I'm just switching between
different camera modes. In any case, let's go back
to adacing and, yeah, let's have a quick look
let's see smudges. Let's just throw on
some leaks and see if that does like maybe
I'll set a bit stronger. Let's see if this
makes a change. Yeah, see, you can see
these really heavy leaks. So the roughness is really
important with the metal. So that's leaks. How much do the smuches look
if I make them stronger? Okay, so the smuches look
a little bit grainy. And the last one would be
like this dirt over here or like the wipes. Looks like that. Mm. You know what the leaks
actually do look quite nice. What if I combine some stuff? Well, if I'm going to
combine these two, so we have our leaks,
and we have our smudges. Let's add a simple blend. And let's blend
these two together, and let's set the blend
to be let's set this to, like, a subtract. Here we go. And let's see. Then we have a position and then just
tone down like opacite. I think that could look
quite interesting. I know it might
feel very intense, but we'll see if this is too intense when we get to unreal. It is too intense right now. So let's go in and tone
down the opacity and maybe actually swap these
two around so that the strong one is going to be like our leaks
and set them to art. Here we go. So we can art a
few small leaks in there. We're almost there, push
this out a little bit more. Maybe in my blend, you set the leaks a bit
stronger. So I'm just here. If I swap these around, so I have my leaks at the top, gradus at the bottom, I'm just using an art to
basically art the leaks on top. And now we get something that looks a little bit
better already. So let's start with just
something like this. I think that will be
a pretty solid start. And then with these leaks because they are a
little bit strong, what I'm going to do is
I'm just going to set my original color a
little bit darker. So that kind of shines
through a little bit more. There we go. And becomes a bit
shiner. So there we go. It's a bit tricky to, of course, really see what we're
doing over here. But I think this is
a pretty solid base. So it's just going to be
like some soft metal. Maybe for my leaks
I'm going to twine like blur them like
the tiniest bit. So I add like a blur, high quality grayscale
on top of this. And then go ahead and go
into your intensity and give it a small blur, maybe like 0.2. We need to be careful
because blurring something, it can very quickly
translate into looking low resolution,
and we don't want that. We just want to give it
like a softness to it. Something like this, this
should work quite well. Okay, now what
we're going to get start with is doing
some variations. So we got our core metal done. Now let's go ahead and just add like these stripes over here. Now, I feel like
that these stripes are actually just
in the roughness. It doesn't really feel like they would be in the base color. So what we can do is
we can do that here. As I said before, substance
signer is very procedural. If I just go ahead
and move this out. This means that I can
actually have these sliders and I can very quickly
turn stuff on and off. The way that we do
that is like this. Let's say we add our stripes. I can go ahead and I can
add a blend over here, and this one will
contain our stripes. For our stripes, we
can go into patterns. And if we just go ahead and there's literally one that is called
stripes over here, we can just add these
pieces and the stripes, all you need to do is
just set the let's see the shift to yeah, let's set the shift to zero, then you can control the amount
of stripes that you want. So we'll see 15 or
something like that. And unfortunately,
there's not a rotation. So because I want to have
them going vertical, I'm just going to ter transform. And in your transform, you can also set your
rotations over here. So I can set this to 90 and that will just
flip it around. If I add this to my blend
and set this to be art, I know that these will
look a lot duller. So that's how I'm going to
most likely add my stripes. But now let's say that I want to switch between these two
with like a simple button. I can do this by adding a
switch grayscale over here, and I can say, has
stripes is equal to true. And if it is equal to false, we will use the blend
before our stripes. Doing this, now if I
just turn it on and off, you can see that I can very
easily turn this on and off. And whatever I add on
top of this, of course, it just as long as I place it in front of my switch,
it will just be added. Now next to this, what you
can also do is you can create a preset for this or
you can expose this. The way that this works
is you go down here and you go ahead and you expose a new graph input like this. With this, what
you can do is you can give it a name
so you can say has underscore
stripes, for example. And what you want to do
is you want to copy this into your identifier
and your label. The identifier is basically to identify which
one is a stripes, the label is just a name. Then what you can do
is you can press Okay. And now if you
just swap back and forth in your explorer
to your metal, you will now have a parameter
called has stripes. The cool thing about this
is that, for example, you can go into your
preview and you can literally in here as a button, you can
turn it on and off. And we can do that
with everything. For example, we can
go ahead and we can also add a switch
grayscale to a metal. And then I can, for example, add an invert
grayscale over here. Because the invert
of white black, so it will save some space. On the way, Ax, I'm just going to use a
black collar because in black collar is slightly
cheaper to use. You can see down here how
cheap it is 70 milliseconds, while an invert was
1.7 milliseconds. In any case, don't
worry about that stuff. Like we don't cover
that stuff in district oil because we don't really need to
for these materials. It's a force of habit. In any case, let's expose
this switch and call this I it's metallic, for example. There we go, and then
we can press okay. I knew I wrote it wrong. Sorry, If you wire it wrong, like I did, you
can just switch to your metal, go to parameters, and type in I I always tend to switch these around
by accident is metallic. Looks like a strange bird
when you're not English. But okay, in any case,
now we have these two, and now we can also turn this
on and off, just like that. So let's test out our
stripes, shall we? Let's save sin Let's go in here and look at that.
We have our stripes. They are a little
bit too intense, as you can see,
but they do work. So now all we need to
do is just go into, like, our blend and
just tone it down. See? That looks very similar
to what we have over here. So that's perfect. So just like that, we can add some stripes. If you want to, like, make your stripes a
little bit softer, you can always go in and add a very small blur, high
quality gray scale. Like that, just to give a
tiny bit of a softness to it, which sometimes could look nice, just to make it
transition a little bit better. But that's,
of course, up to you. Okay, so that's the
stripes one done. Now, next to this,
I also want to just have control over my
roughness amount, so I can change that
in case I want to. The way I can do that is
just like the switches, I can also expose this color. So I can go down
here and I can press expose And Cl is like
roughness amount, for example. And then just press
Okay. This way, if I go ahead and
go into my metal, I can go to the preview
and I can just turn, let's say that I want this
to be a little bit lighter. I can just do that and I
can very quickly switch it. This is all prework
for when we go ahead and balance it out
inside of unreal engine. It is very easy to expose this so that we
can do that kind of stuff. So that's our shiny metal, and that is our metal
panels over here. The last one I have is going
to be this type of metal, which is the more duller metal. For the duller metal, there's a few things that we need to do. So we have our roughness
amount already, so we can just turn
it on and off. That's fine. We have
our metallic already, so we can turn that on and off. But maybe it would be
nice that for this one, we add something into our base color and into our I don't know, probably
not in our normal. Our norm map probably
does not need anything, but just in our base color. Let's, for example,
let's set our base color if we just duplicate
these uniform colors. Let's capture, and
I'm just selecting like over here. Well,
that did not work. Let's move it down, and let's just do the same type of blending as I
did with the floor. Oh, I don't know
what happened there. Let's just copy this.
So the same type of blending with the floor
means that we have one light, just a tiny bit darker, and we blend between
the two using a noise, for example, the
clouds to noise. See? It's just like some
very subtle changes. And what we can do now is we can also then plug that in here. We can add a switch,
and this time, we need to switch color
because these are the colors, you can see it by
the yellow buttons, and we are going to go ahead and we are going to switch this around and we can call
this Oh, actually, soy. Let's set this to
falls like this. Expose this and call
this plain metal. Actually, let's do home. Plain chrome over here,
and let's press a. So if it is true, it will
use the white color. If it is false, it will
use the gray color. So why am I adding all
of these exposures? This is because we are going to create some presets that will very quickly just be able to switch between the
different materials. The way that we do this is
we go down here to presets, and in your presets,
what you can see is you can see
all of these values. With this, what I
can do is I can, for example, say, has
stripes turned false. It has my base roughness, which is a little bit shinier and it is metallic
and has plain grom. I can then go in and I
call this preset Home, for example, and then
I can press New. What this will do is
it will have saved the settings into a preset that we now have a drop down of. Now, for example, now I say, I want to have my stripes. I can turn on has stripes. I can make my roughness
a little bit duller, and then I can go ahead and
I can call this stripes. And I can press new again. New again. Now I have me and
I have stripes. If I switch between the two, you can see that the
settings change, and that's basically
it for presets. Just like this, we can
also say not plain chrome, and it is not metallic. It does not have stripes, and our roughness amount
is a little bit lower. And then what I can do is I
can go ahead and I can call this dull metal and
press new again. So now very quickly, it will
also translate into here. So now we can see this is the dull metal, and
based upon that, I can say that I want to have
it a little bit lighter, for example. There we go. It has a little bit more
shine. Let's do it a bit more. I can also go in and I can also expose this grunge
amount over here. So I can expose this value
and call this Roughness dirt, for example, and press okay. And then if I switch
back to my metal, we now have a roughness dirt. And based upon that,
I can, for example, look at my thumbnail and
I can make this stronger. So that over here we
have a more dirty metal and then finally, it just some balancing
like for example, making this color a little bit darker to give it a little
bit more color variation, like you can see over here. So like that, we can
have dull metal. And then once that is done, you can go into your metal, press update to save
your new settings. And then if we go
to our stripes, we can just go ahead
and in our stripes, you often need to turn on this roughness d setting and just tone it
down a bit more, and it will immediately
update to the stripes. Yeah, the stripes
maybe make it a little bit duller, or roughness. There we go. So that's
like our stripes. And finally, so press update. And finally, our comb and our comb does not need
that much roughness dirt, so let's have a look at
that. Yeah, there we go. Maybe make the roughness
dirt a little bit less so that it is
a bit more clean. And just like that,
we very quickly have three dipes of metal. And the cool thing about this is when we export this to heal, we can, of course,
go ahead and we can export these as
separate textures. So you can right click and
just call it metallic. You can go over
here, right, click, frame, call this roughness. And here, right, click, frame, and call this base color. Like that. So as you can see, very small graph, but it is actually quite
a powerful graph. And then at this point, I
will leave it because I will need to go into
reel because the metal, I need to have special
shaders in order to make it look
really, really cool. And based upon that, we can, of course, make changes. So the next material
that we are going to work on is going to be
our plastic material. So we will go ahead and we will do that in
the next chapter.
25. 24 Creating Our Plastic: In this chapter, we will go over on how to create our plastic. So just like our metal, our plastic is going
to be quite basic. Difference, however,
between our plastic and our metal is that we are
going to give control of the color of our plastic inside of a real
engine because I feel like there are sometimes some different colors and it could benefit for us to
just make those changes. So knowing that for the rest, the plastic is
basically going to be a plain color with
some color variations. You can see really clearly there's roughness
smudges and everything, and for the rest, yeah,
that's about it, honestly. So let's go ahead
and go into subzger. I have a brand new
scene over here. Let's get rid of our metal, once again, we don't need
an ambient occlusion. We do not need a
normal map for now. Maybe I like a tiny norm
map variation later on, but for now, I don't see
like we would need it. The only reason why I
might change my mind is if I see that the
lighting is very boring, then I might want to
art like something. Let's get rid of our height. So all that we have left is a
base color and a roughness. So if we go ahead and
for our base color, as I said before,
we are going to control this color
inside of unreal. This means that we
will need to keep the color gray scale in here inside of
substance designer. So what I'm going to do is I'm going to go ahead and
I'm going to give it like a fairly quite a white color like this because if you
make your color white, it is easier to make
colors darker and change the color than make them lighter while
changing the color. So I'm going to make
it fairly white. And then I'm going to
just add another one that is like a bit darker, and this will just give me some tiny bits of
color variation. Now, doing this, there is another way that you can
actually do this if you want, and that is using
a gradient map. So with a gradient map, you can basically map
a few more colors. If we grab B&W spots
two, for example, basically what the
gradient map allows us to do is you plug in a gray scale, and you can map colors based
upon the color in here. So that looks
something like this. You press Gradient Editor. You click once in this color, and now you can see that
we have three colors. With this, I can go ahead and
I can change these colors, and you can see that
now these colors, they slightly change based upon how I set them. I can
also set it like this. And based upon how light
something is in your grayscale, it will assign this color.
This is nice, if you like. Want to give it a few
more variations like this where we want to give
it a little bit of darkness, a little bit of brightness
and that kind of stuff. However, this is
way too obvious. So I do need to push these
colors a little bit closer together so that it's just a very subtle change,
something like this, see? And this way, it's sometimes
also a little bit faster. It is a bit more way, it's not more expensive, but it's just a bit faster to do. It's just that you
need to then go in here if you want
to change the colors, which is sometimes a
bit more annoying. But this is a nice way if you
just want to very quickly, add some random colors
to your scene like this. Now, for our roughness, what we want to do is our
roughness is going to be a simple uniform color
that is a gray scale, and this color is going to
it's quite shiny, actually. So let's set it to around 0.15. And then we once again
are going to blend this. And you can almost
see like streaks. And I can remember that we had like a grunge map that looked like streaks.This one, maybe. So let's try this one, and let's try let's try these two over here.
Let's import those. Let's see if that works. And of course, we
do have also some original crunches in
here that we can use, but they are not like this.
They are more uniform. Like the ones over here, you can see that they are a
little bit more uniform. So if we go ahead and let's
grab this one over here, I can now go in and see. Let's set this to be an art. And let's set this quite low, and let's give that
a go already. Yeah. Wow. This one is even more
simple than previously, just because we are
doing all the colors and everything inside of wel.
So we can save this. We can call this one
plastic. Over here, save it. I can go ahead and I can
export my outputs, create, once again, a folder
called final, and I can already show you in Marmoset what I mean
with the color overlay. So turn on automatic export
and just give that an export. Now in Marmoset if we just
create a new material, called a plastic, drag
this one in here. Yeah, materials in environments, they don't always have to
be insanely complicated. Often with even very
basic materials, you can already get
really far away. So I think this is like
a perfect tutorial if you have never
really done any, big materials to just go
ahead and practice with it. And then after this, we
will do, our chairs, which will have some nice
substance paint to work. So over here, let's
go to our plastic. I'm just doing this on my
other screen, by the way. And we have our norm
map, which is nothing. We will have a roughness map. And if your norm map is
nothing, we will, of course, also not inside
of, Unwel engine. We will, of course,
make some changes. So now we have this stuff over here. So this
is our plastic. I can see that now my colors are still a little
bit too intense, so I'm going to go
in and first of all, before I start adding color, I want to go in here
and maybe, like, make this push the colors
a little bit closer. It needs to be very,
very subtle so that when I look at it,
that's more like it. Okay, the next one, let's
see, how is our roughness? Our roughness is pretty good. Maybe make it a
little bit more shiny just by setting the
base color back a bit. And then we have our
wipes, and for our wipes, I'm going to make those a
little bit more intense. There we go. So we
can see that stuff. Maybe go in. Let's make this now a little bit
more shiny again. Then basically the way
that this will work inside of unreal engine
is just like this. You would basically
have a color slider, and then you would
say, like, Okay, I want this to be a
yellowish color. So you just set it to yellow, and then it will have a color overlay,
and then instantly, it will look more
like this stuff, and then you can use
any color you want, so you can really
like cherry pick. It is also nice to just play around with how we are
going to make things look. And just like that, we have a very basic
looking plastic over here. So, honestly, that's about it for our plastic
now I look at it. So that was a very short
chapter because the rest of the stuff we can
just go ahead and mess around with in the reel. So what we will be doing in the next chapter is we will
be creating our chairs. Yeah, that's the next one. So we will be doing our chairs inside of substance
painted this time. This does mean that we need
to already create some UVs. So let's say in
the next chapter, we will do all of our UVs on
all of our models in one go, just to keep it nice and
condensed in one chapter. We will also already, assign the tile boom tables wherever
we need, we need them. And then finally, we will do the final textures
for our chairs, and then we are finally
ready to already start getting the base
to UnreelEngine. And once we are in UnreelEngine, we will create shaders, do the branding, and
all that fancy stuff, and we will work on that. So let's go ahead
and continue with doing our UVs in
the next chapter.
26. 25 Uv Unwrapping Our Models Part1: We are now going to start
working on our UVN wrapping. Now the UV N wrapping
is very easy and forgiving inside of Maya because we are using
dilable materials. So what I'm going to do is I'm going to show you the chairs, which is a little
bit less forgiving. And that will basically be our main tutorial on how
to do UV unwrapping. The other pieces, I will just
unwrap them in real time, but I will go quite quickly because it uses the
same techniques. So for our chairs, I do expect that you have
a basic understanding of UVNrapping because it is still quite a complicated
topic in a way. But the first thing
that we want to do is we want to go
ahead and select everything and just press one to go outside of our
smoothing mode. Now you can find your UV
tools up here in the UV, and then you find your UV
editor and your UV set editor. Those are the two
that I like to use. Because I'm recording
on ten ATP, I tend to switch to my outliner because that way I
can scale it down, and I have my UV editor
sticked on here to the side, and my UV toolkit I
always have over here. Within the UV toolkit, the
few tabs that we need are the unfold tab and
the cut and su tab. Those are the ones that
I most of the time use. So let's just dive right in. If we go at isolate our model, right now you can
see that UVs is completely broken. There's
nothing really there. So we need to go ahead and we need to find a good way to art our UVs while having the least amount of
visible seams within here. Now, one thing that is already
easy is that it would be easier if we have these color
panels as separate UVs. The way that we
can do that is we can go ahead and
we can go in here. And first of all, what I tend to do is I tend
to go to UV and I tend to do like a best play and just select once. It does
not really matter. All I care about is that my
UVs are just one big chunk, because sometimes Maya
tries to already art like some seams or they are
leftover from our modeling. So right now, there
are no Seams. Then I want to basically separate these pieces
from the rest. I do this by double
clicking on this line here in the center and just make sure that it goes
other way around, and then I can just
press cut up here. Doing that, it will
basically place a seam in that direction
and also here. If I do cut here, it will
also place one over here. The reason why I do this is
if I now go to Face Mode, and you can also then in
face Mode select here, and I double click on my main
mesh and moved out of way, you can see that now this
mesh is nicely separate. Now, next thing is that this
mesh goes around the corner, meaning that this is not a
really nice looking mesh. Nice looking UV
tile, I should say. So what I'm going to do this,
I'm going to press unfold. Basically, what unfold
will do is it will properly unfold
everything so that it all looks really nice
and you can see the difference if you press your UV checker
box box over here. Your UV checker
box basically just shows like a very
quick checker pattern. And here you can see
the difference between no unfold and with the unfold. The unfold just
shows just make sure that everything is
looking nicely here, see? Fold. Ta da. Then, of course, if you
would rotate your model, it would look even better because then it's
nice and square. So that's an easy one. That's
basically what we will be doing for this entire thing.
So those two are done. We can move them
out of the way and we can now move on
to the next piece. So let's say for the next piece, I want to go ahead and I want to do just
like the backside. I feel like that we can just
do that as one little UV. For this, there are multiple ways that we can
actually do this. So for this one,
what we could do is, let's say that I'm going to
show you another technique, which we will be using,
which is that we will create the UVs based
upon a phase selection. So I go in my modeling
toolkit and I set my UV to angle constraint, and you set it to like five degrees or
something like that. Now when I select this, you can see that now I can just
go ahead and I can go in here and I can just select
all of these faces over here. And yeah, just make
sure, let's do one more. Let's do up until this point, because these seams
they are at the back, so I'm not worried about them, so we can kind of hide them. Let's go ahead and do up until
probably like this point. So that's where
there's a hash cutoff. So that will most
likely look best. Once you have this and
just make sure that you don't accidentally have
anything else selected, we can go to UV Best plane and simply select on a plane
that we have just unwrapped. Now, if we turn off selection
constraints over here, you can see that now this piece
has become its own piece. All we need to do
now is do an unfold, and as you can see now it is a really nice unfolded piece, which if we show our checker
box, this is also working. So this is the last
thing that we have left. It let's turn it off. This is the last one
that we have left. We have a side angles
and these side angles. What I'm going to do is I'm actually going to go ahead and I think I want to make
this piece into one U V. And then for my side angles, I'm just going to have to side
angle up until, like, say, this point, do the
same over here, and then all we have left
is two small pieces. Doing this, we can once again
go to our angle constraint. And for these pieces, we can actually just go
ahead and hold Control, and that's often easier
to just hold Contra and deselect because we are going around
the edge over here, then to ty and select only
these specific pieces. So let's say up
until this point, I want to avoid placing
my seams on round areas. The reason I want to avoid
this is because they are often more noticeable on
round areas because lighting, when something is nice and soft, the lighting often, catches it, and then you can
see the seam where the textures are different
and we don't want that. Next to this, make sure that old control shift just
make sure that you have everything else selected because I accidentally seem to have unselected some stuff. Over here, there we go. And
that should do the trick. At this point, we can just do a UV and a bass
plane once again. Let's do another
angle constraint. And let's do a simple
unfold over here. And now this unfold,
you can see that this unfold is not
going really well. There's a few things that we can do to hopefully fix this. One of them is removing
our history over here, and another one is
freezing our transforms, which you can find over here. Now, once we've done that, let's go ahead and
select this again, and let's try another
unfold. That's unfortunate. In that case, there are
simply too much warping going on in this area for
the unfold to properly work. The way that we can fix that is just split it up into two. So I guess that doing literally this edge over here as a split up would probably
be the nicest look. So we literally here in
the center have an edge, and we just need
to be careful that our seams are not too
visible over there. So let's go ahead and just press cut. Let's try that again. So if we now have
this one, unfold. You see that does give me a little bit of
a better result. It does have a little bit
of bending over here, but that bending it's
around this area, and I'm not too
worried about it. You can see that
your check box is also not too stretchy
or something. So I'm just going to
leave it like this, and I'm fine with that. Let's move this out
of the way also. Now, all we have left is we have left the top pieces
and the side pieces. For this, what I'm
going to do is I'm just going to hold control, and I'm just going to start by deselecting all of these
side pieces over here. Let's also deselect
this small one over here. Double check. Okay. And then do a simple UV and a best
plane once again, and we can then unfold this. That's one side piece. Now
we can select the other one. Hot Control deselect. Over here, we just want to carefully
deselect that same over here. And then once again,
we can do a UV, a best plane, select the
side, and unfold this. Those are now is
done, and then all that is left is these
two pieces over here, for which we can just do
a UV and a best plane at the same time because since they are not connected, they
will not interfere. Then just select both of them. And oh, the only things that this one over
here seems not work. Here, see, let's try it again. UV, best plane, Enter. Now it works. No, no,
it does not work. This sometimes happens if there is if there's like
a duplicate verts. Oh, no, wait. I think I
forgot to select something. Yeah, I forgot to
select something. Where does this one belong to? You belong to this piece, right? Yes. So let's try it again. UV best plane and just now I have that
extra edge selected. So that's just me
accidentally forgetting to select something. Okay, perfect. So now that we
have a chair done, the next one that we
would need to do is we need to do our vent over here. Oh, and we have also
these pieces down here. These pieces, however, are very easy because they
don't have a backface, you can just do a UV and a
bass plane and then unfold it. See? Oh, perfect. This
is a good example. This sometimes happens.
If this happens, remove history, freeze
your transforms. I have this button here, but just remember
it's over here. And now if I do a UV and a
bass plane, it should fix it. Now press unfold,
see? That's it. So for these pieces, once again, UV best plane, these
are very simple, so you just want to unfold them. Turn on my edge and faces. UV best plane. And then later on, what
we're going to do is we are going to map
everything nicely together into one large UV
so that we can texture it. Over here, we
probably need to do history, freeze transforms, UV, UV best plane. There we go. And first of all,
we have this one, and then we have these two
pieces over here like that. Okay, so over here, same thing with these,
often the smaller pieces, you can just select all
of them at the same time. Do a UV and a bass plane,
and then just press Enter, and then it's just a
matter of selecting all the pieces one by one
and pressing a quick unfold. And that will often just unfold them nicely
separately like this. Okay, so the last
one is this piece. And for this piece,
remember how this side, we are going to have
like an actual grid. So I think that we
can just as well do this grid inside of the texture, seeing that it will
always be here. So we can just as well
do that in the texture. Knowing that's what I
like to do for this one, just to be safe, first of all, let's remove my history
and freeze my transforms, is I like to do a UV bass
plane on just this phase. So I want to keep this separate. You get this mode over here, it basically tells
us that we have a problem with our UVs. For that, the way that we
can often fix it is yes, to remove your history and
freeze your transforms. And you can go in and do a UV and a bass plane on everything at the same time
to reset your UVs. Remember how I did
that in the beginning? And see, now it works fine. Okay, so we do not have a back. Knowing that we do
not have a back, I'm basically going
to just do this. I'm going to select
this phase de select this one, UV Best planes. Then double click
on them to select them one by one and
just do an unfold, number one, number two, and then all that
we have left is the side faces for which we
can also do a best plane. Double click on it, number one, unfold, and number two, unfold. And then number two, you often see switching
around because, of course, it is flipped. And now you can see Tara
works totally fine. Okay. Finally, the last
thing that we need to do is we need to combine
all of these UVs together. Because this is going
to be a unique texture. Because it is going to
be a unique texture, we need to make sure that it fits within a one by one square, and this one by one square happens to be this
square over here. This is actually not
difficult because we are going to be quite flexible with these type
of texture and everything, what we can do is we can
automate this process. So the way that we
can automate this is we can go to our tools, sorry, modify, and then go to your layout and
press the settings bar. Now in here, you can choose your textual resolution packing. So let's do 1024 is
my default, always. The packing iterations
means how often you want to calculate it to
pack everything together. Let's say we do this
to like three pieces. Now the presell orientation, you can basically go
ahead and you can set an automated rotation
of your scaling. We won't need to do that.
We can just leave this off. The translate shells
basically means that we give it the ability to
scale things up and down. However, one thing that is very important, you might
have heard from it. It's called textile density. It means that every object
has the equivalent scale in your two D viewpoint as it
has in your three D viewpot to make sure you do
not have differences in resolution between objects. So that's what this one will
automatically do for us. And our rotate shells, we can give it the option how that we want to rotate this. Now, I want to keep
this quite clean. So what I'm actually going to do is I'm not going to
have rotate Well, I am going to have
rotate shells on, but I'm going to have it
at a 90 degree angle. Be what I can do over here is
I can select, for example, an edge over here and I can
press straighten shell. So I'm going to actually
manually by hand, straighten some of these shells by just selecting the edges, and it will try to straighten the shell based
upon that location. That one that's a bit strange that it's merged together when I do a
straightened shell. That is unlogical. Let's go ahead and do
a straightened UV. That sometimes also works. So over here we have our chairs. Let's see if that sell does it, because straighten
shell should not merge things together normally. Or maybe I must have been
mistaken by something. It does not really matter
because then for these pieces, we can just go ahead and we can just rotate these straight. It doesn't need to be perfect. I just need to have it, very quickly straight like
this, just like that. And that's about it. So now
I can just go ahead and press control shift A
to select everything, and we can do the rotation. So we basically say, you
can rotate by 90 degrees. If we set this lower, it might result in having less space wasted within the UVs because your goal is to ty and have as little of
empty space in between. I will show you what
I mean with that. However, that also means that it will rotate all of
these shells at a really strange angle like 36 degrees or
something like that. And that does not
always look very nice. So next to this, there's not much
that we need to do you can set your padding
over here by going to UV, and then you can set
your shell padding. However, because we
have a resolution here, it will do this for us. So at least at this
point, just press apply, and then you can at
least show what it does because I can twin
and explain to you, but here you can just
see it immediately. So as you can see over here, it has done a pretty good job packing everything together. Now, one thing that we can say, for example, is that now this
is nicely packed together. We can select the backside
and we can say, Okay, the backside you will
almost never see, especially like on this area, I can even remove
it if I want to. I won't do it just in case. But what I'm going to do is
I'm going to scale this down. Then if I go in my
layout options, I now just turn off
translate shells so that it does not
automatically scale the shells. This can give us a
bit more resolution. Same over here. For this one, I know that this one is
going to have a grid, meaning that it might need a
little bit more resolution. So I can go in here
and I can just scale this up a
little bit like this. And when I do that, I just
make sure that it has a little bit more resolution just to be able to
cover this shape. At this point, go ahead and just select it
and press Apply. Excuse me. It is it
is not supposed. Why are you
overlapping? Oh, wait. Translate means
moving, not scaling. Wow, that's a rookie mistake. I mean this one. Shells
pre scaling, turn it off. Sorry, for some reason, I thought translate
meant scaling, but that's really stupid because translate means positioning. So turn off the pre
scaling. That's the one. You must have been
thinking like, Emil, what are you talking
about translate? That's my fault. Select
everything, press Apply. And now what you
should see is that the scaling states Oh,
it should stay the same. Let's try it again. So if
I make this one bigger, this one smaller, let's see.
I've done my translate. I've done all that stuff.
Let's try it again, and else I will do it by hand, and the system is not really
registering my scalings. Oh, no, now it does register. It just gives it a
strange way of showing, but it does register.
So that should be fine. Okay. Maybe it's fighting a little bit with your
textile density or something. In any case, this
is now correct. So this is good enough for me. And what I mean
with wasted space is the space that
you have over here. If you want, you can
try and by hand, you can try fill this space. But when you actually have a
lot of very large UV pieces, it's sometimes a bit
tricky to do this. Because as I said
before, you want to keep your text density the same. So you do not want
to go in and do massive scaling of all of these pieces to get them to fit. Like you can do tiny
bits of scaling, but you would then need
to go in and scale everything evenly in order
to get a good result. And that's sometimes a pain. So in this case, I'm just going to go ahead
and leave it here. I will move, some of
these pieces around a little bit just
to give them a bit more spacing in between them. And for the rest,
that's about it. So we got this stuff over here, because there's very
little spacing in between, but that should be
fine because we don't need to do
any normal baking. So let's just leave it at this, and that should be totally
fine. This is now done. You can look at your checker box and then what you can see, if I just like
everything checker box, is that now
everything has nicely the same scaling in
terms of the checkers. They all look the same scale.
Everything is working well. Now you can see here
that this checker box is smaller because it
has a lower resolution. Okay, at this point, we
can close our UV editor. We can save our scene. And now, what you will also see if
I just open it up again, if I now press three, see, it will keep the UVs intact. So that's the goal. It will keep the UVs intact, meaning that the resolution or I mean the texture
should be still the same. However, we can now just go
ahead and press three on them and we can turn these
back into like a high polymsh. I don't know if that one
even needed to be hy pole, but in any case, we
can now do that. And now we just have
a high polymsh left, but we can just texture
it as a low polymsh. So this one is now all done.
Let's add that one back. So in the next chapter, what we will be doing
is we will just be going over the other pieces. These other pieces
are a lot more forgiving because we
use tylobmtals on them, so we can most of the UVs
we can simply automate. So let's go ahead and continue with that in the next chapter.
27. 26 Uv Unwrapping Our Models Part2: Okay, so let's go ahead and continue with our UVN wrapping. Now, for this, what
we're going to do is we need to start loading in just
like a basic texture often. So let's get started
with the Bwall. So the Bwall is
going to be the oh, sorry, my reference is being
messed up. Here we go. It's going to be like the
back here, like these pieces. So what we can do is we can go ahead and we
need to, first of all, start by just exporting our metal to have the
different types of metal. Now, this is not too
difficult because all we have to do is go
into subs Ziner. And in our final folder, I just made three folders, one called stripes, DL and home. And in here, you
can just basically copy your folder location. And then if you go ahead
and you want to go in here, go into your preset
and just set, first of all, the
preset to stripes. Go to Export, right
click Export, turn off automatic
Export because ls it will just try
to keep exporting it, and then pasting your location and just press export outputs. Now the next one that
we want to do is, let's say that we
do home so I can go into my parameter presets, right click Export, and
throw this one into the Home folder over
here, save export. And finally, we will
have the dull metal, right click Export, and just throw this into your
dull metal over here. That's it. So now
do are exported, and we can take it
from here, so we can save this and we can go
ahead and close this. Okay, so for the back, what we want to do is we
want to right click, go to assign favorite material and just assign a
new lamb material. It doesn't need to
be anything special. We just need to
have something so that we can sort of
see what we're doing. Now, of course, with the metals and everything and the plastics, it's even very hard to do that, but we'll see how it goes. So we got this stuff over here, and what we're going to do now is that we are going
to add a color. So here in the color, just
go ahead and click that. Oh, I need to change
the name also. Go to file, press Open. And the one that I
want to open is. So this is going
to be our stripes, so I'm just going to
open up our folder. And I think doing my roughness, I think for all of
them, selecting your roughness, it
will be easier to see. So select the roughness, click back on your
model and just call this metal underscore stripes. And in order to see it, just press this little
button over here, which means the textured view. And then we can see the metal, and then you can also see that, of course, yeah, it's
looking really bad. Now, for this, to make
my life a bit easier, I'm just going to do
a angle constraint, and these angles over here, I'm just going to nuke
all of this stuff out because you can
never see it anyway, not at least how we are
going to create this. And once we've done that, we can go ahead and we
can have a look. So yeah, maybe on the inside, we can also leave that stripes. Okay, so we have this one. Now, as I said before, we can do this very easy
way easier than previously. For this one, you can
choose two things. One of them because
they are stripes, we might need to go a
little bit more specific, but what we can do
is we can go to UV and we can actually just
set on an automatic UV. What this will do is
it will try to project our shape from every single angle as you
can see over here. So from top, left, right, up, down and everything. And then it will
just basically map this UV together like this. So that is a way
that we can do it. If we then go ahead and
we go over here and we go into our UV toolkit, go to transform and rotate
this all 90 degrees like this. It could fit in quite nicely, and we could do these stripes. Now for the stripes, I actually want to keep everything
into one UV. I will also have
the other pieces into this one UV because I rather have tiling
on my materials than scaling it up in here. What I mean with
that is if I want to get these stripes to
be looking correct, I would need to scale this up. See, and then we get
the stripes like this. However, I personally
prefer to have this as RUV. So what I'm going to do
is I'm going to grab, for example, these
pieces, hold J, and just quickly rotate
them so that they are in the correct angle. I think actually all
of these need to be. Yeah, I think only these three
are in the right location. For these, go add
RJ and Jen Rote, these are in the correct angle, and for now, we can just
leave it like this. If you want to go ahead and you want to edit your actual texture to already have some tiling
just for previewing purposes, you can go to your
attribute editor. Go down to your metal
stripes, click on your color. And then if you scroll
down to UV coordinates and click on that setting, I know it's quite a
bit, but in here, you can just set, Oh, God. I messed up. Here we go. In here, you can
set your repeat UV, and if you set this
to, I believe, five by five, for example, that should be pretty decent. We can tile, for example,
this texture by five. So this one is already fine. Now, the reason why I
want to keep all of this in one UV is
because later on, we are going to most
likely create a mask, and this mask will be
like a general dirt mask. It will have some functions like adding some
little bits of dirt, some leakage, adding
some roughness variation and other things like that. So that's why I want to do this. I'm basically going to go in and just now, for
example, press height. Now, over here we
have these top bas. These are going to
be plain metal. So I can right click assign
favorite material Lambert, call this plane. Metal. And this metal
will most likely at, I might not be as shiny
as home, but we will see. And for the plain metal, we can go ahead and for now, I think it's better
if we just out the checker box because
yeah, I don't know. I guess I can try the roughness, but it might be a bit difficult to even
see what we're doing. So here, if we go home,
roughness, suppose open. Yeah, okay, maybe we
are just able to. I just need to see the shape to make sure that I don't
atently mess something up. For all of these pieces,
just go ahead and press one to go back
into our normal view. And what we can do first is
just remove our history and freeze our transforms just in case we ever
have any problems. And then we can just start
doing UVs and do automatics. On these pieces, it's very easy for us to just
do automatic UV. And the reason for
this is because yeah, I don't care too much
even about SEMs. I just need to get
the basics in here. Let's see all of this chrome. I just need to have a
look at my door to see. So my door has a center metal
that is slightly different. However, we might be able to
just do that in our mask, actually, and else we can just add a different
material to this later on. That does not matter for UVs. These strips does also
not matter for UVs, that's just going to
be different material. So I'm going to go ahead and
all of this stuff over here. Actually, you know what?
Everything. Select everything. Hold Canton, and then
deselect the black strips. And for now, for all
of these pieces, I can already assign existing material and assign
your plain metal over here, and then just do a UV and immediately do like
an automatic unwrap. Here, Oh, looks like that the automatic
unwrap did not work. In that case, we need
to do it one by one, UV automatic unwrap. Here we go. And then later on,
we can, of course, if needed, we can
change the seams. For example, for this asset, what can happen is that it will try to add a seam here see. I will try to split
these pieces up. However, they do not
need to be split up. So then you will
want to inspect it, and often you can just do like a best plane and if you then
do like an unfold over here, that, of course, creates a much better UV than previously. But for some pieces,
it just takes really long to do UVs and it's
not really worth it. Like, these pieces, you just kind of like
double check and just make sure where
the white lines are. And if the white lines
are not literally in the center over here, oh, I'm I think, these ones still need to
be able UV automatic. Yeah, as long as the white lines are not exactly in the center, you could try and merge
this stuff together, but I'm not too
worried about it now. I'm more when it comes
to stuff like this. What I do is I tend to just do automatic
unwraps like this. And then inside
of unreal engine, if I see a problem,
then I will fix it. But if I don't see a problem, then it would have just
been wasted time for me. At least, yeah, okay, it will look a bit cleaner,
but that's about it. So here, all the
stuff, I just do like automatic unwraps to
keep it very easy, and then I'll take
it from there. For example, this one, this one is quite bad with your
automatic unwrap. So you might want
to clean it up, but for now, it does
not matter too much. This one, also, it
will probably not look like the best with
an automatic unwrap. But we will see. And so what I will do is I
will do automatic unwrap pass. And then after this,
what I'm going to do is I'm just going
to very quickly go in, and I'm just going
to see if there's some quick changes that I can make just to make
it a bit cleaner. And then that should be fine. But the door is most likely
the one, like this one. Door is most likely
the one with the most unwrapping that we need to
do. So let's unfold that. So rotate this back
into straight. There we go. These pieces over
here, we can make rubber. So right click Assign
favorite material Lambert. Just call this rubber. Maybe, click on the
color and just make the color like a bit
darker just to indicate. And once again, we
can just go UV. Oh, sorry, not UV Bs
plane, UV automatic. And also here UV automatic. Let's say that now we have
these pieces over here, and now if we press Show All, so display show, I should
have had this in my toolbar. There we go. Show A. Now, they technically just have a base UV. As I said before, here
for the checker box, I don't really like the
look of the checker box. So I am actually going to go in, select it, and I'm
going to change this. If I just go ahead
and I go on second, let's right click
on this. Come on. Right click. It's to
break connection. So now we are resetting it, and now we can just add
like a checker box. And then if we go into
our UV coordinates, we can also set this one to be let's do seven by seven
or something like that. Maybe 15 by 15, actually. There we go. I just give us a
smaller checker box. And then I can have
a quick look at this, for example, this one, this one does not
need any split, so I can just go ahead and
I can select all of it, do a best plane, and unfold it. And then later on what
we will, of course, do is we will just pack
everything together. This one, I'm going to leave. It's too small for me to
really worry about that. These ones also look fine. Just have a look at
like a checker box. Maybe the door I want to, like, add a new fix just to make sure that
everything is correct. Before I do that, here this one might also see here
this one is a good one. We over here, having
a seam down here, it might not look very nice. So what we can do instead
is we can go ahead and just for the
pieces that look warm, which are these ones over here, turn off angles
select, by the way. Oh, no, wit, you know
what? Let's leave angles select on. So let's see. These pieces, just to have it go all the way
around like this. Let's do a UV and a bass plane. And let's unfold this
and give that a look. So see, that already
looks like a lot better. So now it does not
have any seams. And for these pieces, I
just want to make sure that they have not, for example, here,
see, that's won. If they do stuff like this with the bolts, that's really bad. So for those, we can
just do like a bass plain and we can just unfold it because there's no reason for the bolts to be any
more than one UVtile. So we can just go ahead
and keep doing that. Might look a little
bit silly for now. But at least then it's
done. Here we go. And once this is done, I think I might actually
time laps the rest just because we've now covered
these techniques, so the rest will just be a simple time laps because else this can take
about an hour, maybe a little bit more
to get everything done. So let's just finish
all of this off, and then we can just
time maps the rest, which will have the
exact same workflow. You can see that this
actually will take a long time if I do it
this way everywhere. Sometimes it might also be nice to just keep the bolts then separate if we want to
try and save some time. But, let's say that
we have this one, and now for the
back, if you want, you can select the
back and you can most likely if you just deselect
this piece over here. Yeah, we should be able
to immediately do like a best plane just for good measure to also
have this one correct. But yeah, that's up to
you because then you can just sell unwrap it by hand. So, if I have a
look at this one, what I will do is I will
go ahead and this piece. What you can try to
do at this point, is you can try to go into
your tool settings and reset your pivot for this piece and simply now do another mirror. So the mirror will actually
leave your UVs intact. So if you set this to
the X at the plus, Merge threshold is 0.01, for example, and just press W. You should be able to
select this piece. Move it exactly into the
same position over here. And let's press height for now, press H. And then we have
this piece over here, which we can select
and just delete. Now if we just show,
that one is back. It does have these
bolts over here, which I can delete because I have the same bolts over here
that are already unwrapped. The only thing is
that it might be that your UVs are flipped. So you might then want to go in and just very quickly do like an unfold to make sure that
everything looks correct. Same over here. Just
do like an unfold, and then you can see
that they change. And this is because often
mirrors flip your UVs around. So you just want
to fix that stuff. But, okay, so that's like
a quick one for that. So now the last one
that we would have is we would have
this door over here. And the reason why I want
to fix this door here, let's turn off
texture view because it's a bit annoying
right now to see. You can also go in here and turn off your texture view like that. Just by pressing the one button. So yeah, the reason I want
to do the door is because the door can pretty much
just be like a flat shape. If we go to our top, and
it's going to isolate mode. Do we still have
angle constraints on? No. If we literally just
select half of the top over here and just do a UV
and do a bass plane on this, most of the time, we
can literally just do relax and get
all of this done. Maybe we want to separate
the window from the rest. But here, if I unfold this, see, you can see that this
actually works really nicely. And then you can just
select the other side, UV best plane. That's when automatics automatic
unwrap is quite lacking. Automatic unwrap in general
in Maya is not the best one, but it can sometimes
save a bit of time. Yeah, okay, at this point, if we now turn on
texts fw again, we now have all of these
pieces and they are unwrapped. What we want to do now is we just want to go ahead
and want to start by combining this all together
into one solid piece, except for this cylinder,
which does not belong there. Doing this, the only
one that I'm a bit worried about is over
here these pieces. Let's go ahead and
just temporarily move those out of the way
because I know that if I'm going to do
an automatic unwrap with so many tiny pieces, it will cause problems
because it will go very slow. However, if I now go ahead
and select everything, I select all of these meshes except for those extra
pieces over there, and I go to modify, layout we still have the
same settings as before, set the preserved three
ratio in the pre scaling, and this time in your rotation
steps, you can rotate. Actually, no, what? Not for this one because
we have stripes. In other pieces, you can go ahead and you can
set the rotation to ten or 20 in order to
get a better result. But in this case, it
does not really matter, and I don't really want
to do any rotation because I'm not sure how I'm
going to use all of this. So, once again, select everything and just go ahead and press
apply at this point. Now, because it will
only or bake down the selected or do the layout for only
the selected pieces, those other pieces we
can then manually place, and that will save
us actually quite a bit of processing time. You see? So now we can see like, Okay, so this is now
all placed together. All I need to do now is
I need to double check that my stripes are still in the right
direction, which they are. So that's the only thing
I need to double check. I'm not too worried
about this side because you cannot
really see it anyway, but it looks like
that it is still in the correct location anyway. Now I can just grab
these very small pieces over here and I can scale them. This is a time saver, of course. It does mean that the
result is not as nice, but honestly, you often
won't really notice. So I move this one, let's say over here, and I then hold Shift and
these piece over here. And these last ones over here. There we go. I should
already do the trick. Because if I need to do
a real unwrap on this, it would this piece alone, it would take me like 15 minutes or 10 minutes
or something. And then I would
still need to, like, redo a bunch of modeling
and everything, and I'm just not really
in the mood for that. So it's like a
strategic time saver. In any case, this
piece is now done. So it is all nicely
placed in one location. We don't need to worry so much about rotation
because the metal, it can rotate in any
other way you want, because it is tilable. However, these pieces, because they have some
specific patron on it, that's the only reason
we need to do rotations. I'm not going to save my scene. In the next chapter, I will
kick in the time labs, and for our time labs, I will basically just do
the unwrapping for all of these pieces roughly in the same methods as
that we've used now. Maybe for some of these pieces, I decide to do like
a manual unwrap. It just depends what
I think is faster. And for these pieces, what I can do is I can, for example, delete these sites because you most likely won't
be able to see that. So let's go ahead and continue to our next chapter where we will kick in the time labs and we do the rest of
our unwrapping. Once again, this time
maps will also be included in real time
in a specific folder.
28. 27 Uv Unwrapping Our Models Part3 Timelapse: A oh Do. Do Mm I.
29. 28 Preparing For Export: Okay, so I on purpose
did not do all of the UVN wrapping
because there are a few things that I
still need to do. One of them is that all of these little small pieces
over here that we have. Oh, sorry, not the window cover. But like all these
small locks and the speakers and everything,
I want to combine those. Reason for that is
because I want to just create a unique texture
for them because they have slightly different colors and lights and all
that kind of stuff, and it is just easier
to make unique texture. But I do not want to go
in and needing to make four or five different substance painted projects for
such small assets. Instead, I have
my small Light B, small lock and all
of these things, and I'm just going to go
ahead and select all of them. I'm going to get
started by creating a new material that I will call small dons underscore A. And then in here, all we really need to do is we just
need to select it, go to our UV layout and
just press Apply with the default settings that we've
already had. There we go. So that should pretty
much do the trick. So that we'll have
done an even spacing, although this one feels no, wait, sorry, the
spacing is not even. We need to go ahead and
because these are way too big, remove history and freeze
your transforms and try again because it looks like
the spacing is not here. See, that makes more sense
in terms of spacing. Okay, so now that we got those pieces done
and out of the way, yeah, that should
do a better trick. I'm not sure if
you want to, like, maybe maybe, like, move this
rotation around like this. And then maybe like,
Yeah, let's do that. Let's rotate it round. Do
one more apply. There we go. Okay. So those are those
pieces. Just keep that in mind. What we will do
is when we export these two substance
painter later on, we will quickly just move them
apart and do it that way. So those are the
ones that I've done. Now, for the sign
cover over here, did I already add plastic
to that? I don't think so. So let's right click
Assign existing, and this is just
going to be a simple plastic material that you have. So now I'm just going to do a few little bits of
material assignment. And the one here in the back, don't worry about that
because with our branding, when we create our branding, we will just use
planes for that. We are not going to add our
branding to our actual mesh. We got all of these pieces down. Now, for our sealing, I think I just need to go ahead
and I need to also go in and assign existing
and just call this ceiling is going to be plastic, so
assign the plastic. Oh, by the way, one thing I want to do is
before I move on, turn on tree again for all of the pieces that need to
have the smoothening. Here we go because I turn
it off for some pieces. So I just want to go through
the process of seeing them and just making sure that all of them
are turned on again. Since I turned them off
here like this one, I turned off, so let's turn
it back on the speaker. I need to turn
back on let's see, ceiling one over here. Let's just press three
to turn that back on. Now for the ceiling, there's
actually another thing. So the ceiling is
modular in terms of that it needs to be repetitive
going on and on and on. I think Actually, in this case, the ceiling does not matter, but it is something that's good to remember that we want to go ahead and try and get these
edges to line up perfectly. And the way that we want
to do that is we want to go ahead and we want
to grab this phase. If you go into your UV toolkit
and you go to transforms, set your pivot to the bottom, and then turn on grid
snapping because grid snapping also works
within this shape. Once you've done
the grid snapping, mostly what we
just want to do is we want to first of
all snap it to grid, then go to our vertex mode, select these vertices over here, actually, you know
these one work as well. Maybe we can flatten
this. Let's do UV shell. Let's go down to straighten UVs. And let's see if that works.
It does not always work, but sometimes it will nicely
straighten things down. I don't know why it takes
so long for it to do it because it's not that
difficult of a shape. Oh, please don't say we froze. Go. So we did not freeze. But now with the
straightened shell, looks like that it does not
look as nice as I wanted to. Yeah, so, okay, if the
straightened shell doesn't work as the
way that we wanted to, then what we can do with this
is we can go ahead and we can just try and get it
as close as possible. So we basically
want to go in and let's go to our UV shell again and let's just do a quick unfold to unfold it
again a little bit better. And for this shape,
just try and get it basically close enough to
the ages by scaling them, and then we will see
in real if we need to do a better job in this. So for now, I'm
just going to keep it like this over here, and we will see if
we see the seams. I'm not too worried
about this one. However, for the
other ones, I am a little bit more worried.
So let's have a look. Ceiling, we assigned
our material. Floor, I did not assign
my floor materials yet. So what I want to do over here is I'm just going to go ahead and I say, press
three, right here. Press three on your ceiling. Now, for your floor, we want
to create a new material. So assigned favorite material
Lambert and CarlasFloor. Go into the color file. And what we can do is
then we can open up the location and just simply grab our floor
material over here. So that one is no problem.
So we got that one. And then what I want to do is, again, this is one of those
pieces that are tiilable. So we might need to make this
a little bit more specific, but we will see how that goes. First of all, I'm going
to go in and I'm going to double click on
this shape over here, yes, press control shift I. And then on all of these
side shapes over here, I'm just going to
go ahead and assign our plain metal
material like that. So that's how that
one will look. Now if we now go ahead and turn off the floor, let's go floor A. Same one again, assign existing
material, plain metal. By the way, did I press
three again on the floor? No, I did not. You can see that the texture is pretty
much changed the same within us changing
the smoothening. Okay, so this is
floor number three. Once again, I'm just
going to go ahead and select this piece, Ctlshift I. So this one is going
to be plain metal and actually control
shift I again, this one is going to be our
floor metal. There we go. And this one we do
have a problem. When we press three,
you can see that we do officially get
a problem over here. This sometimes happens.
If this happens, you just need to place an
edge very close together. This is just because we
do not have any buffers anymore that it accidentally just pushes the
shape out too far. But if I do this, Okay, so let's see if we can. I think we want
to separate this. We're going to go ahead
and just press cut. You don't need to
do anything else, just press cut and see. Okay, so that's interesting that it still keeps that
shape on over there. That is actually
interesting because I've never had this
bad happening. So let's have a look. So if we place a cut over there and we go
for, like, a tree, I guess we don't
really need smoothing, but let's try and now place
another segment in here. See, that does not seem
to work, unfortunately. And at this segment, we
cannot really push it back. In that case, what
I'm going to do is I'm going to
separate the two. I'm going to go
ahead and I'm going to select basically this shape, and I'm going to press Shift
click and extract the faces, so that now I only press
smooth on this one, and it should still
transition just fine, see? So that is done another way. It just means that now
we have two objects. So let's re art this to our
floor and you do the trick. So that should now be all good. So for our back
wall, our back wall does not need anything
very special. We have everything
already setting here, and we also have our materials
here. So that is fine. Our pools, we don't
need to do anything special, our top advertisement. I still need to
turn this into C, because it's a top, one of
them is going to be lights, advertisement, and then metal. So let's do, first of all, assigning existing
interior plain metal. And then here at the top,
let's select these pieces. And also, let's go ahead and
select the bottom pieces, which is set angle constrained
over here, contro shift. So we want to select
the bottom pieces. Right click Assign
favorite material, Lambert and call this
Light if you want, you can make it like
a yellow color or something just to indicate
that these are lights. And then for this center bit, I'm actually going to leave it metal because I know
that I'm going to have another
advertisement sitting on top of it as a separate mesh. So let's see, so that one is now also done almost
at least this one, assign light. There we go. That's better. And we
can press three again, make sure that everything
works with three. Okay. And of course, once we see problems
inside of unreal, then we can just go
ahead and fix them. This one is again one of those tricky ones where
the transition pieces, sometimes you want to make sure that the transition is perfect, but of course, we have that
metal bit from our door, so we should not need
to worry about it. So this UV is correct. If you want to know
more about that, you can have a look at
some of my other course, or you can have a look at some of the modular workflows on my YouTube channel that go much more in depth in
why we need to do this, why we sometimes need to
be careful with our UVs. So our window should be fine. Our door should also be fine, yes. And that's about it. Okay, so this might
look very messy, what we're doing now
with all our UVs and there's lots of little rules
going on and everything. But honestly, you don't have
to be that strict about it. I'm trying to just explain
to you multiple ways, but in the end, yeah, it doesn't need to
be this specific. I think the last thing
that I am going to do is I'm going to go ahead and actually, you know
what I'll do that later. I want to change my
back wild a little bit to basically add the stripes
to some specific areas. But in any case, I think
now at this point, like, I can keep talking, but maybe it's better if we just simply jump into Unreal engine five and we actually start by just setting
these messes up, and then we can
really nit picky, go, change our UVs a little bit, change our materials
a little bit, add some more shader
work, all that stuff. So we will just
finalize these assets one by one until
they look perfect. So knowing that, for
these kind of pieces, now there's one thing
that we do want to do, and I'm just going to go
through the export process, and I will also still
do that in this video. So first of all, we need
to flip around this door. So over here we have a door, and now that the unwrap
is working just fine, we can now reuse this unwrap or reuse this door over here and also place it
on the other side. So it's just a
matter of selecting these pieces over here. Sometimes it's good
to just wiggle this around to make sure
that it all works. And then what you
can do is sometimes easier to just press combine. Do make sure that you re add
it back to your door layer. And then go ahead
and just duplicate it and rotate it 180
degrees, like this. We've been over this
before. Here we go. Then later on we will also just add some screws and everything, and I will go ahead
and I will show you that as soon as we
get into in real. So let's say that
we have this asset. Let's go ahead and go
through the process of basically just finalizing
every single asset completely. So we will export the
asset, we will finalize it, and then we will move
on to the next asset, except for the branding. The branding is going to
be its own little chapter. So I'm going to go ahead
and save my scene. Over here, I want to go to
file and I want to go to Export Selection because
I'm now going to export this mesh
to Unreal Engine. We, of course, still
need to create a project for Unreal Engine, but
don't worry about that. For now, we can go
into our source files, go into the Export folder, and then there is a folder
called two underscore Unreal. We want to go ahead and want
to export this as an FBX. As I'm saying this, I do know
that I forgot something, but let's just
continue the process. Let's call this Door underscore
A and just press Export. Now the thing that I forgot about is that some
of these measures, we need to press three on them, and then we also need
to go at and we need to actually export it with this
smoothening along with it. So let's turn over our textures. Let's see which ones did
we have to press three? This one, this one. These ones, we need to
press three over here. Did we need to do
that for this one? No, I don't think I don't see anything like for this one,
we did need to do that. And for this side,
then probably also. Okay, so now we
have press three, so we've done, like,
all the smoothening for all of them, as
far as I can see. So that should be all good now. So now at this point, because
when we are exporting it, we need to basically turn
the mess into hypol forever. This means that I first of
all, I want to do a save, and I want to do a save scenes, and I'm going to call this as final underscore
Metro underscore backup underscore 01,
and I want to save this. And then we do need to
go in and we just need to reopen our original again. Oh, wait, I believe you
could have also just done like a saves copy. Oh, no, wait. Oh, in three Max, you
have a saves copy. But in any case, the reason we need to do is because
if we export this now, while we have pressed T on, it will not actually
export the high poly. The way that we can
do that is we can go ahead and we can go into create, into modify, convert, and then smooth mesh
preview to polygons. What this will do
is it will turn our mesh into actual polygons. But as you can see,
once we've done that, the problem is that we cannot really go back with
this kind of stuff. That's why I wanted to create a backup just in
case it is needed. So we might be needing to
switch back and forth. So modify, convert smooth
mesh preview to Bolis and it will also
be a lot more to manage whenever
these are converted. Modify, convert. You know what? I'm just going to add
this to my here see, I'm just going to artist to
my layer because then I can just very quickly
press this button. Over here. And then
these ones are last ones where we had to do
that. I believe that is it. So now we have all of our original high pulleys
ready to go, as you can see. So these are the
ones why we need nanite because we now are rocking 63 635,000 pulleys. So you can guess that, yeah, you definitely want to use nanite with this kind of stuff. So at this point,
I'm going to go ahead and I'm going
to save my scene. And we can now get started
by exporting this once more. Select everything and export it. It might take a bit longer
this time to export because, of course, now it needs to
export all of this geometry. But there we go. In
the next chapter, we will go ahead and we will
set up our nungin project. We will import this mesh, we will import our materials, and we can get started by
turning this mesh into a final.
30. 29 Setting Up Our Unreal Engine 5 Project: Okay, so let's go
ahead and get started. Now, just so you know, Unreel Engine five at
the time of making this tutorial course is
still in early access. This means that if
you want to get it, you need to just open up
your UnreelEngine lounger, go to Unreal Engine
and just type in and just take the Unreal
Engine five tab over here. And here you can download
the early access. So everyone can download
this and you can just go ahead and use it
and read up on it. But if you're watching
this tutorial, I do assume that you probably
already know about it. Now, once you've done
that, you can go ahead and you can open it up by
going into library, and in here, you can
just go ahead UnLengine five and number
five, press Lounge. Then what it will do is it
will just launch the system. Now I will pass the video
until this is done. I have some graphical
box over here, which is a bit
strange, but okay. In any case, I'll pause the
video. Okay, here we go. So Una Engine five
has started up. And basically, if you click on games, you get a few things. So first of all, you can choose what kind of project you want. We're just going
to go for blank. You can import first person and third person
shooters and everything, but I'm just here about
making art. Project location. You can go at and
you can just open it up and you can select
whatever fol you want. I will go ahead and
place this project into a simple unwel folder over here inside of
your source files. So you can, of course,
have this project. And then for your blueprint, this is if you want to choose
between what coding model. So we're just going
to do blueprint, target platform, desktop,
quality preset maximum. We do not need rate
racing most likely. We can turn it on if we want later but I don't think I
need rate raising for this. I think the lumen system, it would be cool if we just use the brand new system for this. And then you can
call it something. So Metro Unscre
Interior, for example. Oh, there's a length to parts, so Mtonscoe It in my case, and then I can just go
ahead and press Create. And then it will go ahead and go through the process of
creating your project. Shouldn't take too
long, but I will still pass the video again
until this is done. Alright, here, it's
actually really fast, so I probably don't need to
pass the project after all. So, Okay, once we have
our project loaded up, we will just quickly go
ahead and go over some of the basics. Here we go. So UnreelEngine five. If you are used to
Unreel engine four, you can see that the UI looks
a little bit different, but it still feels
quite familiar, and I don't need to update. So what do we have here? We have a viewport over here
which you can still use WASD to fly around it with
your right mouse button. Most of the content
creation is up here. Like here, you can create all of your lights
and everything. This used to be a
separate window. Over here we have some
more content stuff like the marketplace and
Quicksaw Bridge, and then we have some
blueprints and cinematic stuff. Over here, we have stuff like rain editing,
foliage editing, vertex painting, even
fracture generation, and all that fancy stuff. And then on the right side, we have our world outliner. I personally have my details and my world settings below it. All of these windows,
you can move around wherever you want,
so don't worry about that. And we have a content
browser down here, which also already
has this button, which there is a
way to turn it on. So I forgot. So a content
browser is normally floating. So you will probably
start up with this. So here you have a
content browser, but you can press Doc in layout over here to
basically show it. So in any case, so this is our default that
we have over here. Now, what we're going to do is we first of all need to create a folder structure in order to nicely organize our environment. Let's go ahead and right click
and create a new folder, call it Metro Underscore
interior over here. And then in this
folder, I always like to create a few things. One of them is a folder called assets for our three models. One of them called materials
for our materials. One of them called
textures for textures. Another one called saves for our save files and our scene files and everything, and that should be it for now. Okay, so what I want
to do is because we are going to go ahead and we are going to import our door, so that will be the first
asset that we import, I first of all, just want
to get a basic scene. Now, the scene we have over
here is actually quite good. So what we can do is we
can go file and just do a safe current level S. And we want to save this
in our saves folder, and we can just call this
metro underscore interior. Over here and just press Save. There we go. So now our
scene file is saved. If you want to go ahead and
open up this scene file, whenever you open
up Unreal Engine, at least whenever you
open up this project, you can go to your
settings down here. You can go to project settings, and we won't be spending
too much time in this tab. But in this tap, if you
go to maps and modes, it will ask you like
the Editor startup map, which you can now set
to Metro Interior. This way, whenever we close down Unreal Engine and we
open it up again, it will just showcase
this scene over here. Now we have a bunch of stuff in this scene that I
don't need like audio. I don't need this floor I don't need and don't
need these assets. I will keep this
floor over here. Let's see. We have a skylight and a light that
is fine for now. We don't need to play a start. I'm just looking at
my world outliner. Reflection capture is fine. The atmospheric
fork is fine. Yeah. Okay, so let's leave it at this. I only need one reflection
capture, by the way. There we go. So I only need one. All we are left with
is some lighting, a floor, and a
reflection capture. Now for this floor, we
can go ahead and we can just scale it
up a little bit. Yeah, just have a metal floor or you can give it like a different material,
whatever you want. In any case, it's
just that we have something that we
can play stuff on. And now what we can do is we
can once again save a scene. I tend to go into the
content browser and press Save AL and then it will save your scene and
whatever you have imported. And we can get start
by importing our mesh. So if we go ahead and we can
go into our source files, exports and to unreal, in order to import this mesh, this is actually quite easy
like there isn't much to it. We simply want to drag in
the FBX into our *** folder, and then we get this setting. So there's a few things that we need to do that is different. One of them that is the most important one is that we need to press build Nanite
Because we are going to use nanite basically what
this will do is it will calculate our tire mesh and it will build a
Nanite mesh for that. Generate missing collision,
I tend to leave it on, but it is basically there if you happen to have
a first person controllers that you are able to walk
straight through it. Another important
one is to go down here and press combine meshes. This will just make
sure that all of our meshes are combined and that we do not accidentally
import 50 different assets. And for the rest, that's
about it. You can turn on generate lighten
PVs if you want, but we are going to go
for real time lighting, so we don't really
need it, to be honest. So I'm just going
to turn it off. And the scaling, this is
also an important one. We first of all
need to figure out the scale before we can set it. So having this stuff,
just go ahead and press Import and just import
your base mesh. Generating the nanite that's what often takes a
little bit longer. So that's why it is a little bit slow with importing
compared to unreal engine, but it should not be too bad. Just like that. Here we go.
Okay. Now we have a mesh. Before we can do
something with this mesh, I need to go to create, and then I need to go to a
empty character, I believe. Yes, empty character. The
reason I want to do this is because this character
is the same height as a character in unweel. Technically, a character in
unwel is a little bit higher, but we can base our
environment based upon this specific character
in terms of the scaling because remember how we like to set the scaling a
little bit different. By the way, over here, you
can turn on the snapping, so you can snap to grid,
rotate and scaling. I want to turn it off so that I can do a proper
scaling like this. So to keep it easy, just simply grab your
door and drag it in here. Now, what you can
see is if we turn on snapping on our rotation
and rotate this, we can see that this
door is way too small. However, it is not
dead insanely bad, so we can go and double
click on the door. And you know that Nanite
works when it says 2000 triangles and 1,600 verts, because it will always say
that for Nanite meshes. If you, for example, try
to go to your wireframe, you can see that
nothing shows up. So you know that the
Nanite is working, or it just says Nanite enable. I guess that you can
also look at that. In any case, it's already
looking quite nice, just because everything
is nice and hypol. What we need to do is we need to scroll all the way
down in this mesh, and we need to go to transform
under our import settings. In here, we can set
basic care settings. If I set this to 1.3,
for example, or, I think I only one
point maybe 1.1, to be honest, and then
press reimport base mesh. What it will do is it will just scale up our mesh a little bit because it just re
inputs based upon the scale. And then later on, it will
also save this setting for all of the other assets
that we want to import. So of course, it takes a
little bit longer this time because we have a Nanite
mesh in order to input this. Now you can see now it's
a little bit bigger, and that's actually
looking quite well. So if our heights around here, this is
looking pretty good. So we can now close this mesh, we can get rid of this actor, and now we know that this is
going to be our scale, 1.1. You can see that everything
now is nice and hypol see? It is looking great. And
if you want to test out your nanite here I like that.
That's always looking nice. If you want to test
out your nanite to make sure that it is working, I tend to go to IT, nanite visualization
and triangles. You can see the
Nanithart at work. So from a distance,
it does not need a lot of triangles for
those really large pieces. But if we go nice and up close, you can see that over here. It has a bunch of
really smart triangles, and especially like over
here in these areas. But it is still
nice and optimized, and we are running at
120 FBS right now, and we are probably running
even higher normally, but I can hit 2300,
but I'm recording. I have a bunch of programs open, so then of course, it's
not really fair judgment. But in any case,
that's looking great. So we have this stuff
here ready to go. So we have our very first mesh. Now what we're going
to do is we are going to focus the
next few chapters on taking this completely to vinyl except for the branding. What we're going to start
with is we're going to start with importing
our textures. So if I go ahead and go in our text folder, let's
move this over here. Let's just already
import everything. Right click and Ata folder
that we call floor, right click a folder, that we'll call plastic and another one that
we'll call metal. And within the metal, we
need to have stripes. Chrome and Dull. There we go. Now, importing this
stuff is just as easy or easier even than
importing our mesh. We simply want to grab
our taxi maps over here. And just simply drag
it in to our floor. One thing that we need
to keep in mind is, we have been working in OpenGL. However, unwelEengine
reads in direct X. So all you need to
do is you need to open up your norm
map every time, go down to the texture
and to the drop down and simply press flip green
channel. That's it. Then you can press Save. And
that's all you need to do. Then it will just flip
the green channel, and now it is DirectX. So we can now go
ahead and we can go in and start doing
this for all of them. So I will have this on my other screen just to make it easier. So metal chrome.
And for our chrome, whenever we have a plain color, like you can see over
here, do not import it. So we have actually one, only importing norm map on. But the reason why we don't
need these is because in our shader we can
simply set a value, and then it's cheaper, basically than importing
an entire texture. So we will have a normp
and our roughness. B a normap is plain, it will not do
anything whenever we invert the green channel,
so we can just leave it. And then over here we have
a dull so for that one, if we go to Dull, we
can use the base color, normal or sorry, the base
color and the roughness. They are the only two
that we can use for this. And then finally, we
will have our stripes. And for the stripes,
we will need, once again, only the roughness. So you can see that the metal
does not require a lot. All those extra maps were
more for, like, mamset. And then finally for our plastic let's go ahead and oops too far. Oh, no, wait, not too far.
Let's go plastic, final. And let's just use our No, sorry, the plastic also
does not have normal. So only use the base
color and the roughness. That's it. Very little textures, but it will do the trick. Now, I will finish this part off by creating a very
basic material or, for example, our metal so that we can already just see
how the metal looks. And then in our next
chapter, we will go in, like more advanced shader
work and all that stuff. So if we go into materials, we want to right click and
create a material that we'll call um Scene underscore master. So this material basically
every single texture will use this
material because you can just drag in the
textures whenever you want. Let's open up this material, and let's just
assign it over here. And then you get this note base. It looks very similar to substance designer.
Now, what do we need? So let's go for the comb. Yeah, because the comb
is being dded on this. What we can do is we can
import our metal normal and our metal roughness and
we can plug it in here. So for our normal, you can simply drag and
plug this into your normal. This should feel very
familiar to you. And for your roughness, you can plug this into your roughness. As you can see, now it
immediately already has an color. Now, for our base color,
we can right click. This time, you need
to press right click in sell space and type in constant so that you can
get a constant three vector. It's just a fancy word
for saying plain color. It's the same as like
a uniform color. Now, at this point, we are going to
expose some values. Exposing you can once again, it's similar to when you expose something in
substance designer, you expose it so that
later on you can change it inside of your editor instead of needing to go in this window. The way that we do this is converting things to parameters. You can do this
by right clicking and pressing Convert
to perimeter, and call this, for example,
base, color, plane. Now in here, you will have your default value in which we are going
to set it to white, and then you can simply drag this into your base
color for now. We can basically
just keep building upon this scene until we
get exactly what you want. For roughness, let's say
that we want to have a little bit more control
about our roughness. We can do this by
adding a multiply node, and we can multiply
our roughness using a scalar parameter. You can type in
scalar and find it, or you can press
S and click once, and that is like a shortcut. Call it roughness score amount. And now what will
happen is this value, I believe that we need to
set this to one by default. This value will now basically give us
control over how much of a roughness map we want
to show because we are multiplying this
value by this color. And this value, you can
see as a gray scale. If I multiply it by two, this will become, for
example, lighter. If I multiply it by 0.5,
it will become darker. It's not exactly a
multiply, but it's close. And then over here, yeah, okay, we have a norm map. Whenever we have a taxi map, you do need to right click
and convert this to parameter and just call this
roughness underscore map. And the same over
here, converts to parameter and just call
this normal underscore map. Now, the reason
why we do that is so that we can also
drag in these textures. Let's say we have this.
It is super basic. The only thing that we
need is a metallic, and for metallic, we can
simply add a scalar parameter. Call it metallic, by default, I want to set it to zero. But then later on we
can set this to one, and as soon as we set
this to, for example, one, you can see that
it becomes metallic. So we can now save our scene and we can go back into
our metro interior. The way that you can see
these exposed values is by right clicking
on it and pressing create material instance and
call it Com for example. As soon as you do that
and you, for example, drag this on your
metal over here, you click on it, you can now go ahead and you can now
see all of these values. Here, I'm just dragging
this window down. So we can take it
on and then we can, for example, change
these values if we want. Let's say we want to set
our metallic to one. Now it is metallic,
as you can see. Let's say that we want to
control our roughness. See, I can just very easily control my roughness
amount in here also. And just like that, we can basically mess
around with this. Now, without lighting, it's
a little bit tricky to see the full scope of this environment and
everything over here. So that's always a bit tricky. So whenever we have lighting, of course, the reflections
will work a bit better. Let's keep our roughness
to one for now. You can see like we
have a little bit of roughness variation. There's one last
thing I want to add, and that is I want to give us control over the tiling
amount of our roughness. We can do this by adding
a scalar perimeter. Remember as click and
call this tiling. Set the D for the one and you want to add something called a concentry vector
texture coordinate. The taxi coordinate will
basically control your tiling, but because you cannot convert a texture coordinate
to a parameter, you need to multiply
it with a value. If we set this by two, we will multiply our
taxi coordinate by two. And then if we
plug this in here, we can automatically
control the tiling amount. Simply by saving our scene, or sorry, saving our material. And now if we go in here, you can see tiling, and
if I set this to, for example, five, you can see that now the
tiling has changed. It's really, really
shiny right now. As you can see, it also really depends on the quality
and everything. But that's something
that we can, of course, work on later on. Do keep your metal at one. Metallic, basically, it is
there or it's not there. If it is at zero, it
will not be metallic. If it is at one, it will be. You cannot go 0.5. That would not be
logical because then it is technically not
metallic anymore. The only reason when
we can set this lower is if we are dirt.
Roughness amount. Let's set my roughness amount to 1.3 just to make
it a bit duller. And what you can
do, I will go over this way later on when
we do our lighting, but you can go in your
global post process volume. And in this volume,
you can basically have control over a bunch
of different settings. I will go over this
later on, but for now, in your reflections, you
can set the quality higher. And that's just
basically, if you set the quality to two
in your reflections, it will give us slightly
better quality. In here, we can
also, for example, go like screen space and you
can see how different it looks when we do stuff like screen space compared to Lumen. In any case, for now,
this is like our base. What we're going
to do is we're now going to mostly work more on our materials to art
the rest of our maps. And then what we can do
is we can go ahead and we can start just making it
look more like final. So let's go ahead
and I've just saved all of my scene
and let's continue with this in our next chapter.
31. 30 Exporting All Of Our Assets: Okay, so let's go
ahead and continue. So off camera, I had a
little think about this. And I feel like because this environment is so
incredibly reflective, I don't think it
would be good if we already try to
make our materials while it is like this because with the reflections, I just
don't know what's going on. You can see it like I didn't
think it was that bad, but when I think
about it, compared to this stuff over here,
it is quite bad. Now, that does not mean that
we are wasting time renting. Instead, what we're
going to do is we are going to set up
our base materials, and then we will simply already place our environment
in the place. Setting up this
environment will only take probably like one
chapter, pretty much. So like 20 30 minutes. That's all it will take
to set all of this up because there are
very few pieces. And once we have got
everything set up, then what we can
do is we can just start by going piece by piece
and trying to improve it. So for now, the focus will be just to quickly set up
some base materials. So over here we have our chrome. Let's duplicate it and call this metal underscore stripes. And in this material, you just want to go ahead
and double click it and it's scale up. And we basically just
change out the roughness. That's all we are going
to do for this one. Then what we have is, let's duplicate this again,
metal underscore dull. Let's open it up. It's a bit annoying that
it always opens up in the large area over there. But for now, here we
have our metal doll. Let's go ahead and
add our roughness. And this time, we
need a base color. So for the base color, if we do not have a base
color yet, which we don't, we are going to simply
direct this in here, and we basically are going to create a switch almost
between these two. So you also have switches
inside of unreal. So what I can do is
I can, first of all, convert this base color. Base color map, I will call it. I will convert this
into just a parameter. And then I want to add a
static switch parameter, which we will call
has base color. Then if it is true,
we use our map, and if it is false, we
use our color. See? And it's just like in substance, it's just a simple switch. So we can go ahead
and we can save this and give that
second. There we go. Okay. And now that that is done, we can go ahead and we
can go into our doll. We can turn on has base color. Of course, we already
have our color assigned and set the
metallicness this time to zero, and maybe set the
roughness back to one. There we go. That's like our
doll metal also ready to go. Now, if we go in and we are
going to add our plastic. So for that, let's just
duplicate actually, let's duplicate our metal
doll and call this plastic. Underscore yellow for now. Let's open that
one up over here. I'm going to plug it in here. And for this one, what we
need is we need to have well, first of all, we need
to assign our maps. So we have a base color
map and a roughness map. And then what we need to do
is we need to give control over the color of
our base color map. The way that we do
this is very similar. In here is that we control these type of
roughness variations. Only this time we are going
to add a constant vector, and we can right click convert
this to parameter and call this base color base
color map overlay, something like that,
and just keep it white. And we are just going
to multiply this. And then what you can do is
you can change the color. That's why we wanted to
keep the actual base color quite bright so that
because it is a multiply, white means nothing in multiply while black means
that it will actually overlay. So I'm going to go ahead
and I'm going to save that, and then we over here, we have control now over
our base color plastic. And finally, we can go ahead and go into our plastic yellow, duplicate it once more
and call it floor. And let's just do
floor underscore A. And open that one up, and floor number A will have
its own base color, normal roughness
map. There we go. So those are our base materials. Now what we're going
to do is we are just going to move
this into the corner, and we will go ahead and
we will start by just exporting all of our text texts, all of our models
that we have in here. And then we can
slowly just start by assembling them and
then setting them up. So I'm going to go
ahead and I'm going to actually, you know what? Let's keep this very
nice and clean. And that's get started
by just adding, if you go to assets, just throw on like your here, just throw on all
your plain metal. Let's throw on your
plain metal so that everything will always be white. This will make it easier
later on for our assembly, and just keep that in
mind that we are doing this. So we got a door. Our window over here. Let's see. It does not have No, it does not have smoothening
on this, I believe. Oh, no, wait, it does
need smoothening on this. So we do have Do we
have supporting loops? We don't exactly have
supporting loops, but smoothing does work. I'm just wondering if it
will make a difference. Now, see, it does not
make a difference. So let's not do
smoothing on there. These pieces do have smoothing,
so let's press three. Then as soon as we press three, we are just going to
go ahead and we're going to immediately press, modify, convert and convert
it to a smooth mesh preview. This one, three, I forgot
that I have it saved in here. The convert, three convert. This one. Yeah, this one also just press
three and convert. There we go. So that one
is now also ready to go. So with this piece, we
can also go ahead and we can go File Export selection, and this one I will call
Window underscore A. And it will always
save your setting, so you can just wide way
press Export. Let's see. Then we have our
chairs, our chairs. We can convert this one. We can convert this
piece and these pieces. And don't worry. So the chairs, we are going to go
ahead and we are going to texture those
a little bit later on. For now, let's just already export it and place
it into position because texturing does not really have to do
much with our model. Chairs underscore. Double. Let's call it that. So, so we can just
texture it later on, and then we can just assign the textures inside of unreal. Right now, focus my main
focus is going to be to simply get these
models into in real, set them up, and then we have a better look at all
of our materials. And I feel like that
would be a bit easier. Like, sorry, let me just
add FT underscore A. Oh, no, underscore
module on score A. So basically what I'm talking
about is that I can go ahead and I could do them all separately and I can get
pretty close to the effect. But this is because I would know what to do out of my head. And I feel like that would not
be very fair for you guys, because I don't know what
your experience level is. So so you could just as well have it like that you
are quite a new beginner. And then it would be pretty
mean for me to go in and I can think to
go in and just, like, guess do
guesswork, basically. And I don't want to do
that. So this is often a better way for beginners
to just preview everything. It just means that we need to split everything
up in a few bits, which is, of course, no problem. Let's go ahead and here and just need to turn all of these. Into film measures.
And very quickly, our scene is starting
to, of course, also become a lot more heavy because we are
now getting all of the real geometry in here because this was not
considered real geometry yet until we really start converting this
to real geometry. But the UVs are holding up really nicely, so
that's looking good. So I'm not too
worried about that. If we see any problems, we should be able
to still fix them even with the high
poly geometry. So I can go ahead and call
this export selection, and Metal poles underscore. A? Oh, sorry, metal handles. Handles underscore A to
that one. Here we go. And then we have a
metal center pole, which I believe is just like a single pressing tree,
and then converting it. Export selection, metal
center pole, export. Okay, so we got that
one BwallO back wall has this one needs
to be converted. This door needs to be converted. Pretty much
everything, actually, I think needs to be
converted for this. The top bit this bit over here, these bits, even the small bits over here also need
to be converted. Yeah, the bolts, we will leave. So I think that's it. Yeah.
Yeah, that should be it. So we can select all of this. Export selection. Back will. Yeah, let's just do BwL so
that I do not get confused. Okay. Later on, we also need to place like
all of our class, but all of that stuff
will come in time. These ones, I know that we already turned them
by pressing three. So I just need to select this
site and just convert it. And this is going to
be export selection. Window score floor, and the other one is going
to be door floor. We have this one and this one. If we just press three, convert, this one is going to be
our door score floor. There we go. These ones go with the doors and the
other ones with the windows. Sealing, we can just convert this file export selection,
sealing underscore A. Then we also know by the way
if all of the pieces fit together properly. The speakers. Yeah, we can also
convert those already. The only thing is
that probably we need to go into our backup for our texturing to texture
it. Although I'm not sure. We probably don't
have to actually. I think substance
painter can handle this amount of geometry,
but we'll see. This is going to be
speaker underscore A. And then we have a small light, which we can also convert
Export selection, small light underscore A. Cover this one.
Export selection, small o underscore A. And then I think
at the end of I do remember there are a few more pieces that
I want to create, but I will do that at the
very end of the toil, and I will just be like
a little bonus thing. Just like those handles that
you hold and everything. Export, this is going
to be small underscore. Log underscore B. So let's export that
one. We're almost there. This one is going to be our
window cover, something. Export window underscore sign, underscore cover. There we go. And finally, we have
our small light B. Here we go. Tiny one. Small light B. Okay. Perfect. So those are now
all imported. That's great. Now, we know that our
scaling is going to be 1.1, all we need to do
now is we need to go ahead and go into
our folder over here and go into our
exports to in real, and we're basically going
to select everything except for my door A because we
already have those imported, and we're going to
drag it in here. This will take a wider input, but basically all the
settings will stay the same because we
have already set them. The only thing we
want to do is set the input scale to 1.1, and then we can just go
ahead and press Import A. Now, Import A sometimes it
still pops up the window, so we'll see how it goes. But it looks like so far, it is actually
doing pretty well. I will pass the
video until this is done because this
can take a while. So let me just pass the video. Here we go, so that
is now all done. Great. Okay. So now that we
have all of these pieces, we can go ahead and
we can start by just importing all
of this in here. So all of these
pieces should have our rate tracing turn on, and we will know soon enough
because if we just go ahead and drag these in here just to make sure that they
all look correct, then what I'm going to do is I'm going to go ahead and assign, like a base material to them. But, yeah, we will
know soon enough when we look at our FPS, if it goes down greatly. I shouldn't say that
because I'm recording, so this is not
really an accurate or an accurate look for it, but oh, well, we'll see. See move this one down here. Yeah, this should
be totally fine. I think they're all correct. We have our ceiling
over there also. Door floor over here. We are going to
nicely place this. I just need to drag
it in here just to make sure that everything
is working correctly. And then I can
just go ahead and, like, change the material. So that is all looking good. I think I'm just going to
go in my door over here. And in our window
floor, let's see. Let's open that one up.
You just want to go ahead and let's open
up a few of them. So our window floor, our door A, our door floor, and
just anything that has, like, a strange
looking texture on it. And then when you
have everything, you can click, for example, on Dull metal and then just go into your window floor and
press this little arrow key. What it will do is
it will basically assign whatever we have selected in our browser, which now happens to be
this plain material, this dull metal material. So I just need to make it white. That's all I care about for now. And then I can go at and
I can close these pieces. I can save my mask material, and now you can see
everything is nice and white, but it is also nice and hypol
and just for the fun of it, because I like looking at it, let's look at our triangles. There we go. Yeah, that's
doing a great job. So even with really
small piece over here. And it's quite interesting. I'm surprised how well it
holds up with these type of assets because these assets are, of course, hard surface. So it's not like a rock. A rock always seems to be an
easier thing to optimize, but this seems to be
doing quite well. So having all of these pieces, now what we're going to do
is in the next chapter, we are going to actually
start by building our level. So I will leave it off here. We have our pieces ready to go. So in next chapter, let's
start by building our level, and then what we can
do is we can start to incrementally improve
all of our meshes. So let's go ahead and
continue with that.
32. 31 Building Our Level Part1: Okay, what we're going to do in this chapter is we are
going to get started by building our environment
to get something that looks fairly similar to
what we have over here. Now, one thing I quickly did off camera because it was
a little bit time consuming is that
I went ahead and I did not like the metric
setting it to 1.1. So I just set it back
to one because I felt like 1.1 was
actually too big. So the original was
fine after all. That's just me being
a little bit picky. You can try 1.1. However,
do keep in mind that because we did not really take into account
setting it to 1.1, you might have a little
bit of trouble with, like, the snapping
sometimes, but it just depends on your models and
how big they were originally. So for now, it doesn't
really matter. So this is still the same
scene that we were in. However, I removed
all of the objects, and I was not
thinking about doing that during the recording. So I just removed everything,
so we have a clean slate. We still have all of
our lighting in here. Everything is in here, except that I removed all
of the objects, and this is the scene that
we are going to be using. Now, this isn't
anything special. We're going to do this, and it's going to be quite
simple because we paid a lot of attention during the modeling to make it simple for us now. What we're going to get started
with is we are going to get started by just simply
dragging in our door. Reason I want to do this is I need to have a starting point, and I feel like having
the center door over here is like a starting
point, it would be great. Now with this door,
what you want to do is because it is
a starting point, we want to go down here
to the transforms, and we just want to press
this little arrow button, which will snap
it to zero, zero, zero, then yeah, it's just a nice point for
us to get started with. Now, as you can
see, I think what I'm going to do is I'm going
to make it three doors long. So door, window,
door, window, door. And then we will
have the back door and then another back
door on the other side. So what we're going to do is we're first of all
going to go ahead and we're just going to
build the basis of this. So for this, what you can do is up here we have our
snapping tools, remember. We're just going to go ahead
and turn on snapping and you can turn on the grid snapping here and you can set this
to whatever you want. Now, for example, let's say
that we set it to, like, a grid snapping of ten, and
we will see if that works. And then when you're
happy with that, you basically just want to
press Contra C Contra V, and then and then
you will duplicate your wall over here and you just snap it to
the grid like this. Now this wall, the
reason why I'm duplicating my actual
door over here is because the nice thing about
unreal is that you can simply scroll down into
your assets and go to, for example, your window A, and you can simply drag it into your static mesh over here,
and then it will replace it. So now we have a window and
our door next to each other. Okay, and look at that.
I also immediately found a little problem that
we need to fix later on. So that's pretty
much it for this. So we have a door window, then we can go ahead and we can have another door over here. And we want to have
another window down here. And because the snapping works, we can just go ahead and do
the snapping. There we go. And now we immediately already
have a wall ready to go. Okay, so now that
you have this, now, I think it's good if we just go ahead and do some floor modules. So for the window floors,
let's just drag it in, and we want to go
ahead and let's just maybe it's easier if I just rotate this 180
degrees most likely. Now, the cool thing about this, another little trick that
you can do is you can go ahead and you can copy the actual position
of your window, so you can right click on
your location over here and just press copy and
you can paste it in here. So if I then press paste, I know that my grid points will be on the window here, too. And then, of course, because
I flipped it around, I will need to just go ahead
and move it like this. But just like that,
we can very easily copy this floor
and place it here. And then what I can do is I
can duplicate this floor. And because snapping
still works, I can turn this
into my door floor, and that should give
us a perfect snapping. Yeah, see, that looks
pretty much correct. And this maybe like a tiny bit over here that we want to maybe move it down a little bit, but Oh, yeah, and we probably want to,
give it a proper end. But that's the stuff that
we are working on now. We just need to go ahead and we need to figure everything out. So this one we can
go ahead and do another snap and just
flip this one to be your window floor and one more over here to be
your door floor. See? And just like that,
we can just very quickly do like all
of our snapping. Okay, so we've done this one. Now we're going to
go ahead and we're going to focus on
our advertisements. So these ones, in
terms of snapping, they're going to be a
bit more interesting because I can
remember that we did not really have a specific
metric for it in mind. So here we have
our advert module. I'm going to go ahead and
I'm going to move it up, but I don't think that I will be able to snip it to the grid, because I think what
I want to do is, like, push it further
back by going off grid. Like, I don't know. Let's see. If we push it a bit
further back over here, and then a little
bit down actually so that it maybe
hangs across it. I think that will look nice. Now, I think that
we can still snap to the grid if we just
keep it on one axis. So if we now just move
it to this axis here, we can still snap on the
grid, so that should be fine. Because as far as
I can remember, we do have a grid snapping. Although one thing that I do now also remember is that it means that we will have a double
bar On the way here, there is actually a double
bar also in real life. So there's no problem. And else it would just mean
removing one of them. Okay, so over here,
we see the first prom that we are snapping too large. We can twinted of
snapping to grid to five. To see if that works, but I think that it's
still overlaying. So there is another
trick that you can ty. I don't know if it
will work for this, but a cool thing inside of
Unreal is if you press V, you can also snap to
ertzs then you can, twin snap it to a vertzi. However, in this case,
it does not work, but it felt like this
was the only time that I could actually
show you this tool. So if you hold V, and you would move this, you
would be able to, like, snap this to a ertzi if you want. This case,
that does not work. So in this case, what it's going to do
is we're going to do some manual placement simply
by moving it by hand, which should not be too
difficult because it has quite a nice closure over here. So you just want to
kind of clip it in a tiny bit and then leave
it like that. Like that. And yeah, so I think
that should be actually, we need to have a
look at the front and the back if we want to know exactly where we need
to place these because, of course, the transition at the end is a little
bit different. So knowing that, it might be
better if we first of all, go ahead and grab our
back wall over here, rotate it 90 degrees. And let's see how we're actually
going to place this one. Okay, so yeah, we can place
this one at the very end. So that should not actually matter anything with our snap. Now that I'm here, I
can just as well do it because then I immediately
have a nice endpoint. And I'm trying to basically get this to be at
the right location. I think something like
that should work, and then just push it
out something over here, and m, it feels like that
we are missing something. So this is one that
we definitely need to adjust in order to
get it to work. However, for now, I
can go ahead and I can just First of all, start by moving these pieces. So that's a bit of a shame that this one does not snap as well. I do often just
click away from it, and the only reason
I'm doing this here, you can see out of the Nantes at work when it starts to clip. The reason I do
this is because of that yellow line because else I cannot be sure that
it is not clipping. Later on, we will make our
entire pack environment black, so you will not be able
to see through it, but that also means that
you can sometimes see black lines if you have any
holes in your environment. So we kind of want to just avoid having holes in our environment. So we have this one over here, and I believe that
that one reach then. So it looks like the
scale is correct. We just no, wait here, see, we overshot the scale. That is a bit of a
shame that we did that, or that I did that. Sorry. So for this, there is a way that
we can fix this. It's not a pretty way, but it's basically by scaling
things down a little bit, little bit by bit.
It's basically this. So we go ahead and we go,
for example, to this one, and we make sure
that in our scale that our scale
lock is not turned on so that we can scale
the individual pieces. If I then set the red axis, which is the X axis,
you can see it by the red color to,
for example, 0.98. You can see that
it kind of shoot everything up a little bit.
Might even be too much. 0.99. Then go ahead
and we can go in here. We can move this close together. And luckily we only need
to do this once because Elsa ls I would
go into Maya and, like, fix it up, but 0.9. I went ahead and very
quickly time laps this because just in
a little bit later, we find out that because
of the back wall, we need to redo this anyway. So this was kind of
like wasted work, but I did not just
want to cut it out because else it would
have a mismatch later on. So, yeah, it was like over here because the back wall is
thicker on the other side, we needed to create a new piece. So over here, what I'm
doing is I'm just placing these pieces and
just messing around with the scale until
everything is correct. And once that is done, I was moving onto the back wall, and that's where I noticed. So yeah, that's why T naps is because else you
would need to sit through to me making my mistake
for the next few minutes. And that would not be very fun. So yeah, but
that's about it. The T nap is almost over. It's just about scaling. Just make sure that you if you use this technique, I
use it quite often. Don't scale it too
much, and then your UVs not stretch too
much, and that's about it. So let's kick in the
real time again. One. There we go. So from a distance, you will never be able to notice the difference between
these small scalings. If you would only
scale this one, you will notice the difference, but we need to be careful
because we are going to have text on this and
stuff like that. So I do not want to accidentally stretch it so far that
you can notice it. Okay, so our back mall
is completely wong. Not wong, but we definitely need to work on it a lot more. If we go ahead and
have a look now, I think what we
can do is we can, first of all, just rotate
this to the other side. And yeah, there's multiple
ways that you can do it. So I'm just going to
go ahead and I'm going to use my grid snapping. I'm just going to
rotate this 180, and I'm just going to redo the same work as that
we've done before. And this time, I'm just snapping this one to this point
over here in the grid. Let's see, I
accidentally went down. Looks like that I'm
a little bit off. I am at 000 white. Yes, I am, which means
if I'm a little bit off, I need to go off grid snapping. Push this back a little bit. It's okay to push this
back a little bit, because we can still gridsnap on one point on the
most important point. Turn on grid snapping again. Duplicate switch
this to a window, duplicate the door again, duplicate the window again, and duplicate the door again. Let's see. Okay, so that
should all fit fairly well. See a little hole here. This means that we also need to fill up this a little bit better so that we can not
look through that. So yeah, the only thing that we really went in the wrong is the back wall, which
is interesting. So I don't know where
exactly I went wrong. It's not that big of a deal, so we can just work with this. So now we have two things.
One of them is we have over here a problem with this panel. However, this panel, we can just separate it and we can
place it manually. That should not really
be that big a problem. And we have problem that we
need to extend this out and we just need to in general
place this in a correct place. I'm going to get started
by quickly grabbing my window floor and
moving this out. Because this is the
easiest floor to just quickly duplicate so that
we can now work from this. For the rest, these
pieces over here, we can go ahead and we
can also place them here, but I want to wait because I
first of all need to see how I'm going to solve this
problem over here. Okay, let's see. If I move
this into the center, I think the easiest way to
solve this problem is to actually scale it
out from the center. Which should not mess
with UVs too much. The only thing that I'm a bit worried about is that over here, it will most likely
break some stuff. Let's go ahead and go into Maya. Another thing is that now
we are in the hypol range. So if I now go to, for example, my back wall over here, it's not as easy
for me to just go ahead and grab this
site and scale it. One way that we can do it is we can go ahead and
go to Vertex mode, grab these vertices over here, and you can just do it
in small increments. What you can do is you
can go ahead and you can go to your tool settings, soft selection and
turn on soft select. And basically, that will give us a soft selection like this, which means that if I move this, everything kind
of moves with it, and it's like, very small
variations because we do not have very large changes, I think this might
be the safest way. So if I, for example, do this, I can then go ahead
and export it again. And this way I can balance
it out without needing to go in because
the second thing that we might need
to do 1 second Bewle the second thing that
we might need to do is we would need to
go into our backup file. We would need to rechange that, then we need to convert it
back to the hypol then we need to add it to this
scene and other stuff. Although it does
not take very long, it does take long
to do in a tutorial because I need to talk
about every single thing. But in any case, now
that we have reexpoted, we can right click and press
reimport on our back wall. Give it a second to
reimport everything. And once that is done over here, you can see that now
it has pushed out. And it has pushed out
quite nicely to a point where I'm confident that we
don't have any problems. Maybe I'm going to
turn off my snapping, and I'm just going
to very carefully. Move this forward a tiny bit. Then we will just have some
clipping that is no problem. And then over here, I wonder if the clipping
is bad enough over here for us that we can just
go ahead and do like 1.05, folks, now's why much 1.005. I wonder if the clipping is bad enough for us to just
be able to do this, that we just basically
clip it into the wall and you won't
really be able to see it. I'm hoping that that should be fine because it would save
us a lot of pain and effort, but it's something
we'll have to see. Okay, so if we have
that wall ready to go and this one is in
the center, this door. So that should be all fine. Then we just need to
push this wall out and then we do need to adjust all of these pieces again because we will also
have it on the other side. So let's go ahead and
continue with this. So let's first of all, grab this side over here. Oh, wait. Let's first of all, grab this side over
here. Push it out. And small changes like this, just like the scaling, you rarely will notice
it in your UVs. And if you really do, we will just go ahead and edit the UVs. So it doesn't really
matter too much. This one is a little bit larger, but we'll see how it goes. So let's go ahead and try out something in that direction. Don't forget to, like, move this a bit more in
the center over here, and let's see if
this works better. So pot selection. This is going to be our
back wall. Over here. Okay, we can export that. Can go in here, right
click and press reimport. Okay, and that's now done. So as you can see, wow, that's pretty spot
on, to be honest. Okay, so I'm not too
worried about that. It has a nice
transition going on. Over here, yes, it has
a tiny bit of clipping, but as long as it will
not harm anything, then it should be fine. So let's say we now have this piece and it
is ready to go. We can go ahead and
we can duplicate it and rotate it 180. And in your rotation, maybe
try to turn on snapping. Let's see if the snapping
still sort of works. Does it sort of work?
Not completely. But basically, what I need to do is I need to
make sure that it lines up correctly, like this. And now we're just going to
places on the other side. The other side is a little bit more forgiving because we most likely will not take any
screenshots from this side. However, I still need to make everything just
working logically. So I'm going to move this
over here to this side. I'm going to push
this once again, back in until it's
clipping a little bit. I'm going to go ahead and
grab my window floor, and I'm going to
duplicate this over just to bridge that small
little piece over there. And now what we need
to do is over here, yeah, we have a little
bit of a problem. So what I'm going to do is
I'm going to go ahead and I'm going to delete this. And what I will also
do is I will time lapse that previous part
where we did all this fiddling around because there's
no reason if we need to redo it now for you to sit through 5 minutes of me
messing around with that. So I'm going to go ahead
and turn off my grid snap. Actually, shall I leave it on? No, I'm gonna turn it off. I'm gonna so I place this very
close together like this. And now we just
need to kind of see if we can make it work again, and we'll see how far we get. Hopefully, it will
not be the center because I did not
take into account these back walls adding so much extra space,
at least on this side. So because I did not
really think about that, I have no idea how this
is going to end up. If this ends up
being in the center, it means that we just need to create an extra little module, and that module is
just being cut in the center and it'll just
have a smaller advertisement. It's not that big of a
deal because it means that we can do some
custom made stuff, and we don't need to fiddle
around with scaling, but it is, of course, more work, most likely. Okay, so let's see
how far yikes. Yeah, see? I'm way
too close together. So what I'm going to do
for now is I'm going to move this over
here and I'm going to just quickly
duplicate this over to the other side. All of them. So duplicate, rotate them 180. Move them over to
this side, just by simply moving them like this. And then in the next chapter, we will go ahead and we
will complete this work and we will fix those small
little problems that we have. So let's do this and
let's move this out. Oh, wait. Looks like that. I need to actually
have a look over here have a quick look and just try and get it
already to be placed. Correctly, like
that. There we go. Okay, so what we're going to do is we're just going to
create a small piece, and then we'll
continue with like a ceiling and all of the
beams and everything. For now, just make sure
that you save your scene, and let's go ahead and continue with this in the next chapter.
33. 32 Building Our Level Part2: Okay, so let's go
ahead and continue with just our general
level building. We're going to get
started by just creating a smaller version of
this advert sign. And the way that we're
going to do that, it is pretty simple. And that is that we're
going to go into Maya, and we're going to go to
our Ad top advertisement A. And this is why I
say underscore A often because what I
can do with this is I can go ahead and I can
press like a you know what? I'm going to reuse this
in a specific way. I think that will save us time. Let's go ahead and press
CFD to duplicate it, create a new layer and
add it to it and call it top Atisement under scope B. Now, what I mean
with a specific way? What I could be doing is
I could technically go ahead and scale
this in like this. Oh, turn off advertisement day. Scale this in, change the
UVs and all that stuff. However, what I can also do is I can just because I
want to, of course, create the same UVs and
probably also create like a mask for this to have dirt and grime and everything. I want to be able to
reuse all of my masks and dirt and everything
from my top advertisement. The only thing that I'm going to change is that the
branding will be smaller. In order to do this,
what I can do in this case is I can
go ahead and I can simply cut away parts of the
mesh and do it that way. So I can say, for example, that over here, I'm going
to make a simple cut. Let's say this one. Like this. Then I also need to
go ahead and I need to this is one solid mesh. This is not one solid mesh. I'm basically going to go
ahead and I'm just going to only leave over
this backside. If I go to my front
view over here, I'm going to select probably up until let's say this point because this is the
straightest piece. Hold Control, deselect
this and press, cut. Then what we can do
is we can select over here these few faces, and we can also
straighten them out. That should be fine with UVs. But I think what you're going to I think you know
what I'm going at. So I'm going to go ahead and I'm just going to link them
together with those. Now, over here we
have a cylinder. Honestly, often you
can just place like a simple loop over here and another
simple loop over here, and then just get rid of
all of this backside stuff. And I think I feel like I've
also cut away extently that. That's Undo that. Yeah, you see. I also need to create a loop over here and delete
that. There we go. Now, just double click and just make sure that you just Oh, God. Double click, yes. Do not have it loop
around over here. So hold Console. There we go. And then flatten this out
so that now if we go in, we can make this perfectly
flat like this, there we go. Now we have this
little extra piece, and then for the recipe, we can just do some small scaling. I can go ahead and I
can move this in here. It looks like I messed up. I already messed
up my cylinders. Can I press Undo by any chance? Because I'm really not in
the mood to mess it up. Um, No, it looks like that
I already messed them up. No problem. In that case,
I'm just going to redo it, and then I will just cleaned up. So that's me accidentally deleting my part of my cylinder. But that is no problem because I can go ahead and I
can move this here. And then we would like me to
do some small merging there. And it just means that
for these pieces, let's go ahead and let's select these cylinders, all of them. See now it is getting
really annoying to just select because you
don't know what's going on with all
of these edges. Select them. Let's do an
extract pass on them. Shift click extract faces. So what we can do with
those is we can go ahead and we can merge them. Let's also go here and doing
extract pass on these. Here, extract faces, okay. And then I'm going
to reset my pivot. I'm going to go
ahead and duplicate this. And you know what? I'm actually going to get
rid of these cylinders because if I'm duplicating
this, I can well do that. I can just as well
grab these pieces, place them sort of in
location like this. You can zoom in and you can just make sure
that they really are close enough so that when we do a weld
everything will weld together. And then you
basically just go in here and you just
place like a loop in the center where you can no longer see anything and then
just delete everything else. Fine, Maya. If you want to do it that way, I will play ball and I
will also work like that. There we go. Once again,
just go to the font. I know it's a bit of a mess. And this mess really
comes with working with hypoly meshes like
pure hypoly like this. But for now, I think it's still easier for me to do this
than needing to go in and, like, go into my backup. But now you can
hopefully's why it is so good that we have made that
backup in the first place. So now what we can do is
we have all these pieces. We can go ahead and
select them and we can press combine Same over here, press combine, and all of your IU Vs are still intact
because technically, we did not scale anything, so it will not have
anything broken. And now it's just a matter of, for example, selecting this, and we can go ahead
and do a shift click, merge ftcs at a low
level. Try 0.01. Yeah, there we go.
Perfect. Let's hope that the other ones are
going just as easy. So over here,
select this, apply. Yeah, also good.
Select this one. Apply. All good. Okay. And then finally, all we have left is
this piece over here where we did the merging
along this line. So if we go ahead
and press Apply, Okay, for this one, we need to have a merging a bit higher. So 0.05 press apply. So that did the trick
for some of them, 0.08 maybe, press apply. I don't want to go too
high because CD will try to merge together
the wong pieces. So let's do this. And
then just isolate it, and now we can just
quickly by hand, just to make sure that
everything is correct. We can just merge
this by hand like this using our target belt
and here you can see, like, Okay, we have
a double loop, and that's because over here. Let's Undo our merge. No, actually, you know what the double loop does
not really matter because we cannot see
it. So never mind. Let's just isolate this let's just merge these verts
together over here. Now I'm doing it won again. I need to go this direction.
Sorry about that. Here, this direction
because this one that is just hanging out here
randomly for no reason. I don't really want
to merge them, because if I merge them,
it will mess up my UVs. But if they are just
hidden like this, it will not mess up my UVs. Same over here, it
started to merge it down, but we should not be
able to really see it. So it's more like one
of those things that I'm a little bit too
lazy to do properly. So I'm just going to,
like, cut corners and just quickly
leave it off there. In the end of the day, it
doesn't really matter. And you will learn if you
work in game industry, you will learn to cut corners to just get stuff done quickly because you don't have time to make every single thing
absolutely perfect. So at this point, just right click and make sure that everything is added
to this layer, and then we can do
an expert selection, call it Ad fort Module B. And export it. And finally, we can go ahead and we
can go inside of Unreal, and I'm just going to
navigate to my Export folder. At food Module B
and just drag it in here and just make sure that your uniform
scale is set back to one. Everything else seems
to be totally fine, so go ahead and press Import. Over here. Okay. Now all you need to do is you just need to quickly drag it in here. And now you can see that
it is smaller and you can see that it is small enough for us and
now just go in. So it's like 0.9,
eight, for example, maybe a little bit
less, seven, six, 55. Here, 0.955. That's my no weight, a little bit bigger. 0.6 maybe. 0.6 is 0.96 is my final result. Just quickly drag that on. It does not really
matter. So knowing that, we can now go ahead
and go in here. Okay, so that one is correct. That means that I need
to use this one for my AdVT module B. I
already forgot the value, 0.96, go in here, 0.96, now it's just a matter
of moving this one, and I will just make
it fit on this end. There we go. Ah, that's too bad. Let's move it out in
a little bit more. Over here, it's correct, right? Yeah, over here it is correct. If I move it out a little
bit more, it's, like, the tiniest, slimmer, so 0.62. I don't know. 0.62. 0.961 maybe, actually. Things open 961
should do the trick. Okay, finally, so that one
is now also ready to go, so we don't really need to worry about that stuff anymore. That's nice thing about
small environs like this, we only need to place it once. If this was for a big
video game, of course, you would need to
spend a bit more time making sure that everything
fits perfectly together. I'm going to go ahead and I'm going to get started
first of all, by just adding our
metal bars over here. And doing the metal bars, I'm going to let's start by just like
the metal handles, and I'm just having a look. So they are in between
the ends of doors. So if I drag one of
these in, oh, wait. I have no idea about the height. I need to add my ceiling first
if I want to know exactly. Like I can already place
this one here in location, and I can guess that
it is somewhere here, but it will most likely actually need to
be moved forward. In that case, let's just quickly grab our ceiling over here. And for our ceiling, what we can do is, I'm going to grab like this
transform, press Copy. Grab my ceiling,
which I cannot do over here. Right click. 1 second, I miss
clicked This transform, right click copy, quit my
sealing, right click paste. And now I can get
started by just moving it using my snapping. First of all, move it up
and then move it out. Turn off snapping to make
sure that I can merge this in because I can remember
that I was not sure where I want
to do my snapping. And my ceiling, I
need to go a bit further. It's a bit hard to see. We can turn off the
back facing of this, but doing that, it
would make it even more annoying if I just
want to look inside of it. And we then need to replace
all of our materials. So for now, I can make it so that you cannot
see through on this side, but we will do that later
on because right now, if I do that, it's
a bit of a pain, and it would be like
wasted setup for something that we are
going to replace anyway. I feel like let's
just go for, like, the center. Pretty much is in. Okay, so when we
have that, we can now go ahead and just
push this back in, and it's okay if it just
pushes back in over there. And I'm just going
to look at it from this side and just duplicate it. And snapping should
still work totally fine. So we should be able to
just snap this like normal, and it will just run across the entire rain bit like this. There we go. We have a ceiling. It's starting to get a
little bit dark here. If you want, you can
go from lit mode to unlit mode. But
that does not work. Of course, it does not
work because we do not have any lighting in here. Teta lighting also doesn't work. Okay, in that case, if
you really want to, you can go ahead and go to
create lights and just throw in a point light. Just
throw it in here. And the only reason
why it's here is just so that we can see. See? Just do this. Duplicate it three times. And don't worry about any
settings or anything like that. It's just that I know where I need to actually
place all of my stuff. Okay, so we have this one placing this version is going to be a
little bit messy. I need to because it's
such a large asset, so it's a bit annoying
for me to make sure that I place there at this place
correctly, and no over here. Let's see if it would be
in the center over here. It means that we would need
to go forward to start with but it would also mean that it will
probably not look as nice. We will see here, the transition will
not look as nice. Maybe it's better if I first of all just place some chairs. Two, four, five, six,
seven, eight chairs. If I first of all
place my chairs over here and just place
them against the back. I think I'm just gonna
clip it in there. I don't really care about
it too much. Let's see. So we will have one
chair sitting over here. Let's turn on my snapping. Do the chairs snap
by any chance? No, they do not.
Don't worry about it. Just move it over here. One, two. Yeah, the snapping. It's not going as well
as I was hoping for, but at least you know
the general concept. So I hope you did a
better job than I did. Okay, so we got this
stuff over here. Four chairs. Let's move them exactly in the
center like this. And then it looks
like that, yes, we have a little bit
of space over here, and we will have a little
bit of space over here. What if I make the metal
bars a little bit longer? That could work. So
let's go in Maya, and these are the bars.
Oh, they are hypoly. That's unfortunate.
Doesn't matter too much. Means that I need to go in and maybe it's handier if I
just select from the angle. I need to make these metal bars because these are
the ones, white. Let's see, yeah, at the door. So at both sides, at the door, we need to go ahead and we need to make them a bit longer. So let's go in here and do
a soft selection carefully. This soft selection needs
to be a lot softer. Like this and just push this out a little
bit on this side and also push it
out a little bit more over here on
the other side. There we go. That should
do the trick like this. Also, I did lose a tiny
bit of recording footage, and I don't think that
I've had it back. In any case, the only thing
that I lost is that I picked over here Wall
advert these metal panels, and I just removed it from my door and I
just placed it in the center here so that we can export
this as its own piece. So knowing that I can grab
this piece over here, this is our WL adft so I can
go File Export Selection, and I think I already
exported it also here, WL AdVtA. That's all I did. I just moved it around. I don't know what happened
to the recording. I only noticed it a
little bit later. So unfortunately, I'm already way too far along to fix that. But in any case, we can also
go Export Selection and we can export a Door A
properly like this. And now if we go
ahead and go in here, we can go door A, right click reimport
and give that a go. Okay, let's see how that works. Okay, this one is
just within the range and this one also just
within the range. So that's perfect. And we have all of our
seating over here. So that's looking pretty good. And we have also this
one on the height. Okay, so that the difficult part. So that one is now done. And what we're going to
do is we're going to save a scene and
the next chapter, we will go ahead and continue
on with building our level.
34. 33 Building Our Level Part3: Okay, so we now can go
ahead and continue, and all we will need to
do is now select all of our chairs and these
metal bars over here. And then we can
just go ahead and copy this over to
the other side. And the only thing
we need to focus on is that the bar
is in the center. Like over here,
and then it should also work. So I messed up. I do that a lot, but luckily I only mess up with
small bits like this. There we go. So we
got that one done, then we can go ahead and
duplicate this again. Rotated this exactly 180, and this time, we need
to do two functions. First of all, move the
chairs in the correct place, and then we also first
of all, need to move this back wall
correctly like this. And then I just about
moving it back like this. Double check both sides. Perfect. And now just one
more point of doing this, and then it is done. Correct? No, not correct. Then moved a little bit
more to the site over here. Because a small
centimeter over there, by the time that we
get to this point, it can actually be quite a bit. Did I did accidentally
deselect that, but I think I did
this. Here, see? I did that won let's try it
again. Alright, look at that. There's like is it just me or is there a
weird movement thing? Or or is just this chair incorrect? So that
one is correct. That one is correct.
This one is incorrect, so the chair is not
sitting correctly. Let me just quickly move this. See, does that matter? No, it does not matter on those sides. But of course, I do
not want to have these chairs clipping in when I spend this much
effort getting like a nice little bevel
in between them. So let's just move
them out like that. Ah. Interesting
that I missed that. Et's try it again. There we go. Okay, so that
should do the twig. And then for these ones,
we can just go ahead and we can select
them over here. See already nice
moments like this, you can see the quality is
already starting to get there, even though we have no lighting
yet, no materials yet. All of the shadows are wong. Everything is still wong.
But because we only care about placement,
that is okay. Let's push it back
a little bit more. Like that? I think
that does a trick. Yeah. Okay. Awesome. So, cool. It's already time
to come together. So for our metal bars, let me just quickly grab
them for you. Let's see. So we have them two in the
center of every place. So if we go center
metal bar over here, we have really funky
lighting now, I know. A. That is interesting. The scaling is correct, right? Let's see. One. Yeah. Okay. Okay, then that is curious that the
scaling is not perfect. But in any case,
what I'm going to do is I have over here my grid, and I can set this to the center here and I'm going to set this to the center
roughly over here. There we go. And
then at this point, I'm just going to scale it down. So I'm going to
turn on the lock on my scale to scale
it in all axes. And if I set this to 0.9, you can see that it scales down. So if I do 0.99, 0.98 50.98, 0.75. There we go. 0.77. That's it. 0.977. And
then we have one here. And if I look at my grid, I'm just going to see one
grid point beyond the door. I can then duplicate this
and I can go down here and I can say also one grid
beyond the door, which means roughly over here. And having these two, we
can go ahead and duplicate them and do the same
thing down here. So one grid beyond the door. Oh, yeah, at this point, it starts to actually break
down a little bit. But that's no problem.
Like, I'm not too picky. Let's just do it in the center
roughly of the end seat. And then it should be
fine. You will never be able to really
notice the difference. Okay, so we have those
poles also done. Let's see what else is left. So At ford Modules back walls are all looking good ceiling chairs,
we have those things. We have our little small
bits, but let's first of all, actually sort out some
of the lighting before we add all of these
really small fiddly bits. We have our window sign cover. That one is quite large. So let's go ahead
and move that one. I just want to go ahead
and move this in here. There we go, see.
And we can just, like, nicely cover this on top. Make sure that it's
all looks good. There we go. So
that's also working. And yeah, so as I said
before, so the small bits, like the speakers and
everything, if you want, you can already, like, place
a few of them like this. But it's a little bit
like small filly work. I will only do the speakers
for a good measure. Let's have one here. And let's have one Let's
say over here, maybe. Yeah, let's just go ahead
and duplicate this. We might move it again later on. So it just kind of depends
because I, of course, want to have the
speaker quite close my camera angles so that when I'm rendering it, it
looks a bit cool. So maybe we add even a few more speakers than you
would normally have. Just that when we have
these camera angles, we can see the
speakers a little bit, and the speakers will probably need to be
a little bit bigger. But in any case, for now, we have a decent start.
Let me say like that. So what I'm going to
do at this point is we can go ahead and we can start with doing some basic
materials and everything, and we want to just work on
our outside environment. Because what you can
see right now is that the shadows are
all over the place. If we go into our
world Outliner, we can get started by
just selecting all of our models except for those
three lights over here, and then pressing the
folder icon up here. This will add it to a folder
that we'll call assets. And there we go. Now it's all nicely
organized in a folder. So we know that we do
not need a light source. Yes, we do not need a skylight. We do not need an
atmospheric fog and we do not need
the sky sphere. We just want to have a pitch black on the outside over here. Now, one thing to keep in mind is that Nanite
unfortunately, on this outside that
you can see through it, Nanid does not yet support
double sided materials. I don't know if they
will ever support it. So this is something, however, that I only learned after
I've done the modeling. But in our case, it
should not really matter because we are just making
this one environment. And if you would make
a larger environment, you would often also just
create the outside casing. So for now, this
should not matter. As long as that we just have
pitch black on the outside. Yeah, you can see, lighting, it does just work
fine right now. So yeah, just keep that in mind. And it's always fun that
when you go up close, that I can just see that this is actual geometry and everything. Okay, so now that we have
this stuff ready to go, I think what we can get
started with is we can get started by doing some
very basic lighting, and then we can start
with our materials. So in the next chapter,
let's go ahead and do a lighting and material pass.
35. 34 Doing Our First Lighting Pass: Okay, so in this chapter, we are going to focus on a very basic lighting setup and a very basic material setup. Because that's the thing
with environments. They are not often linear
in terms of the workflow. It's not like you first
do all the modeling, then you do all the texturing, then you do all the materials. Now, in order to get
a good picture of it, you sometimes need to
jump back and forth. So I'm going to get started, and I know that these lights over here are
going to be our actual lights. We might also like
something more interesting at the base or something like a light
in here and in there, just to bring out a bit more
light, but we will see. In any case, what
we first need is we need to turn this into
a emissive material, which basically means
a material that glows. Can do this. So for this one, we do not want to
use our master. I think it's easier if we
just create a new one. So let's call it a missive
underscore master. And then in here, we don't
need a lot for this. All we need is a
constant three vector which we've already covered, convert it to Su Brema
and call this color, and just set this color to be a bit of like a
yellowish light color. Let's see. Something like this, I think will work
fine over here. And then I want to
duplicate this, and we will call this one
ight underscore color, and duplicating is just
CtraZ Contra V. Now, the color goes into
the base color, and you candy see over here see in the missive color slot. The only thing we
want to do next to this is we want to add
a scalar premter with SClick and call this
light intensity. And you said this to like one. And then I want to
right click and want to multiply to multiply our
color with the intensity, giving us control over how strong we want
this light to be. So we throw this into
our Missive color and we press save,
and that's it. That is our emissive material. Now, the materials, I do not
just want to drag them on. I've been doing that before, but that's just because
it's a gray scale. What I want to do is
I want to go in here, and I want to absolutely, have them in here. Let's
open both of them. I want to have them added
on in here, as you can see. So first of all, we
need to figure out, okay, which material
is our light? We can do this simply
by pressing isolate. Oh, isolate does
not seem to work. Maybe it doesn't work
because of the Nanite. The Nanite does close off some features
without removing it. So that might be it, but I think it is
like the second one. And then what we can do is we
can go into our materials, right click on our
missive Master and just make material
instance that we'll call Light underscore A. And with that one selected, we can just use this arrow
key to basically add it. So it's safe. And also over
here, that's pre safe. And this will instantly add some light as you
can see over here. Now, at this point, we are
going to go ahead and start working on liv lumen and everything and just do
some basic lighting. I'm going to get started
by just getting rid of my entire lights over here, so now we have a
very dark scene. But you can already
see that these pieces over here light up. What I'm going to do is there's a few things that I need
to first of all, do. I always like to go ahead
and go into my settings and project settings and just double check all of your settings to make sure that they are correct. Most settings that I want to
double check are down here. So I want to see text
streaming is fine. We don't need virtual
textures right now. Global animation, just make
sure that it is set to lumen, because that is what
we will be using. Reflections lumen, reflections
capture resolution. I'm going to set
this really high to 512 because I feel like that if we are going to have such a metallic
environment like this, I just want to get the highest
quality I can ever get. Detail tracing is fine. Shadow, virtual
shadow maps is fine. That's again, a new feature. It will basically give
us more crisp shadows. It does mean that they
sometimes look a bit jagged, but we have a console command that we can use to remove that. Hardware rate racing, we do not use rate
racing right now. Mesh distance fields is fine. Foxl density, see, larger values can
consume larger values. Yeah, so I need to I probably
want to set this to 0.5, just to give it or 0.4, just to give it a little
bit more accurate shadows because we have such
a small environment, I want to give it more
accurate shadows so that, in turn, this environment
will look a bit better. It will ask us to restart, but honestly, I'm not really in the mood to restart right now. And for the rest, all of
these settings are fine. So, okay, so that's just to make sure that that is all good. Over here, we have our
global post process volume, but when it went over that, if you go down, yeah, your lumen should all be set
on and your amidoclusion, Actually, sorry, lumen
replaces amen cluson. I still need to
get used to that. Global emon is also lumen, and yeah, let's set this one to two in our global imation. At this point, I'm just
going to go ahead and I'm going to save my
scene. And why not? Let's just press restart. Here we go. So we've
done a restart. Okay, so at this point, we can pretty much get started by adding some basic lights. You can go into
unlit mode if you want to be able to
see something, but, of course, it will not be too useful because we don't
have any materials yet. Okay, if we go ahead and the
lights that we want to use, because these are
quite square lights, is we are going to use rectangle lights that we'll place here to basically push out the lighting and just make
it look really interesting. Now, I'm having a think if
I should place two of them. I think I will want
to place two of them. It will be a bit more
expensive because, of course, we have more lights. But in turn, we get this
really specific glow here. While if I just place one
that is sideways like this, it might not give me
the exact same effect. We can find this by
going to create lights, and then here we
have a few lights. Directional, you
can see as a sun. The point light
you've just seen, it will just shine
light from outside. Spotlight will just shine light from a specific direction. Rectangle light is the one
that we are going to use, and a skylight if you have
exterior environment. So let's start with
our rectangular light. The nice thing about
rectangular light is that it is
literally a rectangle, which happens to be exactly
what we have over here. What you can do is you can
basically rotate this light around and you can control
the rectangle size. So what I can do
is I can go ahead and oh, wait, over here. This is because I drag it
on by hand, just add this. I can go ahead and I can
move this light over here and see you can see the
specific look that we have. And then I have a source
width and a source height. Based upon this, I can
make my light a lot thicker or a lot thinner, see? And then I also have
my barn door length, which is basically
those outer sides. What you want to do is you
want to set those quite low, and they basically just decide
on the fall of your light. So on set it quite low, and then you want
to set the angle. Actually, no set the
angle quite flat. Set it at like, pretty much at like 90 because
this is a flat light. So we then basically
move this over here. We maybe set the height
a little bit lower and maybe set the barn door
length a little bit lower. Let's move down a tiny bit,
and now we got this light. Now, you can also
go ahead and you can set the width higher. However, there is a point where the width outweighs the light, and you can see that the
ff starts to act strange. Now, I need to just see because this is
a small environment. So maybe we can actually
reach a point where we can do this entire
environment without it. But basically, the problem
that we have with this will be that the light will be stronger at the center
and not at the sides. But I think that only happens when we get way
later into the environment. So we might be able
to literally place one entire light along here, which would be nice and cheap. Oh, wow, that's a
little bit too long. So let's do doing it this way does mean that the placement is a bit annoying, but it makes it
really easy faster than just make some
general changes. It's a tiny bit more over here so that we get
that light in the corner. And then over here, if it's
like clipping through. Oh, no, here, perfect.
Also in the corner there. Okay, at this point,
I'm going to go ahead and I can change
a few settings. I can change my intensity, which I do want to do. So I'm going to set it probably a bit lower to, like, five, and I can change my color, which is great because I want to kind of color match a bit more of the warmer yellow tone. So you can do the color
match or what you can do is you can use
the temperature. And using the temperature
basically allows us to very easily use a specified
temperature of the color. This is a little
bit more accurate. So for interior lights, this might actually be
nicer because these are the temperatures that
you also literally get when here, look
how cold it looks. These are the temperatures
that you also get, for example, when you buy
a light, I don't know, at Ike whatever, you will often see that it says like
Kelvin or it will say, like a temperature, and
that's where this comes from. So let's go for
like 4,000 maybe, maybe a bit higher, 4,500. Like that Du started with because we don't
have that many lights, we can just duplicate this and we can later on
just change this round. So let's do 90 degrees. Let's move this over here. I see a few shadow problems
here and there. However, I think those
shadow problems will not be that bad because
I have a feeling that as soon as we art our materials that
they will go away. You can see, so we
only have two lights and already starts to
light up our scene. Let's go ahead and
duplicate this. Rotate this 180
degrees over here, and we can go ahead and we
can now just move this on this side. Like that. And just like that,
like a few scenes, we already have quite an
interesting lighting. Some of the shadows are
not looking very nice, but for the rest, we already get at least
some basics in here. Now, there's a few more
things that I want to do. The first one is
reflection captures. These are very important
for our scene, and they are those spheres
that I showed you before. Reflect sphere reflection
capture. Where are you? There you are. Just press G. If you cannot see your icons, press G because G basically
goes into game mode. And with these
reflection captures, I want to have a few
of them in this scene. What they basically do
is they will capture the reflections within
specific radius and display them on here. You can also find these in create visual effects,
sphere reflection capture. The reason I want
to have a few of them is because if I only have one of them sitting here that covers the
entire environment, it can happen that when you are looking at reflections here, you will see the
reflections being warped because the
center point is here. Of course, this
is not very nice. So let's set the radius
to around 300. Over here. Let's just press duplicate and I'm just going to
have a few of them. Don't worry. You
can just overlap. That is no problem. So,
let's do this one here. Is one bit more.
There we go, see. And just do make sure that
they are overlapping. If they do not overlap, then
we might get a problem. Okay, so we already got some very basic
lighting in our scene. We have a bit of,
like, shadow arrows. Now, I wonder if those
shadow arrows can be minimized by setting the
barn door angle a bit lower. And does not look like it. In that case, we
will go ahead and we will work on that a
little bit later on. But we have already some
general lighting over here. It looks a little bit grim, which I think is
actually quite cool. Yeah, you know what? I think I will probably leave
my lighting at this. The only thing that I will
most likely do is I will quickly grab this
light, duplicate it, and set the width way
lower like this and set the bando angle a bit lower because what I can do
is I can use this light to, like, What are you? I need my lights to movable. That's probably it. 1 second. I will show you what
I mean with that. Just place this light
over here, rotate it, and let's just see if we
can get, maybe, like, a cool light that we later
on will place. In this area. Then for now, it will just be a fake light, as you
can see over here. Set the light a bit
lower intensity, sent to two or something, maybe even one, just to
make it like a small light. What I mean with movable
is I need to tell the system that these
are real time lights. If you select lights, you have static, stationary and movable. If you do static, they will
be included in light baking, which is something
that we will not be doing for this environment. If you said to movable, you can see what it says,
totally dynamic. It will mean slower rendering, but it will be completely
dynamic lighting. For this light, every light has a radius, as you
can see over here. This radius, you sometimes
might want to just lower it down in order to
get a desired effect. So I'm, for example, lowering down the
radius of this light, and then I'm duplicating it and also placing it
over here on this side. She can see. Now,
for these lights, it might be nice for me
to just go ahead and right click and because for some reason,
renaming does not work. Let's try it again. Click
click Hold. There we go. Now, it works. Call the
Back Light underscore A. And this one I want to
call Blight underscore B. And the reason I do that is because it makes it easier for me to select them. Back light scope B. Because now let's
say that I want to select all these four lights, I can multi select
them and I can change all of the settings
at the same time. For example, I can change
the radius settings to 500, and as you can see, it will
just push out the radius. Now, there's not one
that I want to do, but what I might want to do is I might want to play around my temperature instead
to like 5,000, and then you can
see that the scene actually changes
quite a bit here. We do 6,000, so it can
go from warm to cold. Let's do 5,000. I
quite like that look. There we go. And then all we have left is we need to fix
those problems over here, which, if I'm very honest, I have no idea what they
are because they are new. It looks like when
I see the tracing, it looks like a nanite problem because one abet it if I go to nanite that it
shows the same type of triangles as you can see. So the nana is working well. It's just I also
still need to get used to working with
it and making sure that everything is
working correctly. And I'm sure I can figure
out stuff like that. Okay, perfect. Let's
save our scene, and let's call our basic
lighting over here, done, and just say like, Okay, this is going to be our
first lighting pass. Now, what we'll be
doing in next chapter is we will go ahead
and we will do our first material pass where we will go in and set up
most of our materials, do some balancing, and then
later on if we have time, we will also go back and
forth a little bit and just our general
improvements to our model. Because right now, yeah, we
have some nasty improvements. There's one thing over
here. I see some grain. It could be that this grain
is in a post process volume. Let's go down here and go to image effects. Oh, no, it's not. In that case, this is probably like an artifact from
the real time lighting, which I'm sure that it will go away most likely when
we create our materials. In any case, save your scene and let's continue
to next chapter.
36. 35 Doing Our Material Pass Part1: Okay, so now let's go ahead and get started by adding
our materials. Now, I do feel like that the entire environment can
be a little bit lighter, for now the way that I'm
going to do that is I'm going to go ahead and
go into my volumes. And in your global
post process volume, there is something
called exposure, and in here, you have a minimum
and maximum brightness. I'm just going to temporarily
set this to like 1.5 or maybe like one.
Here we're going. We'll just make everything
a little bit brighter, just because this scene
is also very bright. And of course, it's hard to get lighting when we don't
have any materials, but it's just like the basics. Okay, so we're going to get
started with our materials. Now, we already have a floor over here, and for our floor, if we just go ahead and open up our door floor and our
window floor over here, we can get started by
adding these pieces. Okay. My view. Okay, there we go. My view froze for some reason. In any case, let's go
into your materials. And because we already
created our floor A, we should be able to go in
here and that's highlight. Okay? Yeah, as I said
before, does not work. In that case, we just need to guess and we guess correctly. So this is floor A. Let's save a scene and then over here. You'll see this time I
guessed incorrectly. This will be floor B over here. Okay, as you can see, the
norm map is quite strong and we need to increase our tiling and all
the bunch of stuff, but that's all part
of the balancing. Now, next to this, we also
want to go you'll see, oh, the reflections are
looking really solid. That looks very similar to
what we have over here. But in any case, next to this, also for the sites we're
going to go for home. So select your home and go ahead and just add this over
here and just press save. And same over here, save. There we go see, so
then we get our chrome. Our chrome is a little bit dark, so that's something that
we also need to work on. But it's just to get the basics. Okay, so that is our floors. We still need to
do these pieces. Let's just go ahead and
just add our chob to our metal handles and our poles. Now we still need to
also go do masks. There's a bunch of stuff
you need to do, basically. That's the general idea
always with the viamins. There's still a bunch of
stuff you need to do, but slowly it will
come together. So here, for example, I'm
going to art on my home, and now you can
see that the home, it looks pretty good, like it
has some nice reflections, and you can see
over here that it has some dullness
in the reflections. So all that stuff
is pretty good. Now it's just a
matter of later on, making sure that it is light enough and that it all
just looks correct. We are gonna Wow, I don't know what
came out of my mouth. We are gonna go ahead and let's do the
advertisement modules, which already have the light. And I just want to make like I think I'm just going
to make it home, but I might turn and
make this shiny metal. Oh, by the way, I need to change those stops to be dull metal. I completely forgot, right
now, it's just home. So this one, go to materials, click on home, and for now we can just go
ahead and add this. And then, of course, we will have advertisements
on it later on. But once we have
these materials, we are going to go ahead
and balance them a bit. And then the cool thing is
that we can then properly, do some lighting and
then at the end, we can just slap on our advertisements and
everything really liquical. I still need to add, like
windows and stuff like that. Back while the back
wall will most likely have a few materials
that are not correct yet, so I need to have a look. Oh, at this point,
it's really annoying that I cannot just isolate that. I'm sure that that is a bug. Like, I'm sure Oh, no, wait, I guess it makes sense because Nanite turns this into
one big chunk of mesh, so I guess it makes sense
that you cannot isolate that. It just really annoying because
now I need to find out. I guess if you just drag in a material that is very obvious, you will be able to know
which material that is. So this one is home. I don't
know why these are separate. For now, just drag it on, but we will change
that later on. The next one, this one
is also home, yes. And then we have rubber, which we have not created yet, and we have plastic, which we are going to go ahead
and just add on this. That is interesting. Okay,
so this is the one where we need to start working on a few things because right now it's not looking very good. It is a nice shot to
see how the home works. Ooh. See that? That is Nant at work.
That is not too good. I'm gonna look in my
settings for that stuff. Okay, in any case, we need to go into Maya, and we need to change some things. Let's go into our back wall. First things first. So over here is our back wall, and I wish I did like the material selection
before this. If I have look. So I'm going to make back
wall probably like stripes. I think it will look cool if
we just do that as stripes. So I'm going to make
these side stripes. This and this will just be home. This one and this
one will be plastic, and then the top will
also be plastic. So if that is the plan,
we are going to go ahead and start by just right click
Assign existing material, and this one is just
going to be metal stripes on this one. Assign existing material,
metal stripes on this one. So these few bits
will stay home. I'm just going to
temporarily press height on all of these pieces, and the reason I'm doing that
is so that I can quickly select all of the bottom bolts, and I can also go ahead
and go in here and just make those Home. Where are you? Plain metal,
I think I called it. Oh, and I can just
press combine. That will make it
easier for later on. How is the handle doing? I'm going to make the
handle Dull metal. Let's go over here, assign
existing material, dull metal. This one is going to be plastic. This one and this
one is also plastic. So let's just double select. Assign existing
material, plastic. Let's show, and now all we need to do is
we need to go in here. And if we just select,
not by soft select, but select by angle, it should
make things a bit easier. If I go in here and I do
select my angle of five, double check my work that
works, Yeah, it does. And then, actually do I need
to go? No, no, that's fine. Yes, by five, and this is
all going to be metal. So existing material that's
going to be plastic. It should be added, and maybe else we
need to separate it. I am always mistaken
how Maya export it. So inside of Mx, you can just add multiple
materials onto one mesh. However, I can vaguely
remember me doing this, and I can vaguely
remember that in Maya, it does not work this way,
and I might just be confused, but we'll see soon enough because we're going
to export this. Because maybe the
problem is because it is Nanite that it does not read
it or something like that, I don't know. We'll
see soon enough. Let's just right click reimport our Bwill and then we
will see how it works. You still need to change the plastic color
and everything. Just press Reset to
FBX. Oh, no, see? Yeah, so that does
work totally fine. Let's open it up. And now let's see what we
can add to this. So the first one, if I just drag it in.
Okay, that's home. That's correct. The second
one is set to rubber. I still I will need
to make a rubber, but oh, no, wait. Actually, I can use the plastic. I can duplicate the plastic
and call it a rubber. And then I can just go in here and I can make the base color. I can make it quite dark. And then in your
roughness amount, just set your
roughness dollar, see? And then it instantly
just feels like rubber. So if we set it to, like, two, there we go. Now, we have rubber because
that was the plan after all. So we have some rubber, which is only being used like
the tiny bit here, which you cannot
even see, but again, we have our metal strips. I keep trying to press late
because I'm so used to that. Metal stripes over here. We need to rotate
our UVs for that. However, because we are Oh,
no, wait, we can do that. We can just rotate the
unwrap and redo that. And else we can always rotate
in here if we need it. We have our yellow
plastic and we have a dull metal over here. Okay, so those are the bases. Now, as I said before,
this material over here, we need to rotate and we need to make sure that it
is perfectly straight. So if we go in here and
just select everything, try it again, select everything. So yeah, for this one, over here, strike that one out, and we have this one over here. Let's strike that one out also. I'm going to get started
by doing an angle select, and then in my UV toke,
I'm going to press cut. Oh, sorry, not cut. I'm going to press
Create UV shell. And what that will do is it
will just separate it into its own UV shell because I'm hoping that everything will look a little bit more straight. If I'm doing that. There we go. Create UV shell. I'm hoping that if
I then relax this, that it will be a little
bit more straight. So if I now press unfold, not as straight as I was hoping. That is a little bit
of a tricky one, like how there are multiple ways that we
can approach this stuff. One of them is cutting this up into smaller little pieces. Another one is by using a world space material to make sure that they
are always straight, but then we get
problems with our mask. I think in this case,
if I have this, I think I'm just going to cut
it up into smaller pieces. Let's turn off the
selection constraint. Let's say that we just double click on this line
and we press cut. Let's see if this piece, if I now press
unfold on it, here, this now becomes a really
straight piece that I can use. And if I press unfold on this one, that is
straight enough. Let's do this trick. Let's
also place a cut here. There we go. And then it's
just a matter of us here. So unfold and also here, unfold. Now, having that done, these pieces they don't need to have very specific orientation. I'm going to go ahead and select these and I'm going to go to modify and press orient shells to make sure that
they are straight. And then if I go to transform, I'm going to press 90
degrees on this one. This one is, this one also
needs to be 90 degrees. This one they should all need
to be 90 degrees, actually. There we go. And now we just need to kind of place
this all together again. So what I'm going to do is
I'm going to go ahead and I'm just doing some manual
UVN wrapping over here. Go to place that
piece over there. These pieces are
the most important, so let's go ahead and place one here. Place another one here. We might need to later on
duplicate our material because the tiling will
be different than the striped tiling on our door, which is no problem at all. It's a no biggie.
We have this one. Wait, let's first of all, just
grab these larger pieces. Let's see. You fit in here. Everything should technically
still fit together. Just depends how
I'm saving this. This one I can rotate 90 degrees and then just rotate it a tiny bit more,
okay? We got those. And now if we go ahead and let's go ahead and let's
go UV shell selection. Select all of these UV
shells and just kind of move them down over here. And then if I move this up, scale it down a little bit
just so that it fits in here. Just try to do it as
little as possible. There we go. UVs. Done. Okay. Go back
to object mode. Save scene. Anything
else while I'm here? No, I don't think so. The home is way too intense, but that's something
we can work on. File Export Selection
back wall over here. There we go. Okay,
so that's exported. And now we can go ahead
and we can just do reimport and I'll
pass the video. Perfect. Okay, we got
some stripes, people. Only thing is that over
here, we have a mismatch, which is because we
undid that selecting. That mismatch, we
can just go ahead and manually by hand,
we can fix that. And we can do that
by going here, quickly going back into our UVNwp see it was
over here, right? Which means that this face. Okay, so the face
on this side and on that side need to
be closer together. The easiest way I guess
for this is to move this temporarily out of the
way, this one also, and to instead move this over here because I don't
think I want to merge, we can try and merge it
together again by selecting, for example, these
shapes over here. Oh, I need to do manual
selection on this, but yeah, I'm not I'm a
bit worried about that, that it will flow
over strangely. So if I go ahead and
if I select this, the annoying thing is that
then what it will try to do is also try to
select those pieces. So just hold Contol and the
select these areas over here. Go into our UV toolkit, and you can use the
Zu option over here. I probably say that one. But if I do that, oh, that's A&B This one over here. Come on, people,
stitch together, then. There we go, stitch
together. That was the one. And then it will have created a little bit of like
a problem over here. But the reason why I
need to be so careful is because I want to keep
these pieces straight. So maybe only unfold these few faces over here so
that the problem is gone. Yeah. So this transition,
we will unfold, and hopefully that will keep
everything straight enough so that I don't need to
worry about this so much. Let's go back to UV
shell selection and just place this in here. Let's go ahead and
place this one probably like here
in the corner. Over here. Maybe it actually might be easier if I place this one
here. I know about that. Don't worry. Let's
move this over here, and then this one can maybe just if I scale
down a little bit, just fit in here. Which means we can then
move this one down, place this one here, and
that should do the trick. Okay, so that should give me
hopefully a better result. We'll see if it looks warped. We can technically also look in here because I
think I import it. So if I go to my shapes, yeah, here, that looks
straight enough for me, so I'm not too
worried about that. Okay. Final export, hopefully. Back while safe. Okay. And in wel
just press reimport. Yeah, that's basically
what we're going to do. We're just going to fiddle
around with things. We might later on just change some of the
materials again, but for now it's just about
doing this kind of stuff. So the next one would
be our ceiling, and our ceiling is just
going to be plastic. So for now, I'm just going
to assign my yellow plastic, and I might later on make
a specific material. I know for sure I will later make a specific
material, by the way. But for now I just need
something in here. Chairs, I cannot do yet. The door the door is
also quite a big one. So let's go ahead
and have a look. And let's see. So the first
one is set to dull metal. I'm sorry if you
heard that sound. That was station. I accidentally
still had it open. It looks like that this
actually needs to be plastic. And then this one needs
to be probably home. Yeah, home. And then that one is going to be a
rubber. There we go. So for now, that is fine. Yeah, we definitely
need to work on the home because it's
a bit too shiny. But I know, it does look sort of cool.
So that's our door. Sorry, the floor
we've already done, and the floor is
actually quite spot on. It's just that the tiling is really bad, but that's about it. Those pieces, the small assets, we don't have anything yet, so all we have left
is our window A and our Window A sign cover. So Window A seems to
be a mix of let's see. So what's the mix of?
One of them is rubber. That one is correct. One of them is going to be dull metal, which is the top one, and the other one is going to be yellow plastic or plastic
yellow, which is that one. And then the window cover is for now just
going to be plastic, and then later on we
will have advertisements in there. There we go. So yeah, the dull
metal, as you can see, that often just works a little bit better with
these kind of pieces. I can see over here
that this is not hypol. So that's something that I'm
also going to quickly fix. So if I go to my window A, I must have just forgotten, if I just turn on my
wire frame, yeah, here. So if I press three and then convert this, three, convert. So yeah, you can see quite a big difference
between the two now. I think that's it.
I think we can now go ahead and Oh, whoops, those bolts, you
guys need to go to the back wall over here. And on these pieces, we
can go ahead and export, and this is going to
be Window A over here. And then we can just go ahead
and reimport this in here. And it should almost be done. There we go. Okay. And now
that feels nice and hypoly. Perfect. So we got our
very bases done over here. What we're going to do in
the next chapter is we can, first of all, like,
balance some teals. One of the obvious
ones is setting a yellow plastic to actually
be like a bit more yellow, like you can see over here,
so something like that. We're going to fix
tiling problems and just like work on the chrome and everything, all
that kind of stuff. I think our lighting
for now is pretty good to just get started with. We might want to just make it a bit more intense by going into light A and setting the intensity to like
five or something, or maybe like three that
will just blow it out a bit. And then, of course, we do
need to do a post effect pass, and we need to create all of
these other extra materials. But for now, it's a solid start. Let's say it like that.
So let's save your scene, and let's continue with
those other things later on.
37. 36 Doing Our Material Pass Part2: Okay, so let's go
ahead and continue. What I want to do in
this chapter is I want to just focus on getting the materials to look a lot better with the scene
that we have right now. We're just going to
take it one by one. So I'm going to get
started, for example, with the floor over here. And for the floor,
I actually think. So the prom that we have now,
the reflections are nice. Those are good, but I
feel like the tiling, you can see here that
it is repetitive a lot, and I don't
really like that. So what I'm going to
do is okay, substance. I'm going to open up
substance designer, and we need to change the
tiling inside of our scene. So, let me just go
ahead and open up our metro floor over here. Here we go. Turns
out I opened up to one substance version.
So let's see. The problems that
we have right now are that the normap
is too repetitive, and I feel like it's also like my roughness dirt is being
too repellitive right now. And these bits over here,
they are too large. So we need to try and
balance this out. If I have a look at my floor, Okay, tiling is set to five. If I set my tiling to two, or maybe sorry, that's
three to two over here. And if I then make these
dots a little bit smaller, I think that will give me a
better effect here or see. So that's already
a better effect. So if we do that
and now if we go ahead and we go in
here and let's see. So first for on this one. Can I maybe I can of course,
make this one bigger. The only problem that
we have with this if we want to make it
bigger by, for example, adding a transform to D
and setting it to X two, is it breaks the tiling.
But don't worry about that. You can always go in and you can add something called and make it tile photo gray
scale over here, which will basically make
it automatically tile. However, I think
it works better if we do it before we add it to our H Scrum scan like this.
So basically have this. Let's go ahead and go into
you might want to just play around with
your setting to make your warping look a
little bit better. Here see, you can see, if you play around with
your mask precision, you can just make
it big or small. And I think that I
just now need to introduce a few more
pieces like this. Here, I think that will work. And then we had our roughness for which we have
this piece over here. And if I just go
ahead and let's copy the transform and make a tile photo grayscale
also over here. That's the only way
that we can really make something large. So we can
do something like this. It's also a bit more
uniform because yeah, scaling stuff up, it will
often just break your tiling. So let's go ahead and
try something like this. Okay? Automatic exports
is still turned on. So now if we go back
to real, go to floor, we can just select
our floor piece or a floor or textures, right click and press reimport. So that's already wanting. So that's pretty good. Looks like that we do have
over here like our lines, but our lines are
not continuing, and this is just
a UVanra problem. Before I do that, however,
I just want to make those little dots a
little bit smaller. So if we go ahead
and go in here into our dart five and set
the scale to two, it should make everything
a lot smaller. And if I re import this
again, Okay, so let's go tea. So getting this scene fixed
is actually quite annoying, but I know a very easy
way that we can do it. A way that works creative we just have flat areas like this. It will not work as well for, like, the walls and everything, but it's basically
by using something called screen space UVs
or world space UVs. Sometimes you also
call it like that. Basically what it means is we can give an option
in our material to not technically use the
UVs that we have created. We do need to use UVs because we need them
to actually later on, create dirt masks
and everything. But basically what
we can say is, Okay, for our base color,
normal and roughness, I only want you to use
a screen space UV, and that will mean that it will just basically project
the map on here. I think it's easier
if I show you. The nice thing about
that is because the UV is basically projected
over the entire world, meaning that it does
not see sems like this. The way that we
can do this is we can go into our materials. If we just go into
our scene master, over here we have our UV. Now, there is what
was it called World aligned World align texture
and world align normal. Let's just open
that up over here. And then it does require
a few things over here. So with this, we can do
this almost like a switch. The first thing that it
requires is a texture object. Right now, these are
parameters to these. To turn these into
texture objects, it does mean that we cannot
actually control the UV, but we can do it in here. By the way, if we cannot control the UV, then in that case, we most likely need to yeah, because I don't
think there's a way that I can switch this around. So then I would need to
duplicate my material. I think I need to create
a new material, people, just because a texture object, it will basically not allow
you to add these UVs. I was thinking of
just using, like, a switch to turn it on and off, but I do not think that I
can specifically do that. Now, I have no idea why it's so slow to just save one
material, but okay. Finally, it's done. Okay, so just duplicate your
scene master this time and just call it S
master underscore world UV. And let's open this one
up. Okay, so it does mean that we probably need to do some copy pasting sometimes. But basically with
this one, if we add a world aligned texture for our textures and a world aligned normal for
our normal map. This basically oh,
wait, this one also. This basically how it works. You have your parameter. You need to right click and
you need to go ahead and oh, I don't think I think we need
to re input this. 1 second. We need to re input these
texts because else they cannot read because we need to do
a very specific function. So if we go to our floor, input
our base floor over here, so you have your bare texture. You then right click and you convert this to a
texture object. See? This mode was away
when we first imported. Once you've converted
this to texture object, then you can go ahead and convert this to parameter
and call it like base color to base
underscore color over here. You basically throw
this into your texture. I don't know why the
name has changed. That is weird. There must be
a little bag or something, that the name changes as
soon as you copy paste, but it should not
make a difference. Okay, so we have a texture, and then you want to
basically plug in your XYZ texture back into
whatever slot you want. And the only one
that we are focused on is the texacise later on. And for text sise
we are going to use our original tiling. So over here, I
cannot convert No, I cannot convert these,
so I need to just quickly redirect those in here. So we have a norm map, and we have our roughness map. So right click, convert the
texture object, right click, convert the perimeter,
Roughness map. And there is a little back right now that
when you do that, for some reason, it does not always assign the
correct material. I will show you how to
fix that after this. So right click texture
object, right, click parameter,
normal underscore map. So yeah, the way that
you can fix this is simply select
your roughness map. Go in here and select
your roughness and press the arrow button. That just comes with narangive. It's an early access, so there are still small
problems like that. But so far, most of the problems they are like
work rounds and easy fixes. Now for our tiling,
the tiling of this is a lot smaller because
it's over the entire world. So it would most likely
be something like 0.05 to get started with, you simply want
to drag this into your texture size over here. So the cool thing is that not everything has to abide by
this waterline texture. So later on when we add
our mask functions, we can use our original
UVs for our masks. So for now, we can go
ahead and this is XYZ, and this one is also the XYZ
texture into our normal. So that should do the trick. Double check, do not forget anything? No, I don't think so. So let's go ahead and save this. And the way that we
can replace this is we can simply
go to our floor. And then if we just
make it a bit smaller, we can go in and just drag
in at the very bottom our floor master or scene
master world UV like this. And now it should give us
a proper UV. Here we go. It's way too small, but
we can go ahead and we can go in our tiling and
set it back to 0.05. One, two? Oh, no, sorry, we need to go in
the opposite direction. So 100. There we go, see? Now the tiling is
working a lot better. The only thing is that line.
I cannot find the line. Let's do 150. No,
where's my nor map line. I like that one. First of all, let's focus on tiling. 100? 80 maybe. 50 then?
Oh, what am I doing? I need to go bigger, 300. So I keep forgetting that I need to go bigger instead of smaller. So 300, maybe 250 seems
to be working quite wide. Now that no map line,
it should show up. So I'm not sure I
cannot find it anymore. I'm not sure exactly
where it is. So let's just try and find it. Okay, so no map it
uses my tiling. That's no problem. Yeah, we should not need to, like, input any of these nodes. So that seems fine.
You can also go into your norm map
and you can check it. One thing that we can
do is we can just increase it to see
if that is working. The way that you can control the strength of
your norm map is by adding a node that's called
a flatten normal node. And in this note, you can
plug in your normal and then plug this into
the normal slot, and then you can press SClick to add the scale
parameter that you will call normal
unscore strength, and just leave this at zero by default and just set
this to flatness. So doing this way, we
can basically control this value to change the
strength of our normal. This can actually
be a handy feature also the art to our other scene. So if we now open
up our floor again, we can give this go, so
we have normal strength. Often, we need to go into minus in order to
get that strength. And I can see that
it doesn't seem to add any nor map detail in here. You have to do five or minus
five, see, nothing changes. So that tells me that there is no proper nor map going
on for some reason. Now, personally,
I'm not sure why, so what I will need
to do because this should work totally
fine texture size. Yeah, so I'm going to
have a look online to see if I can find the problem because this is a
little bit strange. Okay, so I found the fix. So now if I go, for example, to my normal and I set it lower, you can see that now
we start to get a nop. It was a bit of a strange fix. It looks like it's a bug
within Unreal engine five or, like, something that's not
working completely fine. The way I fix it
is I will redo it. I added a static bool over
here, and I set it to True. And I plugged this
into worldspace. So that's the one thing I did. And then I went into
my material note. I went down to material to this little drop down over
here that you can see under your material and then turn off your tangent
space normal. So it will be turned
on. Just turn it off, and that seems to do the trick. I'm not exactly sure why, but then it adds a norm map. It does also me
that now we can see over here our nor map line, and our nor map is a
little bit strong, but that's because
I said it to -16. So now, the only problem that
we have is that this line, it is not in the
right direction. Now, for something like this, we could go in and I could make a very
complicated shader. But because I know that all of our materials
are vertical, what I can also do technically
is I can literally just go into my world Outliner, select everything,
and simply go ahead and with rotation just
rotate it nine degrees. E. So it's like, do you where you
want to spend the effort of creating all of the text orself when
you can literally just do this and
be done with it. So we have this. Now we can also
see that our line is a little bit too
thick and well, our norm map is also
a bit too strong. So all I'm going to do
now is I'm just going to go into my floor A over here. I'm going to get
started by setting this norm map a whole
lot less strong. So let's start by zero. Maybe like minus
one would be nice, just to make it a bit stronger. And then my tiling, I'm going to set it back to 200 maybe. Actually, you can actually go in here. You can
fix your tiling. And based upon how
you set your tiling, this will also, of course,
control where your line is. And now you can, by the way,
also see remember how we did the imperfections in the lines that is not perfectly straight. Now you can see the power of it. So let's just leave it like something like this
to get started with. I think at this point, we are pretty good
with our floor. The only thing I would
maybe do is just make my base color a little bit more intense over
here and then reexput this. And then if we go back,
just reimport our floor. Here, I will just show those white spots
a little bit better, which I think will
look a bit nicer. And then for, what we
can do is we can go into our floor and we can just
do some general changes to our roughness map
to see if we can maybe add some to
improve it a bit. So I feel like setting
my roughness maybe a little bit stronger and then
going in my final texture, and then in here, toning
down this roughness map. So yeah, this was our guessing work when
we were in Mama's heat. So now we can really see how
it is behaving and we got quite close to it to it.
I can't speak anymore. I will take a break
after this because I always get it when I
tugged along here. So my roughness is now a
little bit less strong, but it's still
there, definitely. And now I can just
play around with my roughness amount to get
roughly the same effect. It's 0.75, the same
effects that we have on our reference over here, see? So we got that glare, and now we kind of get
the same glare over here. Okay, that's perfect. It
took a little bit long, but at least we now have
a nice looking floor. You can go ahead and you
can, like, once again, just mess around with, like, normal map a bit more because the tiling
is still quite strong, so you might want to go in here. Like maybe tone down the
position a little bit more. And just in general, set the transform maybe
to X two again, just to make everything a little bit smaller, all
that kind of stuff. And we will go ahead and just do another revision of
this a little bit later. But here you can see that already, improves
it a little bit. And maybe go in
here and maybe set your non map a little
bit less strong. So let's do like 0.2,
something like that. Reimport. And this is just norm for these bits C. There you go. Okay, so that's already
looking quite nice. Now, what we'll do is
in the next chapter, because we spent a
bit long on this, I will go ahead and I will start working on the home
because the home is, for example, looking nice here, but it's not looking
nice over here. So that's something that we can work on in the next chapter.
38. 37 Polishing Our Materials Part2: Okay, so now that our floor
is pretty much spot on, we're now going to go ahead and start working on,
let's say, a door. So over here, we do have
the home down here, and I think this would actually
be the best default home. So if we have a look, we can see that it's a
little bit lighter and a little bit more dull. So what I want to
do is I want to set my default home material to basically match this
stuff over here. So if we have a
look at our home. Okay, let's see. Of course, lighting does change a lot, but if I'm going to
go ahead and let's say let set my roughness
mount a bit duller, Oh, does that even do anything? Oh, yeah, there we go.
There it does something. Okay, let's turn it back,
back up until I got, like, bits of shine. Let's do 1.4 or
1.5. Let's do 1.5. Okay. Now, it does feel
a little bit dark. You might be tempted
to just tone down your metallic because it makes things a
little bit lighter, but do not do that because then it would not be PBR acrid, because something is metallic or it's not metallic,
like I said before. Let's see, tiling. If I
set my tiling to one, will that work
with my roughness? One, two, three, maybe even ten. Now, I only looking at
this part over here. Okay. Let's say I think around
two should be fine. Sometimes there is a seam here. This is because we cannot
get around that seam, but what you can always
do is just rotate it so that it's not in
the way of the camera. Okay, so we have
that set to two. Let's see. What else can we do? So we will add some
roughnes but we will add that in our actual scene. Oh, yeah, we were going
to go ahead and, like, separate the tops and probably also the bottoms
from the actual pole. And tax you out quite a bit. Let's open up Maya because we need to also change
this material anyway, so we need to be in Maya anyway. Okay, here we go.
I open up Maya. So we were going
to go ahead and go into our metal handles. Yeah, let's do this one first. And I was just going to set
most of this to dull metal. Things easier if I just
select it by hand. So these ones, not
the actual bolts. I think I want to make I want
to keep the bolts shiny, but I'm not sure yet, depends on how it looks because
technically, it would not be logical for
the bolts to still be home, while the rest of it is dull
metal, but we will see. Sometimes I am willing to forgo logic because
it looks cooler. So assign existing
material dull metal. And also over here,
for this one, we need to go ahead
and we need to select. If you have trouble
seeing what you're doing, you can always go
and show and you can all the way down turn
of selection highlighting. This way it is sort of easier, I guess, to see
what you're doing. I can also see that there's,
like, a little bit of, like, warping going on, which most likely has to
do with like UVs. So that's something
to keep in mind. And else we just need to press a relax again after
we've done a hypol. That's pretty much the
only way to solve it. The only thing is
that it's a pain to do cresc shifte by the way, because your system is a lot slower when working
with hypoly measures. Darn metal. There we go. Okay, so let's try that out. So we got this one over here. Let's turn on selection
highlighting again because else I'm not 100% sure
that I have it selected. I export selection,
and for some reason, it does not remember
my file. There we go. Export. Tune reel. FBX, metal handle. No, sorry, metal handle metal
center pole. There we go. And this one is going to
be the metal handles. There we go. That
should do the trick. So let's get started
with that one because it will most likely complain to us and want to
us to reset the materials. So let's go ahead and
select both of them. Right click and press reimport.
Just give it a second. Shouldn't take too long.
And then what it will tell us is we need to. There we go. Reset to FBX. Okay. And then just open it up and just
throw in a dull metal. Over here, and over here. Perfect. So now we have our dull metal and we
have our actual Oh, it looks like it also
forgot that I was home. So let's just quickly.
I did not expect that. I thought that it
would still remember the old one. There we go. Home with dull metal. In a really strong shadow, which happens to be in
an annoying location. But for the rest, that
looks pretty good. So what we can do now is we can folks and have
a look at these, and we're going to go for more
of like a look like this. And if I look at that one, go to my metal doll. I can go in here and I can, like, mess around a bit
with my roughness or maybe. Yeah, no, I don't want to set this metallic because then
I will break my own rule. I think I'm going to go ahead and change the base
color later on. So for now, let's
set the roughness to 1.5 maybe just to make it a
little bit more duller even. And I I'm going to make my
base color a little bit lighter later on so that I can over here control the color. So let's keep that in mind. For the rest, I guess, the rest will come down to lighting
when it comes to, like, this home in terms of, like, making it look
lighter and everything. There is a lightness, although it does not
very often work, but in your reflection captures, if you select them, you do
have a brightness over here. And if you set that to two, this time, once again,
it does not work. Sometimes, at least in previous versions,
when you do this, this will brighten
up your scene, but it looks like this is
not the case right now. In that case, we just need
to rely on a bunch of other things which we'll do
during our lighting scene. Now, for our door over
here, so our door, we're going to add a specific b to it that
is a little bit duller. We have these types, and then
I want to go in here first. Go to my door A. Oh, so these are metal stripes. So I must have just given it
a warm material that I gave the plastic material
because I was not thinking because this is supposed to be metal
stripes material. There we go. Yeah, that's
more what I wanted. Okay, so having that, our metal stripes are
the same everywhere. So what I can do is
I can already edit the bare metal stripes material over here and let's have a look. If I go to my roughness, so the shine is pretty intense. The shine is also pretty
intense in here, to be honest. But, of course, I need to
game a fight a little bit. I cannot make it so intense that you cannot see what
you're doing anymore. So let's set it to 1.2 in my roughness
amount for the tiling, three, four, I think
four for the tiling. So we make it a
little bit larger and should be good because I don't think we need to do
anything on a base color. Or base color will make
it a little bit darker. And I can see that it is
a little bit darker in here compared to the rest
of our chrome metal. So let's set it to like this. And then what we'll
do is we will make a special duplicate or a home and just call it
home underscore door. Underscore A because we will later on just
have a mask on this. So we will later need to add specific materials to
everything, most likely. But if I have a look,
so in our door, you can see that your
door metal lifting. It's a xy. It almost feels
like it has multiple metals. Let's so it feels like the door says
like a brushed metal. Look, we like the center. That's pretty good.
And then this still has the home look. So let's do that. Let's
make some changes to this. I'm gonna get started. So those are all home,
that is correct. And up here, they
will also be home. So this is home door. I can already go
ahead and just art this and then just
balance this out. So home door and then if
I double click on it, all I want to do with this
one is I just want to make my roughness to 1.8 to make
it a little bit duller. There we go. So it's just
that this is not too intense. The brush metal, of course, we need to create the brush metal. And then inside of that, we will have a lighter
plane bare metal or dull metal,
sorry, I should say. So if we go in here, our focus
is going to be on these, so let's just press isolate.'s
don of our textured view. I'm going to get
started by turning the entire thing to actually, let's see what I need to
see what is easier for me to select the inside here or for me to select the outside. I think it's easier for
me to select the outside. So I'm just going
to go ahead and I'm going to turn the entire
thing except for, of course, the rubber and assign existing
material and just make it dull metal because those edges are a
little bit more annoying to select over here, right click, assign existing
material dull metal. And now what I want to do
is I want to go in here. Let's turn on selection
constraints on angle of five and let's see, does this nicely guide
other way around? It does. That is my lucky day, but it needs to start
at the center point. So let's do 15 in the angle. And now carefully go in, and I need to select all of this stuff. I know
it's a bit of pain. That's the thing with working
with high poly meshes, but luckily we
have angle select. So we're going to select
all of this stuff nicely, and then this will all
be brushed metal for which we are just going
to create it inside the substance because
it's not that special, just a dull metal with like
a brushed pattern on it. And then we just move the roughness a
little bit around to get exactly what you want. Let's go ahead and go
to show in turn of our selection highlights because sometimes in these cases, that's a little bit
easier for us to see. Okay, so I'm fine with that. No, just go ahead and Also, of course, do same over here. Press F because it did not
allow me to properly rotate. Now, I know that I
duplicated my door over. I guess that I
could do that again to save a little bit of time compared to doing this to the exact exactly same
to the other door. Let's first just
make sure that this all works. Okay, great. So free one right click, assign favorite material
Lambert and just go ahead and call Brushed underscore metal. And now we will see because most likely
with brushed metal, I need to have a
specific direction, so what you will
see is that we will most likely need to
change our UVs again. But for now, so we got this. I just want to make sure, turn off my text for
you. So this door. Okay, so this door is duplicate
of that, so that's fine. And I can already see
that the UVs are not correct. But don't
worry about it. All I care about now is to go in and I'm going to go ahead and I'm going to
just duplicate this. Let's just press reset and
turn off my angle constraints. Rotate this 180, move this exactly back into
this other one's position. We can probably go and turn on selection
highlighting now. Maybe zoom in a little bit to do a bit more precise
work. There we go. And now press height,
H, delete the old one, and then go ahead and
so I have this bag, remember that I need to
re audit and press Show. And now if we go outside
of isolation mode, that should do the twig. So let's go ahead and
export all of this. Door A. There we go. Starting to look pretty
good, hopefully. Once we've done
that stuff, yeah, I think that will look
quite nice because this material over here
already looks really nice. The home actually
worked out really well. So I just This is the
most important thing. The materials might be simple, but they need to be spot on
when we are working on them. So everything needs
to be accurate. The lighting needs
to be realistic from real life and
everything just to make sure that also the material responses
are exactly the same. And yeah, for lighting, we still need to work on it. But for now, let's open it up. Let's have a look. So we
have our metal stripes. That one worked. We
have our plain metal, which will most
likely be our chrome. Yeah, that one worked. We have our rubber, which is a rubber. Then we have our dull metal, which is like our metal dull, but it will need to be adjusted, and then we have
our brushed metal. So let's for now save sin and let's go at an open
up substance designer. And here we are
inside of the metal. And then the first thing
that we're going to do is for our dull metal, this is basically the control for the color for doll metal. Let's add a prepasin
art HSL node, which basically allows
us to just push the lightness up quite
a bit like this. So that is it for our doll metal and for our brushed metal, we can go ahead and we can add a switch grayscull in here, set this default to false, expose this graph
and just call it like brushed underscore metal. Copy this into your label, set it to false by
default, and press okay. And your brush metal, it
will basically just be this. It will be a blend. That has
the blend of the switch, and then it has an
endostropic noise, which happens to be exactly
like the brush metal. And then if you turn on
Y amount by resolution, it will make it a lot thinner. And then you can choose
basically how often you want your brush metal
to happen on your X amount. If you set it slower,
you get this effect. So we are going to go
for quite a strong one. Let's go for eight. There we go. And you basically
throw that into the top. You can choose or you can
do a copy with an obesity, or you can maybe try like
a multiply or like an art. I want to probably
go for like an art, so I'm going to set
the opacity quite low, and I plug this into the top. Now at this point, the
first thing I'm going to do is I'm going
to set my preset. Input PemtersPreset. Let's go to our dull
metal preset over here. And with our dull metal preset, let's double click
on here because else I might get confused. Let's see. Dull metal preset,
yes, that's fine. Let's export this. Oh, it happens to already be
in our dull metal, so that's good. So let's export. And then what I'm going to do is brushed metal
will be like chrome. So let's click on Chrome. Let's call this brushed
metal and press new. And this one basically has our brushed metal turned to true. Roughness dirt, we can, like, control how much you
want. I don't want too much. And then my roughness amount, I want to set this a little bit lighter so that it's
not as intense. Yeah, we can, play around
to the roughness dirt and everything to just get
everything looking nice. And then once that's
done, press update. Export export it to a new
folder that we'll call brushed. And in here, we can
select this folder, and we can go ahead and
we can export this, and it should do
the trick ready. As I said, very quick. So let's go textures. We're going to get started
with our dull metal and just re import our base color. There we go. So that works. So then our default dull metal that shadow is really annoying. It's really weird. I'm
going to fix it later on. Like, here, it's fine
because it's not as intense. But in any case, I'm going to go ahead and I'm going to
go to my base metal. And in my color, I'm
going to give this, like, a little bit of probably, like, a bluish tint and then
just tone this down. Maybe like a greenish tint. Now, let's do blue. Blue green, something
in this direction, like a baby blue tint, and then tone it down in here, something like
that that it feels a little bit off,
but in a good way. Maybe set my roughness back to let's do 1.2
for my roughness. And then what we're
going to do is we're going to duplicate
this and call it metal dull underscore door. And this one, it will basically contain
the metal dull door. So if we open up our door mesh, metal dull door goes
into metal dull. For now, let's just
drag it on here. And then what I can
do is with this one, I can have a look
at my reference, which you can see over here,
you can see it's a little bit more shiny and
it is a lot lighter. So and then later on what we can do is we can go
ahead and we can make it look even better. So the roughness is quite a
bit more shiny over here. Because I do want to make it
look like metal as to 0.4. Let's see. So, this is quite
metallic. I don't know. This one is not
considered metallic. If I set one, yeah, see, this one is not
considered metallic. So for now, let's do that and then first
import our brushed metal. So if we go at an art
brushed to our scene, and I'm just navigating
it on my other screen. So for the brush metal, we only need our
roughness to change. Yes, only our roughness. So it's just a roughness change. Double click on it. Okay?
So the brush pattern is there, sometimes a bit hards. And then it is basically a chrome door Brush nc metal, nscoed door. Let's try that. And then if
we go out and open up a door, there's more
materials than that. Then I can click on the
brush metal door and just assign that one
finally in here. Here you can see also the metals in a more neutral lighting. So you can see that then
it is working quite well. So if we now go ahead and
open up our brush metal door, material, I mean,
open up the material. Let's assign our brushed
metal roughness to this. Okay, then we can see
that this one is correct, but you can see that
there are two problems. One, turning this into
a hypols warped it, which we really cannot
have for this one. And two is that, yeah, it
does not look very nice. And what you can do is
then it's up to you to choose like we can just use the same technique
as the floor, or we can go ahead and, like, fix it inside of UVs. In this case, I think maybe
it would be cool if I just show you how
to fix it in UVs. And then for the rest
of the environment, I can be lazy and just use the material trick without
feeling bad about it. But in any case, so we
have this press floor. So if we now with our roughness, try to get it more
direction of that, which is like two maybe. Let's make it a little
bit more shiny. 2.2. Our base color
is pretty good. Maybe tone it down a little
bit, make it a bit darker. Yeah, something like that, for example, and
it's still metallic. So to fix this in our UVs, because we can still do it now. The only thing is that these
doors do reuse the UVs. So if I go ahead to
select everything, the select this one door, it should try it again with my UV window actually
open or does that. I almost feel like it has
room for the door yeah, it does have room for the door. So maybe we can just
make the doors separate. Let's just go ahead
and select everything. And if we have these pieces, let's go into UV shell
and just quickly drag out our UV
shells over here. We don't really need to
worry about the inside. So the only thing that
we need to do for this in order to fix it unless, of course, there needs to be very specific stuff done like we had
with the stripes. But in any case, for this, just go ahead
and press unfold. And then what you
can see is that it takes a lot longer because the unfold on a hypol it
just takes a lot longer. Now, I'm actually surprised how that it is
still quite quick, but I can assume that
especially on all the hardware, this might take very, very long. Now, I know that we need
to orient these shells. These two are already
oriented pretty well, so we can modify oriented shells just make sure that
they are straight. These ones, however, we
just need to rotate and then we can modify orient
shells again, like this. And now I guess that it might be easier if we just do
a manual placement. So we are still
in UV shell mode. So let's just move
this over here. And let's see. Oh, wow, we do not have a lot
of placement, now. Let's go ahead and let's make the placement
focus on the door. So we're going to drag
all of this stuff out temporarily over here. Then we can go ahead and we can move our doors
in and let's move them down here and try to place them quite
closely together. The rotation does
not really matter. Just make sure that they
are pretty car scale. Although, it looks
like that because they are tapering
off a little bit, if we rotate this 180, that might actually make it fit a little bit closer like that. You know, let's do the same
over here, so rotate 180. You can see that you can see that I am working a little
bit slower in my UV. This is just my PC being slower. And I am quite surprised because it should
not be this slow, I guess, for moving around. In any case, so we got this one. Now, the long pieces
are not really problem. This one over here is a problem. So this is our actual metal. So this one is actually
very important. What I'm going to do
is I'm just going to scale this down and
I'm going to use my tiling and set it up
a little bit later on. And then what I can
do for this one. So we have What is
this? This piece. I have no idea what
this piece even is. What are you? Turn off
selection highlights. Are you on the inside or I
have no idea what this is. Because I cannot see it,
so I'm tempted. Oh, wait. You are on the ins?
Okay, fair enough. Yeah. So you are on
the very inside there. But because you are on
the very inside there, I know that no one will
ever really see you. Even if the door would be open, it would be very
difficult to even see what's going on there
because it will be very dark. So what I'm going
to do is I'm just going to scale this
down because we don't need as many UV space for something
that we cannot see. And then all of these
pieces, it's just a matter of placing it all here. Nicely in the corner. Oh,
wow, we are way overtime. Sorry about that.
For these pieces, you can choose where
you want them. You can, for example,
rotate them and just drop them in
between the doors, which is one thing that
often the automated system, it cannot really see
these gaps as easily. These small gaps compared
to, of course, human eyes. Let's move this one here, and then we have a few
more pieces like this, which we can rotate and all move over here or we can
place it where our door is. Let's see. Let's place this one. Okay, that's a pain. Let's move this one here, in that case. Let's place this one over here because we have
like one long piece. And this long piece, I'm going to go ahead
and God, let's see. See if I can move it here. Try and move it
back very closely, and then just, like, grab
this stuff over here. Maybe scale down tiny
bit just so that it fits because it's quite an
annoying piece to work with. And then this really
long piece over here, just move it down even more. Yeah, this one we can scale. I think this is like
a messy leftover from something near
the rubber door, so I don't care too much about it because we have
another one over here. Look at that. It's like, insanely long, but
there is almost no UV. But it doesn't matter
because this is just a leftover
from automated UV, but it's not the
most important one because else it would
not be this thin. And then finally, we
have this one over here for which I can
go ahead and I know, just throw it in here or something like that,
scale it down a bit. Like that. Okay, finally.
So that is done. So I'm going to go ahead
and do one final export. Oh, and save my scene. A. There we go. Let's reimport that and let's see
how that all looks. And once that is done, we
will close off this chapter. And the next chapter,
it will just be continuing with
probably the window or something like that. But for now, let's reimport
this and just see how this looks because it should
give us a pretty good look. Maybe we want to make
the bottom home by the way. Like the bottom steps. Okay, so it still has
some warping going on. That is a little
bit unfortunate. In that case, we might
want to go ahead and turn on the window because I don't think there is
any warping here. No, it's always perfect. Okay, in that case,
it's just hypol. You could do it by just
cutting out these windows, for example, and then
relaxing them again. But that will cast a seam here, so then I can just
as well just do, like the world align stuff. But at least now you
know what we need to do. So that's basically the
techniques that we are going to use for all of
them, just so you know. And I will go ahead and
turn this bottom piece over here back to home. So
let's continue with that.
39. 38 Polishing Our Materials Part3: Okay, so let's continue. We left off with trying
to do the UVs over here, and I told you that you
can fix it most likely by just placing a cut because right now everything is one UV. However, another way
that we can fix it is by going into our home, sorry, brushed metal door in here and then to
replace our material, our seen master material with the seen master
world UV material, and then setting the tiling
to 200 or something. There we go, see. And that pretty much does the same trick. It also as some of that
really small norm map, but that's because we most
likely have not exposed it. So, okay, so 200
actually is pretty good. So let's leave it at
200 and looks like it, we just need to go into
our world master UV, blah blah blah, and I
need to go in here, and I need to convert this to parameter called
this normal map. And you can see
what happened here. I accidentally converted
it back to color, so keep that in mind, and this one is a
parameter, roughness. And here convert to Oh, you are a perempt or base color. Oh, the base color doesn't
show up because we, of course, have a
switch set to false. I forgot about that. So let's
go ahead and not save that. I mean, let's go ahead and
actually replace my material. That is my fault. Oh, God,
now I need to wait for this. Like I said before, I
will make you a promise. If this tutorial
course does well, I will buy one of those
really expensive SSD cards that write at 5,000
be per second. They cost like 400
euros per card. But when I have done that, loading and this type
of writing everything, it will be super, super fast. So it will all be instant because right now
I'm still rocking. This project currently is
saved on like an old HDD. So not even the new one. Okay, so basically
we assigned this. So yeah, the wide speeds
are simply very slow, and then even though
my PC might be fast, you can see that this stuff
then happens to be slow. You can speed this up if you
want to go by just placing the actual project
files on your SSD card. Unfortunately, my card,
because I'm also recording and my recording files
are hundreds of gigabytes, I don't have space. So I can unfortunately
not really do that. Without or making
everything a mess, but I think my C
drive is the only No, wait, I have two SSD cards, but my C drive is already at 20 gigabytes left
out of a terabyte. In any case, what I
was going to do here is I was going to
change this stuff. Let's turn on
selection constraints. Oops, I opened the door. Ah. That is a bit. Why are you not homing? Or are you like brush steel? That is strange, but it's also a pain for
me to Okay, fine. Let's go to my side view because it's a bit of a pain
for me to select this because it has an angled
slope. So let's do this. Hold control and double click
on your rubber. Let's see. So I now need to go in here, and I think I will end it at that point, because, of course, now that it is in hipoly it's a bit tricky to see
exactly where the end is going to be so this
is why you hear me signing because it is boring to do small
selections like this, and it's just a bit annoying. Ah, yeah, okay,
let's do one low. You probably won't
even notice it, but I feel better if I just
make sure that it is correct, because this environment is not so much about the
difficulty in modeling or the difficulty in
how the materials look, but it's just about making
everything feel perfect. A sign brush metal, dull metal, plain metal.
That's what we call it. I should have called
it home but age. And then for this
one, yeah, okay, I guess I can read on
a weight, I cannot. I can no longer just
duplicate my door. And the reason for this is because we have
made changes to it. I did just try to do, like, a more precise selection over
here, which almost worked. Only over here on the other
side, I think it worked, but on this side, I'm just
going to go ahead and do this. So, we can now no longer just
duplicate the door over, so we will need to do double
the work if we want to make changes to our
door, unfortunately. But that double the work is often just a few
minutes of extra work. So it's not like the
end of the world. Let's assign an
existing material, plain metal. There we go. That should hopefully be
the last export for a door. So export selection, door A. Thank you, export. Ising good. How is this metal over
here going with our door? It might be a little bit light I would not mind it
being a little bit lighter, but let's focus on that
a little bit later. Because, for example, so we have really shiny chrome
this chrome over here, you can see that
it's a bit lighter, but that's because the
entire environment is a little bit lighter. So I think that will happen too. Although over here,
you can see that they used like a duller metal,
which is pretty cool. So yeah, well, you can see
the difference between, like, shiny metal and,
like, duller metal. So there's quite a bit
of stuff going on. I think for our
home on our door, we want to go for,
like, really dead look. Are you still so you must be home then.
And I must be blind. It must be like a
lighting thing. If I go ahead and, like,
move my door over here, no. That is strange. We can test
it out by going to metal. And if, for example,
place our metal doll. Huh. That is strange. Okay, then we are
going to force it. The way that we
are going to force it is by going back
to face selection, which of course, it does
not remember our selection. That's a little bit of a shame. This one also or not. We can force it by just basically
detaching this stuff. So then it just turns out if I select this and go to
my attributes editor, Here, brush metal
and dull metal. So I don't think
for some reason, it cannot see our
material selection, which is a little bit strange. Now, another trick that we can do to see if we can
maybe select this a little bit faster is
to select it in our UV. So if we go in here, drag this, then hold Control and
drag it like this. I can often be a bit
quicker to select this stuff. You
can see over here. I should have thought
of that first time, but I was too busy
talking about SSD, sorry about that. So
we can do this one. And then if we just
also do the other side. And then for the other
side, it looks like that, I need to actually do some
old shift and just do some manual work because
it's not perfectly straight. But luckily we can do
two at the same time, so it does not take
too long, like this. And then what we can do in here, don't know why those
are not selected. Okay, that's all looking at. Shift click extract the faces. If they are separate objects, they must be like, then
they will be force. If I go in now assigning
system material and set this to plain metal,
if it is still not force, then I would be very surprised because this is like, yeah, we're just simply forcing
the system to say, Okay, you need to spit
this material up. It is no longer
part of the phases. So we want you to 100%, make sure that it is
its own material. And most of the time that works. But I'm sure that now that I'm recording it out of the hundreds and hundreds
of times that it worked, now that I'm recording it,
it does not work. We'll see. We will see that's
just how it goes. Whenever you try to
explain something, that's when things break. I'm justkidding, of course.
I'm just kidding. Okay. Shift click Extract Pass. Done. Turn off the editor. And I want you also
to be dull metal. Where are you? Come
on, plain metal. And just for good measure, if I select this one, let's remove my history so that I
don't have so much stuff. I can go to my brush metal
and I can just make it like a bit of a bluish color
to make sure, see? If it still reads as
different materials, then it's an unreal thing
because at this point it most definitely is
not different materials. D A, that's call an expert. Because we didn't
extract phases, we do need to re art all of
our meshes back to our layer also and save yours
just in case. Assets, door reimport. It should not give us
any material warnings. It should just reimport
and unbelievable. That is interesting. If we go to Dora, this, as you know, it should
be a different material. I did my re input Base mesh
plus LDs. I don't know. That should not make a
difference, but we'll see. Now, Okay, fair enough. So now it did register. Strange. There must be some kind of like a weird bug or
something like that. I honestly don't know. It
should not behave like that. In any case, our door is
now pretty much done. If I ever look at this metal, I think I'm going to make
it a little bit duller, which is going to be our
door home over here. So let's open it
up. Let's make it a little bit duller just to
match real life a bit more. Let's do 2.2,
something like that. There we go. It also,
of course, depends really on the lighting. But now what we can do is
we can finally move on to our Let's make the rubber
a little bit light, sorry, I know, but at this
point, it doesn't matter. Oh, no, wait. Actually,
the rubber is quite dark, so let's leave it. Okay, so let's move
on to our window. So for our window, we have
our dull metal over here. Which I assigned to this, and now if I have a look at my I had one reference image that I used for the window that
was quite close to it. So for the plastic, you can see that the plastic is quite shiny. Wait, windows are down
here, aren't they? A over here. So it's like a lighter, but
let's do this one. Okay? So it's still a
little bit yellowish, but it is quite dull and the roughness is a
little bit rougher. So let's go in and
let's start by going into our plastic yellow. And what I want to do with
this one is I want to go ahead and let's see. So our base color is
set to like yellow. Let's see if we can
match it a little bit more with our main
reference over here. So it's going to be
a little bit more like a deeper,
yellow, orange color. To make it also stand
out a little bit more. Let's see. So, it's just
more yellow like this. I don't know, can
I do a checker? Oh, yeah, here, I can
do like a checker, but it doesn't
really work as well. You can do a checker
box and you can move it to this window, but
it doesn't seem to work. So let's actually grab this one. It's a bit more neutral in
terms of colors, in that case. Let's tone this down. Let's see. Let's make this a
little bit lighter. Et's actually make this
quite a bit lighter. Tone down the yellow a bit more. See, more towards yellow, more towards orange, no
more towards yellow. Like this, press G to go into game mode that I can
sort of see what I'm doing. Let's make it a
little bit whiter. Okay, I think that does it. I end up with FFF to
the CFF in my hex SRGB, just in case that
you want to use it. Yeah, see here. That does
give me a better feel. And now, what I'm going
to do is I'm going to set my roughness amount and probably make it a
little bit shinier. See. So let's do 0.9,
just like a little bit. There we go. That
we add some shine. Only over here, we can see
quite a bit of tiling, but that's something
we can fix later on. Now, for our door, I'm going to go door. For our window, the
rubber is fine. Yeah, okay, I might make my rubber a little
bit lighter after all, just as a personal
preference because else, it stands out too much. And then for my door, I'm going to go in metal doll. Actually, let's do metal
doll door and duplicate it. And call this metal doll window. And if we just go ahead
and open up our window as we can go back to materials, select our metal doll window, and assign this over here. Press save. We can, by the way, close a few of these things
over here. There we go. Oh, yeah, here,
that's already adds quite a bit so that we
can see it a bit better. And now, if we just open
up a metal doll window, I'm going to give this Oh, wait. This one I'm going to make home. This panel just to break it
up, I'm going to make home. I'm going to give this one a little bit of a yellowish color. Most of this window, we will
go ahead and work with, like, our mask to make it
look a little bit better. For now, just give the
tiniest bit of like a yellowishlar, like that. And let's set in our roughness
amount maybe to like 0.8. Make a bit shinier and maybe make the color also a little
bit darker, just in general. Over here. Hey,
thank for the rest. We need to go ahead
and we need to use our masks to make this look more interesting.
So we got that one. And now what I'm going to
do is I'm going to have a very dull chrome
on these pieces and probably also on my locks it just to break it
up a little bit more. So let's do Window A,
and let's just select this piece and these pieces. And since we did not use
home yet in this model, we can just assign
existing material and just call plain metal. There we go. And now we can go ahead
and we can export this Window A, here we go. Assets, Window A, reimport. Just give that a second.
Press reset AVX. It's always the
easiest one because else we need to do
some manual work. The thing that we just need to redragon our materials,
but that's okay. So what do we have here? We have dull metal window, plastic yellow, rubber. And then this one is
going to well, for now, it will be chrome
door A, most likely, because that one is a little
bit duller. Yeah, see. That makes it already look a
little bit more interesting. Then we can take it from
here because right now this feels way too
boring and plain, so we'll take it from here. I don't know if maybe doing the brushed look
might work somehow. So let's do metal dull
window for the fun of it. Let's see if a brushed
look works a bit better. Metal doll window. I don't
see something. Let's say ten. I'm not sure if I don't think
it really does anything. Although I'm a little
bit suspicious about, let's just know this. I am a little bit
suspicious about the tiling because it
doesn't show me any tiling. So what I might want to do is I might want to just
very quickly make sure that if I go
to my UV and select this that it does show
the window correctly. See, I knew it, and that is why I check because it does not show my
window correctly. So if I go over here,
for some reason, this is my window, and I'm not a big fan of that.
So this one is fine. This one is fine,
which surprisingly, so the ones that I was
looking at, I is correct. But the other ones, it didn't behave the way I
expected it to behave. So what I can do here is I can just quickly scale this up. No idea why maybe I've got to reset my history
or my transforms, and that's why it
kind of messed up. But in any case, Window A, you can go ahead and save this. Done. Go back in here. Just do a quick
reimport. Here we go. And that should avoid us
having more problems later on. And now we can already see a little bit of that
roughness going on. Okay, so this metal panel, if I just press G. Okay. So that gives me a little trim, which you can see over here
also, like that effect. So quite like that. It's
like the small details. Okay, so those are walls, of course, without any masks, but for now, those
are the walls. Ceiling, ceiling, ceiling. How do you look? You
look pretty plain. The only thing is that it does not have an ambient
occlusion in here. I can add this ambient
occlusion in my mask, so I'm not too
worried about it now. For the rest, yeah, it might it is quite shiny,
but it's not that shiny. This is the one that
I was going to use. So I'm going to go ahead and
materials. Where are you? Plastic yellow duplicate. And just call the plastic
yellow underscore ceiling. And then for the
plastic yellow ceiling, we just need to go
ahead and add it to our actual ceiling over here. And then it's just
like some balancing. So this one should not take
too long to Let's see. Let's set our roughness amount. Let's set our tiling
amount to like one so that it is
softer tiling and set our roughness
amount to 1.1 sorry, 1.2 maybe, something like that. And then what we can
also do is maybe we can give it like a slightly different
color just to break up our scene a little
bit and to give it a little bit more
colorful pieces in our scene. So
let's make this one. Like a little bit more maybe like a little darker and then just a little bit more orange. Yeah, and very
subtle changes like that can add quite a bit to
your scene, as you can see. Okay, so we've got
that one also done. Now what we would need to do is we need to work on,
like, a back wall, and then we also just
need to once again do another lighting pass that is a little
bit more proper. Let's do the Bwall
in the next chapter. Let's already do like
the texturing for this, which will give us a better overview of substance painter. And once we've done
all the texturing, you also then know how
to do all your masks, which we can do after that. And then we need to work on the lighting because right now it still just does not look as nice, the
lighting and everything. Like we're getting there,
but it's not there yet. So let's save our
scene, and let's continue with that
in our next chapter.
40. 39 Polishing Our Materials Part4: Okay, so let's go
ahead and continue. I just wanted to have a look like the back door over here. I want to make this metal. Let's see. What else
do I want to do? I'm going to change the chrome to be also like the brush steel. That's another one
and just like, change the door in the same way. Our stripes are pretty good, so I'm not too
worried about that. Let's do that stuff. Let's
open up our back wall. We're going to get
Whoa, that's sensitive. We're going to get started
by Oh, by the way, this also needs to be home, I think. You cannot
really see it. So I guess, if you want, you can leave it, but I'll just make it
home just in case. And I'm going to go to materials
Home door A duplicate. Chrome door B, for example,
something like that. Throw this into
home. There we go. So that's already a little
bit duller. Oh, sorry. I'm not thinking. Home door B, this has the stripes,
right? No, this does not. So this one needs to go in
this version over here. So Home door B needs to go
in Oh, I do not have that. I guess everything has become metal stripes.
Okay, that's my fault. That's just me not
thinking sraight. Metal doll, where
do you come from? I have no idea where the
metal doll comes from. Let's just go ahead
and go into May and let's see what
we can do with this. So we have our back
wall over here. I was going to go ahead
and these pieces, yeah, you know, what's
selecting these pieces is going to be paint, I'm just going to
leave that chrome. So these are all
going to be stripes. That's fine. This
one. Oh, metal doll. The door knob. That one is it. It's just a bit hard to see
with the current lighting. So we're going to go ahead and we will also make these
pieces over here, metal doll. So let's first of
all, convert this to metal brush metal over here. Then I'm going to go ahead. I'm going to select. You say, let's go up here. Oh, I always forget
press Control Shift. Here we go. Like this. This one is going
to be right click assign existing
erialPlain metals. That one I will
turn into chrome. So this is our brush metal, and then yeah, I did
it the one way around. Let's press Control
shift I to invert my selection so that I do not have that
accidentally selected. Oh, that's strange. Let's
Undo Control shift I. There we go invert selection. This was going to actually
be plain metal also. So everything was going
to be plain metal. No dull metal. This was
going to be dull metal. And then I was going to go ahead and I was going to go to angle. Yeah, it takes a bit
of thinking work. And I was using my angle to basically so these pieces and then turn these
into bright metal. Wow, I needed a little refresher
of what I did last time, even though it was
only 20 minutes ago. Okay. So that does the trick. So those pieces, and I'm not going to care about
the bag right now. Those pieces are going
to be price metal. And the only reason I don't
care about the bag is because to save time, basically. So we got that stuff done, and now over here, I
just wanted to go in. Select this phrase,
press control shift I and convert that
also to dull metal. There we go. Let you do
the trick. So let's see. Let's go ahead and export this. Back will, yes,
save. It's all fine. Let's save sine.
Let's go in here. Where are you back while
they are reimport? Rsavbx Okay. So I think that has
most of the stuff done. So Home door B is actually
now needing to be, that needs to be brush metal. So Home door B actually needs
to go into plain metal. There we go. Then
we have rubber. We have dull metal for
which I will now just do dull metal door over here, and then later on
I will change it. We have our metal stripes, which can just be
replaced with this one. And we have our plastic yellow, which needs to go into
this one. There we go. No. Yeah, okay. That
should be correct. No, wait, that's not correct. Sorry. Plastic yellow
needs to go into this one. This one needs to stay home B. Okay, so dull metal is there, although it might be a
little bit darker later on. We have a plastic
also sitting there. Now we just need
to go for, like, a brush brushed metal door, duplicate brush metal door under score B or
something like that, and throw this into the top. And luckily the UVs are
already in the correct way on the way because it's worldspace so it does not actually
matter which way it is. There we go. So we got that one. I can see that it looks like it still has the wrong
normal map on here. So I think we just forgot to replace those. So
let's go in here. Let's go into our metal, and if we just go into home, just apply your flat norm
map to this. There we go. That should look a
little bit more logical. Okay, so now we have this. We still need some improvements, but for now it's just like a good base to get started with. And yeah, we got these
pieces, so that's all fine. Okay, so that is our door. And then what we can do is we can I think finally get started by just adding our
seating over here. And yeah, our seating,
we were going to go ahead and we were
going to do this inside of substance painter just because it's a little
bit more specific with, like the way that
gradients look like, just goes from
this side and then like spans out to the
outside and all that stuff. And this will actually
also add a lot to our sen because
it will immediately, implant color into our sen If we have a look
inside of Maya, so we can call this
one also done. We're just going to
go ahead and have a quick double check
in our chairs A by opening it selecting it again. Okay, so that seems to all have everything
correct, that's fine. I hope that we do not have
any stretching going on, but we will know
that soon enough. So since we already
export this as an FBX, we do not need to
re export this as anything else that is special. What we're going to do
now is I will close off substance because else I
have a lot of programs open, and I'm going to
go ahead and I'm going to open up
substance painter. Here we go. Okay, so let's get started in
substance painter. So what we're going
to do is we are going to just go ahead and make the final texture
for this asset. And then once we've done that, you also have a
better feeling of how we're going to
do masks later on. So we're going to go ahead
and create a new project. Once again, although
we went over this tiny bit previously, I do expect that
you know the basics of substance painter, and else I would
recommend just looking on some basic tutorials online
on YouTube or something. So we have a template. In our file, we are going to go ahead and
we are going to go to unreal and grab our chairs
double file over here. That is strange.
Let's try that again. It's a very strange error. Chairs double. Okay. I never
seen that error before. I'm going to set my
document resolution. Let's set it to two
K. We can always export it at four k
and then in unreal, we can choose what
resolution we actually want. Norm map format, we're
going to go open GL, just like in subs and signer. Just leave on compute
tangent space per fragment. It will often give
us better normals. And at this point, we can just go ahead
and we can press Okay. What this will do
is it will load in our model, as you
can see over here, and subspa it can handle
pretty high model, so we don't need to
worry too much about it. And now what
we're going to do? So yeah, this is my layout. I have my properties
down here, layers, text set and text
settings at the top, and my assets here at the site, and then I just
have my viewport. Moving around is the same
as that we do in Mam set or I believe also
it's same as in Maya. So there's nothing too
special about this. And we're going to take
this nice and easy. The first thing we need to do is we need to bake some maps. The reason we need to
bake some maps is because the maps are used inside of mass generation, which
we could use for this. The way that I'm
going to do that is I always go to layers,
and out of habit, I just press delete on the first layer because it's an empty layer that
they just add. Then we need to go to
our text set list, and this will be the name of our texture when we export it. So just call this hairs
underscore double, and then what it will
do is it will export it as chairs underscore double
underscore base color, unscoe normal, et cetera. Then if you go into your
texture set settings, and by the way, if you can't find this
window, it's up here. You can find everything up
here in the Window step. In our text set settings, we can scroll down
and we want to go ahead and we want to
press the Bake mesh maps. Now, don't worry about this.
We don't need hypolnting. This is already hi poly even. All we need to do is
we need to turn on use low polymsh as hi pool because the ones that we are
most focused on is the ambient seclusion
and the curvature map, and maybe also the position map. And those three, they
technically do not need a low poly in
order to sort of work. So you just want to press use
low polymsh as hi polymsh, set the output size to two k and leave everything
else to default. And then just go ahead and
press Bake hair double. Now what you can see here is, you can see it going to work. And this ambient
occlusion is also what we'll be adding
later on to all of our meshes using a mask because I think it
will look nice. So all of our maps
are instantly baked. Easy, does it. Now what we can do is we can get started
with our actual texturing. Now, we can choose, do we want to use the plastic
that we have created ourself or are we
just going to go ahead and use a base plastic
that we already have? Now, this plastic
that I see over here, it does feel quite different from all of
the other plastics. So it might be cool if
we just go ahead and just do a unique one inside
of substance painter. So the first thing
we are going to do is we are going to
add a few materials, and we are going
to divide them up. For example, our metal
is going to be one, our plastic is going
to be another one, and then we have our colors. Only thing I want to quickly
check is for our metal. Okay, so yeah, the metal
looks a little bit rougher. I would say, although over here, the telso looks a
little bit rougher. So maybe it would be
cool art if we use our custom chrome metal and then take it from
there, but I'm not sure. I might not be needed.
Let's just see. Let's start with our metal. Up here in your asset library, if you go to smart materials, can often find a lot of
really nice looking metals like aluminium is in here, but if you scroll down, you get more of the metallic
ones like here steel, and you have a bunch of
different steels and everything. So this is quite cool.
So we can use this. Let's try steel armour. You simply want to drag
your smart material in here, and then
it will sign it. And then we can see that,
for example, right now, what I can see is
that immediately, like the UVs are
completely messed up. So it looks like
that unfortunately, we need to just do
a quick unfold on our UVs inside of Maya before
we can continue with this. I was hoping to avoid that,
but it looks like that. This one is even more
broken than most ones. But yeah, that's what
you can sometimes get whenever you you see? So you just need
to do an unfold. And I just do them one
by one, just make sure. But, yeah, it's just
something you can sometimes get when you
turn this into hi poly. To be honest, I
avoided it because I thought it was going
to be a lot slower. It might be a lot
slower for you guys. And still, it is more work
that might not even be needed, but it looks like it is
not as slow as I expected, which is quite nice
because it means that I don't need to worry
here about all of this stuff. Um this stuff over here, it's strange that it even unwrapped it like
that because I can remember that I did
like a custom unwrap. Oh, wait, it unwrapped it like this because it swung down. So we did not add UVs here.
That's why it went like this. In that case, what I'm
going to do is I just need to do a let's do see brain freeze
UV best plane, and then do like
a best plane over here and unfold that one because this one
was very important. And then we have
the site over here, and the sites what we
can do is we can pretty much let's see, where are you? So these sides over here, this is where
something goes wrong. Now, I'm not too worried
about those seams. So you can add it or not. So for example, you can just
hold to an off angle select, hold control like this, and
do it only for this one. You don't really want to
spend too much time or well, you could spend more
than enough time on it, but I don't want
to spend too much time on something like this. So I can deselect that, do a quick UV and a bass plane. And then that one
is just like new. And then I can do
the same over here. And honestly, what I can even do is I can just select
it like this. Hold Control D select,
all of these sites. So all that we have
left is this piece. UV Bass plane. See,
I think this smoot ing was just way too strong
for those small pieces. And now what we can do
is we can just go ahead and for example, here
we have the base. Hold Shift and double click. Oh, sorry, that's the top. Double click on the bottom. Like this and then do one final
UV and like a bass plane. Here we go. Unfold this. I'm going to go ahead
and I'm going to scale these properly later on. For now, just do
the same over here. UV, bass plane, unfold,
and there we go. Okay, perfect. So we've
got that stuff done. I just need to go
in here and just do a very quick unfold for
these extra pieces, and then we can place
the old pieces in here, especially like these ones here. See, unfolding seems to
be Wow, it looks weird, I know, but I'm not too worried
about the shape because I know that this shape
is going to it's unfold. I know that this shape will be containing a very
plain looking material. So that's why I'm
not worried about it looking a little bit off. Yeah, we have these piece,
but I don't think the days they do not
really change much. Okay, so hold J. Let's get started by just
moving this piece in here. Scaling it down a little bit. We didn't need to
have it that big, but I did want to
make it big enough so that we have enough space. For our non Mbitas scale this one up
a little bit and just move this one over here. And on these ones, they can
actually be quite small, because they were not this big. So let's just move one here. Let's move another one
nicely next to it. There we go. Let's
should do the trick. Let's very quickly export this. We need to export
this immediately to also our unreal version. This is shares
double. Here we go. Then we just need to do
the same process again because this is why we need to find out at the
very beginning. New asset, select, share
double and this can of course, go very quickly because if I don't need to explain
it, I can just do this. I can just go ahead
and delete this. Double click Share, double, and then go down
here, bake mesh maps, set them to two k,
use lowly and bake. See? So I can go very fast. You just quickly
reset your model. Then you press Okay, throw
on the silver armor, and we are back
where we started. And now our UVs are
looking correct again. Okay. The way that we
can assign materials, basically, it's very
easy, actually. We can go down here and
we can add a black mask. This will basically
make sure that it will not be masking anything, but now wherever we
paint, we will get metal. The cool thing is that we can
use the polygon fill tool up here and set this
to element select, and then you can
literally select your different element objects, and then it will automatically add these objects to your mask. And you can also click and drag select if it will save you time. So like this, I can just
very easily turn all of these pieces to
metal and then click back on my brush to
properly be able to see it. Now, this metal is
a little bit grimy. So we can, for example, work on our grunge and
on our edges and surface details to basically make it a little
bit less strong. Our A odor is fine. Color variation, let's
see, our roughness. Here we go. So our roughness
has a finish rough. I'm actually going to
turn it off because if all of our other metal
is looking very plain, I want to go in that same
trend. So just like that. Now having this, so the
ones that we turned off, we can for now just
delete them over here, and we can minimize this. And you can cut this whatever
you want, like metal. Now what we need is
we need a plastic, and the plastic is
going to be's see, I'm sure we have lots
of plastics down here. Plastic used. Plastic used
might actually be good. No, not good. Plastic soft. Yeah,
it looks pretty good. If I call this plastic, and then I want to go ahead
and immediately get rid of the bumps because I don't need that no map detail in here. Let's see what
else do we have? We have our edges, which
our edges is fine. It just adds that extra bit. This is the kind of
stuff that we will be adding using masks later on. Our dirt is fine, our
roughness variation is fine. Our white specs is fine. This roughness variation
over here, let's delete it. And then for our color, we want to go ahead
and go in here and let's make our
roughness a little bit shiner there you go,
with the slider. And then in your color,
go ahead and just make it a little bit more
of like a whitish, you know, something
more in this direction. So it is quite white,
but it still has, like, a yellow undertone. I'm trying to capture that. Something like this over
here looks quite good. And once you've done that, we can go ahead and we can
add the black mask again. And this time, in
your polygon fill, just set it to UV select. What it will do is it will
then select UV islands, which means that we can do a more precise
selection like this over here so that we do not accidentally select
our actual seat. I think that's already
it? Here we go. Okay, one left. This one over
here is a lot more custom. As you can see, if
we have a look, we are going to
basically give it like yeah, variation
in the color. Now, what we can do is we
could do this in the shader, or we can just export three
different base colors. I think it might be
easier if we just do three different base
colors on no wait because we do have
many different colors. Okay, in that case, let's
control this into our shader. I'm going to show
you how to do that. It does mean that we need to create a unique shader for this because this is not
the type of control we want in our master shader. But basically, the way
that this is going to work is we are going to go ahead and we are going to
create a new folder over here and just call this seating. And in this folder, we want to start by adding a fill layer. This fill layer will
just be our base. So we can literally
call it base. And for now, it will be like,
Well, actually, for now, let's make it like a red color, but that's just because I
need to see what I'm doing. So let's say I make
it like this try and mimic a color that you
can see on your reference. It's a bit sensitive over here, something like
this, for example. Now, what I'm going to
do is I'm first off, going to adjust my
roughness to make it very shiny so that it looks
like this shine. And we don't need a height map. We don't need a metallic map, and we don't need a norm map.
Okay, that's pretty good. In your seating,
already a black mask, go to your polygon fill and just select these
pieces over here. Okay, that is the base seating. Now what I want to
do is I want to add another fill layer and just call this roughness
underscore variation. This one, you want to turn off everything except
for your roughness. And although you can add
a roughness map to this, a cool little trick is if you
add a black mask to this. And to this black mask, if you go to the
magic wand tool over here and you add a fill layer, you can actually drag
in the roughness. Now, I will show you why I
want to always do it this way, and I literally always do
it this way. I need to go. Sorry, they change the
icons over here to our textures. Scroll down. And in here, if we go for, like, something that is, well, you guys know because
when we went over this stuff, just
something interesting. Maybe like some wipes or something like that or
like some softness. Yeah, maybe this one over here. You basically add
it, and then you can go back into your
roughness and you can basically control the
roughness amount like this. While if you would
add a text to this, it would be a bit more
annoying to control it. Now, this roughness over here, you have a playground balance. It is too sharp. So I'm going to go for something that's
a little bit more softer. And let's see,
roughness leaking. This probably way
too strong also. Yeah, and it does
not feel very nice. Fingerprints. Yeah, fingerprints
might actually work. So let's do fingerprints
and then set the scale up here.
This is your tiling. Set it to five so that you
have a bit more fingerprints. See? And now we can, of course, go in here and we
can just control how much of our roughness we want to show to basically
control the dullness. Now what we need to
do is now we need to basically effect basically fake that effect over here that there is an actual bump and
everything going in here. The way that we can
do this is we can go ahead and actually,
there are multiple ways. One of them is we can use also a norm map along with our color, and I want to try that first. I don't know yet if it's
going to work, however. What I have in mind is
I grab a fill layer and call this height
detail, for example. What I can do to this is
I can add a black mask, and in this black mask,
I can once again just select these pieces over here. Now my idea is that if I grab this mask
black mask, sorry, and I go in and I
think for now just turn on only your color
and your height map. If I blur this, it will hopefully give me
a gradient effect. I can go down here and
I can go to art filter. Now in here, we will have a blur, but we have
a few of them. So we maybe have a
non directional blur, that one we have inside the sign I've only never used it here, but I don't think I have it. In any case, then
we can try blur and hopefully the edges if we
then add a mask on top, the edges will
hopefully stay intact. If I now go in here,
and let's see. So my blur, yeah, you can see it
like a little bit. However, it is not doing
exactly what I want. If it is not doing exactly what I want, which in
this case, it's not, then I'm going to mostly
just do it by hand, and doing it by hand
will basically be this. It will be adding a black mask, going in our so that
was the easy way. Now we're going to go and
do the more tricky way. So we go to our
brushes over here. And I just realized
we are way over time, so let me just, I just
want to still finish this. So try and get the
basic soft brush. And then we just need to
find a right setting. So if we set our
size really high, because basically what
we're going to do is we're going to click Hold Shift, and then click again, and only then we need to do
it with proper settings. So let's set the flow
low. Size really high. Let's see, click Hold Shift, click again, a bit more here. And you might have guessed
that if we do this correctly, it will give us the gradi
interfact that I was looking for that I was
hoping to get with my mask. Here, something
like this. And then maybe it would be cool to add like a few extra
clicks here and there, just to give some variation. And then once we've done
that, this is my idea. So first of all, our height, if we tone down our height, you can see that it will
give us in our norm Maps, it will give us the actual
effect that there is almost like bumping and seating
and everything in there. Then if we combine that with a base color and we set
this base color to black, however, we then make sure that your layer here
set the base color. We then go down here
to this little 100, which is the Obaste
and tone it down. I was hoping that that
will basically just give us the effect that
we're looking for. And we can even go in here
and like a roughness, we can set our roughness even shinier in this specific area here to kind of
really get it and then maybe set your base
roughness a little bit duller. I see. And then maybe tone down your pace
color a little bit more. And just in general, it will
hopefully make everything look a little bit more
interesting like this. So that was basing my idea. Now, I do feel like that
maybe around the edges, I want to make the
norm map a little bit stronger because it feels like there's like a bump here. But honestly, if I
look at other pieces, this is not really the case, so that might be a
little bit overkill. Maybe we can go ahead and
set our height detail a little bit stronger
even. Here we go. So make it quite strong.
And at this point, I will have to save my scene. So just go on, do a save as. I will save this in chairs and just call this chairs
underscore double. Here we go. And let's plus save. Okay, so that is done. And then what we'll
do in next chapter is we will just
continue with that. And maybe later on we will also add like a
single chair in here, but that's going
to be like polish. So let's continue with
that in our next chapter.
41. 40 Polishing Our Materials Part5: Okay, so we now have our base
materials done over here. Now, what we're going
to do is we're just going to add some
general improvements. One of them is going to be a new folder that
we'll call like dirt, and it will just have some
general dirt in here, like the stuff you can see over here and maybe also
a bit on the metal. Let's get started by adding
a fill layer to this. And just call this like
plastic unscored dirt. Or this one might
actually be easier to just add to our plastic
now I think of it. Here, let's add this one
just to our plastic. And this one is going to
have like in the color. We are going to go for,
like, a bit of, like, a brownish yeah, brownish
color or something like that. Set the roughness quite dull
and just leave the rest. And then add a black mask. So substance painter is very powerful with having
mask generators. So if you go into smart masks, we can go in here, we
can grab a few of them. Normally one of
my favorite ones, but I think then we need
to use like two of them. So I will use one of them in the main folder and this one, don't worry. I'm
talking gibberish. I will explain to you later. First of all, for
this one, I would get something that is like dirt. I know. Dirt soft edge. It's very subtle. Let's see if I just click on the dirt and said
it's a bit stronger. Oh. Okay, fair enough. That actually does sort of
make what I was looking for. Let's do dirt soft edge, then. Tonee it down a little bit, and let's go ahead
and then of course, you can see that we have some seams over here
that we need to fix. First of all, let's go into our color and just
set the color to be a little bit more like a
brighter dirt like this. And then the way that
you can basically paint out this mask, you
cannot do it like this. You cannot actually paint on it. But if you go down here
and add a paint layer, you then have a layer in
which you can, for example, set your flow high,
your size low. You can even go into
your brushes and give it a different brush. And then if you press X, you can switch between
black and white. So setting this to black, you can go ahead and you
like in these areas, just paint it out because else you will be able
to see the seam, and that will not
look very nice. So just whenever you be able
to see the seam over here, it would be better if you just paint it out
a little bit more. It's a lot of dirt anyway, so we need to do some
painting out anyway. Over here like that. And then for the rest, I'm going to switch to, for example, my dirt one brush over here,
which is like a soft dirt. And then in here, I can do some manual hand
painting here and there. I can also press
axon for example, paint in some dirt around
the box over here. But just in general, it is handy to do
something like this. And doing manual dirt like this, you can actually
paint over seams, which will give you a
better effect if you want to still have
dirt on the seam. We have a really strange looking artifact down there,
but honestly, you cannot see it,
so I'm not going to bother fixing it right now. And then in here, maybe I would want to have a bit
of dirt because you would, if you think about it,
such small cavities would be like a perfect
place to have dirt build up. Okay, so we got that one. Now, what I want to do is
I wanted to duplicate. So right click and duplicate
layer your dirt and artist to your dirt
layer and just get rid of all of these masks. And then also just press
assign new black mask. This will basically
reset your mask. The reason I want to do
this is because there is a smart material that
I tend to always use, which is called the dust
occlusion material. And this one just adds some general occlusion
dirt here and there, and you can see the dust
that you can see down here. And for that kind of
stuff, it's perfect. So I can tone down my
level and my contrast, and I can just give
it a little bit, also in other cavities. I can just in general, give it like a
little bit of, like, a duh, look here. So maybe if I like tone
this down a bit more. Okay? Actually, we need to be
very careful for that one. So let's not have
it that strong. But we can add some
roughness variation to this later on over here. And the way that we
can do this is x, we already have, like
the roughness variation. So maybe if we just
make it a bit stronger, you can see it and maybe set the roughness
variation above your height detail so that it
kind of overlays. You see? There we go. That
works a bit better. So we got some
roughness variation. But yeah, okay, so this one is just like the dust oclusion. Now, what we want to do is maybe add some very
small custom dirt, like you can see
around these screws, because we have so
little of them. Honestly, we can just add a quick fill layer to our
dust occlusion over here. We can then go ahead
and go into our brush, and if we grab like I think actually just a basic soft brush, we'll
even do the trick. And tone it down, and
then just click like that a few times on your bolt. And just slightly
move your mouse around a bit close to my
mesh. Do the same over here. See, slightly move
your mouse around. And then what we
can do is we can simply turn off
the bolts on this. And then it will give the effect that there's
dirt coming from below it. So for example, if we now
go to our polygon fill, set this to object and set
this to black, here, see, you can now just
deselect the bolts, which in turn give you some
dirt sitting behind it. Like that. Tara.
Okay. Finally, we will have some normal details, and those are these little
grid patterns over here. Now, for these grid patterns, because there are so many, it would be nice if we can
just make it all in one go, and most time I use
Photoshop for it. I can have a look and see if
there's something in here, but I highly doubt it
that already fits. So if we, for example, go into our metal down here, we can create other folder, create another fill
layer that we'll call grid with a black mask, and this is the one that
we're going to use for this. In your grid, just set
your height map, lower. Turn off your
roughness, metallic, norm map, and you set your
color to black again. So sometimes you can find
something over here in your Alphas and you can find
something that is good. However, I don't think
that we have something as specific as this,
as you can see. Yeah, I doubt that I can
find anything in here. You can sometimes find
like stripes like this. But not on this level. So instead, what I'm going to do is I'm going to go ahead and I'm just going to remake this inside a
Photoshop as an Alpha, and I will show you
how to use it in here. So for this, sometimes
what might be handy just is to go ahead and
create a quick screenshot. It does not need to be special. It's just like to get,
like, a rough measurement. So I just press Control Q. That is my screenshot
shortcut over here, and that has opened now
in my other screen. So now what I'm going
to do is let's open up Photoshop. Here we go. And I have created
a simple file new. And then my Photoshop is
a little bit slow lately. Unfortunately, it since I updated my driver, so I
need to figure that out. So yeah, file new,
and then in here, I just created a simple 14 96 by 14 96 blank Canvas over here. So this is the one that
we're going to use. You can use GIMP. You can use any program you really want. For this, it's very basic. I just happened to use hotshop. And I'm basically
just going to drag in that image that I have
because it's like a nice little template,
and I just move it here. What we can later on also
use this for morting. So for now, I will
just move this to the top and there we go. We have a little bit of canvas. What are these? They are
basically just like soft pieces. If I go ahead and I just add a very simple layer by pressing the little
plus sign down here, I can go down here I
set my color to black. And then if I go to my brush, right click on it
and just select your very first half
or hard round brush, and then tone down the size
to roughly the size that you want your individual
patterns to be. I'm not going to go too small
because if I go too small, it will look like noise. So we will go a little
bit bigger in here. Now, this is done here. So
now you can see that in our layer, here we go. We are able to paint on
it just like we want. Now what I'm going to do is
I'm going to basically click, hold Shift, and then drag. This will basically
create a straight line, and then we immediately
have a patron ready to go. Now, at this point,
I'm going to go ahead and I have this one. I'm going to hold Alt Shift and then using my move tool
down here, move it down. And yeah, quite close, and then hold Shift
only and then move it out halfway like this. Then if you Alt Shift, the lines they should be able
to read the same distance. If you don't have this,
you can go to view, turn on rulers,
turn on Snap two, and in these Snap two settings, you set it to everything. Then you get these orange
lines that you have over here. Basically, these orange lines, they can roughly see what
identity was so for example, now we are at so many
pixels like this. Then what I can do at
the very last one is I can go ahead and I can move
this one down like this. And then we have one part. Now, if we go ahead
and in our layer tab, just scroll down and
select all of your layers, right click and
merge the layers. Which your move tool
still selected. If you now press W or W,
if you press your okey, you can actually move it up and down to get it into
a nice location. And after that, it's literally just a
matter of doing this. Over here, and just
start to copy this. There is a repeat
action in Vote Shop. I think it's Contra Chef
t or something like that. But for this specific case, because we are duplicating
and moving it, it does not work for some
reason. I don't know why. But in any case, you can
see that now this is exactly the pattern that
we have in real life. And because it is snapping, it's not too bad for us
to just move this around. And here, so this
is a lot easier. Imagine if we had to do this by hand inside
of substance paint. That would be such
a paint to do, and I would not really
be enjoying that. So instead, just move
this around Sorry, that one was a little
bit too far away. And then we get to
this point over here. And just for safety, I'm now going to select
all of my layers again, right click and merge them, and I'm just going to nice
move this into the center. Actually, let's
move it over here. And then I because I merge them together,
now I can do this. I think if I now finally
select these ones at the end, Over here, and I can then scroll and then go my move
hold I'll shift again, and then you can
actually duplicate your layer in here and do this. Here we go. Now if we go back
to our move tool and just, like, push it around
a bit, there we go. I think that will give us
it's just below our bolts, but I think this will
give us a nice look, see. So now we can already get a sense of what it
would look like. At this point, we can
turn off our shape. What I'm going to just
leave this like this. The only thing I need
to do is I need to press Control I on this and I need to press right click layer from background on
your background, press Control I again. This is because they need to be white in order to
make it as a mask. Now we can go ahead and we can save this so we can go file, save as I will create a folder
called extra details in our textures and just call this like mask under sco Atlas, and then just press Save
as PSD because in painter, you can just import the PSD. So here we can go to File, Import resources, drag in
that PSD just created. Set this to be a
texture over here, not an alpha, a texture, go ahead and set it to
current session means when you close substance
painter, it will go away. Project means this project. Library means that
it will forever be in your texture library. We are just going to input
this into this project. And now what we can do is we can start by projecting
this on here. The way that we're going to
do that is we're going to go ahead and go in our
grid to our mask. Then down here you want
to use projection. In your projection, as
soon as you click it, you get this black bar,
but if you scroll down, it will ask you for
a gray scale map. In which case, you can
just drag in your mask. Now if you hold S, you get the controls. You can
see them down here. So middle mouse button
is just pending round, left mouse button is rotating, right mouse button is zooming. Those are the ones that we need. Well, we don't need to rotate. But what we are
going to do is we are just going to like here. And if you do not hold S,
you can move your view, but we are going to go ahead
and we are going to nicely just make this all fit together. If you want to have
a more precise view, you can go down here
and you can go to Constraint rotation or three? No, sorry, it's not one. Here, Autographic view. Sorry. You can go to
Autographic view, which will give you a more
flat view of your model. I don't use this
view very often, only for if I need to do
very precise placement. But just like this here,
you can see that I'm just moving my view pod around, and that should
already be enough. You don't always need to
hold S. I think that's it. And then when you're
finally ready to go, I recommend in your Alpha to set the hardness to one to make sure that you
have a strong brush, and now you can just go ahead
and you can paint it in. And you can see that it
really helps that we added that extra resolution to
this and that we made it extra big because now we have a razor sharp resolution
on here and it all fits. At this point, Oh, Yikes, go back to your perspective
view over here. It might have messed up your viewpoint a bit
if you just press F. 1 second. Let's set this
to constraint rotation. Oh, God. I messed up. Let's do free rotation, and we basically
need to set this. Let's go back to
orthographic que. It's because I accidentally
did like a free rotation and I always forget how
to reset this stuff. So free rotation and now go back to constraint rotation
and Perspective view. There we go. That
should do it for now. In any case, that's
just me messing up. You can go to Window
and reset your UY, but I've done all
of my settings, or you can just restart
Subs a painter. In here, for height, we can basically control how much height we
want to give it. We can make it very strong. I'm not going to
make it very strong. I'm just going to
look at it from side. And let's say -0.07 seems
to be like a nice height. Then in your base
color, you can just go down here and you
can tone it down over here and you can just
make it like a bit darker so that it stands
out a little bit more. Actually, we want to actually
make it quite dark because else it will not be noticeable
enough. And there we go. So I think this is
a pretty good base. Now, one thing I
forgot is you can hold Shift Alt and then click, and then it will basically
snap to the front view, and that way it will also reset your free rotation
just so you know. In any case. So
this is now done. So what we can do is we can go ahead and save
Racine once again, and now we can start by
exporting this finally. So let's go to export textures. For this one, we're
going to go ahead and in our texture folder has, we are going to make a
folder called final, and this is the folder in
which we will export this. So you can just copy
this location and press save PBR metallic roughness. That should be fine. Although I don't know
if it will also then include my ambient occlusion
map because there's also there used to be PBR metallic roughness with ambient occlusion,
but we'll see. Let's do PBR metallic
roughness to get started with. Then in our file
type, we are going to go for tagaFlesize. Let's just go for four k.
We can always lower it down inside of unreal and just
go ahead and press Export. Exporting a four K does take a little bit longer
because it needs to set your model
to a specific look, but over here, you can see
that now we have a base color, and we have all of
these other maps. Our base color, as you can see, does not have an
ambient occlusion, but we will take care of that after we've set up
a material in here. Oh, sorry, almost forgot. We need to reset. So we
actually need to make a special material
because we're going to go ahead and change the
material looking here. Go ahead and make
this white like this, and then there's a few
things that we need. We need to go ahead
and we need to just do a normal
export like this. Export. And what we need to do is we need to
go into your seating mask, right click on it and
press export mask to file. And then what we can
do is we can call this in here, seating
underscore mask. And that set this to be a JBC. So this way, we have
a mask so that we can control where we want to have
the color inside of unreal. Now, if we go in here, textures, has, and you want to
import your base color, your metallic, normal
roughness and mask. The height, it
will automatically convert into norm map
information whenever we export. So you can just go ahead and
you can drag this in here. Now, I miss clicked. As always, try it again. You can drag this
in here. Thank you. Don't forget to just quickly
go to your chair and do an invert green
channel over here. Okay, now, this one,
it does not need a lot because most of
it is in our texture, so we can just create a
very simple base material. Maybe we want to give it
some control over roughness. So let's just duplicate our scene master and call this
unique underscore master. Open this up. And let's see. So the reason I wanted to
do this is because here, like all the stuff, the
base color is fine. Although we need to change
the color later on, metallic options is fine, but we will actually, you know what, no, this
will become a mask. For now, we will have a roughness map, so
roughness amount, and we will have a norm map, and our tiling needs to stay at zero, so we
can also do that. There we go. So at least
now I have this leftover. I'm going to go ahead and I'm
going to go into my chairs, and I'm going to let's go to select the base color and
just assign this in here. Let's go ahead and
select the roughness, assign this in here,
and let's go ahead and select the normal
assign is in here. Then what we have
left is we have our mask and we
have our metallic, which we can go at import.
This is the metallic. So for this one, right
click, convert to perimeter, metallic and go ahead and throw this into your
metallic folder, and then we have a mask
which we need over here. In our base color, what we're going to do is we
are basically going to larp our base color
with the actual base. This means that it's
like a blend note. So in the top, what we do is we go ahead and we add a larp, and it is called a
linear interpolate, fancy name for pretty much
like A, B and an Alpha. In your Alpha, you
basically plug in your mask, and then in B, you plug in your base
color, and then in A, you plug in your base color
along with a multiply. Like this. And this multiply just contains a color overlay, which is a constant t vector. Now, you, of course, expose this or converts to perimeter and call this
set underscore color. You can give this
like a default, and we were going to go a bit
of a strong orange color, sort of like this
as like a default. You plug this into A, and
what it will do is it will basically overlay this color
on top of our base color. But because this overlay will only happen wherever
we have our seating, automatically the rest
will look normal. And if we plug this into our base color
over here and save seam we know that we have
a few different colors. So we have yellow, red, orange, and I guess that
this is still yellow or maybe like a darker
yellow or something. But here, now you can see
the overlay happening. Seeing the overlay, I can see that it is the one way around. So let's set this one
in B and this one in A, and that should flip around Terra now we have full
control over these pieces, and we will still have all of our norm maps and
everything ready to go. So we can now go
to Metro interior, go to our materials and
right click and just create the material instance and call
this share the score red. And once we've done
that, we can already, like, Add this as
like our default, so we have our chair double. We need to first of all, just press reimport because
I can remember that we changed our UVs and
not yet reimport it, and then add your chair red, press save, and there we go. So this is now our default
chair that we have over here. We can then go in here,
and we can, of course, make some changes to the default and then we'll see how it looks. So our roughness
amount is pretty good. Our seating color is
really, really dark, so let's go ahead and try and make that a little bit more manageable simply by
moving this around. Here, see, something like
this seems quite good. And I'm just trying to get, sort of like the
reference over here. Now that we know
this, we know that, okay, so this needs to be
a little bit less dark. Oh, we have some slight
reflection warping, which I'll also have look at. Our plastic needs to be lighter and our metal
needs to be a lot lighter. So of course, our lighting
is also not really helping. So in our seating,
in our high detail, let's go ahead and just tone
down the blackness of it. Then we have our plastic
and our base plastic. We want to go ahead and
just make this a lot lighter because this is, of course, not the same type
of lighting as that we have. And then in our metal,
our base metal, we're just going to set it
completely to white also. And let's just re
export this and see if that works a
little bit better. And then later on we will
also do lighting pas, and after we've done
our lighting pas, we can have a better
look and see if there's any changes needed. Reimport everything except
for the mask. There we go. So see that's not light
enough yet, our plastic. Let's make it a bit
lighter, even like this. The darkness is
looking pretty good. I think the reason that we
have these artifacts is because our norm map is
a little bit too strong, and I feel like our
norm map is also exporting at eight bits while I believe it works better at 16 bits last time I checked. So in my high detail, just tone down your high detail. Export this. And
for the fun of it, you said, Oh, yeah, wait, TJ. TJ does not do eight bits. In that case, leave
it. It should not make that big
of a difference. It's just that
sometimes it reads a little bit better in your
norm map if you do that. But yeah, we'll
see how it looks. Okay, so let's say
that we now have a baseclready to go and after this, we
will do some lighting. I'm going to go at
first in my materials, duplicate this and call
this hair on the score. Yellow and duplicate this
again, hair on the score. Orange. So yellow goes in here. Then we have red,
then we have orange, and then we have yellow again. Now if we start with our yellow, let's move to the
side and actually also just open up your
orange, by the way. I can now go in my yellow. I can go to my seed color and
I can just start moving it around until I get the
yellow color like that. That's okay. And then go to your orange and your
orange is this one. And that's one we will
just make it a little bit more like this, a little bit orange. Here we go. And then we have our
different color seeds. The colors are not
yet perfect and our reflections are also
not yet working very well. The roughness is even
actually really strong. So I'm not sure if it's useful if we set this a
little bit lower. Let's see if we
go to our orange. Yeah, let's set this to
two probably our roughness because it's a little bit
too strong for my taste. So two, save. Another times to save. I know that these have
been long chapters, but we just need to do this
if we want to do some poison. But at least we now start
to get some color in here. I think the next
part would be for us to do some proper
lighting pass. Once we've done that, then we can just continue balancing. We still need to create for small assets, we
need to work on it. But at this point,
it's a bit tricky to know exactly what we want to do without the short
lighting pass. But this kind of stuff over
here is looking great. So that's working really
well. That's fine. I don't know if our metal was completely white
already, I assume. Yeah, here, so it was
perfect white already. So maybe the only thing
that we can do to kind of make it stand out
a bit more is to make the roughness
a little bit lower. That's the last thing
that I will do. You can also your amputclusion
map, you can export it. And the way that you
would do it over here, but it's not really
needed so much for this asset is you would
go to Export textures. And what I tend to do is
if I just need to very quickly, that's a bug over here. Don't worry about that. What I need to do
if I need to just very quickly export
only my ambit oclusion. There is one that you can export all of your bake maps in here. But if you just go
to output templates, press plus, double click
on name and call this AO. You can just add an RGB. So first of all, I'll go to
PBM Mtell roughness and just like press contra
just copy this text. Then in your AO
arts and RGB note, pasted in the text
and just change the word base color to AO. Then in your RGB, you just want to go ahead and
just grab your mesh Maps, ambient occlusion and just put it into your grade channel. Because this is the template
that you see over here. Now if I go down here and I
press AO and press Export, it should have exported for me a proper ambient
occlusion map that we have baked down so that if I go in here and I drag in
that AO map, There we go. You can see that this is now
a proper ambient oclusion. So I can then go
ahead and I can, open up my unique master I
can go down to my chairs, import my ambient occlusion
in here, right click, convert the perimeter, AO, and just drop it into your ambient occlusion
and press save. And that way it will just also add your ambient
occlusion in here, which could give us some nice extra shadows here and there. Okay, you see like it's
happening a little bit already, especially like
around these edges. So let's say acne in
the next chapter, what we will do is
we will go over another lighting pass to make sure that everything
looks the best that it can be.
42. 41 Doing Our Second Lighting Pass: In this chapter, we are going to do our second lighting pass, which will go a little bit
closer to our final lighting. So we have a scene over here. The first thing
that I want to do is I just want to finish off placing the materials on
our chairs the chairs, because we have global imation, they will actually take quite
a bit of lighting in it, although it's not as much
as I was hoping for, but that's just the lumen
system is accurate, so I do need to just
trust the system. So orange, yellow. Yellow, red, orange, yellow, and
then here also again, yellow, red, orange, yellow. Easy, does it? Okay,
so nice and colorful. Okay, the first thing that we need to do is at this point, I think it's good
if we just create a camera and this camera will basically just
be our point of view. So let's say, and I'm
just doing a guess. I think I want to go
like a camera angle somewhere in direction of this. So let's say I go for like
a direction like this, and then all you
need to do to create a camera is you need
to go down here, create camera here and
just pick camera actor. Now, then when you
go to perspective, you can go down to camera
actor, and this is your camera. You can still move it
around and everything. But the nice thing about
this is that we can change the field of view and
the aspect ratio. The aspect ratio is
cool because I want to go a little bit more
for a long view, like I can see over
here rather than your classic ten ATP
view because I always like to do for the more
long views like this. So let's say 2.3 in the aspect ratio to just give
a few black bars like that. Now for fields of you, I tend to go for, like, around 70 because
it just gives you that little bit more of like
a close up zoom in field, which in this environment works great because
it is smaller. You can also maybe like 75 Now, let's you said for
larger environments, you want to go like 90 or 80 or something
because it feels larger. But for something that
you want to feel cramped, you can go like even
65 if you want. Yeah, let's go 70. And then I then I
am just going to, like, give it a
general positioning. I use my scroll wheel or
I can go down here to set my camera speed lower to get more of, like,
cool positioning. I quite like to have
a few of these bars. Here. Going low will
give you grand feeling, going high will give
you a long feeling. So in this case, I don't really
need both of them. So I'm going to go
a little bit low, but for the rest, it
should be pretty good. I think something like this. Maybe I can go a little
bit to the side to art, some details of our door. No, I think something
like this should be fine. Okay. Let's say that this
is now our camera angle. So a few things that
we are going to change that we can
often see here. One thing is the shadows on
the ground I quite like. We need to just do an
overall post effect pass in which actually
our scene will change quite a bit and maybe change the lighting color a little bit and maybe the
intensity also. So if we grab over here
our rectangular lights, let's set the intensity
maybe like four. Yeah, let's do
like four for now. And let's set the
color, 500, 5,500. 5,300. I'm just going to make my color a little bit
in the direction of, like, whiter because I want to
having this really warm feel, it doesn't feel as
realistic to me. Also, cool thing that
is really good to do is go down here and set your
screen percentage to 200. This will double
your resolution. It does mean that
your scene is slower, but it will give you a
much more crisper view of how you will take
your final screenshots. So another thing that
you might notice is that there is sometimes
some flickering going on. This flickering is
unfortunately because of the lumen system
and it is a bug. If you go to show, visualize
and go to your lumen scene. Oh, now it's gone. It used to be here all the
time, and now it's gone. That's Okay, that's
really strange. In any case, sometimes there
happens to be flickering, and that can be a
problem with a lumen, because I literally did tests for this just
before recording this. Ironically, now it's
all of a sudden gone. But if you have that
flickering effect, which we will most likely
get back later on, the only way to really fix
it is you cannot really fix it yet in game
because we are, of course, in the early
Alpha of Unreal engine five. But if you go down here and
just turn off real time, that's one way to
temporarily stop it, and then you can, for
example, just, like, have a good look at
your environment without seeing all that
flickering going on. And then you can
just take real time off to turn it off again. In any case, we got our lights. Now the next thing
I'm going to do is I'm just going to
add some shadows. And the way that I'm
going to do that, or at least I'm going
to fake some shadows. Let me say it like
that, is I want to create a light and just create like a
rectangular light over here, press G and open it up. Where
are you? There you are. I'm going to go ahead
and I'm going to rotate this light 90 degrees, and I'm going to move this
light in the middle over here. So my idea is that we move this light in the middle because it's a
rectangular light, we can make it a
little bit longer. Maybe set a barn door length a little bit lower and then
move it down a little bit. And this light will be
so low intensity that it will only just show up
in some of the shadows. So if we go to our cameracor let's pass use temperature
and set it to 5,300. And then in here
and the intensity, just start with like one. Now you can see the
flickering again, see? You can see it happening. So let's start with intensity
of one, two, three, I think if we go for, let's try an intensity of tree so that you can just see
like the shadows over here. And then if we grab our
other light, actually, let's click on this and
rename this center Light. Here we go. If we select
the other lights, let's set the intensity
to maybe like 3.5. So we tone down that
intensity a bit. And then we have
our sentites which will basically light up
our scene a little bit, but the goal is to basically get a little bit more
shadow information in here to make scene
feel less flat. And we only want to have
these two down here. Oh, and turn on movable on them. So we only have those
two down there. And now you hit. So
this is what I mean with the flickering.
It can be quite bad. And now if you go to show, visualize and do
your lumen scene, you can see that it
just goes crazy. Yeah, it's a new system. This stuff happens when we try to make tutorials
inside of an Alpha. But at least for the people that want
to learn Unreal Engine five and that can look
past this kind of stuff, it's great usefulness. And, of course,
Unreal Engine four, you can also use for this stuff. See now if you press
off real time, you can say that it
temporarily turns off. And then when you turn
on again, it goes back. I must say that it is
really bad right now, the flickering, it
was not this bad. So that is quite curious
that when we added our lights, it got this bad. So maybe it will tone back down later on when we start doing some of this other work. For my satellites, I'm actually
going to go 2.5 probably. Okay, in any case, so we know about flickering. Just try to look past now, I will most likely go
away again after a while. Now what we're going
to do is we're going to work on our post effects. So let's go ahead
and save our scene. We already have our
volumes over here, and we have our global
post process volume. In here, I will just run
through a few things. The first one is the bloom. The bloom is actually
quite important. You can also see it over here. It has basically the
glow that is coming off from your emissive lights
and your other lights. Setting this high rash, you
can see will give you this really blown out scene. Or what you can do is you can play around with your threshold. And if you set your
threshold above zero, you can basically control
how much it will hold. I'm going to go ahead and
I'm just going to set my bloom to 1.2 maybe. Point, okay, 1.2, so that it does have a little
bit of, like, a glow. Our exposure, we
already went over. Global aberration is basically the lens distortion you get in real life around the outsides of your lens whenever you take pictures with the DSLR camera. This is actually kind of nice
to just give it a tiny bit, like 0.15, just to give the tiny bit of distortion in some areas to make it feel a
little bit more realistic. Oh, the flickering
is really bad. You see, it kind of
depends on the angle. Which is a bit strange. An case, I don't want to
move this camera across. That is something
that I will figure out how we can improve
that later on. Dirt mask, camera,
and lens flares, we all don't need those things. Image effects, image effects you can choose your vignetting, which is basically
just the intensity. I'm going to leave that
quite low to maybe 0.4 or 0.3 to not
have it as much. What you have is your
grain and your grain, you can basically
give it like that old film grain that
you can see over here. I don't know I guess we want to go for,
like, a really sharp scene. We don't so much want to go for like although it
is from the 80s. So on the one hand, it might be cool to
add that effect, but on the other
hand, it might just take away from our material. So for now, let's
just turn it off. Depor field, you can
set the Depor field, but it would not really
work here because I don't have any focal points. Dept field is better if you just want to focus on one object like the foreground over here and just put everything
else out of focus. The color grading is
actually an important one. That's one that we are going
to work quite a bit with. I'm going to get started
by going into my shadows. And what I like to do is
I like to click on Gamma, and then over here, what you get is you get your color wheel. Now with your color wheel, what you can do is you
can give your shadows, actually a specific color, and I always like to give them a little bit of a bluish color because it feels very yeah
bit like in the film, like in films, you can see that they often have
this bluish color. Of course, you can make it
very intense if you want. But we are just
going to give it a slight bluish color like this, and you can also
mess around with your shadows to get
more or less of them. Let's set this to 0.15. Then for blue color,
let's go here, see, it gives an
interesting effect. There we go. The only thing
is I will need to get used to that lumen compensates also the color grading because this used to be
the case that you had full control over it, but now with lumen,
you are giving away a bit of the control. You can also go into your global where you
can, for example, set your overall gamma of
your scene higher or lower. I think setting this
just at one is fine, and you can also set
your global contrast to give some more or
some less contrast. But honestly, I think this
stuff is actually pretty good. You can control mid tones,
highlights, all that stuff. The only one that I
want to do is I want to control my scene
color tint over here. Normally, I would
use color grading lute and then go in Photoshop
and change the color. Unfortunately, I
cannot do that because there is a bug that it
does not work right now. But we have all the color grading options also over here, pretty much. So we can use over here a seen
tint color to just change the entire color of our scene and give it
like a general feel. So what I want to
do is I want to give it a bit more
of like a cold feel. Because I feel like
in this context, it will just feel a little
bit more realistic. If we go for
something like this, so bluish, maybe tone
it down a little bit. I know, Okay, so yeah, this is the right
amount of blue. Tone it down a little
bit like this. Then what we can try is we can try to select our
rectangular lights. And if we now make these a
little bit lighter 5,000, 4,000, so let's do 5,000. So I'm just pushing back
my light color a little bit back into the warmth to
kind of compensate this. Maybe 5,100,
something like this. And this is already starting
to look quite good. And as you can see the shadows, they are slowly, things are just changing along
with all of this. Over here, we have our mobility. Yeah, a bull press cast shadows, it will be turned
off. I don't know. Maybe the Bandor angle
can control something. If we set this to
70, uh, never mind. I don't think that
really does much. I was just thinking I'm just basically in real time
trying to see if I can fix an engine back because I'm just messing around
it like over here, my colors and everything
to see if there's maybe something I can
do to minimize it. But I read online
that it has to do with mostly just like
lowly lit environments, like like the ones that
we have over here. But in any case, we already have a pretty good look compared
to what we had before. If I have a look at this,
and of course, over here, the shadows are really,
really strong, that is true. And we do have some
lights over here. Maybe we want to make our
Cantates a little bit stronger. Maybe like let's set them
back to, like, three. No, it doesn't do much for our shadow specifically. So
that's the thing with this. Radius, maybe 500 in the radius. There we go. So that already,
tones down or like 300. Ooh, Hey, I think they're flickering is because the shadows are overlapping. So it looks like that we
can find a sweet spot here, see? That's a sweet spot. 400. 0450? No, 400
is a sweet spot. And what I think is happening
is that the system it still not too good in handling too much overlap
between different lights. I feel like maybe
that's the case. Over here, what we
also have is we have the problem that this
light over here is so intense that it makes our doors feel
very flat, I think. So let's go to this light
and set this to like 0.2 and just make this
like a much duller light. 0.2. How are our
reflection captures? Our reflection captures
are still won. Oh, that's because we
rotated our scene. Thank you for, it's
good that I noticed it. So I'm going to replace those. Over here because of
course, this time, the reflection
captures don't have a lot of influence
because once again, the lumen system, Lumen almost feels like a real
time thing like a rate racing thing, but so not. But as you can see
here, the flickering seems to be gone now now that we don't
have as much overlap, we can press G, and we actually have a pretty cool
looking scene already. So of course, it still
needs that extra push of the branding and all
those extra things. But if I see this, I
think all I would say is maybe let's give the
tiny bit more contrast. Let's go into global
contrast and maybe like tiny bit more. 1.1. And maybe in our global. Let's make the colors. Just like a little bit more direction
of blue in the global. The global does do slightly
different than just in color overlay.
Something like this. Okay. So we got
something like that. Now I think the
colors over here, they are a little
bit too intense. So what I'm going to do is
I'm going to open up my red, orange and yellow chair. And I'm just going
to in my color, I'm basically going to go
ahead and I'm going to just tone down over here, see this slider, which
will basically be the same as like adding
saturation to our color almost. Okay, we got that. Now,
I do feel like that my roughness amount
is not enough. So let's set this back to one because now with
our new lighting, the roughness just
has changed a bit. And what we might be able to
do is we might be able to actually fake the roughness because here you can
see the lighting, and I think the lighting is
just pushing out a bit more, but unfortunately for us,
it does not work as well. But what we can try to do is we can try to grab this light, turn off the cars shadows, set the source length lower. Rotate this and set it to, like, a very low value, like
0.1 or something. And then try and
place it over here. And then almost it's a bit mean. So it's only something that
you can do very specifically when you know all the angles the environment
will be placed in. But it could be effective. See? Might be mean, but it might also
be very effective. And if we set as low
as possible, 0.05, 0.04 maybe set temperature, maybe like 5,000 it's
a little bit brighter. There we go. S, and it
just gives us that glare, and it just works so much better if we have a small
glare like that. The bando angles lower. Yeah, because this is before. You have a press G in here. Unfortunately deselected ting. Yeah, before after
before, after. See? So it is quite effective. So if we go ahead
and just use this, maybe set our radius
also as low as possible that it just hits these chairs. Set the radius a
little bit more, 200 maybe. There we go. And then we can go ahead and because we have
shadows turned off, they will hopefully
also not interfere with our lumen stuff.
We can go in here. Tone down the width
a little bit more. And then we can go
in here and we can also rotate this 180. I hope MPC is not making too
much noise for you guys. The fans are going
quite high right now. Here we go. Okay. So those are the lights that are
faked. That's good. There we go. So we're
starting quite cool see. And now later on
when we have all of our masks and
everything on here, so we get like
roughness variations everywhere that will
look quite nice. The last thing that
I want to do in this chapter is probably that we need to
add some windows. Now there are multiple
ways that you can do it. I think what I'm going to do is I'm just going to
do it in engine, but you can also do it in model. The only thing it's in
engine, just some placement. In model, it works
the exact same way. You basically go to shapes, you grab a plane, only then you would
do this in Maya. But I feel like that right now, it might be easier for
me to just do it here. And you just simply
rotate this plane 90 degrees and you place it like nicely into this little
slot over here like this. And now what we're going
to do is we're going to go ahead and you know, like per model, so
we have this one. And now we need the
material for this. So for this, for the material, the material is going
to look like this. It's just going to be a really
reflective dark material. So I'm going to go ahead and
create a new material that I will call glass
underscore master. And if I open this
up, this material will have almost nothing in it. It will have a
constant tree vector that is exposed to a peremptor
and call this color. And it will have
a scale pemter so as click that will
call roughness. And maybe another one
that will call metallic because sometimes making
your glass metallic, actually, oh, I was not typing. Actually, it looks quite cool. But for now, we
leave it at zero by default, and we just save this. That's literally our material. So we can go ahead
and we can actually, let's set my send it back to 100 just to make things
run a bit quicker. Let's go ahead and create the
material instance and call this glass underscore
A, Strack it on here. And you can see this
is now our glass, and now it's just a matter
of going in here and maybe, like, moving the color
around a little bit. To give us, you can give it like a lighter or darker color,
whatever you want. I'm going to go for
quite not pitch black, but quite a dark color. And maybe for my roughness, do like 0.05 to give it the tiniest bit of a
distortion effect. Yeah, your metallic, your
metallic does not do anything. So let's do this. And
now we can just go ahead and copy this plane
over to other pieces. And then we can see,
by the way, of course, the reflections work different
based upon your angle, but we can just see how
everything is working nicely. I think that's the one.
No, I think for this one, I think I need to give
it, like, separating. You know what? If I'm
doing all of this, I can just as well. No, wait. Yes, no. Like Yeah, I can just as well
do it in Maya. I'm on the one hand, it means that I need to
re import everything. But on the other hand, oh, yeah, and I need to reset of my materials. No, I'm
not going to do it. So the reason I don't
want to do it is mostly because I'm lazy because if I add glass to my scene, I would need to add
the new material, which would mean that I
need to reset the FBX, which means that I need to then re import all of my materials, and I'm really not in
the mood for that. No re import them, but, like, reassign them while yeah, I think in the end,
I would I would save more time simply going in here. And just doing these two
slightly separate like this because once
I've done it once, I can just go ahead and I
can just duplicate this over to this one over here. I can grab this one and I can duplicate this
over over here. See? So yeah, it's
just not worth all the work doing this in
Maya. 90 degrees. Let's move this one over here. Maybe we can do something
cool with like lights and reflections to make this even
more interesting later on. But for now, just get
the basics in here. And then in our next chapter, we will finally
work on improving our shade more and
adding mask painting. And then hopefully we will
see quite a bit improvement in terms of just that the
scene still looks clean. But on the other
hand, it also looks a little bit grimy and everything. It has just general dirt and
everything because these are often not the cleanest
places you would go to. And this one is
definitely not brand new. So in any case, we have this one over here. And then we also grab this
one over here and just double check that works. And I'm just going to place
this one over here also. And finally, last one. Oh, second to last one. Here one here. This
last one over here. And there we go. You
can even scale down. And let's have a look
at our camera angle. Okay, so we got this. Let's have a quick look at our glass A. Maybe I set my
roughness to zero, 0.05 is actually fine. Just that the lighting
is not very interesting. Of course, over here, because it has an angle, the reflections, they show up, even though
the reflections are not completely logical,
it feels like. They do show up,
and I'm not sure. Yeah, actually, know it.
Let's leave it to this. In the next chapter, we will go ahead and
work on the masks, and later on what we can do is when we are polishing
our environment, we can see if we can
maybe do something interesting still with our
lighting and everything. But for now, this is
looking pretty solid. So if we have a nice look
at our camera plus 200, we are slowly one button, we are slowly starting to get quite a nice looking
environment. So let's go ahead and let's continue with this
in the next chapter.
43. 42 Creating Our Variation Masks Part1: Okay, so we're
finally going to get started and work on the
thing that I've been talking about all this
time and what we've been preparing for,
which is our masks. So if we have a
look at this one, I think let's do a door because it's the biggest challenge to
get something interesting. With our masks, we
can basically add details on top of this
in a very easy way. That's why we need
to keep our UVs non overlapping and keep
them all within our space. So seeing this, what I want
to have a think about is what I exactly want to what exactly do I want
to have in my mask. One of them that's obvious
one is the ambient occlusion. Just so you know, we
have control over the R, G, B, and A. So if needed, we have four different channels
that we can utilize. So we have the
ambient occlusion. Let's also go ahead
and let's have a roughness variation mask
that we can also add. Now, let's also add a mask that we can probably do like dirt
mask, something like that. So we will have a dirt mask. With the dirt mask, I do
need to have a thing because the thing with the dirt
mask is that, yeah, we might need to adjust our metallic map a little bit
based upon this dirt mask. So we want to have that one. And let's see what
else can we have? So, for the roughness, we can, like, add very
specific roughness details, so that's no problem. That kind of stuff. A dirt. It's like sitting really
like the cavities. There will be like small
bits of dirt and everything. You can see it
especially good here, like this kind of little bits
of dirt and all that stuff. So it kind of depends on what we are going to use for this. Yeah, You know what?
Let's start with that, and then we always have geno
that we can add later on. Okay, so knowing that,
what we're going to do is we're going to go
into Substance Painter, and we first of all, need
to create the setup for this mask so that we can then create a shader based upon it. Let's go file and do new, and we are going to
go ahead and let's leave the template to
PBR metallic roughness. However, this template we will most likely change later on. And then in our file, we can
select and we can select A. For your document resolution, let's just set the
two k. We don't need a very high resolution for
this mask specifically. Actually, nor map
form does not matter because we are not
going to use a normal, and then just go
ahead and press Okay. Okay, so the first
thing I want to do is I want to
create a template. This template is what
we saw over here where we are selecting the
PBR metallic roughness. We can also actually set up a scene and then create a
template based upon this scene. So if I have this, I'm going to, for example, delete my layer. Oh, it's a bunch of
different metals. That is actually really
annoying because, yeah, we will need to go ahead and go into May and just export this as its own metals. But it does not matter
for the template. So first of all, let's
finish off our template. In our template, I just want
to go into my channels, and I'm basically going to turn everything off except
for the base color. And then what I'm going to do is I'm going to go down here, go to user Channels
and add an R. User channel one is G.
User Channel two is B. And just in case we will
also add like an Alpha, so we can just name
this R, G B A. This is the channels in
which we will be painting. The reason we leave
our base Color channel is so that we can use our
base Color channel to basically see what
we're painting on. And that's about it. So yeah, because the rest is going to
be like a smart material. So once you have this setup, all you need to do
is you need to go to file and then save as template. And you can call this
template, whatever you want. I'm going to call this.
Metro tutorial mask. And you can see that I've
used this technique in a different tutorial course
before, so we can press save. Now the first thing
that we need to do is this is a problem over here, like with all of our materials. And unfortunately, there's
not yet a setting within substance designer that allows us to just combine all
the materials together. Unless they've ed
it. Now, see here, they've not yet added
something like that. I can remember that they
are going to add it, but in our case, we
need to open up Maya. Sorry, we need to open up Maya. And while that is opening up, I need to have a look
at which pieces. So Dor and the window
will need to have a specific and the Bwall need to have a specific
export for this. The rest, everything with one material does
not really need it. Now, this stop bit, I don't
think we can benefit too much from it because there will be advertisements with it. Okay, so door window, Bwall and the floor? Yeah, so for the floor, I actually because
I won't really add those dirt details
specifically to this area, I will most likely just add
them to only the floor, by the way, it is
looking really cool. I would like the
floor. Only this one, I'm going to make it a
bit thinner, probably. Is May already started up? Yes, it is. Okay, I'm just going to quickly
open up my scene. And basically all we need to do is we just need to temporarily save it
to something else. So we can actually just quickly go into your Expos folder, create a new folder and call this two painter. There we go. And then just go out of the
folder, go to Save files, and let's open up our
final Metro file. And in here, we basically
want to do this. Select, for example, your door. While you're here,
you can also double check to make sure that
the UVs are correct, which I'm sure they are. And then just right click
Assign existing material, and just pick something. It does not matter
what like brush metal. Carefully go to final
Export selection. Navigate to your export
to paint a folder. And as an FBX, just
call this DR underscore A and just make sure everything
else is fine and export. And as soon as you've
exported, Undo, so that it is back to normal. Do make sure that you do that. Do make sure that you Undo
because else you will not be happy because
then you will need to reassign all
of your materials. So we can just quickly do this for the ones that want Window under Score A, export. And Undo. And then we also have
our back wall over here. This one, I just want to
double check to make sure that okay, so
everything fits nicely. I almost feel like it
needs a bigger UV, but okay, assign existing
material, brush metal, file, export selection, B
wall, export, and Undo. I feel like that's just like a bug or something like that. Yeah, that must be. Like, it will still have the same things. And if you are not
sure about it, just reopen your scene. If something like
this happens, I don't know exactly
why this happens. Maybe something went
wrong during the Undo, I can just open my
scene because I know that I have not changed
anything specifically. And then we have floors. Yeah, only the
floors, I believe. So for our floors,
I'm just going to export this one. Or,
actually, you know? No, we don't even need to
do that. Yeah, the floors, we can just use
the original ones. And I believe that that's it. Top advertisement, we don't
need the metal handles. Those have their own
little material, but we will only add like some roughness
variation probably to those. Ceiling has its own material. Speaker, yeah, see, and all the other pieces are just going to be small.
So that's perfect. So now we can just go ahead
and go back into painter. New, and we will just get one done completely
from start to finish. First of all, in your template, find the template
we just created, which is going to be
Metro tutorial mask. See? In the file, this time, just go to
the two painter file. Call this door A.
And for the rest, everything is still default, so we can just press K and
just discard this one. So now you should only
have one material, which we can call door A. And once it's done, it
will be called later on is door A underscore
mask. Okay, perfect. So see, we have all of our
materials here ready to go. Now what we need
to do is we need to set up a SMAT material, which is like the
materials that we drag in. And this SMAT material
will have a mask set up. Let's create a folder called this Metro tutorial
Underscore masks. And in here, we are going
to get started with a default fill layer
that we all call base. This fill layer
will have basically a black color on
every single thing. So just set everything to black because it's going to be a mask. And then what we
will do is we will have another fill
layer and this one is then called R. And for this one, only turn at, set the
base color to white. And then only turn on the
R and then later on we can just turn the basical on and off to basically paint in stuff, and then just right, click
and press duplicate. B, right, click, duplicate, C, right, click, duplicate, A. Now we just need to decide
which map does what? Let's do R roughness variation. B, dirt. Sorry, that's my fault R, G, B, not ABC. B is going to be AO map. And then the alpha map
is leftover for now. Once we have done that, we just add a black
mask to all of these pieces that we
can start by painting in our meshes wide
away. And that's it. So we now have a nice
fill layer over here, which we can right click and
press create Smart material. At which point it
will just come in your library over here and
it will stay here forever. So we are now ready to go ahead and start by just painting
in all of this stuff. We need to get started by going
into our textis settings. And then we can just
go ahead and go into our bake mesh maps, set this to two k and use
low poly measures high poly and just bake everything
because we still need to use masks on
this most likely. So we can just go ahead and we can bake all of this stuff. And once that is
done, here we go. Pers okay. Then what we can do is we can
get started with this. Our AO map over here, we don't exactly
need to art anything because we can just drag
the AO map from the bags. So let's go ahead and get
started with our roughness map. Oh, by the way, I
forgot to do that. Well, it's not that
big of a deal. I need to set the studio,
of course, RGB and A. And if I just go ahead and right click and delete
this smart material, just reassign your SMRT material like this, and that
should do the trick. So having that done, our
roughness variation. Roughness variation is going
to be quite interesting. So I want to go
ahead and it's just going to give it some
extra variation. We can do this sparkly with
like a mask most of the time. So if we go ahead and go and we can even save this
mask later on if we want to. So if we go in here and
turn off smart material, there we go, we have a
bunch of masks here. The one that I
often quite like is the surface worn mask
that we have down here. And if you then
go ahead and just in your base color
temporarily turn it on, and then you can
now see your mask. So I like the surface wall mask, yes, but I do want to get more of those
scratches effects. Often, what you can
do in these type of masks is you can go down here and you can actually drag in your own little texture. You can find these textures just by going to texts over here. And if you then go ahead
and find something that looks a little bit
more like over here, like, let's see,
scratches rough. Oh, it does. Let's do scratches rough and just throw this
into your second one. This is what you will get.
It will just basically overlay this and you can
now have control over it. If you want to have
control over, for example, next, here, you
can actually have a lot of control of this stuff. But if you want to
have control over how much one texture uses
versus the other one, you can use it over here, see? So we can start
with, for example, setting our balance quite
low and our contrast down. And we can, for example, have
this scratch mask dominate. And then the bottom mask, you can also just work with your ambience occlusion
and just in general, you need to work with
a bunch of stuff, even with your past
sometimes just to get that small roughness variation
until something like that. Then in here in
your texture too, you can also set the scale,
so you can set a bit smaller. Like that. So we just basically mess around with
things. That's pretty much it. In here, you can, of course, play around also with
your scratch tiling. You quantity, if you
want all of this stuff, you can use, but often the default for
these scratches are fine. And then finally, when you
are sort of happy with it, but you still want
to add some changes, you can always go in and
add a paint layer on top. And in this paint layer, if we go to our brushes and find something that's like
a nice let's see, something that's like a nice
brush that dirt splash. Let's see. Press X to
go to black dirt one. Maybe if we set the flow higher. Yeah, I think dirt
one actually does. Although it's a
really basic one, it does sort of like
the twig over here. I can see that we don't
have a lot of resolution on these side bars, so we must have accidentally scaled those down quite a bit. But that is no
problem. In this case, just quickly get rid of them. And then if you ever have too
much roughness variation, you can always go in here
and you can paint it away. Let's say we have
something like this. The only thing I want to really focus on is
now just making sure that it doesn't have
any harsh seams in certain locations
or strange cutoffs, which it looks like it does
not for most of these areas. And then when you're
pretty much happy with it, we can move on to the next one. For our dirt, at this point, turn off your color, turn on your base color in your dirt. I like to use my
dust occlusion note, which you can find
in your masks and then dust occlusion
like this one. I think that one often
does quite a good job. Sorry, I'm setting
the Wong setting. Go into your dirt. There you go. And just set your
contrast quite low, but not low enough that it shows all of
these extra pieces. And then you can
just, like, play around to this a
little bit more. And if we have this one, let's go ahead and
add something on top. Let's add some dirt that
we have in the base. So let's go in and let's
add a simple paint layer. And then if we go
ahead and maybe use, I know, let's see, dirt spots. I just want to see
something that's really large, dirt mud. Just looking for something
that's basically really large, but still looking quite soft. Dirt one is unfortunately
too strong. There is one that I often use, but I'm not sure if it's
the best one for this, and it's a fur soft
white over here, because it does give like, if you set your flow really low, it does give you,
like, a nice fall off. And maybe if you use that one, and if you then go for, like, Dirt one and maybe like say
it's bigger and hold X, we can maybe, like,
scull it down to give it let's undo that. Let's set our flow
lower in our brush. Here we go to,
like, give it a bit more of like a fall off effect. I guess that could give
me, an interesting look. It only will need to
work for this one. And this will just
be like general dirt and everything that we'll
add a little bit on top. Next this, we can also
add another paint layer, so you can just stack
them on top if you want. And then we can, for example, go for something like leaking. Now, for our leaking, we can use our brush, but often, I do like to actually use maybe some leaking grunge map because it often gives
me a nicer effect. So if we have a look at this, let's see, scroll down and use the leaking
grunge map over here. Oh, no, that's not
going to work. In that case, you can also use the particle
system, which you can find. Oh, God, where are you? Um, give me 1 second. I completely forgot
where this one is because they changed
all of the buttons. So now I need to try and find
out exactly where this is. It should be in
here, like splat, no rain, no here, heavy leaks or leaks. So often with this one, the default is often
looking really bad. No, yeah, it's kind of bad, like you can see over here. So that's why I like
to use my leaks. But what I can do is I
can just click on this. I can then go in and I can set, for example, here you can play
around with your setting. So let's set our
spound spread lower, which means that it is
closer to one area. Let's set our particle life rent and our particle life lower, which means that it
does not live as long. And then if we go
ahead and have this, let me just do this properly. If we go ahead and
just drag our mouse across this area,
it's like a default. And then what we can
do is we can go in and we can break things up a little bit more.
So let's do this. Instead of me, messing around with the settings
for a long time, I can now go ahead and
go into my brushes, and I can grab an
artistic head brush and set this brush
to be like black. And then if we go
ahead and just, like, testichad might
actually be a little bit too strong, let's
try something else. Let's try like a dt, maybe. And in the two, let's say the flow a bit higher.
The size is a bit lower. And if you go down,
I don't know, so it does not have position I thought the position change, but maybe it was something else. We can paint this out
a little bit just to get rid of that very
basic particle look. Do not try and paint it out
too much because then it will not really work too much
or not as well anymore. And it's just roughness. So it will not be as obvious also. So it just needs to have some
leaks shining through here. So just be careful about it.
Yeah, something like this. Yeah, that should do the twig. It's going to have
leaks and maybe give it like a few or press X. And just give it like
a a spong spread down. You need to reset the settings. Or you can save this save this, but I'm just going
to go ahead and do this and set my flow
jitter also on. And once in a while, I'm just going to
press once more, just to add like a few
extra leaks here and there. That are just coming
down, as you can see. And I hope that that
will actually look good. I won't spend too
much time on this. But here we can see
that we get some leaks, we get some general dirt
and everything like that. So we got our roughness
variation done, we got our dirt done, and we got our ambient occlusion done. At this point,
what we can do is, actually, you know what?
Let's resave this. And then it's easier
for me to just remove this than needing to
redo this entire time. So let's go into our
smart materials. Let's right click and
delete the metro tutorial, and then right click and
create the smart material. So let's go ahead and let's save our scene
to get started with. In our textures, let's make
a folder that will come masks and call this
DR underscore mask. Now that we've done that,
we can go file expo texts, and we do need to create
a new output template, but I already kind of
showed you how to do that. You basically press
a plus sign and call this metro tooth underscore
mask, for example. And now we only need one
single map for this. That's a nice thing. If we go down here
and go for R, G, B, and A, we can basically input a single
map into all of them. Now, for naming, we once
again just need to go to our metallic roughness and just copy this over and
then paste this in here. You know what we can do
is we can just call it dollar sign taxi set
underscore mask. That should be more than enough. Oh, let's press do this again. There we go. Dollar sign
text, et underscoe mask. Okay, for the R, we
need to go ahead and we need to have user
channel zero R, B, user channel one, actually, just
doing gray channel. C R, G, and then B is going to be our mesh
map andmun seclusion. And D is going to
be user channel three over here because two is what's normally
the ambient seclusion, but we can, of course, just
use this map over here. With this done,
it will autosave. So all we need to
do now is create a new folder that
we'll call masks. Over here. Oh, sorry. In the masks, let's just
create a folder called final. It's because I saved it in
my textures, which is okay. Use this folder. In
your output template, use your metro tooth mask. Save it as a Targa file
at two K or even four K, if you want, we'll see,
and simply press export. And now we will have left
a single door A mask. At which point, we can go
ahead and we can now go into RL and then build our material
and import this mask. I will end this chapter by inputing the mask
and we will build our material in the next
chapter. It's called this mask. And then what I
will do is I will basically just go ahead
and repeat this process, but I will most likely do
that in the time maps that I will narrate just because else it takes a little bit long. We got a mask. If
you open it up, it's pretty cool because you can turn off the RGB over here, and you can see that
everything is working. So here we have our
roughness variation, here we have our dirt variation, here we have our ambient
clusion and nothing in the A. Let's go ahead, save sin and let's continue with this
in our next chapter.
44. 43 Creating Our Variation Masks Part2: Okay, so now let's go ahead and actually get all
of this to work. So we end up with our mask. What we can do is we can go ahead and we can just
in our materials. Now, we do need to copy this
over because remember how we have our WorldUV and
our scene master, and I believe we are using the World UV for the stripes
and the brushed metal. So let's first of all, do it in our scene master, and then we can
just copy it over. Let's try and make
it in a way that it is very easy to copy over. In any case, what we
need to do is we need to start by importing
our door a mask, and this will just be
like our template mask. We can later on just use
whatever one we want simply by right clicking and
converting into perimeter and call it mask. Now, all the individual channels are here, so we are ready to go. The red channel is
roughness variation, which means that over here we
have our roughness amount, and then what we
can do is we can lurk and then use a
linear interpolate. We can lurp this color. Let's move this over here
using our roughness amount. So we can say number
B and then we can use our mask over
here for number A, red channel into our mask. And then what we can do is we can go ahead
and we can have basically or we can give it
its own roughness value. Or what we can do is we can just control the roughness amount
from our previous one. I think it is nicer if we go ahead and just
control the previous one by simply adding another
multiplier and call this u variation
underscore roughness and plug this into
the A channel. Now what we can do is in
our variation roughness, we can just basically
control this and we can throw this into
our roughness map. Now, having that done, what we can also do is later on, we can also add a switch
to basically have control if we have a mask or
if we do not have a mask. But let's first of
all, go over here. B channel is going to
be ambient oclusion. And then the green channel
is going to be dirt, which means that over here, we can add another actually, let's just copy this
lurp over here. B, and then in our green
channel, simply goes in here. So here, it's a very
simple shader, actually. So we are just blending stuff together just like in substance. And then we can just
go ahead and copy this multiply again over here, and we can call this
dirt underscore overlay, give this a little bit of like an brownish color like
this to get started with. And that's in the of channel. And then there's one last
thing is that I also want to give a little bit of
control over my dirt. T I can do by just adding
another lurk here. Erb A, the green channel
this time in our Alpha, and just use a scalar parameter that we'll call dirt amount. And this amount will only
show up in this mask, so we can set this to one for now because we are
using a lub over here. So the reason why we did
this one like this is because we want to
use the roughness maps that we have before. While this time because
it's just dirt, we use a flat value. Now, having this
done, let's see. So when we want to go ahead
and duplicate this stuff, we can use this one, and
let's move this around. So these two, we can
duplicate to other material. And then over here, what I can do is just to swap it around is I can use a
constant t vector, and all I need to
do is I need to add a switch static switch
parameter over here. Static switch parameter,
if you add that and say has underscore mask, what you can do is you
can say, first of all, you can hold Control
and then you can move these values out here. Then you can say I
has mask is true, it becomes the retinal
and if it is false, it just becomes black because black means nothing
inside of a loop. We can do the same over
here, copy it just by pressing Contra V.
And doing the same. And because they all
have the same name, they will register the same. So we can now also go ahead
and we can do another one, and we can say,
sorry, copy this one. If true, B, and then if false, we want to add something
called a one minus node. What a one minus node does, it's the same as invert. So see it as an
invert gray scale. We are inverting black, which literally
means white because an ambient oclusion needs white in order to
basically read. So we got this stuff over
here. Should do the trick. So because this done
all turns black. So if we now go ahead
and save our scene, it would be good if we
first of all, try it out. But now, I'm worried
because I'm not sure if the door is the best version, because else we just need to apply it also to
our other scene. Here we go. So
let's have a look. Okay, so we are breaking
something with our door. The default of this is false, right? Yes, it is false. So if this becomes black, and else we can do
the switches here, I think the problem only lays here where I am
multiplying this. And that is interesting. Let's see where exactly
does it go wong. Maybe if I do my switches
a little bit different. Maybe if I add my switches
in different position. Let's go at hold
control and do this. So we are basically just
swapping this around. This one actually can stay because this is just
our embot occlusion. Let's instead do it over here. So this is our
roughness variation. So if it is true, we do this, and if it is false, we do it before we add all
of our roughness variation. The same basic concept. I just I feel like maybe the map gets a
little bit confused. Here, if it is
true, use the lurb. If it is false, use everything
before the lurb like that. Does make it a little bit more annoying to just copy
paste everything. But now you can see that
now this does look like a better result already. So it must have been
something with apparently the black collar not registering into the Alpha or something
in that direction. But there we go. As long
as we are back to basic. Now what we can do is we can
go over here and we can say, so the metal stripes, you
are most likely the Oh, no, you are the scene master. And then it must be
only over here that I turned this into
something else. I have no idea
anymore. I'm so lost. I thought this was going
to be also the other one. Okay, perfect metal
stripes in any case. Let me just move this over to my other screen temporarily. Because we cannot really
see much right now, I'm just going to go
ahead and duplicate this door and move it
a little bit forward. It's the nice thing
about real time lighting that we can
just do this stuff. This is just that we can at
least see what we're doing. Or what we can do
is we can just put height on the chairs. That might be better
because these lights are, of course, specifically created. Okay, so for our door, over here, we have
a metal stripes. First things first is then we
need to turn on has a mask. As soon as we do
that, we will get all of our controls like
the dirt amount, roughness variation, and
all that other fancy stuff. So the first thing that
I see is that, yeah, it seems like the dirt
amount for some reason, it breaks if we go
ahead and have a look. So we are lurping here,
let's just do this. Let's only lup this
with the base color. I don't even know why
I'm multiplying this. I don't need to multiply it. So that's if a he color is true, but that does not matter
because it's after our switch. So that should not
matter in any way. And as long as we have a green channel over
here, which we have, and we have a green
channel in our mask, which we have also,
totally fine. I should give us an effect. Maybe the mask is inverted.
That can also be the case. If we go, for example, to unlit, but if the mask is inverted, we would oh yeah,
wait here, see. I think the mask is inverted. I think that is the problem. So if we go ahead
and just go in here, just add a very
simple one minus note to your dirt over here and just hold control
and just do this. So then we just invert the mask, maybe it's, we are
just reading it wrong. That means that we
most likely also need a one minus over here. Like this. And then the
emit clusion is not a mask, so that one does not matter. But okay, so we now got this. There we go. So that already
gives a better effect. And now if I give control over the variation roughness
and the duct amount. I think I call it dut amount, but I was supposed to
say duct roughness underscore amount because, else, I don't know what
I'm talking about. We can actually have
control over the amount of dirt we want in here
also if it is needed. But, the dirt roughnes amount, if I set this duller, if I set it to see two, it will look dull, but over here we had some dirt in here. It does not seem
to read as well. Let's first of all, just
work on a roughness amount. So variation roughness. Ah, there we go. So
we do get that one. So here you can see that we
do get some scratches now. We have those shining through
in certain locations. Let's go ahead and
set this one to four. I think what we need to do is we need to give it a little bit of slider control over the
amount of our dort. If we go in here,
that's very simple. It's just a scalar parameter
that we will call, in this case, roughness on score variation on the
score amount, for example, and set this to one by default, and then we can have
another one that we'll call dirt on the score
variation amount, and we are just going
to multiply these. So this one will be the
roughness variation amount. Hold Control to
flip that around, and also do a multiply here, hold control to
flip that around, and this will be our
dirt variation amount. So with these
sliders, we now have full control over how
much dirt we want. We can't push it too much, but it should give us
at least something. So if we go dirt
variation amount, and, for example, oh, wow, that's really
sensitive, isn't it? Oh, wait, it is
sensitive because it is controlling also the
roughness variation amount, because if I push this out,
the dirt variation amount, it will automatically also push out the roughness
variation amount, which you can see over here. And I do feel I almost
feel like it's inverted. It's giving me a strange effect. Let's go back into our material. We just need to figure this out. So our dirt amount, let's not have our dirt amount temporarily in our roughness. Skip that and only have it in our color and see if that
gives me a better result. So now if I go to my
dirt variation amount, that is This is not working exactly how
I was hoping it to work. You can see that over here, it is like it is
adding something, but it's giving me a
very weird result. Maybe it's giving me this
result because of the metallic. That could be it.
This could be that we want to like artists
to our metallic. Our roughness variation
among us is a success. Like here we have the
roughness variation, and we can just control that. And that stuff is looking great. I'm happy with that. But
maybe I need to go in here. And I need to add
another lurp linear interpolate after my metallic. And I will call this like a constant three c or just
like a constant and set it to, like, so metallic
one means metallic, set this to like zero. Yeah, let's leave
it at zero, I mean, throw this into
your metallic and then temporarily just grab your dirt variation
amount over here. Throw this also in here. So basically what it will
now say or what I'm now going to say is
wherever there is dirt, I do not want this
to look metallic. Now, this could backfire
and it could make the dirt way too obvious or it
could just break everything. But there's only one way to find out, and that's to go in here. Dirt variation amount. Here. There we go. So it is behaving more normal, but it is still giving
me not like a nice look. And this is our dirt
variation, which interesting. So even though we have this, and this one is actually
really important because it has all those
leaks and everything, which I don't know, well we are not applying
that to that shader, but it should still
show up over here. It has a little bit, but it just does not have
dirt roughness amount. Yeah, it does not have
what I wanted to have. You can see that it is
working a little bit, see? Here. So it is
working a little bit. I think if we just
leave it to one or 0.8. Okay, that's really
sensitive, 0.9. Mm. Yeah, I kind of need
to have a think about it. Let's also add it to our home, and then we know for sure. So our home is home door A. You are just a normal
material, bye. Scene master. Perfect. So what we can do with this one is
because this one has the really heavy leaks
so then we can know for sure has mask,
let's turn that on. Let's turn on all of
these things over here. Let's have a look. So if I go dirt
variation amount, Yeah, see here, this is definitely not doing anything I want because you can see
the leaks over here. Like my dirt roughness amount
I can push and then it sort of shows that the
leaks are very dull, but it does not show this in
the dirt variation amount. So I want to leave this in. I want to leave in my debugging because I think you
can learn from it. So let's run through it. Our ambient occlusion is being totally fine, as
far as I can see. So green channels double
check. Green channel, check. Our green channel, we
are inverting our mask, then we are adding a multiply. What if we add a multiply
before we invert our mask? Because sometimes the inverting, it gives a strange effect. So let's do that. So
we invert our mask. We artist I know that we now audit it back
to all of them, but this could work. So if I now press Save, and that's the dirt
variation amount that we need to have a look at So if we now go in here,
dirt variation amount. Like this one, you
cannot push it too far, but it does look like
it's working now. The reason you cannot
push it too far is because there's only
so much you can do. And I feel like that over here, it might also be working now. So if I now go dirt
variation amount, these are my metal
stripes, right? I feel like it's not doing
anything, to be honest. Yeah, here. I feel like it does not register in any
way for some reason. By the way, we need to replace our home, but that's no problem. Okay, I think we are
getting to the point where so it is
working over here. Like, this is what
I expect to happen. We can set a dirt
mount a little bit, and for the rest, it
will just give us nike. Only it's not working as
strongly as I was hoping for. And it looks like we can
also push it out as far. Here, you can see if I really
push it out insanely far, we, of course, get this effect, but that's not
what I want to do. So I'm going to go ahead
and I'm just going to pass the video and see how
I can improve this. Okay, so right
after I press pass, the first thing I tried
and I found the problem, it's simply that our mask inside of painter is
not strong enough. So we made it too subtle
because here you can see all I did is I just went to the painter
and I did this, and then you can see that
it does actually show up, so it is technically working. Way to fix this is simply by going down here,
adding a levels. Pushing the hell
out of this like this that will basically
artificially bump it up. That most likely also means that our roughness variation over here can also benefit from that, although roughness
variation is quite strong. But what we can do is we
can just go ahead and we can push this maybe
a little bit more, and then we can go ahead and
we can export all of this. If we now go ahead and try this again, right click reimport. A C. So yeah, that's
pretty straightforward. That one is not yet balanced, but this one, if we go for,
like, a metal stripes, what you can do is we can go ahead and you can
set the dirt amount, so you don't want to
really push it too far. I think just one is fine. Maybe actually 0.5 or
something like that, just to tone it down. The thing is that, of
course, your metallic. Now, it makes it a lot stronger. And you can balance that out by just setting your
roughness, for example, to 1.5 and just play around with it until
you get the sweet spot. So let's go one for this and maybe like
a roughness amount. Okay. Let's do a roughness
amount of one and 0.5. That should be fine. This
roughness amount over here, which is our roughness
variation color. That one seems to be fine. If I press this as one, it looks like it's inverted, but I'm not completely sure. So let's just, I feel like
it is affecting everything. But I don't think it's
particularly inverted. We can test it out
just by going in here. And this was our
roughness amount. I did this without
consideration, or it can be that it is
our multiply once again. But let's just plug it in like this and see how it behaves, and then we know
soon enough if it is accidentally inverted or not. So that now if I go
ahead and go into my roughness variation
amount, Oh, no, see. So it was not inverted. In that case, what I
recommend is just in case flip around your multiply
and just add it at the back just because I don't completely trust it
in any other way. So we can then go
ahead and save scene. Yeah, then we can
just mess around. And that should be, so
that should be enough. See? Now that I place my multiply in front
of it, now it works. So I can set my roughness
amount to 0.5 or something, add a little bit,
and there we go. Instantly have a
lot more variation. Let's quickly go
to our door home and also bring in some
nice settings for this. Roughness of 1.1, for example, and a dirt variation amount
that is a little bit lower. There we go. Maybe have look at like a camera
angle so that we can, like decide for
ourself you know, let's do 0.8 now for our dirt. And then what we can do is
we can also go in here and we can now also just mess around a bit more with our
roughness amount to see if we can get
a better result. Let's set this, for
example to one. So now you can see, like we have this little
bit of dirt in here. You can still go in
and you can still, change the dirt color also, of course, just to make everything feel
a little bit nicer. But in general, the
material is working now. So all that I'm going to do
now is I'm going to go ahead and I'm going to copy this
over to my other material. That's the only annoying thing
about this kind of stuff. So I can just go ahead
and I can copy this one. I can go ahead and I
can copy this one, and I can go ahead and I can
copy this one over here. But yeah, it's of course,
a lot of selecting. So if we go ahead and
select all of this, at the same time, it
should not be that bad. So if we go ahead
and press Contra V, open up in our materials, our scene master world UV. And because we are
not implanting the world UVs into
these specific areas, it should be fine. So press Contra V.
And if we go in here, so we can go ahead and see
this is the roughness. This is the metallic over here. The metallic I forgot to do on the weight. I did
the larp down here. So let's just go ahead and
swap that around like that. This roughness amount goes into this larp and into
this use mask. This one goes into
our roughness. This our base colored goes
over here and over here. Into the base color.
And this is our normal, which does not do
anything. So there we go. So we already got
it switched around. So it should be fine.
Should I be ready to go. Oh, no, wait, here,
ABD occlusion. Plug that into your Embed
occlusion. And there you go. And because we are not using the world
aligned UV for these, they will use the original UVs, which are still the
same UVs of our models. So we can go ahead and
we can save this now. Now, I will leave
this chapter off. I know that took a little
bit longer because we had some small problems over here. You can already see
being affected. But what I will leave this off is by going ahead and well, we just need to say,
duplicate our home. And just call this
one home score. Wait, I already did Home
score door. And let me check. So this is the normal chrome. So I don't know
why this one T one is most likely complaining. That means that our switch
is not working everywhere. If there is a switch
over here because I added this into a
separate material. So that's the last
thing I need to do. These ones, you guys
are just normal ones, right? Scene master, yes. So if that is the case, I
just need to go in here, and I need to see
has mask is false. H mask is fall here.
This is the problem. So I can just copy
this I has mask is true and if it is
false, we do this. That was the one. That's
why it was being confused. So if we save this, there we
go. See, instantly fix it. Perfect. In the next chapter, we will go ahead and we will
just finish off the door. And then what I will
do is we will go ahead and pretty much do this for all of
the other pieces. There are not too
many pieces. Maybe I will just do it in real time. Does not matter too much, but
we will take it from there. So let's go at the Sava scene, press Contra H to
basically get back your doors over here. But you can see that already arts like quite a
bit to your scene. If you just do something
as simple as this, set our screams and
you do like 200. You see? Just to
scratch and everything, they art a lot to your scene. Save cena, let's
continue with this.
45. 44 Creating Our Variation Masks Part3: Okay. So now what
we can do is we can basically get
started by just creating our masks and adding them.
I left off with the door. I just want to finish
off the door just because I think it would
be nice if we do that. So we use brushed metal
door, which should be fine. So we can use that one, although you would most likely need to replace it over here.
But let's go in. Let's find brush metal door
and just call it right click and go ahead
and see ST actions. Oh, God, where are you? Rename. I can't find you. Huh? It
always used to be that next. Okay, then I assume that if we just long click, there we go. Fine. Dr underscore A. There we go. So let's just rename that and
let's open it up. And then for this one, that should have already
removed that. Oh, it did not
remove it because we did not add the
same fix over here. So true if false, then set to metallic save. Now we go now that
should fix it. O here. But at least
it's nice to know that the UVs are all
working correctly. So if you're now
going here, see, that's now gone, and I can then just go in here
and I can say has mask. Then basically, if I
go to my home door, I can say 0.81. So most of them are pretty
much already default. So 0.8, pretty much. Oh, yeah, you can see the dirt. The dirt is actually
way too much. Yeah, let's tone that
down for this one. It's way too obvious
for this one. It happened to be not
as obvious for this, but because it's around the
corners, it is for this. Set a dirt overlay maybe a
little bit lighter also. We have that one.
Variation amount here. So everything else is already fine at default pretty much. We have a roughness, so our roughness variation
amount that you can see. So we can maybe also
control that not to make them too
intense, maybe 0.7. But that's already adding quite a bit, so that's
looking pretty cool. Also, by the way, our
rubber, for some reason, I think because after we've
done a lighting pass, our rubber is too dark now. So I'm just going
to very quickly add this to here and I'm going to, like, see, make it a little bit lighter so that
it's a bit easier on the ice. I don't really like
this kind of stuff. This kind of stuff is
a little bit too much. So if we ever see
stuff like that, it is most likely if we turn off the base color here and go into a dirt. This is
often the problem. Then just go ahead and add or like a levels or just
add another paint layer. Just set this to
first soft white, which I'm not sure here it is. And then if you press
X and just on black, just go ahead and paint
this out, not completely, but just paint over
it a few times, and this will basically
just tone it down enough so that it does
not get picked up by the system as strongly.
You can see over here. Because, of course, now our
dirt is really strong around these corners because
this is where the ambient occlusion
is hanging out. But I don't want that. So we can just go ahead
and we can, like, reduce this over here,
to a quick export. And then we can just go in
here and we can go back to our door mask and just
reimport. There we go, see. So that's now a lot more subtle. Okay, great. So
our door is done. Now, what we're
going to do is we're basically just going to
do this for all of them. So let's just move one by one. First of all, I will
just create all of the masks just to
make it easier. So let's save my scene. Let's go ahead and press new grab our let's
do a back wall. First, two k. Okay? That's fine. Yeah, save my scene again, even though I already
set it to save. And then what I can do over
here is I can turn it off. Call this Bwall in
my text set list. I will do this a
bit quickly because else we are spending
too much time on small details like
this because we still need to create Alpha mask with
our screws and everything. So we got this stuff,
layers, smart material. Metro tutorial throw it in here. And then what we can
do is we can start with our roughness, turn it on. Turn off our dirt because, of course, it has
some unique details. So let's get rid of the paint. So it looks like this is the
default that it give us, that it gave us. Sorry. It looks like we have a problem with
our UV here at the top. And unfortunately, that
problem is too big, so I need to go and fix it.
Which is a bit strange. I thought that we already had a problem and
that I fixed it. But if I go ahead
and go to UV Sal and select this,
here, look at that. It is way and way too small. So let's go ahead and
just select all of this stuff. Over here. I think what we need to do is we just need to go ahead
and do a reset X or reset history and
freeze or transforms. And then if we go ahead and
just in here, I don't know. Suppose a quick unfold, and let's just make this
as large as possible. So the top does not
need to be large. The top, I can just
go ahead and I can rotate it 90 degrees. I'm just going to
do this manual. Over here, it doesn't need to be large because you cannot see it. However, the font does need
to be fairly decent size. So if we go in here, we
can just swell here. We can try and stretch
it out a bit more. Don't know if there's a larger
spot that I can do it in. I don't think so.
And then over here, we have an other piece, which I'm just going
to throw in here. There we go. Having that done, for this one, we first
of all need to go ahead and just do
a normal export. So just too unreal, Bwall do normal export. And then what I need
to do is I need to assign favorite material, brush steel, file
expot selection, and then in to painter, this will just be back
will do another one, Undo. Broke again, of course. Oh, God, this time, I did not save my scene
before it broke. Am I just going to trust
on the fact that it will work? Yeah, I think I will. If I go ahead and go to
my attribute editor. Oh, no, wait here. I did lose its material. That
is a bit of a pain. In this case, I will just
go ahead and I will just reopen my scene over here. And it does mean
that unfortunately, we do not have you know, if you go to Bwall I
just need to redo that. However, I will, of
course, not redo that. Now I will do that off
camera. Here we go. So I did all of
that UV work again, just by simply the
same exact thing. Only this time I saved my scene before changing my materials.
So that's strange. It's probably just like
a little bug can happen. So it does mean that over here, we need to just go new and
just redo our Bwall once more. But luckily, we did not
do a lot of work to this. So, just throw in, like, your metro tutorial, throw
off your base colors, get rid of, like,
your paint layer. Call this B wall. And just go in here and just
quickly bake your maps. And then we are back where
we started right away. Okay, so especially I exclusion is quite
nice for this one. I will go ahead and
I will do this one, and once we've done that, you know pretty
much the workflow, and then I will just time
up stress because we are spending too much time
on this right now. So we got this stuff,
okay, so we have a few small UV proms
over here and over here. We could fix those, but
honestly, at this point, you can even probably
just relax them, and it will still be fine after you've
already done this stuff. I'm just going to go ahead
and I'm going to add a simple paint layer on this. Say, I would recommend
that you fix them. I'm just not going
to do it myself just because of time constraints. Um, that's crap. I don't know. Maybe like a dirt one. Yeah,
I'm just going to do that. I'm just going to paint them out because I needed
to do that anyway, because I don't want to
have this stuff everywhere. So I'm just going
to paint those out. For us, this looks
pretty cool, actually, having a little bit here
and there. Not too much. Maybe press axon and
has to flow very low. I don't know. Size a bit bigger. Set flow very, very
low. Here we go. And then we can add some roughness variation.
Now, that's typical. The flow works worse or is stronger when we go ahead and
add it compared to before. But something like that,
that should already be fine. And now if we go ahead and
just turn off this color and go back to our second
dirt, over here, we have a paint layer,
another paint layer, and this one is pretty much like occlusion dirt,
it looks like. So let's not make
this too strong. Let's make it
something like this. Let's add a very
simple paint layer. And maybe like a very low flow, like a high level, maybe add a little bit of
dirt amounts like this. And let's just go ahead
and not add them to the door because
the door will be moving up and down a lot. So this door will have less
dirt sitting in there. And then if we add
one more paint layer, we can just add a few
very basic leaks. I don't know how nice
it looked over here. It does not actually look that
interesting, to be honest. Yeah, it's even too strong. So we might not add the leaks. If I look over here,
it's even too strong. I would need to
go into my amount and tone it down and because
we have a light over there, I don't think that it would
look very interesting. So but then again,
this is plastic. So what we can do is we can
add something else in here. So we can go in and, for
example, I don't know, just grab some kind of
like an interesting brush. Don't know what this one
is? It's Kyle's paint box. So let's go ahead and
set the flow very low. By the way, the
flow, you can also change it into your
pasty over here. But let's just give it
like a bunch of, like, random bits of dirt like that, just for the sake of adding
some kind of variation here. Then go ahead and set your size lower and then just once again, paint out those specific
areas on purpose. At which point, we can go into our paint and we can
tone this down or up. Now, learning from my mistakes, we probably need to set
this quite strongly still. So also down here. Well, yeah, let's
just in everywhere. So let's tone this one down
to kind fit with the rest, the levels and push everything
up a little bit more. And then if we also
just go ahead and just double check our
roughness variation, roughness variation
should be fine. So that should already be it.
We can now just do a saves. We can call this one back wall. Over here and press save. And then we can also
just right away, export this. Set safe folder. Grab your Metro. Where are you? Metro tooth mask over here, Tager file, two K export. There we go. That should
already do the trick. So we have a backwall,
so I will just go ahead and set up the backwall and
then I will leave it there. So we have stripes
for our backwall. What we can do is because we already have the same
settings, which is perfect, we can simply go to where are
our stripes metal stripes, duplicate them and call
them metal stripes on the score B wall. Now, I guess you can also make a material that just has no mask, but since we only use
the metal stripes on two masks, doesn't
really matter. We can just go ahead and open this one Let's close
the old ones over here. So we can open this one,
and all we need to do is go into a mask and replace it with the Bwall mask over
here. Save your scene. And then just go into,
like, your door. Open up the actual model. Oh, it has opened up over
here, which is fine. And then go ahead and where
are your stripes back wall? Well, you know what
I'm going to do. Stripes Bwall and I'm
just going to add this two metal
stripes over here, and that will instantly
fix that one. And now that we've done that
one, let's have a look. Here, we got our metal pieces. For example, for this one,
especially from a distance, I can probably make this
one a little bit stronger, so I can go to this
metal stripes. And then in our
roughness variation, Yeah, I like arts
a little bit more. I don't know why it's
so slow, but okay. Tree and our dirt variation
amount, I don't know. Yeah, you can see
it a little bit, but let's keep this at
like one. So there we go. It's subtle, but it is there. Then we also have a
brushed steel over here for which I used
brushed metal door B. So if I open that one up, brushed metal door B, I want
to go ahead and let's see. So I have brushed metal door A. So yeah, actually, the
settings are fine. So just press use mask. Change the mask to your
backdoor wall mask. For the rest,
honestly, it's like, doing our dirt amount a
little bit lower, 0.5. It looks a bit strange
on those areas anyway, so we probably want to also set our dirt roughness
amount if there's one, let's set our dirt
amount even lower. 0.3, for example, something
in that direction. I mostly focus on the
roughness by now. Like the dart amount,
it was a cool idea, but I feel like it does not translate as well as
the idea that I had. So we got something like
this over here. There we go. And then we can also probably, do something with the
metal if we want, where we can just add
it to that dull metal. So if we go materials, because this one is using the it's also using the plastic, but if we go metal doll door let's duplicate this
called this metal doll Dor or actually metal dollcll Bwall Let's go ahead
and open that. An artist to our metal
doll layer has mask. Set this to be your
Bwall mask over here. There we go. We can leave in a little bit
more dirt in here. That's no problem. And then in our roughness
variation, just like, see, does not have a lot, but we might be able to
add like a bit more. Yeah, it doesn't have a lot. So if we just set this to two, for example, now if we go very quickly, just back in here. And then in our roughness
variation down here, maybe, like in our paint layer, just add something cool in here. I don't know what just something that feels a
little bit more metallic so that it looks a little bit rough I don't know if there's maybe a cool smart mask that
we can use for this. Yeah, let's duplicate
this layer, get rid of everything, and then use a smart mask
like edge scratches. And then go to your metal Edgeware and just tone it
down quite a bit like that. And then in this one,
if you just go ahead and just add a quick folder, this is like we will
only do that for this call it edge damage. Throw in this layer
into this folder and just set a black
mask on this folder and then go to your
polygon fill and select these pieces over here. See? And then we can
just re export this, and that should give
us that few extra bits of edge crutches if
we reimport this. So if we now go roughness
variation amount, it should look pretty good. But it does not really show
up as much as I want it to. So maybe we just need
to make it a bit stronger in order
to make it show up because this would be something that you
would think shows up. So let's add the levels, really push the whiteness of it. Export this once more.
Roughness variation amount. Oh, that's interesting. Oh. Did we add? No, we
did add this, right? Metal dull Bwall, yes. And this is metal dull, Bwall. If that would not be the case, yeah, we would not be
able to change it. So that's a little bit
unfortunate that it does not read as well as I had hoped to. To be honest, it does not read
at all if I look at this, so that is interesting. I'm not exactly sure why
that it would be doing this, but honestly, this
is something that I can just figure out
in my time laps. At this point, this
isn't rock and science. I really do not want to spend another half
hour just messing around with the tiny bit
of roughness that you will never ever see because we are looking at it
from this distance. So, in any case, at this point, because we have reached
the end of our chapter, what we're going to do is in the next chapter, I
will time lapse it, and I will just narrate
over the time laps and I will simply go ahead and
I do all of these things. I will add all of
these masks to this, and just polish it out
and just make everything feel a little bit more like the one at the door over here, where we just have
like this nice quality that we can see down here. So that is the plan
for our next chapter.
46. 45 Creating Our Variation Masks Part4 Timelapse: D h
47. 46 Polishing Our Scene A Bit: Okay, so we are now done
with adding our masks. And so, yeah, mask, they are mostly
visible on the floor and on the door and also
a little bit over here. So it was not a waste of time. It was a little bit more time
consuming than expected, but for the rest,
like, that's on me. For you guys, it's
probably won't be time consuming because you have
your own things to do. In any case, there
is one thing that I wanted to do. There in mind. So right now, if I
have a look at this, so there's a few
things that I just want to do some
random balancing. So this is almost going to
be like a random chapter. I want to make over here, down here, I want to make
it a little bit brighter. Then up here, I want
to maybe, like, change the color
of my windows and then also continue
this color down here. I think that would
look quite nice. So it's just like a few random
things that we can change. Yeah, it's just some final
polaage after we've done that. So here, it's stuff
like duplicating this. Moving it down here
so that we can give it a little bit more like light. Let's move a bit down so
that when we go in, like, a low perspective here, you can see that there's at
least a little bit of light. Maybe it is a bit too strong. So let's do 0.03 or maybe like
0.01. No, that's too low. 0.02. And then we're just going to go ahead and we are going to artist everywhere. So basically, after
we've done this, we will go ahead and
create an atlas that just has the screws and
all of that stuff. Add some general improvements to these things, and let's see. Then another lighting pass. And I believe after
that is done, then it will be
actually the branding, yes, the branding. I
should not forget that. Once all of that's
done, I will just add a chapter which is
just general polish, but that chapter will most
likely be in time laps. So that one will be a little
bit like this chapter. So like over here, we
got this stuff going on. Oh, I must have accidentally. There we go. Let's try
it again. Here we go. So that at least get like, glimpses of that
grid over there. I want to go ahead
and I don't know, maybe want to set our
normp bit stronger on our via It's on mile screen. So oh, sorry, I forgot I
did some tests for this. I just added the
norm map strength to our play material by a
flattened normal like this. So we've already went over that. I did that because I wanted to see if I can get a little
bit more nor map details. The tricky thing
was that the normal detas are now
really strong here, but they are not
strong over here. So instead, what I think
I want to do is I'm going to also change these
nor map details a little bit, and I will do that in
substance painter. So over here, if we open
up our chairs double, yeah, we can save
this scene over here. And of course,
feel free to spend some more time on the
seating and everything. We have a height
detail over here, and this height detail
goes quite low. What I had in mind
is to then go in, duplicate this, and
then in my mask, if I right click
and press invert mask and then only set the height on and
push this height out, what I was hoping is
that it will push one bit up and the rest down. It might be easier if I just temporarily turn this
to like a red color. So here you can see, you'll see, so you
can see that I push basically the other
sides and push them out. And having that
done, now that I've pushed them out, I
can also go in here. I can then click the levels, and these levels is
used for an invert, but we can actually also
use it to then maybe here, push this out to see if we
can maybe make it a bit stronger and use that to basically have height
maps from two sides. Now, once that's done, you can go back in
and just set this to a whitish color and
just re export this, and it should just have all of your settings still
remembered so that when we go in here and just
re input our chair colors, it will hopefully bring
everything out a little bit more. Not as much as I was
hoping it would. In that case, I'm going to fake it a little bit
more by going in here, and for the second high
detail, turn on your color. Set the color a little
bit lighter like this. So the color will be pitch white and then set our
base a little bit darker. So this way, I'm hoping that I can balance that out
a little bit better. So let's try that again, export. Reimport. Yeah, it's
like small bits of balancing like this that we will work on a little
bit more later on, just to make sure that
everything works. Let's see, it works
a little bit. It's just not as
strong as I want, because this is a
very specific effect, but it's also quite a difficult
effect to actually get. Oh, by the way, it is quite
interesting that over here, the seating colors change. That might actually
also be nice thing to just very quickly add to, like, randomly change them around, for example, like this. There we go. See? Maybe do
an orange one at the end. I think that might look
also quite interesting. But yeah, so it is
working a little bit. It kind of depends on
the angle, but for now, I guess I will leave
it and I will like another polish pass I will
work on that a bit more. You can also go over
here, and if you want, you can also do like
a single seating just by pushing this in here. It might not look as nice, but for something
this small like that, yeah, it won't really
be noticeable, so that it is clipping in. So you can, of course, cut the seat in half
and make it look completely perfect and even our brackets and everything
down here, if you want. In my case, just doing this, it just gives a little
extra seating in that area. So we got something like this going on that's pretty good. I later on also actually want to duplicate this entire cart, and then I'm going to, like, show it down there
so that we have a little bit more
depth in our scene. If I have a look at
this, let's have a look. So our metal is pretty spot on. I'm quite happy with that. This metal, however, it is
still a little bit dark. The only tricky
thing is that there isn't much that we
can probably do because it is a PBR metallic. There isn't much that we
can do to brighten this up. Like we could tone down
the metal, a tiny bit, but we are reaching
then we are going a little bit away from
the PBR metallicness. So I guess this is only
something that you want to do if you just have a
very specific look. This is not something
that you could do if you, for example, make this material for multiple different if it is
diable material. But I guess that
we can here 0.8. White? 0.8. Yeah, 0.8. I guess that we can do a little
bit, something like that. Another thing is that
this back door over here, brush metal door B. For some reason, it is still like the reflection and
everything is just not working. We can go at it and we can,
tone it down a little bit, the overall intensity of it. And I guess that you
can also go in here like let's see our
roughness amount here, we can set our roughness amount
maybe to 1.7, maybe push. Here, let's balance
that back out. There we go, just to make
it a little bit darker. While we are starting
to get a lot of flickering ir, but that's okay. That's something that we
can work with later on. What's else? What
else? So we got that. Oh, yeah, I was going to go ahead and I was doing
my window stuff. So if we go ahead
and go into Maya, this might be an
interesting thing. Let's get away from this one. Let's grab our door B. And what I had in mind is for this one over here to
become like a plaster. So if I right click, I
sign existing material, and this is going to be
like a where are you? Plastic plane. Come on. Am I so blind that I cannot
find it? Rubber plastic. Oh, wait, I guess we call it
plastic instead of plaster. Fair enough. So do that. And then if we re export
this, once again, and this time, yeah,
it does mean that we need to reassign
our materials. Although I can show you what happens if you
do the other one. Sometimes it is
fine, so we'll see. Export to unreal door A, over here because I want to
do in more intense colors. Basically, I'm going to mess
around with the colors a bit to gamify this environment
a little bit more, but to hopefully make it look a little bit more interesting. So over here, if we have a door, eh, we can right click and
we can press reimport. And here, I will show
you what happens. Sometimes it works,
sometimes it doesn't, at least from my experience. But so here now
we have a rubber. It looks like now it
has become plastic. Oh, wait, here. So I
did do that one, right? Um, let's press just done. I'm a little bit confused now. I swear that I called
something plaster. Then I must have been then it must have been
just like way off. So if I press done, the
material stay the same. But sometimes what
happens is that it does not show up
the new material. Now, in this case, it looks like it does
actually show it up, so that is quite nice. Let's see if that
actually also works, that if we have a
plastic over here, let's just go ahead
and duplicate our plastic yellow window, for example, duplicate
it and call it plastic yellow
door underscore A. Dig this one onto
your plastic that I have open on my other
screen and save it. Open it up and you can just
go to masks and just use the door mask over here. And we just want to set the dirt amount a little bit lower. So having this stuff like this, what I'm hoping is that when we change this color
a little bit more intense, that will give us a little bit more of like a
flow going through. So I'm hoping to do
something like this. Let's go into our plastic
yellow window over here. And then while having a
look at our environment, we can go into a base color and just mess around
with the colors. If you want, you
can just copy this or you can later
on press cancel. But I just want to
see if I go for, like, a crazy color first, and I just move around my
mouse just to see which color, like a really deep orange color, for example, looks really
cool with this metal. And just like that,
we can kind of see if maybe they
wanted to go for, like, a more artistic approach
with something like this, like a blue color also
actually looks really cool. And then what you can
do is you can, like, tone it down a little
bit to see if you can get this a little
bit more logical. Like, for the blue, I guess it would be more logical if we
go for something like this, while for the orange, we could tone down the
orange a little bit more to get more of
like a stronger color. So what I'm thinking
is what if I do like orange and let's say, what if I do
something like this? So just copy the SRGB. So it's like a darker orange. I then go in and I then open up most of my pieces over here. So the back wall, I want to make you the
same color of orange. This is going to be our
plastic yellow ceiling. Maybe the ceiling, we
don't make it like that, and this is going to be a door. So now we can see
this transition. Now, for our okay,
we have a ceiling. Let's go ahead and
also paste it in, but let's make our ceiling. A little bit darker and a
little bit duller over here. And let's say we have
something like this. So what we can do is we
can just close this and just see how this looks. And now let's say that, okay, having this, now I need to offset this
color a little bit. So what if I grab
my orange chairs and I instead turn them into, like, these deep blue
chairs over here? And then, for example, like RDs. And then just like that, I can just see and play around it. Now, this looks really, really ugly. I'm not going to lie. So it looked cool at the
beginning, but just like that, you can now if you press Undo, you can just go ahead and you can just mess
around with it. So I only want to
want to try a blue also because I feel like blue feels like a color that
they would sometimes use. You can even see it over here. You can see blue and here, like blue, so we have the doors. That could also be cool.
We could also just make our doors like
a different color. But we spent so
much time on, like, the brushed steel that would
be maybe like a shame. But let's say that we
copy this blue color, and this is just prototyping. And then we go for,
like, a door A, and we can also add this, and then we do our back
wall. You can also add this. And now if I just move
this over to my screen, you can see, like over
here, okay, now I have, blue, and I think it's the back wall is
kind of ruining things. Here, it feels like if I do
this, that might be cool. But then again, that
would not be too logical. So let's indo this. Let's do one last test, and that is that we open up our door brushed metal door A. And that's we paste
the blue in here. And what if we make this like
this really blue collar, but because it is painted, it
will no longer be metallic, so set the metallic
to, like, zero. And what if I do
something like that? How would that look? No, it's not working. That
is unfortunate. I was hoping that I could
find something interesting because I want to add some
interest to our scene. Let's see. What can I do? I can add interest by maybe doing almost a
photo edit effect. That is something that I can do. Vagacy like this stuff
is quite a bit duller. So actually, maybe
doing it a bit duller might actually work a bit better if we just tone this
down a little bit more even than that we did before. Sorry, I can speak. Here we go. So that does now fit a
little bit better in here. Then let's have a
look at our ceiling. So our sealing, I
expected, Oh, wait. I never baked an
ambient occlusion for that because I
decided that I didn't want to do my sealing
as an actual mask. However, I can still do very quickly like
an ambient occlusion. I can, for example,
just press safe new and just very quickly add my
sealing A and just do this one. And it just means that I'm
not going to spend any or not a lot of time
on my actual dirt because I don't care about it. So we have a metro over here, and we can just go
ahead and we can, like, turn all of
this stuff off. Just set out to black masks. Call it sealing because I don't feel like I need any
dirt or anything on this. And then bake it and then just bake your ambient
occlusion over here. So turn everything
off except for your ambient occlusion
and just bake it at four k nice and
high. Here we go. And then we can just
go ahead and we can do export textures. We can go ahead and
just add it here. Set this to be metro
tutorial mask, taga file, four k export. And then you can just go
ahead and go in here. Mask. Sealing mask. And hopefully, this
does not give me any unexpected problems
doing it this way. Let's go for ceiling A. Oh, I mean, go for ceiling A mask. Turn on he mask, and then if we go
into our masks, we can go ahead and just grab
our sealing mask over here. That's not giving me exactly
the effect I was hoping for. There is another way that
we can achieve this. However, I just first of all, I want to have a
look in here that if I go ahead and
press B and with B, you can basically switch
between the mode. Okay, so ambult
occlusion is fine. In that case, what we
can do is in our DRT. Go down here and add a
fill layer to your dirt. And in this fill
layer, click once, and then immediately
at the top, you will see your ambient oclusion map. If you just add the
color so to this. And then what I'm
going to do is I'm going to go ahead
and go to levels, and I basically just
press Invert down here. And then I just play
with my levels to make this really strong so
that when I export this again, like this, I can basically use my dirt as an ambient occlusion. So I can right click
and re import this. I can now go ahead
and open this up. You can already see it
happening a little bit. So where are you? I
can open this up. And then all I need to
do is just in my dirt, just make my dirt
pitch black like this. And then you can
just have your dirt variation amount here or see, and then you can even control how much the
darkness you want to be in here and you can
just set your color. You go, that's an
alternative that we can do to at least get here. I want to have these dark lines that you can see over there. So that is working pretty good. Okay, so we got that stuff
done. We got that done. The only thing I
still do not like the backwall if I have a
look at my back walls, it's it feels too dark, almost. Maybe if I go at and also do one more fake light,
and this fake light, I'm going to tone it down a bit, rotate it 90 degrees,
move it up a little bit. Maybe give it a bit more
of like a radius and then set your source height
a little bit bigger. Move this bit closer. Let's see. Set the source height larger. Rotate it back a
little bit more. I need to be careful
that it does not give a strange look
or something like that. So maybe turn off my snap rotation and maybe just give it a little
bit of like a spin. It does not make much
sense to have a light here, but from a distance, it shows he does make everything
feel a little bit more interesting that if I do this
and set this to like 0.1, 0.2, so it takes
even 0.1 already, like arts. That's even too much. 0.05. It does kind of like depend on, of
course, the angle. And this camera over here, it's not perfect on capturing
these type of angles, I would say, because
from different angles, it does, of course,
look very different. But at least it's a start.
So we got this now. I'm just going to go ahead
and I'm going to leave this off by going into
my post effects. So I can find over here
volumes Post facts. And I just want to
basically push maybe the shadows or
something a little bit more towards blue to kind of, like, compensate for the fact
that we now still have a bit more those lights are here. If I sent this to one, no 1.05. I want to
leave it like that. Yeah, so I'm just pushing it to be careful that I don't overdo
it a little bit more. And let's see if we go into our global et's do that 1.1 maybe, 1.02, 1.05 or 04, something in that direction, I think will look quite nice. So we are getting quite close. So the main thing that I
currently hate or not hate, but the main thing I
don't like is the back. Because if I have a
look, for example, I can even if I literally just grab one of these doors
and I would rotate them, it would probably look better than what
we have right now. I I would do this, for example, I know it doesn't make sense. But the goal was to just
show you that I don't know, here, it feels more natural,
even if it's metal. And I don't know what
I can do for this. I can maybe go to,
like, my stripes, where are you? Do this? Hmm. Actually, that works. Yeah. That does work. The stripes do work like that. That's actually
pretty good. If we just suck it up
and make it metal, it wouldn't work a bit better. It also looks interesting with all of our reflections
and everything. And yeah. So, you see,
that's why we try it out. Not the top, just like
these two bits over here. I think if I make
those metal stripes, and I will even
still do that now. So Bwall So this entire
thing is metal stripes now, isn't it? Yeah, pretty much. So if I go ahead, sign existing
material metal stripes, sign existing material
metal stripes, the only problem that
you have right now is that we already created
something with our UVs, and these UVs are not correct because one of them
is flipped around. Another way that
I can, of course, fix this is to just use
the WorldSpace UVs. So if I go ahead and
just add this to my back wall, over here. Yeah, this is like
stuff that normally, if you are making an environment yourself, you have
time for this. And you can really just
like you just keep messing around with things until you get everything exactly
the way that you want. And that is something
that I will basically be showing you
at the end of the chapter. But first, I need to
get every element in place because I'm, of
course, teaching you. I'm not making a
personal environment. If I would make a personal
environment like this, I would probably spend 60, 70 hours on it instead of 20. So let's just re import this. Now it will then start
complaining about my stripes. And what I'm hoping is that my world space stripes is that they are in
the correct direction. But there's only one
way to find out. We basically go to our metal
stripes back wall over here. And if we then go ahead and
go into our master materials, seen master WorldV set
our tiling to like 200. Oh, lucky. We are lucky. 150? What did
I set my other strips to? I think the other
ones, the door strips are actually the correct one. Oh, no, wait. They do
not have the slips. In any case, in that case,
I'm just going to twine, sort of match it up, 100. I swear we did one
of those as like Worldspace I think 100
should is correct. So let's do 100 like this,
and let's have a look again. Type of wall, 100. I think I wanted to have the
top piece also this one. So let's assign
existing material. This one is also going to be
metal stripes. Yeah, right? So now, you know what? I'm just going to throw
everything on it. I'm just even going to
throw the top on it. I think it just looks better. It's just more logical for me to do that because
it looks better. So let's do something
like this, and then our door over here, I do still want to just open up, and I'm going to make it a
little bit shinier by going into my roughness amount. Let's make it like
one. There we go. So we just make that like a chunk of metal that they
just slapped on the end. There we go. Way better. That looks way better
than what I had before. I was getting a little bit
worried that I couldn't get the look that
I have in my head. Correct. See, I don't think that we still want to probably work a little bit more on our chairs to fix those, but we are overtime
now. So the plan. In the next chapter, we will create an atlas of
non map details. This is going to be
a quick chapter. It will just be some screws and you can add whatever
you want to this, and those will be
added to our scene. Especially when we fly
around this, actually, Willie comes live when we
fly around coincidentally. So I will just make some
cool videos where I do, something like this, or I have, like, a fly through like that. Once we've done that, and all of our normal details, then
the chapter will be over. The next chapter after that will be about
creating a branding. We created our branding, which actually is a very time
consuming chapter, but I will just show you
how to do one of them, and I will just basically create maybe like two variations
or something like that. For us, this is like a map, and we have some
stickers and everything. But after we've done that, we will do our branding
and get it all placed here and
everything so that will look nice and cool. And after we've done that, I
think it is polishing time. So let's go ahead and continue with that
in the next chapter. We are getting
closer to the end.
48. 47 Creating Our Normal Map Decals: Okay, so we are now
going to work on that quick little atlas that has some screws and holes
and all that kind of stuff. So if we just have a
very quick rundown, we need to create some screws. We need to create some dents, as you can see around here. So some dents around our
bolts that we had over there. Let's see what else
do we need to create? Maybe also just create like a bolt that we can
just place on top, just because we will
have a lot of space. Oh, I forgot I forgot to create that piece down over
here under the chairs. S, Is that like if I
go over here, yeah. You know what? No, because
we are lower over here. Honestly, in our case, let's
just go ahead and not do it. Let's have it that the chairs
are sitting in the back. You can, of course, do
whatever you want with it. I just forgot about it and
that is completely my fault. I only notice that really late. That's okay. Okay, so we have
those things. Let's see. Let's add like a
construction line, which is just like
a thin nor map line that we can sometimes
place somewhere. That could be nice here. It's like these type of lines. So it's just thin lines that we can place
wherever we want. And let's see what else do we have? Is there
anything else? So there aren't too many
in this environment. Normally, you have a
little atlas and it's like 50 of them and just all like random little
bits and pieces. However, for us, we
are just going to go for norm map details. So I think that should be fine. And it's too bad, we add
a lot of modeling detail, but if we really look at it, maybe the four k, but like small stuff
like over here, like these little
dots, unfortunately, we cannot really
see those anymore. But we'll see how we can
improve that kind of stuff. In any case, we now
know what to make. Let's go to Substance Painter. I think that is the
quickest way to do this. You can model this and bake this down from high
ply to low poly, but because we have not
covered that in this tutorial, we will simply go to
Substance Painter and we will make it
in here from scratch. So let's go to Final and New. Let's go ahead and set this at just like PBR metagraph for now. And in your file,
remember how we created that plane? We can
also use that for this. Document resolution k is more than enough and
norm maps in open GL. Okay, so simple
one is going to be like a little dent that we
can use for around our bolts. So let's get rid of our layers. Let's call this normal
detail atlas over here. Oh, no, actually, let's
just do detail atlas because it will then be called detail Atlas underscore normal. We do not need any baked
maps, to be honest. All we need is we
need, let's say, a fill layer to get started with and just call
this fill layer down. And for this fill layer, just set your height down, basically, and then add
a quick black mask. That's all we really need
because for this one, for example, this is going to
be like a basic hard brush. We're going to increase
the size a little bit so that because we
have so much space, it's better for us to just make it the size a little bit bigger. But of course, you can
just fit everything in how much pieces you want
doesn't really matter. Now, if I now press this, I would get this effect
here if I just rotate it. However, that's not very nice. If I set my hardness
to around 0.5, however, it will give
me a softer look, okay? That's too much. The lighting might not be really working for us in this case, because it's hard
for us to see that something is going down
with the lighting here. You see? You can see
that's going down. It's just with this lighting,
it's a bit difficult. And we can always
go into our height and just set this really strong, for example, and then just give control over this later on. So we got something
like this, so that will look quite nice. It will just have a little
bolt that we can place in it. Now, the next one that we're going to do is going to be like a screw I can't remember like a close up of my door or
something like that. Not really. Okay,
then I will just improvise on what is in it. Then I will say that one, it is a down like this. And then what it has is it has a duplicate this fill layer, invert the heights, sent
it to the other side, and add a black mask. Call this up. Now, we can use Alphas inside
of SubsaPainter. It's actually really powerful. You've already
seen it over here. So this Alpha is just
like a round bit. However, if we go
to, for example, our Alphas down here, which is this button, then
we can find something. There are some default screws, but there are a
lot of alphas that you can download for
free or that you can also just buy online like station Marketplace or Gum
Road or flip normals.com. Doesn't really matter.
They are everywhere. So those would be very handy
for you to just have look. I think I also have a
few here that I got from JROTols which is Jonas Ronegart. I probably say that incorrectly.
So sorry about that. But those ones, they
will look also nice. Let's see, in here. There isn't. I think I lost the
ones that I had, but there should also be like some default
like some crosses or something like that that
we can then soften out. So yeah, I think I happen to lose during the upgrade
of my substance painter. So let's instead go for
maybe like this one. It is like a cross forbidden, but what we can do is
if we grab this piece, and this is literally across. No, no, it's not
literally across. I can temporarily duplicate my up and just call this screw. I'm not sure if this will look
as nice as I'm hoping to. But then we can basically
duplicate this or we can place this in here
and just make sure that you do not place
it on the same level. And then if we go down
here and add a filter, I was hoping that if
we add like a blur, over here, that will basically that it will look
like a little bit softer. But I'm not sure if I
like the look of this. Yeah, I do not like
the look of this. Instead, what I'm going to
do is let's delete that. Let's just grab a basic
hard brush over here. And there is a Alpha, and it is called para boiled
over here, shape paraboild. And then if you go and use that one, this one
is quite cool. So it's really like a bold look. So you can dig this in here. Maybe, like, make it a
bit larger and kind of, like, just places
into scale like this. I don't know. Is that maybe
set the hardens a little bit. Oh, no, wait, sorry, we
cannot set the hardens up. In that case, we
just need to, like, try Got this pretty much
in the center over here. You can go into
your up and yeah, just make sure that
this is quite strong. And then what I had in mind
is to go back into your up. And this time, if
we go into Alpha, we can grab an Alpha that
is just like a square. And the reason why I want to do an Alpha is because
it's more precise. Here we have square
shape or shape square. And this one we
can basically set the squeeze up and
we can give it like a little thickness, let's set the hardness down
or up to, like, 0.8 maybe. And let's scale this
down a little bit. And then if you press X, you
can basically cut this out. So here we just have a very
basic screw and then we can, for example, just see whatever
we want to do with it. Let's say that we want to, like, make it a
little bit thicker. Yeah, it's just going to be basic, like,
something like that. Okay, so let's go
ahead and let's actually re add our shape
para booilt that we happen to have over here so that we can also go
ahead and just in case like another bolt,
just sitting next to it. And finally, what we need is
we need a construction line. So for our construction line, we can actually use our shape. You can also double
click on it to add it, set the squeeze really thin. Yeah, set the
hardness to like 0.8. This might be the easiest
way for me to do it. You can, of course,
also just drag a line, but I know, that
might not be easy. Although this is
quite cool because what I can do is I
can add one of those. Sorry set this in down. I can add like one
of those down bits I I set my hardness a
little bit stronger, Okay, that's not
strong enough. 0.9. There we go. Lucky art. We can maybe use
that for something. Okay, in that case,
what I'm going to do is I'm going to go
back to my brushes, click on the basic Hart, set your hardness to like 0.95. And then this construction line, it will basically be
like a very low size, and I basically go
down here, hold Shift. And click to the other side. See? And then we have
a construction line. And then down here,
you might want to do some manual clicking. Although if we are
mapping this on a plane, we probably do not need to go this far anyway with the plane. But in any case, so like that, we have a construction line. So those two are the
most important ones, and then like a construction
line to add some more. Of course, you can add
much more to this, but let's leave it
at this for now. So we are going to go ahead and we are
going to export this, but we also need to
have a mask for this. So what we're going to
do is these pieces, they are all just
height map information. So we can just turn everything
off except for the height. However, what we can
then do is we can add one fill layer. And you can, for example,
just pick base color. That should be fine. And
just call this mask. And what this fill
layer will have is it will just have a
base color like this. It's actually duplicated and
call this BG for background. So the background will be black. Okay, so it just like a mask.
Then we add the black mask. Now what we can do is we can
go ahead and go in here, right click and we can
press Copy, where are you? Copy mask over here. And then we can go to this mask and we can press
paste into mask. So now we at least have
that mask here ready to go. And then for the last one, I think it's easier if I just
go at it just very quickly. Do this. There we go. And then all we need to do is just quick levels
because a mask, I don't want my mask to be
very sharp or not sharp. So let's just do something
like this. There we go. That should be fine for now. Yeah, that should
be fine for now. So we got this stuff
over here, ready to go. Let's save our scene. Let's go textisEtra details,
normal underscore atlas. And then we can go
file export texts. I'm just navigating to My scene. New folder, final select this PBR metallic
roughness on Taga at, not four K at two K,
that's totally fine. Two K is even way
too overpowered. I would even go for
like 512 or 25, six, but just because
it is this one. And then we have
these two over here. This one is important. And then this one, I'm just
going to quickly name, underscore mask
instead of base color. So that should be pretty
much it. We have those two. Now, all that we need
to do is we need to go ahead and go inside of Maya, for example, and let's use our door as an example
again. Let's go ahead. Shift click, and let's add a simple plane
scare the plane up, set the subdivisions to zero. And for this plane,
all we need to do is we need to right click
assign favorite material, Lambert, call this
normal underscore atlas. And then in your colors, select the file and you want
to select the norm file that we have just created because NMP is the one that we can
actually see what we're doing. Once that's done, turn on
your text view. Here we go. And then it's just a matter of, remember this normal ditals
because we have a mask, we can actually
place our edges just outside of this range like this. So for these ones, we can just go ahead and
we can do this. And when I say this, I forgot that it might be that my norm map in my
chairs are inverted. So that's something that I
need to have a quick look at. Over here, I did not do a
perfect place of placing those, but age and then over
here, we can also do this. So over here for these ones, just go to your tool settings
and turn on preserve U V. That way we can just
move this down so that even though I accidentally
tilted it a little bit, I can just move it down
and I can also just move this in to have it a
little bit closer. At this point, you
can just start by selecting your
faces, extract pass. Select your face again, extract aces and select your face
again, extract faces. This one, extract. And finally, we have our construction
line over here, which, by the way, also
looks like it has, or it is not perfectly straight. Ah, Emil, come on. I could have done
that a lot better, but I was a little bit
impatient about this. Because whenever we get near
the end of the tutorial, I just want to really
just get things done because I want to
see the end result. So any case, we can now go ahead and with all
the extract phases, just delete
everything around it. So all of this
stuff is now fine. If you want, you can
turn off preserve VV, and if you want to make
this perfectly straight, you can go ahead and you
can select one edge site. Over here, and
then just scale it flat and then select
the other edge site. And by the way, those center
edges, I do not need them. So here, if I scale
this one also flat, and I'm just going
to go ahead and these ones, all these
ones over here. They are useless. They
are just leftovers. So I can press Control
backspace to get rid of them. See? And then we can just
go ahead and place that. And if you want same over
here, just control backspace. And then you just
go ahead and scale this one flat and
scale this one flat. Okay, so we got these pieces. Now I will just show you the workflow on
how to place them, and then I will time
maps placing them everywhere else because it
is just literally placement. You basically
duplicate this one and you rotate it 90 degrees. And wherever you want
to place it, you just place it white
in front of it. So for this, we can
move it over here. And we just want to scale it down and make it roughly
the scale that you want, which is pretty large, actually, for a piece like this. So let's do something like this. So you basically place
these over here. And then you just
say, Okay, so there are in my reference,
there are two over here. Sometimes it is a bit
tricky to select them. You need to, like, zoom in to really be
able to select them. That means that there are
also two at the top bit. And don't worry if
they're floating a little bit above, that is fine. Seems like there's
one over here. One over here. And
then there's like one. Then you can do this, you can do like shifty, shifty,
shifty, shifty. Just do something like that, and let's maybe
move this one down a little bit and then move all of them
and a little bit down just to make it feel
like it has the same spacing over here, and then just move it
less and less down. You see, it's really
annoying to select the plane when we have so
much jom try going on. One here, one here. And I just go ahead
and click and drag, hold Control, move
these over here. And once you've done
that done that, what I recommend is
just press height. Just go in and do
random rotations to You can see over here, just to give them a little
bit more variation. And that's about it. That's
literally going to be. You just place it
in front of it, and then we will create a
shader which we'll still do in this chapter is we will just quickly export this
just so that I can show you. We will create a shader
that basically only reads the norm map and,
of course, the mask. And once that shader is done, it will just use the
material below it, so we don't need to make
any materials for this, and that will be
totally fine. Okay. There we go. Okay. So what you can
do with these pieces is you can go ahead and select
all of them, press combine. Hold shift, clone them
over to the other side. Move them forward until they
are just sitting in front. There we go. Now we can do Oh, not control H. Sorry. We can go display, show. There we go. I just
need to re add that. And then for these pieces here, if I just move this to a folder, I call Atlas or to a
layer, I call Atlas. I can then go ahead and
select all of this, throw this into my door
with the extra pieces. And then at this
point, what we can do is you could also do
that with the bolts, but these bolts are not visible
enough for me to bother. But with this, what we can do
now is we can just go ahead and export this to our door A. Yes, I want to replace it. It's for safe. And now if we go ahead and
go in here, let's see. Here's our door, and there's
quite a visible window, so let's go ahead and first
of all, go into textures. Right click New folder,
normal underscore Atlas. And in this folder, just import only your norm map
and your mask. One thing I was saying is that I forgot that when substance
painter exports, it exports in direct X, I must have accidentally
gone into my chairs double and here I've
flipped the green channel, so I just want to turn it off. Now, you probably won't
notice much of a difference, but especially
because we do like something with our chairs that might still
be a difference. In any case, now if
we go to Assets, door and re import
this over here. We can just press done. Here we go. So now
those are imported. They don't look very nice yet. But if we go to our materials, we can just right click
and create a new material. Normal only decals, let's
go ahead and open this up. If we then go ahead
and go in here, we can go in and let's go into our normal atlas and
just input these two over here like that. Then for normal, just go ahead and plug this into
your normal like normal. It's always funny to say. Now all we need to
do is we need to go in our actual material, and we need to go
in our settings. In here, we have our material and just simply
set it to deferred decal and then go ahead and set your blend mode to
translucent or shading, so your decal blend mode to
debuffer translucent normal. Basically, what
that is saying is this has become a decal and a decal is something
you overlay on top and then it will
just project it on it. And then we say we only
want to use the norm map, which means that
now we only have an opaci and a norm map channel. If you go ahead and save that, now you go in here, you can turn this
into a material instance that might be handy in case you want to control
the normal intensity. So we can right
click and convert to material instance and call
this normal underscore atlas. And once that's done, open
up your door over here. Let's go ahead a normal atlas. Let's throw that in here. Give it a second. And they
will also not show shadows. So that's also
good. So they will not display any shadows
or something like that. Don't know. Is there a buck going on or
something like that? I think there's a
bug going on. Um. Oh. Of course, there's a
bug going on. It's nanite. Nani does not allow for translucent materials,
including normal details. In that case, we need to do a
little bit of a workaround. This workaround is that we are going to grab these pieces. Here it's a bit of an
annoying work around. I really hope that
they improve that. So that might just be for now. So let's go ahead and
for these pieces, let's move them out of the way. We are just going to export them as like
a separate thing. I completely forgot
that Nantes really, it just doesn't work
with translucent pieces, and decals are
technically translucent. So let's just export this door A without our bolts over here. Means that we need
to do a little bit more placement inside of real, which for a static
environment like this, I guess, is not the worst thing. It's just a bit tedious to do. But we can go in here. And if we just basically
set this to zero, 00 and just go on like a top view and just move
it just in front of it, we can just drag it on, see? Just in front of it. And we can then just go
ahead and export this one and just call this
Door underscore screws, something like that. Press okay. Or if you want, you
can also export it as the actual
location of the door, and then you just copy
the transforms over. So it all depends how
you want to do it. Let's fix this over here by
right clicking on a door and pressing Rembot that should
just snap back to normal. And else I might need
to just remove one of the old material if
it does not apply it. Yeah, here, just go in here and just press the delete
button on this material. Yeah, there we go. Okay, so that's snapped
back to normal. And then what we just
need to do is we need to go ahead, source exports. To in real, I'm doing
this on my other screen, and we will have a door screws
and open this up in here. And let's go ahead and
just press Import. All that should I'll be
fine. Oh, no, I mess up. I probably turn on Nanite here, turn it off, apply because we do not need nanite for this because else
it does not work. Let's go in here and
just immediately throw in our normal
atlas to this. You can see that they
are working, see? So we have a normal atlas. So at this point, assets and all of this junk we are
later on going to clean up, but it's not that
important right now. So we have our door screws. And if we just go
ahead and add these, rotate them 90 degrees. Now it's just a matter of
moving them over here like this and then nicely
placing them into place. Here, moving them front,
moving them nice to the side, and finally moving
them down here. And there it goes. Now we have our normal
screws over here. And then, of course, you
can just improve those. And whenever you change your material below it,
they will change also. So I will balance out
this material to be a little bit more
shinier later on. But for now, what I can
do. Here, I can do this. And now you can see that
we have our screws. They might only be mostly for close ups, but it does work. So we have this stuff, and what I will be doing then in the next chapter is
if I have a look, I will be adding this
to all of my doors. And what I will do is
I will then go ahead and I will just also add them around some of these
bolts over here if we want to go like
a very close up. We can add these around
the bolts and maybe, like, move the
bolts a little bit. And yeah, that is
most like stuff. Maybe like, add some
construction line somewhere. We'll see. So let's go ahead and continue with that in the next chapter, which we will start
off with the timelaps. But because it will not
take very long after we've done our timelaps
we will just go ahead and continue with
the normal chapter.
49. 48 Creating Our Branding Part1: Okay, so we are now
done with over here, adding all of the little screws and the dents around the
bolts and everything. Although they are not
perfect in some locations, This is mostly just
because of, like, the nanite as you can see of or it's like a shadow
problem, as you can see. These shadow problems,
we can often just fix simply by whoops I accidentally double click by selecting all of our planes because right now they seem to still read shadows. So select all of your planes
and then go in lighting and then turn off things
like cast shadow. And hopefully, or
like the bolts. It might be that it's
just like the bolts. It's not too noticeable.
It's one of those again, one of those problems that fact distance field lighting, maybe. Yeah, I think it's
just one of the bolts. So that is a little
bit annoying. But unfortunately, I would not know exactly how to fix it. Well, I can test.
If I press height. You see? It's a bolt. It seems that for some reason
with such small pieces, they look at that. So that's like small stuff
that I will have a look at of camera to see
if I can fix it, because this entire
system is new. There is almost no
documentation on it. So it's, of course, a little
bit tricky for me for Wi SmartPms to just go to Google and figure out
exactly what happens. I need to figure
it all out myself. But that's why I'm the tutor. But it does mean that I
sometimes need some time. In any case, let me
just stop rambling. We are going to finally get started with
the advertisements. So if we have a look, this window is really large, let me just skirt it down. If we have a look,
I'm going to go ahead and I will make
two long advertisements. I will make one that's just like a map or
something like that. One that's maybe
a bit different. I know that I have
not yet placed these, but one that's maybe a
little bit different and one that is just like location. Next is, we also have a bunch
of stickers, just like, please don't smoke and
all that kind of stuff. So there's a lot of stuff
that we need to create. For this, we're going to go
ahead and we are going to open up Photoshop here we go. And I have created a
40 96 by 40 96 map. So with this stuff, we need to have a quick look, and we know that this stuff
over here, it is quite tall. So knowing that, yeah, we can, of course, just
make it fit in here. But what we will do is I am
just going to guess mostly, but let's say that one
of these over here, if we have a look,
just roughly guess, like the size and, like, the length, but there's only
so much length we can have. So one of these will
be an advertisement. So I'm almost going to create like little blocks
of advertisements. Art like a solid color that
we will make black over here. Sorry, I should do this slow because we've not covered
photoshop that much. Go down here to Little Circle
and press solid color. And then what you want
to do is you just want to go to your move tool, Alt Shift, duplicate this out
to this will be number two. Then we're going to go ahead
and we are also going to create one of these. So let's go ahead and sorry sometimes extently
move around here. Solar block like
this, one is a map. One is another advertisement, but it will be roughly
the same advertisement. And then over here,
we will have room for the no smoking and everything
like that. Oh, wait. Let's do one that is like here, so like in there, we
will have silence, no smoking, all that stuff. Okay, so if we do one of these, I'm guessing that if we
just place that one down here, roughly like this. There we go. Like
that is division, and then all the rest of the
white space we will do for, like, stickers, which we will most likely
download online. So we have this stuff,
what I have in mind. So, of course, the tricky
thing for me, at least, but also for you guys, because you guys
should also learn this is we are not allowed to use actual
advertisement like this. We cannot just throw on, like, Coca Cola logos and everything because it's
copyright infringement. There is copyright on this. Now, often if you
are making, like, a personal project or
something like that, although I would recommend
you stay away from it, they probably would not mind. However, for me, for example, I am selling this cure, and I'm using their branding, if I would do that,
they would mind. They would be very angry
about it and they could like, send me seeds of desist
and everything like that, so they could actually
take legal action. Because of this, I
need to make stuff up. I'm going to make one up because I can just
use the topic. I had in mind to make
one up that is just like a TV show or
something like that. And one of them is going
to be like flight. Another one is going
to be like a map, and another one is I just
make something random. So let's get started with
the TV show, for example. What we can do is I have
a few tabs over here. We can actually use
some cool twigs. So if we go ahead
and go in here, we can get started by, let's
turn off all of these. Create a new folder
down here and just call it Advert the score. A. And with this one, let's just use this black color as a base. I'm going to get started
with just doing like a bluish color. Over here. And I'm just making this
stuff up as I go along, and then maybe do something with very thin white lines a
little bit like you can see. What you can do is you can go down here to your
selection tool. I think we've used
that one before. And we are simply
going to first of all, place a line all the way
across like this and then simply hold Control
Alt and then click oh, sorry, Control Shift Alt, and then click
away on your mask. That will basically cut out anything outside of this mask. I can then go in and give
this like a solid color, and then I can hold Alt
Shift using my move tool. Do something like this, select them and do like a merge layers. And now we can still
doesn't seem to detect. Let's try it again,
merge layers. And now we can just
go ahead and give it a few of these wiltin lines over here. Like that. Once we've done that,
go ahead and merge lays again and just make this
in the opasi down here. Make this very thin,
something like that. So it's just going to be a very subtle effect that is
in the background. Almost like a rendering effect. Okay, once we've done
that, let's get started. And if we go ahead
and go to YouTube, YouTube Com and go to the website This person
does not exist.com. You can actually
generate AI faces. The cool thing about this is because they technically
do not exist. Well, actually, this
one is perfect. Because they do not
exist, we can actually just use these copyright free. So with this, what we can do is, let's say that we have
this phase over here. This phase is
actually quite good. We can, for example,
then go ahead and we can go in here and we can just
make a screenshot of this. And with that screenshot done, we can go into
Photoshop and we can, for example, import this
screenshot in here. I can then go ahead and I can set this to the
side, for example. I know it might look
a little bit strange, but I can set this to the side. Let's do something like this. And then maybe what
I will do is I will go ahead and here, move this into your Ad A, right click and press
Rest Rise layer. This way, we can edit the layer. And if you go down
here, you have a magic one tool and you can use this magic One
tool to basically just get rid of all of these little bits over here
that are in the background. Or what you can do is
you can go in and you can go ahead and go to
your Quick Selection tool. And this way you
can also just try, add some selections like this, and then it will often just
out or detect for you. It does not need to
be super precise. What I'm going to do is I'm
just going to basically try and get rid of Here
you can also use, sorry I go a bit quick, but there are so many
tools of Photoshop, and this is not really
Photoshop tutorial. The polygon lesser tool you
can also use down here. See, even I'm not the
best in Photoshop. This stuff is at my limits of what I
can do with Photoshop, but it's good enough that if
I have something like this, I can go ahead and
I can, for example, right click on my layer
with this person. Go to your blending options, and maybe give it like an outer glow or
something like that. And in the column make
the glow like black. Oh, wa, out or glow in black
does not work, of course. In that case, maybe
go for like a stroke. That does not. I was
hoping that it would, like, do something
interesting, but it does not. Let's see. Drop shadow. We have our inner
shadow over here. Let's use drop shadow, sorry, drop shadow over here. And then we can,
like, play around with paste and,
like, a distance. Mm. Yeah, I still don't
like that, to be honest. I don't know, from distance, I guess, it will look fine. I'll have to have
a look around it. We can also, of course, do some painting in
like adding a layer, placing the layer below it, and then just go to
your brush with, like, a black brush over here, make it like soft, you can, of course, go in
here and you can, like, Oh, do that. Let me just you know that's why again because I accidentally
switched the color around. All right. Oh yeah, we can give it a little bit of, like, a black outline. Then I don't know
if that will look nice if I do
something like this. And if I then hold Control
to select my mask, Control shift I to invert
the mask and then delete. So now we only have
this piece over here. And then if we tone down
the opreste a little bit, there we go,
something like that. And then we can just go for, like, some fancy text. I have an idea. Need to look up if there is no
copyright on it. Okay, so there is none.
So let's go for, like, some kind of, like, yellowish text over here. And I'm just going to press
Capslog and I will call this that late night Um night show. I'm just thinking of
how I should sort this. Actually, yeah, this could work. If I just place the head,
let's move this up. If I place the head over
here, more to the side. That late night show. Oops. And then for this text, we're going to go
ahead and we're going to do some blending options. And let's see, that
late night show, what can we do with this stroke? It's maybe like black. Maybe you can do something like an inner glow and make this
glow like even more yellow. You'll see that gives
a flair effect, like, Oh, look at that. That late night show, honestly, I'm not a graphics designer, so just so you know that, let's go back to
blending options, maybe do something like
a drop shadow and just, like, set the
distance a bit lower. Here that late night show, and then you can also play
around your angle to set like a little bit at an angle. So that late night show and
then we do like let's see, Wit can I use a name? With some random dude. There you go. That's his name. Like night showing
that maybe, like, make this a bit smaller
with some random dude. And then I can do, like, it's like, I don't
know, select it again. Air date, select this and
make this like white. So we can do like air date. And with this white, we can
turn off the, you know, glow. So that's do ir
date, and then maybe double click on your effects
and it will open the effect. In the drop shadow, you set
the distance a bit less and maybe set the size like a little bit less to
make it a bit sharper. And we can just do, so here
we go. We have air date. And then we can do,
like, every Friday at 600 pm. And then we can maybe, like, make this a
little bit smaller. Honestly, I'm just making
this up as I go along. I've not even done,
practice runs before this, to be honest, because I
felt like I don't know, just wanted to get it done. So that late night show
with some random dude, maybe make the dark text a
little bit lower over here. I don't know. Is there
something in here that I can, like, use John Oliver. Cool. So let's see. What else can I do? So that late night show with some random dude I don't feel
like maybe like a gradient. Maybe there's something like
a gradient that we can do. So let's go ahead
and go down here and then you can
use your gradient tool and your green tool, you can set a color if you want. But I think in our case, if we go ahead and let's try, first of all, just
do a basic gradient, go up here and just
click on the first one. And then if you create a layer, you should be able
to click and drag on like a gradient like this. Okay? Maybe the
other way around, click and drag on like this. And with this gradient, if you just hold control
on your mask and then apply an art
layer mask over here. So I'm just thinking of maybe I need to select my
actual gradient, and I just turned off
this little log button. Turning off this log
button basically means that it will
not affect the mask. And then if I select
just my selection box, right click into
a free transform, I can go ahead and I
can just move this up, and I was hoping that
it would give me a better effect, but maybe not. Let's do something like this. And then let's go ahead and
just go like our overlays. And if you just click on it once and then use your skull wheel, it can give you some overlays that you can just swap between. So it can give you some
general idea, like soft light. I don't know, maybe
I will also try out. I'm just going to
turn this one off. And I also I'm going to add
a new layer, go to gradient, and I'm going to see if
we can go from maybe like a dark gold color over here
to like a white yellow color. Here, see? So you got,
something like that. Let's select our mask. I believe that if
we select a mask, it will register already. Yeah, like here. Okay, so we
got, something like this. And then if we go
ahead and, like, tone this down, um,
Okay, that one. Also I don't like like a
mask again. It's twy again. It's this time Twi going
to white instead we go for actually let's make like
a more appealing color so like like a bit of a dark
yellow, orange color like that. Okay. Go ahead and
create a new layer. Let's twy that again. Yeah, maybe something
like that works, and then just tone
down your paste. Mmm. Maybe if we set this to
like a color overlay, let's see, I'm just
using my skull wheel. Yeah, we can always use this as a multiplier also if needed. Oh. Color burns also
look quite interesting. But let's just quickly
scroll through. Lighter color. No.
Soft light, maybe. Yeah, and don't think anything
else is really working. Oh, there's actually saturation. Ironically, even though
it's not our colors. So let's see, saturation
or a linear burn. I think saturation
actually coincidentally. Yeah, just adds like
that extra bit. So let's just
delete the old one. Let's use saturation, and
we can just use, like, our basically our Pasi to
still give some color. So let's just say something
like that. That should work. Maybe the face is a
little bit too perfect. So I don't know if we can, like, add some grain to this. So let's see which
one is the face? It's this one. It
probably won't work. Filter, noise. Art noise. Here we go. Let's get rid of that line over here
that is still leftover. Just select it and
press the lead. Okay, and then maybe
on the outsides, if I just go ahead and select this I'm going to go ahead and add a solid
color that is black. Place it below it.
Actually, you know what? It's not going to
be black. It's just going to be the
color of this noise. I know. I just feel like that
noise does add something. But what I'm going to do now
is I just need to go in, and I have like this
black color over here. I'm just going to grab
a simple soft brush. And I just want to go with my white sorry, my black collar. Which one are you? Over
here, the guy, yes. And let's go ahead and add a white layer to this guy that now I can
just, like, paint this out. And up close, the noise
does not look very good, but from a distance, it does. So I might actually have broken
everything a little bit. But basically, I'm now just going to go ahead and just paint out some of those really
strong highlights. And I just count on it that
you're not going to go so ultra up close that you
will be able to really see, like, all of my
mistakes because, of course, this is something
that I could spend hours on. That's literally what the guys that make these
advertisements do. They probably spent
hours and hours on getting the perfect design. And here I am doing it in, like, a few minutes. So, of course, you cannot
expect it to be just as good. But basically, once
we have done this, here, we already spent
20 minutes on it. What we can do is I can do, like the second advertisement, and then the rest of the
advertisements I will probably do like a time laps. So let's say that we got
like this one. Here we go. AdVO. We can just turn it on and off. Now we have ADF two. Let's go ahead and
grab like a folder, call it AdVorT two. And now, this one should
be a little bit easier. What I was thinking of
is like a travel agency. And the reason I think
of that is because you often I have
another website. Travel is something
that you can find a lot of royalty free images from that you can use
wherever you want. I use a website called on unsplash.com that I found
online that has this, and I can go, for
example, plane. And like this, I can go, for example, or I can do travel. And then I can find
royalty free images that I can just go
ahead and here, this one is also, let's just double click on it
so that we save it. But this stuff is great if we just want to get a quick image. This stuff is also great. Like visit whatever this is
Dubai or something like that. Yeah, this is Dubai
because of the background. Visit Dubai now for cheap
prices, that kind of stuff. Let's do play again.
So let's see. Let's get that
one. I'm not sure. Like, if I zoom that one in
maybe, that one could work. And just like that,
we can just go for or we can
follow your dreams, become a millionaire, and just
show something like that. It's just random stuff like this one. It's just
random stuff like that. I need to be careful
because, of course, planes also have
copyright on them. So like this stuff, it does not have
maybe over here, it's like a tiny bit
of copyright pieces, but for the rest, it
doesn't have a lot. Planes do have copyright. This kind of stuff, for example, great because it
doesn't have copyright, but you should be able to just download for free over here. No fuss, no sign up. You can just go ahead and
you will have to download. And if we just go ahead
and do this one also, let's see in this one, this one, it has too many logos.
I don't trust it. But now if I move
this over here, I can go in and I can, for example, grab my first one. And what I can do is I
can now, for example, just select our layer
and just add over here, the layer object to add it,
and then turn off the log. Because this way,
I can just right click and press Free Transform, and I can, for example, go in here and I
can see like, Okay, so over here with our format, we don't really have
enough space for this one. So we can try number
two. Can go in here. Number two, if I
go in and zoom in, it does not look like it
has enough resolution. We can once again
select a layer, add it, turn off the little lock and just
delete the odd layer. But I think oh, sorry, I miss clicked, select
this free transform. I think I do not have
enough resolution for this stuff because it would have been great if I did
like a plain like this. Yeah, see, simply I don't have enough
resolution for that. Number three, please work. And else I need to
find another one. Then we are going to
go for, like, more Let's say this is
a New York subway, maybe something
with Wall Street, like Learn to invest. So if we tone this down, maybe it will just fit
yeah, you know what? This one could actually
work. So we got this one. It feels a little bit
blown out over here. So if we right click
rest rise layer, we can always also
adjust the image. We can go to image adjustments, levels or brightness
and everything. And we can try and give
it a bit more contrast, maybe make the entire
image a little bit darker just so that you can see
the outlines over here. Le like maybe like tone down contrast bit
something like this. So it just makes it a bit
darker. And then we can go. Let's see. So of course, I don't really have any
reference for this. Maybe if I just steal my, click on the If you go
up here to Outer Select, you can click and drag
and you can just quickly grab your text and
you can reuse that. So if we throw this into
the Ed for two folder, we can go in here and
we can say, like, Okay, this becomes white. Um, maybe, like, I don't know, need a private plane. Let's see, need a private plane. Where? Need a private plane. Okay? So let's say we have
need a private plane. Let's right click and
do a blending option. Let's turn off our inner glow. Our shadow, we can set the
size bit sharper because it feels like a bit more
and the distance lower, feels a bit more of
a sharper thing. And okay, so let's
say we have this. Need a private
plane. Let's select it and just mess around
with some colors if needed. So we can go for the
color and we can see if there's a color that
might be interesting to use. Most of these colors, they feel very like in advertisement, you want to keep your
colors very minimalist. So let's just keep it white. Need a private plane. Go to and I just need
to once again for my copyright, private plane.com. Let's see what kind
of website that is. Yeah, okay, so that
is an actual website. Okay, I found one. So go
to my private plane.com. Right click because that
website does not exist. So go to my Alright, I will make it like a long text. Go to private plane.com, and be fast on Track. That is just like a
little wordplay because this tutorial is for
Fast Track tutorials, so fast on Track seems
like a fun thing to you. No. Yeah. I know it
does not look amazing, but it's a tutorial.
What do you want for me? I cannot spend that much time. And then I can also maybe
find something like online. Okay, so I found one.
So I just went to studio talerbnds.com over here. And then, basically
what you can do is you can give
some information. So what I did is I
typed in Travel. So yeah, I just
went, let's leave. So enter your logo name. My private plane.com. And on my private yeah, dot com. And then I can say
like, fast on track. I don't know. So fast on track. And then press like design. And then what you can do,
so you go like services, next, travel just do normal
travel and just next. I don't really care about
much of this other stuff. Name based, just so
that it is name based. And then I can go for, like, Okay, what do I want? I want to have, like, elegant. I want to have, like, maybe tar and maybe, like, masculine. Let's go ahead and go again. Just something that feels
like it belongs with, like, high quality travel and
something in those directions. So we can go ahead and we
can just continue with this. And then over here, you get,
like, a bunch of logos, so I can go like,
my private plane, fast on track, maybe. And, actually, my private plane, that one also is quite nice. So let's go ahead and
just grab this one, and because I did not
went beyond this point, what I'm going to do is I'm going to take a
screenshot of this because I don't know
what will happen if I press love it, so
let's have a look. Yeah, just like I expected. They ask you to do so much
more stuff and everything, like, design your business
brand and all that stuff. And I don't care about that. I just need a very quick logo. So that screenshot
that I have taken. I can just quickly grab that and throw that in here because
I literally just need, like, a tiny little
logo like this. And then, let's get rid of the Fasten Track. I
don't really like that. So if I just right click Rest rice layer. Let's
get rid of that. And then I can just
go ahead and I can do let's actually do like a select color range and just click on our
white color over here, and then deselect by
holding out our button. Let's see if we can just
press delete there here, see? Like, I just need
something that is super basic and super
quick in here so that we have something else in the corner that adds a little bit of color.
So there we go. So another one. Okay, at this point, we are
way over time. Let's go ahead and
save our scene and I will save for you into
a folder called branding. So let's go ahead and
press Save and do that. And now what I will be doing is we will
actually also go to a website that's called
texts.com over here. And this website, what you can often find is if you
go to their library, this is all completely free. So at least you do need
to make an account, but often you have over here, you have signs or
something like that, and that often also has, like, warnings and stickers
and everything, which would be great if you just like if we can find
some of these signs, and else we just
need to make them. But the reason I'm showing you this now is
because I'm going to time labs the
rest because this will take very long to create
all of these branding. But here, you can
also try airports. You can try like
posters and stickers, and then you can
try warning signs. And if you open it up, over
here, you can, for example, hopefully find something in here that might be interesting. Like even we can literally just maybe find some
interesting stuff for, like, a checking and everything. And else we'll just,
like, make it by hand. So we got, like, this stuff. You also got, like, stickers, but those are mostly broken. And in here, we also have, like, some other stuff, and we can do, like,
something with, like, trash, or we can do I don't know, like, just like random stuff. So we will also be having
a look over there. What I'm going to do
in the next chapter, the next chapter
will be a time labs, and you will just see me adding those extra bits
of advertisements. For the bottom one, we will just go ahead and copy
something like this. For one of these, I will
go ahead and just find some random image online
and just add some text. And for the second
one, maybe I can find a nice school map
or something like that, or maybe I can just
repurpose one of these. And then those extra signs, those will just be adding
layers and adding text. I hope that you have
had a good overview. It's not perfect, but
it looks quite fun. So let's go ahead and continue with this in the next chapter.
50. 49 Creating Our Branding Part2 Timelapse: Okay, so I kicked in the
time laps for our branding. And branding, it's not too difficult what
we're going to do. Over here, I'm just organizing my folders and just making
sure the naming is correct. And I'm going to go to that
website and I'm downloading the buy one that we found over
here would like to travel. Just because it's perf, it's a really good one to
just use and so generic, which is great for what
we are trying to use. I'm just messing
around with the scale, seeing whatever works. And once that is done, we're
just going to add some text. Now, for this, I
am going to change my font because I want to go something a little
bit more stylistic. So I select my text, and I simply use my scroll
wheel on my font to find, like, a text that I like.
And I quite like this one. It just feels very, like, it just feels kind
of, like, cool, like expensive and premium
and stuff like that. For the text, I'm just
messing around with it. Want to go to thinking off
and I'm just messing around, basically what kind
of text will work? Because yeah, when I'm
doing this in Tips, I have the time to really
just think about it. So I just went for a basic
one travel to Dubai, and I'm just using my free transform to play
around with the scaling. And then I'm just moving it down there and then
just book now. I'm not giving it any names
because then I would need to come up with the branding
for a travel agency. And FRs, just in our layer styles we are
just going to go for, like, a simple drop shadow
and a stroke make the drop shadow a
little bit sharp because everything in this
image is quite sharp, so you can see me doing that
here, and that's about it. So it is nice and basic. And then down there, I just went for a little bit of,
like, a different font. And that's it for that
one. Now, over here, I went ahead and I just
tried to find a subway map. In the end, I realized that public maps on New
York and everything, those are actually
copyright free, so we are allowed to use those. So I went to Google and
I just tried to find a metro line and just finding a basic one
that we can use. I set my settings to only
display large images, and I end up just getting this
file. And that's about it. So the subway map because
already has everything in it, we didn't really have
to do much for it. So we can just go ahead
and grab this in here. A mask and maybe
playout a little bit more with our levels just to make it a little bit less dark. And just like that, we
can very easily do that. This one is just text. It is make the background
color, not as black. So like a little bit less black. And then for rest,
we are just going to add some text and
just the number one. And I made up I did
like 21st Street, and I just made it up. I have no idea if I'm sure
that that street exists. I have no idea if
there's a metro station in that street in Manhattan. But over here, I just
went ahead and I went for a more basic
font like an Arial font, and mostly the
reason I did that is because it just felt logical. Like the people that made
this, they probably well, they are graphic designers, but it's more about
conveying information. It's less about
catching your eye. It's more about here
is the street done. And then, so that's
what I did with this. And also, have a look
how I play around with my capital letters and
with my small letters. Everything else up until this
point was capital letters. However, if you look
at your reference, this one is more accurate, like the grammar
is more accurate. Now, over here, I went for a selection mode that is a circle. You can just click and hold on your selection mode to
switch it to a circle. I gave it the basic color, and then I just added like a big one in it, and that's
literally all I did. And once I've done that, I want to add something
extra to this. And what I often can
remember seeing is that it has some general
information that is in We small text
in the bottom. So I went ahead and
I did that, too. I just went for some
very small text, and I just switched my mode. And I just did like
some basic information. Like, need some travel advice, go to Wiwwww dotnctravel.com. I don't know if the
website exists. It's just like a basic website
because it's so small. And it's just
something to have like nicely in the corner over there. So now that we've done this, now what we need to
do is we need to go over the process of basically, well, first of all, actually, I almost forgot because
I'm doing this after. I just added like some more
darkening to the first one. And I did that simply by
just grabbing a brush, setting it to black,
and adding a layer. And I just tried to get
like a gradient effect, and it's just me messing around. I didn't like the gradient
effect in the center, so I end up going for the
gradient effect, like, from the person and then, like, kind of pushing out, and then just mess around
with your opacity. And yeah, it just added like
a little bit extra to this. So I quite like that. Okay, so once that is
done and I did, like, some general balancing
and everything like that, we are going to
move on to, like, all of those like the warnings the warning signs
at texts like no smoking, don't go against the
doors, all that stuff. And for that stuff, you just really need to
look at your reference. So here you get, like,
the please don't smoke. I try to have a look, but I
quite quickly found out that it's quicker for me to just simply make it all from scratch. I got distracted by that
because it was metro. Yeah, I went ahead and I
did have a look over here, and I did type in no smoking, and I did find one, so
that's pretty good. So we can use that one. But for the rest, we
are just going to go ahead and make
everything from scratch. So we're going to
create a new folder and just got like stickers
or something like that. And these ones are
a little bit more flexible in terms of,
like, the scaling. So I just give it like
a base background. And if I look at my reference, there's almost always like a white line sitting
across the top. I go ahead and just
give it some text, and I just try to mimic
the font of the text with the same font as that we have in our
reference once again. And over here, I was getting
a little bit annoyed that this massive window
while sitting next was overlaying on my text. So I just moved
my window around, so now I can see my
text actually changing whenever I use my arrow keys
to switch between them. And I wanted to go for
something that was a little bit round in some cases. So yeah, here, I just
went for this one, and then I just turned
off my Caps lock, so I made it like, please, and just like a normal text, sort of, something like that. And what you can see with that small little
window over there, that window is your
text settings window. You can find it at the top bar. It's like a little folder
button, and you can find that. Now, I tried to add
some more stuff, so I tried to add this one, but in the end, I
did not like it. So I end up just changing my sign to not have
three buttons, but to just be about smoking. So over here, I tried to
cut this out, and, yeah, it just didn't really look as nice as I was hoping it to look, especially because
of the reflections and it's like a
very different one. So I noted that quite quickly. So you can pretty much just ignore what I'm doing over here. I still want to keep it
in because I went to image adjustments and replace color, which is a
pretty cool one. If you like, very quickly,
you want to just go and replace some
colors like that. You can quickly
change a plain color, but I did not like
it, so I removed it. I went ahead and I
just went for, like, a bigger smoke sign like this, and that end up just
working just fine. And then I cut away the bottom just to make
it a little bit smaller. So at this point, making
some smart changes, but for the rest,
I'm just moving on to all of the
other smaller signs. Like, do not lean on the door. And above that, there is a
do not hold the door open. So I went ahead and I used
my original fill layers to add those white stripes and to add those black
stripes like this. And for the rest,
it's all just text. All of this stuff
ended up just being simple text with a
black and white line. And that is about it. So
it was not too special, so there isn't much to say here. One thing that was really
nice is that on text.com, I happened to find
exactly the warning icon. That is used for this. So that is really nice. So you will see me doing
that soon because, of course, it's a
very specific one. So I went ahead and I just scrolled through
my warning signs, and here we go. Do not lean on door.
I literally found it. So that was like
the actual text. However, the actual sticker itself did not fit in the style that we are
going to go for. So because of that, I went
ahead and I only used, like this little
button over here. One thing to keep in
mind is that, of course, the background of that
button is of that sticker, it is too black or too dark. So you can use your levels, and simply in your levels, just push the black
slider more towards the what is it left or
right towards the right, yes, move your black slider a little bit more
towards the right. Ignore what I'm doing now.
Here you can see, see? And then it just kind
of matches the color. And that is good enough
for something like that. I'm just cutting away,
like, the very end because it was a
little bit too long. And I went on to my next one, which is do not hold doors. And for that one, it's
pretty much the same thing. So we pretty much make the same thing art
the black background, art the white line,
art the text. And we can this time
just copy over the text. And then for the warning sign, I place a warning sign on both sides and you will
see me using what I'm going to use inside of you will see me
using it quite soon. I'm sure I found it
in here somewhere. So this one over here, which is like you
are getting crushed. That's what it looks like. And then I just grabbed over here that do not lean because I wanted to just use the red
stuff. So I grabbed it. I quickly selected my magic one, like the red area around it, and then I just inverted it and just deleted
everything else. And then I'm just
going to repurpose this one by cutting
that one out. Over here just by removing
everything around it. And then I'm going to
go into my levels. Now, I try to adjust my levels,
but it was still color. So first go into and saturation, set your saturation
all the way down, and then you can
use your levels to basically make it
black and white. And then you can kind of
just place it in here. And although you don't
have a lot of resolution, now it's just a matter
of using your brush to simply paint in
white in the rest. And that already does more than enough for a small
sticker like this, see. So from a distance, it
will look totally fine. So I'm then just merging that together and placing
that on the other side, and once again, cutting off the extended ends that
we do not need to use. So for rest, it's just again, a few more smart things,
priority seating, some numbers. So that's what you will
see me doing here. Over here, I go to select,
modify, and smooth. And what that will do is if you sell it to
like ten pixels, it will give you
some round corners. And that looks quite nice. And for the rest, I
just random numbers. It does not really
matter the numbers. It's just something
that I can add to just add a visual
interest to our scene. I then went ahead and I did
the priority seating one, which as you can see over here, it's pretty much the
same basic concept. And it's just a bunch of texts. Priority seating,
and then there's another text that is below it that is a little bit smaller. And then later we can
just cut off whatever we have still leftover for
persons with disabilities, that's just how it
looks in the reference. And I'm just making that
a little bit smaller, moving down a little bit, and then cutting away all of that extra bits
that I do not need. Now, I went ahead and
I just looked at, like, is there anything
else that I can find? And in the end, I just found some extra text over
there at the top, and that's the last
thing that I added, just to get one extra
variation next to this. And once again, like smooth. So this is the same way as
that you made the nine. So I just went ahead and
I typed something in 369. I don't know what it means.
It just first number that came up into my head. And that is about it. So
let's now go ahead and continue to the real
time where we go ahead and I will show you
how it actually plays all of this stuff together
in our environment.
51. 50 Creating Our Branding Part3: Okay, so we are finally done
with our branding over here. Now, what we're going to do is we're going to go ahead and go into Maya and we are actually going to
use this. Oh, wait. It would be nice if I
also save it as a TGA, in that case. Let's do a saves. And do TJ, they do accept PSD, but PSD is a really large file. So just call this
branding underscore, A, for example, and press
Save. Okay, perfect. So we got quite a few bits of branding, so that
should be fine. Now, as I said before, because of Nante we are not able to just stick
these on our meshes. That's what you
normally do. So that's a little bit unfortunate, but it's not the
end of the world. It just means that
we need to do a little bit more work for this. So I'm going to get started by going ahead and
creating a new layer, and I will call this
layer branding. And then if we just turn
of our Atlas layer, now what we can do is in here, we can get started by Act, it's sort of the same except
for the overhead branding. So if we go ahead and just
press F and zoom in on this, don't know why it
feels so small, let's turn on our
top advertisement. Something is happening
here. 1 second. This stuff needs to
go back into Atlas. Our advertisement. Oh, I'm in isolate mode. That's it. Sorry, I
was in isolate mode. Okay, so then based upon this, I know that I can actually go quite a bit bigger like this. And having this piece,
let's go ahead and just get rid of our
segment over here. And let's just move it up a little bit so that's
above our grid. Now we can go ahead and just
assign a favorite material, once again, call this branding. And this one comes
in two ways in most of them because we also
have plastic in front of it, so just keep that in mind. So we are going
to add this file. So this is like the first way. Let me just navigate. No, that's the wong
folder over here. Let me just navigate
to this one. So that we'll add
our file over here. That's all good. Actually,
it's too difficult to see, so let's just turn
this back into, like, a white background. Here we go. File, Save as. TGA, and let's save it. And most of this stuff,
it is very easy. It's just us cutting stuff out. If you go to color,
you can pass reload, and that we just
reload the file, and now we can just get started. So I try to keep everything
fairly much on one line. I do want to cut it
out just in front of it over here because that way we avoid the risk of having
white line sitting across it. But it seems like
that over here, it's doing a pretty good job
with being aligned, see? So it's nicely aligned. Even the Dubai folder
is nicely aligned, which I think actually
end up quite well. Of course, all the credit
goes to the guy that made the picture because all I did
just add some extra text. But at least, I feel like this will add a
lot to our scene. So I think it is really good
that we spent the time. Also, like these pieces
also went really well. So I'm quite happy about that. Let's do one here, one here. Then later on we
can just get rid of all the extra lines
I have created. Or what you can do is
you can temporarily wait with all of the small ones
and just first of all, cut out the larger ones. What I can do is I
can, for example, place these, and then I can
say, Okay, first of all, I want to go ahead and Shift
click, extract those faces. Extract these ones. This one. And this one over here. Now what I can do is I
can go in here and I can start adding more eedges
because now these edges, they will just not conti over. And this is also why I gave
it some space around here. So now I can also grab this
one over here, extract faces. So we got that one and
now it's just a matter of going in here and doing all
of these really small ones. For which I just need
to kind of zoom in. And I was also lucky to find exactly this one specific
look on text.com. So that was really nice
that I got that one. Priority seat. Oh, no, wait. Sorry, this is the do not hold doors. Then we
have some numbers. For numbers, because
we have a mask, I can go ahead and I can
cut out a little bit. So I'm just going to actually. So for numbers, we are going
to rely mostly on the mask. Actually, do we need
to? Let's have a look. If we have all of this stuff, we don't need a mask if we are going to cut
it out like this, that would just be
overkill because you can use a mask to make
an effect that is, like, torn off and that's,
like, ripped and everything. And we can always
do that later on. But for now, that would just be extra work for me to
also convert it to a mask. So I just want to
make it extra simple. So what I'm going to do is
I'm going to go ahead and I'm going to leave. Let's leave these for
now. Let's first of all, go ahead and just extract
these pieces over here. Here we go extract faces. And then what we can do is later on we can just add
some geometry to those other ones. Extract faces. Yeah, then placement is
going to once again be a little bit time consuming most likely for most of these, but well, it doesn't matter
too much. Here we go. Now that all we have left
is these piece over here. For these pieces, what
you can do is you can try and get rid of press
control backspace. You can try and use the atl. So the catol it will
try to already connect. But then, technically, it
often allows you to also place in empty pass it allows you to play
some loops like this, which in this specific case, that they are not connected,
doesn't matter too much. We can just connect
them later on. Let's see. I don't think, it's not registering.
That is too bad. It does not register.
Unfortunately, so sometimes it works,
sometimes it does not work. In that case, here, let's
get rid of this line. In that case, what we're
going to do is old school. 1 second. Let's get
rid of this one. And that is Oh, God. I just completely broke my loops now, didn't
I? There we go. What I was saying is
we are going to place our loops like normal. Then you can try and
do a Contra B on vertices and that will
do it try like Java, but often it breaks your
entire UVs, as you can see. So let's not do that.
That's instead, I'm thinking too
difficult about this. I should have just used a mask. But I don't know. Maybe I should have,
but I can also do this. Just add a few extra edges like that because then if you
just don't preserve UVs, you can, for example,
push this one down. Keep this one here, move this
one out, stuff like that. Here we go. Pretty much
does the same thing. I might distort a little bit, but not too much or at least
it should not be too much. Over here, we just want
to push this out again. It is being quite sensitive against my manipulation
compared to normal. Normally, it's not this
sensitive against it. So that's a bit typical exactly when I'm going off script, it does that, oh. There we go. That should do the trick
for something like this. Such a basic thing
anyway and so small, so we can just do like an
extract phases over here. And finally, we can go in here. I have preserve V still on. Push your stuff out. And let's go ahead and add
some extra segments. And now we can just
go in and move this. Wow, it's really need to start pushing everything
back like that. It's really annoying.
Like if I move it, it just keeps
pushing back, back, back, see. And I
don't like that. You can maybe twin out
another segment next to it, and that sometimes
does do the twig to just almost like fake as if it has enough
support like that, C. So I guess that's one
way you could do it. Okay, in any case, this one is now also Done, and that should be it, so
we can extract this. And then all that
we have left is just an empty shell, I believe. Yeah, see here, empty shell. Okay, so for these
pieces over here, these ones will be
slightly different because they will be
in the overhead ones, so they will need to
have some bending. So for now, just get
rid of those segments. This one is fine,
this one is fine. This one can also get rid of some of these random
segments that we have. And then what our plan is. So for this one, it can actually get rid of
a bunch of these. Our plan is to, first
of all, fit them on the actual pieces to
make sure that they fit correctly and they
have the crag scaling. And after we've done that, we will just go ahead
and just set them at 000 and export
them to unreel. And in unreel, it will be
the most easy shade or ever because all we need
is a base color and maybe some
roughness control. But we will also have a
plastic layer sitting on top, so just keep that in mind. So we now got this stuff. Let's go ahead and reset our pivot and add everything
back to branding. Let's save our scene.
And let's just go ahead and let's test out the system right away with
the most difficult one, which is we are going to
add our top advertisement A over and then we simply go ahead and we
can grab this piece. And now for top advertisement A, we can choose how
we want to do this. So, let's grab this
piece over here. Let's temporarily add it to, actually, no, we
don't need to add it. Just like both of
them, just isolate it. I was going to say add it to your top advertisement
layer, but it's not needed. And then for this one, just
go ahead and hold J and rotate is 90 degrees, we
want to set the base. To pretty much fit
in here like this. Oh, I did not leave a lot of
space for myself, but okay. So we got this one over here. Now what I'm going to
do is I'm going to once again re isolate
because I'm going to go to snap to points and I'm going to snap my Vertz
so I press Add a pivot, snap my pivot to this
Vertz over here. And then if I go ahead and
isolate these two again. Now, if I maybe go to IFrame, it might be easier to see, or maybe it's easier
if you just go to like a side view because I'm
going to scale this up until it hits
the top over here. And then I noticed that
it is way too small. That is a little bit
unfortunate. Let's have a look. So if I grab this one
and I move it over here, this one is just
going to, like, fit. Oh, sorry, make sure to Let's Undo that make sure
to preserve Vs turn off. So I moved it over here. Let's see, can I stretch this
out and I can stretch it out up until this point before it starts to be very noticeable? Wow, is it really that long? I did not expect it
to be this long. So that means that if I
would need to scale it, I would need to scale
it up until this point. It does mean it just means
that we need to edit some stuff in our shape. But I'm just a
little bit surprised that it was this much. So let's have a look. If we now go ahead and
so we have this one, I'm going to go in and in our
shape, over here, Ad for A. So all we need to do, Willie, is we need to go into Add A, and we can get started and then just need to
switch back and forth. Okay, so the late
show and everything, all of that stuff
needs to go down. The late show night
with some random dude, text can stay the same scale. This just needs to go down,
so I just use my move t. I use my arrow buttons
to move this down, and I'm basically going
to move it to a point. And maybe, so this point, we can probably just use the
PSD inside of Maya because I did not expect that I needed
to do this much editing. So in our branding, just open up the image name and just open up the PSD instead over here. And then basically
I'm moving this down so that I get
like a baseline. So I move this down. I save. I go in here, I press reload. And now I have sort
of like a baseline, maybe move it down a
little bit more like this. Then what I can do
is I can right click free transform and I can make
it a little bit smaller. Then we have the airdate stuff. That stuff we can also go ahead and we can make a
little bit smaller and maybe move it down
a little bit more. Over here, we can
save our scene. If we go Maya, we
can reload here. So that's now a
little bit smaller. The air date is still
feeling a little bit large, so let's re transform. Tone this down a little bit. And then we have
the guy over here, which is up until this point, right click free transform, and then just hold
Shift and also move this one down. Let's see. So we got something like
this. Now I need to move it to the side because else, it does not really look good. So let's do a free transform. Well, maybe what we
can do is we can do like a cut effect where it's actually larger and his head just gets cut off on purpose. So it's almost like over here, it does not have
an head like that. We can try that one out. Here, let's I miss clicked. Reload. Yeah, we can do that and then have
the air date sitting in, like, the center. Over here. So we got these two.
And the air data is just sitting over here. I know it looks a
little bit strange, but as long as it fits in here, that should be fine
because we will only be using this one over here. And then what we can do is
we can go in and just add a very simple segment in between here and just
cut the top off. See? So now we pretty
much have this, and I can say, like, Okay, so the late show with
some random dude, let's go ahead and let's tone that down a little
bit more over here, just because it's a little
bit close to the edge. Reload. There we
go. Okay, finally. So once you've done that, piece, what you can do is we
can go ahead and yeah, so there are multiple ways
that we can bend this. We already know that.
I'm just going to carefully bend this over here. And then I'm just going to
go ahead and I'm going to, like, add a few more segments. So let's do let's
divide this one up. And let's divide this
one up even more. I wonder if we add three,
if we press three on this, it will warp the text because that would make it
instantly a little bit more. Yeah, even though we don't
use nanite on a plane, it's so little that you
probably won't even notice it. Instead of me just trying
to do this by hand. If I just press three,
yeah, I see here. I'm going to press three, and we will just use this technique. We now got this one,
and the only thing is at the top, let's see. Oh, no, ah, that is fine. So we got that one, so
that's all looking good. So having this
piece ready to go, I cannot select it. There we go. Now what we need to
do is we just need to go ahead and we
need to basically hold shift and clone it
just in front of it. And with this one, right click, assign favorite
material, Lambert. And you can call this
htrunScoPlastic. You can kind of like so right now it is
clipping a little bit. So you can also often move it down, I
guess, in this case. And what we're going
to do for this is just in the transparency. We're just going to
turn this on just so that we can actually
see through it. So now we got these
two pieces over here. Let's see if this
actually works, and if it works totally fine, then what we can do
is we can here's a top advertisement.
Let's just export this. And if this works totally
fine, then that's great. Then we can just quickly, change the UVs to the other
one and use that technique. So let's get started
by just having this one and just carefully
place it in here. You can move it down a
little bit more like this. And we can save a scene. And then all the other pieces, I will once again time
up just me placing them because it's a
bit boring stuff. So file export selection. We can call this top
advert underscore A, and oh, sorry, I forgot
to do one thing. I forgot to go to
modify see here, let's do Shift D and just
quickly throw this into our backup layer just because we are going to
turn this into hipoly. But it's not that big of a
hypoly Here I I do modify, convert, smooth mesh preview to polygons here you can see that it is not actually that hipoly. And then what you can do is
those middle lines over here. They are technically not needed, so we can just press
control backspace to get rid of them. Temporarily press height,
do the same over here. Modify, convert
smooth mesh preview to three D. It has
a few segments, but it is a large asset, so I don't mind having this. You can, of course, remove
every other one if you want. But in any case,
now having this, we can now go ahead
and we can file export selection Top advertisement A. Let's export this again. Save it. Okay, moment of truth. Let's go in here. Textis
new folder called AdVRTS. This time, I am going
to go ahead and go in here and I'm going to
do a saves as a TGA file. Even though UnwLDs I
believe, also support PSD, I just prefer TJ and I'm going to go ahead and I'm
going to drag this in here. So we got our
advertisements ready to go. Now, if we're going
into our assets, we can start by importing our I'm just looking at
it on my other screen. Top at A. Here we go. Turn off Nanite
input. There we go. Let's go ahead and just
use it here in the center one. So let's drag it in. Rotate at 180. Zoom in and just try and place
it neatly together. We only need to place it once, then we can just copy it over. And then we need
to place it once on the other side,
also, I guess. But okay, so we got this stuff
over here now ready to go. And now what we need to
do is in our material. So we need to have
two materials. One of them is going to be let's see, at first base. Yeah, let's do ad
for base over here. Let's open it up because
all this one is going to have is it is going to have in our AdVOds it's going
to have the branding A. And honestly, we don't even need a material instance for this. All we need is a branding A, and we need a constant for roughness that we
will make around 0.8 probably because we are going to have to shine from the one sitting behind it. So we basically just save
this, and that's literally it. And then what we need is
another one, and that one, we can call see through
underscore plastic. This one, it would be nice to
have in material instance. So for this one, we need
a constant tree vector, and this is just a color. So let's set this to
like a white color. Right click convert to perimeter and just call it base color. Of course, it had to out to save exactly when I was typing. Base color over here. Then in our base material, we are going to set the
material type from surface. Oxy surface is fine, blending mode translucent, and the shading model
should be fine. And just set the two
sided just in case. And then for opacity, we are going to get a Oh, no, wait, sorry, translucent. I always forgot surface. Oh, wait here. Decor responds, Color no what? No,
no, that's fine. Where is this located? Surface translucency
volume. There we go. So translucency, lighting mode, surface translucency
volume. Wow. I always forget where that is. In any case, we're going
to have a scale perimeter, which you'll call roughness. And we're going to
have another one that we'll call opacity. What's up with me mistyping? Opacity. So our roughness goes into our roughness
and we can keep it shiny. And our opacity, we are
going to set to probably 0.1, arts over here. Now, we most likely also want to add a normal map later on, just to give it a little bit
more of a warping effect. But that is just going
to be Perlin noise. So for now, this should be fine. So if we go in materials, we have our ctr plastic, and we can just create
material and call this main advert
plastic, for example. I mean, create material
instance, of course. Luckily, you can also
see what I'm doing, and I don't just have to
tell you because I'm so bad at L for some reason, I just always managed to mistaken or forget to say
one word or something. So we have our AdVord
base and then we have our main C tro plastic
command. Where are you? Main Ad ford plastic over
here. And there we go. So now we have our
advertisement, which is looking a little bit like he has a really
big heat for some reason, but that's probably the warping. So if we go ahead and go
over here, ironically, this one we cannot actually see because we have our camera
angle at the wrong side. But at least it is working. I would say that my
main at for plastic, I can just mess around
with this a bit more to see if I can make
this a little bit more shiny. So our roughness is set
at zero, so that's fine. Maybe if I set my
opacity a little bit like 0.3 or
something like that, it will mostly just
make it feel darker. But once we have a normp
it should show up a little bit better.
So we got this one. So now, for this stuff,
it's just a matter of, like, over here, like, duplicating it, and then
later on, just replacing it. So for now, I'm just going
to duplicate this around here just to see how
it exactly looks. And then we also have this small one that we
have over there. For that one, I don't know. I guess that that's sort of
like just fits that you won't really notice too much Yeah, you won't really
notice that there is technically something wrong. I guess that will fit like that. But let's just go ahead
and just give this a go. Also this one over here. And then in our next chapter, I will kick in the time laps. And what I will do is
I will go ahead and make sure that all
of the other pieces are here. I'm going
to place them. I'm going to replace,
first of all, another version of
this with our flight, and we can take it from there.
52. 51 Placing Our Branding Timelapse: M. No.
53. 52 Adding For And Planning Final Polish: Okay, so we are done
with the branding. And as you can see, it
adds a lot to our scene. So over here, this
is like our final we still have some flickering
going on here and there, but let's ignore that. For the rest, yeah,
just in general, it really adds a
lot to your scene, just doing general
branding and everything. Stuff like this, maybe
I will go ahead and, like, sorry, I'm just going
to send it back to 100. For small stuff like this, maybe it's nice if
we just give, like, a little bit more space
that from our angle, we can at least see all of it. But just in general, things are looking really well. So what am I going to
do in this chapter? There was one thing I wanted
to try out, and after that, I'm going to tell you
what we're going to do in the time laps
in the next chapter. So this will be only a few
minutes long this chapter. What I wanted to try
out is I wanted to add some fork to see
if we can maybe, like, get it,
showing up in back. Also, by the way, just let Oh, that's probably the
reflection that makes it feel so
light over there. So if you go to create
visual effects and go for your exponential height fog
over here, you get this one. So you can see it adds
a little bit of well, fog mist kind of light. And what I want to
do is I want to try and see if I can use the volumetric function
for this to see if I can almost make the air
feel a little bit dirty. So I'm going to go
and set my color. For now to white, my idea is that I go down
to volumetric fog, and if I turn that on, it
will react to the lighting. So when I turn this on and
then go back up and set the density to start with
one, then you can see here. So you can make it
really, really intense. But if I go for, let's say, 0.5, and then I scroll
all the way down, and then in your bido
of your volumetric fog, you can go down here and
you can kind of like, you can you can also make
it even darker, actually. So this volumetric function, you can make it slightly darker. But what I have
in mind is that I make it a little bit like this. And then, for example, if you
just turn on off here see. It's a soble effect, but it also makes everything feel
a little bit smoother, and it just makes it feel like there are some
distance going on. Okay, so we have this stuff,
so that's pretty good. I think the last
thing that I want to do is the Dubai poster. I think I want to just make
it a little bit brighter. But we can just do that in here. We can just go to the Dubai one, which is this one over here. And if we just select the image, right click restise the layer, and then go to image
adjustments and brightness and just push it out a
little bit more. This will just make
everything a bit brighter, and then for the rest, I can
do some balancing later on. And that's what I want to
talk to you about now. So off camera, I made a
list of stuff I want to do. So let me just quickly
finish this off by going to AdvertsR
click and reimport. You see, makes it
stand out a bit more. Okay, so I've created a list of the stuff
that I wanted to do, and after that, I'm also going
to do some general polish. The way that I create this
list is I just went over my reference and just had a look and see what I wanted
to do and whatnot. So my list, one of
them we've just done, which is adding
the fog, I'm going to texture all of these
really small assets, and this will all be done
in timeless, by the way. I'm going to texture these
small assets over here. I'm going to go
ahead and just add one extra bit of branding
here in the top over here. I'm going to go
ahead and turn off all the shadows for
these brandings just by scrolling down and turning off cast shadows all of them. I'm going to add a normal
map to our plastic that is just like pearling noise that is stretched
out a little bit, just to give it a
little bit more. General improvement
to reflections, I'm going to do. It's
stuff like over here. Reflections are really strong. So I just want to, like, balance everything out a
little bit more. The doors are great now.
The doors are really nice. I'm going to make the poles a little bit thicker, I think. And with that, I
mean, over here, if you go to scaling, it's like making
like the thick in the sea just to make them stand out a little bit more and
not make them as thin. I'm going to go ahead and add yellow hanging hand grips that you can hang over
here on the side. And they are just like those
like the rubber straps, basically that you
just hang there. I'm going to add the light
that we've added here, I just need the artists
do the back wall because having my camera in such a dark area actually
affects how the rest looks. I'm going to duplicate
the entire environment, and I'm going to go
ahead and remove this window and then continue
this environment on. And the reason I want
to do that is I want to hopefully give it the effect that there's more depth in here. This might give us
conflict with our fork, but we will see how it goes. I want to go ahead and make the window frame metal brighter
and stand a bit more out. That is this frame over
here and also make it stand out more compared to the home that
we have over here. Just in general, I want
to do improvements to the bare metal material. Maybe I'm going to add
some graffiti branding, which is it's roughly the same
as what we have over here. Only then we will use a mask. I want to go ahead
and improve the Oh, yeah, improve the dull metal. And for the rest, just
do some general polish, improve things, and
just see where I can improve everything
in general. So it is quite a list, but most of the things are
quite small on the list. So that's the stuff that we
will be doing in real time, or in time laps. Because we are doing
this in the time laps, I consider this pretty
much already my outtro. So we will do those things. They are just general polish. I will not really
cover techniques that we have not covered before. And as always, I will also have this in real time in a separate folder, only
without the audio. Depending on how long it takes, I might narrate this or not. And just in general, so far, already, the scene is
looking really good. So we got already really
nice looking scene. So let's just push it that last extra mile just to make sure
that everything is perfect. Also, one thing I
forgot to add to it is that I'm going to make this line a little bit thinner. Yeah, all that stuff,
it's really fiddly. It takes long sometimes, like just doing the small pulging because
it's back and forth, back and forth, nonstop. It can take you like
an hour or something. But in general, if
we fly around here, especially at the
higher resolutions, I feel like we have done
a really good job here. Just press G, and you can see, I have a lot of
programs open right. Just in general, we've done a really good job to
capture that grimy look while still having some color differences
and still have, this really nice
quality that we have for these types of things
that just even up close, we still have nice quality going on S. Here we
can go up close. We still have some bolts.
We have some scratches. We have all those small little
details just ready to go. So let's continue with the final push in our next chapter.
54. 53 Final Polish Timelapse: Okay, welcome to
the final chapter. So this chapter, we will
be jumping back and forth between a lot of things because we are just going
to do final polish. I'm going to get started by grabbing all of our
small pieces over here, and what I'm going to
do is I'm going to move them temporarily
away from each other. This is so that I
actually can see what I'm doing when I'm going
to texture this stuff. So later on, I just
don't save my scene. I just basically close Maya
or I close or I reload the scene after I've done the exports that it is
all back to normal. See? Now we go, and now
we are back in normal. But at least now we
have something that we can throw into
substance painter, which we are going to do here. And making this texture, it is very similar to making
the texture for our chair. It's pretty much the same
thing as that we only did for the metal part of
the chair because all of these pieces are metal. So we bake some maps. We throw on a metallic looking like a smart material
or something like that, and I'm just messing around,
seeing which one I like. And once we've done that,
we are just going to go ahead and just play around a little bit more with the
material properties. Add a black mask and then
move on to the next one, which is going to
be like plastic. So that's for the
overhead, the speaker. We just need some
beige looking plastic over here like that. Add a black mask, and then
finally just some red for which we are going to go
ahead and we are going to add an emissive map
in our channels. And then we can just go
ahead and we can basically just throw on an emissive
all in our color, and that's it, just that we have something there that looks
like an emissive light. Now it's just a matter of using our polygon fill to
select these pieces, and then it's just going to be a matter of balancing
everything out. That's literally
it. On our bolts, what we're later on going to do. So for now, we are
just going to paint in that colours in light. And then for our
bolts, we are going to use the same
technique as how we created our Atlas version
to just give it some depth. But you will see me doing
that right after this. Over here, I'm just doing
some simple selections using a hard brush just to paint
in some of the lights, remember, I'm holding
shift for this. And then it's just a
matter of adding this quickly selecting that
last bolt that I forgot. And now just add a fill
layer that just has the height map selected
that goes downwards, and then we can just simply go in and we can use our brush to basically click one until you
can see the outline, see? So you can see me just messing around with the correct
brush size to do this. And then it's just a
matter of placing it and then going to your polygon
fill and deselecting, setting your polygon
fill to black and then deselecting your bolts that they do not are included
in the height map. Next to this, duplicate
your normal map bump, and this time, use
a paraboil Alpha and simply place this on top. And then we can create a little bit of the bolt
types that you can see here. And I'm just placing
these just to add, once again, a little
bit more interest to our scene. Over here. So Easy does it. It's
not too special. I'm just making sure
that all of them are nicely placed together,
and maybe like here, have some smaller
ones like that, just so that they are somehow being bolded against
the ceiling. And that's about it. The
rest is some random balance. We can go ahead and
we can start by exporting everything
to NVL engine. Unreal engine, we just need to quickly add the amissive to our unique master and just also add a quick switch where
we can just turn on and off if we want to have a
mask to change the colors, but you will see me doing
all of that later on. So I got my maps. I can just quickly go into
UnwelEngine over here. Add all of my textures, open up my unique master, and over here, we can already, assign all of our texture maps. So I'm just creating
a material instance. I forgot that I also had to
export my ambient occlusion, which I'm just going
to drag in here. And now we can just quickly, drag all of this
stuff in and edit our actual master material to make sure that
everything fits. So if we go into
our mask material, first things first
is just adding static switch parameter
so that we can switch between having
our chair color or not having our hair color, and then adding another
static switch parameter, and this one is going
to be for he emissive. And if it is false, it is
just a constant that is zero, which means black, and if it is true, it will use our map. In between our map is
just a simple multiply with a scalar parameter, and this is just to control
the actual emissive amount. So we keep it at
zero by default. We can go ahead and press Save. I forgot to set my
switch to false, my switch between
the hair color, but I will fix that soon enough. First of all, I'm
just dragging on my material over here
to all of my assets. There we go, set to
switch to false by default so that our chairs
are looking correct. And then it's just a matter of doing some random
balancing over here. Like I'm turning on my emissive channel and
setting it to around three. And what I'm going to
do now is I can see that my roughness contrast
is a little bit too strong. So knowing that and
you see me like, Okay, doing it like this, I look at it very quickly. But of course, in time laps, it looks even more quick. But in any case, what I'm doing here is I'm now just going to go ahead and I'm going to
give this a nice overlay, and this overlay will
basically just control our roughness and a
bit of our base color, which means that
it will basically reduce the base below it. So we just set the
opacity channels of our roughness and
our base color to basically reduce the strength of the color variation
that you can see. That's all I'm
really doing here, so that now it all looks just
a little bit more subtle, and then we can just
go ahead and re export this and reimport it into real. And then you can
see that here, it's a little bit less strong, and for the rest, it
should look totally fine. So yeah, save your scene. And now what I'm going to do is I'm just
going to go ahead. For above our window, we have
that hole sitting there. I'm just going to create a very basic thing
with some text, like next stop or something
like that, is what I call it. I'm just going to basically
throw that in there. And then also I was
also going to make my manhattan sign a little bit smaller so
that it will fit a little bit nicer together
when we look at it. Next, you save our branding. We quickly need
to jump into Maya and just duplicate one of our pieces over here
and then go ahead and assign this to
our new next stop, and then we can just use
the cut tool to basically cut out this piece like that. There we go. And then go ahead and remove
everything else. And that's one we
can now go ahead and just already export it in reel. So this is very quick
and easy right now. So we can go ahead and
export this to reel. Once we are in reel, we can just over here. Let me just quickly
do that. We can start by placing it around. I noticed that it
was not long enough, so I'm just going to increase
the length after this. But for us, it is
pretty basic stuff. See, over here, I'm just
setting up this one model, placing it here, scaling
it up a little bit, and then I can see that I
need to make it longer. I'm doing this simply by adding
an extra loop around and then simply moving my piece down without turning preserve
vivon because it is black, it doesn't matter if the UVs are stretched because you will not be able to see the difference. And once that is done, it's
just a matter of placing this all the way
around like over here. So, yeah, we are placing
this around also on the other side, and
that's already it. So that adds something because ESA just feels
a bit off that we just have this random bits sitting in. So that
looks quite nice. So yeah, you can
quite clearly see it. Now, I'm just to
kind of go ahead and just turning off the shadow
for all of those details, like I said I would do. And I'm going to create a
very quick plastic normal, which is basically going
to be a pearling noise. On this pearling
noise, I'm going to go ahead and add a transform, and I basically just
stretch this transform out, and then I'm going to
add a make it tile photo just to make sure
that it's still tilable. And then I will just
add like a quick lure behind it and then the normal. So this will overhear
it will just give me a very basic effect as if there are like
winkles in there. Then I just add an
output, set it to normal, exput it like normal, and then should I'll
be ready to go. And then we can just input it. And then in here, all we need to do is in our
plastic material, we just need to
go ahead and very quickly add a norm map to this because we
have a norm map slot. I also just add the flat and normal so that I can have
control over the strength. Because I didn't really
like the strength of it. So first of all,
taxi coordinate, same setup as before, just with the scale perimeter so that
I can control the tiling. And then over here, you can see me messing around
with material and I needed to add the flat enormal that I can control the strength. And now I have every
building block that I need to get
this to look correct. It is just a subtle effect. It's more an effect for if we are moving around
that we can see it. So here you can see me
messing around with my normal and you can see that
it can become very strong. Yeah, it's quite
a subtle effect. I set it to minus
around -50 or -100, just to see if I can get the
effect to show up properly. And I can from specific angles, you can nicely see the effect showing up, and
that is about it. So over here, I'm
just going to go ahead and ignore this, actually. This was just testing
something out, but you can ignore it
because I removed it again. So that's the thing when I
feel like I have the freedom. I just try some
stuff out randomly, even though I know it
will probably not work. I just I just change the
shine a little bit from our base branding to make sure
that everything just looks correct, like you
can see over here. But yeah, for rest next ds is just going to be
changing some materials. L over here, you can see me
just messing around with the roughness
strength to make sure that it is not too intense, all that kind of fancy stuff, just general
balancing, basically. Small balancing out
here and there, just to make sure that
everything looks nice. I'm duplicating over this
light that we have over here. And placing it nicely into position just
to make sure that the entire environment
from every angle looks correct and not
just from one angle, even though our camera is
not looking at this area. I think it will still
be nice if we just have that all looking quite solid. I'm going to over here make my poles a little bit thicker, so I'm just making them
thicker on two axis, and then I'm simply
copying the scale over. As you can see over
here, there we go. So that extra thickness it
just looks a little bit nicer having that because they felt a little bit too thin. Let's see what's the next
thing I do because I forgot. Oh, yeah, I'm just
messing around with my window metal doll to see how it looks if I
made it a bit brighter. I actually looked better if
I made it a bit brighter. So I just then went ahead and I just messed around a
little bit more like my roughness variation and my dirt to just get
it to show up just. Over here, you can see
we're messing around with the collar just to get
a little bit of, like, the dirt in there, which
is quite nice if you have, like, a close up or
thing like that. And over here, I'm
just replaying rounds with, like, my chairs, just to see how strong I want them to be and
everything like that, and just seeing if I
can get a nice effect. I went for minus four. However, later on, I switched
it back to minus two. So I would say go for
minus two if you want to avoid needing to change
it again a little bit later. Now once we've done this,
I'm going to open up my floor texture because
I was going to go ahead and I'm just
going to make this small line thinner and
also make it less warped, just to make it a little
bit more straight. And I do this simply by setting the scale in my tile sampler, my scale to basically make
it a little bit thinner. And then also your shape
that you use as a mask, you need to go ahead
and also compensate that by setting that one a little bit thinner to
around 0.09, and that's it. Now you can export that,
and that's now also done. Yeah, this is a small
detail. You don't even see it from
my camera angle, but at least it is a
nice detail to have. So that's now also
working totally fine. Now, in here, what
we're going to do is we are just
going to go ahead and I'm going to get
started by creating my plastic handle
that you can use to basically hold in
order for, like, support. Now, in this point, what you can see me
doing is I was like, messing around with things, but it was not going very well. So I started over and I tied again because I made
the handle in one way. So over here you can see me
just removing the old one, and I'm just adding the new one, which looks a little
bit like a Yeah, I don't know exactly what
it looks like a handle. So I'm just closing
off my shape by going into surfaces
and an open close. And it was a little bit
tricky to get it white just because it's a bit of
like an annoying shape. So you will see me messing
around with this a little bit more just to
get it white completely. But I had the time because
I was doing a time lab. So I think in real time, this did cost me a little
bit longer than expected. But it slowly got
to correct shape. And when it did, I was able to just keep moving things
around, manipulating them. And then later on we
are going to go to create and sweep
mesh to basically add actual geometry to
this to make sure that it all looks correct. And then what we're also going to do is we're
also going to, like, add a quick cube, and that cube will basically
cover like a grip. It basically just holds
everything together. That's what you
see me doing here. I'm already, adding
this cube over here. So this cube will just
be in center because I had some reference on my other
screen just from Google. And that reference was about
how this roughly looks, and you can see that
it basically just all gets crammed together
into this little cube, and then this is where
everything gets held together. So yeah, for the rest, it is still a basic spline. It's just a little
bit messy to work with it and make sure that
everything looks correct. So that's why you
see me just keep going back and forth between these pieces until I
got something that I like. And then I'm adding
my sweet mesh, setting my wit and height, and just also the optimization. And now it's just a matter
of once again selecting my mesh, playing
around with this, and I decided to just, like, move all of that stuff up, but it's starting to look
quite good, as you can see. So it finally got closer
to what I was looking for. And over here, sometimes
it's okay to just turn these pieces from
Bezier to Bezier corner. And for the rest, it's just
like some moving around, making sure that everything
just nicely fits together. Over here, like a
little bit clipping, so I had to fix that. I try to also mess around a little bit
more with my geometry, but I end up just
selecting that and then moving it back like that, and then going for the cube. So now we're going to go
into the finalized stages, which will mean
that for this cube, I'm going to go ahead
and select the corners, and I'm going to just
give them a segment and make them a little
bit round and then select the top and bottom
and just give them a small bevel over here, and that's about it. For us, turn it into a hypol that we can later
on just convert. I'm going to add one cut here
and here just to make it easier for me to later on place some segments
in the center. And now you can see
me just placing my supporting loops
on these sides over here and pressing three. And for this one,
it's very easy, just two loops on either
side and one in the center, and then you can
also press three, and that's looking pretty
good. So we got that one. I just double checked
and for the cube, I did an automatic UV. However, for the other
piece, it was already fine. So I just assigned the
correct materials. I did an automatic
because this is just like a very quick prop,
that was already fine. So at this point, I ed
it to its own layer, and I just placed it into
the center so that we can properly place this
into our environment. And then it's just a
matter of exporting it to reel, setting it up, creating a yellow rubber
material just by duplicating the old rubber material
and placing it. And then for your
placement, first of all, just do an easy placement, once you've done that,
you can go ahead and you can add small rotations
to dd variations. I also end up changing the scale and making it
a little bit bigger, but you will see me
doing that in just a second after I've
done the base setup. And that should be about
it. So here we can assign a metal doll,
duplicate a rubber, call it rubber
underscore yellow, give it, of course, a yellow
color. That would be nice. Maybe also mess around a little bit more with your
roughness amount, make it a little bit more shiny. And now once you've done
that, I forgot to quickly convert this to actual
polygons. So that's my fault. So I just did a quick
reexport on that. And re import. There we go.
That looks a lot better. I went for 4/bar, and then in the
center bar, only two. So that's basically what you
will see me doing mostly. And after that, it's just
going to be basic placement. I did not like the
scale, as I said before, so I just quickly
redid the scale, and then I went again, four, two, and then four again. Over there, you see
me doing three, but I add a lot of one later on because I only decided on
the amounts at this point. So I was a little
bit late with, like, the first one
because it was just trying out. I didn't
have any reference. I just kind of like guessed because I was not really
in the mood to look up reference because I was
doing this very, very quickly. I just wanted to quickly get
this done and not have like three time lapse chapters
or something like that because that would
not really be any fun. This point, it is just going
to be very small rotations. Just turn off the snapping
and rotate it side to side, but also rotate it back
and forth a little bit. It might seem like
a very smart thing, but when you have
so many in a row, having them all perfectly in the exact same rotation, it
just does not feel right. So doing small stuff like this will actually
look a lot better. Yeah, and then I
just, of course, made sure that it
did look better. And now I just apply
the same thing to this one over here just to make sure that
everything looks nice. And once that is done, we are also ready with these models. And then we are
officially ready with any modeling and I believe also any type of texturing.
Here you can see. So the next thing
would be to duplicate our entire train card. So I'm going to start
with just doing some organization and just
cleaning up my scene, adding the assets to
the assets folder, lights to lights folder, et cetera, et cetera. And then what I'm
going to do is I'm just basically going
to first of all, duplicate all of my assets
and then immediately throwing all those duplicated assets into another folder so that I
can easily organize them. And then I'm just
going to basically duplicate the entire train card. So here you can see me pressing select and select children. I press duplicate, so
contraz Contra V and immediately adds to a
folder. You can see. And then I'm just
deleting the backdoor over here because this is
just like a fake thing. It's just so that we can
look through the back. So I'm just giving it
nothing in the back. And then I'm going to
dit it or select it again. Move it into place. And then quickly just also go into my lights,
duplicate my lights, and do the same technique
where I move them around, and then I just mess around
or I just add a light. And then over here,
I'm just deleting that center window and just make sure that
everything looks nice. And this looks really
cool. So it really gives a much better
depth effect like that. So I will like that.
I'm happy with that. And it will also for our videos, because we have like
flight roof videos, it will really help. So at this point, I'm
just slowing down. But at this point,
it's just going to be having a look at my render, seeing if there's anything
I can remember that I still want to do or if
there's any type of balancing. Like here, I'm just kind of messing around with my
lights a little bit, but it's nothing special,
nothing noteworthy. And just in general, I think, here, I was looking at, like, why that strip is so
light, but at the end, I just took peace
with it because it was just an
ancorate reflection. And that's it. So I really hope that you enjoyed
this tutorial course, and I hope to see you
in my future courses.
 FastTrackTutorials, Premium 3D Art Education