Transcripts
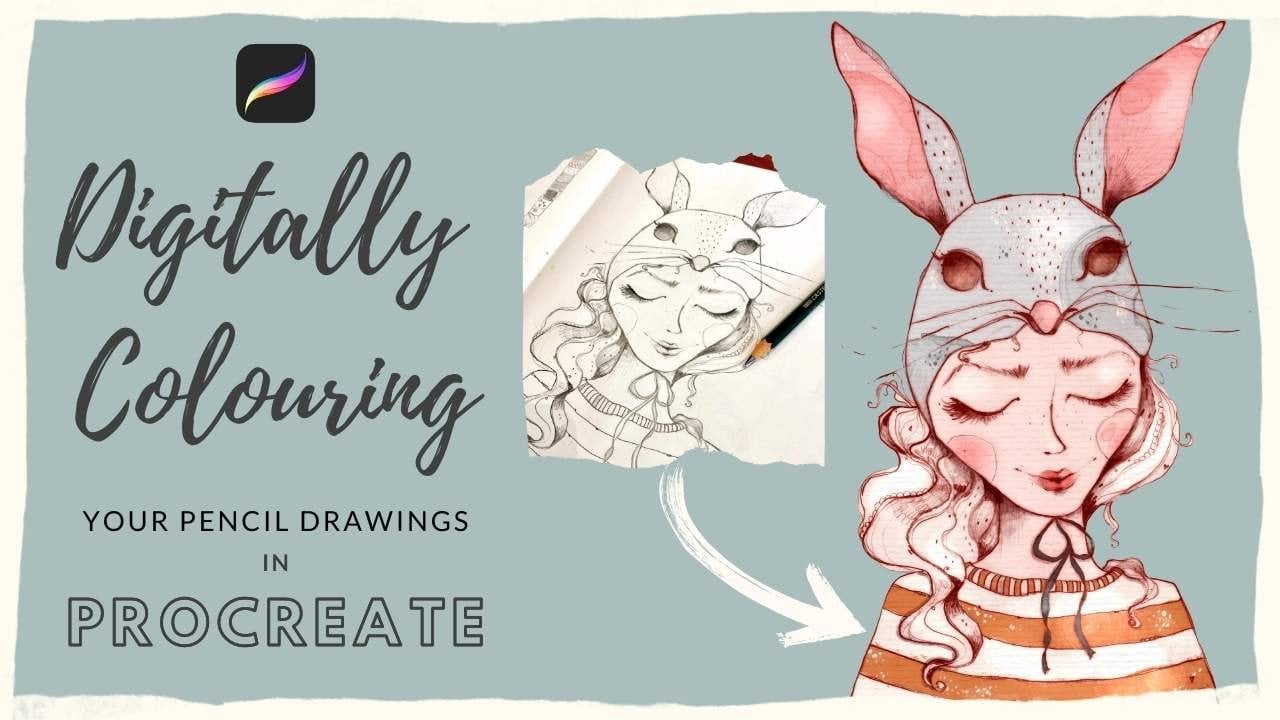
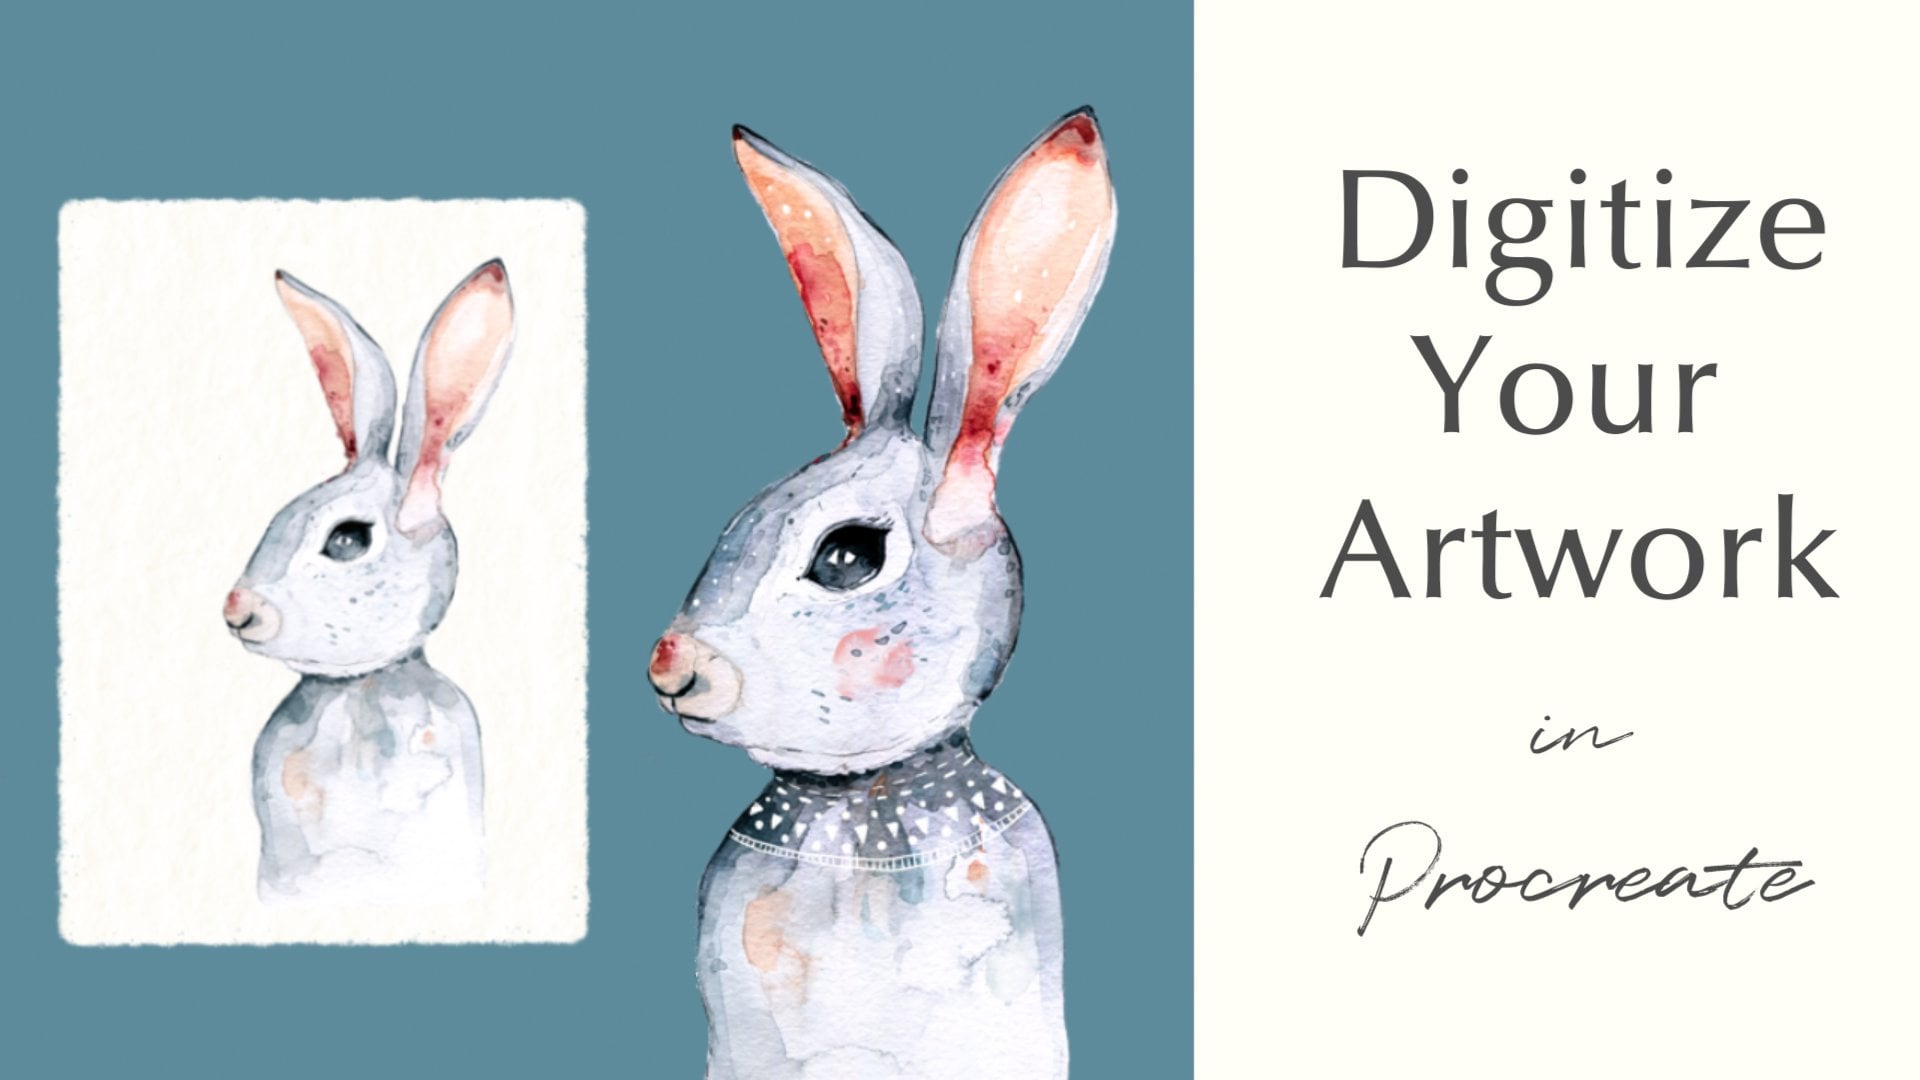
1. Intro: Hello, I'm Julia teacher and self taught illustrator from
Oldenburg, Northern Germany. Now, when I first started
out painting in procreate after years of sole painting
with water color and pencil, I really didn't like
the results I got. This was of course, due
to my inexperience, but also due to the kind of two digital look my
illustrations had. The moment I discovered using texture overlays and
texture brushes and stems was a real
revelation for me and it was the moment I
started liking my artwork. For the last couple of years, I've been experimenting with incorporating a lot
of texture into my appropriate illustrations
to make my illustrations look at least partly
analog or handmade. In this class, I will
walk you through the creation of a highly
textured illustration. This will also be
our class project. You can use my sketch, which I will provide in
the resource section. But of course, feel free to use these techniques for your
own personal artwork. Now in class, you will learn
about texture overlays, blending modes, using
clipping masks and steps. In the resources section, you will not just find
my texture overlay, which illustration an
immediate handmade look, but also a brush set with textured stamps and
textured brushes which I created for myself. I really hope you enjoy the
class, get a lot out of it, and fall in love with texture and procreate
as much as I did. See you in class. Bye.
2. Understanding Blending Modes and Texture Overlays: Welcome to this lesson. Now, very quickly,
before we begin, I will be talking a lot
about blending modes. And I just very quickly want to show you
what I mean by that, or how you can access
the blending modes. You can access them by tapping
on that little n here, and then you have a different
kinds of blending modes. We will mainly be
using the ones that are on top of the normal mode, the ones that are
directly beneath the normal mode up until
or maybe lighter color. Now, texture overlays
are used by me, I think with nearly every
illustration that I create. That is because
they are so easy to use and they have an instant
effect on your illustration. A texture overlay is simply a texture that you
scan in or download, or you can use a
photograph that you took, for instance, of
your wooden desk. Then you put this photo scan of the texture on top
of your illustration. Then you use a blending
mode to combine these two. I will show you, I've got
this watercolor paper here. This is a watercolor
paper I just scanned in and I've got my illustration. And what I will do now is I will set that to another
blending mode. For instance, if I use this
linear burn blending mode, then you can see the texture applies to this illustration. I could also use the
multiply blending mode. Yes, this gives it an
instant texture here. Okay, So this would be
a watercolor paper. I've also got this
wallpaper here. This is something I
found on the Internet. And I will also use a
different blending mode. And I will go with
color burn here. I think the effect
is really great, but I feel it doesn't really look good with this
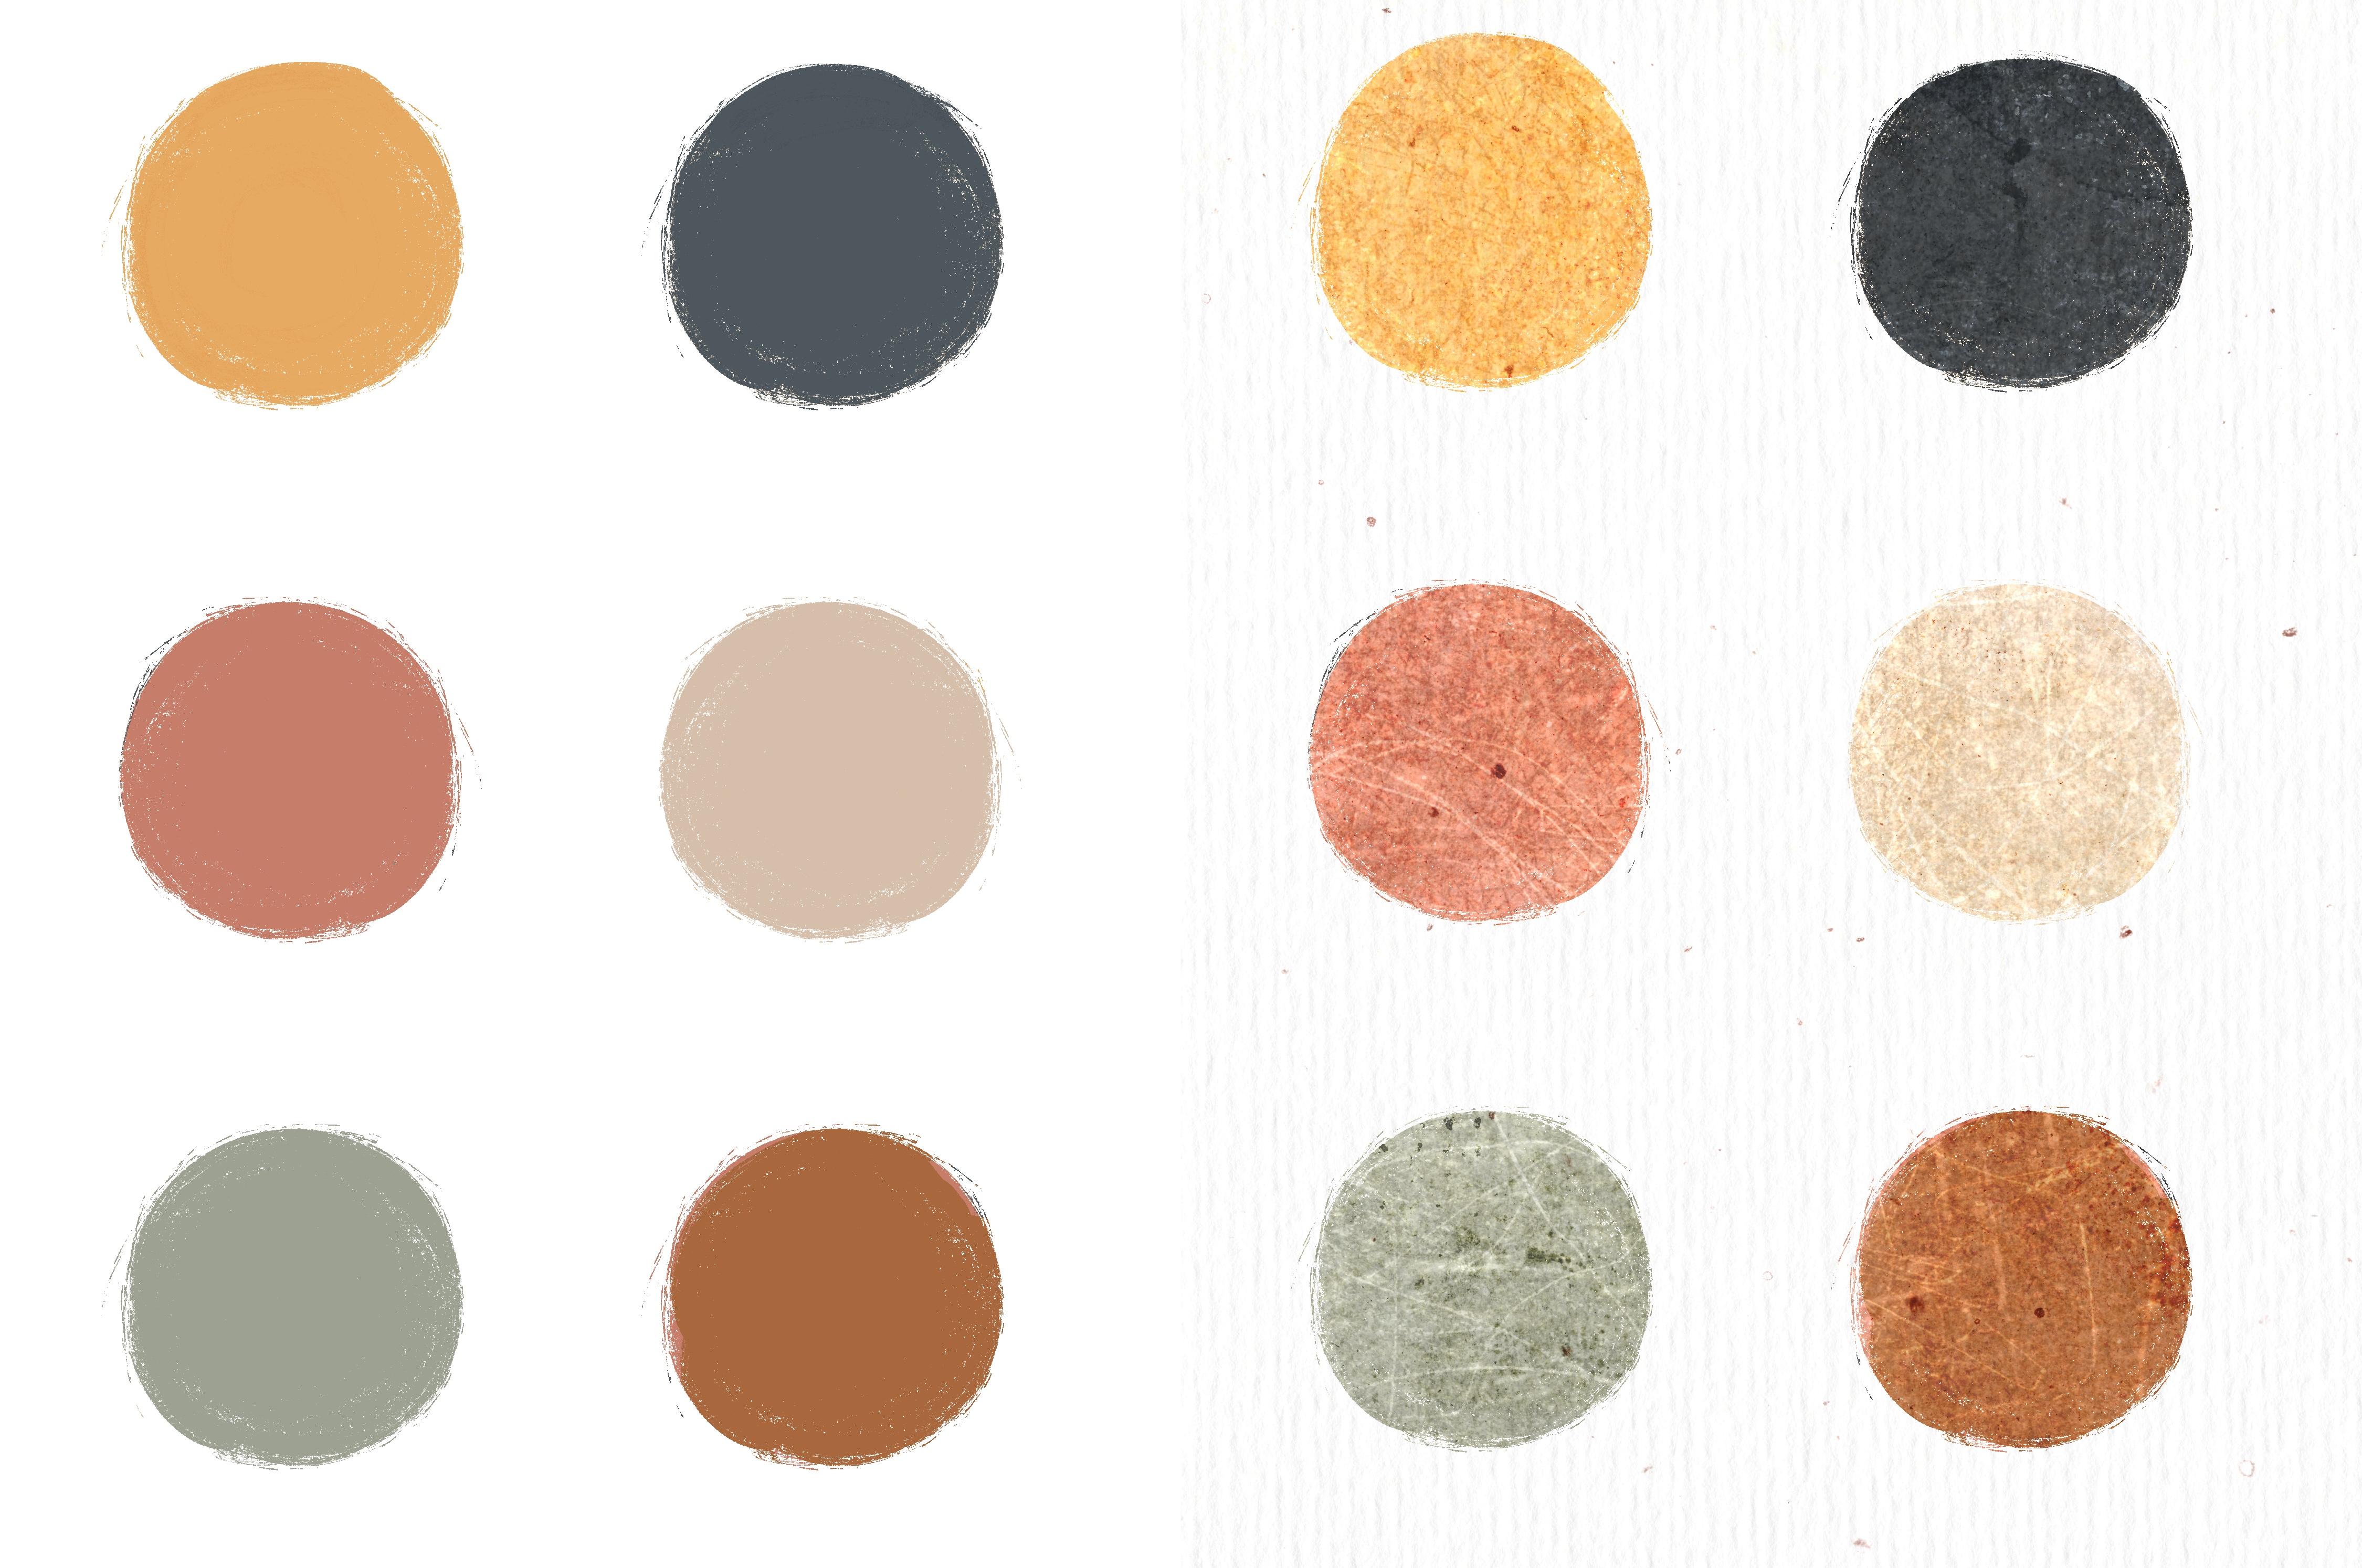
illustration here. Let's have a look. Got some very simple circles. I think here you
can see, let's see, Looks very nice
when you apply this to something simple
like circles. Okay, Wallpaper,
what else do I have? Swirls. Let's see. Let's set them to color burn
as well. Also, very nice. Let's see how they look with the girl. Yes, that could work. Now if I were to decide
that I want to have the multiply mode
with this girl, I just wanted to apply to the
circle and the girl itself. What I would have to do is to put it directly on
top of this girl, then make this a clipping mask. I just tap on the layer
and hit clipping mask. You can see here,
it doesn't look particularly good with multiply, what I can either
do is to reduce the opacity or I
will try that here. Maybe make that image
a bit lighter by going to the magic wand and then going to
saturation brightness and brighten the image. That's already a
bit better here. Okay, now I will put that
one back where it was here. I've got a texture which is you can use these
textures as well. I can see I forgot
the white scratches. Maybe I will start with these, then you can see the different, because these are
both scratches. But I will use the white scratches again
with a blending mode. I find somewhere here on top
of the normal blending mode, like for instance, darker
color, linear burn color. Burn again, is very nice here if you feel that you
don't particularly like, for instance, with this face, it doesn't look very good. If there are scratches
on her face, then I could just use the eraser and work on that
texture and maybe just erase the scratches that
are directly in her face. That's already a bit better. These would be the
white scratches or this white paper
with dark scratches. Let's see, I have the
black scratches here. Now, with these,
you have to go to a blending mode that's beneath
the normal blending mode. Because it's a black or the main color of
this image is black. And you can, for instance, go to Screen or
maybe color Dodge, which I think looks quite nice. But again, I can see there is this very harsh line
here in the texture. So what I would do is to
just use the smudge tool and make sure I'm on the right layer and maybe
smug that line a bit. It's not that obvious. Okay, this is what
you can do here. I will quickly show you how I find these textures and
put them into procreate. Now, as I said before, you can make them yourself, but you can also use sites
like, for instance, unsplash. And then you open the app. And all these photos
in here can be used by you for your
projects for free. You don't have to worry
about some copyright issue. I will just go to the
search and then type in texture, text texture, yes. And then you will find all
different kinds of textures, crumpled paper,
always very nice. Here you can see the wallpaper
and the scratches I found. There's quite a
lot to find here. If there is an image
that you like, let's see, Maybe I'll just
use the crumpled paper here. Then you just go to
that image download, then you will find
it in your photos. There it is. Then you go back into procreate. Insert a photo, Here it is. We'll just quickly
put it over here. Now this texture
here has some color. It's yellow, brownish color. Before I will use
it as an overlay, I will go to the magic wand again and go to
saturation brightness. And take out the saturation. I simply want a black
and white image. The color doesn't affect the overlay or doesn't affect
the illustration as well. I just wanted to be
black and white. I could also play with
a brightness here, make it darker, or
make it lighter. I think I like it a bit lighter. Then again, I will just find
a blending mode that I like. Linear burn looks very
nice or multiply. If I want it to just
apply to this girl here, I will tap the layer and
make it a clipping mask. This is basically
how overlays work. Now so far, we've
just always used one type of texture
with our illustration, but what you can
also do is to have a group of textured textures. They are all set to
different kinds of blending modes and
varying sizes of opacity. In combination, they can
give a very lovely effect. The effect is always
quite intense. It definitely will also change
the way your colors look. You have to keep that in mind. I would just turn that on here. As you can see, there's quite a huge difference between
these two illustrations. Now here, especially
the red here has a very different look
to that red over here. What you can do is to open that group of layers
and have a look, maybe you don't like a
certain kind of texture. For instance, I could
turn off the highlights. As you can see, the effect
is much less intense. Or I could turn them on, but lower the opacity quite
a bit, maybe around five. Again, it's not that intense. I can also make an
effect much stronger. That was a little fly here. I can make an effect
much stronger by bumping up the opacity. This will really bump
up that paper texture. I have different,
different ways of varying this group of textures. Here, I just want
to quickly show you how it looks with the circles. Again, I feel you can see
how lovely the effect is that you have to keep in mind your
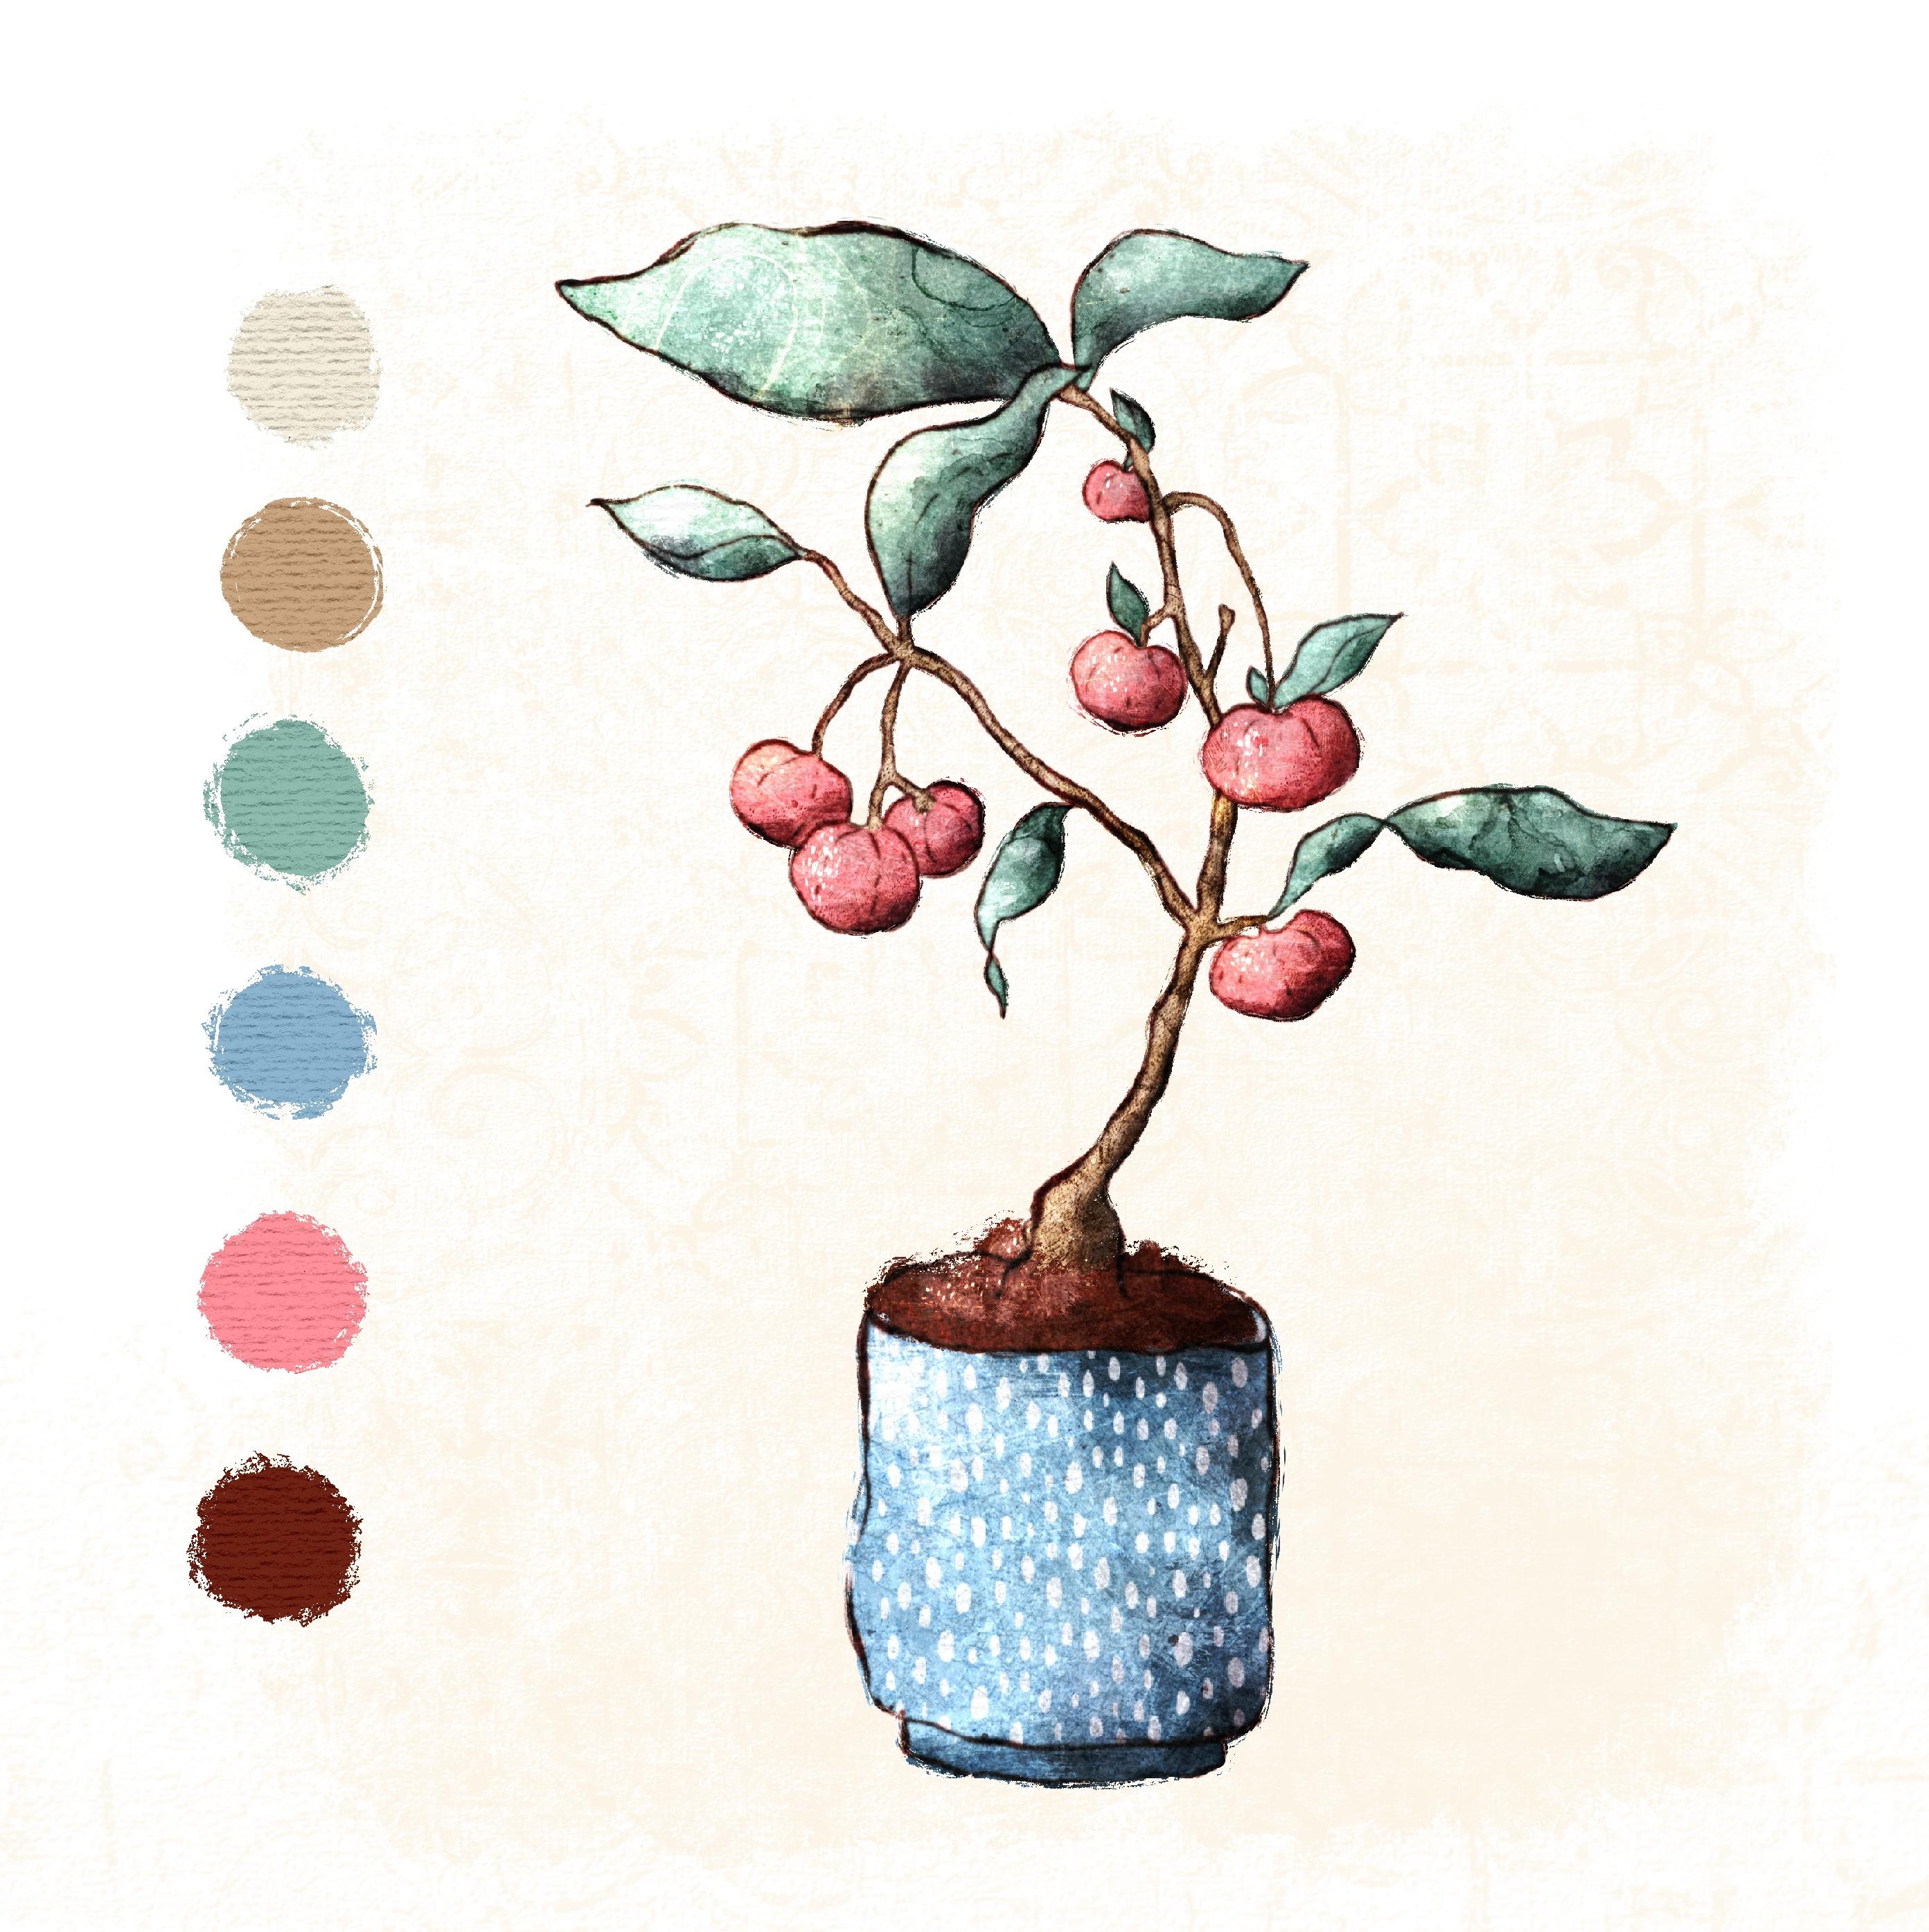
colors will be affected. I have a set color palette
with which I tend to work. But if I feel that the
color or gets too intense, when for instance
this brown here, what you can do is, let me see, Create a new layer to
select that brown, and then make it a bit less
saturated and a bit lighter. Now, before we go on
to the next lesson, I really want to encourage
you to play around with all different kinds of textures and all different kinds
of blending modes. Let's turn on that once more. I think I really like this
multiply effect here, but what I always do is
to just have a look. Might it look nice with one of these other blending
modes that procreate has. I will also go down, there will be some
very weird looks that you definitely
don't want to have. Like for instance this one. But it's always worth
to play around with it. Also to combine different
textures yourself, you can use my
overlay, of course, or my combination
of overlays here. You may also use it for
commercial purposes. But like I said, play around with textures that you find and
maybe combine them. Use one in multiply
mode and maybe one. Let's see Caliburn, then another one with
very light look. I guarantee you will have some happy accidents and find some nice looks for
your illustrations. See you in the next lesson.
3. Using Textured Brushes and Stamps (with and without Clipping Masks): Welcome back. In
the last lesson, I've shown you a
very quick way to add texture by using overlays. But of course, an
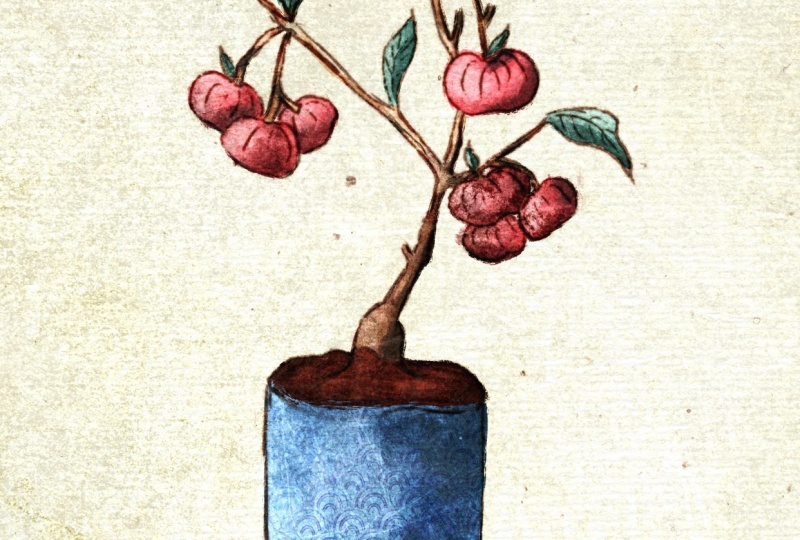
essential part of a textured illustration is to use texture brushes and stamps. Now for the sake of this class, I created this very
flat illustration, which was actually
not that easy to make because most brushes
you find in procreate, which you buy online, are at least a
little bit textured. I used the monoline brush from the calligraphy section and it produces these clean lines, don't vary in
thickness or color, or produce any grain
around the edge. Now let me quickly show you
the monoline brush here. Caligraphyooks like
this, looks like this. If I were to hold it down, it would create
this perfect line. This is a look I could
never achieve using real brushes or colored
pencils or whatever. Now, this is the monoline, but if I just go one
brush beneath already, I've got a textured brush, a chalk brush, and then the
next one is texture as well. This is the blog brush,
actually quite nice. And you can see here you've got this very clean line which
doesn't vary at all. Here you've got all these
little grainy bits in there. Even a brush like this one, the streaks, which
looks quite clean. But if you use it,
you can see again, it has some texture to it. Now let me quickly
clear that layer. If you use a pixel
based software like Procreate and not
a vector based one, like for instance,
Adobe Illustrator, it's actually quite difficult to avoid texture completely. Now there is a place
for this style here and it can look very
sophisticated and beautiful, but it will probably never
look at least partly handmade. And that is what I
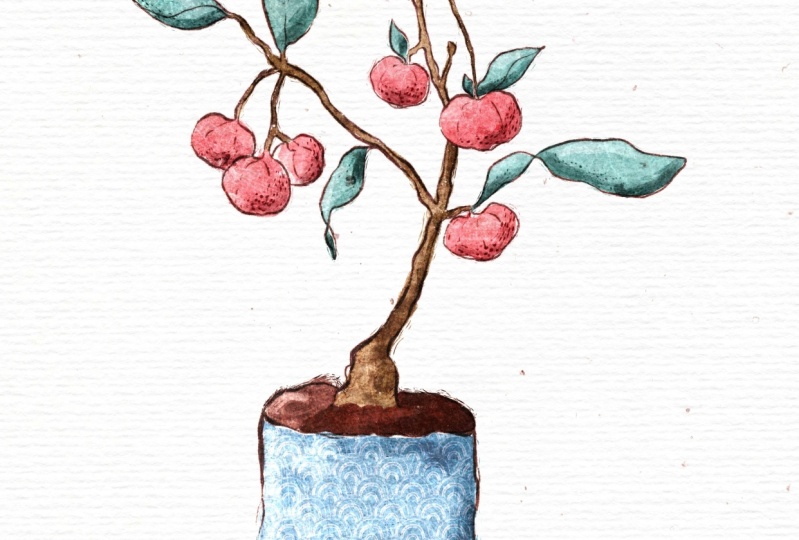
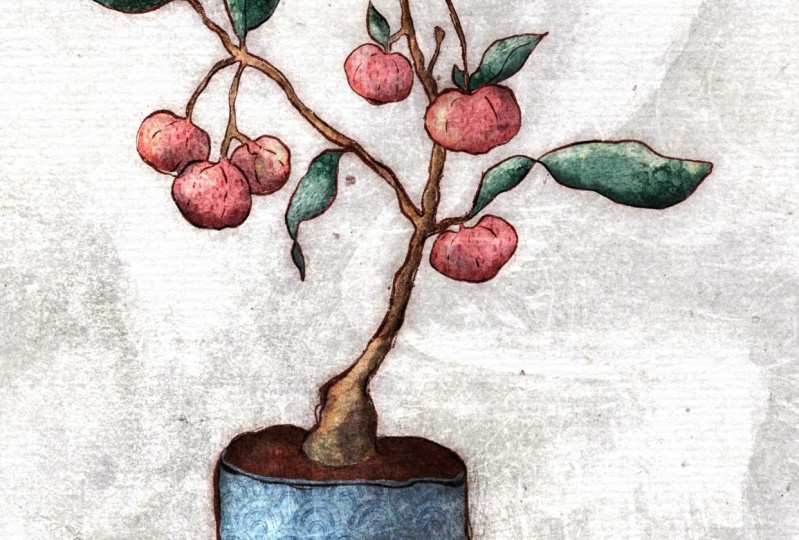
want personally, to achieve in my illustrations. Now, I quickly wanted
to show you how this illustration would look
if you used an overlay. And you can see this is the
exact same illustration here. I think, especially in
the leaves and berries. You can see there is a lot of texture and grain and
color variation in here, which you can't find over here. To me, this looks so
much more interesting. This is definitely
the look I prefer. Now I will quickly
toggle that off again. The first thing I would
do if I were to create an illustration is not
to use a monoline brush. Instead, I would use a textured sketching
brush for the sketch. Let me see, I've provided
this brush set here. I've got the dry ink which
is a procreate native brush. For the sake of speed,
I already created a sketch where I use dry ink. Brush will quickly
show you here. You can see this is
much more grainy and irregular and looks
much more textured. I also try to make sure
to vary the thickness of the lines when I
do an illustration. Maybe sometimes I even
add in, let me see, some cross edges here and there, or just some little dots to make it look a bit
more interesting. Now what I would then do is if I had this flat
color here of the pot, for instance, is to use a
textured brush on this pot. Now before I do that, I'm actually going to set
this layer to alphalog. I will do that by using two fingers and
swiping to the right. Having that on alphalog
means that I can only paint on this particular color here. Let me just show you. If I
were to draw some lines, they only affect this blue here. I can't draw outside
of that now. And that is what I
want now, let me see. I will pick that blue
and then I will go on and make it a bit darker. Then I will use a brush which
is called turpentine brush. This one also comes
with procreate. I think it's in the
painting section, I really like that brush
because first of all, it's a textured brush, but it paints and smudges
at the same time. I feel that gives you an opportunity to mix
the colors on the paper, on the screen here, which is something I used to do
with watercolor a lot. I mixed my colors while I
was painting on the paper. I think I will just
quickly toggle off the shadows here so you
can see it a bit better. I'm on the right layer, I will show you how
that one looks, make it a bit bigger here, maybe make it even more bigger. What I would do here is
to get a color variation onto that pot by just using
all different kinds of blues. Since I decided that my light
source will come from here, I will keep this
part a bit darker. If I go on to the other part, I will make this part
over here a bit lighter. I would deliberately keep my brush strokes very irregular, as you can see it smudges
these colors together. You could also use this
brush here as a stamp. Let me just quickly show
you how that would look. Maybe make that one
a little bit bigger, which also would produce
quite a nice effect, though. I would use the stamp on
a clipping mask then, and not on that layer
here. This is too big now. Okay, I think you get
the gist of it now. This is the turpentine brush. Another thing you can do, especially if you
don't want to have the sketch shown in your
final illustration. Sometimes I leave in the
sketch and sometimes I don't. I really can't decide on a style that I want
to use all the time. Let's just for the sake of this class here say I don't
want to keep this sketch. Then I would try to get
a more textured edge. I would show you
on that leaf here. And I will be using
the sticks brush, which is also appropriate
native brush. I would pick that green
tone and maybe again here, turn off the highlights. Then I would quickly
paint around the edge to have a more
textured looking edge there. Maybe make it a bit big.
I guess that's better. You could even take that a step further if you
like that look, and use this scratch brush here, which even produces
more scratches. Which works quite nice as fur or hair because it is
said to multiply. You see I still use
that same green, but you can see it's a bit
darker on the actual leaf. You've got this
instant texture here. Now another thing I would
do is to use some grainy, let's use the dots here. You can use this
with a darker color or with a lighter color. Both effects are quite nice. What I like about
this one here is that these dots are
not like a pattern. But if you vary
your brush strokes, it looks quite irregular. You can see this also gets
you some really nice texture. Maybe show that
with a light brush or maybe I will just use a very light green tone here. You've got immediate texture
here on these leaves. Now these were all brushes, but I also want to show you how I use stamps in
my illustrations. I would maybe create a new
layer on top of these berries, and then I tap on that layer
and make it a clipping mask. This again means that just just quickly set the
blending mode to multiply here. That again means
that in a minute, if I stamp on it, I will just see the stamp on the berries. But let me just quickly do that. I forgot I have to choose
the stamp beforehand. I will use one of these
alcohol ink stamps. I feel that they produce a
very lovely watercolor effect. I will just stamp here and then maybe make
that stamp a bit smaller, then zoom in so you
can see it better. I would also duplicate the
layer to make it more intense, turn down the saturation
a bit because I feel it looks too pink and maybe
make it also a bit darker. Yes, I like that much more. Okay, if I were to toggle
off clipping mask, you can see it created
a whole stamp. But if it's a clipping mask just applies to that layer here. I think it's too dark maybe. Let's make it a
bit lighter again. Okay. Yes, that's better. Yes. Let me just quickly
show you one more stamp and then I think we are ready to hop into the real illustration. Now, I will use that stem here, and again I will create
a new layer on top. Tap that layer, make
it a clipping mask. You don't have to
always do that, but I very often set
that to multiply. Then I use the exact same color I used for the layer beneath, like this brown here. Let's choose a stamp. Let's use this
texture stamp here, then I will just stamp on
the stem once you've got this color variation and all these little
grain bits here, which make it look
much more interesting. Okay, I think
that's all I wanted to tell you about
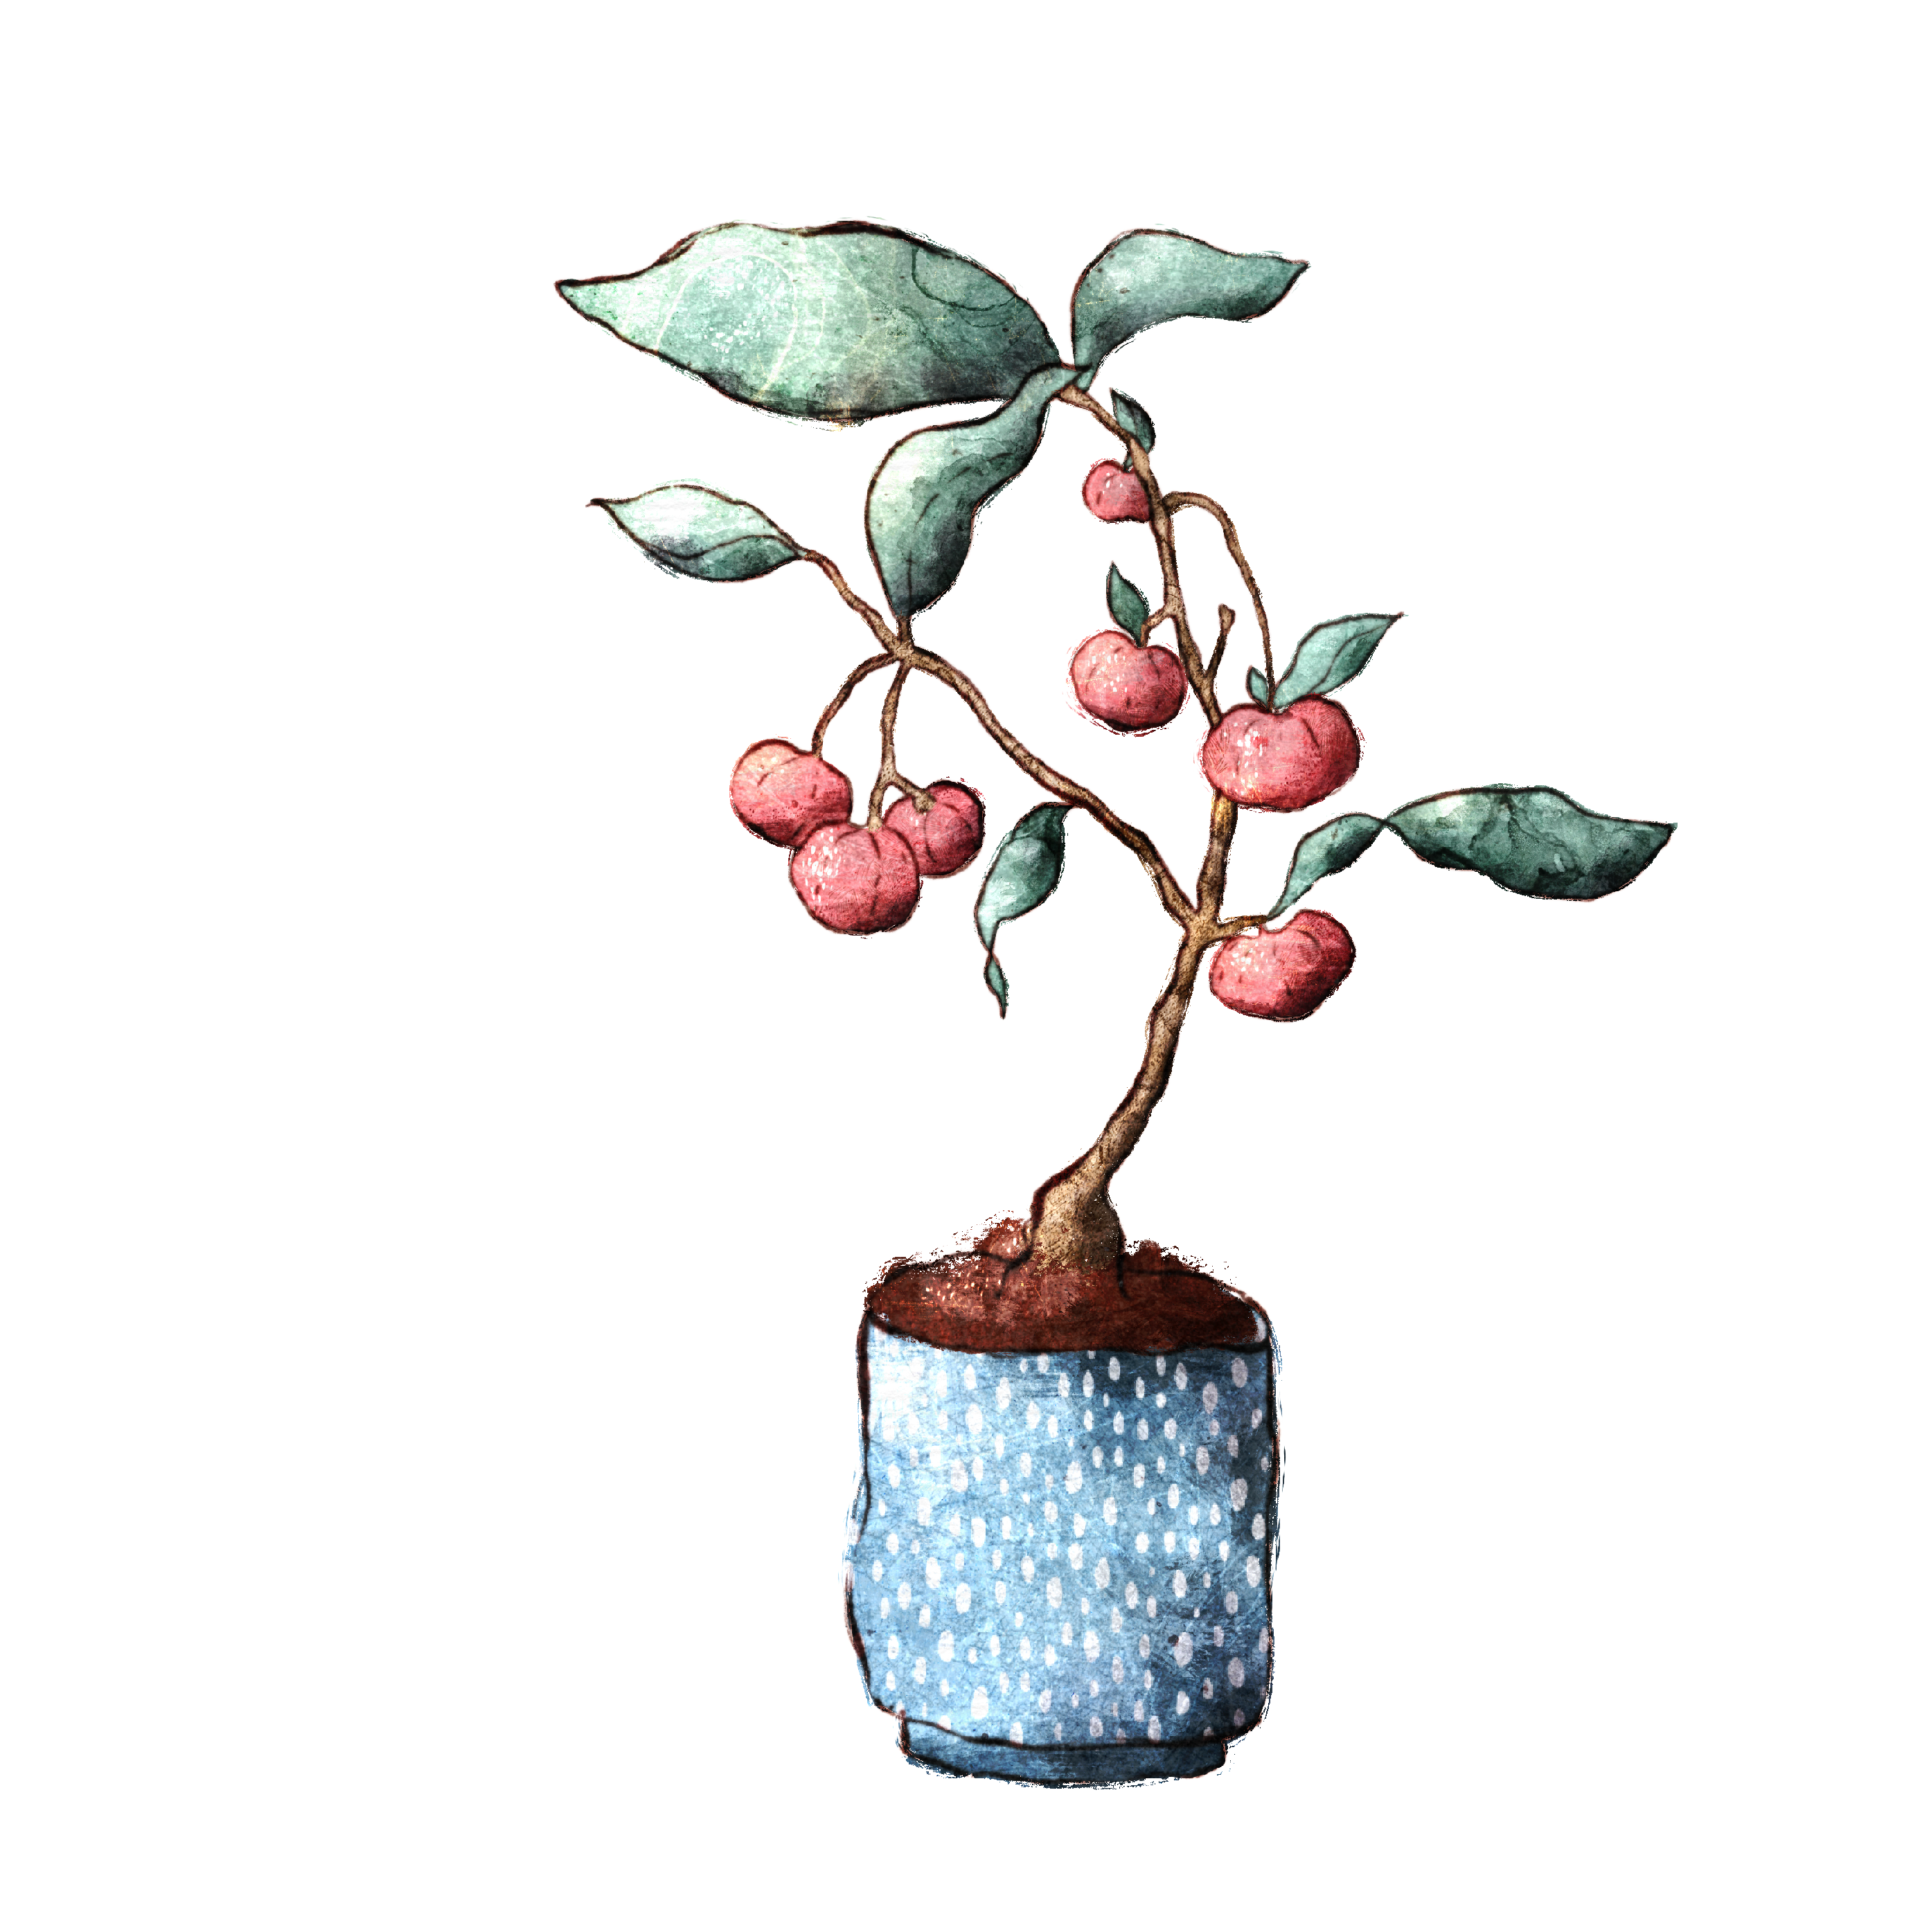
stems and brushes. I will see you in
the next lesson, where we're going to create this sketch for this
little plant here. See you there.
4. Class Project: Linework: Welcome back. Now as a
reference for my illustration, I used this photo I
found on Pinterest. You will find the link
to it and a PNG of my sketch in the
resources section if you want to use
it for the class. But of course, feel totally free to draw another
subject altogether. Just try to keep it
simple because then it will be easier to follow
along the rest of the class. As you just saw, I started
out by drawing the pot. This is because it is the most simple part
of the illustration and I always like to get into my drawings at the
most accessible spot. I then go on and directly draw the twigs and berries
and leaves on the left. If it were a more
complex scene or if I wanted to make my drawing
look exactly like the photo, I would start out with
a much rougher sketch to make sure I place all the
elements in the right spot. But since this is
just practice and I feel free to change my
reference wherever I want, I don't bother to
do an extra sketch beforehand for the line
work I'm using the dry ink, procreate native from
the inking section. One tip is to vary
the thickness of your line work to make it
look much more interesting. And also to add in small details like little mark making here
and there, some crosshatch. Or maybe even some small
geometrical elements like tiny circles or triangles. That's it for the sketch. Up next, I will be sharing a quick and easy way to
lay down your base color. See you in the next lesson.
5. Class Project: Base Colour: Welcome back. I've got my sketch here in my
vibrant texture canvas, which you can download in
the resources section. I have reduced the
size before I created the sketch because I know that I will be needing
quite a lot of layers. The smaller the size
of your canvas, the more layers you will get. If you go here to the
wrench and then to canvas crop and
then you settings, you can change the
size of your canvas. Now with the overlay, it is important that you turn on resample canvas because that way it won't corrupt the
textures from the overlay. I changed mine from 3,500
pixels by 4,500 pixels to 2,500 pixels by 3,214 pixels, which gives me 52
layers altogether. Eight layers are already used
for the texture overlay. Now I've also provided the appropriate swatches which I will be using for
the illustration. You will find them in the
resources section two. But of course, feel free
to use your own palette. I will be using a new
layer for each color. And I will show you two methods to put down your base color. The first one is obvious,
just use a brush. I will be using the dry ink, since that one is quite
opaque and not too textured. I will start with the stem here, I'll be using this light brown. Going to the dry ink, just color in the stem. Okay, I'm done with the stem. Now I will create a new
layer for the leaves. I will show you
method number two. Now what I actually do
quite a lot if I put down the base color is to use the selection tool
instead of a brush. I go to this less tool here, then I set it to free
hand and color fill. Then I just select the
part I want to be a certain color draw around
it and tap the gray dot. The selection will be filled. Now let me quickly show you. I will be using this bluish
green here for the leaves. Go to selection, then now I tap the dot and
it's already filled. Now there are two main
reasons why I'm doing that. The first one is
that I make sure that my base color is
completely opaque. The second one is that it saves time since I've already got some texture through the
overlay and I will be adding more by using a lot
of stamps and brushes. I really feel that I can save some time at this
stage and then put in more effort when I will be adding the additional
texture layers. But of course, if you enjoy the coloring process and I know this can be
quite meditative, of course, go ahead
and just put on some near music or a podcast and enjoy
coloring in your drawing. Now, I will speed up this process for you
and I will see you in the next lesson where I will be adding some stamps
to my illustration. See you there. Now, I quickly want to show
you one more thing. What's really nice, I've got
all these leaves selected. Now what I can do is to try out different colors here while
they are still selected. Just have a look whether I might prefer another
color for the leaves. Then what I will do if I
didn't really match my sketch, I will go to the Liquify tool and then I can just the
color make it a bit smaller, right where I want it to belong. Okay, I will be doing
that for the rest, and then I will see you
in the next lesson.
6. Class Project: Adding the Texture Stamps and Clipping Masks: Welcome back. Now
in this lesson, I want to show you
how to add a lot of texture to make your plant
look more interesting. Before I will do that, if I now decided I wanted
no line work at all, I would toggle that off. Then I would work on
the outlines here, because as I used a
selection on many of them, the outlines are not that great. For instance, I would
go to the leaves and then I would be
using my sticks brush, pick the same colors I
used for the leaves. Then this is quite okay,
but especially here, you can see there
are some brakes in there that I didn't
intend to be there. I would start working on these edges by using
the sticks brush. I not only smooth these out, but I can also add a little bit of extra
detail around the edges, which I quite like
maybe go here. I would do that not just
for the lease obviously, but also for the berries
and the stem and the pot. As I've told you before, I've also got this scratch brush, which I'm using
from time to time, which can add some
extra interest there. If you like that look, you could just add scratches Even though I'm sure I want to keep my line
work in the end. I will just quickly
do that for all of the layers because I think
it just looks so nice. More options later on to use
it without the line work. So I will speed that up for
you and see you in a minute. Okay, so I'm done with the outlining and it
looks much nicer now. Now what I will do next is to add a little bit of color variation to
each of the elements. I still imagine that my light
source is here on the left, and automatically on the right there will be a
little bit of shadow. This part will be
a bit darker here. What I will do is to
take two fingers, set that to eflog, then I will pick this green, it, make it a bit darker. Use the turpentine brush. Make the brush a bit smaller. And just paint on
it a little bit, stamp a bit, paint a bit. Now, as I've shown you before, the alphalog helps so that the brush strokes only apply to this green here on the layer
and not to the rest. So I can just wildly, they'll make it
even a bit darker then going back to the green
and now make it a bit, add a little bit of lighter
value here to the left side. That was the eraser. I've recently bought
this procreate glove. I don't know if you've
seen that before. I got one here. It just applies to two fingers and I think
I will put it on now. This helps you. Accidentally when you move your hand switch to the eraser. For the longest time, I've been wondering why I should use it, but now I know what it helps. The problem is that it my fingers start to fall
asleep as we say in Germany. They get tingly and that's why I don't really like to wear
it, but I will do that now. Make it even a bit lighter here, and this already looks
much nicer there. I will do that to
all of the layers, and then I will see
you in a minute. Okay, Now, next I
want to add stems. I will start out with
my alcohol in stems. And what I will do, I will start out
with the leaves, create a new layer, tap on the layer, make
it a clipping mask. Then I again will
pick that green. I might make it darker
later on or lighter, but at this point I will
just pick that green, set that layer to multiply. Then I will go to the
brush set down here. You find these
alcohol ink stamps. Let's see, I will
just maybe start out with this first stamp here. Now if I stamp on
the canvas once, didn't work because
I didn't select the stamp, now it should work. Here you can see is the stamp, and if I tap on that arrow, I can make it smaller
to fit the leaf. This is quite nice, but it's not visible enough. What I can do is first of all, either duplicate the layer that already makes
it look much nicer. Maybe duplicated once more. If you feel the look
gets too intense, you could always reduce
the opacity a bit. Then I again will move that
stamp a bit over here. Maybe like this. Another
thing you can do. If you feel that you
don't like the color, you can go to U,
saturation brightness. I feel the color is
a bit too saturated. I will turn down the saturation. Then you could make
it again darker, that's too dark or lighter, then you can't see it anymore. Maybe I'll go with
this 40% saturation. You could also change
the U completely, though it doesn't really
look that nice here, but this is a way how you can change the actual
color of the stamp. Okay, maybe if I
make that normal. Again, I think that's even
nicer than the multiply mode, it looks a bit more natural. I will be adding another of the alcohol ink stamps
to one of the leaves, and I will maybe
do it down here. I forgot I still got that color. Maybe I will choose a darker
color right from the start. Why can I not see this here? I will, I will create
a new layer for that. Set it to multiply. There is my stamp much better. Again, with the arrow, you can turn your stamp around, drag it around the canvas, and I think I will
leave it here. Maybe duplicate that once more. Yes, that's quite nice. Shall I do one more? Maybe I will do a light. I will show you with
a lighter color. For this, I will go to the. Let's start out with
screen mode again. Use that same color here. Maybe pick the third stamp. Let's see, landed here on the. Leaves there. I could put it
here, maybe there. I think I like it over here. Okay, that's it for the leaves. Maybe I will use that stamp
here and put it somewhere. Oh yes, I like that this one applies to this part here and nearly
completely to that leaf. And that one over here
could make it bigger. Smaller. I think I
will leave it at that. Good. Now let's move
on to the next one. I have to say I'm already
quite happy with the pot. I think I won't be doing
much more with it. I will just add a
cute little pattern. And I will do that by again
creating a new layer, Make it a clipping mask. And then I will select
this off white, which is a little bit of yellow. I will make it
even a bit whiter. I think in my stamp set, you will find this dots pattern
and the scallowpattern, you can try out
which you like best. I will start out with the dots. I will make them a
bit larger here. Maybe use a blending mode. No, I want that one to blend
in a bit more with a pot. So what you can do is
to reduce the opacity. Now, it's not that
obvious anymore. That's one pattern
you could use. Just let me toggle that off. Or you could use the
watercolor scallop pattern. Maybe this time will
use the off white. Again, just add
that to your pot, has a Japanese feel to it. Like these lovely
Japanese papers. Again, you could make it a bit bigger or even a bit smaller. I think I will keep
this size here. I don't like that one
to apply to what is it? Brim, I don't know,
the floor of the pot. I will just erase that here. Now we'll just
switch between the two to see which
one are like more. We'll erase the
dots here as well. I'll like them both, but I think for now we'll
stay with these. Okay, Now I want to
add a little bit of texture to the
berries as well. I want to try out, I think they might
be a bit too bright, would just make
them a bit darker. Just a little bit saturation. The saturation is fine, but I will keep
them around here. Again, I will be
adding a new layer, make it a clipping mask, a grab that set it to multiply. I tend to start with
the darker colors and then go on to
the lighter ones. Let's see, what do
I have in here? I've got this cross and
this scratch brush. I like the scratch brush
with just lighter colors. We'll just try out this cross cross and add a bit of crosshatch
to the right side. I already feel I
want darker colors. I will just undo
that very quickly, maybe even use some brown there. Yes, I like that better. Now, this is really very subtle, but still quite nice. Let's see, I did the extra layer and I put the
stamps on the berry layer. But since I like it, I think I will just leave it like that. Otherwise, the only option
here would be to undo. Now add a new layer, make it a clipping mask. I think I will be using these here again with the darker
value of the pink, these dots. And put some of them here again on that
darker side of the berries. Again, very subtle. But all of these textures add up in the end will give the illustration a
completely different look. Okay, so now let's see
what else I think. I will leave the berries for
now and go on to the stem. What I will be doing here
is to create a new layer. Again, make it a clipping mask, set it to multiply, and I want to use one
of my texture stems. I've got all of these. These are like, this one is very subtle and then they get
darker and more obvious. This also got some
wallpaper texture to it, which is quite nice, but I think I can
just try that out. I don't know if it
looks good on that. Now you can see it
looks very big. It's actually quite nice. Maybe I will leave it in there, make it apply to
every stem there. I could work with that. Maybe
try out another one again. For instance, this
more subtle one here. Let's see whether I
like that better. Again, go to multiply and
reduce the opacity here. Turn it around a bit. Let's see which one I like more. I definitely like the
wallpaper one much more. I will just delete that one. I think I'm nearly done. What I will be doing last is to add shadows
and highlights. Again, also with these, you can do them in
a texturized way. I will be showing you how I will do that in
the next lesson.
7. Class Project: Shadows and Highlights: Welcome to this lesson. Now, in the last lesson, I've talked about adding some more shadows
and highlights. What I will do before I will get into the shadows
and highlights is to set this textured sketch
layer here to multiply. Or maybe actually I will
just have a quick look how that illustration
looks without the sketch. That's quite nice. I think I even like it better than the one with the sketch. Maybe I can just reduce
the opacity quite a bit. I will have a look
later on whether I will omit the sketch here. Now what you can do is create a second sketch and then set
one of them to linear burn. Then set that linear burn
layer to Gaussian blur, because that has this
vintage look like. If you did etching, then you have to
try out whether you like to put that on top or
beneath the other sketch. And whether you like to reduce the opacity of
one of the sketches, I definitely like to
reduce the one here. Then maybe I just keep
the linear burn one. Yes. What I don't like is that these lines here don't
align with the color. What I will do is
to make a mask. Then I will use a black. And with just a pencil
painting on the mask, you can erase parts
that you don't like but they actually
don't get erased. They are just mask so that
they are not visible anymore. What you can do then is to just toggle off the layer mask. And then you can see
that line again. If I toggle that on, it's gone. Now the best thing you
can do if you want to add lights and
shadows is to pinch all of these layers together
and then add all of your shadows and lightings
in clipping masks. I have to admit because very often want to retain my
layers, I don't often do that. But what you can do, of course, is to create a duplicate of
your first illustration. Just tap duplicate.
Then in the duplicate, you can pinch all of
your layers together. Let me see. Maybe just except
for the sketch, I will delete that one. If I pinch together the layer
mask and the layer beneath, then this layer
mask gets applied. I will just make that a group. Let's delete that
one. Sometimes you have different blending modes. And you pinch them all
together, they, I'm confused. Hit group. Then some of the
blending modes get lost. But if you make it a group
and just say flatten, then your illustration will
look exactly the same. Now let's start out
with the shadows. Create a new layer
clipping mask. It's nice to use some desaturated yellow
for your shadows. I will be using this one here. Maybe add that to your
color swatches as well. I want to have a
very subtle shadow. I will be, first of all, setting that to multiply. I will be using a watercolor
brush like this one here, the fresco which
comes with procreate. I will just very lightly
add shading here. I think pot doesn't
really need a lot of shading because I already
worked on it before. But let's see, maybe with
the stem and the berries. Now, this brush is very
nice because again, you can see here it
has a lovely texture. If you don't press hard, there's barely any
color visible. But the harder you get pres, the more obvious it gets. This is quite nice. Again, keeping to the right
side of the illustration, it's a bit too obvious. The longer I look at it, the less I know whether I
like that blurred line here. Maybe I will change
that later on. Now what's very helpful is to reduce the size of the
illustration and look from it from afar because then
it's much easier to see if something is too obvious
or not obvious enough. Okay, I think I will
leave it like that now. I will also be
adding a new layer, make it a clipping mask. Set that one to the ad mode. That mode is quite intense. You have to see
whether you like it. I like to use that one with
a dark yellow or orange. Let's see, I will start out
with the scratch brush. Let's see how that looks. Go over, that's
the fresco again. I think that's quite nice. I think I will do
a little bit of, make it a bit smaller, a little bit of light with the fresco brush there. Then I will be finally
using the scratch brush. This one apply to that. This one will give
you some scratches. Okay. Have to keep that subtle because it
could be too strong. I will also be the dots again. Again, make it a clipping mask. Set that one to add, but I think I will use it
with a less saturated yellow. Go to the dots again, what happened here? Something
completely different. And add some of these
to the berries. May also here may also here you could also totally use one of
the alcohol in stems. Let me just show you by
toggling off these layers here, because this will
definitely be too intense. Otherwise, pick
that yellow again. Go to the alcohol in stems, make it that layer to add. This is how these stamps look. With the add mode, this is way too intense. One thing I would do is to
reduce the opacity here. Maybe also reduce the saturation because it is a bit too
yellow for my taste. Make it a bit lighter. This is another way how you
can add light effects. Let's see, which
one do I like more? This is the shadows I think I like. That one will erase like on that first layer it did with the fresco fresco brush. I will just erase that
part on this leaf here. Maybe also reduce
the opacity a bit. Now I feel you get
the gist of it. I will just leave my
illustration as I might be adding in the other sketch. You can do that. Let me
just quickly show you by just going to
that sketch here. And this is the one
that wasn't blurred. And I can tap the
layer, tap, copy. Then adding this one to, I have to put off that glove. I can't do a three
finger swipe otherwise. Then just go to paste. Since I just
duplicated the layer, it automatically applies
to the right spot. I just have to make
that multiply again. I think I like
that a bit better. Maybe completely leave
it without the sketches. That's also nice though
I would have to work on these transitions here, but the possibilities
are endless. I just want to very
quickly show you how this illustration would
look without the overlay. Now, this is also quite
nice and textured, but as I said before, I always like to add in that extra texture that
comes with the overlay. Okay, so I think
that's about it. In the last lesson,
I will just give you two bonus tips and I will tell you where you can find me on my different
social media channels. So see you there, bye.
8. Bonus Tipps: As promised, I wanted to give you two bonus tips
in this lesson. The first tip is to create
your own brushes and stamps. There is a wonderful
skill share class by Mel Armstrong called Master Textures and Procreate
with your own brushes and texture overlays That
teaches you how to do that. In her class, you will
learn how to create a custom brush library full of texture
brushes and stamps. Also shares procreate and packs that you probably
have never heard of before. I highly recommend checking out glasses and Youtube channel. I also have a tutorial on creating procreate stamps
from real flowers, which is a fun project
for spring and summer. You can find it on
my Youtube channel. If you prefer not
to create stems yourself or are looking for high quality
procreate brush sets, I highly recommend
checking out Lisa Glass. I'm not sponsored by her, but I believe her brush
sets are among the best. One of her latest sets, the Dreamland brush box, includes a variety of shaders, filler and layering brushes, paper canvas brushes,
painterly stamps, and four texture
overlay canvases. She also has a pack called
the Magic Canvas with ten different procreate canvases containing carefully
crafted texture overlays. If you haven't already,
be sure to check her out. If you want to connect with me, you can find me on
Youtube where I share quick tutorials and draw with
me videos and on Instagram. My handle for both accounts is at Julia Alfred's Illustrations. Hope to see you soon and
have fun creating. Bye.
 Julia Ulferts,