Transcripts
1. Welcome!: So you've been rag
testing for a while now, and you really want
to add a little bit of zing and character
to your rugs. Just add something a little
bit new and spice things up. In that case, creating
a mirror rug is the absolute perfect next
step. Hi, I'm Charlie. I'm a textile and watercolor
artist from Atlanta, Canada, and I specialize in rainbow
colored animal artwork. And today I want to
walk you through, how to create a mirror rug. This is an intermediate
level class, and I assume that you've topped
at least one rug before. If not, pause this video and check out the link in the
description where I linked to my introductory run tufting course where I walk you
through the run Tafting creation process all the way from basic safety and run
Tift and gun maintenance. Through creating
the rug, including the entire process
from designing your rug to tufting it out, cleaning it up, backing it, and getting it
ready for display. This class is going to focus on the elements that are
unique to a mirror rug. When I talk about
designing a rug, either focused around the
mirror or having the mirror as an accent to the
overall design of the rug, I'll cover some tips
and best practices for tufting out and
carving your rug. I'll show you how to
create a carriage for your mirror to add support
to your rug and your mirror. And create a very
sturdy end product. And then we'll go through adding backing and hanging
hardware onto your rug, getting all ready for display. If you have any questions
during this class, please leave them down in the discussion section and I'll answer them as
quickly as possible. And when you're finished, please be sure to show me your project. I'd love to see what you create. Thank you very much for joining
me and enjoy the class.
2. Your Project: The project for this class
is create a mirror rug. Remember this is an
intermediate level class, so we're not going to be
going in depth on how to create a rug using
a tufting gun. If you need information on that, please be sure to check out my introductory run tufting course. I'll have linked in
the description. In this class, we're going to be discussing designing your rug, including a mirror centric
design and also a design where the mirror is a secondary read and supports the overall
design of the rug. I'll briefly walk you
through the tufting process, including some tips for creating a very professional
looking finished here rug, then I'll walk you through
step by step how to create a carriage that'll
support the weight of your mirror and make
your rug extra sturvy. By the end of this
class, you'll have a beautiful mirror rug to show off to all your
friends and family. And when you're done,
please be sure to share your project down in
the project section. I'd love to see what you create.
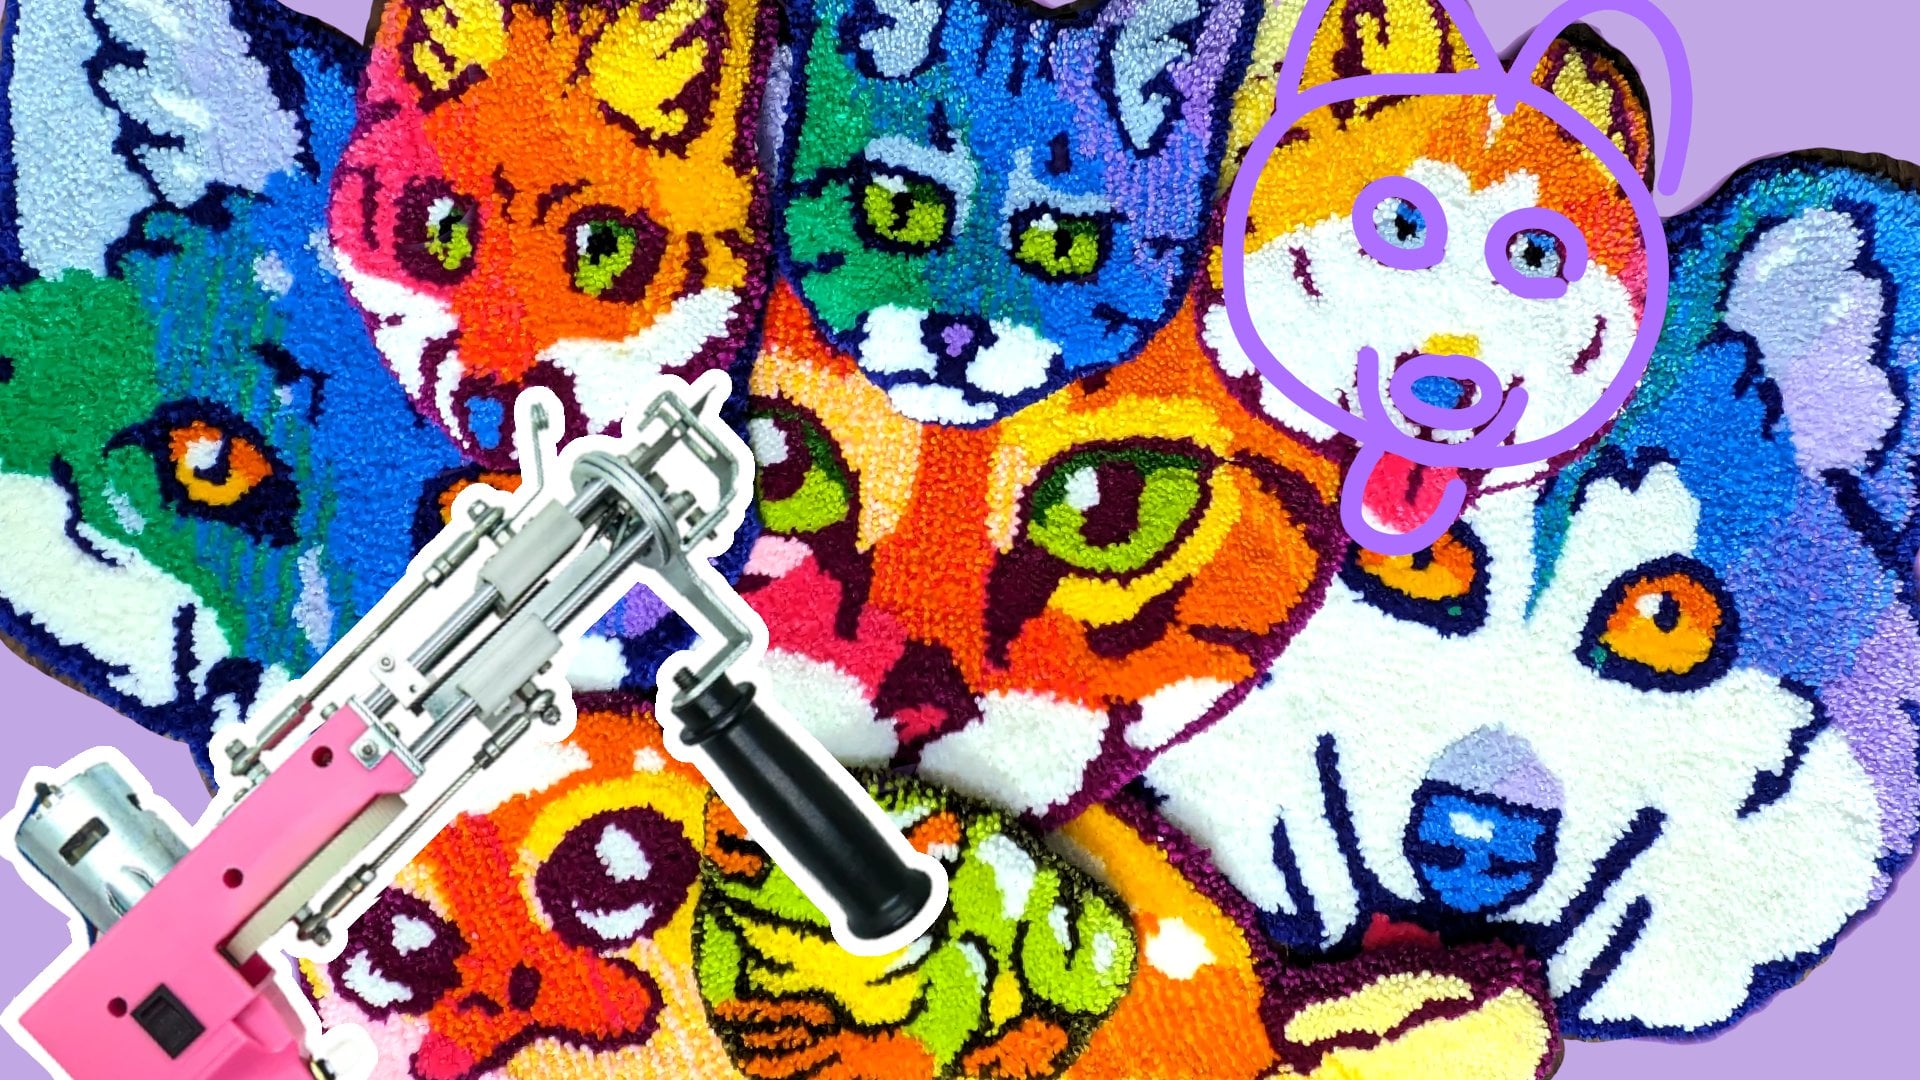
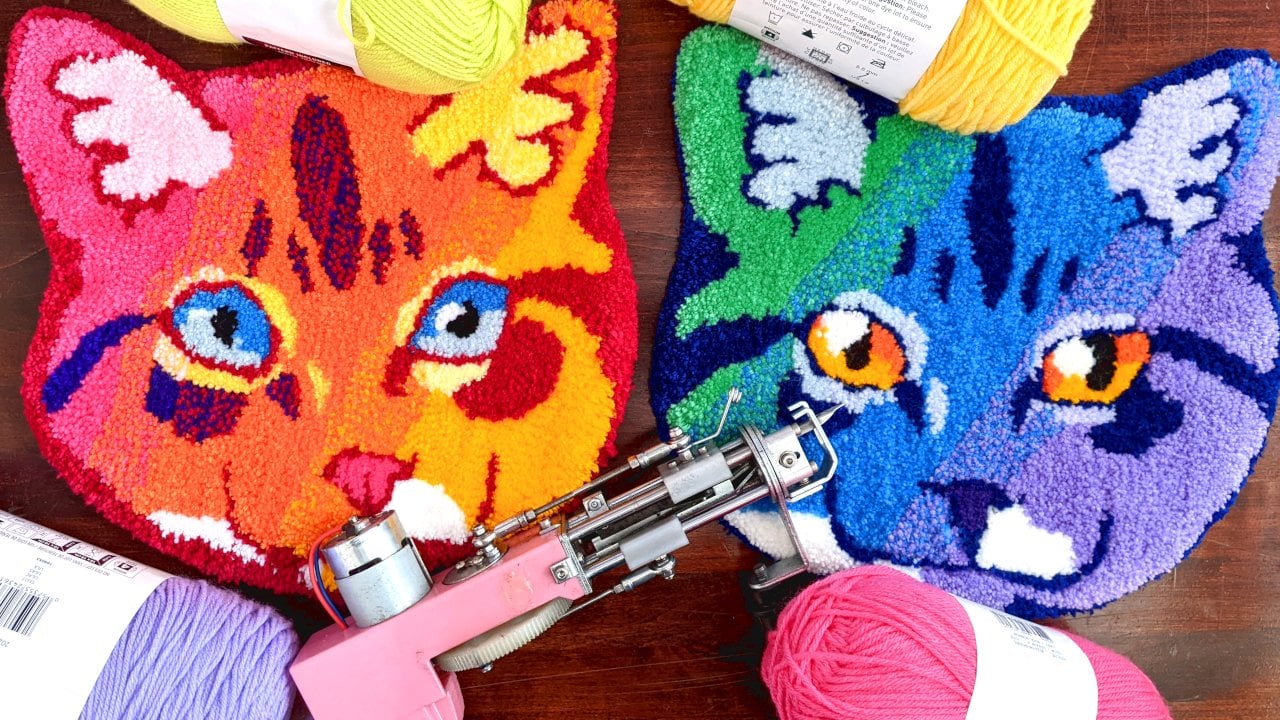
3. Materials: The materials you
need for this project are your normal
tufting materials. So in my case, I'm using primary backing
cloth, lots of yarn, my tufting gun, wood glue
as my primary backing glue, scissors, and an electric
razor to do my carving. You'll also need foam core
or corrugated cardboard, or I can use a light wood, like Masonite, if you prefer. We'll be using hot glue and whether or not you use backing fabric is
completely up to you. I'll be using felt for
my backing fabric. I'll also be using two D rings
as our hanging hardware. And, of course, a mirror. I'll have a list of
all these materials down in the class description.
4. Prepping The Mirror: Before we start
designing our piece, the first thing we
need to do is figure out the size of our mirror. I don't do that.
I'm just going to remove this mirror
from its backing. Looks like it was held
down mostly with glue. Pretty easy to remove. Alright, so this shows me
what I have to work with. Our objective at this step is just to get the
measurements of the mirror. So I'm gonna do that
first before removing it. I see the edges
nice and cleanly. And I'm gonna say
that is about 16 ". By about 12 ". I'm just going to
write that down. We won't need to
remove the mirror from the frame
right this second. But since we're
already working on it, I think it's best to remove
that all in one step. So with this glue, I'm just
going to use my knife here, see if I can pull that up a bit. Depending on your mirror, you might have tacks, nails, staples or some other holding implement
in the back of the mirror. So just have a few tools
ready just in case. I'm going to be really
careful not to put too much pressure on the back of the mirror in
case you crack it. Measuring might take a
bit longer if you have an organically shaped mirror or something that
is more circular. But if you're working
with a rectangle, and you're probably going
to get a standard size. Not too worried about the glue that's here that was
holding on the back. But if that peels up
easily, that's great. But if not, can
actually leave that on for when the rug
is being created, and basically put this
in, we'll cover that up. Now that we have the dimensions, we can go ahead and start
sketching out our designs.
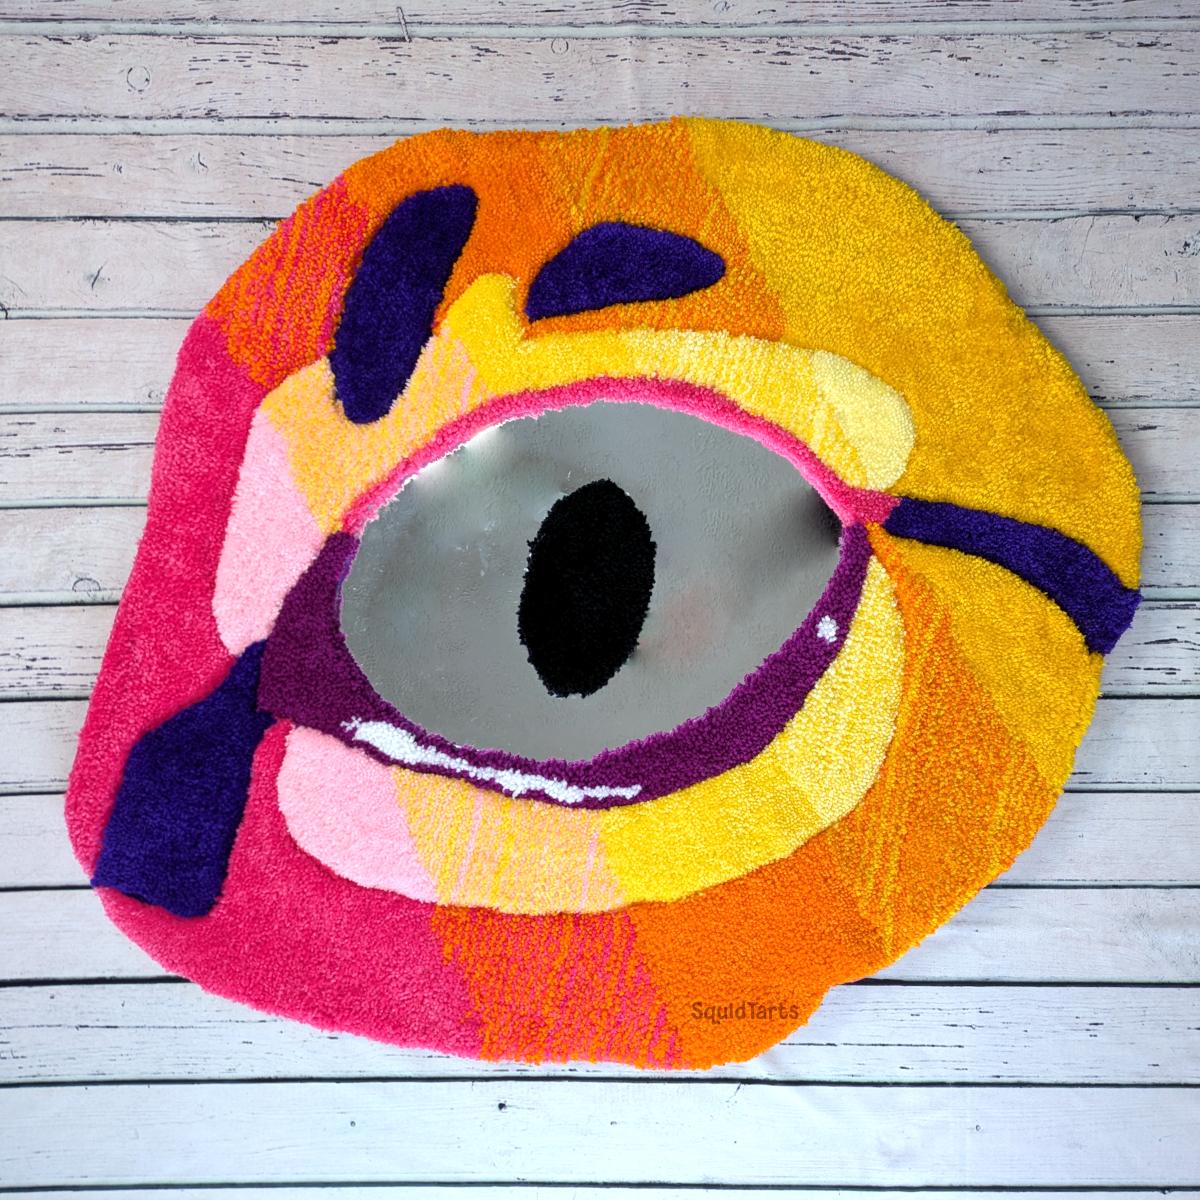
5. Designing Your Rug: A few general principles to
keep in mind when designing your mirror rug is that the mirror is going to
be the focal point. So you can use it
to your advantage by making the mirror
the standout element. You also want to
either maximize or minimize the amount of contrast
in the rest of the rug. If you maximize contrast, then you're going to
have a rug that really pops off and attracts
a lot of attention. If you minimize contrast, you're going to make the mirror
a lot more impactful when someone actually walks up to it and discovers that
it's a mirror. And finally, don't be worried so much about the
shape of the mirror. It's the size of the mirror that's actually most important. So even if you have
a square mirror, you can create a round or
organically shaped rug. Need to make sure that
the edge of the mirror is obscured by the edge of
the window in the rug. Now let me have the exact
measurements for our mirror. We can go ahead and sketch
out some basic designs. And there are two ways that you can design something
around a mirror. So you can either
have the mirror be the focal point, and therefore, it takes up most of the rug or is the central
element of the rug, or you can have it be an accent and have the rug be
the primary focus. So maybe one idea
having the mirror as a primary focus might
be to make an eye. So I really like cat eyes. So I'll draw the main part of the eye inside and
create a pupil. And then we need to
design around it. So make this one to tabby, I really enjoy
painting tabby cats. Have some lighter
bits around here. Darker bits coming out here, maybe a marking here, and then maybe we'll
make this an oval rug, just to give it some structure. We're not too
worried about having things look perfect just yet, so we're going to
refine these sketches. We just want to get
the basic idea down. Traw out our basic
mirror shape again. So maybe something
like a turtle shell. So maybe a sea turtle has
a bigger shell over here, smaller shell here, maybe
something more like that. And then we can maybe add some
details across the shell. And right now I'm just
playing with things. So these aren't
gonna look great. I'm not too worried
about that. We can also play with the
placement of a mirror, like how much is covered
by rug and how much is exposed later on when
we're refining these. So right now we're
just generating ideas. Maybe something
like a sunset rug. So shape like this. The mirror will
be in the bottom, and we'll have the sunset
come out gradients. I'm gonna label this one because it's a little bit
obtuse what it is. Could be a rainbow,
could be a sunset, could be a moon. Who knows? Maybe in terms of a moon, we could have similar like this. Well, the mirror is
here, we have the moon there and a bunch
of stars around it. We have two ideas that focus on the mirror as
a focal point and two ideas that focus on the mirror as a secondary
element. So it's a second read. And I think it's pretty good. So once you designed a
few ideas that you like, you can go on to refining them. Now that we have a few ideas of what we'd like our
rug to look like, it's time to refine those
very rough sketches. I'm going to show you how to do this traditionally using paper, but you can also
do this digitally. First thing I'm
going to do is I'm going to get some paper that's approximately the size
that I want my rug to be. So I want to keep
the limitations of my frame size in mind. The next thing I'm going
to do is place my mirror on the paper and
trace around it. So it's going to
give me the exact size and shape of the mirror. Now, I've decided
that I'm going to go with this cat eye design. So I'm going to use
this highlighter to rough out the
shape of the design. And then when I'm
happy with that, I'm going to go over it
with a black marker. Keeping the sketch
light, it allows me to change up the
design more easily. Of course, if you're
doing this digitally, it's very easy to
go back and change the design around until
you're happy with it. Once I'm happy with the design, I'm going to go ahead
and cut that out, and then I'm ready
to transfer it to my tufting fabric
and get tufting.
6. Creating Your Rug: In this section, I'll
be briefly touching on everything you need to
know about rug tufting. If you're a rug
tufting beginner, and this is your first rug, I highly recommend
you go back and watch my first rug tufting
introductory course. That'll give you a
strong foundation in everything you need to
know about rug tufting. Breaking down everything about the rug creating process from designing all the way
through to tufting, cleaning, and
finishing your rug, including safety tips and some maintenance
tips for your gun to keep it in good
working order. Once we have our design
all sketched out, it's time to transfer it
to our backing cloth. If you've created your
design digitally or you've scanned or photographed it,
then you can use a projector. If you've created your final
design on paper like I have, I found the easiest
way to transfer the design is to pin it
directly to the backing cloth. Remember that if your
design has a direction, so you want it
facing specifically left or specifically right, then you're going to want
to flip your design. For this rug, I'm
showing you how to flip your design manually. So the first thing I've done is I've attached the front of my design to the back
of my tufting cloth. I'm going to go around to the
front of the tufting cloth. This is the good side,
the side that you'll see, and I'm tracing that
sketch onto the cloth. Once I'm done with that,
I'm shining a light through the front side where
we've just drawn the sketch out toward the
back and then I'm going around to the back and
tracing the lines that I see. This will effectively
mirror your image for you. Finished rug will be facing
the correct direction. Just a quick reminder, here
are some tufting tips that I always keep in mind
when working on a rug. First, be sure that you always outline the section
that you're tufting. So, for example, if I'm
working on this stripe, I'm going to go
around the outside of the stripe before
filling it in. Also, be sure to tuft in the same direction
as much as possible. So that means
always going up and down or always
going side to side. This just ensures that
the pile always faces the same direction and doesn't get any ghosting
when you clean it. Sure to take your time,
especially going around curves. The easiest way I found to
go around curves is to slow your gun by just tapping the trigger instead of
holding it down consistently. That just slows your
gun down a little bit and allows you to
take tighter turns. Once you're all tufted out, then it's time for the glue up. I'm using wood glue because it's non toxic, it dries quickly, and it's pretty water resistant, so it's quite sturdy and
stands up for a long time. When you're gluing, make
sure you go straight to the edge of your backing
fabric and a little bit over. That'll ensure that your backing
fabric edges don't fray. I'll be leaving my edges raw, so I want to make sure that they're nice and
tightly glued up. The last step before
attaching your mirror is to make sure that you
do all your carving. You want to do this before
attaching your mirror, so that way you can lay
your rug completely flat. So first, I'm going
to shape everything down to level and
then I'm going to go around each shape that
I want to stand at more prominently and carve
a nice little bevel. And once that's done, we can move on to attaching the mirror.
7. Adding The Mirror: And now it's finally time to
add the mirror to our rug. So the first thing I'm
going to do is I'm going to take the
backing material. In this case, I'm
using foam core, but you can use
corrugated cardboard or a light wood like Masonite. And I'm going to place
that down on top of my rug and see approximately
where I want it to fit. And then I'm just going to
lightly tape that down, flip over my rug, and then
trace out the negative space. So I'm going to trace
out, in this case, the eye of the cat, as well
as the edges of the rug. So in this case, where the
foam core overhangs the rug. Once I have those
measurements traced out, I'm going to carefully lay
down the mirror so that it covers the area of the eye. So this is the area of the rug that I want the mirror
to pee through. I'm just going to trace
around the mirror. I've selected a
fairly thick material here because I want
to create a carriage. I want to create an
indent in this material for the mirror to sit inside. In order to do that, I'm
going to take my knife and cut through the top
layer of the foam core. This foam core is covered
with paper on both sides. I'm just cutting through
that top paper layer and a little bit into the foam. In addition to that, I'm also cutting out the edges
of the foam core. I want there to be
a bit of a margin between the foam core
and the edge of the rug. That just allows our back and
cloth to attach properly. If you're using
something like masonite and you don't want to
attach a back in cloth, then you might want
to go right to the edge of the rug
with your mason. I have my board cut shape, and I've scored the
shape around my mirror. I'm going to go ahead and
score some more lines into the area where my mirror
is going to be recessed. And then I'm just going
to use a palette knife and carefully scrape off all the foam and
paper within that area. So all I want left is the paper
underneath the foam core. If you're using
corrugated cardboard, do this exact same way. We're going to be tearing
off the upper paper and then tearing out the
corrugation in the center, leaving that final
layer on the bottom. Once that's all cleaned
up, I'm going to take some hot glue and I'm going
to put a bead of hot glue all around the edge of the carriage where I'm
going to be putting in my mirror and then putting some hot glue inside
the carriage, as well. And then I'll be gently putting my mirror inside this frame. Now you might be thinking that
this is very light weight, and that is why I've
chosen the foam core. You don't have to worry
about it being too fragile. That lip that we've
just created is going to take most of the
weight of the mirror, but we're also going
to be attaching both the frame and the mirror itself to
the rug using glue. And that's going to
add a lot of strength. Once we have the mirror
glued into the carriage, going to carefully place
the rug over the carriage, and then we're going to
start by applying glue around the edge of the rug
that touches the mirror. You want to get right
to the edge here as much as possible
to create a nice, sturdy connection,
and then gradually work your way out towards
the edge of the rug. If you make a mistake
in your placement, you can just peel up your rug, peel up the glue while
it's still warm, and then reposition your rug. Make sure you're
applying the glue directly over the
edges of the mirror once the rug is in place to make sure that there's
a strong connection. Once the rug has
been glued down to the mirror and the carriage, I'm also going to
go back and add a small bead of glue just around the
inside of the mirror. And then I'm going to
gently push the yarn of the rug down into that glue. And that's just going
to make that connection between the rug and the mirror a little
bit more seamless, so you don't see the reflection of the underside of
the rug in the mirror. I'm going to follow
the same procedure for attaching any elements
directly to the mirror. So again, we're just going
to apply glue to the center and to the edges of the
rug and squeeze outward. And then we'll push down
the yarn around the edges of the rug to create a
clean connection point. Now we're finally to
the home stretch. Now we're going to back
our rugs and attach some hanging hardware, and
it'll be all finished. The first step is to
attach the backing fabric. The way I like to do it is to put a bead of glue
on the very edge of my rug and then put the fabric down and then squeeze
that glue outwards. That ensures the backing fabric gets to the very
edge of the rug. Now going around the
outside of the rug like this creates
a little pocket. So I like to fill
in that pocket with glue and get a nice
hard press down. When you reach the
carriage material, in this case, it's foam core. Make sure you also apply
glue liberally here. You want a really strong
connection between the backing material and the carriage that's
holding your mirror. Once everything's
glued down, we're just going to snip off
the excess fabric. Once your backing
material is glued on your rug and everything's had a chance to cool and harden, we're going to go ahead
and sew on the hangers. In this case, I'm using D rings, and I'm just using a little
bit of my backing fabric, which is felt to
attach the hangers. Now for a normal rug, I just use one piece of
felt per D ring. But because this is going
to have a mirror on it, I want it to be extra sturdy. I'm going to add two pieces
of felt or one piece of felt that's folded over
just to make it doubly strong. When I'm sewing, I'm going to go directly through
the backing fabric, through the rug tufting fabric and right at the
front of the rug. You don't need any
particular stitch for this. Just try to be a
little bit though. Tend to make two
rows of stitches. The only tips to
keep in mind while doing this are to make sure that your hanging hardware does not overhang your rug so
that it's not visible. And this is why we've added
a little bit of a lip between the rug and
the mirror carriage. And the second tip is
just be cautious that your thread isn't getting caught in the yarn on the
front of your rug. It should be easy to
nestle it down into the pile of the rug and
you won't even notice it. If instead of cardboard
or foam core, you've decided to use wood as
the frame for your mirror, and you can skip this
step and instead attach hangers directly to
the wood using screws. Once you have your
hangers attached, your project's all
done. Congratulations.
8. Wrapping Up: Congratulations on M to the end. At this point, you should have a good idea how to
create a mirror rug. Or hopefully you've worked along with me and you've
created one of your own. This class covered all the stuff you needed to create
a mirror rug, including some tufting
tips, some design tips. How to create a carriage
for your mirror, and how to put that all
together into your final piece. Once you've completed
your project, please be sure to share it
down in the project section. If you have any questions
in the meantime, please be sure to leave them
in the discussion section. And if you've
enjoyed the class or maybe there's something that you'd like improved
on the class, please be sure to leave
it down in a review. Your reviews help me polish up these classes and
approve it as a teacher. So thank you very
much for your input. And thank you very much
for watching my class. I hope you had a good
time. Have a great day.
 Charlie Proulx, Watercolour and Textile Artist