Transcripts
1. Welcome!: Have you seen custom rugs
trending on social media and thought it seemed
really exciting and fun. But maybe we're a little
bit intimidated to start on your own in
this class was designed for you to have to use great for anyone
who wants to work with their hands and create large functional pieces
of art very quickly. For, for anyone who wants a
low stress creative activity. Hi there, I'm Charlie. I'm an artist from
Atlantic Canada, textile and watercolor and specialize in rainbow
colored animal portraits. I began selling
rainbow animal or portraits
professionally in 2019. And we'll watercolor is
really fun and satisfying. I really wanted to produce larger works that wouldn't
take a ton of time. I started seeing videos of people using
electric arc Tufte and guns to produce really
large pieces very quickly, being intrigued
by this, in 2021, I bought a wrong
toughening gun and produce my first rug,
and I never looked back. I begin just by producing pieces that I wanted to
produce for myself. And I immediately found a
local market for my work. There's currently
a lot of demand worldwide for customer rugs. If decide to take
this up as a hobby, it's one that can pay for
itself in the long term. And since we're in tough
thing with electric current, Tufte and gun, I knew
as an artistic form, There's a lot of room for experimentation and find your
own voice and it's medium. In this class, I want
to introduce you to everything you'll
need to know to begin your work tapping journey. Materials you want
to purchase and use depending on your
own personal goals. A variety of backing and toughening
techniques and some tips that I use to make
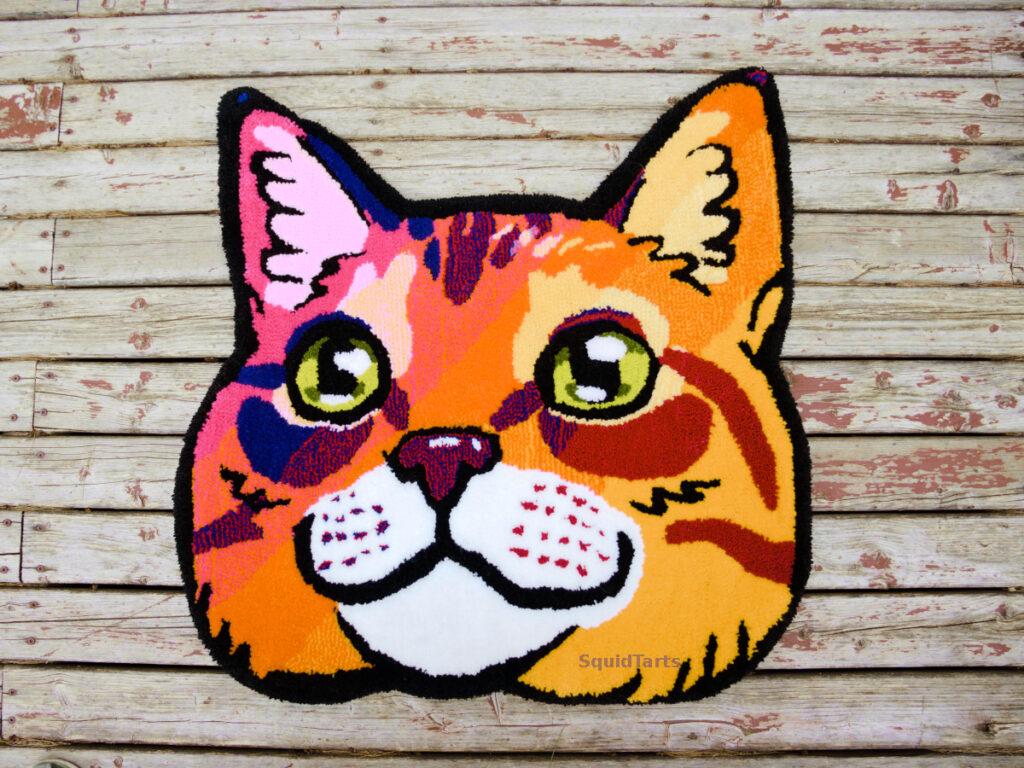
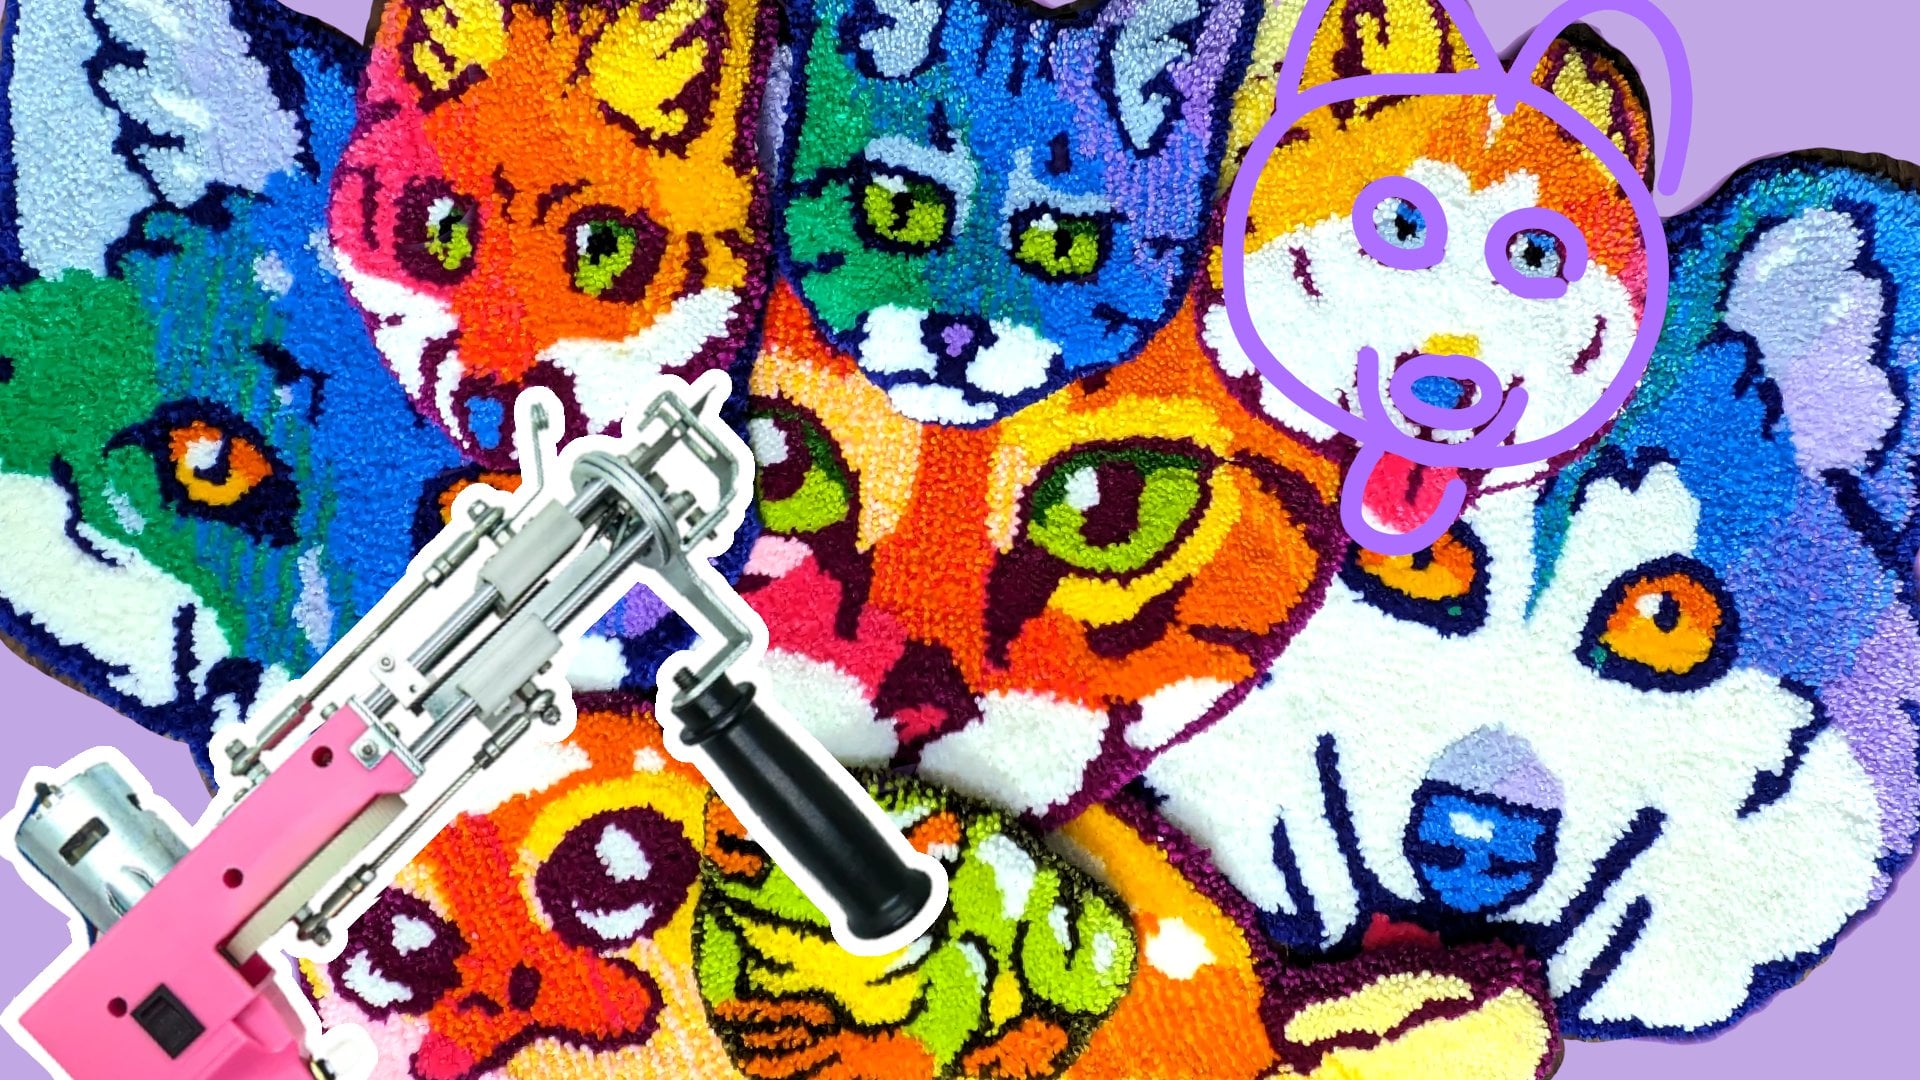
testing easier and to make my rugs extra flash. Your final project
for this class, I'll provide you all the
information you need to produce colorful cat
runs like these ones. But you shouldn't feel limited
to stick to my designs. The techniques I'll be
teaching you can easily be applied to absolutely
designing and come up with. These. Don't feel limited by the
materials that I provide and feel free to explore your imagination for
your final project. Thank you very much
for joining me and please enjoy the class.
2. Safety: Our first lesson together,
I want to go over some basic safety tips for
working with a tactic gum. When you're working with
it's happening. Gun is important to remember that
this is a power tool. Does come with a few dangers just inherent to
using a powerful. The most immediate
health risks to consider is vibration from the gun. As the needle punches in
and out of the fabric, it creates some kickback. In your gun. This can cause nerve damage or nerve numbness
through your hand. And some people have said, I've lasted weeks or
even months for them. Some people like to
use a wrist brace to help strengthen their risks, to help absorb the impact
a little bit more. But I found what's
much more effective is using some sharpness
bourbon gloves. These gloves have a padded
palm which absorbs the shock directly from the
gun and prevents it from going into your
arm whatsoever. Electric toughing guns
are also quite loud, so it's best to use some
sort of hearing protection. I use over the ear
headphones like these. But you can also use
earmuffs which you can purchase at any
hardware store. Another consideration
is the dust produced by Tufte and guns. When you're testing,
the yarn is being cut very quickly and dust is
getting into the air. If you're only creating
a one-off frog, it's probably isn't
such a big deal. But if you want this to be a long-term hobby
or even a career, you're gonna wanna protect
your lungs from that desk. I use a basic fabric mask, but you can also use a
dust mask if you like. On the topic of
protecting your lungs, depending on what
type of adhesive use, you may also need a ventilator
mask like this one. You'll want to use
a ventilator mask. If you use adhesives such as carpet adhesive or
latex adhesive. One final safety consideration
is for your gun itself. Because the gun moves
at such a high-speed, create quite a bit of
friction and heat. So it makes sure that you
are oiling the scissors, which are here
underneath the needle. About every half-hour,
you can just use a basic machine oil or
even a mineral oil. But there's few simple
safety precautions. You should have a long
toughening journey ahead of you.
3. Backing Fabric and Gear: In this lesson, I'll
cover the materials you'll need to start
your shopping journey. We're going to discuss
backing projects, including the two most
common back and fabrics, which are toughening fabric
and burlap also briefly discuss frame and some
miscellaneous materials that you'll want
to have on hand. Ideal backing fabric should have very little stretch on the
horizontal or vertical, but quite a bit of give
between the weave. This a piece of primary
toughening fabric, also known as primary
backing fabric. If you give it a good tug, you see it does not give on the horizontal
or the vertical. We can easily pull
the wave apart. This allows the
wave to move around your needle without distorting the image of your actual rug. The burlap also has good horizontal and
vertical toughness. However, believe is
very, very tight. So this means that
when the needle is forcing its way
through the fabric, it's much more likely
to create a tear. This makes burlap much more
difficult to use both as a beginner and even as
a more advanced Tucker. Well, burlap is much cheaper and more available than
primary backing fabric. If you're going to
splurge on one item, investing in the primary backing
fabric is your best bet. Your next must-have item
is a toughening frame. The frame allows you to
stretch your backing fabric and keeps it nice and taut
while you're touching the two characteristics
you want from a good frame or
that it will hold the fabric taut and that it can withstand the pressure of the gun driving into the fabric. There are many different
types of frames. I've included a
link to a kit that contains a toughening frame down in the class description. We can also create your own frame using
two-by-twos or two-by-fours. Or you can purchase a canvas
stretcher for stretching canvas for artists
at pretty much any craft or art store
and use that instead. Mothering materials you
want to have on hand are a good pair of
fabric scissors. You'll need these for
cutting the yarn as well as cutting your
backing fabric. And you're finishing
fabric if you use that. You also want a marker for transferring
your design or free handing your design onto your backing fabric before
you be in tough thing, you'll want a printer
and some paper to print out your
design so you can transfer it or a projector, or you can just
skip that part and freehand reside directly
onto your backing fabric. You'll also want a yarn needle
for fixing any holes in your fabric or for
completing a whip stitch. If you want to finish
your rug that way. And you'll want some
hot glue for backing your rug or repairing any
holes in your topic fabric. Just review the
materials you absolutely need are good backing fabric, sturdy frame, scissors, a
marker for transparent design, and some hot glue. And some nice to
have extra items are a yarn needle and a printer or a projector for
transferring your image.
4. Yarn: Picking out your
colors is probably my favorite part of Rome. Toughening urine
coming just so many wonderful colors and textures. Just incredibly
fun to go looking at it in choosing
your favorites. This lesson we're going to cover three different yarn types. Acrylic, cotton, wool. You ever experienced
with yarn acrylic, it's probably urine
you've seen most often. It's most available in big-box
stores and craft stores. It has some advantages
and disadvantages. Its availability being a
very strong advantage. It's also very
cheap and comes in a lot of color varieties compared to the
other types of yarn. Downsides are that it's not
very durable or strong, so it's best suited to projects that are going to
be hanging on a wall or e.g. throws for a couch or a bed that are not necessarily
going to be trampled on. Let me will also contact
allergies with acrylic yarn. So just be a little bit
cautious when you first use it. See if get a little bit itchy. If so, then might switch
to a different area. Say most common type
of yarn is wool yarn. Yarn in West Sharmila
acrylic yarn. And it's perfect for wrongs
that are gonna be in high traffic areas that are going to get trampled on a lot, lot Springer and sturdier and hold its shape a lot better. Hello yarn is much more expensive and is much
more difficult to find. You might need to get it
from a specialty store. It also comes in
fewer colors and those colors tend
to be more muted, earthy tones than
the bright colors that you see with acrylic yarn. Final type of yarn
is cotton yarn, and it tends to be a
little bit between an acrylic urine and wool
yarn for its strength. Also pretty hard to come by, but it's a good option for wall hangings if you
have it on hand, but you don't necessarily need to go out and
search for it. Just to recap how this
is going to impact your project is that if
you're doing a wall hanging, acrylic yarn is probably
the way to go just for its convenience and cost. And otherwise, wool yarn is great for anything you're
going to have on the floor.
5. Glue: In this lesson, we're
going to cover everything blue from latex glue to floor adhesive to PVA glue
and even spray adhesive. Going to discuss when
to use which types. Carbon adhesive has some strong advantages
and disadvantages. One of his primary advantages
is that it's latex based, which means that it's
waterproof and strong. So it can be used for rugs that'll be used on the floor
in high traffic areas. It's also quite affordable
and readily available. And most hardware stores. Downside is that because
there's quite a lot of fillers in it to
keep the cost down. It produces a very
strong odor that can be quite noxious to
people and animals. And that, that
smell can last for months or even years after
the rug has been completed. If you put your nose close to a rug that has been tempted
with carpet adhesive, you can probably still
smell the adhesive. Well, this is fine for
homes with adults. Once the carbon
adhesive has dried, I don't recommend it for use
around children or pets. Because of the strong odor and the volatile compounds
in carpet adhesive, you do use this, use
it with a respirator. Most durable glue
is pure latex glue. It's very strong and water
repellent and very pliable. It has a strong odor
when you use it, but it dries
completely senseless and a safe around
children and pets. The cons as I said, it does have a strong
odor when it's wet. It again, you'll want to
use a respirator when you're applying pure latex glue. It's also the most expensive of the glues and it can
be quite hard to find. You may need to get it
from a specialty shop, especially pottery shops
tend to have it in stock. My preferred glue is PVA glue. Glue is water-based and
it's completely nontoxic, so it safe around kids and pets. You don't have to use a
respirator when you're using it. And it's also cheap and readily available. It comes
in two types. There's non waterproof, washable
type and also wood glue, which is more water resistant. The downside of PVA glue
is that it's not nearly as strong as the latex based
carbon adhesive or latex glue. You'll want to use PVA glue on items that are going to be
hung or displayed only, not on high traffic area rugs often use hot glue and
finishing my rugs, I use it for applying the final back-end cloth after the rug has been
glued up and is dried. It's great for getting
into nooks and crannies, tight areas, and creating a
very precise line of glue. Many people like to
use a spray adhesive for applying they're backing. My main concern
with Brahe's HIV is that it is quite noxious. So again, you're going to
need a respirator when you use it and you won't want to be using it around
children or pets. Just to recap, PVA glue is the cheapest and safest
glue that you can use for gluing up the
back has every rugs, but it's also the weakest, should only be used for wall hangings and other art pieces. Here, latex glue
is the strongest, but it's also the
most expensive. And harvest defined is perfect for using with rugs that are gonna be in
high traffic areas. And carpet adhesive is
a bit of a compromise. It's not especially safe, but it is a very
strong and durable and good for carpets that are going to be in high
traffic areas.
6. Tufting Tips: In this lesson,
we're gonna go over some toughening tips
to help you get really comfortable using
your toughening gum or discuss gun control. So how to change your
direction easily? Speed control, out of control the thickness of the pile on
the front side of the rug. And of course, how to fix
any mistakes you might make when using a
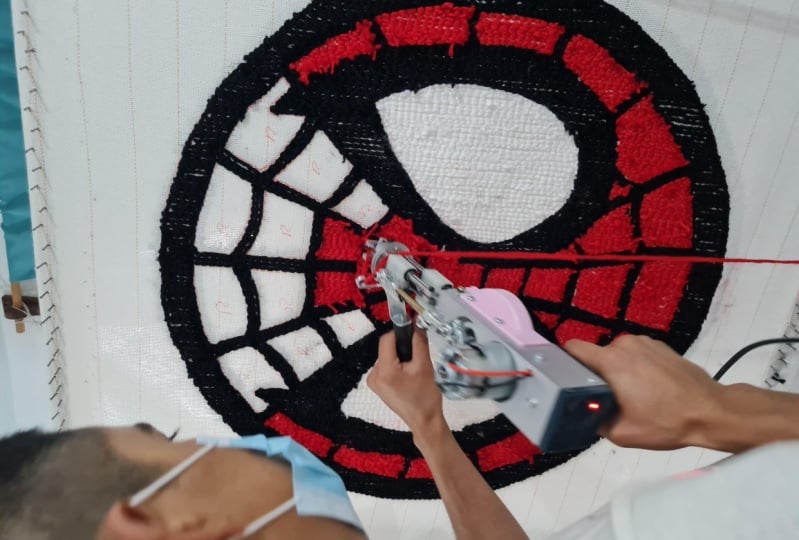
tough thing gun. First thing you might notice
is that it has two handles. This handle here with a trigger
is you're driving handle, use it to change
direction of the gun. So if you want to go right, e.g. you turn the entire gun,
you want to go left? Turn the entire gun. The front handle is
just for stability. So it's holding the weight of the gun just to make
sure that there's adequate pressure
between the foot of the gun and the
backing fabric. When you're holding the gun, you want to use your middle finger to depress the trigger. This will help you with control. It also ensure that
the vibrations from the gun are
distributed throughout your hand evenly and are not going just own your
index finger joints. When you're using the gun. Biggest tip is to apply even and firm pressure
against the fabric. If you find it, you're
going to skipping. You may need to press
harder against your fabric. The best way to fill in
large areas is to trace around the shape and then fill in the areas
with straight lines. So when you're going
around curves, really helps to tap the trigger just to slow down the
gun a little bit. There's also a speed
control on the bottom of your gun that you
can use to slow down or speed up your
gun depending on which area you're
working on your topic. I'm also naturally
want to follow the weave of the backing fabric, so that's vertical
and horizontal lines. So take it nice and
slow when you're going around curves to make sure
you don't cut your fabric. But also try to use straight
lines as much as possible, fulfilling an order shapes. When you are filling in shapes, try to make sure
that you're always going in the same directions, all horizontal or vertical. Reason for this is that the
pile will change direction on the front of
the rug depending on which direction
it was, Tufte it in. So you'll find that it catches
the light differently. You can use this to your
advantage if you want a very subtle shifts
in color. If e.g. if you want to tough to work
of a cat that has stripes or spots that only show up when
the rug isn't sunshine. One aspect of drug trafficking, but surprisingly contentious, is the amount of space that tough to put
between their strands. So you may find some
chapters use a large gap, the rows and others, but the rows right
next to each other. Personally, I think that the
space between rows should be based on your final outcome. So if you put rows that are very close together so there's
no gap between them. Then on the front of your rug, you're going to end up with
a very thick confirm pile. If you want a softer
and fluffier pile, then leave more space
between those rows. You ideally don't want
more than one row width between your rows of yarn. It's also best practice to use two strands of yarn
when toughening. Usually use them from
two separate balls. So e.g. I. Have two
orange balls here, and each one might donate a strand to a single color area. This just gives you a nice thick pile on the
front of the rug. If you want to create
a very detailed area or a very fine line, then you can use a single strand of yarn and you're done instead. However, that's
gonna make it very difficult to fill in
the space evenly. So again, single-strand for very fine details and double-stranded for larger areas we're going to be filling in. My own work. I use a lot
of rainbow gradients. I really love to blend
between colors like purple, blue and teal or pink,
orange and yellow. When creating a
blend, make sure that using colors that are
similar to each other. So they're right next to each
other on the color wheel. If I want my primary
color to be orange, colors right next
to it are yellow on one side and pink on the other. Having colors that are near
each other on the color wheel will ensure that there's
a nice smooth transition. I found the best way to
transition between colors is by putting down
the main color and then putting down a mixture of the color that you
want to transition to and the main color. So if I were to go
from orange to pink, I would put down
an area of orange. And then in the middle area, I would add an area of
both pink and orange, so one strand of
each into the gun. Then to finish the transition, I'll do a solid area of pink. What I love absolutely
most about recruiting is how incredibly easy
to fix mistakes. You can make a steak you've put a color and then
incorrect area, e.g. all you have to do is pull the yarn. You don't
want to be there. And you can use your
nail to straighten the wave and the backing fabric. This will essentially reset the backing fabric and then you can talk over that area again. If you've managed tear a large hole and you're backing fabric, you can just quickly on a patch
and just help prayed over it. Recap this lesson. When using your Tufte again, make sure you're
turning the entire gun when you're doing around curves. You also want to
keep the gun moving in a straight line as much as possible and preferably in the same direction
to keep a nice, smooth, even pile on
the opposite side. Make sure you take
your time going around curves especially doesn't erase. You can take your time. Most importantly, remember
that you can fix any mistakes. Should be a nice low
pressure activity.
7. Finishing Your Rug: In this lesson,
we're going to cover everything you
need to know about finishing your rug to give it a beautiful professional finish, and to make sure that
lasts a very long time, I'm going to cover the glue up, various finishes and some tips for getting a nice clean
finish on the front. Once you've typed in
your rug, you want to add an even coat of
glue to the back. This will ensure that
your urine stays in place and doesn't fall out if your drug is being cleaned or his pulled on by child, e.g. with your rug still attached to the frame to make sure
that it doesn't curl, apply a thin even coating. Try to get into any
nooks and crannies and cover a little bit of the edge of the backing
fabric as well. You want to ensure
that your glue is fully dried before removing your rug from the
toughening frame usually takes about 12:40, 8 h depending on the
type of glue used. For the PVA glue that I use, I usually just leave
my rugs overnight and they're dry by morning. Whether or not you
add it back into your rug is personal preference. Some people like to trim any visible backing cloth
off the edge of their rug and call it a
day with that, personally, I like to add a backing
because it adds a bit more of a professional touch and also add some
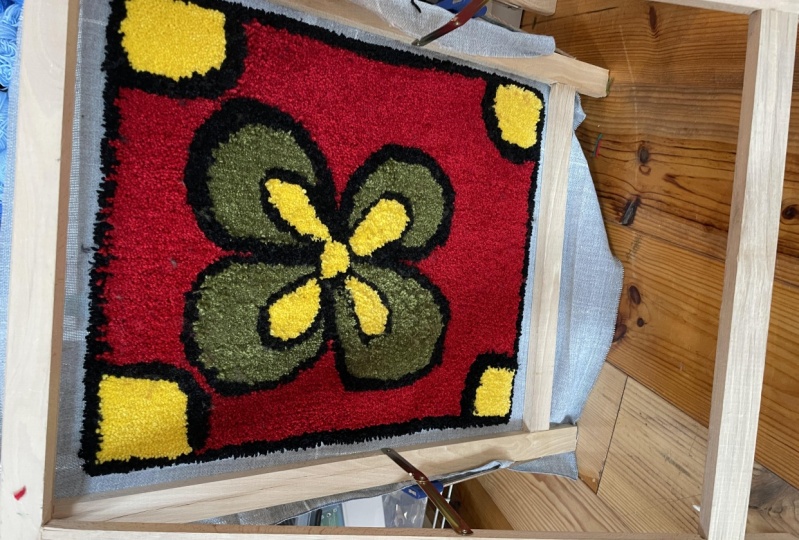
durability to your rug. The easiest and
fastest finish for a rug is called a
waterfall edge. In order to do a waterfall edge, you trim so you have
about an inch to an inch and a half of excess
fabric all around your rug. Into the excess fabric you're
gonna cut relief cuts and really cuts are just
perpendicular to the fabric. Just want to cut them every few inches and then hot glue those down to
the back of your rug. When you're folding
these relief cuts over, you want to make sure that
one or two strands of the yarn from the front of your rug also shows up
on the back of your rug. This ensures that you're going
to have a nice clean edge. That's also why
during the design, I recommend keeping a
thicker outer edge so that way you don't
lose any detail. The inside of your rug. Once your x is backing fabric
has been glued down to your rug and there's
a nice ring of yarn all the way
around your rug. You can apply your
backing fabric. That can fabric that
I prefer is fleece. It's very, very sturdy
and quite affordable. It also doesn't require
any extra sewing so you can glue it on directly. We want to trim that down
to an approximate size, apply it with glue. I use hot glue for
attaching my backings, but many people prefer to
use spray adhesive is a bit faster and then you
want to glue down the edges of your backing
fabric very carefully, as near to that rim
of yarn as possible. Hot glue works best for this
just to make sure that you get into the very narrow
nooks and crannies. And then you can take your
scissors and trim off any of the excess backing fabric
that might be overhanging, would that your rug is complete. Another common finished
her rugs is a whip stitch. Whip stitch is great if
you have a very small rug, a drug that doesn't have
very thick outlines. Or you have trimmed at your backing fabric a
little bit too short. Whip stitch finish your rug. You want about half an inch
to an inch of excess fabric. Going to take your
finishing backing fabric and turn it to about the same size as the spare
backing fabric on your rug. You want to pull
these two fabrics in half over each other. And just so up the edges, you can use the same yarn color
is used for your outline, or you can use a color that will call them in the
rest of your rug. If you have any type turns on your rug like this one here. Just going to continue
the same pattern. I'm just going to
tuck your fabric in and your needle through the back and follow the
same basic pattern. What makes the biggest
difference between a professional looking rug and an amateurish looking rogue is the amount of finishing you do after your top did
you always want to go back over your rug and even at the pile as
much as possible. You can do this with an electric
shaver or with scissors. It's a little bit more
time-consuming with scissors, but you can get the exact
same kind of effect. You can also go over your
lines and trimmed down inside the room pile to make your lines a little bit
straighter and more. Even if you like, make
sure you're taking your scissors to
the outside edge of your rug and really
clean up those edges. Really clean edges will help the entire rug feel
just one step better. But just to recap, wonderful edge where you're going
down the edges of your rug is really
good if you have a large area to cover or you
want to work really quickly. A whip stitch is
great for if you don't have a very small rug or you don't have very much
excess backing cloth around the edges of your book. The most important
part of making a rug look nice and finished on
professional is the cleanup. Take your time cleaning
up any spare strands and tightening up any lines
that need tightening up.
8. Design Tips: In this lesson, I'm going to
go over some tips to help you finalized design
for your own projects. We're going to cover some
design elements including linewidth, shapes and colors. And I'm also discuss some tips for choosing the correct ER. Creating your
design. It's best to use thicker outlines around the body of your design and thinner lines on the
inside to add more detail, the thicker outlines
on the edge of Iraq will allow you to create a waterfall edge for your backing without losing detail on the inside of the rug. When designing your
rug, you want to try to create simple shapes. Might help to think of
rug drafting as more like pixel art
than oil painting. You're not going to
create very crisp lines. There's always gonna be a
bit of fuzziness by using simple shapes and
helps to convey a sense of your subject, rather than getting
photo-realistic, which would be
extremely difficult or possibly impossible with a rug. If you're doing a
rainbow design, you want to choose analogous
colors for your rainbow. So analogous colors are
colors that are very close to each other on
the color wheel. So e.g. if I do an orange tabby cat, I know that orange is going
to be my primary color. And the color is
closest to it on the color wheel are
yellow and pink. These colors will blend together nicely and create a
beautiful gradient. For areas where I
want to draw the eye. I'm going to create
high contrast. I'm going to use
complimentary colors. How much color is just opposite colors on the color wheel. So if oranges my primary color, them, blue is the compliment. In my rug example, I might use an orange
cat with blue eyes. Another aspect to consider
is the tone of your color. So e.g. a, pale blue like this. Why not stand out
as strongly against a pale yellow as
this darker blue? You can check the value
of your yarn by taking a photograph with your phone
and just desaturating it. Were your analogous colors that create your rainbow
that are close together. You also want them to be
close together in tone. So they want them to have
a similar gray value. For a high contrast color. You want them to be
quite far apart. When you're creating
a rainbow gradient, I found the best
way to do it is by creating a block of
one color on one side. Your transition color
on the other side. And in the center, use one strand of each
of those colors on either side to create a transition area
where it's going to be a mix of color one and
a mix of color to. This just helps create
a nice soft transition. The calf when
creating your design, I want to use thick outlines around the edges of your rug. Thinner lines on the inside. And you want to really simplify your shapes
as much as possible. It's also good to
consider where you want contrast and to use
your colors wisely. Complimentary colors
for contrast and analogous colors that are
close to each other on the color wheel or gradients.
9. Your Project: Finally, time for less than
you've all been waiting for designing your own project. In this lesson, we're going
to discuss everything we've discussed in
the previous lessons. We're looking how to
apply those skills and principles to your own
personal projects. Most important consideration
before you'd be in toughing is what is your end goal?
You want a wall piece. You want a pillow or a
throw off your couch, or do you want a rug for
using in your kitchen, living room, or entryway? The final goal you
have for your rug will dictate the type of materials
that you'll want to use. A few decided what you
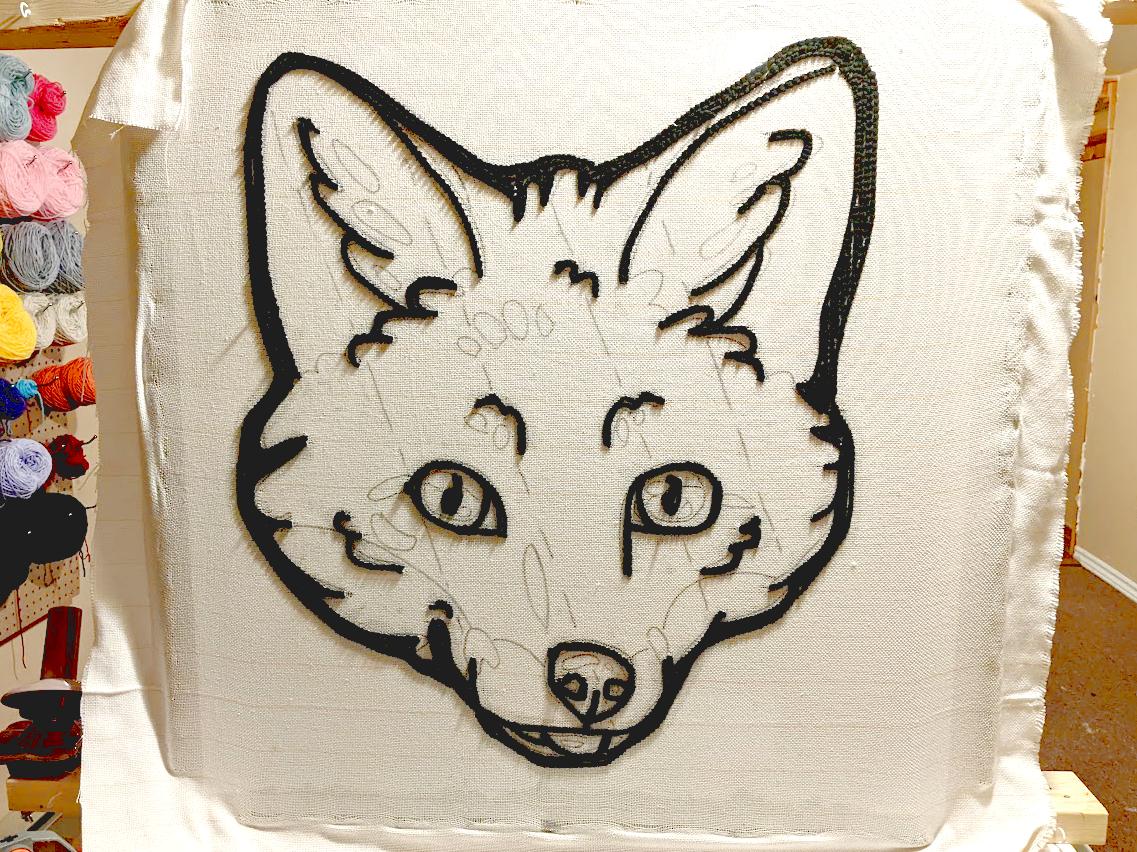
want to use your work for. You can start designing it. I usually begin my designs
with a photograph and I'll just trace
around the subject. So in this case it's a cat. And I'll use the principles
that we discussed earlier. So using very simple shapes.
So we're going to use e.g. I want to round the corners, make them a little bit thicker, make the head a little
bit rounder just to make it easier when I'm actually
toughening those areas. Also create a thicker outline. This will help with my waterfall
edge when I back my rug. And I'll keep the internal lines a bit thinner to make them look a little bit more elegant when you're designing your rug. Also keep color in mind. I think my primary color
you'd like to use for your gradient and put
that in the center. And then the colors
that are near it on the color wheel and
go on either side. So e.g. on this blue rug, I have green on one side
and purple on the other. Both of those colors
contained blue. So I know it will make
a nice smooth gradient. Also be sure to plan your
color blocks so that way you have transitional areas between your two main colors. So if my main colors are
blue and purple, e.g. I want an area where the rug
will be toughened with both blue and purple to help
create a smoother transition. The same on the opposite side, or the blue and green section. I want a section between blue and green where it will
be both blue and green. And finally, you want to reserve your complimentary colors or any area that you
want to really pop. In this case, it's
the cat's eyes. And because I've used
blue as the main color, I want the eyes to
be orange and yellow to help them really stand
out against that blue. As we discussed,
there are few ways to transfer your design. You can print out the
design of the card size, tape it together, and pin it to the back of your
primary backing cloth. And then it's just
a matter of tracing it onto your primary
backing cloth. You can also use a
projector or 300 design. When transferring your design, make sure that you're
backing cloth is nice and straight
and very tight. The tenants of the cloth
will help your gun make clean straight lines
and will prevent any tearing before
transferring your print. Make sure that if
there's a particular direction you want, e.g. if you're using words
that you flip it first, remember that you are
creating the pattern from back to front or
whatever your design is, will be mirrored on
the front of the rug. Once you have your
design finalized, it's time to pick out your yarn. Remember, wool yarn
is the most durable, but also the least bright. So if you want a rug that's
gonna be on the floor, especially in a
high traffic area. We want to use wool, the most available
affordable yarn and also in the brightest
colors has to be acrylic yarn. You're
making an art piece. Acrylic yarn is
probably the way to go. With your design transferred
and your urine all picked out. You're ready
to start drafting. Remember to put on your
safety gear before you begin, you'll want an anti vibration
gloves and dust mask. When you're tough thing. Try to use straight
lines as much as possible and try
to always go in the same direction as much as possible throughout
your entire rug. Remember that for
going around curves, you can slow down your gun
by tapping the trigger. And there's also a speed dial on the bottom
handle of your gun. At this point is also
important to remember that you can fix any
mistakes you might make. If you put yarn somewhere
you don't want it. It's very easy to pull it out and just retyped over that area. If you make a small hole
and you're backing cloth, you can usually just tucked over it going in the
opposite direction. If you make a larger whole
and you're backing cloth, you can talk to round it and then so on a patch over top of it using same primary backing cloth that
you're currently using. And then Tufte over
that. You'll end up with a seamless
patch on the front. Once you're tough
thing is all done. Time to glue it up. It's very important
to clip your project because nothing is permanent
until it's glued down. This is another point
where you need to consider the final
goal for your rug. If you want your road to
be used on the floor, you want to use a stronger glue, especially a latex based glue. Using a pure latex
glue is your best bet, but because it's
extremely hard to find, you can also use carbon
adhesive or floor adhesive that should be available
at any hardware store. When you're using latex glue, make sure you're using
a ventilator because the chemicals can
be quite nauseous. If your piece is an art piece, or especially if it's going to be around children or pets, I recommend using a PVA glue. There are both waterproof
and not waterproof PVA glue is a wood glue is going to be much
more water resistant. And you can find that
at any hardware store. When you've decided
on your glue, it's time for the glue up. Make sure that your rug is
still on the frame and full taught and apply a thin layer
over every area of the rug. You can overlap the edges of the backing
fabric a little bit just to make sure
those edge pieces are really glued down nicely. You want to leave
your rug on the frame until it is thoroughly dried, depending on your glue,
this can take anywhere from several hours to
a couple of days. Or the PVA glue that I use, I usually my rungs overnight and they're good to
go the next day. What's your clothes
dried? It's time to decide on backing. Whether or not you back your
rugs is completely elective. So this is another
decision that you need to make for your own
personal project. Personally, I prefer to back
my rugs because it adds some durability and a bit
of professional touch. I like to use fleece or
felt for backing my rugs. But you can use
any material that takes your fancy
unless I'm backing. We covered two different
types of backings. The waterfall edge
and the whip stitch. Waterfall edge is perfect for larger rugs and is
much, much faster. Whip stitch adds a
nice extra border. So especially if you have
not added an extra border. In the toughening process, you might decide to go for
a whip stitch instead. In the end, whether
or how you back your rugs is entirely up to you and your
personal preferences. Once you've decided how
to handle the back of your drug handbook cleanup, you can use scissors or an
electric razor to clean up the pile of your
rug so to make it as flat and even as possible. You can also clean up the shapes by putting your scissors down into the pile of the rug and cutting on a
slight diagonal. This will just help differentiate the
shapes a little bit. While you're in the
cleanup process. You also want to
make sure to trim all the way around the edges to make sure they look smooth. And even. This one will
elevate your road to the next level and get a
nice professional edge. Just to recap all
the steps you're going to follow
for your project. Make sure they keep
your design shapes simple to make them easy for toughening
your goals in mind when you're at
purchasing your materials, the type of glue or urine
that you want to use should depend on the final product that you want to produce
when you're testing, remember to toughen
straight lines all in the same direction
as much as possible. And that you can tap the trigger
on your gun to be around curves to make that process
a little bit easier. I remember during the
toughening process that you can fix any mistakes. Nothing is permanent
until it's glued down. Also remember that
gluing things down at the end is very important for
the longevity of your rug. Remember that backing
your rug is elective, but it does increase
the durability of your rug and gives a nice
professional finish. Also, be sure to take your
time cleaning up your rug. More time you spend
cleaning your rug more professional is
going to look in the end. Your final step is to
share your projects. I'm really excited to see what everyone creates
with this course. And I'm sure that
your coursemates are also really excited to
see what you create.
10. Final Thoughts: To wrap up, I want to
thank you for taking my class and invite you to reach out if you
have any questions. I covered a lot of
material in this course. And really we're just scratching the surface is of course
cover a wide range of rock types of materials and uses the return to play around
with them and find a combination that
works best for you. It may seem
intimidating at first, but remember that
wrong toughening is really fun and forgiving medium. So don't be afraid to jump in, get your hands dirty, and get started right away. And of course, please
remember to share your work. I'm really excited to
see what you'll create. Thanks.
 Charlie Proulx, Watercolour and Textile Artist