Transcripts
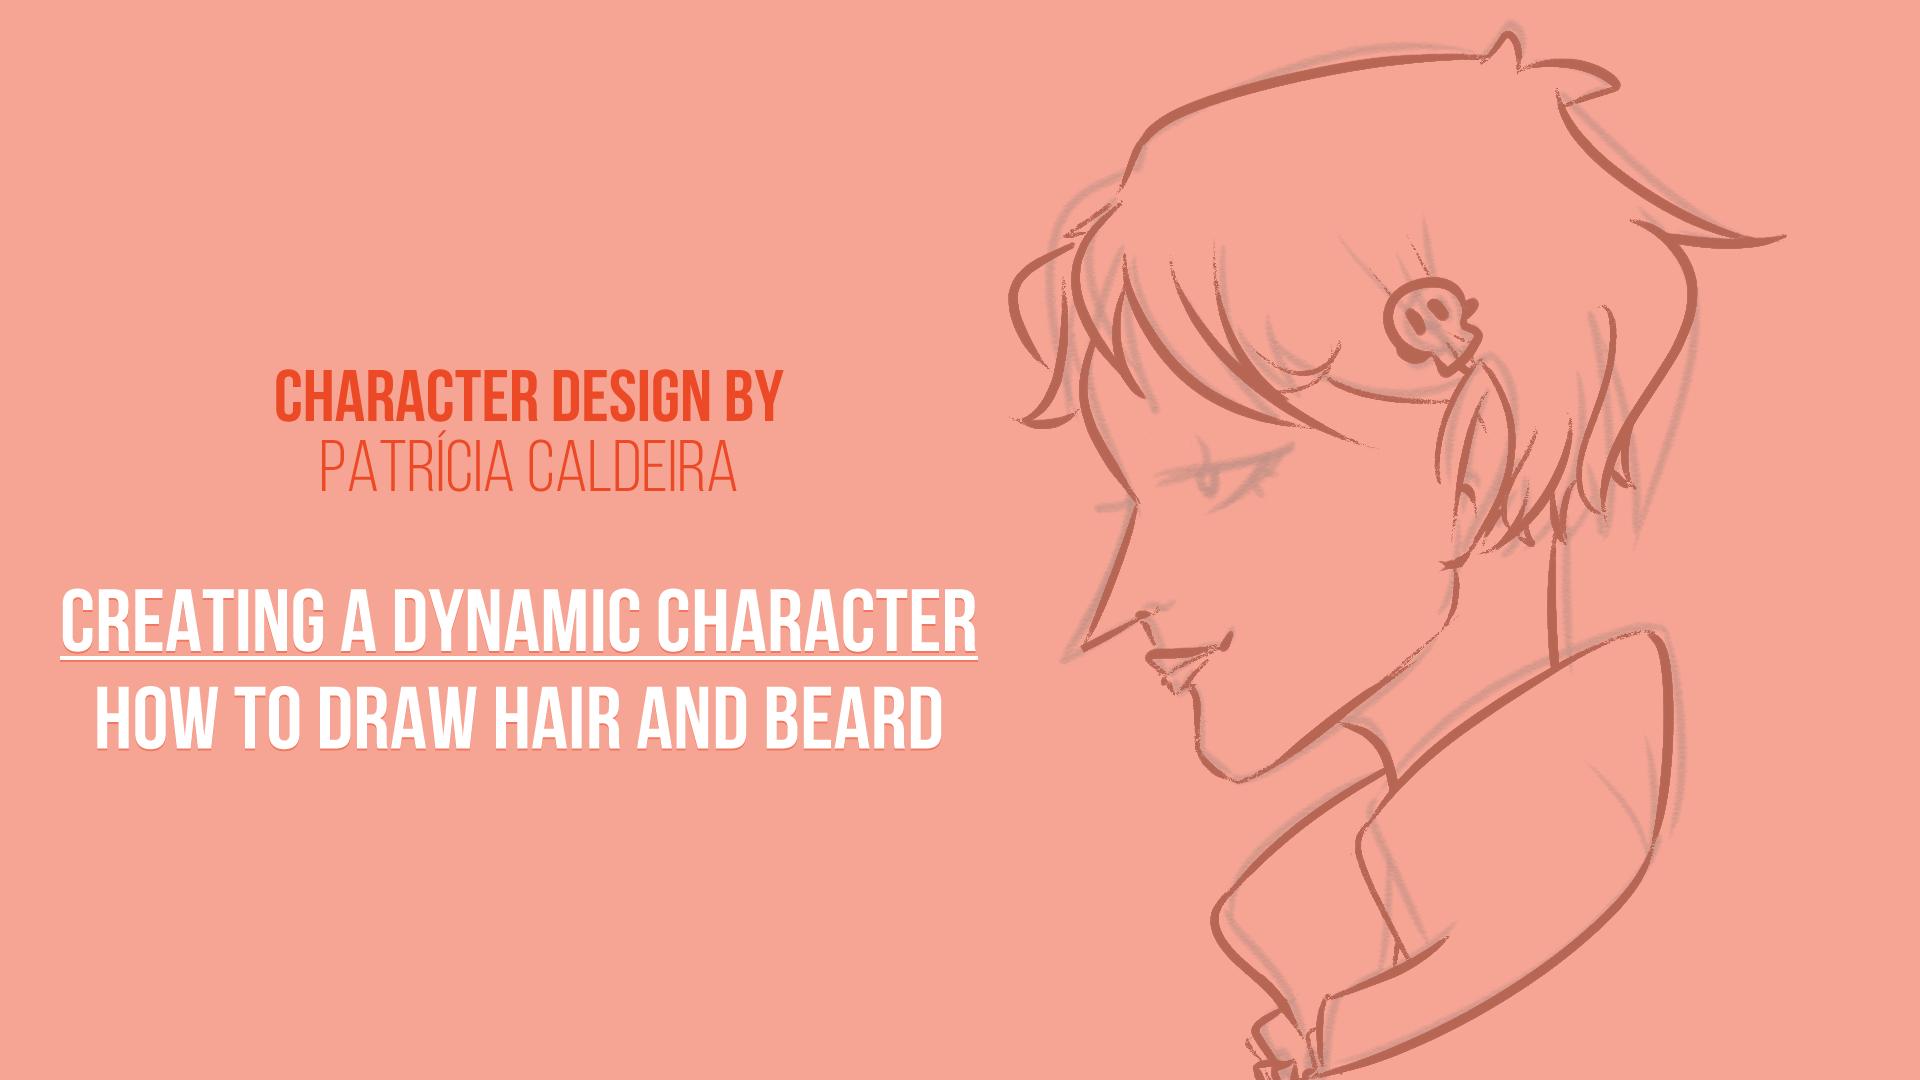
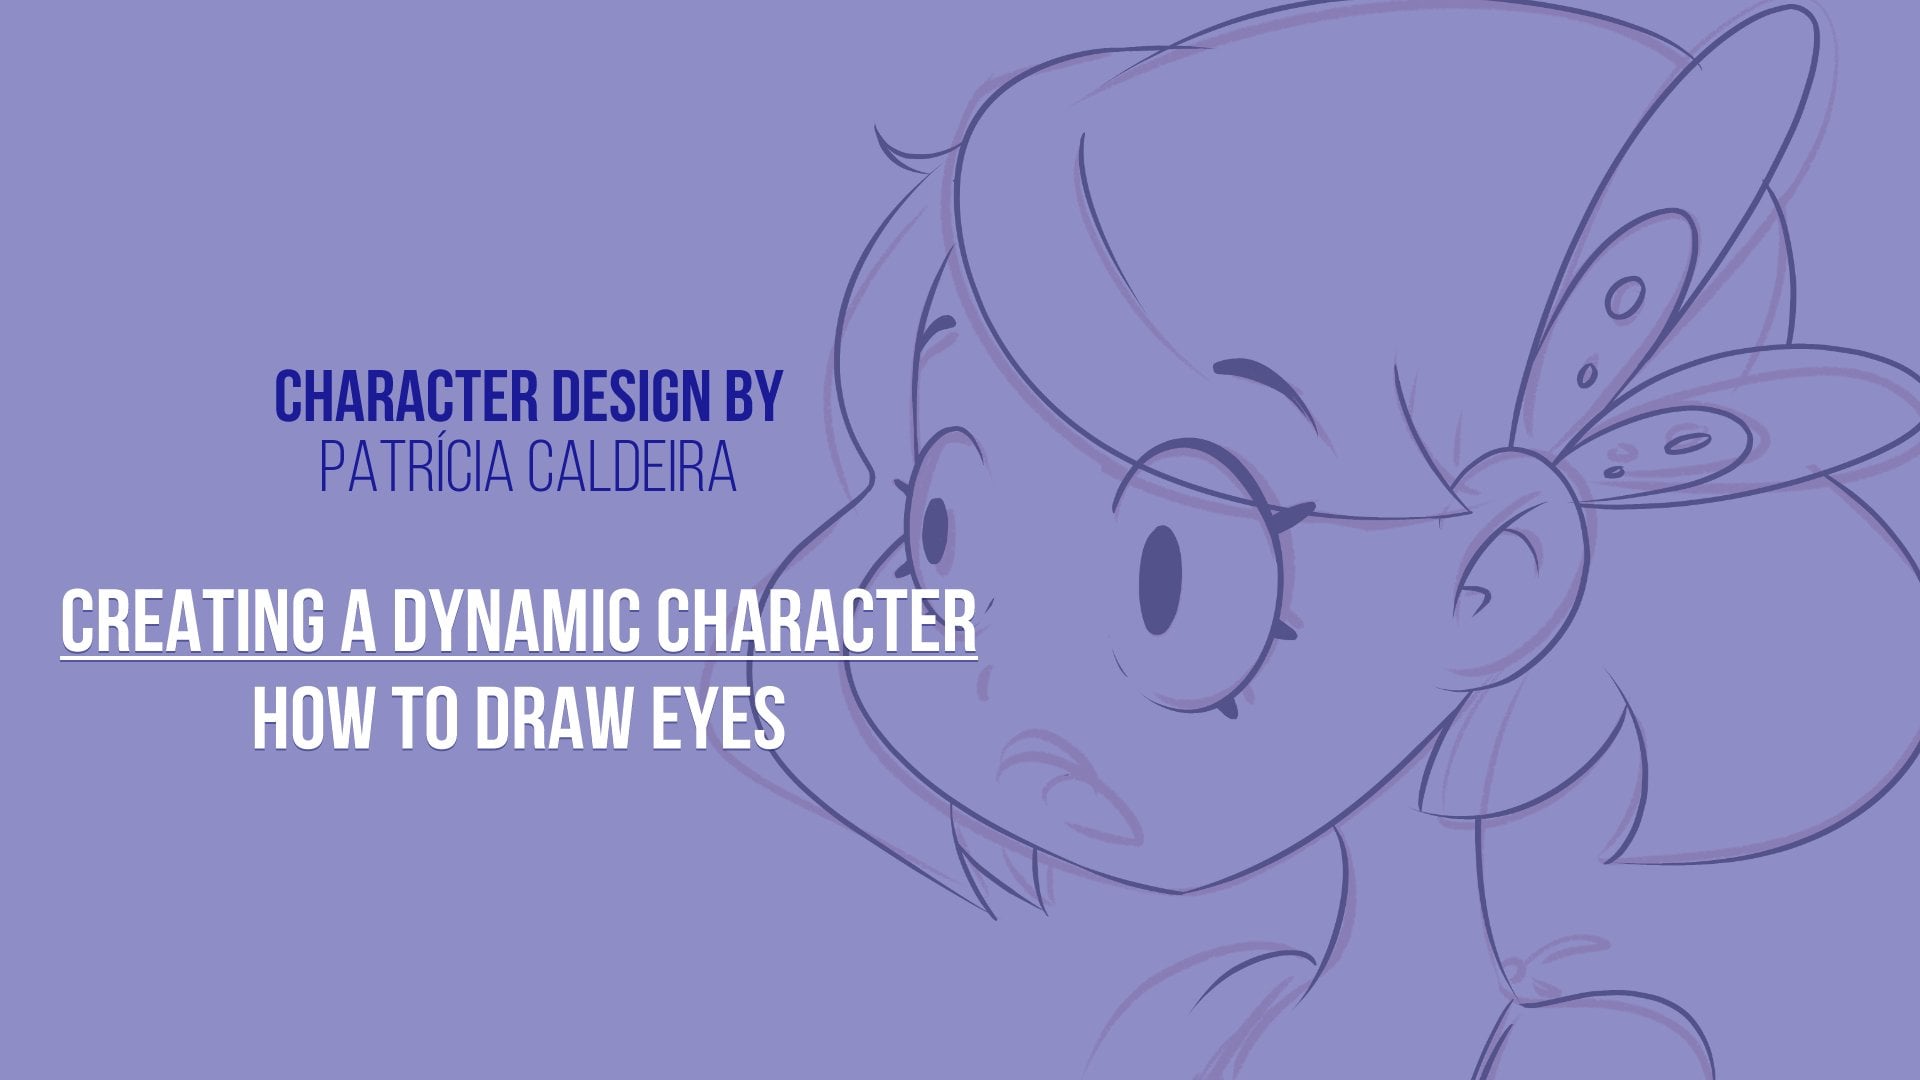
1. Introduction and Course Overview: Hello and welcome to the course on hot drawer hair and beards. My name is statistical data, and I'll be guiding you step by step on how to draw different hair and beard styles. Mustering hair and beards can seem complicated, but it doesn't have to be. We'll be splitting the course into simple steps so you can improve your drawing. Practicing first took over finding reference images off hairstyles for you to use in your drawings. This will help a lot in the upcoming stages, where we'll be drawing according to those images, defending shapes into areas and taking your time practicing the different hairstyles later will cover a few off the major beard styles that you must coming see in different points of view. This will give you the foundations to draw more complex spirits styles later on. And finally we're recovering a few more fun beard and moustache cells to practice so you can take your character drawing to the next level. I'll also be giving you an assignment, a TN so you can apply your newfound knowledge and practice your drawing skills. I would like to thank you right away for checking out the scores, and if you're ready to learn with me, let's get started
2. Reference Images and Inspiration: Hello and welcome. We are now going to talk about hair and how to draw ahead. The first thing we're going to be doing is showing you where to look for references, images when drawing here. So let's start. Let's go to a browser and the first and most general places that you can go ISP interest, which is really easy to use, and you can find a lot of references here. It's very easy to create in the country here if you don't have one. Unfortunately, you need to create one to look for things in here, but it's totally free and very, very useful. You can find tons of references for drawing B. It's hair or any other part of the body, so I really recommend using it for inspiration and reference material. I tend to use it a lot when looking for styles or environments. It's very helpful. So, yeah, we can come to Pinterest and just type in hairstyles. And there they are, a lot of different hairstyles in several positions. You can just save those images to a board of your own or safety. You much file and use it as a reference. If you're looking for something more particular. You can look, for example, hairstyles for short hair, and this way you can only see shorter hair that you can practice drawing or for men. We do the same and just right hair cells for men instead of beans. You can also click the drop down and just look for boards. Here you can find boards, which are basically public folders, where you can see what other people have saved. For example, if you look for braided hair, there are a lot of boards with his hairstyle and a lot off means that you can check out. There's also this part here that I've created. If you'd like to use it and follow it, feel free to do so. I've seen the lot off different hairstyles that you can use as reference images. I live a link for this so you can check it out. Finally, another great place to go is 1000 and one slash hairstyles dot com. This is mostly affection website, but for what we want to use, it's perfect. They have the hair cells divided by a few sections, for example, we have here short hair and then you even have its march subdivided like pixie styles with bangs more curly or even something more formal. There's a lot to choose from. I'm going to save some pictures that I find and that I like so we can use in the next video as references for drawing the head. You can use the same as me. I live the false for you to download, or you can just speak something that you like and follow along with your reference image in the next videos. So let me see here. Median hair, hair stuff. I'm going to choose here dissection with banks, and now you can just see what you like. These are pretty much like those hairstyle catalogs that you find on your hairdresser, so I think I will go with this one. It's pretty simple and seems like a good example for us to use, even though she looks a bit menacing. Let's just focus on the hair for now. When you choose one just right, click it and she was safe. Image as change your name and folder, if you like, and save it in your computer, then we can go back here and let's choose a long hair this time. Take a look on what they have here. Let's try without banks this time and check out the humans. Go through the pages and see what you like. This one looks pretty good, so let's save this one and go with it. Just right. Click and save image. Now let's write long hair reference and save it. Finally, let's just choose one more for men so we can cover both here in woman and men so we can go through the images, see if there's anything you like. There are a bunch of Siles, some more complicated than others. I think I'm going with this one. It looks good for what we want to do at save it as men hair reference. And there we go. We have thes tree images for references. I'm going to post this for you to download, since we're going to use this in the next video to show you how to draw the hair step by step through shapes. So while see you right after
3. Let's Draw Short Hair!: We are not going to start talking about shapes and placement off her hair in the head, using the images that we've saved in the previous video. So I lived them available to download. We're going to use them as reference for this video, and first we're going to start with a short hair way, the front position and then the side position. So I have. Here are image and one thing that you can do. We're drawing new things, and sometimes you're not sure what the shapes are, and you having a hard time finding out how toe draw. It's for it to look good. You can just get your reference image and draw the major shapes over the actual image. If you're on the computer, you can just put the photo in your file and drove over it or, if you're doing it, traditionally, just printed out and draw on top off the printed image. All right, so let's see, we have here the fringe from the hairstyle like this, and then we can keep going over the rest off the shape. This is mostly a very rounded style, with a lot off curves and some pointy ends at each side. As you can see the whole general shape, he's ready around, almost like a helmets. Let's not draw it over here on the site. This is also a good exercise for you to draw your head. So let's start with the circle, then a straight line in the middle, going down and draw the general shape of the head around it like this, with two small years spoke ing out in its child, I'm just going to add a bit off a neck and shoulders here, but don't worry too much about it right now. We're mostly practicing the hair and not the head itself. And now I'm going to change the color of her brush a bit. So the hair stands out more and we can start drawing the actual shapes off the head. So as we've seen before, the overall shape is very round. So start with that a big, round, helmet like shape all around the heads. After that, we can add the fringe, going almost to the high level and the big tilted to the side. So here we have the base shapes for the head. I'm just going to put them a bit transparent, so we can better see the lines that I'll be making. Now I'm going to use blow 40 sketch lines. Now we're working with the base shapes from before and adding some extra details all around . I'm going to draw some strength off hair but division from each part, so it looks a bit more detailed and not so flats as the previous shape here on our fringe. Let's also add some more lines off course. You can always adds as many lines as you wish for the head, making it more and more complex and detailed. Or you can do very few and leave everything more simple and geometric. It's always up to yourself and how you want it to look. Let me just add some small face details here very quickly and put the hair slightly longer . There we go. That looks nice. Then, when you're happy with your sketch and things are in their proper places, we can go for final lines, so change to a darker tone or grab a ban. If you're doing it traditionally and follow the lines you've done before. Remember that you can still make changes now, so feel free to change a few things in the general shape. For example, I'm making the top off the hair a bitch rounder than before. I think it looks nicer that way, but you do your own thing. There's no wrong way about it. Remember to keep your lines pretty loose and try to make them in one longer stroke. I am setting for a very simple style, making just a few strands off here. But remember that you can go all the way outs and make a lot more, or you can make even fewer than me making it simply. And finally, if you wish to, you can drop it off the face. Although we go more in depth on those special features on other videos here we are just focusing on here for the moment. Now we can call our own hit here on the computer. We can just make a new lawyer and point on it, using the paint buckets or the brush in another color. Let's also add some quick shadows to our hit. Let's say on lights is coming from the top, right? If so, our shadows, we must would be on the opposite side, right over there. We can also add some shadows near the individual strands of hair for some more tests, since they have their own weight. I want covered this much in DEPT. You since is a whole new subject that takes some time to teach. But if you're interested in learning how shadows and might work and how to draw them, deliver comments. And if there's enough people looking for its, I'll end up making some new features about it. All right, that's about it for the short hair in the front position. So next let's do it in a profile view in the side view. So let's start with our sketches. Once again, start with a circle for our heads and draw jawline. And here it's also adds a quick knows here with a tiny eye and mouth, along with the neck again, This is a pretty nice way for you to practice your heads and their practice, your overall lines keeping them loose. So as we saw, the hair is a bit shorter in the back and the tips in the front row almost abortion. Now we can't know for sure how the hair looks like in the back, but we can imagine how it looks since the overall shape is very round, we can keep going with that theme. So let's make our hair rounding up and becoming longer and pointer next to our shin. Then we have one off the masses off our heads and then we can add a fringe over here, something it beat towards us right there. So these are our main shapes. I'm just going to put it bigger for year to see. Now we can start sketching everything up, adding some details to it. I'm going to start with our fringe. Don't forget that it's a big tilt it and then just go to the rest off the hair switcher parts off the big shape into small areas and give it some detail. Remember that near the front it gets point your and longer. Now I'm just trying some quick facial features and the next so it doesn't look so blend. Here we have our sketches. It looks pretty geometric and after this we can clean everything up, going through each line carefully with long loose lines. So just get on with this, adding details where you see fit but mostly keeping up with the previous sketch lines. Do it as complicated or a simple as you want spend as much time as you need. I'm also not taking a long time on the face, since it's not the main focus here. But feel free to add details there as well, if you'd like. All right, So as before, let's add some color to the head, painting inside the lines and then at some quick shadows to wait and see if the light is coming from the right. And here we have besides view for a hit. That's it. No, I'm going to give you a bonus tip if you're working, we could so do as I am if you're not happy with the colors she'd chosen for the head and don't want to paint everything up again, we can just go here toe the layer sections, right click it's and go to new correction layer and choose who and saturation and change just sliders, A beat to something that you prefer. All right, that's about it. For this video, I'll catch you right after
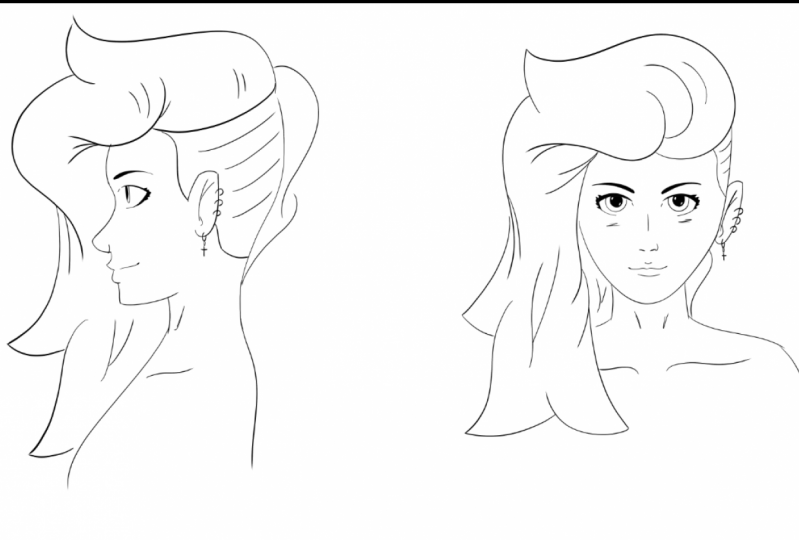
4. Draw Long Hair: all right, so let's go to our second part off drawing shapes for the head. This time, we're going to be drawing long here. Let's do again the same exercise as we did before, drawing on top off the hair to find the general shapes. The's hair reference might look more complicated than the previous ones scenes. It has a lot off strands going everywhere, but we can just divide it into big masses or shapes that will help us simplify everything while conveying the general feeling off this hairstyle. Okay, now we can go here to the site and first create ahead so we can use for the hair. Very simple, just a circle, then the line dividing it and in the show and rest of warheads at the neck and some quick shoulders below. And we're good to go now. Let's do our men shapes for the head, as you can see in the reference, the hair goes all the way to a bit below our shoulders and one side is bigger than the other in terms off mess. You can also see the dividing line off the hair around here at the top, so let's start drawing the main shapes. This is mostly a wavy hair, but this is just a mine ship, so don't worry too much. If it's not looking waiver right now, just focus on the main shapes all the way to the shoulders, part off the right side shaped discovering the face. So remember toe add hair on top of that. All right, here we have our men shapes. I know it doesn't look very pretty right now, but this is just the mine shapes off the hair. This is all about showing where each part off the hair is, so we have a reference point. Now we can start sketching our hair. Since it's wavy, we'll try to keep the lines wavy as well, going all around the previous man shapes. Remember to keep an eye on the reference image next to you, so you can draw inspiration from it and see how the hair flows all around. The heads go over the main shapes that we've draw before and that as many or as few details as you want. I'm also going to add a quick phrases before, if you want. You can also use this opportunity to try out expressions and difference mouths, sheens and I shapes. I've made videos about all of those, so feel free to check them out if you haven't already. This way, you can improve all aspects off, drawing ahead at once. All right, so now we're going to do our final lines. So start trying longer and looser lines all around the previous sketch lines, adding smaller strands off fair as you see feet. And as you look into the reference image, take your time. No need to rush it. Maybe try a few different things longer strands, shorter strands, ticker areas off hair. Maybe make it longer on one side and the other like the reference image and so on. Just have fun working on needs and relax. There we go. We have here some long hair, and now we can just call a rate up. But first I'm just going to move it a bit down. I feel like its floating a bit too much. All right, that's much better. One of the good things off working digitally is that you can change things around Italy, but sometimes you just want to feel an actual pencil and pen in your hand. Okay, back to call her going for a more red or orange hair this time since the previous one was a big, more blonde. She'll everything up. And then we can make the shadows right. After for the shadows, just pick a darker turn off the color. If big before and start adding some areas of shadow, choose the direction off the light source. I'm making it as if the light source is coming from the top writers before, but just use the same as a reference image to chose and study how the light makes the shadows appear on it. If you want to take it a step further, and you can also pick a lighter tone, and they had a few strands of highlights to the hair, adding somewhat depth to it. But that's totally up to you and yourself. See what works best for you and go with it all right. Here we have a front view, and after these we can go to the side view. So let's start by drawing our heads in the side view. Once again, start with a circle and make some wines for the jaw in the front, off the face. Then you can add a mute if you'd like. I always like to make them anyway, even though the hair will end up covering it, then make the neck and the sludge shoulder here. Now we can start making the hair. Let's start with the men shapes as before, very big areas off her. This is mostly just a big mess. Again, we can take that. We know how it looks in the back, but we can imagine that there's a lot off hair back there as well. We can also add some hair showing behind the head over on the other side. All right, that's pretty much the area. Now we can go to the sketchy lines, so start adding some details. I'm starting with the face and then adding the hair. Remember to keep the lines wavy. Also, part of the hair is covering a bit off T I, but I still want to show a bit of T I and mouth, so it doesn't look exactly like the reference image. Okay, now we can do the final line so we can make everything clear. So start trying the lines very smoothly and make a long, low strokes divide your hair into smaller shapes and as much as you want, be as detailed as you want. I'll also finish the face here very quickly and simple. If you want to practice the face, just take more time. Doing this part much are videos on a specific facial feature you want to learn. If you'd like toe and just keep going, there's no rush and no timer, so relax and practice until you get the hang of it. So then we have it. Our hair from a side view that's no color you up as before. Take your brush or paint buckets and pointed up going over all dairies. After that, we can add or shadows as before. I always liked toward some shadows in this paintings, since it's always a good opportunity to practice your shadows. And, of course, if you want again, you can give some highlights to the hair to make it pop up a bit. There we go. We have here a long hair in both use. Next, we're going to do a short of style on men. This will be a shorter one than before with some differences to it, so I'll see you again right after this video
5. Super Short Men Hair!: All right, let's go to the last section on this part where we talk about the step by step growing with references. This time we're going to use the mill reference so we can practice a very, very short hair. Of course, when you're trying a short hair, you don't necessarily need to be drawing a man. But this is a very good way for you to practice of masculine FISA's well if you want to. So, as always, we can start by figuring out the main shapes we have here for the hair by drawing on top off the head. This is a pretty run shape, and at the front, near the forehead, we have more fatigue. As you can see, we have basically two different lengths offs, hair. The top part is longer, and the Party of the Year is very short. This is our men shape. Now we're going to try to do this by ourselves, not trying. We're not looking here for a photo realistic style. We want to develop our style for character design. The objective here is for you to adopt everything to your own style, So what I'm usually doing is for you. to follow along the trick to your particular style and develop at the same time, practicing and, of course, having fun. So I have here my head reference. As you can see, it's Marshall Metric in bigger than when we do our family face. As always, we're starting with a front view. You can see that in your hair. We have a dividing line from the two lengths, so let's start with that and make the bigger shape off the part of her hair. And then we can add a small apart there. No, I'm just filling up the face and a few details ready quickly with a very cartoonish style. But if you want, and if you've seen the rest of my videos, you can take more time trying this and applying the techniques and styles that I've talked about in this hit. If not, just take your time practicing their hair right now, since we have our main shapes, let's not go some more detailed sketches to the hair in the reference that are some tips off hair appearing at the top. But you can make it more generals. You've metric shape, but you can make the actual tips appearing like little spikes. Go through the shapes, look at the reference image and adapt your drawing as required. So that's it. Very simple. Now we just need to do our final lights, so clean everything up and make your final eyes for the character. Don't rush it. Just go through each line individually, making them a screen and loose as possible. This time, as opposed to the other times. It has shorter strokes. Since it's a short head. Feel free to change anything that you feel that should change, but that will look better. For example, you cannot some mortal steps in your hair or do the opposite and make it more geometric. Take your time and have fun. There's no timer rushing you now. I'm just going to do a quick, simple face to the character. When you're finished, you cannot some color to it. So just because color that she want to use an editing, you can also pick up a skin color if you'd like to. Finally, let's just add the shadows to give it some more dept. Feel free to try different styles and waste to paint. Experimenting is very important and helps you see what works and what doesn't work. All right. Next we can go for the side view. So let's sketch your heads. As always, start with a circle, then make a straight line going down for the show. End of the front, off the face as a near and the neck. Very simple, just like in the front view. Things look a bit bulkier than when drawing the female hit. Now we can make our men shapes off the hair. We saw that it kind off has two layers off it so we can do that again. Let's make a shape here near the ear for the shorter hair and then another bigger one at the top. These are our two general ships for the hit. You can also draw the rest off the face really quickly. I'm doing a very pointy face here. Okay, let's do a more detailed sketch Now. Let's start here with the longer hair shape creating a few spiky ends for the hair. There we go, and then we can do here or short of part of her head. So once again, we have here are longer head on so and shorter hair on the bottom. So once you're done, let's go for a final lines again. Once again, take this time to try out different precious or tried different bands or pencils that you want to. Maybe you wind up finding something new that you like to work with. You never know. So use your practice not only to practice your lines and you're joins, but also to practice your materials. It's always fun to do that, and you never know when you discover your new favorite tool and your own unique style. All right, so when finished with, this video will be talking about different hairstyles, specifically the tree mind ones. This will be a great time for you to go over and practice at the same time as me creating different things in different styles. OK, so that's our side view. Now we just need to paint everything up. I'm using the point book at here, so it's faster and then just playing to smaller details. I'm also pointing the skin very quickly, and finally, we can just call her the shadows. A small T appear as well. If you want, you can show a line like this to divide the hair into parts instead of going straight to painting with a bigger brush. And then you can grab the paint buckets and pointed up like this. Then if you wish, you can change some things with a brush after all, right, here we have our two different views. According to the reference, when you're ready will be going for our next figures. Where will be drawing different types of fair from straight to wavy and curly, so I'll see you there.
6. Types of Hair : Straight Hair: So let's go now for some types off here. We're going to be covering the tree mind ones. And in his video we're talking about straight hair. We're going to practice a few examples, so you can just do this at the same time as I do sketching along with me. And when we get to the final lines, I'll be speeding up the video a bit, since it's very simple to do, and I bet you're tired of seeing me do them over and over again. So grab a piece of paper, are making new document in manga studio photo shop or your other software of shores. And let's get going. I'm going to pick here the tool I usually used to sketch in the reddish color, and that's start drawing a simple head in the side view and as many details as you want. But right now I'm just doing it very simple. Since we're practicing here for the hair, go with a very simple geometric shape. We're doing a long, straight hair here, so it's all about big shapes off here, going all the way past the shoulders. The lines for straight hair go mostly straight down instead of waving around. There we go. We have a very simple style over here, very straight forward, mostly straight lines all around. Now let's try to do this in the front view. Make ahead sketches before and start drawing the hit or head is the petrified it in two parts, one for each side. So let's do that here as well. Don't forget to keep it long in going mostly straight down. There isn't much followed him going on here. Very simple, with everything based on big shapes. All right, let you slice. Let's now go for shorter hair in the side view. Draw ahead. Reference like always pretty simple. Now let's just add some very simple straight shapes for the head. Let's also add a small fringe here, trying to make the hair very long since we're working with short hair right now, maybe all the way to the nose level or at the bottom off the ear level should work lovely. You can also take this time to practice more of your character design skills and, for example, at a few quick closing just to whatever you feel like you. But don't forget the main focus now is the hair. Okay? Lets go for front facing short hair this time the pretty quick heads here. I bet that if you've been following all along and sketching with me, you'll be able to draw these head reference with your eyes closed by now. All right, let's make the hair now Focus on the big shape off the hair, going all around the head and then linked to about in those level. We can now add some details to the hair like individual strands of hair, if you'd like just to make it look a bit more at the quick face, some accessories and some quoting if you'd like and we can keep going toe our next hair example. Let's try doing something different this time. For example, a bit off, the hair shaped and the other part longer. So here we have our side view head references, always beginning with a circle and then the lines for the job and neck. I'm sure you've got the hang of this right now. Now let's tow the longer part off the hair all the way to the ship, and it will be divided at the top, where the rest of the hair is super short, since its shape. Something like this, you can even have it not entirely shaved and a bit longer. It's up to you. Let's add some details by sketching on top of this, and you can keep it mostly geometric or just at someone's for the strengths. Off here, it's up to you. We can even have here a bit off a wave toe. Give it's a bit more volume. There we go, a more alternative hairstyle. As you can see, you just have to let your mind flow and go with it. And if you don't feel very inspires right now or you're not sure what to do, you can just look up a few referenced images like in the websites we've talked about in our other video. Enter from there. But for now, feel free to follow along and practice with me. That's what I'm here for, all right. We can also make longer hair with the French, for example, so let's make a quick head reference with the fringe there. Let's change things up, and instead of making the longer part off the head going in the front off the face, let's put it all the way in the back instead, so it doesn't look so much like the previous one. There we go now, just at some details to the hair and the face again. Just go through that board of Pinterest, stupid like I'll be updating it as much as I can with new references images for you to use . So let me know if you like them now, I'm just going to clean everything out so I'll be speeding up this part off the video. Remember to keep long and loose lines very clean when drawing straight hair. It's all about, as you guessed it, straight lines so focused on doing those long straight lines as best as you can. Off course, the hair doesn't behave like a perfect geometric shape. So do keep parts more curved and with strands of hair poking out, go trigger previous lines. But feel free to change things up if you'd like, or even just start a new one and go through that one instead. It's all about practicing as much as you can, so don't worry, dropping one sketch to work on another. It will eventually pay off in the end. Trust me all right. That's about it. For straight hair off course, if you want to, can just color this, but I won't be doing it in this video. Once you're happy with your practice, we're moving on to our wavy hair, so I'll see you there.
7. Types of Hair : Wavy Hair: Hey, again, let's now practice some wavy hit. So it will be something between Carly hair and straight here. So let's see what I mean by this. Once again, start withdrawing ahead reference to use as a base and let's do a medium size hair first. When drawing wavy hair, we tend to have her lines more rounded up instead of going straight down as before, so focus on keeping looser lines. We can still focus on the general shape, of course, but this hair cell is easier to make when keeping the wrist loose and just go with the flow . It does help as well if you make it with more volume. As you can see, it has a very different feel than when we were doing our straight here. It has much more curves around and a lot more volume. Let's not do a front view. Keep in mind the same things drove very wavy lines all around and keep your wrist very loose. As you can see, we had way more volume when drawing wavy here because off the motion off the hair itself, let's add some details to the head. You can keep this very geometric you food like or go with more details, having smaller strands off hair all around and further giving depth to the hurt itself. The way I'm doing my lines is very different than the way I draw the straight hair. As you can see, it's all about keeping the lines much looser. So do try to practice this a lot. That's not a here longer hair. Start by making ahead reference and focus on the main shapes. Next, give the lines very loose, like you feel drawing in notion. Wait and make the hair very long all the way below the shoulders. Now let's add some details to the hair. Split the hair in as many parts as you want. Just remember that the further we split up, the more complicated and detailed it will book. So remember to do it according to your overall style and stick to it. I feel that for an artist to be recognizable, it's very important to stick to the way you drop and not just full of trends blindly, although if you're recently started out or you're not sure where you prefer to troll to experiment a lot and see what works best for you. All right now, let's so the front facing view, you might want to start by drawing the hell line, so you're sure was the division between the face and the head. Then you can focus on the main ships off the hair with long, wavy lines all around. Since we're doing longer hair now, make it going all the way to below the shoulder. Keep going and add as much detail as you see fit, as you can see here, wavy hair as a lot more volume than the previous straight head. Let's not go for an alternative style like we did in our previous video, with the medium size hair and partly shaped so focused on drawing very loose lines for the longer part back there and quick strokes for the shaved part. Add as many details as you see fit as before, and there we go. This is more of a punk or alternative stuff. Now I can do this in the front view, make the head reference and squint the hair. According toa, a previous hairstyle. The left side will be the longer hair and the right side will be the shorter shaved him. Keep going adding details or keeping it very simple, totally up to you. I'm keeping the facial expression very bland on purpose. But if you want, you can just add expressions to the eyes and mouth. Change it up as much as you want. I'll talk more about official expressions in my other videos, so to check those out if you want. All right now I'm going to clean everything up. So L speed up the video here, since this is mostly just going through the previous lines, making smallest along lines, take this time to see what works best for you. If you like to the things most issue metric or something in more detail and with a lot of strands off here, drawing them almost individually, maybe you actually enjoy the sketch, aligns more and want to go further into that style you've. So you can also do that. So feel free to experiment as much as you like. There's no rush, and Ulzheimer go as fast or as slow as you want. Improving your art takes time and practice, so dedicate yourself to that and try to sketch things out whenever you have some time in your day. Okay, that's about it. For the wavy hair. When you're done with your practice, follow me to the curly hair practice video. This will be the less off for my archetypes videos. So all Syrian Libbets.
8. Types of Hair : Curly Hair: Hey, again, Leslie. Let's draw Curly hit When in wavy hair we have something a bit with more volume than with straight hair. Here in curly hair, we can just pump it up with column and go all the way to the extreme trying very round lines. Curly hair is usually a big mess. People that have this type of hair can confirm it. I'm sure that if you have this kind of here, you're not in your head right now. So when drying, it's we can say adventures off that. Let's start as always, with a side of you. Draw the head reference. Let's start with something longer for curly hair. We can make everything very geometric, some trying small health circles like this. Or you can just exaggerated a lot like this, making a very wavy form with all these shapes connected. For now, I'm doing it more geometric With this small off circles, it's basically a whole lot off hair going wildly all over the place. As you can see, it's all about the round lines and the whole lot of volume, when adding some details, tried to focus on the general shape from before, try varying the size is off the half circle, so it doesn't look too artificial. As you can see here, she's not trying in hair. Here. Everything is here. It can be very fun to do it like this. Just play with the volume of your lines and try things out. Let's try here a front view. Now the same principle applies. Focus on volume and small and medium size health circles give going all around the heads and all the way to the shoulders. He can be very well sometimes, even though people with this kind of hair usually don't like this type of hair, since it's very hard to dominate it. It's always very fun to draw it, in my opinion. So let's take adventures off that fun and just enjoy your lines. Don't for if they're looking a bit off a mess. That's kind of the idea. When we're doing this curly hair, we are even occupying way more space off the paper than before. As you can see now, we can try a shorter hair here you find in your head how long it will be and then starts sketching. Draw those off circles all around and making them to live, all to hear level very short, but still very Carly. Then details as you see feet play we did with your lines. As much as you want something like this, let's now go for the front facing position. Keep having fun with your lines. I believe it's very important that you enjoy what you're trying, so just keep going and practice a lot. Listen, your wrist and your mind and keep going. There's no timing holding. You spend as much time. What is little as you want? All right, let's now go for a health shift style as before, but with something more geometric. Draw the head reference first and then too big clothes like lines all over. We can split the hair right there to the top. Part is longer, and the Party of the year is the chef Terry. Now, let's add some details as many as you want. We can make it bigger curls or smaller ones. Maybe you don't like its shape, so just two more curls all around up to you. Let's just do this one again in the front facing position. Remember to do those big girls all around and leave the right area emptier, since that is where the shaped area is. So play with your lines. Try things more or less you metric and see what you like best. Finally, let's just do our final lines. I'm speeding up this part here again. Just go through the lines loosely and west. Few lines as possible. I would like to just take this timeto ask you, you fear enjoying the scores. Do consider leaving a review. It will help us a lot So we can Which more people and think you be proving discourse over the time, always working as much as we can to give a good experience to you and every single one of our students. Also feel free to let me know in the discussions what you're liking, what your favorite hair cells so far and any tubes that you have for other students. All right, that's about for this video. Next, we're talking about beards and general facial hair. So you're right after
9. Let's Draw Stubble Beards: hi again. So let's go for the next part. We've been learning to draw hair in the previous videos, and we're starting to draw beards and mustache. I hope you've enjoyed the course so far. We're going to have three parts is before were treated from tops off beards, and right now we'll be doing a very short beard like a stubble. So let's do a head reference. First, draw a circle and then the line going down and keep trying the rest of your face. Like I said before, this is always a good time to practice this. It will help you quick in your sketches and loosen your lines. I'll just draw some quick facial features here and the headline so it doesn't look too weird for a reference. Now we can start drawing the men shape or where the beard is going to be. The beauty usually starts from near the year, basically touching the end off the hair and for stubble you want appear to go all the way from one year to the other were very close with Shin. This is where our short beer will be in this spice over here. Let's now move on to our detail sketch so we can understand better. How we're going to draw are very short beard, basically a stubble almost shape. So I'm going to start here with our ear and start making very small short lines to resemble the stubble. This is how I go about drawing disc types off beauts. It's a very easy and quick way to do it. Just keep your lines short and quick. Cultural off the beard and feel free to add some facial features if you want to. You might also take this time to practice your hair drawings from the previous radius. Okay, let's clean everything up now with some final lines. Go through the previous slides, carefully keeping your lines loose here. We still draw the counter of our face. You might decide not to do it if that's your style, but most of the times it's best to keep it. Then just keep going with a short line so evenly spaced. Don't overdo it. Keep it simple. Simpler is almost always better, in my opinion, and now you can draw the rest off the head with as much detail as you want to. If you're focusing on practicing piers, you might want to not even sure the rest. It's totally up to you. Then we have a front view of our short beard. Now let's see how we do this in the side view. This is very similar in terms off the general idea, so let's create ahead Preference in the side view. First start with a circle for the mind part off the heads didn't line going down and throw the rest off the shin and neck. All right, so this time we only see about half of our peers. So our drawing will be something in this area here. Feel free to keep this part very geometric. This is only a way for us to visualize the overall area. I'm going to add some quick facial features again. So let me just be this part, Okay, Let's now do our sketch lines. This will be mostly the same as before. So small ones to represent or several don't forget to keep changing the lines direction accordingly. So just imagine the arch oft appeared and draw them like that. Then, here on the hair, the hand appear, tend to converge one into another. If they aren't completely shaved, all right, so we cannot draw the final clean lines. To me personally, this is the kind of beard that I like to draw the most. It's very simple, and I think it can sue. It's a lot of different types of characters. Don't forget to draw the lines all around the face so their head doesn't look like it's floating into the short lines evenly spaced on the beard itself. Then you just need to finish the rest of your drawing. So let me speed this part up again. So there we go. We have here the two versions over stubble beard, A very short beard, like it has been shaved recently. Next will be going for a short but full beards, one that has a lot more volume than this one. So practice this one as much as you want, and when you're ready, I'll see you in the next video
10. Draw Short / Medium Beards: So now we're going to be doing a full beard, but still very short. So once again, let's start with a front view. Make ahead, referenced as before, I'm sure you got the hang of this by now. Circle and then line going down and so on. So this time the beard is going to be fuller than before. So the ship is going to go out off the sheen area. You want to make it very sick with the lines for the apart from each other to give it more fallen. Just draw the general area for now, some for if it looks super geometric. A quick, simple face now, and some hair. So it doesn't look to blend speeding this part of it now. All right, so here we have our shapes, and now we can jump onto our detailed sketch to draw this beard. You want to add details as before, keeping the general shape that we've drawn. And again, Don't forget to add as many details as you want for the rest of the face and hair with a beard connecting the hair. So there we go pretty short, but with a bit more volume than before. And another thing that is going to change here is that this time we don't have to make the actual shoreline like in the stubble, you control the beard with small strengths connected. Going all around near the shop. You don't need to actually draw every single strand off here toe that would make you going sent very quickly, so focused on trying the general shape to resemble the butte. Then you can finish up your hair and the rest off the head. Reference how you like. So I'm going to speed up the spot here as well. There we go this time. Let's add some color to our drawing. Since it's a fuller beard, he tends to get some color. Very simply, choose a color and painting Vieri and in the hair. Since it's usually is the same color, I'm actually want to change the color here to black, so it stands out a bit more. All right, this is almost like a wolverine kind off beard. Of course, if you want, you can add the mustard so everything is connected. That's a personal preference and how you want your character to look next, we can go to the side view. Let's start with head reference again, as always, but as many details as you want. And then let's add hero shape for the beards, along with the mustache that we've done before. Once again, the beard comes from near the ear and goes down all around the shoreline. Don't forget to add the moustache area as well, this time, then, just as a quick hair to make it pop up a bit more. Now for the detailed sketch, I had some single strands of peer to the mustache and the bottom part of the beard. Instead, off the wavy lines, we do hear some pointy, almost like a triangular shaped lines, making the bearded beats spiky. And then when you're done, we can go for the final lines. So just follow the lines and keep them very loose, pointing lines all around the bottom, off the beard and the mustache. It's always good to have a different type off lines on opposite sides, so that's why I keep the top line smoother and more linear and the bottom lines extra spikey. It gives a nice complexity toe our character. There we have it. Once again, we can not just color or beard and hair, very simply off course. If you want, you can add some more details at the end. So there we go. We have our short but full beard and non shaped but still somewhat short kind of beard. Next, we'll be talking about a long, full beard, so I'll see you right after.
11. Time for Long Beards!: Hey again, Let's now go for a less part on these mind beer types, we're going to talk about long, full beards. These are somewhat similar to the last video, but this will be longer and have more volume. After these, we're going to have some fun drawing other kinds off beards and mustaches. So stick around. As always. Let's start with a front view first with circle with the line going down and finally draw the rest off the face along with the neck. So we have here or head reference. Add us many official details as you want, and choose a hair cell that you like. Now let's see the main shape for the butte. This is going to be longer, so go all the way. Baloch Online drawing almost an inverted triangle but smoother and then come to the top part near the mouth. You can just have a beard, or you can add the most such there as well, totally up to you. And as you can see the beer, discovering a larger and shin so we don't need to draw those lines when we clean everything up later, let's do our detailed sketch. I'll first go over the facial feature. So I'm spitting this part of the video up, not for the beards. Start sketching the strengths off beards all around. I would also like to tell you that you don't always have to close your lines when drawing beards, even though that's what I've been doing so far. And so about stylistic approach. You Do you? I can show you better what I mean now, once I start drawing the clean lines when drawing the final lines, you can keep the lines short like this, and then just get some space apart from each other. You can connect some and leave others. Father report. The simkin also work when drawing the moustache leaves the space between lines. Do try not to leave a lot of space, though Otherwise it might look like the beauties floating in the face instead of having your more realistic volume. Since this is a full grown beard, it tends to be a bit more white, so feel free to loosen up your wrist and just draw short bursts off lines all over. No, I'm just drawing the rest off the heads, so I'm speeding this up once again. Now Let's go for the side view. So truck we had reference. Remember to keep practicing this. They are very helpful. And then you can start drawing the main shape off the beauty. Since it's a full grown beards, it will go as before and go all the way down below the shin. Make the general area and don't worry how geometric it looks right now. It's supposed to be a very rough representation off the beard, and now we can start sketching things up a bit. I'll start with official features again, and now for the views. We do the same as before. Short lines for the beard. This is a very while and full beard, so have fun with it. You can keep the lines connected or not. It's totally up to you. Finally, we can just clean our lines. Take us much time, as you need for this. There's no timer and no rush. Cuba wrist loose while doing it and decide which style of drawing you prefer. Also feel free to draw more off the face and practice expressions and hair cells. I would also like to take this timeto ask you if you're enjoying this cars to consider giving us a review. This will help us lots. And I know I've been saying this before, but it does really helps. And we want to make this the best course we can. So your opinion matters. Feel free to leave a message in the discussions or send me a message telling me what you like and don't like about the course. All right, I'm now going to point it up. You've seen me doing this a 1,000,000 times already, so I'll be cutting this part and show, you know, the end result there. We have our long full beard in both views. I hope you've enjoyed its else. You? In the next video, we'll be talking about all the fun beard and mustache styles Judge can do suing a bit.
12. Fun Types of Beards: So let's now just have some fun drawing different styles off beards like goatees, more elaborated massage and so on. We won't throw every possible combination, so you don't have a lot of information. Be Internet you right now, just the ones you see more often the wrong from their own. You can just make them up and have a lot of variations around. All right, let's draw pretty regular style. For me. This is something that I associate a lot with other people. And by the way, if you want, you can make a bunch off different heads references now next to each other. And then you can focus on Lee on the piers and moustache. But it's up to you. So for this beard style, let's start by drawing two arch lines under the nose for the moustache and then feeling it up going down. This is a very trim kind of beards with a big moustache. So let's trow here or detailed sketch practice the hair and other features if you like, or just to a pretty super face and head like I do. The bottom part off the beard is almost like a round rectangle with the top being a bit more Kurt. Now let's going up the lines. You can, of course, just too pretty loose lines away from each other, making look a bit more wild. But just close everything up, making British geometric and perfectly trimmed. Another option is just to a bit of both, like I'm doing here. Then we can finish the rest of our face. I'm going to speed this part of bait here, so the view doesn't end up being too long since recovering a lot of different things here. There we go, a very simple start. As I said, I usually associate this kind of appeared for other people, but that much of speaking. So let's hit is in the psych position. Do the head references before ready Loosely. Breakfast is as much as you can. It will help you Listen up your lines and your wrist. Now we can just throw the shape near the nose. Same principle as before, with a big mess on the bottom and curves for the moustache. Let's questions up now. It's pretty straightforward to drop. Just focus on the general shapes. Go to the rest of the head features as well as much as you want or you can just not. Sure, definitely. Although I actually recommend you to take your time and do so. Practice is never too much. Finally, let's clean everything up. As you can see, this beard style doesn't feel the whole face, so it's fine to keep some white space between the Muslims and the year. You can also add some small stubble there. If you wish up to you, try the lines with varying weight, according to the following off the beard that will help it pop up more and give a more sense off that once you're done, just finished the rest of the face. And here we have our trimmed and contribute. There's one looks ready, classy, as you can see next. Let's draw go to you without the mustache, so start by drawing the head reference. The goat is a shorter beard and pretty small. Normally, it doesn't occupy a lot off the face that are a lot of sizes. You can go it. It can be almost like a stubble, or it can be longer, so let's see what we can do. Sketch things out as before, with as many details as you want. I'll keep fast forwarding the videos to not bother you with my own details. So let me know in the discussion if I'm moving too fast or too slow for you or if it's just a good place. All right, let's clean everything up now. Long lost lines as always, and the beard with shorter, once very simple in geometric. I'm keeping the first features pretty simple as well, too much with the character, but also because I don't really want to spend a lot of time on this for the sake of explaining the beard styles. Lovely. Let's move on to the side view off the goatee. After this, I'm just going to do a few more for checkouts, and then you can just mix and match, come up with a new period styles, or even take a knowledge you got here and apply to drawing from reference images. Let me know in the discussions if you'd like me to make a Pinterest board with beard styles for everyone to use. If that's something that will be helpful for you, I will add it and leave a link later on. Okay, this is our shape for the goatee those simple and geometric once again, but on the site, just some quick first features and move on to the detailed sketch. Argo Tea here still has some value, but it's a very small entry ampere style. After this, let's move on to the clean lines. Pick this time toe. Also practice your hair since we've done that just a few figures ago and it's still pretty fresh in your mind. Get the lines vos and use a reference if you need to. There's nothing wrong in using one. They are there to help you. Okay, lets just do two more style. Since we've done one without a moustache before, let's do one. Now start with the head references always. I will actually just copy the previous ones and place them below to save some time. But I do recommend you to practice the head reference whenever possible. This is just to speed up or beard and moustache training right now, so let's do a very classic moustache with a whole lot of volume. Draw the general shape as a big arch filled in. I really choose to mostly what older people have a big, fluffy moustache and Now we can do the detailed sketch. Let's also take the opportunity to make big eyebrows to complement the moustache. Go through the facial features one at the time and take as much time as you need. Put on top of the message. Make it be white arch and then for the bottom, just just most small lines. It's almost looks like a broom. Lovely. Now for the final clean lines, go drew each line one at the time carefully and without rushing. Take your time well, practicing specific parts off the face. It's also a good time for you to practice and try different cells off characters because it will help You have difference and new ideas for your characters. There we go. We have here a very big moustache. Let's see how that looks on the side view here. Since it's from the side view, the lines start to tilt and it looks almost like a rectangle shape. You can make it disappointing as you want, though. Try it out. It's always good to try different new things now for the detailed sketch, start adding some volume to the hair and moustache breakfast, a bunch of different styles to do your lines. I'm always trying to do lines in different ways and different weight to see what I can come up with. Don't try to restrict yourself too much to a style. Do your own thing. I'll take this opportunity to also say that if you'd like to share your drugs with us, feel free to do so. I'm always looking forward to see what you can come up with, so don't be shot. Okay, let's no go for the clean lines. Loose line. Zola run. As I was saying, We can just practice alongside me here. Doing the same beards and mustaches has I am. But you can just practice by yourself other kinds. And if you do that, I'll be more than happy to see what you've come up with and for you to share with us. If you have your own character, I would love to see what you've decided to do. All right, here we have a very big and fluffy mustache that looks nice. Next, let's door Final one. This time we'll do a very elaborated and classy moustache. Let's draw the general shape here almost like a magician style of Butte. We can even add here a magician has for him. That's no sketched himself. I think we should leave our lines all very close. So it looks more perfect since it's a pretty dream style and we don't have any wild beard strands going on. So there we go. It's no door. Final lights, very curved lines style as opposed to the rest, where we do our lines very straight. Go through the lines one by one, keeping everything pretty nervous. This guy has a pretty big ears. As you can see, it's always important to explore different types of features and not just beards for your characters. But for this style of beard, I will do a very classic character, either a magician kind of character or something like a duke or the higher aristocrats. Well done. Let's now go for the side view, draw the general shapes off the face and then focus on the beard and moustache. These are very trimmed features, so on the side we won't see much of it. For this. Sketch lines go over the previous ones. Keeping that pointing and curly moustache, along with the end off, appeared in the same style as before. Finally, for the final, clean lines give the shapes very tidy and curved. Don't worry about time or perfection. There is no time pushing you and no rush making you go faster. Enjoy your time practicing and it will all come naturally. So there we go. We have our four styles off beards and muscle Sheer feel free to explore more off them. I'll give this to you so you can use as a reference for yourself. And if you do try new things to let me know in the discussions, I'll check their mouth as soon as possible. Next will be heading over for a quick assignment so you can practice what you've learned so far, so I'll see you there.
13. Practice What You've Learned! (Assignment): Hey, again. I hope you've been having fun watching the videos and exercising your drawing skills. In this video, we will talk about your class assignment. If you've been following the previous videos, The silent will be very simple and similar to what we've been doing. So for the assignments, I would like you to use that knowledge you've been getting so far and draw full head with all the features you've learned. Don't feel overwhelmed by its just shoes. One feature at the time and show it biggest all of eyes mouths, another off years, then those big expression you want to convey and finally make the hair and beers. If you wanted to have one now at trust, you can do this. But if you feel that it's something a bit out off rich for now, just make ahead reference. Pick a selloff hair and beard and draw that in it. You don't need to worry about official features for now and concious practiced. Use ones into the rest. Later on, I'll be looking forward to your characters. Yes, feel free to use reference. I actually encourage you to. I hope you've been enjoying these videos. Leave a comment in the discussion, and I will be very grateful if you also left a review. Thanks for watching
14. Before you go! (Thank you!): Hey, again. I would just like to leave this here to thank you for shaking the course so far. I'm glad to see you come this far. I'll do my best to keep updating the videos with new information. So feel free to leave a message on something that you'd like to talk about. Or if you have an opinion that you'd like to share, I'll keep creating new courses and videos as long as you keep watching them. So if you haven't seen my other videos, feel free to do so now. I'm sure they will be helpful if you have any interest in throwing. All right, I'll catch you some other time. Thanks again for watching else you later.
 Patricia Caldeira, Illustrator | Digital Artist | Designer