Transcripts
1. Introduction: Adding motion to your art can go beyond
making things move. It can help you bring life
to your creations and connect with your audience
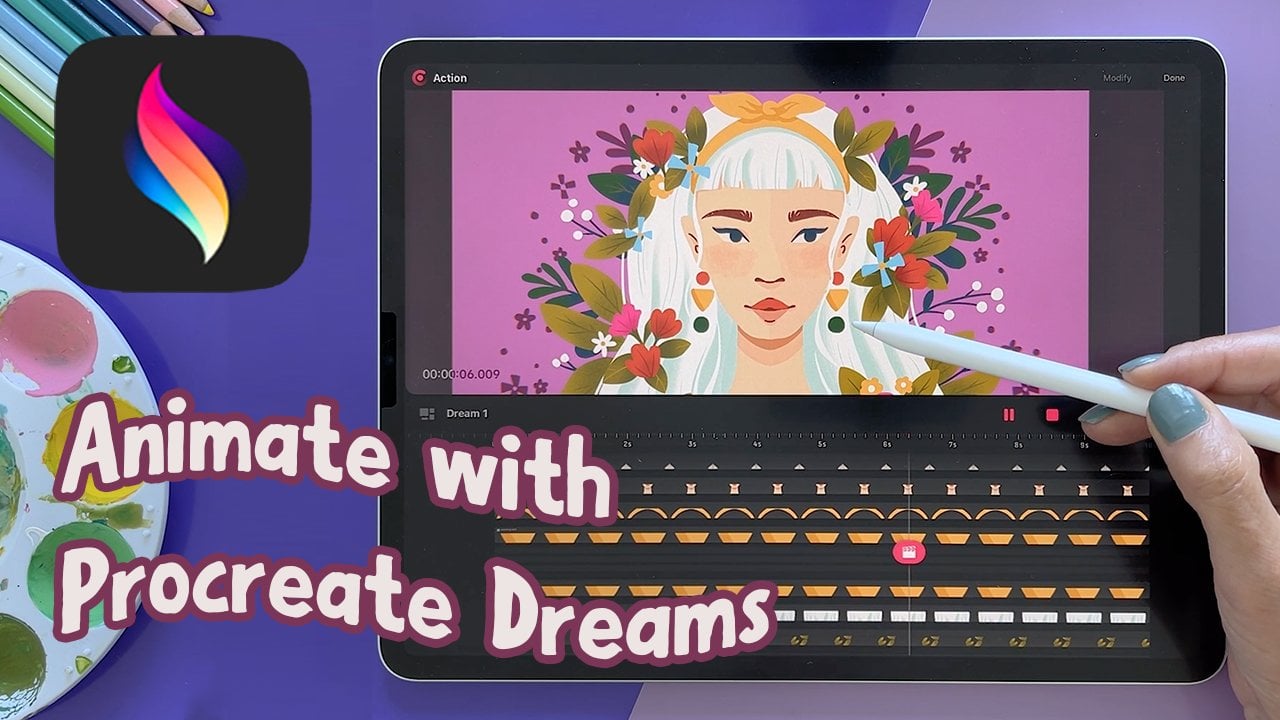
on a deeper emotional level. Welcome to another class. In this class, we are diving into a magical world
of procreate dreams. I'm Eva, and I'm full
time illustrator. As an illustrator and designer, I have worked on
various projects. Often as part of team where breathing life and story
into characters was a key. During this class, you will
learn how you can add life to your own illustrations using Procreate dream school features. In this class, we will dive into Procreate dreams
timeline functionality. I will introduce you to
many excellent shortcuts, gestures, and exciting features. We'll explore the key framing
and performing feature. And I will show you
how to use only on skin while drawing
details frame by frame. Our project will focus on bringing illustrated
scene to life. And I will be sharing
with you how you can infuse your illustrations
with emotion. By animating semi realistic
team from a hot mug, rain behind the window, and adding movements
to the peds, you will create a cozy mood
that captivates your viewers. I will also show you how to prepare your illustrations
for animation, ensuring that every shape and part is ready for animation. By the end of this class, you will be equipped
to add live to scene using various
animation techniques. So you can enrich your
portfolio in the future with animations that resonate with your audience on an
emotional level. And if you want to take
your knowledge and skills to the next level
after watching this class, check out my other
classes about drawing people scenes, color, and more. There is a variety from begin level to more
advanced levels, and you can just visit my
teacher profile to find them. So without further ado, let's start and see
you in the class.
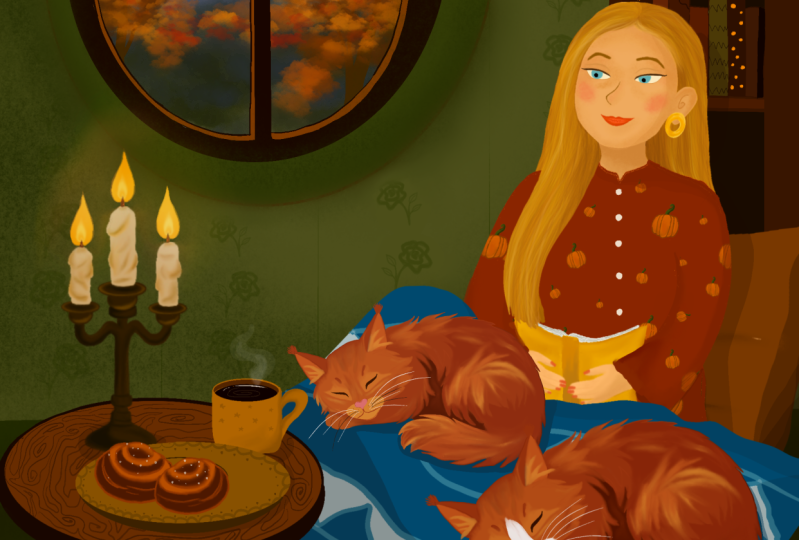
2. Class Project: So as you already
know, in this class, we will be animating an illustrated scene of a cozy evening with
the rain ambience. We have four characters in the living room scene with books which are
here on the edges. Then we also have
a hot beverage. We also have lots of
plants big and small, which I think are nice
addition to the home vibes. To breathe in life into this illustrated room
scene with characters, we will animate elements to enhance the relaxing atmosphere. And the aim is to
help the viewer to experience the artwork
with more senses. You can imagine smelling, maybe the tea or hearing the dog snoring and
this type of details. I can totally imagine having a chill evening like this
when it's raining outside. So while creating this project, you will learn how to create a variety of
animation techniques. For example, you
will learn how to create semi realistic steam, which we will add to the mug and the teapot
here on the table. We will also animate the
rain behind the window. We will also add the movement to the cats and also to
the dog character. We can create this cozy
mood in your artwork. I will also show you how
you can prepare parts of your illustration file for animation from your
existing artwork. By the end of this class, you will finish an
animating illustrated scene using variety of
animation techniques. You can add animation to more of your artwork using the skills that you learned in this class.
3. Class Resources: And if you want to start animating right away,
I'm here for you. I prepare the illustration as
a separate procreate file, which you can download and start animating right away,
following the lessons. Without the need to create a full illustration
like this beforehand. To find the file, just follow the steps in
the description, and you will be able to download the illustration
separated into parts, ready for this class
project animation. I prepare the procreate project, which you can directly import
into procreate dreams. And of course, I will
show you also how to import the procreate file
into procreate dreams, and all the steps
which you need before animating the scene in one of
the following lessons too. The best way to
find and download the resources is when you're
on your desktop computer, not just on your
iPad or your phone. So I would suggest
that you will find and download the
resource and everything, what do you want to download to your desktop computer and
then transferring them into your iCloud drive or your iPad directly using
airdrop if you are on the mac my preferred method is always using the airdrop to add files to my iPad from the
computer or from the phone. And if you want to use your own illustration as
a project for this class. I'm also sharing how I prepare
the layers in Procreate before exporting into
Procreate dreams in one of the following lessons. You know, all the separate
layers of the character, I mean, the girl character, the other dog and everything in a separate lesson which
you can watch and see how you can prepare your own illustration for
this class project as well. Now let's move on
to the next part.
4. Preparing the Artwork: Now I will show
you how I prepare my artwork to animate
in procreate dreams. Right now we are in
procreate where I created the artworks and you can
create the artwork, of course, directly in procreate dreams, or you can prepare it
in procreate beforehand and also save it as a file
or as separate images. And now I will show you, as I mentioned, the artwork
from the Procreate file. In my gallery in Procreate, I have a variety of
sketchbook spreads and more detailed artworks
and we will be animated more detailed
artwork in this class. Let me open one of
these artworks. I will show you here
in my layers panel. That I have a lot of
different layers. What I will do, I will
actually go back to gallery, and I will duplicate
this project. I will tap on select, select the project, and I
will duplicate the project. I will exit the mode, and then I will tap on the name of the project
and I will rename it. I know which project
I'm working with. Here I will call this project. Let me scratch this rainy for That works. You can of course
use your keyboard, but sometimes this is faster. It depends what do you prefer
with renaming the files. Then I just step here, and I have another project
created which I can adjust without ruining
the layer structure that I created here. I will go to this new
project for animation, and we have a lot of elements. Here we need to think about
which elements we want to animate and which
will be separate. So I will go to the layers panel and I can merge all the layers
of the girl illustration. Because I will not be animating the hair because
she's sitting inside. Also the face, I can
draw a new eye if I decide to animate the eye
later on in procreate dreams, and all of these can
be merged together. I will tap on the group, and I will flatten the group. We have the girl in one group. Then here as you can see, I already separated
the tail and the cat, which is this dark
cat here sitting on the table because I know that
I want to animate the tail, so it's easier to
separate these. Then if I move down here
to the other layers, you can see that I have
also this other cat. But here, I still
have the highlight and the tail separated
because I edit the highlight a little bit later after I color the whole cat and the color of the
cat eyes and so on. Here I can merge this group. I can click on the group, and here I can select flatten. We have the tail of
this second cat. Or actually the first t, as you can see here. This group contains more layers. This one is already flattened, which was the T and the shading. I also have a class
about drawing cats. If you are more
interested in details how to create the
shapes and so on. I can flatten this one as well, selecting flatten we have
these in separate layers, and this will be helpful when
we want to animate them. Then as you can see, I have the sofa table and other layers. Here, I have a layer
with glow of the lambs. This one needs to be separate because we want to
animate it separately. But I have two layers, which I can keep how they are. If I move to more layers. I have the lamps, bookshelves. I'm thinking, probably
will not move and animate these
lamps because I try different animations which can work nicely for this image, but you can of course, add more animated elements. You can make these lamps move. But I think for
the example that I will show you is not
necessary in this case, so I can flatten
all these layers. I will select the lamps bookshelves by
swiping to the right, the frame of the window, and then I can just flatten
these layers together. Because the sofa table is
above the layers with glow, I can just take this group
and by holding and moving it, I can move it above
the sofa table, and then I can merge
these layers together. By just pinching them
together as you. Then I have all the
plans which are outside behind the window behind
the glass outside. I will keep these layers all on separate layers because we want to add movements to
these plans separately. Then I have everything which is behind the glass here
on separate layers, and I also recorded the process of this whole illustration. If you are interested in that. Here, I will flatten all of the environment
behind the glass. I will just click on the
group and I will flatten. Then also, as you can see here, the pillows are separate. But I don't think I will
animate the pillows here because we would need more complexity and
storytelling in this one. These floor elements
are already flattened, so I can just flatten B. These are merged. I think we can also merge the sky
and the floor together. Here, this doesn't
have to be separate. Window frame needs to
be above all the plans because the plans are covered with the window
frame, so that's separate. We have the Ts in
a separate layer. Then we have the pots
and the details. I think we can also merge
all of these together because they will not be
animated in this case. I will just pinch
the layers together, which I think can work
well just in one layer. And now I can move on
to the dog layers. And if you can see here also
on the preview and the dog, the dog is kind of like
dark because I think that worked the best
for this illustration, and I will talk about it
more in the recording about creating the illustrations
so not in this class. So if you are interested more in how the
illustration was created, you know, I will talk
more about that there. But here you can see, I actually try different
versions also of the dog, for example, more brown
version of the dog. Of course, they need
to be adjusted. This is just quick test
or this a spotty dog, which is inspired by the
Louisiana leopard dog pattern. Anyway, but I decided to go
for this darker version of the dog and we will make the dog move as
well a little bit. Let's just flatten. This one as well. Then I have the texture from
my watercolor paper texture. I will have to apply that on the elements before exporting, this will be separate
and steam from the mug will be also separate because we
will animate that part. Now when everything is ready, I can go to the branch and then I can select share and I can save
the procreate file. While you wait as
it's exporting, you will save the
document on your iPad, so it's easy to use in the
Procreate dreams later on. So I can just save it two
files and then we can start in Procreate dreams in one of the following
lessons with this file, and I will show you how you can import all the elements
for the animation. But if you want to create your
own illustration as well, this is how I would prepare
it in procreate separating all the layers into the parts
that you want to animate.
5. Procreate Dreams Interface: When you open Procreate dreams, you will find yourself
in a theater. Here you can create open, and share your movies. As you can see in the top left
corner, there is a button, and when you type this button, you can see the side panel and view the storage locations. Here you can see the
storage locations like your iPad storage, and also the iCloud
drive storage, and you can choose the one
which fits you the best. My favorite is storing
the files on my iPad. Now I can tap the button again and I'm in the
preview as before. Every project you make or import into
Procreate dreams will appear as a movie with a preview image like
this in the theater. If we now move to
the top corner, you will find the select
option and the plus sign. When you tap on
the select option, you can select one
or more movies and you can either delete, duplicate or create
a new folder. Can tap here to exit this mode. As you can see, I
already created one folder here with different
animations when I was testing out animating
the girl on the bike or the same character moving on the bicycle more
down the hill. I can tap the arrow to go back again to the preview
as we were before. Also notice the plus sign, which I already mentioned
here on the top right corner. As you can see by tapping on the plus icon in the
top right corner of the theater we just did opens a menu where you
can create a new movie. If you're not sure
what resolution you should use to animate. Procreate dreams helps
you by providing a variety of standard screen
formats and resolutions. Here you can just
swipe through to view the different preset like
social media, square, screen size, white screen, ultra white screen, and we are back to the
social screen size, which as you can guess, nine 16, then we have the square format, which is one to one screen
size, as you guess, it's a screen size, and white screen is 16
to nine resolution, and ultrahitScreen is
21 to nine resolution. This is a good range of
popular aspect ratio commonly used in animation
or social media formats, and as well as cinematic
ultra wide screen formats. You can choose the
best format to fit your artwork
and the project. Then you can also choose your preferred resolution by tapping here on the four k icon, and here you can see four k two, HD and 720 P resolution. I usually like to work in four k resolution
because this gives me flexibility of high resolution
animation at the end, which I can always scale down later if I want to have
a smaller file size. Then you can see here on
the top right corner, we have the ellipses. When you tap on the ellipses, you can see more options and set your movie duration
and frame rate. If you notice the frame rate is set to 24 frames per second, which is a nice standard
frame rate for animation, providing a good
cinematic quality, so we will keep this
setting for our animation. But as you can see, you have
a variety of options here. Then regarding the
duration of our animation, I think for social media, it's nice to keep it
around 30 seconds. I will also keep this
setting from this selection. But don't worry,
you can also change your movie resolution and frame rate later in
the movie settings. When you decide on the ratio frame rates
per second and duration, you have these options
at the bottom. You have a draw
option and empty. When you choose draw, you can dive straight into
draw and paint mode animation. For our project, we will
choose the empty and create a new movie and continue
in the following lessons.
6. Interface and Workspace: All right. And now we are in the Procreate dreams interface, and here I will
guide you through a brief overview before we
import our Procreate file. Procreate dream splits into three main areas and the white box in the center
is known as a stage. While the surrounding space around it is referred
to a backstage. You can have elements and
characters in the backstage before you move them onto the stage when they
will be animated. The objects and
characters while being in the backstage area usually
appears at reduced opacity. Then here near the stage, there is a time
code feature with various options like
the onion skin, editing onion skin
and background color, which you can change, but we are not going into that right now. That covers the stage area
and the backstage area. Moving to the center, you will find the tool bar here. On the left side
of the tool bar, there are these icons here. When you tap on those, you will go back to
the theater preview. While we are here,
let's rename our movie. You can tap and hold and you can tan and we can call
it rainy evening. When you're happy,
you can tap done. Now let's resize also our movie. Tap on the movie. While we are in this mode, you can tap here on
the name of the movie. Then we will see more
options for our movie, and we will go here
to properties. Here you can see we have
the frames per second, which we already talked about. We will leave it at
24 frames per second, and also the duration
will keep at 30 seconds. But what we want to change here is the size of the artwork. Here we have certain numbers. We just need to check what is our size of the
artwork in Procreate. To do that, you can
just swipe up here, go back to procreate. And I will open the
illustration and you can find the size of your illustration by tapping here on
the range icon, tap on crap and resize settings, and here you will see the
size of your artwork. My artwork is 3,500
by 2625 pixels. I just need to remember that. Here I will tap cancel and
I will go back to procreate dreams I will write the
numbers we just talked about, 3,500 by 2625, and then we can tap ten. Perfect. Then our artwork should match the movie setting
exactly like they are. Then the other things
that I want to mention here are the icons
here on the right. Here is the play button, which controls the playback, and we'll be using this
a lot when animating. Then here next to it, we have the circle, which is the perform button and the perform button
activates performing. And we'll dive into this later. Next to it, we have
these little rectangles which are representing the
timeline editing button, and this will allow you
to select and manage tracks like grouping
or duplicating them. Then we have this
drawing symbol, which is like something you
would draw with a pencil. You can guess this
is drawing symbol, which takes you to the
drawing and painting mode. While we tap this, you can see what
happens and you can see more icons here on the top, which are in procreate, including brushes,
erasers, layers, and more. Now I'll just tap done. We return to the mode which
we were looking at before. And here we have the plus sign. When we tap here,
you can see that you can add new elements
like tracks, photos, videos, text and files. Here below, we have the timeline and we'll
use this area to set up and animate our animation
and all our creations. Now let's import our project. So now to import our movie. You can do it in different ways. One of the ways
how you can import your procreate drawing
is by tapping on the plus sign and select files and you can choose the file
you want to import. There is way I like to do it as well and is just by
going to procreate, to do that, just swipe up
here, go to procreate. This is our artwork. We need to go back to gallery, and then I can tap and take
the artwork, swipe up, go to procreate dreams, and then I can
just drag and drop the artwork and it's importing into my Procreate dreams movie. Now, when it was imported, it's just in one piece of content held inside
of our track. Well, more on that in a moment. So now it's just in one piece, which is just single
drawing track. We want to see all the layers
that we had in procreate. To do that, we need to
convert the layers to tracks. To do that, we need to
tap and hold here on the drawing track from
the context menu, we need to select
convert to tracks. Now, instead of a drawing
here, it says group. When you tap on the arrow here, you will see all the layers and the artwork layers basically converted into
tracks of our movie. A difference between the
layer and content is that the tracks contain the content used to
create your movie. You can import content
such as images, videos, and audio, which
you can see here, which we just talked
about a moment ago. So just to repeat, now you see the
horizontal areas here, which are tracks, and we can feel the tracks with
pieces of content. Here is some
terminology for you. Now let me move on to the next
part where I will show you some gestures which
are useful to know when animating
in procreate dreams.
7. Procreate Dreams Gestures: Now let me show you
some basic gestures, so you can speed up your workflow on the
stage and the timeline. You can move the stage by tapping and holding
with two fingers. You can also rotate it
and zoom in and out. You can do the same
with the timeline. You can in and out. You can move it to the sides, and you can move on the timeline also just with one finger. When you zoom in on your artwork and you want
to quickly zoom out, you can also pinch your fingers together
to fit the screen. Let's do that. And to
see other gestures, we didn't animate anything
on this artwork yet. Let me go and open some
of the other movies. I will open this one. In this movie, I already animated the rain,
which is great. What I wanted to show
you here is you can use the playhead toggle here
to play back the movie. But you can use, of
the playback button. But what is great here when you quickly move the playhead
towards the left, you will get the
instant playback of your animation,
which is great. You can stop it by tapping here. Like in Procreate, you can tap with two fingers to go back and you can see the pop
up message that you do the step
with three fingers, you can redo what you just did. What is great in
Procreate dreams is that it stores
your undo history, which basically means that the undo history is retained
even when you close the app, which I found very helpful. And then you also have the two finger tap and
hold on the stage and the timeline to undo and redo with three fingers
series of actions, and when you use
the two fingers, it will rapidly undo the series of recent
changes to stop that, you just basically
lift your hand. If you want to adjust
these preferences, you would just go to preferences and you will see
the settings here. I have the settings here
to start undo steps to 100 and rapid und
delay is 0.6 seconds. That works for my
animation editing and you can test out what
works for you the best. It doesn't undo too many steps when you just tap and
hold on the screen. Then I will click done. Then what I can do also here, let me open this group. With three fingers, I
can scale up and down the timeline and I can move
it from side to side as well. Again, you can go up and down and you can also
go side to side, so you can adjust the
timeline like this. Basically, you use the three fingers to
slide horizontally to adjust how much time the
timeline shows on the screen. Also, you can use
the four fingertip for the full screen preview
of your movie. Okay. Now I'll tap again, and I am back in this preview. And I will show you
some other gestures when we are animating
our illustrations. I will again tap here
on the side and I will go back to our movie.
8. Animation Principles: Here, I wanted to show you
one of my old animation, which is animating
a jumping ball, which is a classic exercise for beginners for different reasons, basically building
fundamental principles and introducing the
basic principles of animation such as squash and stretch and also
spacing and easing out. These are building blocks of animation and
understanding them, helps you to really
create believable motion, and also the ball is quite
simple thing to animate, but here I made it into a orange and then a
little bouncy bench. I just wanted to
make it a little bit more interesting in this part, and why basically squash and stretch is
important in animation. Because when you
notice when the ball is going up in the top
part is almost round, but then here when it's
higher up, it squashes. Then when it's going
down, it's more narrow. Just at the moment when
it hits the bench, let me try to show you exactly the moment because it's very short It changes shape, and you can see how wide it gets when it
touches the bench. The squash and stretch basically helps you create
the realism and weight, and it gives your
objects and characters sense of weight and
volume when they move. You are enhancing the
realism in their movement. And it also helps you to enhance the emotion and expression
in character animation. In addition to that,
it also creates visual interest because when you move the whole animation, it's not just stiff
ball going up and down. But other thing,
what we are going to look at is creating
this in between frames because it's important
when you are moving object from one side of
your stage to another side, to create just enough frames for you to create the fluid
motion, exactly how you want. Basically in animation,
this is also called in between or tweening. It's a crucial process in
animation that involves creating the immediate frames
between two keyframes, which will be the
starting keyframe and the ending keyframe to produce
the illusion of motion. This technique is essential
for several reasons. As I mentioned, the
smooth animation, then also the timing and pacing and detailing
and complexity. If we talk about
the smooth motion, it ensures that the
animation transitions will be smooth in
one post to another, and then you are eliminating any strange jumps in animation, when you just go
from one frame to another key frame and it
will have a strain jump. And then when you have
a timing and pacing, in between allows the animators to control the
timing and pacing of the animation precisely by adjusting the number
of in between frames, you can make the animation
appear faster or slower, depending what do
you want to animate. Here you notice that in
some parts of animation, the ball or orange is jumping faster and in other
parts, it's slower. And also the in between helps
the animation to maintain the consistency by carefully crafting the frames
that link to key poses. Our key poses in this
animation are when the orange is on top and
also when it hits the bench. Let me stop this So basically, when we will be
creating our animation, we will be focusing on
the main keyframes and then also the amount of
in between keyframes, and we will be using
a little bit of the squash and stretch
in our animations, but not as much as it was important for
this animation here. But I just wanted to
share this with you. So you know what
would help you create more fluid and lifelike
animations when you want to go deeper into
animation process and create more animations in
the future by yourself. All right. And now let's
move on to the next part.
9. The Sleeping Dog: All right. So let's
start animating. And I thought we will start
with something more simple, which I think it's a great
way to start to help us to get into the flow of
animating this whole scene. The first thing to
animate will be the dog. Let me oom in so you
can see it better. Here, let's open the group. And let's find the
track with the dog, which is here and we name the
layers in procreate before. Now we have it nicely organized. Now I can just tap
here on the track. The playhead will appear on the spot that
I want to see it. If you want to zoom in, you can double tap on the track, you are in the preview, which is even more detailed and zoomed in, as you can see. To get out of this mode, you can just zoom out. So here, I will make sure that the playhead is at the
beginning of the timeline. Now, for this part of animation, we will be using the
performing feature because we want to make the
dog look like it's breathing, so we will make his
back move up and down. We don't have to redraw
everything frame by frame because
this feature will help us to add keyframes and we can easily record our movement, so it will look natural. Let's do that. We have our
playhead at the beginning, just to make sure we are on
track that we want to be Now, I will tap on the playhead
from the selection, I will click on the move, and then I will select warp. Here you can see there is this grid around the
dog or the mesh. Here you can also adjust
the amount of the controls. I'd like to add a
little bit more so we can adjust the movements
more naturally. I think six should work
nicely in this case. Now I can just tap on
the performing feature, and here you will see it's ready and I can change from
circle to square. And now I can just move
one of these toggles to imitate the movement of the dog breathing.
Let's just do that. I will move it up and down, and you can see that the playhead is moving
here on the timeline. I will continue
moving this up and down until the playhead
finishes in the timeline. You can also see here in the top left corner that
the action is recording, and now it's stopped, so I can stop my movements, and I can move the
playhead again to the beginning and you can play it back if you like
how the dog is moving. I think this looks
pretty natural. I'm happy how this turned out, so I can stop and I can zoom in. I can show you how these keyframes were created
so you can see it here. You have these keyframes
under the track and you can tap and hold on the keyframe to delete the keyframe if you
want to adjust the movement, or you can also
move the keyframe. But I think it's
great how it is now. I will leave it as it is. Then one more thing
I want to show you here is the modify button. Here you can modify
the motion filtering, which means smoothening
the animation. I think in this case,
30% works great. I will also leave it that and I will tap here and tap done because I think the
movement looks very natural and it was very
quick to do as you can see. Now let's move on
to the next part.
10. The Plants: The next thing to animate is the movement behind the window. Now we will animate
the plants behind the window using similar
technique as we did for the dog. Let's find the plans behind the window and I can already
visually see them here, and I also named each plant. When you o in on the track, you can see here
the small toggle with the check mark and
when you tap on it. The visibility of
the track changes. You can see the plan
here disappeared, so you can always double check which track is where
on your stage. We will first start with
this plan on the left. We keep the flow. We will first animate this one and then we will move
on to the right. I will tap on the track, we can see the playhead. I will move the playhead to
the beginning of the track. Then I will tap on the
playhead as we did before. Now we need too out so
we see the boundary box. If you don't see
the boundary box, you can always step on the track so you
will see it again. Or you can tap here on the stage to hide and
see the boundary box. Then here we have
the corner toggles. When you tap on those, you will see this small icon
where it disappeared now. When you tap again, you can see here this small
corner thing. If I zoom out, maybe you can
see it a little bit better because it will be on
the dark background. Here, you can see it. And then let's tap on it again. Then we have the
three small dots and we can edit the anchor. That's what I want to
do here because if I just move the plant
from side to side, it will just rotate
around the anchor point, which is in the middle. And we don't need that. I will tap and I will click on those three
dots, edit anchor point, and I will move the
anchor point to the side because we want the plan to move just slightly from side to side, and we can imagine that the plan is attached
here on the side. While doing that, we can edit the anchor point on all these
plans behind the window. I can just step on this one, zoom in, dit the anchor point so you can see it it
appeared right away. Here I have these
two plans together, so I'll just move
it here to the top. Then I can move to the
plan number three, move the anchor point. Then move again, oops. Now I move the anchor point, so I need to undo. Then I can tap on the
plan number four. You can see it it's this one. I can move the anchor
point to the bottom. Go to plant five, move the anchor point and zoom out and we are
missing the plant six. I can just move the anchor
point here to the side. We can go back to the plant
number one. It was here. We will use a combination of two different tools to animate the movements
of the plant. We will be using again, the performing feature together with two options which
are hidden here. Let's start animating the
plant here on the side. So make sure that your playhead is on the left side on the
track, at the beginning. Then you can tap here to
start the performing mode. First, we will start by
tapping on the playhead and you will go to move and we will
select again the warp. In this case, I think I
will adjust the controls to eight because I want to add movements
only to the edges, so to have as many
controls as I can have. Then I can start moving one side of the
plant. Just slightly. We will add these
subtle movements like the plant is moving or
wrestling in the wind, but we don't want
to move too fast, so it will start to look
like hurricane is outside. We want to create this
relaxing atmosphere of the plans gently
moving in the wind. You can see here the timeline, so it's almost 30 seconds. We finished the first movement
and to look more natural, we will use the other tool. I will tap here again. We will select move and scale. Now, we already adjusted
the anchor point. Now I can tap on the
performing feature. And I will move this
corner of the plant, so I will just step here, and I will just start gently moving the plant
from side to side. Because I didn't draw
the corner of the plant. I don't want to
move it too far out here because then it
will look strange. I need to tap again and go back. But if you create
your own illustration and you feel in the whole shape, you can move the
plant even more. But again, that would look
too wild like a big storm. I need to move the playhead
to the beginning again. Here, I can delete the move and scale by
tapping and holding, so I can start again. Let's tap on the
performing feature, tap on the playhead.
Move and scale. I can zoom in so I
can see it better. Then I can just move
the plant from side to side in the circling
movements to create this more natural look to add to the warp and the other
movement that we just created. I will just continue
moving the pencil in the circular movement
until the timeline stops. Now we have these two
movements on the plant. Perfect. Now we can move on to add movements to the
other plants the same way. I will stop this part, and then I will just
move to this plant. I will tap on the track. First, I will add the warp. Here, I will move it to five, and then I can press
the performing feature, and then I will move the
bottom part of the plant. All right. And now I
will zoom back in. And I will repeat the same but with the right
side of the plan, so we have more movement there. I'm trying to move
the pencil a little bit differently
than I did it here. If it's moving
more to the right, I will move it more to the
left or go slower or faster, and I will continue these movements until
the 30 seconds finishes. Now I will zoom back
in and I will move the plant using the move and
scale like we did before. Here I just need to
zoom out a little bit. We can see the movements better. I will take this
lower hand corner and we can start now we can't start because I forgot
to move the playhead. Let's do that. Now tap
again and now I can move the plant. All right. And now I can see that
the plant is moving too much out of the
corner of the stage. So I will exit the performing mode and I will move the plant little bit
higher. So tap on it. And this movement is not recorded because I'm not
in the performing mode. Now we can check how it looks. Okay. And the same
like on the stage, you can just singe to zoom out
to see the whole timeline. Here I will just zoom out
a little bit so we can see the plans moving. Okay. I think they're
moving pretty nicely. As we move them, I mean, this one, a little
bit higher up. Maybe I can move this
one a little bit to the left. Let me do that. Find the track and out
of the performing mode, I can just move it
slightly to the left. I think that works great. Now I will continue animating
the rest of the plans with the same method and
I will speed up this process because it's
the same how I did it here, and then I talk to
you in a moment. All right, so let's
check our animation. I can pinch out and out
and see all the parts of our animation that we did hit play and actually before that because now we will
see only this part, but the animation
so far is the same. I'll just zoom out so we
can see the full time line. When I tap on play, we can see we already
have quite a lot of movement just using the
performing feature. These are all subtle movements, which will add to this
cozy scene that we are creating the dog is breathing and we can see the
back moving up and down. Then we added movement to all of these plans behind the glass, and here I was super careful not to move
these plans too much. They don't move too rapidly and too fast because they are next
to the characters. We don't distract
the viewer from our characters with very fast
movements of these plans. Here I can see I will need
to adjust these raindrops, but we'll be animating
rain in later lessons. And just to recap. When I tap on the track, we see the boundary box. Let me tap on it again. Then with these three dots, we adjusted the anchor point and then with the playhead at
the beginning of the track, we use the move action
and we use combination of warp and move using
the perform feature. I think everything
looks great so far. If I preview it again and now we can move on
to the next part.
11. The Lamps: All right. And now let's add some animation and movement to the lights that we
have on the scene. So I will zoom in. All right. So we have three kind of groupings of light or I mean, we have two lamps, one on the left side, one
on the right side, as you can see, and then we have these four lamps on the top. I was thinking that
it would be nice to animate them as
one light source. First, but now I thought that
might not look that great. Basically, what I'm
thinking now is to separate these light sources into
three different groups, and then we can add movement
to these groups basically. But if we look at our layers, so we have a group
with two layers, so you can expand and collapse the group by tapping on the arrow as we did before, and then you see
these two tracks on each of these tracks, we have all the lights together. What we need to do is to separate them on three
different tracks, so we are able to
animate them separately. There are different ways
how you can do that. One way how I do it
sometimes is to go back to procreate and separate
these light sources there. I can show you how I
would do it in procreate. I need to turn the artwork. As you saw before, We have different
layers for everything. Here is the group
that we prepared in the previous lessons where I
was separating the layers. What you can do is to separate these using
the selection tool. You can merge these layers. I would have one layer
with this blurry. Visual. Basically, this
one is also blurry, but this one has less opacity because I'm using
the blending modes, which I will show you in a
second in procreate dreams. I would select this layer, put it out of the group. This is the main one and
this one is very faint, so you don't see that much. But what you can do is to select swipe down
with three fingers, then you can cut and paste, and then you do it
also for this one. Then the third one is just the glow here
on the right side, if you see it, if you
hide it and hide it. Here, when I cut the selection, it changed the blending mode, so I would need to put
it back to screen mode. And then we have all the
three layers that we need and you can select one layer by just holding on it and it will hide
all the other layers. It's hard to see now because obviously we have
white background. You need to hide the background, and then you can see
this faint light here. You can see there is
a slight difference. Then you would save it as PNG. You would say PNG and
save it to your images, and then you can import it one
by one into Procre dreams. If we go back to procreate
dreams, you can go here. So here we don't
need this track. So I would first add the track. From using the plus sign
as I showed you before. We have empty track,
and then you would use the plus sign again
to import photos, and then you would choose
the PNG that you just saved. This is one way how I
do it sometimes when I forget to separate layers and then I want to import
something else to animate. But I will show you another
way how you can do this. We can go back. We have
the glow The glow group, we don't necessarily need it. Now, let's just tap and do. We don't have that extra track. We just don't need.
Here on the group. I will tap and hold, and I will group the group, which was grouped
already in procreate. That's why it was grouped
here. We had two tracks. But as we need to separate them, I'm not going to
work with groups. We'll talk about groups
in later lessons. Here, I will keep this
one glow layer as it is, and I will hide this one, so you can see how it differs. Basically, on this one track, we have all the content
with this soft blurr light, and then we will
keep that and we'll just animate the secondary glow. Let's see. It's just like this soft glow. We are not going to turn
off and on the whole lamp, but we'll just add
this soft glow. I can actually tap and hold and you can click on track options and you can delete the track. Now, I will tap on the track
that we are using currently, and then I will
add three tracks. Track number one, so
it will be one lamp and then we have two other
groups, this one and this one. We need two more tracks. Okay. All right. Now we will add the glow on a separate
track, as I mentioned. Double check that you
are on a correct track. Now we will also use
the drawing tools. We will be using
more of them later. This is the starting point, so you get used to using them. Let's step on the drawing icon, and then we can go to brushes. Then tap on the
brush icon again, and then we will choose
one of the other brushes. For this one, I
think airbrushing works great because we
want this soft light. Let's select the soft brush. But here you can see we
have blue color selected, which is not ideal for
this type of light. What I'm going ops See, I already tab here,
so watch out. That you don't do that. Tap
to do so we don't need that. Now in this mode, you can activate
the color picker by just tapping and
holding on the canvas. This is pretty useful, and that's one of the gestures
that I use quite often. I will choose something not
super bright white color, but maybe a little
bit orangey color. It changed here, and I
think that works nicely. First, I will paint
something on this lamb. Let's see maybe 6%. Then I will paint on
this side of the lamb. I'm not covering the
middle part of the lame because the light is mostly
visible on this side. So this should work fine. Now, what I want to
do is to zoom in, as you see, it's just
painted one frame. I will tap and hold
and I will feel the duration because
we want that light on the whole track and basically happening
the whole time, we are watching the animation. But here, I created the
drawing too much to the right, so I can just step and
hold and move the track. Here, I just want
to make sure that I feel the whole track and now because I moved it, it didn't. You can just step and
hold here and just drag the contents of the track
to the end of the track. Then the next thing,
what we want to do is to tap and hold on the track and we test
out a blending mode. Because this might be too
strong as a light source. If we select lighten,
maybe screen, let's see, lighter color, and I think screen works
great in this case. We painted the light or the idea of the light on one of the tracks
and one of the lamps. While we already also
changed the blending mode. Now let's just add the
light before adding the animations and other
fun parts to our movie. I will just step
on the next track. I will make sure that the
playhead is at the beginning. Then here I will paint over
these lamps the same way. We have something like this. Very randomly. Now, I will zoom in, I will tap and hold
to feel the duration. I will pinch here and make sure that we feel the
whole canvas, pin again, go to the beginning and
tap on the next one, make sure that the playhead is at the beginning
of the track. Then I can go to this lamb, paint a little bit here. Do the same hold. Field the duration. Now let's
change the blending modes. Tap and hold blend mode, and I think screen works great. Tap blend mode, screen. And we are set for our animating or
animation of the lambs. Here, I think I didn't
do it very evenly. Let me see if I'm on
the correct layer. Here you can also tap and hold and you can
rename your track. This is lamp left Is
it? It is. All right. Here, I will just add
a little bit more, the light is bit more
even left and right side. And here. Let's
see where we are. These are top lights. Then we have the
light on the right. I can rename. To spell
it right or correctly. You might notice that we have here this different
color preview. That's because
when you tap here, you can see we have onion skin, so you can hide onion skin. That one was showing
us previous frames, but we don't have any previous
frames. In this case. Now when you tap on the tracks, You see that all these light
sources have the same color. What we want to do now? Let's start with this one. It's a left lamp, and I
will tap on the playhead, and I will select the filter. We have selection of live
filters, we have opacity, Casi and blur, sharpen
noise, and HSB. In this case, we will be using
opacity and gaussian blur. Let's first set the opacity. I want to have the one keyframe
here at the beginning. I want to maybe
reduce the opacity. I think 60%, overall, it's quite nice in this case. I don't think 100%
looks very natural, I would like to
keep it around 65%. This is like a
reminder for myself. And now we will animate the movement or basically
the opacity of this lamp. We need to swap from
the drawing mode, so we disable the drawing mode, and now we will activate the performing mode because
it's easy for us to move the togglehad of
the opacity and we can try to create this
natural of flickering lamp. Actually, I will
zoom out so we see how is the effect
on the whole scene. This was more like a reminder
that we want to keep it to 60% and now we will
animate it separately. We can delete the whole opacity because we want to
recreate it now. Let's delete and I will
tap on the toggle head. Now I am in the performing
mode, so that's what we want. Now I will select
filter opacity, and now we can start animating. Just to make sure that I am not adding 100% opacity
to this animation, I will be moving the
opacity around zero to 60%. Maybe not going
completely to zero, but something in these rounds. You can see that you have
already performing mode activated here you can try to notice how you are
controlling the light, and how fast or
how slow you want the flickering to be moving. Sometimes you move
the togal faster, sometimes slower, and
that should work fine. What you can do now is just to play it and see
if you like it. Now, maybe it's turning on
and off maybe too strongly. What we can do, we can blur it or we can redo the animation. But I think the blurring
works better in this case, let's zoom in. We can move this keyframe
completely to the left by tapping holding and just make sure that the
keyframe is there. Now it starts at the beginning. Here you can double check the opacity and I
will move it, wait. I didn't disable it. Let's go back. Let's just zoom in because I didn't want
to record the new action. Tap and hold, move the keyframe, and we are out of
the performing mode and I will set this
keyframe to around 60%, and I will check how
is the next key frame. It's 78, so I don't
want it to be so high. These other ones are already how I was moving the toglehad. Here maybe you'll just set
it to basically even lower. The other ones I
think should be fine. We can check the last
one. Where are we? The last one is 40%.
I think that works. Now, let's add the
opacity feature. Sorry, opacity we just did. The blur feature. Because we already
animated the opacity, I don't think we need
to animate the blur, but what I usually
like to do is just to add the playhead here
and then filter. Now I can add the blur. You can see that it
added a keyframe for me, I can blur the lamp. I mean the lamp light. Maybe 5% works
nice in this case. What I can do here, I can go to the
end of the track, and I can just step and tap again and it adds
the 5% automatically. Basically, I will
have it blurred 5% the whole time the
animation is running. I can double check how
everything looks by going to the beginning and see if I like the subtle
animation of the lamp. We didn't animate this one yet. This one I think works nicely. Now I will go ahead and I will animate these two lamps
with the same principle. We already have
the drawing done. What I just need to do is to add the opacity and the blur
to both of these traps. I will speed this up and I
will talk to you in a moment. S All right. I edit animation to
two other lamb groups. So we have left
and the top group, and you can see on each of them, we have a live filter, so we have the opacity, and then we had the Gbler. The first live filter we used with the
performing feature, and the second one, we just used with two keyframes. I will show you also other ways how to use
key frames later on. Here we just used
the same keyframe or same setting for the keyframe at the
beginning and at the end, so the blur look of the
light will stay the same. I applied it to the two a tracks and now we can preview
our animation. One thing is actually, I haven't mentioned yet, if you are zoomed
in on the track. For example, if
you didn't animate the rest of your track, so now we can see
only 0-2 seconds, you will see that the playback is showing
you only those 2 seconds. If you want to see
the whole animation, you need to zoom out
on your full timeline. So now we will see
the full timeline. This is very useful,
as I mentioned, if you animate it only
part of your animation, and you just want to preview
it without the playhead running the whole length
of your timeline. When I'm looking at these lamps, I think everything
is pretty nice and you can always adjust
some of these keyframes, if you think it's
too much or it's taking too much attention
from the other animations. But for now, I will
leave it as it is, and then we can move
on to the next part.
12. The Rain: Now, let's dive into
animating rain. We will draw and
utilize groups as well. I will draw a few shorter lines in the similar places
as we already have. To access drawing mode, I will select the squiggly line. From the brushes, I will go to Calligraphy folder and I
will use the water pen, which I think works quite
well for this illustration. Now, I already taped on the
canvas. I created a mark. If that happens to you, just tap and undo the stroke. Just to make sure that
you have white color, tap and hold on the stage and you can sample the
color that you want. I will sample
lighter white color. Size of the brush, I will
keep around 4% because I want to create thinner lines and shorter lines that
we already have here. I can zoom in and I
will recreate some of these lines on this frame which
is already creating here. Here, you can just guess approximately where
you place the lines, so it doesn't have to be perfect because we will hide
the other layer and see where we are still
missing some of these lines. I am not recreating
the bouncy droplets because it would be very hard to animate because our
plans are moving, it would be difficult to match. So when you're drawing
these random lines, you can make them longer and shorter and the placement
doesn't matter that much, but just make sure
they are aligned. So you don't create
lines angle to the left, some to the right, and
some are straight. Try to keep the same
angle. All right. So now we have a few
lines already created, and now I can hide
this track and see where our rain
is distributed here. So I can zoom out and see, and I can fill in
some of these areas. I'll just add some
shorter ones here, maybe something longer here and really trying to keep
them aligned vertically, which is a little bit difficult when you are
drawing free hand, but it's a good way to
practice your lines. And you don't want to go
overboard with these lines. In this case, you don't want to have the areas
that are too busy. Try to balance it out and you can also
delete some of them. I think this is fine. Here, as you see, there
is just one frame. In this case, we don't need to draw everything frame by frame. I will tap and hold here, and I will stretch
this piece of content. We have three frames. Now you don't see it,
but when you double tap, You can go really in
the Zoom in preview, and you can see that we have three frames which
are exactly the same. I tested different ways
how to animate rain and the speed of rain that I really like is when you
use three frames. What I will do now, I will exit the drawing mode. Now I will tap and
hold and I will duplicate these three frames
which are on the track. We will move this
content little bit down. We will try to create
this realistic look by alternating the placement of these raindrops without the need of redrawing all of them. So tap again if you don't
see the boundary box. Now I will move this one a
little bit to the right. But if you don't see where
the previous content was, you can tap here and you
can select onion skin. You can always adjust
the onion skin. Because we have three frames
in this content group, I adjusted the visible frames
to five, so we'll see it. You can also adjust the opacity. I selected purple color
so we can see it better. Here, I can reduce the opacity because our
raindrops are not that opaque, they are quite subtle. This works, I think
better in this case. Now you can see where your
previous raindrops are. If you tap again, you
can see you moved it from here down here. Now I can tap and
duplicate again. And this third piece of content, I will move again, so I need
to tap again and move lower. You just want to make
sure that you are not placing the rain drops in the
same spot as the other one. Now let's duplicate
it one more time. Duplicate and this fourth
one will move down again. But you can see that we have all the rain on top
of the character. We don't want that, so
we want to move all of this content below
the character. I will group this by
tapping on the squares, and I will select the
content that we had so far, and then I will tap
and hold and group. Then I will move the
whole content down. I'll just take the content
snap it from the track. With the other hand, I'll just
find the right placement. I think it will work
the best behind the window frame and
on top of the plan. I will dragon drop it here. Now I dropped it
in a wrong place. I will take it, I will undo because I want to drop it in
between. Let's do it again. Take the content and
find the dotted line, so you place it in between
perfect now I will move it to the beginning of the track Now I will zoom
out to see how it looks. On the timeline, I will zoom in, so I can have preview only
of these four frames, which will be enough for
our animation. Let's play. I think it already
started to look pretty nice. We can adjust it. Now, tap and hold group, and I can double check how
I moved the rain drops. I think they all look like that I'm moving them
more towards left. This one compared to the previous one is more to
the left and this is as well. I will move this one little
bit more to the right, and let's see how that looks. I think that's much better. Now what we need to
do because as we moved all our content
with every step lower, we need to feel the top
part of the window frame. Let's just do that.
In this first one, we need few drops here. Let's go to the drawing
mode, take the brush, and I will add few of the
drops in the top part. Basically, what
you need to do is to just fill some spaces, making sure that you don't have the same placement
of these raindrops. That should be fine. Then let's go to the second one. You can see where the
previous raindrops are. I can just add one here. Let me zoom in so you see
it a little bit better. I can add one here. And still trying to keep the same alignment
on these drops. Now, let's go to the third one. Again, just filling in
some of the spaces. And the purple ones,
if you remember, are the previous frame The fourth one. We can add one here, one here. I think there is a gap in this part and there
is nothing here. Now we can preview and see
if we like how it moves. I think there is something
missing in this part. But other than that, I think
it works pretty nicely. Let's see. I think we need to
add some rain drops in this frame and this
one in this part. Just one here. This
is previous one. This should be already better. All right. I think
this works great. Okay. So what we can do now is to group all of these
like we did before. So we will tap on
these two rectangles. You will select your content, tap and hold group. And I think because we
dit this type of rain, I think it will
look a little bit better if we actually
place it behind the plans because then
we can imagine that plane plans are
closer to the window. So I will take the group and
move it behind the plans. All right. I think
this is much better. Okay. So what I will do now, I will duplicate it a few times. Then I can group it, and then I can duplicate
it to fill the timeline. Okay. Let's check I feel the
timeline, that's perfect. Now let's create another
layer of our rain. I will tape on the plus
sign, create new track, and we can use what we already animated here on this track. Here, I will ungroup this part, so we can copy only those few first
frames. Now I can zoom in. We have our four frames. I just need to
group these Again, I can copy them easily,
copy and paste. Now I will ungroup this part. We have these four frames. Now because we want our rain in the foreground to run
slower or fall slower, we want to make these pieces of content a little bit longer. We will have one more
frame per each of these. I need to exit this mode. And then we are here. You can stretch one piece
of content like this, but if it is here, you can stretch it with
the others next to it. What you can do, you
can actually use your second hand and
tap on the screen, and then you can
extend the content, which is great gesture
to know about when you want to work with the
pieces of content like this, tap on the screen and
extend, tap and extend. Perfect. Now, let's group this together I will tap
and hold group, I will exit the mode, and I will make the
whole group bigger. These drops, they
feel closer to us. I will move it slightly
to the side and then we can test against the other rain if it
is bigger enough. Maybe we can make
it even bigger. For that, I need to zoom out. I can move the whole
group a little bit lower. Maybe this placement works
a little bit better. Now we can apply blur, is in the beginning blur. 1% or maybe two
would be too much. Let's zoom in and see. So maybe 2% actually
is fine in this case. Here, I will tap again to
create second key frame. Now we can also
reduce the opacity. Go to fiilter opacity and here
we can set the opacity to, let's see, so you can
still see around 85 86%. Then let's create
a new key frame. We can zoom out and play
it on a bigger scale. I think this works great. I set up the blur to
2% opacity to 86%. I think it's always good to
test it out if you like it. Now when we duplicate
this group, also, our opacity and goes in blur is duplicated,
which is great. We can just duplicate this
group multiple times. Then I can group more groups, and then we can duplicate it Then I can group
more of them together, so we can duplicate them faster. Now duplicate duplicate. And see where we finished
on the timeline. And I think now we filled
the whole timeline. Perfect. Now I can exit this mode and we can preview how
everything looks. All right. I think
it looks great. Now we can move on
to the next part.
13. The Cat Tail: And now, let's add some
movement to the cat. We will be animating the T tail, as you already know, and you have a variety
of options here. For example, you can use
the move and scale option, but I think in this case, the tail would look too stiff. I would like to have it a little bit more natural looking. I mean the movement. The other option is that you
can draw it frame by frame, but as you can see,
we already have some texture and some
shading on the tail. Without the need of
redrawing everything, we can animate the tail movement using the war in a little
bit different way, how we animated the plans. Let me show you what I mean. First of all, let's
adjust the trek. I need to make the
track shorter. I will grab the end of
the track and I will just move on the timeline until
I am at the beginning. Now I can zoom in and see
how many frames I have here. I think it's still
quite a lot of frames, so we can make it even shorter. Let's see. We have four frames. I think three frames are
plenty in this case. Now I will zoom
out a little bit, and I will duplicate these
three frames because I want to finish basically
with the same tail position, and then we can delete
this last part, so we will have a nice loop. What we can do now is to
duplicate this again, and then we will adjust this
middle part of the frames. I think for the middle parts, I think two frames are enough. So what we can do now, not using the
performing feature, we will just add keyframes, and we will be using
the warp tool. I will zoom in, so we can see
how many controls we need. Select the move and warp. Then I will select, let's say, maybe
actually eight controls. We have more control
adjusting the tail. Now we can adjust the
shape of the tail. I will adjust it only slightly. That should be enough
for this first one, tap on the keyframe. Tap again to copy. Now you can see we have
this slide movement. Now I will duplicate
this whole thing. We have the same movements. It's always moving
back. These two are the same and these two. I can always duplicate
the middle part and adjust it and we will
create this nice loop. With this duplicated one, I will delete this keyframe
and I will adjust this one. Let's just move
the tail slightly, trying to keep similar shape. Tap paste. Now duplicate this whole thing. Duplicate, delete. Now we can adjust it
again and we can create this subtle movement without the need of redrawing
everything. Of course, if you are
drawing it frame by frame, you will have more
natural movement. But like this, you save
a lot of time and you don't need to recreate all
these textures right now. Let's duplicate this
whole thing again. Now I will delete the
middle keyframe and age this one copy paste
duplicate the whole thing, one more time, then
delete this keyframe. Now I can copy this
one and paste. We can test it out how it
looks so far if we need more frames zooming
on the timeline, so we see all of our frames. Then zooming out on
the whole scene. I think the movement
is pretty nice, so you can decide
if you want to add more that the tail is moving
even more there to the left. I think we can add some of them. Now you just have to
see that these two are the same and this one, you have to double check. This is the middle part. Now, we need to copy this keyframe and then duplicate
the whole part, duplicate again,
delete this keyframe, and then we can adjust. Of course, you can play around with this shape as
much as you want, but trying to keep similar shape of the tail
like we had until now, it doesn't look
maybe too different. Now we can adjust it again. Now I can copy this
one and paste. I will duplicate the
whole thing again, delete this frame
and then adjust. I will speed up this part and I will talk to
you in a moment. Let's test it out. You can zoom out to see the
whole movement better. I think on the big scale, actually, it looks quite nice. Maybe the side frames
are too stretched. I will stop this and I
will delete these edges, and I will stretch these ones and move the key frame and
test it out again. Okay. And I think the movement is
much nicer now and you can add the movement to the tail of the second
cat the same way. All right. And now let's
move on to the next start.
14. Coffee Mug Steam: All right. So let's test out our animation, what we have so far. So we have the lights,
we have the rain. We dit some movement on
the tail of the cat. As you can see, I added this
secondary subtle movement. This one is a little bit faster. So it's up to you
how many frames you would create for
these movements. Then the dog is here
moving as well. Now, let's add some
nice moving steam from the mug and the kettle. I will stop the animation, and now we will be creating
the movement frame by frame. Let's find the layer
where we have the steam. The steam is here on
a separate track. But because we need to
draw it frame by frame, I can just hide this one and I will just step here
and create new track. We have a new track here. And now we will be
creating different frames, which will be hand drawn. When I was testing how many frames or
different shapes for the steam you need to create this semi realistic
steam animation. I thought around six or seven
frames are good enough, and then we can repeat them. The main point is that
you start with one shape and then you end up with
the shape which is similar. It looks like it's morphing
into the you know, same shape which
we started with. First, you'll create
a rougher version of the design to ensure that the
shapes flow well together. Once you're happy with that, we'll redefine it further. Let's do that. Let's go
to the drawing mode. In this case, I think the water
pen will still work fine. Now what we can do
is to swipe down, and then we are in a
flip book preview. Here we can also
show the onion skin, and we can set the color. I think leave it on purple Now let's sketch
first idea shape. I think something like this would work great for
the first shape. We can adjust it of course. Then the next shape can
move a little bit higher. You will follow exact shape
that you created here, but it's just moving up. Maybe here, we can create
something more rounded. Maybe here we can add a
little bit of volume, but it's not that far
out from the first one. Now we can go to the next one. Then in this one, we can maybe create more
volume here on the top. Then here it will be thinner. Let me move it so we
can see it better. Then this one is
moving even higher. Maybe we can add something
here maybe a little bit. You can test it out later on. Now if we move to the next one. In this one, I think we can
start breaking off the shape. Here we still have that volume. Here it's starting
to get very thin, so I can add this
little bump here. We are changing
the shape as well. We have the volume in this part. Then here it can start to break. We separate these two shapes. Now, if we go to next one, in this one, we can still
keep the volume here. Basically what we are
doing all the time, we are moving higher and
higher because the steam is leaving the mug here
because we created that bump, maybe that bump starts
to go higher as well. Okay. So something like this. And this one, we can
push a little bit lower and then this one
is as well separated, but a little bit higher
than previous frame. We can add a little
bit of a bubble here, and this one is higher. You can clean up the
shape if you are happy, how it's moving later on. Now we should start
moving back to the original shape.
What we need to do. The first shape was just
something like that, that was more simple
than this one. What we can do is basically this top part
disappeared because it vaporizes then here we
can make it th Okay. And yeah, let's see. Maybe we can delete
this top part. And just have it wider here, and then we can
always test it out. Now to exit the flip book
mode, we can tap done. Now if we zoom in, we can slide through our
frames if it makes sense. I think it can work. We will create more subtle visual, don't worry about that. Let's play it. I think
they look pretty nice. But I think the first one
needs to be chunk here. I will just zoom in and
stay in this preview, go to the drawing mode, and I will make it a little bit more round here
on the top because we are just creating
illusion and it's semi realistic
inspired by animation, so it's not realistic team because that one is a
little bit more detailed. Here, I will switch to
eraser and just make the bottom part a
little bit thinner and you can come up
with your own shapes, of course, but make
sure that you are moving the volume higher and
higher with every frame. You can see you start
here a little bit higher, higher and basically want
to move to the last frame, which vaporizes and it's
similar to the first one, the transition will
be quite smooth. Now, the second visual, let's go to brush. Let's clean up the edges. We have nicer shape. Here, I think I can
still add more volume. The top part can be more round. Then I can add a little bit
like a dot or a spot here. It's separating from this part. Then if I go to next one, I think we can still
have more volume here. It's still different
from the previous frame, but it's like this
chunky nice shape, and this one is more round. Here we have it thinner, then this spot can get smaller. It's a little bit different
from the previous frame. I think this is nice. Then if I go to next one, we can add more volume
I think to this part, so we are in the fourth frame. It's still different
from previous frame, but then we have more volume, and then there is
this small bump Then it's separating
in this part. We can make this one
a little bit smaller. Then maybe the bubble here, it's a little bit bigger. You can experiment
with the shapes, as I mentioned,
depending what you like. Let's check the next one. In this one, maybe let's clean up this part
and then we can push this one out and make
it more pronounced. You're still moving up with all the shapes
that you are creating. Just always check
the previous frame. You can see purple here. It's not the same. This one is a little bit higher. And then there is this bubble. Let's erase this little part. Here we can make it a
little bit thinner. The transition looks nicer. The steam is breaking
off that type of idea. You can play around
really with the shape and maybe almost create a small
character from the steam. That's also a fun idea. I think this is nice. Let's check the next one. All right. I think
here in between, we can add one more. I will just duplicate
this one and adjust it. This one needs to go
a little bit higher, then we can add
more volume here. Reduce the volume here
on the lower part. And also here. We are still moving higher up, and then we will reduce
this bubble or well, it's not a bubble, this piece
of steam or how to call it. This top part basically, this looks like I don't know, kidney or bean shape,
something like that. Then this goes
higher up as well. It's still a little bit
different than the previous one. But it's nice fluid
shape, I think. Yeah. All right.
Then this next one. We can compare to first one. Okay, it's not the
difference, so that's nice. What we can do here, we can maybe add a
little bit of volume in this part and I will delete the top part just to have a more similar
shape to the first one. Okay. So here, maybe we need to add a little bit of this and maybe slide,
something like that. I think they are pretty
similar. That's great. Now we will adjust the look of the steam and we will
do it by deleting the middle part because steam is mostly opaque on the edges and more transparent
in the middle. Let's do that. For that, I will take the soft brush, which you can find
in airbrushing. I will reduce the opacity of the brush and we
will test it out. Erasing softly and you want
to erase only middle part. You need to reduce
the brush size and softly start erasing. Maybe even one. Maybe two, it's better in my case. I will also increase the
opacity of the eraser. Okay. And at the end,
I will go back to one. So I have more control. So something in 1-2 would be the best here based on the size of the steam
that I created here. Okay. But I think this is nice. You can delete bigger part on one side and keep more
on the other side, and then move on to the next one and basically do the same, deleting the middle part. I always do it after I'm
happy with the overall shape, so you don't delete stuff
when you still want to adjust because that will
create back and forth. If you want to adjust something. Here, I'm mostly deleting
the parts in the trunk here areas just to make
it more translucent. The next one. Still adding
the translucency here. I think that's pretty nice because of course,
it's more organic. If you delete one part
more than the other, I think it will
still work nicely. You can really test out
the look that you like. Here, we need to delete part of this top and make these
transitions more translucent. Then the last, we can
make the top translucent. And this part as well. I think that works well. We need to see if
the speed is good for our animation.
We need to play it. I think that's maybe too fast. We need to test stretching
the content pieces, exit the drawing mode, zoom out, and then you can stretch each
of these content pieces. All right. So let's test out how it
looks if we have two frames. Yeah, I think that works well, but maybe we can
add three frames. All right. I think
this speed is much nicer and you can test
out if you want to have it even slower so
you can stretch each of these content pieces again because you can
always test it out, what is the speed
you want to achieve for each of your small
animations in these type of scenes because sometimes you
want it to feel faster or slower depending on
really the atmosphere and the look and feel
that you want to create. I think this one, the speed of the steam rising
here, it's great. So what I can do now, I can group this part, group. Now I can also change
the blending mode. It's even softer, tap
and hold on the group, select blend mode, and you can test out the blend
modes which you like. I think in this case, soft light or maybe even hard light works nicely,
so you can test it out. I think soft light
is pretty nice, but maybe you will not
see it against the rain. So you can change to hard
light and see if you like it. Okay. Of course, you can
also add the opacity, we can reduce the
opacity by adding the filter opacity and you
can reduce it maybe to 80%. Then I will just add
a keyframe here. We have the same opacity. Now you can duplicate
the group and move it also here so you don't
have to animate it again. You can tap create new track. We can copy this where are we? Copy, and I can paste it
here by holding paste, and then I can just move
the same group here, and we will have two different steams
with the same effort. But now, when you look at it, they look the same
way or the speed. What I like to do in this
case, let's stop this. You can move one of the tracks, they are not starting
at the same time. When you test it out,
they move differently. You can move it even more. So they are even more different
when you just look at it. This one, we can just duplicate. Here, this one, I can copy and I can paste here and move it. And I can shorten it
and test it out again. Let's just move this one
next to it. All right. I think this looks great. You created different steam from the coffee kettle
and from the mug. You can play around with how
the steam looks play with the different blending
modes and you can zoom out and see how your
full animation look like. With these two, we need to
still feel the timeline. But I think so far
it looks great. Now let's move on
to the next part.
15. Extras and Exporting: Now we can test our animation. What we have so far, we can zoom out to see
the whole timeline, and I think everything
looks pretty nice. So at this stage,
what I will do, I can also add sound, and then I will show you how you can export your animation. Let's just in here, I can just add new track
and I already downloaded a few sounds from platform where you can
find different sounds, so I can just swipe
up open the folders. Here I have few sounds which
I can add to my animation. And when you are looking for
different sounds and music, make sure that you have a correct license depending where you want to
use your animation, if it is for your client project or to use on social
media or wherever. So here, I think I will
just take the City in, and then I can just
drop it here on the timeline and you
can see it's importing. I can slide this away and
let's check the sound. You can see the sound
was imported here. You can make sure that it
starts at the beginning, and then you can check how
far it goes on your timeline. But usually the sounds are
angered in 30 seconds, so it automatically
fills your timeline. Now we can also test
it out with the sound. I think that's pretty nice. Now when you have
everything said, you can tap on the
name of your movie. Then from the options, you will choose share. Here you can also select
different settings. You can choose different
type of audio. You can tap here to choose
MOV file or MP four. And here you have
even more options. But I will keep it as it is. Here you can also choose the size that
you want to export to. For example, on Instagram, 720 p should be enough, but I always like to
export on higher scale, so I can always scale
it down if I need to. And here we have the video, or you can also select
frames as images. Now when everything is set, you can tap on port, and then you can see that
your video is exporting. And of course, depending on everything what you
edit to your animation, the export might be longer
or shorter in your case. And then when
everything is said, you can choose where
you want to save it and I usually either save it on my iPad or I can directly
airdrop it to my computer, so I can easily share it later on or you can airdrop
it to your phone. All right. That's it. With the export, I
will save the video, and then we are done.
16. How Did it Go?: I hope that you enjoy bringing the illustration to life and had fun exploring the animation
or animated illustration. We want to call it your movie, and I hope that
you have fun while adding movements to
your illustration. And please upload and share
your project with others. I would love to see it. Also the work in progress, if you want in the
project section. If you want to take
your knowledge and skills to the next level, also check out my
other classes about drawing people scenes,
color, and more. There is a variety from begin level to more
advanced levels, and you can just visit my
teacher profile to find them. If you would like me to share
your projects on Instagram, please take me in the
Instagram stories in the post and
post description, so I can help you and your art to be discovered
by more people. Thank you for joining
me in this class. Say creative. Say you and see
you in the next class. Bye.
 Iva Mikles, Illustrator | Top Teacher | Art Side of Life