Transcripts
1. Introduction: Creating dog portraits
is a rewarding way to celebrate a beloved pet's
unique personality and charm. In this class, I will take you through my step by step process for painting a dog portrait using watercolors in Procreate. Hi, I'm Eva Michaels, and I'm full time illustrator. Before we dive in into painting, we will cover essential
preparation steps like choosing references, planning your composition, and deciding how to
stylize your portrait. We will also explore
practice sketches and what elements to include
in the final artwork. Additionally, we will talk
about color palettes to help you decide on the best color combinations for your portrait, ensuring harmony and impact. As a project, you can create one or more pet
portraits and get inspired by the variety of photo references I will be
sharing during the class, or you can use your own dog as your model for
the illustration. And even if you're a beginner and new to procreate,
don't worry. I will take you step by
step through the process. So you can end up with
a lovely pet portrait. So without further ado, let's start and see
you in the class.
2. Preparation: In this lesson, I will guide you through choosing your
photo references, planning your composition,
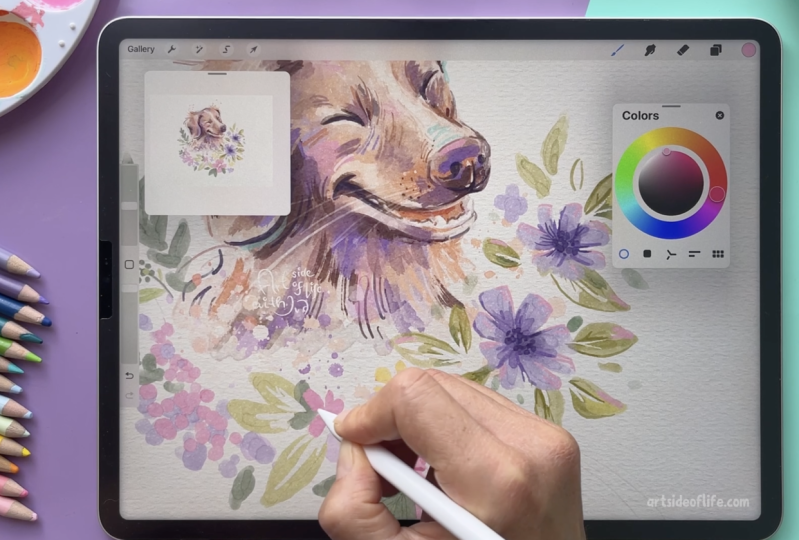
and setting up the canvas. So for this class, I have a collection of
some photo references from some stock sides and pictures from some
of my friends' dogs. So for example, this one, you can see this photo
reference is quite nice because we have the
personality of the pup, and then we have also some
nice elements around. So it's green. We
have some flowers, and the pup is smiling,
which is quite nice. So try to choose high quality photo
reference that clearly shows the dog's
features and personality. So when the photo is
in better quality, you can also see
some reflections in the eye of the dog and
other fur details. So but let's not go to
the details just yet. So try to choose
high quality photo, which you can also crop to
prepare your composition. Now, here is another
photo reference where we don't clearly see all
the features of the dog. So for example, with a reference
from a client like this, you would need to
maybe highlight some shadows and lower the
contrast in this reference. And if you would need to
work with photo like this, one of the main tips is
to crop your reference, so the dog is the main
focus of your portrait. So here we would crop this part out of the portrait so you
can plan the composition better and portrait
or the illustration about the dog because here we are not illustrating
the whole scene. Then here is another
reference where you can see the layout is horizontal in compared to the portrait
ones that we saw before. So try to agree with your
client if the portrait or the illustration
of the dog should be horizontal or in
a portrait layout. And after that, you can
prepare the canvas for your illustration based on these requirements that you
agreed with your client. So here is the canvas. And here, if I go to
the Canvas setting, you can go to the
Canvas information and dimensions and set up your
pixel width and height, or you can set different
sizes in inches, and I recommend higher DPI, so you can work
with more details. So here is a quick summary. So try to choose the
right photo reference. So try to request or find
the right photo reference, which is a high quality
reference that clearly shows the features of the
dog and the personality. Then prepare the
canvas which fits the requirement from the
client or your personal plan, which is the portrait or a landscape version of the
canvas and set up the pixels and the size and the ratio of the canvas from the start so you don't have to
redo things later. Then also play the focus of your illustration
or the portrait, so the dog is in the
center of the attention of the viewer so you don't have too much unnecessary negative
space in the portrait. Alright, now let's
do some sketches.
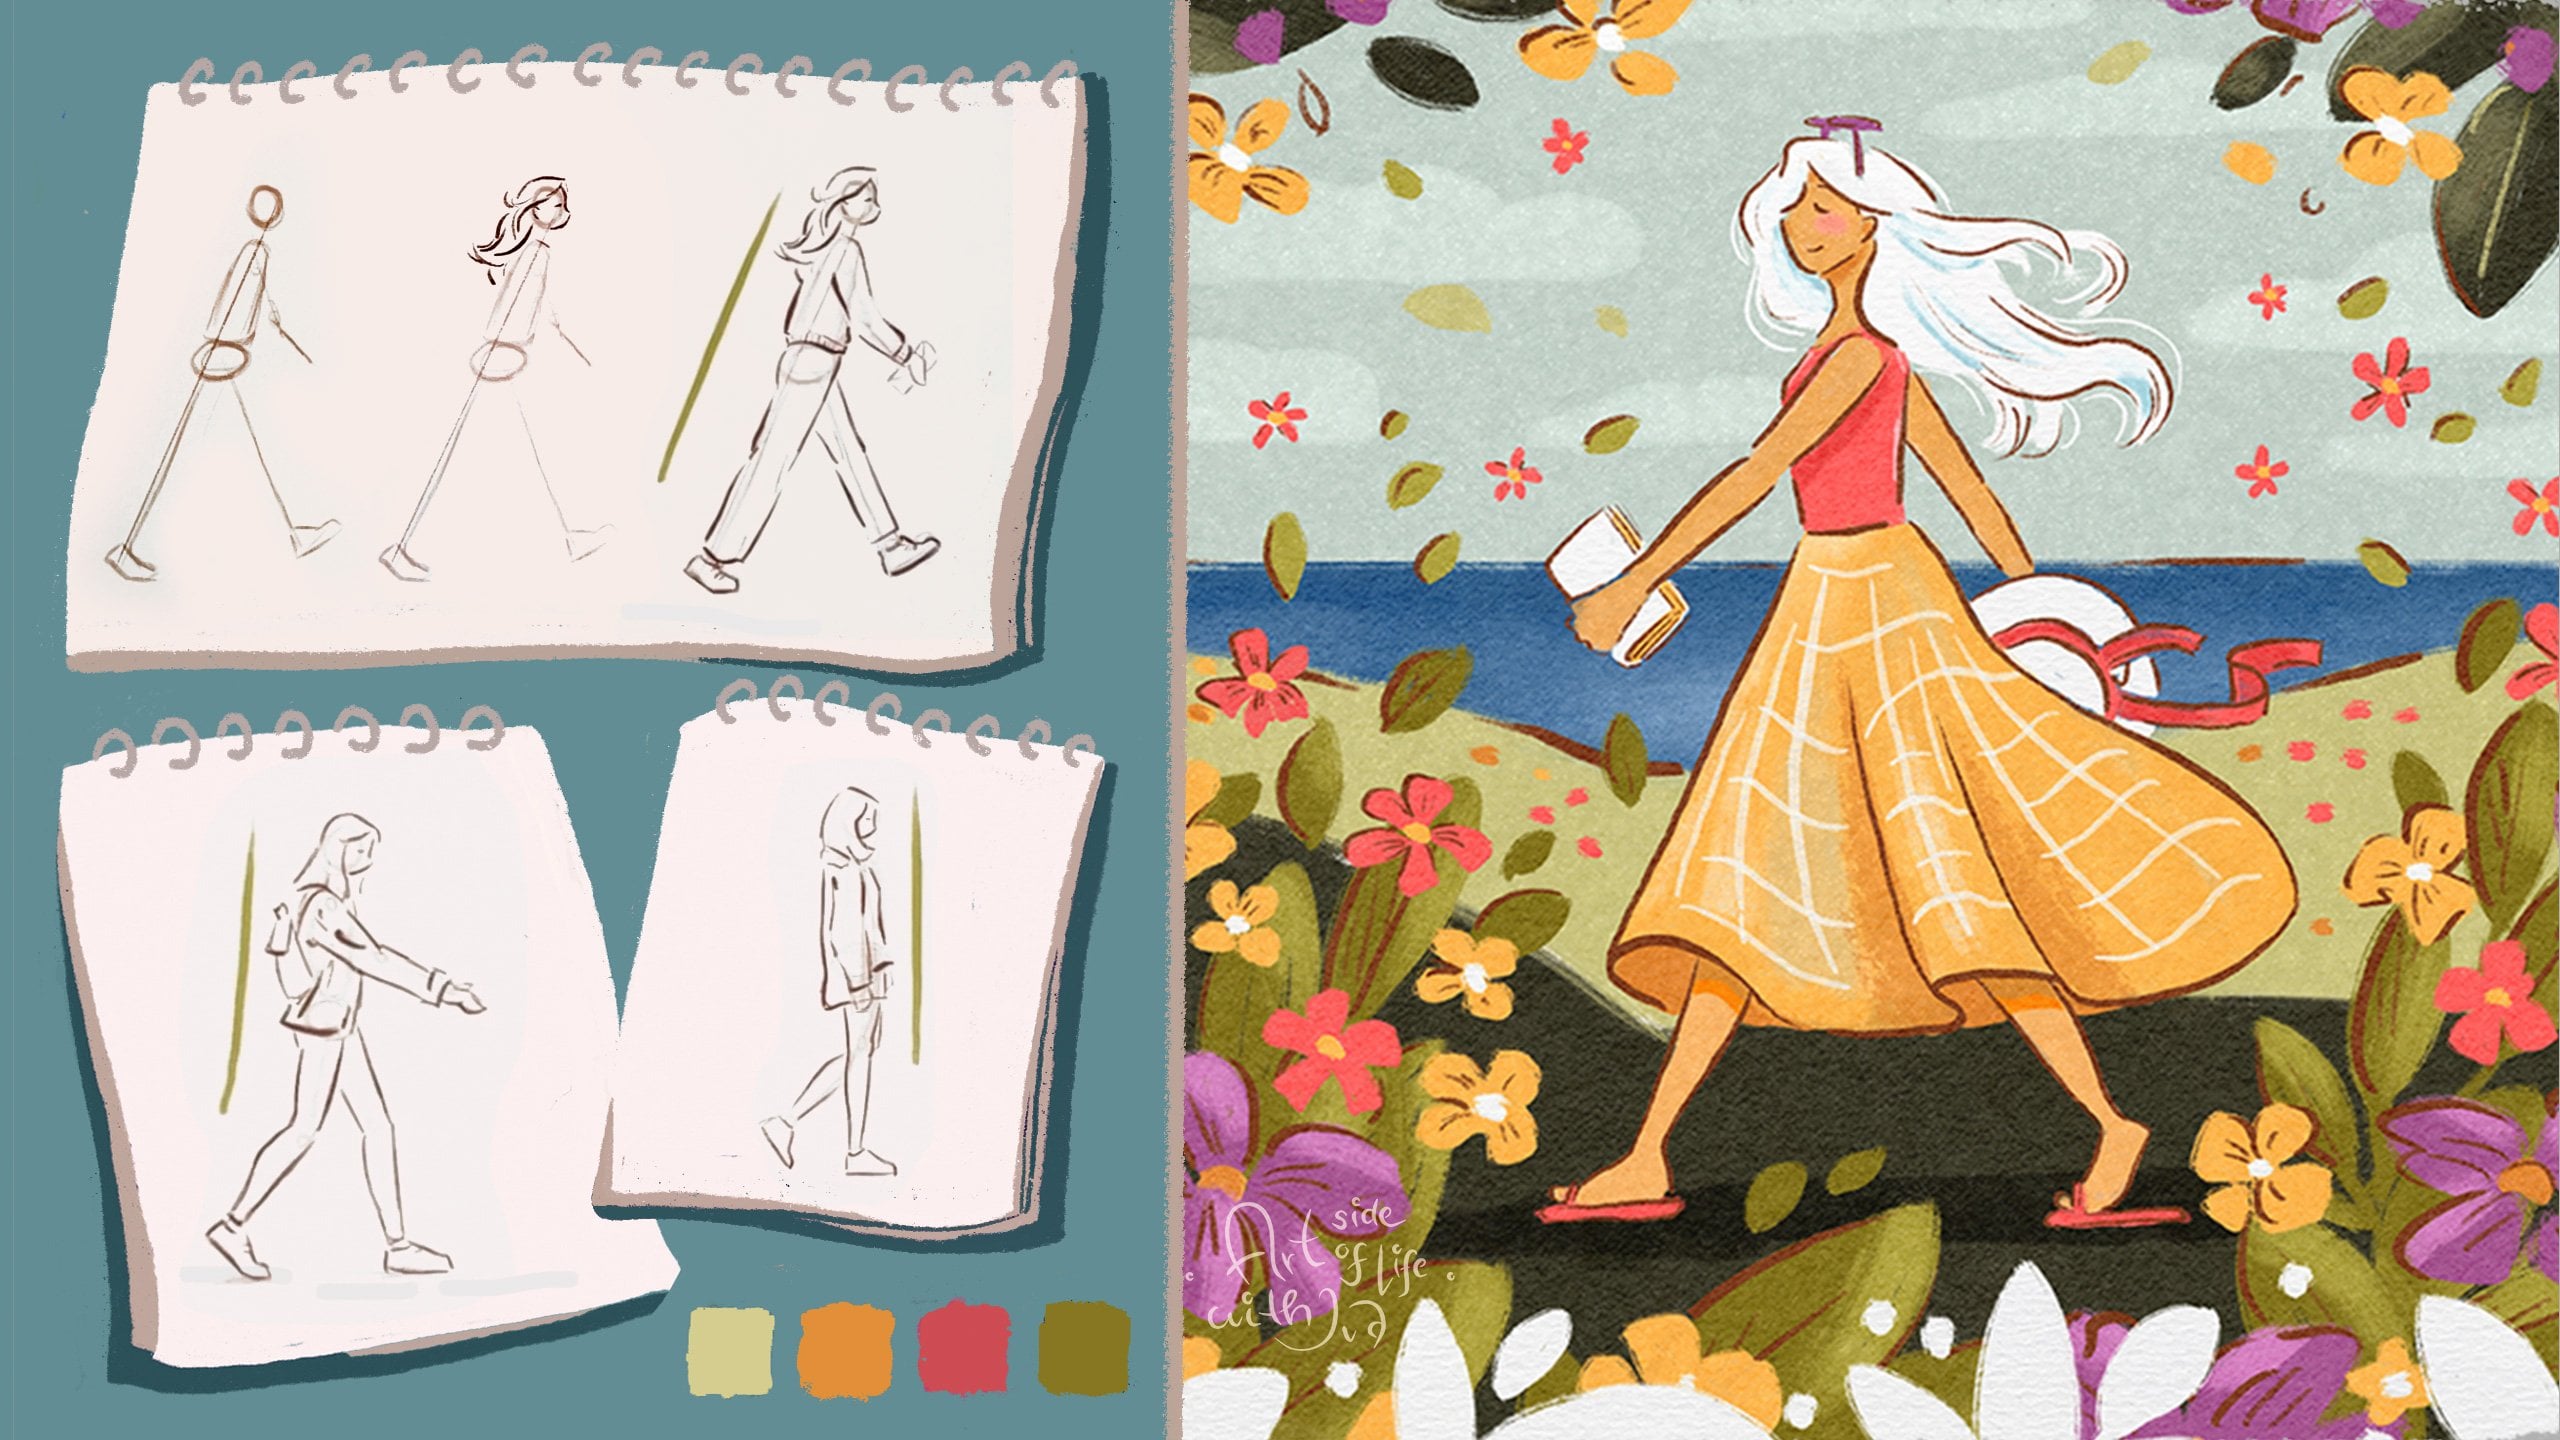
3. Drawing Practice: In this lesson, I will share with you my tips and approach to quick practice
sketches to help you achieve the dog stylization
that you envision. And before you start painting a full
detailed illustration, I always suggest that you
warm up with some sketches. They can be more detailed
or more rough sketches, based on your references, either of the dog
that you are planning to illustrate or maybe
some other dogs to figure out the proportions and stylization of the dog
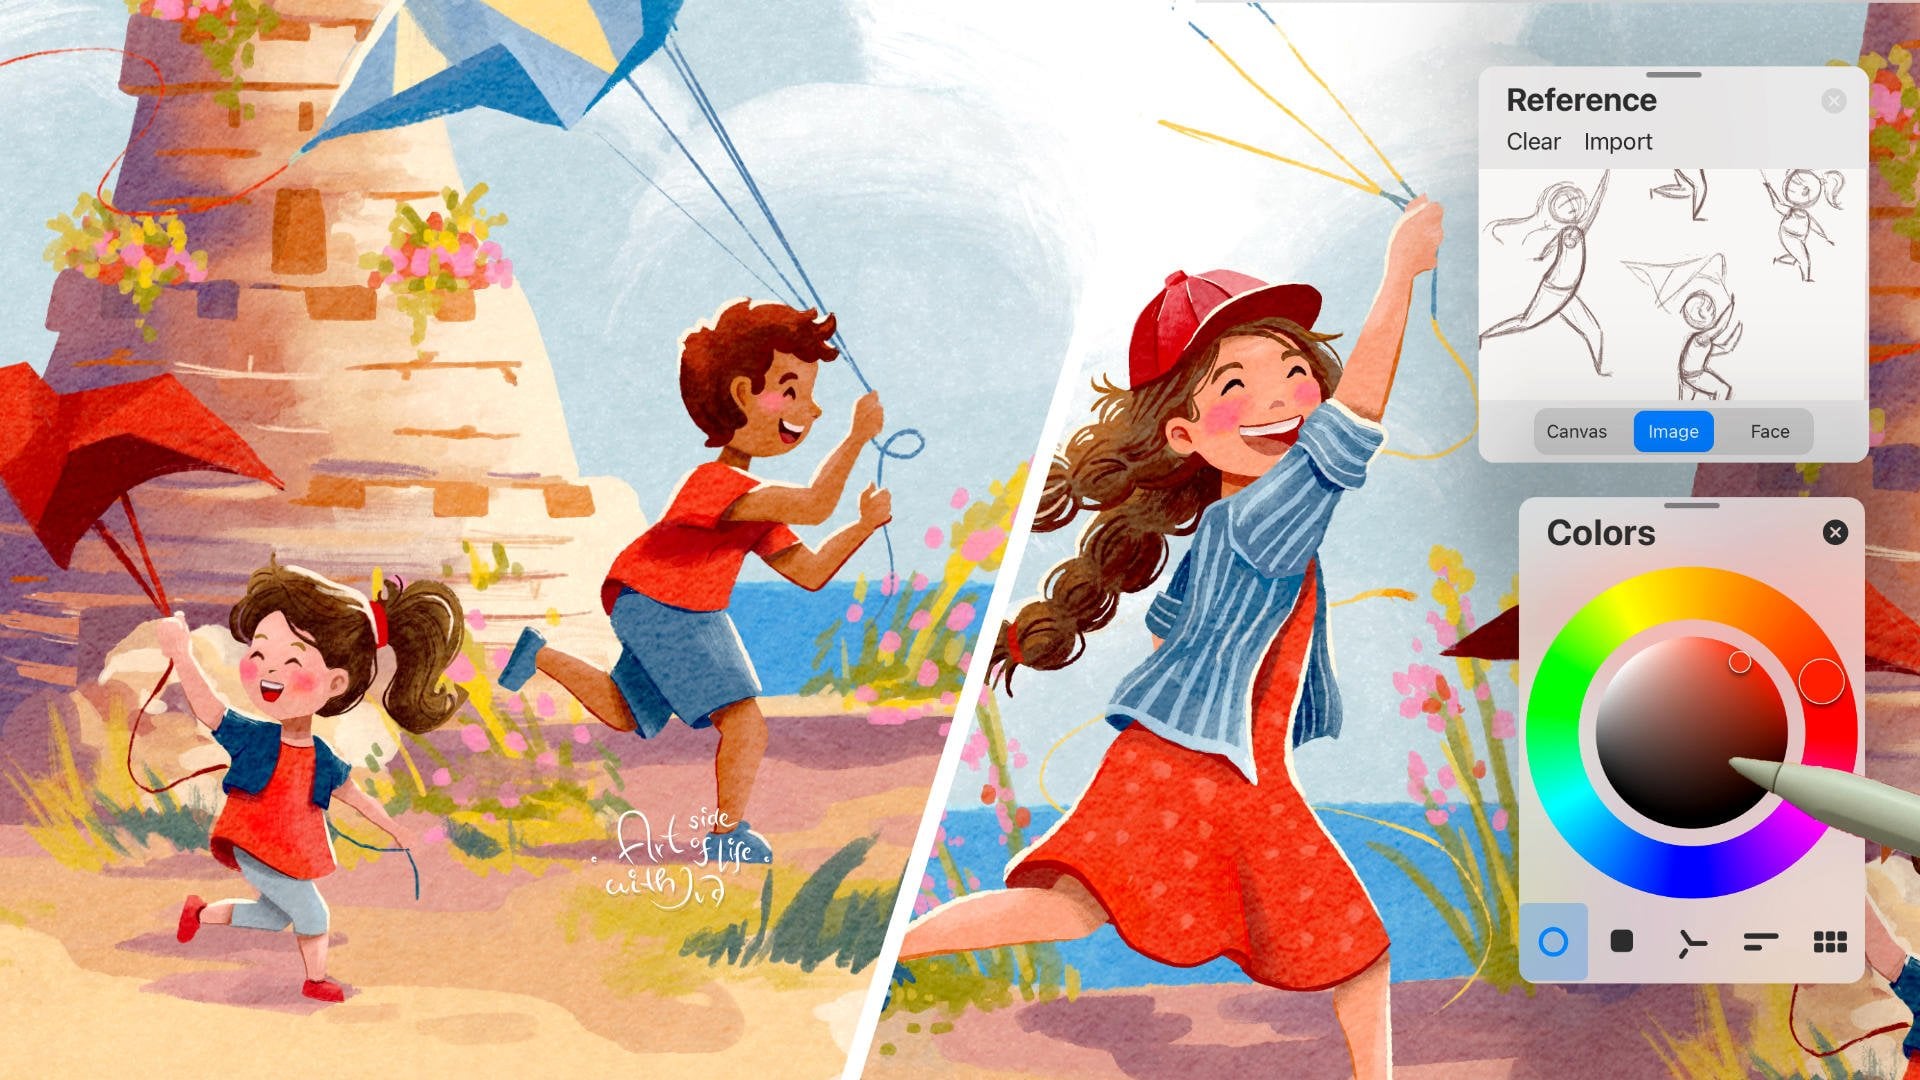
that you want to sketch. So here is one of the sketches
that I created before, and this sketch is not
exactly how this references, but I wanted to
bring a little bit more personality to the dog, so you can see the happiness
of running in the meadow. So let me import another image, so we can do a quick
practice sketch. Alright, so here we
have a labrador, and I will take
some softer brush. You can use other
brush that you like, but I like to combine more softer brush for the
initial sketch and then brush with more hard edges so I can have more
definition on the sketch. So here we brush data, yes, the number eight from
my sketching set, which you can get if you are interested in trying
out new brushes. So here, I would just look at the initial
composition of the dog. As I mentioned, try to
crop the composition, so the dog is center
of the attention, and you can always include
some of the thematic elements. So here, I can make the
brush a little bit bigger, and I'm looking at a dog that it has more triangle
composition. So we have the head, and the rest of the
body is in this part. So as you can see, I'm
starting with a triangle. So don't be afraid to just
sketch with the basic shapes. To practice the first shapes
that you want to use, and then you can
push the proportions if you want to bring
more stylization. So as you can see, I started on the same layer, so I need to cut this out so I can reduce the opacity
of this rough sketch, and then I can bring another layer just to create a little bit
more defined sketch. So here I can zoom in. This will be the nozzle, the mouth of the dog. And as you can see, I'm
really using simple shapes. So placement of the eyes, make sure that they are kind of in the same distance
from the nose. Then we have the chest and the legs are
kind of like hidden. So here you can notice that the legs are actually
placed like this, but to push the proportions, you can try to place them more
close next to each other. If you are not going for
a photorealistic sketch, or the representation
of the dog, because we have, of course,
many different styles, how you can create
these portraits and illustrations
of the animals. So I would reduce
this rough sketch. And now I will
create a new layer, and I will take the brush
with more hard edge, as I mentioned before. And now I can emphasize
some of the shapes. So here, I can make the
chest more pronounced. Then we have those legs here. Make sure that you notice
where the paws are. Even though on this, we don't see that that well. So that's why I was mentioning, try to request maybe
more photos from the dog owner or if you
are drawing your own dog, try to find different photos
so you can practice how the pause look even if you don't see them on
your reference here. So here I made the chest
a little bit too big, so I can remove this part, and then I can just
draw the nose here, and then we have
those nice eyes. So as you can see,
I'm not keeping the same placement as I
had on the rough sketch. And here I can emphasize the head to be a
little bit more flat, even though it's not so flat. So here you can play
with some of the shapes, and I'm planning to
do more detailed and longer video and
basically structured plan on how to do the stylization and simplification because
there are so many aspects which kind of go into developing
your own style and also how to basically stylize and design the shapes
and everything, basically what you draw, right? So anyway, for this part, I'm just practicing to notice the shapes of the dog
that I'm drawing. So here you can see I didn't do exactly the
same proportions. But I think for these type
of practice sketches, you can draw what you see. And the more that you draw, you notice some of the details
that you would change. So here, the same on this one, you can emphasize the shadow. So try to notice where the shadows are on the
reference already when you are doing these practice
sketches because that would help you when you are
doing the colored version. And maybe here we
can add a tail, even though we don't see it. Here I would decide to
exaggerate the nose. Maybe you can make
the nose much bigger. You can also move around some of the elements if you want to adjust some of the proportions. For example, in your sketches, you don't have to
redraw the whole thing, but you can test out a little
bit different proportions just by moving parts
of your illustration. And of course, it's
good to try and practice to draw
things more times. But like this, you
can also notice what would you change
after drawing. All right, so you
can also zoom out and see what works
on your sketches. So don't be afraid to stylize or abstract the dog's
form a little bit more, even though this is pretty close to reality in proportions, but it's not photorealistic interpretation of the reference. So basically, stylization and simplification can range
from slight exaggeration of the features to full almost like a cubist or surrealistic
interpretations depending on your
artistic vision. So try to practice quick sketches to
match the stylization, what you want to achieve, maybe a little bit
bigger nose or unexpected colors or edding, tail or ears in
different positions. Alright, let's move
on to the next part.
4. How to Plan Colors: In this lesson, I will
share with you ideas on how to explore more
color combinations for your pet portraits. So imagine this is a photo reference you
might get from a client, or maybe it's just one that
you have of your own dog. The dog is super cute, but the photo itself might not have very
exciting color palette. So let me show you
how you can get inspired by other
photo references and their color palettes. So I think this is a
great photo reference, and here you can see we
have colored background. You can test out and mark down some of these colors
which might work for your portrait from
photo references without actually drawing
all the details, and it's very tempting
to go to more details. So maybe let me take
a different brush. A little bit bigger
and fluid brush. So you can sample the color
from the canvas, as you know, but if I want to do that here, it doesn't work the same way. So I can still sample
the color from the photo reference with using my finger and tap
and hold function. To explore color combinations for the pet portrait quickly, you can just sample a few colors from
the photo reference. So for example, if I
have very dark values, and then they are
brownish tones, and this pink works quite well
with all of these colors. It works great as
a background tone. Limiting your colors like
this ensures the pet stands out while still harmonizing nicely
with the background. It's a quick and effective
way to make the portrait pop. And using a limited
color palette really brings out the pet
features like their fur, their markings or
their eyes without overcomplicating the portrait
with too many colors. Here you can play around and see how the background
tone would work with all the colors that
you want to use and if they would stand out
against this background. So all of these three colors
would stand out nicely. For example, if you decide to go for just gray background, would blend too much together. Let's try a different
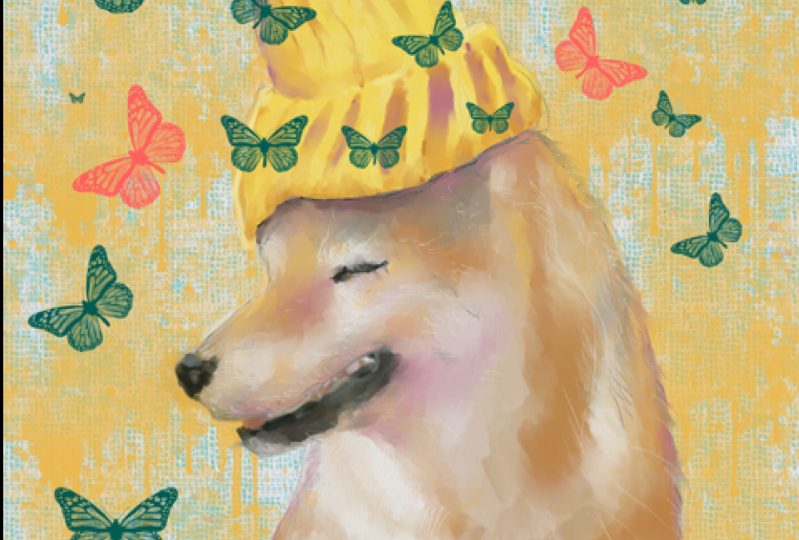
photo reference. I think this is a
great photo reference, and I think this yellow
background works so well. If you are working
with dark colors, and you can create obviously different
shades within the coat of the dog, right? So you can notice that
it's not only black. So we have different
shades of black. So you can use different colors
for these lighter tones, and then we have
obviously white, but it's a little bit of white. So it's not pure white. And you can see it here. So it's more in
these colder tones, and that's why I think this
yellow background works so well because it kind of feels very warm next to this dark dog. And here we have another
example of a dark dog. And we have very dark
shades of black. But then we also have some of
these brownish color tones. And then you can use some
of these off white shades. But overall, it's very dark pop. So here you can test out how the background would
look with more colors. So here you have a little bit of this beige that wouldn't
work great with brown. Here we have, again, like this off pink and some
of these reddish tones. So this red background works
great with the black tones. So here we have a
lot of dark shades. So you can just try the
dark shades next to all of these colors and just see if that works for your portrait. So I think this would
work quite nicely. Let me show you a
different photo reference. Here we have even more
extreme color combinations, so it pops even more. So the dark color is kind of very dominant
in this portrait. We have a little bit of
brown in it as well. And then we have this very saturated red in
combination with white. So it's kind of like a
striking pet portrait. But what I would
suggest if you are painting something
like this here, that you emphasize
actually the eye here because the eye doesn't
have such a high contrast, and the focus is more
here on the shirt. So I would suggest to tone
down some of the contrast here and you bring the attention more to
the face of the dog. Alright, so this
is about planning the colors of your
illustration by just testing the color combination
and what works together before you dive in into painting
the whole illustration. So try the color
combinations that you like, so you don't spend time on something that it doesn't
work or you don't like. And the colors you choose
also lets you set the mood. For example, warm color tones
for a golden retriever, or a bright yellow or red
background for dark fur dogs. Plus, it keeps
everything cohesive, especially if the portrait is going into a specific space. So always consider
limited color palette for your color combinations
in the pet portraits. Alright, let's move
on to the next part.
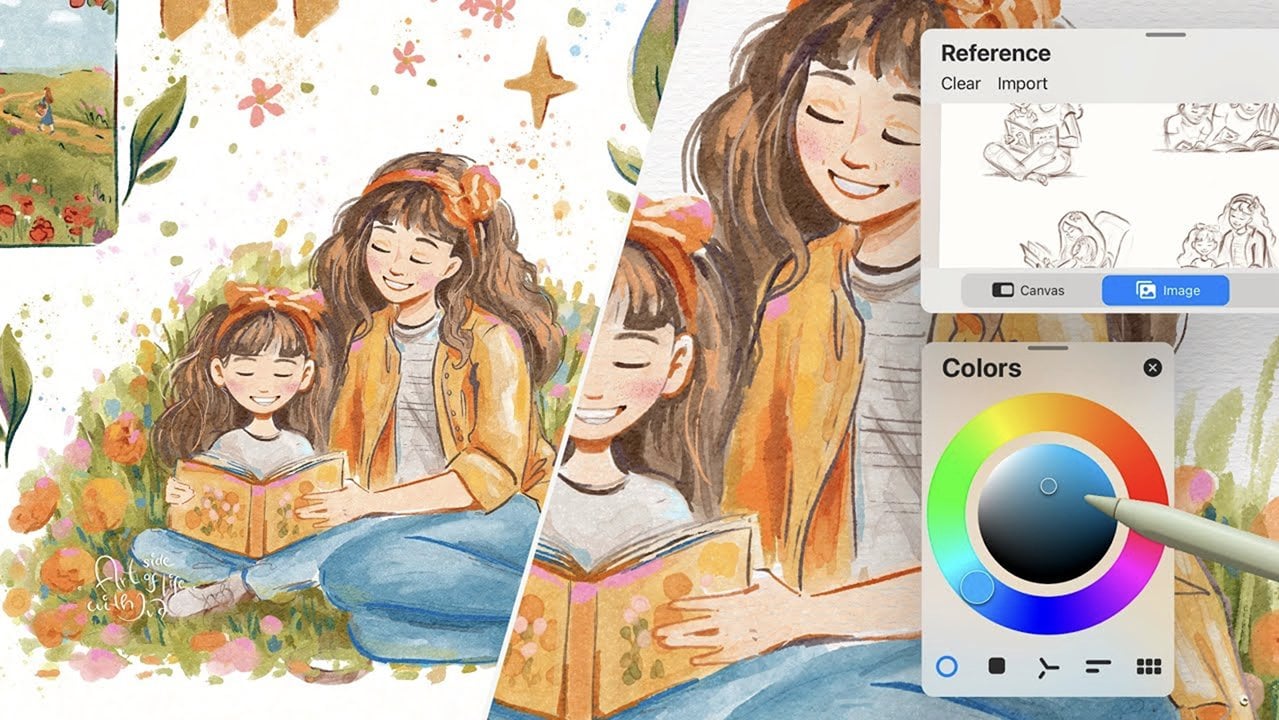
5. Plan the Colors: In this lesson, I will
share with you my tips on creating color palettes
and color combinations. Alright. So here I have a few more examples
of different dogs, and here I was sketching Shiba Inu and I want to point
out some of the colors. So when you're painting
dog portraits, first, I suggest you to select
limited amount of colors. So for example, on this one, we have more brownish tones and just to mark these colors, I would suggest something
which has maybe some texture, so you have more fun
blocking the colors or basically just choose
any brush that you like. And what I wanted to mention
here is that the limitation of this color palette is that I chose these
warmer brown tones. So you can see it's this, like, reddish brown tone, and I combine it with different shades of
these warmer colors. You can see there is not such a huge variety
of colors here, but this is the limitation that I worked with
in this portrait. So it was mostly this brownish, reddish color version
of the Shiba Iuscat. And all of these colors are in the realm of this brownish tone. So you can see this is very
limited color palette, and you can combine it
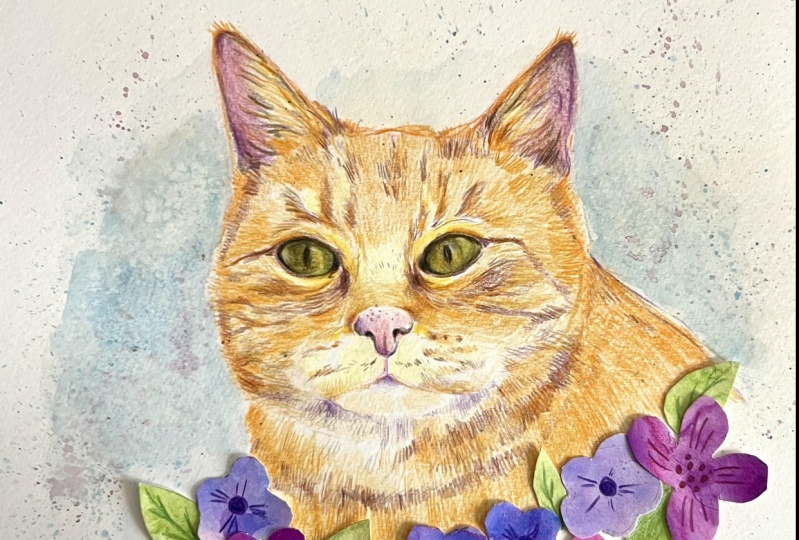
with some other colors. Me import reference
photo so I can show you what I mean and
where I got the inspiration. For example, on this one, you can see these
warm color tones, and these are a little
bit more orange. So if you decide to go
for more orange tones, you can combine it with some of the complimentary colors
on the opposite spectrum, and you can choose
complimentary by tapping here. And you can see that with the orange and
warm color tones, if you go to the other
side of the wheel, you will have these
blue color tones. So you can see on this
photo that is very nicely combined with RDD's
bluish flowers, which is perfect combination with this type of
coat of the dog. So if you want to add elements, you can think about
these color values. So more yellowy colors
you would use here, you can go maybe for
more purple colors on the other side of the wheel and you can also move
these around the wheel. So these sliders will help you establish where are
the complimentary colors. In this case, I quite
like those purply tones, and that doesn't mean that you have to go to these green tones. You can stay in
these warmer colors, and you can still
use complimentary, limited color palette
and more purply or less saturated colors because it still creates this
nice contrast. And here you can see it works very well with
these green tones. But if I choose split
complimentary color, so you will have one on this
side and two on this side, that means you are in these
blue tones and you have the more saturated,
almost turquoise. This would be very bright and you want the
pup to stand out. What I would do or
suggest here is to go to less saturated green tones. If we go back to some
of our colors here, I would choose green, which is less saturated,
as I mentioned. Because already here, this green which is not so saturated, it still takes the
attention from the dog. Here, I would suggest
that you focus all the bright colors on the dog and then for
these other colors, try to make them less saturated. And you can help the
pop to stand out. Next to these orange colors, these color combinations
still work. So try to create limited color palette which fits the best the
dog that you are painting by simplifying
this whole painting process and selection of the colors
by choosing the colors that work well together and bring
the attention to the pop itself because
that's main part of your painting and try to
create this color harmony.
6. Values, Light and Shadow: In this lesson, we will
explore noticing values, light and shadow in your
photo references. All right. And now let's quickly talk
about shadows and light. So basically, try
to see and map out the values which are on
your reference photo. So, for example, as you can see, the coat of the dog
is pretty dark here. So try to notice where are the darkest parts and the lightest parts
on your reference. So basically, you
are mapping out the light and shadow areas on the dog to create
a sense of form, even when you are stylizing. So you will try to
notice that on this dog, I have the darkest parts around the belly because they
are more in the shadow. So it's definitely this part compared to the top
part of the dog. So we have some shadows
under the chin, and then we have the lighter parts kind of
on the top part of the dog. So try to map out some of these colors early
in the process. So you can notice the transitions how you can build the colors within
your illustration. So this is keeping
it very simple from the start to establish
the correct value range, to make the portrait
field more realistic, and then you can also play with more unrealistic colors for the shadows and for the light. But in order to play with
some of the extra colors, you need to establish
the values first. But we will take it step by
step in the painting process. But this is something to
think about to practice or to plan before you go
to more detailed painting. Try to notice the shadow areas and the areas in
light. All right. Let's look at some other
detail that you can think of before diving into more
detailed painting.
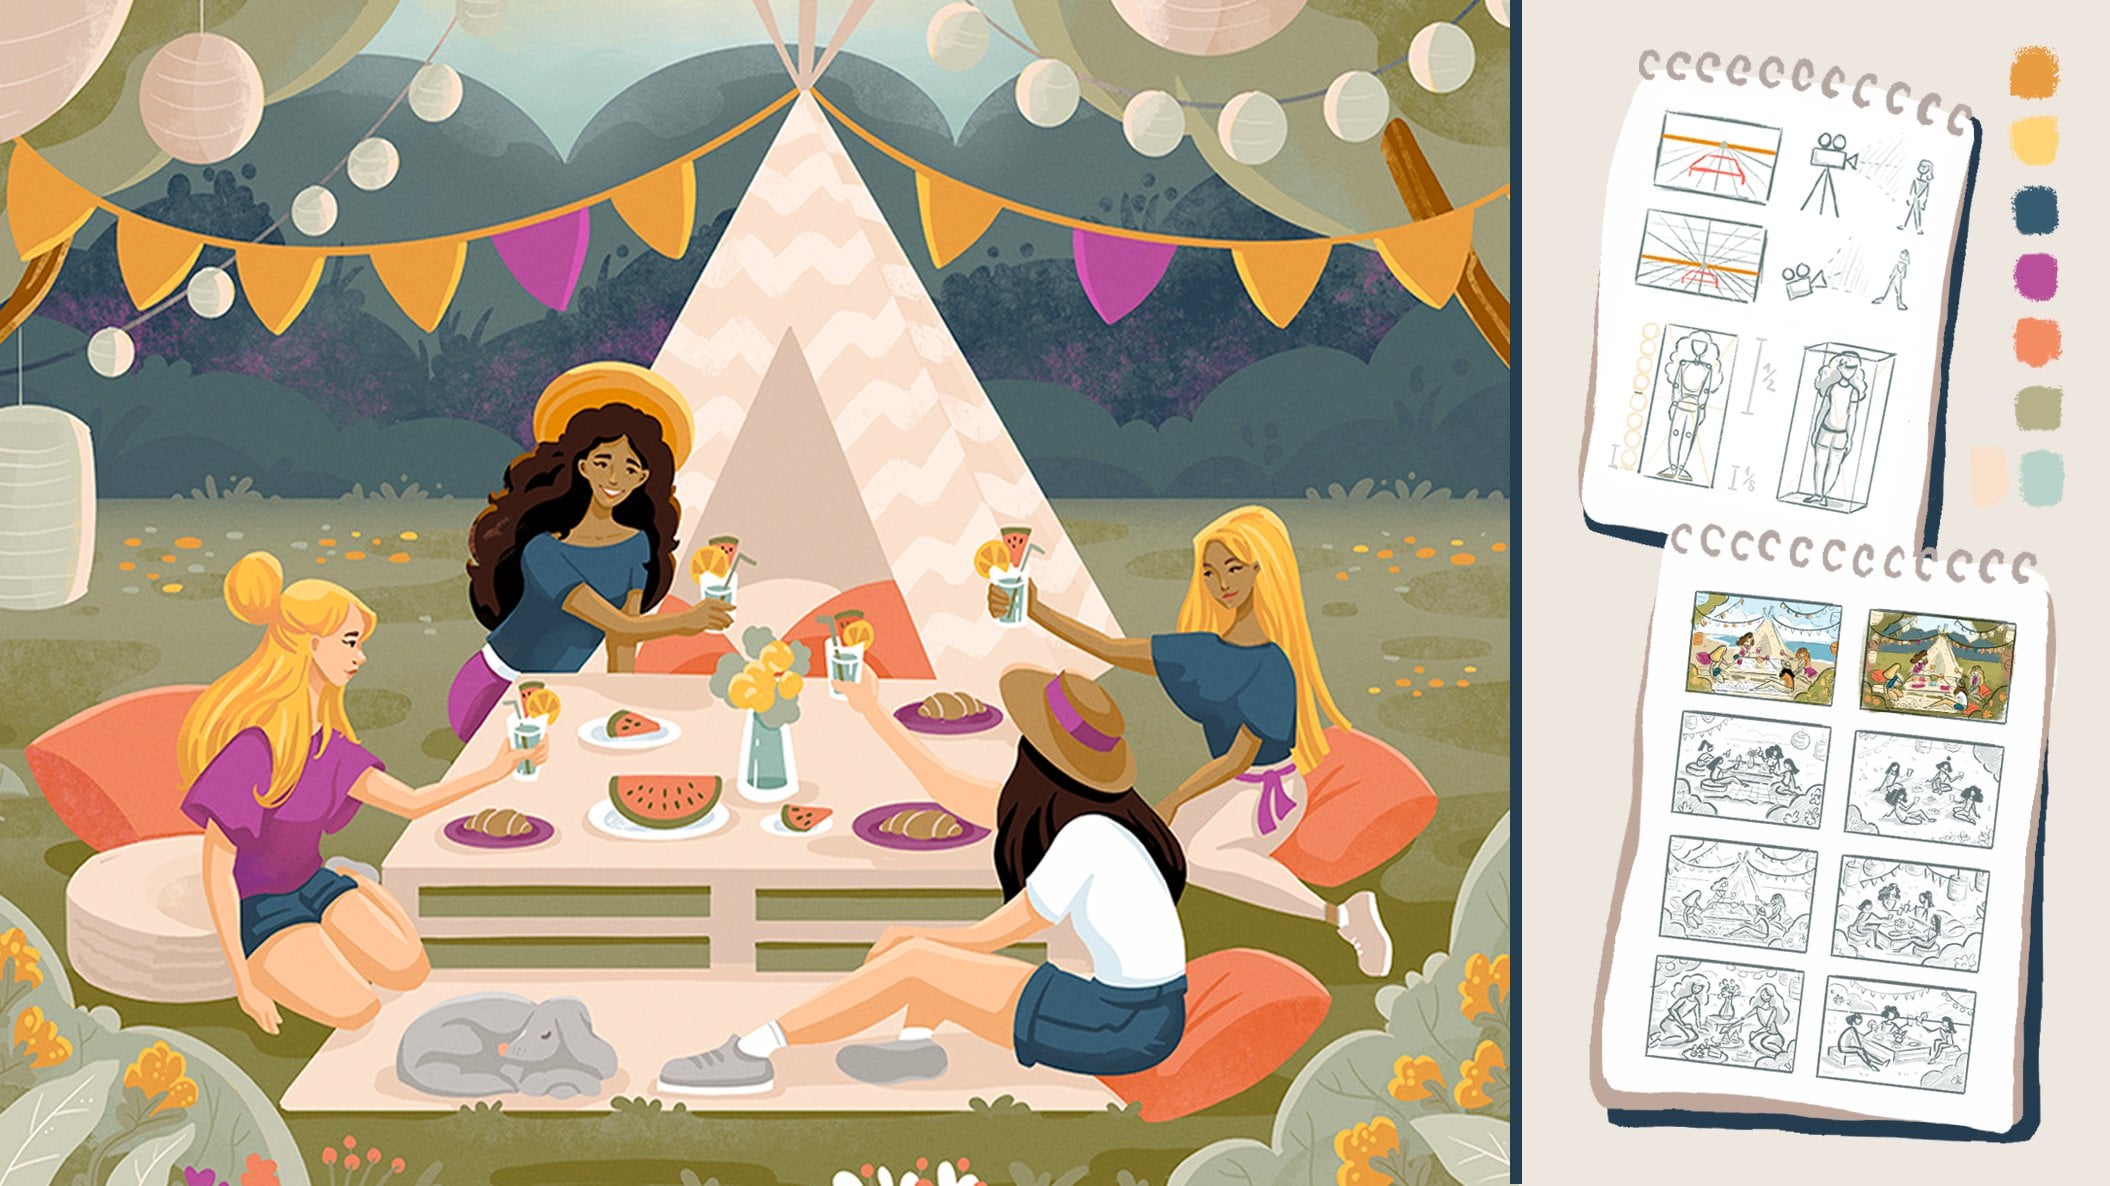
7. Make it More Interesting: And after we talked about some
of the background colors, let's talk about some of
the other elements that you can plan into
your illustration. So one of the elements
that you can add to your pet portraits are the seasonal elements,
for example. So on this reference, you can see these nice pumpkins. So I can include these bigger elements
into the illustration. And I can plan with
the composition which would fit with the
illustration better. So I can add some of these
pumpkins here on the bottom. And just add some of the other details into
the illustration here, you would of course shade
them and add all the details because right now they still
look more like apples, you can just add some of these pumpkin
definition details, but this is still just
very rough sketch. And then of course, you can add some of
the environment into the illustration and see if that works with
your packed portrait. So here, I can paint
under the sketch. So it depends if you are
creating illustration with the outlines or
realistic without outlines. So here I can just quickly
add some color to our pup. So I quickly edit
more color shades. What I also wanted to mention here that you can
add other elements. So for example, these
seasonal elements can be just in the bottom part, but you can also just add maybe falling leaves
if it is maybe autumn. So you can add some of these floating elements
into your portrait. So maybe some of these floating elements are
also covering the portrait, and this can be pretty cute. Maybe you can also have
the dog looking up. You can also maybe add colorful confetti
into your illustration. So if you want to kind of
add celebration, like, very funky portrait, so you can play around with some
of these elements. I can add also some
other type confetti, maybe like these longer ones. You can play around with different shapes that you can add to your
portrait illustration. Then you can also remove
some of these lines and play around with
different values. These are some of the
elements that you can add. So let me quickly create
a summary for you. So think about the background
color early in the process. So try to plan the
background colors or the colors around the dog that you are drawing
or other pet. Work well together to help the animal stand out
in your illustration. Then think about the elements that you can add around the dog. Whether those are seasonal
touches like autumn leaves, maybe pumpkins for the Halloween
time or spring flowers, you can add winter snow which
is falling around the dog or maybe some small details
from a summer beach scene. So try to think, like, what are the seasonal touches, but you can also add some of the personal items like
maybe dog's favorite toy or their favorite blanket or maybe the iconic lease
or a sweater of the dog. Basically, you are adding a
little bit of storytelling. All right. Now let's move
on to the next part.
8. Project Illustration: And in this video, we will begin the process of
your project illustration. And I will walk you through
the entire process, and we will be using
the sausage dog as inspiration for our
project illustration. But I also prepare
two other breeds for more inspiration for
your own pet portrait. So I will start sketching
with simple shapes, and I'm using also references, and using simple
shapes helps you to create accurate
proportions or at least more accurate than just drawing right away and
focusing on details. And of course, this
comes with practice. So more you draw, the less you can focus on simple shapes and find the process for drawing
that fits you the best. Now I reduce the opacity
of the first sketch, and I will just
redefine the shape that I originally sketched
before I start drawing. And if you're wondering, I was sketching with
pencil brush, number two, and sometimes I like to sketch
with number one or eight, so I try to alternate which
sketching brushes I use. Now I reduce the
opacity of the sketch, and now I will
start adding color, and it's tilted
because I want to add more dogs in
the composition. Now I will take the
brush number 18, which is more grainy wash, and I will start building
the basic colors. And you can work with
different opacity of this brush by
layering the color, starting from the lighter and building more layers
to become darker. So I will take a brown color. And I will start filling in the areas based on the sketch, and I am not lifting the
pencil because like that, I can just build more layers. Now after I sketched one layer, I lifted the pencil and now
I will draw another layer. And don't worry, we
will blend it later on. So now the dark spot will
be here in the corner. So I every time lift the pencil and I create something
like a rainbow here. Now I will do the same
on the other side. And on this side, I have the
shadow here on the left, closer to the head, and I'll just build up
the shadow like this. And now I will draw the head. This part will be orange, so I'll just draw the
top part of the face. And I can also cover the ice because unlike
traditional media, we can add the lighter
areas also later on. So you don't have to leave
the white spaces the same way as you would do with
traditional watercolors. But I think it's nice way to
do it as well if you want to play with the traditional feel of creating actual watercolors. Now, this can still
look kind of strange, but don't worry.
We'll fix everything. So now I will create another shape here
of the darker color. And the same goes here
and in the middle here. Then I will add another shape
here and then the nose, and then I will
add another layer for the nose the same way. And now I will fill
the body as well. The legs will be more
that beige orange color. So I am not feeling
those just yet, so I'm keeping that
white for now. And now I will build more of these shapes based
on the shadows. Now I will go to the smudge
tool and from the smudges, I will take one of the textured
smudges, the number 43, and then I will blend in some of these areas on the edges. You see here that the opacity or the strength of the blender tool is a
little bit lower. Now let's take
beige orange color with the same brush number 18, I will fill these
areas around the face. And I will add more layers
to the right side because that's where the shadow on
the face of the dog is. And then I will add some of
that color here on the pose, and now I will blend it as well. But I want to still keep some of the watercolor
feel here as well. So I'm not blending
it completely, but it's already starting
to look quite cute. So let me turn on the reference so we can see
it also from the distance. And now I will take
a different brush. I will take brush number 16, so I can add some details. And I will create those
details on a separate layer, and I will take darker color so I can define these
details easier. And you can leave and paint with this brush with
multiple strokes, and it will help you also blend the colors
a little bit more. And I will also define the eyes more I'm always keeping an eye here on the smaller visual to see
if the shapes are okay. And I'm using kind of
more almond shapes for the eyes and adding
some reflection. And we have the dark
pupil in the eye, and the area around the
eye is also quite dark because we don't see much of the white usually with dog eyes. I will define also
details on the nose. And I will also add the mouth. And now I will go back
to the orange color, and I need to add the
spots above the eyes, and I can just delete parts, and I can delete it with
the brush number 30. And then I can also paint with the brush
number 30 because that one has more opacity
and more rough edge, which is also quite nice. And now I can add
more color here to the side so you can
fill in the shapes. With this more opaque brush after you have the base ready. Now I will go back to
the brush number 16, and I will add more of the shadow areas and
define the pop more. Now I will go to
brush number 30, and I will take a lighter
purple and I will add some nice light purple
hues to the sketch. Because I think it's
quite nice to add more vibrant colors
to these type of concepts because the
dogs are super cute, and I think you can always add some unexpected colors
to your sketches. And now I will
also add some dark brown to the more grayish colors that I had at the beginning, and I'm adding these
colors only to the areas where I had
the darkest values. Now when I'm happy
with more colors, I can blend it together again
with the brush number 43. And I will take the
brush number 16 again, and I will add some
darker areas to emphasize the details
and also the eyes. You can create a new layer, and with the brush number 18, you can do another pass
on the whole body if you feel like that it's still quite light and you want
to build up more color. And you can do it on a
separate layer so you have more control over the
darkness of that layer, so you can kind of
adjust it and reduce the opacity if you feel
like it's maybe too dark. So now I will reduce the
opacity a little bit and I will merge the layer and
on a separate layer, I will take the watercolor
splitter brushes, and I quite like the
brush number five, and I will take one of
the colors on the canvas, and I'll just add few splitters. So maybe smaller ones, and it depends on your pressure. So the splatters
adjust so you can tap or you can hold and then
create more splitters. And that's why you can do
them on a separate layer. So you can always adjust
and go back if you want to have more subtle look or more stronger and
bigger splatters. And I will do one more layer
with details in the eyes. So I will go back to the
watercolors and brush number 16, and I will take white color, and I will create
highlights in the eyes. And I will lighten some areas
with a light purple color. So around the eyes, and I will take the
brush number 11, and I will add a few details and approximately with a
brush size like eight. And then I can add
also the whiskers. Which I think they add
quite nice detail. Then you have them
on a separate layer, so you can adjust the
opacity if you want to. And I can also add few
little like hair strands, so the fur is kind of
like sticking out. Alright, I think
this is pretty cute, and now I will add some flowers and some other dogs using
the same technique. B Right. And at the end, I
edit some leaves, some flowers, and on
a separate layer, I edit few splitters with a
watercolor splatter brush as just last detail for fun
and to fill the composition.
9. Round Composition: Alright, so as you saw, I had the composition
with three pups. So that's one of the
examples how you can combine more dogs
into one composition, maybe for one client, if they have three dogs. If you don't want to do
the traditional three dogs sitting next to each other. So this is a little
bit more creative or artistic or whatever
word you want to use. And now I want to show you
how you can rearrange some of these flowers because as we look at some of
the references, we had this reference before. So this is also duck
tallingRtriever, and it's in a very nice pose. So you would be
able also to create such a beautiful scene with
this pose exactly as it is. But as we can create different
compositions, why not? So here I'm selecting two layers with the
flowers and the leaves. I can keep them
separate like this. Then I can use the
selection tool, and then I can just move some of these flowers closer to the dog. So kind of frame the
dog with nice flowers. I can move them a
little bit lower. And then in this case, I can maybe even hide some of these flowers
and the splitters. So I can keep two of
them as a reference. And I think this would
be quite enough, so I can bring it forward. So I think this is quite nice, just to work as a composition. And then I can add some of
the smaller flowers just around so we can have some
of the flowers here as well. These would be a
little bit bigger. Let's make them slightly larger and then we can
add some of these leaves. The composition can work
here as well like this. So here, I think we can add another flower and you can try
a different color as well. So maybe some of these smaller flowers in different color can
work quite well. And then you can combine. So we can add maybe
some ferns here, keeping the illustration
quite loose and try to alternate the elements
so they are not the same. So for example, here, I can see that the composition
would be a little bit nicer if I move some of the
elements a little bit lower, so we can balance the
composition like this. We have a round
composition here. And as I said, you can do all of these in the sketching phase. So you don't have to
rearrange elements like this. But if you prefer playing
directly with color, this is also quite fun, I think. So you can try to create
different elements like these. So you can find references for foliage and make
these fun details. So here I can also add different details with
a more bristly brush. For example, on the leaves, So trying to add
different details. So we have some of
the lines and some of the other detailing
brushes that you can use. So for example, here
for the middle part, I can add some of the rougher brush strokes
just to add the definition. But you always need to
check so this doesn't take too much attention from the dog that you have
in the illustration. So I think here there is
not too much contrast, so I think that's
still quite right. Here, maybe I can add
actually yellow flour, which kind of
complements the coat. So it will be quite similar, but maybe not exactly the same. Now, when I tested this color, I think a little bit
brighter yellow. It's better in this composition. But I don't want to add
too much complexity. So I'm making these
yellow flowers smaller so they don't take too much
attention from the dog. So we can add some of
the purple ones just to repeat those colors
within our composition. So I'm always looking into this smaller version if
everything works together. So now I will just add a few more details and move things around and
see how they work. And as I mentioned before, you can plan the composition
and placement of some of these elements way ahead
in the sketching stage, or if you prefer playing with colors and shapes to figure
out the composition, you can use this approach. So I will catch up
with you in a second. When I finish adding more flowers and moving
around some of these details. All right. So I will call this
illustration done, and I moved around some of the flowers in the
composition, as you can see, and I think some of the
bigger flowers work best in this placement because the face of the dog is tilted this way. So you can test out
different placement of bigger and smaller flowers depending how the face of
the dog is positioned. So for example, when it's
looking towards you, you can try placing maybe one bigger flower here
and one smaller here. Or kind of creating
this curve form of flowers or just test out
where it works the best. So and then there is the fun
part when you get to see the whole portrait finished and you are happy
with everything. And then you send the finished
portrait to your customer, and you ask for the approval
from your customer. And then maybe you can implement some final tweaks depending how you agreed with
your customer, how many feedback loops
you want to include. For example, you can agree on a feedback loop when
you send the sketch, and then you can
test out some of these tweaks and loops later on. So I hope that you
enjoyed this process, and I really like how the flowers and
colors work together. It's very vibrant and
spring fill portrait. And like this, you can test out the different looks of the portraits that you
want to implement. So maybe you kind of work more with striking colors
and striking background. And in that case, maybe you want to tone down some of the
colors of the flowers. But because I have
very light background, all of these fresh colors
work well together. So it really depends on
the color combination, the pose of the dog, and the details that you plan
in your portrait paintings. So it's always fun
to create based on the personality of the dog and all of that that
you can implement. So I hope that you really
enjoyed creating your portrait. And if you create
different portraits inspired by this class, I would love to see them. So please share them as
a project or tag me on the social media so I can share your projects with others.
 Iva Mikles, Illustrator | Top Teacher | Art Side of Life