Transcripts
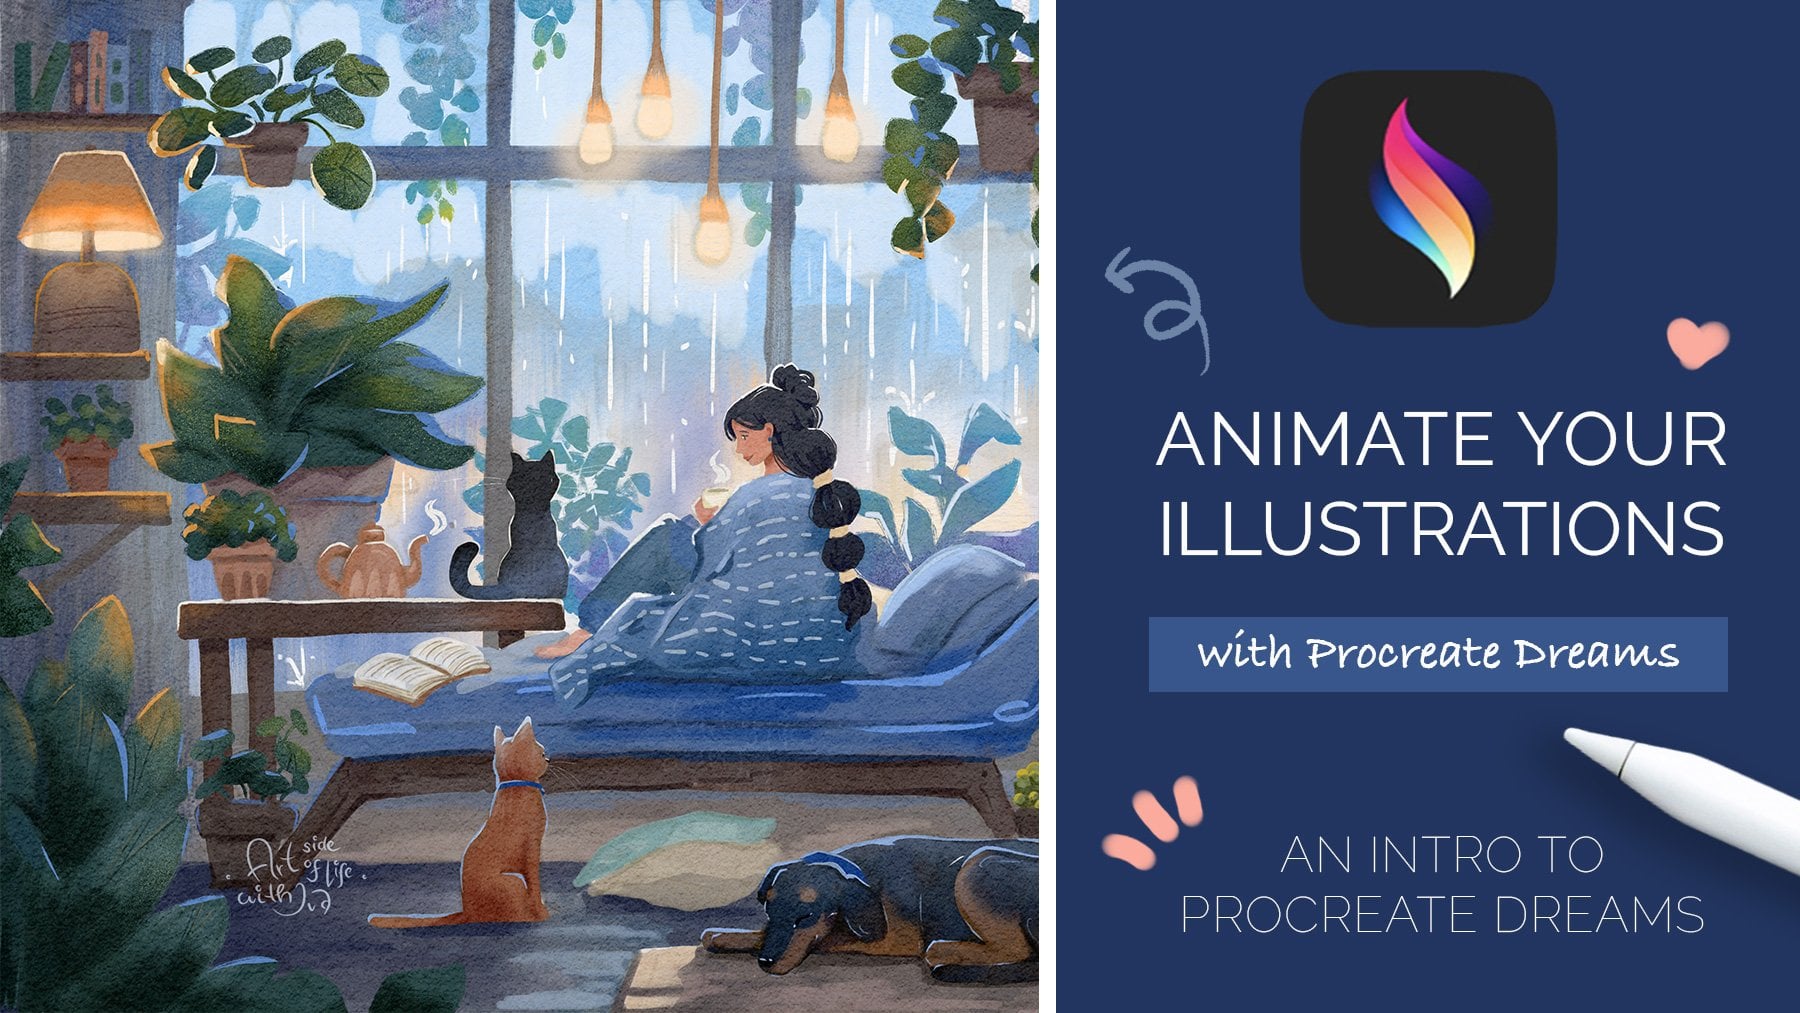
1. Intro: Hey there, and welcome
to another class. In this class, we'll
explore Procreate dreams. As someone who has spent quite a bit of time
working with procreate, I think this app could be revolutionary for both
digital art and animation. Hi, I'm Era and I'm full time Illustrator
based in Central Europe. While working on a variety
of client projects, animation was often
a part of projects, so knowing how to bring life to visuals using animation
will give you a lot of bonus points and opportunities while working
on variety of projects. During this class, we'll
start off with simple shapes, meaning I will also show you how to prepare
shapes and parts of the illustration file for animation from the
existing portrait artwork. By the end of this class, you will add life to a lush colorful portrait using variety of
animation techniques. You can use the
portrait illustration from my previous class for this animation or you can use your own
portrait illustration. Also, I will show you how
you can use keyframes and easing to add fun
bounds to your animation. During this class, we'll
talk about variety of the cool procreate
dreams features and its time line functionality. Which will allow you
to separate components into parts and animate
them dynamically. Giving you a very hands
on approach to animation. I will also show you a
lot of cool shortcuts, gestures, and exciting features. We will also look at
how you can use layers, which will allow
you to work a lot with the details of
each animation track. In addition to that,
I will show you how you can use key
framing and perform feature and the keyframing
will help you to create smooth and seamless animations without needing to redraw
scenes constantly. Moreover, I will share
with you how you can use onion skin while drawing
animation frame by frame. And we will go through
all these steps while creating a fun portrait
animation project. So I hope when you finish
this class and this project, you will feel like, oh, I can't wait to share
my project with others. And when you're sharing
it on Instagram, please make sure that you
take me in the image, not only in the description, because that way I can see your illustration and maybe you will see it in one
of the next videos. If you don't know yet, you can find even more drawing tutorials and classes they are procreate
and other tutorials. I have more than
30 classes there, there is a variety from begin level to more
advanced levels. You can also find different
topics without further ado. Let's start and see
you in the class.
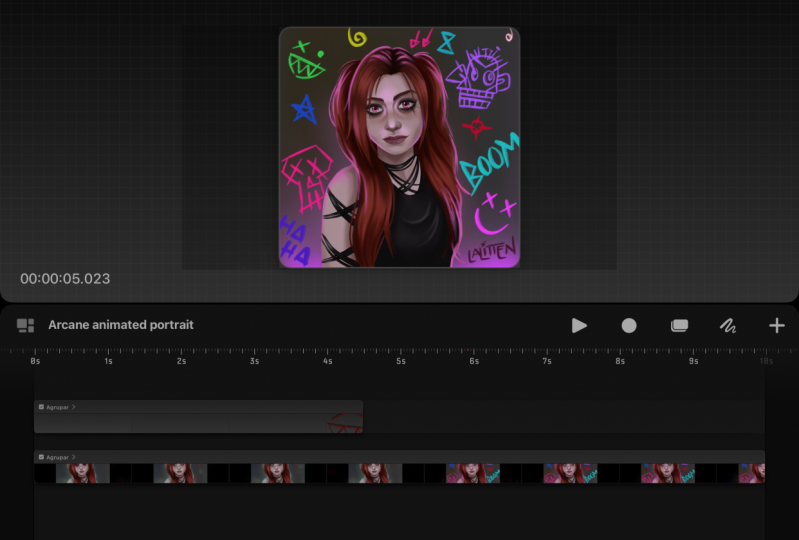
2. Prepping the Objects - Pt. 1: All right, let's start with preparing the artwork
for the animation. I thought we can use one of the artworks from
previous classes. If you watch that class, you have already
created illustration. Maybe like this or
something similar. You would have a
different portrait. But this illustration wasn't
created for animation. Specifically, we need
to adjust and prepare the layers for the animation
in procreate dreams. But you can adjust your
illustration in other software, it doesn't have to be procreate. I will show you also how you can import images in
procreate dreams. But one of the
great things about procreate dreams is that
you can actually import the whole procreate file
and use the layers how you have them set up in the
procreate file right away. That's what we are going to do. Let's start preparing this file or other portrait
file that you have. What I want to do
in this one is to animate these
florals separately. Then we will have a
little bit of animation with the eyes we need the
pupils to have separate. Then we also need to have
the eyelid separate. Maybe we can add some animation to the hair and the earrings. Let's prepare the
layers for animation. As you can see in this file, we separated the layers
into foreground, character, and the background. For our animation, we need to separate these flowers
into clusters. If you have a different
illustration, you would separate some of
the greenery into clusters. Because I imagine
that these type of clusters of flowers would
go from small to big. We can merge all of
these together and we need to merge them
into like flatten groups, which will help us
basically in animation, and it will make
our life easier. Another thing is to
rename the layers, because these layers
will keep the same name. Also in procreate dreams, let's first merge and
prepare the flower layers. Here I have all these
layers separated by color. The flowers are created on
separate layers like that. What I can do here
is just to click on the layer and flatten here. I will just rename it, let me scratch that.
We will rename it. After we select these flowers, go to the selection tool and I will select
them one by one. We have this one here, swipe with three
fingers cut and paste. Let's see. All right, this can be one group, we don't need to separate these. I think that's fine. Then
let's go to this layer. Go to selection tool, again, draw around the flower. You can separate
these three together. I think this is
enough. Let's do that. Let's see, maybe I can
group these together. We want to have the
same amount of flowers. We have 1234. And this is 1234, okay. I think that can
work. It's even. Let's wipe down, cut and paste. This will be to rename Scratch and he
doesn't want to do it. Okay, so left, okay, this one rename left. Then let's go here.
Cut and paste. Okay, so you get the idea. So let's separate all of them. So this one, cut and paste. Cut and paste again,
Rename bottom. Oops. Oh, okay, that's helpful. It created the name by itself. Nice. Okay, and then we have this pink one, cut and paste. Okay, and then
what we have left. So here we have two. So this will be, of course, you can decide how many clusters of flowers you want to have, basically how many small
animations you want to create. Now, the next one. Did we rename this one? We didn't rename this one. This is F. Okay, let's that. Okay. I think now we are. Okay. This one already are quite long, so I think that's fine. Okay, now let's go
to the character. We have this loose hair, we can call it strands as well. Here maybe. Okay, then we have face. Let's look at this one. We need the pupils separately. Name this one. I would like to have the pupils moving maybe from side to side. We need the white of the
eye separately as well. These parts can be together, but basically the mouth
needs to go lower. We can merge the mouth
with the rest of the face. We don't need a sketch.
I will delete this one. Don't forget to copy
the whole canvas if you want to use the same
illustration later on. Okay, this is the whole phase. We can merge, okay,
the accessories. I will keep separate, but this part here
and blue highlights, I can merge as well. From here, what I need to do is to check the pupils,
and as you can see, it's not very clean because
of the lines on top. Let's go to brushes
that you can take. Any brush you used before, I will just use a pencil brush and I will fill in the pupils. We have like full circles, we can move them around. Make the brush a
little bit smaller. Try to make sure that the pupils end up
with the same size, so we don't have one eye
bigger than the other. The pupil she's quite like. Even of course, you can use the symmetry
tool for this one, but I think in this case
maybe is not necessary here. I need to delete some
leftover color here. Maybe make it clean here. I think they're fine. All right, we have pupils, we have face. I need to rename this. So face. Okay, then we have the, there is some leftover here, Maybe it's from this one. So we need to remove the alphalog and
delete the leftover. All right, so let's zoom out and see what else do
we need to adjust.
3. Prepping the Objects - Pt. 2: Okay, so now we have the facial features
and pupils separately. The pupils work fine. Now we have the
white of the eye. So we can move the pupils behind the eyelids,
which are here. Maybe we can call it actually
the eyelids or eyelashes. So we know what is what. Okay. Maybe I'll just
do it like this. Okay? So we have
eyelashes and face. Okay, so that's fine.
But what we need to do, we need to create like
eyelids or basically like a mask where the
pupils would move. Because now if I just
move the pupils lower, they are on top of the
skin, which looks strange, so they kind of go
out of your eye. We have to go here with
the full face and shirt. We need to rename this. This is face hoops. Okay? Like this, Perfect. I will disable the alphaog. Now I can zoom in and create a selection
somewhere around eye. We have enough of the skin color here.
This should be enough. Now I will, first of all, maybe I can create a
feather selection. Just a little bit. Two,
I think it's good. Here is the feather and
amount 2% Now I will slide, swipe down and duplicate. Now we have this
mask. We can move it. We need to have it under the eyelashes and
above the pupils. But right now we
don't see the pupils. You can either just
erase it like this, but just to make
our life easier, you can click on the layer
with the white of the eye. Click on the icon
and go to Select. Now you can cut. First of all, you need to
be on a correct layer. Let's go to this layer. Let's load our selection by
holding the selection tool. And you can see it's the
selection that we wanted, but it deleted our
white from the eye. Actually, let's go back. Let's double check. Okay,
it's still not there. Okay, now it's there.
Let's do it again. Select now go to
the correct layer, which is this one,
the Batman mask. Now, what we can do is
swipe down and cut. Now we can use the pupils,
the movement easier. As you can see, they're moving behind the
skin, which is great. I can see there is
some leftover here. Let's zoom in, and I will
delete this leftover. Okay, I think this works. This is nice. Perfect.
The eyes are ready. This is the mask, we can call it eyelids,
pupils, face, shirt. I can move maybe these
elements together. Okay, now they are in the same group from
the accessories. Let's separate the hair
band, cut and paste. We can call it just bow. Okay, and from these, let's separate the
earrings, cut and paste. Okay, you name, okay, we have earing, left earring right now, the background we
have the light green, dark green, and purple. These leaves I think work
separately like this. But what I found out is that
you need a separate layer. If you want to keep
the same color, I will just create new layer. I will move it from the colors. This is the color palette
that I had for this. I'll just select this color. I'll just drop it to the layer and you can see
it just appears here. All right, if you're
not using procreate, you can separate each
layer as an image. In procreate you can
just tap and hold on the thick icon to
separate one of the layers. And then you will disable the background and you
will save it as PNG. Now if we have all
our layers here, let's just go back and unhide all the layers by holding onto
the thick button. Go to the ranch icon
and go to Share, Procreate, and save procreate
file into your files. Here, I will just
save it to files. As you can see, I already
recently used procreate folder. I can save this as a floral
portrait for animation. This will be my version four. That's it. We have
the file ready.
4. Animation File in Procreate Dreams: Okay, now let's open the
Procreate Dreams app. When you open the app, you will see the files and animations that come
with the app already. I have these three
in the app preview. Maybe with the future updates, you will see some
other animations when you here in this area. You can in on the files so
you can see them better. You can also select some of
these and create the group. Maybe I can create a group with these two that
I was trying out, the parallax animation when the girl goes on the
path down the hill. This can be maybe a next class, but what I wanted to show you here is that you can
create a folder. You can call the folder
something, maybe bike. All right, And then
you can click down. We have the folder
with those animations. You can see them here
and you can go back. You can also select,
as you can see, you can delete or duplicate the animation if you want to keep something and then adjust. It works similar
like in procreate. If you want to create big
changes to one animation, maybe you want to
duplicate it beforehand. Now I will disable
the selection. This was my test. As you can see, when I was
preparing the animation, planning for you guys to bring the best ideas that I
wanted to share with you. As you can see, as I mentioned, we have all the files here. Now what I can do is to
click on the plus sign. We will create white
screen canvas for us. Basically, we are
creating new movie. When you swipe up, you can see the other options. Obviously this is
for social media. You can create also Square, which would fit
our illustration. In this case too, we
have the screen size. As I mentioned, this is
the one I will choose. We are not going to draw from
scratch because we already have the illustration
from procreate here. We can just click on empty. Now I can go here. As you can see, we have all the different icons here
which we will be using. But if you want to go back, you can click on
these four squares. You are back into your
preview of all the movies. Now I will click here, click on the plus sign. If you were working with different drawing
software, not procreate, you can import all
the layers into tracks one by one using
the photo option. Or you can also import a different video if you want
to draw on top of a video. You can also animate text
or work with tracks. Here, you can add tracks. But what we will do here, we will go to files. We will go to your recent folder and choose
the file that you save. The last which in my case was new floral portrait and
its procreate file. Now I will select the file, then I can open it. Wait until it imports
into our files. Now, tap on the group and hold. All of these options
will appear for you. You can rename the group. You can change the blending mode if you work with
different tracks. But in our case, because we
imported the procreate file, we want to convert all
the layers to tracks. We can animate them. Click on that. Now you can
see the name change to group. When you click on the arrow, you can see that all our tracks are now as separate layers. You can also see this red
highlight around our tracks, that means that it's selected. There is a useful shortcut
with three fingers and you can scrap down or up to zoom in. Everything is like
zoomed out to zoom in, You go up with two fingers, like with procreate, you can
also zoom out and zoom in. Now I can click on
the whole group. Just one tap. You can see we have
here the totals. So we can adjust the whole group to fit
and fill the canvas. We are not animating
anything and we are adjusting the whole file. Now as you can see,
the handles disappear. If you want to have them again, can just step and you can
see the handles are back. When you click on these
three dots here you have the flip horizontal and flip
vertical and added anchor. Just remember here if you
are looking for it now, if you click on the
name of the file, you can see that there are
properties staging, timeline, and sharing In properties, I will keep 24 frames per second because it works nicely for
this type of animation. Duration of the animation, I will click on the
time and I will set it to 10 seconds rest. I will keep the same
as a screen size here. You can also rename your file. You can also upload
your picture, which is fine like this for now. You can also adjust onion
skins blend primary frame. I'm not going to draw with
onion skins right now, this is not necessary for me. Here you can set up loop
ping pong or one shot loop. It will be looping ping pong like in your phone,
if you saw it, it goes from back
and forth Here, I will set it to one shot. Here you can see
your export options. That's it for
setting up the file. When you are happy with it, you have all layers set up, but as you can see,
we had 30 seconds. All our layers are much longer. What you can do here, how to select all the layers? Because here, if
you tap and hold, you select just one track. And you can see these options. You have track options, you can show height, duplicate. We will look at all of
these options later on. You can rename the tracks
highlight Blendo Mask. But as you can see here, the layers that we
named before in procreate are already named on our tracks, which is great. What I wanted to show
you here is how you can adjust the
length of the track. Because what you can do here, you can go to the
end of the track. You can tap on the track and slide and make the track
shorter, which is great. But here I will need
to do it one by one. How would you go around it and adjust all of them
as you just noticed? I also went back with
just double tap. Tap with two fingers
like in procreate. Now, let me show you how
to select all the tracks. Go to this icon. Now with the pencil, I can slide through
all the tracks, then I can adjust the length
of them to my timeline. This is very helpful. And you can also
deselect certain tracks. To get out of the mode, you just click on
the timeline mode. We are all set for animating, and let's do that
in the next lesson.
5. Animating the Earrings: All right, before
we start animating, I notice there is one
layer which doesn't have anything on
basically a track. You can always double check by ticking the button on and
off with the visibility. If you want to delete it, you can just and hold
and you can delete the content and hold and
you can delete the track. If you want to add
the new track, you can just click
on the plus sign and click on the track. All right, let's start
animating the earrings. We can just find the earrings. Here we have the earring left. There are different options
how you can animate. You can use the drawing
option, which is this one. You can click on the layer if you want to
draw on top of the layer. As you can see here, the earring was highlighted
with this boundary box. If you want to draw on
the same layer, that one, if you want to draw
on a separate layer, you will create a new track. Now what I want to do here
is to record the movement. What we will do here is to move the slider
completely to the left. If you move it to the left, it just jumps up.
Want to keep it here? And move it slightly
in the middle. Now you are completely
to the left. Not to the bottom left
corner but in the middle. Now click on the icon
and select Move. First we will select
Warp option here. I will keep the controls
like they are for now. Then I will click on
the Record button. You can see here, it's ready to record your movements and
create keyframes for you. You can always adjust
the key frames later on. Basically, if you're asking
what are key frames, those are the points in
the animation which will be marked on your timeline
where the movement goes, if it is scaling up or down, or if you are making the move from
left to right and so on. You can imagine in
the Warp option, I will just zoom in. I will select one of the points
somewhere in the corner. I will click on
one of the points. Now when it's ready to record, and this button is right, you can start moving your
pencil either in circles. But what I found out, I like the movement
which is infinite loop. That will create nice easing out in animation when
we will be scaling. In this warp option, I will use the
circular movement. If you create the circular
movement on the side, you are moving the whole object. Let's go back. If you want
to move only part of it, you have to tap and
move the anchor point. Let's do that now. You can create
this soft movement while the movement
was recorded for you. When you zoom out, you can
see that the sliders here. But it recorded the
movement only from here. I didn't check the slider
If it is on the left, if you need to redo it, you can just double tap or
you can just tap and hold. You can delete Warp
Control point. You can create the whole thing again by sliding to the left, making sure to select
the move and warp. And now we can move
our anchor point. We can zoom out here, so you can see, let's
move the anchor point. And you can see the
slider moving here. All right, now we have
the first motion. You can preview the
slide movement. All right. Now move
the slider back. Now we can see all
the anchor points and that the app is ready. Now I will take a
different point. Maybe this one. I will move the earring again. All right, perfect. We have this subtle
warpy movement. Now let's move the
slider back again. This time let's select
the move and scale. Click on this, we can
zoom out slightly here. Click on the three
dots Added anchor. Let's move the anchor here to the top of the earring so
we can move it easier. Now let's click on the move. First the movie icon, then move, then move and scale. Click on the corner
icon, Anchor. Now it disappeared.
Let's do it again. Okay, we want to record
this action again. It's ready and take the anchor. Now, in this infinite loop, I was not moving in circles. But in the infinite move loop, we can check how the animation
of the earring looks like. I think it looks fine, but I'm not sure about
this warp movement. You can always adjust that. You can delete that part. It's the warp. You can redo the warp again, just tapping and holding. Now you can delete
the whole thing. You can double check. Now it's just moving
from side to side. I will do the whole thing again. It looks more natural. Moving the slider to
the left Record button, Move Warp, zoom in and
make the movement smaller. All right, now let's create
the move and scale again. I will just move
from side to side. All right, now we can
check our movement. You see only 3 seconds. That's why there is this jump. So you have to out to
see the whole timeline. Now the movement is nice. Now I can repeat the same
process for the second earring. Because I want the earring
to look a little bit different than just
copying this track. But you can copy the
track with the movements, but then the both earrings
will be looking the same. Let me do that and talk
to you in a second.
6. Animating the Headband: All right, now I animated both. Let's stop this recording and
let's check the movement. I can zoom out. I think the movement is quite nice. It's Sal, which I think works
well for this illustration. You can stop the
movement and you can in, you can see all the points. And if you want to collapse
all the key frames, you can just step and hold
and collapse, move and scale. You can set the easings, I will select the easing. I will set everything
to ease and out, which means ease in is
starting the animation slowly and then speeding up the movement as it
comes to the hold. Ease out is starting off quickly and slowing
down at the end. Ease and out is
combination of these two. Here we set up the easings. You can see it here. We
can do it here as well. Set all the easings and out
here you can also expand. If you double check again, we can zoom out like this. It moves quite
nicely if you want. You can also play longer
with these because I feel like this one is not moving
exactly as the other one. I think the movement
was a little bit nicer here. You can adjust. And then you can also animate this top part the same way
as we animated the earrings. You would go to the
bow click, go to move. We will go to warp. In this case, I will
set more controls. We have more options here. Now I can record. I will move some of these
top points to create this subtle movement you
keep moving and the app will keep recording
your movements and set the key frames,
which is amazing. Now I will go back
and you can see you can hide and unhide
the whole track. Now, click here, Move and warp. We are still recording. Now I can move another point. Perfect. Zoom in again. And let's
animate the other side. Perfect. Let's create a little
bit movement also here. All right, perfect. Now let's zoom out. We can play the animation
of our accessories. And I think that
works super nicely. All right, now let's move
on to the next part.
7. Animating the Hair: All right, now let's animate some of the
loose hair strands. A little bit of the hair. Let's find the correct layer we have here. The loose strands. Tap on the track. Move the slider
to the beginning. Click here on the icon. Again, on the move,
we will use the Warp. You can also test
out the stored, but I think Warp works fine. But as you can see, this
whole thing is quite big. Again, the selection of the horizontal and
vertical controls. I will push to the
highest limit. Then I will record the action. I will move a little bit or
the end of the hair piece, or the whole selection. Let's do that. The
app is ready here, I'm using the slow,
circular movements. Perfect. Let's move the slider
to the beginning again. Now it jumped up. I have to find the layer again. Let's zoom in, Move the
slider and select the warp. And select the anchor point. Somewhere near the
end of the hair. Maybe this time I can take this, move the hair a little bit. I'm moving it slightly different direction
than this other one. Now let's zoom in again. Click on the track
to bring the slider, and I will move this other
anchor point as well. All right, let's see what
happens if I move this one. Let's find our track here. Move warp and let's
move this one. All right, I think that's great. Now let's animate the back part of the hair just to add a little bit of the
movement there too. It's this one. You can
double check, yeah. All right. Again, click at the
beginning on this one. You can use the distort just to make it
bigger and smaller, but I'll just use
the same function and move this anchor point. All right, I think
here I need to move this one hair
strand as well. I will go back and find this
part and do another warp. I think it should be
this one. Let's move it. Yeah, I think this is great. All right, we have slide
movement there, maybe. Let's move this one too. We have to move
to the beginning. Zoom in, select
the correct track. Let's move this part
of the hair as well. I think animating the hair, it's like great practice to practice animating
these parts. Let's see if we can adjust this part of the
loose hair as well. I think that can be nice warp. All right, let's, I'm not
sure if we move this one. It moves also this part, which is strange because it comes from the back of her head. Maybe we can try somewhere here. All right, I think this
is nice and quite subtle. All right, and then we can
move the other side as well. Okay, this didn't
work like this. Then let's move this
strand of the hair. All right, so we
have that one done. Let's go to the main hair
piece or hair kind of folder. So I'll click on this one and I will move this side
of the back of the hair. All right? And we can try
to animate also the fringe. But that one, let's see
how that will look. So we can zoom in. This is quite subtle, so we can check the
whole animation. I think the fringe is
quite strange because it's separated with the face so it doesn't move the
edge of the fringe. I will try to go
back, not like this, obviously just double tap
and now it should be fine. Okay, The fringe is
not moving. All right? I think this is great. What I want to try
out here is to animate the shoulders
they are moving. Let's find our layer. I think it's this one. The face and shirt again. Go to move warp. Let's hire up the controls, we can test it out. I will move one of the
anchor points up and down. All right, this doesn't work because we have
these flowers here. We will leave this one as it is. I will stop the action. Go back. But you can animate the shoulders going
up and down as well. If you have a different
portrait animation. And you want to show
that the character is like breathing in and out. All right, so we have
the hair animated. And now let's move
on to the next part.
8. Animating the Background Plants: All right, now let's animate
the background flowers. First of all, let's
animate these green ones. It's light green track here. First, let's create a keyframe. In this case, we
are going to use a different way of
animating this one. We are not going to record the actions and create
key frames that way, but we will create our
key frames manually. Click here, as we just
already had that selected. Click on Move. We will
select Move and Scale. We have our first
keyframe selected. Now I want the movement
to be quite quick, but not too quick. I was thinking around like 30
seconds or maybe 1 second, but maybe 1 second. It's already too long because our timeline is 24
frames per second. The 30 seconds is
around like 13 frames. We will create a
new keyframe here. You can duplicate the previous
keyframe by clicking on the key frame and then tapping on the line
under the track. Now the icon is gray. When you tap on
it again it turns white and you duplicated
the previous key frame. What I want to do now is to go back to the first
key frame because now it's like full size tap on
the first keyframe here. We will change the scale. Tap on the number here
so we can set it to 0.0 because we want to
scale up from the zero, basically, you don't
see it in 30 seconds. It will be the full scale that we had in the illustration. You can also use the handles
like we did with recording, scaling up and down. But I think in this case
this is much faster now. You can test out the animation, you can see it just pops up. What you can do here, if you think this should last longer because
it was pretty fast, I think we can move
this anchor point. To move the anchor point, you tap on it, hold,
then you can move it. Now let's check it out. Okay, I think that's a
little bit better now. I can hold basically tap on hold to set all
the easings again. We will set it to ease in and out we can check our animation. It just appears. That's great. What we can do now is
create a little bounce. Go to the key frame, tap on it. Click around 1 second, click again, we
duplicated the keyframe. Here in between we have 123456, maybe that can be a
little bit longer. We move the key frame
again to eight. This keyframe disappeared. We have eight.
They're all the same. I will copy the same keyframe and move it again like 12345678. It's around here.
Click copy the size. They're all the
same, the full size. Now in the middle one, I will scale down the
leaves a little bit. Not with the numbers, but this time I will just
use the anchor points. Now just scale it
down a little bit. Maybe like this, I can
test out the animation. Because now we created
like this little bounds. See perfect. Now let's repeat this with
the second plant as well. Click, move and scale. And now I can create the same anchor points
in the same spots. This one again, the same area. I can make a little bit smaller. Then the first one
I will set to zero, the same as we did before. Now we can test them. As you can see, they
bounce out together. If we want the first, the dark green bounce
out as the first one. And then we have the dark green. The second we can move
the whole to the right. I can tap and hold on the
track and move it to the side. And maybe to like 30 seconds, it will start later. As you can see, the key
frames stay the same. Now we can test it out. The green one comes out first, and then the light
green comes second. The light green should be first. I will move it back. I can tap and hold and take the dark green and
move it to 1 second. I think that will work better because it comes after
the first bounce. Let's see, maybe we can move it a little bit later, maybe one frame later,
somewhere here. Let's test it. We need to zoom out to
see the whole thing. Okay, I think that's
a little bit better. You can also adjust the
key frames if you think the bounce should be a little
bit faster. Let's do that. You can zoom in and find the
keyframes on this green one. The green one comes
out first. It's here. I can tap and hold and
move it one key frame, I can do the same
with these ones. The gap is shorter, we can test it out again. I think it can be even faster. Let's move it one more
then these other ones, one to the left, and I think this one seems
like it's not even out. Yeah, now it looks more even. We can test it out. Again, I like the movement
on the dark green, but I think the light green, it's scaling up
and down too much. Let's find the key frame. I will scale it up a little
bit more. All right? And I will test it out because I think the difference
was too big. Okay, I think that works well. Now I can zoom out. Now what I will do
with this purple one, I think this one can
appear later on. First, we will set
up a key frame. You can go to filters, you can select opacity. We have the first key frame. I would like to have
it appear a little bit later so we can
move the whole track. It's hidden, I think
it should appear when the other green
leaf stops bouncing. Let's create a new key frame. Here the opacity is 100% Now we click on
the first key frame, we reduce the opacity to zero. It should appear later on. Let's see, we move our slider to the left and
then check the animation. All right, what I think we need to do is to move this back. Check where is the
first key frame? The first keyframe is here. I think it can appear basically going 0-100
for a longer time. It's more smooth so
we can test it out. Okay, we need to move
this frame a little bit later after our last key frame. I will also move
this key frame here, not completely aligned
with the dark green. But starting with
the light green, I will shorten this part. We have better preview
like visually. Okay, let's zoom out. I think we can move it even
further around 3 seconds, it appears later on. This is based on
your preferences. Let's say this 20 and
see how that works. Okay, I think this is better
alignment that it starts appearing right after the
dark green with appear. I think this is great. And now we can move on to
animate the foreground flowers.
9. Animating the Foreground Plants - Pt. 1: All right, now let's animate
the foreground flowers. As you can see, we finished our animation somewhere around. Let's find the key frame, Okay, 3 seconds and like eight frames. Okay, now we will find the layers with all the plants and we will start
with the top left. Let's see. All right, this is our first layer. We will first create key frames. And then we will move the tracks to create
the movements in the basically places on the timeline that it
fits the animation. So it, they appear one by one. But as you can see what we saw
in the previous animation, that basically when
you move the timeline, the key frames will
stay the same. That's why I want to create
the key frames first. They have the same amount of, basically they have
the same speed, right? It's easier for me to measure. So this one. All right, so it's
this first one. I will select the move
again, move and scale. So we have the first key frame. The bounce will be
around one full second. We want the animation or the
movement to last 1 second. I will create another key
frame by tapping on it. Then the Id will be
around 13 frames. Click again until it turns wide. Then I will create another
key frame in the middle. Let's repeat the process for
these other layers as well. Click on the layer, move the slider to the left. You are at the beginning.
Select move, move, and scale. Click on the icon to copy it. And align the key frames
with the other ones, here, here, and here. Let's do this one
move and scale. Copy by clicking on
the icon. Tap here. It's not on the timeline, it's under the timeline. On the move and scale timeline, click again again to
create a new one. All right, let's move another one and scale copy
by tapping on the icon, tap under the track, tap on the icon to
turn white again. Again, same goes here. Move and scale, copy again. Okay, we have a few more just repeating
the same process to create the key
frames for all of them. Okay, we have one
last thing here. Move, copy, copy. See again, it's
desaturated or not white. Now it's bright and white. You make sure that you created the keyframe and now
we can animate them. All right, we start
with this one. As I said, we created all
the key frames in full size. When we tap on this
third key frame, we want to scale it
down a little bit. I will also move it closer to the hair band that's perfect. Then when we go here, you set up the numbers 20 in the scale x and y. All right. Now you can test it out. I think the bounce is nice. Let's do the same. Here we have the second one
which is this one, the third key frame, scale down a little bit. If the boundary box disappears or the handles
just step on this icon. Again, it appears here, I'm keeping the anchor point in the middle because we are
scaling from the middle, not like on the earrings. All right, like this. Then the first key
frame set to zero. Now, test the animation again. I think the bounce on this
first one, it's quite big. So I will scale up the third
key frame a little bit. Let's see, I think the movement doesn't
work that well. Here I will delete
the keyframe by just holding click on this
one tab to copy again. I will just scale down
without moving it. Now I will test the movements. Okay, I think this is
little bit better. Okay, now let's go to
the next one here. The first frame set to
zero, third key frame. Just scale down a little bit. I can zoom in here
to see it better. In this case, I think the
anchor point can be the bottom. Let's adjust that one at the anchor and drag
it to the bottom. Now let's adjust the first
key frame so it's zero. Okay, that works. Click on Done to
get out of there. Okay, now we see
the boundary box. Now we can scale it
down a little bit. Perfect. We can maybe do that
with the first one as well. But let's test out the
animation if it works. Yeah, I think that works nicely. Let's adjust this anchor point on this one as well and
see if that works better. You can set it up somewhere
here and see if that helps. In this case, I'm not so sure it looks
very similar to me. Anyway, maybe I'll just go back to keep the anchor point there because it
doesn't work there, and here it works better. Let's move to the next one. These are the leaves. Let's set them to zero. Third key frame, we need to, again, move the anchor point because they're like growing up. Then click done, then
we can scale it down. This is just the bounds. It doesn't have to go that far. All right, let's check. Okay, I think that's nice. All right, let's go to next one. First one always zero. Third one at just
the anchor point by clicking on the three dots. Slide it down. Click done. I can also scale it down. We scale down this one. Let's zoom out on the artwork to see if everything works
nicely. All right.
10. Animating the Foreground Plants - Pt. 2: Now this one's at 20. Third one just scale down. Oh, what happened here? Oh no. We have a mistake here
with selection M. All right? This is not great, then that means this
one is together. All right, if something
like this happens to you, you can go back to procreate. Let's see, let's find
the correct layer. Where is it here? Because
we don't see it here. Okay, let's turn on the
background so we can see it. All right, these are these two, we can merge them again. Turn on the background. Take the brush, I will
take white color. Fix this mistake. All right, come on. Okay, good. Now I will create a PNG
out of this cut and paste. So we have these two
layers separately. Again, hold, okay, export PNG save. All right, now the
second one, PNG save. Okay, now you can go to the
file so we can replace it. We are on this track. Hide the two because I
don't need them anymore. I will just delete the
content on these two tracks. I will import the images again. Photos image perfect. Let's the other image which
is this one, the leaves. All right, let's create the key frames on these
ones which we lost. It was move and
scale and then copy. Okay, we just zoomed
in on the timeline. Let's do it on this one. Move and scale. Copy. Copy. Okay? I didn't want that,
but all right, I hold the pen there
too long. Okay. Now this one, this is
the third key frame. We want to scale a little bit. Maybe this one we can
move the anchor here. All right, now I can
scale it. Click Done. Scale down a little
bit for the bounds, the first one set to zero. Okay, let's add
this one as well, which is the flower set to
00 and the third key frame. Let's make it a
little bit smaller. All right, now we can
zoom out and test it out. Zoom out, okay. I think everything
is appearing very nicely with a little
bounds. Let's see. Oh, we are missing this
one we don't have yet. All of them. Let's find it. We didn't set this up. Okay, This is 00. And the third one, we have to adjust
the anchor point. Click scale down a little bit, and now we can
test it out again. Let's zoom out so we can see it. All right, perfect. Now let's adjust the timeline
so they appear one by one.
11. Animation Timeline: All right, now let's adjust
the timing of movements. Let's check where the
last leaves appear. It's around here 2 seconds. Let's see, it should be okay. So they'll stop bouncing
somewhere here, 2.5 The first flowers that we want to animate
are these ones. Let's double check. Okay,
they should appear first. So I can tap and
hold on the track. Move it, Let's move it to 2.5. They will appear after
the green leaves. We can check if that works. Yes, perfect. Those
will appear first. Then maybe we can
have these two, these leaves and these flowers. Let's find them. They
were somewhere here. I will tap on the track, Move it to the side, 2 seconds. Then we can move also this one, because that's the one I want. All right, Tap and hold again. We can zoom out a
little bit more. The first one appears
somewhere here, probably this one can
appear around 3 seconds. Let's test that out. Green one. Okay, I think this one
appears too early, so we need to give this one
a little bit longer in. We can maybe move it to 3.5 It's in 3-4 This
one and this one. That means we have 1
second between each. Maybe we can add actually 1.5 second just to give it
a little bit more time. We can always adjust the
timeline so it's longer. We have these two now. Next one, maybe we
can add this side, the red one, pink
one, and green one. Let's double check where they
are left being left bottom. This is left, these
are all ones. We can move them all together. Let's select these three. Click on this one,
we can group them. Tap and hold and group. Now I can move the whole group. Let's move it here. All right, We can move this one. This was one. Let's move it
to 1.5 second. All right. Then we have the these
two. Let's find them. These are bottom right. With this I can select it. You can select these
two layers hold group. Now I can move it.
Let's zoom out. We need to move it to the
last one was 5 seconds. This one can be 45.5 to clean up. If we have these two, we can group them
together as well. Group. Perfect. Then
we can test it out. I don't see the last one. Let's go back. And
somehow disappeared. Let's see if I disabled
the visibility, but somehow it
disappeared completely. Let's just go back. Here they are. All right, so we didn't lose
them. That's good. Now I have all the layers
also appearing on. We need to move this
one. It's this one. All right, so let's
disable this one. Okay, I know what happened. I had the other two layers
selected With this one, we had two as a group. And the other ones,
when I moved them, the second group moved super far away, so
we didn't see it. Now let's select this one, group it, Let's double check if we don't have anything
else selected. We don't. Now I can move this group. Let's move it to 5.5 seconds. Let's test our animation. Okay, I think it's
moving quite nicely. If you want to have
the animation faster, you can always move
the key frames. I can see that here on
these dark green leaves, I am missing some color
from the illustration. If that happens to you, you just need to find
the correct layer. This is our layer. You can disable this
one and you can always draw on the layer
here, it's on zero. You need to go to a key frame when it's visible,
which is here. Now without the recording, you can draw on
top of the layer. If you want to use
the onion skin, you can see the flip book. Or you can import
the image again, which I think I can do there. Or you can just draw
with the same color. I would import the image again if you see
something like this happening now to exit the flip
book, you can click down. I think the animation
is pretty nice. In the next lesson, let's animate the eyes. I will import this image again, like we did with
the previous ones, if you spot a mistake
in your illustration.
12. Animating the Eyes - Pt. 1: All right, we have quite
nice animation that we have. Background flowers, foreground flowers
appearing one by one. I also organize the layers that I move the tracks every time
you want to move the track. And maybe you don't have space, you can create a new
track and then tap and hold and move the
track up or down. You can also create groups
with all these flowers. We have all the flowers
in the same group, how they are appearing. For example, we have all these background
flowers in one group. When you tap and
hold on the group, you will have this menu. And you can also change
the color of the group. You can find it easier. Let's select green. When you zoom out, you would see the
color coding easier. Now let's animate the
pupils of the character. Let's select the
track with the eyes. Now we will record our movement. Make sure that you
are at the beginning. Click on the Record button
so you see it's ready. I will zoom in a little bit. We will need to do this tries. We want the character
to first look at the flowers appearing
here, here, and here. Let's test that out because
you don't want to go too far out with the
pupils out of the eye. It's quite tricky.
Let's try it out. All right. I think maybe she
can look down first or no. Well, let's see. She's looking left and right. I think I need to start
with her looking to the right or maybe to the middle at us and
then to the top left. All right, let's go back, let's find the correct layer. I will start again. It's ready to record. Okay. She will look at us. Okay. I think what we need to do is actually go back
with the double tap. I think it already did
what I had in mind, which is tricky because
I was just zooming out. You have to use the
three fingers to be sure to undo some of
your steps. Let's see. I think everything works fine. All right, let's find
the pupils again. Again, see I need
to get used to it even better because
I'm so used to, from procreate to use
two fingers to zoom in what we need to do
before we start recording, let's move the pupils maybe to the left and
that's where we will start. All right, now we will
start recording again. She will look to
the left, up side. Bottom bottom. Okay. We need to do it faster. Okay, Let's go back. Let's record middle side. Okay. We didn't move
the slider once again. Let's go to the
beginning record. We will move to the middle
side and we have to be done before second two. Let's try that. Okay, I think this was better, but I think she look to
it too, hectic here. Let's try that again. But I think it was much better. Let's move the slider
to the beginning, find the correct layer. Maybe what we need to do in
this case is not recording, but actually set the key frames based on where the
flowers are appearing. Because like this, it's
quite hard to match. But let's try one more time. All right, maybe this one
actually worked. So let's see. I think the key frames
don't work that well, so I will not use the recording. So let's go back, exit the recording, let's find the key frame
where this appears. It finishes here we are at the pupils here
will set the key frame. The character is
looking up here. All right, now let's
find another key frame. This one appears the character
will look to the side. Now here let's find another key frame. Okay, so it finished bouncing. Zoom in key frame, move it to the side. Okay, another key frame. So let's zoom out here so we can see it somewhere here. All right, now we just
need to move it down. Okay, Now we want the character
to move to the front. We can set it to nine, Okay, it's here, nine. We'll have a forward
view looking at us. Okay, let's create the key frame for the beginning
because we want her to also look at us before
the flowers will appear. She starts in the middle here. In the second two, she can go to the right because we
have the second flower, second three, second and a half. Let's do that now. Hold set or easings, ease in and out. Let's test out the eye movement. Go to the beginning. I think she should start with looking at us so
we can adjust that. You can test out also
different easing, you can basically
start quite slow, ease, we can test
out how that looks. So let's see.
13. Animating the Eyes - Pt. 2: I think we can move the key
frames a little bit later. If we are here, the
flowers appeared, it can be a little bit later. We have the eye staying
there for a moment. We need maybe two key frames. Few frames. It stays
there because it looks weird if the eye
moves all the time. Let's find the second
one so we can copy it. We have a few key frames here. We have this one. Let's
copy it. It stays there. We have two here.
We have one here. We need to copy that one. Copy this one here as well. All right, I think this
should work nicely. Let's test it out. I think we can set it up to linear because this easing in doesn't feel
natural for the eyes. We can try linear here. I will set up also
another key frame. It stays there for a
little bit longer. The eye looks one direction
for another frame or two, whatever feels more natural to you. All right? And I think the linear
might work better, but you can try
whatever you like more. I think the linear easing
works a little bit better. Here, we need to double check the key frames because I think it didn't
copy the exact key frame. I think it was copying
the previous one. Okay, here it stays. Although it's moving
a little bit, which I wanted that
it doesn't move. We can check the numbers. This one is 5158, and this one is interesting. Let's copy this
and paste it here. All right, now it's not moving. Let's test these two. Okay, this is working. These two are the same. I think the first key frame
was based on the scale, as I started with
these two thing, I think we need to keep them there maybe a little bit longer. These should be the same
if you check the numbers. This one also slightly longer. The eyes rest on one point. All right. I think
this is almost done. We can test out the easings because we tested linear ease out and ease in. Let's try ease in. I think the linear
worked the best, but you can use the one
that you like the most, or you can animate it by
hand using the movement. All right, that's
it for this part. You can also animate opening the eyes with
drawing function, which I will show you
in the next lesson. But if you want to
keep it like this, I hope that you love your animation and you
will share it with others. See you in the next lesson
or in the project section.
14. Bonus: Opening the Eyes - Pt. 1: All right, now in
this bonus section, let's animate the eyelids so the character will open eyes. I will create a new track. We can draw on that
track, new track. You can go to drawing, we will draw on this track. You can also slide down. You have this flip book mode. Then we can draw on top of
the eyelids. All right. Now when you are in
the flip book mode, you can activate and deactivate the onion skin and that means that you will see
the previous frame. I will keep that on.
As you also see, there is no button to sample the color for the color picker like you have in procreate. But here you can
sample the colors from your artworks with your
finger. That's great. I will create a new color
pallet to draw the eyes. Let's go to color palette. I will create the
new color pallet. I will zoom in. First,
I need the color of the eyelid I can add
to the color palate. Then I need the skin tone color, which I have here on the
left. Which is lighter. Of course, you might have a different colors
for the skin tone. Then I need this darker one, which is on this side. I will use this for
the second eyelid. Then I need the color for
the eyelashes and pupils. I have that here, and that's it. Now we can draw in our flip
book from the brushes. I think the closest is the six B pencil to the brush I used in
this illustration. I will use the six
B pencil brush, but as you can see, there are some other brushes
you can play with. On this first frame, I will draw the eyes closed. I will draw the eye lids lower. Let's show the onion skin. By selecting this, you will
see the previous frames. Now I will take the darker eyelid color
and I will draw a line. We can draw closed eyelids. Then I will take
the lighter color, which is on this side, and I draw the eyelid, I mean the eye lash,
something like this. And I will do the same
on this other side, but using this darker color now, taking the dark blue
to create the eyelash. Okay, so trying to be even with the thickness
of the eyelashes, I zoom out to see
how that works. I think the eyelid needs to
be a little bit thinner here. It shouldn't go that far out. I think this is a little
bit nicer like this. It's more like a suggestion of the eyelid maybe
from the top. We keep it there, but
here on this side, we don't need to keep
it on the other side. We need to use the darker color. Here, I will make
it a little bit thicker and see how that looks. Maybe let's go back. Okay, I think this
works quite nicely. Maybe it can be thicker here, it doesn't have
to go so far out. I will use the darker
color here just to cover it and lighter color here. All right, so we have
the first frame. I will duplicate the frame by
just stepping and holding. We want the frame to
be maybe two frames. I think that should be
enough, or three frames. Now, we will adjust
the next one. I will duplicate it again. We will be adjusting this one. Let's take the dark one and we'll be moving
the eyelids up, basically making them thicker and erasing the bottom part. Basically just
uncovering the eye because we already have the
eye so we don't have to draw it again here, I need to actually draw, erase. That's a mistake. All right. Now, in this next one, now we will erase part of this. We'll uncover a little
bit of the eye. Then we can always adjust the
frames if it doesn't work. Okay, We'll duplicate
this frame. Du duplicate one more time. This is the fourth one. And we will erase from
this one can erase more. We need to erase
it also from here. Then add the darker
color erase here, because as you can see, there is a little bit of
the eyelash there. We'll do it like this. Then we need to add a bit here. You can see the purple
from the layer below. Let's erase this part. And you can already see
the pupil showing through. I can erase here, and then take the lighter
color to paint over. Okay, I think this is nice here. I need to erase a little
bit more, I think, and a little bit
of this eyelash. Okay, Now duplicate fourth one. And on the fourth one, we can already add more
of the eyelash here, trying to keep it even. When you play it, you will
see if it is evened out. Okay, And then erase again. I'm trying to keep the thicker eyelash here
at the end on both sides. All right, let's duplicate this 13 times and then adjust
on the fourth one. We'll erase again, but
I think here we can. Move the eyelash kind of
higher somewhere here. So we are kind of getting
there to the open eye. Okay. So this is
already much thicker. How does it look? Maybe more here, this is higher, so we need to add
some of it here. This actually needs this
darker color here, not erase. This is the habit of
drawing from procreate, because when you choose the
color, you can draw it. It here, we need to delete. Now, we are already matching a little bit of the
eyelash under it. This is the lighter one here. It's the darker one. All right. So we can duplicate. I think we are almost there. Duplicate. And I think now I can A and I'm not sure, but I think this
should actually, we don't need this one. But let's see. So we can click done. Now we can test how does
the animation look like. Yeah, I think it looks fine.
15. Bonus: Opening the Eyes - Pt. 2: Let's test it frame by frame. Here on the second frame, we see a little bit of that
line which is strange. And then it gets thinner
and much thinner. And then the pupils
are moving already. What we need to
do is to actually move the pupils a
little bit later. They don't move right away. They should start
moving only afterwards. All right, this
should be better. Now, they're not moving. I need to adjust
this fourth frame. Go back, slide down. And then in this frame, we need to add a little bit of that dark here and add some of that color. Okay, we had four frames. I need to delete this one. Then we can copy. Oops, no, copy paste, paste. And then this one
was much thinner, so here I need to add a
little bit of the dark, so we are missing that. Okay, so here, cut, cut, and then I can
duplicate this one. Actually, no, copy paste. Then this one again
is much thinner, so we need to add some
of the dark there. Again, just a little bit. It's matching. There is
not such a big difference. This one cut. Then we can duplicate this one. Copy, paste, paste, and then
we can see how it looks. We go to the beginning. I think it looks pretty nice. But I think the first frame, the eyelids are still a
little bit too thick. I mean the eyelashes. Let's adjust that one. Okay? First three. I will delete this one. As you can see, you don't have
to be in the drawing mode. You can do it here. Just delete. Delete what you can do. You can also stretch
the key frame. You don't have to just copy it, but this is just longer. You can delete it
here, here as well. And just stretch the key frame. It holds for longer time here. You can just adjust
it in one go. Here we have the blue selected. I want the darker base here. I can just make it a little bit thinner and on the other side with a lighter color. But this is up to you how you prefer the look
of the eyelashes. But I think now they look
pretty similar as you can see. Here we have the same three. You can see the onion skin. Now you can test out, if you like, how the
eyes are opening. I think one of the eyelashes
was still pretty thin, but almost it was super nice. I think these are a
little bit thinner, so you can leave it as it is, or you can actually make
the first one even thinner. That would be probably the easiest you can draw over them. So taking the darker one
so you match the style. All right, and as a last thing, I disabled this one, the last thing you
can just slide through and group the eye. We have one group
with the eye opening. We will start with close eyes, then we have the full animation. Let's test it out. Perfect. I think
that works great. You can also make the eye
opening animation longer, or you can also
make the character look only to right
and left and then to. It doesn't have to
be three spots. This is up to you how you
choose to animate it, but I think it works great. I hope that you love your
illustration and animation.
16. Exporting Your Animation: All right, we are done with
our animated portrait. I really like how it turned
out With all these leaves and eyes moving and
other small details like with these
subtle movements. I hope that you love
your animation as well. And the only thing left
now is to export our video so you can save it to your files or share
it on social media. And I hope that you can share either your progress images in the project section or
the full animation on social media and tag me so
I can find your animation. Now we can rename the file
either while exporting, or you can go back to the
preview and tap and hold, and we can rename, let's rename the file to floral, poor floral portrait animation. We can add gaps. We can click Done here. You can also just select no. Let's go to the file
when you tap and hold. You can select Shared. We can select the video file. You can also frames as
images or current frame, or save the procreate
Dreams file. Let's save the video file
and let's wait until it loads. It's almost done. Perfect. Now you can
share it directly to Instagram or share
it to Google Drive, or you have other options like Pinterest or wherever
you want to save it, I will save it to my files. For now, I can call it Flora portrait animation as the file is already
named like that. But you can also change the name here in
the export setting. Now I have a folder
created for this one. I can just click Save. I am done. I hope that you really love this animation because it
was a lot of fun to create. I hope that you
enjoy the process. Also the class. I'm really looking forward
to seeing your project. Please share it
with me and others. You can inspire everyone
around you as well. You can also upload
your animation maybe to Instagram or Youtube
or wherever you want. Take me and upload
that as a project. I know where to find
your animation. So thank you so much
for being here and I really appreciate it and
see you in the next class. Bye.
 Iva Mikles, Illustrator | Top Teacher | Art Side of Life