Transcripts
1. Welcome: Hey, welcome, my name
is Samira September, our full-time content creator based in Cape Town,
South Africa. I've been teaching online
for four years and counting with thousands of
students around the world. I've developed this Skillshare
class for individuals. We have no idea where to start, but want to teach online. You already have a skill or you already teaching
in-person classes. But you want to
save more time by turning those classes
into digital products. You can do that with
an online course. The e-learning industry
is currently worth more than $250 billion. It's estimated to be worth
even more in five years. So in this course, I'll
be teaching you how to create your first
phone line across. All you need to start
teaching online is a skill. Maybe you are
graded ***********, playing guitar,
cooking healthy meals. You can turn those skills into a digital product that can possibly make you money online. This course is for
complete beginners. So it's okay if you've never created a piece of
content in your life. So I'll be walking you through the steps to creating
your first online course. Don't you worry about being an expect what you already
know is enough. Someone out there who
doesn't know what you know. So you can help
them by taking them from 0 to step number one, that's barely to another
person to follow along. All you need is an
internet connection, a smartphone or computer, and strong-willed to land.
Now let's get to it.
2. Topic Validation: Hey, Welcome. In this lecture, we're going to talk about
researching your topic. You might have a host
ID already by the dude, help to research and
figure out how people are searching and typing when
looking for your course topic. Secondly, this will help set realistic expectations
when it comes to demand. You can use Google Trends or YouTube to see if there's a
demand for that cost topic. You can see maybe
the latest video and check the views
on that video. And that way you'll get an idea how much demand there is
for your course topic. It's very helpful to research
a topic first to get that confidence and set realistic expectations
for your course topic. The third benefit to
researching your course topic, you'll be able to see other
courses covering your topic. And you will see
what the reviews, what people are
complaining about. And you'll be able to get
that feedback and make sure you improve certain things
that people complain about. I'd recommend this approach because you can end up comparing yourself and not deliver a unique approach to
the creation process. So for example, my process, I tried to minimize
going through other people's courses when it comes to the topic before
creating the course, because I want to deliver my unique approach and the way I do certain things I'm
teaching in the class, okay, That's it
for this lecture. I will see you in the next one.
3. Outline: Hey, welcome back. Now that we have
researched our topic and we are ready
to plan our cost, we call these the
outlining process. Here will be using
a Word document or my favorite app called
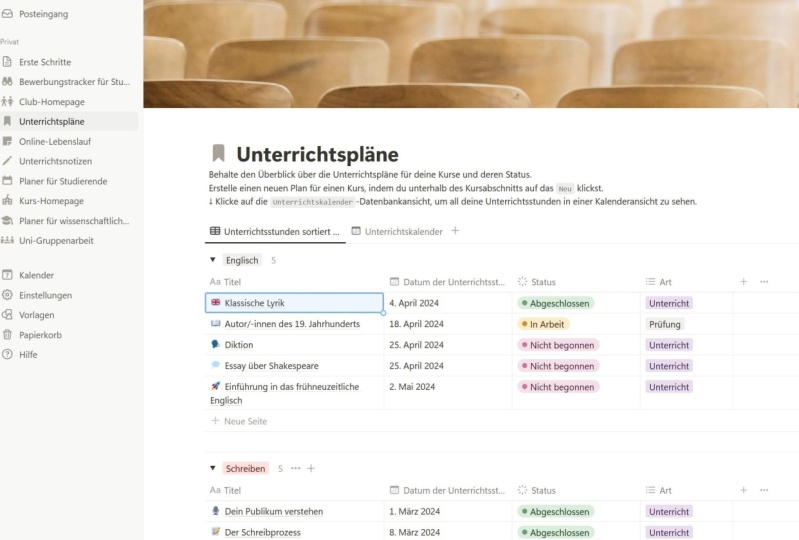
notion to plan our lectures. That's where we'll be creating
lecture one from step one, which is the beginner, the most simplest
step of your class, followed by one that requires the first lecture understanding if you get what I'm saying. So for example, if
I'm teaching someone how to create a beat
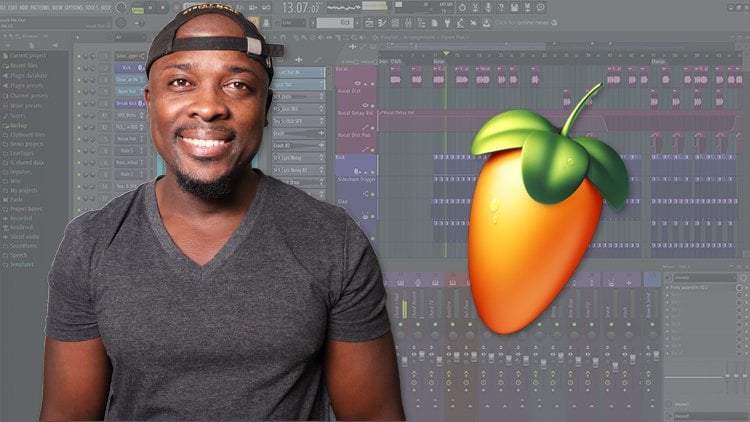
and Froot Loops, I don't just go straight to showing them how to create
drums and everything. First, a show them the
interface of protein loops, where to find things, where to find sounds. That would be my first lecture, maybe then my second lecture. I will show them how to take those sounds imported
into a new project. Take your student from
beginner to result stage. This is where
outlining comes in. It's very important when you
sit in front of the camera, you know what you are recording. If it's ten lectures, you know, I'm only recording
three lectures to the lecture one, lecture two, lecture three, edit those, whatever process you're
going to prefer. For example, I will outline the whole course and then outset one day to record
maybe four lectures when I'm done with
those or edit them, upload them, and then a
callback to record the lectures and do that over and
over again until I'm done with creating
the whole course. But don't worry, you're
going to learn how to do all of these in this class. That's it for this one. I will see you in
the next lecture.
4. Outline Part 2: Welcome back. In this lecture, we're going to start
outlining or cost, which is blending our lectures in an order that makes sense. You can use Google
Sheets or Google Docs to plan your lectures. But my favorite
tool and thus the total I'm going to show
you here is notion. So you go to Notion dot s o. The personal plan is free. You don't need to pay anything. You can go to. Try notion for free. You can submit your email yeah, create an account and then
select the personal plan. Okay. So let me show
you the personal plan. Let's go to solutions. Go to personal. It says free for, in the visuals, free
for individuals. This is the plan
you are going with. You can download
notion on your phone, on your computer, which means the data would be synchronized
everywhere you go. That's why I love Notion. Okay, now let's go to my
notion and we're going to create an outline
template for a course, okay? You Dan signing up. And the first thing you're
going to see is a blank page off notion with some guides
on how to use Notion. Okay, under private year, you can click plus to
add a blank page or no, Shane, we have pages and blocks. Okay. So I'm only going to
show you how to use one block, the block we're gonna be
using to create the outline. Let's say the course will be recording in for
studio, for example. That is the course name. Great. Now we have a blank page. As you can see, it
says empty with icon, you can select this and then
it remain the blank page. You can decide to
add stuff or you can select templates to
use Notion templates, but this is not a notion class. So we're going to go straight to the template we're going to use for this outline
and the database, as you can see here,
select a board. After selecting board, you
create a new database. These are cuts. You can rename this first
card to your first lecture, or we can select
all of these cards, delete them, and
create new ones. Let's say the first
lecture will be intro, Doug Train to Studio interface. That's our first
lecture as an idea. The second one, importing some
poles into efforts to do. That's our second lecture. So if we decided
those lecture ideas, we like them, I can just
move them to not studied. Move this one to
note that it also, when you start
recording the lectures, I just moved them
to in progress. When I'm done editing, just move them to complete
it as drag them back. So you get to have these cards that you can move around
and manage your project. Also, you get proper
structure for lectures. This one maybe is number
one, you can even right? One if you want. And the beautiful thing about using cards to create courses, you can click the one card, which is introduction
to FL Studio and write the content here, what you're going to have, let's say five points
that you want to make sure you talk about
in that lecture. And that is how you
create a course, outline.
5. Course Description: Welcome back. In this lecture, I'm
going to show you a structure of
course description. This is very important
because it's an additional promo tool where people can read through what's inside the cause,
what to expect. So the structure I will recommend
you follow is first you introduce yourself or write an introduction on what
the course is about, but write it in a manner that interests their
potential students. As you can see here
in this class, I'm going to introduce
you to Notion whether you are a
content creator, entrepreneurial person who
loves to organize life. As you can see here. Now I'm showing them the
benefits they can get from lending this
tool with Notion, you can create your
own to-do list, writing, blog posts,
content planner, timetable. Why do I need to follow
along with the course? Because people want
to know if they have enough tools to follow along. They just need a PC, Mac or smartphone,
notion, web or app. Again, who is this class for? Whoever is interested
to learn notion, you want to improve
productivity. You are looking for
all-in-one tool to develop content and
collaborate on projects. I'm looking forward to
seeing you in the class. You can go longer than this, but for this class,
I didn't think that is unnecessary to go any longer. Okay, That's it
for this lecture.
6. Design: Hey, welcome back.
Now that we're done outlining our course content, it's time to design our
cost by this amine, you will decide which
tools you're going to need based on
your core style. For example, this is
a guide approach. A want you to see my face. I want to explain something. I don't need
anything else. Okay. All I need is a
clean background, a camera and mic, a light. I'm good to go. But for example, if you
are someone who will be teaching people on
exercise programs, you might want to
make sure that you have all the equipment
you need for that. You have a camera to capture you displaying the movements. You have nice lighting, maybe a wireless lavalier mic. Another cost style will
be whiteboard lectures. We have a white board. Your camera shows you and
your whiteboard and you can do your lessons like that. Another one will be
screen capture lectures. Let's say, for example, you are teaching someone how to trade or how to use Excel, or how to use a design software, then you will need a
camera for these lectures. All you need is
an OBS program or any screen capture
program like Camtasia. For that, you will need a screen capture software
quality mic that minimizes your background
or lavalier mike to capture your audio for a
better student experience. Maybe a nice high-quality
webcam to show your face while you are doing the screen capture tutorial, that will be a course design. You're going to decide
what you are doing and then you will know what
type of tools you need. That's it for this lecture. I will see you in the next one.
7. Record: Hey, welcome back. Now that we've decided on the design or style
of our course, It's time to record our
first lecture for this one, these few rules
that a one-to-two, make sure you keep in mind. The first one when you
recording your lecture, I will recommend you to break it down so that it's
easier to consume, okay, and it's more
motivating for the students. They feel like I'm just
gonna go through these for like six minutes and
then I'll take a break, maybe do something else. Even if it's like ten lectures, it's easier for people to
consume content when it's shut instead of having
one lecture that's like 20 minutes in your course, I recommend you keep it at
five minutes to ten minutes. Try by all means to structure your content in a
manner whereby you know what to cover
in each lecture. You don't make it way
longer than it needs to be. Just deliver the
right information. And editing will help
with removing errors. That will be one, the format, making sure it's easy to
digest for your student. Number two will be
your background. Please make some effort
when it comes to these, make sure your
background is linked. List. If you don't have, when's the LED lights
or anything like that? That's fine. Just make sure
it looks good to the eye. And number three will
be a video quality. Please make sure you use
a device that can capture at least 1920 by 1080 h d. This way, your video will
be able to fill up any TV, laptop, or monitors scraped. But fortunately, we
have smartphones that can do the
impossible these days. So if you have a decent
smartphone that can shoot 1920 by 1080 HD, you are good to go. Fourth one will
be audio quality. You cannot go wrong
with this one. Bad audio quality. People can just log
off just like that. 50 per cent of the
experience is audio. If people can clearly
hear what you saying, even if the video quality is not that great, it's washable. So when it comes to audio, I recommend to use something
that can be close to you. For example, I just
moved to a new place. I haven't treated the room yet. But you can hear that
the quality is descent. This is because one, the device that's
capturing my voice is close to my mouth. And this means all the
aqueducts corner around in this room doesn't
get to the mic. It's just me and the mic. So whatever you are using
when it comes to recording, make sure it's close to you. You can use a dynamic
mic like this one. This is a Samsung nine cue. You might get a dynamic mic. Dynamic mics are designed to
eliminate background noise. It's the mikes they use
for radio stations bus the same mites they use for performance is think about it. There's loud noise playing, but you can still hear
the singer singing. That's the power
of a dynamic mic. You can get decent dynamic
mice from around $50 upwards. If you don't like the
dynamic mic root, you can go with
the lavalier mic. So a lavalier mic
is the tiny mike. You can just clip it to your color and start
shooting content. It's direct because it's
close to the mouth. It's high-quality and
you can just plug it into your phone
or your camera. You can get the $20
Boyer, love William Mike. Another important part of your recruiting process
will be your lighting. For example, I'm using
two lights, these panel, goat ox light facing me, which is a video light, and there is a ceiling light. That's the only two
lights I'm using. And I have been nice blue background light just to make
the bedroom interesting, I want to show you something, what I'm gonna do now
I'm going to switch off the ceiling light. Switch it on. We shut off and switch off the
video panel light. But don't worry, there's
a cheaper way to do this. You can set up the
camera in a position where the wind or
light is facing you. You can use the natural light to get a decent quality video. You don't need to be
fancy about this. Again, I prefer dark room and set up the light the way I want, but I feel like that's way too advanced video
production stuff. You don't need that to stat. I don't want you to be overwhelmed
when it comes to this. Okay, another tip for better audio recording
near cushions, comfortable things for example, I used to have my coach
behind me and it helped a lot when it comes to
minimizing room noise. Some people will have
a blanket over them, but they hang it with something that doesn't
show when the camera. You can go crazy, you can be creative with it. And another audiotape is recording separate audio
if you have the tools, let's say you're not
using the lavalier mic. You can buy a USB dynamic
mic like the one I'm using. Plug it in your laptop, click Record and
Audacity to record the audio and hit
record on your camera. And then you can sync those
in the editing process. All you have to do to
simplify the sink. Hit record on your order, CT hit record on your camera, slept twice and
those NEP waves will be clear and louder than
the rest of the audio, making it easy to sync
the audio and the video. And that's it for the recording guide for
your course lectures. See you in the next lecture.
8. Recording Part 2: Hey, welcome back. In this lecture, I'm
going to show you how I set up my
tools for recording. Please forgive me if the voltage gets duck because I'll be moving the camera around a
lot to show you what's what. So let's start with
the desktop setup. So this is the microphone
I use to record my audio. Does the market some names
you It's USB powered, so I just plug it
straight to my computer. It's ready to go over here. I have Audacity old pet, which is a free
software that you can download to
record your audio. Voice overs. That's all the CT. So I just hit record
year he'd recorded my camera snap twice and
then I'm ready to go. Okay, this is my second
monitor, the mantle, use for screen records, Editing all that good stuff. As you can see, please
don't judge my bare ground. You're going to
see a lot of y is monitors laying around
four right there. That's where I'm able
to share the timeline, which lecture I'm going
to record next k, and this is my camera's dead. This is my camera like this. The lightest facing me, which is the subject. This way, the lens of
the camera can see me clearly and as a
supporting light, I use my ceiling light. So what I'll do,
I'll make sure I set the video light panel
temperature to the same as my ceiling light so
that they work well together. And that is the benefit of investing in a video light,
particular been amazing. You can find decent
video lights, small smartphone size video
lights for a thousand red, which is like 50, $60. And you can start producing
better videos and be more in control of
your video light. And that is how I record my lectures for
screen recordings, you can download an
app called OBS Studio, which is a free
software or Camtasia, which is a paid software
to record your screen. And please forgive me
for the audio quality. I'm using my camera
shotgun mic because I had to move around to get and you can do the same
thing with your phone. Just get a nice tripod stand to mount your smartphone
and should quantify. So if you have a smartphone,
you are ready to go. No excuses. No excuses. That's it for this lecture. I will see you in the next one.
9. Editing: Hey, welcome back. In this lecture, we're going
to talk about the process of removing the errors you made while you are recording
your lectures. And this is my favorite
process because it can help you remove all
the errors you made, making a perfect deliver
at the very same time, it gives you that second
opportunity to add more ****** to the
lecture production. And this is the editing process. These are use DaVinci Resolve to remove the mistake
in the editing process. All the mistakes, the
things you said that you like now I'm not
happy with this and you get to pick the tics. You'd like, for example, if I'm recording something, I'm not happy with it. I tried to say it again and
again until I'm happy with it and then continue with
the lecture content. In the editing process, That's where I will
remove the mistakes at texts to emphasize a certain
point if there's a need, all that good stuff. And that's where the
editing process comes in. And that's it for this lecture, I will see you in the next one.
10. Promo Video: Welcome back. In this lecture we're
going to talk about the promo of video production. You weren't done editing
your class lectures. You happy with the area to help with the whole production. Now it's time to shoot at
that video that will make people click and give
your course a chance. This is the promo video. In this video, it's
very important that you have fresh, recharged
and everything. And I also recommend that
you script this one. Make sure it's at least one
minute for five seconds, you just go straight at you. What you do, why you are
an expert in that topic. What are the students should
expect in the course? What are they going to land? Also, call to action. If they want to do
a certain thing, whatever result
they're going for, they can check out the class. So the promo video is very important because it's
the tool you're going to be using to give people an idea of what's
inside the course. And that's it for this lecture. I'll see you in the next one.
11. Thumbnail Design: Hey, welcome back. It's time to create your course. Tom Naylor, this is very
important because it's going to be the cover
image for your coat. So it's very important
that it's high-quality. What I recommend is
you download Canva, which is a great tool for people who are not
designers like me. Go ahead signup to
convert N here, we can create
thumbnails For three, and you also get to
choose templates. We're just going to
search name, thumbnail. We can click on
YouTube thumbnails. Here you will get ten blades
that you can customize to your own liking to simplify things and only
see the free templates, you can just go to
Price and select three. Let's click this one. Great,
customize this template. Here. You'll see these
in image of this guy. You can just delete it, click on it, delete, remove it just like that. Let me bring in
an image of mine. This is the image
I'm going to use. But looking at it, it still has the
background in everyday. So what I'm gonna do, I'm
gonna go to Biji remover, which is my favorite tool
to remove the background. It's a free background remover. I'm just going to drag
and drop that image. Okay, great. Now the
background is gone. I just imported it. It's Dad. I'm going to click Download. Show in folder. Let's go back to Canva. Let's drag that image. Great. As you can see, you can
just go to the edges to enlarge or decrease
the image size. Right? Here we go. Now we're
getting somewhere. Click Edit image. Let's add some
brightness to this. At some brightness as you
can see, adjustments, some brightness, great contrast. Let's just go down in
contrast a little bit. Now. Let's go up like that. Alright, now we're done
with editing image. Just click Edit Image. Then here we can
change the text. I'm going to delete this. Delete this one. You just
click and delete on things. It's that simple. So let's
click on this image, right-click on it
and send to back. Right-click again. Send to Back. Great. Now it's behind these. I can click on
these without being distracted by delete the best. Delete this one,
delete this one. Delete that one. Delete bird one. Let's say maybe this
is a notion class. We're just going to say notion. You just double-click on
it and edit the text. And these are options where
you can change the fonts, the size of the text. And now we are done with
the course thumbnail. We can change the color, change it to white, change it to whatever
color you like. You can even download PNG transparent icon
off the software. Maybe you are teaching
and drop the logo here instead of having
a Vet Text again. And that is how you create
thumbnails for your courses. So you can play around with current while to get
used to the tool. But it's a great one for people who are not graphic
designers like me, and that is how you
create cause thumbnails.
12. Project for your Students: Welcome. In this lecture, I'm
going to talk about creating a project
for your students. This is very important
because you can give a student a resource or
a tool they can use, maybe a clip from
a video if it's an editing video that
they can practice with. Because the most
important thing is for your students to take action
right on your Skillshare. You can just go
to class details. The project section. This is where you can give instructions on what
the project is a bar, for example, these
mixing class I have attached a few bits stems. Please download the zip file. Feel free to share your mixes. Please feel free to
share your mixes. This will motivate
your students to take some action or have something to work with
to make it simple, something that they can do. For example, the stems
I shared or just a one-minute length of the song. They can quickly download those
and use them to practice. And that is the project
for your Skillshare class. And we're done.
Thank you very much.
13. Thank You: Hey, you've made it this far. Now that we done with the
course creation process, the most important thing
is you taking action. That is the whole purpose
of creating a viscose. So please feel free to reach out to me if you
have any questions. I'm happy to add new lectures
to answer your questions. And like I said
during the course, you don't need fancy
expensive equipment to start. Just start with what you have. My name is Samira September. Thank you very much. Amount.
 Sabelo September, Music Producer, Content, Web Design