Transcripts
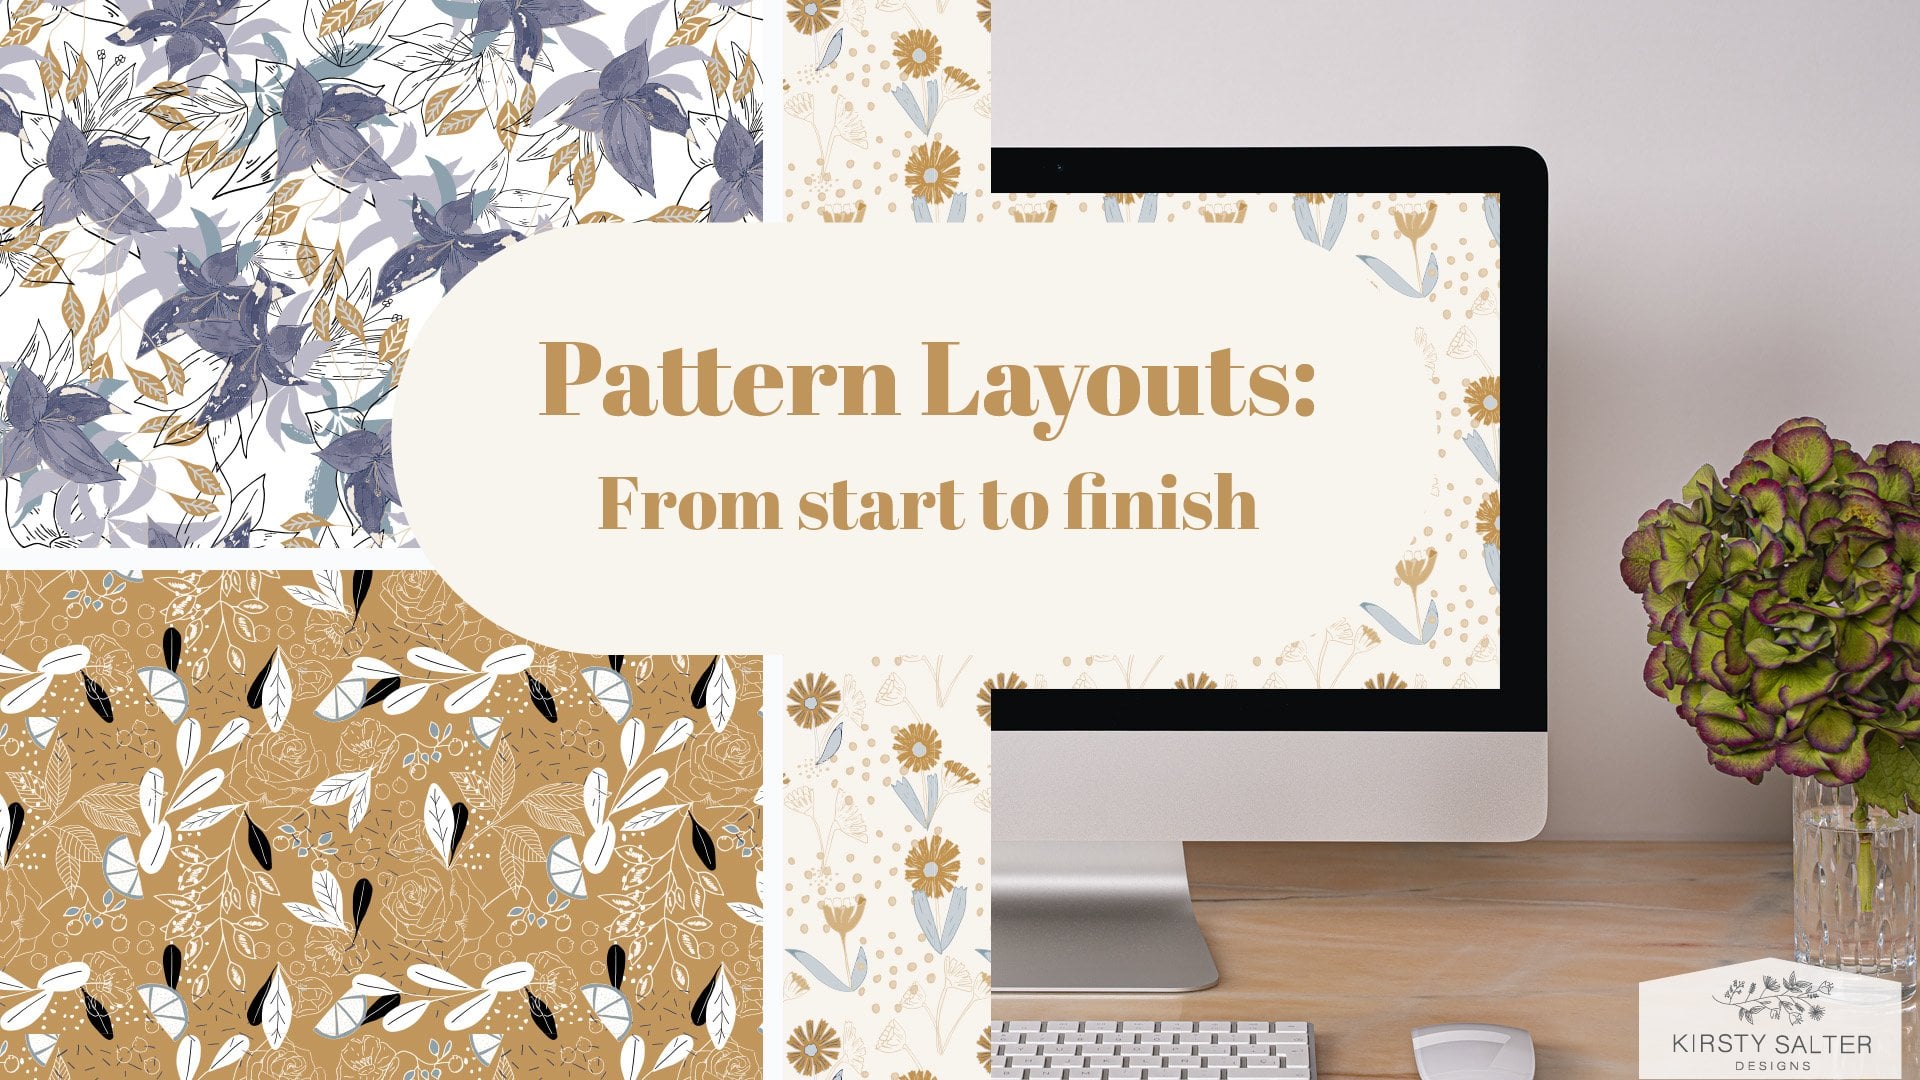
1. Introduction: A Hi, I'm Kirsty from
Kirsty Salt to Designs. I'm excited today to be
able to teach you how to create repeating patterns
within Adobe Illustrator. When I first started
creating repeating patterns, I learned a few techniques which basically to me were the only solution to
creating repeating patterns, but actually seemed
to be quite technical and always made me
second guess if I actually created the
pattern correctly, which meant I was overlooking a few things and was actually just confusing me
and taking a bit of the love of creating
my patterns. I chose adobe illustrator as it allows me to scale
up my artwork from a small motif that
I can print onto a business card
to something that can be printed into
a large poster. It's versatility works a lot better with what my
style is and my profile. I started researching
a bit more and actually found
another technique, which has been a
lifesaver for me. Especially if it comes, I like to create a range of
different styles of designs, especially for my patterns
where they'll basically be either toss,
horizontal, lateral. There's just a range
of different ways that I like to be
able to create them. I started initially
using illustrators and defined pattern within
the actual software. And that really did
start to confuse me. I seemed to not be able to get my lines to really line up. I found I was spending so much time just trying
to understand how it was actually working
within my pattern that it became a bit of a unmotivated section
for me when it got to that stage of creating my pattern after all
my motifs were done. Today, I really want to share
this technique with you. I has saved a lot of time for myself and even when it comes to checking my pattern
at the end to make sure I have actually
correctly got it laid out. This technique just allows
me to double check and if I really feel that it
needs to be redone again, it's not as difficult as
it has been in the past. I'm excited to show you
today and feel free to put any comments or any
questions you've got below, and
let's get started.
2. Class Project: For this class project,
I love for you, Be to show us and share with us what pattern you create after learning this technique
through this class. I believe that every
pattern has a story. Every motif, the
reasons why it's become the actual repeating
pattern that you've created. A lot of my stories, I've started with creating
a bit of a story line at the start and then
start sketching my motifs, then bring it together
as a pattern. So I've uploaded
an actual example of what I would present
for this class project. So feel free, I'd be lovely to be able to
see what you've learned through this class and be able to reflect and love your work.
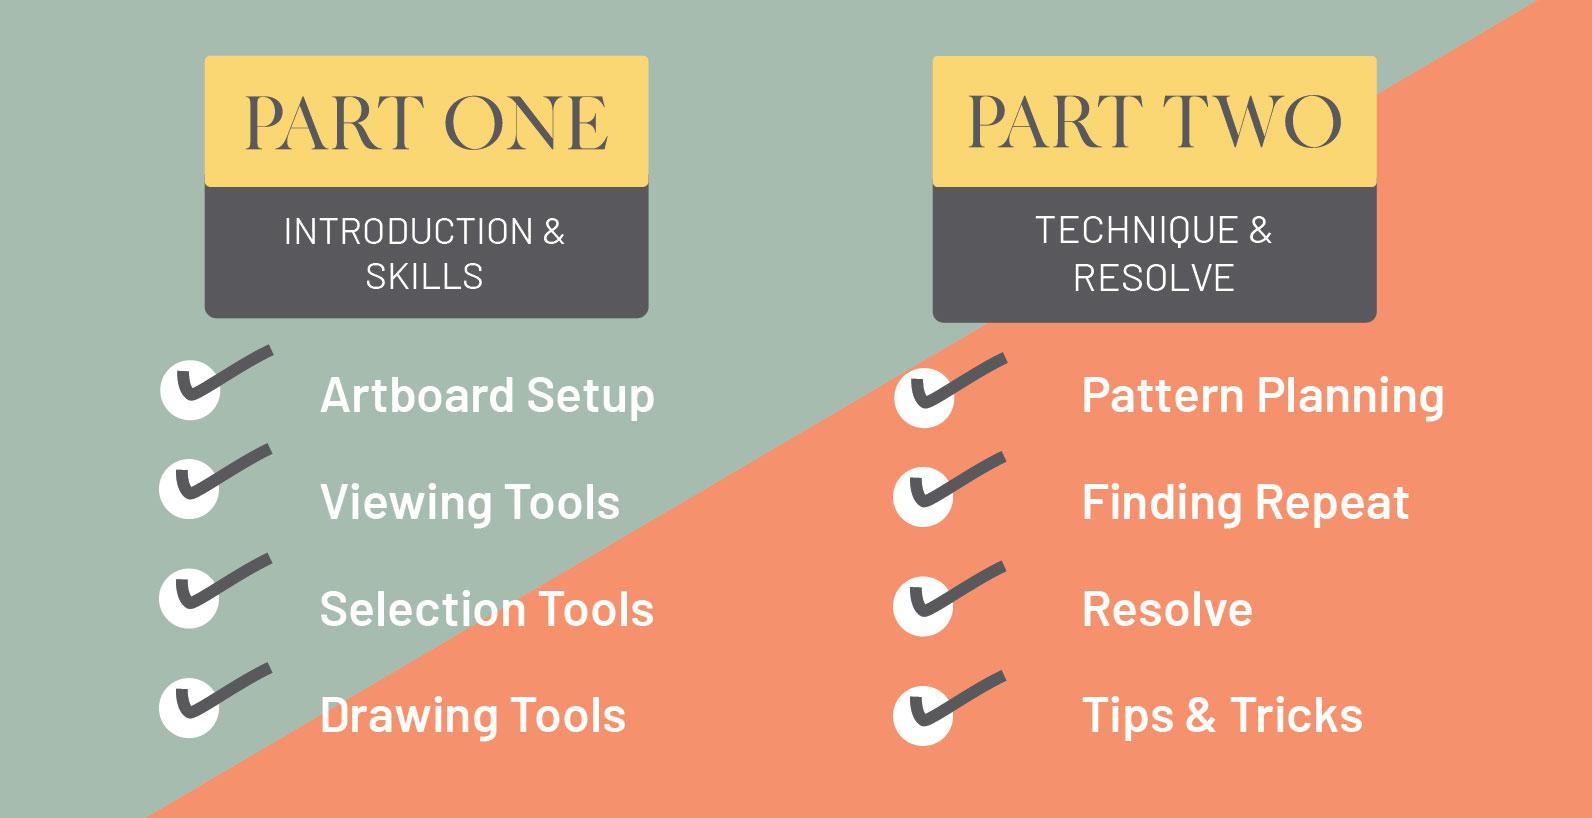
3. Pencil & Pen: For these modules,
we're going to run through the drawing techniques. Now, there are some tools
within Illustrator that allow us to create in
a few different ways. These drawing tools I'm
going to show within this class will be
the pencil tool, the pen, the paint
brush and blob brush, the shape builder tool,
which I really do love, and the type tool. So I'm excited to show you
this, so let's get into it. The pen tool, the paint
brush and blob brush tool, the shape builder
tool, which I really do love and the type tool. So I'm excited to show you
this, so let's get into it. I'll do the same thing for you. I'm just going to press
pencil here or shortcut in. Now, I want my stem
to be a dark brown. So I've got my fill
with nothing in it, and my stroke is the green. Now, I'm just going to go with
just a normal stroke. Mm. I'm very penicy about my
stem, so I apologies. And I'm going to
call it my stem noo. Now, I want my stem
to have round edges. So it looks like I've used a goal point pen or,
you know, a permanent. So when I've set when
I've gone to do this, my default here is set
with a round caps. Some of you may find if
you're new to illustrator automatically defaults
to sharp square edges, which works for some people, but it's not my style, so I always keep it on und caps. That's how mine may look
different to yours if you sorry, if you've just opened
illustrator for the first time. Now, I'm just going to
do a little bulb leaves. So what I'm going to do is
this little section here. And it's just the breakout of where the flower
is coming out. So I'm just going to select
here the pencil tool again, and I'm just going to
draw my little one. Lab. Nothing to you fancy. As see, it's got no f
fill at the moment. So don't get this fill. I just want you to go
up to the top right. And you can select the box here, which is the last color
you currently used. Or I tend to do is I just grab or hold down
the boundary box, or the outline box, the stroke, and then drop it in the fill, and it'll put it in there. Depending on what sort of
look you're going through, you can use you can keep that
same stroke on the outside, or what I tend to
do is I remove it, which gives me just a bit more
definition in my corners. How I like it, but it's
completely up to you, how you create your
flowers and your designs. Now, my next part is I want
to basically create my bulb. So I'm just going to pick. Here we go. I'll go with that. I do want it to have a fill, but I want to have
the same fill, that same peach
color into the film, but I'm going to remove
the boundary box because I do want it still to have a film. I'm going to press the pencil, and then the last thing I'm
going to do is I want to make sure I'm drawing behind
this little section. So there's a little tool here, the circle on the square, where it says draw
normal or draw behind. Draw normal is it will
draw on top of whatever. So if I've drawn this as I have, the next thing that I draw on top of that
will go on top of. So if you want to draw behind, make sure you do click
and draw behind. Big scoopi bub.
That's disappeared. Where to go. Alright. There we go. So I forgot to click that such drawing that. Sorry,
that's my mistake. If you ever have that situation, I do it all the time,
where you draw a stroke, but it doesn't get a color, just means that you haven't properly selected the color, which I
do all the time. So just make sure you click
color after, there it is. And there's my bub. Oh,
my little bud flow. I'm just going to add
in a few little strokes just on this petal to basically
show a bit of shading. Now, I'm just
aiming at a stroke, not a fill like I did with this. So I'm just going
to click on here, and I'm just going to change
that to a deeper color. I'm going to press the pencil. Do check. That's all there. And then I'm just going
to do little strokes. Now, for any time, you
want to resize those. What I tend to do is
just make sure I've selected only those strokes. And then what I'm going
to do is come over here. And I'm just going to resize
that to say 0.5. Okay. And that basically
resize them down. So that's just a pencil. That is entirely created
with the pencil tool. The pen tool is a
great tool to use for creating a lot of
different designs. It allows you to
have smoother lines, control the lines and manipulate them just
under better control. With this pencil tool here, creating this, it's free form. It's like sketching
and doodling. With the pen tool, you can
create precise curves. By using the pass and anchor
points that it provides. So I'll just click up here and the pin tool is shortcut P. But I just want to
show you what it allows us to do as an example. So I'm just going to click here. Now, you see this
line that comes out. I've not got anything else
pressed on the keyboard. It's literally that
is the pin tool, and it's just showing
me obviously how many points I've come away. Now, if I press down and
hold down the mouse, I I stretch, this out. See how that curve keeps
going and creating, I twist it around. Allows me to create a
very nice smooth curve. If I'm about to
create my stem now, I can literally get the
most smoothest stem that I want with this tool. It's really really powerful
and it's such a great tool. And for the preciseness,
it is fantastic. Everyone creates
different styles. So this works for some people, and it doesn't work for some. But with me, it's on whatever
the day I'm feeling. So I've done that
first little curve. Now I'm just going to
do the same again. I'm going to press down, hold and stretch out. So I'm going to want
mine to just stop there. I'm going to lift off again. And then I'm just
going to have a curve round to about there. I'm just going to press
my mouse down like a tap. I'm not going to
hold down again. I go to tap. And that's it. I'm going to press escape because I want to
disconnect from this. I don't want to click
on anything else. I want this path to stop. I'm going to click
escape. There we go. Now that is my stem. With this, I'm going to
just pick a dark green. Here we go. And for pen, and I'm just going to do
the exact same again. Now, when I go to
click on this anchor, it's going to have It's going to have a little
dash beside it. Now, what that's saying
to me is that if I click on this anchor with
the Pen tool selected, I'm going to basically
rejoin editing that path, which I don't want to do, I don't want to
touch or edit this. So I'm just going to start
creating the path here. Now I've created this path. I want to show you how you can
basically manipulate this. This is one of the
great things with the pen tool that
I really adore. Now, if you go to your
indirect selection, your direct selection tool here, And you see you got
these anchors here. If I click on one, it's got these little paths to
stick out. I zoom into it. If I click on this handle, If I drag that out. Now, I always have
to remind myself, especially when I first started
and illustrate this path from the top handle to the bottom handle has to
be in a straight line. I can drag the handling
closer to the anchor, which reduces the smoothness
of my stroke here. As you can see it's getting
sort of a very sort of sharpish corner
as I get closer. I I drag it out, it
gets more curve. So And if I move that left
or if I move that right, it manipulates the top curve to. You just have to remember, whatever you want to
do in the bottom, if you want to make it more straighter or more of a sharper or basically reducing that
curve, you can do that. That's fine. But if you're wanting to
stretch the curve left, then you're going
to have to come up to the top handle here, and then obviously adjust that to be smoo to compensate
for the other side. Just keep that in mind
when you do this. I really just want
to keep that shape. I just want to give you an
example of those handles. Now, I'm going to create here. I'm just going to go
for a sort orangy Oh, no, sorry, I was going
to go for a green. Pas my pintol. Now, I'm
just going to come over here and just connected
to that path. Just going to go up, and I
want to have a curve here. Now, I've just tapped here. If one great thing to
remember with the pen tool. If you're wanting to create your next anchor to be a curve, then press and hold, and then obviously stretch
out your next section. If you're wanting it to
be just a solid anchor, no adjustment handles, then tap. That's what I've done
here because I want this point to be a
sharp stop point. I'm going to come down
here and now I want to give the bottom
section a curve, so I'm going to press down
and hold and pull out. Now I'm going to tap
on that because I don't want to have to redo that, but then I want to extend. Honestly, with a penal, play with it because it's
so it's so much fun. It is annoying when I
first started to learn it, and I got very frustrated
with it at the beginning. But it was just persistence. I learned and learned. And there was just a point
where I went, h, I get it. That's how it works. As she can see here. I'm just creating what
I need on the curves. But then I get to that point, I don't want to carry this. I don't want to have this
path that's a bit crazy, so then I click here,
and that stops it. Back to just a normal path. I'm just going to back up here. Give that example,
the same again. I'm just going to go up here, extend that path out. Don't want to extend it out, so I'm going to go down here, and I'm just going to
pull that out like that. Stop perfect. I want another one
to be out here, and then back in again. Oh, I'm not going to lie. Some of my flowers
do tend to look a little bit crazy,
but that's okay. That's what I love
about this industry because we've all
different unique styles. Now I'm going to click there, but I want this one
to be big and bulky. There you go. Now I
want this to end, so I'm going to click Escape. So I'm disconnected.
There we go. Now, I want this to have fill, so going to do the same again, grab the out of box, drop. Don't want to have
that that out of line, so That's my fire. I'm just gonna rotate
that slightly. Drop that down. There you go. So it's a bit different from
the one I created here. This I went for more
of a random curvy one. But honestly, just play with it. Now I'm going to
do my flowers now. Now, same again, I
want to draw behind, and let's go into nice vibrant
color. I don't want that. So I'm going to draw behind
here, press P for pen. I'm going to press down, and I'm just going
to do the same sort of jagged leaves I had. I'm outside. I'll sort
that in a second. Go. Same again, click,
back out. Click. Then again, back out. Click that anchor again. I'm stopping the actual handles from being created on that tool. This probably looks like a
very angry flower right now. And then out again, I want that to try and get a bit more of a
raise. There we go. Click on the anchor to end path. Oh, there we go. She she is, and then back down in. And then I want that to
have quite a big kick. So go Escape. I'm just going to there you go. Now, that's quite
a simple design. I'm just going to move
that a little bit round, and I'm just going
to create that fill. So same again, just drag that into the middle. There we go. I don't want to bound for
an actual stroke box. And that's that flower. So that there is how I created
that flow using the p. Now, it's a lot more precise, and for me, it just takes
a bit longer to create. And For me, it's not really of the
free form style I go for, but I'm not going to lie. I have created some really lovely flowers using the pentol. The one thing we'll
say about the pentol, it just requires a bit of
practice and a bit of patience. Once you figure out how you can manipulate your pass and how you can utilize
your anchors, it is a really great tool.
4. Drawing Tools Cont: The next great tool I'm going to teach to you is the
paint brush tool. Now, the paint brush tool is very similar to the pencil tool. The only real difference is that with the
paint brush tool, you're able to use different brushes when
you create a stroke, which is fantastic
if you're wanting to create a path that's got especially if you're more creating your
own calligraphy. And wanting a certain
brush type texture throughout your actual design. So that's one of the
great things about it. So let's get started. Now, the shortcut for the
paint brush is B, B for brush, but I'm just going
to show you where it is because I've been
used in the pencil, it's currently just
under that section. But normally when I open
illustrator straight up, it's the first thing that really pops out, so
it's paint brush. More of a Sady green. There we go. Now, the one
thing I do love about the paint brush tool is it is free form like
the pencil tool. But it's like Illustrator
smooths out my line for me. When I do create anything
that is a floral design, I tend to go more for the paint brush tool than
I do the pencil tool. I'm just going to show you here. I'm just going to do
a little line here. Now as you can see
it's quite jagged. I've still got my
mouse held down. Going to release now.
You can see there, all those jaggy
lines smooth out. Illustrator just in
a way irons it out. So that's one of the reasons I really do love the
paint brush tool. So as you can see there, I'm just going to go into
the selection tool there. And yeah, it's just
lovely and smooth. And if I redo that, I back up again,
press B for brush, and if I just do that again, same again, just sort
of smooth it out. So Yeah, I don't know why, but it is just something I have noticed on my many times using both pencil or using
the paint brush tool. For some reason, the
paint brush just gives it a little bit more
of a smoother edge. So tends to be a bit
of a go to for me. So there I have,
I've got my stem. Now I want to create
my little leaves. I'm just going to create these. I'm kind of going for
a little bit more of a I'm sticking with
the same sage green. Let's go bring that
in and let it. And once again, same again, it was old jaggy, and
it smoothed it out. Now, I want to do a nice fill. I'm just going to basically drag that color into the fill. I want to get rid of
the outline color. I'm just going to click there and just maybe bring
it down slightly. There we go. Now, for
I'm going to go for it. I'm feeling more of a
yellow color today. I'm just going to drop
this to a yellow color. Make sure I've got
my fill there. Press B for my brush. Going to make sure
I'm drawing behind. Then I'm just going to do Nice, big petals. Like I said, please
don't laugh at my flower and let go again. So obviously, I want to just make sure that's
filled with that color. But that is basically a flower created using the
paintbrush tool. Now, the next one is
the blob brush tool, which is how I created this one. The blob brush tool is
kind of a say option. It's not something that
I regularly go for, but the one thing I
do love about it is, if you're painting
with a certain color, if the two paths, actually, I'll just draw it
for you because it's a bit hard to explain. But if for instance, I've got this yellow, and I'm going to draw
a few leaves here. So it's not going to be
pretty, I promise you. So That's that draw. Now, if you see when
I hover over it, you see how it's got a
path on the outside. It's like its own
personal shape. The great thing about
the blob brush tool is it allows you
to create shapes. It marriages your past together. If the color is the
same, it will marriage. If the color is different,
it won't marriage. So I'm going to go with
the same color again. You can see this shape. I'm going to do say a circle
that goes through it. I'm going to go round up. Now, when I go to select
it, it's one shape. It's marriage. If I change the color, I I change the color, Click the blob brush. And then if I went over again, Obviously, that's gone behind because I'm currently
drawing behind. But you see there,
it's separate, and that's because the
color is different. So that's the one great thing
about the blob brush tool. And I'll show you when
basically drawing out this flower here. I'll just delete
that. So as normal, I'm just going to grab a
green color from my stem, blob brush tool,
and I'm just going to draw a nice stem there. Same again, I'm just going to it's ever going to
be pretty in this one. There we go. And as you can see,
because of the same color, it is the stem and my little leaves have
all become one piece. So it's really good if if
you're not too worried about working in different
sections within your artwork, this is actually nifty. Nifty, I don't know if
Nifty is the great word, but it's quite cool. Now, with the blob brush tool, because it creates
things not as a path, but as a shape, We can use the
shape builder tool, which is just over
here in the left. I just looks like two circles, one on top of the other
with a little arrow. If you select that, it selects our shape here. But if you see it's got a
plus sign as I go across, it allows me to make this into one shape, which
is really great. I really do love
this, especially when I'm trying to create
my own shapes. I'm just going to go through and you see how
it's turning red. It's just showing me what shapes are turning and merging
into the one shape. I'm going to go there,
and that's one shape. Miss it a little bit
there. I'm going to go through that. That's one shape. Now, I'm just going to
finish this flower off, not the prettiest one
I've ever created. But I'm just going to
click the blob brush tool. I'm going to pick a color to put in, something a bit orangy. Then once again, I'm just going to make sure I'm drawing behind. And then I'm just going
to create that one. Then I actually want to have slightly different color bulb. Let's go to get rid
of that. In here, just a slight different tone. One of the main reasons I'm
doing this is because I want I want my petals
to be different. I don't want them to be
exact so they're selecting, but I think these two are
the same. That's fine. Now I'm just going
to drag that down. Now what I'm going to do here is go to the shape builder tool, and then I'm just going
to make them one shape. Same with this one, one shape. The nice thing that I do like
about the blood brush tool, if I'm wanting to
create circles, Just really quick
little circles just to basically add a bit of color
or texture within something. Then I can do that
really easily. Just making sure I draw on
top is just basically going. S S Not the most prettiest flowers, but that is how you can create different
flowers within illustrator. Same technique here, blob
brush was used for this, paint brush, pen, pencil. I've kind of got a
funny thing going on with that one there.
Get rid of that one. But that's exact same way. Each of them have
all been created. So It's not too hard, but the way I've done these, when I spend a lot more
time creating my flowers, They do obviously
look a lot better. But if I'm looking for more of a simplistic hand drawn
or hand painted look, obviously the paint brush
and blob brush is amazing. But if I'm more looking
for tighter detail, then pencil and the
penol are fantastic. Now, as I just go
through and show you a few other different methods
for us to create shapes. Illustrator does have
some presets for us. If we go over here on the left, got a few shortcuts here. We've got rectangle,
which is M eclipse, L, line segment tool. I don't really use that
a lot because for me, I tend to use the pen
tool or a pencil tool. That's not really
what I jump into, and I'm not going to go
into it within this class. I'm just going to
click rectangle. If I hold down
shift on my keypad, it allows me to
get an exact box. If I lift up shift, then I can create any right
angle to sorry shape. As I was talking about
the shape builder tool, before I forget, I'm
just going to show you how it allows you to
create your own shapes. There is just a simple square. Now, I'm wanting to show you how to create
your own shapes. So just going to go
same again, a square. But with the square, I want to actually
create my own shape. I'm just going to
click R for rotate, and I just want to
put the square on its side. I'm just
going to put it there. Now with these two, now with
the shape builder tool, whatever items you want
to manipulate and change, you have to make sure you've
got them both selected. So that's the two. I'm going to click the Shape Builder tool. Now what I want to do is I want to just have this triangle. I don't want the
top of this square, and I don't want the
bottom of this square. To do that, I'm going to
hold down the option key. Which puts my little arrow
with a minus next to it. If I lift up the option
key, I've got the plus. That is telling
us that the plus. If I select the shape here, it's going to keep that shape. If I hold down the option
key and has the minus, it will remove that shape,
which is what I want to do. I'm just going to score through there and that shape disappears. Same with the top section and
disappears. There you go. There is my triangle, and because there is a
back section triangle, I have my two. So I use this a lot for any
of my geometric shapes, really good quick and easy tool. Before that was actually
brought into Illustrator, I went through the
painstaking jumps of having to create them myself, learning how to cut and
erase in a straight line. It was painstaking. Then the shape
builder tool arrived, and it saved me quite
a few times over, so it's a great tool, great one to keep in mind of. The next great tool the
illustrator has is the type tool. So it's just here or
simple shortcut t. If you hold it down, there is a few
selections it does, and it's really easy to use. If I give you an example
here, if I select, if I go up here and I just
select the clips tool, so I want to just
select a circle. Now what I'm showing you
is how I created this. Now, I'm wanting the
exact same thing. I just want text
around a circle. What this option here, the type on a path tool allows
us to do is that allows us to put text around this path. So that's what I want to do. So I'm going to select there. And automatically
illustrator puts in a whole lot of texts
as an example. Once that goes in, I'm just going to copy what
I've written there. Happy days sketching
and pulling away being creative I just love it. Ooh. And that's it. Really simple. Illustrator takes basically a lot of
the stress away. And if you want to do
downsize it you can. And one of the things you have to sort of watch out
for is obviously, if you want it to match
all the way to the end, it's just calculating
how big your font is. So if I select my font there, if I increase my font size, I can get it up to the end. If it's not just the right size, you can type your font size in here to try and
make it fit perfectly. There's many different
ways to work it. Oh. Let me escape. So, yeah. So that's the shape builder tool
and the type tool.
5. Repeat Pattern: Now, I've created these
shapes just to have simple to make this
class quite easy to understand and making it
less detailed because sometimes So let's get into creating our
first toss pattern. Now the first step
that what I always do for this method is
the differences between the two that I'm
going to show you is one that I'm going to
set out my tile. I'm going to set out
my artwork space of what I'm giving
myself to work on. The other method is how I basically start
putting together my motifs. And as I go through, I then find the repeat
within the pattern. Hard to explain,
but I'm going to show you that after I've shown just using
a boundary tile. I'm just going to set this up. Now, I'm just going to go over here to the rectangle tool. Now, I just want to
create a square. Nothing too complicated
just a square. I'm going to hold down
shift and drag out the box, and I'm going to hold up there. Now, I really want to have
all sides the same size. To do that, I'm going
to come up to here. I'm going to put
this to, I'm just going to round it off to 13130. There we go. I'm going to keep this just going to give
it a slight color. Nothing too much. There we go. There we go. Now, what
I also want to do is I want to make sure I can't
accidentally move this box. So to do that, there's two ways. I can go to object,
come down to lock, lock selection, or I
can do the shortcut, which is command two. That just means I can't accidentally grab
this or move it. My first step in creating
this toss pattern is, I'm just going to start
grabbing as that's on top. I'm just going to
grab all my shapes here and right click, arrange and bring to front. Now, the two main things to be aware of is when
you are designing a box like this is that if I was to grab this shape and
put it right on the corner, While I'm creating my pattern, I have to remember that whatever
falls off the edge here has to be repeated here because
it falls off this side. What's technically happening is this is going to be mirrored and being placed on this
side. I'll show you just now. So I'm going to I'm going to hold down option and just drag this so
I can copy this. I want to put this shape here, and then I'm going
to do the same with a few others where
I'm just going to basically copy to me to rotate. Just going to place
them so they fall off. But when you're doing this, just remember to look what's on the other side because you
don't want or you may want, but I don't want any of my squares to touch
another square. While I'm dragging these,
I'm being very conscious of the fact that I
don't want them to interact with another color. Say drag that and
that goes about here. Now, I've done that side. Now, remembering that my shape, this square is 130
points wide and high. There's a sneaky trick
to moving copying these to be on this side to be exactly 130 points, and I'm
going to show you that. Selecting all the items
that fall off this side, I'm going to right
click, go to transform, move, and this
magical box pops up. Now, what this box
allows us to do is move and copy the
artwork we have selected. Now, I want to move these
horizontally across 130 points because that's
the width of this box. I'm going to type in here 130. I don't want my artwork to go up or down vertically,
so click zero. Then I'm going to click Preview, and you can see it previews for me, how it's going to look. Now, I will change
the square because it's just a bit too
close for me for this, but I can't do that
right this second. So I'm happy with that, and
I'm going to click Copy. Can you see there?
Literally magically copies it across to
that space there. Really nice, very simple. The one main key thing
with this is you need to remember what
your box size is. Click Transform move. Now this time, I
want to go vertical. I don't want anything
horizontally, but I'm going to want to
do 100 and dam preview. Sometimes it's best just
to click that on and off and it shows you there. I will move the s. But apart from that, it
looks quite good. I click copy. There we go. Just going to move up to give
a little bit more space. Just make sure
that is all right. Now, as we've done all that
and got that side done, which I'm really happy with. What I'm going to do is I'm now going to drop
my pattern into my swatches panel so I can firstly check to make sure I haven't messed
up this pattern. So I'm just going to go and I'm going to go
command shift two, which releases this box. Now, what I want to
create for me to be able to grab this pattern and
drop it in my swatches. You have to remember, and
I do this all the time. So when you do go ahead and do it and you wonder
why it's not working, the best thing to do is just
redo your boundary box. What a boundary box is is basically a duplicate
of this box, which sits exactly behind it, so it's literally a
brother that sits behind, and it has no fill and
it has no outline. I literally is transparent
but sits behind. But it allows illustrator to sit and they grab whatever is inside that box and drag it
into our swatches panel. The best way to copy this
and place something directly behind is to go command C, and then go command B. Now, what that does is places
this exact box but behind. Now, if you look over here, I've got that boundary
box selected, but it's put a fill in. So I have to make sure
that doesn't have a fill. And it's just transparent
on both of those. Now what I'm going to do
is I'm going to select this whole section.
This whole pattern. I'm going to select it, and I'm going to drag it
across over to my swatches. Say it's got a plus sign. That's a good sign. That means it's
allowing us to do that. I'm going to let go of it, and
there is my pattern there. Now, to check to see if
the pattern is correct, correct, sorry, or if
there's any errors. I'm going to select M
or rectangle over here, and I'm just going
to do a big box. Go to let that go, and
I'm going to select my pattern, and they have it. That is this pattern
here repeated. Really nice and simple
way to create pattern. That is how to create a
toss pattern using tile. Now, if you ever do find
for one reason or another, in this design, it's
quite easy to spot, but if you do happen to have say one of these
boxes is cut off, it probably means that one of these shapes hasn't
been duplicated across. I'll just show you
that as an example. I'm just going to
grab this box here. And I'm going to
delete that box. Let's see what happens
when I drag that. I'm going to grab my pattern, drag it in and let go. Now I'm going to come
into the same box, and I'm going to click
the new pattern pin in. Now see what's happened there. This box is narrower. You can see the repeat there. And that is because this
hasn't been duplicated. So if I go here,
and to be honest, I'm going to show you what
happens when I refine this issue in one
of my patterns, I if I ever see
something missing? Just to be sure I haven't missed anything else is I select everything that falls off on that one side
and I delete it. And then I come back
on this other side. I'm just going to make sure I haven't got anything
else clicked, and I do the whole thing again. It only takes 2 seconds, but it can save you a whole lot of pain
trying to figure out, especially if you've
just fixed one problem, and then you see
there's another one you have to basically
redo it again. It's quite frustrating. So
what I'm going to do here. Now, just remember,
It's the same process, but when we're moving
objects from left to right. That is obviously
going positive. That's going from
say zero to 130. Because we are now going from right to left, it's
going negative. For going left, we
need to do -100. I don't want to go vertical. I want to keep that preview. Happy with that copy. So do the same again, grab it, pull over. Click this, put the
new pattern in, and dip, that's that solved. Another way to
create a pattern is, and this one can take
a bit more time. If I'm wanting to create
a very simple repeat, then this is another method. Very simple motifs, where
it is literally one motif, and all I'm doing
is repeating it. This method has always
been the quickest for me. The one thing about
this way is that you have to pretty much create
your repeat pattern. And then in a way hunt
to find the repeat, which in some ways is really fun and I actually quite enjoy it, but some people find
it really frustrating. That's why people go
with the tile method. But it's each to their own, it's just what
works best for you. I'm just going to
line these all up. Now, what I'm doing
here is they're just going to be line stars. Nothing too fancy, nothing All I want to do
is just line them up. Now, the one thing
with this pattern is that when you're creating it, you've got to pretty much
create a repeat pattern, not within any box, as you can see, I
haven't used it. I'm not even taking into
account this artboard. But in my head, I'm trying to create
a design which repeats and looks very similar. Some people love this method. But this actually
works really well if you're creating a piece
which is very similar. One of my designs, Swedes honey was
created this way, and it's just it's an easy way. H Right. So I've just created
this simple pattern. Very easy. That. Now, what I want to do is, I want to find my repeat. So to do that, I need to
pretty much create my pattern. And by doing that, I'm literally
going to duplicate it. I just want to pre
what I've already got. M. So there's the pattern there, quite happy with that. Now, I want to find the repeat. That is what the aim here is. So to do that. I'm going to make sure
I've got no fil, no fill. I'm going to give myself
just a background. I'm going to go
to the rectangle. Now, what I'm doing is, I'm going to select
the top of this star. And what I'm trying to do is
find its sister, basically. I want to find the start of that and down to
the next one. Now, You've got to remember that I want to find the top of that, top of that, but then I've
got to find the other top. I. I'm going to go top of there and I go down
to there found. Yeah, that's good. Where's the other one? Is there another one? Is there another one? I just don't think they're
aligned correctly. So I'm going to let that go. And right now, that
is my repeat pattern. If this was very
similar to this one, this box is mimicking
this design. The only thing that I
really need to focus on now is I need to make
sure my stars aligned, so they don't look
like they're crooked. So to do that, I'm going
to Oh, apologies there. Just going to go along here and just make sure
nothing's grabbed. So I'm going to change this.
I'm just going to put this into like a pale pink fill. That's my border. All right. I'm going to make sure that that background
goes to the back, so go down to a
range, send to back. There we go. Now, I'm just going to remove anything
that I don't need, which is all this. Oops. Which is pretty
much or that's grouped. Something's grouped. Where
are you? I live again. Now, I'm just going to
remove what I don't need. Now. With this design, I obviously want to make
sure that that is exact. Now, yes, I have found the duplication here,
obviously not perfect. But I want to make sure
I remember the numbers. To make your life easier and every time
this is what I do, I'm going to put that to 28, and I'm going to do that
to one, two, three. It's a very small move, but it just works. 208 and 1123. I'm going to remove all
the items on the right, and the same on the bottom. Then what I'm going to do is I'm going to select the
ones on the right. And that's groups. Where
have you come from? I'm going to just remind
you just as a safety. I do forget, and it's
just and I apologize. I've forgotten this time, but make sure you do lock that down. Just to save yourself
any grief by accidentally creating
your pattern, but then slightly
moving your background, it will throw off
your whole design and sometimes it's the last
thing you think of. I'm going to go
down to transfer. Move. I'm going to moving
these 208 by zero. I want to see the
preview, which is there. Yeah, pretty happy, click Copy. Now I'm going to
do the same again. I is going to grab everything that's close to
that top line just to be sure that tip
doesn't rotate over. Move. I don't want to go horizontal, but I want to go vertical. There's the preview.
Click copy. There we go. Now, I'm going to unlock this back box and do command
option two to unlock it. I want to create
my bounding box, which is going to sit behind, which is going to be
command C for copy, command B for back. Then I want to make sure because I've just copied
and pasted something, is what is the last thing that
you've been left selected, which is behind this pink box. It's telling me that that actual object has
got a pink fill. I'm going to make sure
my bounding box has no fill, no lines whatsoever. I'm going to click
that. There we go. Now I'm going to do what
I did with the other one. I'm going to grab this and
I'm going to put it in there. Now I'm going to
check. I'm going to go check and make sure. This can also be the very
exciting part I find. This checking to see if
your design is correct. And there we go.
Oh. Don't want you. That is my repeating pattern. So as normal, I tend just to run around it and just make sure I haven't messed anything up. But looking at that, I'm
pretty happy with it.
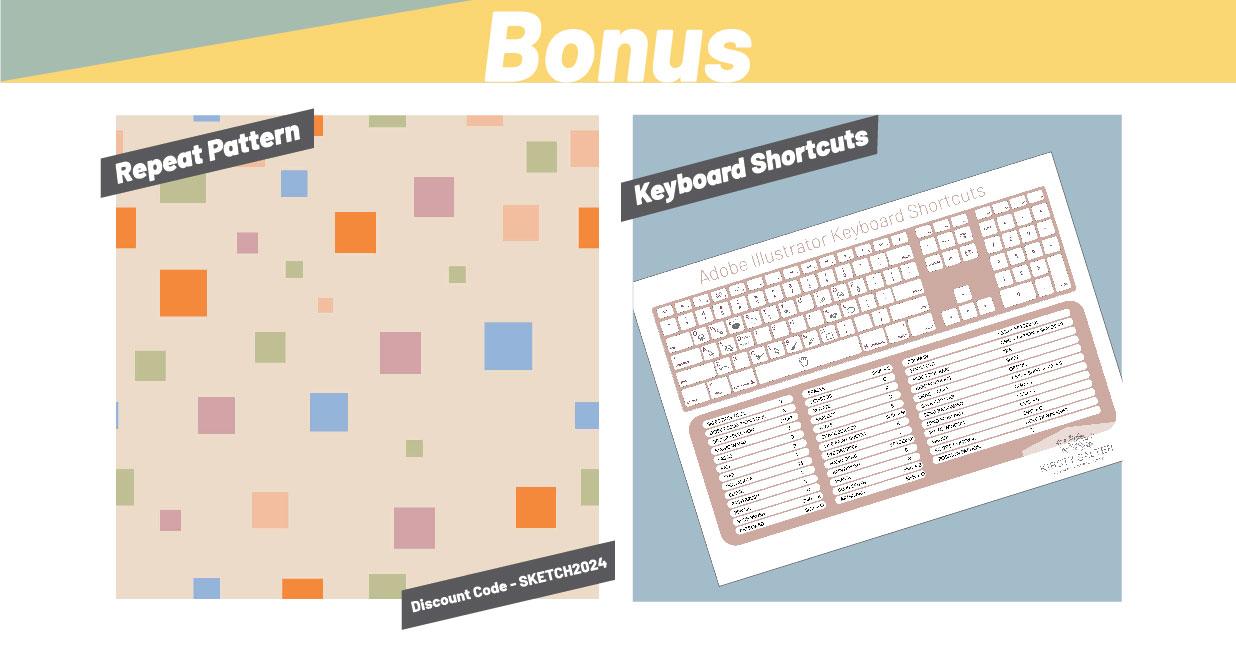
6. BONUS: For this module, I'm
going to introduce to you just little techniques
to find out if you've got an issue within your actual design if
you do how to check to resolve the issue and a few other little
points that you may find within Illustrator
and may concern you, but actually aren't
really to worry about. Now, I've created
this pattern here. And as you can see here, there's a few things
aren't correct. Now, obviously, all
the shapes that I'm working with were squares, but for some reason, I have some little errors happening here where I have some of my
squares being cut off. Obviously isn't great. It's not what I'm really after and looking through
the actual design and is popping up quite a few places so going to run through how
to resolve this problem. Now, a lot of the time, especially if you're working with quite a detailed pattern. The best thing is is to remove pretty much two
sides of your pattern. We're just going
to do this just to show you exactly
what I'm meaning. I'm going to remove
this one side. Now you probably have
already spotted my error, but I'm just going to show you
here and this is what I do to resolve any of
these cut off issues. I remove two sides, and then from the start of it, if I check, My artboard
is 500 by 500. I'm just going to basically do the steps that I shown
in the previous module. I'm going down, so I want that to be zero and that to be 500. Preview that. On tick
for some reason. There we go. Copy. Then same again here, I'm going to do the horizontal. I'm going to move
horizontal 500, zero. I want to preview that. Please thank you. Copy. Right. Now I'm going to
do the same thing again that I did to actually
create this one. So I'm going to grab my
pattern, drag it in, come over, click, and then I'm going to press on the
new swatch, and there we go. So my issue was that I had missed one of my squares when
I was cutting and moving. And I actually can see if
I just shuffle my pattern, just to the left, I can
just check it all over. Another thing you can do, which I do quite a lot is
just to mainly just scale back my actual patent, and then just obviously
have a good look at it. Make sure I'm happy with it. Make sure there's
nothing coming up. Yeah. No, I'm pretty
happy with that. And that is a complete
repeating pattern. Nice and simple, but this
is basically to really give you an idea of how you can find certain issues
within your design. So to run through
that technique again, and resolving any issue
that you may have with an actual object being
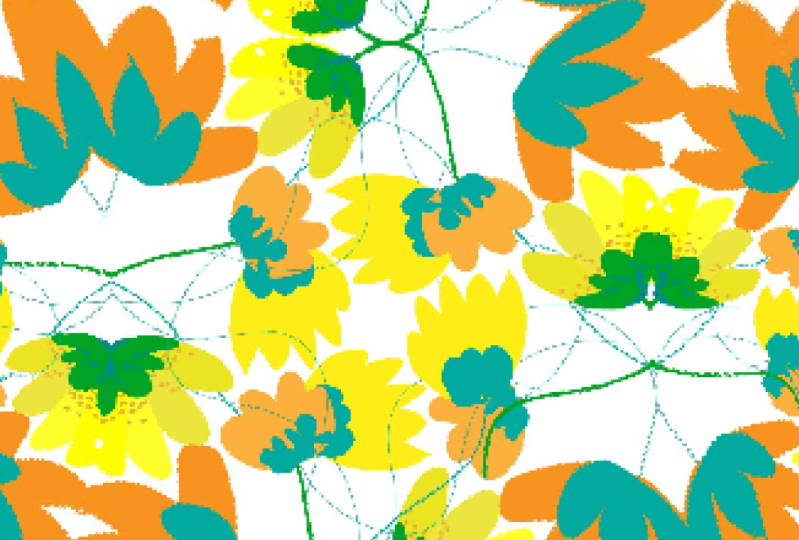
cut off or a motif. I've got this pattern here, which is a lot more complicated
than the previous one. So I'm just going to
drag that over here. And then I'm just going to
do the same thing again. I'm just going to pull out
and then have a look to see if anything is
obviously in error. I've seen one here. Cut off there on him. And then here as well, seem to have cut off there. Sometimes it is just
a bit of hunting. Same again here, missing one. Yeah, it's one of these things that the more detailed
your artwork is, the more you've got to spend that extra bit of time
just checking over your design and seeing if there is something that
just has been cut off. It can be quite
tedious at times, and there's nothing
more frustrating when you're checking
out your pattern and excited to see
how it's going to look and then you notice there's something
missing from it. So, don't worry you're not
the only one that happens to. It happens to me, and it's
just one of those things that the quicker you get
at resolving these issues. Then the quicker you end up coming up with
your final design. If we end up going back
to how we resolve this, I'm just going to click
on my square here. I'm just going to quickly
note down while I'm here, which is a good technique to do, especially if you're
dealing with a lot of patterns in one day. I always tend to just note down the actual size of my artboard that
I'm working with. Then what I'm going to do
is I'm just going to once again just cut away. Anything that just so I don't need these because they don't fall off the artboard. That falls off the
artboard, they do two. So I'm going to remove them. The same down the side two, I'm just going to grab
them and then remove them, make sure I'm not
moving anything I'm not supposed to be. Move that. Now, I'm just going
to check here, make sure he's on the board. O's just ever so close. I'm just going to check myself. Just to be safe. I am going to remove
him. There we go. Now, as I go down here, just going to go
down right close. And then that's all of them. Now, I'm just going
to come up and then go right click, move. And this is the long axis. I'm going horizontal,
so this will be two, two, three, three,
and then zero. Now that's my proof, pretty happy with that copy. Then same again top to bottom. Bring it down, stop. And just make sure I'm grabbing anything I'm not supposed to be. And then right click, move. And then I'm not going
horizontal going vertical, 17, zero, zero. Preview, check that's all. Yep, seem pretty happy with that goes there that
goes there, Cuppy. I mean, yeah, that's pretty
much what you're looking for. So as you can see there, what I've done is I have moved So I've got this
really detailed pattern, and I'm going to run through the same technique
that we have just run through just to go through
the process again. So I'm going to grab this. I'm going to drag it over here, create this pattern. No. I'm going to check
and see if it's okay. Now, straightaway, I can see is not good
here with this flow. It's cut off there. Just checking myself. Yes. And here as well. I seem to be missing
something here. The main thing that I tend to do is it's a bit like a map. So I try and figure out
where it's cut off now. I would guess I can't see him down there. So
that's that one. And there's obviously
something missing here. And I would guess. That's him there. He's not got a friend on the other side. So we're going to
fix that right now. So obviously, I've moved and done something there
along the way. Now, obviously, I'm
going to be moving. I can see that's missing from there and that's
missing from there. So what I'm going to do to
see if I am indeed correct, and I haven't messed this up. So I'm going to move
the motifs on that side and make sure there ones that
actually are on the board. There's nothing
there. That's fine. Yeah. And go remove
them, remove. And then checking all this, go do the same here. Remove. And you two, just to be sure that I've
actually got everything. Yeah, we're all still there. Same again that
we've done before, but I'm just basically
going to grab the motifs that are
falling off the side. Transform, move. Now I'm going vertical, which is not horizontal, obviously, jumping
down there copying. Yeah, pretty happy with that. Just have to be very wary that when you do do this,
you are minusing. You're actually going back along the ruler I
call it in my head. What I'm going to do is go
right click, transform, move, and it was going
to be minus two, two, 33, vertical zero. I'm going to check the preview. Yeah, pretty happy
with that copy. I'm going to check
my pattern again. I'm going to grab that
and throw it in there. Now, I got to look at this. Click on my box. Click on the pattern. And I
love when I see that happen. So you can see here
the flower that was half missing has been resolved, and the little bit that was sitting with
no friend at all. Has been refilled. So
that is super exciting. That is how to resolve a pattern that you have an
element that is cut off. Sometimes it can be
quite time consuming, especially if your pattern has multiple layers,
but it's worth it. It's the quickest
way to really do it without really giving yourself
a bit of a head spin. So that is my bonus. Fix a per. Now, another thing I will
sort of bring out on, and I'm going to check to
see if I've got it going on. But during my time working
within the Illustrator, there has been times. I know Illustrator has done quite a few updates since
I first saw it pop up, but I did have a few
comments of people asking, how do you resolve with the Illustrator cause sometimes
with the illustrator, you get a very thin
and very faint, I might add white line. It's like you can
see your tile box. You can literally pick this
shape out of your pattern. Now, what I tend to do
is I tend to export my pattern and into a JPEG and actually view
it outside illustrator. When I do this, I never
see the thin white line. So my only input really
there is if it's not there when you
export it into PNG or JPEG, then it's not there. It's not real. It's
just something that Illustrator has spat out. And I have tried a few times to see if it
was an error on my side. And then after a bit of research and communication with Adobe, the actual came back and
said it's not there. And for my own peace of mind, especially when you're trying to send your artwork
to printers, the last thing you
obviously want is for that thin white line to be
visible on your artwork. So when you ever have an issue, or you can spot it. I have to see in
this latest update with Adobe Illustrator. I have not seen this white line. So just check your up to date, and if you do see a white line and you've gone through the
steps as we've run through, and you're still seeing
a faint white line, send me a little comment. I'd love to be able to see what the issues that
you're coming against and I'd love to be able to help. So that is my bonus
for this class. I really hope you've enjoyed it. It's been great to
be able to teach you the technique that I
use to create patterns, and I'm hoping to be able to bring a new class
soon to you shortly. Have a great week, and I can't wait to see
your class projects. And if you've got any
feedback or would like to learn another technique
in a different software, just drop me a comment. I'd love to hear your
thoughts. Thanks.
7. Thank you: Thank you for
completing my class. I hope this experience has
actually been a rewarding one, and you've been able to pick up a new technique creating
your repeating patterns. Please follow and like
the class and share with any family or friends that are also looking to get
into this industry. I'll be looking to
upload some new classes. So if you click,
follow or subscribe, you'll be able to
get notifications on my new class coming out. Stay A and keep well
and keep smiling.
 Kirsty Salter, Illustrator & Surface Pattern Designer