Transcripts
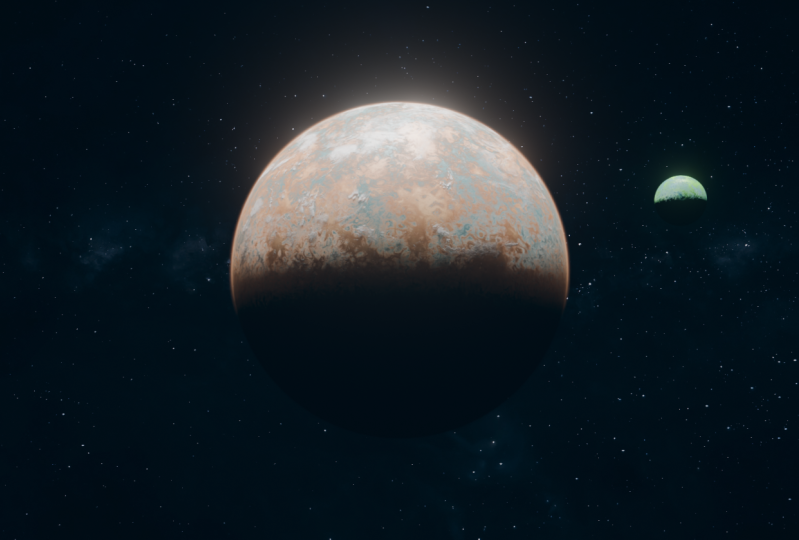
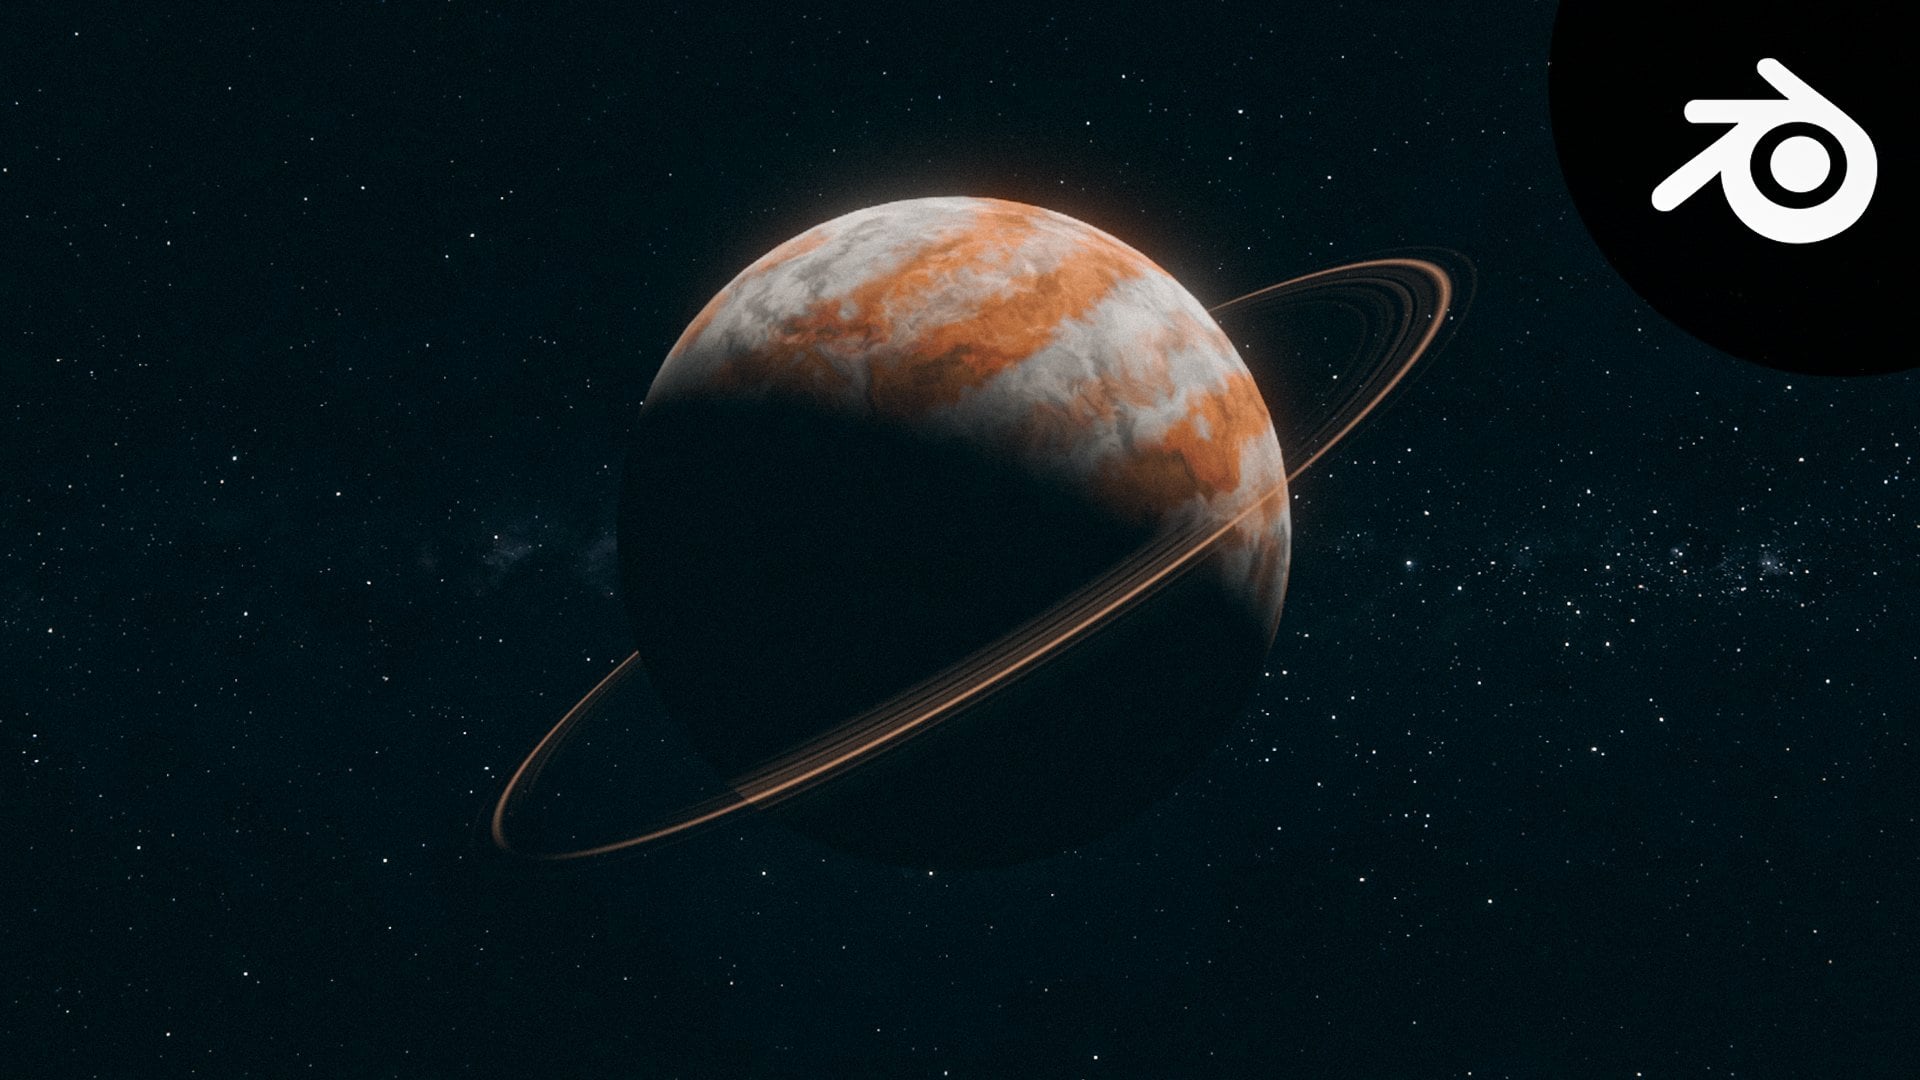
1. Course Trailer: Ever tried creating planets in blender and ended up with
results looking like this? Planets might seem like the most basic thing you can do in three D. Just add a sphere, slappy texture on it
and you're good to go. But the reality
is far from that. Pretty far in fact, that when I started digging
into the topic, I found out how little
information is there about actually how to create
good looking planets. The majority of videos out there teach variation of
the same technique by relying heavily on compositing that there is
something wrong about that. But I think that
in order to create a realistic looking planet, you need to try and make it as physically accurate as possible. That's exactly what this
course is trying to do. This course, you will
learn how to create a photorealistic
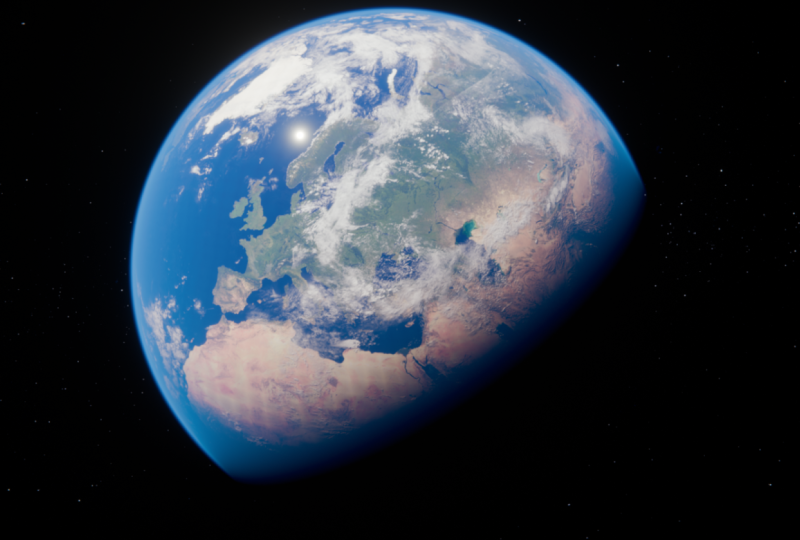
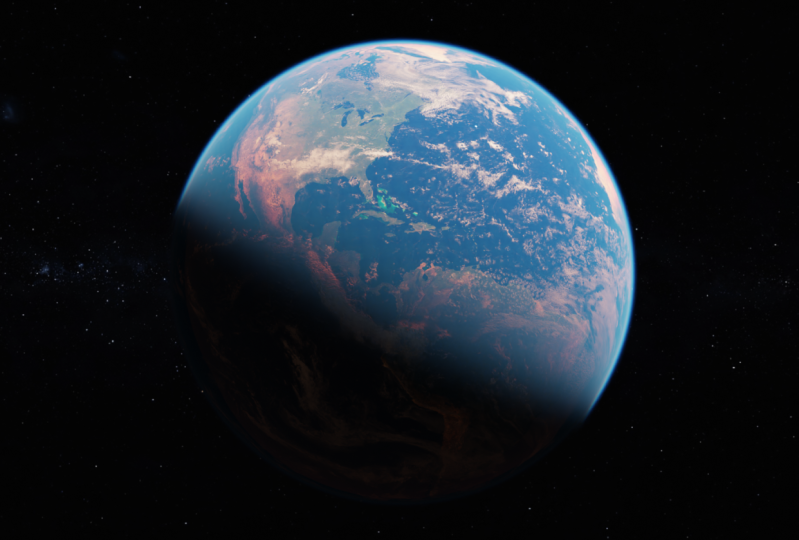
earth in blender, 100% pure blender magic. These are the results
you will get straight out of rendering
with no compositing. This mini course can be divided
into three big sections. You will start by learning
how to set up your scene. Forget the common
misconception of using simple spheres and point lights when it comes to
creating planets. Instead, I'll g you
through the proper scene, set up lighting
techniques to unleash your full power when it
comes to creating planets. Then we will move on to
texturing our planet. Texture work is often where
planetary renders fall short, that's why a
subistantial portion of this course will dive deep
into the world of shading. You will learn how to
create flawless shaders for your planet's surface clouds and most importantly,
the atmosphere. You know how complicated
is that if you ever attempted to create a
realistic planet in Blender, we will dive deep
into the world of nodes and procedural workflows and you will learn
techniques that will take your texturing level
to new heights. Lastly, we will finish
by rendering and doing some really
small compositing. Rendering planets isn't like
rendering any other scene. This course will
give you the things that you need to keep in mind when it comes to setting up
your scene for rendering. And by the end of the course, you will be well versed
when it comes to optimizing your
planet's renders. We will also do a little bit of compositing just to take your
renders to the next level. Make your planets shine
at a quiet level. I try my best to explain
everything in detail, but I'm expecting you at least to know your
way around blender. At least how to connect pipes. Lastly, this course will
give you the exact way on how you can create really
stunning planets in blender. If all of that sounds
exciting for you, we can't wait to welcome
you inside the course. See you inside and happy blend.
2. Scene Settings: Alone. Welcome, in
this first video where we are going to prepare our blender for all the work that we will be doing
throughout this course. So this is a fresh
blender scene. I'm going to pick general, and surprisingly,
I'm not actually going to delete any
of these elements. Or actually I might
delete the light, because we are going to add later a sunlight,
not this spotlight, or actually point light.
So hit X and then delete. The first thing I'm
going to do is to adjust the UI of Blender to optimize it as much as possible for all the work
that we will be doing. I'm going to hide this bar right here because
they don't need it. So let's just go here. You will have header
and you will have this option show tool settings.
I'm going to hide it. So I will basically have
more area to work in. The other thing, there is a really important add
on that we need to activate that we will need later for all the node work
that we will do, which is the node
angular add on, which probably already
have it activated. But just in case, make sure
to go to Edit Preferences, add ons, and from
here you need to look for Node Wrangler. This one right here. Yeah, this
is all we need for now. Right now, let's start
preparing our scene. Planets are always
spheres as far as I know. Should we delete this cube and go shift a and add a sphere, or should we work
with this cube? The thing is about
spheres in blender is that they do have really
terrible topology. Especially if you
look from the top, if I hit tab to jump
to the edit mode, you will notice that you have this huge pole right here
which is super ugly. For example, when we
will subdivide this, if I go here and
let's add modifier, generate subdivision
surface, let's crank the level to two and shade smooth. You will
notice that still on the top you will
have some weird, basically something
that looks like a star. And this is basically a
sign of bed topology. That's why actually creating
planets out of spheres. And this is basically what most vides you will
find out there do, is not the best solution. There is a better
way to do this. I'm going to select the
sphere and x to delete it. Let's try to think
of a way of how to turn this cube into a sphere. The main reason for
that is that when we will turn this cube
into a sphere, we will have an
even quad topology, which is exactly what we want. Here's what we'll be doing
while I am in the edit mode. Hit Tab, I'm going to hit
the right most button, and you will have an
option called subdivide, which will actually
subdivide this cube once. And you can do it twice. But instead of like basically hitting subdivide
and all of that, you can hit shift R to repeat
the last operation you did, which in our case it
was the subdivide. On a hit shift R, I will be able to subdivide
this cube even more. I will settle on
something like this. Basically five level or
six level of subdivision. Right now, we do have
the same exact cube. The only difference is
it is like subdivided like a lot. Right. Now, if we can figure out
a way to turn this into a sphere will be good to do this while you are
in the edit mode. You will have an
option right here. It should be yeah, Sphere. This option right here. If I select a sphere or the
shortcut is shift olds, you will be able to basically
convert this into a sphere. Notice what will happen. I will be able to transform
it into a sphere. So make sure that the level
right here is one and boom, right now we turn this cube, which is called
cube, into a sphere. The really nice thing
about this sphere is that it is all basically quads. It does have really nice
topology and all of that, which is exactly what we want. So let's rename
this, for example, land, because this will
be our planet land. And boom, this is our sphere. I'm going to hit end
to open the sidebar. And from here I
want the size to be exactly 2 meters by 2
meters by 2 meters. This will ruin our scale. So make sure you
select your sphere. Hit Control to
apply the settings. And make sure you
apply the scale so that it will be back to one. We need that later for all
the text recorded stuff. And hit and to
close the sidebar. Okay, Right now we've got the
surface of our planet done. Let's right now add a camera
and a light for the camera. We already have one, which I don't know where it
is. It is right here. I want this camera
to be pointing exactly to where this planet.
So how can we do this? Basically, I need, first of all, to reset the position of
this camera into the center. You can easily do that by
selecting your camera. Make sure you jump to
the object properties. For the location, I'm
going to turn it to zero. And for the rotation also, I'm going to turn it to zero. So right now it is
pointing just like so if I hit one from
the number pad, I'm going to jump
to the front view. And as you can see
from the front view, I need to have the
x axis right here and the z axis pointing top. If I want the camera
to be pointing exactly from the front
view to this planet, I need to rotate it
to something like, so that it will be
pointing exactly to this. How can we do that?
Make sure you select it and in the rotation
on the x axis, make sure it is 90. Right now it is
pointing like this. And you can always change the location so that it
will be something like, so this is exactly what we want. Something that you will always
find me doing is basically to go here and add
another window from here. I'm going to hit zero from the number pad to jump
to the camera view. So this is what my
right now sees. And we can hide all of these unnecessary stuff like
the tool bar by hitting. Let's hide all of
these overlays. You can also jump to your camera settings by clicking here. And in the Viewport
display you will have this option
called passe partout, which is actually a French word. What you need to do is basically
to bring this up to one so that basically everything outside what the camera
will see will be black. I find this way
less distracting. Let's right now just
adjust our view. So make sure you
select your camera. You can hit J and then y
to move it on the y axis. And let's get it slightly
closer, something looking like. So I think will be good. We just basically made sure that everything is in the center. The next part will
be just adding a simple light and adjusting the overall lighting
of the scene. If I just jump to the
rendered view from here, space should be black. That's why I'm going first of all to jump to the environment. And in the color or
actually in the strength, I'm going to bring
this down to zero. There is no light
from the environment. Other thing, I'm
going right now to go shift A and let's add a light. What is the light that
exists in the space? It is not a point light,
it is a sunlight. So I'm going to add a sunlight. And what you need to know
about the sunlight is that the position of
the light doesn't matter because it is
just a direction. It is like you have
a huge source of light and all matters
is how it is rotated. And as you can see,
if I move this light, nothing actually will change. The only thing that will
change if I start rotating it, I'm just going to hit alt G to reset it back to
the original position. And you can hit JZ to
just, I know as I said, the position doesn't matter, but just for the sake
of us, so that, okay, we can see that there is a sunlight and it
is pointing down. And as you can see, the slide is hitting this sphere
from the top. And there is some sort
of like degradation. It is not smooth enough. So that's why I'm
going to select the sphere and hit shade Smooth. Right now it is
perfectly smooth and from the settings
of the sunlight you can always jump here and you can bring the strength to
something like 25. This you might say like,
okay, this is too strong. And actually with all the
textures that we will add and the atmospheric
elements we will add later, 25 actually will
look pretty sick, so don't worry if it
is a little bit too bright for now, We'll
fix that later. Also, if you want,
you can play a little bit with this angle which will basically control
the extinction of the light or the
extinction of the shadow. I don't know what they call
it or how soft the shadow is, so yeah, you can definitely
play with this number. The last thing that we
need to work on right now is actually our
render settings. We're not going to adjust
all of them right now, but there are a couple
of important ones that we need to basically
change right now. So let's jump to our
render settings. First thing that you will
see is the right now we're using V. V is not the right render engine
that we will use. We're going to use cycles. We're going to leave
the feature set for now as supported in the device. If you have a GPU card, then you probably need to
use it or you should use it. Make sure to jump to GPU. Compute this will
make everything slightly faster for the Viewport sample
and render sample. I'm going to leave
them right now, the way they are directly. I'm going to jump into
light paths in space. There's no light paths. I'm going to bring this
to 00, also to zero. And also for the
transmission, should be zero. There are still a
couple of settings that we will get back to them later, especially in the volumes, but as of this moment, this is all we need to
actually start working, creating our planet for now. The last thing I'm just
going to get back to, which is in the sun settings, in the angle, I'm going to
reset it to its default value. Reset to default value. I dig this result way more, if we need to later on increase the angle, we
can always do that. But as of this moment, I'm just going to leave it to
the default value. Right now, we do have a
ready blender scene to actually start adding our
textures and all of that to it. I will see you in the
next video where we are going to add the texture to
the surface of the Earth. Yeah, I will see you
in the next video, also make sure to
save your fire.
3. Create the Land Material: Malone? Welcome.
In this new video, where we are basically going to create the look of the land, or the material for the ground. Since we are going
to create the Earth, we need real life textures. And the really nice thing that Nasa offers a lot of
these textures for free for us to use in the resources folder that
comes with this scores. Besides the Blender projects, where you will find all the different projects
during the scores, you will also have
the four K textures and you will have also
the eight textures. These are the same textures
just in different resolution. Four K is more for the
wide shots and you can use the eight K if you're going to create a close up
shot of the Earth. Generally, since there is only five textures in each folder, it is not a big deal
whether you will use the four K or
the eight K. Yes, eight K are heavier for
computer to compute, but at the end of
the day, there are just five textures based
on that you can design. For a close up, you
use the eight K, and for more of a wide shot, you will use the
four K. In our case, since I'm going to
create a wide shot, I'm going to stick to
the four K for now, unless I notice that I
need a higher resolution. At that case, I can swap the textures to eight
K. This will be really, Now back in Blender,
make sure you select your land object,
which is the sphere. And I'm going to jump from here, from the time line which
is the default editor. I need to jump to
the shader editor, basically where we create
materials. Right here. There are a couple
of things that I like to do, basically. First of all, I'm
going to hit end to hide this side bar
to have more space. And also, if I activate
this magnet right here, the nodes will be able
to stick to the grid, which I find more satisfying. Let's start shading right now. I'm going to call
this Material land and I'm going to jump to the
rendered view from here. And this is the result we
get. It is really boring. The first texture
that we will need is a map of the color of the
Earth in the resources folder. If I go into the
four K textures, you will have Earth
color four K, which is a map of the
color of the Earth. So I can easily just drag it and bring it
into blender like this. And I will put it
here and I will take the color and
plug it to base color. And boom, as you can see, it is right now on the surface, but it is weirdly mapped. Like notice that it
doesn't look right. In order to fix that, I
need to tell Blender how to map this texture on the
surface of a sphere. That's why we're going to use
a texture coordinate node. Which luckily, because we're using the node angular add on, all you need to do
is to make sure that you're selecting your texture, which is the Earth color. And hit control and this will
add a mapping set up to it. This mapping set up
will help you to map the texture on the
surface of the sphere. So you can basically
change the scale, change the rotation,
for example. You can change all of
these in our case. First of all, I'm going to, right now, as you can
see, I'm using UV. I want to change it to object, and once I do this, okay, it looks kind of better, but not quite right yet. That's why in the texture
node you will have here something called flat and
there is an option for sphere. So if I pick sphere,
boom, normally, okay. It's still looking
kind of weird. Why is that happening? Oh, okay. I did a small
mistake, not the object. I need to change
it to generate it. Yeah, make sure it is
generated by doing this. As you can see right now, this texture is perfectly mapped on the surface
of the sphere. I can always hit zero to jump
back to the camera view. This is what my camera
is seeing right now, and it is basically just
staring at an empty ocean. Except with a small island, really tiny island right here. I guess this is how, either
way this is really boring. I need to rotate this texture. In order to rotate this planet, all you have to do is
to select your sphere. And from the object properties right here or in the viewport, I just prefer using real values. I can start rotating this until I get a look
that I'm happy with. Let's say something
like so will be good. Yeah, let's leave it
at this. You can see Africa right here,
Asia right here. But this still looks fake, because in real
life, for example, the oceans should
reflect more light. Let's say the areas
where the land is, it should be slightly
rougher and it should have some bumps and that's where the Earth land ocean comes in. It is basically a black
and white texture which will help when it
comes to the roughness. I'm going to take
this Earth land ocean and bring it into blender. I'm going to use the
same mapping set up. That's why I'm going
to bring these nodes here and connect the
mapping node to this. And also make sure
you select from flat, make sure to change
it to sphere. It will be mapped the right
way onto the surface of the sphere and
we're going to plug the Earth Land ocean
into the roughness. Let's take color and plug
it to the roughness. As you can see
something is happening. But surprisingly, it's not the right thing
that should happen. Here's why. Another handy
shortcut that you can use with the node Angular
add on is the control shift. And click on a node to
see exactly what it does. As you can see, this is how our Earth land
ocean looked like. Black will mean a value of zero and white will
mean a value of one. Let's think about it, we
plug this to the roughness. So what is the roughness
value for ocean? Should it be one or
should it be zero? The surface of the
ocean is not rough. It needs to be a value of zero. As you can see in the texture, it is white, which
means a value of one. So we need to invert this map
to tell blender that, hey, we want these areas to be one because they are rough,
because they are the land. And we want these areas
that are white to be black because that represents
zero and they're not rough roughness of zero. Let's
invert this texture. Go shift a hit for search. Let's look for
invert, invert color. Let's put it right
here for a second. And let's get back to looking at our principal SDF control
shift and click on it, and we're back to
our usual view. Let's plug this here and boom,
something that happened. And this right now looks right. If I just hit control shift
on the invert node right now, it is perfectly the
way we want it. The rough areas are white,
which are the land, and the black areas are zero, which are the ocean,
because it is not rough. And let's click on the principal SDF to get back to
our usual view. You can also hit zero from the number pad to get
back to the camera view. Now to the last texture
that we will add, which is basically some,
a bump to this map. Because as you can see,
everything is flat even though the surface of the Earth does
have some hide variations. Let's say that's where this
topography map comes in. Make sure to bring it into
blender and let's put it here. And make sure to connect
it to this node. And here's another
handy shortcut. If you hit Alt with the right most button and drag over two nodes that
you want to connect, you'll be able to connect them. Alt, right most button, and drag over these two nodes. You will have this
red box to help you. I'll be able to connect them. This shortcut is really
helpful when you have really far nodes
from each other. And also make sure to change the mapping from here, from flat here so that it will look right. Control shift and click
on Color and boom, This is a topography map, but how can we use it? We're going to use this
map as a displacement, which will basically create some bumps on the
surface of the Earth. And when it comes
to displacement, we need to plug it to
the displacement output, or actually to the
displacement input right here. But
there is a problem. This is a yellow socket,
and this is a vector. So we need to transform
this data from the colored data into a vector. And we can do this using
a displacement node. Go shift a S for search, and let's look for displacement. Let's add it right here. And I'm going to take the color and plug it into the height. Take the displacement and
plug it to displacement. Nothing is happening
because we're still looking at the topography map. So we need to get back
to our usual view by control shift and clicking
on the principal BSDF. As you can see something
is definitely happening. But for whatever reason, these bumps are not real. It still looks flat
because by default, blender will not
displace the geometry. By default will fake that. We need to tell blender
that, hey, blender, we want you to actually do some real displacement
to change the geometry. To do that, you need to jump
to the material settings, make sure you are in
the land material. If you scroll down
under settings, you will have here an option called bump only displacement. Bump only means that blender
will do some sort of fakery to fake the look
of actual displacement. This is not what we
want, we want to change from bump only to displacement. Bump. And as you can see, something is happening right
now and we're changing the, underneath the geometry
of the sphere. But the effect right now
is really, really strong. So we need to deal
with that. And this will be really simple because we can play with the settings of this displacement
node right here. The first thing which is
the mid level, which point the displacement is calculated? Is it from the bottom
or is it from the top? In our case, it is computed in the mid level, which
is the middle. We want to change it to zero, so it is computed from
the ground level up. All we need to do right now is to just play a little
bit with the scale. So let's try 0.1 Let's see, this is still way,
way too strong, so let's try 0.05 This is more or less
still pretty strong, So let's try 0.01 This is starting to
look kind of better, but I don't know is it
really strong or not. It is still pretty strong, So let's try 0.001 Yeah,
this is more like it. I think this is better because in general, yes, mountains are huge
and all of that. But when you start
looking from the space, they start to lose their glory. They are more or less flat. But either way, for
now, I'm going to leave it the way it is
we might get back in the future to change
these values and tweak them a little bit
to get a better look. But as for now,
we're good to go. And by doing this, we
finished our land material. As you can see, it
is pretty simple. Maybe you can organize
it just so that you can use it in the future.
So these are our textures. And we did this
really simple displacement set up to add more
depth to this Earth. And we can always hit
zero to jump back to the camera view to see
exactly the result we got. You can also hit
the home screen to fit the render in
this small window. This is basically it
for this video on how to create the
material for the land. And we'll see you
in the next video, where we are going to actually
add some clouds to this, which will make it look
even more realistic. I will see you everyone
in the next video. Also, as usual, make
sure to save your file.
4. Create the Clouds Material: Alone. Welcome, in
this new video where we are going to add some
clouds to our planet. In the last video, we created the material for the ground. And right now, it is about
time to add some clouds. This is my usual scene, and basically clouds will be above the surface
of the Earth. The easiest way to do this
will be to achieve D, to duplicate the sphere,
which is the land. And I'm going to rename this to something Clouds,
super creative name. Both of the clouds and
the land are two spheres and they are basically on top of each other and they
are overlapping. We don't want that,
we want the sphere of the clouds to be slightly bigger than the
sphere of the land. So make sure you're selecting your clouds and jump to
the object properties. And you will have here
an option for the scale, which will basically
allow you to make it either
bigger or smaller. In our case, we want it to be slightly bigger
than the land. That's why the value that
I found that kind of work is 1.001 which
is slightly bigger. And this is the key
word, slightly bigger. Right now nothing happened
because the clouds still have the material
of the land to fix this. Just make sure you
click on this to basically delete that
material from the clouds. And we will have a
white sphere, perfect. Right now we have
the cloud sphere and we're ready to start
doing some shading. Let's create a new material for the clouds by
clicking on you. And let's rename this to Clouds in the resources folder that comes with this course. Under the four K or
the eight K textures, you will find the
clouds, Earth clouds. And this is the map we'll use to add some clouds to our scene. So I'm going to drag
it into Blender. Let's put it here right now. Let's figure out a way of how
to make the system works. If I hit Control Shift and click on the Clouds to see
exactly how it looks like, Control Shift and click on it. This is how our
clouds is looking. And the first problem that
you will notice is that it is mapped in a wrong way
on the surface of the sphere. That's why I'm going to hit control to add a
mapping node to it. The usual workflow,
I'm going to change it from here from
UV to generated. And make sure to change
it from flat to sphere. And right now we will
have perfect mapping of the clouds on the
surface of a sphere. Step number two will be somehow to figure out a way to
tell blender that, hey, blender leave the white areas the way they are and
for the black areas, make sure they are transparent. Because if we imagine that these black areas
are transparent, the Earth or the surface of the Earth will be visible
in the black areas. And that's exactly what we want. We want to leave the white
and get rid of the blacks. And what is the
thing that controls transparency, Let's say? What is the thing that
will leave white and we get rid of
black? It is alpha. So if you notice in
this principle, BSDF, if I just scroll down, you will have here
an option for alpha. If I drag it way, way down, basically this will
be super transparent. And it is not super
transparent for a reason because I'm still
looking at the Earth Clouds. So control shift and click
on your principal BSDF. As you can see, it
is transparent but not the way I imagined it. Okay, there is a
slight problem is that when I change the Alpha, nothing is happening because I should be able to see the
surface of the ground. What is causing this problem. My first hunch will be that
in the render settings. Yeah, transparent. We set it up to zero. We need this to be
something like 12. Yeah, so now it makes sense. Now it works the
way we intended. Make sure that this number
is not zero, it is 12. Earlier when I was setting up all of these
different settings, I just glance over it
and change it to zero. So the most important thing is that this alpha will control which areas are transparent
and which areas are opaque. So if I take the color
out of the Earth clouds and bring it into the
alpha, we got some clouds. If I fly around the Earth, yeah, this is
looking pretty sick. What we're doing is basically
to use this Earth clouds as a mask to tell blender which areas are transparent
and which areas are not. And in reality, what
controls the color of the clouds is not this
map, It is the base color. So if I change, for
example, this to blue, as you can see, we're changing the color of the clouds to blue. I'm going to set this basically to white because
that's what I want. And right now we
have some clouds going to make them even better. We might add some slight
subsurface scattering to them. So in the subsurface
scattering radius, make sure to set all
of these to one. And let's add something like 0.001 Make sure you do this in really,
really tiny values. And at the same time, clouds
tend to have some volume to them or they're not just a flat to the sphere
around the Earth, they have some height to them. That's exactly what we will
try to fake right now. What is the thing that
will allow us to add some bumpiness or some
displacement to clouds? It is basically the
displacement socket and this is exactly what
we will do right now. Let's go shift A, and let's
look for a displacement. Let's put it here.
And I'm going to use the same Earth clouds to do
the displacement workflow. So I'm going to take the
color and plug it to height. And take the displacement
and plug it to displacement. And something is happening. First thing I always
like to verify is to jump to the
material properties. And from surface bump
only make sure it is set to displacement And
bump and something is going, we're adding a lot of bumpiness or a lot of
displacement to our clouds. This is not exactly
what we want, so let's play a little bit with the settings of
the displacement. First thing, the mid level
should be set to zero. We want it to be calculated
from the bottom up. From the zero point up. We don't want it to be
calculated from the middle. Step Number two will be
to change the scale, because right now this
is way too strong. So let's change the scale from something like one to
something more suitable, like 0.1 And this is
still pretty strong, so let's try 0.001 Let's
zoom in a little bit, okay, This is looking
pretty decent. The effect is pretty subtle, and that's exactly what we want. The only thing is that you may notice is that it
is pretty low res. This is because of two reasons. First of all, there is
not enough geometry in the sphere clouds. If I just hit Tab for a second, as you can see there is
not much geometry here. Number two is that we're
using a four K texture, so it is not the highest
resolution image possible. But for now I'm going to
stick to the four texture. The only thing I'm
going to do is to add a subdivision modifier to this by going to add modifier
and subdivision surface. And you can crank this
number, for example, 23. And this is one to two. This is how you can add
some clothes to your shot. The last thing I'm going
to do is to hit zero, to jump back to my camera view. And this is what my
camera is seeing. And surprisingly, I don't
like this angle that much. That's why I'm going to select the land jump to the
object properties. And I'm going to
rotate it slightly on the Z axis until I get a better view, something
that looks like. So at the end of the day, we settled on America,
just like in movies. Yeah, either way everyone, I'm going to leave
it at this for now. And maybe we can change some values here and
there in the future. But as how to add some clouds, this is the workflow for it. Make sure you save your file. And I will see you
in the next video, where we will add some
atmosphere to the scene, which will actually make this
look like an actual Earth. So yeah, I will see you
everyone in the next video.
5. Create the Atmosphere Material: Hello, welcome. In this
new video where we are going to add the
atmosphere to our planet, this is where we
stopped last time. Basically having the surface of the planet with some
clouds floating above it. Right now, we need to add
the most important element, which is the atmosphere. By far, the atmosphere
is the hardest part of this course because there are
different ways to fake it. And probably will find the
lo tutorials on Youtube that will show you different methods on how you can
create atmosphere. The hardest thing about atmospheres is how to
get the extinction. Most of the tutorials on Youtube will basically
either show you that it is basically just
like a solid sphere around the planet or try to fake it later on
in the composite. In my opinion, this is
some sort of cheating. I know probably all
the shading work we do is some sort of fakery
at the end of the day. But I would love to get the
atmosphere right inside of blenders and basically get it as physically
accurate as possible. And I don't want to later bother around trying
to get that look. And that's exactly what we will attempt to do in this
video to try and create a physically
accurate atmosphere directly in Blender. No trickery, no
compositing, no anything. Everything will be
rendered using cycles. So let's jump to doing that. First things first, I have
my land selected right here. And I'm going to do
shift D to duplicate it. Since basically the atmosphere will also be above the clouds. We need to make the
sphere slightly bigger. If you remember, the land have a scale of one, the clouds 1001. I want this land 001, which I'm going to rename
to atmosphere, to be, let's say 1.002 It is slightly bigger than
the land and the clouds. I'm going to delete
the material, and I'm going to
create a new material, and I'm going to
call it atmosphere. And since atmosphere is not just a surface,
it is a volume. We're going to delete
this principle, SDF, because the atmosphere tend to scatter the light
in a certain way. And what is the thing that
scatters light and blender? It is a shade or cold volume. Scatter this one right here. This is the main hero of this
set up that we will build. So I'm going to take the
volume and plug it to volume, and from here I'm going to
change the color to a bluish, earthy color, something like. So here's the exact hex code if you want to get
the same exact value. And I'm going to bring
the density to something, let's say like 50
or let's say 250. And as you can see, something
is definitely happening. We're starting to add some
layer of volume scattering, let's say, to our planet.
But there are two issues. First of all, you
will notice that it is not the high resolution. There is some sort of like
squares appearing right here. The main reason for
this is that we need to bump our subdivision level. We don't have even a
subdivision surface. So to fix that
problem, go to add modifier subdivision surface
and we'll be good to go. You can even crank this to
two and we're good to go. We fix that first problem. The other thing is this effect right now is really strong. And here's the most
important thing that you need to understand. We want this volume
scattering operation to be so gradient. What
do I mean by that? Basically, if I just
zoom in here and I need to show all of my overlay so that you will be able
to see what I mean, what I want is, is that the atmosphere will
be here, for example, a value of one and it will
gradually fade to zero. The hardest part
to get inside of blender is how to
get this gradient. Basically, the only
way to do something like this is by using some math. That's exactly what
we will be doing. We will be using brat math to
get this exact look so that the atmosphere will
be here strong and it will gradually fade
beautifully into zero. Let's learn how we can do that. Let me get back by hitting
zero to my camera view. Let's try working on that. First thing I'm going to
do is basically to add a texture coordinate just to
exactly see what it does. I need the object
to control shift multiple times until
I jump to object. What this will do is basically
to give me, let's say, a representation
of the coordinate of every single point of that. And that's what all of these
colors basically represent. As you can see, for example, the more I go to the left, the redder it gets because
red is in this direction. And that's why this
color get red. What I want you to
understand is that this is a visual representation of the different coordinates of all the different points on
the surface of the sphere. From this, I'm going
to try to build a mathematical operation that will allow me to get
the look I want, the smooth fading to this, I'm going to add another node which is called a vector math. I know the moment we
start mentioning math, a lot of people get scared,
but this will be simple. I'm going to add a vector
math in the operation. I want the length.
Where is length? Yeah, it is. This one
right here. Control shift. And click on it to see
exactly how it looks. Let's just hide the
clouds for a second. The length operation will
give you the distance of a certain point on the surface from the center.
Let me say that again. The length operation will
calculate the distance of a certain point from
the center to the point. For example, just to see, these points that
are on the surface of the sphere will be a value of one because they are basically the furthest
from the center. And the values that are
inside the sphere will be 0.005 or 0.003 et cetera. And since zero represents black
and one represents white, if you start to imagine this in three D by doing this operation, and if I plug it
into the volume, I will start to get some
sort of a three de gradient. What does that mean? I will
start to get a gradient that is basically in the middle or in the center of the sphere, It will be black and it
will gradually go to white. And that's exactly what I want. This is what length
operation is doing. Let me get back to the
normal view and let me disconnect the
volume to this. I'm going to add a math node, which is usual math node. As you can see, we transform
this from a vector data, which have three values, to a scalar, which
has only one value. I'm going to plug this here, and I'm going to
change it to subtract, and I'm going to
subtract one from it. By doing this, I
inverted that operation. Why do I do that?
Because what I want is, is that I want a gradient that
goes from white to black. After this operation,
I get a gradient that goes from black to white. What I want is the
inverse of that. I want a gradient in the center, it is white and it will
gradually fade into black. So this subtract is responsible
for inverting that. So this is the first
step. As you can see, everything is black right now. So we need to start bumping
the intensity of this effect. To do this, here's
what I will do. I'm going to plug this
into the density, and let's plug this
into the volume, and let's disconnect this. And nothing is happening for
now. Here's what we will do. I'm going to add
a multiply node. And the main reason
adding a math node, not multiply a math, and we select multiply. The main reason I'm adding this is basically to be able to multiply the intensity of
what is coming out of here. I need to boost that signal. So I'm going to multiply
it by, let's say, something like 20,
not 220 already. You know what? Okay,
we multiplied it. Oh, something is happening. Something is wrong right
now, let's try 20. Okay, Something
weird is happening. We're not seeing the effect right here, for whatever reason. And my hunch is telling me that I need to do some
displacement to it. Okay, let's just
bring this here for a second and let's do
some problem solving. The main reason we're not seeing any sort of volume
scattering or any sort of atmosphere here
is that basically all the atmosphere is right
now, basically in the center. And when it gets to the
surface of the Earth, it is almost a value of zero. So what I want to do is to make this atmosphere slightly bigger. Your first instinct
will be to, hey, you can scale this, but this is not the right
way to do this. I'm going to do this using displacement. And
here's what I mean. So I'm going to go shift A
and look for displacement, which we used plenty of
times during this course. And make sure you jump to your material properties and scroll down and change this from bump only displacement and bump. I'm going to plug this
into displacement, and for the mid level I'm
going to turn it to zero. And let's bring this
to something like 0.00 or let's say 02 and boom. Something is
happening right now, we're starting to
see this atmosphere. And as I said, the main reason we had that problem is because all the gradient or
all the atmosphere was stuck inside the
sphere of the Earth. We wanted to go outward. So right now we have
something looking like this. If I just zoom in to the
edge, as you can see, we're getting that
same look that you see in most
videos out there, which is this ugly harsh
line in the atmosphere. Right now, our job is to
somehow build the system that will allow us to get
the smooth fall off. I'm going to add another
node right here, and I'm going to change
the operation to divide. And I'm going to divide it
by the same value as here. I'm going to go shift a, and let's look for value. And I'm going to plug this
here. And plug this here. Basically, whatever value
I will plug right here, it will go to the divide at the displacement
at the same time. Instead of writing the
same value here and here, I'm going to change this to 0.02 and you will get
something looking like. So what we are
trying to do right now is to build a system
for the gradient falloff. Divide is the first
operation. Second operation. After that I'm going to do a multiply and I need
to lower this value, let's say to something like
20 because it is too intense. And if I just zoom in to the edge to see
exactly how it looks, it is still a harsh
line as you can see. To get the ingredient fall off, I'm going to duplicate this math node another
time in the operation, I'm going to change it to power. I lost everything, so make sure to change it from
base to exponent. As you can see right now, we're starting to get the
gradient fall off right here. If I just zoom out, this is the result we got. If I had zero to jump
to the camera view, this is what it looks right now. Effect is still way,
way too subtle. So I need to boost the
signal to do this, multiply this, or actually
duplicate this multiply node. And let's bring this
value to something like 250 or let's say 50, because this is too strong. Yeah, this is starting to look pretty sick.
For whatever reason. We still can see some grid on the surface of
the atmosphere. The best solution for that
is to actually bring this to 00.3 and you will
start getting rid of it. Let's try 0.04, this is better. Let's try 05. Yeah, this
is way, way better. Right now we nail the
volume scattering part of our atmosphere now to the
last part of the atmosphere, because we need a
volume scatter. And at the same
time, the atmosphere does have a property
of absorption to it. That's why I'm going to also add a volume absorption node. Let's put it here and
let's just organize this now tree slightly for
this volume absorption. I'm going to take the same value out of the multiply node
and plug it to density. And let's change the color to
something like brown inch. And I need to mix both of these. Let's go shift A and let's
look for add shader. Let's plug it here. Take
this and plug it to shader. Right now we have a
really simple set up for how we can emulate the atmosphere or the
light scattering in the atmosphere of the Earth using this really simple set up. I know this might sound like
it is really complicated, but actually want to
just do a little bit of research and try to visualize, let's say all of these
different operation. This is really
basic. Either way, let's just fly
around the Earth and let's also make sure to
activate our clouds and yeah, this is starting to actually
look like an actual planet. The last part that
I'm going to do is to jump to my render settings. And under volume, under volumes, as you can see, you
have step right render. Basically, this is responsible on how smooth your
volumes will be. The lower the number, the better quality you will get. For the sake of this course, I'm going to
actually lower it as much as possible
to 0.01 I guess. And same thing for here,
0.01 And this will give you a way better
look to your atmosphere. Yes, it will slow your
renders drastically. But I think that the
result that you will get out of this is really nice. Honestly, As you can see, we are emulating, or
we're simulating, how light basically acts in the atmosphere and all of that in a really,
really nice way. And that's why basically
this is a key, to get this shader working, the way it is intended is
to lower these values. This is the usual trade off. If you want like really
outstanding quality, you will push your
computer to the maximum and you will have
more or less slower renders. Yeah, this is planet right now. If I hit zero to jump
to the camera view, this is what we got. You can play with all of these different values until you start getting a
result you're happy with. Yeah, I'm going to
leave you with this. Don't be worried to experiment. Make sure to save
your file also. And I will see you in the
next video where we will actually set up a couple
of shots to render, and later on we'll move on
how to composite this shot. Yeah, I will see you
everyone in the next video.
6. Rendering: Alone. Welcome. In this new
video where we are going to set up one of our shots
that we will render okay, So this is where we
stopped last time. And the first thing
I'm going to do is to jump to my
camera settings. Let's select the camera. And right here in
the camera settings, the first thing I'm going to
change is the focal length. By default, Blender
comes with 50, but I'm actually going to
change it to a wider ****. That's why I'm going
to change this to 24 millimeter ****. Of course, the moment
you will change to a wider ****,
basically everything smaller. That's why I'm
going to select my camera J. To move the camera, hit y, to only move it on the y axis and let's get it
closer to our planet. Right now, you need to think
a little bit about how you want your planet to look like or how you want
your animation to be. Of course, if you're going to render only one steel frame, you can probably just play a little bit
with the lighting, for example, and you will start getting interesting things. Or if you want more
of a close up, you can always, for example, take the camera, for example, hit seven to jump
to the top view. And you can do something,
as you can see right now, you will get a close up shot. And you'll always see similar compositions in movies
and all of that. But either way, I'm actually not going for this angle for now. What I want is a master shot, which is something
looking like this. The animation that I have in mind is basically if I select the sun and hit our ax to
rotate it on the X axis, the animation I have in mind is something that
will start like this, and slowly the sun
will just rotate. Now of course, we're doing
things the wrong way, because technically we should
not be moving the Sun, we should be rotating the Earth or changing the
position of the camera. But in our case, we can cheat
that by rotating the sun. Let's do a little
bit of animation. First things first,
I'm going to jump to my output settings. And I want this animation
to be only 3 seconds, 24 frames per second. So if I want 3 seconds, 24 multiplied by three, so I will have 72
frames to render. And after that, I'm going to jump from the shade or editor. I'm going to jump
to the Timeline. Yep, the timeline. And you can zoom a
little bit here to better see exactly
what we will be doing. I'm going to select the Sun and jump to the
object properties. And I'm going to animate
the rotation on the x axis, that's why I'm going
to rotation x. Hit the right mouse button, insert single key frame. Let's go also to the end, and let's also
insert key frames. Basically, right now we do have identical keyframes,
nothing is happening. I'm going to jump back to
the first frame and I'm going to rotate it to
something like so. And you can always
replace single key frame. What will happen now is that so will slowly rotate
to reveal our planet. Yeah, this is
looking pretty good. But one thing that you
need to keep in mind that this will not maintain
the same velocity. It will start slow, and then it will go
faster, faster, faster. And at the end, it
will slow down. We want this movement to be linear to keep the
same velocity. That's why I make sure
you select both of your keyframes to jump to
the key frame interpolation, and make sure to change it
to linear so that it will keep the same velocity
along our animation. And that's exactly what
we're looking for. This is the animation
that we will get. The purpose of this
video to show you what is possible, but
at the same time, for example, you can create some animation for the
camera, for example. So that the camera
with time will get closer, for
example, to the planet. You can probably also
do a little bit of rotation to make a
more dynamic shot. But in my case, I'm going to leave the camera the way it is. So let's right now play a little bit with
some render settings. I'm going to jump to
the render settings. Of course, cycles support GPU, compute the most important thing which is the max samples
or the noise threshold. In our case, I'm going
to actually work with the noise threshold.
What does that mean? That once blender
reaches this threshold, it will basically decide that, okay, I'm done with this
frame, let's move to the next. It is basically a
different model on how to render an image. In the past we used
to mainly use samples and once blender reaches
the sample count, okay, it will move
to the next frame. But with noise threshold
it is way more accurate because once you reach a
certain threshold of noise, you can move on to
the next frame. So it is way more
efficient and it will give you better
results, in my case, actually going to use 0.1 And I found that this value works really well with
what I have in mind. Make sure to keep noise checked because you want
to noise our render. And the last thing which
is really important, make sure to jump
down and under film, you will have here something
called transparent. Make sure to check transparent. So basically you will have
only the Earth rendered. And later on if you want to swap the background
or any of that, that will be really easy to do and we will be doing that later. Stay background behind it. The last thing that
you need to do right now is to jump to compositing. Make sure to check, use nodes
to use nodes for rendering. And let's set up where we
want to save our render. To do this, go shift a and let's look for a node
called file output. Let's put it here. And
let's plug the image. And plug it to image,
make this bigger. And let's select
this file output and jump into node properties. From here, we're
going to basically specify which file format we want and what is the naming of the file and where
we want to save it. First of all, I'm not going
to render the scenSPNG, I'm going to render
it as open XR. Make sure it is RGBA
because we want the alpha channel and make
sure it is float health. This is actually
more than enough. Probably a lot of movies will basically go find
with float health. Float fall is way too overkilled for the
Dec. Make sure to change it to DAA
loss or DAB loss. In my case, I'm going to
change it to DAB loss, which technically will have
the same quality as lossless, but it is way smaller files. I bet you will probably never be able to tell the difference between the lossless
and the DWB loss. And for the naming, let's
call it, for example, Earth Shot 01 Underscore, the blender will
basically put the name of the frame after the
underscore on the last thing, we need to tell Blender
where to render this shot. To do this, you can
always click here. So let's jump to my
Blender projects. And I will have here
a folder called Earth Shot 01. So
let's put it here. I'm going to delete both
of these just in case. Delete selected files. Okay, and hit Accept. And because I selected
those two files, I'm going to delete
this name right here. Perfecto. So I'm
going to save it to create realistic
Earth assets, Blender projects Earth Shot 01. Just tell Blender where you
want your render to go. And the last thing,
make sure to go file and save your project. And once you finish
that, make sure to go to render and
render animation. Right now, you need to wait for your Blender to
render the scene. And I will see you
in the next video where we will be doing
some compositing. Yeah, see you there.
7. Compositing: Be welcome in this last
video where we are going to do our compositing work
once we finished rendering. Right now, it is about time to start combining all the
different elements, Add a star background
to our render, and basically make
it possible for people to watch it in
the form of a video. For this, there are
two different options. Either you can continue working in your
usual blender scene, but I will highly
recommend that you start a fresh blender file because it is fresh and it
will be faster. And that we will not ruin
the three D stuff that we did or the render layer that we set up in the compositing tab. That's why I will
recommend that you start fresh blender scene. This is my fresh blender scene. I'm going to pick
general right away. Right away. I'm going
to jump to compositing. All of the work that
we will be doing right now will be in the
compositing tab number two. Make sure you check use
nodes and let's activate this magnet so our nodes will stick to the grid because
that's satisfying. And another thing
which is that if you jump to your render output, make sure that the
scene end or the number of the frames is 72 because that's the
length of our scene. Make sure to change that to 72, the same length as
your image sequence. And I'm just going
to hit this to basically make the
timeline in the middle. Right now, let's
start compositing. First thing, I'm going
to delete both of these tunes, select
them and delete. And I'm going to go and let's look for image to
import an image. And the first thing
I'm going to import is the image of the
stars background, which you will actually find
in the resources folder. And your compositing
textures you will find here this Night Sky. I'm going to import
it into Blender. Click on Open, and let's choose Night Sky Control Shift
and click on it to see it, and this is what it
is looking like. I'm going to hide the
sidebar by hitting the first thing that you will
notice that it is so huge. If you want to make
your image smaller, make sure to hit V, this
will make it smaller. Or if you want to make
it bigger, you hit OltV. This is a weird way to
scale your preview image, but we just get a deal with how Blender works at the end
of the day to jump to the last frame so that I will
be able to see the Earth in its final state,
control spacebar. And make sure that your cursor is somewhere in the compositor. Hit control spacebar to maximize this editor.
Right now we can focus. Make sure you select
your viewer note to be able to move this preview
image slightly up. This is what we
will see right now. After doing this, let's import the image
sequence of the Earth. Let's go shift A, and
let's look for image. Click Open Earth Shot, and in the folder of
your Earth Shot Render, make sure to hit A to select
all the different images, and click open Image. Right now, this is
our Earth shot. We want this Earth to
be over the night sky. That's why there is a node
in the compositor called Alpha over which will allow
us to do this shift A. And let's look for alpha over. Let's put it here. This node by default will put what is
in the second socket. Above the first socket, the
sky went to the first socket. So let's plug the Earth shot
into the second socket. And boom, this is
exactly what we want. This is more or less the final composition that
we will settle on. But let's start doing
some adjustments. And there are two things
that we will be doing. First of all, ad just a little
bit degrading of the shot. Add more blues, make it
a little bit more faded. That's number one. Number two, we'll add a really
tiny animation to it by changing the scale
of the different elements. And number three, we're going to add some extra
spice to the shot. Like a little bit of blur, a little bit of glare, and a little bit of let's
say **** distortion. And **** and
chromatic aberration. The first thing I'm going
to do is to add curves. So let's go shift and let's
look for curve RGB curves. And let's put it here, the
look I have in mind is a slightly faded look when
it comes in, the blacks. Which means that
I'm going to take this point and bring
it a little bit up. But generally, this curve is
really, really sensitive. So even though I move this
point like really tiny amount, the effect is really drastic. That's why I would rather
basically getting back to its original position
and I'm going to hit shift and change
the value from here in really, really
small increments. I just want the
hint of faded look. Not like fully faded, let's say. And yeah, I'm
digging this result. This is the before and
this is the after. Yeah, this is
looking pretty good. I want to add some blues or some scans in the top areas
or in the highlights. That's why I'm going to red
and I'm going to lower it to something like saho now this is the before and
this is the after. This is the before,
this is the after. And as you can see, we're adding a hint of an in the highlights. And let's add a little bit
of blue to the highlights. Also, something that
will look just like, so I think this is good. And let's reduce the magenta a little bit by
reducing the green. This is the before
and this is the, this is the before and
this is the after. And I'm really, really digging
this result right now. Let's add some transform node to create a really
simple animation. And here's a really
handy shortcut. If you select all of
these nodes and hit H, you will be able
to minimize them, which will give you more
screen real estate, let's say. To do your work, I'm going to
select all of these nodes, move them a little bit down. The first thing
I'm going to do is to make the Earth
slightly smaller. So let's go shift a S
to look for something. Let's look for transform. I'm going to put it
here in terms of scale. I'm going to change
it to something like 0.8 I'm also going
to the night sky. And I'm also going to add
another transform node. And I'm going to put
it here and I'm going to create a really,
really simple animation. Here's what we will be
doing. I'm going to hit control space bar to get
back to my usual view. Let's select the
viewer and move it slightly down so that we will
be able to see everything. I'm going to jump
to the first frame. Okay, I'm going to create a keyframe for the
angle of the night sky. Scale of the night sky. Insert also keyframe also a keyframe for the
angle of the Earth. Insert keyframe and a scale for the angle of the Earth
insert key frame. After that, I'm going to jump to the last frame which is 72. I'm going to bring the scale of this space back around to
something like one point. Let's say one to
slightly bigger. Make sure to insert key frame
and I'm going to change the angle to something like three angles and
insert keyframe. And same thing I'm going
to do for the Earth. I'm going to rotate it three
degrees and insert Keyframe, And I'm going to change
the scale from 0.8 to something like 0.9
slightly bigger. And Insert Keyframe, So
this is our animation. I'm going to select
this and select all of these nodes t and
choose a linear. And same thing for
this transform. Make sure to select
all of this, is it. And choose linear. So we will have something
looking like this and it will go to this. Yeah, this is exactly
what we want. Some of you right
now might wonder, why did I choose to do this animation on
each node separately? The main reason I'm
doing it this way is that this will
ruin my render. Here's what I mean. I'm
going to select both of these two nodes and I'm going
to hit empty, mute them. Right now we don't have
any sort of animation. And just to show you what will happen if we
choose to do it, let's say the conventional
way by adding a transform node at the end
of my notary in my viewer. I'm going to put it here
and I'm going to make this image slightly bigger
so that we can see it. I'm going to go and make the Earth smaller,
just like we did. So let's go transform. And I'm going to put
it here and I'm going, let's say to make the
scale something like 0.5 we made right now the
Earth smaller, right? Now, if I jump
right here and add another transform
node and I'm going to cancel the scale operation, we scale by 0.5 Right here, I'm going to scale by
1.5 This will basically, or actually probably
it even more, something like like two or no, wait two, yeah, this will cause a little bit of
degradation in my earth shot scale because
first we're scaling it down and then we're
scaling the whole thing up. And that will cause
a little bit of degradation and we will lose
a little bit of resolution. That's why I think it will
be better if we create or add a transform note
to each layer on its own. To each node on its own. I'm going to select
both of these transform X to delete it. X to delete it. Make
sure to bring this here. And I'm going to select both of the transform node and
hit M to mute them, and I still don't see anything. So control shift
and click on this to be able to see
the final result. And the last thing
we are going to do is some final spice. The first thing I'm going
to do is add some glare. So let's look for glare. I'm going to change
it to fog low. Change this to him in terms of resolution the
quality of the fog. Low. For the threshold, I'm going to lower it to 0.2 Let's say 0.1 Yeah,
this is better. I'm going to leave it at this. Let's add also a blur. No, to slightly blur our
render in terms of size, I'm going to just make it one. Let's add a **** distortion. This is the usual stuff that
we do in every editorial. Basically, this
will be distortion 0.01 for the dispersion, which is the
chromatic aberration. Let's 00.5 a really tiny amount will do the job, and
that's basically it. The last thing that we are
going to do is to go shift. And let's look for file output, connect this to this in
terms of the final render, I want it to be by hitting
Jump to node properties. From here we can pick the
final format that we want. We're going to render
this as a PNG sequence. So make sure it is RGB, we don't have any alpha,
and let's call it, for example, Final Earth Shot Z. One score like so let's
choose the location. Let's say it is in
our Earth shot. I'm going to create a new
folder and let's call it Final Earth Shot Accept. And once you do this,
all we have to do is to go to render and
render animation. This should be really
quick because we're just rendering
sequence of images. Once you render is finished, let's close this and the first thing I'm
going to do is to hit control space bar to get
back to my usual view. And I'm going to
jump from here from general video editing,
video editing. What we want to do right now is to transform our render into an actual MP four video that we can publish on the
Internet and all of that. Once you do that, make sure
to go to add image sequence. Let's jump to Earth
shot. Final Earth shot. These are all the final images that we got out of compositing. Hit eight to select them all, and hit Add images strip. And let's make sure
it is beginning of my time line at frame
number one, just like so. Once you do that,
we're going to render this shot even one more time. Let's go here in
your output panel. Let's jump to render
in the file format. Make sure it is
set to MPG video, which is the usual MP four
video for the encoding. Let's make sure it is
H 264, medium quality. Change it to high
quality encoding speed. Let's keep it at good. Yeah, these are all the settings I'm going to change for now. And where I want to save it, I'm going to also save it. In the final Earth shot, I'm going to Final Earth shot
and I'm going to save it as Final Earth shot one. Right now it will be an MP four, accept and go to render
and render animation. This should be really
fast, like blazing fast, because we're just rendering a simple image
sequence right now. If I jump to my assets, Blender projects,
Earth shot one, final Earth shot, I will. First of all, these are the different images that
we had out of compositing. And this is my final video. Boom, this is
looking really nice. Anyway, let's set everyone for this course. I
hope you like it. I hope you learned a little bit about how to create
planets and all of that. Feel free to check the rest of my courses here on the platform, and I will see you
in future courses.
 Yassine Larayedh, VFX Artist