Transcripts
1. Intro: Hi, I'm conversion. Thank you so much for
checking out this class. This class we're going to
create some Easter clip art. We're talking fast
and easy to do. And then we're going to turn
around and use that clip art to create a word search puzzle. But it's exciting. I thought so. First of all, create our
chocolate Easter Bunny. We'll add some highlights
and shadows to give it that chocolate look. Then we'll move on to
our marshmallow Bunny. Again. We'll add some
highlights and shadows. And then we'll add some
sugar sprinkles to the top. For the, it will just
add some highlights and shadows to give it that 3D look. Then we'll move on to our
word search base by creating a background before we start adding in our words
and our letters. This is for you if
you want to make some Eastern clip art to use
for Easter activity sheets, I'll be using my iPad, the Procreate app,
and my Apple Pencil. So if you're ready,
let's get started.
2. Class Project: In this lesson, we'll go
over a class project. For the class project, I would love to see your
chocolate Easter Bunny that you create along with your
marshmallow Benny, as well as the Easter egg. Then if you take
the next step by creating your own
word search and incorporating the
Easter clip art that we just created into that
word search puzzle. I would have absolutely loved to see that in the project
section of this class as well. Up next, we'll go over the free resources I
created for this class.
3. Free Resources : In this lesson, we're gonna go over the free resources that I supplied for this class to help create your
Easter clip art. You'll find that under
the projects and resources section on
the Skillshare website, rather than on the
Skillshare app. I created a Procreate
stamp set that you can use to create
your Easter clip art. We have an egg, we have
a marshmallow bunny, and we have another bunny that we'll use for
our chocolate bunny. I also created a sprinkle brush that we can use for
our sugar sprinkles, for our marshmallow by me. I'm also going to provide a word search grid that you can use a four-year
word search puzzle. This will save you some
time in creating this base. Up. Next, we'll start creating
our chocolate by me.
4. Chocolate Bunny: In this lesson, we're
going to create a chocolate Easter Bunny. No, Not one you can eat, but one that you can
use as clip art. First, we want to
create a canvas. Tap the plus symbol top rate. We're gonna change it
to inches, ten by ten. Measure your DPI is
at 300. Tap Create. Now I'm choosing a brown
for my chocolate bunny and I'm grabbing my bunny stamp. And I'm going to tap
the screen now because sometimes the stamp itself
isn't strong enough, we're going to want to tap
that layer, hit select. It makes sure your color
fill is on at the bottom. I'm just going to go back
that layer, hit Select, and then I'm going to drag the color fill and fill the bunny. Now I'm going to add a layer and change it to clipping mask. I am going to go
with a darker brown. Then I'm going to
change my brush to the willow charcoal
Procreate brush. I'm going to up my
size to about 9%. Now I'm just going around the whole outside
perimeter of my bunny. I'm going to add another layer and change it to clipping mask. Now I'm changing my color
to a lighter brown. I'm going to change my
brush size to about 3%. And I'm just going to go over the areas of the bunny that
would have some definition. I'm going to add them
to the neck, nose area, the mouth, the eye, and the inner ears. I'll also want to add some further front shoulder
as well as the hind quarter. Then I'm going to just add a
little bit to the tail area. Now I'm going to smudge it. I'm grabbing the smudge tool. I'm making sure it's set
one soft blend airbrush. And I'm going to go over those highlighted areas and just soften it up just a little. Now I'm going to go back to my shadow area with a dark brown. And I'm going to smudge that. I'm just bumping
up my smudge size and I'm just going over the
outside edge of my bunny. Now I'm going to add a layer at the top and change my
brush size to about 11%. I'm just going to rub some areas that I want
to highlight more. I'm just going to
lighten up my color just so I can see it. I want to be able to give
my beanie some texture. And I'm just going to do some areas to my bunny just
so I can see some texture. I'm doing the hindquarters, the front shoulder, the tail, and a little bit on the head. Now I'm going to add a layer, change my color to
the dark brown, and I'm gonna change my brush to the soft airbrush
and it's about 4%. And my opacity is at 65%. I'm just going to run it along the bottom
edge of the bunny. I want to make sure that my layers are changed
to clipping masks. Now I'm going to draw
out an outline format. I am going to smudge that. I'm just going to
change the opacity a little bit and I'm
going to lower my brush. Now I'm just going to
add some definition to the neck area, the mouth, as well as the news. Then I'm gonna go
back and smudge. I'm going to add a layer. I'm going to choose a blue. I'm gonna make sure I
grab the monoline brush. I'm just gonna draw a circle for the eye and
fill it with color. I'm going to swipe
two fingers to the right to alpha lock it. Now I'm going to
choose a darker color. And I'm gonna grab that
willow charcoal brush. I'm going to lower the size. I'm just going to run it along the bottom right
edge of the eye. Then I'm going to grab a lighter blue and run on the top-left. Now I'm going to grab
this smudge tool and I'm just going
to smudge it out. I'm gonna go to the
soft blend airbrush. Lower my brush size, and I'm going to run that
along the top left edge, grab the darker blue and run
that on the bottom edge. I'm just going to
smudge that out. Now I'm going to add a layer. I'm going to choose a yellow. Grab the monoline brush. And I'm gonna draw a
circle in the center of the eye and fill it with color. Now I'm going to alpha lock that two fingers to the right. I'm going to choose a darker
yellow and I'm going to grab that soft blend airbrush and I'm just going to run it
on the bottom right edge. I'm going to go and grab a
little bit later yellow. And grab the soft airbrush
and run that on the top. Just to give it a little
bit of a highlight. I'm going to go back and do that to the blue layer as well. I'm going to duplicate
that blue layer. Change the bottom
layer to black. I'm going to swipe
two fingers to the right to turn
Alpha Lock off. I'm going to shift that shadow just a little bit to
the bottom right. Then I'm gonna go to
the Adjustments tool, do the Gaussian
blurred about 3%. Now I'm going to do the same
thing to the yellow layer. I'm going to duplicate it, change the bottom
layer to black, turn the alpha lock off, grab the move tool to move it just slightly to
the bottom right. Then I'm going to do the
Gaussian blur it to about 3%. Here you go. We're
going to group all of these layers and label
it chocolate bunny. Up. Next, we're going to create
a marshmallow bunny.
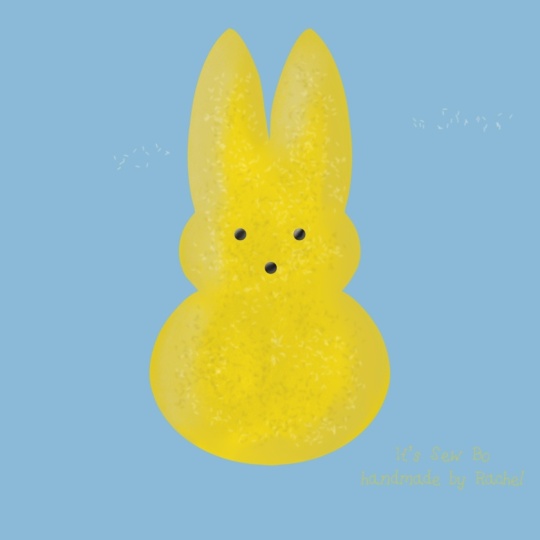
5. Marshmallow Bunny: This lesson, we're going to
create a marshmallow bunny. We're going to add a layer. We're gonna change our color. I'm going to choose
a nice bright blue, and I'm going to grab the
marshmallow bunny stamp. And I'm going to tap the screen. If it's too large, just
adjust your brush size. Now I'm going to select that layer and make
sure my color fill. And I'm going to hit
select this way I can color drop the blue
for the whole thing. Now I'm going to add a layer and change that to clipping mask. I'm going to grab a darker blue. Grab the soft blend airbrush. I'm going to run it along the right-hand side
of that bunny, just to give it some dimension. I'm going to do just a
little bit of that left ear. Then I'm going to run it down the outside edge
on the other side, just to define the edge
just a little bit more. Now I'm going to
rename that dark. I'm going to add a layer, change it to clipping mask. I am going to go grab my
willow charcoal brush. I'm going to bump up
my size to about 10%, and I'm just going to run
over the top of that Bunny. I'm going to go back and just
smudge it just a little. Now I'm going to rename
that layer dark. I'm going to add a layer,
change it to clipping mask. I'm going to grab
a lighter blue. I'm going to run it along the
left-hand side of my bunny. Now I'm going to
rename this light. Now I'm going to add a layer and change it to clipping mask. I'm going to run it along the right-hand side
above my shadow, just to give it a
little bit of an edge. And I'm gonna do the
same to my left ear. And I'm just going to smudge
it out and blend it in. I'm actually going
to shift that over just a little bit and
continue smudging. Now I'm going to add a layer, change it to clipping mask, go with a little bit darker. Grab at the sprinkles. I'm just going to
run it over the top. Now I'm going to duplicate
that layer, alpha lock it. I'm going to go back and
re-label these layers. I'm gonna go back
and change my layers and this is gonna be a light. We're going to fill
that in and I'm just going to shift it
up to the top-left. Going to add a layer, change it to white. I'm going to go over
the bunny again. I'm going to rename
this layer white. Now I'm going to go back to
that dark sprinkle layer and I'm just going to do the
Gaussian Blur to about 1%. I'm gonna go back to the light layer and do that
Gaussian blur it to about 3%. I'm going to lower the
opacity of my dark layer, as well as my white layer. I'm going to lower the
opacity on my late layer. I'm going to add a Gaussian
blur to the white layer. I'm going to slide
it to about 2%. I'm just adjusting the opacity. I don't want it too noticeable. If your sprinkles are too dark, just go back and use the
Gaussian blur to adjust it. You want it to blend
in rather than stick out, add a layer. Now I'm going to
go back to black. I'm going to grab
the monoline brush. I'm going to draw out
some circles for my eyes. I'm going to duplicate that
layer and move it over and I'm going to duplicate
it again for my nose. Now I'm going to merge
them all together. Alpha lock it. I'm going to change
my color to gray. I'm going to go and grab my
airbrush, my soft airbrush. I'm going to run
that brush along the bottom right
side of my eyes. I'm going to grab some
white and I'm just going to highlight the top-left
of those as well. There is our marshmallow bunny. Now I'm going to grab
all those layers, grouped them together, and
rename marshmallow bunny. Up. Next, we'll create
our Easter egg.
6. Easter Egg: In this lesson, we're going
to create an Easter egg. I know it's just an Easter egg. Show you how to create
it fast and easy. We're going to add a layer. I'm gonna change my color. I'm going to grab that egg stamp from the free
resources, adjust my size. I'm going to tap that layer, hit Select and make
sure my color fill. Now I'm going to fill it. I'm going to add a layer and change that to clipping mask. And I'm going to
label this dark. If you happen to
run out of layers, you can always duplicate this file and create
a whole new canvas. I'm going to the
soft blend airbrush. I'm just going to run it
along the right edge. And I'm gonna go back and grab a darker color and
bump up my size. I'm going to add a layer. I'm going to rename it light. I'm going to choose
a lighter, purple. I'm going to run it along
the left-hand side. I'm going to go back and
change that to clipping mask. I'm going to add a layer
and change that to white. I'm going to highlight that
right in the center of my egg. There's our egg. I'm going to highlight
all these layers and group them together
and rename them. I'm just going to fix the label here and change it to white. And I'm going to rename
the group to egg up. Next, we'll change our colors so we can have additional
clip art to use.
7. Changing Colors: In this lesson, we're going
to change our colors. Add a little bit more
detail so we have other options and additional
colors to choose from. When it comes to our clip art, there's a couple of ways
that we could change color. If you have enough layers, you can go from here, but if you don't just go
back to your gallery, swipe left and duplicate. Let's start with the
marshmallow Bunny. I'm going to duplicate this.
I'm going to flatten it. We're going to go to
the Adjustments tool and the hue saturation. And I'm just going to
adjust my hue here. You can have different colors. I'm also going to show you how you can change
it a different way. Should you have a more
precise color in mind? We're going to go to the very bottom marshmallow bunny layer. And we're going to choose
a different color. I'm going to Alpha
lock all these layers. I want to fill that bottom
layer with a different color. I'm going to use green. Now I'm going to
choose a darker green. And so all the layers
that mentioned dark. Now I'm going to choose a
lighter green and I'm going to fill all those layers
with that lighter green. Here is a different way to
get a more specific color. For our clip art. You're going to want to turn
off the background color, Share and save it as a PNG to your camera
roll or to your files. You can use it. Later on. I'm just going to
fast-forward the video. Once you have the
colors you want, you can even go a step
further by adding some patterns to
your Easter eggs. And procreate comes with several patterns
that you can use. You can just create another layer and add
it as a clipping mask. Then you can grab
the Move tool and warp it so you can
just position it just to give it more of a
pop in the center of the egg so it doesn't give
it a flat image look. Then you can adjust with the
blend modes if you like. You can freehand your
own design on the EKG. This will give you additional
Easter clip art to use. Up. Next, we'll work on
our word search base.
8. Word Search Base: In this lesson, we're
going to create a background for our
word search base. We're going to want to tap
the plus symbol top right. We're going to do
8.5 inches by 11. This is something that
I want to be able to print out from the US. If you're on a metric country, you'll need to work
with a size that you can use from your own printer. I'm going to tap Create. I am going to insert a file. I'm going to use the
word search base that I provide for this class. I'm just going to adjust it. I have enough room
for the top for my clip bar and the
bottom for my words. Make sure snapping
is on bottom left. I'm going to change
the background color just to a light pink. I'm going to add a layer and
move it beneath the grid. Then I'm gonna go back
to my grid and label it. Now I'm going to go
to the airbrush tool. I'm just going to streak the background using
various colors. Then I'm going to go to the Liquify tool and
adjustments panel. I'm going to bump up
my size to about 64. I'm going to twirl it rate. I'm going to move it
around, hold it in place. Move it in some form
of a direction. Then when you're
happy, you can go back and turn down the opacity. Now I'm going to add a
layer above my grid, change my color to black. And I'm ready for
the next lesson. Up next, we'll start
adding our words.
9. Adding Words: In this lesson, we're
going to start adding our words to a word
search puzzle. I'm just going to fill
out the grid with some handwritten
words for my puzzle. I'm going to use chocolate. I'm going to add bunny. Hop. You can choose whatever
words you want. I'm going to add Easter. If you can overlap
them in some way, that would be great too, but it's not necessary. It really depends on
how many words you want to add and how they
will fit inside your puzzle. I'm going to add eggs. How about basket? Now I'm going to add a layer. If you're using this
for personal use, you can go ahead and use any font that you have available
in your procreate app. If we're using this
to sell later on, make sure you choose
a font that will come with a commercial
use license. This is very important. Anything that you create
to sell online or to sell physically makes
sure that font that you are choosing to use counts with the
commercial license. Make sure you check out the usage of that
commercial license. Because all commercial
license vary. I'm gonna change my font to a font that I
actually created. So I know I'm safe either way. I'm just going to
start filling in the bottom words that
I added to the top. You're going to want to make
sure that your type is left justified that way all
of your words line up on the left-hand side and
you're going to want to make sure that all of your
words are in all caps. You can do this if you
have a full keyboard displayed and you
can tap Caps Lock, I'm going to add
chocolate Easter eggs, and then I'm going to duplicate that side and move it
over to the right. Now I'm doing it in two columns, but you can choose to do it
in 234 columns depending on how many words you're using and how much room you have. If you need to adjust your
grid or your type size, you can do so now, uh, sometimes you don't
always know you need to adjust the
sizes until later on. Make sure all the words
you are typing out at the bottom of your puzzle
or capital letters. This is very important because your whole puzzle grid is gonna be filled with
capital letters. So that helps people when they're searching
for these words. Up. Next, we'll start
adding our letters to fill in our word
search puzzle grid.
10. Adding Letters: In this lesson,
we're going to start filling in our word
search puzzle. We're going to add a
layer, add some text. I'm just going to
position my textbox, the width of my grid. I'm going to adjust
the size to my letters fall inside that grid box. I'm going to tap my keyboard. If you're a little tiny
keyboard comes up. Just close out of that. You might have to
do this a couple of times until you're full
keyboard comes up. This is helpful
because at least on my iPad I had the
Caps Lock option. And this is so important. This is a great tip because
it saves you from having to push that shift button every
time you type a letter. Now I'm just going to start
filling in the top box row. And I'm want to make
sure that I have that position for that be in
place so you can count over. This grid has 12 boxes across. So you can see that my B for my bunny falls within
the ninth box. I want to make sure my ninth
letter is going to be a b. We're going to adjust each row. And we're gonna have to
fix the kerning because not everything lines up
exactly in that box. So I'm just going to go
and adjust the kerning between my letters so each one falls in the center
of that grid box. Just so you know, it's best to start from the
left to the right when you're doing
the kerning because anything that you
shift on the left, it will adjust everything
on the right after. If you see something's off on your left-hand side of that row, if you go back and
shift from there on, it's going to move everything on the right-hand
side of that letter. Now this is going to be
a little time-consuming, but it's well worth it. Now I'm going to
duplicate that row. I'm going to retype
my second row. I want to make sure the
Caps Lock is a one. I'm going to need my third
letter of that row to be a C, as well as my ninth letter
of that row to be a u. And I'm just going to
go back and adjust my kerning further
remaining letters. Now I'm going to duplicate that row and repeat the process. I'm going to need my
fourth letter to be an H, add my ninth letter
to be an n. Now I'm just highlighting the
whole row and I'm going to type different
letters across. I'm going to go back
and adjust my kerning. Now I'm going to duplicate
that row, move it down. I'm going to measure my
caps lock is the one. And I'm going to
fill out that row. Now I need my second letter, my fifth letter, as well as
my ninth letter to match up. Now what I need, I'm just
going to repeat this process. This going to duplicate
that one layer because I didn't need to adjust
my kerning as much. I'm hoping that
it'll carry over. And I'm just going
to fill up that row, add my letters where
they need to be. I'm going to
fast-forward this video, why I finish up this process. I'm going to turn my hand
written letters off. Here's the base. Up. Next we'll add our clip art.
11. Adding Clip Art: In this lesson, we're gonna add clip art to our word search. Ad your clip art, copy
canvas and paste, insert photo, insert file, draw directly onto the canvas. We can go back to
that procreate file, make sure the background
color is off. Go to the Actions menu, go to Add and copy canvas. Now we can move this
directly inside our word search
puzzle and tap Paste. Just resizing it and
putting it in position. We're going to go Actions
menu, insert a file. I'm going to grab
my chocolate by me and it's gonna
move them please. Now I'm going to go
Insert a file again and grab my marshmallow by me. I'm grabbing a
green and then I'm gonna go to the organic
procreate brushes. Grab sword grass. If you need to adjust your grid, just highlight all those rows. Grab your move tool and
adjust accordingly. There you go. Up next is a heartfelt thank
you to all of you.
12. Thank You: I want to thank you so much for taking the time and
watching this class. I hope you really enjoyed it. I tried to make it
easy and quick. So you can make last
minute activity sheets like the word search puzzle. For Easter. I am all about expanding
my thoughts and my creativity when it comes
to repurposing my artwork. He take the time to
create your artwork. Don't you want to use it
for other uses as well? Make sure you hit that
follow button soon get notified on my next class. If you're looking to
get some focused on your goals and you
love Procreate. Make sure you check out
my Skillshare class. If you're looking for
more tutorials in Procreate as well as
other mediums to create. Make sure you check out
my YouTube channel. Thank you so much from
the bottom of my heart. I can't wait to
see you next time.
 Kimber Shook, Artist | Designer | Creator | Teacher