Transcripts
1. Introduction to the course: Hello again guys. As you know, my
name is Nico and I have a pretty exciting
class for you today. We're going to be looking at a project where
I'm going to show me all the techniques that I
use for my everyday renders. So we're going to be using
Cinema 4D and octane Render. And we're going to
cover everything from how to set up the scene. Where do I get my
three models I'm free textures to use in
my everyday renders. How to model, how to
create new environments, how to texture placed cameras. And finally, how a perfect render and compose
it in Photoshop. So stay tuned. I'm sure you will learn a lot. And with this course, you're
going to be able to create a whole new level of
different artworks. So please enjoy this course
and let's get started.
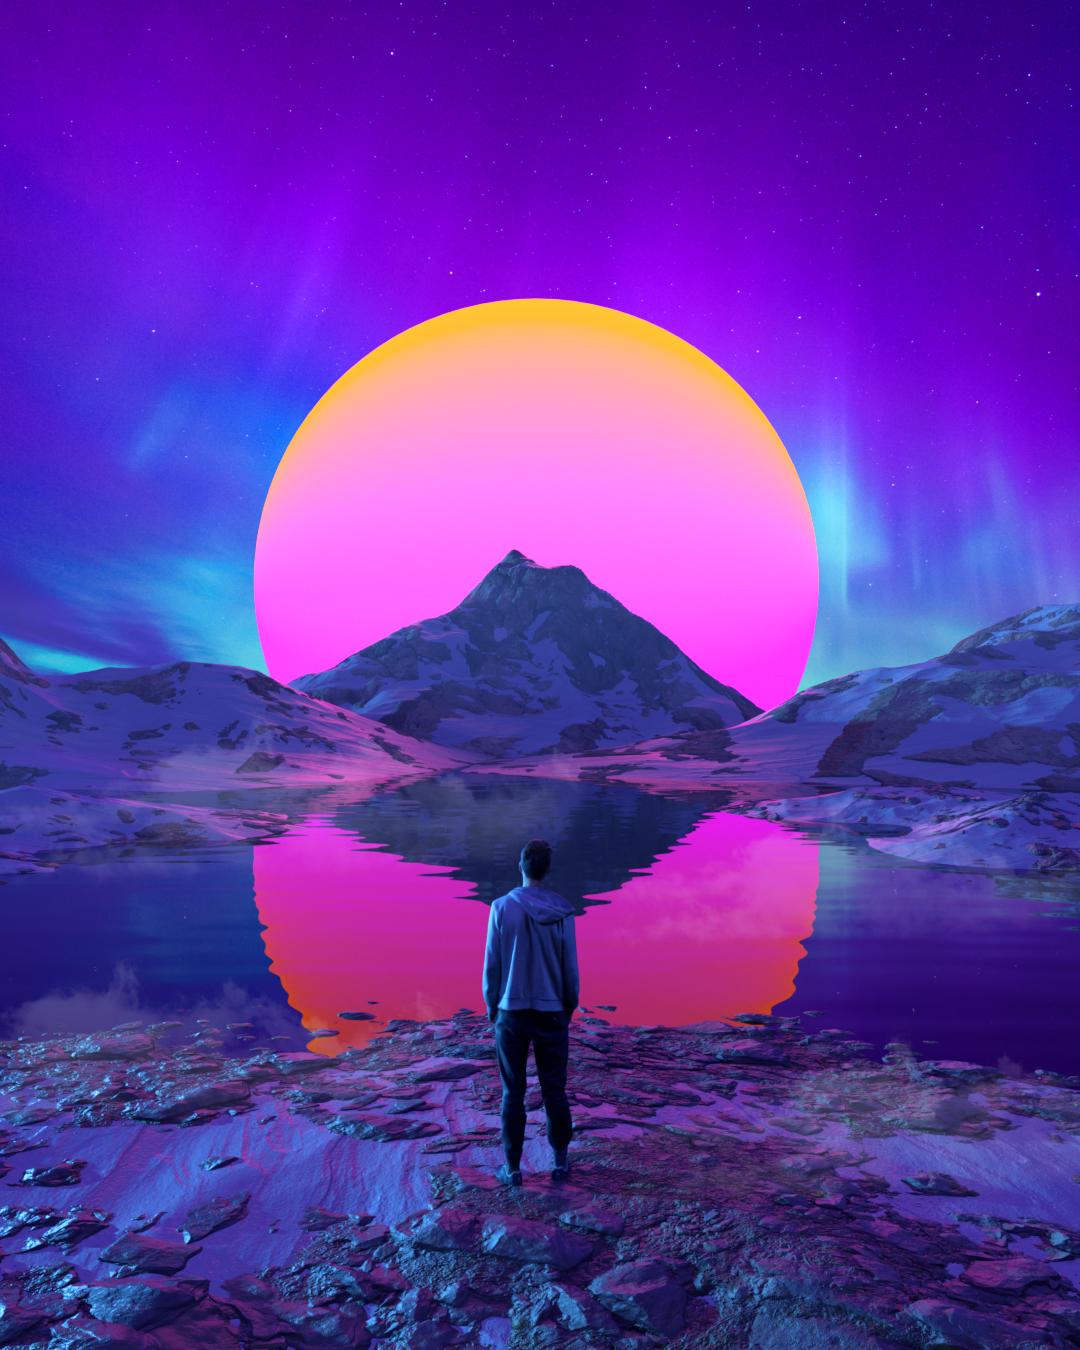
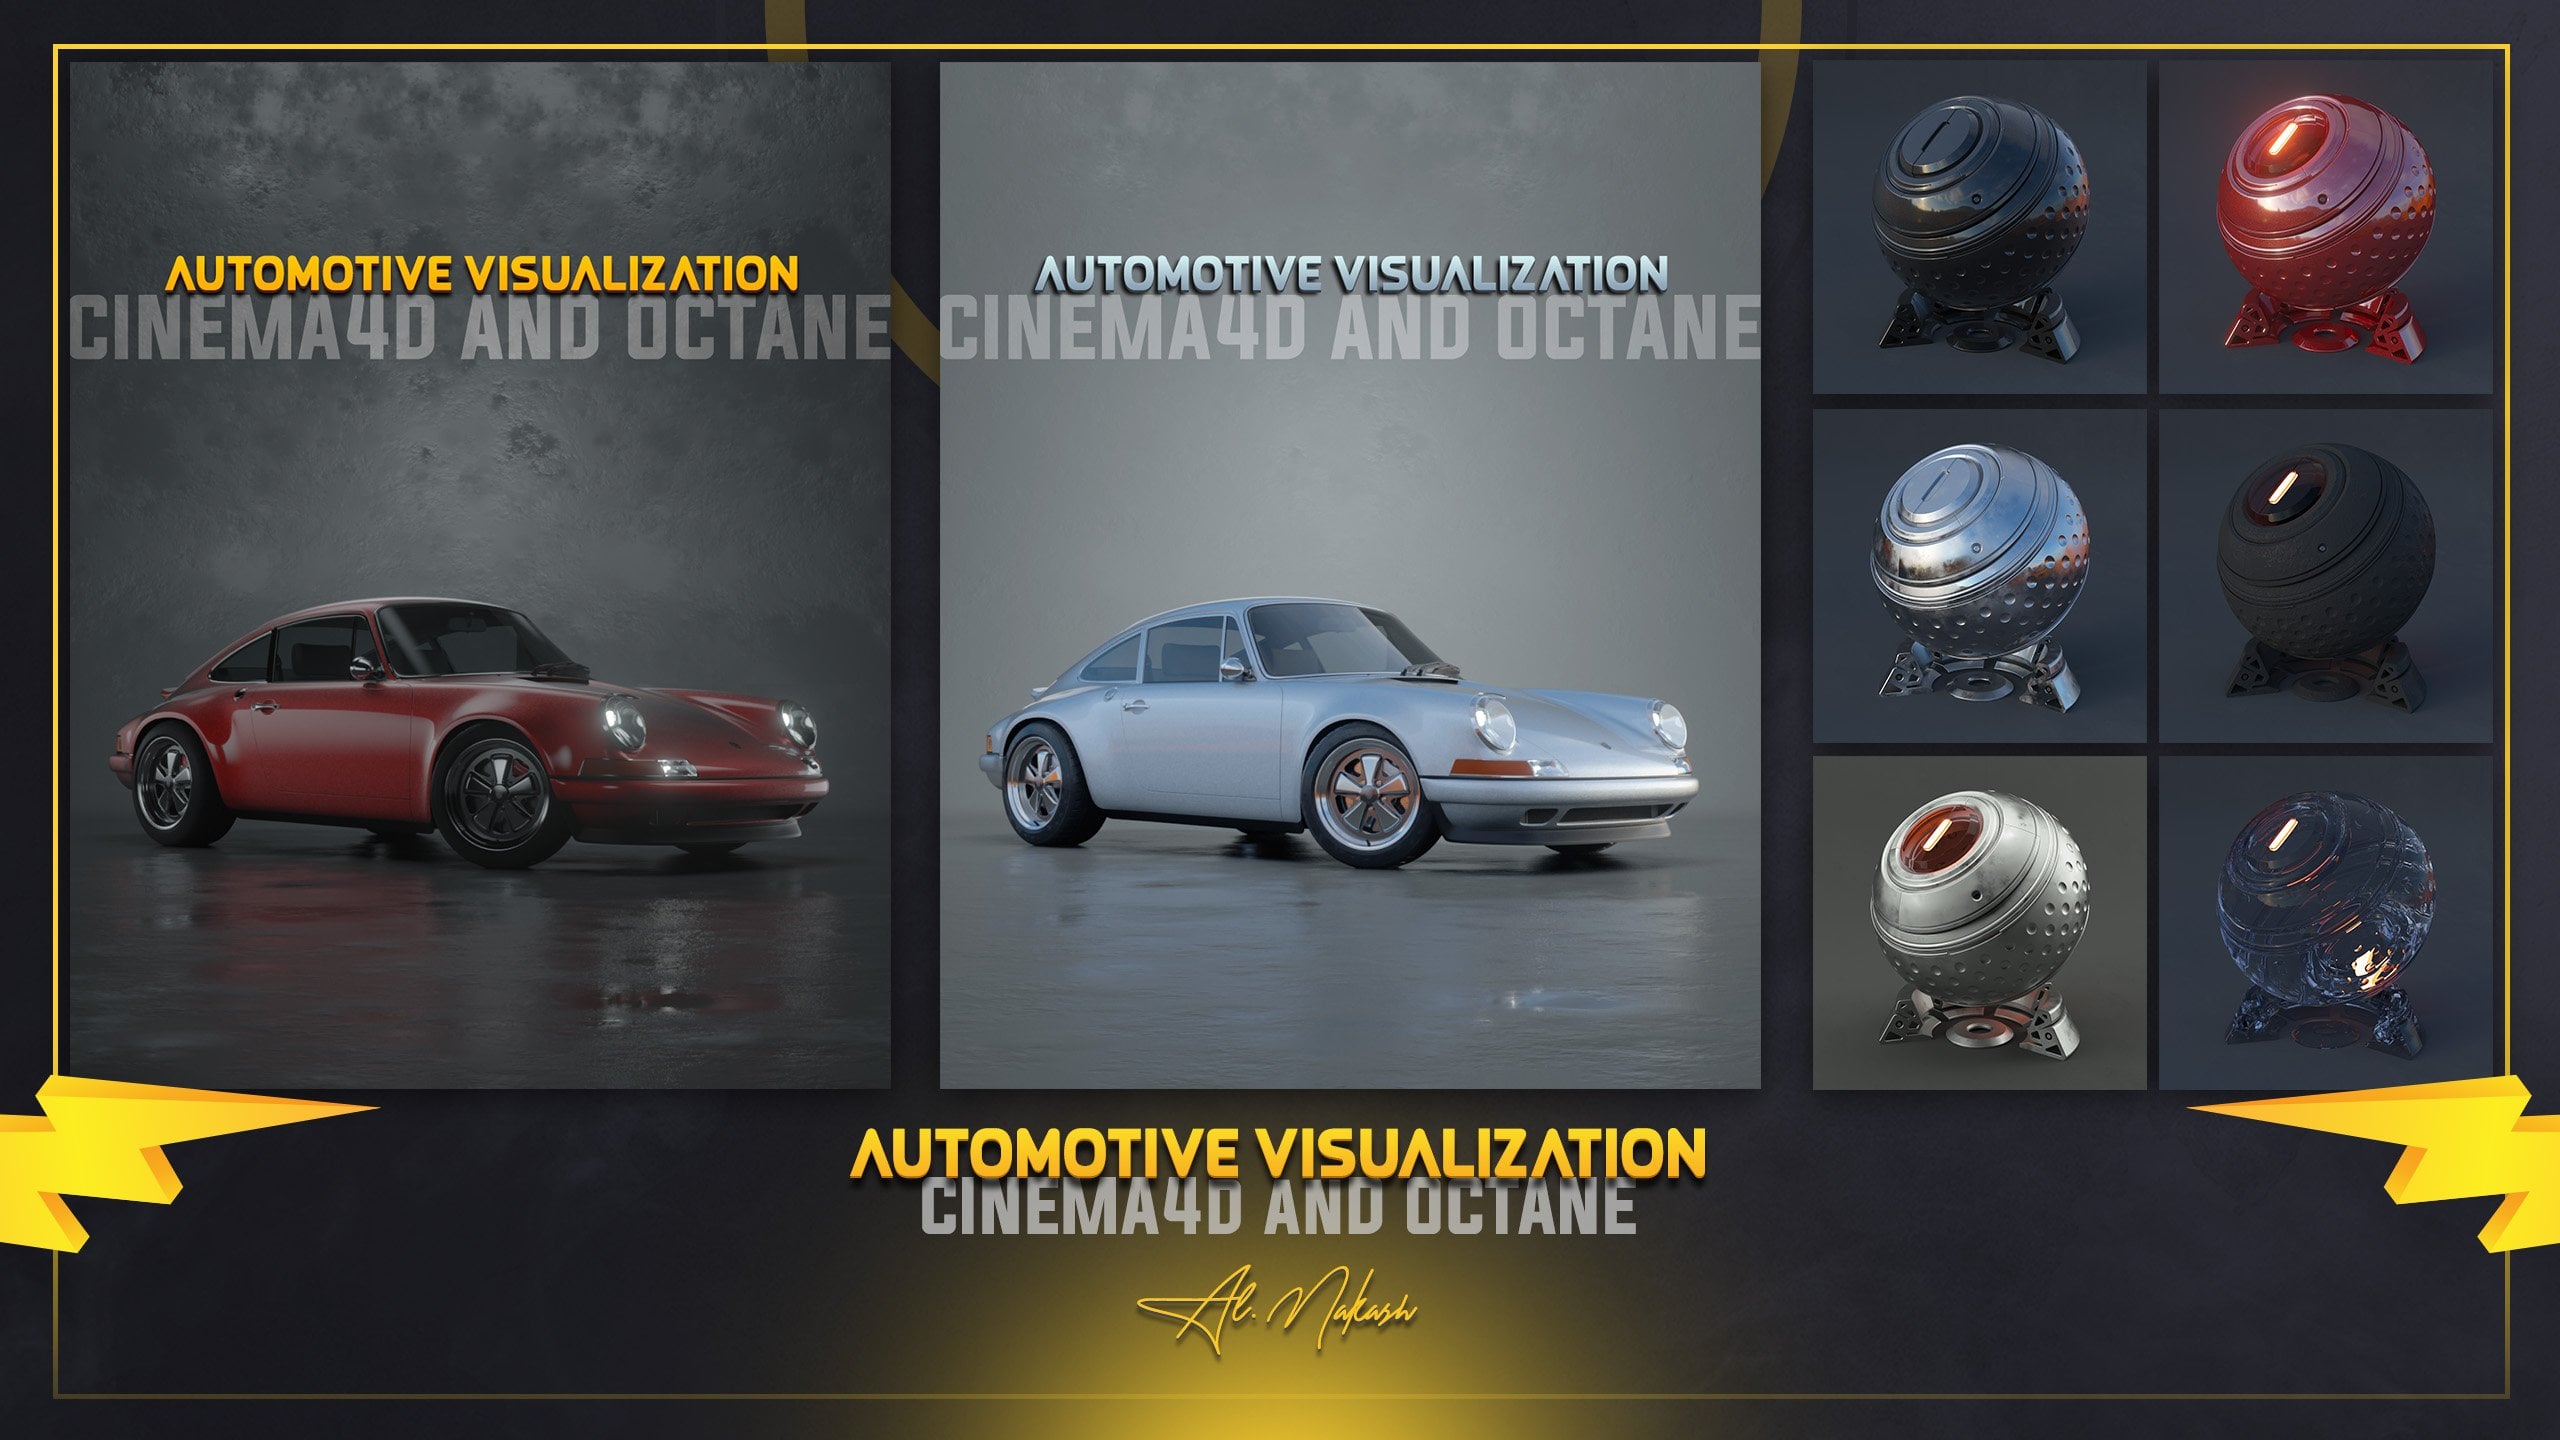
2. Project explanation: Okay guys, here we are again. First of all, I want to show you what you're going to be able to create with all the things that you're going to
learn in this course. So for example, we are going to be able to create, you know, renders like this one where we texture and
environment the water. We downloaded some assets from the sites that we're
going to see later. We created the character, for example, in this
case in death studio. And we also texts to
the sky this sphere, which is like a planet. You can use these
same principles for pretty much every
piece of art that you create a k. So this
is another one. We unloaded these
assets, we position it, it very well and discard
and this character, they are also from death studio. And these kind of
principles can be applied in any kind of environment, any kind of render, any kind of our work. You can use, any type of angle. It's actually pretty,
pretty useful to create. Both are still our words
and also animated renders. In this course, as you know, we are going to be looking to create an non animator render. But you will be able to create these amazing pieces by herself every day and as
you know, is so practice. But this is the potential are words that you are
going to be able to do. Okay, so let's get to Cinema 4D. We're going to be
start learning how to use this amazing
tools. See you there.
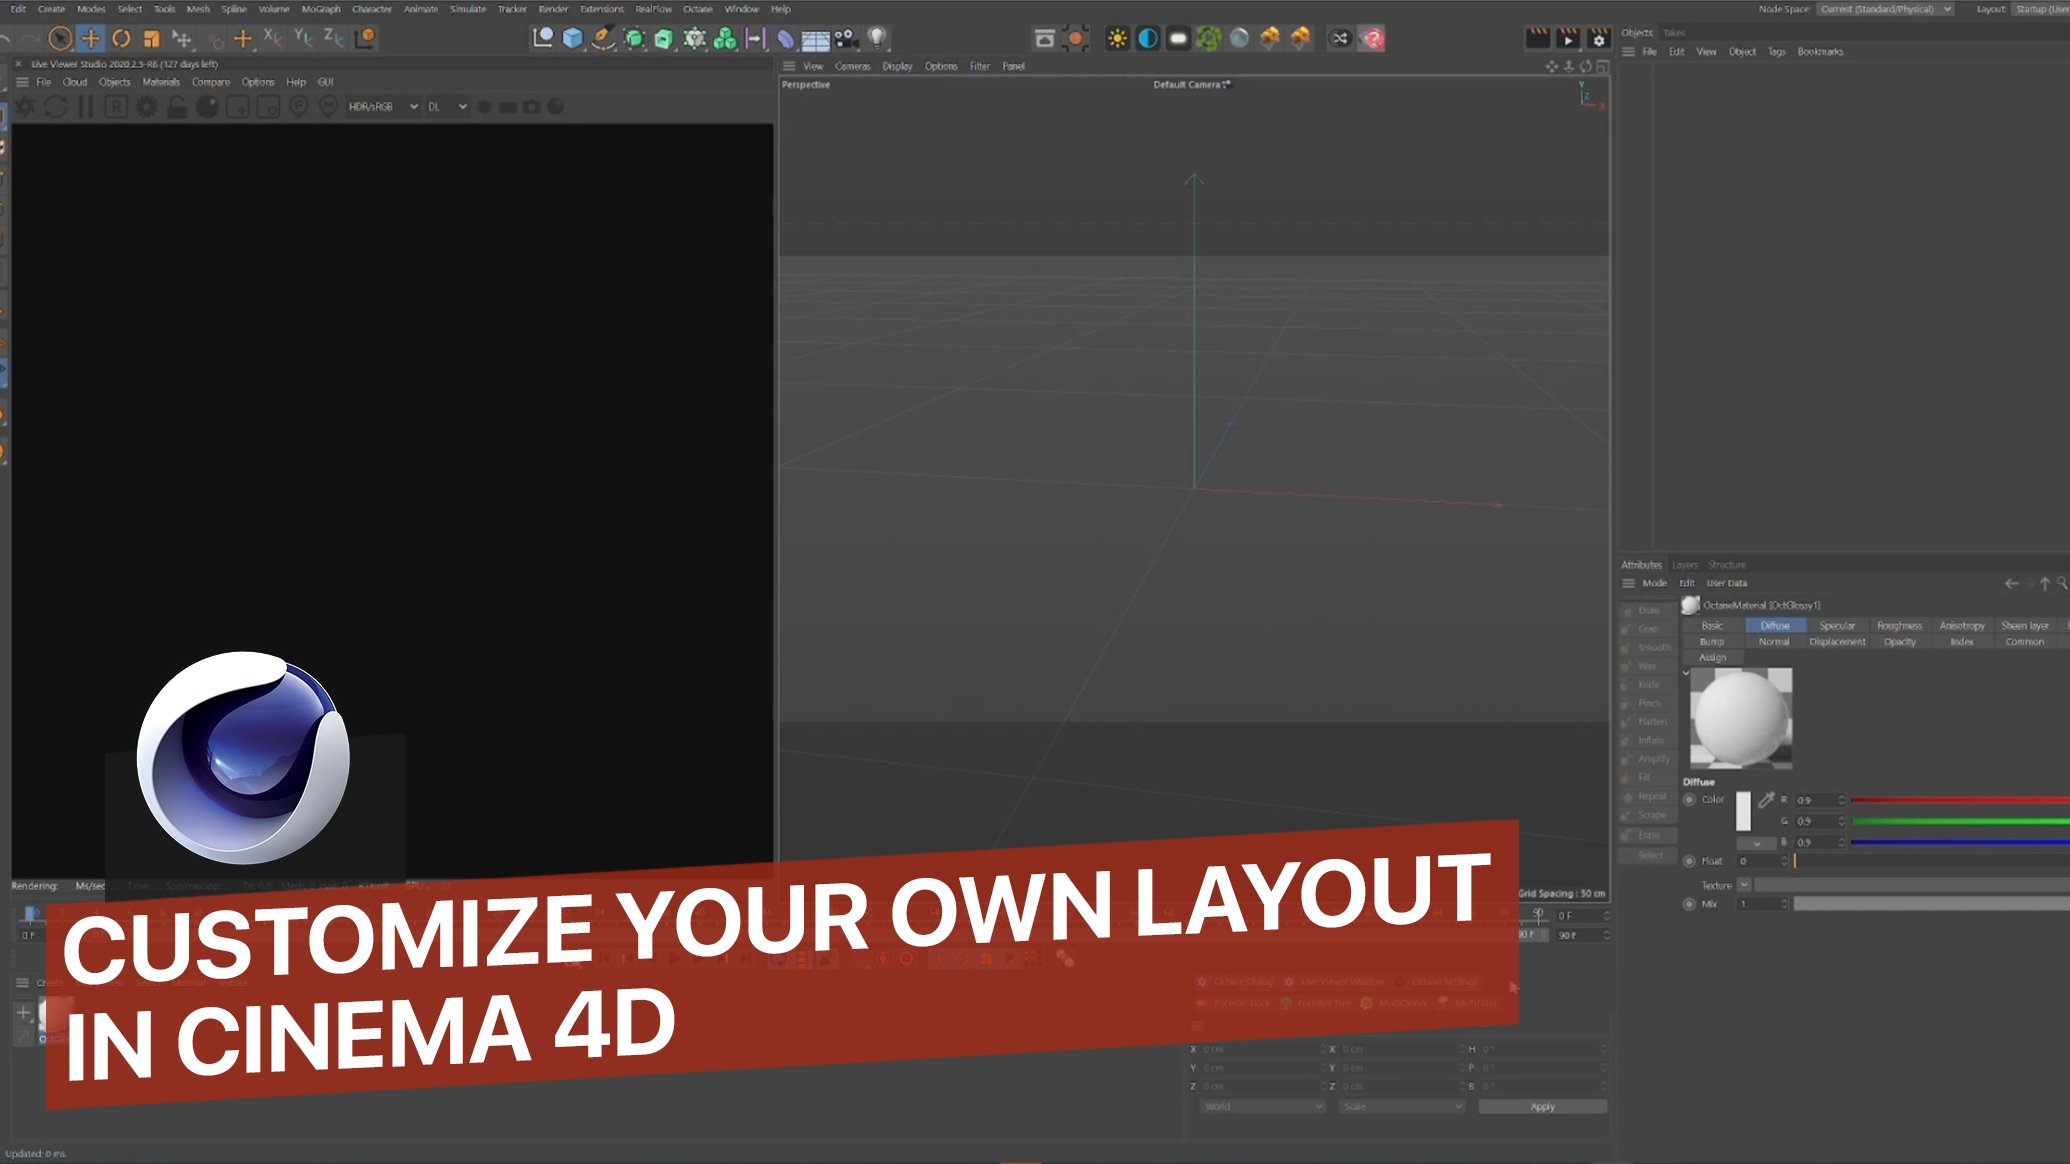
3. Scene setup and composition: Okay guys, here we
are at Cinema 4D, and this is the first layout
that you are going to be looking at when you first
open the program, okay? So we're under startup layout. You can always, you
know, personalize this. And I'm assuming as you know, that you have
obtained installed. If you don't have octane
is told just head to toe side and you can download the free version so you
can start learning. So don't worry about that. What I like to do
first with this is just head over here to obtain, just press a live viewer. And this is going to be able
to render in real time. So we're going to be able to see this render in real time. So let's grab this here and let's drag and drop it
to this corner here. So here we have our viewport
where we're going to be composing our scene, cameras, lights, everything
is going to be here. And in this other
window we're going to see the render in real time. Okay, so let's go first of all to the
resolution and we're going to change this resolution to a resolution more
adequate to Instagram, for example, we can start creating our daily renders fast. So let's head over here first. I'm going to load
recent that I have. And as you can see,
we're going to start with this 181350. Let's go to another
one that I have here. So we have another
resolution here, but just for the sake of making this tutorial a little bit faster and then you
can also work faster. Inside Cinema 4D, we're going to be using
this resolution here. Remember also to have a
surrender, obtain render. And this is going to pop up. And we're going to be talking about these settings
a little bit later. Okay? So just copy this for now. And we're going to be good. Perfect. Then we're going to
change some settings from the obtain render engine. And we're going
to change this DL to be T. And what this is going to do is making a, having
better reflections. So we're going to be able to see these
realistic reflections on all matters regarding the lights are
going to be better, faster, more optimized, and
better for our general theme. Then we go here and again, we're going to be loading
this present they have. This works very well. I'm using for all my
renders, these settings. So just copy these ones and you are going
to be good to go. So let's head to Camera Imager. Just copy this. Be nicer. Let's go to Settings. Here. Don't check our DF doesn't
make a difference. Just check the GPUs
and you want to use. And we are done
with this and X2. So let's see our render. So where do we have? These are the materials
and we're going to use. So let's head to our
render piece here. As you know, when we need
is to create mountains, this sphere over here, this guy, some more
terrain here for our character that we're going to download and some water. So let's start with this
general set up of the sea. Okay, Let's start composing these and let's start blocking out our base assets and models. Okay, so let's start with
the waterfall example. For that, all we
need is a plane. So we had over here,
just grabbed the plane. And as you can see, the first thing that
I like to do is just making the plane bigger. So we have more
place to play with. And if you press
the letter N and D, you might see that we have
really small topology here, we need more topology. So let's change this to
300 and here to 300. So as you can see, we have
more topology to play with and to be
detailing our terrain. So I'm now just
checking where we could place our first
view, our first camera. And this might be a
good place to start, right over here. Perfect. This is perfect. So let's go back
to the other view. Let's press N and C. And this is the clean mu. We want to lock this angle of visual here so we can start
composing the scene. So let's head over here
to OBJ if Alton camera. And here you have
uncheck this, check it. And you just loved
the camera over here. If you move around,
the camera is going to be locked in that position. So for moving around in this
viewport, just love this. You can move around and you
can see also the camera here. You can also move it around. You can do whatever you want. Go to the group this view again. We need now these free
or five mountains here. So let's grab dose for that. We're going to the
same place as before, to the square and
grab a landscape. Let's uncheck this
so we can start modeling and playing
around with the landscape. So this is going to pop up. And it's not very similar to
the monitors that we need. So for that, you can play
around with this dot here. And let's make this bigger. Let's just put it in the level
of the water and let's put it back in the scene. As we can see, this
is very small. So what we're gonna do
is we're going to be pressing the number five
and moving to the right. Also present the left-click. The mountain is getting bigger. If you go to the left, is
shorter or smaller, bigger. You can do this to
every single model and asset data
import to Cinema 4D. So we have a big mountain. Here we are. What you
might see is that we don't have much more definition
and details here. If you press M and D, you could see that we
need more topology. So yet again, Let's go here
and change this 100 to 300. Again. So as you can see, we have much more details. Okay, So let's go back again. And we have what could be
the first mountain here. If you don't like the shape, you can play around
with the seed here, you have, you may go, I believe that to a
thousand or more. So for example, you have these different kinds of modern times that
you can play around. Let's go with, let's see, let's see a good mountain here. This one. Good work. And now actually let's
go with another one. Let's go with this
one and let's make it a little bit wider. Okay, So as you know, we need some more
mountains here, 1234 mountains more and the
terrain for the character. So if you keep pressing control and move to
one of the sides, you are, you are going to
be cloning this mountain. Let's do this again. What we're gonna do now is to
start placing these around. Let's put this one here
and let's make it smaller. And also let's change
the fields because we want to have different
variations in our modern times. I'm just pulling random
numbers here, so don't worry. Let's see. This one could work I live. Let's make this bigger than c. Okay, That one works perfectly. And for these other
mountain here, let's do something really
similar again as this here. Let's go to the seed K. Okay, I believe this
one could work. So let's move it a
little bit here. And like this. Let's make them before from the camera because we
need this depth in the scene. And let's make this
whole thing bigger. Let's move this
one to this side. First. I'm going to make
it wider, bigger. Okay? So we have our first
three mountains over here. And we need two more. There are more of like terrains
and this one here too. So yet again, Let's go here. We grab a landscape and we're going to start
playing around with this one. Here. We're going to use this one's
really flat because we need just maybe this one's
a little bit bigger. Let's see. Okay. Maybe this one here, like this, little bit bigger. Let's clone this to decide. Let's make it a
little bit wider. And let's change
the seed like this. And let's put this
one here like this. And we just need this
terrain over here. So let's grab, for
example, this one here. And let's bring it all the way here. Let's move
it a little bit. Let's make it a
little bit flatter. Flatter terrain
for our character. And here we are. So as you can see,
we already lot the main objects in the scene. Let me check this to
be in the center here. This we can make it a
little bit wider to, okay. So we just need this
fear right here. And for that, we're going to be grabbing just a sphere and
placing it over there. So let's go here again. Let's grab the sphere. Let's go all the way to the back and remember precedent number five and moving to the right. And we're going to make
this sphere bigger. Let's see how this looks. Let's put it right there. And let's also increase the
topology because as you know, we have really small topology. Let's go to maybe a
100 segments here. There we are. I believe now is both a great moment to
save the scene and a great moment to start seeing
this in a live render. So let's first of all save
this pressing control and S. So here we are at the
folder of this project. Let's go here and let's do
maybe close to Skillshare. So here we have the project
and it's important for you to save between every
single thing you do because Cinema 4D
tends to crash. And that is going to be really a downfall for us
because we are going to build this in the
work that we've done. So let's go to the
rendering real time. Let's press here
in this icon here. And let breath and embrace
this so we can log the view. Okay, I'm seeing that we need
a little bit more of a sky. So let's move the camera just a little bit like this and
a little bit like this. Okay, we are in the center. Now. Let's move this a little
bit like this here. Okay, Let's put this down again. Perfect. Let's say this again. And as you can see
here in the render, we don't have any lights
and the reflections. But for that, we're going to
create our first material. So for that, let's
get to materials. Create an ad, a glossy material. If you left-click
here and the material is going to pop up,
double-clicking the material. And here you have
both the material and the node editor,
which is this. We are going to be
using it later. At this point, we need
just material to sit in perfections and the reflections
of the general theme. So we're going to be
going to be handled here to diffuse chance to
change it to a black. And then two roughness, we're going to change
it all the way to one. Roughness, As you can see, controls the reflection
of the general material. Okay, so let's go to one. And we're going to
apply this material to the whole landscapes
that we added. So let's drag and
drop the material. You can do it both. Dropping it to the
scene directly, or you can just rub it
into the landscapes. This here is the list of all the assets on the
scene, including cameras. So you could just drop it here and it's going
to be fine too. So one thing that I
realized is that we need more details and these
landscapes, okay? So what we're going
to do for each one of these is gravity. Just select them. And we
already did this to this one, to that one, to
that one we have, as you can see, three
hundred and three hundred for the sediments. But we need more
sediments in this one. So let's go three hundred,
three hundred for now. Let me check the other
one and that one. Let's go three hundred
and three hundred. And the last one here, we hundred and three hundred. So let's save this.
And as you can see, we already have
this general scene where we have the mountains, you know, some terrain. Let's move this a
little bit here, too. Little bit slower. And a little bit here too. We can make it a little
bit wider like this. And you can see we have the
terrain, the mountains. We might want to be a little bit like
this with the camera. Just move it around. And keeping mind that everything
that you'd texture in this scene is going
to look black, maybe. So for that, you just
got to go to Options, layer color, and then you
will see the real color. Now we're going to start looking around where
we can get the asset. So this character for the scene, and these textures
for the terrain, the snow, and also this guy. So let's head to the sites
where we can get this.
4. Modeling the environment: So before texturing guys, I'm want to show you
another technique that you can use to sculpt
and create the terrain. Okay? So for this demonstration, I'm going to hide this
free landscapes that we're using for the coast and the
other little mountain here. So I select them, them free and just uncheck this. So let's say that we
don't want to add water, but we want this
plane to be a field. So in order to do that, we're going to, first of all, Dexter the field with the same black texture that
we used for the mountains. So we can see the imperfections. And we're going to
apply an effect that is over here called displacer. So let's grab the displacer
and let's drop it in the plane and
inside the display. So we're going to be heading
to shading shader noise. There. You can see that already
we have some results. Double-click in this square. Over here you have
all the settings for this shader, okay? So the first thing you're
going to do is to increase the global scale here to
let's say a 3 thousand. Okay? Here you got me all different noises
that you can apply. So for example, let's
try the gracious. Okay, let's try it. The Nike. Okay, pretty similar. Let's try the Ober. Okay, That is pretty cool. Let's try the wavy turbulence. Okay, so here we're going
to use the wavy turbulence. And let's go back over here. Let's go to object. And we want this to
be more detailed, more strange, more height. So we're going to be heading
to hide and increases to 50. There you can see you,
we're having some results. But what about if we want, for example, let's say a
hole here in the middle. So one thing you can do is you can play around here in
the shader and you know, just go around between
the seeds until you get something
similar as you want. Let's say this one. But then you can also use some brushes and scoped
by hand this terrain. So in order to do that, you have to sell it the
plane and make it editable. You can make it editable by just pressing this icon here
or pressing the shortcut, which is the letter C. So we press the letter
C. And this is, as you can see,
already, an editable, as you can see, this icon here
when we proceed, changes. So this is indicating that this is can be
editable, right? So let's say now that we want to edit this
with the brushes. So I have my brushes over here for the sake
of this tutorial. But we could just go over
here to, let's say tools. Let's go to Mesh. And under Mesh,
let's go to brushes. If you wanted to
get these brushes right here on the
right, like I did, just wrapped the brushes
from here and you could just put them any
place you want. Okay, so let's make
this editable again. And here we have two brushes, so let's leave it here for now. So we're going to be grabbing, let's say the drawer. And we said that we
wanted a hole over here. So if you just press
left-click here, this is going to be
like growing point. So you could just add
volume to the scene. So you can start as you can see, creating some cool stuff here. But let's say we
want the hole here. So we grabbed this and we keep
pressing the key control. And if you press Control, this is going to
subtract volume. So you can start playing
around doing your stuff, just adding, just
deleting volume, and just creating
more things you want.
5. Free textures and models resources: Hello again guys. So this is one of the sites that
we're going to be using. It's called quicksort
omega scans. And this side is
actually amazing. These are a bunch
of guys that are scanning the whole world
and that is the remission. So you can find
here a whole lot of things from surfaces, materials. You can also find assets like
plants, modular buildings, so you can start creating
your own buildings, rocks, you're going
to be find it here. Everything rashes. So we're going to be using
this site for surfaces. Now, remember, we need to grab a surface which
is the material for the dirt and rocks and
another one for the snow. So I already select them. I'm going to show you
how this thrill goals. So let's say you decided to
do this one, just press it. You are going to be
able to log in using your Facebook and every kind
of social network. You have. A login, use it
Epic for example. And you will have
here the selection of the resolution I
always use for k. You just download them. And once you download them, you will have, you will
have this for example. And me show you here
are the assets. You will be getting this, right. It's a sip. So if you unzip this, you will get these maps. These are called maps.
You have the color, the imperfections, you know, the reflections to cause this, we're going to be
using in the node area of the material to start
creating these textures. I selected this
rock material for the terrain and going to link that in the resources
for this project. But you can select any kind
of material you want here. For example, you
put surface here. Let's go to surfaces
and here we will have a lot of surfaces to play
around and they are amazing. So you don't just limit
yourself to do as no iterate. You can do like
maybe forest one, rocks one, these branches
are Mason this roots. So I selected this
rocky material one and the other one is snow. This one is the other one that
we are going to be using. And for this guy, just head to wallpaper, Let's say Boreal this, this, you could
just look it here, just grab an image
that you want. Let's say, let's press here for k. Let's say we want
to use this one here. So you're getting there. You download it. And let's run and drop
it to the asset, fair. You know, I know it's not
the same as this one, but it's going to look really
stick in our final render. We might want to have
one that is like maybe more of the colors
that we're looking for. But this one is going to
do just fine for now. Maybe we put here
purple, Let's see. Okay, so these ones
are much better. Let's grab one from here. Let's say maybe
this one over here. No. Okay. No. Okay. You just grab the one
that you like the most and you go around with, I'm going to play
around and look one. So again, for this
kind of color, but you know the drill. Finally, we have the
character, okay, So for the character and every kind of assets
that you want to use, Chet had to sketch up. In Sketchfab, you will
find every kind of acid. And it's a simple as just downloaded and drag and
drop it to Cinema 4D. So let's say for example, you want, I don't know. Let's write here. Car. Okay? So here you have to breath downloadable because these are the ones that are going
to be downloadable. And if you see this icon here
in any model that you want, you just breath the model, go into the model and
download the model. And here you have the, you always want to find the FBX auction because
it's the one or an OBJ to cause are the ones that you are going to be able
to import into Cinema 4D. So what I did is I looked for a man and then scroll
this whole thing around. For example, this one could
be used pretty well here. Here we have the character, but I ended up choosing, as you can see, another
one, and I have it here. Yet again, you're going
to be downloading a sip, you unzip it, something
like this could happen. You will get the OBJ for the mesh and a folder
for the textures. You will, you might find
another kind of files here like dot doc and all
that kind of stuff. Don't worry about that. Just use these ones too. Let's go to place these
models into our scene.
6. Models placement: So here we are at the scene. And what we need to do now
is just to place the models. So for every single
model than you have, and then you want to download
and put into the scene. You will have to do
this same drill. So let's get to File. Let's press Merge. Here, you will be heading to the folder where
you have that file, which is dot OBJ. Fbx, in this case is in assets. Standard men and Model Mesh. Here just use the standard
OBJ import and press. Okay. And you will have, let me just duplicate
this and lock it. And you will have the
character over here. So as you can see, the character is really small. So yet again, the same that
we did for the mountains. Just keep pressing five. Let's go to the right and just grab our character and
place it where we want it. Let me see how this looks. Is still really small. So let's make it a
little bit bigger. A little bit smaller. This a little bit. Okay. Let's move it around. Okay. Let me see how this looks. Okay. This looks pretty fine. We know it's a little
bit to the right because I want to have in
a little bit different. But it's perfectly post. I actually wanted to do it. I hit on I don't like
having it in a side. So let's go here like this. And we are ready to go. As you can see, you don't
have the textures yet on it. We're going to be texturing in the next episode here
in the next class. So head to the next
one and we're going to start texture in the sky, the water, and this
whole materials.
7. Texturing: So let's texture
this whole theme. Let's start with the, let's say the, the character. So for that, we need
to create a material. Again, let's call
it two materials. Create Glossy Material. Double-click in the material. And now we're going to
open the node editor. So here we are at
the node editor and here you can see
the base material. Okay, let's see here, name this material to men. So we kept things
organized here. And here we're going to
drop all the textures that came with the model right here. Let's go here is
just one texture. So let's go right here. And we're going to keep
pressing this assisted color. This is a color map. Let's go to diffuse. So as you could see, we have
the color in the diffuse, but it's really shiny. So let's go to roughness and maybe let's go to
all the way to one. Let's go to specular
reflection information. For example, if we go to 0, nothing is reflecting, but
let's put this in the middle. Okay, so let's close this and let's drag and drop this
information to the character. So as you can see, here, we are not going to see, but here we have the
texture character. Okay? So now we're going to be
working out the water. But before working the water
out, we need some light, some skylights so we could start seeing these reflections
more realistically. So let's head to objects, live and just press
obtain the light. As you can see, the whole light, the scene is totally different. And what this did is to create an artificial sky so you
could see it's like a sunset. So let's love the camera again. And with this, you can
control the light. So let's move this
around like this maybe, and let's make it a
little bit like this. We can start seeing our
reflections in real time. So let's do the water for that. Yet again, go to objects
of solid materials, created Glossy Material.
Double-click here. Let's name this water. And let's change this type of material specular
lets you could see the material now is transparent and it's more
reminiscent of water. So let's go to the Node Editor. Let's, let's first apply this material acidic so you
could see the difference. So let's drag the material,
drag and drop it. And as you can see,
is really flat. It's not what we need. So what we're going
to be doing now is we're going to be
grabbing something that is called the noise
mode, the noise node. So for that, you could hear search any kind of notes here. So let's write noise. That's random drop this here. And here you could
see the pattern of the noise and we are using. So let's, for example, grabbed the noise where you are playing with water
and you're creating water, just the noise always
goes to the bump. Okay. So a secret, see, this is already coming. Some imperfections. Actually. Let's go here
to Glossy Material. And let's change this to, let's say, black color. So you can start seeing
better the reflections. Let's close this and
let's keep with this. And what we need now is we
need more, more, reflect, more reflections, more patterns, which is more reminiscent
of this water over here. So we're gonna do, is we're
going to make this bigger. Here is the scale. Let's put it to maybe 500. So now we're talking and we need more like
horizontal lines here. So you want to have two relative scale and
put this to maybe 250. So here we have the water, okay? So I'm gonna move this
a little bit too. Okay. So there we have the water guys. So now we're going to start
creating the material for D, For the ground. Okay? Um, for the ground
we're going to use. Then C, we're going to use we talked the
rocky ground material. And also we're going
to use the snow pure. Okay, so let's grab
the rocky ground. As you could see, we have
more maps here to use. So if we head back to obtain, Let's save this and let's
create another material. So let's go to here is materials
created Glossy Material. Double-click here. And let's name this ground. Okay, let's open the
editor and we're going to drag and drop the albedo. Displacement, normal. And let's say roughness for now. And let's see how
this roughness looks. Okay, so here we have the roughness that goes into roughness is pretty
self-explanatory. Here we have the normal. Here you see the name. Let's go with normal. The normal is called
imperfections. Here we have the displacement, that is the amount of power and strength we want
to, this is perfection. Let's leave that there for now, and let's grab the color and let's put it into the diffuse. So we have here the one that I told
you call displacement. Okay? But what
happens if we grabbed this and we put it
into displacement? It doesn't let us do it. For that, we need another
node which is called, you guessed it, displacement. And we are going to
put this into texture. And from here we can
go to displacement. One thing that is really important with this
node is that you have to keep pressing
it, select displacement. And in level of detail. Just put the resolution of
the image of the texts are so curious for k. Let's
grab and changed it. These two tube just to
see how this looks. Let's close this,
but keep open this. So let's drag and
drop this here. We can see this is
like very like big. And to change that, we just going to be
grabbing another node and this is going to be
another you're going to be using a lot is
called a transform. And just grab the node
and just put it into every texture that you import
it into the transform node. Here we go. Here we could make the whole set of
textures smaller. So see what happens when I put this over
here, for example. Here is a smaller
is getting smaller. If getting a whole lot smaller. So here we are with the
texture and we're going to be adding a little
bit more of a strange, strange because we
need disrupts to be a little higher.
Let's go to five. And there we are. Let's put this a little bit. Here. Let's move the
terrain a little bit down because it's eating
our food, our fields. So I believe there we go. Okay, then we're going to apply the same material
to everything else, to this terrain over here, this one over here, and
the mountains over here. Okay? So we need some snow now. Okay? So first of all, for the mountains, I want to say that you can use
another material. So for example,
if you go here to Quicksilver and you
breath under surface, you go to rocks. Let's say here you have
a lot of rock material. You could just be grabbing
another material here. Let's say this one. And I already have the
preset for this, so I'm going to use that one, but it's the exact
same way as we did here with this material. Okay, so I have made
my preset here. Let me just grab it for you. This is where I, this is
something more advanced, but you could see here
that you can have this whole materials
for yourself. Close this. And this is my rock
material here. I'm going to show you how
this, how this looks. The diffuse go with the diffuse. I used to transform every
single thing that we did here. I just did it with
this material too. So I'm going to use this
material to start using it. The mountains and
as you can see, is a rocky material,
it looks better. Okay. So now we need the
material for the snow. For this, we're
going to duplicate every single one of
these landscapes. Okay? So let's grab them all. Just keep pressing Shift
and grab them all press Control and just
duplicate them. Again. From the 11th one to the seats, six months we have all
these duplications. This doubles its clones
of these textures. And now we're going to create
this no material yet again. Let's go here to materials,
create glass material. Let's call this
snow node editor. Here we go. And let's grab the textures
for that material. So here we go with
the snow albedo. We don't need the
displacement here. Because there's no definite, we don't need it to be
higher and stronger. We just need the imperfections that we are going to
get with the normal. And let's go with the, with this tool
actually were fine. The albedo goes
here is the diffuse one and the normal goes
to the normal ones. So we didn't add the roughness because
I'm going to show you another way that you can
control the reflections. And we saw it before. It's this roughness is like a general roughness
for the material. So let's put it over
here like this. Here. And there we go
with the roughness. Well, let's drag
and drop this one to these other
materials over here. Let's just drag and drop it in every
single landscape here. And let's delete the other
materials that we don't use. Okay, So nothing is
showing as you could see. So let's graph, for example, this landscape number seats, which is the one
sharing this space. And just move it a
little bit up until we know it Shelves. Here we go. Rugs on the snow. Let's do the same for
every single one of those. I'm going to try to
do them at once. So I'm grabbed them all and
just move it moving them up. Okay. So this is not going to work
because they are different. So let me just grab one by one. As you can see, this
now is showing. Let's go again. Now it's showing. Let's go with the nine. Now it's showing eighth. Okay, we got some
snow under seven. And for that, we need to
move a little bit here. And there we go. Let's save this. And as you can see here, we have the snow materials
on top of the mountains. Okay? So let's take the
sky on the sphere. So for the sphere, what I like to do is
create the material. But now we're going to
create a diffuse material. Double-click here.
Let's call this fear. And let's go to the Node Editor. So as you can see here, we need a material
which is going to be like when a
gradient color, right? Because we need this
material to go from purple to this orange
material over here. So what we're going to
do now is we're going to create this
emissive material. And this is the gray material
because you are going to be using it for every
single neon piece that you want to
make a sun energy every that is emissive, you're going to be
able to use this. So let's go to this node here
called black body emission. Since we need a gradient from the sphere, Let's
write gradient. So we need a gradient
in purple to orange. So here you have the
properties of the gradient. Let's grab this here and put
it in a purple like this. And let's grab this over
here and put it into orange. Maybe like that. Let's connect this to texture, and let's connect
these two emission. As you could see, this
is very, very bright. Let's go here, select the black body emission,
surface brightness. And let's make this
down a notch to ten. Analysis that we have to do
is double pref this here. Let's go to this
section of the area in diffuse just changed
from white to black. So you will see the
colors a little bit more saturated, saturated there. So let's apply this and
let's see how this looks. Okay, so we're going to
make this term free. Let's make this free. To, let me see. Perfect. We need to move the
sphere around this. In this case, what happened? Okay? Well, let's
put it like this. And we need more purple, okay, so we're going to
be heading here. Just double-click
here and do this. There we go with
more purple color. Let me just check something out. Ten years actually say, Okay, there we go. There we have the sphere. Let's change this guy. Now. For this guy, we're going to be
heading two objects. And now we're not going
to be heading to light. We're just going to
breath HDR environment. Okay? So under HDR environment, we're going to be
pressing this icon here. Double-click here. So here is where you're going
to be adding the texture. Not here. Q. So go here and you could
find any texts rewards. Here I have all my
wallpaper, wallpaper, as I told you before, and I was able to find
the same wallpaper that, uh, using the other sky. So I double-click here. I press yes. And nothing happened. But why? I just added the wallpaper. Okay. So what you have is activated this daylight
that we used before. So just press this check
here and check it. There we go. But it's too big. So let's go here again. Let's go here again. And let's press you
breed UV transform. Press this arrow here, and here you have
all the information and settings for this wallpaper. As before as the
transformation node. Here you can make the small
picture a little bit smaller, the photo or bigger. Let's make it smaller. And we needed like down. So let's head back. And here you could
put it down or up. You can organize it. So let's put it down. It's a little bit short, so let's make it a
little bit bigger. Okay? And a little bit down again. So another thing is that
this is too bright. We need more of a
night sky here. So for that, we're going
to just go here again. And here you have the gamma
and the power of the scene. We need to change the
Gamma to something more dark. There we go. Okay, So we are basically
almost done here. The sphere is to whitish, so we're going to be changing
that a little bit now. So let's go to sphere again. Note editor. Let's close this. And let's go to gradient here. Let me see if I add another one, if this one here, okay. You just play around with this. I'm just playing around
and seeing what is the best options
that we have here. There we go, This 1.5, that can work perfectly, okay. There we go. Okay. So Let's talk now about the lights that
we need and the fall. Because if you know here, we want to give
default to the seams so the mountains look
to be further away. And we have this whole concept and atmospheric sense
in the overall scene. So let's add to that.
8. Volumetric Lights and fog: Okay guys, so the first
thing that we need to do is to add this blue light here. And for that, we're going to re-enable the obtain the
light that we use before. But what happened? This guy has gone again. We have the solution for that. So let's press this sum here. And let's make the sky texture. What this is gonna do
is it's going to be able to be like transparent. Now, it's going to be
something that makes us see the texture that we added
before in the octane sky. But we're going to
maintain the light for this obtain the sky. Because as you can see here, we have the reflection of
the sun, which was here. So if we move this around, that reflection is
going to change. That inflation is changing. So let's put the light in a direction where we
have this over here. Turning to that color. Make it a little bit more here. Like this, maybe this, maybe like this a little bit. Let me check. And let's also
change the color of this light to a more bluish one. So let's go to the Sun. And here we have
the color of light. Let's go to this
bluish color here. And there you have
the blue color. There we have the blue color. We need a little bit more
power here or brightness. So let me just put it
that way and let's move it a little bit down so we
can have like other color. Okay. So let's talk
about the Fog now. In order for you to add the fog, Just gotta go to object
and add fog volumes. So when you press this, this weird box is
going to appear here. Okay? So what I'd like
to do first is I like to put it this way. So these are all like
lines or planes. I want them to look at
my way just because. And then we're going to
press here in the volume. First of all, change
the box of size two. Maybe 400. Because more boxes and the boxes were those planes that
conform this fall. More of those is going to make the Cinema 4D crash really fast. So used the amount that
you feel comfortable with. I like using 400. So now we're going
to make this as big as we need to cover
this whole scene. Here you have the bulb
source and here it's really dense thought that
we are going to be using. So we need something like this. Maybe we want to have this made it bigger
and more in the back. So there we have the fog. We didn't see anything because, you know, we had to
take a little themes. So let's go to
medium breath here. And let's first go to absorption
and put this into white. The same for scattering. This is the amount
of light that you let pass through this fall. We're going to leave
it at 0 for now. And we're going to take this. So let's put this one here. Let's say add to 50. And the top one here, let's say at 0. Let's put this a little
bit higher here like this. And there you go. You can see that if you
play with this around, you're going to have more
dense or more light fall. I tend to use light fall casino. It's better for me. There you go. You have the light bulb? Okay. There you have the fault. You could see it's
pretty much the same. Okay, so let's just grab this now and go to the Render
Settings and camera settings.
9. Camera & render settings: Okay guys, so here we are in. Before checking the
render settings, we want to do one more thing to this sphere of tech circus. As I said, now, we need more
saturation of this color. So I'm going to introduce
you to this new node that you can use in every single
material that you use. So let's head to the sphere
note editor and just grab the color correction
node and you have to drop it in this line that
connects the color to the diffuse or to the black body emission is
actually the same deal. Let's put it here. Here are going to be able to control everything from the
contrast the game, but we're going to touch only the saturation and
check the sphere here. When we do this, now we have the color that
we want it, okay? So we want a little
bit more saturation and a little bit more of light, maybe actually state two. And there we go. We have a more live the sphere. Let's head to the
render settings. Actually here in obtaining, just remember this,
it has to be a, b, t and CEF, the Render
Settings here didn't change. Just copy these ones
are the most optimized. Here to your GPUs. Just copy the senate here. And let's go here to this icon. And the same, remember to keep selecting obtained
render and had to obtain under Render passes, you're going to
be able to select the folder to save
your render passes. I already created a folder
just selected named renders. And this is going to
be saved over there. So here we're going to start seeing the
passes that we need. So let's press Show
passes, say beauty. Beauty is the main path. Let's go to very passive. We need the reflection, the
Chateau de noise beauty. Beauty is going to make us have a clean render
with no noise. So we need only this free to start working
fast and every day. Okay? So if we press Shift on, are this is going
to be rendering. Let's check one more
time the resolution here because we need to change
it. Let's go to main. Everything is pretty
much the same. Remember here 16
bits, we need a PNG. And let's go to
output 181 for 50. We're good in that area. So let's just press Shift
on are actually here. She's dinar and this is
going to start rendering. You can see this a
friend or in real time. It's going to take a
few minutes because C is a simple scene. Once we have the render, we are going to see the render and go to the
Photoshop composition. See you there.
10. Photoshop composition & final render: So here we have
our render passes. As you can see, we
need the main one, actually the shadow one. Here we have the reflection one. We're just going to
grab the main one and drag and drop it to
Photoshop here, let's press. Okay, and here we go. So we're going to
do here is just, you know, the overall colors. Let's say we want
more saturation. So you want to breath control B. Actually, let's press here, go to image adjustments, and let's go to saturation tone. And here you can just start taking the
saturation a little bit. So here we go. It's actually looking better. And let's press Control B. You could give a totally
whole atmosphere to be like this. Alright, this. Okay. And you also can add some
planets on the sky too. This is something pretty
awesome and Mu here. So if you go to, let's say here at Google, look for a planet. And let's say we liked, let's say maybe this
planet over here. You just grab the image. David. Anywhere. Actually, we had a
problem with this image. So let's grab another one.
Let's grab this one. Rabbit. Save it. Here it is. Let's grab it and drag
and drop it here. And just go to the image normal. And let's select Screen. And that is the only thing
that we didn't know. We had a Black Baron
Macron in that image, the screen, what death is. We just, it just made that
blend with the general scene. So let's do this on top
of this planet here. That is something
that you can do. You can put it
here, planted over here. Let's put it here. Like this. You could add the amount
of planet you want, the spheres, you want,
anything that you want. So I don't like the planet. I'm going to remove it, but I wanted to show you
how to add it. So guys, this was everything
here in Photoshop.
11. Outro : So there we go, guys. That was the tutorial. I hope you learn a lot of, please share your projects below because I want
to see what you do and I would love to give you my feedback and see
you in the next one.
 Nico Fernandez, Digital Artist