Transcripts
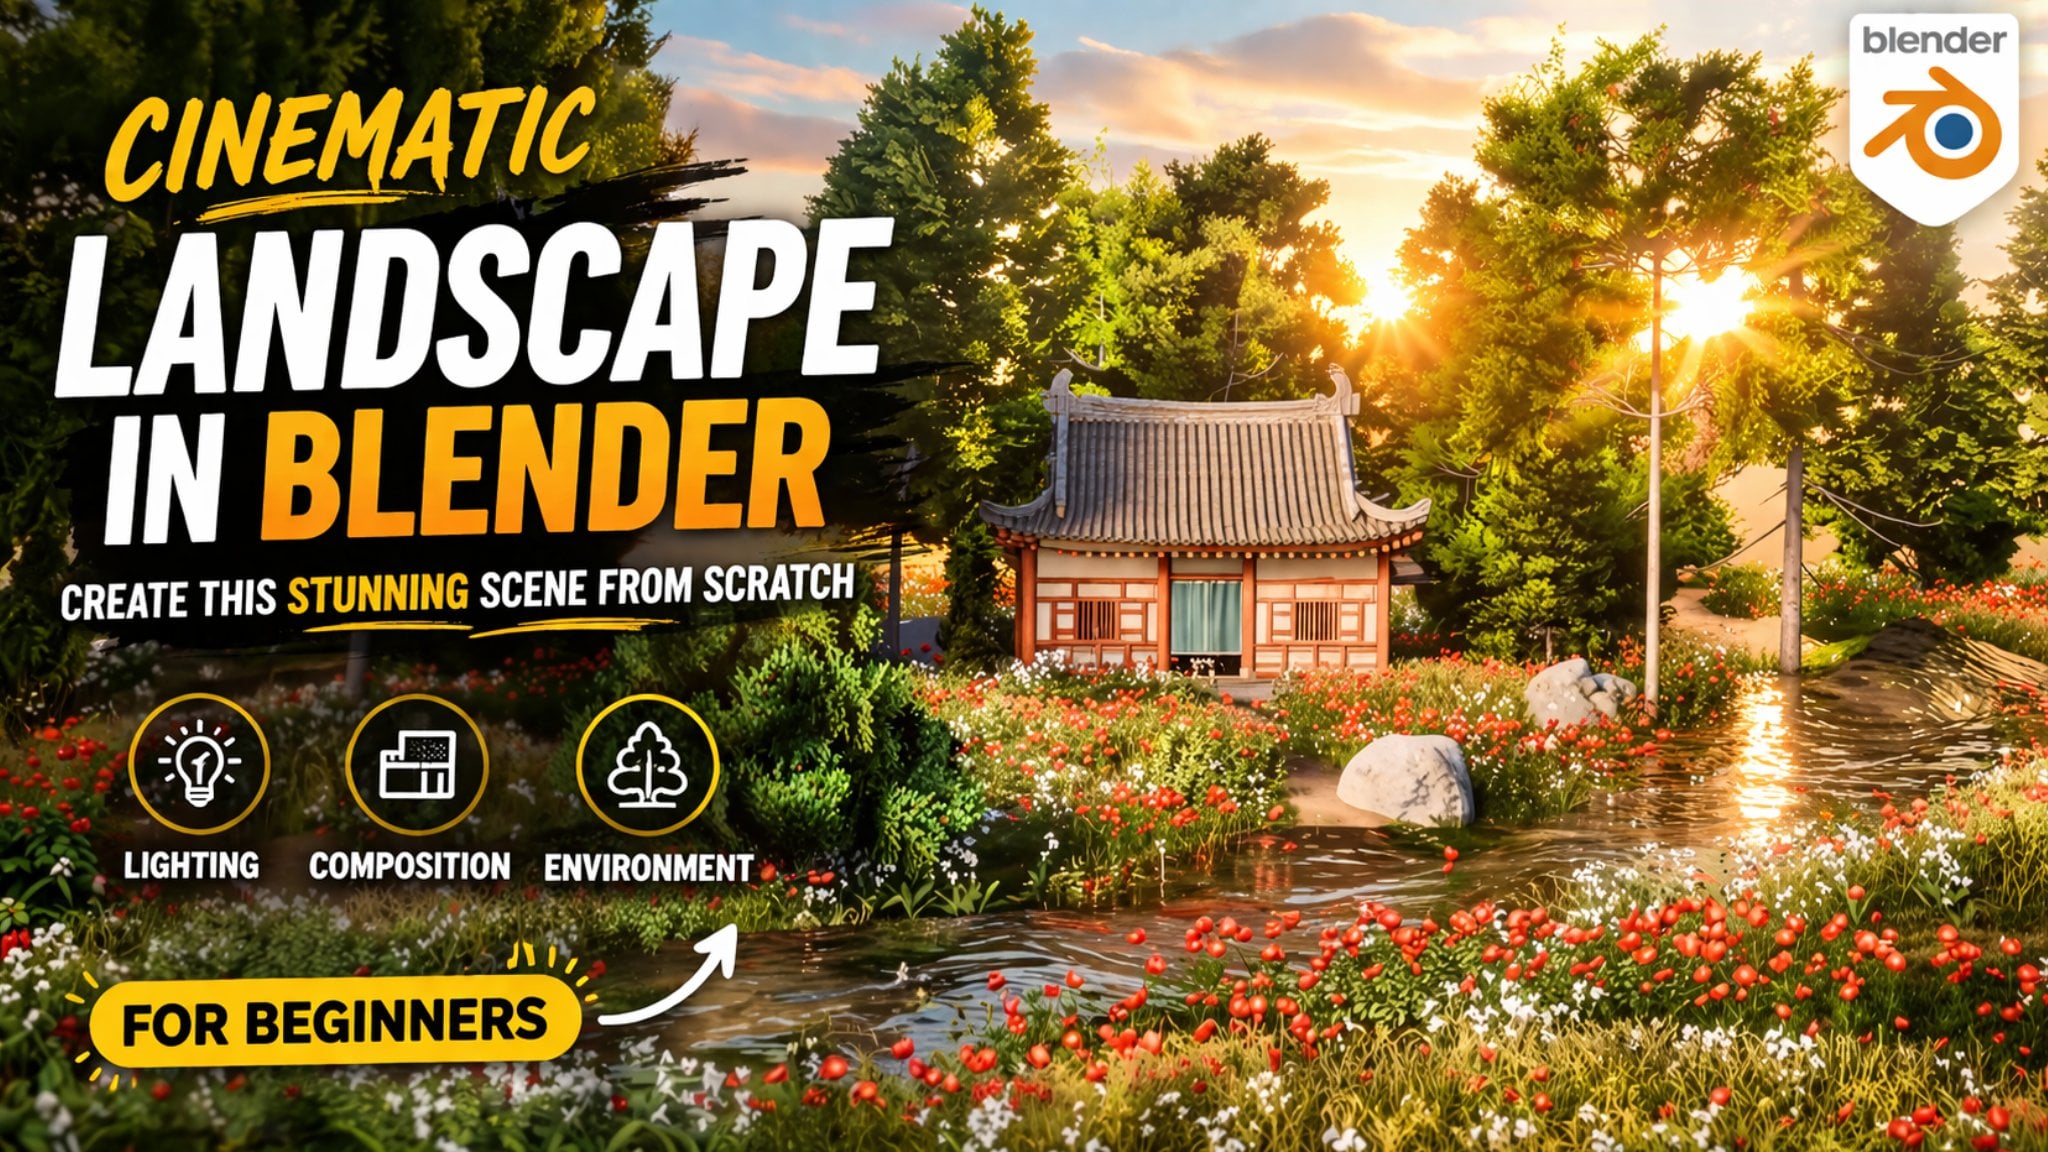
1. Class Introduction: Do you want to create stunning cinematic scenes
like this all inside blender? Well, in this course,
I'll show you exactly how to do
this step by step. Firstly, we will start
with the blender basics. Even if you are a complete
beginner, don't worry. You will learn how to navigate, set up your scene, and prepare your workspace for
cinematic creation. Then we will move on creating a beautiful landscape
and setting up our camera for
cinematic composition. You will learn how to design your elastic environment
that tells a story. Next, we will add stones, a boat and distribute leaves naturally ging blender
particle system. This will help you bring your scene to life with
realistic details. Then comes one of the most
important parts lighting. You will learn how to create dramatic and realistic lighting that set the perfect
mood for your scene. After that, we will
add trees across the mountain landscape and even a stylist with falling leaps animation and make the scene more
alive and dynamic. We will also scatter
trees, add volometric hog, and create a cinematic depth that look like a
real movie short. Then we will enhance the
scene by adding grasses and flowers to make the win look
more natural and detail. You will also learn how
to animate the camera for a smooth cinematic
movement and create a realistic water animation that reacts
beautifully to light. Finally, we will do compositing inside blender to
polish the look, adjusting color, contrast
and glow effect. And then set up the
best render setting for personal quality
cinematic sorts. Everything you see in this scene was made using free tools and assets and you don't need any prior experience
to start this course. By the end of this course, you will have the skills
and confidence to create your own cinematic
three D vals in blender, even if you are just starting
your three D journey.
2. Downloading & Installing Blender: In this video, I'm going
to explain how can you download the latest
version of Blender. Blender is officially
free and open source. Okay, so let's start open
and brojer and this time, I'm using the Chrome projec. So here, search
here blender, okay. Such Share blender and three D and you will get
this official website. This is ww blender dot Rg. You need to enter
into this website and then this time the
latest version of blender is blender 5.1. In your case, it
might be different. In your case, it may be 5.2, 5.3, and maybe six. You need to download the
same blender version. Okay or you can even download the latest
version of blender. This course is capable
of all the versions. So here, I'm going to
press the blender 5.1. And in this video,
Alex also explain you how can you download the
older version of blender, you can match with this course. This time, I'm going to
download this blender 5.1. Simply press this
download button, and it's already detected
that I'm the Windows user. So if you are using the Mc, it will be detected
in your browser. So this time it's downloading. So let me finish it. Now let me back one
step back and show you. This is already selected as Windows and installer
pack, okay? That's perfect. And
it's showing me that you are looking for the LTS release or
previous version. So I'll explain to
you how can you download the LTS release. LTS release means
long term support means the blender will give you the support for
a very long time. And previous version, as
you know, this is a 5.1, so you can download
the 4.2 LTS 4.5 LTS. So these are the stable version, but the latest
version of blender, uh, it is not very stable. It's downloaded or
what you need to do. You can go to this
download folder or even you can
press here this one. I'm going to the download
folder for this time. Here it's here. You can
right click and here, press this open button, and it will open sometime.
It's now running. So press this next. Okay, and it's asking
you for the folder, leave it by default,
press the next. Okay. It's very simple process
to download and install this blender because it will
not ask you for EML ID, not sign up, not sign in because it's completely
free forever. Now, you need to press this
install button here and now it's installing it will
take some time to install. It's not very heavy software. It's very lightweight software. But if you uh, design something if you
make the environment, if you make the animation, then it will be heavy
according to your UGS. Now press this button again. Okay? You need to press only SNS and it will be
installed in your PC. Here, the blender is
completely installed here. I'm not going to learn how to support blender and
just finish it. Now let me show you this
is the blender 5.1 here, you can simply right click
and open this blender, okay? And it will be opened perfectly. Now I'm going to
show you how can you install the older
version of blender, go to the same website, blender and just
press the download any version of blender and go to this LTS release firstly, go to this LTS release, and you will get the LTS reels
missed long term support. This time it is showing the
blender 4.2 LTS and 4.5 LTS. You can download any of these. This time, I recommend you
to download the blender 4.5 LTS press this read more, and go to this here and
press this download button. Now, it will ask you in which format do you
want to download? For Windows, you need to
download Windows Installer pack. I have downloaded the
Windows Installer pack, this one. Windows
Installer pack. If you are using the Mac OS, then you can download
this Mac Intall maybe Mac Apple silicon
according to your Mac. If you are your Linux user,
you can download this one. Most of the users are Windows, you can use this
Windows installer. Simply press this
Windows Installer and it will be downloaded
and the process will be exactly the same presnet next and it will be
installed in your PCs. I'm not going to install it because I have
already installed it. Going to show you how can you download the older
version of blender. Again, return back to this one and press the
previous versions. After the previous version, you can press here, download any blender
and it will show you all the blender version release it's showing you the
blender 1.0 well, let's see the date. It age of 22,003. The blender 1.73 was released. But this time, I'm going to show you if you want to
download the blender, 4.2 version, let's suppose here you can see this is
a blender 4.2 version. Just enter into it,
or even you can download the blender 4.4
version, just enter into it. I'm going to download
the blender 4.4 virgin. So I'm going to enter into it. Okay. Now I will show you all the mini versions
of blender 4.4. Let's suppose I'm going to
download blend 4.4 0.2. I want to download the
blender 4.4 0.2 virgin. Here it is the blender 4.4 0.2, 4.4 0.1, 4.4 0.3. So under 4.4 0.2, there are lots of virgins, for the Windows, for the Mac
and for the Linux as well. If you are a Windows seizure, which version is for you. For the Windows version, you can download the Windows
4.4 0.2 Windows X 64 SI. The extension would
be MSI and X 64. This one, you can download
this one for the Windows. If you want to download 4.4 0.3, good is 4.453 64 dot MSI, this one, Xi MSI
in any versions. For the Mac user, you
can you can taste. Okay, there are two versions. You can download this one
DMG or this one maybe. I think 64 should be perfect for you for the Muser and
for the Linux user, you can download this
one, the process will be exactly the same place
next and next and the blender will be
installed in your PC. Rightly can open this and
wait for the opening. Here, the blender 5.1 has been
opened and it's showing me the splash screen and
here is a button of import blender 5.0 preferences. It means I have already
installed the previous version, Blender 50 and I have set
up all the preferences. If I click there, so it will imported all
the preferences, all the adds, all the settings in this new version of Blender. This is very helpful for me because I don't need to
install again and again. I have pressed this
one and I'm waiting to installed all the addons in this latest
version of blender. Now this new version
of Blender has been successfully opened
here you can see, and all the add ons has been successfully installed
here you can see. In this course, I have shown you how can you install
this blender kit? And how can you set up
all the settings here? All the settings I
have explained to you. Okay, you can go here and check. How can you set up
all these settings? Okay, so I'll meet you in
the next audio, my friend.
3. Basics of Blender: So in this video, I'm going to cover some important
settings of blender. So you should this video completely so that your
blender will work fast. So this is called
the splash screen, so you need to choose general. Okay, this is a cube,
this is a camera, and this is the
light, as you can see in the outliner type. Okay. If you want
to know the name, then you need to
press this button, and here it is sewing outliner. You need to place this one. It is sewing pperties. And here it is
three D view board, and at the bottom
side, it is timeline. Okay, so I'll discuss
all the things later so you need
to go to this edit, then go to the preferences. Okay, the st cut is Control and this comma button
in the windows. And then after you need to go to this interface, o interface. Then here we don't need
to alter any changes. Then you go to this viewport, and here we will not change
anything, go to this light. Editing animation. Okay. First four, we will not change anything. So in the animation
type, what will we do? We will select only location, rotation and scale.
So what will we do? Select this location
and then pre hit and select this rotation, then press **** and
select this scale only, and disable all of these things. And you can enable this soaring. Okay. This is the
important setting. So I'm going to
this get extension. And here I have installed
some extensions. This is the blender
kit, bull tool, and loop tool, modified
tools, and tre Lights. These are important, so I'll explain how can you
enable this one. This is the add ons. Okay? This is the gate extension. Both are very, very similar. Go to these themes. We
will not change anything. Here is the input.
Here we will change. Okay, I will use this setting. Okay? Emulate three
butter moss. Okay? What it will do, I'll show you. But in this time, okay? Emulate three butter moss. And if you are using a keyboard with no numpad button,
let me show you. Okay. So as you can see, it is a keyboard, and here, this button is called
numpad button, because it consists
of numb lock button. So this is number one, number two, number three. Okay, this is numbered one, number three, number
seven, numbered zero. These are the hot keys that
I will use again and again. So if in your keyboard, this numbered
button are missing, and you need to
enable this setting. Then after if I will say
praise numbered zero, then you can press this button. And if I will say numbered one, then you can praise this
one, this one, this one. So which setting suit you on? Let me go to this preference
again in the input tab, you will need to
enable this setting. Okay, emulate numbed. So what it will do
simply you need to press the upside button,
okay, this button. Need to press this
button for number one, number three, numbered
seven, and number zero. So you need to
enable this setting only if you are using a
keyboard with no numbed button, then enable that setting. So I'm going to here. I I I have a laptop
with numpad button, so I'm not going to enable this. Go to this navigation, but before that enable this
emulate three button mouse, go to this navigation, and here you need to enable
this object around Selexon. I will show you what it will do. Okay, let me it is enabled, so let me show you minimize it. Now I have selected this cube, and if I press and rotate it, now you can see in
this the blender consider this cube as a origin point and
it's rotate around it. If I select this light, then it will consider light
aza origin point. If I select this camera, then it will select this
camera aj origin point. Okay. So this is the concept of object around Selexon, okay? If I disable it now
let me show you. If I rotate it while selecting this cube and
light, it doesn't care. I enable this one because
it is essential for me and this perspective should
be enable go to this system. The most important setting
is this system setting. If it is selected like this, then go to this Coda, optics, HIP, and this one. If it is sewing
like this because I'm not using a MAC that's
why it is sewing like this. This is I'm not using
AMD graphics card. That's why it is
showing like this. So I have NVD graphic card, that's why it is showing
this one Coda and Optics. If you are using
NVDagraphic card, then these two settings will be essential for you.
These two settings. And if you are using MD means zonGraphics card
or AMD graphics, then HIP is essential for you. And if you're using a MAC, then this setting
is useful for you. Go to this CUDA if
you are using NVDA and enable both of these
optics enable both of these, and I'm using NVDA, so I'm going to the optics
and enable both of these. Okay. Now rest of
these things are same, so I'm going to revise
you, go to this animation, make these settings,
go to this input, enable this emult
three button mouse. And if you are using
a keyword with no number button,
then enable it. Go to this navigation, enable this object around selection along
with perspective. Now, go to the system. If you are using NVDA then go to the optics
and enable both of these AMD for HIP and
Apple for open one API. That, select this button and here save preference.
So it's saved. Now it's time to work. So if you want to rotate this cube, what do
you need to do? Press Alt and simply rotate it. This alte button,
let me show you. This is the alte button. Okay. This is the alte button, this is the Control button, this is the zipped button. These are the important
here are also Alt Control Zied
and alte button. Okay. So if you praise
held, then you can rotate. If you praise shipped
along with Held, then you can navigate, okay, shipped and held
for navigation or movement or El for the
rotation. So that's perfect. So I'll meet in the next video. So in this video,
I'll explain you some basic concept of this
blender, basic su blender. So whenever you open the
blender for the first time, it will look like this. So this is called the splash
screen, okay? Splash screen. Here, your recent file
will be visval here. Okay, even you can donate it you can open your
saved file from here, and you can directly jump into the today amazon cptingGeneral, VFX and video editing. But most of the time we
will choose this or you can say 100 times we
choose this general. I'm going to choose this general and don't save
because it's already. This is the first
visual of this blender. Okay? It has a cube. Okay, this is the cube. This is the camera,
and this is the light, as you can see, this cube, camera, and the light. Okay. Now here the name is here, camera. Cube and light. This is called the outliner
means all your three D props, lights, and anything which
are in the three D viewport. Okay? This is the
three D viewport. This entire screen
is three D viewport. This is the outliner, and this is the property. You can even check the name from here, property, outliner. Okay. This is the DV pot, and this is timeline. That's perfect. These
are some tools. You can even check the names by expanding it and
collapsing it like this. This is the move tool,
rotate tool and scale tool. So I'll explain you it. Now, here it is
called the Gizmo. Okay? This is Gizmo. Even you can rotate
it using this Gizmo. Okay? Even you can rotate it. You can zoom it using this
Jumat and Jomin button. You can navigate it, like this from this button
gebllZm navigation, rotation. Okay. This is camera view
mode. Now let me show you. You can see this is the
camera and yes, here. This camera is now
capturing this person. Okay, this person. So if I
press this camera button, then you will enter into the camera view mode,
as you can see. I'm entering into the
camera view mode. Means what the camera is capturing is now
visual here, okay? So after pressing this
camera view mode, another lock icon
is now visible, but I will explain it later. So this is called you can say the orthographic projection
or perspective projection. If you praise this,
then it will look like two D and everything
is now missed. I'm going to disable it. So now that's perfect.
Okay. So let me revise you. This is outliner,
this is property, this is three D viewport. This is animation type, and this is tools. Okay? So this is
enough for the video. I'll explain you remaining
things in the next video by in this video, I'll explain you how you can
manipulate your objects. It is called simply
maze, cube is maze. You need to go to this ad and here you will get
this maze option. In the maze option, it
is sewing something. You will get plain under maaze
cube, circle, Uspaiqspare, slender, cone and Taurus
in this maze folder. Means all of these are maze. This cube is also a maze. Me simply means you
can manipulate it. If you want to move it,
then how can you do? So let me enable
the JD Axis edge. Here, this is the viewport
overlays. Here is the JDAxis. Now let me show you this Xs, red line denotes X axis. This green line
dendes which exist, Y axis this blue line
dendes which exist, Jdaxiseven you can
see it in the Gizmo. This red line denodes here Xs, green line denodes Y axis, this blue line
dendes here, Jadaxs. This is very important, okay. This and these are
not going to change. If you want to move this cube, then you need to
enable this move tool. You can simply collapse
it or expand it, simply select this move tool, and here it move
tool is now enabled. Even you can select
any of these to move. I'm going to select
this cube and then after I will move
it in the X axis, as you can see it in
moving in the X axis, you can move it in
the JD axis asL. You can move it in
the Y axis all. This is the basic
concept of moving. Okay? How can you rotate it? Simply enable this rotation tool and simply you can rotate it in the Xs in the YXs in the JDAxis. This blue line denotes J axis, this red line denotes X axis, this green line dendes Y axis, you need to remember it. This is one time
process. Trust me. So I'm going to scale it. Scale means simply
changing the chip. This is scaling in the
jet direction only, as you can see, it is scaling
in the X direction only. This is scaling in
the Y direction. As you can see, it is scaled. My God, how can we undo it? Praise Control and
jet to undo it in the windows and command in JD in the MacBook.
That's perfect. We have rotated it, we have scaled it and we have
changed its position. Now this time go to this object. Killer and killer rotation, Sotkat LTG, LR, and LTS. I'm going to praise LTG
to killer this position. Here you can see TR for
killer it's rotation, t to Kias scale. Now, this is the
object properties. Here you can also move in the X axis by
changing this value, Yaxs by changing this value, Jadexs by changing
this value as well. You can even scale it in the X axis by
changing this value, rotate it in the X axis. So you can even
change the values from this setting as well
from these object properties. Now, here you can see while
having in the object mode. So what is the object mode? So you hear the move tool. If you want to move the
light, you can move it. The process is exactly the same. You can move the camera.
What is the object mode? Select your cue and here
the setting of object mode. This is the setting
of object mode. Object mode has only move, rotate and scale tool. Move, rotate and scale.
What is the transform? Transform consists of move, rotate and scale all of this. Even you can move it, you can scale it,
you can rotate. So this is the combination
of all of these three. In the object mode, we can
only move, rotate E scale. But in the addit mode, we can do lots of
things, lots of things. Even you can move rotate and
E scale in the addit mode, but you can extrude it, insert it, bevel it, loop it, knife tool, polyhel spin, and
lots of settings. The most important settings, let me show you this one, then this one and I think for
the ceria it's sufficient. So I will sew you. Now we can even manipulate it what
is a slow, let me saw you. I have deselected
it by pressing. You can press A to
select all of this, A for all of this and t
to deselect all of this. You can praise A and praise anywhere in the viewport
to deselect it. Okay. Here you can see
it is vertex exon mode. This is a exon mode. This is pas exon mode. What are the differences? This is a vertex exon mode. Means you can select this
vertex only this vertex. You can select this vertex. You can select this vertex. If you want to select
more than one vertex at the time, then
select this one. Pre ship and select this one. Press ship and select this one, ship and select this
one. Set this one. So if you want to
manipulate a single vertex, enable this move tool
and select this vertex, now you can move this cube. Wow. That's too funny. I think even I can move
it in J direction, you can move it
in the X directon then Y directon then J directon. Now we are manipulating
it in this. Now I'm going to undo it
because it's not looking good. Now I'm going to
choose this exon mode. After selecting this sexo mode, you can even move
the whole edges. If you combine two vertex, then it will give you one edge. Let me show you this vertex and this vertex combines edge. Here the exo mode, you can select this edge. Now you can move it
in the Y direction in the J direction. What is phase exo mode? The four vertex combines means a single phase or the four
edges means the single phase. If I select go to this phase selection
mode and select this phase, now you can manipulate
it. Move it. Rotate it in the J
direction. That's perfect. I think. Now it's time
to insert and extrude. For the insert and extrude, we will use the sort cut
because these are complex. For the insert son,
the st cute I extrude, the st cuttaE means
the first letter. Extrude the first letter E to the scat E. The first letter of insert is I so the Scutgi If I select this
phase exon mode, it will basically work in the pas exon mode,
both of these. Select the space and then press
I to insert it like this. Then if you want to extrude it, then praise E to extrude it. What I did, let me
show you again. Praise to insert it, then praise left
button of your mouse to finalize your insertion. If you praise right button, then it will revert
back like this. Praise I and then praise
left button of your mouse. Then it's finalize the position. I'm going to praise E to
extrude it in which direction, it will select
automatically like this. That's perfect. Son. You
can even extrude it inside. Let me show you undo it. If I want to extrude it inside, then you need to move
it backward like this. I made something like
this, what is this? I don't know. That's perfect. I can select this one and
press I to insert it. You can insert this one. You can insert this one. You can insert any of these things and you can
make some weird things. That's perfect. I'm
going to reveal some more sort cuts because
blender is all about stcuts. Here for the move, you
need to press G. Okay, rotate the first letter R, R scale the first letter Hs for a extrude the first letter EE, E, then insert the
first letter H, I, these are the same. But here, G means the grab grab. That's where the grab means to hold something so you need
to press this G button. GRS for the movement, rotation and scale, E for
extrude and I for insert. Now, go to this object mode, now it is looking something
like this because we have manipulated it
while having the dit model. Now I'm going to
add something else. Select this one, move
it in the X direction. Go to this add, the st
cut is hipped and A. This add, the st
cut is hipped A. If you praise hip a, then you will get
something like this. Go to the add mad maze. Then this time, I'm
going to import a UV sphere. This
is also a maze. While having the object mode, we can only move,
rotate and scale. The shortcut of move G rotation
for R and S f is scale. While having in the object mode, we can only perform
these three accents. But when we enter
into the addit mode, we can do lots of things. If I enable this
te selexon mode, you can even manipulate a single vertex, set
a single vertex. Now you can manipulate
a single vertex. If I enter into the lexion mode, I can manipulate a single edge. This is phase exon mode, so I can select this phase
and move it if you want to select more than one pass
or more than one butts, you need to simply press
**** like this and you can now do something like this, what I'm making, I don't know. But I want to clear your
concept, so that's perfect. I'm going to the object mode, it is looking something like this. I don't
know what it is. So I have explained firstly, how can you rotate it, move it and scale it. Then in the edit mode, can you insert it
and extrude it. These five concepts
are important. Then in the next video, I'll
show you what is solid mode, what is material primi mode, and what is rendered mode. If you want to disable
this JD axis simply go to this overlay and disable this
jet now it's not visible. I'll meet in the next video by. So in this video, I'll
show you what is here, the solid mode, material mode, and here render pre mode. I'm currently in the solid mode. Solid mode consumes less GPU
means less graphics card, less CPU and less dam. And if you are working in a very uh detailed modeling and very detailed seal karen
and detailed animation, then you need to have
in the solid mode. And what is the material mode? Material mode simply
shows the textures, colors of the object. I'm in the material mode, and as you can see it
tea of white color, that's why it is showing
the white color. Now let me move it here, G and X, G and X to move
it in the X direction. Even you can use this move tool to move it in N direction, or you can use the sort cut. If you want to move it
in the Y direction, G along with Y to move
it in the direction, G along with X to move
it in the X dicon. If you want to rotate
it in the X direction, then R for rotation, X for the X dicon R and JD for the rotation
in the J dicon here, something like this
R and X to rotate in the X dicon R and Y to rotate in the Y dicon so G
and Y to move in the Y dixon G and J to
move in the J dicton. These are some settings. If you want to scale it, then press along with X to
scale it in the X dicon, S and Y to scale it in
the Y direction and X S and J to scale
it in the J dicon. These are the settings
or the shortcuts. Now, this time, I'm
going to import a model. Let me import a
Giro so that I can show you what is the
here. It's downloading. The chair is not downloaded. As you can see, it is of golden color mixed with some
pink and reddish color. Because it is showing the color. That's why we are
now able to see it. But whenever I will go, I'm going to this
solid mode and you can see there is no any
color visible here. Solid mode simply show
you the shape and size, but it will not
show you the color. If you want to see the color, then you need to go to
this metal priv mode here, then it will show you the color. What is the work of this
render preview mode? Material premium
mode simply show you the color exact color. But the render prime mode show you how your image will look like when you want to
share it in the Instagram, when you want to share it to your client, how
it will look like. You can see it is
looking like this because of the
lights in our scene, we have only one
by default light. This is a one by default light. That's why it is
looking like this. If you increase the
number of lights, then it will look perfect. Let me show you. So I want to duplicate this
light to here as well. The salt cutup duplicate it. The first letter duplicate is D, sort cut is shipped and D, shipped D, move it here. So that's perfect. You can see I change the light,
it is looking like this. I want to move the light
maybe here, let me show you. If you move your light here, then it will visual like this. It is all about the light. In the render pero mode, it will look how your render
image will look like. Simply, I will explain all of these things in the projects, but I want to clear these things because if you see these things, then you will familiar with it. I'm going to this
solid mode again. Now another two mode here, you can see this is
the wire frame mode. If you enable this
wireframe mode, then it will show the exact wiring of
all of those things. You can see it like a wire. Even you can manipulate a
single things in very detailed. But while having the solid mode, go to this X ray mode. This X ray mode along
with the solid mode, then it will show you the X ray means it will make the
message transparent. You can see behind it because
we are in the X ray mode. XR mode simply make it
transparent and wireframe mode, so the wires, simply wires, converted into this material
mode, so the color. I will simply sow
the exact color. But if you want to check whether how it will look when you render, let me show you. If I press zero or you can
press this button this button. Now it is looking like this
in the render P mode and it is looking like this in the material preview
if you render, then it will look like this. What is rending?
Let me show you? Go to render and here you
will get this render image. Press F while you
go to this here. The shortcut is F.
As you can see, it's rendered and it took 22 seconds to render and
you can see the lightings. It is exactly similar
to the render P mode, as you can see, similar
to the render P mode. We need to adjust our
lightings to render it. That's why it is showing the material p mode is
looking like this. I have explained everything. I'll meet you in the next video.
4. Creating Landscape in Blender: So in this video, I'll
show you how can we create this mountain or you
can say this landscape, how can we create this
landscape in the blender? I'll show you
basically two methods. First one, you can say we will use the
proportional heating and we will change that plane and we will change the
plane to make this. Second one is very easy. Then we will use a premde this shape of the
blender so let's start. Firstly, you need to
open the blender. Let will minimize
it. Open blender, then create a new
file from here, firstly, we will delete all of these things
because we don't need. If we need it, then
we will import it. Press A to select all and
press X to delete it. Now. Our collection is fully
empty. That's perfect. I'm going to add a plane, go to this ad maze and
here you will get a plane, just add it and we need to increase its Cscaleo
press to scale it, or even you can go this one object properties
after selecting this plane, and you will get this scale in X axis scale Y axis
and scaling Jad axis. JD axis will not work
because it's plain. It's plane, it doesn't
hide any thickness. So we need to scale it in
the X and Y axis only. If you engreage it in
the daxs it won't work. This time, I'm
going to scale it X and Y by 50 times,
something like this. I have increased it 50 times. That's perfect.
Let's do it only ten or 12 times ten times
or 12 times because our CNA very large and we
will add our water to it. We don't need this
amount of scale. So this time, I'm
going to edit mode. I'm in the object mode. So in the object mode, you can only scale,
move, rotate or scale. But in the edit mode, select this plane and
go to the edit mode. In the edit mode, you
can do so many things. You can move, rotate, and scale. And you can also extrude it, insert it bevel it loop, and even you can cut it. Lots of options. Now, this time, I'm in the vertex vertex mode. Let me show you
what is vertex on what is edge and what is pass. Vertex simply, it's a point. It's a point it
is called vertex. If you will add minimum two
vertex and connect them, then you can say it's edges. And if you connect
four vertices. If you connect four vertices, then you can say
it's, it's phase. Simply it's a single vertex. It's a single vertex. It's also single vertex. But if you can connect them, then you can say it's
edges. That's perfect. This time, I'm in the
verte selection board, press A to select all of these, and then you need to right click and you will get this
subdivide option. Okay. You need to go to this edge and you will get
this subdivide option. Right click, subdivide and don't click anywhere because
this option is important. Expand it and make it here
maybe 40 times or 50 times. Now, it's divided in 50
times. That's perfect. Now this time, I'm going to use this
proportional editing. What is this proportional
editing? Let me show you. If I select any of
these vertices, this vertex and press G to move, then it only moves
the only one vertex. That's the selected vertex. Let me undo it. If I enable this proportional editing, Okay. I I enable this
proportional editing, and if I select any vertex
and press G to move now here, it's called the
circle of influence. It's called the
circle of influence, this one, the circle
of influence. You can increase the
influence or decrease the influence using the
scroll wheel of your mouse. Let me scroll it. Now, you can even increase
or decrease the influence. No, it's looking like
a very mountain. Do it. Now let undo it
and do it purplely. Select any of this PG and
reduce the influence. Make it something like this, PG and something like this. I'm doing it roughly you
don't need to do it perfectly because we are just learning Pre G and do
it something like this. Now, we will place our
home or house here, select this one and press G, movie and pre G movie tear. Even you can make something like this or you can use the pre made landscape in the blender,
I'll show you the way. Firstly, do it
menial so that you can understand the
fundamentals of the blender. Press G and just move it. Now, we made
something like this. I know this is not
looking perfect. So you can even adjust it later. So press G and move it here. Now press G and move it here. Now it's looking like this. It's not looking perfect, but you can even adjust it. Now I'm going to this object mode, it's
looking like this. This one right you
can see it smooth. We made something like this and even you can place
your house here, we can place our house here so that it will look
something like this. Here you can see it has the structure of
something like this one, and here it has also the structure of
something like this one. So that's perfect. Now I'm going to show you the EG method. Firstly select this one and
move this in the X axis. So press G and H to
move it in the X axis. Now, you need to go to
this edit preferences, and here you need to go to
this Gate extension and here search for the ndscape that
I have already installed it. Now search for the
here landscape. This one, this is
the ANT landscape. You need to install this one. I have already installed it. That's why it's showing
the option of uninstall. You will get this
uninstall option. Simply install it. After installing, go to this
addon section and again, enable this
landscape, enable it. If enable, then it will
show you the landscape. Just enable it and go to
here and save preference. Although the autos
preference is enabled. Now, you need to go to add mass and you will get
this landscape option. Simply add it just zoom it our landscape has
been successfully added. If you are not able to
zoom it properly, like me, I'm not able to zoom it, then the shortcut is
numpad delete button. You need to press
Numpad delete button. Here you can go to this view
and here you frame selected, the sort cut is
nump delete button, select this one. Now
you can zoom it. This is a pre made
landscape, we can use it. Firstly, let me scale
it by the ten time. Okay ten. Here it will work in
the JD Axis as well. Pre train in the JD as well. This is the pre made landscape and this is the landscape
that we have made. You can use any of these both will look
perfect in our scene. This time, I'll use this landscape because
this is the pre made, but you can even digest it
using the proportional rating, enter into the dit mode. The shortcut is tab. Press
tab to in turn to edit more and take inspiration from this mountain and just
adjust your mountain, something like this so that
it will work properly. Just reduce the circle influence and make a good mountain. It's dependent. You can
make something like this. Uh, it's also looking perfect. Now again, go to the edit mode. Now, I'm going to show
you one more thing. What is front orthographic? What is back orthographic? What is right orthographic,
lab orthographic? Let me show you. Here
this is the Gizmo. The name is Gizmo even you can enable it to disable
it from this icon. You can enable it disable it. Press this one and you can
enable and disable it, okay. Now this is overlays. If you will disable it, then it will disable all you
can say the ground and axis. These two are important. If you press this minus one, the sort cut is numbered one, then you will enter into
the front orthography here. This is the front orthographic. Minus one minus one, not minus Y or numbered one, it's called front orthographic. Okay. Number three is called
to right orthographic, numbered seven is called
to top orthographic. This is a shortcut. Now, let me press number three. This means you can even press X. This is the right orthographic. Number seven means the JD. If you press X, then you will enter into the
right orthographic. If you press this JD, then you will enter into the
top orthographic. That's You know how to navigate it
using the held button in the Windows or Option
button in the MacBook and shipped and held to
move and held to rotate. Now, if I select any of these, then it is rotating
something like this. If I diselect anything,
it's rotating perfect. You need to go to the
added preferences again and you will enter into the navigation here it's showing the object around
selection in my system. What is object around Selexin? If I disable it now
let me minimize it. If I select any of these things, let me first add something more. I'm going to add this monkey, press G and X. If I select this monkey, now I can rotate something like this.
Something like this. Now after enabling this object around selection,
let me enable it. If I select this monkey, it's rotating
something like this. Means you can consider it this is circle and
this is the origin point. You can consider it
origin point and now it rotates in the same distance,
something like this. It's very useful when you create the landscape to overview
from the direction. If you will disable it, if you will disable
it, now you Okay. You can't see it properly from the direction,
something like this. It's better to enable
this object around Selexon and also don't
disable this perspective ups. Otherwise you will face
much problem enable it. This will be the setting
and just say preferences. That's perfect.
Now this mountain is a little bit too height. Select this mountain and go to these object properties
and this time we will use seven is perfect. Now this time I'm going
to delete this mountain. Even you can use this mountain, it's not so much bad. Select this one,
press X to delete it. We are going to delete
this Sujan as well. Now, this is the front
orthographic minus Y, so we need to rotate this one. R, and this is the J direction. Let me first enable it. On the overlays, you
can enable the JD axis. This is the JD axis. This blue line denotes
the J axis R and Jad rotate it in the
90 degree -90 degrees. Here you can see this is
the jd -90.60 degrees, make it -90 degrees. That's perfect.
This is the scene. Now I'm going to
disable the Jad axis. Now In the next video, we will just adjust our water. We will add plane for
the water and we will first set our camera
angle and then we will work according
to our camera angle because this is very important.
I'll meet in the next.
5. Scene and Camera Setup: Now in this video, we will set our water plane and we
will set our camera, create a new collection firstly. Select the main collection. This is the main
scene collection. You can see this is
the sub collection and this is the
object or message. Select this main collection
and right click and create a new collection and rename it scene because this is the scene. Ah, that's perfect. This time
I'm going to add a plane, go to this maze and
a plane. It's added. Here it's plane. Now go
to the object properties and change the plane to
50, something like this. Now, we will increase
the skill maybe 70. Let me change. Now,
that's perfect. Here it's the shading issue
because it's collapsing, but we don't need this one. Select the water or you can
rename it water firstly. Go to this collection
double click and the sort cut is F two and praise water. This is the water and this is the landscape.
That's perfect. Select the water and just
enter into the dit mode. Firstly, we will divide it. I we divide because we can use the proportional iting
Without dividing, you can't use the
proportional iting. Press A to select full all tics, then right click and subdivide even you can go to this edge and you will get this subdivide this
setting is important, expand it and make it maybe 80. Yes, it is perfect.
If you are using a low specPC then you can use
the 40 or 30 number cords. Again, go to this object mode. Now this time going
to use, firstly, it's saying me to save the
project and it's important. So I'm going to
save it landscape. Just press save blend file. Now I've saved it perfectly.
I have divided it. Let me enter into the edit more by pressing t. I
have divided it. Now you can see in the
object properties, the scale is not uniform, means the 70 70 and
last one is one. We need to make it uniform.
How can we make it? Just press Control A in
the windows or command in the MacBook and you will get the setting and just
press this scale button. Okay. Now here, the scale
is purplely uniform. You need to go to this
object and here apply and you can apply the
scale. Now that's perfect. I'm going to apply a modifier Modifier simply
saves our time and effort. Simply slide this aba and go
to this modifier panel and you will get add modifier and simply we will add
a deform modifier. Here is the
displacement modifier, go to this deform and
apply the displacement. Then you can search
here displacement, DSP displacement, modified,
this is the displace. Add it. Now after adding,
you can expand it. After adding, you can create a new texture, simply create it. After creating, here is
the sort cattle show you this is the button. Are same. If you will
click this button, you will be redirected into it. This time, I'm going to
create this button and here it's showing image or
video image or movie. Instead of image or video, we will use our clouds
enter into the clouds. Now here the size, you can increase or
decrease the size. It simply changes it,
something like this. But it's very important to subdivide this plane,
otherwise it won't work. The size, you can even
decrease or crease. So I'm going to increase
it by two that is perfect. It's 0.10 is perfect. Now again, go to
this modifier panel after changing the settings.
This is the settings. You need to change
it to the cloud and the size depth and this one. If it is not working like this, if it is not acting like this, delete this plane and
again, add a new plane, firstly, subdivide it, then apply scale by
pressing controle, apply the scale, then
apply this modifier. If it is not working in PC, now here you can change
the strength level. You can make
something like this. I'm going to change it w two. It's perfect, even you
can change this one, but this one is perfect. Now it changes. Select this water and right
click and you will get the option of sad
smooth, just smooth it. Now you will get
the texture of it. It's looking like
a wave waveness. Okay now even you can
increase or decrease the waveness but pretty good. We have created this water. Now this is the landscape. The landscape is colliding
with this water. What will do, we will select this landscape
and you can even enable the mob tool or you can
use the sort cut and just make it
something like this. Now this is under the water. Now, it's looking pretty good. Because in the scene, you can see it's submerged
into the water. It is submerged into the
water. That's perfect. It's looking good. Here you will get water here edge well, so it's not any problem.
That's perfect. Now I'm going to set
our camera angle. Here the camera edge,
something like this. I'm in the front orthographic. This is the minus Y, press minus Y to enter into
the front orthography and check everything is perfect or not, it's perfect this time. I'm going to add a camera. This is the collexion
select this collexion now go to this ad and you
will get here camera. Simply press this camera. Now the camera is
successfully added here, you can see later you. This is the camera, it's
not visible this time. But this time, I'm
going to show you a shortcut to just
set our camera. Select the camera and you
need to press Control. Lt and zero number at Go button
to just frame our camera. Press Control Alt and zero. Now our camera is
here, it changes. Let me exit from the
camera view mode. Now here is the camera. It changes its location. Let me firstly
adjust the camera. Go to the object
properties and you can even change the location
rotation and scale, but scale is not
necessary location and rotation of the camera. Select this camera and
change the location of the Gdexis simply
make it low angle so. This one and rotate it. This is the X axis, rotate it in the X axis,
something like this. Make it a little
bit J in Jxs Now, rotate it in the JD axis as
well, something like this. Now this time,
rotation in the X axis as well. This is the basics. Then we will refine it again, but you can see the
demonstration purpose. We will make our scene
something like this. This is our scene. We
will work on this. We will add some stones here, then we will add a boat and
we will add a tree trunk, some leaves over here, then we will add trees, background trees, and some foreground trees
and a home here. This is basically our frames, et show you first minimize it because this
is the reference image. This will look
something like this. Now, minimize it because we
need to first this is the YXs change the location in the YXs or something like
this is perfect. Now this time, I made this one, this is the water and I
have inputed this camera. Now I'm going to
divide my viewport. Divide my viewport
because I will work according to my camera.
Select this one. You need to right
click and you will get this vertical split
simply split it. Now we have divided our
viewport into two persons. This is basically for the camera and we will import our
reference image here. Press D to hide this one. Press T tiger and hide this one. Now even you can
hide this Gizmo. Let me hide this one by
pressing this button. Now, that's perfect. Now I'm going to
divide it again. Slide this one, this one, right click and horizontal
split, something like this. This one. By mistakly you have deleted this Vapot B mistaally if you have
deleted this pot, let me if you have deleted
something like this, something like this and you if you by mistakenly, if you have deleted
your viewpad, then you can again import it. Slide this one, right click, horizontal split, just
split it, make it here, and change it to this
is the viewport, you will get the
three D viewport, change it three D viewport. Now this is the
top orthographic. So this is the three D viewport. Again, right click and
vertical split this time, and this time we will
enter into the camera view more press number at zero or even you can press
this camera button. Now, you can adjust something
like this. Let me show you. This is the outliner
in the data. This is the properties
in the data. This is the timeline
in the animation, and this is the viewport
from the general. Okay Now this time
again, select this one, right click horizontal split and this time we will
use the image dita. This is the image
data and we will use the same reference image
that I'm just showing you. We will use this
reference image, we will input it here. You can download
this reference image in this video as well, and I have given it in
the previous videos. So let me minimize it. You will get this
option of here open. This time going to open this reference image,
this reference image. Copy location. And this time I'm going to paste the location and this time
reference image just open it. We will work on the
reference image. That's why I have divided this screen into
the two portions. This is the camera and
let me zoom it firstly. You don't need to
lock it otherwise, the camera will not move. Now, let me hide the layouts. Just hide it
something like this. Now save your project because
our project is important. Now press and hide it. Now we will work on the three D environment means
we will import our scene, Mint stone, we will
import our boat and trunks in the next video.
I'll meet you in the next
6. Installation of BlenderKit Addon: So it's time to download
the imaging add on, okay? And this is the imaging
order and from this add on, you can import any
type of assets like the car, bike, glasses, and any type of assets
like chair table, environment, trees, and you can download
the materials as well. So this is very
important add on, and you must have to install
this add on in your blender. And this is 50% free add on, you don't need to
pay this add on. Okay? So for it, you need to open any
browser, and this time, I'm going to using
the Chrome browser, okay, and search
here blender kit. Okay? The name is Blender. And if you are
already installed it, then you can skip this video and go to this next video. Okay. Now here, this is
the blender kit. This is official website, simply enter into this website, and the process is pretty
simple to install the add on, open this website. So now you need to
press here all, and it's the cookies. And here in the top side, you will get this
download blender kit, simply press this
download blunder kit, and it's showing me
the blender version. Okay, this blender kit version, simply press this,
okay, download. And here it's showing you
how can you install it? Here you go to this
latest version, download the blender kit, and dragon simply drop it
in the blender, okay? Simply simple like this. That's perfect it's downloaded. Now I'm going to open
the blender and I'm going to show you the long
process to install it. You need to go to the
edit preferences. Then you need to go to this
add on here, this add on, and this time you need to
go to the install from disk and you need to
locate your disco. So this time, here
is the blender kit. So you need to press
simply install from disk and it will be
installed in your blender. That's perfect. It's simple. And here you can see
it's enabled on the top. By the way, if it
is not enabled, to go to the preferences again and go to the addon and
search for the blender. Okay. Blender, and you will get this blender ket on simply bid If it is disabled, simply enable it after disabling this one and
simply enable this one. You will get this side
down. Okay, that's perfect. Now we have installed
this add on. And if you search here maybe
table. Okay, let me search. And table and hide this. And you will get so many tables. And here, this is the log
button means it's paid, and here it is not
locked, means it's free. Okay, you can use
the free virgins, and it's copyright free, and you can use it anywhere. You will not get any copyright after using these free models. And even you will
get this filter, you can enable this free first, and you will get only the
free tables these times. Okay? Now I'm going to show you how many free models are
inside this blender kit. Okay, so you will get maybe let me go to this homepage
of this blender kit, and it will show you how
much models are free. So here you will get
59,350 free assets. So you can enjoy these sets, and if you need full plan, then you can go with you
can go and purchase it. But I don't recommend
you to purchase this blender kit at this time because you
are learning phase, so you only need the free plan. Free plan is enough. That's perfect. So enjoy
this 60,000 models. And by the way, if
I like this table, then if I press this one, it will simply be
imported in my scene. Here you can see
it's unpacking file, and it will be here, let me delete this cube select this cube and hide
it. Now, you can see. And it's pperly arranged.
You can use it. Go to this metal premode and this time it let me hide this. And here, it's compiling. That's why it's
taking time, okay? And after it, you will get
this table. So that's perfect. Now, you can use this
table because this is coffee at free
in your animation. And even you can move
it and rotate it, scale it, it's completely free. So enjoy this imaging class, and I'll meet in the
next video, my friend.
7. Environment in Blender: So now in this video, we are going to
import our stones and boat that's necessary and we will place our
stones and boat. According to our camera, we will place our stone
here and boat here maybe and tree trunks
here. Let's start. This time, I'm going to show you how can you import
or download the stones? This is the blender kit. This is the blender
kit, let me firstly. Expand this one. This
is the blender kit, even you can go to
the added preferences and here add ons, if you have installed it
and search a blender kit, you will get blender
kit just enable it. If not enabled, then it
will not visible here. Now praise stone here
in the find models. This is the find models.
Praise these stones and you will get so many stones, but you need to go to this filter and enable
this free first. But you will get a
large stones here, so we need some small stones. We will use this see five. If you need a large stone, then you can import from
here. Let me show you. I have placed some
large stones here, here, you can download it
from the blender market. Blender kit. But this time
I'm going to use cache five. Okay, just zoom it out. You go to this website
and we will search here is cache five, skfb.com. This is the official
website. Let me here. This is five.com,
enter into the Skee five and this time going
to search here Stone. I have used it from here stones and enable
this downloadable option. Okay, this is the
downloadable option. Now here you will
get so many stone, some are paid and some are free. This is the dollar sign
means it's 100% paid. You need to download the
free version or free ones. You will not get any copyright, so you can use it freely. Even you can use this
River stones and we will place it in the C
as well. So that's perfect. And you need to invest time
and you need to explore it. Let me search. You can
use this stone as well. This is the stone,
beach and stones. Even you can search simply beach and Stone, you
will get this one. Okay, this is the stone, you need to explore
it basically. This time I'm going to
use this stone pile. Simply search here stone pile, you will get this option. Select this one and I have shown you how can you install
the Sketchfab add on. It will simply help us
to download the probes. This is the photo scan, so it's very low in
I think the sides. It's perfect for our scene. Now, here, let me
show you this is a copyright free
creative common, you can use it now even you can download three D models
in the GLTF format. Then you can extract it, then import it in the blender. I'm going to show you
how can you do it? Then I'll show you
the shortcut method because this is also important to know how can you import it. This is the GLTF
but in your case, if the GLTF not visible, then you can use the GLB then after if both
are not visible, then you can use this Bx method. But why I'm saying you to use this GLTF because blender
supports it perfectly. You will get the
texture as well. Don't need to map it manually. This time going to
download the GLTF format, this one. Now it's downloading. It's downloading.
Then we will open our downloaded folder. Open it. Now this is the stone pile, so I'm going to cut it and
paste it in my main folder. This one, this is the stone pile right
click and you will get the extract all simply
extract it in PC. Now it's extracted successfully. This is the SN GLTFGLTF
file, not scene bean. Simply sled the Zen GLTF drag it and drop
it in the blender. This is the shortcut method. And simply the long cut
method is Control C, the path and simply
go to this here. Let me you file import
and you will get this GLTF option here and
simply paste the file. This is the sen GLTFimport it, and now it's imported here. It's very big in size, so we need to make it small. Now, select this Ksfa model because it's imported
here and right click, you will get the
select higher key. This one, then press
S and scale it. And scale it according
to the scene. Press to scale it. Simply it's scaling
X Y and J after pressing a and we will
place it near the camera. Again, press to scale it. C I'm not able to joom it, go to this frame view and
frame selected. This one. The st cut is
number lead button. Move it in the Y axis and we
will place something here. Not just copying this
reference image. I made this. I didn't download
it from the Internet. I made this one. I'm
not going to copy it. I'll just change something. Move it here and press
to scale it this time I'm going to just move
it in the JD Axis age well. I move it in JDExis so that it summer into the water
so it will look natural. Let me scale it. Okay,
down. Now that's perfect. It's looking good and I'm
going to use another assets. But this time I'll use
the see five models. This is the Skeche five. Let me show you this is the press end to
open the side menu, but make sure that you have
installed thee five add on, go to the dit preferences
and search Skee five here, this five plugin and you need to enable this one in
the add on section. I have enabled this one.
Then you need to go to this Skee five and
press activate add on, but you need to make an account. Cross. Go to this cache
five and go to the top. Firstly, go to the top and
you need to make count. Enter into the homepage. This is the homepage and
you need to make unt. Then you can use the count. This time, I have
searched the stone, enable the downloadable option and this time I'm going to use another assets in my
pack, let me search. This time I'm going to
download this Riverstone. Search Riverstone and you
will get it. Slide this one. So I have provided
my blender file. I have provided my blender
file if you need any assets. So just select this
one if you need this X asset and search where is this
asset in the collection. You can press Numbe delete
button to just search. So this is here this asset, this asset is under
the Skee five model. What you need to do
just rightly and select hierarchy
and press Control C if you need this asset and open another blender file
that you are working on it. Then press Control V on it and you will get this one, okay? So if you need this one, then I'm just showing you
how can you just copy it from the My Blenders
file. That's perfect. This is the stones. This is also the photo
scan let me check first. I think this is also
the photo scan. That's perfect for us. Now, you can press the download
three D model, and again, you can import it,
something like this, import the GLT format and press the download and input it. But I'm going to download
it so that I will give you. Now you can even use it. But this time, I'm
going to use this one. Select the link of this
model, this stone. And simply firstly enable this case fab add
on by pressing N, go to this activate add on. Firstly, you need to
enter your login ID. I've entered my login, so that's why it's
simple for me. Firstly, log in it, then go to import from URL and
just paste the URL, but it will not work in the scene because we are
using the IV engine. Don't press this import model. Otherwise, it will give
you the Python error. Go to this here, render properties and I'm
using the IV engine, change it to the cycle engine because it will only work
in the cycle engine. After importing, you can change
it to the engine as well. But in SN I'm going to use the cycle engine because
it's perfect devise, I'm going to change the
GPU because I'm using my GPU in MPC. Max simple is 32
perfect for MPC and Max simple render is 128 is
perfect and that's perfect. Now press Import model, then it will import our stones. Uh, so it's added. It will add all the things
in the world origin. So it's added here, just move it in this all of this thing. Again select this csfare model and right click Select hike and move it according to
our scene. This one here. Now press numbed
delete button to focus or even you can go to this
view and frame selected. If you are not viging keyboard with the
number delete button. So it's very important
to use a keyboard, drag it here press to
hide it and to scale it. Now let me move it here and to scale it a
little bit more. Now, let me move it here. I'm working according
to my camera. I'm working according to my camera and this is
the reference image. I will not copy my
reference image 100%. I'm taking just inspiration
from my reference image. Now, if you diselected it, so again, go to here, right click select
hierky and this time, I will just move it here, something like this and move
it in the success edge well. Now, we need to add our light. I'll add it in the next secon. Now I'm going to rename it. This is the River Stones. Now this time we can use
so many stones here, this time I'm going
to use my blender kit select the collection. We should select this
collection as well. I'm going to click select Hike. After selecting it, move it in this scene, something like this. Right click, select hike
and move it into the scene. Select the scene and search for the stone in the blender
kit and this time, disable this eye button and enable the free
first in the filter this time I'm going to
import some stones here. This time going to
import this stone, press this one,
it's downloading. It will be downloaded
in this one. This is the world origin, so it will be downloaded
in the world origin. Select this stone,
this stone not. This is the downloaded
stone Stone 03, in my case. The name is Stone 03. You can simply search Stone 03 here and you will get
the same model here. If Blender kit will remove it, then you can use another model. This time Stone 03, now we will move it
here. Move it here. Again, number delete button to just focus number
delete button. I have selected the empty. You can control any
objects with the empty. This empty, I'll show
you how it works. Simply press to scale
it and rotate it in the Jaxs something like
this. Again, press. This is the biggest stone, and we will place our boat here. I'm going to place
it here as well. Now move it into the water
so it will look perfect. Natural press and we will
rotate in the X axis, R index, something like
this. That's perfect. Even you can import
another model here. You will get so
many stones here. Even you can use this
stone, this stone. Let me download
some stones here. Okay. This is the stone,
select this scene, so it will be downloaded here this time I'm going
to change my Tre D cursor. It only works for
the blender kit, not for the sketch five. Press shift and write
bottom of your mouse and you can even change
the Tre cursor. I have placed it here and select this stone. Now
it's downloading. It's downloaded here,
stone press to scale it. Now move it into the water
so it will look perfect. Now we need to move it here. We will place it here
and press to scale it. Now move it here in the water. Now it's looking perfect. Even you can add so
many things here, you can add so many stones
and so many river acids. Even you can add this one, this one, it's depend on you. You can add so many things, you can even add this
one, let me show you. But no, I'm not going
to add this one, but leave space for the boat because we
will add our boat here, leave space for the
boat In the next video, we import our boat here and we will import
our te trunk here. This is the te trunk and boat
in the next video, we add
8. Boat and Tree Trunk: So it's time to add our boat and it's time to add you can
say the tree trunks, this one tree
trunks. Let's start. This time, I'm going to sled this scene and disable this one. Now, I'm going to
search your boat in the blender kit boat. And make sure that
you have enable this free fast option
and you can use any boat because it's a C. But this time going
to use another boat. Previously, I have used this
boat here, this is the keg. You can even search this boat. The name of this
boat is here and it's exactly the same
that I have used it. Even you can use the Skee
five model, let me show you. I'm going to the sketch
five and this time you can search here boat and you can download it and make sure that you have enabled
this downloadable option and you can even use this boat and any of
these it's depend on you, but it's paid here
at the dollar sign, it's paid and some
of these are free. I think most of these are free. You can use this boat and
this boat it depend on you. But this time I'm going to
use the blender kit model. Uh Okay, you can use
any of the boat. I think you should make the scene according
to your preference. Now I'm going to use this boat. Even you can search this name
in the blender kit and you will get the same model here if Blender will not remove it. Select this one here
the scene selected. This is the scene is selected. This is the select this one and place it according
to the scene. Move it here and rotate
in the Jad axis. Even you can rotate RN
JD or you can go here. This is object
properties and this is the rotation Jad axis
rotate, something like this. But I think we need to
scale it down and suppress. It's Hing, move it
under the water. Now, move it here. Let me check. It's under the water perfect. I'm going to place it here
and this is let me show you. I have enabled this move tool. That's why it's
sewing something. It's sewing the blue one
and this is a green one. If you select this blue one, then it will just
move on the surface. I'm moving in the blue one. I'm going to place it
something here this time here. Even you can refine it, I'll refine it later as well. So I'm going to place it here. You can see in the
camera Preview mode. This is the boat and stones. That's perfect. Let's move
it under the water as well. We need to rotate it,
I think in the X well, rotate it in the X axis. It's not rotating perfectly in the Y axis and move
it under the water. No, it's perfect this time, yes. Now this time, let me
first, something like this. Now I'm going to change my
water according to the boat. Select the water.
This is the water, select the water
and firstly this blender kit and enter
into the edit mode. Now I'm going to edit it. Firstly, enable this one. This is the proportional
iingEnable it, and this is the
vertex lexe mode, select any of this vertex and just move it press G
and move it upward. Press G, move it upward, G, move it upward so that it
will submerge into the water. Now it's looking perfect. It's not divided properly. That's why we don't have here, here, what text, here, text. Even you can divide it.
You can select this for what it says and right
click and even subdivide it. Then after you can
manipulate this one. G and decrease the
circle of influence. Now it's looking perfect
this time, I think. Now again, go to
this object mode and we have added it perfectly. Now it's time to add
our T trunks here. I'm going to change
my three Dcursor Base the three decursor. Now, this time I'm going to
search for the tree trunk, select the scene because I want to input it here and
here in this one, this is the three decursor. Search here tree trunk. Okay. And you will get so many models here and
disable this eye button. Here you can use any of this, this one, this one as well. This is the Porto scant. It's perfect for our scene. You can use this one
old dry tree trunk. I'm going to firstly
use this one, even you can use
the sketch five, let me copy and paste
it in the sketch five. Okay and you will get
so many models here. This is the paid, so we
are not going to use it. This time, you can use this one, but dry one is the best. You can use this one and
so many models are here, you need to invest your time. Use this one but delete the
base plane after using it. Now, this is the paid, use this one, this is the
tree trunks, that's perfect. Here lots of low polytT one. Low poly is perfect for the blender because this
is not the main object. You can even use
this one as well. I'm going to use this
one and this one, not from the blender kit because I'm going to
use this cache five. This one is perfect, I think, this one, this is the low poly. Use this one, this is
the tree trunk and this is just select this one. I'm going to download it in
the GLTA format for you. You can use it. But this time
I'm going to use the link. Press Control C to open copy. Then I'm going to open
my blender and just hide this one and select
the screen and press N to enable
the CC fab add on. Enable the Cc fab login it
and import from the URL, paste another URL and
press this input model. It will be imported
in the world origin, not in the three
d cursor because this is e not the blender kits, but we will adjust it later
because it's downloading. Imported supress N
to hide this one. This is the side menu
and this time right click and select
hier key again and we are going to move it
in the Yaxs the size is pretty big supress to scale it down and then place
it here anywhere. Okay. And we will refine
it according to the scene. Firstly, we need
to add our lights, so we will add it in
the next section. I'm just placing it,
then we will refine it. Rotate the Jadexs R and Jd
Even you can use this one. This is the object properties and rotate it in
the JDExis as well. But I prefer this one. This is the sort cut and this is submerged into the water
and move it in the X axis, and again, press a little bit to scale it so that it
will look perfect. Now, move it here a little
bit. Now, that's perfect. Even you can play so
many things here, but this time, I think
it's pretty good. It will look like this. Now, we have added
so many things here and select this one and rename it the tree
trunk rename it. We have added so many
things here in our scene. In the next video, we will add our leaps here in the water. It's not properly visible, but I have added so
many leaps here. You can see here.
We will distribute our leaps in water
in the next vdio. In the next audio, we will learn the effect of the
particle system. Select the water and you will get the particle properties. We will understand
the working of this particle property
in the next video, so it's beneficial for us.
I'll meet in the next.
9. Particle Distribution of leaves: So in this video, we will distribute our laps
here only this person, we will distribute
our laps here only. So let's start firstly, we need a leaf,
create a new collexi, select this main scene
collection right click, create a new collexon
and this is this one. This is the leaf, you can renamed particles. This is the leaf particles. We need a leaf, a single leaf, then we will distribute it. Firstly, I'm searching
in the blender kit. If I will get it, then, this is the atom leaf atlas, I'm going to download
it and we will use a single leaf from here. Simply press this one and it's downloaded here
the lott um leaf. Now, move it in the a
axis. Okay, Zoom it. Now this time going to use a single one,
select all of this. Precip and select all of this. Firstly, we don't need
to select this one. This is the empty. We don't
need to select this one. Select all of this without
selecting the empty. Okay. It one and press
X to delete one. We only need a single one. Slide this one and press
LTP because it's parented. Sort cut is TP to car the parent and choose this killer
and keep transform. That it's now slide this empty, press X and delete this empty. This is the leaf 006, remove the 006 because
it's the first leaf. I'm going to distribute this
leaf in the whole scene, first let me scale it. I'm going to show you
some concept of it. Now, let me sled this leaf. This is the main leaf, sled
this leaf and enter into the object properties
and here scale is not uniform and rotation
is not uniform. We need to make it
uniform, press Control A, make the scale uniform, Control A, make the
rotation uniform. And you can even make A and
make the location in form. But after doing it, the
origin point changes. Select the leaf right click and set origin
origin to geometry. Even you will get the option
here, object set origin, and you will get the origin at two geometry here.
That's perfect. Now this time uh,
this is the water. This is the water
it's uniformed. It's important that all of
these things are pretty uniform because it will only work when all of
these are uniform. Now this time,
select this water, but make sure that you are saving your project
after saving, let me show you firstly,
press Controls to save it. Then go to this file
and you will get the save incremental in the
latest Valindo versions. Press it and it will simply make a copy of it,
Landscape one. It makes a copy. Now go to particle
properties after selecting the water Let water go to this
particle property. And we want to distribute
the leaf, here is the leaf. We want to distribute these
leaves all over here only. We need to select the s of
it, but we will do it later. Go to these particles after
selecting this water, create a new particle
system here. Now, this time going to use the here because it's
proper and good. Go to this advance, enable this advance option, so you will get the
rotation option. This is the rotation option. So enable this advance as well. And for this time,
I'm going to use the hundred because
blender may crash. Now this time, I'm going
to the render properties. This is the render
properties and here it's in the path and it's
emitting the he, but this time I want my
object, so this is the object. And this time, this
is the instance objects pick this marker
and choose the leaf. Now, it's distributed. It's not properly visible,
but it's distributed. Increase firstly,
let me scale it. Make the scale a
little bit higher. Now as you can see
it's distributed. But I think the
rotation is not good. It's rotated badly. I'm going to rotate it here. Good is enable the rotation, expand this one and
choose this non option. Now, it's rotated
perfectly here. This non option, but
make sure that you have done all the things that I have already
shown you here. Firstly, let me choose
this is the main leaf, go to the object properties and the scale is proper uniform.
Rotation is uniform. And firstly,
location is uniform, but I have changed
the world origin. This I have changed the
origin to geometry. That's why it's
working properly. Side this one, it's properly attached to
the ground or not. I think it's properly
attached to the ground. Yes, it's looking perfect. Now I'm going to
decrease the scale size, go to these particles
and I'm going to make it 0.5. Let me check. Yes, 0.5 is pretty good, but it's distributed all over the water and I
don't need this one. Here you will get let me choose
This is the vertex group. We'll assign our vertex group
in the deinity density. Firstly, we need to create
this is the vertex group. Select water and enter into the edit mode so we can
select our vertices. Now, where do you want
to scatter your leaf? I want to scatter my
leaves only this person. Select this one and go to this vertex object data
properties to it a vertex group. Here's the vertex group. Cita vertex group and don't
forget to assign this one. After assigning this will work. Assign this knots assigned,
let me deselect it, and again, select this
one it's perpely working. Rename it the leaf vertex group. That's perfect. Go
to the object mode, select your water and enter into the property spinal and you
will get a vertex group. In the density, we
will choose the leaf. Now the leaf is scattered here. Now, this time going to
decrease the size of the leaf. Scale under the render scale
wouldul be 0.1 or two, I think. 0.2 is perfect. It's not realistic,
but I want to see my leaps in the camera,
so it's visible. Now in the numbers, I will choose the 200 is
perfect for this time. If you have done all the
steps that I have shown, then you will get the same
region real here, okay. Now, everything is perfect. Even you can play with
this and this class is important and it's not
for the complete beginner, but I think you should
know this one because you will use our add ons to do the same work and addons
will do it properly. Firstly, we need to
understand the basics. Then we will use the
same settings here to create our grasses
using the add ons. This grasses using the add ons. So it's important to know
how particle system works. That's perfect. We
did it properly. Now it's scattering here. Now in the next
section, firstly, we will keep the lighting to it because it's looking
very raw and very wide, we'll give the SCR
texture to it. Then in the next sexton algebll we will add the
water material to it. That's perfect. I'll it
in the next section. Keep learning, keep
10. Sky light and water material: So now in this section, we will work on the
texturing and lighting, it's not so much longer videos. This time we didn't add
any lights to our scene. That's why it's
looking like this. I'm going to add
environment light. Firstly, you need to go
to this, let me show you. This one, this is
the render setting. Firstly, go to the
render properties and make sure that you enable the cycle engine along with the GPU if you have
GPU in your PC. And viewport is 32 and the
render is 128 in my case. I'm just jumping into the render P mode and it's very heavy. It's loading and you can see there is no any
lighting in our scene. That's why it's
looking very black. I'm going to add a light. For adding light, you can
use this world properties. You can go to the
world properties. Here you can use external HDRI. But I have created this
scene using this skylight. So here is the world properties and you will get this color. Under the color, you can
choose the sky texture. This is the sky texture and
it's pre made by the blender. Use this scat texture. It gives the light and
it's you can say the sap. This time, this is
a leaf or what? Okay. This time, I'm going to use the sun
size should be one. You can explore this one. Sun intensity should
0.2 because it's very sharp Sun elevation
you can change it. The 45, I think, 45 or 40 is perfect. Sun rotation, let me rotate it. I want the rotation
from this side. Here, let me check the si dose. Here the sis, in this direction. I'm going to change it here even you can change
the altitude, okay? I think it's perfect.
Now strength strength should 0.2 or 0.3 is
perfect in my case. Now, I have added the lights
and I have added the sidos. Even you can use
these settings if you have created your scene in
the front orthographic, let me praise one
and as you can see, I'm in the front
orthographic here it's visual the
front orthographic. If you press number one and your scene is looking
something like this, the mountain is
looking like this and this is the boat you can use the same settings
here and even you can adjust your settings
according to your reference. Now here we need to refine our boat because the edge is not perfectly touching to it. Let me rotate it. You
can even rotate it. I'll do it later while
we will refining it. Okay? Now, I think that's good. It's time to add
our firstly water, then we will again define it, save your project, and
we will use this one. This is the camera view mode, so enable you can navigate it
using your scroll wheel of your mouse and just jump into the render properties
and here and go here, this is the output properties and enable this render region. So it will simply crop
the unwanted portions. I will look perfect. Now here it look
cinematic in my case. I hope that it's looking
perfect in your case as well. I'm going to select my water and this time it's
very important, you need to see it, expand
this one, something like this. I'm going to create this water, you need to have patients
to learn it because I'm just doing it very
detail. Select this one. This is the water material, and I'm going to use the blender kit because the blender kit is
perfect for the material. This time, this is
the blender kit. Even you can press N and
search here blender kit. You will dra kit here as well. Here's the models materials, you can import scenes, HDRI, brushes, and
so many things. Here's the material,
the logo here. Even you can select this one, the material and press in
and search here water. This is the water and we will
use the procedural water. Here are lots of water, lots of water material. This time, I'm going to search
for the procedural water. Even you can search here. Okay this is the
procedural water and I'm very thankful
to this creator. This is the creator. I'm
very thankful to it. I'm going to use this
procedural water because this is perfect for our scene because I have used this water
material in this scene. Select the one, make sure that you have selected
the water material. Let me show you under the scene here the
water is selected. Then after select this one, it will simply imported here. Now, water material is
successfully applied to it. Water material is applied to it. I'm going to refine it. Select your water material
and make hide it. Right click and say
it is smooth firstly. Now I'm going to refine it. Here in the timeline,
we use the Cedar edit and it works to add
material and texture. Press N to hide this
one, select this one, press G to move it here, g and jom it jom it. Let me expand this one because
I want to sew it here. Firstly, let me
firstly sew it here. It's better to sew here.
Because I'm teaching. This is render P mode. Now, the water is looking
something like this. Make sure that you have
enabled this enlight and world under this setting,
it's looking like this. Now this time here the
scale if you will decrease the scale means it will
increase in the blender scene. This is the water
and you can see it's looking sharp
from here, so here. Slat your water and
just enter into the modifier panel and
exterens should be one. If you have applied this
displacement modifier, then you can do one more thing. Select your water
and press S and JD to scale it in the JD axis. Let me enter into the solid move press S and JD just make it
something like this. If you have applied this
modifier then you need to do it. But I didn't apply it.
Going to make it 1.1. Now save your project
because it's important. Let me enter into this
is the render Pero mode. Now it's looking crazy here. The scale is one and wins. If you need a wins, then you can adjust it. But I think 0.02 is perfect. And even you can
explore this one. This is the pre made
nodes and the scale if you will increase the scale simply it will decrease
it in the scene. So it's better to make one, so it's perfect here. Now let be enter into
the camera view mode and it's looking like
this here in the camera. Firstly, we need
to add the texture in the mountain as well. We will add trees,
background trees, and image, then it will just show
you the reflection, then it will look perfect here. Let me okay. Make it downward. Make it here. After reflexion, it will look
something like this, you don't need to panic. Now this time going to select this one, this
is the mountain. I've selected this mountain
and search here material, ground or mud or
even land material. I'm going to use any of this material because it is
not visual in the scene here, it's visual,
something like this. This time I'm going
to use this material. Select a mountain and I'm using this ground material and this is the greater thanks to
it. I'm going to select it. It's copyright free material, you can even use it
and hide this one. Now after adding here, you can see this
is the reflection into the water, it's realistic. After adding trees and background trees and
here the sunset, it will reflect properly, you don't need to panic. Select a mountain and go
to this object property, the scale is not proper. Rotation is not proper. Press Control, apply the scale, Control, apply the rotation. Now here it's good, but here you can see
it's repetitive. It's repetitive. How can you solve it, select
your mountain, and Firstly, let me enter
into the addit mode. Edit mode and press A to
select all what it says U, a smart EV project. If it's not sewing,
just go to this UV a smart EV project such
anywhere Smart project. Now again, wrap it. Now let me go to
this object mode. Now it's looking pretty
perfect for this time. Save your project. Now we have added our lights and everything. Now this time going to
firstly manipulate our object because this is the boat and it's not properly
attached to the water. So this time, I'm going
to this solid view mode. Exit from the camera view
mode and select the water and in turn to edit mode by
pressing tab and this time, I'm going to
manipulate this one. Press Napa delete
button to Zoom. Then we need to refine this one. Press G to move it a
little bit upward. In this one, this is the, okay proportional
itingEnable this one, move it here in this side.
I think it's perfect. Let me enable disable this one
in the edit mode and go to this object mode and
enable render properties. Render pode. Now it's
looking perfect. In the next secton we will add our trees to it. I'll
meet you in the next
11. Trees on Mountain: Now it's time to add our
trees and this house. Here is a little house. We will add this little house
and we will use our trees. Let's do it. But here, I think that this tree trunk is taking so much
memory of my PCs. I'm going to delete
this tree trunk. Okay. Let me show
you here this is the task manager here it's
taking very much GPU memory. If I press shift and
disable it in the viewport, now let me show you.
Here you can see. It's taking lots of memory, it's better to delete
this tree trunk, right click and
here you will get the delete high key and just press Delete high key button. Now, here you can
see, it's dropped. No, that's perfect,
now it's better. We will use another
tree trunk here. This time going to sew you. Again, create a new collecxion. Select this main collection, right click sin collecxi. This is the trees and house. Okay. This is the
trees and house, collapse all of these things, select the trees and house
and press shipped and C. This is the three D cursor, press shipped and C here, shipped and C, it changes
to the world origin. Select your mountain,
press number Dili button. Even you can do it manually, shipped and right click to change the three
D cursor position. Now this time,
select this one and search for the old house. This is the old house in the blender kit and search
This is the material panel, that's why it's
showing the material. I'm going to this one, this
is the models and it's showing so many old house
models even you can use. This is the old
Chinese rub house. Now I'm going to
explore something. Even you can use any models. You can use this one as well. Now, I'm going to explore it. I think that I have imported
it from the SCH five, but let me search it. Lots of models are now I'm going to search
it in the Skee five. Okay, so just copy it and
paste it in the SkagFb. This is the old house, and make sure that you have enabled this
downloadable Option, and this time, I'm
going to use this one. Okay? This is the old house. Let me saw you in the blender. Okay? This is the blender. This is the old house. Okay?
This is the old house. It's very similar. I'm going to select this one. And even you can download
it, then import it, but this time I'm going to use even you can download
it in the GLTF format. I'm going to copy it so
that I'm going to use my add on and this
time hide it okay. Now press in to enable
this sche fab add on. Here is a sacheFb add
on, simply paste it. Now let me change
it to the solid Mu. Now press Import models. It will take some
time to download. Now the house is
successfully imported. At the house,
again, right clicks light hi key because this
is the best practice. Press to scale it and make sure that it's
visible on the camera as well move it here and move it on the top and let
me move it here. I'm just customizing it. Press s to scale
it a little bit. Now, I think we should
scale our mountain as well, press to scale our mountain. Something like this. Then again, select a house, right click, let hike and we need to adjust it press and
to hide it firstly. Now I'm going to adjust it here. You need to just see in the
camera view mode as well. Now, this time, I'm
going to make it a little bit here. Now here. It's not submerged
into the mountain. Make it down. Let
me move it here. I'm going to adjust my
mountain for the home, select your mountain
or landscape, enter into the edit mode, and enable this
proportional editing that I have shown you and select any vertex and press G and expand the
circle of influence. Now press G, move it downward. And press G, move it downward. Again, G. I think G is
very helpful in the blend. Now, even you can use
another house model, it's not necessary to
use the same model. You are learning how to
create the landscape so you can create something like this. Now, it's attached. Think it's attached
Prey G movie tear, G movie tear. No, it's perfect. I think now. Yes. Now
this time going to place my trees because the house has been
imported successfully. Now, this is the trees and house and this is the house
model rename it house. I select your trees and this
is the house and this time, I'm going to use this cache
five model because I love it. Even you can import from
the blender kit as well, but I think the five models are pretty good then
the blender kits. Blender age is good
for the material, but even you can
import it from here, let me show you what is tree. Okay? Now, let me show you. It has lots of tree. Even you can use,
this one, this one. But I think we should add a low poly tree because
we need to scatter it. So it's better to
add low poly so that our scene
will be optimized. Hide it and this time Impely save your scene and go to
this case fab and this time, I'm going to import a tree, let me show you which
tree I will use. Okay. This is the maple tree, even you can use this
one, this is the free. I think I love it, but I'm not going to do it. It's good, but it's paid. You need to invest time here because you are
learning to create. This is the animated tree, so I'm not going to use it. I need low poly tree. Even you can use the pine tree so this time I'm going
to use this tree. This is the low tree. This is the low poly treef and this is the mountain tree when you can use
this one as well. This time, search low poly
tree, you will get this one. Now, it's downloadable. It's downloadable in my country. I'm going to download
it, so I will give you and just extract it and
import it in the blender. But even you can use this one, I'm going to copy the link, and this time, I'm going
to open my sketch five, add on, and just Okay. Here log in it and import it. Now, the tree has been
successfully imported here, so press N and
firstly di select all of these trees and
right click and again, select it because
it's good practice. Again, make it scale
according to the scene. You need to consider
your scene as well because I'm just
making my scene. I'm going to place it here. You can see the
reference image as well. I'm going to place it here. Now I'm going to move it here. I'm going to do it one by
one because it's parented, so you can move it
one by one as well. Select and press G, you can see, this is the pole, do it okay. Firstly, I'm going to
make a parent of it. Select this one and
disable this move tool. Select this one and press
P and select the trunk. Even you can firstly
select the trunk and press the SP press Control
P and keep transform. If you move the tree
the trunk edge we move, select firstly the trunk. Let me select the trunk. Then press C and select
the leaps, Control P, keep transform and do
the same thing here, select the trunk and this one tree leaps and
Control P and keep transform. All of these are successfully. Now, let me do one more thing. Select this one, something
like this, all of these. Now we can place it one by one. Enable this move tool again and you can even place it here and nigered to rotate
it, now move it here. Now, place it here. Now it's not on the ground, so you need to place
it here in the ground. Move it here and move it upward. Now let's move it upward. Now, select this one
and we are going to place it here behind this one. This is the house.
Move it here again. It's depend on you.
How will you place it? Now, move it upward
a little bit. Now, select the last
tree and place it here. Move it here and this time, I'm going to place it here. And move it upward a little bit. And I'm going to add
another tree as well. In the blender kit, I'm
going to search a tree because we need a high poly
tree of one tree only. We will use one tree, disable this eye button
and you will get so tree. Firstly, let me see the color. Just go and save your
project and then enable this ender PV mode and
see what's looking, see the reflection in
the water and it's looking pretty good
and that's perfect. We will composite our scene so that it will look
something like this. Now this time, I'm going
to import another tree. In the scene here
you can see this is the main tree. This
is the main tree. I'm going to import a
tree, something like this. I think I have used this tree. This is the pine tree.
Search in the blender key, you will get this pine tree. Select your tree and house and then select print pine tree. It's imported here.
Select this one and we'll move it upward. I think you need to scale it
and we would add variesens. We should add variescen
and it's good. Now we have successfully added our trees and even you
can add so many trees. This is another color
tree, you can even add it, but I don't recommend you to add this tree because it's not
matching to the scene. This time, we need to
move it here as well. Now in the next audio, we
will add our atys tree here. Here, you will get
a stylised tree. It's animated tree.
This is the tree. This is the animated tree. The leaves are falling here. We will add this tree and we will animate this tree
in the next video.
12. Animate the Stylish Tree: So in this video I'm
going to add this StylistreT is the sllistre. It's looking like a real tree, but it's the atylis tree. Now let me show you
the project file. This is the project file
of the statis tree. Let me go to this front. Here you can jump to the
front or you can jump to the first frame it
is of 250 frame, it is tameline even you can
expand it and collapse it, it's tamline it is of 250 frames and 24 frame
it cut to 1 second, it's ten second and
ten frame timeline. Let me play it. Even
you can play it using your space button of your
keyboard or this button. Here you can see the
leaps are falling. We will use this tree
and we can customize it. Here are lots of setting here
in the modifier section. He's lots of setting, we will customize it. What you need to do is just
download this project file. This is the blender
project file. You can download it and
also how can you use it. This is the blender project have downloaded it let me show you the add ons
and stylized tree. So I'm going to
give you the link. This is the Gamo link. Simply copy this link if you want to download it from
the original resource, and paste it on the browser. This is of stylistr. It's free of cost. You need to select this generation
version 1.1, then again, praise zero and tip zero and
again purchase it. I have purchased that's why it's doing the purchase again. Even you can download it from the resource section
of this video, I have given the link. You can simply download it from the resource section
of this video and you don't need to download it from the Gumroad or this website. Yes. Now I'm going to download it and now copy the path
where do you have downloaded. Now I'm going to show
you two options. Simply, I have opened two blender at a time
here two blender. This one is the tree,
simply select this tree. Firstly, let me enable this one. This is the Okay, Gizmo, and this is the overlays. Here in the outliner,
disable these lights, disable the lights, and
this is the camera, disable the camera by
pressing means hide. Now select your trees, press Control C, and simply
paste it in this one, okay. Now here's paste Control V,
it's successfully imported. This is the one option.
Now, another option is let me create
a new collection. Select the main collection,
right click No collection, and this is the
tree stylish tree. Press tree Now go to this file append and you
need to just paste stuff. This is the tree append and you need to go to this
collection and here we will import this extra and only we don't need this
light, append it. The tree has been
successfully appended. Are added in our scene. I have shown you the two
options first option is easy, simply copy it and paste it. Without closing the blender, paste it here, you
will get the tree. Now, move it here,
but good practice. Right click the whole collection selected
objects, and again, move it here in the scene, and I think we need to scale it. I'm going to move it upward. Press to scale it,
something like this. Now, move it here
in this direction. Now I'm going to move it here. As you can see, it's
hovering in the air, we need to adjust this one, this one and press R
and X to rotate it. Even you can use modifier that's called the
synap modifier, and X to scale it in the X axis. Now move it here.
It's the ground. Here you can see
it's the ground. Now I'm going to move
a little bit upward. And this is the Y axis, R and Y, I think it's good. Even you can adjust it from
the dit mode, let me do it. Firstly, select this one. This is the ground, select
the ground and enter into the edit mode and select what it says and do it manually one by one after enabling this one, is proportional editing, after enabling the
proportional editing, just move it on the ground. You can do it
something like this. If you don't want to use
the ring wrap modifier and this one I think this is
not the professional method, so I'm going to use even you can do it
something like this, but I'm going to
the object mode, select your ground
and this time, I'm going to use the modifier, but make sure that it
has enough subdivisions. If not, then create
it and enable, apply the subdivisions
and here you go to generate and you will
get the sring graph modifier. If it is not visible, then search here SringGrap. This is the spring
crap modifier, just enable it and
the targets would be this mountain, this landscape. Now it's perfectly stick. We don't need to do it manually. It's perfectly attached.
This is the power. Now I'm going to
change the offset, press shift and do it manually. Okay. After selecting sip, it will
just deform it properly. Now, I think that's
perfect. Apply this one. Now, this is the rocks. I'm going to again, use the Okay, apply this one. And again, add modifier, deform, and you will get
the synrab modifier and choose the landscape. Now, you need to change
the offset of it. But on surface, you can
choose the outside option. Okay? Now, change the upset. Even you can choose this one and this one outside is good for this.
Now that's perfect. Now, this time, I'm
going to animate it. Let me first play it. This is the cadeaor I'm
going to change it to the timeline and go
to this first frame. You by pressing this button, save your project,
and let me play it. Okay. Now here, you can see
it's playing perfectly. But in my PC's playing
ten frame per second. Heres is very low. The ideal FPS is
frame per second, APS is 24 frame per second. Here you go to playback
in the timeline and here you will get
the frame dropping. I'm using the timeline
in the animation, change the timeline
and here playback, you need to choose
the frame dropping. It will just play real time. Okay. The leaves are falling, the tree fast, I think,
the tree is fast. I'm going to select
the tree and here after selecting this
tree, let me show you. I've selected this tree. After selecting this tree, you need to go to
this modifier panel, you will get so
many option here. Everything is perfect,
even you can play with it. Okay. Here you will get
the branches length. Even you can change the color. I'm going to change
the color because I have changed the
color here to green. So firstly, let me so I'm going to this
surrender PV mode. Now here, it's pink in color. So the reflexion
is also the pink. So I don't need, so
I'm going to change the leaves color and
choose the drop down menu, and even you can
choose any color. So this color. Now
this is green. Now here select this one and
move it little bit upward. So this is the light green. I think the light
green would be good. Now, this one. Even you can
copy this hex code here. This is the Pi 47 A, one, B, and FF. This is the hex codes,
you will get the same. Now, this is the leaps density. If you make it one, it's very, it has no any leaps, so it's better to make it 300. Even you can change the scale
of the leaves, everything. But I think 0.15 is perfect, and the seed means the variesence now this is the important wind
speed, make it 0.5. Now let me first enable
this solid mode. Now let me play
it. Now it's good, but I think 0.3 is perfect. Yes, this is perfect. Now, you will get the
falling leap settings, falling leap settings,
density is perfect. I think the leaps are perfect. Now distance, I want to
cover larger distance. I have enable the 20, so it
will cover the full distance. I think we should do it 50. Now let me play it. Okay. It's
playing from the 80 frame, so we will change the settings. Now, it's covering the distance. Yes. End point should be 500. Now let me play
from the 160 frame. No, that's perfect.
Here you can see it covering the larger distance. It's covering the larger
distance, that's perfect. Spread 0.6, it's spreading
purplely. That's perfect. Even you can change
the rotesentbulins, and every so many things here. I think it's good. You can change the wine
speed long here you can see how long this wine
can hang here. This one. Even you can change the wine here minus two, let me check. No, minus two not minus three
is perfect for this time. Now, let me play it.
Yes, that's perfect. It's starting from something
around 80 or 90 frames. I'm going to change the
starting frames would be 90 at end frames would be
maybe 400 or 300. It's up 12 seconds. 12 second animation
is good, 90 to 400. You will get 311 frames
something around. Okay. If you need a exact
twoel second timeline, so you can multiply 24
into two elve you will get the same 288 frames,
282 88 frames. So 90 plus 288. 90 plus 288, you
will get the 378. The last frames would be 378. You will get the
exact ofel frame, 377. Let me show you. Here the duration is 12 seconds. Right click here in the bottom pooter line and you will get
the scene duration enable it here 12 second
frame 12 second timeline. Let me play it. Now it's playing perfectly now enable
the surrender PMO to see it. How is it looking? Now it's looking pretty good here, the
leaves are falling, we will adjust our
lights, don't worry, and I think we need to
just add our light. Go to the world
properties and here you will get the sun intensity, make it 0.3, or here,
strength is 0.4. Even you can adjust it later. Now, this time you can
increase the ozone or do Now here the sun rotation also even you can change the
sun rotation and elevation. So now that's perfect. We have added our falling
lips animation here. Now, we will add this image in the background so that it will perfectly reflect
with our scene. That's perfect. Now
in the next video, we will add our
background trees here. We will add our background trees here in the back portion.
I'll meet in the next video.
13. Placing Background Trees: So it's time to add
our background trees. I'm going to use this pine
tree you can use this one. I have searched in the
sketch five trees low poly. I got this one. Even you
can use this tree as well, I think it's also
good. Trees low poly. Even you can use this
one to scatter and let me check my scene.
This is the scene. Even you can use any of these, not change to the solid mode. I'm going to the sketch five and I'm confused between them. So I'm going to use this tree, it will look perfect. I'm going to download it in the GLT format so
I can give you. The name is Pine Tree Low Poly. I'm going to partly
copy the path URL and press N to enable the side
menu and disable this one. This time, again, create
a new collection by selecting this main
collection and BG tree. Okay? It's very busy. Now press N. Again, enable this is C fab addon
and again, login it. Press Control, we import for URL and just press
the import model. It will take some
time to import. Now it's imported, I think, let me check the size of it. It's only 1,600 abites
it's very small size. Right click, let hike again
and press to scale it. It's I think large
according to our scene. So I think it should
be like this. Now I'm going to
do one more thing, move it outside the scene
because we are going to use again the particles effect
here, particle system. For it, I'm going to show you it's not separated,
it's collected. That's perfect. It's
only a one tree. Rename it double click and
rename it the BG tree. It's on the dating, I think. It's the tree and
firstly, let me show you. After selecting that tree, you need to go to the
object properties and here the scale
is not proper, rotation is not proper. Press Control A and this time, I'm going to choose the
all transformation. Now, everything is proper. Now select the tree again, right click, set origin,
origin geometry. Origin is here, here, you can see the origin is in the middle portion
of this tree, but it should be the origin
should be in this person. What you can do, I'll
show you what is the side effect of this origin
as press and to hide it. Now this time we need to
scatter it on the background. We need to scatter it here. Let me show you. We
will scatter it here. Think what you need to
do it for scattering. So we can do one more thing. We can simply select
the ices and scatter it here and we can
do one more thing. We can import a new
plane to customize it. I think we should
import a new plane. Select the Bgi tree and again, import a plane here. I have imported a plane
and scale it scale it. Scale it and scale
it in the X axis, S and X and X to
cover this distance. Only this distance,
the camera is not going to see everything
this distance, move it here and I'm going to scale it in
the Y axis, S and Y. Even you can do it from
this property panels here. Object properties
panel, you can do it. Now this time, press Control A and choose the scale
option and Control A, choose the rotation option, not the scale optonOwise it
will change the origin point, submerge into the water. Now after doing this, you
need to do one more thing. This is the plane,
name it Bite again. Big plane is perfect for this. Now, you need to
do one more thing, hide this plane disable this one in the
render so that it will not visible in the render. Otherwise it will
not look perfect. Now save your blender project
and make incremental of it. God is file and save incremental
because it's important. Now I'm going to show
you one more thing. Who is file, clean up
and purge unused data. It will delete the
unused message from your blender scene, and I think it will
also delete this image, delete it. Now it's not deleted. But in your case,
if it is deleted, simply again, open
the same image. After opening enable
this fake user. This is the fake user
enable this one, so it will not delete
it. After deleting. Now I'm going to
select this plane, enter into the edit mode, select what you say
erat subdivide, and again, give the
sufficient subdivision. I think 808050 is
perfect for this. Otherwise, blender
will grass, I think. This time, I'm going to use the particle systems to
select the BG plane. After selecting
this plane, go to the particle properties and
create a new particle system, go to this here, create
advance for the rotation. And this time, I'm going
to choose the object, only a single object, and what do you want to scatter? Here, I'm going to choose
the instance object, this one, this is
the bigettree again, enable this rotation and
choose the known option. I think it's perfect. It's perfect. Now
we need to scale it and I think the numbers
are pretty high. Now, that's good.
Now here, the scale, you will get this scale in
the render. Now I scale it. Now here you can see because
of the origin point, it's submerged into the water. What you can do just enter into the front mode by pressing minus Y or even you can press
the numbered one button. Now I'm going to change
the origin point. Selective tree, the
origin point is here, but I already told you the
origin points should be here. How can we change
the origin point? There are lots of options, but I'm going to show
you the EG option. Go to this tool,
this tool and lock this origin and enable this
move tool after locking it. Now just move it downward. Oh my God, my trees are dancing. Now, move it here.
That's perfect. I think. Again, disable it don't
forget to disable it. Now again, select your pane. This one, budget tree plane. Again, I'm going to check. Here, all of these are
not scattered properly. Here, even you can change the intensity radius
and so many things, but it will not affect. Go to this particle step and the number would be
50 good, I think. And you can customize
so many things here. Now, this time, I'm going
to the magic scale would be 0.5 or 0.4 or 0.3 is
perfect for this time. And here disable emeter
in the render it will not show you the em in
the render. It scattered. Now let me enable
this render removed. But before that,
save your project, it's looking like this. I think it's not
looking good because we have chosen the
bad tree, I think. This time I'm going to delete this tree because
I don't like this one. The color of this
tree is not perfect. Select this tree, press
X and delete this one. Now what we will do, select this tree
because I'm going to use this tree because
this time it's perfect. Select this tree that we
have used earlier this time, go to the object properties and here this time,
everything is perfect, but rotation is not perfect, control and apply the rotation. Now this time, I'm going
to the particle stip. Slide this plane and go
to this particle type. Even you can customize it
after applying all the things. Here in the render, you will
get this sstans object. Simply slide this one. Now here, you need to do one
more thing here. Let me again, choose this one, this tree and here you
need to go here this time, I'm going to just press Control A and apply
all transformation. After applying all
transformation, right click and you
get the origin point. Here you can see
it's not working properly because we
have parented the tree. We didn't join them because the trunk and the leaves are
different and separated. I'm going to join them. Select the leaves and after
selecting the leaves, press shift and
select the trunk. Okay. This one and press Control J to join
them. Here Control J. Now it's disappeared,
select the plane and again, go to this instant object and
select this one, this tree. This time, select this tree, place Control A all
transformation, right click again sent
origin origin to geometry. Now this time here, it's
perfectly arranged. You need to face each and every thing
because it's blender, you need to adjust it
according to your preference. I think I have cleared
it in very deep. It's not perfect because we
have separated these tree. If you are using the
particles system, you need to change each
and every settings. Now here this time going
to the tools here and affect only origins and make
it downwards till here. That's perfect. I
think. Press one for the numbered one to go to
this front orthographic. Now this I'm going to scale it disable this origin and
go to the particle systems, let this plane, and
even you can increase the hair length to increase
the size of this tree, but I'm going to press
shift and scale it. Now, I think it's good. The length is pretty good. Yes, that's good. Now I'm
going to decrease the numbers. Numbers would be
30 or 40 perfect. Now, move this collection here. Check the good
reflexion on the water. Check the reference
image and check the reflexion of the water.
Both are looking good. Now go to the surrender
properties and enable this DNgoption.
It's looking great. Now that we have
set our trees on the background as well,
it's looking great. Here the two trees, so it will interact
with the backgrounds that we will add in
the next section. Now it's time to add here, you can see the
grasses and flowers. We will do it using
the Geo Scatter add on that we will learn
in the next section. So that's perfect if you are facing any problem in
this particle system, you need to do one thing, simply just join all of these things by
pressing Control J. It should be a single
object after joining, make sure that the scale
rotation is perfect. Then right click Set
origin and you need to set it using these tools. Now you can again, go to this plane
and these particles and okay these particles
and in the render, you will get this instance
object just select this tree. That's perfect. Next audio, will use imaging add on to scatter the grass
I'll meet in the Nasa
14. Installation of GeoScatter Addon: In this video, we are going to install this imaging add on that's called the Boom reader
and using this add on, we can create so many
things, let me show you. You can download it
from the resource section of this video as well, but I think you should download it from the
official website and you can download the content pack from the
resource section of this video, but you should download the latest version
of the addons only, but the content pack
will be the same. The content pack
will be the same, but download the
latest version of the addons only, not
the content pack. Here the link, I have given
the link to download. This is the main add on, so just copy it and paste
it in the browser. This is the GO scatter
website. Even you can search. Let me search here, GO Scatter. Only Scatter and this is
the official website, w doscater.com, here and here you will get
the add on. Here the add on. This is the Imagine website and you can download the add on. After downloading, you can
scatter something like this. Here download this biome but
where the download link. Discover these biomes
and this is the biomes. I think I need the add on. Here's the download button. So this is the Geo
scatter, Geo scatter. This is the biome reader
is absolutely free. You don't need to pay it, but this is the Geoscater
and ioScater is paid $99, I think. Free is enough. You don't need to buy anything, and we are pro, we can do it in the
free version as well. Good is Bom reader,
another name of geo scattered biome
reader, don't be confused. This is the Bom reader
and enter your name, professional, you don't
need to say through things. Your name professional
and even you can use the TIM Mail and email address
and just send this link. Then it will send you the latest version
link in your Gmail. Even you can use the
temporary email, then open your email and download the latest
version of this addon. Don't you only need the add on and everything
is you don't need to download the
content pack every time because you have given
in the resource sexton. I have copied the
link, let me show you. I've copied the link from
the text. This is the text. Now I'm going to paste it here. I will redirect
directly to here. Simply give your name professional email and download the latest version
of this add on. I'm going to show you how can you download the content pack. Again, open this
one, text value, and this is the plant library. It is here in the gum Road. I copy this one and even you can search a set pack of plant library or biome
reader in the gum Rod. Paste it here. And you need to create an
account in the gum road. It's absolutely free. You don't need to pay anything. It's $0 Gum Road. It's the Brant library. After downloading this add on, you can create
something like this. It's crazy add on, I
think it's very useful. Here, these are the free. I have already purchased, that's why it's swing
the purchase again. Give a fair price of zero
or even if you want to give donation then you
can press any amount, two, three, 500, anything. But this time going to
press zero and again, purchase it after purchasing, you will get so
many things here. After purchasing, you will get this GSCatterPlant library. It's I think 700 MB. You will get the setbacks. You will only get this
setback and this one, this plant library
and the add ons that is downloaded
from the email. Download the content
pack from this link, download the pack from this link if you want to
download the latest version. After downloading, you will get this Scatter Plant Library and after extracting
it's 1.13 GB. But before extracting,
it will be, I think, 700 MB and you will
get the setbacks. It's also important. But I have given the link of all of these things in
the resource panel. Now, you only need a latest
version of this add on only. Now let's start the
process of installing it, copy the now I'm going
to show you one thing. In the document of my PC, I have created the GOS
scattered DND means do not delete because you
don't need to delete it, rename it because
it's important. You don't delete it. Create any file in your D
drive or E drive and rename it Scattered DND because
you don't need to rename it to delete it after
installing this add on. Open the blender. So this time I'm going to open
blender and go to this edit preferences,
get extension. Install from disc and
then look at your path. This is the addon. This is the add on,
let me show you, this is the addon. You
need to install it. Even you can drag it and
drop it in the blender as well and just install from disk. It will take some time and then it will be installed in your PC. I successful here. It's successfully installed. Now go to this add on sexton and here you will get
this biome reader. The name is biome reader. Simply enable this one. If it is not enabled, then here go and save
references. Now the main thing. Now this time, I'm
going to this one. This one it's the
timeline, in the timeline, go to this asset projec and here you are getting
only these assets. But this time I'm able to see the assets because
I have added this one. Now I'm going to show you how
can you add these assets. Okay? So for this, you need to go to
the edit preferences again and you need to go
to the file and paths, and I have added this one. This one I have
added these things. How can you add this, create
a new here, create a plus, create a new and you need
to locate your files that I have saved it in the
documents folder. This is a Geo scatter DND. Add asset library. Firstly, you need to
copy it in a safe place. You need to copy it
in the safe place. Then after add asset library, and you need to just
copy all the assets in the folder and press
this add asset library. After pressing it, it will
be just added here GS scatter DND and just go
and save preferences. After saving, just
minimize it and go ahead Scatter DND and you will
get all the assets here. Here the GS cutter DND
it's swing it because I have copied all the assets pack. This is the asset peg, 1.13 GB. This is the spring
grass and this is the one only 63 and 63 B. So you need to copy these
things in the DND file. Now I'm going to again open my blender. This is the blender. Now this time, delete this
cube and add a plane. This is the plane. Now
press N and go here, choose the biome reader. Search for the biome reader, it's biome den you need to press N. Here the emitter,
choose the emeter. Now here you will get the open biomes and select this one. Now my PC sewing the biomes. But in your PC, if not
sewing the biomes, then go to the setbacks and here you need to
just install this one. This is a free library. This is the three D grass. If it did not install,
let's install it and even you can
do one more thing. If it is not visible
in the biomes, then you go to this file
and file install a package. Choose one, go to your download document folder
that you have this one, I install the setbacks. Install a setback then again open go this file,
install a package. Again, go to this
document panel. And again, choose this again
another setback install it. After installing, you
will get this one, this one, all of this. That's perfect. Exact it
and again close this. We have successfully
installed this biome reader and I think it's
very amazing add on. We will understand the
basic scattering in the next video because we need
to understand some things. I'll meet you in the next
15. Basics of Scattering: So now I'm going to show you
the basic of scattering of the biome readers only because we have understand
the particle system, so it works on the
particle system. That's why I have
explained the basics of particle system in
the previous videos. So I'm going to create a new new file and press A and delete
because I love deleting. Now this time I'm going to add a plane and scale it
something like this. Okay, I have scaled,
go to the object, I have scaled three times.
Let's make it three. Now after skiing, you
need to do one thing, what you apply the scale. My friend, press Control A and apply the scale, it is uniform. Now, that's perfect.
Again, press N and go to your biome reader. This is the biome reader and emterEmter means
simply the plane, where do you want to
scatter your objects. Simply select the
emeter and this one. Now, you need to open the biomes and simply select
what you want to in. Okay. So if you want to import, I love this one wild grass 04. If you want to import this one, simply select this one
and it's importing here. Okay? It's planting the flower
and grasses, everything. And it's the free version
of the addon and it's sufficient after press
exit and again close it. If it is not looking like this, then you need to
enable this one. This one in the view pod
button. You need to enable it. If it is looking
something like this, then you can enable one by one, this one, it's very heavy. You can say the addon because it scattered lots
of things here, you can see one, two,
three, seven assets. It has imported seven assets. That's why it's
very heavy addon. But it will give you
a perfect result the rogs and everything. I think we will use
it in the main sing. Now let me go to the
surrender property, but before that
we need to enable the cycle engine. It's opening. It's opened in the IV engine, so I'm going to open
in the cycle engine. Go to the solid mode and here
in the render properties, you will get the
cycle engine and GPU and again change to the 32, I think in my PC perfect. Enable the DNI again go to this cycle engine and no lights. I'm going to use
the Blender lights go to this here and enable disable this light and seen world because it's
the Blender light. Now, see it's looking
the cray now we will use the settings to
create something in our scene. That's perfect. Now
I'll meet in the next
16. Scattering of Grasses and Flowers on Mountain: So now it's time to apply
the theory in the practical. I mean, we are going to scatter the grasses
on the mountains. This is the mountain, so I'm
going to scatter it here. Let me frame it firstly. Yes. This time I'm
going to select this mountain or
landscape and make sure that you are saving your
project because this is the heavy add on and I think our PC will not handle it if you are not
using a high spec pC. Select this one. This addon
is pretty I think clever. I will digest our scene
according to the PC. Select this one and now go to this object properties
and scale is not uniform. What will we do? I'm going
to uniform the scale. Contol and transformation, it's a simple way because it
is on the world origin, that's why I have
chosen this setting. Now, that's great. Okay. After choosing this, now, I'm going to do one more thing. Press and open the biome reader. This is the Bom reader. If
it is not visible this one, then go to the edit preferences and add ons and enable
this biome reader, not the blender kit. This
is the biome reader. Enable this one. If it is not visible in
the addons section, then please install it after watching the previous video that I have shown, how
can you install it? So here are the emitter,
what will we do? Just drop this choose
the landscape. Now after choosing the emitter, now it's very congested. Now here, you will
get the open biomes. Click this one. Now,
you can explore. If you have a good PC,
then you can explore. But this time I'm
going to use this one, go to this spring grasses. It is not visible,
then you need to just copy this in this one. This is the spring grasses
and this is the setbacks. You need to simply copy this spring grass that I
have given the links in the resource section of the previous videos that I have shown you, how can
you install this one? Then install the setbacks. Then you will get this
spring grasstT time, which grass would I use. You can use this grass and even you can use
any of these grasses. Okay. Explore it.
It depends on you. You don't need to follow me. But previously, I
have used this grass six so I'm going to use
this simply select it. Now it's importing and it will
take some time to import, and it will customize this one according to your preference or your PC and it's not disabling anything in my PC because I think it's capable to
handle this scene. Now if it is disabled
in the view pod then you don't need to enable it or otherwise,
blender will crash. Here it's showing
the security warning means it's giving me warning hide hide all
the things. Press okay. Now cross this one. No,
nothing is visible. You don't need to be panic
here because it's hidden. Enable this one after
saving your project, here it's the scattering. It's the scattering
and see the flower, firstly, let me press N because I will use this
one to hide everything. This is the Geo
scatter collection. Press end to hide
this side menu, press control to save your project because
it's important. It's scattered
properly, let me see. If not, then we will
scatter it more. I think it's scattered properly. Now let me enable the render. This is the render PD mode. Let me enabl it and see whether it's looking perfect or not. I think it's looking perfect, but I think we should scatter
more. What will we do? I'm going to again
open this one, press end to open the biome
reader, and this time, I'm going to select the
grasses three d grass and just move it down and
you will get the density. I'm going to make it 120 and you need to wait scattered
now select another one. Now again, choose 350. I'm just increasing the number so that it will scatter more. Now, this one, I'm going
to choose 350 again. Now, it's scattering. Even you can increase
the scale size. I'm going to select this one. This second one grass meat
and scale should be 1.5. Make sure that you are
saving your project. Now, it's perfect, I think. Now this time, I'm going to
increase the flowers height. Okay? This is the flower. This is the pink flower,
so I'm going to select it, and density should be 215 in my case because
I like flowers. Now, this time, it's perfect. The scales would be 1.5. It depends on you, how you optimize or how you
design your scenes. 1.5 is pretty high, so 1.3 is perfect.
Yes, it's good. Press N and save your project. Now that we have scattered everything and
it's looking pretty amaging. It's looking amaging
see the reflection in the water, it's looking great. In the next section, we will customize our scene, we will composite
our scene and add pg camera animation
and also this one, see the sunset animation
here in the background. We will add this one
in the next video. I'll meet in the
next video, but.
17. Cinematic Scene Art: So it's time to finally add this image to our
scene so it will look cinematics and you will get the reflection in the
three D view port here, water, you will
get the reflection in the water of this image. And I think this is
the sunset or sunrise. I've downloaded it
from the Internet and I've used this one in the
reference image to create this cinematic portraits and I have used this for the
reflexion and background. Now, this time I'm going
to you can download the same image in the reference resource section of this video. So I'm going to download it. So here you can use any of this. I have search Sunrise image. Then you need to go
to this image section and you can use any of this. Any of this. But make
sure that it's perfect. I think it's good.
You can use this one. You can use this
one, but don't use this grass one because it will
not perfect for our scene. You can use use this.
That's perfect. Now, I'm going to use this one, this one, download it from the resource
section of this video. The name is BG image. I'm going to copy the path. This is the BG image. Now this time, I go to this solid mode because the
scene is laggy little bit. Now save your project. Now I'm going to
show you one thing. How can you import that
image in your blender? If you are using a PC with
older blender versin, then you need to
follow one thing. If you are using a blender
version before than 4.0, 4.2, I think, then you need
to go to edit preferences. And exit it, go to
the add ons or get extension and search for
image plane. Image a plane. But it will not appear in the
latest version of blender. Images planes, input it. After that, I'm going to just
down it had this e Scatter. It's laggy. Hide it
in the viewport. Hide this geo scatter
only in the viewpot, not in the render me
mode. Now, it's pre. I'm going to add image as plane. Save your project again, select the scene collection and Ship A. After Ship A, you will get
this image mesh plane. If it is not visible, then you are using
oldest version of blender and use the latest
version or even you can enable the add
on that I have shown Ms plane and you
can use the image. Let me choose the image. This one, this is the BG image. Input plane, it's inputed. So press to scale it. To scale it more, it will
cover the whole area. Our scene I think is big. Now scale it more, scale. Now we will customize it according to our scene.
Firstly, scale it. Press S and X to scale it in the X x even you can use
this p parterty panel here. I've scaled 132 times in my
PC and I have rotated it. Now, I think let me enable the render PMO to see
it in the render. Now it's not looking great, so I'm going to scale it down you can move it
a little bit upward. Now press to scale
it down a little bit, move it downward. I think perfect. But here, this scene is not
looking like this scene because we need to
adjust our lightings. We are going to add
emission to it. This is the plane and
it's not a plane. You can say that it's an image. I'm going to change it to the Cedar editor
instead of timeline and select your image BG image
and this is the BG image. Here you can see in
the image editor. This is the material output, and this is simply
the node setup and it works from
the lab to write. Firstly, this data sent to this and this data
sent to this output. You don't need to understand
so many things here. You need to understand
only one thing. Let me show you here in
the emission section. If you increase the
strength by one or two, it will simply give
you the white. Because we didn't add
the color option, it's simply emitting
the white light. Simply drag a wire from the color and join
it to this color. Now it's looking perfect here, make it to not to 1.5
perfect this time. Now here, I'm going
to customize it more because you need to select this one and
choose the reference image. This is the reference image. Here it's a little bit good. What I'm going to do,
I'm going to do here, this line, this setup, we will add something here. Press ship A or even
you can go to add. You ship and here
you can search. Add here, you need to
do color and you will get the hue saturation and
brightness and contrast. I'm going to add a hue
saturation and add on the top. Now here saturation,
make it 1.4 or 1.2, let me choose and let me
change the hue value. I will simply change the color, and I think zero and by default is good
0.5 feet by default. Now let me add again,
you can search here, go to this color and I'm going to use this
brightness and contrast. Again, place it on the
top, not on the bottom. It has connected on the wrong. We need to connect
here. Alpha with this alpha and drag it here. Remove this wire and drag it
on the top side. This one. Now this is the brightness and contrast brightness and increase the contrast by one, I think, let me check and
increase the brightness, reduce the brightness by 0.5. No, it's good. Now we will
work on the lightings. That's perfect,
we have added it. This time, I'm going
to fix the lightings. Good is world
properties and here you can see in the rocks and the lights are from in this direction
in this direction. The lights should be
in this direction. In the world properties, I'm going to change the rotation maybe to fix the lighting. So here, I have changed the sun rotation to
118 degrees, okay? Now the lighting,
see the lighting, save your project and
see the lighting. Lightings are in this direction, in this direction,
this is the lighting. Okay. Now I'm going to
change the intensity to 0.2, and here is trenth 2.4. That's perfect. Look, the
reflexion is pretty good, but we will composite it so that it will look
something like this. Now this time, I'm
going to change the location of the stones. This is the stone, so
I'm going to change the location first,
let me choose. Here's the river stone, how I located it. Select it and praise numbed delete button in the collection. Even you can select
any of these of one part of the stones and
even you can praise Sp and G, Sheep and G and choose
the collection. It will simply select
the whole collection, but it will select
the whole collection. Select this one and
praise number delibtan. This is the river stones
and I'm going to move it here and I'm going to move it in the Y axis and move it here, move it in the Y axis. No, that's perfect.
Now in the next video, we will add fog here in the reference image,
you can see the fog. I add this fog in the next
video, it will look perfect. When you will render it, it will look amazing because
it's the preview mode and it's simply showing the one fifth or one
sixth of the end. I'll meet in the next video
and we will work on the fog.
18. Adding Fog in the Scene: So now it's time to add
our fog in the scene, so it will look cinematic. Enter into the solid mode
because it's very heavy. Now for creating fog, we need a cube, and we will simply hide all of these
things using the cube. Select this Imagis plane and move it a little
bit backward. Even you can move it
here in the Y axis. Now, I'm going to select
the scene collection. This time, I'm going
to import a cube, import a cube and press to scale the cube so that it will cover
the all background tree. Praise to scale it more and
scale it in the X axis. Now, I think it's pretty good. I want to cover only
the background images of background trees,
not the images. Scale it down in the YX where I don't want to cover
the image as well. So only the background. Even you can do it, just in
turn into the edit mode, go to the space selection mode. Now select this backface. Now enable this move tool and just move it
little bit inside. No, I think that's perfect. Now, I'm going to select
this space and make it here. I think the proportional
editing is enabled of it. Now, this time, I'm going
to move it here. Till here. Now again, go to
this object mode and select this one and
press Control A and all transformation. Now select this one right
click and set origin origin to geometry and don't forget
to save your project. Here I'm going to
select this one because nothing is visual here. Here select this cube and
rename it fog F two and fog. We can easily search it here. Okay. Hide anyone.
This is the fog. Now this time going to this, this is the object properties
and here you need to go to this viewport display
disable this one. You need to go to
this viewpot display and here display edge. You can even check it a bound so everything
is visible this time. Now here, I'm going
to create a pg, for it, you need to
expand this one. Expand more. Let me
expand move it a little bit upward. Move it here. It's a little bit tricky, but when you practice a lot, it's like a game for you. Select your fog and here
I'm in the Cedar editor. You need to consider in mind that I'm in the Sedita
and we will add some nodes and Blamey
nodes are easy for you because I'm going to show you the easy
process of adding it. Select your fog even you can add materials from here
material properties. Create a new material because
it has not any materials, it will look white in your skin. When you will render it, it will look very, very white. So save your project firstly
and create a new material. By default material
is principal BSDF and output material means you can
simply change the colors. You can't add any
fog because it is connected to the surface here in the surface,
not to the volume. Means if you want a
volume, volume is what? Fog if you want a volume, then you need to add another principal volume
node. This is a node. Principle BSDF means
you can change the color roughness
and so many things. Select this one,
press X to do it. Now, press Shift A and go to the Cedar and you need to search principled
volume because we need a volume
select this one and apply it here and how will you connect this
volume with the surface? No, because we are
using the volume nodes. We need to connect this
volume with the volume, this is the simple nodes. You don't need to
do so many things. Go to this here,
render properties, and it's looking white
because I have shown you. Now here in the density panel, you need to make it as
low as possible, 0.02. Okay. Now looks, it
has citd the fog. It's very simple, my friend. Disable this fog, this is the
previous enable this fog, this is the after. This is the previous
and this is the after. I think we need to
scale it in the X axis. S and X. I will cover
this tree as well. Now, even you can scale it more to cover this front trees.
This is the Y axis. I'm going to change it
from the properties, object properties and
scale it in the Y axis 1.1 and 1.25 is perfect, I think, and move
it in the Y axis. Now here, very dense folk, even you can reduce
the number by increasing the number by 0.3, even 0.01 is perfect, I think, or 0.015 is perfect. Okay, that's good. Now time to render a single frame to see how
our scene is looking. Even you can decrease the number even you can change
the color of the fog. Here's a fog color,
even you can change it. So increase the saturation value a little bit and change the hue. Okay, something like this. Blush, if you want
to give you want to give you blues or
yellow tone, okay? Here, you can copy
the hex code here, BCA and EEF simply. Now, I'm going to
render single frame. Firstly, go to
this uh solid mode and here you need to go to the surrender properties
cycle GPU engine, 32, I'm just testing as render. Denise enable U GPU. Now here this time
under the performance, compositor enable the GPU
and here memory tiling. Under the performance, you will get that memory
here performance memory. And reduce it, divide it by two, if you are using a low spec PC and if you're using high specs, then you should also reduce
the styling because it will increase you can say
the speed of render. I can go to this render PV mode because I'm going to
change the color. Here you will get the
color management and this time I'm going to use
the filmic because it will give you
the film look and even you can change the medium
high contract contrast. Even you can change
the high contrast. So the medium high
contrast is perfect. Even you can change the
gamma and exposure. I'll do it later.
Firstly, let me render. Now, use solid mode while rendering because it will increase your render speed. Good is render and render image. Render image simply means
it will give you the image, how it will look Look, the scene is looking
pretty good. I like the scene, but background
trees are not visible. I think this scene is
looking imaging without the background trees.
I like this scene. But I'm going to show you why the background
trees are not visible. First, let me close
this one here, BG tree. This is the big tree and here
it disabled in the render. Enable this in the render. And after selecting
this busy tree plane, if you want to hide the plane, you need to go to
these particles, and here in the render section, you need to just
hide this semter. Even you can go
to this viewport. Let me choose the viewport here. Here is the viewpot display and disable this so
emeter it will not show the so emeter in the viewport and not the
emitter in the render asull. Now if you render, then it will show
you the background images along with the fog. Firstly, let me save it. Now I'm going to the render
view render firstly, This is the previously rendered
image. Now here the slot. I'm going to choose
the second slot, it will save the surrender
into the second slot. Okay. So this time going to
render and render image, it's rendering the image in the second slot, not
on the first slot. So we can compare easily
how it is looking without the tree and how
it's looking with the tree. We can compare it.
Now it's rendering. I think both are
looking perfect, but it depends on us. So it's looking
something like this with the tree and let me show
you without a tree. Go to the first lot. This is without a tree. I really like without a tree, and this is with the tree.
I think both are good. This is looking like
you can say the island, and this is looking like a good. I'm going to save both. If you want to disl
the background tree, then you can actually
depend on you. Go to this image and save and
you can save it anywhere. This is under two Okay. And go to this slot first. This is the render one.
This is the render one. Even we will composite it, so it will look perfect. Save it. Close this one. Now in this next video, we didn't animate
our camera till now. In the next audio, we
will animate our camera. Next video is very interesting. I'll meet in the
next vdio my friend.
19. Camera Animation: So then this video is very, very interesting because
I'm going to show you the camera animation
in this video. We have a camera.
This is the camera. If not visible, then go
to the search camera. Hub blender is very soft and it provides lots
of options here. Select this camera and
I'm going to do it. Firstly, we need to
open a timeline. Instead of this aerator, just go and enable
this timeline and have reset it to start frame
90 and frame is three, seven, seven and exact second. Right click and here integration
enable this integration. And go to the output
properties and it's showing the 24
frame per second. Is the filmy rendered setting. I think you should use
the 24 frame per second. But even if you have
a high spec spec, you can use that 60 frame
and 12 frame as well. 24 is perfect for me. According to 24, I
need something around, let me choose 24
multiplied by 12 second, 24 multiplied by 12
second approx 288 frames. If you will choose a
60 frame per second, then for the 12 second, you need approx uh,
seven, 20 frames. So you can adjust it according
to your preference here and it will show
you the duration if you change the frame rate. If I change it to the
12 frame per second, the duration is 24 24 seconds. If I change the frame rate 60, then it's sewing
the four second. So 24 frames per
second is perfect. Now why have I started
the animation from the 19th frame Because I
want this leaf animation, this leaf animation here and it will not so the leaf
from the system frame. That's why. Let me play it. Firstly, you need to
save your project because this is a
pretty heavy scene. No, see the leaf animation. It's playing laggy
because it's playing one frame per second at
a time, it's very low. Here go to this playback and enable the frame
dropping option here. Okay. Now good is first
frame and I'm going to use a single camera animation and very smooth
camera animation. I don't need you can see the complex camera
animation this time. God is camera and
where the camera, let me choose This
is the camera. Now, this time, here you go to this object and you will get the animation here the
shortcut is K and I. But if you are using
blender burgeon, the scenting wage
different that time. So you need to
press I each time. It will insert the keyframe in let me it will
insert the keyframe in the location rotation in
scale if you will press I. I want to start the
camera animation from here. From here, here you can see. Just press the camera and select the camera and I'm in the
very beginning means of my beginning 99 frame and press I here in the CD view If
you press I in the uh, timeline, then it will show you all channels, select
all channels. Now go to this last
frame because I'm going to do the very basic
animation of the camera. If you want to learn
the complex animation three D Nim and
character animation, then you can join my another course because I have created so many courses on the
animation side as well. Now, this time, I'm
in the last here. This time, I simply
this is the YX. I will enable the move
tools to check the YXs. I'm going to simply
change the Okay. Something like this, press I and even you can rotate it in the Jadexs
little bit minus five. Presst to do it very smoothly. You can do it like this. I don't want to change
any settings more. Select the camera and
press I now go to this first frame and check here. The first frame means the
19th frame in my case. Now here you can see this is a camera and DT
will start moving. If I press this space
button in my keyboard, even you can press
this play animation. It's playing okay, but
here is the catch. I will start slowly and end fastly because we have
chosen the Bzia curve. This time going to select
all of these keyframes. This is the key frames. Right click, even
you can press and you will get the interpolation mode and choose the linear. This is the settings.
You can select both of these press T and you will get this linear option.
That's perfect. My frame, camera animation is simple edge that.
That's perfect. How this time in the next video, we will do compositing. I'll meet in the next video, next video is also important.
20. Water Animation: So now in this video,
we are going to add animation to the water
because this water is very, very still like this boat and this stone and
this mountain, and only the tree is animating and it's falling its leaves. So it's looking very unnatural. So this time, I'm going to
add animation to this water. So select the water, okay, that I have already selected.
This is the water plane. And this time we
can give animation. It's not so much difficult, but I'm going to give the
animation using the materials. So here, this is the timeline, so I'm going to create
a new horizontal split, but this time, I'm going to first change it to the Sadaror. Just expand it. Now
this is the shader or. Now it has the
material of water. Now this time, again, here, go to this line and right click and this is the
horizontal split, just split it and this time, change it to the timeline because I'm going
to add animation. So it's important
to now this time, go to the very beginning
and in my case, beginning is 90 frames and
it's 377 frame with the last. I'm in the beginning, now, just move it
downward, expand it. Now this is our scene. Now, if you want
to give animation, so this is the waviness. I'm in the 90th frame
here, you can see, let here is the 19th
frame is 90 frame, current frame is 90. Here's the wanes, right click and you will get
insert key frame, the sot cut I often. Even you can do
something like this. Or your mouse here
and just press I. It will add you can
see the key frame to it so that it
changes its color here, let me go to the timeline here. Now go to this last frame, and this time, I'm going to
change it to the 0.4 or five. 0.4 and again, press I or even right click
to insert a keyframe. I'm showing you
how can you change the materials with
the animation value. Now let me play it firstly. It will not show you the thing live because the PC is not
able to handle my project. Now we have animated
the waviness. Now this time going
to animate the skill. So go to this again, 90 frame or V winging
in your case. And this time scale each one, so right click and insert
keyframe and go to the last, this is the 377 and
make it 1.2 is enough. 20%. And again, add a keyframe. Don't forget to add key frames. Now both are overlapping. So here you will get the
option to expand it. Now this one. Even you
can expand this one, this is the cedar node. This is the waviness
and this is the scale. Expand this and you will get the key frames.
Now let me check. Firstly, it's animating or not. We need to see whether
it's animating or not. Otherwise, you need
to do it manually. I think it's animating. Yes,
it's animating this time. Yes. What will we do? We need to first change
to select all of this, right click, or even preset
into place and and linear. Now, I will just move in the same speed.
Here you can see. This time it's perfect. Now this time I'm
going to change the settings of these leaves because the leaves are
falling very unnatural. So select the leaves here
where the tree here the tree. So the leaves falling
very, very unnatural. So I'm going to firstly check. So go to this modifier panel and I'm going to
decree the density. Even you can degree the
density of the leaves. So here go and you will
get the wind speed. So wind speed is
0.4 0.5 is perfect, and density should
be one is good. Now distance distance
is good and spread when three or four is good because you need to firstly
explore these things, then you will understand
why I'm changing this one because I have
already rendered this scene, and I thought that I need to update this one because it's
not looking perfect here. So now let me go and play
it from the very beginning and let me firstly check
whether it's perfect or not. So I think now it's good. Okay. Now, I'm going
to save it now it. Okay. That's perfect. So everything is
now perfect now. Now I'll meet in the next video.
21. Compositing in Blender: So in this video, I'm going to do the
compositing after compositing our scene will be
looking something like this, something like this. We did the camera animation, and for the compositing unit to render a single
frame at least, go to the surrender and
render a single image. Firstly, go to surrender
and go to this view render and if it is looking
something like this means it is sewing image. I'm going to render this image. I'm going to
composite this image. If it is looking
something like this, then you don't need
to render because we have already rendered it
in the previous videos, I think, so you don't
need to render. But if it here, render, if it is not looking like this, then you need to go to
surrender and render an image. After rendering a single frame, it is very important. You need to render a
single frame at least. Then you need to go
to this compositing and here we will use use nodes. Enable these use nodes.
Here is the use nodes. Enable this one and it's
sewing this image and go to this node node view
and just press. Even you can press and
now here you can see it's showing me this
image in your case, it's sewing the
previous image render, it's showing you this image, then you need to first change the slot and again close it. Then it will simply
show you this image. If it is not showing this image, simply press this button. Render active scenes. You can press this button here, then it will simply
render an image for you. Now this time we will
add some nodes here and trust me, it's very easy. Press G to move it here. If you are using older
version of blender, then it will show you these
two nodes, these two nodes. Simply press P A and
search here viewer node, and place it here and connect this wire
with the viewer node. Simply, it will show
you this image. Now this time, I'm going to add a SPA search and search
for the DNH firstly. So it will simply denoise it. D here, you don't
need to do anything. Even you can press M
to see the effect. M means muting.
Now this time the most important is glare Search
CiptA and search glare, it's very important glare simply filter and glare and
enable this one. After I place this one, it will change everything. It's looking great. But this time I'm not
going to use this streak. I'm going to use
this bloom option. Now this time, the
strength is pretty high. A little bit reduce the
strength and even highlight, you can decrease the highlight, 0.5, and even you can increase
through smooth and clamp, you can even increase or
decrease the clamp value. I'm going to make it point I think 0.5 is
perfect this time, or even 0.4 is perfect. So this is the settings, even you can use
the high settings, you will get the ultra
high realistic image. Here, this is not
affecting too much. Now another node A
and got is color, and we will use the color correction adjust and you need to
color correction. This is the color correction. I'm going to use it now
this time go to master, even you can increase
the saturation value, 0.1 0.1 is perfect
this time here. Yes. Even you can increase or decrease the
contrast value and gamma, so many things, but this
time, I'm not going to change anything because I want
to make it very simple. Now press Cipte and this
time go to this color again, adjust and we will use a
color balance this time. This is the last one, use the color balance and we will change the
gamma settings only. Here's the gamma settings, let this gain even you
can change the colors, increase the saturation
value a little bit. Now here, you can
choose any settings. Even you can make it
green, make it this one. Even you can change the
whole theme of this image. This time, I'm going to use. It's depend on you. Let me
reduce the saturation value. I think you should
invest some time here because you are learning
so many things at a time. I taught so many
things in the course, so you need to invest some time. I think the gain is not perfect. I'm going to change the hue value. This
is the bluish tone. So this is the lost
low little bit. Now, I'm going to increase
the exposure value. I think we should add
another last node. This is the color
basic and you will get the exposure you can get the
brightness and contrast. So I'm going to use
the color correction we have already the
color correction. I'm going to use the exposure
value. Let me place it. Exposure should be 0.1. Yes, 0.1 is perfect or
even you can use the 0.2. Now, that's perfect.
I have used the nodes and see how it's connected is connected
to image to image, image to image, image to image, and here image to image
and image to image. You need to connect all
of these in the sequence, and I already told you it
works from the left to right. It first send data to it, then it data to it, then it will send data
to it and make sure that this is connected to
the compositor as well. So when you will render,
you will get this image. Select all of this, don't
select this first and last one, select this one, this four and press to see the effect
after compositing. It is looking something like
this after compositing. It's crazy. Even
you can increase the saturation value 1.12. Now, that's perfect. Now, I'm going to again layout mode and don't forget
to save your project, my friend because it's very heavy and we are at
the last n this time, it's the reference image and
this time I'm going to use, let me open the here, I'm going to open the
image editor again. This is the image editor, and this time, I'm going
to use the render. Search render result. If you're using the older
version of blender, then you can use
the render image. I think this is not
the composite one. Let me check the render
and view render. And with the rendered
image, render and render, it's not sewing here
because we have opened it, change it to the TD view
port and render and view render that's on the image. Okay. When you will render
it at the highest quality, it will give you this
effect. This one. I think it's before
the compositing. After compositing,
this render result will be changed perfectly. That's perfect. Limit in the next video so that
in the next video, I'll show you the
render setting.
22. Final Render of the Scene: So now this is the
final video where we will learn final
rendering techniques. So here you need to go to the surrender properties and I'm using the cycle engine for
the photo realistic output. This is the GPU
compute and here, this viewport is not matter. The max sample is I'm
going to use 258-25-8256. And the noise Tisold if
you're using a high spec SPC, then you don't need to care
about this noi threshold. But if your PC is not
very much passed, then you can increase at 0.1. But don't encourage it too much. Otherwise it will
give you bad image. Here the 0.01 is
good for my case. This time every
setting is perfect and here you will get the
light path here this time, we have used the fog, so I'm going to increase it to by ten, so it will give you
the effect of it. The transmission glossy
means the reflexion, so I'm going to use
the ten and ten. It will increase
the render timing, but it will give you
the best output. This time, everything
is perfect, I think. Now this time, go to this
film, expand this compositor, use GPU and use telling 1024 and this time escalator
and you can use this one. But even you can use
this persistent data, but we have animated the camera, so it will increase
the render time, so I'm not going
to use this one. Now, here the color management, I have used the film and
medium high contrast. Let me on check my image, save the project and go
to this final render. If you want to see the
compositing as well, so go to here and choose the
compositor to camera here. I will show you the
image after compositing. Now even you can increase
the exposure or everything. I'm going to increase
0.1 0.21 it's very high. 0.1 is perfect for this time. Now here this time, I'm going to decrease
the gamma by 0.95. Okay. That's perfect. Exposure means it will
simply brighten your scene and gamma you can simply
consider as a contrast value. I think this is the rendered
output and it's good. You can change the gain to change the color and I have given the
lowish color to it. Now this time change to the solid mode and
we are ready to go. Now here you need to go to
the output properties and this time a start frame and the frame is perfect
24 frame per second. If you want a four k image, just in case this
percentage by 200%, it will give you
the four k image, but it will take a double time
to render 100% is perfect. Now here output folder. I'm going to choose a
folder to give my output. This is the previous
project that I have worked in the
character animation. I'm going to choose a folder,
so I have choose a folder. So here are the lots
of method to rendered. Most primers are good method
is PNG format or EXR format. But this time, you can
use the PNG format. But you think why don't you use the FFM PG video
directly video format because it's approx 200
or something frame. Blender maybe crash at
100 frame or 150 frame, then you will lost
or your renders. But if you will render
in the PNG sequence, all the PNG formats, something like this,
let me show you. If you render something like
this in the PNG formats, then if blender crashes
at the 54 frame, then you can again start
renting from the 55th frame. This is the plus points. I'm going to render
it in the PNG. And everything is perfect. You don't need to overwrite
it. That's perfect. Now, simply go to surrender, firstly save your project,
and I can make a copy of it. Okay. Again, go to surrender and this time choose render animation. But before that, you can render a single image to check it, then press this surrender
animation and it will start animation in my
case from the 90th frame because starting frame
is 19 and it will render until it will
reach to the 377 frames. I'm going to render
it so Almi to after entering and in
the next final video, we will make a movie clip using the PNG sequence.
Almi to after
 My 3D Class, 3D Artist & Blender Instructor