Transcripts
1. What is this class about?: What's up? My name is Fred and I have been posting their the artisan Lisa Graham for the last three years. Under in this year's I invented many cool techniques, medical ideas. I gained followers and, you know, many things have changed. I changed turns off styles, but there has been one thing that hasn't changed. Hands axis, angelic artworks. No matter how many of them I would post, they would always get great engagement. People would always love them on. They would always just feel so beautiful. And that's why today, in this class, I want to teach you how to create angelic artworks. We'll go in depth, learn all the ideas and the Higgs behind these artworks so can create the hollow effect. I can make it shine. How can it glitters to the skin to the background? How you can use Kummerow future to give you image some magical colors and even how Todd clothes for your party? Oh, wait, that's not That's not all rosy. Gonna learn how to give you a stunning picture that will make it look like it was painted on so much more. I mean, it just simply stolen, just gonna turns from the way you look at things there. So stunning was that said I really hope you're going to enjoy this class is going to be really useful for you, my dear friends. What are you waiting for? Just good. Click next and jump into the first. Listen, So you guys. Bye bye.
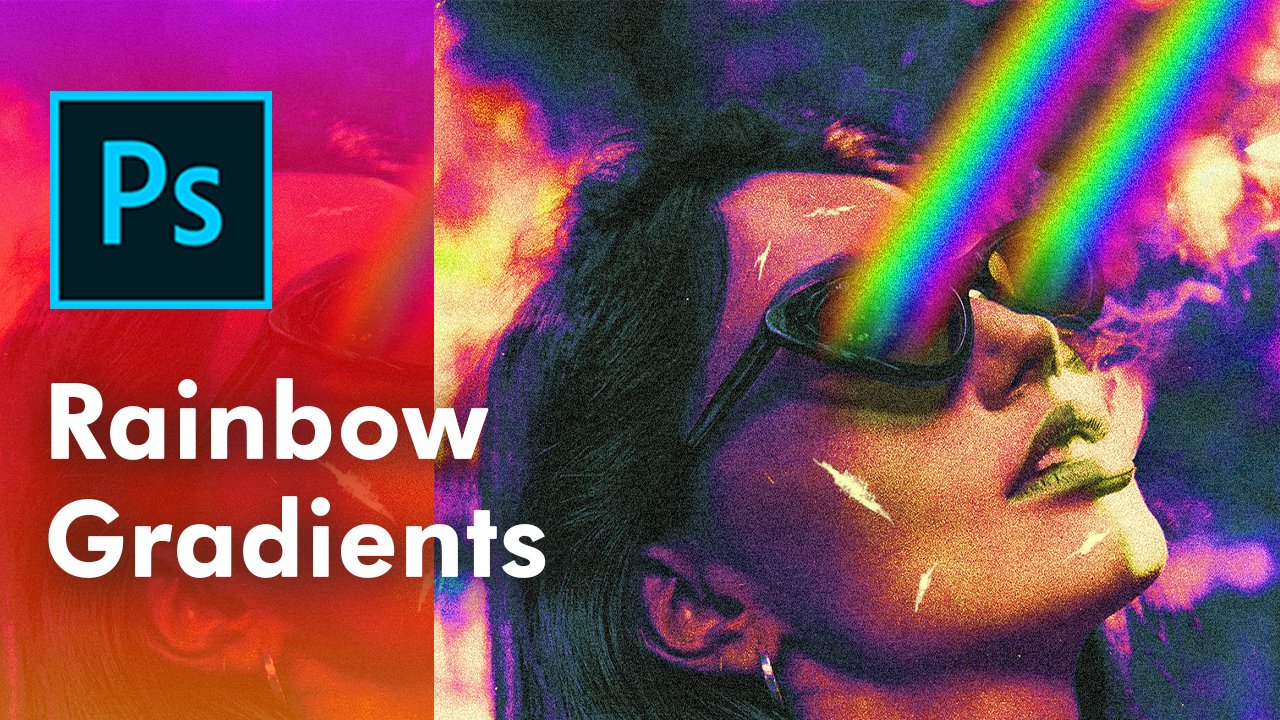
2. Editing The Colors and Halo: What's up, guys? And welcome to the first lesson. Hello, my dear friends and France eaters. I know this what doesn't exist, but who cares? Right, So our first lesson is going to be about this. Hello? How to create it? Best practices off, creating it on many as a detail. So here is the image that you're going to use on before we start. Make sure you don't know all the images that we will need for this class. In general, you can find the files in the resources area or in a lesson called class materials. I mean, depending on where you are watching this, the first let's go to force a politically create you. Okay, Andi, I will go with with 1000. Make sure you have a pixel selected that were important. Height run to 50. Never explained why these parameters on results in 300 color murder GB So this is the usual parameters that I use Whenever I create a network for Instagram, for example, as you can see, which 1000 height 1 50 is like 4 to 5, basically on its it helps you to create a portrait image on Instagram that takes the biggest portion of the screen, which means that it catches lots of attention. So I just created, Create Now under. Let's not start by importing this image home. Okay, so I'm just gonna make this bigger us to make sure we don't have any empty space on their down. So we have enough place for the hollow. Let's click OK now. I also wanted to leave. His background lurked over, Is there It's always so useless, but we hope, actually, Goto. Hello, what I would like to do. I would like to aided the colors off this image. For example, you see his colors. They look recognize. It's pinky greenish. It looks kind of magical. Andi, I want to show you how you can do that. Two. If you don't want to watch this, just keep few minutes ahead. So let's go to filter. Let's go to camera. Raw filter. This is the future that usually used, not usually always used to edit the cars of May image, and I don't remember exactly colors that I close there, but we'll just experiment now and see which colors works better home. Usually you can adults with Violet as you can see total exulted magical. You can decrease the contrast. Just make sure that you can't get the colors better. You see more colors can increase some shadows and black sander also at some, behaves on vibrant sounds Go to hs adjustment. This is where we're headed, every color one by one on Let's go to Hugh. So, for example, the average here we can make our colors go orange or we can make them go, Pinkie. As you can see now, the faces are already with Pinky the same ghost or injures whom you see. We can control them like that, that simple. And let's see what we do here. Not you can just go on just, you know, move to the left and right and see which one you like the most. Yes, Alexis, let's see. Okay, I also just want adult with explosive. Just makes out with brighter and this is good. So now I think this is fine. Legis click. Ok, this already looks pretty magical. Bomb to Kabul. That's that. So now let's zoom in on Dino to create the halal. We will go here, click right button and chose ellipse toe. Ok. This a rector shape. Just click on it. So if you have never used vectors before, if you have never created shapes before for the shop, this can build with complicated for you. So if you have any problems, just keep watching this. So just rewatched is basically again and you will understand better. Every time you watch the video, you will understand better. So before we actually start drawing anything, let's go here to feel and struck. You know, you want to make sure we don't have any fuel color. So if I just click here on here, as you can see, I have the 1st 1 which just tells me no collateral. And if I just click on it, boom, no calorie. See, then there. 2nd 1 which is just normal colors, is one color. Then we have radiance when you choose, like few, however, two or three colors and then we have patterns where we can actually dispatching. But I just want no coal, no feel color toe. Why example, if you look at this ellipse so visited, it doesn't have any colors inside. It only has colors on the border just right on the border. That simple now Let's go to stroke. This is a call or the border that I was refering to. Let's click on the circuit. Let's make sure we have here. Bite color selected came on De. So this tin picture is going to be the sickness of power. Ellipse before that Mexicans is this. Hello is pretty sick. Sometimes I also do ours that a little bit sinner like this Spanish cancer. This is sin on, for example. But this one is sick, so it'll depends on the harmonium. Do you have to your borders, but we can change It later spoke. So just go here before you start drawing. Make sure you have here Mueller selected. OK, very important on now. For example, before you start during, make sure to have a look at this. Hello? How it was thrown. So okay. Now, for example, we would start drawing. I can just click on dry like that on DBU. Whenever you created Victor object, This property panel opens up automatically. Okay, let's say you don't have it just in case for the shop goes crazy. Andi, make sure you go to window on. Select your property spaniel. As you can see, it's checked that Miss Abbott here. And then, for example, if I goto layers, if I select the Ellipse and I go to property panel, I will say the same thing. The water we have here Yeah, basically, we have the same things that we So here it's exactly the same thing you just located in different places. I know it made its its a little bit confusing, but trust on for them. But we can change the parameters from here or from here. Doesn't matter. Let's go just to the properties on De. So I want to change this. So this time, pixels. As you can see, this is pretty soon. I want to make this ultimate seeker. If I just make it 20 pixels. Click, Enter, boom. As against you. Not much sicker. Maybe. Just maybe, this is too much. I'm not sure, but we can't let the with 18. Okay, this should be fine. Now let's go again. Two layers Now, for example, let's say that you did that on now. You want to change its shape. You think that it's belong on? I don't. You want to make it more compact not to change the shape. Can just go to edit, make sure you have selected the Aleph. Still, you go take it. And then here you can just free transform path when you choose is as you can see. Now we get this transform options on. I can just click and drag to make it smaller, Bigger on So and also one notice if you're using older versions off for a shop, Okay, Whenever you make this bigger, smaller you probably know that you to hold shift in order to make sure that it goes small, bigger, smaller, proportionally. But for new versus a photo shop actually, you don't need told Chief by newer versions. I mean, 2020 I maybe 1 2019 I don't really remember exactly. But you can just try toe under, for example now for if I because I'm using the latest version when I make is this bigger or smaller? I don't need told, Chief. Actually, if you if I want toe, distort it. So I need to hold shift. For example, toe, make this, as you can see, go to make the which bigger hunger to make it smaller. Okay, so just try this shift and result ship. See how it works for you depending on your field trip version. Okay, so this is fine. Um, this looks good. I just want to make it with smaller like that. John does. This should be good. Let's let's make those with higher. Let's click, OK? No, not what went to do before we actually continue doing anything to this. Let's go here. Regret button on the empty space somewhere here. Not on the text, Not here, but on the empty space. Click here and choose Convert to Smart because right now this is so if I just don't if I don't do it right now So you see this is akin. It means that this is a director object what we want. We want it to be a smart object. Onda, let's click right button here and choose Convert to smart off. Why did I do that? Because when we have smart off, we can actually do changes to his object on the quality will still be good. More or less good on all the nice things. That, for example, when after this helps elected If I go to filter now, I can use all of these different cool filters and I can't play them through my life. If I have just director object and I cannot apply, this filters to my lair. Okay on this were important because we need sounds. It's pill time, so let's not go to blue on. Also go to filter the blur and let's go to go symbol. This helps us to make our layers with blurry before sample. If I have here is rages, I can make it vigor as you can see. Boom! Not really, really blurry, but it's too much. We want to make dealt with smaller, mean, not layer. But the blue Let's go with two. He just needs to be really softball. Maybe tooism too much. Let's go with one. Maybe 1.5. OK, there should be fun. Let's kick. Okay, now, if it was a mean, we will see that it's out with worry, and that's good. So now Oh, fruitful. That's this artwork. We see that it's going. How do we do that? Not to do that? I just go again here on the empty space, someone's aware click right button and choose blending off. Yet we just have different lifestyles that I will do for a bowler. As you can see, we have a stroke in the shadow. 13 color will it and blah, blah blah. But it's OK if you don't know them. OK, because for this lesson, we only one of them on this is outer globe. So if I just click here, as you can see it now, it's also automatically selected on bones are to glow, so most likely going to see hear different things. Different effect because you haven't come figure to your art. Gloria. How do come figure? First of all, make sure you have your preview opened. Clicked. I mean, because went off. You don't any effects. That's why. Make sure it's quick. Go to blending more mature. It's normal for past amount. 100% noise. Zero. Let's go to color. Let's make it just wife right because it just corpses color code for five on Just spaces aren't going to be like take okay on. Obviously, that is already getting glowy aan de. So let's continue. Let's make technique softer. Spread onside around this. So what's pregnant? Size does A basically controls this drink off the glows off the glow and how big it's going to be exemplify makes spread bigger. As you can see, it's too strong and it's not soft enough. And if I make size, you guys, you can see it's glowing really, really a lot part. It doesn't look good, right? We wanted to be able to with less like that. Let's click. OK, so now I can just couples are the parameters from me on. If it looks finally, just click. OK, now if I just zoom out, it already looks good. So now what you can do. Here's for example. Let's say you don't like your glow. Let's say it's too So what you can do, you can first will try to change the go see in blue, so you know to change it, have to click twice on it. So, yeah, I go to girls and blockages click Boom, boom! Double as you can see it happen now you can, for example, turn it off to start going through it without go simple. Andres Garcia. As you can see, these are the ghost in blue. I feel like it's toe Egypt. It's not soft enough, but that's why I feel like he's got employees butter. You can try to increase the radios. I see. I think that is too much. You can make it one. Try to see which one looks actually better or two. OK, actually, like one. But again can be your personal. Maybe 1.5. Yeah, this guy can be a personal taste. So let's go like OK, so now we can, of course, leaves a hollow legs act. But if you look at my original artwork, what I did there is actually put it behind the head. How did I do that? So for that you can just use must on there for the movie FDR lips. And if I just click here to create a mask Boom. As you can see now we have a mask on before we continue. Make sure you know how mask works mixture Water's mass before you go into okay, because mask is the most important thing in partnership. If you don't know how mask works, then doesn't make even in your sense for you to go and watch any other tutorials. Learn how mask works and only then go and do other stuff. Please, it is very important. So now let's go to brush pickle bottom. Choose Barstow. Make sure you have here black elected the first color musket black or past 200. 400. This is normal. That's also make sure you have here hardness not zero, but around 80% now, using black color on the mask, so make sure you have not seen it. But the much selected we can go on start deleting some parts of the jalape. If I just throw here with black color on the mask, as you can see, we see here black colors. And now the hollow is fading away. And I just make make sure it looks like it's going from behind her head just like that boom and not behind your head. Wow. Now let's continue what else we can do here. So for that, we look here, you see that this part is able to be bright on This part is darker, and we can actually do this manually before example, because we have here Hello. We can make it look like this part of the head is brighter to make it look more realistic. Because if you have, sir, if you have only had some glowing thing, obviously your head needs to be brighter, right? So for that, what I want to do is let's go first. Well, to say, Let's not click here and choose brightness. Contrast. Very important. And let's increase brightens a bit like that. So this is fine. It's not. Go to let's make sure your brightness layers located above the image on bolos. Alice. Okay, and now again, we're going to use a mask in order to make sure he sees the brightness on their own. The top off. So right now, as you can see, we see it everywhere. But that's the first thing there's been to invert this mask. Basically, as you can see, this is what that I will see it everywhere. I want to make it black. So basically, if I inverted, it's going to be black on. We're not going to see the brightness anywhere at all. Let me check if I'm actually recording. Thanks. Gotta have because it happened to me. It has happened to me a few times that I started doing zealous in, and then I realized, Oh, I'm not recording on, and I'm just like, yeah, it's painful. So nothing. You have this much selected here. Let's go to properties and yes, you can see this is a prop this awesome on we can click Invert, boom! And as you can see, we don't see the brothers anymore If you go to the slur as against Damascus black And that means we don't see the brightness anywhere. What we can do now again, it's like they're a brush toe. We make sure we have bite color here selected, so just make sure your first colors white under goto hardness make it zero Now, for example, if I drove with white color, I'm actually going toe Really well, the brightness effect before them Before I start let me make my birth small It's too big if I start drinking As you can see, we start seeing the brightness effect where we drop This is so Oh, Cem Wow! A knife fight turns it opened on boom Bright on If you want to make the brightness even stronger you can just double click on this sun shine boom, boom And I can make the brightest stronger But no, it's too much, bro. Let's go back yet. It's too much good. This looks good already. So I will stop here in the next lesson, I will show you how to make the dry ice basically white ice that are really, really shiny. It's gonna be awesome. And then after that lesson, we're gonna do some other cool techniques about you guys in the next list. Wow.
3. Adding Glow to the Eyes: What's up, guys? Friends here. So doing Coalesce. Listen, because this how on awesome added some brightness to the head on today, actually going toe make the ice shine bright like a diamond. So, first of all, what we do is we want to create any empty words. So if I just go here, click from this pattern bomb that's against a nice near to learn. And by the way, no diversions. A photo show was a button off for new empty layer. Looks different in your version is just like a plus, so just make sure you don't get confused. And now it's against. If you have years to learn, make sure it's on the top on. Let's not go to our brush toe, OK, Make sure you have white collar selected enough, for example, were coming to the first. We're going to start drawing inside I with white color, so I'm just gonna make my brush smaller a bit. You can just click right button on your mouse toe. I can't open the brush size hardness options and make them smaller began soon. I mean there many different ways to control your brush, size and hardness, so you can just google them if you want to see all of the methods. Okay, Make sure passes 104 100. And if I just zoom in here also make sure your hardness is zero. OK, again I want to make my gosh even smaller and you can just not start drawing inside the I like that on when you go to places that are small Just make sure just make your birth smaller and throws her a swell wow on roasting to draw the ultimate here Because we see that obviously some part of the answer So it doesn't perfect And I know this looks weird but trust me, it's good enough. Let's do the same to the other I So just drawing, drawing, drawing, drawing drawing the red road Dro dro dro Okay, this is good off. That's not click right button here and just comfort. So again, not on the image, not on the take but here somewhere empty place triggering about discomfort too Smart object very and very important. Ok on now let's go to filter Let's go toe poor and let's go to go to implore again So basically, if you remember how we did this how the technique is the same. First we had some go see in blue, and I would like to go with two here, probably on the Let's keep. Okay, now we toe out to go. So we regret button here and chose blending options on Make sure you selected out of Globe . As you can see, it's already glowing. So if you want to make this out with softer, you can just use the past to make its like less strong elder weekend because I feel like this is too much. So this is good? I think so. If you just turn off preview on turn tone as you can see the ISA really, really shiny, I think it looks nice. The interior could also make the ice as a color, for example, F. Seattle's where made the ice black power instead of part. But then you also need to make sure that glowing is also black color because you don't want to make black ice with white clothes on the border. It doesn't look good. So now let's say you want to change the colors. Do you just want the experiment right? So 14 to the first of all is a you need to go to this Where? So the ice on the persons that came two days you to double click on that transits Let because it is a smart object. That means that for example, if I double click on it, I will see the Eisler opened in a separate file. If you have never dances, just follow my instructions. Go here Double click boom, boom as against. And now I have here a new project automatically open. And if I zoom in, I will see my eyes basically the brushes and drove with white color on First of all, I want to change the color of this size. How do I do that again? Click right button here. Go to blending options and now use color overlay. So if I just adjust your color overlay from as you can see now they're green. I mean, I don't think green is a good choice. Maybe let's make them like Violet a bit pinky like that not to stroke like that. So again, you can just copy my color court in order to have the same colors. So just click. OK, Now, make sure you're blending Mourners normal prices 100%. Let's click. OK, that's against allows the ice are pinky. But if I go to marginal project, I will say that I still lives and white here white Because if I go here, I see this star I can hear. This means that I haven't take this project. I need to save this on on these in my original project will be updated. So if I go now to file and click safe from we're waiting. We're waiting. Employing Mexicans. We don't see any stars here anymore. That means up. This is the last version of the product and we saved. We cannot close this on Douala Think ice tonight against it Looks weird because we have think eyes and white close That mean? That means we'll seem to change the globe for that. Just go to this layer off the ice Goto Afterglow double click on it! Boom, boom! Open it! And now I can click here under the coach and I can just change it. I can make it black Zach. Violet thinking on Boom! It looks nice. Sleep okay? Yeah. I don't think it looks and you can't play it with his strength and so Okay, let's go. Okay. Now is one option. You can also do the same to the hell as well. How do you do that with the hello again? Choose your helo. Okay. On again. This also smart object. So you can just double click on it. Boom, boom. Double click on the image Naevia fear and your product opened. And we seek a nine hour to change the color off the olives. What is actually the best thing to do is use legs, airlifts. Alexei lips. Okay, you go to properties and you will see here the white cars that we chose. Let's say just in case you have done something wrong and you don't see here the properties there is also a second wait to see the color of two straight to see and change the color of your lips. How again? Make sure it's like that. Let's go here. So, like celeb still a nastiness. You have selected it. You will see here this stroke enough. For example, if I just click on it, I can just change the color and boom. So now what I want to do. So let's make it black. Yeah, let's make it black white. Or let's say it's a bad Angela. I don't know. So, um, nothing. The average black we can just go to file on Click Save again to make sure it's safe on. Let's just close this. I never seem to make sure it's going with Blackheart. Wow. So now let's go to a lips toe. Let's go Talk to lodge is double click on it. It's got article and make sure it's black. Click here on the Make It Black. What's clip? OK, so again you can play with up. I see. See if you want to make this stronger, softer, maybe like Okay, let's click. OK, for now, but I want to do here. Maybe I would like to add a little bit more Gaussian blur, for if it just double click here. But maybe a little bit of Margolis and Bloom would actually make it better. It's fine. That's good. Okay, Why? Wow. So again, that's it for this lesson. Guys, I hope you learned a lot in the next lesson. What I want to do is, first of all, I will probably revert back Sisto original settings, which means, like here, white eyes by Hello. So regarding this effect here, as you can see, the rainbow effect on blah, blah, blah This actually not connected to this cause I have a separate class, bratty child to create this rember fake. Why they have a separate class. What is Because it takes some time. So I don't want to mix two different classes on you can. Just if you could. If you just go to see, as on my classes, you will find this class as well what I want to do here. It's I want to add some basically shining effect in the next lesson. Let me show you what I mean. Something like that. But not on the face, but actually around her. So it's like, just starts around her basically something. Oh, let me just show you an example. Boom. Bright stuff like that doesn't look awesome. Of course it does. So you guys is the next lesson. Bye bye.
4. Glitters all Over: What's up, guys? So bring all us two lessons. We created the hello and also made the eyes trying bright, bright, bright During this lesson, we're going to create this amazing stars go getter. But you can call them how you want. Okay, Um so first of all for that, we actually need first of all, on an image off star sky. And let's see if I have I mean, you will find the images definitely in your life. When you don't look all the images you will find it started just as well. So I will. I will give it to you so you don't need to search for it before them. We have here. I have individual for cluster of stars, but just place it here. Let's rotate this on. I want to make this bigger expert here bigger here. Let's keep first will make sure to put it on the top. And now we need to change the blending. So if I go to normal, I can try changing the blending. Martin, see which one works better if you're lightens screen, color, touch on other stuff Mexicans is this basically starts here that you see there kind of too small. And that means that the Pentagon's image that they're using you want to get different effects. So, for example, it turns us off. Let's try something else. I wanna try this image. It's a little bit different, but I think it's gonna work well. So just give it a try on Let's place it here. Let's make it bigger. So is this this image Me to make sure that we see on this this star so nothing else like that. Okay, now, unless a gate tried to change the blending more to see if this one is actually gives better effect. So this actually looks pretty cool. Ready? I like the bramble. If I put lighten, I mean, it gives a pretty nice effect. I would say again, we have your stars. What? Again? I mean, they're too small. There's not trying that too, because whenever you create anything, I mean not not on the Angela. You always have to experiment with different images and then decide which one works best for you. So once I want that room that we work better, let just goto passport go to come, for example, and I will just type star here, a star said We have many beautiful images, for example, even image like that. It actually would work pretty well, I think because it also has colors, not on the stars. Okay, so I'm gonna experiment with stream. You just 1st 1 is this one. Next is this one else up And as I mean that table experiment. Okay, so first of all, let me just download this and again. I will provide all the images when you download the project files over the images will preserve. And let's try importing. Strive with this image. Change the blending moment. Wow, Look at that. So this lecture looks pretty nice the screen because it adds brightness to the ice and also at some really nice points. And I just feel like really also not stone itself. Let's look at the other one that we don't let's see which one is better again. Rotates is make this bigger speak. Okay. A noggin lists tried blending this. Let's see which one extra work they usually like in the screen works pretty good. You could also go with overlay, but this one is also nice here not only the stars, but also some other stuff like spaces. Stuff I would call them, though it now it's up to the last one that I would like to try is one of my favorite fixtures, actually, but its eyes is this one or this. I will go with this one. That's again, importance and places here. Let's click. OK, let's change the blending more. Okay, I think this car at works best. As you can see, we also have years is really bright spots. So now let's say you have this and let's say you don't want toe show the stars over with the face. You can actually make sure that their phone, let's say only on the background, for example, How do you do that? First of all, you have to create a mask. When you have a mask, your you just go here to his brush toe. Make sure you have black color selector. Make your brush bigger hardness zero, I would say even bigger enough, for example, with black over selected here, and when you're drawing on the mask, you can actually just go here, start drawing as you guess I can remove the starts from the face basically or from anywhere . Other places that you don't want them to be unlike that we can make sure they only appear on specific places on it. Looks really, really, really not. Isn't this magical? Okay, so what? We're going to the next lesson is actually put me show it to you but at the same issue sees a skies here. I will show you how it can actually add skies into your image. Not skies, but clouds. Clouds. Sorry. And we will add clouds here on DSI How it looks. We want one cloud here and only here. And so do you guys. Bye bye.
5. Clouds on The Artwork: What's up, guys? How are you, my dear? And see does so But it'll just didn't go unless listens during this. Listen, we want to add some clouds to the on by Claude Time in so something like that, I can see the sea. We have some nice clouds on how we're gonna do that. First of what? We'd actually an image off a cloud. Onder. Let's see if I can find something and again I will provide all the images and the project files for you to download. So, for example, interior. We could have you something like that. But the problem with this is that it's going to be difficult to other isolate the cloud from the artwork because this is all, like one big cloud. Basically, what we need is actually going to have some small clouds. OK, finally, I found the images so we can use this one for this one on. Let's try with this month course. Well, let me just imported into Watership on. I want to put it somewhere so far, so I would actually make it a smaller Let's cook. Okay, Andi, I want to try with blending mode sports, see if it's actually going to work. Let's see, it doesn't work. So we obviously need to do it. The blue color from the image Probably don't that is, um well, of course, in many ways to do like to lead the background like put it best touted talents or plays on the fears in your version of for the trip, you can just trouble object selection tool. He talks it automatically select objects on the image on. In this case, it would actually work pretty good. But I would have seen that most of you have all the versions of water shop. And that's why I'm gonna show a different way to select travel that will just go to magic. Want toe this elapses to select objects by colors and not, for example, let me just actually turn off everything else. For now on now I want to click on the blue color from as against you. Now the blue collar is selected and before use this still make sure you have has this selected Make sure all of your parliament is exactly like my announced. So like those a bull colors a knife I create mass booms. Do not what we have here. We have everything except the come out What we need. We needed to be reversed. Win kept on these oclock That's what we're gonna do it. We will select the mask. We will go to proper this panel and we will click in work on boom Shaka laka Boom have you feeling is oclock Let's go to the layer styles on again Let's just zoom in now And for example, I was women. I will again click on the blue color and not being able to blue color selected because they all seem to do it them from the just What I will do is make sure you have he has amassed selected make sure you have your black color selected. Okay, we're important now. For example, if I take my brush tool is black color and if I just start drawing, what was gonna happen is going to delete all the selected stuff because of you. When you have a selection, brush tool works only inside the selection and because we have selected here, only the blue colors is going to delete on Liza Blue Course because we're using brushed away with black color on the mask. Which means said, whenever we drove it till it starts off again. We just drove over here on its do. Its stuff does not go to select on this. This is already good, but we can go over and first again at Select Our Magic Quantrill on Let's Again just click on some blue color like that. Let's again. So I brush still on. Go on, try toe with all the stuff that we don't need. Let's go to select on this like that. It looks pretty fine, pretty fine. I don't think you can say that anyone. That's right. So now what's going to the? We need to make sure that the ages are a little bit soft. For that reason, let's like the mask. Let's go to properties. We can just use Fraser. It make it a little bit softer, so let's not go to learn panels again. As against in lobby. If he has this weird border on, make sure you have, such as the mask. So like the brushed off his black color and just religious borderlines. Now let's turn on everything else Now. I would have this guys, I can just put them here because to try Oh, are you some blending modes now as well? For example, lighten or screen. Now they're gonna look fine. I would like go was lighten. I can put it here, for example. Not resemble. We have one called here. We can create a copy of this, so just click right button choose duplicate Lor on Take. Okay, we have a copier. Now we can let's say put it here because I make this bigger. So if I go to edit free transform, I can just make my cloud bigger puts in here or here a swell, I mean, yeah, this is nice. So now we can also try to select as that cloth. So it's just important. Why do I do it? Because I want to make sure they have different shape off cloths, different shapes off clouds. Sorry. Okay, let's make the ultimate small. It's like, OK, first of all, it's again tried to use someone the most to see. Maybe it's going to make our job easier on. We don't actually need to do with the background. No, it doesn't. We will need to do the back. Sorry. So again, let's go to the Magic want roll on this one. Just make sure that you have sample wears, not selected like this. We don't actually need toe. Turn off all the background stuff. Just make sure this is not selected. That means that it will work not only with this image and not all those images. So not, for example, I can go here again. I can just click here on the blue color boom. It's elected. I create a mask. Oh, as you can see, didn't select the other part. So make sure you have kids is selected a knife. I click here again. How much you can see. It's like this as well. Not crazy Mass. Let's select the much go to practice and just click inward. Okay, not go to our lairs. Let's go to this little It's like they're a brush tool. And let's just start doing things all the stuff that we don't need here. So this weird edges we don't need them to now, first of all, let's go to this. Let's like this mask. Let's go to properties. Let's increase the president because go to layers. And now let's go to Lear's. And let's change the blending more see which one works better. Okay, I think I said this class. I'll be weird. This happens. You know, you experiment with different images, different clothes. Sometimes you have something that sometimes you don't get something nice. What to do in this case is, first of all, let's select the game brush. I want to make sure I could get rid of this just then. What I want to do is actually I want to add some off the clock. So let's go to screen. Make this normal on the measure. If you're white color selected on now, for example, if I just start clicking here to add some of the it just over the clock to make them look more or less normal just to convict him whom you can go through back here. I did too much, Probably on Duh. This looks good tonight. Again, we can just as against now, this cloud looks much better. Moralistic nugget. I can just try toe, you know, change the blend most to see if it works. Well, lighting is good. Let's put it here on day. I can just taking pre transformation Just rotate is a bit like that. So Let's go. Actually, to image adjustments on brightness. Contrast. Let's, um, brightens. Yeah, this works much better. Ah, good. Now I can just put it here. Can put another one here. Now you have Here is the clouds as well. Wow. Scorpius is closed here, and yet I corporate It's a quick way without actually duplicating. The letters are off course and many other hold kids that you can use in order to duplicate stuff. So if you don't know what he called his just click right button and just duplicate were like we did before under That's it for this artwork as well. Bunch Cuba. So let's see. How long is this? Okay. Pretty long. Um, so in the next lesson, guys will actually create. Where is it? Where is it? Where is it? Where is it? Where is it? Okay. This artwork here, guys. Thats a turkey. It's a pretty nice artwork, and I would actually like to show you houses was created step by step. What? The problem is that I cannot show this to you because I did this for my client. That means that I cannot share this image with you. But I showed you all the steps that you need in order to create this art. Turkey has a hollow the glitter part of the colors pinky, pinky colors. As you can see, one more stuff that I didn't show to you. How bad this nice texture and we will do that now. So you know, Todd's a nice texture. What you need to do. First of all and again Venus image that you will find in project file. So this is a texture. Let me just place it inside. I will make this bigger. Let's click OK, now let's go toe. When you have the texture, he'll go to blending modes on Let's just choose different blending more lightened color. George. Wow, this looks really nice. I like that. Let's see which one works better, so it's usually light and screen or overlay. I would say let's just over late because I think it just makes everything so much, but I don't know why what we can so that we can actually add more off glitters off. Let's turn this off. Let's go to split apart. Let's duplicate it, Onda. That would have wanted I want just to move the glitter Parts of it. So to do that, let me just try to see if it actually save. It's a good idea. OK, let's just leave it like that. Let's turn this own on. Boom, Shaka laka Boom! What we can do is we can make out with brighter, so it just legislatures at brightness contrast on like that. Decrease, contrast. Wow. Don't you freaking gloves is business is amazing, huh? Wow. Really nice. I didn't expect this to be so good as well. I mean, I wanted to have something that's but this is even better than I was expecting. So that's it with the starter guys, I really hope you enjoy this on C in the next costs, make sure to check my other classes. I did lots of cool stuff. I mean, at least I would love to think so. I love you guys. Bye. Bye. See you
 Photoshop Classes By Fred, I will help you get PRO at Photoshop