Transcripts
1. Intro: Hi, I'm Kimberly, and I'm very excited to bring
you this class. We're gonna create and use a greeting card template
using Procreate. I've created many
homemade greeting cards throughout the years since. I've absolutely loved Procreate. And I've been using Procreate for the
last couple of years. I wanted to incorporate procreate into my
homemade greeting cards. Although we'll be
using 8.5 by 11 inch, its form for our templates. I'll provide an A4 size form for those that want to work
along using a metric guide. This is for you if you love creating homemade
greeting cards, and if you're a last
minute kind of person, if you love to start selling digital or even physical
greeting cards. If you ever even thought
about selling a template for others to create their own greeting
cards and procreate. This is definitely for
you regarding to create our greeting card using
an 8.5 by 11 inch guide. Our Baikal design will create a 5.5 by 8.5 inch size card. I'll show you a
similar size by phone, with the end card being
sized at five by seven. Then we'll go another
step and create a quarter photo greeting card that will have a finished size, a foreigner quarter by
5.5. Once it's folded. Once we create our
greeting card templates, we'll work up some
greeting cards using pre-made designs
that I already had. This way you can see how to use the templates you just created. Then I'll show you how
to create a set of instructions that can be
used with your templates. Should you want to start
selling your template online. We'll also go over some
instructions that should go along with your digital
greeting card files. If you would like to start
selling those as well. We'll be using the iPad, the Procreate app,
and an Apple pencil. But you can use a
stylus or your finger. If you're ready.
Let's get started.
2. Class Project : For the class project,
I would love to see your bifolio template along with the finished card showcasing
your new template. I'll then show you
step-by-step instructions for your quarter folded
design template. This will be a great time to showcase a quarter folded card. I can't wait to see
what you come up with if you happen to
take the next step by posting your greeting
card digital files or your greeting card
template for sale online. I'd love to see
what you created. Make sure you post it in the project section of this class. The rest of us can check it out. Up next, we'll talk about free resources that are
supplied for this class.
3. Free Resources : In this lesson, we'll talk about the free resources I
created for this class. You'll find them on the Skillshare website under the projects and
resources section, rather than on the
Skillshare app. I supply you with an
8.5 by 11 inch guide to help get your bio fold and quarter folded card
template started. We'll be using an 8.5
by 11 inch document. I also supplied an A4 guide
for those who want to work along using a
metric template instead, I also included a checklist of things you should
include if you want to create your
very own template to sell online for
others to use, as well as a checklist if you want to take your
creations a step further by selling digital files of your created greeting
cards online. Up next, we'll talk
about considering the envelope before we start creating and using our
greeting card template.
4. Consider the Envelope : In this lesson, we'll
talk about considering the envelope before we start creating the greeting
card template. I wanted to bring
this up because I wanted to let you
know some greeting card envelopes sizes for you to consider when creating
your greeting cards and your greeting card template. I'm based in the US, so everything is gonna
be based on inches. If you are in a metric country, you might have to do a
little research and finding what are common envelope
sizes in your country. Here are some common
us envelope sizes. An a2 will use this envelope for four and a quarter
by 5.5 inch card. This will be our quarter
folded greeting card, an A7. This is used for
a finished card, a five by seven A9. This is perfect for our
5.5 by 8.5 inch card. Being aware of some
common envelope sizes, it's beneficial for yourself
as well as an end-user, one creating a template
and a greeting card size, you want to make sure
that you yourself can find an envelope as
well as an end-user. Up next, we'll start creating our bifocal
design template.
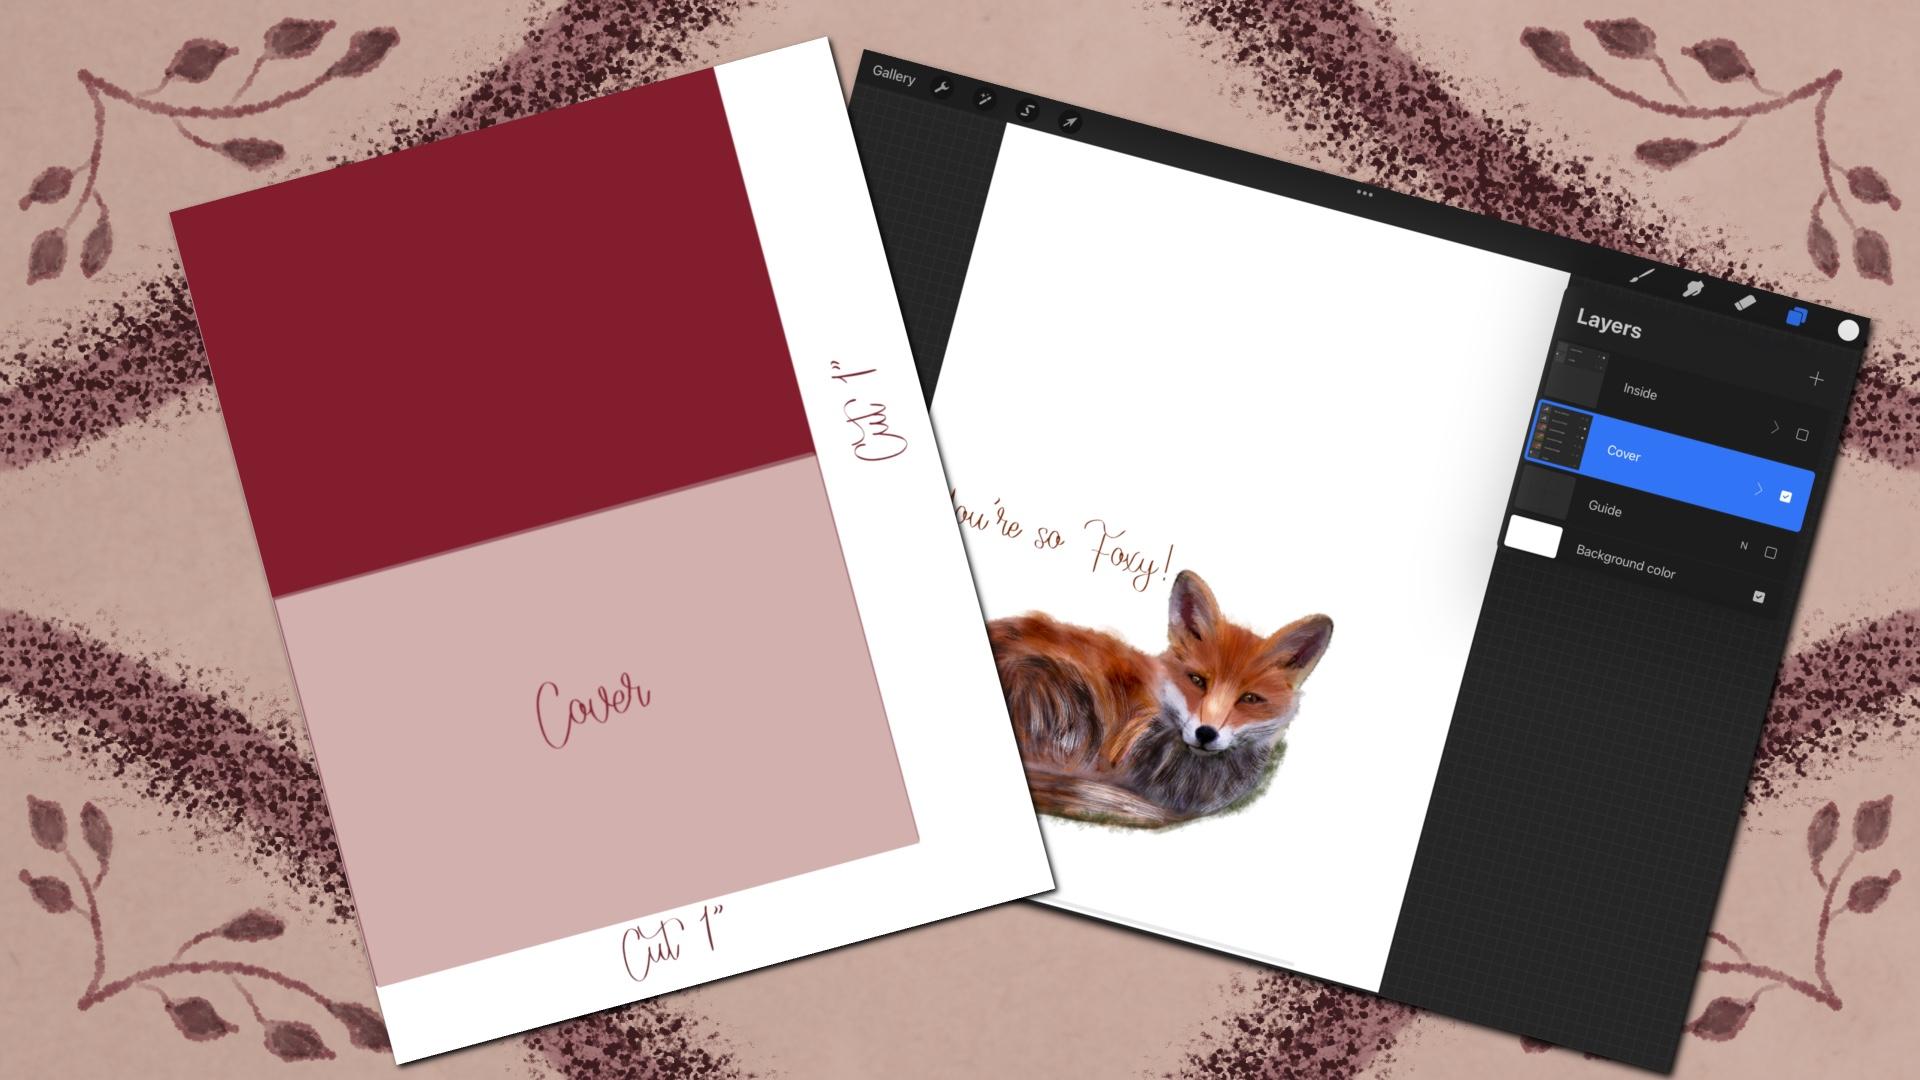
5. Bifold Design Template: In this lesson, we'll create our Biodesign greeting
card template, which will be used to create a 5.5 by 8.5 in size
greeting card. Tap Import, import,
the 8.5 by 11 inch guide into
Procreate relabel. Make sure you label as you go. This makes the file
more organized and easy to find which layer
you need to be on. Pick a color. Make sure you use
a monoline brush. Add a layer above the guide. We're starting at the 5.5, drawing across and filling. Add another layer. You
can hand-write or you can use text to label this as cover. I'm just repositioning
in the center. Now we're going to
group these two layers together and rename. We're going to
label it as cover. Add a layer above
the Cover Group. Label it, insert here. Now let's group these
and rename them cover. We're going to
duplicate this group. Change the text to inside. Rename the group to inside. Turn the guide off. We're going to rename
this group to inside. Up. Next, we'll talk about getting our
template ready to sell.
6. Ready Template to Sell: In this lesson, we'll take the green card template
that we just created and get it ready to sell by some instructions and
getting the file ready. Now, I'm going to show you
an example of instructions. Should you actually
want to create a Procreate file template to
sell in your online shop. Starting off with instructions, we're going to reposition
this to the top center. I'm going to add a layer beneath and fill
it with a color. I'm using white, grouping
them and renaming them. We're going to want to
get rid of the guide. I'm flagging my layers. There's less layers. I'm making sure I
relabeled these. I'm going to highlight,
Insert here layer. Then I'm going to
take a screenshot. Now I'm going to do the
same for the inside. I'm going to highlight Insert
here and take a screenshot, will be using these
for the instructions. Now I'm going to import the
screenshots that I just took. Make sure I add them in
the instructions group. You're going to add
the other photo. You can position these
however you want. You just want to make sure
you have enough room to add some clear instructions. We're going to add some type, letting the end-user
know where they need to insert their photos, what layers will need
to be checked off? I'm just repositioning. Getting the right layout may
take a little bit of time. That's why you
definitely want to keep an original file in
case you have to come back for any reason in
case you miss something. This is just an example
of what I added. You can use these
instructions for yourself when you're creating
your greeting cards, as well as the template itself. You also want to make sure that the end-user knows
that they need to save each page separately
as a JPEG or PDF. Wherever they can
find these options. Just repositioning. Now I'm just going
to duplicate that. Move it next to
the inside photo. I will have to go back
and change some wording. Because for this we
want to make sure they have the cover checked off
as well. The instructions. Here's an example
of what I added for the inside instructions. I'm just finishing
typing this out. Now. I'm keeping the pictures
with their instructions together so that way I
can move accordingly. I've included a checklist with some suggestions on what to add with these two instructions. You'll find it in the projects
and resources section. Then don't forget to add your information as
well as a thank you. Makes it a little personal. If you have a logo,
you can add it here, your website, any information that they can find you online. I'm just going to add thank
you in my name for right now. You can use this,
keep this as this, or we can even add a screenshot. How and where they can
find the JPEG PDF options. We do a screenshot and
add instructions just like we did with the inside
and the cover above. The insertive position. It I'm just trying to resize
it roughly about the same. You can also add some folding and size instructions as well. Here's an example of what I used for my saving instructions. I personally prefer to save my greeting card files as PDFs. Now that you have it pretty much where you want to save a copy, we're going to
duplicate the file. Because we're going
to want to flatten these instructions
and label them. It's less layers for the end user as well as yourself when you're
creating your greeting card. Here's another example of
instructions that I've actually used with my
greeting card templates. Remember to purge
your time-lapse video before saving it as a
procreate file to sell. You can do this by going under the wrench icon video and slide the time-lapse
recording to the left. Add your name and
photo to the template. You can do this by going
to the Actions menu. This is a wrench icon, top-left tab on Canvas. Then at the bottom
canvas information. Make sure it's the one
about this artwork. You can sign it or just
plug-in your name. Then add a photo. Then we'll
save it as appropriate file. Go to the Wrench icon, go to Share, then tap Procreate. Remember to label as
precise as possible. This helps the end-user find
it once it's downloaded. Up. Next, we'll create our by folded greeting card using the
template we just created.
7. Bifolded Greeting Card: In this lesson, we'll
create a greeting card using our previously created
by full design template. I'll do this by importing some previously created designs. And I'll show you
how to actually save the finished greeting card so that way it can be
exported and printed. Now we're just going to use our template that
we just created. I'm just importing
a design I had already created and
move it into position. Add your design to the insert
here layer or above it. Make sure you stay within
the cover placement area. From just adding some
text and positioning. We've got to make sure
we check that layer also does not show when
we save and print. If you're using
your greeting card designs to sell online, make sure the font that you are using has a commercial license. Some fonts don't automatically come with commercial
use licenses. Just typing out a saying here. Make sure it is moved in place. And you want to save each
layer separately and use the top part of your Sarah image when
you choose a PDF. Not want all the layers saved when you are
exporting this. You definitely want to choose best quality because you
will be printing this. You're going to
want to label and habit in a folder that
you can easily find. Make sure each page inside is saved separately,
labeled accordingly. If you've never printed on the backside of a piece of paper before
using your printer. Just pay attention on how it
comes out of your printer. Because you are going
to want to know that placement when you're
reinserting your paper again, put that in with my printer. I have to insert
my cover face up. Since it was actually
printed face up, my printer flips the
paper inside the machine. You can see that
it is printed out. Let me show you. All we do for the Beauford
design is just fold in half. Just like this. Here's the outside.
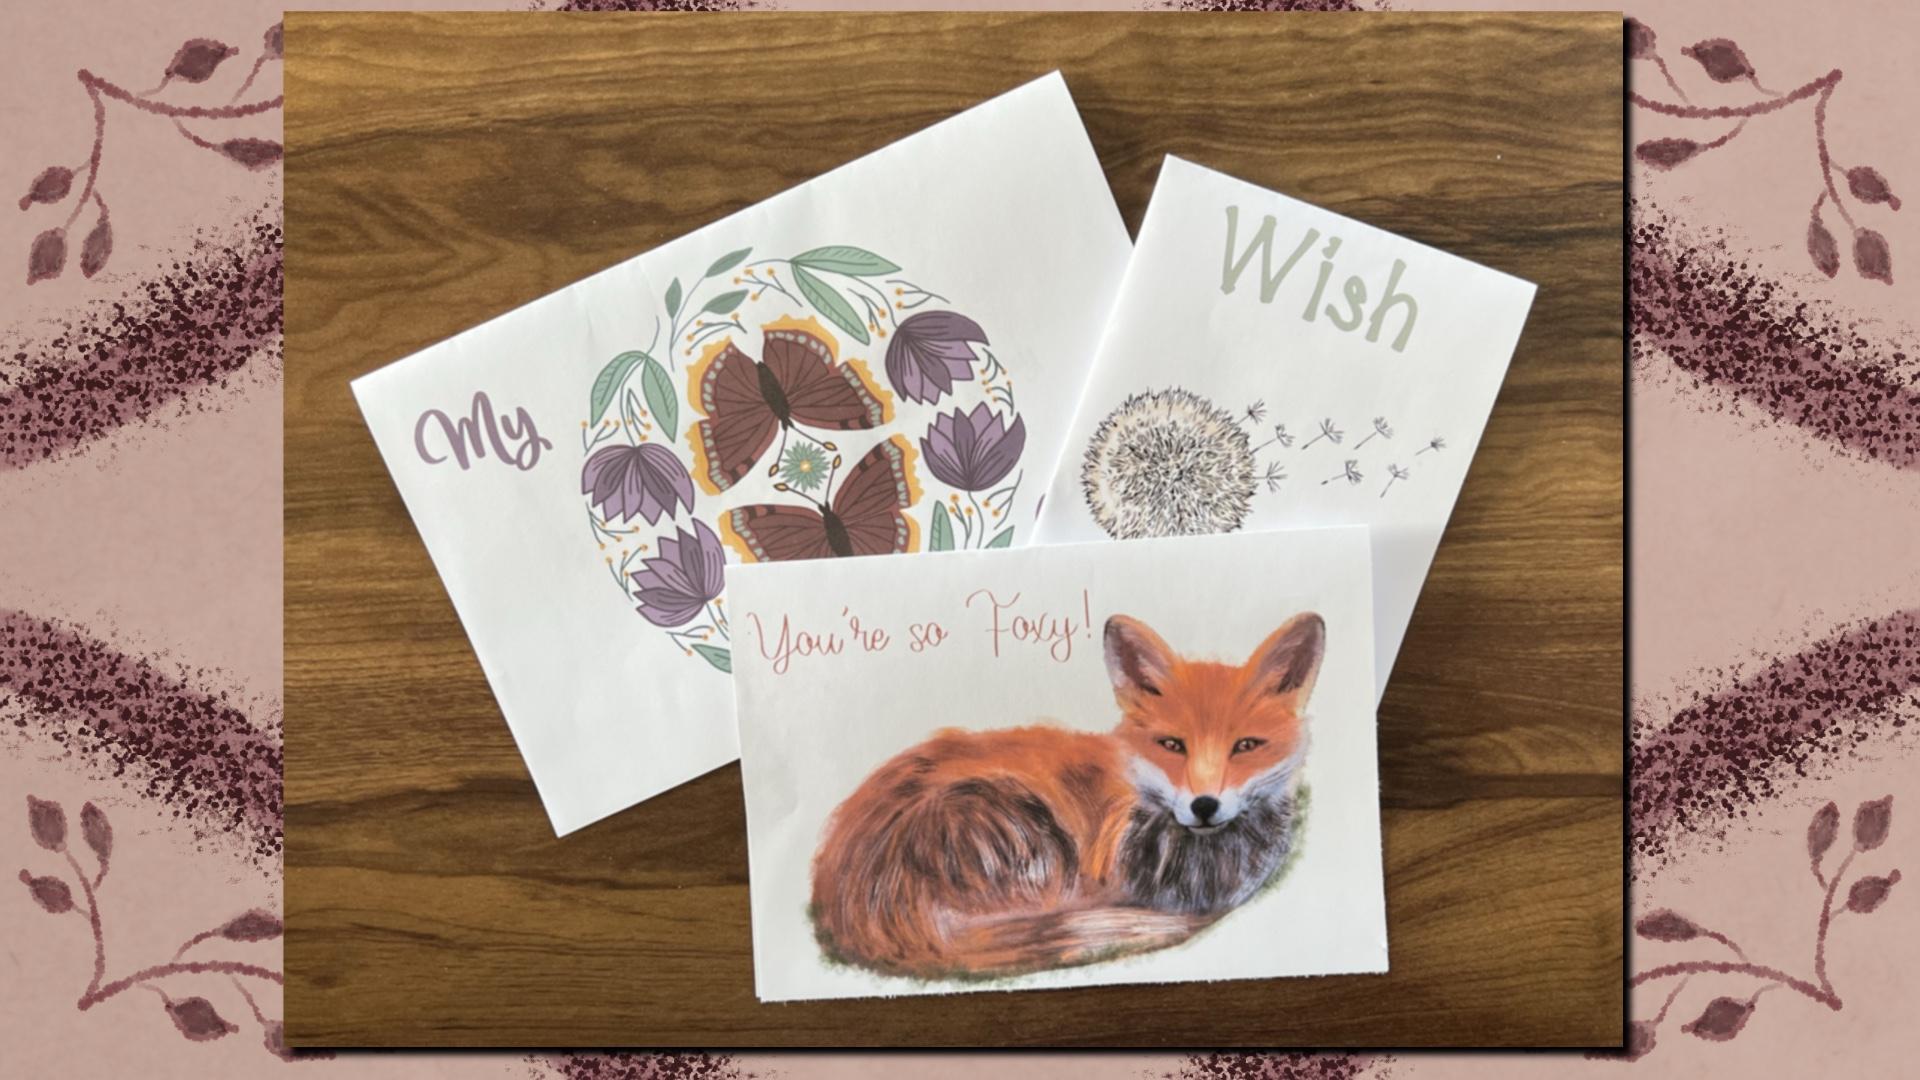
Here's the inside. Now that we created and used our first greeting
card template, I would love to
see your by folded greeting card in the project
section of this class. Next, we'll create a before to design with a size
adjustment template.
8. Bifold Design with Size Adjustment Template : In this lesson, we'll create an adjusted size by full
greeting card template. We'll do this by
creating a seven by ten inside an 8.5 by
11 inch sized form. This way, we can create a five by seven inch
greeting card. We're going to use our
8.5 by 11 inch guide. Again for our adjusted size
greeting card template, we're going to create a
seven by ten inch form. By folate will give us a seven by five inch
greeting card. You want the five inch
mark? The 10-inch. You want to fill a
rectangle like this. We're going to label this
like we previously done. Gonna label this one cover. Again, we're gonna make sure
the layers are labeled. We're going to group them
at a layer inside the group above the text that
says insert here. This gives your end-user
as well as yourself someplace to start when
you're adding your design. We're going to label
it cover, duplicate, and change covered
two inside now, since it's gonna be trimmed
after it's printed, the inside actually has to be positioned differently
than the cover setting. This work gets a
little bit confusing, but I'll show you
in the end result why it has to be that way. So I'm just sliding it
down to the very edge. Now if your printer is
different than mine, you're still going to
want to position this here because the finished side is still going to
be ten by seven. We're going to trim an
inch off the very bottom. So basically this is what your form will look
like before we trim off the excess
will be cutting an inch out the bottom and
an inch off the right side. If you were looking
at the cover face on if we were to turn this page, like return a page in a book. Here, we're looking at the
backside as if we could see through the sheet of
paper are inside print. Would it be at the top of your paper once
it's flipped over? This way, we are now
looking at the backside, upside down once we turn
the inside image around. So you are looking
at the inside, quote, face on into position
where it needs to be. You're going to have
the quote all the way at the bottom of the page, even after return the top. And the side. Here is a side-by-side
example of the cover, where we trim the
bottom and the side where you have the image in
place using the template. And here is the inside side-by-side of wherever
it will be trimming the side and the top when you're looking at
the inside face on the template showing that the inside quote is right
where it needs to be. You'll be able to see this
visually in the next lesson when we create a greeting
card and trim it offline. Up. Next, we'll create an adjusted
by folded greeting card.
9. Adjusted Sized Bifold Greeting Card: In this lesson, we'll create an adjusted
size greeting card, which will give us a five by
seven inch greeting card. Now we're going to use the
template we just created to create adjusted
size greeting card. I'm going to do this with a pre-existing design that
I had already created. Greeting cards are great
repurpose idea for all the artwork that you
work so hard in creating. I'm going to want to
turn the grass off that. I'm just moving this in place over top of my cover
placement image. I just want to
reposition so I can have room to add some type. Moving it in position, still inside my cover
placement area. Make sure I turn off
the cover layer. I want to clean this up a little bit by erasing
some of the grass. My printer has some limitations, so I try to stay away
from bleeding off the side of my greeting card. Otherwise, my printer
is going to give me a border that I don't want, which is a reason
I removed most of the grass on this fox image. I'm going to print this
directly to my printer. I'm going to choose PDF. Here's where you can
choose to save it directly to your
files or printed. I'm going to repeat the
same steps for the inside. We're going to turn off the
inside placement layer. Once we have our inside text positioned where
you want it to be. I already have my paper
with my cover on it, already flipped over and
reinsert it into my printer because that's what it requires in order to print
on the backside. I'm going to choose PDF again. Best. Then print. Or you can choose to save it. I already have my cover page flipped over inside my printer because that's what my printer requires when I need to
print on the backside. Now I'm going to
trim an inch off the bottom and the side. The backside is where
it needs to be. We're going to
measure out seven. I'm using. But you can certainly
use a pair of scissors. We want to trim the bottom, so we want to measure 107 by ten. In this paper is 20 pound paper. You may want to use 24 pound or a card stock if your
printer can handle it. This will help
with show through. Up. Next, we'll create our quarter
voted design template.
10. Quarter-Folded Design Template: In this lesson,
we'll be creating a quarter folded
greeting card template. We're still using the 8.5
by 11 inch size template, but we're going to quarter
it off so that way the finished size card will be four and a quarter
by 5.5 inches. Just like we do with the
other two templates. We're going to draw this out. Starting at the 5.5 inch. Doing the bottom-right corner. I will duplicate it. We're going to label it hover. Want to group these? Label them, cover bottom-right. Move the second layer
up to the top-left, and we're going to have to
flip the text upside down. You can do this by grabbing the Move tool and
rotating it 45 degrees, four times until it's in
place. This is crucial. So when you refold it will
be folding it in 1.5th, then in half again. Now I'm just grouping, re-labeling to inside,
top-left, upside down. I'm gonna remove the guide. I'm going to add instructions just like I previously done. Getting our template
ready to sell lesson. Emerging down, I'm renaming, adding my insert cover here, highlighting the insert here layers, and taking screenshots. So I can prepare my
instructions for this template. Going to flat in my
instructions, purge my video. And here's where we can also add our name to the
canvas information. Here's an example of a set of instructions I use for a quarter folded greeting card that
I have in my own shop. Up next, we'll create our
quarter folded greeting card.
11. Quarter-Folded Greeting Card: In this lesson, we'll create
a greeting card using the core of folded
greeting card template that we just created. I'll do this by importing
previously done designs. Showing you how to save a
file correctly and fold it. Once it's complete. I'm going to check the
instructions layer off. I'm going to the
Insert cover here layer grabbing my cover image
that I've already created, pasting it and moving it in position inside the
cover placement area. Now I'm going to check the
cover placement in beach off. Go up to my inside,
insert here layer. Go grab my inside quote. And pasting it. I'm
going to move it. So it's centered within
the inside image. I need to flip it upside down. And I can do this by using the Move tool and rotating
it 45 degrees, four times. You can see if I turn
around the type for the inside will show up as the correct image at the top
left and upside down. And my cover is bottom-right. And this gets saved
as a one-page PDF. Since I've already saved this, I'm going to go and print
it from my saved file. This is just gonna be
one page printing. I'm going to buy
fold it in half. My cover will be on the
right-hand side facing up. I'm going to fold it in
half again so my cover stays on the outside and the inside core
is on the inside. There's my cover. I open it up. There's my inside. Now that we used our quarter
photo greeting card template to create a quarter
folded greeting card. I would love to see
what you came up with in the project
section of this class. Up next, we'll get our greeting
card files ready to sell.
12. Ready Your Greeting Card Files to Sell: In this lesson, we'll
go over what we need to add and what we need to adjust to our digital
greeting card files so we can get them
ready to sell. If you're creating a greeting
card file to sell online, make sure the font you are using counts with the
commercial license. License may come
with limitations. So make sure you double-check the allowed uses
before placing it on your greeting card and placing it for sale
in your online shop. Saving each layer and page with a clear
title so the end user, as well as yourself
can find it easily. I'm doing the same
for the inside by labeling it exactly
like I did the cover, but making it inside the
cover was labeled cover. Remember to save each
page inside separately. Here's an example of some greeting card
instructions I came up with. So my end-user knows how to
print from the file supplied. I want to save it as the same title as my
previous cover and inside, but I want to label
it as instructions. I am going to save
this as a JPEG. I'm going to create a
folder so I can include all of my files in one and then I'm going to compress
it to a zip file. It makes it easier to upload to my online shop by having
only one compressed file. You may want to also
consider a curated by logo. I've added a curated
by commercial, this brands and credits
this file as my own. Should. The customer wanted
to come back and search for more items by me. I've added on the opposite
side of your cover. When either the left
side of your cover, the top side of your cover. Here's a set of greeting
card instructions for a quarter full load card. This is just me at
creating it from scratch. You might want to
pause this video here when creating your own
greeting card instructions. That way you have an idea
of what you may want to add for your own greeting
card instructions. And don't forget to check out the greeting card digital
file checklist that's included with this class under the projects and
resources section. Up next, we'll discuss multipurpose our greeting
cards into other uses.
13. Multi-Purpose Your Cards: In this lesson, we will discuss some multiple purposes for your greeting card
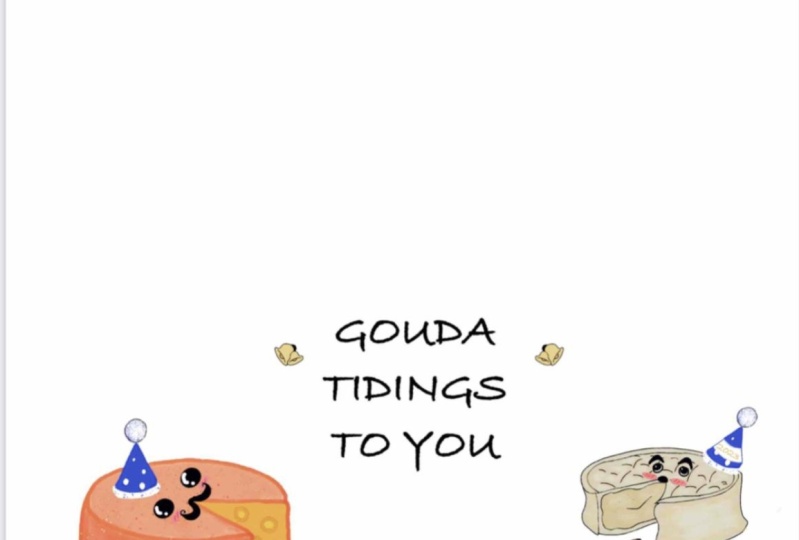
that you created. You've worked so hard at so many projects
here on Skillshare. Why not re-purpose them
into some greeting cards? When you're creating
your greeting cards, there's multiple uses that
you can use for these. You can not only repurpose each element that you are
using for a greeting card, for another greeting card. But you can also
change the colors, the fonts, the quotes, even the holiday that you're planning on using the
greeting card board. It can create an online shop selling your green cards
as digital downloads. This means no direct
shipping on your end. You can also showcase your
designs in your portfolio. Should you ever want to license something similar for a company? If you happen to
take the next step by posting your
greeting card template online to sell or any other
digital greeting cards. Please share a screenshot or the link in the project
section of this class. I can't wait to check it out
and see what you created. Up next is a
heartfelt thank you.
14. Thank You: I want to thank you for taking the time and
watching this class. You'll learn to how to create some greeting card templates
as well as use them. You also learned how
to add instructions. Should you want to sell
these templates online? Some instructions
that can be used to sell your digital
greeting cards as well. If you have a moment, please make sure you
share your project. Leave a review, follow me to get notified
at my next class. If you're on Instagram, follow me at Cambridge. I hope you check out my other
classes here on Skillshare. I'm really looking
forward to seeing you in my next class.
 Kimber Shook, Artist | Designer | Creator | Teacher