Transcripts
1. Introduction: Art is meant to
live on your walls. In this class, we will create a beautiful
series of paintings. Perfect for home decor, gifting or starting
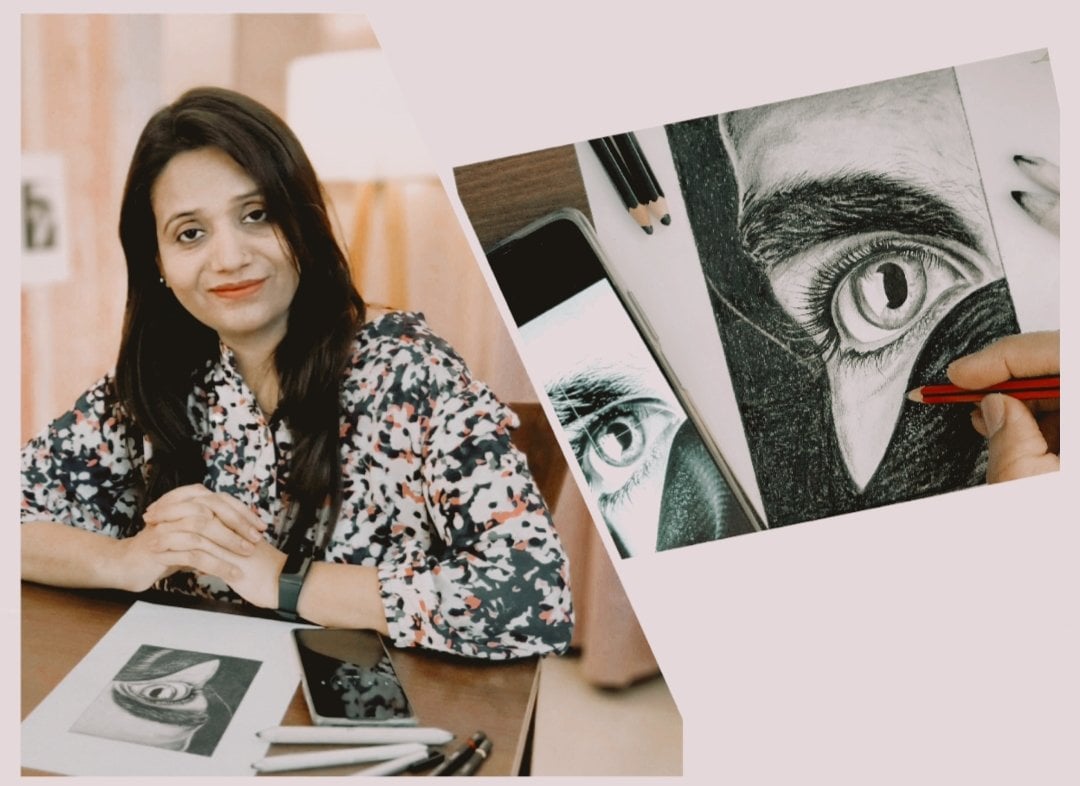
your wall art journey. I'm Tanujahopla, an
artist, art educator. And an entrepreneur. This series is based on sunflowers created using all
pistils and watercolors. I have kept everything simple, calm, and bigner friendly. Even though we are
working on them as a set, every sunflower painting is designed to feel
complete on its own. So you can choose to display all three sunflower paintings
together as a series, or you can also use
them individually as single artworks on
different walls or spaces. By the end of this class, you will have three
coordinated paintings which are ready to display. In this class, you
will learn how to work with simple, easily
available materials. You will understand how to combine mixed media
in a relaxed way, how to create harmony
across multiple artworks and how to build confidence without pressure or perfection. So come join me in this class, follow along, and let's create something calm and
beautiful together. Let's start creating
the final art together.
2. A few basic tools: For this class, we will be working with very
minimal art supplies. Let's start with the paper. I'm using 300 GSM,
watercolor paper, which works best for
watercolor and mixed media. You can also use 200 GSM, but thicker paper is always
easier to manage with water. For this art series, I have taken an A
four watercolor sheet and mid and cut it
into three parts. One piece is 15
by 15 centimeter, and the other two pieces
are 30 by 11 centimeter. Miring and cutting
the paper before starting helps keep the process organized and stress free. When it comes to brushes, we are keeping it very simple. Instead of many brushes,
you will need only two. For shading, instead
of using many pencils, you only need one
dark shading pencil, such as eight B or ten B. To blend the shading, you can use one blending stump, or if you have Earbd,
you can use that also. You also need a rough paper. Just tear or cut a
small piece by hand. We will use this to create some soft abstract effects
in the background. For colors, I'm using camel cake watercolors and dome soil pastils which are
easily available in India. You are free to use
any brand you are comfortable with as the
techniques will work the same. Keep some tissues nearby. Tissues are very
important whle doing watercolor for lifting color, controlling water, and
correcting small areas. And finally, you will need
some clean water for painting. Come along and join me in
the next class where I will be teaching you tips and tricks for making
the art series.
3. Simple tips to begin: For sketching the sun flower, we will keep the
process very simple. Start by drawing a light circle, don't worry about
making it perfect. And next add four small
markings around the circle. These markings
help us understand the basic direction and
balance of the petals. Once the four main
markings are in place, gently add more small
markings in between each one. So from these markings, start shaping the
petals loosely. This step makes it
much easier to place the petals evenly and keep the sunflower looking natural rather than crowded
in one place. Important is use a very
light hand while sketching. These are just guidelines,
not final details. Now, let me also show you a second simple way to
sketch a sunflower, which is the sideways sunflower. For this, start with a slightly oval shape
instead of full circle. This helps create the
angle of the flower. Add a few light guide markings along the edge of the oval, focusing more on one
side to show direction. From there, sketch
the petals loosely, letting them overlap
and vary in length. Keep the lines soft and relaxed. So this is the stem
just for practice. And now let's add small small petals in between
all those long petals. Let's practice it
for this flower, and then we will practice it for the other
way flower also. These steps will be very helpful when you are working
on the final art series. Now, I would like to share
some key points that will help you for painting and giving some
mixed media effects. First, let's talk about
smudging with oil pastels apply oil pastel a little bit
and just see the movement, how you have to apply it. Then use your finger just to
give some smudging effects. So later, when you will
make the sunflower, there in petals, we will give this kind of effect
by using oil pastels. You can also use an extra
piece of paper for smudging oil pastels By rubbing the
color lightly with this paper, you will get beautiful, subtle, abstract textures without making the background heavy or messy. And this method is very
easy and bigner friendly. Now here I will show
you how to give oil pastel effects for the
center part of the sunflower. You just have to scribble your brown oil
pastel in this way, little circular and just fill
it in a circular way again. Then after that, you can take
your acre shade or you can take a light brown and just move it above
whole brown tone. That is your next step. And after that,
what you can do is, again, you can use your
finger to blend them. So I feel personally
that oil based colors, that means oil pastels, smudges nicely with hand. You can use tissue paper, but you can try with fingers. It gives a better
smudging effects, what I have observed, otherwise. And now you can give some dark brown
old pastel effects again, above that base. Now, let's look at
watercolor wash techniques. For a soft background, we will use a wet-on-wet effect. Start by lightly
wetting the paper, then add diluted color and
allow it to flow naturally. Try that yellow diluted color on that oil pastel orange
effet because later, you will be working like
this for the petals. Now, while the
paper is still wet, you can gently tap with
a tissue to lift color. This creates light areas, texture and subtle highlights. So for a while, I'm just showing you how to give
these effects later. We will be doing the same ways, all the key points, which I'm showing you right now. Next, for gray shading effects, use any dark shading pencil, such as six B,
eight B, or ten B. And if you don't
have shading pencil, you can use any dark pencil. Apply the pencil lightly where
you want shadows or depth. So I have shown you how you will do it
on the petal shape, and now just a line on that, we will use stump for showing
the smudging effects also. Like, stump is a better option. And if you don't have a stump, you can use normal earbt which also works the same
way how a stump works. Now, let's add some watercolor touches above the shaded part. Now, let's practice some
diluted color wash on paper. I'm using teal blue. You can use teal blue
or turquoise blue. Just wet it and move your brush, the flat one and
give some washes. Now let's try another
color. This is brown. You can try it with different
different colors also just for practicing
the wet washes. And basically, what happens is when we will be doing
the background, in that case, these washes
will help you a lot. So practice before making
the final art series. So once you are comfortable
with these basics, we will start building our
art series step by step. Everything we have
practiced so far will come together naturally
in the final art series. So come along and join me as we start creating the final
artwork step by step, using these techniques in
a calm and relaxed way.
4. First art series part 1: Welcome to the first
art piece class. Here, the main subject is sunflower and
background is abstract. Let's do the drawing first. So before starting, you should always look for the
center of your paper. So here now, I'm going to
draw the circle first. Remember to draw light. After making the circle, you can erase the
center marking. Then you can go for
the same technique, doing some markings here. And then in between
these markings also, you can make more markings, and then you can
draw the petals, some random shapes of them, giving some curves also. Remember, the direction of
each petal is changing. Then draw the petals in between
all the petals like this. Giving curves is very
important to give that natural effect in it. And now you can show Stemp also. Like this. So I'm going
to use dome soil pistils. So first, what you can
do is you can take brown and do some scribbling
in the center. Yellow ochre also. And you
can just fill the white caps. When you will fill it, it will automatically blend
with the prom tone. Next, you can use finger
also to blend them more to give some realistic
touch in your sunflower. You can use a little
bit of black pastel, give some light
strokes like this. In the center also
you can give view. Do it in a circular way. And one more circle
you can create. A little bit of gaps I'm giving. And some more hand
blending you can give. Move your finger a
little bit inward. Remember to wash your hand after you are done with the
black while you still work. After giving black
and merging also, a little bit of
orange you can give. Only in the outer section. You have to press the
color a little more hard so that it can
come on the top area. Plus, I'm going to use leaf green little bit in
the center part. And some here too. I think we are done with the
center of the sunflower now. It's looking
satisfactory and nice. Now, in each petal, I will be giving
orange oil pastel also in different
different directions. You can see and learn
how to give them. And remember, before you use
if the color is not clean, you can use tissue
for wiping it. So what I'm going to do is giving some lines
first with orange. Do it carefully so that it
should not merge with black. And now fill a little bit. Remember to do the
strokes in this way. So. Now, you can do some hand
movement also on it. When you will press it, then it will give a
lighter effect like this. Using your fingers
allows you to feel the color and control the
blend more naturally. Fill orange in between the petals also like this. Now, I'm going to
use leaf cream here. I'm going to fill the stem. Use the side of your
crayon so that you can fill thin spaces easily. I'm going to use dark
brown on this piece of paper like this on
the side of it. So the paper which I
have tiered with hand, that gives a very nice effect of wall pastils in an abstract way. You can see that what I'm
going to do is randomly, I'm going to use my thumb
for giving this effect. One more. You can use more color if you feel
that the color has reduced. A little bit here, too. Let's give some
random strokes here. Some green shade can
merge with brown. And some green I'm
giving here too. If dog green merges
with it, it's okay. Let's take a little
bit of gray, too. Gray goes very well
with different colors. So gray we can give
like this horizontally. I'm going to rotate it, and here use a little
bit of olive shade. So what you all need to do is to keep an extra sheet
of paper above your artwork and apply a little more pressure
while using your hand. This helps the paper stay steady and allows the oil pastels
to transfer smoothly. Using oil pastils in this way is actually very simple
and Wigner friendly. You can merge this green also to give that
soft tone here. Now, I am going to use any
of my dog shading pencils. On one side, I'm
going to give it. On one corner, in between three, four petals, you can work
with your dog shading pencil. Now, you can use your stump
to give a smudging effect, or you can use earbud also. Stump gives a very soft
touch to the pencil. Join me in the next class
where we will continue working on the background and take this sunflower
series forward.
5. First art series part 2: Welcome back. In this liston, we will continue with
the first art series. Now, let's give a water wash
first on the whole paper. With round brush, I will
apply my yellow color. You can take permanent yellow
or any dark yellow and then apply it on the
petal like this. Focus on movement and
flow, not perfection. When it is wet, you can
take a piece of tissue and just tap a little bit in few areas to give little
light shades also. It will highlight
the watercolor area. Do it carefully in
small small areas. Let your brush move freely
and trust the process. Now, let's give some
earthy tones in it. Like, I'm going to take
a little bit of ocher, or you can take
beige color also. You can apply the
color from here, take your flat brush
for this process. The color was coming less, so I took some more. It's okay if yellow
merges with it. A little bit of brown. The oil pasters have already created a basic structure
for the background. So now we are simply
enhancing it with watercolor. Now steel blue or
turquoise color, take a diluted shade of it. Here you can use car
diluted watercolor. I'm using a flat brush and
moving it in one direction. Try to follow the
same brush movement rather than going
back and forth. You can give one more coat of tea blue or turquoise shade. Little bit of blue. I'm giving in this corner also. Whether the strokes come
on the flour, it's okay. It will look nice with these
brush effet and strokes. Now I am using a diluted dark brown
color with a thin brush. Gently place this color
in between each petal, keeping the brush movements
light and controlled. This subtle step adds
depth and separation, helping each petal stand out without making the
sunflower look heavy. Notice how the diluted color
softly blends into the base. It naturally enhances the
form of the sunflower. This completes our
first art series. In the next class, we will begin the second art
series together. So do join me there. And
6. Second art series part 1: Welcome back. If you have
completed the first series, you are already familiar
with the techniques. Now we will apply them in a new way for our
second art series. So just look for the center. Somewhere here, I
have my center. Now I'm going to draw
curvy little bended shape. Like, it should bend
slightly like this, and then some markings. I just show you from
close till now, what I have drawn, a curvy shape here, then some markings. I can erase the
center marking now. Then some random petal
shapes like this. These three I have
drawn on this side. Now some more will come
on the other side. Don't rush this step. Slow relaxed strokes work best. In between, also, some then some leaves of it. And now curvy shape of
the stem. Like this. So the highlighted final sketch of sunflower is in the center. This is how it looks in
the center of the paper. And on the top and bottom, we will give some abstract
effects like the earlier one so that it looks
connected with that one only. And there is a variation in the form of the sketch
first in this art series. And color combination
we will try to keep similar so that
they keep connected. As you know the color palette, which has all these shades, brown black, yellow ochre, leaf green and orange. So we are going to use all these again for this sunflower
in the center first. Let's use dark brown
first in the center. Remember how we did
the scribbling first. So we will do first
that one the same way. You can scribble here. Remember that here
there are few petals. So the brown should not
go on these petals. So do it carefully. Let's do yellow ocher next. Fill the white caps. And next is do some
hand blending. Next step is using black, how we did the first artwork. So in this one, we will use black little
bit in this small area, a little bit here also. And some here and some random black touches
in the center like this. Blending is important with hand, so we will blend carefully. The finger should not
come more on the petals. Do blending with hand
in small small steps so that it should not
cover the base color, which is brown and ochre. Do a little bit here with
small small strokes, first orange I'm
using. In this area. And then some green, especially in the center. Like this. So I'm
going to use orange. I'm just marking the one green because the shape of
them looks like petals. By mistake, we can
do them with orange. That's why I am just giving a
light green touch here with my leaf green so that we should
not make them like petal. So these are green later,
I will blend it also. And then orange we are
going to use here. Like before. In each petal,
fell orange like this. See the directions. Some
orange will come here also. The center petals. Let's do some hand
blending also. Be careful. If it will
merge with black, then the orange tone will
become a little blackish. So in these petals also, we can do some orange. Ess only. Some blending with hand. So smudging with hand. Here, for the stem, I'm going to use my leaf green. I'm using leaf green, but you can choose
your choice color also for the green areas. Sap green will also look
nice instead of this. Just lightly. I'm doing it. I'm not putting pressure. So basically, when we have
to do watercolor with it, then a slight impression of
everything is sufficient. Impression of the
leaves, impression of the petals and impression of the center area
of the flower. You can just give with less
pressure with oil pastils. No need to do too much of
blending of oil pastils in it. So my color theme
for this art is doing brown gray and olive
green in the background. For the same connection
in this artwork, I will be using these shades. Plus to simplify it this time, we will do the background, half of it, little
grayish stone, and half of it,
little these colors. I will be taking brown in
the black and white touch. Plus here we will
be using turquoise, the teal blue on the other side. Let's give a touch of brown
again on this extra paper. And gray. So I'm going to brown and gray on half of the paper, little bit here. I will keep it like this. Read closely. Notice how the oil pastiles already
guide the background. Once this base is in place,
everything becomes easier. Some brown I'm taking on
the flour also, it's okay. Abstract and mashed because everything is
abstract and mashed. Great touch I'm giving here. And some brown a little bit on this area. Some more filling. Everything in this art
is big enough friendly. You can easily do all the steps. In between these two brown, you can give some gray again. Now I have changed
the direction to give a different shape here. Now, I'm feeling
olive green here. Let's give in this way. One more here, too. And one you can give
here like this. Let me just refill the color. You can create your
own shapes also, and you can create
the background according to your color
combination also. It's totally your choice. Only the technique you can follow to give that
abstract touch. So green here too. Next is a little bit
of pencil shading, which I gave in the
first one also. So here I will
highlight this part. So filling with any of your
dark pencil you can use. Because of this
step, your petals will highlight more
when you will paint it. Okay. If you have stump for
smudging, you can use stump. If you have ear burt,
you can use that also. Wood with the earbt. It gives a smudging
touch nicely, and some black and
white touches here. Or if you use sump, then also similar way you have to do and similar
effects will come. Ends are like getting
a little more softer when you will use
um softly like this. It's getting light and marched. So we are ready with the base. So join me in the next
class where we will focus on creating the soft
watercolor background.
7. Second art series part 2: So we are ready with the base. Now we will be starting
with watercolors on it. For painting, you
need a little bit of water and always remember
to keep tissues. Keep watercolors which
are available with you and preferably
use cake colors. They are always easier to use. So first, I will give
a wash of water. You can apply water
on whole paper. Mainly on the flour, it's required first because we will be giving yellow
shade in the flour. Later when we have to paint
the background, if required, we will again give a
water touch for the base. For wet on wet effect, we have to do first the
water touch on the paper. So I'm taking any
bright shade of yellow. Take a small piece of tissue and just tap in few areas to
give a lighter shade also. Watch closely. Like this. Now I will colour
rest of the petals. It's very easy to paint when you have done
all pastels before. So tissue tapping. To give
that natural effect in it, a little bit of light
tones are also required. Now, the sheet is wet. So I'm going to take
teal blue colour for this green side, which I have given before. I have used olive
green over there. Keep the colours diluted and
the brush movement soft. Let the water do some
of the work for you. You can comfortably use watercolors whether the oil
pastels are done before. So more blue I'm adding here. If your background
looks slightly different from mine,
that's perfectly fine. Each artwork in a
series can have its own personality while
still feeling connected. Let's take some poker colour or beige color for
the other side. You can pick more color
if it is coming light. Little bit of brown, I'm taking. A little bit of ochre. We can merge here with ta blue. As the sheet is wet, so they will blend
automatically. Some ochre, I'm
blending here too. Giving some tail blue again. Because the first
layer was light, so it's important to
give second layer also. In between, you can
give some strokes. Now I'm working on
one direction mainly. A little bit of dog
green I'm using here just to highlight
the stemp and the leaves. Very mild touch of green. To enhance the flower shape, I'm taking a little more brown, and I'm adding here in
between the petals. See how beautifully they are enhancing when
I'm adding brown. Everything I'm doing
when my sheet is wet. So if while doing the
process your sheet dries, you can again put
some water with your flat brush and
then redo the steps. Here, I'm using a little bit
of flat brush movement also. And again, some brown For enhancing the leaves, a little bit of the boys here. Use your flat brush
blend it with the base. So in this piece of art, I did mainly on the right side, teal blue shade or
turquoise blue, and on the other side, I took
all brown and ocho shade. In the center, I
took the sunflower, and I tried to keep a
connection between these two. So we are done with these two, and now I'm going to
start with the third one, trying to keep a
connection with these two also and adding some
more creativity in it. So join me in the next
class for the third series.
8. Third art series part 1: Welcome to the third
art series lesson. So in this series, I took one square shape and
one rectangular shape, and again, the other and last one will also be a
rectangular shape. And on this one,
I'm going to make sunflower again in a different
way with different method, and color combination is in same connection
with the last tune. Remember, I taught you how to make sunflowers in two ways. So in this one also, it will be a front view of sunflower, but I'm going to make
two sunflowers in it, and only half of them I'm
going to show on the paper. So come along and see how to
make it and follow with me. I'm going to use this area. Here I'm going to
make half circle. Let me show you closely
first, this one, and on the end of
the paper here, one more. Half circle here. So basically, you can leave
this much space here, and here I'm left
with this much space. It's up to you also according
to your paper size. You can choose how
much space you are going to leave on the
top and on the bottom. Next, I'm going to
add few petals in it. So to make it easier, we can do markings. You can use your scale or ruler for knowing the
exact centimeters, and then you can do markings. But I'm doing
without any markings right now without
measuring anything. So random way of
making the petals. Just be careful that
all the petal size means length of them
should be the same. Direction of each petal is also according to the
shape of the circle. So when it is like this, then the petal should
be in this direction. And when we are moving forward, petal directions
are also changing. In between also, we
can show more petals. Like this. Let's come
to the other sunflower. Let's come to the other
sunflower, D markings. Little size is
little smaller here. Again, I want to
say that it's up to you how much size you want
to give for each sunflower. Let's add more petals here. So what different I'm going
to do in this art piece is, I am going to use my dark pencil again as you are familiar with doing shading with dock
pencil and stamp or ear bid. So I'm going to use the
same method so that you should not face difficulty in doing shading in the next part. So what I'm going to do is in the center of the sunflower, we were using oil
pastels before, and I was doing scribbling
with the brown oil pastel. This time, I'm going
to use my dark pencil, doc shading pencil, and I'm
going to do scribbling here. And I'm going to do
scribbling here. Watch closely. One way
is you can do like this, or the other way is make
small, small circles. Otherwise, same. So the whole area
has been filled. Now, with stump or earbt, you can just work like this. Stump will automatically blend the pencil and it will
give a medium tone here. In between, you can
leave some spaces also. A little white touch
can also be given, or you can say some highlights. Plus, what you can
do is again with your dog pencil on the sides, you can move it like this. So pencil movements as we
were giving black white pistil touches in
the last art piece. Like this. In each petal, I'm going to give some pencil
movements like this. So both curves are bending
and you can give like this. Here, the direction of
the curve will also change according to the
direction of the petal. In the petals which
are in the center, you can do some filling
like this with Dob pencil. You can watch closely. Next I'm using earbud
instead of sum. It gives a very soft touch here. So only use it just where
you have used the pencil. Try to leave some white
caps also. See it closely. Its merging it softly. Then here also. Like this. See how easily and beautifully you can do
shading in the sunflower. The other sunflower also, I'm going to do the same way by using my dog pencil first. By making small circles or other way is doing
some scribbling. You can choose your
way of doing it. This is super easy way to
make a sunflower center area. Let's use some stump now. In between, you can use
it, and in between, you can leave some spaces
also for highlights. Let's give some
lines on each petal. So I'm filling a little
bit with pencil. Let's fill the pencil here too. Et's use, but now softly on the small petal stew. You can use Stump also if
you don't have earbud, and you can use abut also
if you don't have Stump. As we are going to paint
the background now. But before that, for enhancing
the sides of the petals, I'm going to do a little bit more of pencil shading only in these little areas so that later sunflower petals should
enhance in the background. So in each petal, you can give a little bit of
pencil movement like this. So filling. Oh. Filling here too. And then stump. Move it softly like this so that it looks
merged with the background. Ends of each part.
I'm using stump so that very light tone of
pencil should also come. Because later, it will look beautiful and marched
with the watercolurs. Same way. Now I'm going
to do in this flour too. So filling of pencil. You can use any of
your dark pencil or if you have shading pencils, then you get ten B or eight
B, which move darkest. So you can use those also. Let's use stump for this flat. Stump gives us dclte
touches easily. Erbert also gives
the same effect. So we are done with
the sunflowers. It's looking beautiful. So join me the next class for the
third and final series.
9. Third art series part 2: Welcome to the final
art series class. So for the same connection
with last two artworks, now I'm going to
use this piece of paper for giving some
smudging effects of oil pastels in it. This time we are going
to use less oil pastels. So only in the background, we will give some smudging ones. Otherwise, the sunflower center, I didn't do this time
with oil pastels. Let's refill it with
the same color theme. So I'm adding brown. Olive green. Because we are re using this paper, so try to use a thick paper
for this purpose. Gray too. So here I'm thinking
of giving green first. And some brown. Gray hair. Some green. A little bit of brown in this corner. So we are ready with the base. So for painting now, you need to put water on whole paper like
earlier art ones. You need to put water wash. You can give vertical strokes or you can give horizontal ones. This time, take yellow
and just work like this. No need to fill neatly. You can just give some
yellow strokes here. Same way in the other sunflower. Now, I'm going to give Teal Blue or you can
say turquoise here. With flat brush, you can
easily work like this. Then on the rest of the area, let's give some hooker. Did you get brown. Some brown touches you
can give here too. Like this. Little bit of awkward
touches in between, like this in the teelblue
area and wash your brush, wipe it, and take
some teal blue. Give some teal blue or
turquoise tones here. Some awkward touches
we can give more. A little bit of pale blue
darkness we can bring. Like this in this corner also. Very slight orange. Give very mild touch of it. Not fully also. Remember,
sheet should be wet. Paper should be wet. Only this much
orange is required. This car shade, I
feel that it's light, so I'm increasing it by
doing the second layo. Like this. With this
final artwork complete, our sunflower art series
comes together as a whole. Thank you for spending
this creative time with me and for being
part of this class. I hope you enjoyed
the process and feel confident to create
more art series on your own. If you would like to
continue learning with me, feel free to follow me here on Skillshare for
upcoming classes. Until next time, keep creating and enjoy
your art journey.
 Tanuja Chopra, Be Artistically Unique