Transcripts
1. Introduction : Hello and welcome
to another video. My name is Jay, and in
this class we are going to learn how to make a
portrait of your pet. You will learn how
to draw the for, how to create the
reflection of the ice. How to blend
everything together, create the outlines,
the whiskers, and a nice little background. Let's have some fun. Let's get creative. Let's begin.
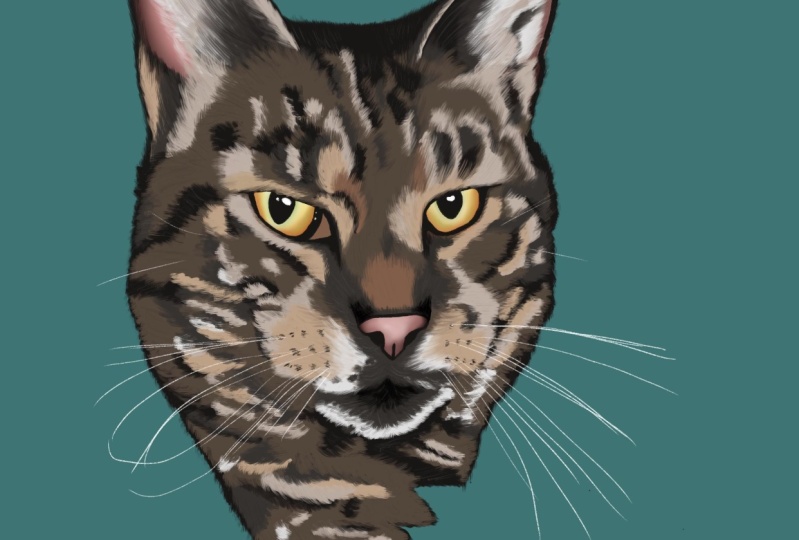
2. Download FIles: Before you begin, make sure to download all
the files that I included in the projects and resources section
under this video.
3. Creating Canvas & Importing Files: Okay, So as always
before we start, we're going to start by
creating our Canvas. We will be doing that by
clicking an a plus in the top-right corner
of our program. Click on that and we're just going to click on the square to keep things simple and easy. Okay, So before we start illustrating refers
going to import all the files for the
people that I don't know how to import the files. I'm going to show
you real quick. I've important for files in
this class to our brushes. One is a color palette and
the other one is the photo that we're going to trace
to create our portrait. Let's start by
importing our brushes. We're going to our
brush library, which in the top-right
corner you see five icons and the one under all the way on the left
that looks like a brush, is the brush library. If you scroll all the way to the bottom, you see imported. That's where all the brushes are going to be that you import. So click on the plus in the brush library
that's over here. And click import again. And then click first
on the crispy brush, which is the brush we're going
to use for our outlines. Then click Plus again, click Import again, and
then import differ brush, which is we're going to
use to create the fur of the cat of whatever animal
you're illustrating. So now the brushes
are important. We're going to import
our color palette that we're going to be using. In the top right corner you
see this circle over here. I don't know what
color it has on your screen with me,
it's red right now. Click on that one. Go to your palate. You have five options in the
bottom over here, which is Disc, classic
Harmony Value and palettes. If you go to Palettes and
then click on the plus, then click on New from file. Then import the cat
portrait swatches. So those are the colors
we're going to use. Now. Are we going to do
is import our photo? So we will be doing it
by going to the tool in the top left corner. Click on untold next to gallery. And if you don't click on Insert a file because you
have downloaded as a file and now import
the photo of the cat. This is the photo of the cat. Now we have imported it. All we're going to
do right now is going to place it in a good, in a good way so
that we're going to illustrate it perfectly fine. So we're going to
make it a bit bigger. A little bit, not too much. And we're going to center it. We're going to only draw
the head in this case. So turn it around a
little bit so it looks a little nicer, more artistic. And put it in the
center nice way. Alright, so when
it's in the center, when you're happy
with it, we're going to lower the opacity. We're going to do that
in the layer section, which is the two squares here
in the top right corner. If you click on that,
you open the layers. And if you then click on
the end of the layer, the end over here that
you find over here. Click it. Now you see the opacity, it right now as max
because it's full colors. If you lower the opacity
by sliding these bar to the left to around
60 percent or so, you see that it
becomes a bit lighter, so it's easier for us
to trace our image. Okay, so what we're going
to do next is we're going to trace our cat.
4. Outlines: So before we're going
to trace our image, we're first going to
create a new layer. So go to your layers in
the top-right corner, which is the two little squares. You know where it is. Click on the Plus,
which is over here, click on layer two, then this screen will pop
up where you can click on Rename and name it. Outlines. Here
we're going to draw all outlines and I'll just make sure that the right
brush is selected. So go to your brush library. Make sure that you go to
the imported section. Click on the crispy brush
that we have just imported. Click on that, and
then make sure that the color black is selected by going to your color
palette panel, which is the circle and
the top right corner next to the wide one
and the bottom row of the color palettes that you have imported as well,
you'll find to black. So I'm next to
divide is the black. We're going to be using that. Alright? Okay, so now we're going to
decide the size of our brush. Like in the left
side of your screen, you'll find this panel
over here which demands, which decides the
size of the brush. You see also the percentages. I think around 6% is good. But if you click on a crispy brush and you're
in your brush panel, in going your screen
a little bit, you can see if you like
the thickness or not. I think 6% is perfect
for this exercise, which you can like
have a little bit of practice by going on
screen a little bit, by trying out with
like No pressure and thicker pressure to have
a little bit of a feeling of like thin and thick. So just practice a
little bit on the site. And also what I can tell you right now already
from the start, if you made a mistake in your lines and you
want to go back, you don't always have to
erase. You have two fingers. If you click which are two
fingers on the screen, the lines will disappear. If you went a little bit too far back and you want
one line back again, for example, right now, we want that line back
again with three fingers. You can bring back the line that you just have deleted
with two fingers. You delete it with
three fingers, you bring it back. So that's a good first
start of everything. Alright, so now we
know the brush size, that's the lead that we're
going to trace the image. So what we're just going
to do is we're going to trace the outside of our cat. So we're just going to
start with the ears. We're not going to do every hair because we have a
firm brush and which, which we will be using to
create just that later on. First we're just going
to go very simple. Just make like those
kinda structure. See if I zoom in just like that. That's going to be the
outside of the for right now and just trace the
ear like that. Tried to do it not with full pressure, so
it's really thick. Tried to practice your
your your pressure by doing it a bit lighter. And if it doesn't
work out for you, make the brush a
bit smaller too. To help you out with that. You see if this works out fine. And just trace everything. See over here still some lines. Just see all the lines that you see that are going
outside of the can. Just trace that
little bit of that. And just do every firm on
the outside like that. Just a little bit of hair
light and we're going to fix that later with the
other brush with first, just make sure that you have, that you draw all
the outlines like this. There's like that. Alright, so there's a
lot of hair in the ears, for example, which is very
difficult to illustrate. So what we're going to do
is we're just going to close it out by doing this very simple. See if I zoom in. Maybe if I should use a little
bit of a smaller brush, like 4% maybe works
better for this. And just, you see, just do this to
close it out nicely. Same thing for in the air. Just close it out. Doesn't
have to be perfect. It's not going to be a
hyper-realistic portrait, but it's a good way to start. Like learning how portraits
work by tracing it, by learning first
the basics of it. All right, So just this and
then same thing here again. There's going to be the hero
of the hair of the ear. In here I see a line. And let's just finish
with the outside. Just like very
quickly like this. And just trace the head of
this beautiful cat C here. And I made a mistake, which we can be reasonably
quickly like this. Alright, so because we're just going to only draw the head, we're going to close it out
by doing something different. We're going to make it
close illustration. You can do it the
way you want if you just want, do it like this, that's fine by me, but I like to make it a little
bit more artistic. So we're going to
do it like that. You see, we're going
to draw a point, another point and another one to the other side like that. Maybe a little bit nicer. Practice it a little bit until you are satisfied with yours. Let you get to like kind of
like an image like this, like that is an appoint
two I like to do. The point is because
it's a fur and appoints can create a
little bit of extra for us, an artistic effect
for a portrait. But you can do it in any
way that you find pretty. Alright, so now we have
the outline of our catch. You see it? If I
take the photo away, this is the entire outline. We're going to draw the
insights, the eyes, the nose, the mouth, and a
little bit of stripes. Not too much because
we're going to do the stripes with the
firm brush later on. Okay, so let's go to the ice and just trace the ice. Like that. You see goes all
the way to here. And then like you see, for example, the outline
of the eye is very thick. So we're going to
draw that very thick. First, we're going to
draw the line like that. And you see there's
still a line here. And because it's all black, we just can color it
all black as well. To make it very easy. We don't have to
color it later on. Pupils, same thing. We just go trays the pupil like that and worry about the
reflection and anything. We're going to come
back to that later. Same thing with the
ion the other side. Just trace the
image legged and a little bit thicker on the edges because it has a bit of a
thicker line in the bottom, thinner and here sticker again, here, very thick line
to close the eye out. And this is basically where the tears come
from, the tour bus, I don't exactly know how to call it in an animal may
result the same. And again, for the pupils, just trace it like that. Very simple. Really quickly
fill it in with black. Don't worry if it's
a bit liberally or like it's a bit shaky or
anything, doesn't matter. We're going to go later on and revise it with Arthur brush. Alright, so that's the ice. Now the nose, same thing. Just trace it. Very simple. Like I can do it a bit faster probably because I've already practiced this like a million
of times in my lifetime. But if you're not as fast,
yeah, take your time. Feel relaxed, Don't worry, everything will be fine. Just do it in your own
tempo. Don't feel rushed. Don't feel like you need to be just as quick
as other people. It's your own tempo, your artists, and you have to find your own
way of doing things. And that's totally fine. All
right, so that's the nose. You see that I also created a little bit of the
nose holes like that. Later on we're going
to add some fur and it's going to
look a lot nicer. But first we're just going
to create the outlines. Same thing for the mouth. First. Here's a good way to practice your thin line to thick line because the Melville's
a bit like this. You see too thin to thick. So practice a little bit but no pressure to more pressure. No pressure to more
pressure and low pressure. Two more pressure. No
pressure to more pressure. And that's a nice
way to create like a sharp Lang going
to a thick LAN. So practice it a little
bit on the side. No pressure to more pressure, no pressure to more pressure and low pressure to more pressure. Later on with the whiskers,
we're also going to do that, but for now, we're just going
to focus on the outlines. Okay, so for the no same thing, we're going to create a
little bit of an effect of the snout and animals have
a movement of the snail. So just like very
simple because what further later on we're going
to add some measure things. But you see that it's
already creating a bit more of a face effect. All right, so here
you see a little bit stronger for lines. Same thing for here.
Just creating them. Wherever you see
like stronger lines. Just like this very
simple, some Rivoli lines. So you can be extra shaky. Don't worry too much
about being too perfect. Because with the
airbrush later on, maybe make the eye a
little bit longer here, same thing on the other side. Maybe a bit thicker
because there's a lot of black there. For
that's totally fine. Don't be too
perfect. We're going to fix it all good later on. All right, so now we
have basically the, the, the basic of the face. We can like make it a bit
longer like this leg, leg that at some extra lines like that to create
a little bit more. And that's fine. Now we are going to
add some division. So what we're going to do,
we're almost done with the outlines and now we're
gonna go to the next part. You see that this cat has
a lot of black stripes. So we're going to just decide where the
black stripes are going to be. Just like that. Really quickly. See like a bit like you did like there was with the brush later on we're going
to be totally fine. Okay. Same thing here and make
this a little bit thicker. I do that because they
don't want the full brush. I'm gonna go over it and then you'll see that we can
create like an overlap. And having a little bit more of a thick line here to deal with makes
things a bit easier. You will see later on right
now doesn't make any sense. Same thing can do that over
here with thicker like that. Create like a little bit of the line where the black is going to be like all the way maybe. And then make it a bit thicker. Like this. Connected to each
other. No problem. And also over here, DDGT do those really quickly
like some lines like that. Over here. Click over here. And just, we're almost
done with the outlines. And then we're going to
have some major fun with all the fur. Just like that. You see like if you look
at the cad right now, like if you take the photo away, you see that it doesn't
look like the exact cat, but does because the cat also is defined by its
colors and bytes, trash and everything, but the shape of the
cat is what it is. All right, so these
are our outlines. We're going to start
with the coloring.
5. Furry Outline: So to start with the coloring, we are first going to
create a new layer. So we're going to do a little squares in the top-right corner. We're going to create a layer on the bottom side
of this layer. So we're going to do
it under this layer, but on top of the photo layer. So click on the photo layer
and then click on Plus. Click on the layer to rename
it and call it for outline. So what we're going to do
next is we're going to change the brush
to our airbrush. So we're going to
click on offer rush. And what we're going
to do is first is like check if the brushes
are good size. Like mine is already
a good size, it is at 6%. And in practice a little bit,
because with this brush, if you press very hard, you see that the lines are
very thick and strong, which it can do for
maybe like human hair, like when you're going
to later on you're going to want to make like long hairs
and everything like that. But for the cat it needs
like a bit shorter strokes. So you have to press a little
bit slightly on the screen. So not strong, but like none other pressure and just practice a little
bit on the side. Just like that and
brush it all together. You see that when you zoom in it already turned into for this, even if you do it more, turns darker and darker and darker. So that's kinda the effect
what we want to do, it's going to take some
time because you have to do a lot of strokes in order
to get like this effect. You see it's already a
nice furry, furry color. And now like because you see like I made a lot
of lines on the strokes, I'm going to teach you
something else really quick to empty the entire layer of all its colors and strokes and everything.
You have three fingers. If you put it on the screen and just swipe it to left or right, it will delete all the,
all the strokes you made. No matter how many you make, you go all through the, the thing you see, it's a big mess. You want to delete everything, but you don't want to
go do by one by one. So you just have three fingers and swipe and everything
will be gone. But you will still
have to layer. It will just empty it out. Alright, so practice a little bit on the
sides with the brush. Because what we're going to
do next is we're going to go to the outline
and just do this. You see, if I zoom in, you see that I
create like for on the outside of the outline. So all these Ripley
lines that we have created will not
be visible anymore because would make it all disappear by creating
a nice for layer. So if you just do that
everywhere on the outside, into the direction of
where the hair is going. You see the hair still little
bit on the background. Just do it into the direction of like where differs going. Mostly up in this case. And in with the hair of the ear, same thing into the
direction of the ear. C, because it goes up like that. Maybe it's a bit exaggerated, but I still see some over. All right. And just
do it like that. Follow it around. Very slightly vary,
slightly vary slightly, but very fast and
close to each other. So like you see here,
very close, very fast, very close, very fast, very close, very fast. So just play around with it. Don't worry, if you make
mistakes, you can go back. So don't worry about
making any mistakes. Many people are
always afraid of, like putting the pencil
on the screen or on the paper because
they are afraid of making mistakes and
they can't go back. But Barbara's always said
you never make mistakes, you always make happy
little accidents. So trust yourself. That guy knows what
he's talking about, right? And just everywhere. Just follow it around and
do that in the entire cat. Just all the way. Follow the hair everywhere. You see into the direction. And if you do it good like this, you see that it turns out to be like nice for don't
press too hard, just make a couple of
strokes until it gets dark. You see here it goes a
little bit more like that. And just play around like that. We're going to basically do
the entire catalog is Nestle. Just like that. Let
me see here I'm in, I'm in a bit of a
mistake. That's fine. Just everywhere around the things that
we're going to create a realistic fury effect
on the entire creature. Alright. I'm going to speed the video up a little
bit because I think you know already what
I'm talking about. So I see you at the next part
and just do it everywhere. Just remember to go into
the direction of the cut. You see the hairs
go here. So didn't do their hair like like that. He said, just follow the hair into the direction
of which it's going. And if you're not sure,
don't just do what feels good to you and it
would loose nice to you. And I'll see you in a
second for the next work. And don't worry also
to go inside here because later on we're gonna go over it with another color, so we'll be seeing that anymore. All right, There you have it. The entire outline is now turned into for you see that everything now has a nice smooth
Harry outline. And that's what we
wanted to create. I can revise everything a
little bit, that's fine. Also later on we're going to
totally check everything, that everything looks smoothly. So what we're going to
do next is we're going to define our colors.
6. Tracing Light Colors: So right now we're
going to decide where our colors
are going to be. We're first going to create a new layer on the bottom
of the flower layer. So go to your photo
layer again and click From there on the Plus, click on Layer 4 and rename it. Right now we're going to be
coloring the base colors, so just call this layer
base. That is fine for now. We're going to change the brush into the crispy brushing N. Because all we're going to
do is we're just going to decide where our colors
are going to be. So you see, here are some beige colors and here
are some beige colors. And here are some beige
colors and here are some beige colors
everywhere else too. So we're just going to
pick our bash brush. So go to your color palette. And I included this and next
it is brown in the top row. This is the base color we're
going to be using right now. So this one over here next
to this dark brown color, which we're going to use
for the base of the, of the cat, but for
now just this base. And so all we're
going to do right now is just decide where
colors are going to be. So if you zoom in and
you use your brush, just very slightly like that, like boo,
boo, boo, boo, boo. So draw it a bit
like, like this. You see like what we have done also with the outline before. We're going to go
out of the buffer. Just like that, in a
bit of the direction of where it's going and just
color it in like that. And do that everywhere
you see the color base. So you see here
is a bit of dark, so we're going to skip
that and just do this. Let's assume in and make sure
that everything looks nice. So just like that very quickly. Buh buh buh buh buh buh
buh. And just color it in. It's going to look a
bit spotty and messy, but with the first same thing as what we've done
with the outline. Right now, the outline
looks like perfectly fine. And for all three, we're going to do the same
thing with this later on. So first, just color
everything in like that. Everywhere you see base same
wherein the snout over here, like it's a bit
wide but also base. So we're going to only focus
on the color that you see. So we're just tracing the
color of the cat of the photo. Really easy, very simple. Just trace it like that. You see, just color
it very quickly. Don't worry too much. Later on we're going to go
over it perfectly fine with her for a brush and make everything blend
in with each other, with all the other colors
and everything like that. So just like that, you see, we just decided to where the
colors are going to be. Same thing here. It's maybe a bit of
a lighter beige, but we also have
a color for that. So first, you see like this
is a bit lighter than this. So only this part we're going to draw because this part is
like the lighter beige color, so we're going to
use the other color. So for here, just colored
apart, that is fish. Very simple, just tracing,
tracing and tracing. Here's some dish, soap dish. Same thing on the other
side of the, of the snout. Very quickly. Just decide
where all the colors are going to be. This
will help us a lot. They are wrong because
like literally, if we do everything
with the brush, that would make it's such a
long time for us to color everything in because we
would have to start from point-blank right now because
there was already color. We only have to do
the edges and it will already start to
look like for you. We'll see later on
what I mean with that. But first let's just continue with this little
bit of space here. That's going to be lighter base. Alright, so this is
the base for now. What we're going to do
next is we're going to create a layer on
top of this layer. And we call this light. So light bluish, because
we're going to do the same thing with the
color that is next to it, which you have to be
patient and a bit of a grayish beach next to it. Click on that one. And
now we're just gonna do the rest you see over here. And it's going to
look very messy. But that's the
meaning of it because later on we're going
to make it very nice. So same thing. Just like that. You
see everywhere there's some don't focus too much on the small hairs
because later on, once we're all done
with a light brush, we're going to go
over everything and maybe also some small
light hairs every, every here and there to
make it look perfect. But it's like this.
Follow the light brush. All the light sites. In this colored very quickly. You see how I do it just
like just very quickly, very thick and doesn't
matter too much. Messy. As long as it's sort of in the direction of
where the hair is going, we're totally fine and
just do it everywhere. Everywhere There's the
light beige color. After this, we're
gonna do the whites, the CDA whites over here. And then we're going to
build up color after color. Darker, lighter,
from light to dark. Well, why does the most light? But because it's
also not too much. We're going to do
that a little bit in between. Just like this. You see how nice
everything looks. Because if I would
take that photo away, see, this is what we
have done so far. It doesn't look like much yet, but later on you'll see it's going to all
blend in together. Alright, send him over here, light the light and just
color everything like that. These are white hairs. We're
going to do it with light. Boop, boop, boop H-bridge
beach, beach niche here. Beijing, the edges darker has under it so we don't
have to touch that. And all the way over here, we've seen very messy. Do it very quickly,
don't worry too much. The precise work is
going to be later on. And even that's not precise because Anna, messy Illustrator. So I teach you how to be
messy, organized messy. I call it. I don't
know why I call it. I've just made it up right now. So that's how it is. You go and just everywhere you want to draw the base color. He just told a beige color
here, little bit here. So you because all the
other colors are going to be dark and this is very, very small hair, so we're not gonna do one by one later on. We're going to when
everything is dark and like, Oh, blend it together,
we're going to go over it. And I keep saying
the same thing. But repetition is key
because that's life. You need to do things
multiple times here at multiple times to start
to understand it. Good. All right, so those are the
base colors right now we're going to create
another new layer. Where are we going
to do, Do whites. So create another new
layer on top of this. Rename it, you know now how
that works, call it white. And click on the white
color that is on the bottom row all
the way to the right. And just do the same thing. See it if I zoom in, you
can see it very well. Don't go over the darks. Here's a lot of dark gray, so we're just going to do it
in a decent wrongness of it. Same here, Wait, wait,
wait, wait, wait, wait, wait, wait, wait, wait, wait, wait, wait. Whites. And here's grace or not. We're not going to
go over that thing. Whereas here, Here's some white. And then wait, wait, wait,
wait, wait, wait, wait. See how messy I do this
and I'll quick, I do this. Just like that. Later on we're
going to blend the gray and the white altogether. And right now it doesn't
look like anything. I know. I know. All right. So see, that's the
white of the mouth. There's no white
anywhere else but here. So just draw some lines
like that very quickly. So that later on we know
that there's white as well. Same as here. Some white hairs. Very messy just like that. Boop, boop, boop,
boop, boop. And don't forget to make the
sounds with it. The boop, boop,
boop, boop, boop. That makes things more fun. Just kidding, of course. Do you. Alright, so you see, now we have all the
light colors in there. Now we're going to
the darker colors.
7. Tracing Dark Colors: All right, so now for
the darker stripes, we're going to create
another new layer. So I'll create another new layer on top of the white layer, rename the layer
and call it your'e. So we're going to do the same
thing with the gray color, which is first a lighter gray. Later on we're going to
go to the darker gray. So first, in the middle
road or three colors, the one and the most right is the color we're
going to be using. Click on the crispy brush, make sure that is selected and we're going
to do dissenting. This is a bit of the letter
grace because of shadows. It's basically the same color, but because of
shading and lighting, it can appear that some colors are a bit
lighter than others. And we're going to be just
coloring goes right now. Anywhere you see
the gray colors. Just going to be a bit
of the darker ones. But here you see that
little lighter gray. And just follow that
along in here as well. Just messy, same thing as we have done with
the other colors. Here's a little bit
of a brown spots, so we're going to go
around it like that. There's like this and just create like all
the lighter grace. And see very simple. Same as we have been
doing all along. Let's do this ones as well. 0101, c. Here's some lighter
grace and grace. And just draw it like that. There'll be too
perfect. Like don't be too much of a perfectionist, just make it like this. The law degrees here. See, it's all good. We're going to blend it all
nicely together in a second. There'll be more than a second, but of course, little
darker hairs, thinner. Middle here, middle here. They're using those little, little stroke like that. We see. It will all look very neatly. Also notice over here, really don't worry about
how it looks right now. Just like be messy. We'll save a lot
of time with this. Yeah. Well, you see it,
it can take a bit of time and later on
with the firm is going to even take a little
bit more time to create all the things nicely in there. But believe me, it's
a really fast way of making port is because
if you wanna do it for BI, for hair by hair, It's going to take
you a long time. And I want to teach
you do things faster. But this is of
course also are very bit more of an intro
into the portrait world. If you want to get better,
you have to practice more. And also put a lot of time into it because
practice makes perfect. It would just cost
you some time in order to get light things. Perfect. And if you want to
do it perfectly later on, maybe this is a
good way to start. Alright, so what
we're going to do next is we're going to
create a new layer. On top of this layer, we've got to rename it
and call it dark gray. Dark to break. I think I write Gray wrong because I think
it's like rid of a so little bit of English
over here. My mistake. Same over here.
That's rename it just for the sake of the
video of dark gray. And now we're going to
pick the darker gray in the middle next
to brown over here. And we're going to fill
in the other colors. Same thing over here. So this is basically all
the darker ones that you see all over here. And a bit like that. And there's color and messy. If you want to like be faster, you can like make the
brush bigger if you want. Let's do that for the
sake of the video, you see that you could do
it a little bit faster. The only thing is
with a big brush, you don't have to
control so much on like the the shaky lines. So I like to do it a little
bit, little bit smaller, but for bigger spots, you could use a bigger
brush for sure. Just like that, you see. Beautiful. Well it doesn't
look beautiful yet, but it will just go over all the dark lines and leg. We're going to blend
it all together. After we have all the colors
in here, we're going to, we're going to first color
the base of the cat. So we don't have to
do that anymore. We're going to add some
shading and some highlights in the eyes and ears and
everything. So that is done. And then we're going
to focus completely on differ because that takes
the most time and right. And just color all
the doors close that you see over here. Dark, dark, dark, dark,
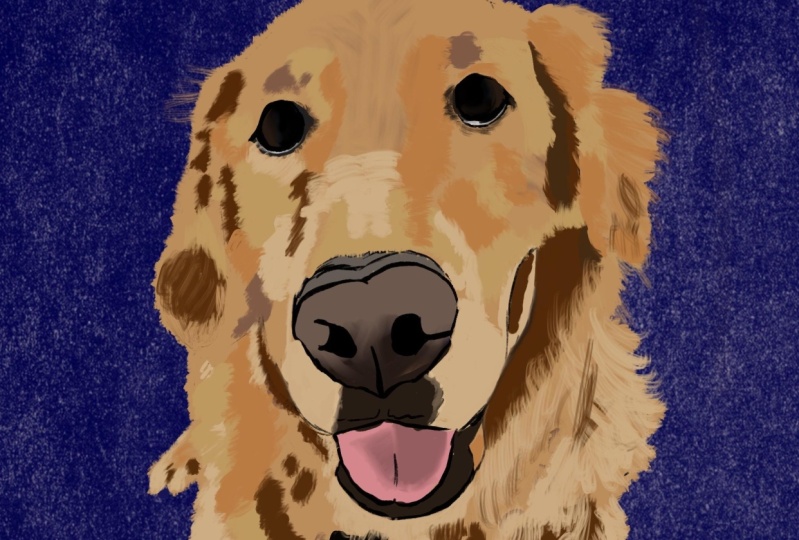
dark, dark, dark, dark. And you can draw every animal, I guess, like if you
have your own animal, if you want to draw
your own pad and it's, for example, a golden retriever. It's going to be a lot easier. But I decided to do my cat
because my cat is very complicated because it has
a lot of multiple colors. And if you can do this one, that means you can do anything. And that's why I
decided to do this so that you can you
already have the hard one to deal with. So you know, now,
you now know how to do the easier ones with
just a simple color. Even golden retrievers have more colors. Don't get me wrong. They're lighter blonde,
like darker blondes. But you have to
figure out a little bit what kind of colors
would work for that. And that's maybe a good
chance for you to try to see if you can figure out the colors of other animals that are not
like giving you the cause, but you decide yourself with
colors you can use for that. And we're curious if you
can come up with it. But also, I wouldn't
really love to see how your portrait of
this cat turned out. So please also send it to me. And also don't forget to leave a review on this
video if you want. I would really appreciate that
because I'm still growing. And I would love to have more people to teach this
kind of classes too. If you have any questions also, please let me know like I
would love to answer them. And if you would like to
have a specific kind of thing that you would
like to learn in the illustration world
or the painting world. Please let me know
what you would like to learn and maybe I can
make a video on that, depending, of course, if
I know how to do that, because I don't know
everything out of people might have a better
solution for things like that. But I'm an illustrator already
for 15 years or longer. So I have quite some knowledge to be able to share
with you guys. So please let me
know if you would, what kind of video she
would like to see. I do a lot with cartoons, so that's also an option. You see that all the
lines are starting to already make a lot
of sense over here. Yes, yes, yes, yes, yes. Alright. So that's all
the dark ones, I think. Maybe a little bit
more over here, maybe a little bit
more over here. Some spots everywhere you see. All right. So that's
that little bit more, little bit more,
little bit more. And we're going to go
on to the next step. Okay, so we're just going
to add a little bit of the brown of the nose and there's a little bit brown here. If you look, there's
slightly maybe like you can see it better when the photo
is a 100 percent opacity. But because I've
done this already 1000 times and know
exactly where it is. So click on the Plus again, rename it and call it loop. It's gone. And rename
it brown. There we go. Go to the color palette. This brown in the middle layer, which is the darker first, if you click on this brown
over here and just colored the most like that
into the direction. See, just a little
bit like that. And a little bit here as well. We went out a little bit. There you go. Those
are two browns. Little bit over here as well. This is slightly not too much. I see that I made a mistake
with the base year, so I'm going to delete
that real quick. You probably haven't was with
the light beige apparently. Alright, so there you go. Now we have created all the stripes. Well, we're going to do
next is our base colors.
8. Base Color: All right, So for
our base colors, we first need to
create a new layer again to keep
everything organized. The layer is going to
be on the bottom of all these layers
because it's going to be under all these colors. So go to your photo layer again. Click on the Plus,
rename this base color. This is going to be very quickly because what we're going
to do is we're going to drag colors into a
color, but we want them. For example, I'm going
to show you real quick, what do we have to do
first in order to do that? Because if you, for example, grab the yellow
right now and you think like we're going to
draw these eyes yellow. So when you hold it and you drag it to the eye and you
drop it in there, you see that everything
will be colored yellow. That is because the program is not detecting any layers yet. So first what we're going
to do in order to color only the eye is we're going
to go to our outlines layer. Click on the outline layer
and click on reference. Reference. Reference makes it so
that we are able to draw the lines only
where we want it to. Because right now the reference makes it so that it
detects the outline. So if you go back to
the base color layer, so click on the base color
layer and do the same thing. Drag your yellow to the eye. You see it only
colored the IRA now. So if I zoom in and do it again, you see it only colors the eye. Now the next thing
is when you drag, you hold on the color
and the top corner, and you drag it and
you hold the pencil on the screen in the center in the top you see a percentage that is you color
drop threshold. And that color drop threshold is like if you do
it very little, that will mean it will
leave a little bit of an edge on the edge of your lines. That's
not what we want. We want to color it completely. So do it as much as you can without coloring
anything else. Because if you go really far, I will show it really quickly. What happens if you hold it again and you go all
the way to a 100 percent, it will cover everything again. And that's not what we want. We only want to
color the part of the eye so that this around
90 percent in this case. And it will have a nice line. See there's no space between it. The color of the
eye is just yellow. So you see it very
good Right now. We're gonna go through the
same thing with the other. I just drop it. Boom. Okay, so we're going
to do the same for the nose. Like the gnosis little bit of this pinkish color over here. So drop the color to the nose, and that's the
color of the nose. All right, So after
nose is done, we are going to do the
same thing with the first. So grab the fill color, which is the brown
and the top row, this one over here, and drag it there. You see that it's
sometimes, for example, the threshold, like it's
already too much at 90 percent, then you have to do it
a little bit lower. So you go to 80, 80
something percent. You see. Now you see that this part
still needs to all be colored. The ears are also
going to be pink. But because we left
an opening here, we have to do it by
hand. You see it? We have to do it
a little bit like this because if we dropped, that means that everything will get pink and we don't want that. So we left an opening
here if you wanted. Did it easy like a calcium
explained to you really quick. Make sure that everything
is closed because if you have a little bit of an
opening in the outline layer, that will mean
that it will cover everything the field because
it detects an opening. So that also means that it
wants to color the rest. But if you want to
just color the ear, if you go to your outline
layer and go to the black, and you want to, for example, let's close this part out. Like close it together. You see, now we close this part, you see now the outlines
close all this part out. Which means if we go
back to our base color and click on the base
color and we drop it. It will only call it that part. So if you wanted easy enough, color it yourself, that's
like a nice way to do that. Same thing goes
for the other ear. I think this one is
already closed out, but this one is not. So that's probably because
some part over here see, this is not closed. This is an open line, so that means it will go all the way and it
will cover everything. So we go to our outline layer and we're going to
pick our black. And then we just closing
this part off like that. We're going to go over
it with the brush layer anyways later on. That's maybe a good
thing to explain to you that sometimes if you want to use faster
methods of coloring, that you have to close
things out really good in the outline layer,
what you want to call it. You see, now everything
is pink like that. Very simple, very
easy, very fast. But for example, sometimes you just want to
leave things open, but then you have to
paint it yourself. So I hope I explained
that very well. If you don't understand
it, please let me know. I think it's very
clear. Alright, so we're gonna go continue
with the rest. The gnosis colored, is it? It's colored, eyes are colored. The ears are colored. Here still BC over
that from the air. So what we're going to do is still there's a little piece of the pie that's just going to
be a dark color over here. Just pick a dark
gray and just color that in like that. Very simple. Now we have our base
colors and we're going to create shadows
on our base colors.
9. Shadows and Highlights Base Color: To create shadows and
highlights of our base colors. What we're gonna do is
we're going to create a new layer on top of
the base color layer. We're going to rename it
into shadows and highlights. This color. Shadows and highlights
for the base color. And what we're going to
do next is we're going to click on the layer by clicking on the screen and
click on clipping mask. Clipping mask is
another handy tool that you can use for a lot of illustrations which you can like figure out
later on by herself, is like, for example, right now, the clipping mass makes it attached to the
layer on the bottom. So for example, it is attached to the layer of the base color. What that does is now
when I pick the color, Let's go pick our orange color to see it a little bit better. And I zoom in, it
will color here, but it will not color there. So it will color only on the spaces that the
layer is attached to. And because only the brown is
colored in the base color, it will only colored parts of that knot looks like a tiger. You see what I mean? So
if you try to color here, it will not be visible. And like it's still on the
screen and I go in there, it will only color that part. It's very handy if you later on, when I have a specific shape, you want only color that shape, create a clipping
mask, attach it to it, and you can make nice shadows
and everything like that. Maybe we'll do a video on
that later on as well. Okay, so to start with our
shadows and highlights, we're first going to create
the shadows of the eye. So what are we going to do? Is we ever I here
and we're going to have an orange color and
our crispy brush selected. So what we're going to do is just color the edges
of the eye like that. Very simple, just the outline, just the edge, just like that. You do the same
for the other eye. My may look weird right now. Well, I think it looks nice. If you didn't do it
really nicely yet. You can always erase something and make it a bit more smooth. Okay, so for the next part,
what I'm going to teach you is like something fun
that you can also use. A whole lot of our projects for yourself is this much to want
to click on this much tool, which is this finger
next to the brush and the eraser in the
middle of those two. So click on that one. And if you click on it again, the brush library opens. Which brush we're going
to use is the soft brush, which you can find
in the airbrushing. So for example, if you would
be in another brush section, you go to the, the airbrushing, click on that, and then
click on soft brush. All right, so now make sure
that the size is correct. Like not too big
because it's too big, you wipe everything away. What we're going to
do is we're going to blend the orange
with the yellow. So if you zoom in on the
eye and I'm very slightly, just slightly, slightly,
slightly don't press too hard because it
goes really crazy, real fast. Very slightly just blended
in smoothly, smoothly, smoothly everywhere so that
you don't see a line anymore, but it becomes kind
of a gradient. You see over here
that the orange is slowly going into the yellow
and just do that everywhere. Very slightly, very slightly
blended altogether. It's a very nice through a
lot of people use this tool for life or for portraits
and everything, realistic portraits
to make the shadows very blended it together with
the skin and everything. But same thing we're
gonna do here, but this is just the
basic simple way to blend everything together. You see, just turn
everything around, zoom in, and just
blend like this. And you see that the eyes are already looking very neatly. So what we're going
to do next is we're going to pick the white color. And we're going to do
the same thing around the pupil. Just like this. Around the pupil. To create a little
bit of a white. Because we're going to
make a gradient from orange to yellow to white. To have a nice reflection can make it a bit
thicker if you want, if you want a bit more
of a thicker thing, gradient and do the same thing
once the lines are there. Pickers much too and blend it together.
You see what I mean? If you zoom in, you see
that white, yellow, orange, perfectly smoothly
blended together. You can make it as
thick as you want. And this is also
cool to see with your own paths what kind of
colors it will turn into. We're slightly make sure that you don't touch the
orange too much because it's altogether.
And there we go. Nice gradient in the
ICC looks beautiful. Okay, So the same
thing that we're going to do with the nose, we're going to pick
this darker pink color that is next to the pink, which is a bit more
of a brownish red, which is going to
be a nice shadow. We're going to color the
sides of the nose like this. And the bottom as well. And then blend everything
smoothly together. You see that everything is
smoothly and nicely blended. If you look at the nose
that like a test now, dark to light, dark to
light, dark to light. This is the tip
point of the null. So when we grab white again and we just draw little
bit of tips like this. And we've blended in together
as well. Not too much. Maybe make the brush a
little bit smaller to have a little bit more precision. And just blended in nicely to create a little
bit of a highlight. And tried to shape it in the
form of the nose like this. You see there you
have the highlight of the nose maybe blend a
little bit more until you're satisfied. There's like that. Okay, So the same
thing for the ears. We're going to grab
that dark color again. This time we're going to
color all this parts dark. All this court do to do. So color it all dark. All the way over here,
all the way over here. Same thing on the other side. Scholar, real dark,
dark, dark, dark, dark. Maybe a little bit
over here as well. Not too much because
we also want a little bit of a
like a whitespace. Grab the brush again, maybe make it a little
bit bigger distance and just color it like
this, blended altogether. Maybe you need some practice. But that's what these
videos afford to just learn and create a
gradient from dark to light. Same thing on the other year. Really simple. There's
blended all nicely together. And you see now the
eyes, the nose, and the ears have a gradient and everything looks a lot
more realistic later on, but it's going to
look even better. So now you know how to blend. And let's go start
with the for now.
10. Creating & Blending Fur: Okay, so now to blend the for, we are going to create a new
layer on top of everything. So above the outlines
even and click on Plus. Because we're going to
make a real messy layer. We're going to call
this ferry for yeah, For refer call it for whatever you want. I'm
totally fine with it. It is like to create names. Don't make any sense, but they still make sense, you know. All right, so grab
the first brush. And what we're going
to do next is going to blend everything together. So because, for example, over here to Harry goes
in this direction, we're going to draw this white over this brown does Brown over displace this gray over here so that it gets into that
direction very neatly. I'm going to teach you a very
smart trick that we can do. Like if you hold your
finger on the screen, you get this half a circle or this circle with two colors, which to bottom color is the color you're
using right now. And a top color is the one
that you're going to pick. This is a color picker. So if you pick this color, this color is what
you're going to use. So what we're going to do with the first brush is we're going to brush
everything like this. What we have done
with the outline into the direction of
what the firm is going. You see. And you create further pathway very slightly, very gently, create the fur into the direction of which
the hairs are going. See. Until the outlines, the, the little spots that we have created are completely
disappeared. And it's all just a for, for a mess right now. Alright. So you see what I mean? Okay, So what I mean with
this is like right now, we kinda do the same
thing again, color, pick another color, and then
it's the black or dark gray. And you do the same thing. On top of everything. You see. You blend the debate and a
black together very nicely. And you create this effect. And you just keep on doing that, keep on doing exactly that. So the gray over here is
going to overlap this brown by picking a color. Now you have the
gray over here and the brown is going
to overlap the gray. You see. And this is going to require some time because right
now if you zoom in, you see everything is
blended very nicely. I'm even when we're later going to add some more dark Harrison, some light hairs to make
it even more realistic. But like first we're going
to do this everywhere. So everything is
going to overlap. Choose the color and
just blend it together. Choose the color. And
just quickly like this, very quickly, just blend it. You see? And it looks very
neatly. Brown over here. Buh buh buh buh buh
buh buh buh buh buh buh buh buh roan over here. This black is going
to overlap the base. And just do that everywhere. Into the direction of
the fur is flowing gray. The direction. They also, you'll see that
slowly bit by bit, like it's going to require
some time, believe me, like the QC, like we're already busy for a while and all we have done is this
part over here. What is fun? This is
like a fun process. This can be a bit messy and
just like create hairs, brown buh buh buh buh
buh buh buh buh buh. As we have done with
the black and outline, very slightly and fast. Just create the fur. And you were because we already
have selected the color, so we don't have to do didn't
complete thing right now. And that makes things so much faster because if you wouldn't have to do this everywhere, it would be such a long time. And you'll see, and over
here with the base, we have created
this black outline. We're going to disappear
and we're going to make that disappear by going over it. You see the black
outline will disappear and beige will take
over completely. So go over the lines a
little bit like that. We have created as outlines, a little bit like that to
create a little bit more for realistic effect. What happens? It will blend nicely together, see turns into black. But just going over the outline. I know it's a bit
of a messy layer. If you want to do it The
bit more controlling, which would require
a lot more time. You can also create layers
per color if you would like, but then you would like have to really make layers like brown is the bottom
one, things like that. So it requires a
lot more effort. I like to just do this. It's messy in the mistakes don't matter so much because
it's easy to overlap. You see this overlap everything. Just drag this all the colors of the outline way so that
it's not like ugly anymore. And in gray. And we're going
to speed up this video, a video a lot because otherwise like it
will take forever. I I assume that you
get the hang of it. Just try to do it then if
I have something to say, I will say it's something to at least make sure that all the outlines
are gone over here. Same thing for the other
year, of course later on. And you'll see that
everything looks smoothly. You see with longer
things because the hairs of the era bit longer, you just make some longer
strokes like this. You see, but not strong. Slightly, slightly, slightly because the
strong one is really thick and doesn't turn relate to
her so slightly and flows with a slightly high
flow, slightly in flow. Just keep on doing that. Darker ones. Oh, puh, puh, puh, puh, puh,
puh, puh, puh. And see everything blends
smoothly together. You see how things are looking. Just do that everywhere. Over here, some darker hairs to blend everything
perfectly together. See how smooth it goes, black to gray to
lighter gray to base. Make sure that everything
is smoothly blended. And grab the base again. Repeat, repeat, repeat. It's a lot of
repetition, I know, but that's what
painting is about. It's a lot of repetition. A lot of patients is
required for this. You see that the air is
already looking really nice, almost finished with the air. And after that I'm
going to speed up. And due to the
inside of the face a little bit. Some round. Just give you some
examples on how I do this. And I hope that you understand and can do it because I cannot keep on
talking for four hours. Select two. That would make the
video way too long. And you will lose my patients OR and you
will lose the patients. So I don't want to
have that to happen. Let's not. So therefore, we did
the bit quicker. And you see how
nice the ear looks. Later on we're going to
revise some more things. For now. You see that everything
looks smooth and dandy. Here. Same thing, brown. We're going to add the Rhone
in there and bit longer. And you'll see that
all the colors that are almost disappeared. Keep blending, keep
blending, keep blending, keep going over it
until like there's a nice smooth line
going into it. You see everything looks
super beautiful over here. And you see that the hairs
of the ear are now created. Okay, So just keep on going until like everything
looks very nice. And then into the erection, all you have to do
is just brush into the direction of where
our colors already are. C, grade layer over layer
over layer over layer. Here's the letter hairs. So now if you already get it, just keep on pausing the
video or go to the next step. If you already
understand completely what I'm talking about. And this is just going
to be the process for the entire thing. You see. I've just done
only this corner right now. And this I like
how long it takes. So right now we're going
to speed up the video a little bit by blending
everything together. Same thing from this
black over here. It's going to go
down a little bit to the darker brown and a darker gray and just blend
everything to get her. All right. I see you in a bit. I hope you understand
it. Please let me know. If you still don't get it, then I would like
to help you with something good. But
there's a lot of practice. Just keep on practicing until you basically feel like
you get it. You see. By just making small strokes, you create like a
nice contrast and nice gradient from
dark to light. But this time inherit for
us what we want to create.
11. Pick the Color & Brush Slightly: Okay. Can you see how overlap, everything like that all
goes to the direction. So this is on top of, this is on top of this is on
top of this list. I'm doing everything
and see that everything is being overlapped. Everywhere. We're going
to see those things will become more for it anymore. Furniture you see like
how the two ears are looking already. Very realistic. And that's why I like it's gonna take a
little bit of time because it is a little
lot of brushwork. You see, you're
gonna go over this, over this, over this. And this. They can pop like I call
it the BIC and pop. And just keep on
going everywhere. But make sure it's in the
direction of the airflow. That's why we already kinda
decided to the airflow. You see, I'm just
all right, Easy. Differ and life to
your portraits. And you can do this
with any animal, lions, basically only
animals with fur of course, because you kinda do
a turtle ligase or crocodile or an elephant,
maybe just this steel. You could do a
mammoth though like those historic elephants
that have a lot of fur. And just everywhere you see
that I'm just adding for, for, for, for, for,
for and just be messy. Don't worry too
much as long as you go into the right direction. It's all smooth C.
And then you grab the white and you go with
the light over dark. Here's Doug against
dark over Brown. Remember smoothly
blend everything together. Darker over dark. You should maybe
not see it so well. But look, here's more like hair, so we're going to do the
dark over dark parts. So a little dark over here. And then the brown, the dark
overlap everything nicely. And just keep on
going until you get like a nice smooth like furry layer C. C
Here's a bit dark, so you can always just like
take that a little bit more out by going over it
with a lighter color. And just brush and
brush and brush. It's a lot of repetition. And that's also
why I like to have this layer altogether
so that like you can just pick and pick and pop. Otherwise she would have to
go a layer, beige color. You have to go to the brown
layer and a brown layer. And it's a lot of
changing and I just like and prefer to us because
it makes it a lot faster, makes the process
faster, makes it easier, and makes it more fun for
you because it doesn't take you like five hours
of illustrating. I think, like if you
get the hang of it, it may take you two hours to finish this
portrait from here. Maybe an hour, depending on how fast you are, a faster going. I already feel like
we're doing really good. Like already speeding
things up, glide nicely. And we're blending
everything together, perfectly smooth and see, now everything looks beautiful. All right, and just
keep on going. I'm going to speed
up the video again, and I'll see you in a
couple of seconds, minutes. Also a nice thing to
notice that the I just draw a little bit
of darker is like this to create a bit
more contrast with more shading cues like this. Seeing that things look
a lot more realistic now. And let's keep it going. I'm here at the nose, same thing as we have
done with the eye. Just a little slow.
Load gradients from the dark to the great sea. And we do it blend the gray and the black altogether nicely. Just like this. Same goes for the other eye would we
have done with the other side? Does do the same thing.
Different direction. And just fast strokes. You see fast strokes, buh buh buh buh buh buh. Fast and slight, fast and slide. You see all the entire
right side is already blended that loose
already really beautiful. And if you keep on going and keep on going
and keep on going, it will look more, more pretty anytime you just
go over it and over it. Until it's just of course, It's totally up to your
taste, to your standards. And you'll be done. So just keep on going blending
everything nicely. And we're going to
speed it up again.
12. Brush & Blend the Fur: And at the snout,
we're going slightly over the mouth,
you see slightly. We're going to still have a little bit of black to
show where the mouth is. Rules are going to spread
them out a little bit like this layer by doing
the same thing. We're slightly little hair. So I got to see.
13. Keep on Brushing & Blending: And let's just keep on brushing. We have here the brown color
now. Brushing that in. You see it like why
we did the shapes. Like you see that because
we did the shapes, all we have to do is
basically to the edges of the shape that it makes
things a lot easier for us. And that's why we did decided already where the shapes are. We're going to go
so that we can just decide this is where
we do the shapes. And now we're just easily can
brush all referring to it. Just keep on picking
and popping. Just oop. Next color, bubble, bubble, bubble, bubble, and just
keep on doing that. Keep going back. Now you want
graying in? Is that easy? Yeah, it's easy. It's the only thing that it requires a little
bit of time in order for us to really
see the result. But let's also fun. Because when things take time, that means it takes effort. So that means when we're done, there were feeling
a lot more proud of herself with the results. Okay. Okay. You feed it bit by bit, the process already starts
to really come together. You see that everything
is like working out. You see like the
entire right side over here is already really nice. Like later on we're going to
add some shading for itself. But first let us
finish everything. Like, just like wanted to
say like something real quick so that it doesn't that is not too
silent for a long time. And then we can just
keep on, keep on going. And just understand that the process is a
bit long sometimes. But you will get better at
EJ will get faster at it. Just make the strokes really quickly and slightly like this strokes quickly and slightly. And say, when
everything looks very nice and just keep on doing it. And here at the chin, you see
we also have a dork length. We're going to also
again slightly strokes, strokes slightly
over the chin line. And we make that
disappear as well. Make it all come
together and will look beautiful to see if it makes it look like
real for already.
14. Finalizing The Fur: And if you're really
enjoying this class, please leave a review and let me know what
you enjoyed about it. And also please send
me all your creations. I would really love to see
like how you all did in this. I believe everybody can do this. But let me know if you had
some difficulties with something. Like
Please let me know. Like I'm really curious. What you think of the level is, is it easy enough to
learn as a beginner? Shared with everybody,
so everybody knows exactly what
they can expect. And also really just
turn your screen around, like zooming and really
make it easy for yourself. Because I had a teacher in like in high school that
always told me that. Never turn your paper that
that's unprofessional. That's not how artists do it. I believe that an artist
can do whatever he wants, whatever is comfortable
and nice for, for him or her. So just do whatever
feels nice to you. Sometimes people wanted to, to want us to do with
too much like ourselves, but we have to realize
that it's just our ego and that everybody has
a different way of doing their own thing. It's just your your job to find yours was a comfortable
way for you to illustrate. How do you enjoyed the most, the RU, patient,
needle-like things quickly. There's a lot of different ways. What kind of shapes you like, what kind of style you like. Never listened to what people
want and think is better. Always listen to your own heart. And what brings the
most joy out of you. I'm a bit of an all
round the illustrator and loved drawing
cartoons cells, or love to draw realistic
things. And that's fine. You don't need to be good
at one thing you can. You can be good at
multiple things or you don't even have to be good at it as long
as you're just like it and enjoy the
process of everything. A little bit of philosophy
as well in my classes. And it's just something
I'm also passionate about. And I just feel that
everybody should just do what he or she loves
to do once to do. Same for the path. Really, your path is Sharon. You decide how you are
going to get somewhere. Because we are tending to much to follow a lot of other people. He or she did it this way. So I'm also going
to do it that way, but it might not be working out for you as well as that person. Because for you, maybe something else needs to be
done differently. It's always stick
true to what you believe and to what
you personally, personally love to do. That slide got in
life, but also in art. And of course, if you're
already dead like the, a 100 percent like, you already know exactly
what to do and what to do. Like like how to do all the
strokes and everything. You don't have to
keep on watching. I like Please just
go to the next step. Make it as short as
possible for you. I just do the entire process
so you can see like that. It doesn't require that long. It is long, but it's
not super long. So I just wanted to show you the entire process
because I think that's a cool way of showing
that I'm really making these things live
for you guys right now. Well, life, it's prerecorded, but I'm doing this In the
moment at this point. So yeah. It's kinda life for
me at this moment. So I just enjoy yourself.
Have fun with it. And at 1 you see that
you're just done in like we can go to the next step. And you decide if you want to see the entire
process with speedup, brushstrokes and
everything like that. Or you just want to go to
the next step already. All depends on your
own preferences. If you'd like to see the entire
process, stick watching. If you want to go onto
the next step already because you already understand
what I'm talking about. You can go to the next step. And then we're almost
there. Let me see. I think that's almost it. Just like like somebody
touches NDR. That's good. You see that everything with all the brushstrokes
and everything we have done that everting starting
to fall perfectly in place. So yeah, those are all the, the brushstrokes from now. Now what we're
going to do next is we're going to go and create some shadows and some highlights
in the texture of AR VR.
15. Shading Fur: So to create shadows, we are first going to create a new layer on top
of this layer. So I'll go to the layer section, click on the plus, and we're going to
rename this shadow. Shadows for. Okay, so now we have
our layer Shadows for. So what we're going
to do, we're going to select our dark gray brush, which is this one over here in the middle row of
our color palette. Click on that one. And
what we're going to do is go over every light
color in entire screen. We are slightly,
slightly, not heart. We're going to create just
some texture like this. Because what happens is
like when I zoom in, you see that there's
like some hairs here right now everywhere. And that creates a little bit
more of the shadows of the darker of the darker colors. So just do it out everywhere. Tikrit, like the texture
of the fur very slightly. Don't make it too visible. If you do it very slightly
over the gray as well, overdue what? This
is like, this. You see that
everything starts to become very like Ferrari. You see slightly, slightly, slightly create more shading
in the lighter colors. Very slightly. I'm almost not pressing anything on the screen. No pressure whatsoever. Just everywhere. That needs a little
bit like for example, if you see like places that already have
a lot of texture, you don't have to
do with mostly it's like in places where there's not a lot of texture and
there's just plain color. So the grid a little
bit more for you see, like over here, there's
not a lot of fear anymore, so it will just create like some darker lines in there where slightly and does do that everywhere that you
think it needs. A touch of shooting
very, very slowly. And just relax the
phone with it. And of course, into the
direction of the firm itself. You'll see that everything
starts to look smoothly. This was just a brown spot and now it creates
like some shadows, like some deeper Harris,
let's say like that. Over here, it's not necessary. It already is really nice overlapping this leg and
some spaces where need some. Especially in the snout
here in the center, we're very dark or
I mean very light. And only C is just
a brown spots, so create just some short hairs. Are slightly more too much. So I'm going to sort of eyebrows and I would
call that with animals. So everywhere. And you don't have to do
with very dense lead us through a very randomly
here and there. And it will already create a
contrast of dark and light in the scene, this open
spaces where we just had. So for those just
all we have to do, not everywhere, just
this little space is to create the illusion of
everything is for R3. Let me see, like
in the wide lens is taught to look
very beautiful. See the really good here. And just everywhere.
The same thing. And this note and into the direction of
where the hair is flowing. And that's basically all. I'm going to speed it up to
do everything real quick. And then I'll see what the next step which
is the highlights. Alright. So that was
it for the shadows. Like if I take that layer away, you can see that
it's a bit lighter. See, like, you see it very well. When I take the layer away, you see that the really
differed is really different. And I hope you can see it
really good that the camera is just a little bit more contrast and more realistic
feeling of for, alright, so now we're going
to create the highlights.
16. Highlights Fur: 40 highlights the same thing. We are going to create a new
layer on top of this one. Rename it, and call
it highlights for. And we're going to select this gray color in the top
row of our color palette, which is this one all the way on the right, click on that one. And we're basically going
to do the same thing as we have done with the dark one. Only a bit less. The dark
really created the shadow. Right now, we're going
to do the same thing for a slightly creating, like some lighter
hairs here and there, but more in a dark spots only. So in the brown you
see, if I zoom in, you can see like just some
sunlight stuff here in there. That's really going to
give that effect of all the loose white hairs that we saw in the
beginning into photo. And just do that everywhere. Just everywhere you
think is necessary. Especially here
in the gray area, which is actually like
a bit grayish white. So you atom little
bit more like this. You see some white
hairs here and there. Short hairs. So unlike, don't make long strokes,
make short strokes. If your dog or cat has a bit
more long hair done indeed like long hairs would be
a bit more necessary. And just like this, everywhere, sunlight has very quickly, just move around very fast at some light
hairs here and there. Because this is more
for some lighting, this has nothing to
do with shading. And some here, some
here, some here. And I'll just anywhere
you think is necessary. All up to you. Very short, very short strokes like this. And look how cool our
cat already looks. Awesome just with some
brush strokes and some, some blending altogether that
you can create this, right? So this is it for the highlights where we're going to do next is the reflection of the eye
and the whiskers done, we're going to
create a background. And you have yourself,
your own portrait.
17. Finishing Touches: Okay, to start with a reflection of the ice and the whiskers, we are first going to
drag our photo layer, which is all the way on
the button by holding it. And we're going to drag it
all the way on the top. Why we do this is so
that we can see exactly where do whiskers and where the highlights are from the ice. So what we're going to do
next is we're going to create a new layer again by
clicking on the plus, rename it and call it final. Final. This is the final process
of our portrait itself. After that, we're
just going to create a background and
we will be done. So what we're going to do
first is we're going to keep our brush selected. And we're going to pick
the dark black color. We're going to create the little black spots over here in the snout where
the whiskers come from. So what we're going
to do is just slightly loading dose like that. Grid the hair where the
whiskers come from. Just like this, just trace
the spots on the photo. And that's that same
thing for the other side. Just follow the photo and
the direction of the hair. And just make some
nice furry spots. Nice and smoothly. If I take the photo away, see exactly what it looked like. It looks like right now
is just some black spots. But right now, we are going to change our brush, intuitive, crispy brushing, and
we're going to pick the white color over here. And what we're going to do
next is we could just going to trace the whiskers. You don't have to do it exactly because it's very
difficult to like exactly like go over the whiskers like you
have to have a very, very steady hand to do that. So just quick strokes. Like I want you to practice
a little bit on the site by creating like thin strokes from snoop with no pressure, almost no pressure sequence. If you do pressure you
get very thick strokes, almost no pressure. And just create like
these white sharp lines, make sure that the
point is sharp. So we'd know
pressure in the end. We're going flowing
off like this. You create this pointy lines. So just practicing on
the side a little bit. And once you get the hang of it, just draw the whiskers
like that very quickly. Very messy. There's
like that. You see? And that's that for that side. Same thing here with more curls and some
small ones over here. And you see also
in the face it has a little bit here,
in here, here. So just draw those as well. No problem. And that's basically
that for the whiskers. So now we're going
to do a reflection. So zoom in and just color with the white pencil over the reflection by
filling it in like this. Same thing on the other side. Just color it like how
you see it on the photo. Like that. Missing.
Just draw it like that. Let me zoom out. You
have done all of that. So what we're going
to do is we're going to turn to a vision of, of our photo layer. And we have created
our entire cat. So all we have to do right now is create a background to make their whiskers pop
out a little bit more so that you can
see it a lot better. So go to Layers and
scroll all the way down. And there you see
background color. Click on the white screen
of the background color. And you can change the background
to what color you want. What I would like you to do is maybe create your
own background, come up with something
that you have created. Not something that I do, but
let's play around with it, some colors and craziness and create like a nice
background for yourself. I'm going to create like it's simple to make the
video a lot shorter. And I'm going to pick a
nice blue color like this, that everything pops out
really well this year, the cut pops out beautifully. So what I'm gonna do next
is I'm going to do like a little rectangle in the background to make it a
little bit more artistic. So we're going to first turn off our reference from
our outlines layers and click on the outlines layer if you do exactly what
I'm doing and turn the reference of via do
that is because if I go now all the way to create a new layer and it's there and
drag it out to the bottom. We're going to rename it. Call it BG for background. So what happens if I do like No, go to Selection tool. I guess I'm going to
create a rectangle by creating or clicking on
the S From Selection. Create a selection tool that
is kind of like a rectangle. Pick a nice color
into your disk, and then pick an orange
color over here. And I'm going to fill it in. Like what would have happened if the reference would
be still unemployed, only color to where
the lines are. So you would just go like two little spots and then you cannot do the thing
that we're doing next. So by clicking on the arrow and clicking free form,
turn it around. We could not do this because it would be two different forms that it would not fill
into complete background. And then just put it in
the background like this. And there you have it. Your
very own animal portrait.
18. Thank You!: Thank you all so
much for watching. I really hope you
learned something and enjoyed the class to the max. Please leave a review and as video and share some
of your thoughts. Also send all your
beautiful creations because I'm really eager to see
what you have created. If you would like to see
some more of my work, please check out my Instagram, which you can find
on my profile. Thank you so much and
have a wonderful day.
 Jeroen Van Wel, Let's get creative!