Transcripts
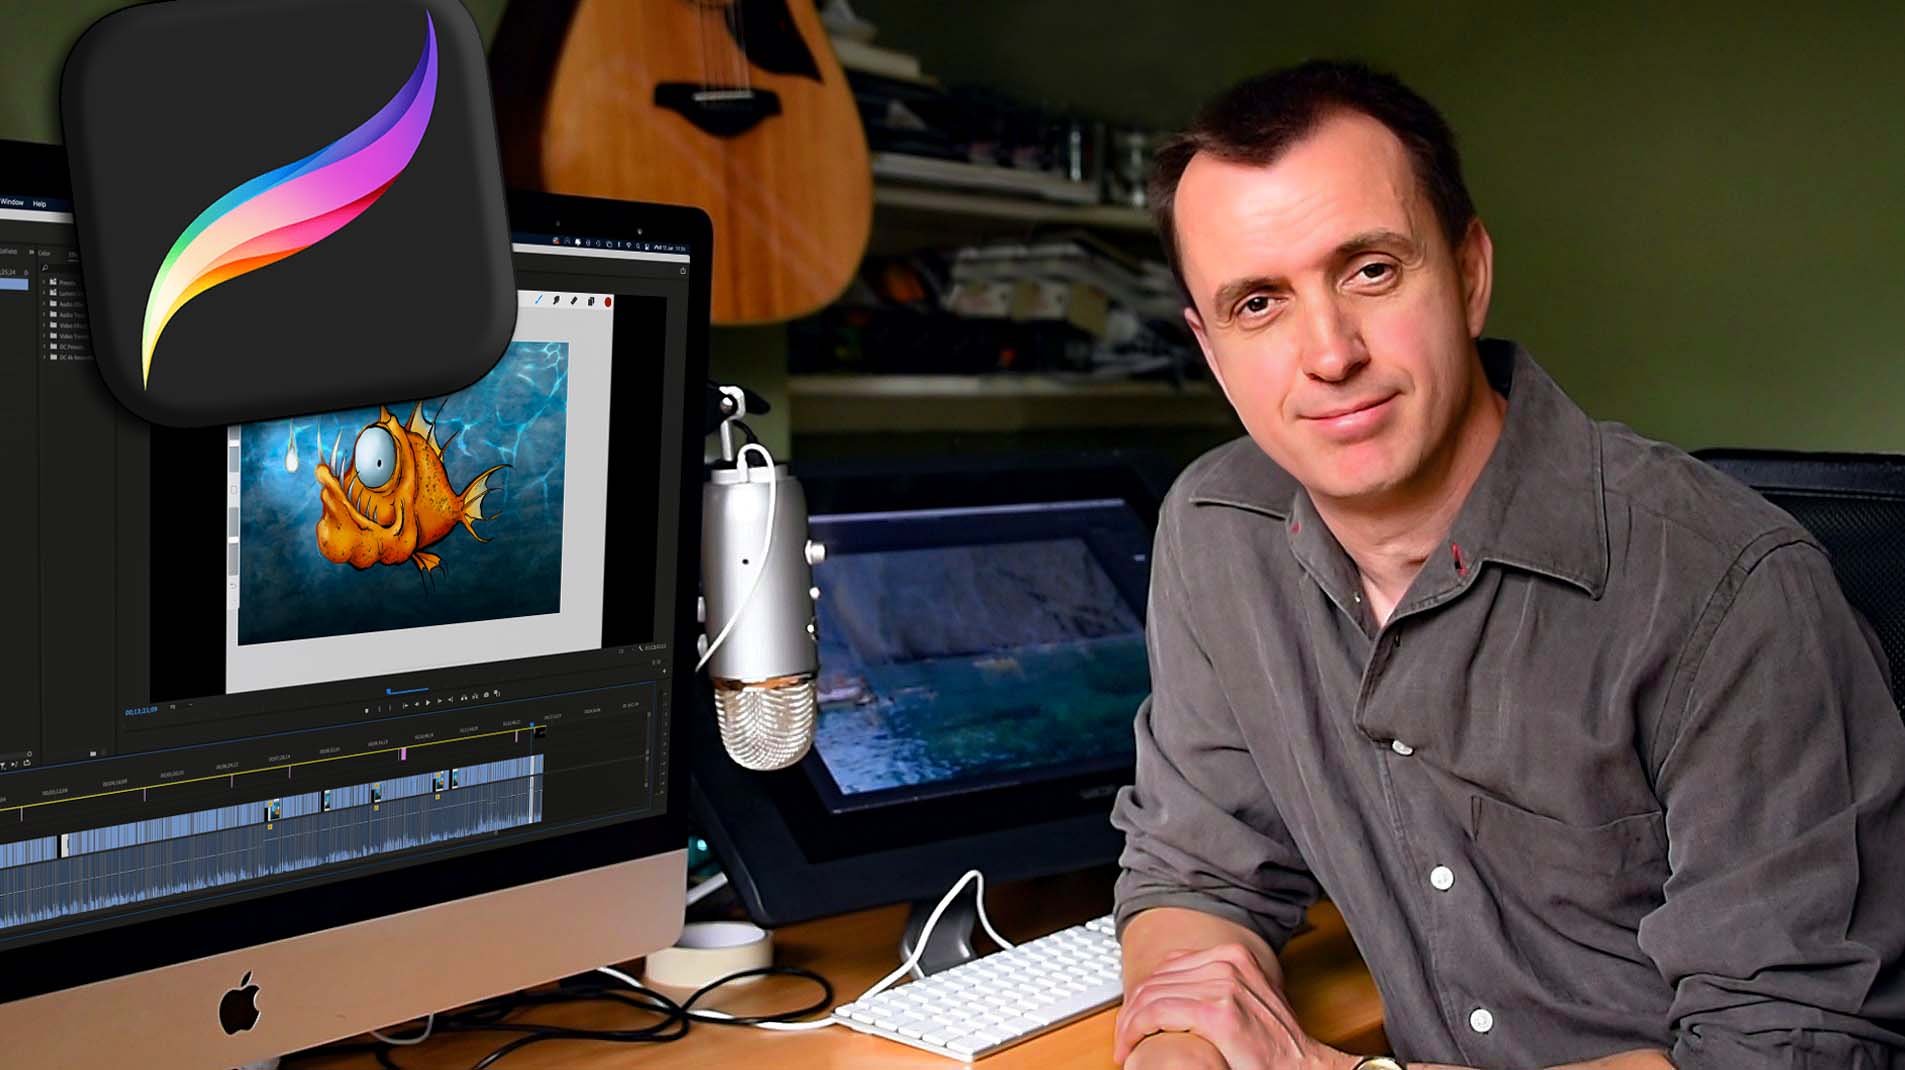
1. Introduction: Hello, and welcome to create a pointteristic
pepper in Procreate. And try saying that five times
really quickly. I'm Simon. I've been a designer illustrator
for nearly 40 years, and I'll be your guide
for this course. And on this course,
we are going to be creating this pepper
inside Procreate, using a brand new brush set and brand new techniques
I have developed, especially for creating
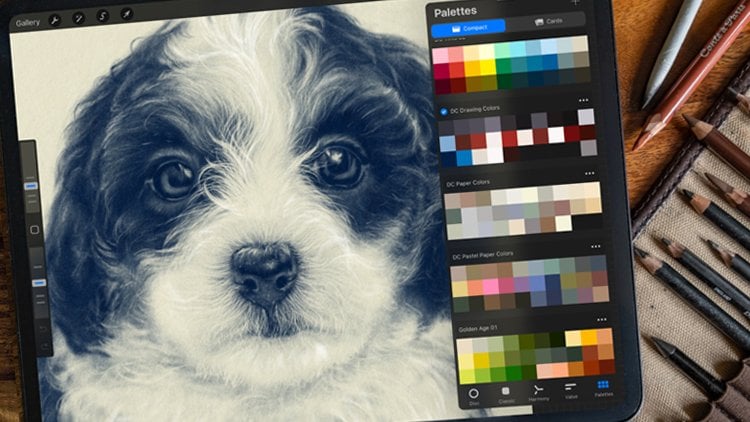
pointeristic artwork. So what is pointism? Well, I'll show you if I zoom in on an area
of this image. Say around here. What you
have is a whole load of dots. And if you're zoomed in really close, they don't mean much. But if you put down enough dots and change how close
they are together, so you vary the density, you end up with
different values, and eventually you
can create an image, which can have detail, texture, but also you can have some lovely transitions
from dark to light. Now, the traditional way to do pontism is where you get
your piece of paper, you get an ink pen which is capable of putting
down fine dots, and you start making
dots, dozens of them, then hundreds of them,
then thousands of them, then tens of thousands of them. And I do like the
effect that it creates. I also admire the patience of traditional artists who
are willing to spend days. Creating some very
beautiful images. But for me, I don't really
have the patience for that. And also, I'd like to avoid repetitive strain injury
on my wrist if I can. So I created a brush
set called DC Dotty, which you will get
with this course. And it's a series of brushes
that can let you create some beautiful pointistic images in hours instead of days. I also have a procreate
file for you, which is designed
to be used with these brushes so you get
the complete studio. With these brushes, yes, you can create pointistic
effect really quickly. I've also created something
which is going to help you put down really
large areas of tone, all using points in seconds. But that is something
that you will be introduced to when
you're on the course. Okay, so with these brushes, you can create pointistic
pictures incredibly quickly, but you need to learn
how to control them. And really, that's what
this course is all about. Giving you the brushes,
giving you the paper files, and also telling you how
to control the brushes and how to create some
great pointistic artwork. My name's Simon. Let's
go on to the next video.
2. The Project Brushes: Okay, here we are.
We've got the file I was mentioning in the
previous video loaded up. Look, we'll start off simple. We'll just use a
simple black color. So come up to your colors. You will probably
start out with a disc. If you've got that and you have a different
color like this, just drag down into the bottom
left, well, the bottom, because for this exercise, we'll just use a simple black because most pointerlistic
pictures are black. Personally, I prefer to
use the classic tab. I just find that square a
little bit easier to navigate, but whatever you feel
comfortable with. So let's come up
to our breath set. DC dotty. Let's take
a look at this. Well, we can do it from
the top downwards, I suppose, but I've given
you this DC pointed line. I I draw it, there's our line. I've included this brush for
the sake of completeness. It's just a continuous line, but I never use it
on this course. Now, if you come over
to the left hand side, this is our side slider. This at the bottom is
our opacity slider. For everything on this course, I've put opacity on 100%. It's always full opacity. For the size, every single
brush stroke I make on this course will have
the brush size at 3%. And if I choose, say, let's try DC
medium scatter. And that little dot you're
seeing is just because I'm using a mouse so that you can see where I
am on the screen. But as soon as I put my pen close to the screen,
it disappears. And can you see that
hopping around? If I do a quick spray, the that's the brush
stroke I'm getting. And if I zoom right close
and personal with this, that spray is made up of lots
of little dots, 3% size. If I take the size of
something like 20%, the dots get a lot bigger. Some styles of pointism do
use different sized dots. Most don't the same dot put down in different
concentrations on your page. So I will tap with
two fingers to undo that and bring this down to 3%. No, you can see, I have
these little notches. Sometimes when you
export a broset and then you import them
onto another iPad, you get to keep the notches. Just in case you don't
me show you what to do. I will come down to my 3% notch, and you see that
little minus sign in that little squared dialogue
box that popped up. If I tap on that, I'm going to get rid of that little notch. But look, if I come
across in my pen, that dialog box disappears. I wish it wouldn't tap again, move across with a
pen. It doesn't work. So, tap, I'm right handed, so I'm holding my pen
in my right hand, so I'm going to bring any finger from my left hand and come and tap on that little minus sign and the notch goes,
so I can move around. And if I want that
3% notch again, so I bring it down
to its 3% there. Again, hovering with my pen over that notch and with a
finger from my left hand, tap on that plus sign,
and you get the notch. Just for the sake
of this course, I suggest you go through the various different brushes
we've got and notch at 3%. You only have to do it once. That is all of them apart
from the two at the bottom, DC nice buildup and
Hard block at inner. Those are utility brushes that are going to help us,
and I'll show you how. So if I just quick
pinch in to size my canvas so that it fits on the screen, let's
go through these. Now, I've already
done DC pointy Line. That is a line like this. If I come to DC pointy one dot, I am going to zoom
in again for this. This, I suppose, is your
classic pointistic brush. If I just tap, Listen, That's putting down dots like this. And you can see the denser
I put them in together. The deeper the shade I'm gonna get when I start to zoom out. You can barely see
it. Okay, again, on this course, it's there
in case you need it. But if you drag it
along, eventually, you will get a line of dots, but look, you can hear this. That's me tapping
down with my pen. I never use that on this course. I do use the one underneath it. Sometimes DC pointy
Line broke one. Let's take a look at that
and zoom in a little bit. If I place this next to that continuous
line that I just drew, you can see the
line is different. It's a line, but it's
made up of a whole series of these dots pad quite
closely together. And if I come to DC
Pointe line broke two. Again, it's a line, but
those dots are just a little bit further apart and just ever so
slightly scattered. Look, if I do this and I hold and I draw
around like this, that is procreate giving
me a straight line. But you can see the doctor
ever so slightly scattered. That is because, well, the way the human hand works, you're likely to get slight scatter variations in your line. So this brush is emulating that, and if I come to DC,
point your line, broke three, again,
the dots are a little further apart and a
little bit more scattered. Now, if I come two,
ask scatter brushes. DC very light scatter. Fady light scatter,
DC light scatter. Again, it's a light scatter, but it's a little bit
denser medium scatter. Now we're starting
to get the dots more densely packed together.
Dance scatter. Yeah, that's a lot of dots put
down all at the same time, DC Very Dance scatter. Well, you can use this. It creates a very dark effect very quickly, and if I zoom out, when you go out beyond
a certain point, you don't see the
individual dots or you don't notice the
individual dots. What you start to see is
areas of tone instead, and that's what we do to build up the different
parts of our drawing. Now, the one at the
end, DC wide scatter, this scattered dots over
a fairly wide area. That's so you can cover
large areas very quickly. But also, look, as with
all of these dots, you make repeated
brushstrokes and you gradually build
up the density of the spot in a certain
area like this. But keep on going, keep on
going and keep on going, you can see if I zoom out again, I'm starting to get an area
of toner from light to dark. And typically, what I would do here is I would come to, say, dense scatter just at
the bottom end and put in some thicker brush strokes there I might even come
to very dense scatter in the later stages of my
drawing when I put in a lot of tonal areas like this. But if you take a
look at this, well, you can see that
would take me what an hour to do if I was going fast using
traditional techniques, you've just seen me do this. In what a minute or two. Just think of the time
you can save here. But it's not all hooray. Isn't life brilliant? Because these brushes, which
work well by themselves, they don't place dots.
They spray them. And supposing I
want a hard border, 'cause sometimes I'll
need a hard border. Well, in a sense, this course is all about how to control that spray of dots, so you get the speed, but
you also get the control. Just very quickly,
let me show you this. Instead of coming to
our brush library, we come to our eraser library, which is, Look, it's
the same brushes, but instead of
putting down dots, we can use them to erase. Like, for example, if I come to DC dense scatter here, Again, set 3%, and I come
to this area here, I can start to take
out brush areas. Now, in general, it
can be easier to put down dots than it
can to arrase dot, and I'll go into that more
on the course itself. But I also have these
two brushes at the end. Generally speaking, that's
what you'll use these for. DC nice buildup set to
100% opaque always. And you can use
this to just take away Brushes around the area. It is a fairly soft brush. As I do a few more times. But the one I tend to use the
most is hard blocker inner, again, set to 100%. And with this one, look, if I come to this area
here, what am I set on? Okay, let's try 7%. If I press lightly, I
get a very hard area. If I press hard, I get
a very large area. So it's very responsive to
the pressure of your pen. Now for this, I'll use
it on part of the side. It is good for getting rid of large areas especially where the dots aren't that
densely placed together. But if I can zoom right up
close and personal with this, if I do it on this area here, you can see it creates
a very hard border. It's either on or it's off. And when you're doing
a pointlistic drawing, you tend not to have
those hard borders. So that doesn't quite
work because it's almost like it's cutting
halfway through some dots. So the way I would tackle
something like this, I would maybe use
it to come down to just the very edge of the work that I'm
doing like this. And again, you can see that's looking a little bit unnatural, but then what I will do is I'll come back to
my brush library. And these DC pointed
line broke one and broke two and broke three.
Pointed line broke one. Let's get that. We're
using it as an eraser. Again, it must be on 3%. And if I come and you can see my cursor wobbling around
there, if I come here, that slightly broken
line can help break up the hard line I've just created if I come to TC
pointed line broke two. This is going to
work even better. Now, look at that. I'm just
trimming along the edge. But because I'm putting
down a series of dots, and I'm repeating brushstrokes
in one or two places. I don't get that ruthlessly
hard line that I get. With hard blocker inner. Instead, I can make
that dark border look like a series of dots rather than Somebody created that edge by hacking away
with a pair of scissors. And the only thing I would say on this is that, look, yes, you can erase, and
often you will have to. But occasionally, if I can
write up close and personal, well, those are the pixels
that make up the picture, you'll get some stray
pixels like that, which are going to
be smaller than the dots that make
up your image. And ideally, what you want is just a whole load of
dots all the same size, but nothing bigger and nothing smaller getting in the way of the effect which
we've just created. Okay, those are the
brushes you either paint on and for this course at 3% and full opacity or you come to a razor and you can use the same brushes to take away, again, at full opacity. And if you need to do a bit
of cleanup in that area, you come down to
either nice buildup or mainly hard locker in and you do neatening and
tidying up work like that. That is the basics
of how you create your basic tonal areas
using these brushes, they will cut down the amount
of time it takes to do your pointistic drawings to a fraction of the time that it would take using
traditional media, let's move on to our
project. I'll see you there.
3. Import our References: Okay, let's get started with our first real
world project. And straightaway,
I want to talk to those of you who have
done my tutorials before. Yes. Another piece of
fruit or vegetable. So before you start
saying, Oh, Simon, no, I'm not going to do
another flipping piece of fruit or vegetable. Well, okay, yes,
you can say that. It's a fair point, but I
will give my usual answer. I'm not just thinking
about this exercise. Yes, I want to show you
various different things, but my ideal is
for you to move on and do your own
original bits of work. Also, I'd like you to
work from real life. So what can we draw
together that you, no matter where you
are in the world, you can go out and get different
versions of that you can either photograph and draw
or ideally draw from life? And the answer is fruit and veg. If you can afford an iPad
and an Apple pencil, you can afford to go out and buy a pepper or a
banana or an apple. Everybody knows what
a pepper looks like. So when you do your
own great pepper and you post it on
a forum somewhere, which you should be doing
art is meant to be shed. Other people can
look at this and go, Oh, yeah, it's a pepper. It's brilliant.
They'll recognize it. And the other reason, as
well, is that it's more complicated than those exercises we were doing in
the previous video, but at the same time, it's not a massively complicated object. So you've got a challenge, draw a real world object that
everybody will recognize, but it's not too
much of a challenge. Okay, so, well, we need a
reference photo for this. I'm going to get my finger and thumb and pinch
inward slightly to reduce this and then
just finger and thumb, two point of contact drag
off to the side like this, and I have my mouse connected to my iPad
so that you can see that little dot moving around on the screen so that you
can see where I am. That will make life
easier for you. I will come up to this
little wrench icon, and you can see I have a number of different sub menus here. I want to come to Canvas, come down to where it says
reference and turn this on. I get a little window, which at the moment just shows
the screen I'm working on, which not much use. If I come down to image, this is a photo which I
have in my photos album. And I can two finger pinch and zoom and move
around like this. I can make my window
bigger, as well. Come to this little
bit at the top to move the whole
picture around. This is what we're
going to be drawing. Having said that,
it's gonna be a lot easier for you if this was
a black and white image. So what I did, I took the photo of the pepper
and I imported it into a program on my desktop
computer called Silver EFX. It is part of the
Nick collection, which is a series of
plugins that you can use in programs like Photoshop
or Affinity Photo. What I did was I created a black and
white version of this, which is pretty contrasty, because silver effects
lets you create all kinds of black and white
effects from color photos. It's a bit of an
industry standard. It is a really good program. So if I just come down to the bottom of this window open
up a little bit like this, then finger and thumb
Pinch outwards. There's the image that
we're going to be drawing. We're going to be using our
poiners and brushes for this, so let's come up to
this, our brush library. Whatever brush we use for all of the brushes
in this library, I want it set to 3%. If I come over to the size
on the left of the screen, there's my size slider. You can see I have a number
of different notches here. That one is set to 20%. The one underneath
is set to 10%. All of our brushes,
we want this on 3%. Okay, so very quickly, how
to create these notches. Look, I'll use my pen for this. If I move this
slider up and down, you can see the size of the brush getting
bigger or smaller. In theory, I come across with my pen and press that little
plus sign that I'm circling, which will create a notch. The problem with that is
I'm moving my pen across, and that window disappears. So I come and type again, move my pen across,
and it disappears. Okay, so look, I'm right handed. Tap there with my
pencil hovering there. I'm going to take my other hand, using one of the
fingers or the thumb and come and tap on
that little plus sign, and I create a notch. Now, the nice things
about these notches is if I move up and down, that little slider will
snapped these notches. And so, just in case when
you import your brushes, you don't get these
little notches, which sometimes
happens, I want you to come down to where it's 3%, and I want you to do
what we just did. Tap on the little plus sign. If you want to get
rid of a notch, tap on that minus sign. So all of your brushes should at least have a notch on 3%. That is for your brushes. It's also for your erasers because we will be using
them to do some erasing, and I want every single dot we put down to be the same size. There are some kinds of pointism where you get
different sized dots. We're not doing that.
No, as for a color, well, I want a straight black. You can use different shades. You can use lighter shades
and different colors, but I just want a
straight black. You might well be in the disc part of the
colors in the disk tap, in which case, you
bring it right the way down to the bottom. Probably bottom left, but black. Okay, so for our layers, we have a paper layer which is providing a little
bit of texture. You can't see that.
At the moment, you'd only see that when
there's a little bit of color or tone in the picture, which we don't have
at the moment. I used a fine paper texture, and I set it to
very subtle anyway, because when people are doing
real world pointillism, they almost always use
a very smooth paper. Because the more
texture paper, well, the dots would soak
in and blob out. And also, rough papers have
a nasty habit of ruining the point of your nice
expensive mechanical pen. We also have the
outline layer here, and you notice that plus the fine paper layer have that little padlock
next to them. That means they are locked,
so you can't draw on them. Because otherwise, if you
could, much as you try, you would probably end up at some point with
a whole load of black dots over
that red outline. You do not want
that. That would be a nightmare to separate out
the two different layers. And instantly, supposing I wanted to unlock
it for any reason, slide to the left, see
where it says, unlock. You tap on that, and now you
could draw on that layer. We don't want that,
so slide to the left again and tap on Lock. The layer we want to start
off with is dotty bits here. So let's choose our
brush for this. I'm going to choose let's try DC very light scatter because now I'll zoom in so that
you can see what I'm doing. Puts down a very widely
scattered set of dots. If I compare that with, say, DC Dad scatter, same thing. But the dots are packed
it much closer together. That is how you're going to
get your tonal variation. It's not about picking lighter
or darker shades of gray. It's about just painting
with little black dots, and you get your tonal variation based on how close
they are together. To fingertap that
a couple of times. Now, let me show you something. DC medium scatter, and supposing I wanted
to concentrate on this top bit of my pepper and I put down an area
of color like this. This is what you want
to avoid a scribble. You can see the line
strokes that I've made. You can see how
if I do it again. I'm starting off
and I'm being good. I'm trying to get my
brush strokes together, but by the end of the stroke, I do what we all do, and
I get lazy and I do that. At the start of
that brush stroke, the dots are reasonably uniform. So I'm getting a
smooth tonal area. By the end, though,
I've got bored. And so you get to see the
individual brushstrokes. That's what we want
to try and avoid. That said, how long do you think it took me to
make that brush stroke? Maybe, what, 2 seconds? And look how many
dots I put down. And now imagine that
instead of using procreate, I was using traditional piece of paper for those of you who
know some bristle board, that's a kind of
smooth drawing surface and a fine line of pen. How long do you
think it would take me to do all those
dots individually? It would take a lot longer than 2 seconds, much, much logner. If I was working fast and I was confident with
what I was doing, that might take me
what? Half an hour? Straight away, you can see
how this technique can speed things up to a
ridiculous degree. However, it does bring its
own set of challenges, and that's what
we're going to be looking at on this course. Because, look, if I teething a tap again and I come to, say, DC wide scatter, I put
down my area of dots. One of the challenges is getting
a consistent tonal area. Now, that's not bad, but supposing I put down an area
like this and I spend a bit too long in one
area and then go off a bit too fast
in another area. You can see the doctor denser
in some areas than others. So this is going to
be a manual skill. Figuring out how to get
fairly even areas of tone, but also how to get
gradated areas like say, see this bit here on the photo. You have some light bit
gradually going down to darker areas and trying to get those transitions
from light to dark. That is going to be
another skill that will develop as you learn to
handle these brushes better. But I think the main
issue is, for example, look, let's take a look
at this bit at the back. I can draw really,
really quickly like this and lay down an area of
tone. Isn't that fantastic? Think of how much
time I've saved, but the only fly
in the ointment is most of these brushes
scatter dots, which means I've gone over the edge of the pepper
into the background. I need to learn how to
control these dots. So I can do this
technique hundreds of times faster than
the real world, but also not end up with a blobby mess because
in the real world, yes, there are soft,
graduated areas of tone, but there are also hard areas like the back of that pepper. And so these are the things
that we're going to be developing as we work through the projects
on this course. I that is enough setup, I think. So in the next video,
we'll actually start laying down
some areas of tone. Alright. I'll see you there.
4. Let's make our First Dots: Alright, let's get
started with this. Let's just double check we are on the right layer
dotty bits here. For my brush, I'm going to start off with DC Light scatter, and I'm going to start with
the lighter areas first. And fairly soon on, I think I'm going to
concentrate on this bit here, which has a mixture of some of the lightest areas plus
some of the darkest tones, so I can get an
idea of how dark I want to go because
with this method, you want to start off with lighter areas and then work
down to the darker areas. That's why I've chosen DC Light scatter as my first brush. With this method, because
you're spraying points down, it is a lot easier to put down points than it
is to erase them. And also, with
pointilism more so than just about any other form of illustration or art
that I can think of, your life is spent getting
really up close and personal. And if I was to choose, say, DC pointy one dot, and putting in a whole
lot of dots like this, you cannot help
but work close up. But the whole thing about
pointism is you're putting down areas of tone,
dark to light. And the rest of that
sentence I just said, which is the most
important part is, you're putting down
areas of tone, dark to light relative
to each other, like that little tone here. I could paint that really
dark area and think, Oh, wow, that's fantastic. But until I zoom out, I don't know how that area
looks relative to, say, this part of the
pepper, for example, if I spend all my time zoomed in and only working on
one area at a time, I cannot help but make mistakes. I cannot help but
make, for example, this bit of shading on the left side of the
pepper too dark, relative to this part of the
paper. That is human nature. So for the shading, I would
normally adopt an everything everywhere all at once policy where I put down
an area of tone. Then I'll put down
maybe a darker area of tone in another area, but I'm constantly zooming out like this to compare the tones
relative to each other. And yes, I will sometimes
zoom out even as far as that because there is something about making your image very, very small that lets you see
tones and a whole load of other things in a
very different way than if you're working
up close and personal. So plenty of zooming in and out to judge
how you're doing. You can see when I
pinched outwards, I accidentally
created a line there. So what we'll do come
to our layers panel, tap and come clear. So now I have a
completely clear layer. I will come back and
choose DC light scatter, start with the front of the
pepper and start to lay down an area of color or an
area of tone like this. I'm going to put my brush in different directions because I don't want to get a
constant scribbled effect, and already I'm going a
little bit To fast with this. Oh, that's a point.
Make sure you are on opacity of 100%, as well. I don't want any gray
dots. I want black dots. And I'm moving my brush
in different directions. I'm moving that way,
I'm moving that way, I'm moving that way,
I'm moving that way, and laying down brush
strokes like this, or I'm moving in little
tight circles like this. And actually, I quite like
that, so I will do this. If you're wondering why I didn't make bigger brushes than this, which cover wider areas, that is because of the constraints of
the procreate engine. I wanted a single small dot, and all these dots that
you can see are all just variations of
the same single dot. But when I set things up inside the procreate
brush engine, I made that dot splat down faster for some
brushes than for others, so you get this either denser or lighter scattered effect. I'm just laying down an
area of color like this. What I will do is come
to DC wide Scatter, which is a bit denser than this, but I think I can
afford to do it. And, yeah, that's looking
a bit more random, and I quite like
what that is doing. Come on, let's actually look what we're doing and lay
down areas like this. Now, I want to do that thing that I said might be a problem. I'm going to go over this border where the pepper turns over to go to the stem. You can see these
slightly hard borders. Well, we need to know
what to do about them. So let's show you that
in just a little bit. But for now, I'm just building
up these areas of tone. If I make repeated
brushstrokes in an area, you get more dots, the area gets denser and so you get
the darker areas. Just for this, I know I said
I'm going to be adopting an everything everywhere all at once policy so I can
judge the tones. But one thing I do like to do is just choose one
particular area. And for this, I'm going to
use the area we're looking at on the reference photo
so I can get an idea of the different density of dots and how the
tonal areas look relative to each other so that I know what a dark
area looks like, what a lighter area looks like. And the bit I'm doing right
now is definitely dark. I'm not sure there's any areas around here which are
darker than what I'm doing. I'm going to swap to let's
try DC dense scatter. See how that does. And, oh, yeah, that's definitely
looking darker. It's also a more tightly
focused brush so I can get more local areas of value. And when I'm doing this, there always comes
a certain point when I'm using this
technique where I think, Oh, no, I've gone too far
or this isn't working. It's just a mess of pointer. I'll come to DC medium scatter. I want something just
a little bit lighter. Because until you get
enough points down, and until you start
controlling those points, you end up with
just a sea of dots. It looks like nothing
in particular. It all looks too scattered. And so, within the first five, 10 minutes of doing a
pointistic picture, you can be forgiven
for thinking, No, this ain't
working. Give it up. To which my advice is,
no, keep on going. Eventually, the form
will start to appear. Now with that, I'm going to get rid of a few of those
lines because I've got lines of color rather
than areas of color. I'll come to DC wide scatter. I must admit I do quite
like this brush because it does scatter the
dots quite nicely, but you can see here again, I'm going over the
edge of my pepper. I don't really want that, do I. Carry on. Put down
different dnsters of dots. Like at the moment
with this, look, if I see them up close and
personal on this area, I will even try and
make them the same size on my screen,
roughly the same size. And now, what I'm going to
do is I'm going to squint. That's where you
close your eyes so they're almost closed and
everything becomes blurry, and I'm going to look at
the values of the photo and compare it with the values
that I'm doing right now. And straightaway,
surely, you can see this if you're
doing the same thing. My picture in this area is overall much brighter
than the photo. That is okay at this stage, because, like I say, it's a lot easier to
put down points than it is to erase I was doing
this and thinking, am I going to have to
redo this tutorial because things are
getting dark very fast, but now I come in
close and I squint, I can see I've still got plenty of tonal areas to lay down. Overall, Yeah, that can
do with being darker. So now I do that and I come in, and I take these areas, which I think, Yeah,
that needs to be darker. Yeah, it gets darker sooner. I realized that when I started
squinting at my image. So I'll lay down
some areas here. I'm working fast, one reason is, I always prefer
fast brush strokes. Fast brush strokes
look more confident. It saves me time. And also, if I completely mess things
up and I want to start again, I haven't wasted too much time agonizing over where
the next dot is. I mean, imagine doing this traditionally and you
get to this point after what? How many hours and suddenly realized, No, I don't like it. I've got to start again.
That would not be good fun. Let me scip my eyes again. Yeah, need a bit
more around here. Definitely need some
more around here. Within this area, I'm
not concentrating on one small bit and trying to
get out looking perfect, before I go on to the next area, I know I'm focused in, but I'm still trying
to do a little bit of everything
everywhere all at once, looking from area to area, seeing what works, what
needs building up. I'm going to swap
to medium scatter, which is a little bit
more targeted because I need some areas here which
are a bit more targeted. And I know you can
hear my brush and so you're getting a feel of
how fast I'm working. Now that I've laid down my more general areas of color, whoops. I'm starting to imagine areas
there. I shouldn't do that. Always need to be looking
at what I'm doing. Build up things this way. Okay, look, at this point, I could keep on going with this. In fact, I'm sorry,
I can't help myself just seeing another
bit which needs building up a little bit. Okay, little bit
of a squint again. I'm getting closer there.
I still need to do a little bit more
work in some areas. But let's show you
what I'm going to do with these borders.
It's pretty simple. Around the border, the
dots aren't too dense, so I can come to my
eraser, open it up. And the brush I'm going
to use for this is the hard blocker inner brush. This puts down a no
nonsense hard edge line, and it should be set
on a pasty of 100. No massing there. I'll
make the brush size. It can be any size
because this isn't dots. I just want to raise things. If I draw a
brushstroke like this, in that denser area, you can see I'm getting
a very hard line that's cutting dots
through the middle. That's not what I want
in the darker areas. I'll have to look at
different ways to erase in the darker areas. But for the bit
around the outside, I can just come in
and trim these dots away and stop when I
get to my red outline, which is in the background. And you get less of a problem here where you're
cutting dots in half. I know that when
it's zoomed out, people are probably not going to notice but it can be
a little bit ugly. And you have a whole load
of just tiny little bits of ugly in your picture. They can start to mount up after a while. You
don't want that. Now, what about this area here? Yeah, you can see
these areas already. I know there's only a few dots, and I'll probably
put down those dots again pretty soon because there is tonal areas on the other side over the
lip of that pepper. But for now, I just want
to get rid of these. I'll come to those
dots in a little bit. So I'm going close to the
border of where I'm working. But already, you can
start to see that border is looking a little
bit took dotty. It looks like a line rather than a series of dots
making up a line. So what I'll do is
come to my eraser, and I'm going to
come to let's try either DC pointy Line broke one or DC pointed
Line broke two. If I come to my drawing and
I take a look at these, let's take a look at
pointy Line broke one. And if I draw a line, you
can see it is a line, but it's a line that's made
up of a series of dots. To fing attached one, do that. Let's try pointed
line broke two. Again, it's a line, but it's made up of
a series of dots. So I'll come back to my
eraser. I will choose what? Let's try DC pointed
line broke one, and I can come back and
move along this area. Oh, let's check it's on
3%. Yes, it's on 3%. And when I do this, rather than getting that very straight, uncompromising hard line, I'm now getting a
slightly softer line. It's a little bit rougher. It looks a little bit more like the dots I've drawn than
the straight hard line. I will come to the slightly
wider space pointed line broke two for these end areas. It doesn't mean a
bit more scrubbing, and you can see rather
than a series of dots, I am getting one or
two little gray areas just on some of the
areas which I'm erasing. But when you're zoomed out, it's not gonna be that noticeable, and it certainly
looks better than that very hard eraser
that I was using. Remember, I don't want
any hard lines here. Well, if I do want hard lines, I want them to be slightly
different to that, but that's a topic
for another time. But that is the very
basic technique. You put down a spray of points using the various
different brushes. You work light to dark. You don't mind going over borders because you can
always erase things again. Although, ideally, when you're working in different
value areas, you want to try and minimize the amount of erasing
you are doing. On hard borders, like the
outside of the object, yeah, that's fair enough, but on
the inside, not so much. Okay, I'm going to call
a halt on this lesson. In the next lesson,
we're going to be adding layers and
merging them down. I'll show you that technique
in the next lesson.
5. New Layer & Merge Down: Okay, so I'm working
away, and as I said, I am a bit worried
about going too dark in certain areas because it can be quite hard to
erase what I've done. But at the same time,
I've got to judge things, and there are darker areas here, and if I squint, I can still see certain areas which need
to be a little bit darker. And so at this point, I'm
doing what we all do, and I'm starting to get nervous that I'm going to go too far. So I'm going to come
to my layers panel, and I'm going to create
another layer on top of my dotty bits here layer. And come to my brush. Let's come to I'm
medium scatter, and I'm going to draw on top of the areas I've already got, which do need to
be a bit darker. I'm zooming in a little bit
closer than I would normally. That's because, look,
I'm recording this, and I'm worried that by
the time it gets to you, you won't be able
to see the dots because it's got to go
through video editing. You might be watching
it on a smaller screen. So I need to zoom
in just so that you can see clearly
what I'm doing. At this point here, let's choose let's choose light
scatter because I'm seeing one or two bits which
go across rather than down. There's a little
bit of direction in this area which
I'm drawing now. Scribble. But as before, I'm still working fairly fast. I'm going to come to Well, let's come to dense scatter. Let's do it like we mean it because instead
of me spending all my time worrying that I'm on a certain area which I'm
gonna make things too dark, and if I do, what
do I do about it? All of this new detail is
on the new Layer four. And I'm looking at this,
thinking, Is this working? And I think for the most part, it is I am zooming a
little bit too much, so I think it's a bit difficult
for me to judge things. Look, if I zoom out a little
bit like that, for example, maybe those little
ripples I was putting in are a little bit too high up. So it comes to my arrays to. For this, I'm going to
use DC nice buildup, which is a slightly
softer edged eraser, but I paste on 100%. My size, if I just
hover because I've got a nice Apple pencil
and a fairly modern iPad, if I arrase certain
areas, look at that. I can erase this area, but I'm not affecting
the bits underneath. I can erase weight at well, nothing and also do
the edges as well. But because a lot of those dots are on the
layout underneath, I can work quickly, I
can work efficiently. I'll go to medium scatter. This means I can work
with confidence. And when you work with
confidence, you can experiment. You can try new
things like that. Line I was putting in was
a little bit too high, so I'm putting it down there. It only to make things
a little bit darker, as well, but a little bit
of a scribbly line there, and deepen this area, let's come to DC
wide scatter and just make repeated
brushstrokes to gradually build up
this area here. And I'm quite enjoying
what I'm seeing here. Also, this highlight here, which I've been
beavering away with, that could do with
being a little bit darker, as well, I think. A little bit of
direction in there, let's come to DC down scatter
because at this point, things are getting
really quite dark, so I can get away with using
the dense scatter brushes, but there's a little bit of direction in that pepper area. So I am making brush trucks like this to control what I'm doing. And yet, sure enough hip, look, if I can write to the edge
of the pepper at this point, it is pretty dark, but there's a slight area of
reflected light. I'm going a bit too dark
in just one or two areas. So I can come back in, come to my eraser and get
rid of these bits here. Let's come to pointy
line broke one. If I come up right at
close and personal, I can see there's one
or two little bits of reflected light on the
edge of the pepper. And so what I can do is come in, create this slightly
rough outline, but I can arrase those areas. I can erase those dots I just
put down just in that area. But the underlying
layer is not affected. That useful, so I can
get a little bit of reflected light going
around like this. Now, you don't really know how well you've done until
you turn off the outline. Let's take a look at this for the first time with the
outline turned off. And that really does make a difference to how I'm
looking at my picture, because I don't have
those red lines in the background to push
my eye around the page. The only bits I'm seeing is what's going to be
in the final image, and it's starting to take shape. Quite pleased about that. And that I found is what happens when you do these
pointistic drawings. You put down your
different density areas. It starts to look
like a bit of a mess, but it's only when
you start putting in the deeper areas where they belong and putting in borders. Hard borders, soft borders. Effectively, that's
what we're doing. We've got soft borders in
these shaded areas here. Have hard borders on
the edge of the pepper. So get the hard borders and
the soft border sorted out, then you're going to
get a bit more success. Now, looking at this, make sure I'm on the
right layer four. What arrays do I have selected? I'm going to come
back down to DC nice buildup because one or two of these lines
that I put down, I think they should be
at a steeper angle. So I'm going to get rid of them. Come back to say, medium scatter and put them at a slightly greater
angle and then just blend in these areas. And that slightly steeper angle, yeah, that is working
a little bit better. Eventually, I will
get to the stage where I've done away with
the outline altogether, but not yet because just price sign off on this video,
I can see, Look, I'm going to come
to light scatter because there is an area here, which does need some dots. It's not completely white
needs a bit more blending in. Let's not bother with that. DC medium scatter, that needs a little
bit more definition. And there's a slightly
hard border here, but I'm going to bring this down to here because I can
see a darker area here. I can go over that red line fairly confidently, come around. And then come to
my eraser and just knock back that area there,
do a bit of cleanup. And there will come
a certain point where I'll turn around
and say, You know what? I like what I've
done with this area. Not just yet, though. I just want to put
down a little bit more some areas here. Oops. I just went over
those highlighted areas, which I did just
short while ago. I don't want to do
that. Came around here. I am working a little bit faster than I would do normally. Let's choose hard
block it inner. It's giving me a more
crisp arrased edge. And because these
dots aren't very dense around the
stem of the pepper, I can come in and
erase them like this. For these ones just on the edge, now that there's
only a few left, I will come back to
pointed line broke one and just do a bit of a fine
trim on that edge, which hopefully shouldn't look
too hard because I'm using a slightly broken line
compared to hard locker inner. When I'm doing these
trimming of the edges, I'll either use
pointy line broke one or pointy line broke
two for most of them. Oh, there's one more
thing I do want to do point line broke two. No, I need to use something
a bit harder for that. Hard blocker, inner. Make it nice and fine because there's one or two
highlighted areas here. I can see where I've drawn them in in red in
the background. Those are the highlight areas. If I want this to
look realistic, I need those highlight
areas in place. Now, that may end up being
a little bit darker. But I'll do that
later. Remember, keep on coming back,
checking your work, create new layers,
and now I've decided, Okay, that's as much as I
want to do with that layer. There's nothing there
that I dislike. A lot of it I do like. And so while I'm
liking what I've done, click on the layer,
come to merge down. Layer four merges down into
the dotty bits here layer. So now everything
is on one layer. And when I do that? I
create another layer. And I come, too. Let's
try medium scatter. Come back up here to the top. I can put down my dots.
Densely as I like. I'm not worried about messing
it up. Do mess it up. That's what 30 seconds
worth of work, which I can just
clear and get rid of. But just while we're
here, carry on with this. I think a little bit
more here as well. That needs to be a
bit deeper there. That's really quite deep shadow. But you need it's
coming out a little bit more. A little bit there. Come to my eraser.
What on my own. Hard brush. Take it away
just from that sharp edge. Take this away from the edge of that pepper,
and this bit hit. Take it almost down to the red line because I'm
getting some dense areas here. Then switch to pointed
line, broke one. And just for these final areas, use that slightly dotty line as opposed to the
very hard edge. Come here and trim it back. If you have a large area of stray dots which
you need to trim, which is what we're doing now, start off with a hard, block it in a brush just
to take things back. And then when you've
taken it back to almost the point where
you want it to be erased, come to either DC
pointed in broke one or broke two and do
your fine erase. Let's take a quick
preview of this. I'll do it a little
bit zoomed out. And that yeah, no massing. That's a definite improvement. That was what, three
or 4 minutes worth of work, tap on the icon. Come to merge down, and repeat. Create a new layer, work
on that, merge down. That way, you get to work with more confidence and you get to control the
terminal areas. What I suggest you avoid doing is what a
lot of people do. They get happy with
a certain layer, but then they just
create a new layer and a new layer and a new
layer and a new layer, and they don't merge down. Now, for certain kinds
of illustration, I can see the point in having
a lot of different layers. But with this, it's
just dots. That's it. And also, I've had to give you a pretty large canvas
because you tried doing all those millions of little dots on a canvas
which has hardly any pixels, say, the screen size canvas, which is the screen
resolution of an iPad. There's simply not
enough of pixels. That's these little tiny dots. That make up your picture, there's simply not enough of them to produce a
convincing effect. For this, you do need
a lot of pixels. And so a lot of pixels per layer means your procreate
files are going to get bigger and bigger and
bigger until eventually you're going to run out
of memory on your iPad. Not the storage memory which stores your pictures, the RAM, the bit of memory that every app uses to do all the
interesting things. This iPad, well,
most of the time, I need to use the latest iPad
to show off new features. And so this has 16
gig of RAM on there. That is plenty enough for
everything that I'm doing. But if you have an iPad
which has less RAM, eventually, you can start
running into memory problems. And every layer that you
have takes up more memory. And so if you have hundreds
and hundreds of layers, eventually, you won't be
able to create it anymore. You'll run out of memory. That causes all
kinds of problems. But if you keep on merging down and merging down
and merging down, you won't have that problem. And also, if you are happy
with what you're doing, and then you merge down, all of your dots are in either one or two
different layers, which means it's very
easy to carry on editing things like erasing dots
from a certain area. If you have dozens
of different layers, you're going to be playing
that awful game of which layer is that
little dot on? And you spend all
your time going, Is it that one? No,
is it that one? No. Is it that one?
No. And frankly, that is a bit of a
crap game to play. So create a new layer, work over the top
of your old layer as confidently and as
quickly as you like. Weren't you're happy with what
you've got, merge it down. Okay, that is it for this video. In the next video, we're going to talk about a
little shading problem that we're facing at the moment
and what we can do about it. Alright, so I'll see you there.
6. Import Textures: Two of the issues we've
discussed on this project so far have been how to lay
down an even area of dots. Now, that's got a lot to
do with brush control. And another problem we've had is discussing how to
judge your dark to light areas relative to other dark and light
areas in your picture. So let's talk about them now. The first thing I'm going to
do is come to my erase tool, I'm going to come down
to hard block it inner. I'm going to set
it fairly large. I'm going to come down to
my dotty bits here layout, which has all my dots on, and I'm going to erase all of these dots I did here
and these bits here. No, no, Simon. What are
you doing? Don't do it. Think of all the
hours you worked on this. Okay, all the minutes. But anyway, you get my point. Then I'm going to come up to my wrench
icon or my actions. I'm going to come down to add, and I'm going to insert a file. I Cloud Drive. Now, there is
a file for you to download. And for me, where have I put it? Drippy cat Art Studio,
pointers and Textures. And I'm going to come
down to this one which says Fine dot chart. That is going to load. I'm
not going to make it bigger. I'm not going to
make it smaller. That is important, but I am going to use my finger
to move it around. You can see these blue and yellow lines all over the place. I don't really need
those at the moment. That's just the snapping
in my settings. I would just move this
off to the side here and come to my layers
panel to set it in place. Now, sometimes when you import an image and you are
on an empty layer, it will go into
that empty layer. I was on the dotty bits layer, and so Procreate created a new layer and put
down these dots. So what are the little previews of a series of
textures I created, which took forever, by the way, you can see is I've got
different rectangles of varying densities of dots. These were all created with my pointless brushes set to 3%. And you can see, because of
the different densities, I'm getting different
tonal areas. So let's take a look at this.
Let's move this across, and let's zoom
right in with this. I want to zoom in on generally a light area like
the front here. And then what I do, I
do what I did before. I squint. And I'm looking at the
lighter areas here, and I'm trying to
figure out which one of these different swatches
most closely matches it. And I think it's
fine dots three. There are some slightly
lighter areas, but I think fine dots three, at least one eye squint, seems to give me a
general tonal area, which is a smile brightness. Alright, so let's zoom
out a little bit on this. Let's zoom out a
little bit on this. And make that inserted
image invisible. What I will do is, now that I know I want fine dots three, I come again to insert a
file and look at this. Fine dots 03. Click on that and I get this. I'm going to move it across so that it covers my entire pepper. Come to my layers, and I'm going to
rename this 203. Just for the purposes
of this tutorial, I know that if I have a
layer sector 03 or 05 or 09, it means that layer is one of my pointer
list texture layers. And as you can see, especially
looking for zoom in, what I've tried to
do with this is give an even brightness throughout the entire texture with just one or two little
random variations in there so that it looks
hand drawn, which it was. And it was a nightmare. I'm sorry, did I just sound like I was about to burst
into tears there? Well, maybe I was. And I
don't want to talk about it. But you can see that with
just a little bit of work, I'm going to cover a massive
amount of ground with this. Now, when we go on to do the project where
we draw the statue, which is the most advanced
project we're going to do, we're going to get into
things like clipping layers, which you may have heard about. We're also going to get into
things called layer masks. Which maximizes the flexibility
of these texture layers. So now, though,
we're just going to erase because whilst
this is great, I don't need it in all the
areas all at the same time. So we're just going to erase
the bits we don't want. But before we do, though,
this layer is called 03, I'm going to swipe my
finger to the left, and I'm going to
duplicate that layer. If I make it invisible, maybe you can see that
maybe you can't look, I'll zoom in a little bit. Because I have two layers
sitting on top of each other, if I make one of the layers
invisible and visible again, things appear to get just a tiny bit strong look if I zoom in. Every dot you see on
the screen is actually a mixture of darker color, plus the dots around the outer areas are
slightly lighter. That is so the pixels can
blend in together just a little bit more nicely
than they would do before. And so those lighter gray pixels are actually partially
transparent. But if you take a partially
transparent pixel and duplicate it and put
it on top of each other, you get a less
transparent pixel. That's why you're getting
slightly stronger effect. But if I pinch out there. Make this a little bit smaller. What I'm going to do,
I'm going to make sure that I can see
the entire picture. My top layer is selected now. I'm going to come
back to my transform. Click on that, and
I'm going to move the whole thing off to the side like this and come back to my layers panel because then
I have two sets of dots, one on top of the other, and because that offset slightly, I'm getting greater
density of dots, but I'm starting to see
some patterns in there. I haven't moved this far
enough. So come back. To my transform, I'm just going to drag it
across like this. And if it needs to be, I'll
pinch outward slightly. You see that little green dot
at the top of the screen, that's my rotation dot. I want to rotate this around
a little bit to further break up any kind of patterns I might have. And
actually, you know what? Maybe if I just drag it
down a little bit as well, make sure it's still covering
the top of the pepper, and just drag it around until
eventually I get something which looks I'm still
seeing patterns there. So yeah, what I'll do is I'll rotate this
around like this. I'll take it back because
I have snapping set on, things snap round at
15 degree increments. If I turn off magnetic and
snapping and move this around, I can move it much
more smoothly, and actually does that
work a little bit better? Let's take a look at that.
Yeah, that kind of works. But as before, I now have
no shading, light shading. And because I duplicated it, I've got slightly
darker shading. I will make this top layer
invisible for a second, and I'll come down to
my original 03 layer. Take it in a little
bit like this. And now we'll do
what we did before. We can throw eraser, hard
blocker in selected, and I'm going to erase the
bits. That I don't want. So start off with your brush
set bigger than that, even. Just come close to the
pepper, but don't touch it. Come around like this. For the shadow, I'll look
at the shadow later on. For now, I just want to get rid of these various different
brush strokes like this. The stalk, as well. There are various lighter areas there. I've done that nice and quickly. Because I used a
big brush and I was zoomed out, I can zoom in again, make my brush size quite
a bit smaller and now, how big is this? That's on 14%. And now I can just go around. And because these dots are
very sparsely scattered, I don't have to
worry about getting those ugly hard line borders. The dots are too far
apart to give me that. Bring this round. This is just going to be me doing more of the same going
around the outline, so I will fade out and fade back in again
once I've done it. Actually, just as a quick aside, just while I'm working, I got this idea because
when I graduated, I had to produce a leaflet for a local countryside commission, and they wanted an illustration, and you could only
use one color. And so what I did,
back in those days, I think it was 13 86 or
something like that. I'm not sure. But you know
what letroset is, right? Letroset is where we used to get all the letters in various
different fonts and typefaces, and there'll be transfers, and you could rub with
a pencil or whatever. And transfer those letters onto a piece of paper.
Thank you very much. But also, just around
the time I graduated, I learned that as well
as doing letters, they have things like
this, these textures, where you have a series of dots like you're
looking at right now. And so I bought this ectroset which looks like
we're using now. And I was able to
very quickly knock up an illustration for them using only one color because we were only allowed
to use one color. I think it was like a park
gate or something like that, and everyone was very impressed, and I felt great, and
they didn't pay me. Is this sounding familiar? Bet it is. Why do I keep talking With my voice
going up at the end? Probably sarcasm. Because they never paid me
and I'm going to stop now. Alright. So that means I
can cover huge areas very, very quickly with
a regular pattern. The other advantage of this,
which we're gonna see soon, is that now, well, look, if I make this invisible
for a second, up until now, you've seen me put down dots, and you've also heard me
talking about trying to balance the different values relative to other values on the screen. That's all very well,
but effectively, I'm working with a white
background because I want to emulate a
white piece of paper, which is the most common
way of doing pontism. It is not so easy how to judge your values when you're working against a
white piece of paper. That's why when people paint, they will often
prime their canvases to be a different color or they'll put down broad washes so they can judge
different values. We didn't have that. We
were trying to judge all of these critical values
relative to each other against a white
background as we were drawing, which is a bit of a pain
in the backside until now. I guarantee that judging these
different values relative to each other has suddenly
got a lot easier. So, as well as being
a huge time saver, this is also helping me
make informed decisions. Now, just while I'm here, there are one or two areas that I
definitely don't want it. There was a highlight
here, a bit of a highlight down here. I'll worry about
this stem later on, I think, a little
bit light bit here. And what I'm doing is I'm going around and taking a look at the various different
highlights in my picture and taking those dots
away from those areas. Yeah, it's definite bit here. I'm being fairly cautious about how much I take away because
basically, I'm raising. Once these dots are
gone, they're gone. So I'm being a little bit more cautious than perhaps
I would like, but that's the
nature of the game. When we do the tutorial
where we do the statue, you'll see me using layer masks and clipping masks to
do the same thing, and that is going to
make life a bit easier. A little bit around
the back, as well. That's very, very light there. Alright, that's working nicely. It's looking rather uniform, but look, I also have
this layer here. So I'm gonna repeat
what I just did. I'm gonna go around the
outside like I did before, and I'll fade out and fade
back in once I've done that. Okay, I've got to a
certain point with this. I've got rid of the outline, but I don't need all this
dark for all of the pepper. And so I should do
what I did before and erase it from various
parts of the illustration. But I think this one's going to be a little bit more difficult because it's not a simple
pepper or background thing. There's different shaded areas. So it's going to
be more difficult. I might get it wrong, and because I've just erased things, once I erase, I
can't get it back. So I'm going to come
to my layer three, I'm going to swipe and
I'm going to duplicate again and make this
one invisible. Actually make the
bottom one invisible. So if I do mess things up, I always have another
version there as backup. Alright. So with that said, I have my layer on top, my eraser, hard block up inner. Let's make it. How big is it? You can just see
it moving around, but that will get
bigger, trust me. So I want to get rid of it in certain areas where it's
making things too dark, definitely around the side here, but you can still see
the layer underneath. That first layer we created. So we're getting
these two layer of dots that are interacting
with each other. And so as well as
covering large areas, which we did before, I'm starting to get some
tonal variations here. Nice and quick and easy. You can see there's a big
line going down there. Which, if I just break up by cutting into it a little bit, some round it about here a
little bit down the bottom. You can see some lighter areas
there coming around here, maybe a little bit of reflected
light on the far side. And I think that kind of works. Yeah, that works for me. If in doubt, take away
a little bit more than you need because
in the next video, we're going to start knitting these different areas together. Alright, so I will
see you there.
7. Blend in our Textures: Okay, so look, if I compare what we had
just a short while ago, very localized areas of color. Let's make this a little
bit smaller so you can see, and you compare that with what we have now, all of a sudden, I've saved myself a
massive amount of time with all that area covered, and I think it's
going to be much easier for me to put down the various different dots and blend in different
areas of color. Before I do that, though, in the last lesson, I created
this layer four layer. Now, I didn't do
anything with it. It's completely empty. If you still have your layer
four layer, great. We'll use that. If for any
reason, these transfer sheets, let's call them that, if they made your layer
four disappear, just create a new layer and
we'll carry on working. Oh, and incidentally,
just in case you're using an old iPad and
you're worried about the amount of memory you've got or you've run out of memory, you can certainly get rid
of this duplicate layer, I think, because I think we're
gonna be okay with this. In fact, look, no, I'm
going to get rid of it. So one less layer
to worry about, my blank layer four is selected, I'm going to come
up to my brushes, and I'm going to
choose light scatter. I'm going to keep those
two different layers that we created in
the previous lesson on separate layers for now, but pretty soon I'm going to
want to merge those down. Oh, but just while
I think about it, this layer which gave me all
the different tonal areas, I'm going to drag that
up and out of the way. I'll drag it above
the outline layer, keep it invisible so that if I want to start
merging things down, I don't accidentally merge down that layer because it's no
use to the final product. It's just there to
help us on the way. Come back to layer
four, DCight scatter, because the first thing I want
to do is start blending in these different areas because I can see a definite
transition there. To do that, as well, I'm going
to turn off the outline, and that's definitely
going to help me. And then, Oh, even just putting down just a little
bit of light dots. Let's try doing that a second. In fact, that's come and clear that layer because I'm going
to use DC wide scatter, which gives a broader
scattering of dots, and I'm just going to come
to certain areas just on the edge where I can see the lighter and darker
areas start to meet. I'm drawing bits in
on the lighter side. If for now, I do it
on the darker side, I'm just going to make
the darker areas darker. I will be want to do
that, but right now, I just want it to look like I've got lighter and darker areas, but not with such
a sharp division. Like, there's bits
down here where I can start to blur them.
And you know what? I my way to do this, as well, is to start putting in some of these darker areas on the
other side of the pepper. So there's a darker area
here. Oh, you know what? Now that I've got these
different areas of color, now that I'm not drawing
on white, all of a sudden, my job of putting down darker tones has suddenly
become a lot easier. I've got something definite. I've already got a tonal area to work with or to work against. No, work with.
That sounds nicer. And so we can put down
these different areas of tone with something
to compare them with, and this is great news. I have a large area here with
a little bit of texture, so this is not the
easiest area to work on, but I've got to do it sooner
or later. Let's do it now. And this really is a case of everything everywhere
all at once. Make your area, put down your tonal areas in
different places, and then you're going to go
back and revisit those areas. Why didn't you happy
with your result like this bit around here? That's a little bit
darker around there. I can just see that.
I've got an area here which is most definitely
starting to get darker. Bring that round like this. Also other areas here. Most definite darker area down here. Come
on, look at this. That really needs bringing up tiny little bit of reflected
light at the bottom. And looking at the
direction of this lighting, it's kind of going
in a bit of a curve. I'll put down my broad
tonal areas first, and then I'll use some
of the tighter pencils. As opposed to this one,
which is DC wide scatter, for putting down areas, I probably use this one a little bit more than
I use everything else because it's easier to lay down a lighter
area of color. I'm not worrying about hard
edges so much at the moment. I'm just putting down tonal
areas where I see them, and I'll gradually build up. And you can see,
I'm not finished with the left side of the pepper at the moment,
not by any means, but I'm going back round
to the right because with that area slightly
darker on the left, it's making it easier for me to judge The dots I'm doing on
the left on this darker area. And once I do that a little bit, I realize that the
area I'm doing now more towards the far
left of the pepper, that needs darkening
up, as well. So like I say, everything
everywhere all at once. I must watch that film. I've been meaning to
watch it for ages, and it did win an
Oscar, didn't it? Also, Michelle Yeo great actor. So much respect for her. But while I'm here,
Okay, come on. Everything is on its own layer, so we take advantage of that. We come to our eraser, heart
block it in as chosen. So we can take back
these dots around here. Maybe I should put on my outline because it's becoming
a bit difficult. I missed a bit down
there. To finger tap to undo a few times. Oops, three finger tap to redo, and let's take this back to
the same border every time. So we get something consistent. And I think that's sufficiently dense enough in some areas that I need to come back to my
pointy line broke one, so I don't get such hard areas. Oh, little bit here. You know what? Let's swipe
down until I come to recent. This shows all the brushures
I've been using recently. It a smaller menu, so it takes me less
time to grab things. I forget when they included that recent items
thing in procreate. Maybe it was Procreate
5.2, but it's very useful. Yeah, just around the top here. But let's just take a look. Are there any areas here? I'll blink it off and on again. So that's what we've done
so far on this layer. I quite like it.
Yes, I thought so. There's a little bit down here. Well, I want that
to be blank again for now because there is
a strong highlight there. Maybe I went a bit
too far with that. Let's just see what that looks
like when it zoomed out. That is a rather
definite highlight which maybe I need
to take a look at. But I'll shave away the
bits of this layer, which I think are too strong,
and I'll come back and take a look at that
in just a little bit. Mustn't forget these
highlight areas. These few areas where there are absolutely no dots on my Papalea, those are
really going to help. If I make my outline
invisible again, yeah, you can see, they do help. Now, I think for this, it's
all gonna be about process. I don't think I have
anything more to add. It's simply a case of me
just getting on with things. And if I don't have
anything to say, then look, there will be certain sections where I'm not doing any talking, I'm just working, but I don't want that to be the
majority of the course. You're not paying good
money to watch me draw, however fast I speed things up. I'm going to carry on
working with this. If I think of anything new
to say, then I'll say it. But I think what I'm gonna do
from here on in is speed up the video and do some soft cuts so that
you see me start working, then it will fade into me,
finishing the work I'm doing. Alright. I'll do that
in the next picture. So I'll speak to you then.
8. Draw the Stem: Okay, so as I said in
the previous video, a lot of this video is just
going to be me drawing, and that's going to be sped up, and then I'll fade
into the stage I want to get to before
I start talking again, but a couple of things
just before I start. I am going to come
over to my gallery, and you can see right in the middle I have
something called pepper. I am going to slide to the
left and duplicate this file. I'm going to rename
it to Pepper 02, because that way, I have a backup of the work
I've done so far. And then I'm going to
come back in and I'm going to correct
that from Pepperoni. Seriously. Pepper 02.
Would that be right there? Let's tap there. Pepper two. Thank you, Apple.
Thank you, IPad. So now I can work confidently on the Pepper 02 file
because I have a backup. Just before I open the
file again, though, I'm just going to take a minute
to look at what I've got, because that little thumbnail I have is giving me some
useful information. It's like I said
a few videos ago. It zoomed out, and
so I'm looking at that and seeing certain
shading details, which I wasn't really seeing. Well, I'm zoomed in much closer. Do you have a saying in your
country that you can't see the wood for the trees or you can't see the forest
for the trees, and what that means is, if you're right in the
middle of the forest, you can't get any idea
of what shape the forest is or how big it is because
you're too close to it, you're amongst all the tree. Well, this is our forest. And now I've got some ideas. I'm thinking, I
definitely need to darken up that panel on
the right hand side. Then I'll take a look
at the left hand side, the top, as well, but it's that right hand side
that's really bugging me, so let's take a look at that. So, open it up. I'm gonna make a decision that I'm happy with what
I've got so far, so I am going to come
to my layers panel. Layer four, ah, I'm happy
with that, soap, merge down. So that's merging
into layer three. Yep, happy with that,
soap merge down. Can't tell because I can't
see the whole picture. And yeah, I'm happy
with that, as well. Soap merge that down back to where we started from,
create a new layer. And I was about to say
let's start again. But look, let's try Let's try
working a bit zoomed out, as well, because I need
to put down broad areas. Let's see what it's
like working at this magnification
rather than too close. I'm gonna put on some music. I might listen to
some classical music. And for choice, I'd
like something light or any kind of music
ideally without words, but I want the mood to be light and ideally a
little bit playful, because that keeps
me in the bit of my brain that I
want to be rather than getting all serious and wound up and worrying
over the details. Keep it playful. Okay,
let's make a start. Okay, I feel like I've made a certain amount of
progress with this. But really, I've taken
this as far as it can go, and to go any further, I really do need to put that
stalk on top of the pepper, because I can't really
judge my values without putting in that dark
shadow on the right side. Plus, also, when you see the base where the
stork joins the pepper, that's also very dark. In fact, those are
possibly my darkest tone. So, come on, I really do
need to sort this out. So, come to our layers panel. All my dots are on one layer. I am going to knee
my outline for this and a layer five. That is empty. That is what I will draw on. Let's come to my brush. And I think I will go with
medium scatter for this. A lot of the time
I've been using wide scatter because when
you look at the pepper, there's a lot of very
broad areas that I wanted to try and
cover fairly evenly. The wide scatter scatters
points over a wide area. But that stem has got some more localized
areas of tone there. So I'm going to start
off with medium scatter. Let's see right up
close and personal on this and make a start. Well, it's the darkest areas. Those are the ones
that I need in place. So I want to do those first. Also, if you look, you can see there's quite a bit of what would you call
it linear detail? There's a bit of a
texture to this, which I want to get and so I think I'm gonna be using the pointed line broke
brushes for that. Anyway, I'll probably
speed up again, and as soon as I have
something useful to say, Well, I hope useful.
I will let you know. Okay, I'm back with just
a couple of points. If you notice, the very end of that pepper is rotated round, so it's pretty much
a straight line. May notice the way
I've drawn it, I've put in a little bit
of variations in there, so it's not completely straight. That is because you
look at a photograph. You know it's a photograph. So certainly until
Photoshop came along, most people would just
accept it's a photograph. Therefore, it's real. And if it looks a little bit off,
well, that's okay. Because it's a photograph, it's real. That's
a world and good. But the fact of the matter is, we are not doing a photograph. We're doing an illustration and people know it's
an illustration. And so things that people
will accept in a photograph, they won't necessarily accept the exact same thing if it's
in a drawing or a painting. Sometimes you've got to
doctor reality a little bit. And so that's why I've roughened up the very
end of this pepper. People will accept a
hard straight line in a photo because
that's just the angle. But with an illustration, people are likely to look at the same straight
edge and think, maybe you've got it wrong
or you've been lazy. I'll just come round
and do a little bit of trimming on it now. I lock it in, get rid
of the out of it. There's not that much detail in here anyway at the moment, so I can get away with
doing this and not have to do that thing I
did with the dotted line. Maybe I should, but instead,
I'm going to move on. Right, the next thing,
I've made a start with the various bits
of but as I said, I'm getting some rather
interesting textures here, and I think the best
way to tackle them is to come to my
broken line brushes. Broke one, I think is going
to be too much like a line. I'm going to try
using DC pointed line broke two because the dots are spaced a little
bit further apart. And so I can give the suggestion of a line without there
actually being a line there. So just around this lip here is also I wanted to
note a line just on the very outer bit of
the end of the stalk. Come round. Like this, you know, sometimes on the course, I would just speed up just a short segment without announcing that's
what I'm doing. So if I suddenly appear
to be going a lot faster, that's what's happening.
Please don't be alarmed. You don't have to keep up
because when I do speed up, I wouldn't be able to
keep up with myself. Another thing to notice is that I'm really close and
personal with this detail. And when you do that,
it becomes a little bit difficult to judge the tonal areas that
you're putting down. Are they the right tones? I'm fairly safe at the
moment, because look, if you look at this bit here, I'm doing some very dark areas. There's not much
detail in there. But if I was trying to do a
subtle gradation in tone, this might not be the
best way to do it. If you remember when
I sped things up, for the subtle variations
in tone, I was what? About that big, and that enables me to judge
things a bit better. Anyway, back to the stork. Now, there is one thing
which I'm seeing here. I'm getting kind of one or
two little double ridges just where I'm circling to show you an example of
what I'm looking at. And I think those need
to go in, as well. So I'm using my dotted
line number two for this. There's also a little bit
coming up around here, and putting in these
different lines is starting to help
define this texture. I'm going to swap to pointy
line broke three because the dots in this line are spaced a little
bit further apart. I think I'm going to need
that in one or two areas. To suggest a line, but not
make it too dark so that I'm losing the texture,
if that makes sense. Suggesting some of
these lighter lines rather than mark them in
with a thick black line, which is just not
gonna look good. I also have some
lines going across, and it's that mix of lines going across plus those lines
going up and down, which is kind of defining
the look of this stork. This is possibly, possibly, it is the hardest
part of this pepper. Because we're trying
to pack a lot of texture into a
relatively small area. And our photo is working
with film grain. We're only working with dots, so it doesn't make life any easier for us, but
we'll carry on. Let's try deepening
some of these areas of tone where they are deeper
in the outdoor picture. Then let's come
back to for this, I'll come to pointy
line broke one and array some of these areas here because I need to see
what that looks like. Oops. You went a
bit too far there. Ultimately, I need to
see what this looks like next to the other
bits of the pepper, but without that red
outline in the way, it's funny how soon as you
make our outline invisible, you get a much clearer idea of how the whole
thing is working. Let's come to our
dotty bits here, layer because there's
one or two straight dots here, which I haven't erased. So while I notice
them, I'll do them because I might not
notice them again. Ah, it's only a few
dots here and there, but one of the things
about pointism is it's a very precise
style sometimes. And I think one of the things
that people like about pointillism is all
those dots people put down in such
a controlled way, and maybe one or two
little stray dots, which we will get because we're spraying down dots rather than
doing them one at a time. That can spoil the
effect a little bit. Anyway, look, let's
take a look at this. Oh, see what I did there? That was the one I pinched out. I accidentally arrased. Let's try to finger tap with this and see whether that's
fairly recent or well, let's try it. Can you hear me? That was the sound
of me two finger tapping. So far, nothing. So I'm going to place two
fingers on the surface of my iPad and just hold
it. That sit there. That steps back through the
undos really, really quickly. And now that I've got
rid of that mistake, I three finger tap to start redoing and
adding these back in. And I want to get to the point
where there it comes back. Then two finger tap
a step backwards, and that's the point
where I raised it. So it looks like I've got a little bit of a
redo to do here. Never mind. Layer five,
that's the right one. What have I got here?
Pointed line broke one? Let's just quickly come back
and redo some of these. And come to dotty bits here. For that, I need my larger brush because I'm
dealing with bigger areas. Come here, do these. And all those bits I said about, let's make it neat because we're doing spray dots as opposed to one dot
at a time and blah, blah, blah, blah, blah, blah. What I just said,
but, like, you know, all over again.
That's interesting. What layer am I on? I've got a few bits of the stem
on my layer underneath, my dotty bits here layer. But let's face it, I am definitely not
the first person who ever use Procreate to start
drawing on the wrong layer. Anyway, come on, let's
take a look at this. Take it to about there with
the outline turned off. And yeah, it's starting to work. I think I've said all the points I wanted to make about this, so I'll merge that down. I will create a new layer. I'll carry on and then I'll speak to you in the next video.
9. Finish our Pepper: Okay, I think I've got to
a certain stage with this where I've got something that
looks vaguely like a stork. I've got something that looks vaguely like what I was after. What I did find was because there's a lot of texture crammed into a
fairly small area. I was relying quite a lot on these pointed line broke
brushes to draw in the area, and you can see there's
a slight linear quality to that texture going
down, but also across. I was also using the same
three brushes but as an eraser to take back some of the detail around
the darker areas. And so I've got to a
point where tonally I can compare what I've got
with the rest of the pepper. And now that I have, well, especially this darkest area of the pepper on the
right hand side, I realize now that needs
to go a little bit darker, maybe on the left
hand side as well. And that's the way it works.
You build up one area. Then you go and do another area, then you realize
you have to go back and revisit the first area, and that's generally
the way it goes. What I'm going to do, though, let's show you this.
Choose a bright color. This area here,
hopefully you can see that where the stalk disappears behind the
front of the pepper, let's undo that.
Thank you very much. And come back to black
Thank you very much. Let's come to classic. I always prefer the classic palette. It's not as pretty as the disc. But for me, it just makes sense, and I always know I'm getting
the color that I want. And also, look, if
you take a look here, you got some very fine detail just on the left
part of that stalk. I'm not going to
do that. I've done some general dots in the area, but one thing that people who do art are always
saying is simplify. And in the case of
ponism where I have a series of dots rather
than a continuous tone, that is doubly true. If I start trying to draw every tiny little bit
of detail in that area, I'm not going to get
anywhere with that. It's just gonna look confusing. In fact, maybe I already
pushed it a bit too far, anyway, but we'll carry on. So what we go to use? Let's try Let's try
medium scatter. Let's take our outline just so I know which
area I'm dealing with. And thank you. I was working a little bit
too closely there. And just drew some tones
along here. Bring it around. I can see one or two
tiny little bits of reflected light just
right on the edge, but I'm not gonna do those
for the same reason. I don't have enough dots. I also don't have
enough patients, but that's a story
for another time. While I'm here as well,
I just want to come to wide scatter and just built this darker area just on the corner that could do with building up just
while I'm looking at it. And then as before, come two. Well, we'll start off
with the hard blocker inner just to come
close to our line. I wonder if I have any dots. Yeah, I do have one or two dots there and just knock that back. Then come to pointy
line broke one, just to roughen up that
border a little bit, and hopefully you can see
those dots are disappearing. But because I'm using a line which is a series of
dots all close together, that should mean
the border I get. Should look a little
bit more dotty. Okay, so let's bring that
down to here, outline off. And yeah, that's helping
build up that area and differentiating the stork from
where it joins the pepper. There are one or two areas thug, which I do want to
take a look at. I'm going to come to
pointed line broke one, there's a tiny bit just
on the edge where I'm going to just throw in the
closest I've done to a line. And you'll notice with this, I've held off until Nab before I start putting any hard lines. I mean, that is a dotted line, but even for this, I'm going to go with the
dotted line part two. I'm also going to
strengthen that edge just a little bit because it's
getting a little bit lost in one or two areas. And I want people to know where the pepper ends and
the stork begins. And I can only do this now that I've got sufficiently
dark enough values there that I can get
away with doing this. Otherwise, it would
just look like a line. Yeah, one or two
areas here as well, which could do with strengthening
up just a little bit. Yeah, that's starting to work. I think the next thing for me to do is, well, pretty soon, I want to decide
enough is enough, and I just need to
recognize that moment where I'm starting to
lose the will to live. I'm not there yet, but
it's in my future. I can sense it. So I just
want to finish off just by just darkening up
one or two areas because now that stork is there. I can stand to do that, and it will help balance
up the picture. I already have my layer on top. That's just the one I used to beef up that edge of the pepper. I've got plenty of
space on there, so I want to use that. Come to. That's right. Wide scatter and just build up one or two
of these darker areas. Okay, let me see what I've got. So far with this,
let's just make this top layer invisible for
a second and visible again. Yeah, those changes help balancing up the
picture as a whole. So, merge down,
create a new layer. Can I get away with even darker in those darkest
areas on the pepper itself? Let's come to DC dense scatter. I only really use the dense brushes just
when I'm getting towards the end of the
project because they really do go down
thick and fast. So the best saved for areas
which are already dark, but you need to beef up
just a little bit more. And even then, I'm not
going wild with this. If you can hear look, I'll bring the iPad close
to the microphone. Can you hear that? Tiny
little short strokes. Just try and help things along. Okay, let's take a look at that before and after
they're very dark bits, in fact, let's make
this window a bit smaller so I can give you a
little bit more screen space. And I did it again.
What happened there was I was moving this around and I accidentally put down that little straight set
of dots with my finger. So two fingertaped one, do that. Oh, I've got a little
bit down here as well. Which layer is that on
the dotty bits layer? Let's do that. Let's pinch
outwards. Move it across. Let's take a look at those
final few changes I've made. And yeah, those very dark
areas in one or two areas, that's helping define the form. So yeah, I'll keep that, so I will merge that down.
10. Create the Shadow: Okay, I'm getting very close to the stage where I'm
going to call this done. There is one thing I
do need to do, though. I need to put that shadow on, really, so it looks like my pepper is
sitting on something. What I don't fancy
doing as well, especially at this stage
where I'm coming to the end and I want
to sign off on this. It's been goodness
knows how long carefully putting
in that shadow. Now, I've got a rough guide
there of where the shadow is. That's done with my red outline. But I think it will simplify it. It's just so the pepper looks like it's
sitting on something and I don't fancy having to do a whole load of subtle shading. So this is what I'm going to do. I'm going to come again
to my wrench icon, which is the actions,
and insert a file. And I'm going to call
it my fine arts chart, and there's my Fine
arts chart again. So what I will do is
come to my layers. Now, if you remember, this layer inserted image, which I kept, I'll
turn it back on. There's my fine arts chart. And let's take a look at
that. Next to these shades. Now, what kind of
shades am I getting? No, I don't want
this to go too dark, maybe not quite as dark as
the picture because I don't want it to start dominating I haven't worked
this out beforehand. I'm just going to try and
judge it on the spot. Let's look at the
lightest part first. I'm going to go
gently with this. I'm going to go with fine
dots 03. Yeah, I'll try that. So zoom out, make this
invisible for a second, and come to insert to
file, fine dot three. That's in place. Let's just
move it along a little bit and come to my layers
icon to commit to that. I do not want it there. I want all my shadows to be underneath
my dotty bits here layer. And don't forget we
should rename this. Let's call this three. I only need it in that one area. So eraser brush,
hard blocker inner. Let's make this big because we don't want to
waste a lot of time doing this and just rub out
the bits we don't need. Actually, Yeah,
give me a second. Sorry, I'm just
thinking out loud here. I'm moving that across by
using the select button, which I'm circling and dragging from the inside
of that dotted line. And I just want to do a
quick on off with this and just look at the
pepper on off on off. Is that helping to bind the various different regions
of the pepper together? This way, I'm getting
a bit more contrast. This okay, I wasn't
expecting to do this, but yeah, I'll do it. I will drag this above. I will come to my
arrays tool again. Hard block it in,
and I would just get rid of it most
of the places. In fact, I'll do this
with the outline off so I can judge this just a little
bit better, bring it around. Then start to zoom in and
make my breast size smaller. I'm coming close to the edge, I'm leaving in one or two
little straight dots as well, because it's making the edge
just a little bit less. Dot or no, Doctor,
it's providing a little feather to the edge. I quite like that. Let me
take a look at this now. Let's make this smaller again. Let's drag this across so
I can see the whole thing. And without that little layer of dots with that layer of dots. And I think for the
most part, yeah, I'm going to keep
this, but what I will do is just in
one or two areas, the highlight areas, I'm going to take it away
from there because I do want to keep some
highlights as highlights. But what I'm finding is, again, it's like I've
mentioned earlier, it helps bind all those
different areas together. It makes the whole
thing more unified. There you go. That's the phrase I'm looking for. Unified. No. Yep. I'll just release
a little bit of these areas because I
like what it's doing in the mid to deeper tones
in those transitions, but I don't want to lose
all the lighter bits. I still want to
keep the contrast. But also compress the textures together just a little
bit more than they were. Yeah, I don't want much, do I? All I want is for this to
look a little bit better. And if I can do it
quickly like this. So be it. I will leave that as its own separate layer
just in case I come back in 10 minutes time. I
think, You know what? I was so pleased with myself
that I did this by accident, but on further reflection, I hate it, so get rid of it. That's the beauty of digital. I can keep it or I can lose it. So where was I? Oh,
yes, they're shadows. Is layer five empty? Yes, it is. Let's come to layer
five. Come here insert far now what
was it? Number three? I'm going to go for
Fine arts four. The reason being
is my peppers just got a little bit deeper in tone, and I was homing and in
between layer three and layer four for my
initial shadow area. So I'll go with four. Bring it to about there.
That's interesting. I'm zoomed out, and I'm
moving this around, and it takes a while for the graphics card to
catch up a little bit. Sorry, I say graphics card. Graphics device, whatever an
iPad uses to show graphics. Okay, so now my outline layer, I can't see it. Not a problem. Come to my outline layer, swipe to the left
and duplicate it. And did you see that? All of a sudden it became
a bit stronger, swipe to the left,
duplicate again. And now I'm getting a much clearer idea of what
I'm looking at. Let's just do the
big work first. Hard blocker in is
chosen, nice and big. Make sure we're on the
right, layer five, which should be renamed to 04, so I know which tonal sheet this is and get rid of it
in most of the areas. Leaving just the shadow areas. Let's do this. So now I can focus a
little bit more on this area and use
this as a guide. I don't need it to
be the same size. I just need a rough idea
of what I'm looking at. And there's a little
bit of shadow just peeping out from
underneath the pepper there, let's make sure we get rid of it from the actual pepper itself. Then bring it around like this. A little bit careful with this. And around here. Oh, and definitely
get rid of it where it's on the actual
pepper itself. But I want more shading there. And I think for the
fine tuning for this, I need to come to let's come
to very dense scatter and just try and soften up
this edge a little bit. I do end up with one or two even smaller dots than the small dots
I'm already using, but I can live with that. And I'm going to cut in
a little bit more in little circulart
motions as I get towards the far end of the shadow because the farther away you get from
the pepper itself, the more that shadow is
going to get softer. And you know what? I'm not
entirely happy with this. It's not quite working for me. So what I am gonna do
is I'm gonna come to my paint brush DC wide skirting up. Can I
make a difference? Yep. That's kind of working a
bit better for me, I think. Just while I'm here as well. It's just one or two areas here, which could do with
being a bit darker, but I'll hold off
doing that for now. Instead, I will come to
my eraser and make sure I haven't cut into
my actual pepper. So now I'm going to
quo my inserted image, and I'm going to try, actually, this is useful, make sure my
swatch layer is selected, come to my transform tool again. And I'm going to move everything on top of my initial shadow. Because if I see it here
and I decide, say, Oh, I want fine.06 and lay
that to make it the darker parts of my shadow
because I'm looking at fine.06 against a
white background, it's going to look different
when it's actually in place, lying on top of my
original dots layer. As it is, I think find dot six seems to be about the right
level of shading that I want. So make inserted
image invisible, come down to my first shadow
layer. And what do I want? Six. So once again, come to actions,
add inserted file. And I said I wanted six d nine. There you go. And that's in place. That's
where we need it. As before, come to our large hard
blocker inner layer and just rub all this out. Now, you can do this by using, say a selection, or you can
use it by using layer masks. But this tutorial, I
want to keep things fairly simple and
we can get more creative with things like I've just mentioned
further down the line. So get rid of it
over my pepper area. Make my brush a little bit
smaller I definitely want to remove this darker layer
from the side of my pepper. I didn't spend all
that time creating these shadows and gradually
building them up only to slap a massive sheet of dark tone over it
right at the end. Alright, now, let's zoom out a little bit and see
what we can do with this. I think for this, the darker part of
the shadow, isn't it? Which is about there. I only want this
in a small area. Let's come to this area here. Fade. Well, at the
moment it's not faded, it's a definite hard
edge. Like this. Maybe come needs to come around a little bit more softly here. And now I'm going to come on top again and
create a new layer. I am going to choose, let's try medium scatter and see if I can't blend the edge of
that in a little bit, so it's just not as
hard as it was before. Also, I notice as we get
closer to the pepper, we're getting
darker areas there. So let's just try and do
this border a little bit. And that's come down to the
actual shadow layer itself. Let's choose a dense
scatter brush. And yeah, that's actually
working a bit better, I think. Just feather that area, so it's not so intense. Well, so sharp. Does need
fading a little bit, otherwise, it just looks wrong. Especially if it's
fading a little bit more the further
away you get. And I think at this
point, let's turn off our well, delete one outside. Yes, I know, alright. I can't delete it
until I unlock it, but let's delete that. Let's come to the other duplicated layer
unlock and delete that and make our original
outline layer invisible. Okay? That's worked. And just try to do a
bit more feathering. I'm starting to confuse myself a little bit as to which
layer I actually on. I think the light of the two shadow layers that
needs fading a little bit, so choose my eraser, dense scatter and
get rid of that. What am I doing? Get rid
of my outline layer. Better. Come to
the darker layer. Actually, let's take
a look at this. Let's make that layer around adding dots invisible
for a second so I can see more clearly what I'm doing
on this darker layer. And yeah, sure enough. Yeah, reducing or raising
pixels from the edge is giving me a better
effect than if I start adding pixels to the edge.
So we'll go with that. Et's take a look at
the layer underneath because I still not
quite happy with it. I'm going to come
back to Let's try hard blocker inner because there's one or two little
straight dots around here, which are almost like half dots. I'm kno keen on those. So I'm just rather than making sweeping brush strokes with this, can you hear me do this? I'm just tapping down. I'm using my hard blocker brush, but rather than
making brush strokes, I'm just tapping down and you can see on the screen
where I'm tapping down. So rather than a brush
stroke, I'm nibbling away. At the edges, rather than
taking a big sweeping bite. And that's probably
working a bit better. Okay, I'm starting to get
and in fact, I like here. I will take those two
different shadow layers, and I'm going to merge the top one down
onto the bottom one. Now, what's happening
with this layer ten? Yeah, now that I've done that, those original marks I
made, they're not working, so choose the layer, tap on the little icon
and come to clip. I'll redo those
shadows because I need just a little bit of a deeper shadow just very close to the pepper
in two areas. Let's come to widescatter again. Good old widescatter and just
build up in certain areas. So we get the idea that as we get closer to the paper,
the Shavo gets deeper. I need a little bit down here to merge those two shaded areas. I'm not going to go
overboard with this. There's also a little
bit just here as well. That a little bit right there.
Then I come to my eraser. I choose my hard blocker in it. I'll make it very small just for this one area here, a
bit bigger than that. Just so I don't lose
the form of my pepper, and make it a little
bit more sharply defined for the pepper itself, a little bit bigger and just
come back and just erase those dots just on the
edge of the pepper. Ideally, what I want
here is for you to be able to see where the pepper
ends and the shadow begins, but I don't need a very
hard dividing line. This is one thing I've noticed. A lot of my students, when they do shadows, they're a little bit timid with them. If I zoom out in one
or two places here, it's difficult to see where the pepper ends and
the shadow begins, and I am fine with that. Sometimes you'll see an object with a shadow underneath it, but it still looks like
it's floating in space because the shadows haven't
gone quite deep enough. And sometimes you'll
find with a shadow, depending on how
bright the object is, how much light there
is in the room. The shadow can be
as deep in tone as the object that's casting it, because especially very close
to the base of an object, that's the bit where
light is going to die. It's the light graveyard. And so if there's no
light on the object and there's no light in the
actual shadow area, that's where you get
your deep shadows, and it's very hard to
tell which is which. Alright. Now, let's
take a look at this. I think, Okay, look, I'm going to close
my reference window. I'm going to pinch in and pinch
out to see what I've got. And I think I'm going
to call that done. So come to my layers panel. That layer ten, I'm
going to merge down. I'm going to rename
this to shadow, and that should be
underneath the pepper. Now, with pointllism, that doesn't really matter that much, but for other projects, while you're putting down
solid areas of colour, the shadow should be
underneath the main object, so let's just get
into that habit. Okay, there's the pepper. There's your first project. I will spend just a couple
of minutes in another video just showing you a
couple of things you can do with this once you've got it.
11. Getting Creative!: Okay, very quickly before
we sign off on this, I just want to show you a
couple of things that you can do with this that you can't
do with traditional media, just as a few ideas for experimentation and
annoy people who refuse to use digital
art because they think it's not as good
as traditional media. First thing, come to our gallery and swipe across and duplicate. And if I come down a little
bit, there's Pepper, let's rename this two
Pepper 04, call this up. Because at the moment, Okay, we've used dots,
nothing but dots. And they're black, which
is traditionally what you see most of the time when
people do pointillism. But supposing I find that
a little bit too dark, let's come. What
should I do with this? I'm not fully
committing to this, but just to speed things up, I'm going to take that layer 03, I'm going to merge it down, so I have just the pepper on one layer and the
shadow on another layer. I will come to my pepper layer, the dotty bits here layer, and I'm going to
Alpha L. I'm going to come and I'm going to
choose another color. Let's try Let's try red. Let's try pretty
deep red like this. And come and choose
my hard block it. In a brush, it's set
to maximum size. And. What color would
you like your pepper? You like it that color? What about a slightly
brighter color? A little bit more of a
ready red. Let's try that. And that's changed. In fact, let's undo that for a second. I'm going to put that
in just some areas, and what was it more
pinky red, but darker. Let's choose that. Do that. And this is very, very crude, but I'm going to choose
kind of a deep solid green. Put this here, make my
breast size smaller. And o, I'm working at
lightning speed here. I'm sure you do a more
careful job. There you go. There's a stem. For the shadow. Well, let's come
down to the shadow. Let's tap the icon and
come to Alpha Lock again. What should we have kind
of a bluish shadow, maybe a bit like that, and Now, come on. Let's make it a
bit more intense. A bit more of a bluey
blue like this. And then we can come back to
our dotty bits here layer. I'll take my brush. Same brush. Actually, no, let's
come to nice buildup. It's got a slightly softer edge, which I think could help. I'm also going to
reduce the opacity down to, what, say, 50%, and I'm still gonna make it
large. Not quite that large. In fact, no, let's
take it down to 15%, and I'm going to take some of that blue I use
for the shadow and put it into the shadow
areas of my pepper. I will come back to a
fairly bright red color, and gradually build up some of these red areas now
because it's on 15% and it's got a
slightly softer edge. Rather than having
a hard transition, I can gradually build
up the color that way. Let's try a little bit more
of an orange color like this and come to more
the highlight areas. And add some brush strokes around like this.
Let's come again. Let's try choosing a more
yellowy color like this. And put in one or
two areas here. Bear in mind, though,
when I am doing this, I used to have just black dots, and I judged all the
values of my pepper based upon how black
dots clump together. But now I'm introducing reds and much, much lighter yellows. So that will affect the
value of what I'm doing. That said, I'm having fun. And you can see, I'm doing this at lightning speed,
ridiculously fast. Let's choose some deep blue
just around this area here. And maybe make my breast size
a little bit smaller and put a little hint of blue just in some of these
shadow areas as well. Let's come back and choose
a much lighter yellow and maybe play around with the greens of the
stork, for example. So you can do this
really quickly just while I'm here again. Let's come to. Well, let's
come to our dotty bits. Here layer, swipe to the
left, and duplicate it. Well, immediately, you can see I'm getting a much
stronger tone. That could be an
effect in itself. But what I'll do is I'll
come to the layer below. I will click on Alpha
lock on Alpha lock. I'll make the top layer
invisible for just a second. And then I'm going to
come to my adjustments, and I'm going to
come to Gausibl or Gaussibl or Gausia blur or whichever way
you want to say it. Click on that. Put your finger on the top left of your iPad. I'm going to do it about
here and drag across. See that? And as I drag across, I'm starting to get
everything looking blurred. I'm going to go with 5%
so you can clearly see the effect and come back over to my layers panel
that will commit to it. I'll turn off the
shadow layer for now because those hard dots
start a new encroach on it. But let's come to our
above layer, turn that on. And who. That is what I call
a rather intense image. But you saw how
quickly that happened. Look, all they did was I
blurred the layer underneath. And if that's too strong,
just come to where it says, and tap on that and you can
see the opacity slider. I can take it all the
way down to zero, so everything is transparent and then gradually up the opacity. To dial in the amount of
halo effect that I want. So I'm going to go with what?
When you're doing this, don't look at that
little percentage number that's saying 60, 58, whatever. Look at the screen. Ignore the numbers.
Numbers aren't going to tell you
what it looks like. So, supposing I do
that, for example, now, with a couple of
touches of the button, I've got a whole new effect. Now, what I'm doing here is I'm just giving you
one or two ideas. I'm not going in and
refining, like, for example, the side of that stalk
could do with being touched up over the very
edge of the pepper. This is just one or two ideas
so that you can have fun. And while we're
here, let's turn on the awful lot for that again.
What brush are we using? DC nice buildup. Let's
up the opacity to 50%, so this goes a bit faster. That bright yellow is selected, and now what I'm doing now is I'm affecting
only the blurry areas. I'm not affecting the hard
dots which are on top. So all of a sudden, instead
of it being pointism, this is pointism with blurred
areas in the background. This is an entire new genre we've just invented right now. Just think what you
could do with this. 'Cause what I'm getting here, I'm getting the dots on top, which are a certain
color, but I'm getting variations on those
dots underneath. And if I come to the shadow
area, all of a sudden, I'm changing the look of that shadow area just
by painting the blur. Dots. Let's come back
to our yellow color. No, very light, slightly
green or yellow. Let's come to our stork. I can put down bits there. As I say, I am working
very, very fast with this. I just want to make you aware of some of the possibilities. Now I'm using kind of a deep cyan color just for
some of these shadow areas. And so I'm getting variations in tone based on the
blurred dots underneath, interacting with the
hard dots on top. One thing that Sara
was doing was laying down areas of colour
next to each other, as you can see me doing here, so that when you zoomed out, those colors fused together, which is exactly what
we're doing right now. So really, the possibilities
are quite widespread. I'm going to have to wrap this up because I'll be
honest with you, I'm just enjoying
what I'm doing. I'm thinking, what happens if I put that yellow layer
next to a red layer, or what happens if I put a very deep cyan somewhere in the shadow areas where there's already kind of purple areas. I'm going to wrap up this
project now, but before I did, I wanted to suggest
to you just some of the possibilities of
the things you can do once you've got your
pointlistic picture. Okay, let's move on
to the next project.
12. A Procreate Primer: Okay, now, this video is just a very quick
primer for Procreate. It's just in case
you've never used the software before and you
don't know where anything is. It's more just a quick
tour of the interface. If you need more of
an introduction, than I have Procreate
the Fast Guide or Procreate solid foundations. And both courses have
got very nice reviews. Thank you very much for that.
Anyway, let's get started. There is your Procreate icon. I'm circling it
now. And if I tap on the first place you
come to is the gallery, and you can see various bits of work I've been working on. Now, yours will look
different to this. Because if this is
the first time, you won't have
created anything yet, and so you'll just
get the sample images that come with Procreate. Anyway, come to the top right. There's two icons there I want to show you. One is Import. If I tap on that, that's
where you can load up various files that you
may have downloaded from the Internet or
from one of my courses. But I'm going to cancel
that because instead, let's create a new file
for you to work on. To do that, come to the
plus sign and tap on it, and you have various different presets that you can load up. Let's just do this as
simply as possible. The very top one where
it says screen size. Tap on that, and
you get a new file. If you take your finger and thumb and you pinch it inward, you can resize it. You can rotate by moving your
finger and thumb around. And let's just move
that to there. Great, you've got a file. You
want to create something. And to do that, you
come to the top right. You've got one, two, three,
four, five different icons. Let's show you what they do. The first one is the brush icon. If I tap on that, you can see you have a whole load
of different brushes. What you're looking at right now are a series of pastel brushes, which I'm working on
for a new course. But what you will have are the brush sets that
come within Procreate. If I come down to where it says sketching and
I tap on that, there's various
different brushes, and you have a whole load
of different brush sets, which have brushes in
Okay, so let's choose one. Let's try Nico
roll, tap on that. Okay, so the next thing
is, I need a color. To do that, come to
the very top right where you can see
that yellow circle. That is my currently
selected color. If I tap on that, I have access to various
different colors, and I have various different
ways of choosing the colors. If you come to the
bottom, you can see I have palettes
highlighted in blue. Now, these are various different
squares that you can get. So if I tap on, say, this red, I can draw with that. If I want to choose
a different color, tap again in that
little red circle. And you'll notice
whatever color I choose, that little circle in the top right changes
to that color. That lets you know what your
currently selected color is. Tap away, and there you go. Now, at the moment, I'm not
very pleased with that. It's not a work of art. I want to get rid of it. So
take two fingers and tap. That's two finger tap
once, and tap again, and you can step backwards through the brush
strokes that you made. If I then realize actually
that was a masterpiece, I can three finger tap to redo. The finger redo, two
finger tap to undo. And if you hold down two
fingers on your iPad, just for a short
while, you'll start to rapidly step backwards
through the undos. Hold three fingers down
for just a short while, and you'll rapidly go
through any redos. Alright, back to these colors. So I have palette
selected at the bottom. If I go through these, where it says disc, tap on that, and you end up with a disc, and you can see around the outside all the
colors of the rainbow. And I can move this
around so you can see I'm selecting greens,
yellows, oranges, reds. And these are quite intense reds because that circle
in the middle, that controls how
intense the color is, and you can make it much less intense and lighter or much
less intense and darker. So you've got your
full fat red there. You have darker
versions down here. You have light
versions across here. But as you go across, you get less and less saturated colors. You can see that is a very, very desaturated red.
It looks like a brown. I can move it back
towards saturation, and I can move it
here to achieve more of a pink effect.
So that's the disc. The classic, this is my favorite when it comes
to selecting colors. You've got all the colors of the rainbow laid out
on a slider here, and you can see the full fat
color is in the top right. Darker versions of it
are here as you go down, and as you go towards the left, you get less and less
saturated colors until eventually you
end up with gray. White, black. Any color is available to you. And if you want a
little bit more control rather than dragging
this around, you've got your hue slider here. But underneath, you have
your saturation slider, and you can see, as I move it around
that little circle in the big block of color
goes side to side as well. I also have my value or my brightness
slider at the bottom. If I move that, you can see my little circle
in the square goes up or down to get lighter or darker versions
of my base color. Just underneath that,
you have your history, which is all the colors
I've chosen recently. Then the harmonies. You have lots of
different modes here, split complementary. I'm not going to get
into all of these. These are just a way of choosing things according
to color theory. And you can move that central
reticule around like this, and you can control
the darkness or brightness of it with this
little slider at the bottom. Next to that, value. Well, it's a computer, and any
color has a numeric value. Those three sliders I was
talking about the hue slider. Well, look, there's a value.
193 degrees, 73% saturated. Now it's 46% saturated
and 75% bright. And I can digest it that way. Also, you have red. Green and blue sliders. And you can achieve lots
of colors that way. And finally, we get
back to palettes, and let's choose a color again. That nice red. Let's come back to our brush tool.
There's my brush library. Nicarole selected. Did you notice that it seems
a little bit small, and it's not quite as intense as that color I
chose in the top right? Well, the reason for that is because of these two
sliders on the left. The top slider controls how
big or small your brush is, and you can see the brush slides getting
bigger or smaller. That's what? 39%, 40%. And yeah, sure enough, you
can see the brush is bigger. But it's not very intense. That is because
the bottom slider controls the opacity of the pressure at the moment.
It's set really low. If I take it up to
100%, and I drawn out. Oh, yeah, you can see that's
a much stronger color. If I take the opacity,
so it's way low. You can see that I can
gradually build up the brush effect more subtly. And at this point, I should say, these two sliders learn to use them and learn to vary
the opacity a lot. Learn to vary the size a lot because then you get
small brush strokes, you get bigger brush strokes,
and you vary your work. And if you alter the opacity, you can build up much
more subtle effects. Let's choose another
color for this. Let's choose a nice not very
subtle yellow and crank up the opacity and the brush
size there. There you go. Two really subtle brushstrokes. Now, supposing I want to get that red I was just
using, well, that's okay. If I just press and hold my finger up in the top left where the little
color circle is, just hold it for a couple
of seconds and you'll get the last color
you were using back. Okay, that's our brushes, but you can do one
of three things with every single brush
in the brush library. You can paint with it
like we've been doing. But if you come to
the icon next to it, which I'm circling, this
is your smudge function. And if I tap on smudge and
come down to painting again, there, you can see,
I have Nico roll. But this time, instead
of painting with it, let's come to that border. I'm zooming out by dragging outwards with
my thumb and finger. Let's come to that red
and yellow border. I made my brush size
a little bit smaller. And if I just rub
along that border, can you see what's
happening? I'm smudging. Like this. And I can blend
different areas of color. And if I come to a different
brush, let's come to. Well, let's come to airbrushing, and choose one soft airbrush. I make my brush size larger because the brush size
doesn't stay the same, no matter what brush you select. I chose a different brush, so now I have a
different brush size. And if I come to that same
area and I start smudging, can you see I'm getting
a much smoother blend because the soft air brush is a very soft,
simple blending tool. Alright, so that means we can create brush strokes
with the brush function. We can smear the brush strokes around with the smudge function, but we can also erase brush strokes using
the erase function. Again, it is the same brush. But this time, we're
using it as an eraser. So let's do this. Let's take
the apasor right the way. Let's make our brush size. But any old size, and there you go. I have now erased the paint
strokes from that area, and this is a very
important point. In traditional media, using
eraser on a piece of paper, you can always see a bit of pencil leftover and the paper has been flattened where
the brush stroke was. But this is not
traditional media. This is digital. If you wrap
something out, it's gone. There is no trace of the brush stroke to
finger tap to undo. The arrays or anything else
you've put on your canvas. That was 100% opaque. If I take this down to
a much lower opacity, say around 30, 34%, and I start building
up, you can see I'm gradually erasing in this area. If I make repeated brush
strokes or I press pretty hard, I can vary the brush stroke. And here's another nice thing. If I come to textures, let's try dove lake. My brush size, 6%. My paste is about halfway, and then, now you see that? I'm raising, but I'm getting the pattern that
the brush makes. As part of the erasing process. So you've got lots of
different ways to paint, lots of different
effects when you smudge and lots of different
effects when you erase. Alright, I'm going to pinch inwards to see
more of my canvas. Now, the one icon we
haven't looked at is this one with two squares in
there. I'll tap on that. This is my layers panel. And you can see I
have something called a background color
and layer one. Alright, well, let's take a
look at background color. If I tap on that little
white rectangle, that is the layer icon
for background color. Well, you can see, I have
my colors open up again, and I can choose
whatever color I want. For the background.
That's useful. Let's make it lighter. But for my layer one, if I tap on the little icon
which I'm circling now, I get a whole list of options. I can rename it, which is always a good idea if you can
remember to do it. And I can do various
things to it. Like, for example, if
I made a mess and I just want to get rid of
everything, I can clear it. Two finger tap to undo that
and bring back what I've got. But what I'm about to show
you is something I've seen a lot of beginners not do, which is a real pity because
it's very, very useful. Come to the plus
sign at the top, right, tap on it, and I get a new layer layer too. If I come to my paint brush, let's try oriental brush, and let's try any
color at random. Let's just try green
color so it stands out. And brush size is big
enough and I can draw. That's not standing
out very well. Let's try upping the opacity. Yeah, that's better. And yes, I know it looks like a match, but
here's the thing. See that little tick mark
right where I'm circling. That is a toggle switch,
and if I tap on it, the layer becomes invisible. Tap on it again, it
becomes visible again. See the little
ensign next to that. If I tap on that, well, I have a whole load of things
called layer blend mode. We won't talk about those, but you can see I have opacity. It's a slider, and I can make this top layer
completely invisible, partially visible or fully visible and everywhere
in between. If you decide what
you did was nice, but it's in the wrong
place, well, look at this. Come to the top left and look at this
icon with the arrow. Tap on that, I get a box around everything on that layer where there are pixels
because at the moment, we're using our transform tool. And look, if I tap anywhere, normally, it's an idea to go on the outside
and move around. Look at that. I can move this. What's more, you see that
little green circle on the top, which I'm circling now. If I tap and drag that, I can rotate this around. Like this. You notice you get
an elastic line. So if you want to
move it very subtly, drag the green line
out and you can move things very
slowly like this. If you want to
move it fast, take the little green elastic line
around and look at that. Alright, we've got
different modes here. At the moment, I'm in uniform, which means I can resize it as well as moving
and rotating. But if I come to
something like free form, I can stretch it like this. If I come to distort, I can take just one
of the corners and move it out in like this, as well as the corners
around the side. You want to do a quick bit of simple perspective,
you can do that. If you come to
warp, I get a grid. And if I drag
weather lines cross, I can warp this. And if that's too much, I've got a reset button down the bottom. Let's just quickly warp this
around like that, and say, I tap on my layers icon.
That's now committed. The changes I've made are
permanent unless I hit Undo. Now let's come
back to layer one. And the next thing we're
going to take a look at is this looks like
a little S shape. It's the selection menu. Now remember, we're not on the
layer with green squiggle, we're on the layer with those
big red and yellow marks. And you can see at the bottom, I have various different
ways of selecting areas. At the moment, I've got
rectangle selected. So if I come here,
drag out a box, you can see where
I've dragged a box. That area is clear, but I'm getting these little
moving lines, which let me know
that wherever there are moving lines,
it's not selected. If I then come back
to my selection tool, and let's just come back
to let's try freeform. I can move this whole area around or wherever
I want it to go. I can stretch it like this. And once I'm happy with
that, I can just tap on, say, my selection icon again, and that gets committed. If I come to my
selection tool again, you've got things
like free hand. And if I drag out
an area like this, if I come back round to where that little white dot is tap
on that little white dot, I now have an area selected. Which is a free hand shape. So that is the select tool, various different ways
to select things. Next to that, I have
my adjustments. I don't want to
get into these too much because there's
a lot to cover, but supposing we come to hue
saturation and brightness, I can take this entire layer and change the hue and
swap it around. Can you see that when I do that, the red are getting more pinky and the yellows
getting more orange because every color is being
shifted around the rainbow. I can also alter how
saturated it is, like, completely gray.
To pretty bright. I can also alter the
brightness, as well. You can alter the entire layer, but come to the top in
the middle where it says, hue saturation brightness. But if I come to this little triangle which I'm circling now, instead of working on my layer, I'm now going to work
using my pencil. And you can see my little brush
icon has now turned blue, and it's got little
sparkles there. And what that means is,
let's choose something. Let's try wild light. That sounds dramatic.
Check my size. The opacity is up full. I'm going to paint in a
certain area like this. You notice how I went
underneath that green area? That is because the
green paint stroke is on the layer above. So my little brush
stroke gets hidden. I've painted with
this, but I can move the hue around and
change this color, the saturation, and the
brightness just in that area. And if I take my opacity
down on my pressure, make my brush size
larger, for example, paint in a different area, you can see I can
gradually build up the effect like this. And if that's not enough, look, if I tap on my erase tool, I can erase these brush strokes while I'm painting in this mode. And if I come to my smudge tool, I can blend the effect I'm doing whilst I'm using hue,
saturation, and brightness. So tap again on the adjustments
icon to commit to that, but you can see I
have a whole load of different adjustments, and I cover all of those on
the solid foundations course. Okay, so now the final icon
is this little wrench icon, which is your actions icon. This is where you come if you want to add something
like insert a file. Okay, let's do that.
Let's come to palettes, and I'll load up
blobs of Joy 01. This is something I created
for the watercolor course, and it gets loaded
into its own layer called inserted image. Now, at the moment,
I don't want it in the middle of layer
one or layer two, so if I just tap and hold, I can drag it up to the
top of my layer stack. And when I do, watch
that green brush stroke, it suddenly gets placed behind
those little blobs of joy because whatever at the top of the layer stack covers up
whatever is underneath it, things like layer
two and layer one. Now, supposing I
like that layer, I can lock that layer so I can't draw on it,
or I can unlock it. And supposing I don't
want that layer at all, I can come to delete
and get rid of it. Supposing I want
to keep the layer, but I don't like that
green brush stroke, I can clear the layer. Various things you can do. Quickly coming back
to our wrench icon. You can add various
different things. You can cut, you
can copy, canvas. You get various
different assists, which is beyond what I want
to do here at the moment. If I decide that my
little maroon and orange blob with cutout
is a masterpiece, I can share it. And I can tap on Procreate JPEG, if you're going to place it on the Internet and
you can export it. I'll use AirDrop,
tap on my IMAP. It gets exported. And
we're good to go. You can also export videos. That's probably the videos
you've seen on the forums. Preferences, that's more than I want to get into and help. Well, what we're doing
right now is the help file. So that is a very basic
walk through for Procreate, and it's just there to give you a quick head up so that you can follow along with this course
a little bit more easily. Go back to the course,
go and have some fun, and I will see you in
whatever video you land on.
13. Download Resources into Procreate: Okay, let's show you
how you can import various different assets into
Procreate from Skillshare. The class I'm using to show you this is one of my classes, learn to draw with Procreate. But what I'll show you holds
true for any other class. Okay, so first thing,
let's scroll up. You see a number
of different tabs. Here you want to press
projects and resources. And here, if you come
down a little bit, you can see there's various
different resources I have. So let's download a
few files. Let's try. Well, for a Procreate sketch, at the top left, all I
need to do is tap on that. Gladys sketch, Procreate. And I can also see something
here which says, save. So I'll come to save, and I'm going to save
it under my files app. Now, this is an app which
comes with every iPad, and it pretty much does
what it says on the tin. It's just a way of organizing your files, so I'll tap on Save. Now, while I'm here, let's
download a few extra things. So I've got the procreate file. Let's try the file underneath, dolphin dot JPEG tap on that. And that downloads, which took a little
bit of time and again, come to save, make sure
I have file selected. And while I'm here,
let's calm down a little bit because
I want to find yeah, where I'm circling,
learn to draw palettes. These are procreate palettes and I've compressed them
all into a zip file. So if I tap on that, come to save, so I'll come
to save save in files again. And also the brush set. I wanted to show
you that, as well. So let's come to the brush set. And yeah, I want to save
that and save that in files. So I will swipe up
from the bottom of my screen and let's just
come to my files app, and sure enough, here are the various different
files that I downloaded. If I come to this rather
small little symbol at the top, just
where I'm circling, and I tap that is a useful little button
because it will give you some information about where on my iPad these various
different files are stored. Okay, so sometimes I
have people saying, Look, I've got a problem.
I have a ZIP file. I don't know how to unzip
it. It really is easy. Let's come to this
one in the top left DC line to draw brushes
zip just tap on it, and it automatically extract. What about the learned
to draw palettes? Tap on that. It extracts. And you can see I've
got the dolphin there, and I've got the Gladys
sketch Procreate file. Now what about DC A
three paper file? This is a procreate file
that's been compressed. Sometimes I have to do that. All you do with this, again, is just tap on it
and the file unzips. I already unzipped it earlier,
so now I have a copy. I'll come to the one which has two at the end of the file name. That's the second
one I downloaded. If I tap and hold on it, and come down to the bottom,
I'll press delete. So now, well, okay, let's come to DC A three
paper file, Procreate. I'll just tap on that.
It gets imported. And there it is.
If I just pinch in a little bit, that's my file. Okay, well, that was
straightforward. What about importing a
brush set, for example? Again, very easy. Just come up to my brush
icon, tap on that. And you can see I have
various different brush sets on the left of the actual
brushes themselves. Just where I'm
circling, there is a plus sign tab
on the plus sign. And then, well, at the moment, procreate things
you want to create a new brush. You don't. Instead, you come to where I'm circling and come to import. Come to, in this case, I'll come to Chrome. So DC learns draw brushes. They unzip to a folder,
tap on the folder, and I'll come to say,
DC drawing brush set, tap on that. It imports it. And right at the top,
you can see DC drawing. Now, I already have that from one of my previous
courses just here, so I'm going to come
up to that DC drawing. Tap on a little icon, and you get a number
of choices there. I will come to delete. Yes, I did want to delete that. As for the palettes,
again, very simple. Come up to the top right where
I'm circling, tap on that. Come to palette at the bottom, and you can see I have a number
of different files here. Anything which starts
with DC is my work. Supposing I come up to the plus sign at the
top right, tap on that. New from file, let's come
to where I'm circling. Again, it shows me the path. I want the crown folder. Let's draw palettes dot zip. So let's try DC drawing
color swatches, tap on that. And again, that gets imported at the top
of my palette list, ready for me to do whatever I want with it. And
I'm good to go. And that is how you can
download files from Skillshare onto your iPad so that you can do whatever
you want with them.
 Simon Foster