Transcripts
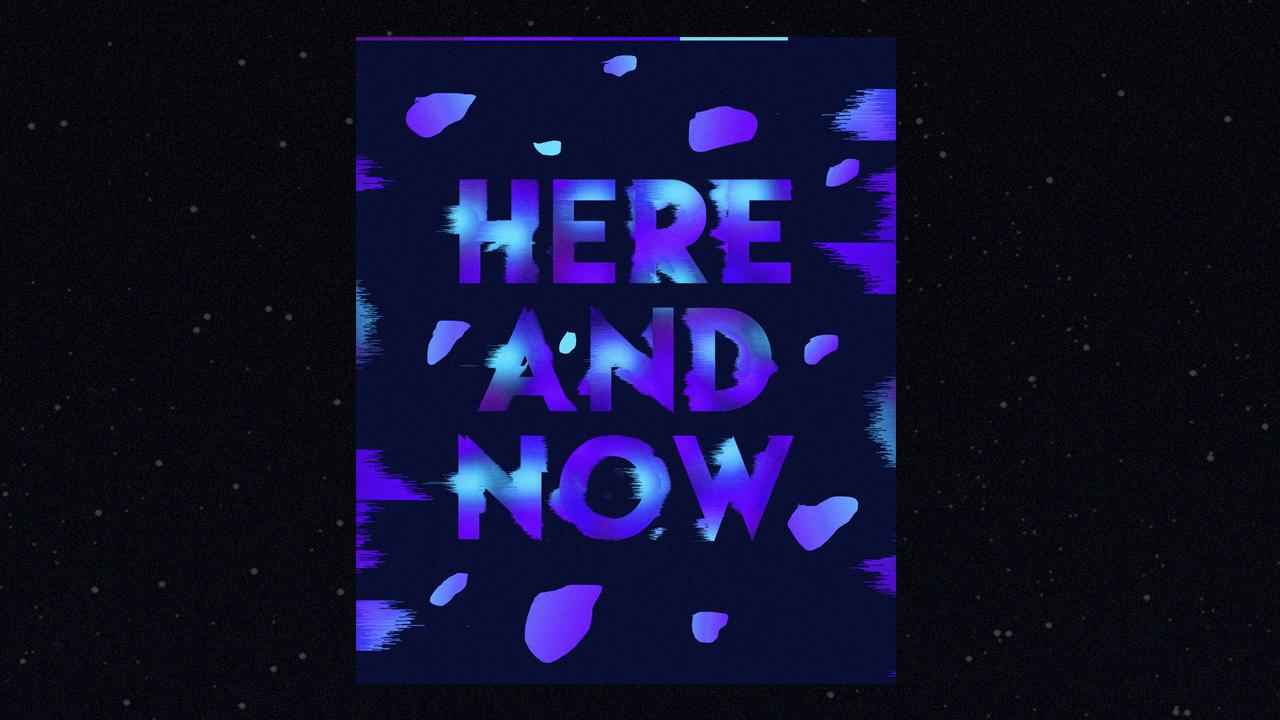
1. Intro: Hi. My name is clients and on this class you're going to learn how to create this exact poster . But with the same technique, you can create similar posters like this, like this one, or like this one. The's busters are part off my daily artwork project, which I share on my instagram page. I hope that this glass and the techniques you are going to learn we'll help you or will inspire you to create something unique and beautiful. So make sure to enroll and see on the next video.
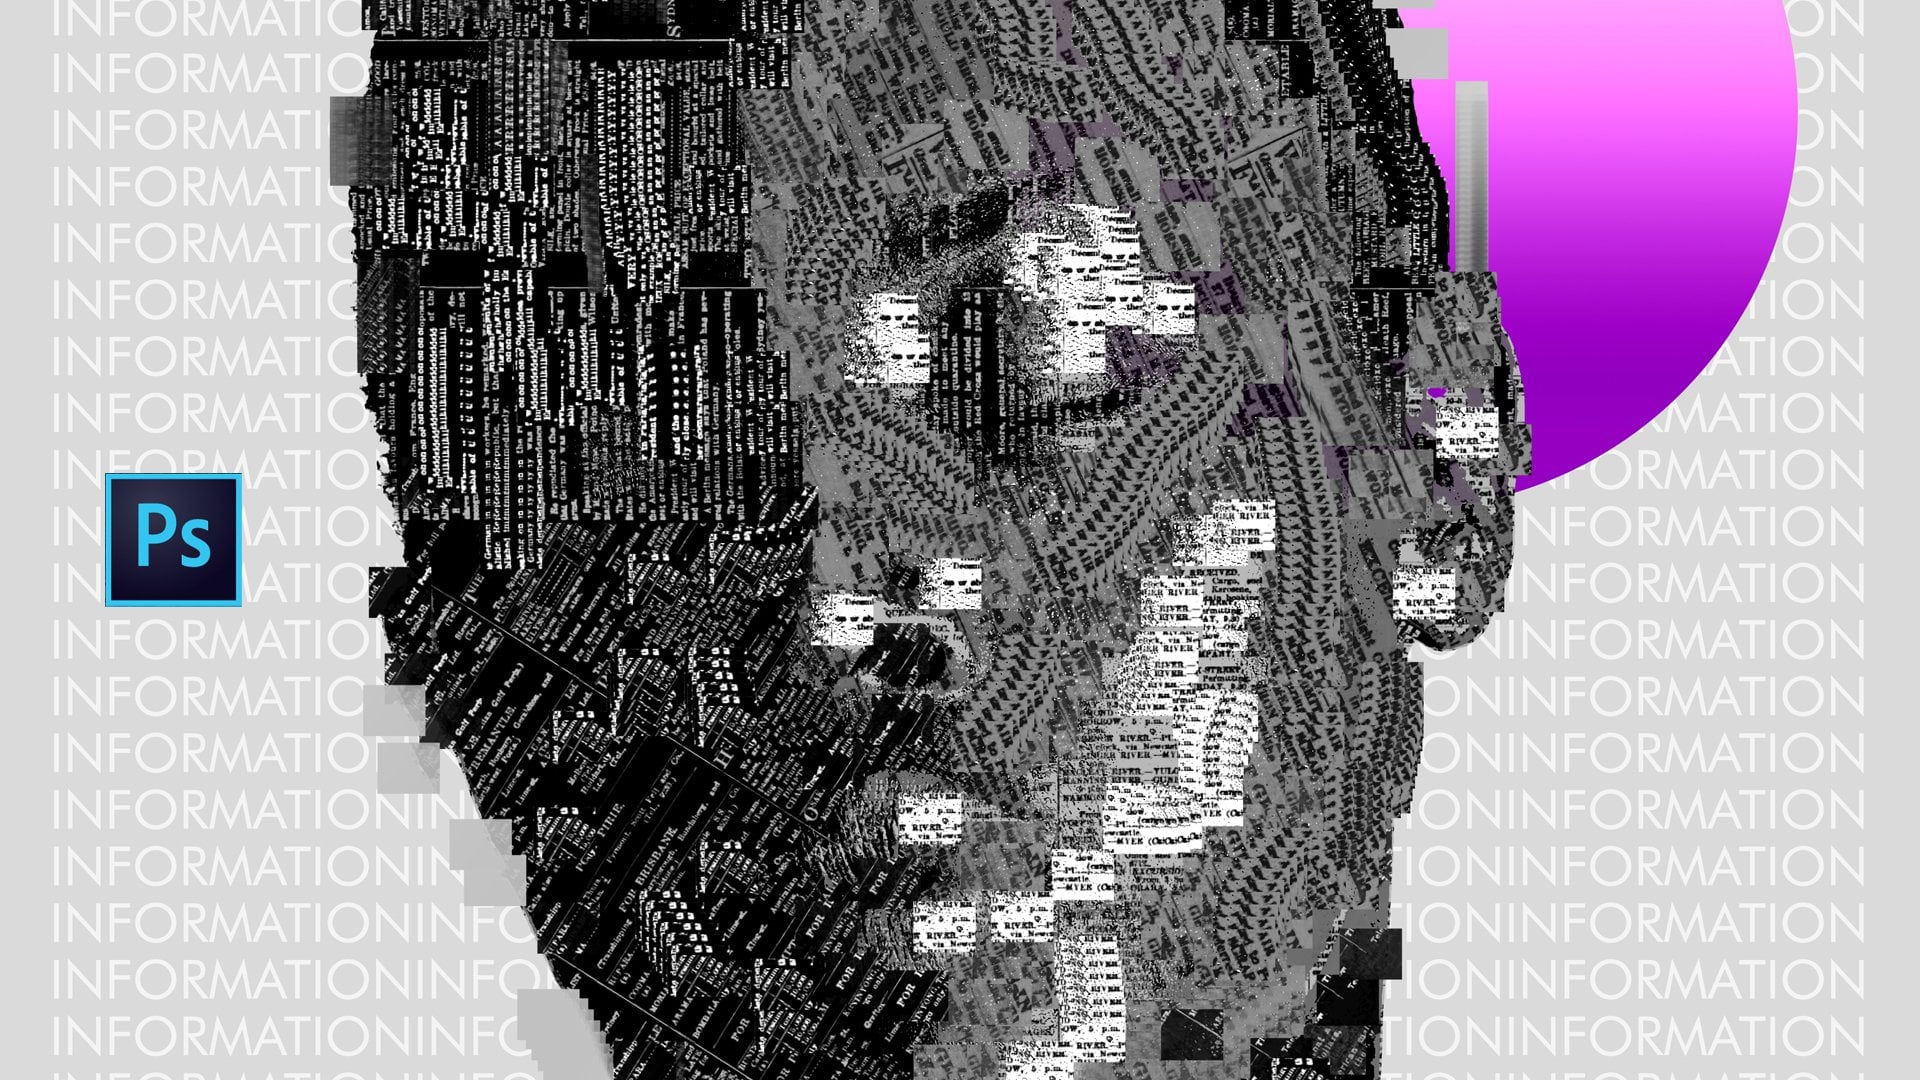
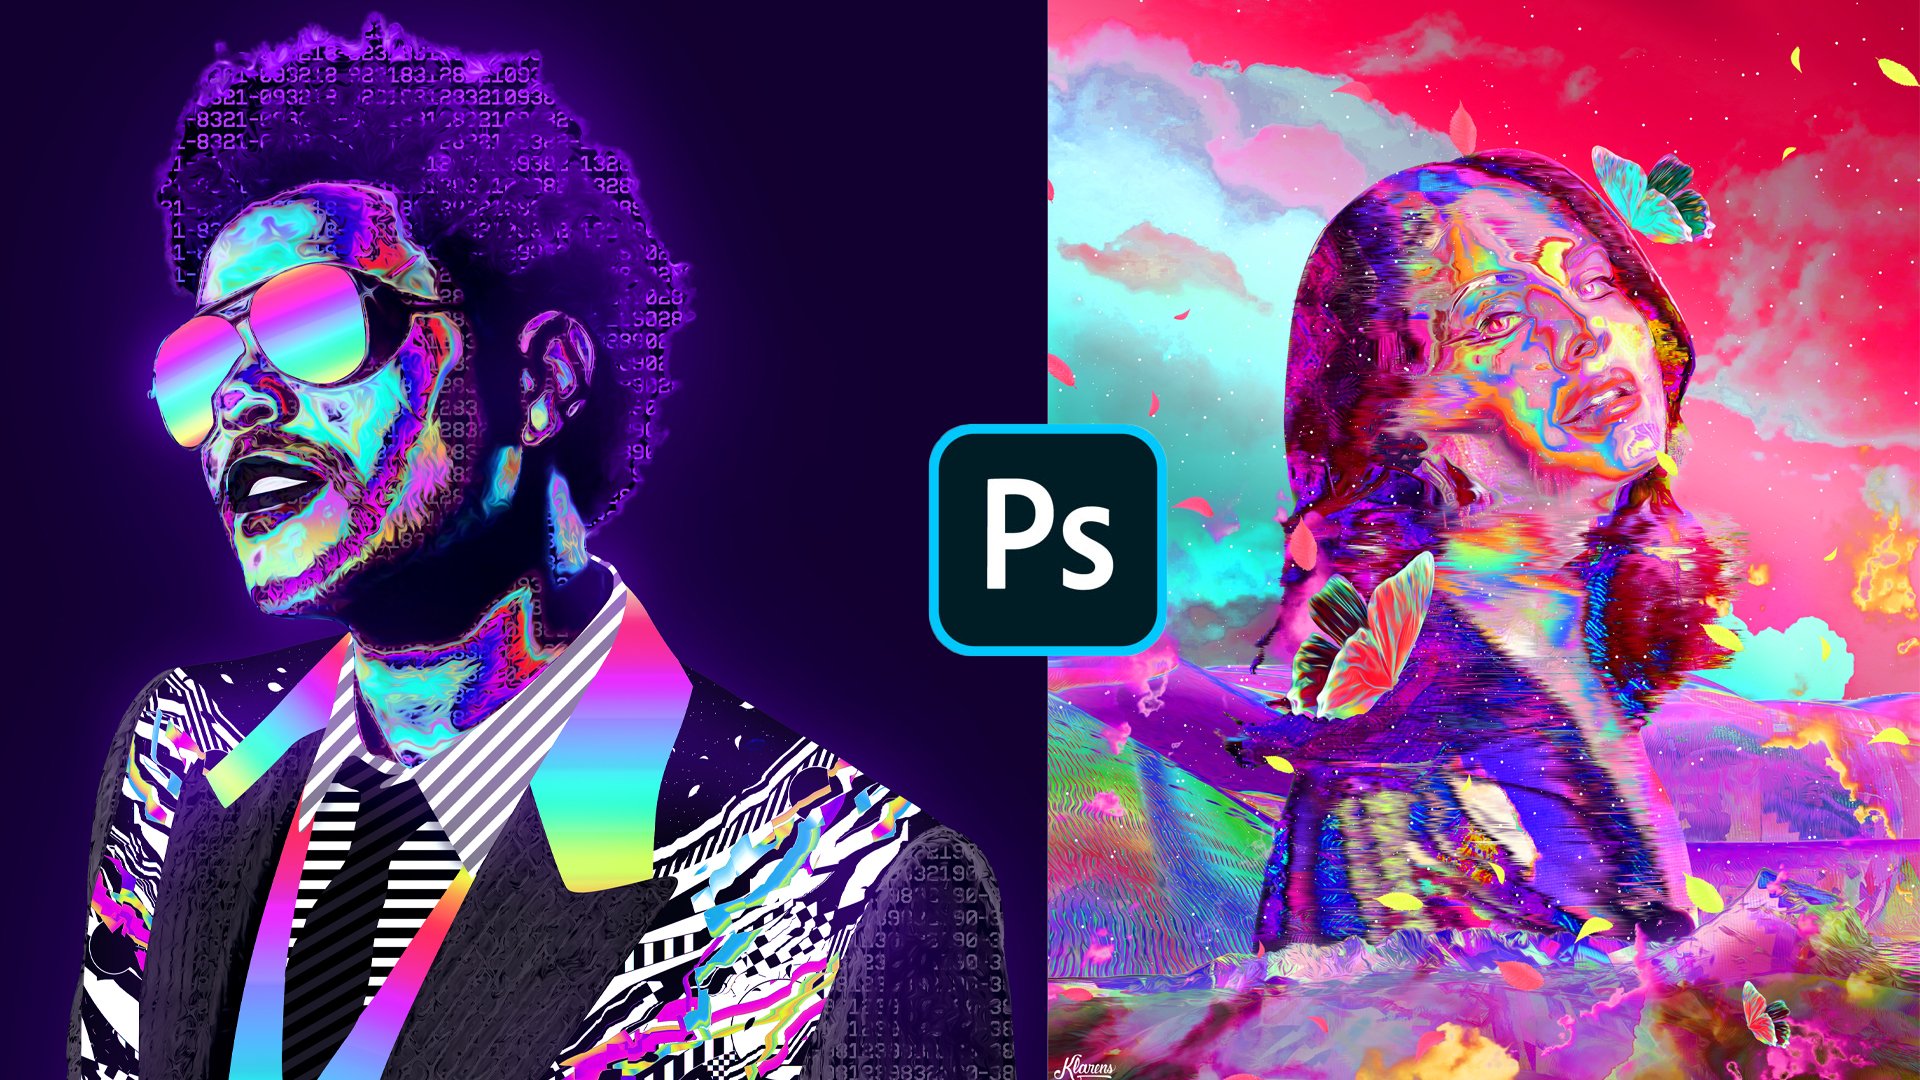
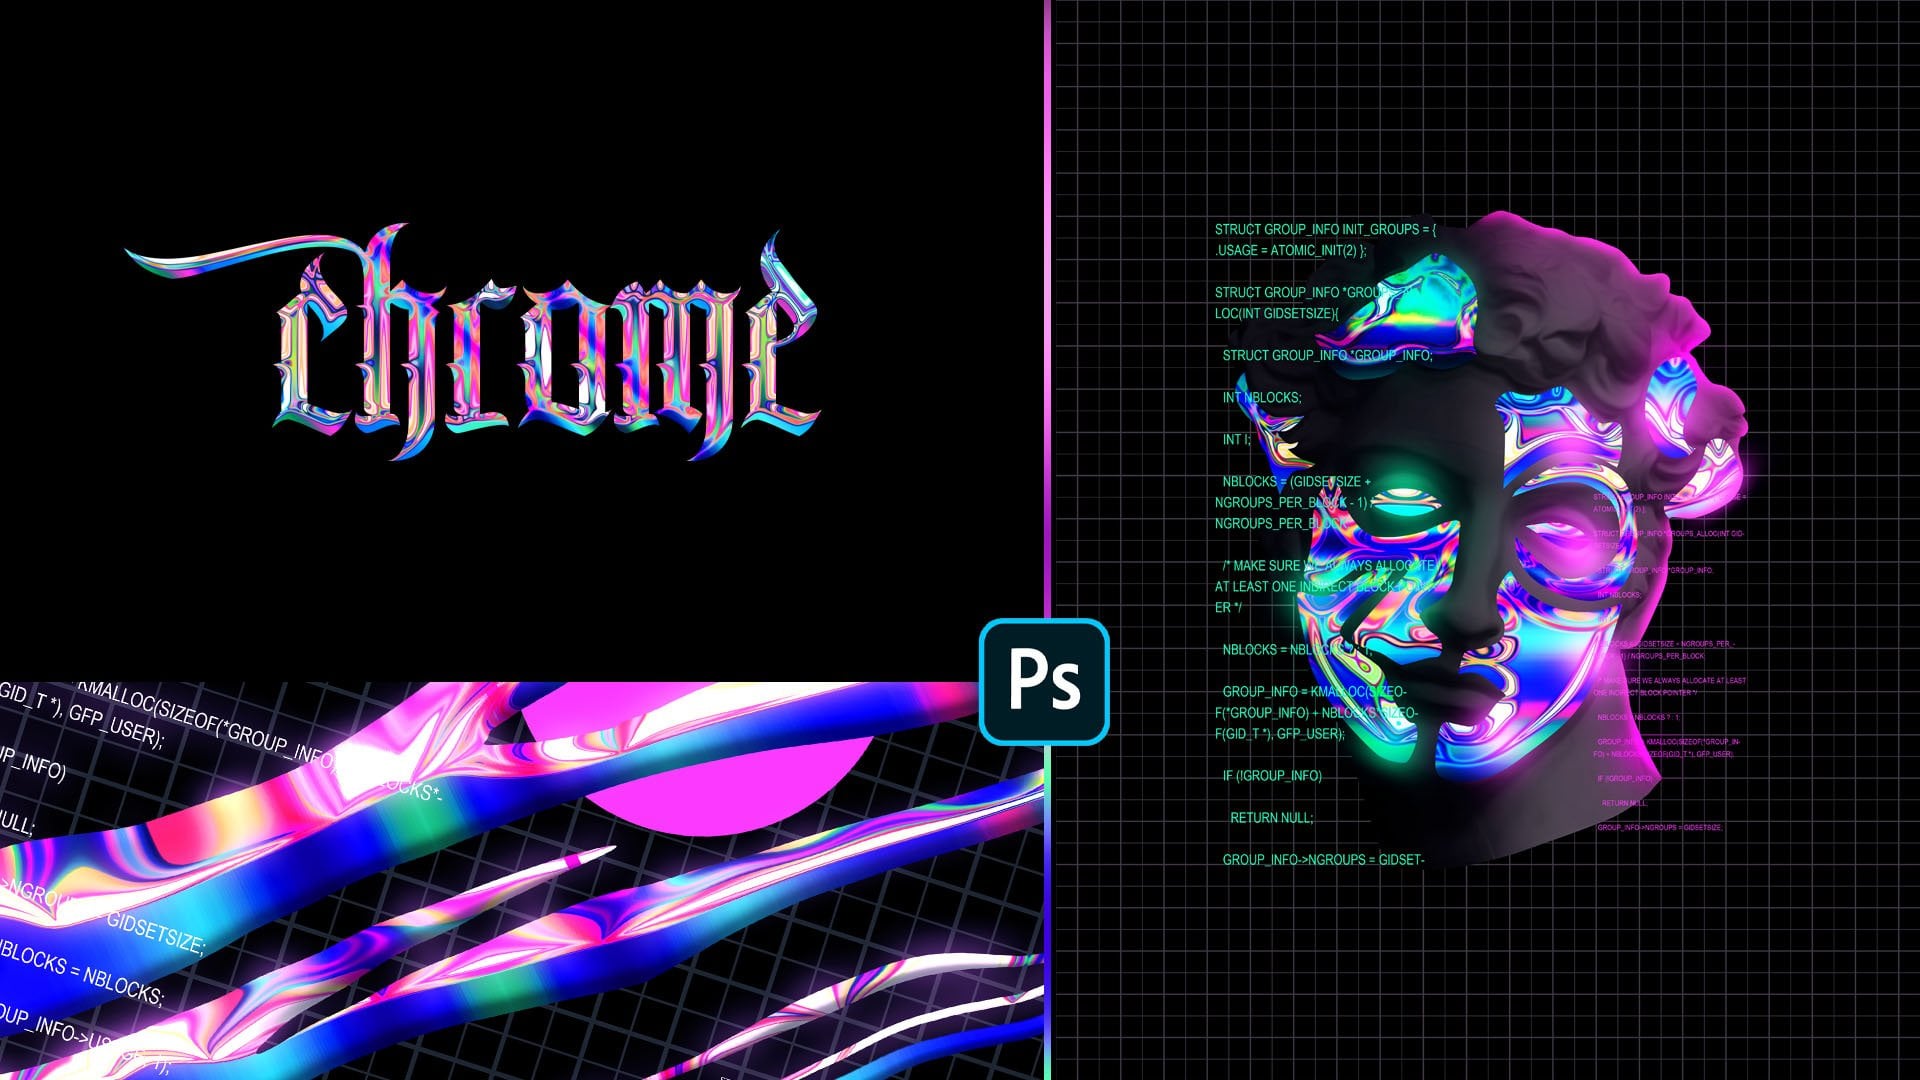
2. Explaining the process: Hey, guys, Welcome back. So on this part, I'm going to talk about the process. We're going toe toe dough on creating this artwork. So I have some examples here on my instagram page. You have this one right here. This one is a good example of what we're going to do on the first step, of course, is to create some text to add 1/4. Some words I don't know, but something is important. Is ah the position off the text. Then after you add some some text on it, you need to have the texture or some color. Some thought pattern on, then ofcourse, the most important thing we're going to learn is to create this this glitchy effect. And the final part is ah to add some aesthetics toe, make it more like a postures. Let's find out some other examples. This one right here also see, this one right here is another good example. Uh, but enough with with talking, let's get started with working on it.
3. Coolors: Hey, guys. So on this part I need to talk about something really important about the artwork which are colors off course. You can choose your own colors for the artwork, for the texture or the pattern you're going to add on the text. But something really helpful to you would be this this website a website called ah Bowlers that CEO, on this website you can find some cool off color palette. You can go on this section here, explore and ah then see some really cool color palette that you can use. Ah, you can seize something you like and ah maybe, like export PNG and just save it as ah, the file so it can be helpful to you Anyway, that's just something which might help you. Ah, also, as I said, you can create your own color palette. So it's just something that I thought would be helpful to you. Now let's get started with the work
4. Text And Texture: So now we are on for the shop, and the first thing we need to do is set up our for the shop file. So file new and let's set up the size. It's ah, you can choose your own size. Let's set the resolution 300. Ah, if you want it for print, I'm setting this size color mode. Make sure it's rgb on da click. OK, now the first thing you need to do is at some text. Ah, I've thought off a quote. Uh, also first, uh, you can set your your fun time choosing this lemon milk fund. I really like. I always use it. So the quote or the text I'm reading is ah, here and now because of ah, book off from does area like so, uh, you can position it on the center. Let's make it black. So you're gonna you can see it better. Ah, if you want toe to change the setting off the position, just elect and goto this part right here. Click on it and you can set the space between between the words the height between between the lines, then the size of the fund. But I think I think it's It's okay like that. I don't know. Maybe Yes, it's OK, I think. Let's position it now. Um, let's Pekka a color palette. I have one right here. I think this might work for this. In this case. Let's Koppett based command Control V Command Control T toe to resize it or to move it positioning, positioning it right here. So it's easier for me to pick toe. Pick some colors from from this part right here like that. Just click on it. Okay, so now let's set Ah, background. So create a nuclear Onda. Uh, Let's rename it background. Let's position it below the text, so just hold it and position it below. And now, just ah, at the background. Goto this Grady in tool and select pain bucket tool. Now go to color. Some picking this dark, the darker, darkest color. Click on it and just apply. And now we are going toe some colors on the background, which were going toe to apply into the into the text. So let's let's ah, make it go into this brush tool. Click on it'll just click be Let's set the size off the brush and now goto colors. A ZAY said them picking colors from this color palette I chose. You can choose your your colors as you wish, but I'm going this way. So just said some colors. Keep in mind that that, uh, these scholars will be inside the text. Let's pick the other color and just supplied her randomly like that. That's big the other color. So we're just applying this to the to the text. Now let's position this our first click on this. I I can read here so the layer becomes invisible. And now select all this this background or just this part right here, which is mostly with our colors on DA command, control shift, see or added and copy Merced and now based it. So here it is, the layer. Let's rename it Dexter. Now let's make the text layer visible again. It's invisible now because it's below the texture. Then now let's make invisible this layer right here. So, as you can see, it's just the part with selected first. Now, let's copy this, uh, this text layer by holding old key and drag it up. Now let's make this below layer invisible and move this layer up now let's ah rest arised type. So it becomes, ah, edible layer. Let's create a copa of it by holding gold. Now we're going to apply this texture into the text. So move it up on goto layer, create creeping mosque. Now I think it's Ah, it looks good any way you can Still at collars on some parts you would like. Take that goto brush and see it's only applied on the on the text because we we applied the clipping mask effect. I think it looks good like that. Now the next step is toe. Apply the glitch ethic.
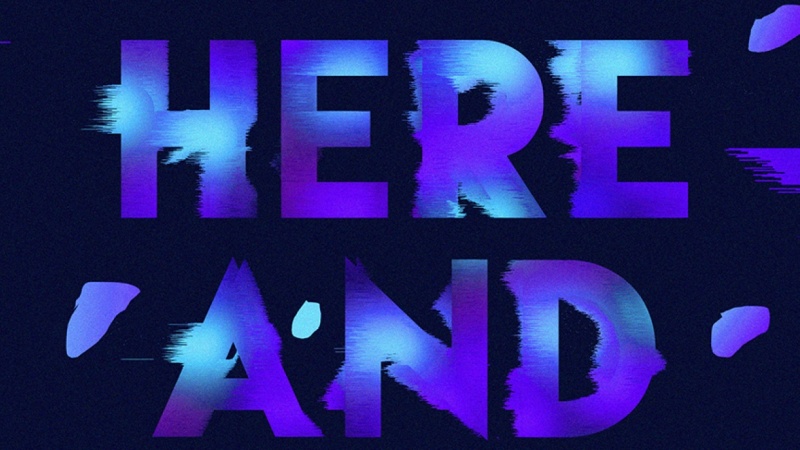
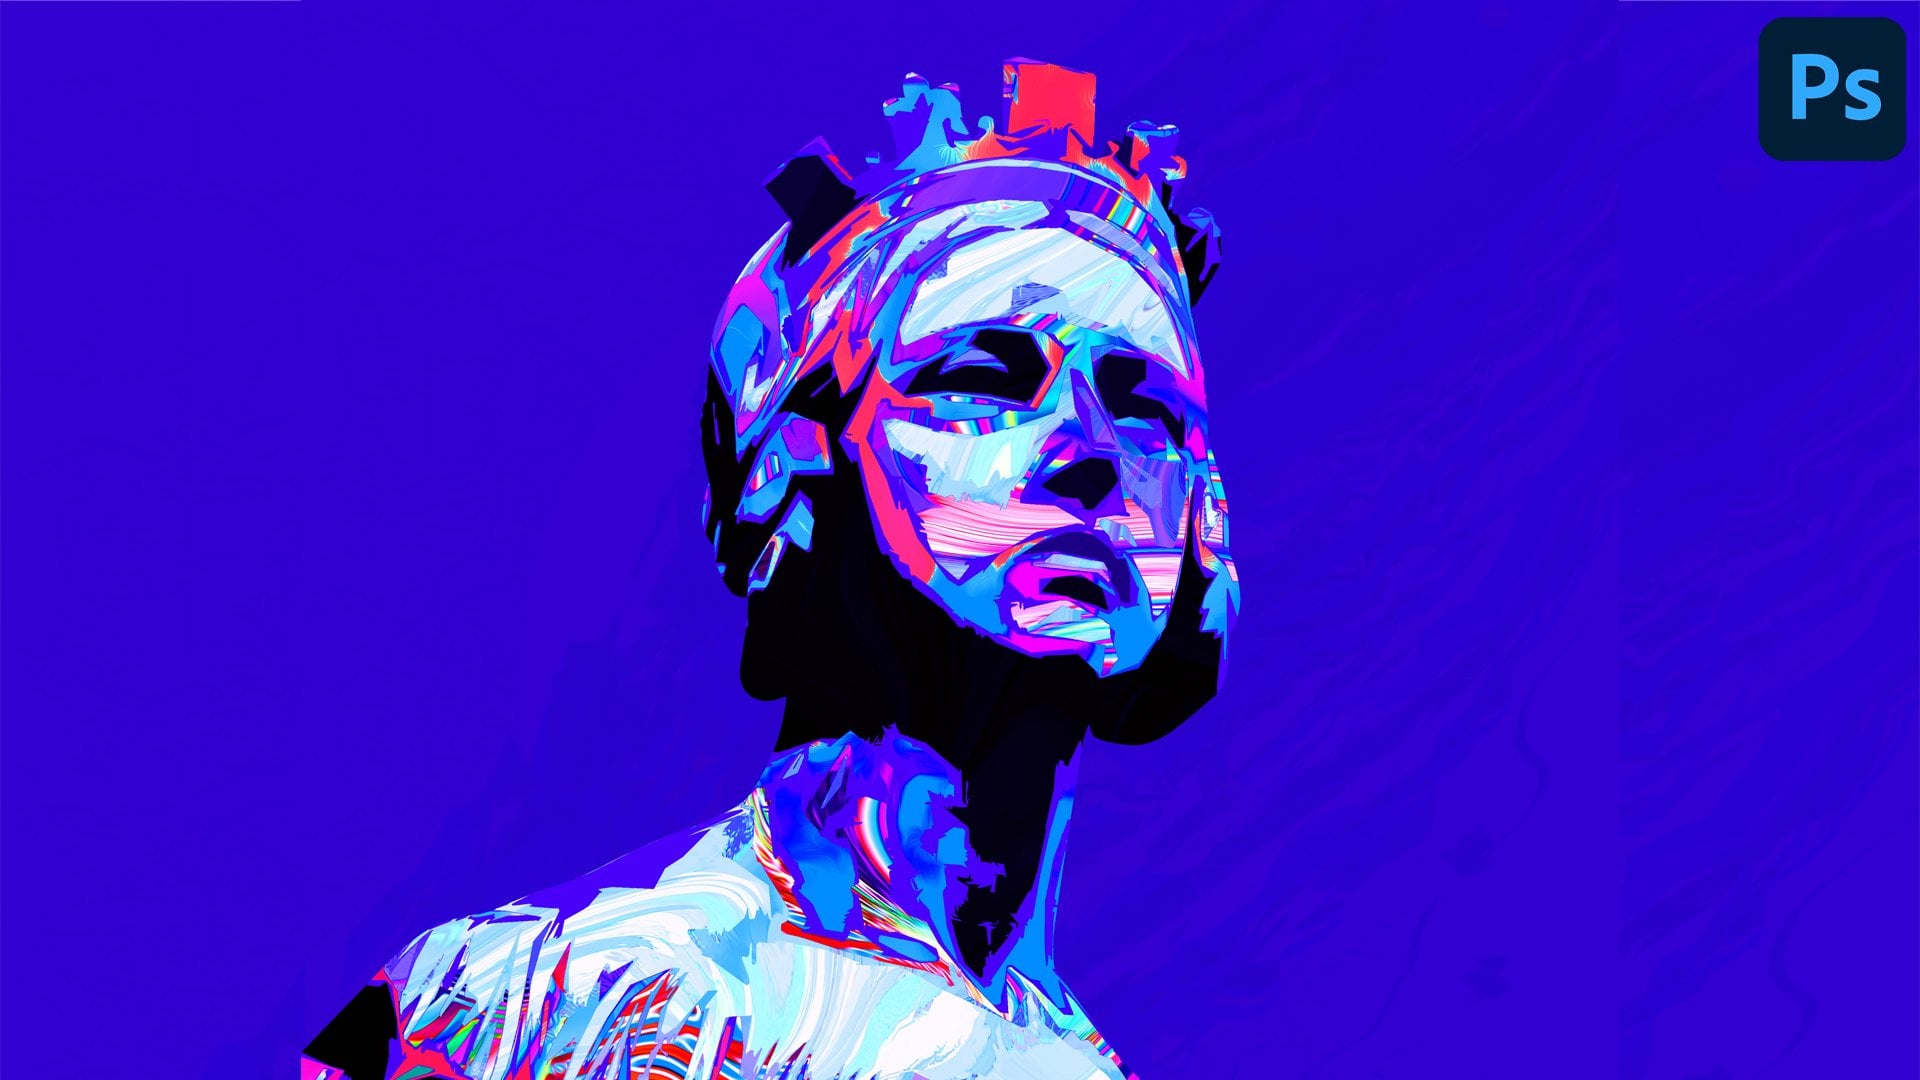
5. Glitch Effect: so the first thing we need to do is tow. Select this these text with its colors inside. So let's make invisible this background go to select Select all the text and Goto Edit Corp emerged on DA based. Now let's make invisible this middle there on Dhere we have as one they're the text with its texture inside. Let's make a copy of it by holding old and now Ah, we're going to apply Ah, the the effect. And to do that, you just need to goto filter goto style eyes and goto this wind effect. Now here you you have these three methods win blast stager. But as I have experimented with the three of them I think first is better to apply this this plus effect So click on it and click Ok Ah, so this is ah a small effect, I would say also make sure the layer below is visible. So let's say this one is regular. This one is greats one. So as you can see, here's the difference. Now you can apply this effect again by going toe filter and ah, as you can see, it's already here wind and ah the the effect is more visible now let's make another copy off the the regular earlier. So hold out and move it up. Now let's go toe filter, stylized wind and let's apply this other effects. Stager, Click. OK, so as you can see, this effect is more visible. It's more harsh. Let's position it may be so. It looks better. You can delete some parts that may effect on the text like that. You can keep this one. This part right here. Maybe it's it's okay. You can position this. Ah, layer below. Let's call it great to Ah, now you can apply again. This, uh, this effect maybe try this. Wind click. Ok, let's apply it on the glitch one. Now there again win on DA apply list. Wind effect striked again. It's ah, it's a very small ah difference. But I think it looks good Now Let's Ah, maybe Let's, uh, cut this part from the grich to layer and it cut on. Let's based it Command control T toe to reposition it. Maybe create something like that to create a more greet she foster like that. Let's copy it by holding old key. Come on, control T to reposition it. Let's make something like that. Yes, I think we achieve the most important thing, which is this greedy effect. So now we just need to add some aesthetic some some Grady INTs toe. Make it more like a poster or something we can print, so see on the next spot.
6. Final Touch: So now we can at some some Grady in some shapes, as I said. So let's create a new layer on DA. Create some shapes. We une easier the easiest way. I think it's to use this laser tool. Click on it and, uh, create some shapes. Take that on da goto this Grady in tool and just applied. Also, you have the colors Here. You can choose different colors, but let's keep this one's again. Create another shape. Apply this Grady Int You can president G button for for the radiant. Now, after we created this Ah, this shapes. We can play with some adjustments. So create a new layer on the goto This battle right here and let's ah, let's play with some adjustment layers like brightness. Contrast the the most fun adjustment layer, I think issues situation. No, let's play with saturation right here. I think it looks better like that. Also there, Hugh, I think this one is really good one. Let's see the original. Maybe maybe like that it's OK. Anyway, I think you you have come up with something different with different colors, so so you can choose You're your own style. Also another thing you can do is at some some noise on it. So let's copy it Corp. Immersed based on da Goto filter noise and add noise. I think I think the this amount of noise it's OK. You can choose uniformly rig ocean, but uniform. It's better, I think. Look, OK, As you can see, this noise makes it more like creature or something Retro. Something crazy you can do is go toe filter, just stylized wind and apply again this stager effect or apply these blast effect. But, uh, it's your own choice. I'm undoing this and keep it like that. So yeah, I think that's it for this tutorial. I hope it was helpful to you to create something unique. Maybe you can use these techniques for creating something else, Something gritty. I don't know. Maybe a poster or ah, cover artwork. It's their own choice. I hope it's helpful to you. You can share your projects on the project section and I will share them on my side. Rampage on da. Yeah. See on the next video by
 Klarens Malluta, Visual Artist