Transcripts
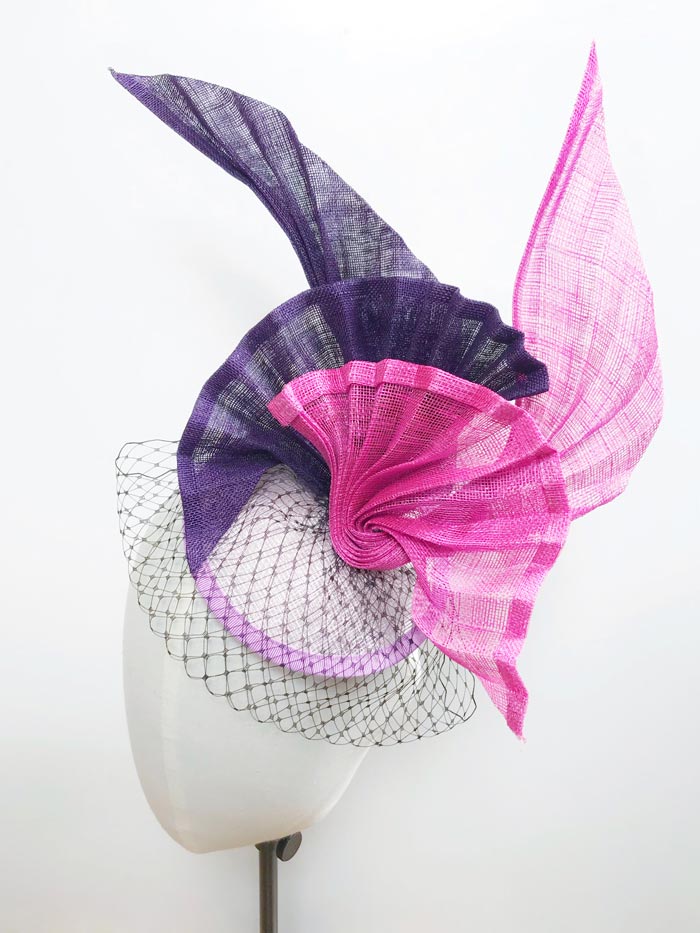
1. Chapter 1. Introduction: Hello and welcome to my studio. My name is Allen the swap and OMB had Designer. Today we're going to learn how to create a fascinates a hat. Just like one of those on the mannequin. We're going to learn how to create a fascinating had base, how to wire and trim it. We also going to learn how to create beautiful decorations. But the ends of the class, you will learn traditional military skills and we'll be able to create a hat on your own.
2. Chapter 2. Tools and Materials: Before we stop making alphas and later, it's very much important to learn about different tools and materials we're gonna use today. So let's start. One of the most important materials is a cinema, a store incomes in a variety of different colors. So it isn't to choose the shed that you would love to work with. It also usually comes already stiffened. So you can feel that it's quite region. Working with cinema, It's Tour. We also use water. Once it makes cinema store flexible and stretchy and much easier to work with, especially when the blocking or making declarations. Wire comes in different sizes and colors. Black, white, brown for fascinates her hat. We're going to use more flexible wire. One millimeter. It also covered with a cotton thread pliers to cut the wire. Threats. Just the regular, good-quality cotton threads. Choc o, pencil, whatever you find easier to work with. Needles. I use needle size number nine. But again, he will figure out what needles are easier for you to work with. Glue. We're not going to use a lot, but sometimes it helps. I would recommend using huge Igloo as it dries quickly and it transparent when it tries, which does not affect on the quality of color of the cinema straw or any other material you working with. Measuring tape or ruler clips that you can easily buy in any art stores. The evil that helps them, you stitching a very thick part of the fascination or hat also makes sure that you find clean bowl that is your size and an easy to work with. Caesar's. There's never too many scissors. There has to be scissors for fabric. Scissors, singer, my store. And smallest equals threads and more delicate work. Beans. Beans are used for blocking. You can use any fancy like I have few examples here. But most importantly, that it's easy and comfortable for you to work with. I usually prefer at least one. Those are regular push pins that you can easily buy in any art store. Iron. Iron is the most important tool in military. We need a regular, basic standard. Iran wouldn't know STI. Although working with this cinemas tour, especially when it's stiffened, it leaves a lot of dirt, grease on the iron. That's why I usually is they can pay for it to protect both the surface of the iron and the material, especially when the Working with a bright colors.
3. Chapter 3. Hat Block: In order to create a fascinates and had base. One of the most important tools is a hat block. The traditional Milner had blogs, a mate of woods. We're going to use a don't shape. If you don't have a wooden had block at home, not to worry. There are different materials that you can use. For example, a polystyrene dome shape or the polystyrene mannequin head. And we can use the back of the head. If you're using a polystyrene hat block, cover it with a fabric. Just like this example here. We're going to use an iron and high-heat might melt polystyrene material. So in order to protect it, cover it with a thick fabric stretched around the hat block and secure it with a piece. In order to begin, we need to protect our headlock. For this, we're going to use a cling film to cover the headlock entirely. You can also use plastic bags, but please try to avoid any plastic bags with a print on it, as it might transfer. Has love for our future house.
4. Chapter 4. Cutting the Sinamay: For the first step of creating a fascinate to have based, we're going to need a head block covered with clink film of plastic bag. Cinema store, chalk, measuring tape, a ruler, Caesar's blocking things, and water. We're going to need two layers of cinema material. Sake you measuring tape, a ruler, and measure two squares, nine inch, each. Carefully caused the material.
5. Chaptet 5. Blocking the Sinamay: Now we have two pieces of cinema store. And we're going to block one layer on top of another forever before we start doing it. It really important to understand the properties of this material. As any woven fabric cinema store has stretchy and non stretchy sites. To identify stretchy announced stretchy sides. We're going to look at the direction of the yards. When yarns crisscross themselves. It means that this side is non stretching. But on the diagonal, the material is very flexible and very stretching. This is called bias. We're going to use these properties a lot in hat making. In order to create a fascinate, to have base, we need to block it over headlock. To begin with. We need to apply water to make materials softer. Implant material on top of the head base and start securing it. Will the things from the non stretchy sides secure it with the first beam, then turn the hat block, stretch the material, and secure with another hairpin. Now as both sides, the keyword, continue with the ADA to non stretchy sides. Secure with a big, then turn the catalog, stretch the material, and secure with another happy. As now for non-structured size Otzi keywords, we can start stretching the material bias. If material dries out. Use mobile will always keep. Cinema Store wants to rise as it helps for the material to stretch. Now start stretching on a bias. Just pull the material, hold it with your left hand and secure with the right-hand. Done the material on the other side and do the same. Stretch the material with your left hand. Hold it while stretching and secure with a hat pin. Now continue with TU oddest sites. Stretch the material and secure it with a P. Now turn over the headlock. Stretch the material and secure with a happening. As the first layer is blocked. We're gonna do the same with a second layer of black led to water until material fills, soft and flexible. Located on top of the first layer. Same way, blocking it from a non stretches side. Block, stretch. And secure for the ping. Now continue with the other non stretchy side. Secure but the fin ten over stretch and secure. Now continue stretching on device. You can see how it's easy to stretch material on the bi's. Secure with a B over stretch. And secure again. Continue with the two other sites. Stretch, secure, turnover, stretch and secure. This is the result we want to achieve. Smooth stretched surface, perfect for fascinate to have base. Now we have to leave it aside and let it dry.
6. Chapter 6. Taking off the Hat Block: Now I'll have basis dry and ready for the next step. We're going to need a better paper and iron, chalk. And the templates. First of all, we will use an iron to create a smooth surface. Making paper is very much important as it protects the material from any Greece than might be on the surface of your iron. And I run it with a circular movements all around the area of a half base is very much important not to press and hold and iron at one spot as it might burn the material. So continue with a circulant movement, evenly spreading the heme. So y i really is important. First of all, it helps for both layers to stick together. Second of all, if we have any imperfections, the Press of the iron and heat helps to smooth them the area and plus, it gives a little bit of shine as a final batch. Now after we finished running and how material is dry, we can start removing the happens. Now that old happens out. We're ready to remove Almohads carefully using your fingers, slide underneath the material and pull it. There. I'll have base is ready.
7. Chapter 7. Trimming the Blocked Base: Well done on creating a beautiful have base for our fascinates her hat. The next step would be choosing what shape you would like to make. You can choose. And I drop shape or circular shape. Whatever you like. You can help yourself by creating a template in advance. I created a circular shape, and now I'm going to place it on top of a head bass using a chalk. I'm going to trace around the shape. Now carefully carved the shape following the line. And the base is ready.
8. Chapter 8. Wiring the Hat Base: Now, in order to secure the shape and make it stronger, we're going to need a millimeter wire. That's the building that we're wired, that we're going to use. The best one for the fascinate to hat is one millimeter in diameter. We will measure the circumference of this shape so we know how much war to cropped. Use the ping to mark the beginning and stop measuring. From this point. Go all around and have base. It's 40 centimeters. Well, 16 inch plus I would add another two centimeters will happen. Age for the overlap of the wire. We measured circumference of the head base is 39 centimeters. I'm going to add another two centimeters, four overlapping of the wire. So it's going to be 41 centimeters. And that's why I'm cutting the, why. Use the plies and cut the y. Now place the wire around the half base. You can use clips to keep it in place. Okay, using a match you thread. We're going to stage the Wyatt. I'm gonna show you how to use a wise teach to secure the y. First. Make a regular stage. Step aside. About an inch. Greater loop. Go inside the loop and stretch. In Shonda half inch. Go inside the loop and stretch. If the wire is moving, it means that you have to secure and stretch a little bit stronger. As you approach the overlap of the wire. Mencius teaches closer to each other. This will help to secure both layers of the wire together. In order to finish creates a double loop. Simply go inside a loop twice, stretch, and cuts.
9. Chapter 9. Creating a Bias Strip: Now I'll had base is finished. All we have to do is to hide the wire by creating a cinema store training bias trip. Just like one here. In order to create a biased tree for trimming, they're gonna need cinema, a straw, Ireland, voter, ruler, baking paper, matching threat, a chalk, pencil, clips, glue. Ideally you Hulu. Caesar's. Under surfers for irony, use a fabric clause or an ironing board, whatever works best for you. To greater trimming, we need to cut the material on the bias on the diagonal. We can fold the material 90 degrees. This will help us to identify the perfect buys life. Here. I will measure nine centimeters. Now cut the material following the line. For lengths. Just makes sure that the bias trip will cover the circumference of the head base that we measured before. Now use a little bit of water for our BY strip. This will help to make it softer. Now, holding both hands, just stretch the bus trip. For the next step we're going to need a bus trip and iron and illimitable except looking at the vice trade on the backing paper. Now full device trip in half. All the way. Open up and folds both sides. It's over, it's a center, slightly overlapping each other. Make sure that you create a straight line all the way. And now fold again. Make sure that you keep material slightly wet as it helps the process. Map with the vacancy paper on top and start irony. Pressing and spreading the heat of the iron all the way. The reason we're using a vacuum favor is that it helps to protect the surface of I strayed from any dirt of the iron. And that's the result that we are looking for. And now continue all the way down. Fold both else toward the center, overlapping each other's likely altogether covered with baking paper and 13-year ironing. And now our Vice drop is ready. But in order to perfectly allocate on the circular fascinated base, we need to curb its. For that. Isn't the heat of the iron. Whole device trade. And try to correct for the health of your hands. Pressed the iron and holes, and please buy it. Buy strip. Whether your house is a little bit of water to make materials softer, it will help you to carve it easier. Press with the iron and start to a state where the Joe Haden's.
10. Chapter 10. Attaching bias Strip to the Hat Base: After we finished curving the trimming, we're going to place it only had base to cover the why. Use a little bit to make materials softer and more flexible. Now started applying the trimming. And the place where the Y overlap each other. This is going to be the back of our hat. Carefully place the trimming around the edge and secure it with a clean. As you go. Use your fingers to press the material. Just like that. Let material to dry. Now, I'll material is dried. What do we have achieved? Is that our trimming molded over the shape. As you can see now it's a perfect rounded shape. Now, we're going to use a little bit of glue to secure the trimming around the edge. Open up the trimming, and use just a little bit of glue on both sides. Isn't your finger spread the glue round, especially the edges and put it back. Pressing with this part of your hand. It's very much important that these edge is securely attach to the base so it doesn't stick out. That's, it looks really nice and beautiful. Use clips for suppressing while the glue is still trying to continue all the way until the end. Try to work with a small area at a time as glue tries really fast and you won't be able to attach Ola trimming at once. Press with your hands, and then secure it with a clique. Try to use glue carefully so it doesn't go through the layer and doesn't ends up on the surface. When the glue is dry, remove the clips in order to finish. Stretch the trimming a little bit. And folded insight. Now continue same way. Using the glue on both sides of the trimming. Spread it with your finger a little bit, and then carefully placing on the edge. But we need to achieve is that layer on top covers the layer underneath. So it looks like that. And now secured with Eclipse Latin tried. As the glues dry, you can remove the security clips. To finalize, we gotta make few stitches right here just to secure the trimming. Use matching threat double Fred, and start stitching. From insight. I'm going to show you how to make an unfeasible stage so that it's so strong, but you can't seat. Go inside the same place and go to the other side at the angle like this. Now, to exactly the same and go to the other side of the angle. Like that. Make few stitches along the edge. When you think that it's secured creates a double not going into the loop twice, one to stretch and cut. So now we secured the trimming, plus it looks absolutely invisible.
11. Chapter 11. Decorations 1: Pleating a Sinamy Fan: Well, I do hope you enjoy the process of half making. So far. As we finished our head base, we're going to put it aside for now as we are going to concentrate on making declarations. One of the first expressions we're going to make now is we're going to learn how to play a beautiful family. So let's get started. Here's an example of two beautiful fans. You can make it smaller or bigger. It's absolutely up to you. I will show you the technique and then you can make changes based on your desire to find the bi's folding materials 90 degrees. Just like that. Measure 40 centimeters. And make mark. Now cut the material at the edge. Dow square in half on the bias. Now we have to take care of the edges. Use a little bit of water and start folding. The edge. One centimeter are happening. Continue folding all the way. The edge. Press with your fingers as you go long. When you finished folder again, pressing with your fingers makes sure that the line is straight and accurate. Now we're gonna do a little bit of irony. Using baking paper. Don't solve just to avoid any dirt from the iron and keep all material clean. Because it's a very bright material. Use a medium, heat, no steam. Start irony, pressing the iron. What do you need to achieve is to secure the edge by flattening the materials and attaching defaults. Continue all the way. Now cut the edge and makes sure that it's securely. Attached. Now continue with the other side. Is a little bit of water. Fold one centimeter of half an inch present with your fingers. Try to keep the lines traits. And now fold again. Our triangle is ready. Now we can start Clayton. In order to begin, we're going to use a little bit of water. Don't use too much water just a little bit. Now, we can start bleaching. Accurately fold the material one centimeter of half an inch. Pressing it would have fingers. Turn it around and fold again. You please could be wider or narrower. It's absolutely up to you. Now continue. Up to the end. Fold one centimeter, half an inch. Press with your fingers. Turnaround. And press again. How are we creating the form? If material dries, just add a little bit more water. When you finished. Press the blades again with your hands just to secure them. You can also use a little bit of irony for better results. Now, alpha1 is ready.
12. Chapter 12. Decorations 2: Creating a Wide Bias Strip: As we finished our fan decoration, now we can move on to make another one. The next declaration is going to be wide strip, exactly the same as we made to cover a fascinates you had based. But this time we're gonna make it whiter. So let's continue. To create a bus trip. We're going to use exactly the same skills as we did previously. In order to find a perfect buys triply. Folding material 90 degrees. Press the biased reply and measure 25 centimeters or ten inch. This is going to be the width of our strip. Market. Will the chalk, you can create a wider or narrower virus, trip it absolutely up to you. And based on your design, I'm going to carefully called the line. Apply a little bit of water and stretch the bias trip. Stretching makes our vice trip longer but narrower. So always consider that when you're measuring the size of the training, marks, the center of the bias trip by folding it in half. And press with your hands. Open up and fall towards the center, slightly overlapping both layers. Now carefully fold them again. Make sure you're following a straight line. Now it is in baking paper and a medium heat Irish. But RNA. By pressing the iron. Now we have a perfect bias trip.
13. Chapter 13. Decorations 3: Sewing the Veil: Now we're going to use the veil file decorations. Decorations are made of synthetic materials. So if you decide to adn the veil, please use low heat so you don't accidentally melted. We're gonna caught fois centimeters, which is approximately 168 inch flanks of the veil. Using a Machu thread. We're going to go through each little square and joined the edge together. Start with a first little square, and then I'll go through each little square of the ydA edge. Now secure the edge of the veil with PDUs dishes. Elbow is writing.
14. Chapter 14. Attaching the Decorations on the Hat Base: The finished preparing all the declarations, and now it's time to put them together. So we have a fascinated base. We have a plate chicks then as ale and abides tree. To begin with, first thing we have to do is to attach the veil to the base. This is always the first part of the decoration. So if veil is part of your design, you always put bailing first. So now let's take and matching threads and start securing it. Locating in the middle. The fascinates adds start use ditch underneath the veil to hide the nots. Make few stitches to make sure that the veil is secured on the fascinating base. After you finished. Just create a little knot and cut the threat. Now we can put it aside and work with the bias trip. Now I'm going to show you how to manipulate bytes, treat too great, a beautiful curve with the help of the steamer. You can use a regular garment steamer or a cattle, whatever you have available. Just few words about working with capsule, open, delete and put it to boil. Always put only half borsa and never fill it up to the end. When water boils, it creates bubbles and sprinkles. To start working with by street. Caught the axis on both ends. Now we're going to use a clique field. Open. It is just a tube that will help us to create a beautiful curvy shape. Apply a little bit of water to stop seeing the material. And gently twisted around the shape holders with both of your hands and start stealing. You will feel that steaming makes material bear soft. Once you have your turkish shape. Take it all the steam and hold it for several seconds, letting me to call up and then take it off. Our curve is ready. Now using a steep we can also manipulate the shape of the fascinates. Pleated fan. Just use this team and find different ways how you can play with the shape when you happy with your results. So now this deeming hold the shape for several seconds, letting it cool off. Now we have to decide how exactly were located decorations on our hat base. To make it easier is a Manichean hat secure that had vase with a little pins so it doesn't move. And start placing the decoration. Trying to locate the decorations different ways. By seeing the details one side or another side until you happy with the result. Once you finalized, secured with a thing. Just like that. If you don't want to use whole paste, you can always cut it in half. Well few parts. When you finalize the design, stitch, it would've matching threads. Now using a matching thread starts teaching and securing the declaration to the base of the hat. Status teaching underneath the decoration so you hide the nodes. Go on the other side. Making an accurate stitched, go back on the other side. Just make US teachers to make sure that the shape is secure. When you've finished. Make a final and logs on the inside of the hat. Be careful not to stage the veil as it's now called the thread. Continue good. Other parts. When you attach it to the decoration, makes sure that you cover the laws of the veil. Stage on top of the hat.
15. Chapter 15. Sewing the Elastic: Now ahead is ready, so exciting. The last step would be to secure the hat and a hat. Now we need to stage the elastic. So let me show you how to do that. Measure a proximately 35 centimeter, 14 centimeter lags of the elastic and create a few notes on each side. I made three knots. On both sides. Now make few marks on both sides of the hats. And starts teaching be elastic. You're not sound the fascinates her base. And with a matching threat, stop creating a loop. You don't need to stitch the elastic, but just to overlap it with a thread creating Mac few stitches until you make sure that the elastic East secure, ugly, stitched. When you've finished a novel not uncut. Now repeat the same thing on the other side. Plays a lot towards center of the base. And stack for each Hewlett. Teach them fret over elastic. Make few stitches to make sure that it's secure. Secure with a double knot. And caught the threat. Finished making fascinates her hat. And I'm going to show you how to put it on. Elastic goes until you feel here. Just like that. In orange, you hairstyle. And locate the Fest and actually had on the site, as it looks much better like that. The way we created a loop over the elastic that we can fool it and adjust. For example, Eve elastic is too loose. You can always make it shorter but creating another live. Just like that.
16. Chapter 16. Thank You for Watching: Well, now we've finished making a fascinates ahead. And I do hope that you enjoyed the process. And I also hope that you will continue making beautiful hats using the techniques that we learn today. I would encourage you to experiment and to try new ways of manipulating Siena, my store as a so many different ways. Beak here is the open-minded and never give up, even if you make a mistake. It's always a beginning of something new. So happy hatch making and thank you so much for visiting my studio and for attending Mike online workshop. Wishing you all the best unhappy hat making.
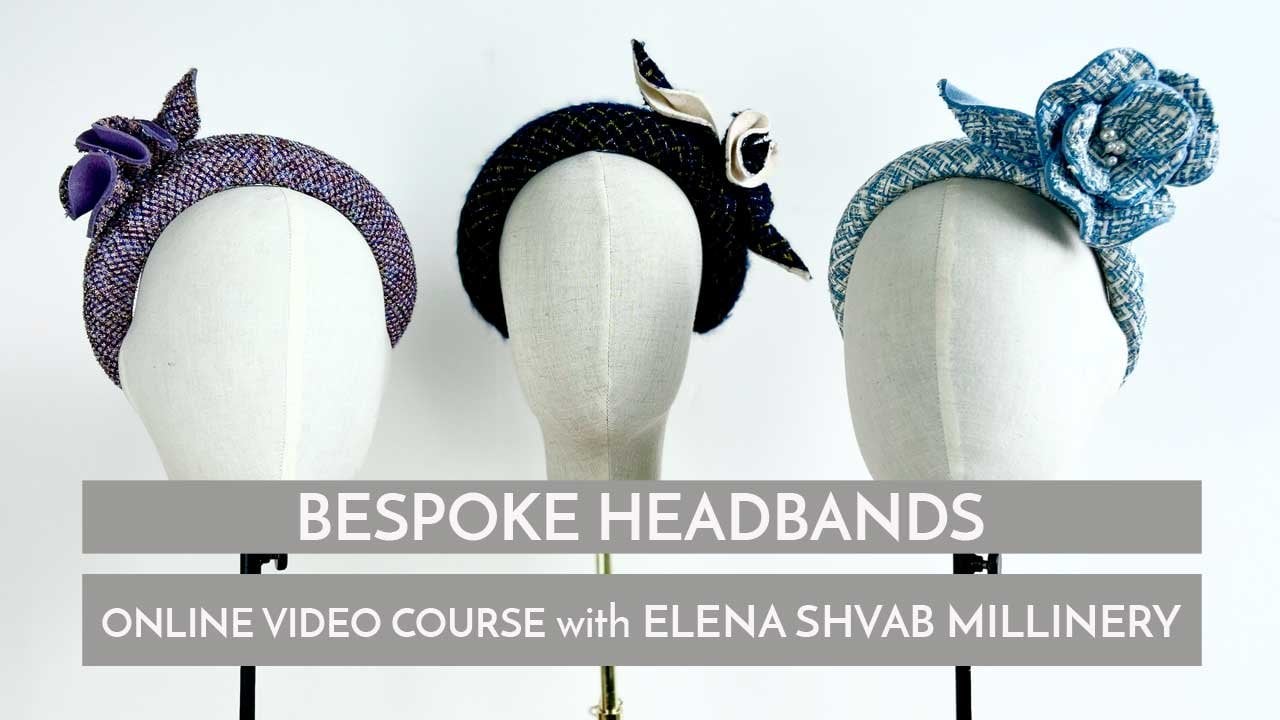
 Elena Shvab