Transcripts
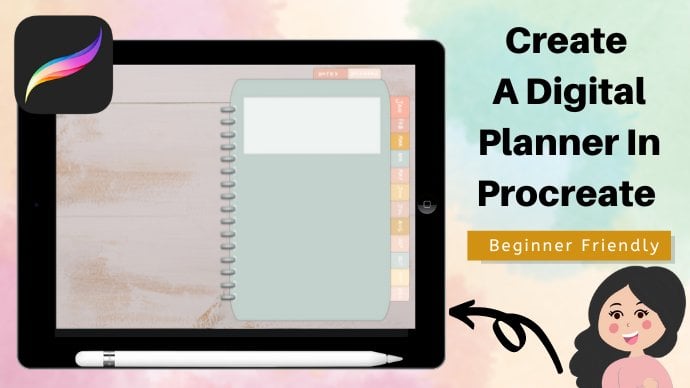
1. Introduction : Hi everyone. Today we're going to be
learning how to create this digital planner using
Canva and PowerPoint. Learn how to create
these monthly tabs. How to create these
Daily Planet templates. How to create these
weekly planner templates? How to hyperlink, had to
create notebook pages, and how to create
a stickers page. If we have a look and
see if you can see that we look for
digital planner. We have nearly half
1 million results. And this is because digital
planners are a great way to make passive income
from places like Etsy. If we click on this color
here, it's got 5,116. Five-star rating. We can see that they
have got 80,000 cells. Click on the seller.
The majority of item that they sell
are digital planners, undated planners,
OneNote Planner, academic planners, all
sorts of plant-based items. And this is a really good
way to make passive income. Because once you create
these planners, Once, you can sell them multiple
times to multiple customers. So today we're going to learn how to create a digital planner. Whether you want to sell it
or you just want to create a planet for yourself
and be able to customize it to what
you're looking for. For this course, we'll
be using canva.com. Canva is an amazing tool for people who are
graphic designers. It makes it extremely easy for us to build, create designs, whether it's templates
such as logos, business cards, or if
it's digital planners, flyers, that sort of thing. They have hundreds and
thousands of templates. This is an amazing
tool for anyone looking to get into
digital design. For this course, I'll
show you how to make a digital planner using
a free Canva account. It's all of the techniques
that we go through and all of the images and shapes and everything that
I use will be free. But I would suggest
if you did want to, you should sign up for Canva pro this because you have
a lot more choice. You've got a lot more freedom
in how your designs look. And you can really
customize your planners. And you've got lots
more templates as well that you can use. If you would like to have a look at Canva pro
and get a free trial. I will leave a link in the description box
below of my course. So please do check it out. But like I said, we don't need a Canva pro account
for this course. If you are planning
to create a lot of digital planners are a
lot of digital designs. I would suggest that you get it just for the fact that
you've got lots more choice, lots more options,
lots more photos. And I do think it's a
lot easier to work with. And I do have a free trial
if you do, and I check out. So please do have a look at the About section of my course. Also be using PowerPoint
to import our planet, where we'll create shadows
as well as hyperlink King. I really hope you enjoyed this video and thank
you for watching.
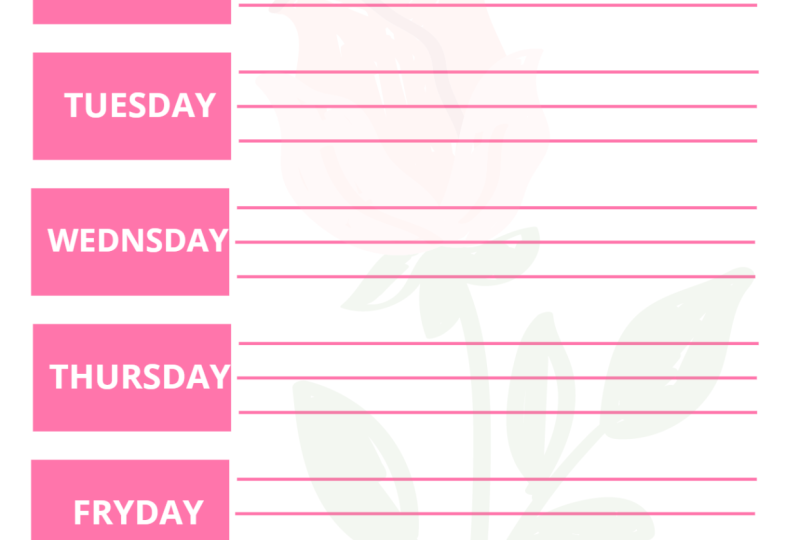
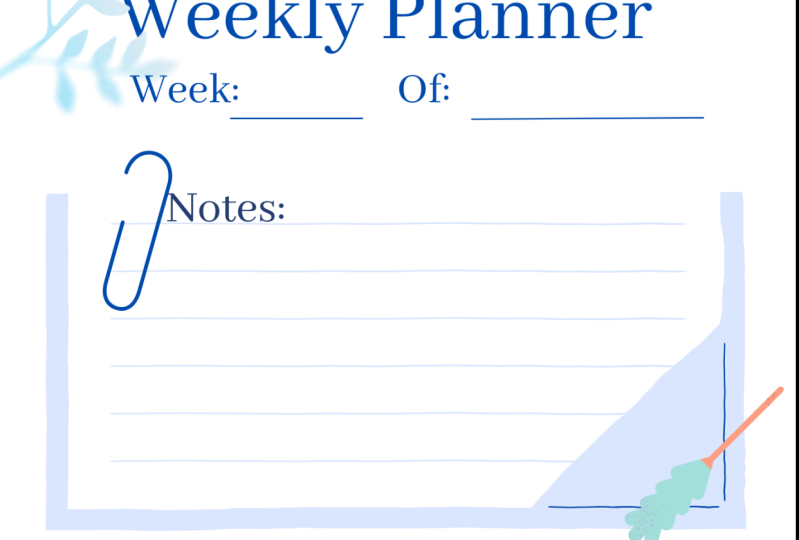
2. Creating Your Weekly & Daily Planner Templates: And we want to do is go into Create a design. And we want to go into our custom size. You want to change this to inches fast, 5.3 by eight to seven. And this is a standard A5 size. So you want to press Create new design for our weekly principal planner page, but we want to do is create a nice simple design. The first thing I want to do is I'm going to go into text and add a heading. And I'm going to try weekly planner. And just move this to the top. Then want to go into font and change the font. You can choose whichever font that you like care. And then I want to change the color as well. Then went into had a sub-heading and untried week. I just wanted to re off and hard to change the font as well here and change the color. And I just want to make this a bit smaller. I didn't want to do is go into my elements and click on my straight line to make it smaller, which is positioned right here. And I'm going to go into line width has changed to one. And I also want to change the color to my pink color. Then I just want to copy this and move it just under here as well. Just make it slightly smaller. We then want to do is hold onto all of these elements. Tend to do is hold onto all of these elements. And I want to press Group. And I'm going to just move it just so it's aligned properly into the middle. Just going to ungroup his hand. I'm going to make this a longer and just group this, move a tiny pit site. Then when ticker into my elements and click on my shapes. And I want to click on this square shape. And I just want to make it a bit smaller. And I just wanted to make this a bit lighter. Just make these appear lighter as well. Then want to go into text and add a sub-heading. Don't try Monday here. To make it smaller and change the font. I want to change the font color to white. Then we're going to go into my elements and I want to add some lines to position is just make it slightly longer than I wanted to go into the line width. Make it 21, changed the color. And I want to just copy this three times y. Then what you do is click on all of my elements and I want to group them together. Then press Copy to this six times. Just sort of go. Every day of the week. I'm going to go into my text and just change the days. And when to do is I want to go into my element. And I just want to add some declarations here to my planner pay. So I'm going to search for a rose. Just place this in the top right. And committed, just add any image that you like, whatever suits your fancy. Search for a plant. Next. Next I want to add a leaf. What you can do is click on the leaf and you can change the color of it. And what I want is to position a backwards. So on lines to be in front. You can see at the lines code for the leaf just for that pattern. And then I want to search for some washi tape. And they're just want to add these to the edge of all of the tes. Hey, we've got our weekly plan page. I then want to do is add a new page. And I want to group my heading and all of the elements that you can then press down and press Group. Then I'm going to copy. And I just want to take it right at the bottom here. And we'll announce to do is, I'm going to add a note section and a books about things I achieved in the week. The thing is I challenged me in the week. So you want to do is we want to go into elements and I want to search for paper. And you can see you've got quite a lot of different options here. So I'm just going to choose one to I like. And click on this yellow one. You can make it because home. And if you click on it, you can change the colors if you like as well. Just going to convert light pink here. Then I'm going to click on Text and add a subheading notes. And just move this to a top here. Then I just want to change color. And then we're going to go back into my elements. And I want to search for another node page. I want to add it to the bottom. And you can change the color of this as well. And I want to go back into text and a sub-heading. And it's a font size. And change the font style as well. And you just want to come and change the font color. Then I'm going to search for another note page. Just copy this. And it's the color of this kind of dog. Next going to do is just add some picture elements all around the sides and at the bottom can just search for some plants. We've got our two weekly planner pages here. But we now want to do is create our daily planner page template. So what we want to do is just go and create a new page. And I want to copy heading. Copy, time to just move it down. I'm going to copy this as well, which is maybe a tiny can. And then I just want to ungroup this. I want to try to delete this. And here I want to just replace this. One day. We went to give our customers option to sell cool the day of the week and respond to position this in line with my Tate. Then when to go into elements and go into my square shape. And tissues, make this slightly bigger and just make into a rectangle. And I want to change the color, go into text and add a subheading, write goals for today. And move this to the top pair. Change the font, change the size, change the font color, and then want to copy this. If this down. And copy this as well. Put this into a material right here, a point and known to go into that line. And I'm going to copy that. And I'm going to move it underneath, which is expanded. And to fail, change it to I wanted to copy them. And then copy again. Then I'm going to copy my books again. Just copy this. I want to replace this. This section is Kentucky my meal tracker. So I'm going to just replace this by breakfast. And then I just copy this. To label this as lunch. I want to do is go to elements and go into my line and just rotate it into a straight line. Changed color into I, change the line weight, just make it smaller, which is tracker. In between. Then we're going to go into text, hand at a subheading. Just try tracker. And I want to change the font. Just make this bigger. Just above. And I'm going to copy these books again, is going to be my ungrateful for section headings. I'm going to copy my books. This is going to pay my notes section is copy this. And I'm going to copy my line. Just take at the bottom and duplicate and compare. I then went to is just add some decoration around the elements and search for data. I'm just going to add a pointer to the top as well. I'm just going to search for some washi tape and change this to daily planner and my daily planner page. So we've got our two weekly plan page is and daily planner page. Now, we want to now save as PNG files. You can see here we've got all three of our files as PNG files. So we've got our weekly plan page until a daily planner page.
3. Creating Planner Cover Page, Tabs & Adding Planner Templates: Do now is go into
Create a design. And we went to come
to custom size. I want to make it an A5 size. So five, change to inches, 5.83 by 8.27 and press
Create new design. And this is going to be our
cover page for our planner. What I want to do is I
want to go into uploads. And here you can upload all of your images that
you want to use. I get all of my images
from a free pic.com. I've just uploaded this
wooden background image. I'm just going to move it, just scale it to make
it a bit bigger. Free pic.com is a great website. If you have a premium account, you can use the images
for commercial use. But you do have to
make sure you're not using the images as they are. They have to be part of
another project, for example. So, for example, by using this wooden background image
for our planet project. And that would be totally okay. I next want to do is go into elements and go into my shapes. And I want to search for a procedural and search
for a curved square. I went to want to change
the color just so I can see a little bit better. You just want to expand this. But making sure you've
got enough room on the right hand side
for all of your tabs. Then want to click on my object and I want to change the color. And the next one to go into my square shape and just
place it into the middle. This is where we
can put our name. So I'm going to
change this to white. I think that looks nice. Next one to do is add some
tabs to the right-hand side. So I'm going to click on
my curved square again. Just make it smaller. Don't want to go to position
and send it to the back. Change the color of this. Just so I can see here. I want to do is I
want to press copy. We want to go to
fetch wealth in here. I've got 1234567891011. I've got 11 is one
way to do is just click on all of my objects. I got into positions and go into front and
then go backwards. Then what I want to do is just
click on my objects again. I'm just make them smaller
and move them up a little bit so I can fit another tab in. Just wanted to copy
this last tab, move it down to the bottom
and position it backwards. Okay, what we next want to do is change the color of our tabs. Go into color. Can you
just go into color? And I just wanted to do this
for the rest of the tabs. Then want to do is click
on my curved square again. And I want to create
some tabs for the top. And then I want to
just change the color. Then I'm going to just
click on these both. And just position to the back. I then want to do is
I want to go into text and I want to go
into add a sub heading. And I want to write Jan. And you want to keep the
font of this as Open Sans. Because when you import
it into PowerPoint, if you do have any other font
which isn't on PowerPoint, just going to change the
size, change the color. Just make it bold. And I just want to rotate it
and just move it into place. Then I just want to
copy this position in the next tab is
changed this to fab. And you just want to keep doing this for all of the month. And want to copy this. Just rotate it
back into and just try to move this to the top and just copy this
and write stickers. I think I'm just going to turn
this into a square shape. Instead. I'm going to go into elements and
go into my square. And just make it the same size. Just delete this one to
fill, change the color, and just position it backwards. I think it just makes things
look a bit better too. I'm going to do now is
go into free pic.com. And I want to add a floral
background to this. So I'm just going to
go into free pig. And I want to search for
a floral background. And I just want to choose
one for my cover page. Going to go for this one. Just want to press download. Download. I want to upload image and just add
my floor background. Just want to click on it. And what I can do
is I can go into effect and I can go into
background remover. And you can just
remove the background. And this feature is only
available if you get Canva pro. It's not available
with the free account. Well, how much do
is just position it and then I just want to
make it slightly bigger. I'm going to click on it
and I want to go into position and go backwards. We've got our cover page. At the moment. Canvas does not allow you to add shadows to any of your objects. I should make this
look more realistic. We want to add a shadow. So I'm going to do, is
I'm just going to add. An image of a plain white
page with a shadow around it. And I'm going to add this
behind my cover page. And this image that I've
got here a little bit available at the end of the
tutorial for you all to use. I'm just going to
make this bigger. We want it to be slightly
bigger than our cover page, just so it peaks out. Then we went to go into
position and go backwards. And we just want to
leave in the back here. So you can see we've got sort
of a shadow effect here. So it looks like I've got
a shadow in the back. Now, what we now want to
do is we want to copy this page and I want to
delete this section. I want to do is I want to upload my weekly planner template
that I created earlier. So I'm going to go
into Upload Media. And you went to, go to
Device and press Browse. And see here we've got our three different templates
that we created. So I'm going to click
on the weekly planner. Just wanted to add this in. You just want to make it bigger. So it fits nicely. I just wanted to
change the color of the pink square into white. Just move my page back. I want to do is I want to
click on my page shadow again. I just want to make it bigger. Just want to position
it backwards. Just so it looks like we've
got multiple pages here. And what I want to do is
I want to copy this page. Don't want to delete template, and I want to go back into
upload media into device to browse and click on my second
weekly planner template. And I just want to
add this one in. Then again, just
duplicate it and just delete this and add
the daily planner paging. So we've got our three templates that we created, weekly planner. And our daily planner. I want to do is I want to copy this page and
just delete this. And I want to add a page
from my notebook canal. And I'm just going to upload
an image of a notebook page. And again, you can get
this from free pic.com. If you have a premium account, you can use it for
commercial use. I then want to do is copy this page and just
delete this image. And I want to add an element. So I'm going to
go into my square and just create a
square root page. This page is going to
be for my stickers. I'm just going to make
it a light pink color. Don't want to go into text. Heading. Just write my stickers. Just position this to the top. And you can change
the color of this. If you wanted. You can
add a border to this. If we go into elements, come into our shapes, I'm going click on this shape. I can just add the border if we wanted to go into color and just change it to
maybe even a white color. So we've got our five
pages, so weekly planner, second weekly planner,
daily planner, I'm a notebook page
and our sticker page. I want to add a tab or pay
for each of my months. I went to click Copy
and I just want to delete the border and
delete this heading. And I just wanted to change
the color to the same color as this January
tab I've got here. So you can see it's
a green color. It's going to go into fill. Just change the color to that
green color I've got here. Then I want to go
into text heading. I just write Jan and just place this into the middle and just
make this smaller. And I want to change
the fill to white. And then I just
want to copy this and I want to do the
same for February, change the color of this into the same color
I used for February. Then I just wanted
to change this text. Then I just want to keep doing this for the rest of the month. We've now got all of
our tabs five months. So we've got December, November, Toba,
September, August, July, June, May, April, March, February, and January. So we've got all
of our templates. What we now want to
do is we want to import this into power plant. So we want to click
on to the three dots and just type pain
of power point and click and press Download.
4. How To Create Hyperlinks & Shadows In PowerPoint & Importing Into GoodNotes: Just opened up my platinum in PowerPoint. And you can see some of the text has just misaligned little bit. So I'm just going to fix that. I'm going to do is I just want to add some shadows to my tabs. So I'm going to click on all of my tabs. And if he right-click and format to object. And I'm going to come into shadow, go into presets. And I just want to choose a shadow. I didn't want to do is I'm going to click on my January tab, come into Arrange, bring forward because I want it to be over February. And I went to go into March going to arrange and send it backwards because I want it to be behind February. And I just want to do for the rest of the month. And you just want to click on my sticker tab backwards is behind a notebook tab. I'm going to do is I want to go into my page, is just going to click on the label on the tab. And I just want to delete these. And I'm going to go into my first page. Click on the label and the tab. And I just want to copy these. And then I'm going to press paste and went to go into Arrange. Send Backwards. I'm going to click on the label and press paste and arrange. And I'm just going to do this for the rest of the pages. So what I wanted to, when I come onto a month page is, for example, this is February. I want to make sure that the February tab is above everything else. So what you could arrange and press forward and I just want it to be above the other month just so we know it's February. If you look at January, you can see January comes first, then the February, just so it gives it a more realistic effect. Then I'm going to click on the February tab, going to arrange and press bring forward. And you can see here is above the other months. So we've just added all of our tabs again. When I want to do is I want to add some hyperlinks to my tab. If you click on wonderful type of checks and we right-click, you can see that the hyperlink option is grayed out is because this shape was created in Canva. So what we want to do is go into Insert Shapes, go into our curved square root, just want to create a curb square over our tab. Just copy and paste this. And I just want to create two boxes for the top tabs as well. Then what I would do is I want to go into View, go into Slide Sorter, and I want to move the weekly pages in front of the January tab. And I want to move the notebook and a sticker book. After December. And I want to go into my first page to right-click hyperlink, go into slide title. And I want to set that link to slide 2 is a January page is on slide two. So I'm going to click slide 2 plus. Okay. Right-click again and press open hyperlink. You can see takes us to January tab. The next one I want to go. This type is going to be February. February is on page six. I'm going to click on the tag. Hyperlink, slide title. Go into Slide 6. Press Okay. And again, I can hyperlink. And you can see it goes straight to page six. And I'm just going to keep doing this for the rest of the month. I also want to hyperlink the notebook and the sticker page. So if I go down, I can see that the notebook pages on page 17 and stick a book is on page 18. So I'm just going to right-click hyperlink. Slide titles. It can slide 17. If I open, hyperlink, should go to the notebook page. Link the sticker page, slide 18. Okay. They've got a hyperlink objects. So we want to do is, I'm going to click on all of the objects. And I want to go into the fill and press no fill. I want to do is click on the object. Copy. And I'm just going to copy them onto all of the pages. And then I went to do is I want to go back into fatty, go into line and press no line. And I want to do the same for the other pages as well. Just keep doing this. So we've got all of our tabs until hyperlinks. Now, what we want to do now is just arrange our pages. I want to go to View and go into slide sorta. And I want to move my daily page in front, and I want to create 31 daily pages for each of the month. So what I want to do is just duplicate this Command C, command V and J Study 1 times 3, four. I want to do at the end of the month is addFive weekly page to us. So I need to do is duplicate this five times and duplicate this five times as well. I'm just going to press Command C, Command V. Just move this here and copy this 15 times. And then just move them one here just so that they're in pair. So you can see we've got 31 daily pages. And at the end for every week with goal, a weekly plan, a demo. So one week, two, week, three, week, four weeks. And we've got a 5-bit carrier as well. So we see some of the days go into the fifth week of the month. Why I want to do is click on the 31 daily pages and click on their planner pages as well. And press command C. I want to click. Into February. So just off the February tab and press Command E that we just have the February of koala pages. Again after March, April Command B over C got windows, it would be Control-V. Just keep doing this. And I want to duplicate my notebook pages well, so entrepreneurs Command-C. I'm just going to copy it about 15 times. So that's where our notebook. And I'm going to just duplicate my sticker page as well. Just give it five pages here. We've got our planner pages all in order. You can see after the month that the page is kinda the daily pages are going to be key pages. And everything is in order to do is going to manifest page. And I went to click on this February hyperlink. Hyperlink. Hyperlink. You can see it takes you straight to February. February has moved to slide 44. It automatically adjusts your hyperlinks for you. I just want to do is I want to press Save. Once we've saved our PowerPoint presentation, we want to turn it into a PDF, and I would suggest you use an online website for this. This way, it preserves the hyperlinks. And sometimes if you try to export their own PowerPoint, hyperlinks don't work. So you want to type in small PDF, PowerPoint to PDF. And click on the first link. I'm using small pdf.com. And you just want to change your files and you can just download it once it's done. So I wanted to do is I want to go into GoodNotes and go into ad and press H for my planner. And you can see here we've got our panel features. Click on the Pen tool. You can see if you click on the tabs, it takes us. Click on notebook, takes you, click on stickers, takes you there. January. Can see I've got the daily planner. And at the end she's got your weekly planner pages. Kind of December. Again. If you've got your pages here, notebook, you've got a few pages here they can write on. So this is our example we wanted to write in our notebook. I can click on the Pen tool. Click on the Pen tool. January. The date here, say for example, it was so he can write L1 slash 0, 1. If it was a Monday, you can circular calls for today finish. You could just personalize this as you wish.
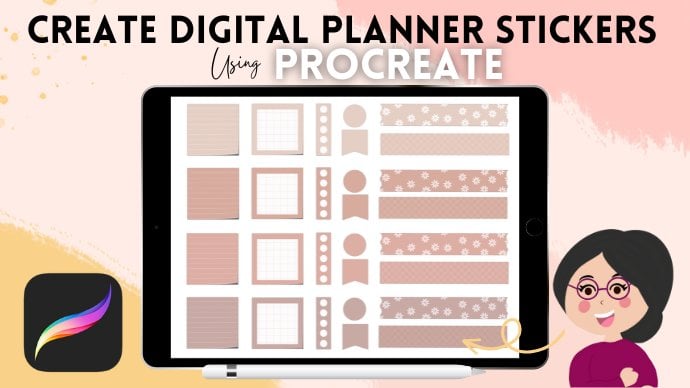
5. Creating Digital Stickers For Your Planner & Importing Into GoodNotes: Now we're going to learn how to create dish two stickers for our digital planner. Digital stickers are a great way to personalize planners. And you can sell these MCS packs as well. People really enjoy these. So the first thing I'm going to do is go into Create a design. And I wanted to search for an A4 document. What we're going to start off with is creating some washi tape. I'm going to go into elements and search for a ribbon. And I'm going to choose the shape here. Just move it to the top. And I'm just going to change the color. Damaged tissue is going to elements again and I'm going to search for a heart. And I'm just going to pick one die like make it a bit smaller. I'm just going to mutate a tiny baby. Do is change the color of this into white. And I'm just going to copy this is positioning. Again. Just put it right here. Dynamics select all of my elements. And I'm going to press group. So this is our fast washi tape. I'm going to go back into elements and I'm going to go in shapes. And I'm going to choose this square shape. And I'm just going to make it smaller. I want you to go into element and search for glitter. And I'm going to choose this gold glitter here. Why I want to do is just make it smaller. And I want to copy this and just want to make my square root but bigger. Excel. Now told them to all my elements press Group. Today we've got our second washi tape, go back into elements for your propene. He could see him quite a lot of different options. Going to choose this one. I'm just going to change the color of this and then copy this. A few more different colors. Next one to go back into my elements and click on my square. And I'm just going to create a few rectangles and circles on them for our to-do list. So I want to go into shapes again and click on this circle. Changed the color to white. Take a bit smaller and positioning. You want to copy this and this may fall straight down. Keep doing this. And the non-depressed group tonight just want to copy this. And I want to change the colors. I'm just going to go for a light pink. And then just want to create a few cool shapes. And just copy these and change the color to search for a tick. Now, you can see for quiet of different options. We can just pick quantities and just make these into different colors. Next, such an arrow, change the color. What I can also search for some heart shapes. We can see this shape is called two different colors. To see what you can do is just make this smaller and you can change the Colosseum. The wrong kind of like a dark outline and more soft pink color. So multi-copy, this is a femur times xij for Eros as well. Now, just had a few of these here as well. When I went to is create a new page. And we're going to learn how to create some icon sequence. Now. Quantitative is current element and go into your circle. Just make this smaller. Composition is going to element and I'm going to search for a phone. You just can change this to the light pink. When I want to choose a phone icon. Just position this into the middle. And I don't want to click on it and change it to white. And click on both elements. Are numerous group. Then monument to copy this and choose Delete. And I'm going to search for a harmony element. So you can see here for the quiet of different ones. So I'm going to click on this one. Just make it smaller to fit a circle and positioning into the middle column into winds. And again, just group these. And then you want to compare ungroup and just delete the money element to search for a shopping cart. Now, copy, ungroup. It is delete. This. Can just search for a phone. Ungroup. The phone. Can just search for a coffee cup. Next. I'm going to choose this one. And I just want to change the colors slightly around. And I want to group these. Could be coffee cup. And you just want to keep doing this for a few more elements. Hi Elements and search for a lot of different options here. I'm just going to pick a few of these elements, go into my square and change the color of this. Copy this. And I'm going to group these together. And I'm going to come into my lines. And I can just create some lines here. And I want to change the color to white. Just duplicate this a few times. And then wanted to do is go into my cap square, change the color of this, and then compare colors this into why analytical package my square is create one more notebook. Elements. Go into my shapes again. You can change the color of the letters as well if you wanted to download. And we want to download this as a PNG transparent background and press Download. So here are my PNG files that have caused my stickers. So if you have a learning, you can see it's a transparent background. What I want you to do is click on my sticker and press Copy. And then you can hold and press paste. Then we're going to do is click on this day. He teaches crop whichever image that you want. Here. Washi tape to use. A smaller one.
6. Conclusion : Thank you for attending my class today. I really hope you've learned a lot and you've learned how to create your own digital planner. It's really easy and simple and you can personalize this however you wish. Hope you've learned touch hyperlink, how to create your own daily planner templates, how to create your own weekly planning templates, and how to create dish two stickers to customize your planners. I really hope you've learned a lot in this class. Thank you for watching and please to view my other courses. I'll be uploading a course every week and I hope to see you all. This digital planner be created will be available for you all in this lecture, as well as the digital stickers. I really hope you can use this for inspiration and helping you create your own digital planners. Thank you.
 Janna Uddin, GRAPHIC DESIGNER & DIGITAL ARTIST