Transcripts
1. Introduction & Overview: In this course, I'll
show you how to create a children's coloring book like this using a free
app called Canva. I'll show you how to
create the interior, the cover, and also how to
get it published on Amazon, Katie p, So you can
sell it either to the public or send them as
unique gifts to your friends, family, and loved ones. So grab a cup of coffee, get comfortable, and
let's get started. Alright, before we dive in, let me show you what we're
going to cover in this course. The first thing we're gonna
do is I'll give you a tour, a guided tour of the book that you're going to create so
you know what you're in for. And by the way, it's a published
book on Amazon, Katie p. So if you want to go
and get it, you can't. We'll go over what is Canva for those of you who are
unfamiliar with it, and also why I'm
recommending that you use it because I think that
that's a good question. Also, what is Amazon kVp or
Kindle Direct Publishing? If you're unfamiliar with it. Then we'll actually get into
the meat and potatoes of creating and
publishing your book will do it in four steps. The first step will be number
one to pick a trim size. That's basically how large physically do you
want your book to be? Step two, we'll go over
designing your books, interior, or in other
words, a manuscript. Step three, we'll go over
designing your book cover. And then step for the uploading slash publishing
process to Amazon kVp. And just so you know, I use
the word in this context, uploading and publishing
interchangeably synonymously. So it's pretty much
the same thing when it comes to
Amazon, Katie p. So step for uploading or publishing to the
Amazon kVp platform. Then we'll have conclusion
and next steps. Next steps basically is going to be other books you
might want to create. This is by no means
my first course. There are other types of book
that you want to create. Then I may have a
course out there that I will point you towards. One thing that I will say, this course is not about, it's not about publishing
a best seller. I know there are a
lot of courses out there on how to make
money on Amazon, kVp, and how to
publish a bestseller. And those two are kind of, you need one to get the other. But at least from my
point of view when you're starting off on
your authoring journey, it's best to get
familiar with how to publish the book and
how that process works before you start
fussing and worrying and stressing about how to
publish bestseller. It'd be like, for example, if you're just starting
to play tennis because I don't tennis coaching. And you say, oh,
but how do I become the best tennis
player in the world? You don't even know how
to hold your racket. Does that make sense? So this course is not going to be about publishing
a bestseller. It's about publishing a basic
children's coloring book. I did it actually as a
unique gift for a friend. I made a bit of a story, you'll see when I
go into the book. But I made up a basic
story about her, put some basic outlines in
there for coloring purposes. And then I sent it to her
as a unique and gift. And I think that's a really, really cool place to start. You could create a story,
story about, let's say, your child or the children
of one of your friends, or the story of how you met your partner
and fell in love. And you could create a
cool book from that. If you want to create
an Best Seller. There's a lot of other, particularly research
that you have to do before even thinking
about creating the book. Because let's face it, if you create a book that no one wants, no one's going to buy it, and therefore you're never
going to create a best seller. So just so we're clear,
this course is not about creating an
Amazon Best Seller. You may sell a few copies. That's a bonus. But it's about getting that first or second
book published, getting you comfortable
with that process. And then shore,
if you want to go for bestseller or you want to iterate and make your
books better and better and better,
more power to you. I certainly encourage
you to do that.
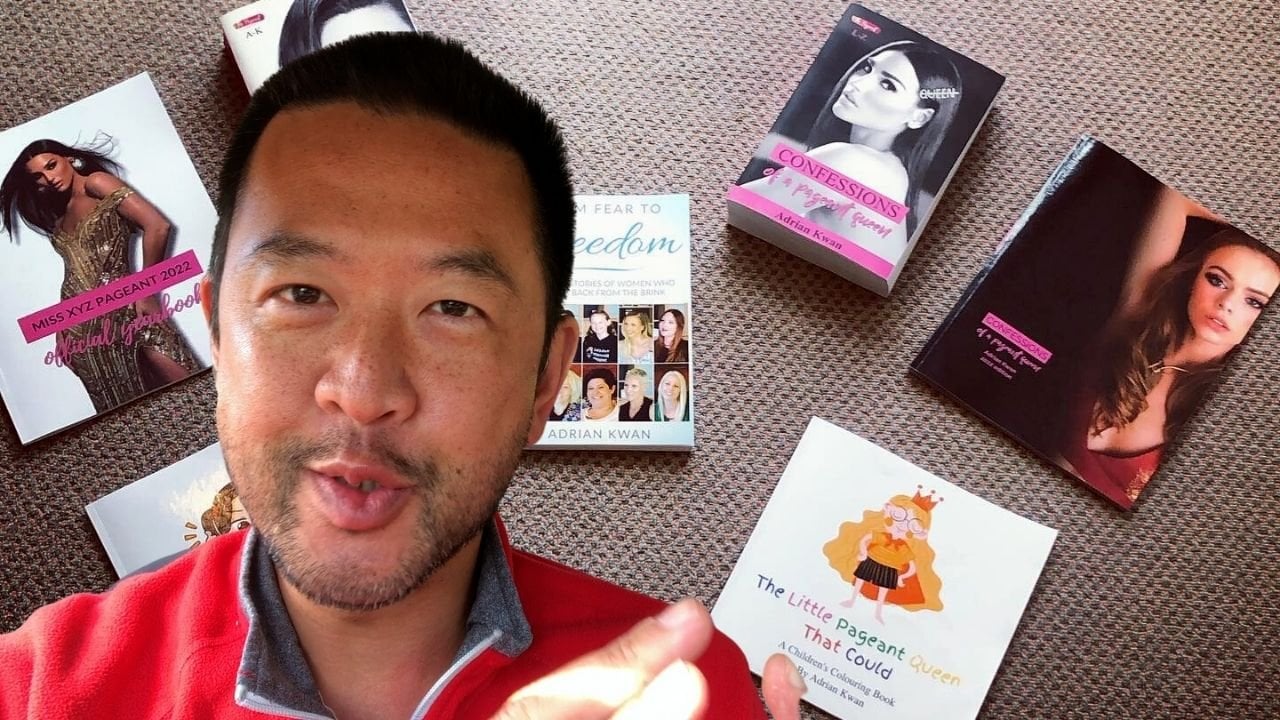
2. The book you'll be creating: As promised, let me give you
a brief tour of this book. And just before we
dive into that, let me show you the
listing on Amazon. So here it is. On my kVp, what they
call the bookshelf. You'll see another
version over here. This is unpublished. I think this was an early draft version
or something like that, but here's the actual listing. You can see that it's live. And if I click on
the View on Amazon, then you can see that
this is the amazon.com. I actually purchased this. You can see, I think I send it wants to my friend
who I wrote this book about and then wants to
myself, as you can see here. But It's available in the US, in the UK, in Australia. So that's the actual listing. It's a genuine book. I've actually
published this book. And to give you an idea. So first off, when we
talk about trim size, this is an 8.5 by 8.5
inch paperback book. Now, is there a reason
that it's 8.5 by 8.5 inch? Not really. I like the square format for
a children's coloring book. In one of the following videos, I'll show you the
different options you have for trim sizes. You don't have infinite options, but you certainly have a lot. And you couldn't make
it bigger if you want. A lot of people use
8.5 by 11 inch, particularly if
they're doing activity books and things like that. But it's only 24
to 30 pages long. I wanted to make it very quickly and very simply just so
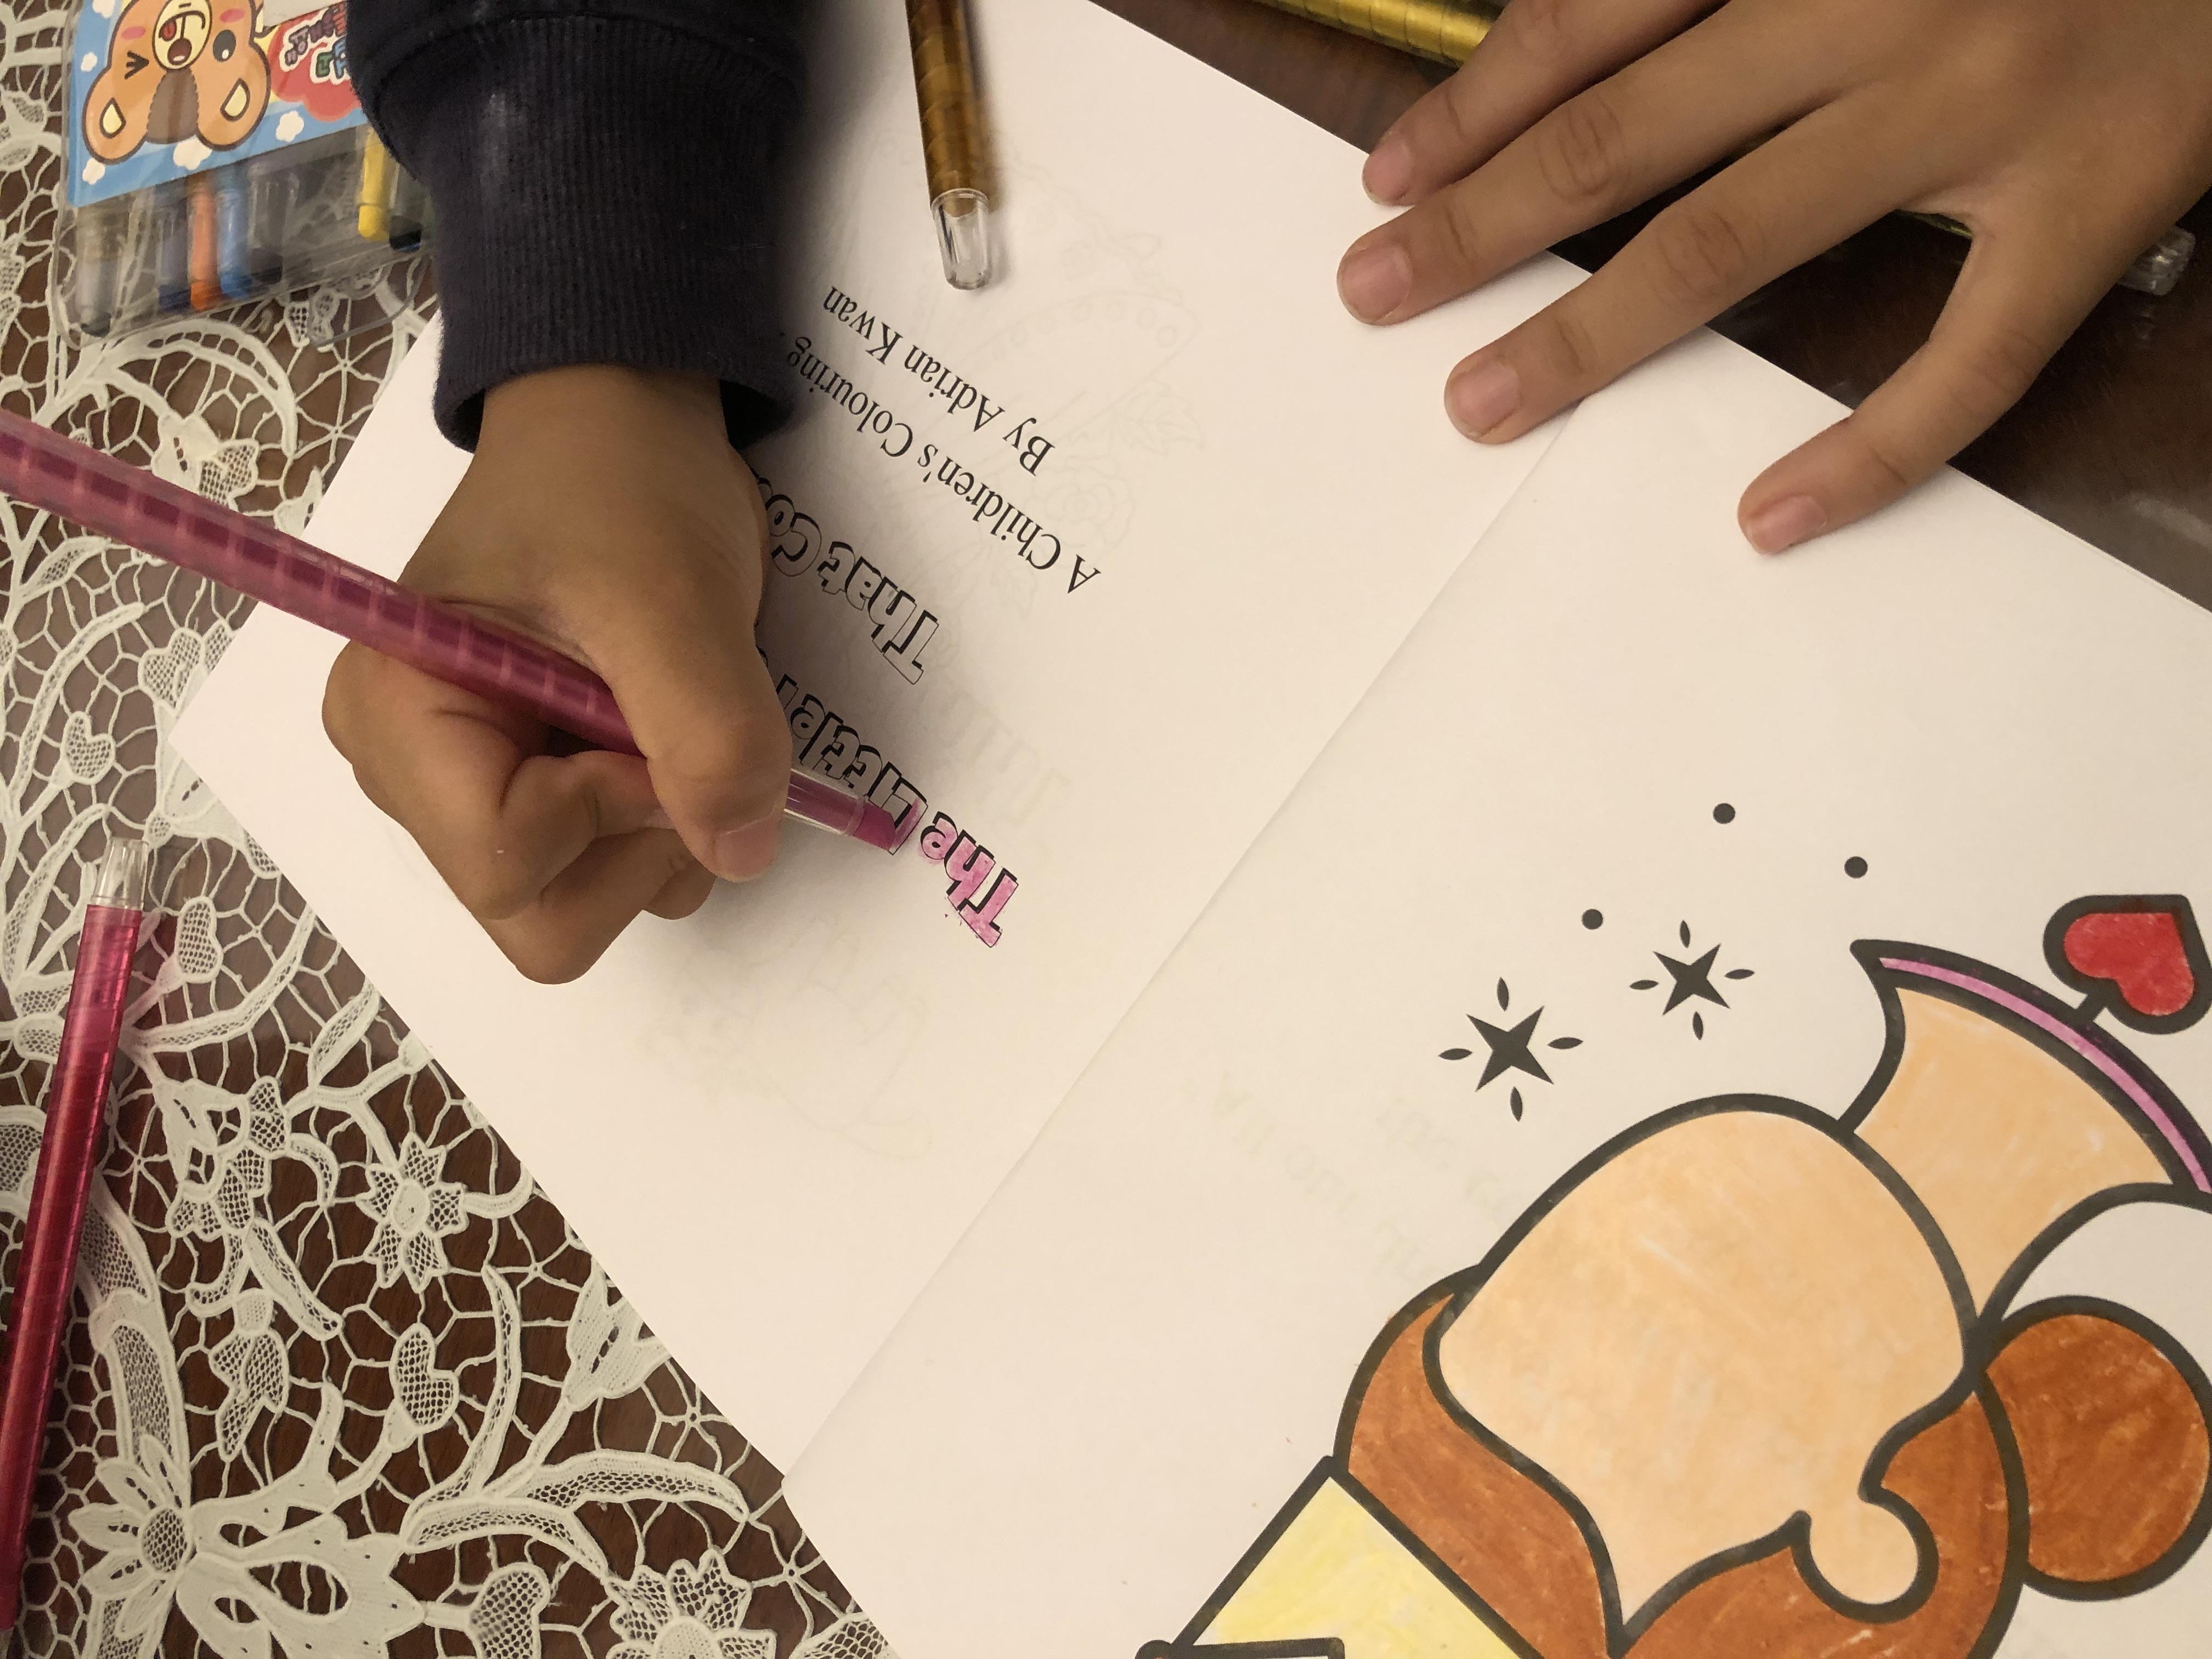
I could get it done. And then on the inside, It's basically what
you'll see is, and you don't have
to do it like this. This is an opening
quote from Disney. Probably shouldn't show that because Disney
might not like it. But for me, what I
wanted to do was create text on one side and
a colorable image, if that's a word of colorable
in image on the other side. And yes, this had been has been colored in one, not by me, but by my nephew who
I gave gave the book to to test drive whether he could color it in
and guess what It worked. He was using crayons. He actually drew the eyes in. A little bit creepy. But as you see, the spread or the two-page spread is a
left page and right page. You can see on one side it's a colorable in image
and on the other side, because this was a book for young pageant queens and my
friend is a pageant queen. I was putting in
sort of motivating motivational quotes that would be suitable for that audience. If you're wondering why
me as a guy is writing, think like a queen. And you can see here it repeats. So equina is not afraid
to fail on one side using a font that children
can color in. Then on the other side,
a suitable image. And it goes on and on and on. As I said, it's about
2424 pages long. And then on the last page I
actually forgot about this, but I put a more
complicated sort of Mendelian pattern
as a challenge. And obviously my nephew
had to do that because I taught them all it's
difficult. You can't do that. And so he proceeded to do it, actually did a good job
with it with crayons. So this is, this is a book that I'm going
to show you how to create. Can you do your
own version of it? Absolutely. I certainly
don't want you to copy this because
you could get in trouble from Amazon
for doing that. But let's say at least
aim for an 8.5 or 8.5 by 8.5 inch paperback book. What if you start playing around with the formatting size? You could run into
trouble if you are first-time publisher,
a first-time author, because that's
where most people, when they submit their book
for approval to Amazon, if they get knocked back. The biggest reason is because some formatting issue,
particularly with images. So I encourage you for this
first time through just to follow me through
8.5 by 8.5 inch, you can change that. I can encourage you
to change your text. You can make it all text. You can make it or images and no texts, some
combination of that. And you could certainly
make it more pages and 24. That's fine. But this is a book that
we're going to create. It's an actual published
book on Amazon, KT P, As you can see. And the approval process
from it took me probably about half an hour
to create this book. It really is that simple. And then once I submitted it, it took about 24 hours
to get approval. I think I said I
think it was less. I submitted it before
I went to bed. And then probably halfway through it about
lunchtime the next day, I got the notice that
it was approved. So this is a book that we're
going to create right now.
3. What is Canva and why use it?: Okay, what is Canva and
why should you use it? Now to put it basically, Canva and I'll share
my screen with you. Canva is a graphic, graphic design app
and it's free to use. And here is my screen
or my interface. There's obviously a
lot of stuff here because I use Canvas a lot. If your first-time or to this,
then you'll see nothing. And by the way, you need to
go sign up for an account. So I'll put the link here
below, but it's canva.com, CAN va.com go and sign
up for a free account. You can use their
website version. This is the downloadable
app version and that's for free as well. I like having the app version Just because I can work offline. It's a bit more reliable. But this is a Canvas screen
and it's basically a, it started life as a
graphics design app. And the reason I'm
suggesting you use it is because it's free. And B, it's extremely powerful. And C, it's very easy to use. So when you put that, had
the combination of three, powerful and simple to
use and easy to use. That really, I think, makes it something that
you should at the very least check out, not
just for your book, but if you're doing social
for your social media design, if you need graphics
for your website, then you really
should check it out. And you go, Oh, I don't have any graphic
design experience, agent, I couldn't
have used this. I have very little graphic
design experience myself. But where can be really
sets itself apart is if, for example, you go
create a design. And let's say you wanted to do an Instagram post which he
had saying 1080 by 1080 P x. That's shortfall pixels. So an Instagram post
that to square. And then you've got Adrian, I wouldn't know where to start. Well, the good news
is that everything, every sort of design
that you can create in Canada pretty much has hundreds, if not more, free
templates you can use. Now what I will say is, so here are the templates
on the left. If you see a little crown, that's for pro users
only and that's you pay, I think it's about $20
or something like that. Us per month. You get access to
more templates, to more fonts, to more images. But unlike a lot of other apps, the free version is more than enough for you
to get started with. It's not like the pro
version is great. In the free version is so bad
you need the pro version. So I'll say that off the bed, but that's just what these
little crowns means. So I am a pro user. But let's say you're
scrolling down here and you wanted to create a post
for your Instagram. And let's say we're
looking for quote posts. Everyone loves
quite posts, right? So you type in here,
quote, and guess what? It gives you all
these templates. Here's a simple one. In fact, so many
people use Canva. You might scroll through
this and go hang on. I've seen that somewhere before. It's probably because it's
been created on Canvas. So I'll just click this. And then Bob's your
uncle. That's good to go. All I'll do is double-click
on here and put what that is. I could never start a
day without coffee. And then okay, it's now on two lines, the font
a bit too big, so you go up here and you just shrink that
font a little bit. You might say, I
don't like that font. So you can then pick
whatever font you want. Let's go with an all caps one and shrink it
down a little bit. And then let's make sure it's in the center of the
box and then done. And then you go, Adrian,
what else can I change? I can change within
reason the color, some images. You can't
change your color. This one I can't,
but you can drag, but you'll see his elements. This is a big one and
this is where you can drag all sorts
of other images in. So if I type in, for example, coffee, and let's go graphics because I don't
want photos or videos. Look, here is a coffee and image of a coffee
cup. It's for free. I'll click on that.
It's too big. You say, well, let's shrink it. Let's drag it into
the middle. Okay? This process is
something you can repeat whether you want a
Facebook page cover, a YouTube cover, and podcasts, cover image, whatever you want. There are so many
different possibilities. And the thing that frankly
is a bit overwhelming with Canva as it keeps adding
more and more options. So it's not to the point where
you can also create video. You can create websites, and as you can see
here, you can even create print products. I mean, I wouldn't
use it for this, but you can see here
that it's got a resume. So if I click on Resume and
let's just see what happens. So it starts out with a
blank and then I will have resume templates on the left. And I mean, honestly
you go what, Adrian, this is not the
resume I would use, but if you click on it
once, It's not bad. And then when you go through all these templates
that are available, chances are you'll
be able to find one that's usable for you. You just go in and change it and then you
can print it out. If it was a graphics
that you really like, you could print it out
on a t-shirt or a mug, et cetera, et cetera, et cetera. So I hope this shows you
how powerful Canvas can be and how simple it is to use and add to that, that it's free. I mean, there is a pro
version, as I said, but the free version
is extremely powerful. That's what I started on. I do have the pro
version for disclosure, but you don't need
it for this course. So just because it's free, it's powerful and
It's super simple. And I'd like to think
intuitive to use. It's a no brainer,
and especially when you can use it to design a book, then we're going to go with it. So that's the introduction
to the Canvas app. Go to canva.com and sign
up for your free account. If you don't have one,
I will say if you've never used the
Canvas app before, maybe before proceeding
to the next video, sign-up for your
account and download it and just have a play with it. And you'll quickly see how
simple and easy it is to use. And you'll be pretty
amazed, I think, but what, by what you can create
very, very simply. So that's the Canvas app.
4. Why publish on Amazon KDP?: What is Amazon? K, d p. Well, Katie P stands for
Kindle Direct Publishing. And I think it's because
back in the day, Katie p. Was primarily used to publish
Kindle books or ebooks. But now it can publish
Kindle books, e-books. It can publish paperback books, such as the coloring book
that we're about to create. It can also create
hardcover books. The insides can be black
and white, can be color. It can pretty much create any
book that you want to make, at least as a beginning author. So why use kVp? Well, you'll be relieved
to know that it's free. And the other thing is, it's backed by Amazon. So the good news is if
you publish on kVp, your book is going to
be available on Amazon. And Amazon ships to pretty
much everywhere in the world. I know because I've had to
ship my books to Australia, to the UK, to the US, to South Africa, to Japan. Even one of my clients is a is in the Navy and I
had to send it to a navy postbox or
something like that. So Amazon literally ships
it everywhere and they're shipping rates by enlarge gonna be the cheapest in
the world by far. Because that's what Amazon
does and also the printing, the cost of printing
your book is probably going to be the
cheapest, again by far. And I say this because
my best friend, he was looking to publish
a book on real estate. And I just asked them, Well, what was the quote
that you got given? And he looked it up
and I said, well, let's check out how much
it would cost to publish the same book on Amazon. And it was a third of the price, not half, not thirty-three
percent less. It was 1 third, I think, of the price to
publish the book. So that little conversation
with them, I like to say, you probably owes me a coffee
or two from that one thing, That's Amazon kVp, that's
why to publish on it. I will show you the link. And by the way, this is a
good time to say if you don't have a KT P account, it's free but do
sign up for one. Go to war, go to Katie
p.amazon.com or just look up kVp, Amazon, kVp on Google. The count is three. And the good news is, if
you have an Amazon account, if you've been using
Amazon to buy stuff, which let's face it
over the pandemic who hasn't said anything that has been keeping us a lot
of, a lot of us sane. But you can use the same
contact details to sign up for your Amazon
account. So that's easy. The one thing that
you will want to do, especially if you're on
ten or getting paid, your tax information and banking information
handy because it will ask you to
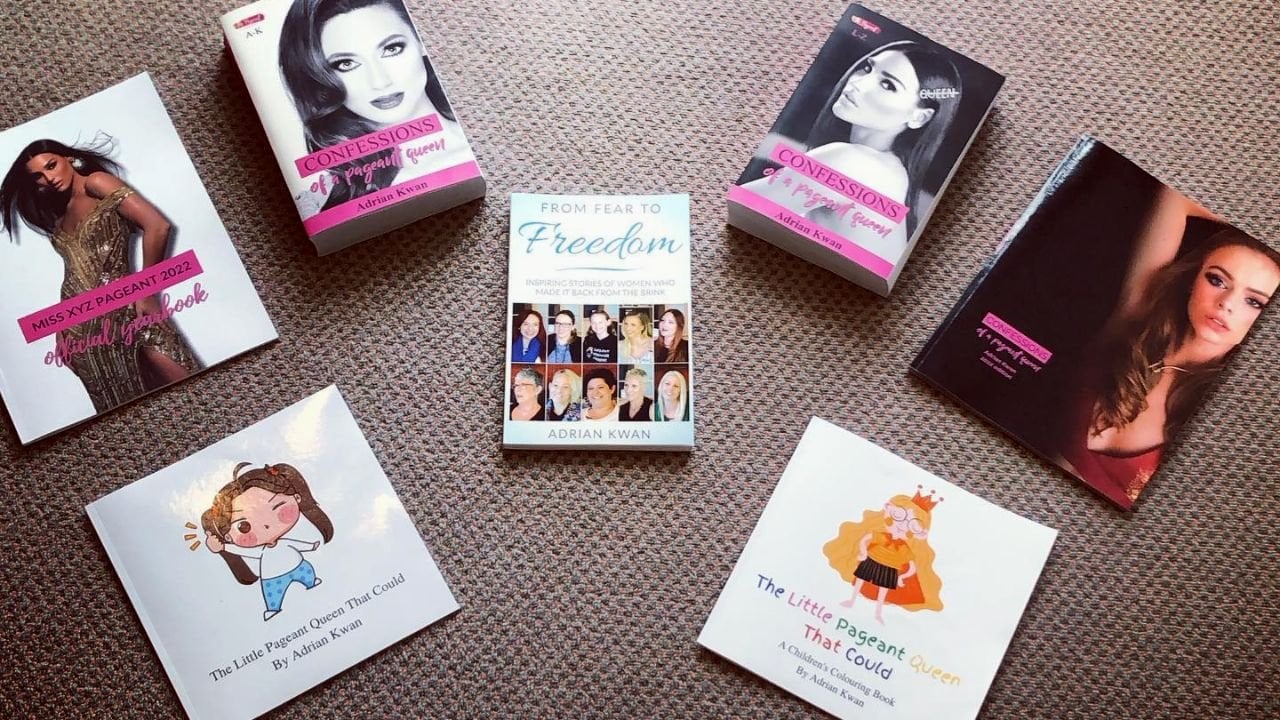
put that in and do a brief texts questionnaire. But this is the kVp, what they call the bookshelf. I showed this in a previous
video, but please don't go. Oh my God, why do
you have so many? It's partly because I published
a lot of books and partly because the cause of that I
publish on book publishing, I'd like to show you
that I've actually published the actual
book is not theoretical. It's very, very practical. So yes, these are all
the books I published. Some are very in-depth, let's say, proper books. And some are books
that I've created, either just for friends, such as this one I created as a birthday present for my
friend Chloe over in Ireland. And these unruly, proper books in the sense
that I'm not looking, I'm not expecting anyone
would buy it except to me. So I bought a copy,
send it to her. That's one copy. And I bought another copy, send it to myself so I
could show you that I have two copies and this
book probably will only sell two copies ever, but this is what the
bookshelf or look like. You will see your
title spring up here. If you've published before or want to get this book published, but go and sign up for
your Amazon k d P account. Now, I don't want you
to wait to the end of the course and then go to it and realize you haven't
done it yet and they go, Oh, it's too hard. And then never
publish your work. I hope you forgot
your Canva account. Squared away. Ready to go? Now go get your kVp account, good and ready to go. Now we're gonna get into
the meat and potatoes of how to create your
children's coloring book.
5. Step 1: Pick trim size: Your first job is to
pick your trim size, as in, how big do you want
your actual book to be? Now, if you're happy to just
take my leave and go with an 8.5 by 8.5 inch square
paperback book. Then you can skip this
video if you want to. And I do suggest that
you have a look at this. Now, this is a kVp help article. The link is something
indecipherable above and I really wish
I'd make filling simpler. I'll put it below. But if you need to find this, just look up, go to
Google and type in k, d, p trim sizes. You will find this article. Then we scroll down,
scroll down, scroll down. And what we're looking at is
a trim size specifications, width by height, with minimum
and maximum page count. Make sure you're not looking
at this one which is only applicable to
the Japanese store. I don't know why it's different. I guess if you're printing on the Japanese publishing on the Japanese stores and
have a look at it. But let's, for the
vast majority of us, we're going to start with
Katie p or this listing here. And as I said, so paperback is
what we're doing. We're doing 8.5
by 8.5 inch here. If you follow my
mouse, we are using black and black ink and white
paper for the interior. The interior is
actually not color. The color that you saw before is because my nephew colored it in. But the main thing is here, if you have a look, so
black and white paper, black ink and cream paper, your minimum page count is 24. Is 24. If you ever get
around to publishing a book that has color in it, and you choose a
standard color ink, which is a bit cheaper than
the premium color ink. You then have a minimum
page count of 72. Which to me is not ideal for children's coloring book
unless you want to or are willing to publish
children's coloring book that has a minimum of 72 pages. That's not what I wanted
to do and not what, what we're gonna be
doing in this course. So just be aware of that. And this is why I wanted to
show you this so you know exactly what you're aiming
at before we get started. If you use a premium
color ink on white paper, and I've used this to publish children's books in the past. Then again, your
minimum becomes 24. So have a look at this table
and focus on what which one, which option you want to go for. You can see down
here the hardcover, which is probably not really appropriate for coloring book. But again, the minimum
page count is all 75. That by the way, means
if you publish 20 pages, 55 pages of your book are gonna be published
as blank paper. That's basically what it means. So we'll be doing 8.5 by 8.5 inch black ink and white paper. I guess I could say that it's premium color ink
and white paper, but the interior is
black and white. You could do whitepaper,
cream paper. If you want another option,
then have a look here. As I've said, some people for, especially for children's
activity books, because you want the
book to be a bit larger because children aren't the best with
enhanced skills yet. So having a bit of a
larger book allows them, allows you to put
larger images in, which makes it a bit simpler for at least young
children to color. In. A lot of people do
use a 8.5 by 11 inch. Again, black ink and white paper or blank ink and clean paper. And your minimum page
counts are there. So to get to this article, google kVp trim sizes, and hopefully this is the
first one that comes up. I will put the link below, but as you can see up here at some indecipherable garbage, I really wish it was
simpler to get to, but there's no easy
way of getting to it. So pick your trim size. As I said, if you're happy to just go with my
recommendation as a start with 8.5 by
8.5 inch paper back. Then, let's just go with it. If you want to pick another
one just to make sure it fits into one of these
categories here. And now let's
actually get started.
6. Step 2: Create your book interior: Okay, let's go into step two, how to create your
books interior. So I'll bring up Canvas here. Now this is the actual interior to the book that
I've been showing you, the coloring book. This will look somewhat familiar if you've
watched my video where I gave you a
guided tour of the book. So this is what we're going
to have by the end of it, at least something that
looks vaguely like this. If I click down here, you can see it's got
that minimum count of 24. So that's perfect. And as I mentioned before, the way I've done this and
you don't have to do this. But I've done for
two-page spread, one image, and then one piece of text or motivational quotes. One image, one piece of text. This one here is
an odd page out. That's the first page,
which by the way, all the odd pages in a book, because of the way
books are printed, the first page is always right facing or toys at
a page on the right. And all your even pages are
going to be on the left. So this is a first spread here. Second spread here. And I think what
I've also done, yes, I've alternated whether the text is on the left or on the right. The first spread, the
text was on the right. What text was on the right here? Then on the second spread,
the textures on the left. Again, you don't
have to do that, but you can see here images, texts, this is what
we're going to create. So you go Great, Adrian, How do I do this? Very simply, you're going
to go to create a design. And I hope you've
picked your trim size. Let's go to custom size here. And you're going to put
in, make sure please, you pick inches, not
Px, which is pixels. That would be very tiny and you can't have half
a pixel anyway. So 8.5 by 8.5 inch, just double-check IN for inch. Create new design.
And you get to here. Now, what I would recommend that you do if
you're going to create, let's say 24 pages. Because again, that's a minimum
number that we need for publishing is just to start adding pages
until we've got 24, so that we know how
many we're going to, how many we're going
to have to fill before we can publish the books at page
181920 twenty one, twenty two, twenty
three, twenty four. Now you know that
the first page up here is going to be
your title page. So what I recommend putting
here is the book title, something that's appropriate
here. That's the cover. Beg your pardon. So over here, this is the sorry, this is the initial page. I've put a quote. Alright, so we'll do that. So forget the title
at the moment. We're going to put
inspirational quote on the very first
page of that book. So I will just copy paste that. But if you want to know
how to drag in texts, you go agent that
might be useful because I can copy paste it. So go with here, Kotex and honestly just click
any one of these. It doesn't really matter because
now you can change that. So you could put
in here a quote, and I'll put in motor
quote goes here. What I will say is as
you're doing this, please make sure that you
drag it in from the sides. Don't let the text go all
the way to the edges. Now, there is, let me
center this and you can see that when it's in the center Canvas snaps and locks for you. So I'm going to suggest
that you at least drag it into where
you see these sort of that purple square
drop up, a pop-up. Let's not go outside there. And it's really important you do that because for two reasons. One is if your, if your text or your image goes too
close to the side, particularly towards the spine, it's impossible for anyone to get in there to
actually color it and it sort of becomes obscured. If you imagine that
you have a book, there's not so much of an
issue on a thinner book, but if the image or the texts
sort of went into here, it's a lot harder
to color it in. So that's one reason to just drag drag the box
in from the sides, at least until that box shows up if you want to
drag it and even more, then that's even better. The other reason is
if you put your text or your image too
close to the sides, too close to the margins, then your book will actually
be rejected because Amazon can only print up to
a certain distance from the, basically the edges of the page. It doesn't want to
chop your text off. So I need you to drag your images and your
text in from the side. So at least two there. In my experience, it look even better if you drag
it in a little bit more, but you can do
whatever you want. Now, if we are going to, this is a motivational
quote here. If you did want to
put the title page here, you absolutely could. If you wanted to instead port
and or some coloring book. And I'm not American, so I spell color that way. And then you could put in, I'll just hit that
and then I will click Duplicate up there. And by Adrian Quan, now if you wanted to make
that color in a bowl, you need to pick a certain
font that actually allow. People to color it in. And in this one here, let me just find the name
of the font that I used. So the number of
fonts that I use is this one, bang-bang outline. So you go to here, you
go up to here which shows shows the font. And let's see if we can
find bang, bang outline. There it is. Now this one is a pro only font. So you'd have to be a
pro user to use it. Let me see if I can find another outline font that
you could use it for free. So let's have a look here. So there are some
here, this one here, Mary Kate outline,
that would work, but actually it
looks really cool. So Mary Kate outline
is for free. Your version of Canva should
have the exact same fonts. By the way, this one here, blueberry outline, that
looks pretty cool as well. So you'll find a font. So what you wanna do
now is find a font. And then if you're going to at least use words in your book, find a font and then try to use the same font
throughout the book. You don't want to be
changing font every page I find that a bit distracting. But I've gone with
Bang, Bang outline. So I will keep it to
bang, bang outline. Let me go back up here. I will go to recent
searches, bang-bang outline. So I'll leave it like that. So whether you want to make your first page and let
me just remind you, the first page is you
open the book and the very first page is going to appear by itself on the right. So this first page
here put whatever you want to be on that first page if you want
it to be an image, go for it. But generally, obviously
books have a title on the first page in that
book, I put a quote. So let me skip across
to the last page now, because your last page is
going to change this over, is going to appear
on the left side. Now, it's technically
not the last page. You'll see that there are
a few other pages here. And whenever you print a book, other pages are
added to the end, either to make it so that
it can be printed properly. That's printing because it has to be in multiples of four. Or because as in this case, Amazon wants to publish a little thing on the
back page itself. So technically it's not the very I mean, this
is a back cover. We're not talking
about this page here, but we're talking about the
last page of your book, which if it's an
even numbered page 24 is going to end
up on the left. So what I recommend is
that you go all the way to the all the way to
the end and then put, decide what you want to have
on that very last page, you can see that I put
a Mandela pattern. And if you wanted to, you could certainly
go somewhere, find them Mandela
pattern and then drag it into the upload here. So going into, I should let
see if I can do that for you. So rather than talking about it, if I go to Google
and type in Mandela, and we'll go to images
and let us go to large. Now these are large
Mandel of patents. The reason I tend not
to recommend that you, The reason I caution
you when doing this is please make sure
you have the copyright. If you get an image from Google, even if it doesn't seem
to be copyrighted, but you drag it into your book and you publish on an Amazon, you could get into trouble, as in your Amazon account, could be suspended or canceled. That's why I tend to use the images that
already within Canva. Just because you're
free to use those ones. That's why they're in
Canberra in the first place. But let's say if you
wanted to drag one in, this one, this one probably
here is appropriate. So I will save this
to my desktop. And again, I'm not going to recommend that you
actually do this. I'm just doing this so that
if you have images that you want to upload to Canvas to
show you that it can be done, how you do it, save
it to your desktop, then go back into Canva. In fact, go back into Canva. You can actually
drag it into here. But just the way I'm
screen recording, I can show you that
at the moment. So you could drag and
drop it into here, it will automatically upload. But if you hit Upload Media and then you go and
find your image, it will upload there. You can see, just
give it time until that blue bar is finished. Then if I click it, it brings it in here. Now again, I'm not actually
going to use this. And I don't recommend you
do this unless you have certain that you have the
copyright for this image. This one certainly, it had someone's name on it and I wouldn't use it as well because it has some lines and
it's not completely transparent on the back. If you have a look, it
looks like it's got some pencil lines here. So it's not ideal for
children's coloring books, but if you have some images of your own that
you want to use, let's say you're a
graphic designer and you create Mandel or patterns or illustrations
and you want to import it. That's how you can
do it. You can absolutely use your
own images there. Just be wary of copyright. So let me shrink
back out of this. And so what you can
put on the last page, let me show you the
simple way to do it. I am pretty certain that Canva will have some Mandel
or patterns here. So what Mandela? I just liked the idea of
putting a challenging, challenging piece at the back will look for black
and white one, because remember,
we're going to print in black and white. Well, that one's really,
really difficult. So we'll just go with this one. And remember, because
it's in Canva, we can automatically uses, we don't have to worry
about copyright. I will again drag
it until we get that purple square on the
outside, wherever it is. Sometimes it's a bit finicky
and doesn't want to show. There it is. And there it is. It's a bit hard to
see just because it's behind the actual mantle,
which is the square root. But there it is. So that's the very last
page and that can be a challenging one for the for your child or whoever
it is to finish on. So now what we have is
the first page done, title page or quote. And now we're going to
operate in spreads. Spreads or left facing page
and a right facing page. And this is the only part. That's a bit tricky.
And Canva is you don't automatically see which page
is going to be on the left, on the right, because Canvas doesn't know this
is gonna be a book. This could be for anything. So page to remember, even pages up on the left. All the pages are on the right. That's what I need
you to remember. And as soon as after he
published a few books, you'll remember that one rule. So even pages on the left, odd pages on the right. So let's go back into
Canvas here, page two. And all you need to do now is start either putting in text. Remember I was using the bing, bing font, but just
whatever you want. So again, it doesn't
matter what you click on here because you can change
the font afterwards. So if you wanted to do
an inspirational quote, you could, or you
wanted to tell a story. Let's say you could put Once
Upon a Time dot, dot, dot, and then you go and
choose while chose bing, bing, bang, bang out was font. That's a little small. Let's make that bigger, so make it easier for the
children to color it in. Again. Just make sure that
that's not going outside of that square. And let's drag that into the center right there you can
see that cross has formed. I don't want it to get
anywhere near the margins. I'm actually going to make
it even a bit smaller. So that's fine. Okay, So the box has gone all
the way up to the margins, but the text you can see as
well within the margins. So if you want to do text, that's how you do it. If you wanted to do images, all you do is go
into elements and search for particular image. So let's say castle. Now, you'll see
there my reason I've actually put outline
now the reason I put outline in it is because
if I just put search term, and by the way, let's
go to graphics. We don't want like photos like this because
we can't cover those in. But if we go to graphics, we might end up
with a whole bunch of not any color stuff. Nothing wrong with colored
stuff if you want to use it. But the problem is it's
probably not that usable for coloring in book because
this is already colored in. So what I found is if you
put whatever you want to so castle and then outline. It ends up cameras
pretty good this way. It ends up showing you images
that are actually outlines. So if I now remember the
ones with crowns or pro, only, so let's find a free one. That took me actually
a really long time to find one that was free. That's unusual in Canva
for my experience. But let's say you wanted a particular image and you
couldn't find it for free, then obviously you either
can get the pro version, I think I can get a free
trial and use it to make your book or just
find another image. I also believe you
can buy individually. Mrsa isn't imitate
you really want then you can just buy the
individual image. But this one here
finally is free. And you can see there, it actually turns out wide here. I was going to be afraid that it wouldn't it would show up as white here
and you can see it. But there it is. You can click it and resize it. Remember to not make it too big. So there's our square. So we'll leave it smaller than that square will center it. I mean, you can make it
smaller if you want to. If you wanted to
change the color, you could change the outline. I don't know. Let's say blue. Just bear in mind then if
you want to use color, then you'll have to
pick color printing. So I'll leave it at
black to make it simple. Now you could just do one. That's how you do
images basically. And you could just leave
it at that if you want. But there's no
reason that you only have to have one image per page. So thinking of a typical
children's book, you can see I've searched for unicorns, a unicorn outline. Let's see if I can find
one for free more easily. This time, I will scroll down. And you know what, I
apologize for this. I've never had to use his before because I never had a
big issue with afraid, but there's actually a
filter. You go up here. Let's try this filter, filter and let's hit free. That, that's a bright idea
Adrian will hit apply. And let's just go
unicorn outline. And let's see what happens. So we've got this
unicorn cupcake. Scroll down, scroll down. Again, we're looking for
a black and white ones so that people can color it in. And there's one here. Now, I'm not terribly
impressed at the moment by my
options with unicorns. So maybe I won't look up. Unicorns aren't actually
that one there is better. So I'll click that and again, you can use that
on the same page. What I'm saying here, what I'm telling you
is that you don't need to have only
one image per page. You can put in as
many as you want. Let's see if I can have
more luck with sun. So again, the filter is on
here, that's a bit better. So there's lots of, Finally, there's a lot of
sun images here. If I click on this
one or that color. So I probably won't
use that one. It's not really an outline, so let's get rid of that one. Let us, you can use that one. Now if you wanted
to use that one, you can see that it's gray use
it's not showing up great. So you could change it to, change it to black up here. But that's okay.
That's not great. And look, the main thing here is that this is how you do images. So images, or you go
to your elements. And remember, look at
the, look at graphics, then look at photos because it's unlikely that you're
going to want to use, for example, a photo like this. And you're certainly not going
to want videos or audio. So go and graphics. Use that, which I really
should have known about. I apologize for that,
but use your free. Having said that, the probe unicorn images
were a lot cooler, so maybe you do want to try pro, and remember you can try
it free for 30 days, um, but free and you have
other filters here. I could have used the Blackfoot
of I wanted the outline. So if I do that, then we can see here, Let's try another one.
Let's try rainbow. So with all those filters
on, let's see what happens. Black filter has really
not worked very well. So I'll just put outline again and play around with this drag, just make sure nothing is
outside of this purple box. Yes. So there That's okay. That's inside. So this
is how you do images. This one looks like
gray, not black. Let me just make sure
that's black anyway. This is how you do the text. This is how you do
images and just go on and on and on until
you hit page 24, which is Atlassian, where
we've put the Mandela pattern. Now, let me cheat
and use that phrase. Here's one we prepared earlier. And by the time that you've
finished playing with it, as I said, this is what
you'll end up with. So this is the finished product. As I said, I alternated image pages with text
pages you are free to use, or images you want if you
don't want to use texts. But I thought it helped
to tell a nice tail. So by the end of it, again, make sure that all your
text is within the boxes. It hasn't gone too
close to the edges. You can actually see I've drawn some margins in for myself
using my knowledge of kVp to really make sure that I didn't put the
images too close to the side. So you can do that too by
dragging it from the top. I won't do that now
because it will override this one or
change this one here. But if you really want
to make it obvious, drag in some margins
for yourself. So you know, you never
go over those margins. So you never have images
or texts too close to the edges or too
buried in the spine. And then just keep going,
keep going until you've got your interior created. And it looks
something like this. So this video is a
bit longer than I wanted it to be because
I thought it'd be easier to find free images
and outline images. So I do apologize for that,
but on the other hand, I'm going to leave
it in because it shows you what to do if things go wrong and you can't find the image
that you want, remember that you can
dragging your own images. So if you have a source of images and remember the
handle, their copyright, make sure you are allowed
to use them commercially, not free for you because
you probably going to sell it on Amazon Katie pizza, it needs to be a
commercial license. If you have a source of
images somewhere else, I shown you how to
upload them and you can drag them into Canva. And if you really are struggling to find
enough free images, really unusual
without unicorn and the castle that there were
so few free images to use. But if that happens to you, type something else
in or just get the trial of the pro
version for 30 days. That'll be more than enough
time for you to make ten of these books
and then you can cancel your trial
if you want to keep the Canva pro version
because it is very useful and
that's what I use. So that's how you create
the interior of the book. Now, last thing before we
leave this video, export this. So got to the top right. We're gonna go download. And we want this PDF print because that's what
Amazon kVp will want. Uncheck this, it
shouldn't be checked. All pages color space. That doesn't matter
because there shouldn't be any color because we're doing
black and white. And then just hit download. And this will then go away. It will think for a bit
and then pick a place to save this PDF file to where obviously you can
remember where you've put it. So for me, I'll just
put it on my desktop. And it's called children's
coloring book dot pdf or hit Save. And now my interiors
done and it's exported, ready for uploading to ADP. But we'll be getting
into the cover next.
7. Step 3: Create your book cover: In this video, we're
going over how to create your lovely book cover. Cover for a physical
book obviously has a front cover and back cover. Just note the barcode
that or Amazon and pretty much every
book that's ever printed will have just, this will come back up in a sec. So that's the barcode. There's a spine. But when we are only
printing a book that's 24 pages, fic, yours might be a bit
thicker, but if it's only, let's say it's a minimum number, it's about 50 or 60. But if the book is 24 pages, it's too thin to be able
to print any spine text. So we're not going
to be worrying about anything on the spine. If you print it. I mean, there's a book
here that a lot thicker. This book has spine texts, but we're not gonna do
that because our book, our book is too thin
to have spine texts. So here's what we do. And let me show you the screen. That would be a good idea. Adrian. A link you're going
to need to know. And I'm going to get you to
go to now Katie p.amazon.com. I'll put it below KT
P.amazon.com forward slash cover hyphen calculator. Go to there. This will open up. And what are we doing? We're doing a paperback
interior type, black and white paper type. I put in white for
coloring book. Page ten direction
will be left to right. Measurement units. Remember we're doing inches, interior trim size
8.5 by 8.5 inch. If you did another option, pick that option,
then page count. This is why we do the cover
after doing the interior, because we need to know how
many pages are in our book. And we know that there's 24. Now, I can hit calculate
dimensions and I will do that. This is all cool, but I don't
really even look at this. It's cool to know, but I'm just going to hit Download Template. And it will go away and
download the zip file. Now, if I go and
open this zip file, what you will see here
is that there is a PDF. And remember I showed you how
to upload files into Canva. We're going to want to
upload this PDF into Canva. So now we're gonna
go back into Canvas. We're going to import
that file now, please make sure
you do it this way. Otherwise you could
get lost here. So we're gonna go up to the
top and create a design. We're not going to worry
about custom size at a photo. We're going to
import file and then go to that folder that
you just unzipped. Find the PDF file, not the PNG, the PDF and double-click that
or click and then hit Open. Now Cambria is gonna go
away and import this. I will say that
Canada occasionally has problems importing
this PDF for some reason. If it screws up, just try it again. And if it screws up again, just reload camera
and it should work. It's always worked for me, but maybe half the time it doesn't work the
first time for some reason, I'm not sure why. But you can see here now, it's the first design
up on my page now. And it's this really
long-winded name. Let's call it something
a bit more appropriate. So coloring book. And the reason we've
done it this way, it's already worked out
the dimensions for me. So now if I click this, this is what we get two and
this is why I didn't worry. Remember when we did
the cover calculator and it gave us all
those dimensions. I don't need to know
that because this graphically is going to
show me how to do it. Now, you certainly can read
all this in your own time. I'm not going to go through it. The main thing here, I'm actually going to click
these ones and delete it. I'm going to delete all this. The main thing here to remember is that the front cover is on the right and the back
cover is on the left. So actually it says here
back cover, front cover. Now, I don't want to leave these things here
because guess what? We leave these things here. It's going to print
on your actual book. And I know which ones
are from which ones are bad because I've
done this enough times. So I'm deleting all of that. We will eventually want to get rid of or
cover the pink area, because we don't want
to print a pink on the border of our book. But it's similar to when I told you to make sure that
all your images and texts where within the
margins that purple box that popped up.
This is the same thing. Make sure please make sure otherwise your book
may not be approved. And then you have to
do this again, that everything that you put on the front cover or the back
cover is within the white. It doesn't go near the pink. Well, it can go near the pink, but just to be on the safe side, don't try and drag something
all the way up to the pink. Because what's going
to happen is Amazon's, as you're going to come
along when you print, when they print your book, it's going to chop off along the sort of this
grayish line here. So you certainly don't
want something in the pink that you really need. And it's a bit of, a bit
of a margin for error, which is why you have
this sort of pink area. Not to put anything
that's vital in. And by the way, remember
when I said the barcode, this is where the
barcode is going to go. So I will just get rid
of that text for now, but I'm going to leave
that yellow rectangle there just to remind me not to put anything important there
because guess what? When the barcode is printed, it's going to cover that up. Let's create a
cover, a simple one. And obviously you would
put more time into this. But you put your heading
or your type title, sorry, an awesome
children's coloring book. Again, my Australian,
my Australian spelling. I want this font to be a
bit big and you know what? Let's use the same font we use
on the inside of the book. Just why not? So bang-bang outline,
That's great. I don't want it to be
grown, want it to be black. So just keep an eye
on these things. All sorts of little things
want to trip you up. So 64, that is too big. I think there's no hard
and fast rule here. I'm just using my eyes. I will say it looks like there's too much distance
between the line. So if you click on
this and you go up to this little
button here, spacing. I want that line spacing
to be a bit smaller, something like that.
Then awesome chill. So there's my title. I'm going to try middle at
roughly on my front cover. And then let me
just hit Duplicate. And I will put my name by Adrian Kwan and I'll
make that just a bit smaller to differentiate
it from the title. Drag it down. Match it up with the
center of the tidal. That'll do maybe
drag it up a bit. And then we want so
we go to elements. And let's look if it was
for a pageant queen, then obviously you can
type in pageant graphics. And let's have a look. And we don't need an
outline on this one. Book covers, I should
have said our color, so don't worry about finding a black and white one
that's someone's coloring in Cane color and no one's going to color in the
cover of the book, I don't think anyway, but you'll cover will
always be color. So I'll go to graphics
and find a suitable one. This one here is not bad. This one also here will do. So. Again, you'd want to put
more thought into this. Obviously, I'm just
showing you how it's done because of how
to do it as simple. And then you can
lose yourself in adjusting and adjusting
it and making it perfect. So that'll do for
the front cover. Back cover, you can
put whatever you want. You don't have to put anything. But let's say that we
put this one here, which actually looks
a little freaky. Put it here. We'll try and center this
person on the back and we'll put some back covered text
if you wanted to do that. Again, doesn't matter
which one of these you click because you can
always change the font, so don't worry about
which one you click. Drag it down. We will send to that and go. This is an awesome
coloring book. Obviously, something
a bit more that makes a bit more sense in the new, pick a different font. I might just pick a basic one. I don't know. I like railway. That seems to work. So drag this out. So it's not all
sort of like this. Give it a bit more
space from it to avoid the white, the pink area. Let's try and center this alignment with
that image so it looks good and like that. Alright, so our back
cover would be this. Our front cover would be this. We're good to go. The only thing is
we don't want to print a yellow rectangle
on our back cover. And we certainly
don't want to print pink and a line and a blue dot. So what we need to do is, and this is the
only kind of cheap, not cheap. It's important
for you to know. We'll go to elements. Let's get a pageant and
just find a rectangle, this basic one here. Now, I want the background
of my book to be white. So I'm going to go up here
and I will pick white. Now. Drag the rectangle all the way, all the way to the top left. Drag it across all
the way to the right. Make sure it's all
the way to the right. Really important,
otherwise it won't work all the way to the bottom, so we don't want to be able
to see any of that pink behind you go,
Adrian, That's great. I can't see my work anymore. I'll just get rid of
that spine texts there. And you're right. So make sure you've selected
your rectangle, your white rectangle,
and position. Let's send them to
listen and backwards. Backwards. There we are. I send it to the back. I think things start showing
through again. So forward. There it is. Now we've lost a
yellow rectangle, but we've done the
design already so we know none of our bag covers current
that yellow rectangle. And we know that we're not
writing over the spine. We know that our
images are way away from the margins,
that pink area. So we know this
is going to work. So that now is our cover
image ready to go. That how you do it when
it comes to exporting. Export it the same way you
exported the interior. Appear, share, download,
find that print, PDF, print, hit
that color space. Technically probably because
it's pretty much go CMYK, but because we're
using basic images, don't worry about
it, but we hit CMYK, untick crop marks
and bleed and save download settings if you want download and exactly
the same as before, Canva will go away, do its work when it's ready, it will prompt you to save it. So I'm going to save
it to my desktop. Coloring book cupboard or PDF. Looks good to me. Save. And now we are done. So you've done the interior, you've exported it, you've done the cover,
you've exported that. Now the only part left is to upload it and publish
it to the KTB platform, which is what we'll
get into next.
8. Step 4: Upload/publish your book to Amazon KDP: We're almost there.
That was a hard part. Now the easy part
uploading it to the Amazon kVp platform. So we go to remember, I got you. Please, to create your kVp
account way back on one of the first videos so that you
can go straight into this now and I'd have to
fumble at this step. So you probably won't have
anything here like I do, because unless you've published a book before, if you
have, that's fine. All you need to do is go
up here, click Create. Now I will say, I'm going to go through this pretty quickly. I've already said that
we're not trying to create a bestselling book here. There's a lot of detail you
could go into potentially with the uploading
and publishing process if you wanted to, in order to, let's say, optimize it to get the maximum number of
people to buy your book. We're not gonna do that. I'm going to pretend or assume that you're just printing
this for your own benefit, or just to get published,
or to maybe sell it, to get it for your
own children or give it to a friend or
something like that. So I will gloss through
this pretty quickly. If you wanted to dig into more information about the
various bits and pieces, you could certainly do that. I will say if you
click on My Profile, I've got a course you'll
complete guide to KTB publishing and that
digs into this process, this exact process in
a lot more detail. If you want that, that's
available for you there. So let's go through this quickly with the assumption that
first-time through, you want to make it as
simple as possible. So we're going to
go for paperback. Let me just get rid of this. And you'll see we have
three tabs to get through. Paperback details,
paperback content, paperback rights and
pricing language, English, book title
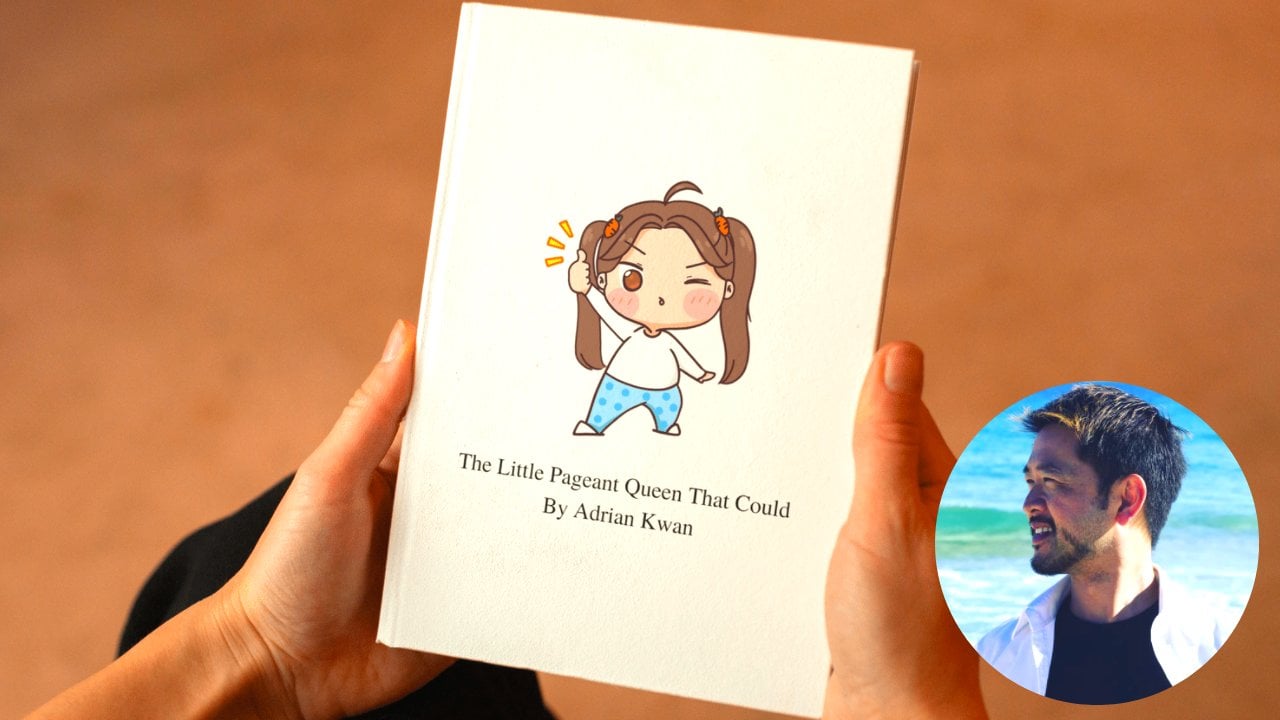
or whatever you want. So for me it was the little
pageant queen that could, maybe that should be
who could, but anyway, the little pageant
queen that could, I did not have a subtitle. Anytime it says optional, That's exactly what it means. We don't have to put in
anything because I'm trying to make this as quick and easy and painless as possible. I'm not going to put in
anything that I don't need to series blow my book is
not part of a series. Probably the first
book publishing. Edition number nope. Author? Yeah. Okay. I'll put in
my author name. Contributors. No, no. I don't have any illustrators or anything like that description. Now, this is one of the
most important parts. If you want your book
to be a bestseller, I've already said that's
what we're going for. If you wanted to put a
thought out description here, I certainly encourage
you to do so. I'm just going to put here
is a cute little story about an awesome little
pageant queen that could. It's also a coloring
coloring book. I would never encourage you to put a description like that, but you get the point. You could also just,
so you can play around some basic formatting here,
Bolding, italics underline. You can't put any links
in your book listing. Just bear that in mind. Moving on. Publishing rights. I do. I own the copyright. That's because that's one of the big reasons to use Canva. Remember, I caution you against bringing
in outside images. Make sure you have the
copyright. Keywords. Super, super important. Again, if you want to
hit bestseller rank, I don't want to with this
book and they're optional. So I'm going to leave it. I will say, for example, if you're going,
What is a keyword? Well, like I said, my best friend wanting to
sell a real estate book. One of the keywords,
real estate, I would encourage you to put in. So think of it as what
search terms would someone put in that they
would find your book. So doing a real estate book, Real Estate children's
coloring book, you probably want
to put children's coloring book in here. And you can choose up
to seven searches. You can see, I'm leaving a blank categories now you do need to
choose at least one. You can choose to. They do need to be
relevant to your book, otherwise, Amazon
doesn't like it. So if I go down
to, I don't know, juvenile fiction and
we will just go, oh, go activity books. That's fine. You could
pick another one if you wanted to
want, it's fine. Low content book.
Let's see this out. This is not a journal or
a notebook or a planner. Does this book contain
low mood situate? No, it does not. To
children's coloring book. One or three done. We're 1 third of
the way through. Let's keep barreling
through this. We needed ISBN, give
me a free KTB ISBN. And there you go. By the way, to pay for ISBN. So this is a really
neat feature. We've got a free ISP and does it, you don't
need to remember this. Amazon will remember it for you. Publication date optional, which means it will
default to today's date, the date that I'm
publishing my book. Print options are important. Okay. So black and
white interior, not to cover the interior
with white paper. Okay. Trim size again, very important. So it's not six by nine inch. Select a different size. We need to find r
8.5 by 8.5 inch, which is the very last one. Always click that
in half by 8.5. Bleed. We're going we're
going with no bleed. Trust me on that one bleed is a complicated issue for
other books for another day. The cover finish,
what I will say, this is a glossy finish and you can see that
it reflects the light. A matt cover doesn't, it's more, it's flat. It doesn't reflect
light as much. If you are planning
on having a lot of people taking
photos with your book, maybe for marketing purposes. You know, there's
gonna be lots of flash photography and this is
the only thing I will say. It tends to bounce
flash photography off and then you can actually
see your book cover. That's the only thing different
between matte and glossy. I do like glossy. It's shiny, it
looks a bit better. You might prefer.
I will glow, Glow. I will glow with
glossier so well, but I also go with glossy. The next step is upload
paperback manuscript. Now, ignore that
it says pricing, assessing my fault because I actually did this
for this course. And realize that I
had forgotten to switch screen recording on.
It was just showing my face. So what you do is hit Upload
paperback manuscript. Find your manuscript. So for, here for us to tear children's
coloring book by PDF, double-click that
and we'll upload. It will take a bit of
time, but not too long. It depends on your
Internet speed, but hopefully your
manuscript is not too big. 2024 pages. When we get down to book cover, don't use cover creator. We already have a cover,
so upload a cover, you already have upload your cover file and
you do the same thing. Double-click on your
coloring book cover, that's what I called mine
Colin book cover dot PDF. And then you'll see here it says uploaded successfully,
uploaded successfully. It's processing your file. Then you get to go down. Don't check this box because we didn't put the image of a
barcode on our back cover, we left a space for it. Remember that yellow rectangle, but we didn't put
the actual image of a bar code this so
do not check there. Then the exciting part, we hit Launch preview. Now, this could
take a bit of time. It's not your internet speed, it's waiting for kVp to finish processing your interior
and your cover. So this is where I'm going grab yourself a cup of coffee
or a glass of red wine. Come back to this
when it's done, you'll notice it
because you'll see your cover in your
book in all its glory. But when I published
a bigger book, this place, at this phase, I had to wait ten or 15 minutes
for, so it can take time. This one is actually
done for us even better. So this is the first
time you actually get to see what your
book will look like published with the
spreads rather than the individual Canvas pages. Which remember what I said? Kevin didn't know you
were making a book, so I didn't know to
put it like this. But Katie does. So by the way you go, Oh my God, Adrian, why
they are the dotted lines. I didn't put that there. It's just the guides. It's just a guide to help you. So if you want to get rid of
it and you can unclick that, you can see the barcode that
Amazon's going to put there. So that's our cover. And let's have a look. Now, I will gloss through this, but you want to make sure
that obviously there are no spelling errors
or that nothing, once again, nothing has gone
to close into those margins. So make sure it's far away
from these dotted lines here. So leave the guides on, maybe, maybe turn them
off, you won't know. And again, if you go to close into those margins
when you submit, we're about to submit
this book for approval. Kgb was enough, can
print this book. You've put something too close to the margins
and that's by far the biggest reason when I've helped people to get their
book published and why, why Adrian is my book
Getting rejected? This is by far the
biggest reason because something has
gone in the margins. And it only needs one thing
to go into the margins, by the way, for your
book to be rejected. This is what the
book looks like. Go through this and make sure
there's no spelling errors. If you've put in text, make sure none of your
images or your texts has gone inside the
margins, even has. Go back to Canva, fix it, re-exported, and then re-upload it and then get to this phase. A cool little feature
here is a thumbnail view, which will show your book as spreads so you can
look at it like this. This is the first time you get to look at your book like this. Because again, Canada couldn't
show it to you like this. This is where I can see. I've got the example of the text is alternating
right, left, right, left. That's okay. Images look good. Once you're happy with it, then all you need to do is
go down here, hit Approve. And again, if
something goes wrong, don't hit Approve, just exit, fix it in Canva, re-upload it and then go
through that process again. But we're now on to, we have to scroll back down. That's all done. Now, kVp is able to tell
us our printing cost. This is not how much
it's going to sell for. This is just how much
Amazon is going to charge us a copy of the book that's
printed or purchased. And obviously we're going
to charge more than that, so we're not actually
getting charged, but this is how much Amazon
is going to charge us for printing in the
different markets. So this is America, UK, etc, etc, etc. Just maybe double-check that these details here are correct. Hit Save and Continue. Now we'll move on to our final page. This is basically
the money page. Territories and going with all territories worldwide,
worldwide rights. Because why not? Primary marketplace. Pick whichever one you want. Whichever one you pick
goes up to the top. So I'll leave it
as.com.com at the top. It gives you a minimum
and maximum price. So let's just for
argument's sake. And again, this depends on who you're going to
sell the book too. If you just want to sell it to yourself and then send
it to your friend, put in the minimum
price of $3.58. What you'll see is an Amazon
has this neat feature where it calculates based on $3.58 us a rough equivalency
in the other currencies. But this is really
the only thing that changes with his
primary marketplace. If I put I'm in Australia
by put.com delay you, the minimum price is $7.48. If I change it to $9.99, you'll see again, Amazon
will populate this for me. And by the way, you can
change these individually. So if I wanted it to
be 999 in Australia, but for 99 in the US, I can do that because
it's the second row, not the top row or the
primary marketplace. That change I made to the US market doesn't
filter through down here. So for 99 for example, let's make it in pounds
five, ninety-nine. And then you could
make it, for example, this is just an example, €699. And I will copy paste. You get the idea. So that's surprising. Royalty. So we get, you will get 60%
of the list price. So let's call this $10. I would get $6 out of that. And the printing price
was basically $4.50. So Amazon did ducts are
printing price from royalty. Well, right now 60%. And then we're left
over with $1.50. And you can see the
different margins here. Now, again, if you're just
printing this for yourself, the minimum pricing,
because you don't want to try it yourself
more than you have to. If you're intending on the public being able
to buy this book. And I should say when
he published his book, the public will be
able to buy it. They may not find it,
but they can buy it. So just give a little
bit of thought to this. But don't worry
too much about it. 60%, 40 percent royalty on
not gonna go into that. If you want to find
out more about that, go to my other course, click on My Profile, find the
one that's called Amazon. You'll complete guide to
Amazon, KTB publishing. And I'll go into more
detail about them. And that's included.
You won't have to pay anymore for that. But fiddle around
that pricing when you are ready, you're now done. Publish, paperback book. Okay? So now we've hit Publish. You get this window here
saying your paper back has been submitted and Amazon
is now reviewing your book. As I said, right at the
beginning of this course, it can take up to 72 hours. With a relatively
simple book like this, I found it takes a
lot less than that, normally about 24 hours. What do you have to do now is
keep an eye on your email, the email that you signed up
for your kVp account with, and hopefully you get
an email from kVp. I shall not be able to show you. Here is the email that
you will get something similar to this if
your book is approved. If you follow the steps
that I've laid out, it should be
approved. No problem. So look for your email,
check your email. Keep an eye on your email, and you'll get an
email with that title. Your paperback book is
available on Amazon store. This is obviously not that book. This was a different book,
but this is the e-mail I got. If something was not quite
right with your bulk and then you'll
get an email like this saying attention needed. Please review your title and
it will give you the I mean, first off, if you
get this e-mail, please don't freak out. It doesn't mean your
book is rejected and you'll never be
able to publish it. It will give you the issue. So in this case it was
an issue with the cover. And then again, as I
said, these tend to be the vast majority
of causes for rejection has
something to do with an image or cover that
wasn't quite the right size. It says resize your front
cover so that the image or background on the
front cover extends far enough beyond the edge. This is similar to what I showed you to do with
that white rectangle. So all you need to
do then is go Don't panic code and fix the issue. Then re-explore in Canva,
re-exported from Canva, re-upload it to ADP, and then go back, go, go back through the
print preview and then make sure
everything's good and then hit publish again. Now that will re-trigger
the approval process. You'll be waiting for another, let's say 24 to 72 hours. But hopefully that you'll get
published the second time. But the moral of the story is, if you followed the
steps as I've laid out, particularly if
you've done an 8.5 by 8.5 inch paperback book,
it should be published. No problems. So look out, check keep an eye on your email. For that email. If you do get one saying
attention needed, then don't freak out. Make the necessary
changes in Canva, re-export from Canva and
then re-upload it to the KDE platform. And
you should be fine.
9. Next steps: Okay, that's it. So hopefully within
24 to 72 hours, you will be a published
author if it's your first time,
double a special. Congratulations. If you get an e-mail back from Amazon saying
your book has been rejected for whatever
reason and you can't figure it out or you have
any other questions, just drop me an e-mail info
at Adrian jay Kwan.com. And in terms of next steps, if you're someone
who is interested in publishing not just
children's coloring books, but maybe other
books or maybe even making a business's
side hustle out of it. Then do check out
my other courses. Just click on my profile. You'll see the building
library of the delight, their ever-expanding library of courses that I'm putting out. Some children's
books such as these. Some are much more
complicated books, proper novels, coffee table
books, things like that. I've also pulled out a course about doing your own podcast. You're interested in
things like that. Click on My Profile, check out the other courses. If you enjoyed this one, then please leave me a review or send me an email letting
me know how you got on. And frankly, look, if you've
managed to publish a book, send me the link because
I'd love to check it out. Check it out. I've had a couple of people now write me reviews or semi messages saying
thank you so much. I'm now published
for the first time and that is the main goal. That wasn't main golf
courses like this that I produce is to
be very practical. I don't want to just talk at
you about book publishing. I actually want you to follow
step-by-step, as you saw, wasn't always
perfect, but follow step-by-step and by the end, actually have a book published. So that's next steps. Have a look at the
other courses and look, you can go through and publish
another book like this. You don't have to
just publish one. And I encourage you to
publish more than one because the more you publish
like any other skill, the better you're going to get. So whether you want
to publish for profit or just publishes
really, really cool, unique gifts and
trust me on that one, when people get unique, tailored books published
just for them, they're blown away that
you could do that. They never would have
thought that's possible. But whichever way
you want to go, best of luck with your journey. Again, any questions? Just e-mail me infrared
Adrian, jay Kwan.com. Thanks for watching. I
will see you next time.
 Adrian Kwan, 3x Top-Ten Amazon Self-Published Author