Transcripts
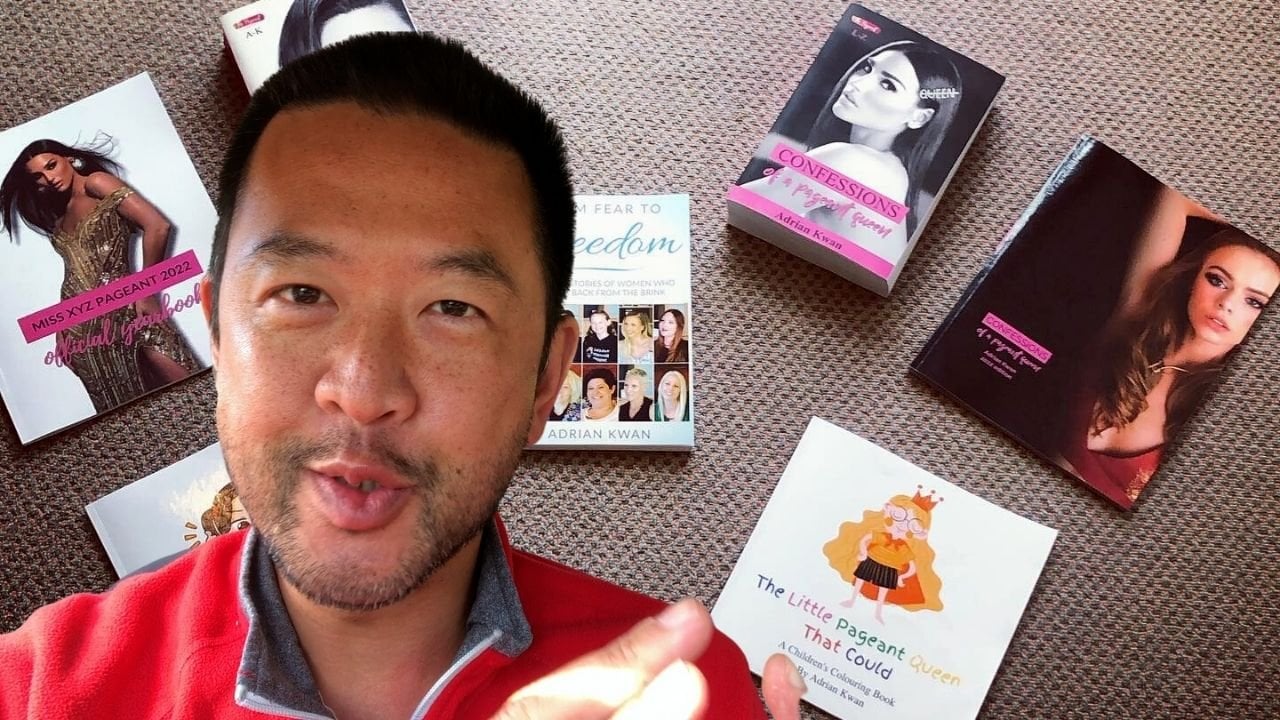
1. Introduction: In 2017, I published
my first book, six by nine inch
paperback text-only, went onto hit Amazon
Best Seller status. After that, I published
a two-volume tome, 1600 pages in total, black and white, six by
nine inch paperback book, children's books
and coloring books, 8.5 inch by 8.5 inch paperback, concert programs or
pageant programs, 8.5 by 11 inch full
color paperback book. And then most recently
coffee table books, some of which are hardcover, 8.5 inch by 11 inch, full color on the inside. My name is Adrian Kwan and the only reason I showed you all those books
wants to show you how many different types
of book it's possible to create on the Amazon platform. And what I have for you in this course is basically
the course that I wish I'd had when starting out my own publishing
journey back in 2017, how to write your first book? How to format it? How do
I format my manuscript, my cover, how do I do the actual uploading
and publishing process? Two, kVp and how does
that process work? So if you ever wanted
to get published on the Amazon kVp platform
in this course, is going to be your
complete guide to understanding the platform
and how to utilize it to publish whatever
book you want to create as quickly and
easily as possible.
2. Course overview: Before we get to the meat
and potatoes of actually how to publish a book on
the Amazon platform. Let me take you through
a quick overview of this course and just run you through a couple of slides so I'll share my
screen here with you. First off, why published on
the Amazon kVp platform? It's fast. And when I say fast, I mean, from the time you
submit your your book, you can be approved sometimes in less than 24 hours. It's easy. Now I'm not going to say that. That means it's intuitive
and you can just do it without taking a
course such as this. But it's a lot less
difficult or it's a lot easier than a lot of people think, especially
first-time authors. It's free publishing of
the Amazon KTB platform. You need an Amazon KTB
account, but that's free. Here's a big one. The printing prices offered by kVp are a lot lower than any
other platform I've seen. Put it to you this way. I
have a best friend who's in real estate and he wanted to do a small run of
real estate books. And he got a quote here from a printer, an
Australian printer. And I said, why don't you check out the printing
prices on Amazon? It could be cheaper. I think it turned out to be 1 third to one-quarter
of the price. So it's very, very
competitive price, very, very competitive print pricing, which is not really
surprising given the scale that
Amazon does it at. It's available worldwide. That's it. So when you publish a book on the KTB platform, people literally around
the world can buy it. Amazon handles shipping. And when they buy
it through Amazon, it's often free if they
have Amazon Prime. That's hugely important
because Amazon shipping is also very cheap and
very, very quick. You can print hardcover,
paperback, and e-books. There's a large variety of
trim and manuscript options. So to give you an idea, this was the first
book I published. This is a six by nine
inch paper back. I have published, I've just got a stack of
my own books here. This is an 8.5 by 8.5
inch children's book. And then underneath
here I have a gigantic 8.5 by 11 inch. This one is full-color
coffee table book and I have a hardcover
version of it down there. So sky's the limit really, when it comes to your
different options for printing on kVp, this is a really
big one if you are invested in creating a business or becoming a
best-selling author. There's a lot of
people already on Amazon looking for your book. There are other
printing platforms and publishing platforms who
might let say add another. They might say they book
quality is better or they offer faster shipping or
certain trim sizes. So combination that you
can't get on Amazon ADP. The thing is none
of them can compete with the number of eyeballs, the amount of traffic
that Amazon has. So if you're serious
about selling lots of copies of your book or as many copies of your
book as possible. You have to be on Amazon. I'm just gonna put it out there, which means you might as well publish on Amazon because it's one of the easiest,
best, and fastest. You can get paid very easily. This is another big one you
put in your banking details. There is tax information
you need to put in. I'll cover that in
a subsequent video. But it's very easy to set it up. You give your bank details and you get paid for the month. 60 days after the
close of the month, 60 to 90 days after the
close of the month. So there is a bit of delay
in getting your royalties, but it's very easy to setup. And obviously you
don't have to worry that Amazon, within reason, you don't have to worry
that Amazon is just going to fold up and
disappear and take all your royalties
with them so you can trust them In that
sense, proof copies. This is when you have
submitted your book, but you haven't hit Publish
and you just want to make sure that it looks right. You can submit a request
for proof copies to Amazon. You don't have to
pay any markup. You just pay the printing
cost and the shipping cost. You're not allowed to
sell these copies. So they'll actually
have proof copy printed in big bold letters
on the front cover. And I'll have a special bar code on the back that just makes it very clear that
this is not you're not supposed to sell for retail. And because it has proved
copy on the front, then obviously
you're not going to do that because
people go why does my copy of the book have proof
copy written on the front? The big ones. So that's if you want to
check that everything is printed correctly, correctly. The big one is author copies. Now, author copies
is after you've hit Publish and your
book has been approved. And so your book will be
available for sale to public. However, obviously,
someone buying through the Amazon platform will be
paying the Amazon markup, which is 40 per cent. It's not insignificant. Now, if you want
to sell or if you want to give away copies
of your own book, or you want to have some
copies of your book that you can sell
either in person or let's say on your website or maybe on your social media than Amazon allows you
to buy author copies. There is no limit. No limit on how
many you can order. You can order up to 999 at once, but you can place
multiple orders of that size if you want. And again, you pay printing
costs and shipping cost only. Now you might go, What? Adrian, why don't I just do
everything as author copies? Well, first off, people, the public can't buy author
copies through Amazon. So if someone wants
a copy from you, you will have to work
out the shipping. You'll have to get the address, you will have to
take their payment. Secondly, it won't count
towards your book sales. So if your goal is to become, is to climb up the
Amazon bestseller list, none of the author
copies are going to count towards your book sales, but author copies are
a huge thing for me. I think there will be for
you as well if you're a self-published author and
you're just getting started out and you want
some copies that you can sell yourself? Yes, you can. With author copies,
they can be shipped everywhere around the
world and you do get them fairly quickly as
well, which is great. Now what do you need
before publishing? Well, you need to set up
an Amazon KTB account. There'll be a subsequent
video on that. And remember, an Amazon
KTB account setup is free. You need a formatted
menu script. So if you've just got your
book in Word document, now you can just upload
the Word document. There are certain
ways that needs to be formatted and certain file
types that are accepted. You'll need a formatted cover. So you can just create some
sort of image and then say, hey, stick this on the cover. Again. It needs to
be formatted in certain ways and be certain
measurements details. Now the details
that you'll need, some of the details anyway, some are obvious title. Some of you will
have a subtitle. The description is the book
description on Amazon. So when somebody goes to
buy your book on Amazon, it's what appears underneath
that description. Keywords. This doesn't pop up in public
on the public listing, on your Amazon listing, but they help people
search and find your book. So remember the public is searching for a
book on, let's say, cooking or ketone
cooking or paleo diet. Then you probably want
to put paleo diet or keto cooking, Quito recipes, let's say in your keywords, pricing, that also
includes royalties. So that's something that
you'll need to work out. Just get a rough idea as to
how much you want to sell your book for or how much
royalty you'd like to make. Then you can adjust
them up and down very, very easily individually for
each market or each country, I might add a few other
details you need to add. Now the Amazon kVp
publishing process. First off, you will submit what we just
covered, the details, the manuscript, and you'll cover to Amazon
kVp for approval. Now that's just a fancy way
of saying they're gonna go, go away and check that basically everything
is the right size. Everything is
formatted correctly and there are no glaring issues. The approval process itself, they say it takes
up to 72 hours. I have at the beginning of 2022, notice that it's
taking about 24 hours, so they say can take
up to 72 hours. If you are printing
a thicker book or more complicated book
or a longer book, then that does make the approval take a little bit longer, which I think makes sense. The approval notice will be delivered to your email inbox. You got Adrian, I
submit my book. How am I going to
know I'm approved? Keep your email. Keep
an eye on your email. And you will get you'll
get an e-mail very obviously from Amazon
kVp saying that either, hey, congratulations, your
book has been approved or hey, it hasn't been for
these reasons. So for example, this so
your book has approved, it is available immediately
for purchased by the public. There's not a separate process
you have to go through. So if it's approved, people can find and buy
your book on Amazon. If it's not approved, then they will tell you
why it's not approved. You go away and make those
requested changes or fixes, and then you resubmit the approval and the approval
process begins again, so that 24 to 72 hour
process begins again. For me, at least the
most common reason, and with people I've helped, the most common reason for
something to be rejected is the manuscript or the
cupboard being the wrong size. And it's normally to do
with images formatted correctly being too close to the edge or too far away from
the edge, things like that. I do have one weird one where I got the
title wrong because I just put sample
Tidal because I was just practicing uploading books. And then Amazon
realized that, hey, the title on your book
is not sample titles. So there was a mistake there, but aside from that odd one, or some really flagrant ones
like copyright rejection, copyright infringement, then the most common reason
for rejection is hey, you gotta fix these images. Something's a bit the wrong,
the wrong dimensions. Fix it, resubmit
it, you'll be fine. Okay, what we're going
to cover in this course, how to set up your kVp account. A reminder that that's free. The different types of book
you can create on Amazon, kVp, and there are a lot I've
just shown you a few then, and I'll show you
more in the course, the three parts to every book, how to set up your book. And that's in terms
of the trim size which I was talking about before in terms of approval,
bleed and margins. The bleed is not you
bleeding, don't worry, bleed is a specific term for
publishing how to create. We'll cover these types
of books and these probably are the main
types of books you're going to want to
create something like the standard black and
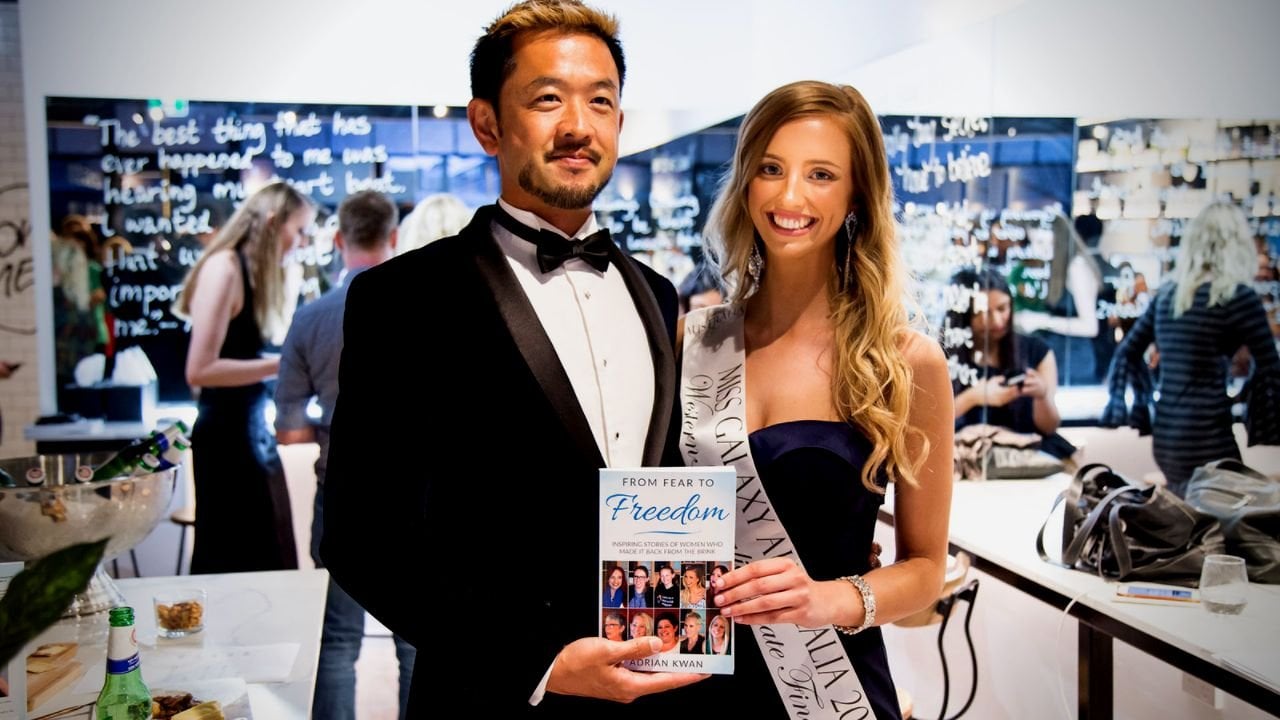
white text-only box. So for example, the first
book that I created. Which is this one here, from fear to freedom. So six by nine inch
black and white book, that's just text on the inside. So we'll cover that 1 first. Then photo, I've called
them photo heavy books. So either something like a concert program or
a coffee table book. So something that looks
a bit more like this. This is 8.5 by 11 inch. It could be hardcover,
could be paperback. This one is full
color on the inside. And the images go all
the way to the edges. As you can see, by the way, that's what bleed means. How to create or what I would recommend for creating
what software, what I recommend for
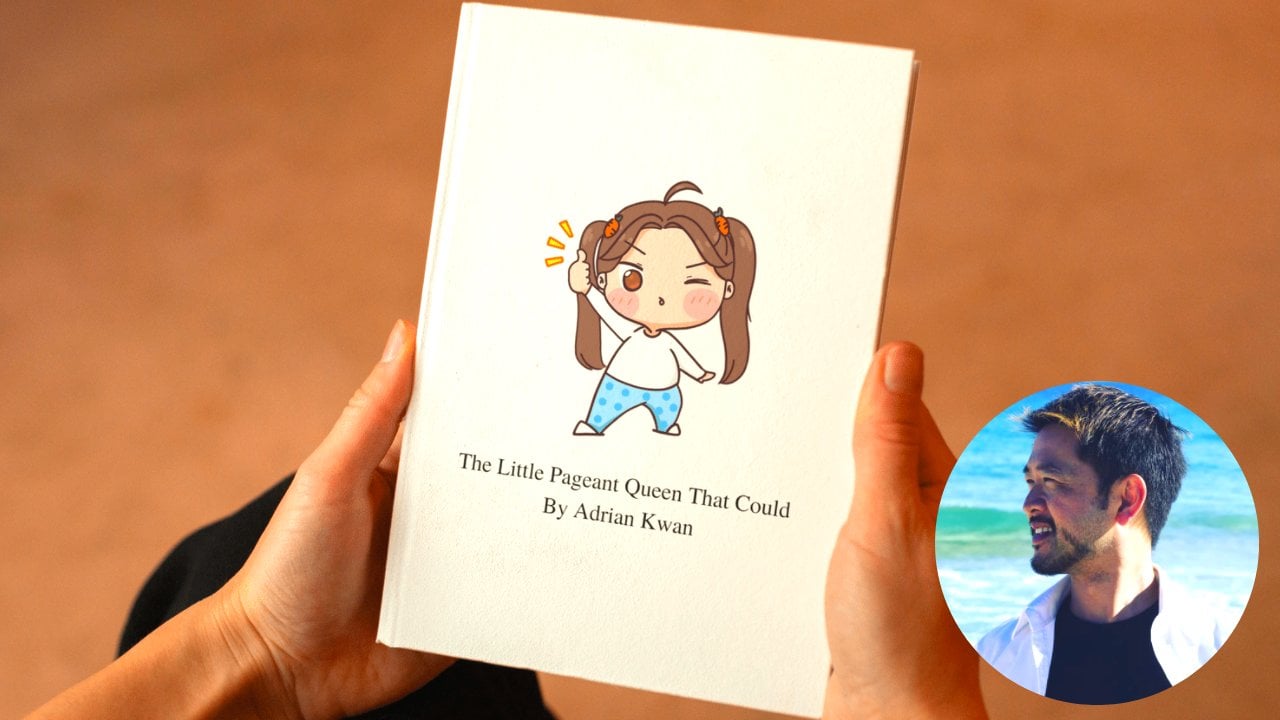
creating that sort of book. Low or no content books. For so low content books. So for example, this is
a book and I will be using this book quite a lot as an example of how to
create a low content book. I created this as a birthday
gift for my friend Chloe. It looks like a children's book. It's really not that a bit
adult themed on the inside. But this is a low content book. It's called that because it
doesn't have a lot of texts. You're certainly
not like a normal, let's say, 200 page book which
took me months to write. This might take an hour to
do the manuscript if that. So that's a low content book. There's also things like children's coloring books
that I have down there. A no content book Is doesn't mean it's blank on
the inside means for example, a journal where all you've
got on the inside might be ruled lines or maybe
your journal prompt. You haven't really
written anything at all. So those are low content
and no content books. And a lot of people
who are creating businesses out of low content
and no content books. And it's something that
I'd never thought of. Even though I published
my first book in 2017 and hit Amazon
bestseller status, it never crossed my
mind that you could write a children's
coloring book on Amazon. Just never thought of it. I'll show you how
to create that. And the software that I
would recommend for creating that will cover how
to create your cover. That will be both for
print books and e-books. Really importantly, the kVp uploading slash
publishing process. And that is a screenshare. It's really important, That's
one of the most important, not the most important
part of this course. I'm not going to talk about
how to upload your book. I will share my screen
with you and you will see me entering the title
and the subtitle. Changing prices are
uploading the manuscript, finding it on my computer, uploading the cover, entering
all that good stuff. Because it's a really, really want to help
people get published. And it's so easy to talk
yourself out of it. Get intimidated and go, Oh, it must be really complicated
and you just don't do it. That's why I'm going to
share my screen with you. You can watch along
in real time, pause the video and I certainly
encourage you to do this. Pause it, you do your part and pause and watch
me do my part. Pause it, do your
part. That way. You watch that video
once at the end of it, assuming you have
your manuscript and you'll cover ready to go, you'll be published by the
end of watching this course. And that's really,
really what I want. So that's it. I'm not going to
keep you any longer. So we'll get straight into
actually how to publish a book and your guide to
this Amazon kVp platform. But just again,
there are a lot of good reasons to choose
the Amazon platform. And even if you chose another platform to
primarily publish on, my guess is you're
going to want to at least publish that same book on the Amazon platform because everyone
knows what Amazon is. Everyone trusts it in terms
of it's not some sort of shady deal on the side where they're going to take your payment details
and steal them. People trust that people
are comfortable using the Amazon platform to buy
things, especially books. So let's get to it. If you have questions
about any of it. First of all, watch the course. Watch it again if you have to. You can always email me
on info at Adrian jay Kwan.com with any questions and I'll help you
out where I can. But let's get into your guide to the Amazon Katie platform
and how to get published.
3. Set up your KDP account: The very first thing
you're going to need to do in order to be able to publish to the Amazon
k d p platform. Remember, k d P stands for
Kindle Direct Publishing. I guess it comes back
from the days when it was about publishing on Kindle. Nowadays it's not just about publishing Kindle. Obviously. You can publish paperback books, hardcover books that works. But the very first thing
you need to do is go to k d p.amazon.com and set up a k
d P account, which is free. You don't need to pay anything. Now, the good news with this is that if you have
an Amazon account, which you probably do, most of us do, then you can use the exact same login details
to create your kVp account. It's very, very
straightforward and simple. I'm not going to
walk you through it. This here is the page as you want to get to so
Kindle Direct Publishing. And if you need to create your, I mean, this is a sign-in page. If you want to create
your kVp account, then obviously you'd
hit this button here. Then you'll be taken to, I need to enter my name. I won't do this obviously because I already
have an account. But the point is, go there, set up your account, it's free. I won't walk you through it because it's very
straightforward. Things like enter your name
and your e-mail address. The most important part there
from my point of view is the tax information for
me being Australian, it was a text questionnaire. And you need to have some texts details and
you'll want to put your banking details
in there as well so that when they are royalties, Amazon knows who to pay. The tax questionnaire is
important to fill out and look, I'm not a tax expert
by any means. So if you need to get tax advice from a tax
professional than do that. But it's important to
set that up because, for example, for me being
an Australian citizen, whereas Amazon being
an American company, after I filled in the
texts questionnaire, Amazon decided it would take 5% withholding tax
on all my royalties. Now if you're an
American citizen, that might be different. If you're a UK citizen, that might be different again, but it all depends
on you filling out that tax questionnaire. So sign-in or create
your kVp account. It is very, very simple. Just have your tax information. I needed to have
my tax file number here in Australia and have your banking information ready to hand before you do that. So that when you
go to set it up, you have all the
information you need and you don't need
to go running about. But it's at k d p.amazon.com. Create that account. And again, it's free.
4. What type of book do you want to create?: The first thing
we're going through this in the order that I would say that I would have liked
to have gone through if I was starting this whole
self-publishing journey again. But you have to
decide what type of book you're going
to want to create. For many, many people, the first book they
want to create is something like the
first book I created, which is, for me this
was a nonfiction book, but nonfiction and
fiction aside. It is a paperback book. It's about a hundred, two hundred pages thick. On the inside is just text. There's no photos, there's
no fancy formatting. I know some people
have approached me about producing poetry
books which have a little bit of the text is formatted in a
slightly different way. But I think for many of you, this is going to be the
first port of call. Nonfiction or a fiction book. Probably a paperback, and probably about 30
thousand words long, 100 to 200 pages. So you might want to create
a type of book like that. Now, the reason that we're
going through this is just to, maybe you don't want
to create this. Maybe there are other types
of books you want to create. Or if you have an
idea for a book and I'll show you some of
the books I've created. Maybe it will help spark some bright idea or
you might want to actually change the type of book you were thinking
about grading. I've been putting more
effort recently into publishing low content
or no content books. Primarily for me, it's
been children's books. So you can actually publish
now, I never thought of it. So you can publish
a book on Amazon and have it be a
coloring in book. Now the reason I didn't think
about that is because I was thinking when I was publishing that I'd
create a book like this. And obviously I'm hoping
no one buys this book and then start coloring
in on the inside. But there's absolutely no
reason why you can't use Amazon to publish a book
that looks like this. And now this has been colored in by my five-year-old nephew
didn't come colored in. But I use them as a test
subject to see whether the actual paper would hold the color from a
pencil or crayon. In this case, it did. There's no reason why you can't create a children's
coloring book. You just need the
appropriate images. And I've even put some texts in there which can be
colored as well. And that's only a 24 page book. This took about I mean, this took months of work. This book in total took about an hour for
me to turn around. Now I know the
publishing process because I've done it
many, many times. But in order to create the
manuscript and the cover, it took all of about
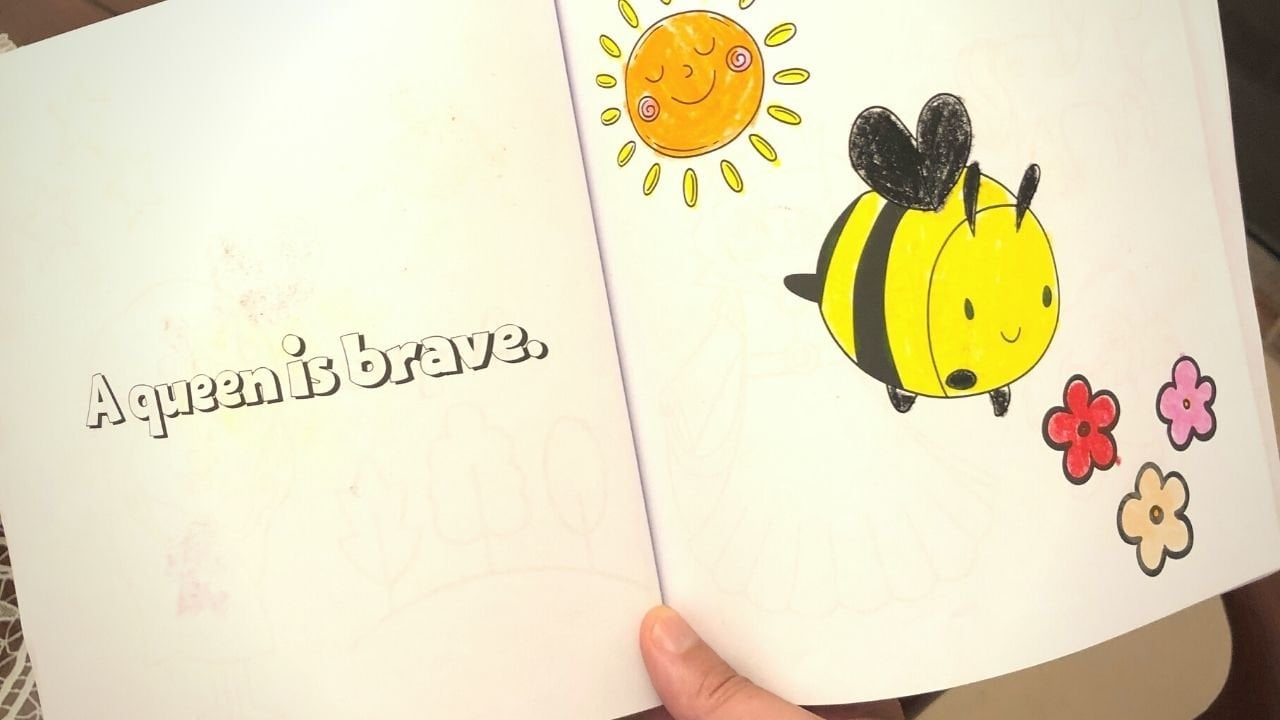
an hour to create, so it was very, very quick. Now you might want to create just a genuine children's
book that has, let me open this up for you. Images on the inside, looks like that and
some basic texts. So it's somewhat similar to
the coloring book I need. The images aren't
colored in a bowl. So you might want to create a low content or
children's book. You might want to create
a training journal for a particular sport. And by the way, if
you're interested in low content or no content
books as a business, just go to YouTube, for example, and put in a search that you'll be amazed at how
much materials out there about turning low content and no content books into a genuine business,
particularly on kVp. You might want to create
a coffee table book, whether it is
hardcover, paperback. Now, these, what you put on the inside of these is
very much up to you. This is only a test print, so it doesn't have the
actual words in it. But when I say
coffee table book, I'm talking about
books where there's a heavy emphasis on the images. And it's a nice large book. This is 8.5 by 11 inches, which I like to think would
look good on a coffee table. Or maybe in the backdrop, if someone has a
YouTuber or streamer or an Instagram influencer will just be nice in the background. So you might want to create a
book that is not just text, but it has at least an equal
emphasis on the images. So that's a possibility
for you there as well. I've been looking at creating
programs for pageantry. As I said, I've been working in the beauty pageant industry. I've thought of the idea
of either a yearbook or a pageant program. Think about it like
when you go to a live content and there's
a concert program, same sort of thing in there, except it would be photos of headshots of the pageant
girls that are competing, together with a
written interview with each of them on the inside. There was gonna be spaced
on the inside for message from the director who is
in charge of the tangent. The section for sponsors. So you can see here you
can get books sponsors. These are just mock sponsors. They're not real. But at the front of this book of this program had
potential sponsors. The message from the director,
something like that. Just to say thank you, or this is what the
pattern is about, etc. So that's another idea
that you could have there. What else do I have here? Now this, these books, as I said, were based on
interviews that I did. And each one of these remember it's two volumes and the
other volume is there, each one to 800 pages thick. Now the idea with this book was, I didn't interview a 160
people face-to-face. I had pre-written questions. The women who were
featured in this book emailed me be answers
to their questions, and they emailed me a photo
because the beginning of each chapter had a full now
it's a black and white photo, but a full-page photo. This is only six by
nine inch by the way, it's not 8.5 by 11 inch
like the coffee table book. It would have their name, their pageant title, and a
little quote about them. So it had a photo. But then after that, the inside was the written answers
to all their questions. This book had a mix
of photos and words, but the emphasis was still
very much on the words. But you might want to do a
book that features interviews. And then the final
book that I have here that I've produced anyway, this is a unique, well, it's a birthday
present I created for my friend over in Ireland. So only published
this really with the intent of ever
selling one copy, and that copy was to myself. But it's like a
children's book only. It's kind of adult themed. So that's part of the
attraction of it. It looks like a children's
book, but it's really not. And on the inside, it has particular
stories about her. It's about a girl named Claudia. Obviously she's from Ireland. I just put some sort of maybe inappropriate or joke
themes in there. And this is a book
that you could, could, you could
create either for, let's say a child or a friend, or even, let's say a partner. You might want to turn the
story of how you two met, how you met your partner
into a really nice book for Valentine's present or for Christmas present or
something like that. So those are the types of books so far that
I've published. Having said that, you
could easily create, come up with an idea that
I haven't included here. You are by no means limited
to those types of books. Come up with your own. I just wanted to show you
a few different types because I think a lot of you
might be thinking about, as I said, this is what I'm
going to be publishing. Just a book, fiction
or nonfiction, and just texts on the inside. As you can see, there are a lot more options available to. You. Gotta decide what type of book you'd like
to create first.
5. The three parts to EVERY book: I'd encourage you to think
of any type of book, regardless of what type of
book you're trying to create. In three parts. There is the inside which
we'll call the manuscript, the written stuff or the
photos if you have that. There's the outside
the cover, obviously. Now, eBooks do have covers. The file format is
slightly different, but an e-book does
have a cover as well. Then there are the what I
call the uploading details, which is what you
will need when it comes to the uploading or publishing process with k d p. Now just to give
you a sneak peak, this is the kVp platform. And I've skipped across to
the middle of this book. This is just a dummy
book I'm uploading, as you can see by the
title, sample title. But some of the details that
you'll need to put in title, some of these are
optional by the way, so subtitle, but
that's optional. Then the description, obviously you probably will put a different description here, at least if you want
to sell your book to more than just yourself
or your friend. But there's a description
here which is important. And then the key words which
I've already said as well. So those are the
three parts inside, outside and then the
details that you'll need for the uploading process
or the publishing process, how you create the
menu script for each book does vary a lot depending on what type
of book you want to create. That's what we're
going to go into next, my suggestions as to
software, particularly, just remember that creating the cover and those
uploading details, they're pretty much identical regardless of which type of
book you want to create. But we're gonna
get into creating the manuscripts for the
different types of books now. And look, you can skip
ahead to, if I'm creating, if you want to create
a book that just text, then you can just
watch that section. If you want to skip ahead
and look at how I created, let's say a low content or
no content children's book. Then you can just
skip to that section. If you want to look at all
of them to get an idea of different ways and
different softwares you can use to create
different manuscripts. Then go for that as well. That's what we're
getting into next.
6. Trim size, bleed and margins... oh my: The first thing
you need to do is decide on what's
called your books. Trim size, the bleed,
and the margins. The margins. It's more like
you need to be aware of them. You don't really decide them, but you definitely need to
pick your books trim size. And that's a fancy way of saying how big do you want
your book to be? So for example, this one is
six inches by nine inches. This book here is
8.5 by 8.5 inches. And then you have
books which are, oh, by the way, if you
decide to cover type paperback or hardcover, although that's more
of a recent thing you need to decide with
Amazon because used to be you
could only publish paperback but cover as well. This one is 8.5 by 11 inches. So what size do you want to and what type
of cover do you want? Paperback or hard cover. Now, I am going to
give you one link. It's going to be down here. It's Katie p.amazon.com and
I'll put it under there. But let me share my
screen with you now. And here it is. Now the reason that
I'm just going to send you here rather than talking you through it
is because there are a lot of different options, but there's not
unlimited options. So a sensible question
might be, well, Adrian, can I create a 20 inch
by 20 in hardcover book? Now you can't, there are
certain options here. And there's information
about, as you can see, trim size, bleed, and margins. So I really need you I strongly encourage you
to read through this. I didn't tell you
what bleed bleed is. Sounds very weird, but bleed common is only important
when it comes to images. Now, an image with
full bleed or with bleed goes all the way to
the edges of the page. And imager doesn't
have full bleed, has margins around these images. As you can see, they don't
go all the way to the edges. Now, there's a reason
that that's important because it affects your
menu script setup. And it's to do with printing and the way they
manufactured the book. But bleed. So books that
have bleed or the images, those are the ones that you
want the images to go all the way to the
edges of the page. If you select no bleed when you're uploading
your book to Amazon, then that means there's
going to be margins or whitespace around the
edges of the book. So to give you a
typical example, if you are writing
a non-fiction book such as this one,
images in this one. This book has,
doesn't have bleed. If you're creating a cover, a coffee table
book such as this, then maybe your book will have
bleed just for reference. The cover of every
book does have bleed just the way Amazon
words and images going. Because this is
actually an image file and you think that
it looks like text. But there's a blue background
to this book that's an image and it has to go
all the way to the edges. So cover always has bleed. But that's what bleed is. Now, to go back to
this KT P topic, you're going to have
to go through this, educate yourself as to what
the different options are. So, for example, trim
size specifications, width by height with minimum and maximum page
count for Amazon.com. So you click this and here are the different
options you have. So there's a five
inch by eight inch, there's 8.5 by 11 inch
and this is paperback. These are the hardcover options. Then you have black
ink on white paper. So black and white
on white paper, black and white on cream paper, standard color ink,
premium color ink. And you'll notice that for
example, premium color ink, you can have a
minimum of 24 pages, but with standard color ink, you have a minimum of 72. So when I was producing
my children's books, I only wanted about 30 pages, so I had to choose
the premium option. If I had chosen the
standard color option, I would have had to
produce a minimum of 72 pages to take
it back to here, go through this
and work out what trim size works best for you. Whether you're going
to want bleed or not. Suffice to say, go through this. I'm not going to
read this to you. This is probably one of the
most important katie P, help articles you're
going to have to read before you start
writing your book. Now, they are margins here as well as to the minimum
margin requirement. And then really importantly, if you're creating your
book in Microsoft Word, which I will get to in a sec. But Microsoft Word is
one of the best tools, are one of the tools
certainly for creating a book that's simple text. So if you're looking to
create a book such as this, where it's just text, no images than Microsoft Word is a really good option
to use because a lot of people have it already
and it's widely available and most people
know how to use it. But you're going to want to know how to
set up the margins. So you'll need to know
this information here. And then it actually has. And I've used these guides
before and they are thorough, detailed, but you need
to follow them through. They're not difficult,
but they are detailed. How these are step-by-step
guide as to adzes, formatting using Microsoft
Word or Pages for Mac. Now, you follow those steps. Then when it comes
time to publish, we are guaranteed that
your manuscript is going to upload it straight away
and not have any issues. If you just decide to open
up Microsoft Word and start typing and not pay any
heed to the margins. When you upload it. It will not be accepted
because it's the wrong, probably the wrong size and
the margins will be wrong. And I'll probably be all, all different types
of reasons why it will be rejected by Amazon. Because if you think when I
open up Word, at least to me, it to a standard A4 size piece of paper or letter
size piece of paper. That's not really,
that's not likely to be the size of the
book that you want. So this is your
first port of call, deciding the trim size. Remember that actual
physical size of the book. Deciding whether you want
a book with bleed or not, because that will affect the
manuscripts size as well. Again, if it's just
a book with texts, you probably don't need
to worry about it. If it's a book that has even
one image in one image, then you will need to make that decision as to
whether you want bleed or not because that will affect the manuscript size. And then when it comes
to actually formatting the inside of you want to use something like a Microsoft Word. Then go through the
step-by-step guide so that you get your documents
set up the right way. The first time. You get the margins set up the
right way, the first time. When you do the
uploading process, you're not going to get
email back from kVp saying, sorry, can publish your
book because this is wrong, this is wrong, that is wrong. That's really not what you want. So this is a little
bit of hard work you need to do and a bit of
self-education you need to do. Again, the link, I will put
the link to this article. But if you just search for k, d p trim size, maybe they
changed the link. I don't know. But if you Google
for kVp trim size, you will hopefully get
to that help article. And it is full of
useful information. And it's probably the most important information
you're going to need to know before embarking
on your book.
7. Creating a text-only book: Alright, let's get into how
I would go about creating the manuscript for
different types of book. Now the first one I'll
go through in this video is your standard text only book. So regardless of whether
it's fiction or nonfiction, only text on the
inside, no images. Paperback or hardcover makes no difference to how you
create the manuscript. Now, this book is
probably the most flexible in terms
of how you start. I'd mentioned in the
previous video that I want you to decide on trim size, bleed or no bleed and margins. Now, I do stand by that. Having said that, if you've
already written a book in Microsoft Word and you didn't know about picking
trim size or bleed, no bleed or margins. Well, the good news is that
if it's a text only book, Lead doesn't matter
because you're not bleed only comes into it when there's
images in the book. Remember, margins. There's an easy way to fix that. And then trim size as an easy
way to fix that as well. When it comes to different types of creating different
types of manuscript, this is probably
the easiest kind of manuscript to create. Now you can do it in Word, open up a Word document pages. For Mac. You could use OpenOffice. You could even use
something like a rich text editor or Google
Docs if you want to do that. So Google Docs I mentioned because that's completely free, although OpenOffice, I
believe is free as well. And honestly, you
can just get in there and just start typing. And I say that for one reason, when it comes to
uploading are created, when it comes to turning
your manuscript into a format that kindle
can understand. There is a tool
that they've come up with called Kindle create. But if you click on that, you can download Kindle
create for free. You don't have to pay for it. And you can see download
for PC, download for Mac. And I can actually open up my copy of kindled
credit for you here. What Kindle create
allows you to do. In fact, pretty much
what it's designed for is to take that
Word document that you've created or that rich
text document, you import it. And it does all the
formatting for you. So if you can see here, this is actually a book
that I just typed. I didn't end up publishing
this book and there's some adult language in here,
so forgive me for that. But I just typed it up in Word. I didn't set up my margins
are my trim size First, I just typed it in Word, then I imported it
into kindle create. And all you need to do is
for your different chapters, you apply what's called
and you can find this, how to do this in the
Kindle, create help. But basically all you
need to do is apply the heading style to
your chapter headings. And then Kindle
credit will import your document and it
identifies for you, if you have a look on the left, it automatically identifies the different chapters for you. Because again, forgive me
for the adult language. But the use of the
heading style, the heading paragraph
style inward. And even if you don't, kinda credit is pretty
good at working out where your chapters
begin or end. Once you've imported it into to create important
your document, your Word document, or you're
rich text format document. Obviously, I hope that you've spell checked it, et cetera. And the first thing
I'll get you to do is make sure that
all the chapters that can degrade has detected are actually the
chapters that you want. Then you can export this file and you can just
simply upload it into Kindle, which is very, very simple. So you don't need to worry
about the formatting. You don't need to
worry about bleed. You don't need to worry about margins or anything like that. You are going to
be able to Take, take your word document
imported into kinda create, make sure the chapters are
correct, then export it, and then upload that
file that you exported directly into kindle, into ADP. And your book's done, you
need to create the cover, but the book's done
without you needing to worry about any
sort of formatting, fancy formatting margins, etc. It's all done. That is extraordinarily
simple and very, very quick. Big benefit as well
is that you can take that same file that
you expect from kindle create and use that
to create your e-book. So you can from one, from that one file
on your computer, create both the
paperback version, the e-book version,
which are super nifty. So you can give your
customers the option whether they want to buy the
paperback, the real thing. So something like this. Or whether they
want to purchase it on their Kindle or
the Kindle app. Now, the formatting
and if your book has, I know I said textile, we're talking about texts,
any manuscripts here. But just so you know, as
soon as you start bringing in charts or images, then kinda create is
a bit harder to use. You may then want to use your word document or your Microsoft Word,
beg your pardon. Your pages, apps. Obviously this is
Microsoft Word. This is the outline
of the course that we're going through
at the moment. If you decide to
go through this, if you decide to
use Microsoft Word, yes, you will have
more flexibility. In terms of now, I used Microsoft Word
to create this book. And I probably would use
Microsoft Word again only because this book
did have images in it, some images in it. I wouldn't describe
it as image heavy, but it had images in it. If you do decide to create your manuscript in
Microsoft Word, however, you will need to go through that kVp help article I told you about in
the previous video. Set up your trim size, setup the blade, and
set up the margins. Now you can do that after
you've written the book, but it's probably
better that you do. Before you write the book. You will need to
make sure you set up that document correctly before you can upload
it to the kVp platform. So you really have two options
when it comes to creating the manuscript for
a text heavy book, such as this, you
can just go crazy, type it up in Word, type it up in pages, OpenOffice or Google Docs. And important into kindle
create and let Kindle create, do all the heavy
lifting for you. Bonus, you easily create your
e-book from the same file. If you really want to have fine control over
the formatting, or you have some images
or charts in your book, then you're probably
going to have to use a Microsoft Word or
something similar to that. And you will have to
watch that KTB read that KTB articles
that I referenced in the previous video and set
up your document properly. So margins, paper size,
things like that. Otherwise, when you
go to upload it, it will not be formatted correctly and it
will be rejected. So when it comes to a text heavy or
predominantly textbook, I think you've got two options. One, they can do create, simplest, simplest thing to do. You don't have many
options in terms of formatting, but you
probably don't need it. If option to use a word
processor like Microsoft Word, it will give you
more flexibility in terms of fine tuning things, but it is more finicky
and you'll need to pay more attention to setting
up things like trim size, paper size, margins, etc. So those are your
two main options for creating the manuscript. For a book like this.
8. Creating a photo-focussed book: When it comes to
creating a book that has much more
emphasis on photos. Beg your pardon. So something that
looks like this. Yes, there is text, but this is an 8.5
by 11 inch book. There are large photos. They need to be high-quality. You need to have the ability to really edit but
manipulate those photos. Although being able
to edit those photos is super important for
book like this as well. Then Microsoft Word is
not going to cut it. A word processes is
not going to cut it and Kindle, create, forget it. What I've used to create the software I've used to
create books like this in the past is Adobe
InDesign or Adobe InDesign. And I will show your
screen shared here now, Adobe or the Adobe Creative
Suite is by no means free. I believe I'm paying $50 or $55 Australian per
month to use it. But I was initially
hesitant about using a book using software
such as this because I thought it was
gonna be super complicated. And I didn't want to have to learn how to use
another piece of software because I had some bad experiences with
Adobe products in the past, with Photoshop and
then with Premier Pro, although I do a lot
of video editing, so I know my way
around that last one. But this software,
Adobe InDesign, is really custom built to
create books such as this, where you do have large images, you need to have fine control over where those images
are going to be. Are they sufficient
quality enough? And then you're going
to want some tools that help you with the amount of texts that you're
going to have n. So for example, one
very nifty feature in InDesign is that you can
allocate an area here for text. But there's no guarantee
that your text is going to fit perfectly
into this text-box. So it allows you to create the reflow text boxes
where if the texts, if this textbox is not big enough to contain
all the texts, then you can link this
textbox to another textbox, and it continues on with
the rest of the text here. So you can see here, maybe you can't because
it's a bit small. Forgive me. I'll try and blow it up for you. But you can see here, I really love to bring the
best out of other people. And that's what pageant queens. And then it's finished there. And then in the next text box
because it's flowed on do. So that's what, that's
what pageant queens do. Now you might go, Adrian,
what's the big deal? I could just do that in any
other piece of software. Well, let's say I wanted to take this text and I
didn't like the font. I wanted to make
it a bit bigger, a bit smaller, or just a
different type of font. Suddenly, this finely tuned textbox that you
might have created, it doesn't fit the
text properly. Then you might have
the text might be cut off or it might
be way too small, whereas in InDesign, it
will automatically adjust, so it goes smaller. Then there'll be
less texts in the follow-up textbox, for example, or if it's only bigger, I can show you this, not that I probably
want to do this. So I got to remember
not to save this, but let's say I go into here
and I make this text bigger. Let's make a 12th. 12 is now less texts
that can be fit in here, but it flows into here. Now, Adobe InDesign, it is
only a piece of software that I would be using to create photo heavy
books such as this, such as coffee table
books, where yes, you want large quality photos, but you also have some texts. Maybe it's for designing a pageant program or a
concert program book. Or maybe it's designing
a coffee table book, which is my current
projects such as this. I understand that you
do have to pay for it and understand that
there is going to be a fairly steep learning curve. If you're someone who's not
particularly tech-savvy, then It's not that I wouldn't
recommend Adobe InDesign, but what I would say is
that the type of book, if you're trying to create
a coffee table book or books such as this, and you have the
limited tech skills. This may not be the best or the easiest type of
book for you to create, at least for your first book. So you might then want to outsource a design
to someone else. Obviously that's going to cost. But when it comes to
this type of book, I would recommend Adobe
InDesign or any type of software that allows you to do some of the functions
that I just showed you here. So reflow texts. It allows you to fine
tune control the images, make sure the images
are the correct size. Even do simple things
such as actually looking at your book as it's
going to appear as a book, that's not always an option. So if your goal is
going to be create something that looks like this, then you're probably
going to need a more advanced piece of
software, such as InDesign. That piece of software is going
to cost more than likely. Your alternative is
to outsource it. And then obviously you have to probably pay someone for that. But for this sort of book, I'd recommend Adobe InDesign.
9. Creating a low or no-content book: Now when it comes to
creating children's book or low content, bulk or no content
books such as this. This is my favorite
pastime by the way, because it's so quick to
create books like this. And I think it's a
really, really cool, unique gift to be
able to give someone. But whether you want to
create a unique gift, whether it's about
creating a coloring book, such as this, or whether it's about creating
a genuine children's book, not a joke children's book
for your adult friend, but a genuine children's book. Then the piece of
software that I'm going to recommend is Canva. Now I will bring them Canva
up on your screen here. This is the exact menu script or my joke children's book for
my friend over an island. Chloe, The Girl from dairy. Now, canva. The big benefit about
Canva, there's twofold. Number one, it's an image, well, to Creative Suite where you play
around with images. And it is super powerful, yet easy to use retail, that's a jackpot you want. So number one, you can create
amazing things very easily. In Canva, you can
create websites, images, social
media, even videos. Now, that's number one. Number Two, benefit of using Canva is believe it
or not, it's free. Now there is a paid
version of it, but you probably don't
need the paid version. The paid version has access to a few more templates,
which is kinda cool. A few more stock images, which certainly is some of
the images I've used in here, or the premium ones. But you could find free ones. That's fine. So when I say free ones,
for example, elements, if I go into here,
let's look up lion. And let's just say
I go to graphics. This image here and this
image here with the crowns. Those are the premium you need to pay Canva in
order to use them. But all these ones here, 12345678, I mean,
they're all free to use. So you don't need to
pay to use Canva. It's super powerful, super
easy to use, and it's free. Now, this is, as I said, the exact manuscripts that are used to create Chloe's book. This is the one that
I uploaded to Amazon. It got approved. And you can see how
it looks in Canva. But just to give you a
super quick idea as to how simple it is to
create this book, a children's book in Canvas. If you go to create a design and you put them custom size. And you can see 8.5 by 8.5 inch because these books
were 8.5 by 8.5 inch. Click on that. And now I have my first
page and then I can add pages or duplicate pages. But what I need to do
is go to elements. And let's say, let's stick
with the lion motif. And let sound creating a
children's book about Align. Click on this.
Voila. It's there. It even has these margins
built-in so you don't put the image too close
to the edges of the page when I think
about bleed or no bleed, this book wouldn't have bleed. So I don't want my images to
go too close to the edges, otherwise Amazon
won't approve that. And then on my next page, I could put some text. So I go here and just
add a heading and go. This is the story of
a lion named Leo. What's not be very imaginative. Now, I'll shrink this so it's back within
that purple box. You can see popping up there. So it's not too
close to the edges. That text is not very
Children's Fund, is it? So let me go pick this can be picked up
more or kids font. Let us pick, I think I've
used this one before. Brush. Oops, let me
get rid of that. Let me hit brushes in here. Oh, here we go. Here's brushes. So that is how easy it
is to start creating a manuscript for
children's book in Canva. Obviously you just
add more pages. You can add more images, you can add more text. You can play around
with different fonts. So maybe I don't
like the brush or font for my coloring in bulk, I use this blueberry
outline font. You can make the font
bigger if you want to. Make sure it's still
within those margins. And when it comes
to text, while, so when it comes to images, you can add more than
one image if you want. The benefit of being on
Canva is that, you know, all these images you're
actually allowed to use. You don't have to worry about
copyright because on Canva, That's part of the benefit
of working on the platform. So you can put more
than one image there. And look really
Bob's your uncle. Here's one that's
only for the pro, but I have the Pro can I
do actually pay for Canva? That's how useful I'll find it. I don't pay for a lot
of different software, but I love Canva. So if you want to invest in one piece of software
to just Canada, particularly if you want to
produce this book Canvas, you can create things like this. Very, very simply. Children's book, coloring books. I will say if you want to create and remember Canva
is free and super powerful, you can use it for things
other than creating books, such as your social media. But if you're wanting to create
genuine no content books such as journals,
training journals. I know some people have produced number tracing books or handwriting tracing
books for kids to learn. There are some other
pieces of software there might be a bit better to use. I wouldn't say they can do the number of things
that Canvas can do. Such things as book, bolt or creative fabrics. They're more tailored and I'll put the links to those
pieces of software below. There, more tailored to creating no content or low content books. In Canva, you
definitely can do it, but Canva is more an
overall graphics platform. It's a super powerful, super easy to use
platform, and I love it. And I can create, as I said, I can create a book such
as this within an hour. I created this book within
about an hour as well. And the coloring book, I think
it was even, even shorter. So I love these books, like I have a lot of
fun creating them and you can create unique
gifts, as I've said. And the Canvas software is free. So if I was going to recommend one piece of software for
your low content books are no content books
will be Canva if you really want to do things
such as journals, things like that, where it's a genuine no content buckets, maybe just lines or boxes or journal prompts,
things like that. Then maybe have a look
at creative fabric of book bolt because
those are the two ones that I see everyone
in that space using.
10. Creating a cover with the KDP cover creator: Let's talk about book covers. Now. They're gonna be
two options here that I will recommend for you. The first one is
completely free. In fact, they're both
completely free. The first one is the
k d p cover creator. Now I will share my
screen with you. This is one that pops up
during the uploading process. So when you begin the
uploading process for book, it will ask you to
upload your manuscript, which we've just created, just covered in the previous videos. Then it will ask you
to upload your cover. When it does that, it gives you the
option to create a cover using Kindles
cover creator. Now, you can produce a relatively okay looking cover with Kindles cover creator. And I say this because I
literally published this book for the sole purposes of testing out really Kindles
cover created. Actually, I also
use it to test out whether Kindle create
that app that I recommend for creating text
heavy books to make sure that the book inside worked well and you can see
it worked really well. Then I wanted to use Kindles cover creator to
create the cover. Now, again, forgive the adult language when I created this
book and it arrived, so I publish it just
shifted to myself. I looked at it when that cover. Yeah, it works. But it doesn't look
great as opposed to maybe let's say a cover
that looks like this. My cover that hit
number one on Amazon. But you know what? The more I look at it. I mean, this book
kind of stands out. It's very basic. But almost because it's basic, it really, really stands out. So I might almost now, having looked at it
for a long time, prefer this sort
of cover design, this sort of cover design. But let me break it
down to you this way. The Kindle cover creator. So the one that you will
be prompted if you want to use it during the
actual uploading process. This is not something
you can skip two, so I can send you the
link for this one. But if you decide
you want to use it, you do get some templates
over here, choose Design. And it comes pre-loaded
with some texts based on, again, when you begin the
uploading process, for example, you put the book title
in the subtitle, the author name, and kindle
the cover creditor will pre-load some of
that information onto some of its templates here, template design,
and then you just pick whichever one you want. And then you can make
some edits to it. So I pick the template
and again an auto filled. So an auto filled
the tidal wind from the title information I put in during the uploading process. It got my name, he got the subtitle, and it got this from
somewhere else as well. I might have actually
just type this in. You can put photos
in there so it looks basic, but it works. So if you want something
that's super basic and you're happy with the
way these templates look. Then use the cupboard credo
Kindle cover creator. Again, I can't send you the link for it because it's part of your pop across it during
the uploading process. And when I do the walk-through of the uploading
process with you, you will see very clearly where the Kindle cover crater is not really hidden,
but where it is.
11. Creating a cover with Canva: If you want a bit more creative
control or you don't like those templates because I kinda recover credit just
looks a bit arcade to me. Then I'm going to
recommend Canva, our friend Canva, or again, to create your cover. Now let me share my screen. This again, I keep using
Chloe's book as the demo. This is the cover, the exact cover
that I uploaded to kindle for this book
here on the right. On the right is the front cover. And on the back, on the left is the back cover,
as you can see here, front cover, back cover, front cover on the right,
back cover on the left. Now the only thing that you
need to be cognizant of when you're doing your
creating your cover. And I mentioned this
now because when you do it on the Kindle
cover credit, it takes care of all
the sizing for you. When you create your
cover on Canvas, you will have no idea what
cover size you want to create. You may know that it's an 8.5 by 8.5 inch book, for example. But you don't know
exactly the image size you need to create. And if it's off by even
one or two millimeters, kVp will not approve it. So what I recommend you
do is go to something called the K D P
cover calculator. Put the link below because
this is one that you can link to indicate ADP
cover calculator. It will ask you to put in all the information hopefully
that you already know. So I'll be talking about
hardcover or paper back. Let me fill this out. So interior type,
black and white, premium color or standard color? We'll go with well, for Chloe's book, it was
premium color paper type. Well, there's only one
option, so we'll go with white page turn direction
was left to right. We're not going backwards. Measurement units. We'll do it in inches
for this example. The interior trim size
was 8.5 by 8.5 inch. Now, you'll note
that in this course, I got you to do
the manuscript to, I covered how to create
your manuscript first. And there's one reason for that. And it's when you get
to this stage here. And it asks you for
the page count. Now obviously you
can't put page count in if you haven't
done your manuscript or if you've done
your manuscript and you haven't
formatted correctly, because if your manuscript
you've done it in Microsoft Word and it's on
A4 size pieces of paper. You might think, oh,
that's 20 pages. But then when you go, oh, well
actually the trim size is six by nine inch
and I'm going to use this font and
this size font. You then go, Oh crap, it's actually a 100 pages. So that's why you need your
manuscript and you need your formatted manuscript before you can actually use
this cover calculator. But for Chloe's book
it was 24 pages. Now when you hit
calculate dimensions, it will go away and give you
the dimensions and look, you can use this. And if you know your
way around Photoshop, then you can use this. What I suggest however, is that you download the
template and it will download the template as a PDF or
actually know as a zip file. You hit Download Template. You'll get the zip file here. You open it up and
you extract it. Now I want to extract
this one because I already have my PDF extracted, but I want you to get a hold
of this file right here, the PDF version of the P&G, we could use a PNG, I
guess if you wanted. But the PDF, you're
now going to get that PDF go to canva and you're going to
import it into Canvas. So the way it goes
is you'll go to the top, create a design. To get all this. You'll go to import file. You hit Import File
and find that PDF. Yeah, right there. So paper bag, you can see
8.5 by 8.5 underscore 30 because in this case it
was a 30 page book premium white NUS dot pdf. You import that file, and then you get to
this page right here. Now there's a whole
lot of information here that you don't really need. But it's very useful for graphically shows you where
you need to put stuff. So remember front cover as it
says here is on the right, back cover is on the left. You can delete all this
stuff because you certainly don't want to print this stuff
on your actual book cover. But it explains
what each part is. You'll remember that
I told you that bleed that regardless of whether your book manuscript
as bleed or not, covers always have bleed. So all that means is
that your images will go all the way up to the pink. But then Amazon's machines
are going to come along and chop it off
somewhere within, somewhere within that
solid black line. You can see here black solid
line equals trim size. This is where your
book will be cut to produce the final trim size. It's not an exact science. Those so anywhere
within the pink, that is where Amazon
might cut your book off. That's another fancy way of saying anything that
you really need. Printed on your cover. Put it within the white. Okay. So you can read through this and I do encourage you to read through it and understand it. But in Canva or you need to do, once you've understood this, you can start dragging
things onto here. I'd probably say get rid of
the texts first once you've read it because we don't want
to print that on our cover. So we can start dragging
things onto it, right? We can drag text onto
it at a hitting Leo. The brave line, right? We use our font. Let's say we go
with Prussia font. That's a bit small. Let's make it 70 to
play around with it. Leo, the brave line. You'd want to put your
author named, et cetera. But you can see the process here and you keep
playing around with it until you get to something
that looks like this. So you can see
here, this is how I created my children's
coloring book. You can see the remnants of the template in the background
with that pink outline. Obviously, I've gotten rid
of all this text here, like remove this template
layer from final artwork. If you want to know how, you want to know
how I removed it, you just click on it
and then hit Delete. It's super simple. But you drag your stuff onto the template so you don't need to worry
about the measurement. It's been calculated for you. You make sure that
you don't have stuff that's going
into the pink, anything that you really, so
for example, if I did this, then I have no guarantee that the top of this girl's crown would
actually be printed. It might cut it off
right here along the white line because
remember it could be cut off anywhere in the pink. So it might end up
cutting the top of a crown off,
which is not great. Even there. It might cut the
top of a crown off because there might be
cut anywhere in the pink. So if I really want
that image shown in its entirety that I need
to drag it into the Y. But you put your text, you put your author's name. Very usefully. The template will show you where the bar code for your book
is going to be printed. And we'll see this more
in the uploading process. But every book that's printed
on Amazon has a bar code. Any image that you
put there might be covered up by the barcode,
which is not ideal. So this just shows you, Hey, this is where the
barcode is going to be. Anything you put there
will be printed over. So you'd want to just
be mindful of that. So that's really useful there. That front cover on the right, back cover on the left. When it comes time to actually upload this or export this, then you'll want to
get rid of everything except your actual images. So it will look
something like this. No more pink, no
more solid lines, no more dotted lines. Even got rid of the bar code, space holder or placeholder. That's important because if
I uploaded this as my cover, when I printed my actual cover, when I purchase a book, it's going to come with
these pink bars around the outside and this giant
yellow rectangle on the back. So make sure you get rid of all the templates stuff when it comes time to export
your actual cover. But you could probably
guess from this. If I was just told
that these were the actual dimensions of the cover and to
create something. Well, I don't really know
where the front cover begins and the back cover begins
with the spine of the book. How close to the edges
can I put the images, whereas a bar code going
to appear, all that stuff. So for creating your cover, I recommend Canva and you can
create a much bigger cover. You can go in there, use a cover calculator and credit
an 8.5 by 11 inch cover. And you go through
the exact same steps. So yes, the ending image
would be different. But as I said all the
way at the beginning of this course,
creating the cover. You can create any size
cover you want in Canva. So you go to the kVp
cover calculator, put in the specifications
of your book, download the template,
import the template, the PDF into Canva, and then use that template to guide you in
creating your cover. Once you have all
your cover setup, then just remove all
the template material and then you're going
to export that. Katy likes a PDF file. So when it comes time
to export your file, then importantly, camera
allows you to do that. So you click Share. This is actually
changed a little bit since last time I used it. Download. And you would just, I mean, here, choose PDF print. Now I have two pages.
The first one still had the templates of material on
it, so I don't want that. I just need page two. I click Page two. They'd done download
and Canva will go away and export that to somewhere where a place
of your choosing. And export that as a PDF file. When it comes to the
uploading process with Katie p. And it asks
you for your cover file, your PDF file, or you
have to do is locate that file uploaded to
Canvas and you'll be done. So those are the two ways that I would suggest for
creating a cover. Either use the built-in
KTB cover calculator, which again, I can't endure, linked to KTB cover creator that you'll come across during the uploading process
and the next video, I'll give you that walk-through so you'll see
exactly where it is. Use that KTB cupboard
crater or use Canva. Canva is three super powerful, got lots of good templates, lots of cool images. If you want to create
something more advanced, you could use something
like Adobe Photoshop or a more advanced
graphics package. I'm by no means an
expert with that. So you will have
to pay for that. The other option is you
can pay people to create your book covers
for you as well. But I think you can
get pretty far with either the free KT P
cover creator or Canva. And now I'll take you through a walk-through
as to how to actually upload or publish your
book on the KDE platform.
12. Uploading/publishing a physical book to KDP: Alright, so the process
of actually uploading or publishing your book
to the KDE platform. Now, whether you're
publishing a physical book, so a paperback or hardcover
or an e-book, kVp, breaks it into three
pages or phases, and you'll see this in a
second because I'm going to share my screen and upload a dummy book or a
pretend book with you. The three phases are Detail. Number one. Number two is content. Number three is
rights and pricing. So those are the three phases. And then once you upload it, you hit Publish and then you
gotta wait for KTB approval. That's just a fancy
way of saying that manuscript and the
cover that you uploaded, did you do it all
correctly or not? So when you are ready, so you've got your manuscript and you've got your
cover ready to go. You go to k d p.amazon.com. Now, this is my kVp.amazon.com. And for the purposes of what
we're demonstrating here, let's go with paperback. So let's zoom through
this language. Whichever language you want, book title or offload
Chloe's book again. So we'll put in Chloe, The Girl from dairy. This one didn't have a subtitle, so I don't need
to put anyone in. It wasn't part of a series
or addition number. You could fill those
out if you want. Obviously, I'll put my name in. Contributors. There weren't any. If you had an illustrator or
something like that, this is where you can
put them in description. For me, the goal of
this book was simply to publish one copy or two copies. Want to center myself
so I could show you and the other one too
obviously sent to Chloe. I'm not thinking about selling this book to
the general public. So the description, you
need to put one in. I just put this
something like this is a story about a lovely
girl named Chloe. For me, that was enough. But if your goal was
to be a bestseller, When I asked you what
your goal with a book is, you will need to give
some thought as to what description would best fit what someone is
searching for left is that, let's say as an example,
or what gives your book, what description
would give you a book the best chance of being found? That also applies
by the weight of the title and the subtitle
which I just gloss pass. That is more important
if you want your book to be found by the
general public. So what I might suggest that
you go through this video, see all the different
information that you're going to
need to fill out. And then if you really want
your book to be a bestseller, maybe give some thought
to it before you start the uploading
process because it's a bit late to be trying to
figure it out on the fly and not too late but on the fly. You might not be able to
give it the thought that it deserves if you want
it to be a bestseller. But for me, for this book, I'm only expecting
to sell two copies. So that description right, there will be just fine
publishing rights. I own the copyright. This is one of the
reasons why use Canva because I know all the
images in there I can use. If you're publishing
a public domain work, that's not something
we've covered, then you would hit that here. Keywords. Now it says optional
because once again, I'm not intending on selling
any copies of this book. I'm going to leave that blank. If you are intending on selling a bestseller or selling it at least to the
general public. You'll want to put keywords in. This is not an exact science. Different people say
different things. I would suggest if your
book is about real estate, real estate in there. If you're trying to sell our
children's coloring book, put children's coloring
book in there. So you can have up
to seven key words. But give some thought to this. If you want your book to be discoverable by
members of the public, categories, choose up to,
to browse categories. You'll need to
choose at least one. Here, the different categories. Now, again, because I'm just
sending this book to Chloe. I think I just put comics
and graphic novels and just put gentle and I'd
be done. That's fine. If you are intending
to be a bestseller, The wisdom is you
want to try and pick categories that are
applicable to your book, but aren't super competitive. That way you give your book the best chance
of hitting number one in that sub category
or that niche or niche. And then you increase the
chances of Amazon promoting your book for you in
the suggested results. So there are a lot of
different categories here. But for example, if you go into nonfiction and let's say
you go into business, I would say the
general business and economics niche is going
to be super competitive. So you probably don't
want to pick that one. You might, maybe it's
about bookkeeping, that it probably be a bit
less competitive and gifts. But again, it's not
an exact science. Pick. You need to pick at
least one category. You can pick up the two. And your book will
rank differently or separately in
those two categories. Again, because if this was
just a gift for Chloe, the categories really were
immaterial for my purposes. Adult content. Now, for Chloe's book, it happened too, yes. So I'm gonna hit yes. If your book doesn't
have adult content, then hit, Save and Continue. So that was the
paperback details. Now we're going onto
paperback content. Remember there are
three phases here. Isbn is a unique
identifier for your book. You can buy them yourself. They do cost money but might
as well get a free one. Hit. Assigned me a freak ADP ISBN. There it is. Publication date,
I leave it blank, which means it will
default to today's date. If for some reason you wanted to put the date in the past, you could do that as well. Print options. Well, what did you
choose back all the way in the trim size and
what type of book. Right. So I chose premium
color interior. The trim size, it
wasn't six by nine. It was 8.5 by 8.5. It is bleed settings. Me there was no bleed. Paperback cover finish. This is a glossy cover. You can see it's shiny. If you publish and met cover. It's not shiny. I like the shiny cover
for children's book. I will say that if people are
going to take photos with your book and it's in front
of flash photography, then this will just blind the photographer and you
won't see the book details. So mad cover, the only
thing I can really think of is it's better for
flash photography. Otherwise, I really think it's a matter of subjective choice. I will choose glossy. It's a children's book. There we go. Glossy is the part
you've been waiting for. Manuscript. Upload your paper
back manuscripts. So if you created it in Word and you format it that
correctly fingers crossed, then this is where
you'd upload it. As you can see here, you can upload a doc, doc X HTML, TF. You can also upload the special Kindle create format
there as well. But you go to upload your paper back manuscripts, I hit this. I will find Chloe's
book, which is here, and I manuscript dot PDF, double-click that.
Does the uploading. Now, I think it goes without saying the bigger
the manuscript, the longer will take
to upload or to depends on your Internet speed. But that should be uploaded. Now, it will normally
say uploaded. Okay. There it is. I don't know why I wasn't
saying I uploaded before, but manuscript has been
uploaded successfully. We move on. If you want to use the
Kindle cover creator, the one that is a
bit more basic, but hey, it works. Then you'd hit Launch
cover creator and you'd be routed straight
into the cover creator. I'm not going to use
that because I created my cover in that
print ready PDF. So I will upload my cover file. There's my cover, cover dot
PDF, double-click that, does its thing again, uploads and now that's done as well. It should say cover
uploaded successfully. I'm not sure why
it's not coming up, but we'll check other it is
cover uploaded successfully. Now, did my Does my
cover include a barcode? No, I didn't put the bar
code on there myself. I left a space for it, but I didn't put one there, so I leave that blank. Now here's where you go
through the preview. So book preview, we're going to check that our
book actually looks right. So hit Launch preview. Now, it may take some
time depending on how big your manuscript and the cover
that you just uploaded is. So you may need to
give it a few minutes. When I did my 800 page tome, I think it took about five
or so minutes at least for this preparing
your files and to finish and for the
preview to load up. But go away like a coffee,
whatever you need to do, and then come back when it
loads up. And here it is. So now just before you start worrying
about the dotted lines, these are just the guides. So if I click guys, they're
not gonna be printed, but it's useful to see
where the margins are. So that's the cover,
ron cover on the right, back cover on the left. And then you can go
through this page by page and just make sure that the text there's no
spelling mistakes. Make sure it's within
the gray line. That's where the margins are. Make sure the images are within the gray lines so you can go through the whole
thing like this. Or rather than the
two-page view. What's neat is that you can
hit the thumbnail view. You can see the book as
it would actually appear, as it's gonna be printed with
odd pages and even pages. So page spreads. So page on
the left, page on the right. I've checked obviously before
I published Chloe's book, I checked to make
sure it's all okay. So I know this is all okay. I can hit Approve. But if this is the first
time you're uploading, it really makes sure that
everything looks right, that there are no
spelling mistakes, that everything's
within the margins. Because if you submit
it and it's wrong, then kVp will flag it and you'll need to go through
this process again. Better to take a little bit
more time here and get it right then glossy fruit and have to go through
the whole process again. But suffice to say, when you've done your checking, it approved the
bottom-right corner. And we'll scroll back down. It will now tell you
based on the choices you made with your ink
and paper type, et cetera, how many pages
you're printing cost. This is not your list cost. This is not what the
public will pay. This is how much
you're going to pay in the different Amazon
countries for the printing. $3.60-five us for Amazon.com. As an example, versus $5.5 Australian fires
here in Australia, but we'll hit Save and Continue. Okay, final phase, we're
almost at the paperback, the rights and the pricing page. Territories. Select
the territory for which you hold
distribution rights. I just leave it as all. If you wanted to individual for some reason you
can do that there. I'll leave it as all. Choose location where you expect the majority
of your books at us. Now to be honest, I think
the only function of this is to decide which price comes up
at the top down here. So if I leave it as Amazon.com, which is the American store, then the top line here
is in US dollars. Now you can see
minimum, maximum. So I need to enter our price
somewhere within there. So let me put $9.90
in us than I tab. Then what Amazon does, which is actually really cool, is it figures are
roughly equivalent price in the other countries. So one US dollar being more
than one Australian dollar. You can see here, if I charge
roughly ten US dollars, Amazon and suggesting to charge $14 roughly in Australian. If I chose, if I change this
to be Amazon.com today, you then at the top is the Australian dollar price with different mean
and different max. So let's say I put in here 1999. Give it a second. Then Amazon will calculate rough price is based on
the Australian price. I don't really think this
makes any difference. It's not like if I
put in Amazon.com, people in Australia
can't buy it. I know that's certainly not
the case because I've done Amazon.com before
and people will necessarily have been
able to buy my book. People in the UK,
people in the EU. I think it's really
just what ends up being this price up here that Amazon will base
everything else on. Having said that,
you can choose and set all of these
prices individually. So if you wanted it to be
£7.99 rather than £7.66, you can put that in there. And that by the way, because it's not the
primary marketplace up top, it won't affect all
the rest down here. So you can go down
here and go, oh, I want it to be
99999099999999999. Neural. I want it
to be 1199 yen, $12.99 Canadian 1399,
Australian, €999. So you can see that's
how that works. So it's just a top-line. Amazon likes to calculate a rough equivalency for you
and that's a neat feature. On the right, you
will see numbers. This is money. So you're printing cost,
amazon royalty rate. So 60 per cent of the list
price that you've put in here, then the royalty that
you actually get is the 60% minus the printing cost. If you wanted to use
expanded distribution, which is Amazon, might promote your book into other channels or
other bookstores. You can take that. For that you pay in the
form of reduced royalties. So if you enroll your book
into expanded distribution, you only get 40% royalty. So you can see that your
royalty is decreased. Obviously, whether you want to do that or not, It's
completely up to you. I don't. I'm happy to just
sell on Amazon. So that's how the pricing works. Once you're happy with that. T's and C's, as it says here, that you can take up to 72 hours for your book to be available. I found that the
beginning of 2022, at least in my children's books, it's taking about 24 hours. Having said that,
if your book is bigger or more complicated, it might take longer, but it's up to 72 hours by clicking publish,
blah-blah-blah. Of course, here's where
you actually hit Publish. Now, I would recommend
that you do, do a quick once-over,
especially on your first time, that everything is right
before you hit Publish. Because once you hit publish, the approval process
is going to begin. And then if you change anything, once the approval
process has begun, their approval process has
to begin or over again, which means another
24 to 72 hours. So that yellow button there, I guess should be a red button. You hit Publish and
then Amazon will go away and begin its
approval process. Then after 24 to 72
hours in your inbox, you will get an e-mail from k d, p. It will either say
something like this. Your paperback
book is available, which means, hey, you
pass, it's all good to go. Anyone can buy it. And here's a link to
buy it on Amazon. If there's something
that needs to be changed or fixed or corrected, you'll get an email like this
saying attention needed. The email will tell you
what needs to be fixed. You then need to go
away and fix it, re-upload it if
that's applicable, and then trigger the hit Publish and trigger
the approval process. Again. This is why I said it's better
to take a bit more time, get it right the first time. So you don't get an
e-mail that says, Hey, your manuscript wasn't
formatted correctly, then you need to fix it anyway, trigger the upload
process and then wait another 24 to 72 hours. So it just pushes you back.
13. Uploading/publishing an eBook to KDP: Let me quickly run you through the e-book uploading process because it's almost
exactly the same. So share the screen. We go to Kindle e-book and you'll see much
of this is familiar, so I'm not gonna go
through this again. Put in sample book, title, series, edition number, author, exactly the same. Contributors, exactly
the same if you had an illustrator description, this is a cool
prescription and remember, you need to give this
more thought if you really want your book to be discoverable by the
public, I own the copyright. Keywords exactly the same
as with a physical book. Browse Categories, exactly
the same for this one. I just choose nonfiction and
let's choose, I don't know, health and fitness and general age range,
agent grade range. This is a bit different. You can pick whatever
you want for this, it's optional if
you want to pick a children's book age
range or US grade range, I'm ready to release
my book now. You can make an
e-book available for pre-order up to a year
from the release state. You can read through that and
see if it's right for you. But I'm ready to
release my book now. Hit Save and Continue. Okay, this is a bit different. This is the upload manuscript. Digital rights management. Again, Kindle is good at
explaining what this is. You can choose whether
you want to enable digital rights
management on your book. I tend not to, because I'm not too worried
about people pirating my book because if they do while they're reading
my book anyway, but maybe you want to enable it. But uploading
e-book menu script, you remember what I
told you about Kindle create and that you could upload the same file not
only for your physical book, but also for your e-book, or here's how it works. Here's the KPF far from kindled, create our user to create
the paperback version. By the way, this book right here was created
from that KPF file. So here's working. The credit really is super
cool, saves you a lot of time. I hit that KPF file and it's going to upload
it for my e-book. I don't need to create
two separate files. Do any separate formatting, done, cover, creator, or cover exactly
the same as before. I will say the color for
an e-book is different. So uploading a cover
for an e-book, it requires a different
type of file. It's a JPEG or tiff file, which is a fancy way of saying
it's a basic image file. You don't need to worry. So specifically, if anything, it's easier than
creating the paperback or hardcover image file. If you need the guidelines,
you can click them here. And you can see here
it says format. These two files,
I would say J peg is the more common one. Ideal dimensions recover
files 2560 by 1600. So you could easily
go into Canva, create a new design, make a 2560 pixels high, 1600 pixels wide, and then go nuts and create
whatever file you want exported as a JPEG. Then you'd come back to here, upload your cover file, which for me is here, test cover up like that. Now it's finished
uploading successfully. So manuscript is their
cover is uploaded there. You launched the preview, exactly the same as for
your physical book. And you can see here that it
has launched the preview. It looks a little bit different
because it's an e-book. But you go through
the same process. Make sure in this case, this is not a book
that has images, but you still want to
check the spelling. Make sure the
formatting looks about right Kindle formatting
is a bit different, but just make sure it's good. When it's good. You can also see
what it looks like with different font sizes because on most Kindles you
can change the font size. So play around with it. That's how it looks on a
tablet phone Kindle, eReader. And you've got your
table of contents which has automatically created because you use to
kindle create for this. This is where it's
super, super cool. So you can click on
this and it will take you straight to
the correct chapter, which obviously you
can't do in a paper bag. But once you're done here, go back to the book details, scroll down to the
bottom and we say ISBN. Now it says can do e-books are not required to have an ISBN. So if you wanted to put one in, you can, but you don't have to. I'm not going to I
don't want to make this more complicated
than it has to be. Hit Save and Continue. And then final
page, the pricing. Maximize my royalties with kVp select again, it's optional. If you want to enroll,
you can find out well, you can find out more about
what kVp select is there. Katie p. Select is basically
almost like Netflix. You pay a monthly
subscription and you get to read lots of books. And my understanding
is that you then get paid for how many pages of your book people read
on a Kindle eReader. So because it can track that. So if you wanted
to enroll in that, you can, there is
a caveat there. If you want to enroll
in KTB select, you'd like to make
your Kindle e-book exclusive to Kindle. So read up more about
that if you want. I'm just going to
leave that for now. Um, well, let's hit Enroll. Territory is exactly the same
as with a physical book. I'll leave it as all
primary marketplace. You know how this works. Since I'm from
Australia, I guess I'll put it in Australian. Now, you can select a royalty plan here
which is different. Thirty-five percent. You might ask, well, why would I want to pick 35 per cent? It comes down to
the prices here. If I pick 35 per cent, I can charge anywhere from
$0.99 to 220 Australian. If I want 70% royalties, Kindle, amazon will lock me into a much more fixed price range. So it's up to you. If you're happy to have it
within this price range, obviously, you will
get the 70% royalty, which is more if you need it for some reason
or wanted to charge something different
than you'd have to go with a thirty-five
percent royalty. Kindle charges, delivery fees versus printing fees
for the physical book. It's a lot less than the
printing fees minute, so $0.03. You will see here also
70% royalty plan has delivery fees based on
how on the file size. So how large is a file? 35 per cent royalty does
not charge delivery fees. So this is all very
self-explanatory, even though there's lot
of information here, it's not too complicated
to understand. And you'll see your final
royalty calculated there. If I hit 35 per cent, you'll see that
it updates there. So set your price
is the same way as you would with
a physical book. You can allow Kindle book
lending if you want to. Okay. I believe if you put in
70%, then it's locked. You have to allow. So that's just a
little detail there. This will look familiar. It can take up to 72 hours, but once you are ready and you've double-checked
it, hit Publish, it will take those same 24 to 72 hours to either be approved
or come back and say, Hey, you need to fix this up. Then wanted to proved, then you're good to
go and it will be available to purchase on Amazon.
14. Wrapping it up: Okay, We made it well done. I feel like because
I've recorded this course in one go and my
throat is beginning to hurt. I feel like I've
dumped a whole lot of information on you. So go back, watch the
parts and watch it again. Watch the parts that you
didn't understand again, what your parts that
pertain to you. Again, if I didn't explain something fully enough,
We're still confusing. Then please please feel
free to email me info at Adrian jay Kwan.com and I
will be happy within reason, obviously to help you out. I won't simply take
your manuscript, format it for you, upload it to the cover, all that stuff. But if you have any
particular questions as to, let's say you publish your
first book and it comes back and it needs
a correction and you're not really
sure what that means. I'm happy to help. If you have any questions
or you need advice about what sort of trim size to use or you have a book
idea and you maybe want some suggestions or advice, then I'm happy to give you
give you that advice as well. But suffice to say, I mean, I started this course
pretty much by showing you all the different types
of bolts I have created, especially just within the
last month or two in 2022. So I like to say that everyone
has a book inside them. That's not to say a book inside them, which
would be painful. But I think for everyone, there's at least one book that you could
publish that would be useful to someone somewhere. So I really hope this
course has given you an idea to different types of
books that you can create. Different types of
goals you can create, whether you want to be a
bestseller or as I've done, you just want to create
a one-off unique book has a really cool gift. I really loved this idea by the way, I'm going
to do more of those. But suffice to say, the sky's the limit, you're really only limited by your creativity and
your imagination. So now that you pretty much know the fundamentals of how
to create any book, the different types
of manuscript, the cover, and the
uploading process. Please please please go
away and give it a go. This would be a waste of my time and your time
or mainly your time. If you just watched some code that you never do
anything with it. And I'm continually astounded
by how many people have author on their
bucket list says they have wanting to become a published author on
their bucket list. And the reason it's
on their bucket list is because I think
it's so hard to do. It's up there with things
like jumping out of a plane and climbing
Mount Everest. Sunlight publishing
a book is much easier than either of those two. So I hope this shows you
the different options, how to get it done. You can always educate
yourself more, especially like
with low content, no content books, if you
wanted to educate you. So how to use
Photoshop or InDesign, you can go and do that too. But I hope this gives
you a good grounding. If you have any
questions, as I said, e-mail me info at
Adrian jay Kwan.com, and I'll be happy
to help you out. And all that remains
is for me to wish you best of luck with your
authoring journey. And I hope you drop me an email and let me
know how you went.
 Adrian Kwan, 3x Top-Ten Amazon Self-Published Author