Transcripts
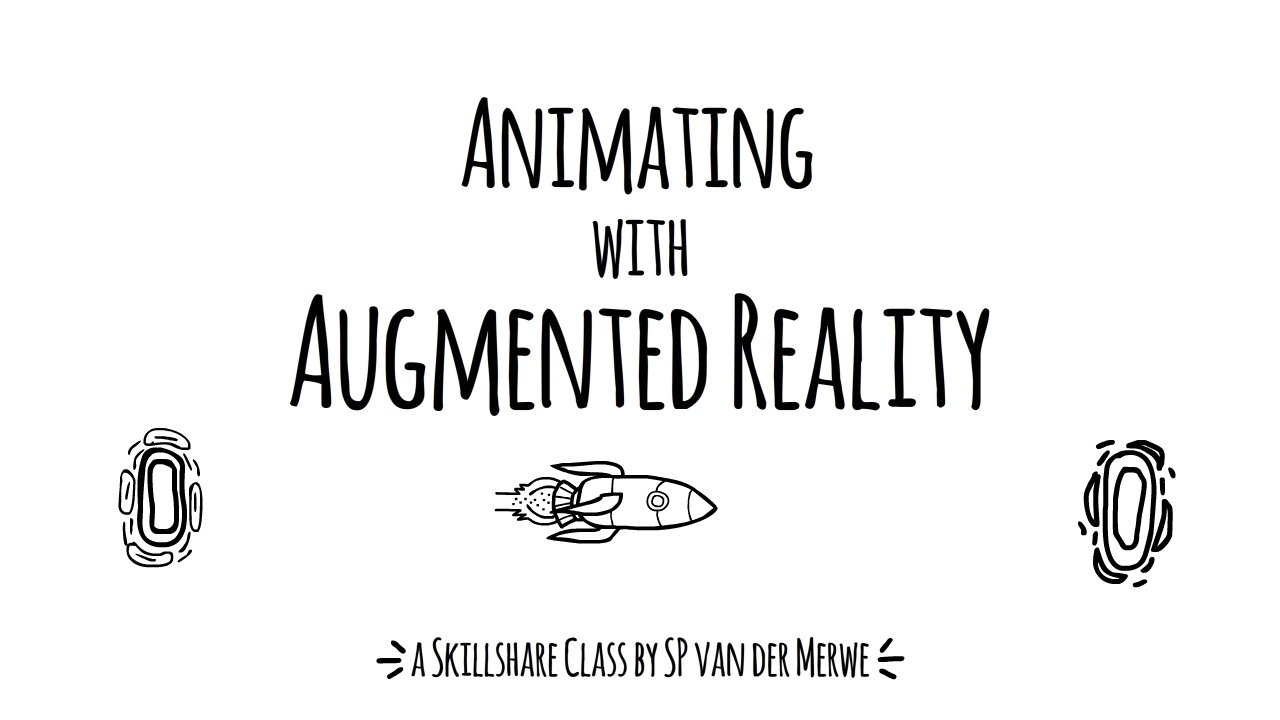
1. Introduction: Welcome to the class, Design and create an
augmented reality experience. Ever wanted to see your
designs come alive? Imagine creating captivating
animations and then transforming them into
interactive experience that you can hold in
your hand and share. In this beginner course, I will teach you
how to do exactly that with no prior augmented
reality experience needed. I'll guide you step by
step through the process. First, we will draw a static poster with
different layers and then we will animate them through the use of
Photoshop timeline. You learn the fundamentals of animation through the
use of this tool. Then I will show you how to
import your creation into Adopt Euro and build an
interactive AR experience. Finally, we will export and
share the AR experience. Have fun and I can't wait
to see your own creations.
2. Choose Between different Formats: Before creating our
Photoshop file, we have to think about the format that we
are going to use. In my case, I want to use this video to be posted in
my social media account, specifically Instagram, because it's the
one I use the most. For that, I have to have already a specific idea of
the format that I'm going to use to help
you in your own projects. I create this image
here that you can access where I explain the formats that you
have at your disposal. You can do it depending on the social media platform
that you want to use. You can do horizontal,
square, vertical, or a vertical that is a
mixture of the last one, mixture of the square
and this vertical here, the one that I'm going
to use for this project, will be a four by five. Below this four by five, you have these numbers
here which are the pixel size to achieve
this format here. Let's do this. I
put this aside now. I will create a new, I can do it here, or I can create immediately
a new file here. Photoshop will open you this new window where you can choose from
different presents. It's easy way to
right away choose a format for the thing
that you are going to use. In my case, I want to
do this project for social media platform to be
shown on mobile or on web. I go to one of these categories. Here I can use Web. I look for a format that's close to the one I going to use. If I don't find specifically the format that
I'm going to use, I can just like choose
one of those here. In the right side, you have
the width and the height. I just need to
change these numbers here to the format
that I'm going to do. So 1080 by 1,350 This is the width, and
this is the height. First, the height,
and then the width. Now I have my format that
I'm going to create. Here. We have the format
we are going to do to verify it corresponds to the four by five format vertical to be used
on the Instagram. Now we are going to start
heading our first layers.
3. Create the First layers: This project will be animated. The layers that we
are going to do, most of them will be moving, will be having some effects. At some degree, it's very important when
creating our layers, we have to think organization. You have to be well
organized and well named here in this right
side where you have layers, each time you create a layer or each time you end
creating the layer, you give them the name that will allow you
to identify quickly. What is that layer represents? What is that content has? The first layer that
we are going to do, it will be the background. But before starting doing
and heading our layers, let's do something very
important that will help you position the elements in
our scene in our canvas. We come here to view. And in guides we will
create a new guide layout. As you see here, it
automatically has the rulers and the guides
that I want to use it in the project. But normally we'll have
none here, none here. We just have to create
the guides that we are going to use back again. I will want two by two. Immediately. I will have
the guides that divides the space into in
vertical and horizontal. It also adds the
limits of my canvas. I'm going to show how this will help us to position our objects. Once it's created, I can
give it a name if I want. In this case, I would leave it like this, and I click okay. Now I will add the
first element, that it will be the background. I will choose this tool
here, the rectangle tool. I can now position
this element here. How I do do this, how I created, I specifically
start from one point. I click here and then I
drag to where I want. See that it, it snaps right away to the lines that
I define in my guide layout. This is why it's ful
to have the guide. Now I can, from one
point to the other, create my background
as easy as that. I can do it another way from
here to the other side. It doesn't matter with this
created now like I told you, organization back to my
layer that was created here, rectangle one, I want to
change this to another name. I clicked two times. Now I can change the
name of my layer. I will call it background. Okay, with this tool
that I just created, now you have access to different
properties of this tool. Since it's a rectangle, I have the possibility to change its appearance and the stroke, the line around this shape. Also, I can change its size. The transform I will
not touch because it corresponds exactly to the size of the canvas I just used. I will change the
fill and the stroke. For example, the feel, I
will use red and the stroke, I will use a white for example, or this color here, golden. I will change my stroke. Now I have a background
with a stroke. One of the things I will also
change is that because you see the rectangle now has its
margins outside the canvas. That's because my stroke, the size of my
stroke, goes outside. Because depending
of the placement that you want to
have your stroke, I want to have my stroke pointed inwards and now
and not from both sides. I choose this option here. Now you see that the size that the total size that he has, it is all inside. Now I can change
back again the size. I will change it to 34
and we save the file, file save S, give it a name, and then you can save.
4. Set colors and add more layers: I want to do specific
colors that I chose before starting
this project. For you to do the
same, you can access the image that you have at
your disposal, named colors. So we can, we can open
it from Photoshop. Take it, put it here. Now, how we can change the colors in our
rectangle? Simple. We go back to the layer background in
the appearance parts here. I'm going to choose the feel. I want to do this color here. And the stroke, I want
to do this color here. At the left, I choose Feel. I'm going here. I click here. Now you have the possibility
to choose the color from this image here you
have different colors. Or we can just, you see the peak appears here when
I go outside this window. Now I can choose this one here. Automatically, you will discover that color in this
wheel. Click Okay. Now for the stroke, I will use the same method. I click here. Now we have the rectangle with
the colors as they should. All that taken from
this image here, I want to create
a new rectangle. One that will be inside
and smaller than this one. This first I just
created come here. I can do this once again, choose the tool and
create a new rectangle. But I will take advantage of the one that I already created and I'll create
a double of this one. Or you can do this
to clone this. You have to choose it. You can slide it over. This, I can here. Now you have two background layers,
two rectangles. I changed its name to
rectangle rectangle center. Now I can change some
of its properties. I want it to be smaller. I'm going to change its size to 950 and its side to 12, 37. I want to center this
rectangle inside I also its the stroke something
way smaller like this. And as you can see, I can position once again this rectangle with
the help of my guides. A quicker way to do this and
the exact way to do this, you choose the element
that you want to align, the element that you want to
align to with both selected. We now have access to
this align buttons. I want to align the one that
is over the background, the one that is selected. And I want to align it
perfectly in the center, in the vertical part, right in the middle of
the horizontal part. Now I have two rectangles, and this one here, I
also change its color, the color of the stroke. I want to have the red one here. I still have both selected. I have to just choose one. Now, with that one selected, I will select this color here. I don't want it to have a. I want it to be transparent
or inexistent. To do that, we just have to
select here in the field, you have the option
to have none. If I go back to this one and
I did the same to this one, as you see, it will be
completely transparent. All objects that come from the back of the rectangle
will be visible. But I just want to do that
to the rectangle one. The last one I created. This rectangle here will
not have fed, say this.
5. Create Triangles: Let's continue adding
some more layers using the same principles. This time I'm going to use the triangle tool
to create a triangle. Once again, I choose
a point and I drag, and I have the size
of my triangle. This triangle I want
to the field to be the red one I have here. As you can see, you have this option
recently used colors. We can choose right away
the color that you want. One of the ones I used
before, the stroke. I don't want it
to have a stroke. It's okay even though there's a number here that doesn't count because it
doesn't have a stroke. As you can see here,
I change it and it does nothing zero. I can change my
width to something. Of course, I already know the numbers that I'm
going to put here. But feel free to test and to do your own sizes just because
I already done this. I know already the numbers. As for the width, I have
710 for the height. For the width, I have
864 for the height, 576. Now I want to transform
this triangle. More specifically, I want
to turn it upside down. How you can do this, you see
when I select an object, it is highlighted, highlighted
with the blue box. This box signifies, of course, the shape of the total
size of your element, but also it allows
you to transform it. I can pick one of
these squares here. If I have these two
harrows appearing, it means I can change its size. But if I want to change
its size in a way not like this
changing everything, I'm squeezing its shape. If I want to do it correctly, I click at the same time in
the keyboard, the old key, and now I change its
size without changing its shape back to the
first size control, Z. If I want to turn it, I just have to see
this icon appears. These two errors. In the curved errors, I just need to let
this icon appears. Now I start turning. But if I press my old key
again in my keyboard, now I can change it
with fixed degrees. I will move it until it's
upside down, like this. As you might notice, there's a tool bar that appears here, floating next to the
layer I just selected. This is a contextual task
bars maybe already know, but in the latest
versions of Pop, this contextual task bars exist to help you
with your workflow. In this case, I
selected the layer. This contextual task bar is associated with this layer
and with this function. Besides doing manually the
rotation or the scale, he proposes to do a symmetry in the horizontal x or
in the vertical x. Meaning that when I had
the triangle this way, when I just draw it
was in this way. Instead of using
manually the rotation, I would just automatically, once this tool bar appears, choose this function
here, flip vertical. And it will already turn into
the correct opposite way. I just have to accept it done. Different contextual task bars appear depending on what you
are doing in your scene. I will not now change
the name, Triangle High. Now I can position it with
the help of my guides, exactly in the middle or in the intersection of
those two guides. Something changed here. I will once again change
is width, which is 864. Now I can position it correctly, I can close this one. Now I can also do a copy of this triangle here,
like I told you. Can do this, change its
name to triangle low. I'll put it here with the help once again of
the contextual task bar. I will flip this one also. Do I change its size? This one will be
100.73 and height ten. I wanted to align it to the stroke in the bottom of this rectangle
so I can use the Align, also the align buttons for that. I need the object that
I'm going to align with, the object reference to where
I'm going to align to it. Now I'll put it exactly over it and centered and save.
6. Add Circles: Let's now use a new tool
and create a new shape. So I come here, I select the ellipse tool, I want to create
a perfect circle. If I click and drag, as you can see, I'm
doing an ellipse. To do a perfect circle, you just press in the
keyboard, the old key. At the same time that you drag. Now you have the
perfect circle change. It's with an that have to
have the same values to 460. Then you can select
this option here. Every time you change a value, it changes both
at the same time. Now I'm going to center this circle and I can
do it using my guides. I will change the field, I can leave it red. And the stroke, I will
change it to this one here, change its size to 36. Now I have the option
also as you can see right next to the size, I can change the style,
the stroke options. I'm going to do a
stroke down here. We can change the
type of, for example, if I put three and the gap. I can leave it too. I name it Circle Center. I can do a second
one behind this one. I just need to copy change its name to Circle
Behind Center. And also in the organization, we have to put it below
the circle center. And I will change
its size to 605. 605. I will change its
feel to the darker brown here and change the stroke to the red one. And I think, yes, my dash, I will higher value
with the gap one now I can manually put it at
the center or just use a reference and
center like that, you can save, I will have a small effect
to the circle to, to distinguish it from the
triangle that is just behind. And they are of the same color, I need something to
distinguish both. I need, I select my circle here, down here have the effects. And I will choose drop shadow. I can leave it just like
that, as you can see, have a small effect working that allows us to
distinguish both shapes. Okay, I made a mistake
with the dimension. I need to quickly change the dimensions of
the two circles. This one it will 545 and I will align it. This and this one
here needs to have 414 and also aligned
with the background. Also the strokes,
they will have 32. 32. Also save. I will create a last
circle, a smaller one, so I can duplicate this
one. Change its name. Small up. I will
change the size, also the stroke to 18. Change to dotted the to
one and the gap to one. This to inwards
the end to square. Also the colors I
will for the stroke, it will be red to the
field will be dark brown. Now more or less here aligned. Yeah, here aligned with
the vertical guide. For now it's good. Save this.
7. Make the radio waves: I also need to do a
sequence of circles behind these two big ones in the center back again
to a copy of this one. Those circles that
I'm going to do will replicate or trying to emulate radio waves they will not have. Phil, I would change
style and size of stroke. The size, overall
size of the circle. I will put it a line like this, changes color to red and its opacity also to change the name, To
be more precise, you see that this circle passes in front of
all the others and I just want them to pass
behind all these elements. They need to be way
below the other layers. This opacity. I will change to 35. I will, because I will do several circles like
this one separated by size. I will create all them inside of a new group where I have all these circles inside. So now I just need to drag
and drop over this file. This is the first one I
will do the second one. This one will be bigger 639. I need to center every time
I can leave it with okay, I have to change
its number also. This one was the first one. This one is the second one. It goes below. I need
to copy another one. We'll call it three. This
one here will be 687. Also align it. Another one will be the
fourth change to 729. Keep the same opacity. This one here, 5,700.74 also a line, 61, 819. And the last one, seventh one, you can have a 864
also centered. Something's wrong over here, I think it's Yeah,
this last one here. There you go. This one. I can put it back to
100. There you go. I think we are over with
the circles and safe.
8. Add the Banner: Let's not create a banner
with the text over it. Back to our tools.
Drawing tools. I will choose a rectangle and I'll create
something like this. Change my stroke to this color and the field
to the darker brown. Change its size to 866, 219. I will align it transform. I want to make an effect in
the edit transform path. Warp change from custom to
bulge and change its size. Here the band to minus nine. I will accept it. I
will put it over here. Lo change its name, banner. Now I will add a
text in the banner. I choose this new tool, text horizontal type tool, with this new icon
appears in my canvas. I just have to click
whatever I want. Select all these and
change the text to show my work, sorry. All in capital letters. I will position it here. I will change the type to impact regular. This can be 50. Now I need to align
with the banner, so I'll just the
banner there I have. I will do the same
transformation that I did. Just change a little
bit the size. There you go. And maybe transform
also my text. It resembles a little bit the deformation that
I have in the banner. Choose. Show my work once again. Transform warp bulge. I can do it manually. Now you have the banner with
the text and we can change our texts later on
if you want save.
9. Polygon Tool: Let's use a different tool
to create a different shape. Once again, here I can
choose the polygon tool. Works just like the others. Click and drag. Leave
your out key in the keyboard pressed and
now you have this shape. I can't change this into a star. For that, I will just get
rid of the stroke to be, I will change this value here to 0.4 and this
value here to 50. This will set up the percentage distance from this point here from the center, This five points here, from the center at a value. Now I have a star,
change its color. Also change its size
because I want to put it inside this
circle, small circle. I'll put it 56. I will zoom in, I will
do exactly like this. I will call it small red star. I will duplicate this one, and this one will be the
white star at the bottom. I will change its size. First I will change its
color and its size to 103. And I can leave
it here centered. I can zoom in lower
a little bit. I have my two stars. I also want to use this tool to create two looking turbines, one here and another one here. I can duplicate this one, so turbine left, I'll drag it to the left change also its size. I live at 70 and this
value at 20 change, I will drastically and align it with both
sides of the batter. This one here, I can
lower a little bit. I wanted to to be
behind the bender. And another turbine in this
side, so turbine left, Duplicated turbine right, and in this side, safe.
10. Add Titles: I will now add the text back to this text tool. Click
whatever you want. I will write for the first text, I will write your name. So center here and just change its size to 65. And duplicate this to change it to Designer. As you guess your name,
you put your name. Designer depends on what
you do as a profession. I just put designer where you
can put whatever you want. It's below your name. Change its size to 43
and the color to gold. I don't have it here. Maybe I'll do. I will open the colors and now I will choose this
one here and safe. So be sure it's centered. So I want to do it. Put it here, save it.
11. Add Lightning Bolts: I will now add the last
element to the composition. For that I will
create a new layer for this element which
is the lightning. I did it by hand so we can use the Select polygono
lesser tool by hand. We can do the
lightning of course. And then you choose to fill option this one here with
the color that you want. In this case it will
be this yellow one. I will feel this. The select. I have my shape. If you
have difficulties to do a perfect shape or your shape not really
going well for you, I left, you can find
it in the documents. So you have a lightning here. What you can do is open
it, select the object. As you see, there's
a new context bar, depending on what
you are going to do. In this case, I have an image, I can select the subject, there's a background
and a subject. I select the subject, I then choose to put this
selection here in my canvas. But for that, I have
to create a new layer. Now this new layer, I will feel the select. I can close this one here. I can erase the one I
did by hand. This one. I did it also by hand, but I can't do the
same two times. This one I will
call it lightning. I want it to be
behind these circles. For that we have to come here. Behind the two circles, we put it here. Now I want to copy this will be
lightning, right? Then lightning left. This one here will be. I will flip it to put
it on the other side. Now we have the poster with
the lightning. Save this.
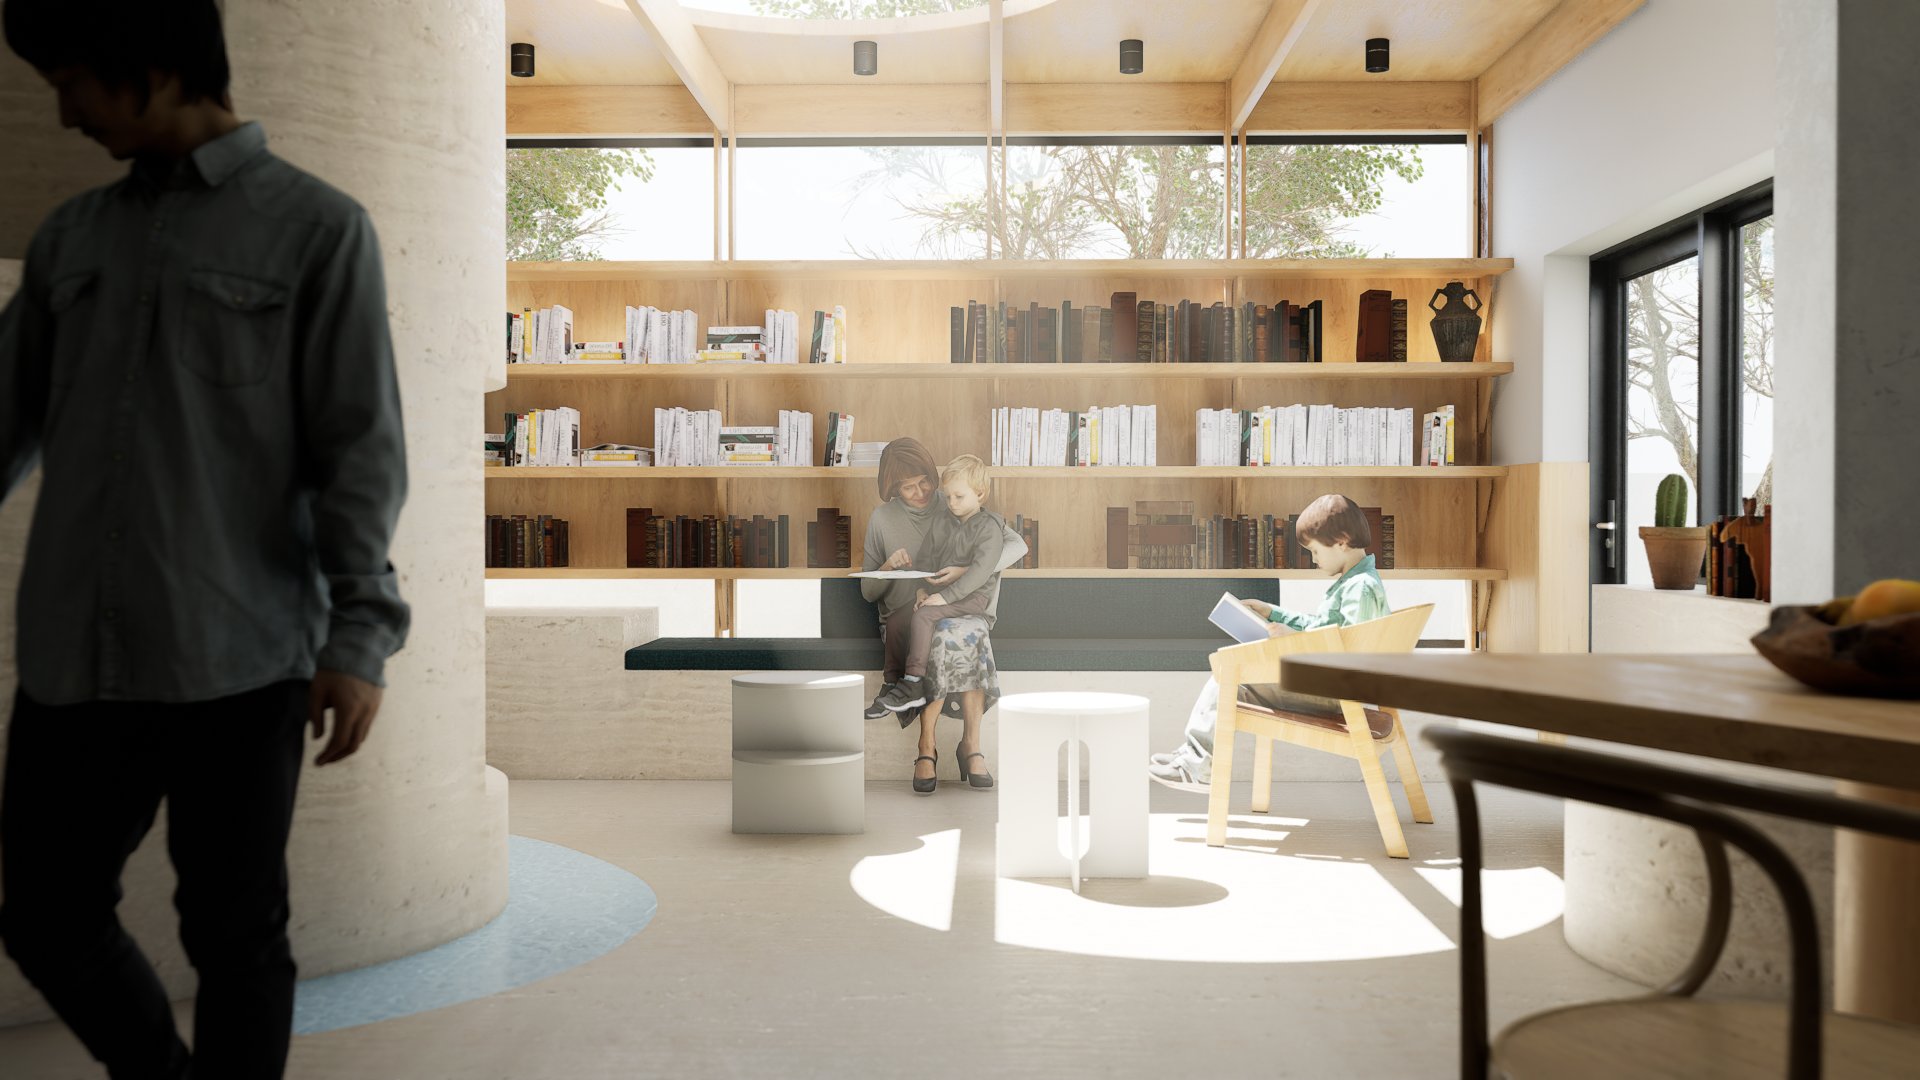
12. Add Photos: You will now add
pictures of yourself, two different pictures, striking different poses to be used in
the middle of this poster. And once we are in
the animation mode, I will explain you how to pass from one
picture to another. This way, it adds some
dynamic field to the poster. To show you what we
are going to do, I took two pictures of myself, like I said, doing
two different poses. Try to the photos be taken by someone so you don't move and stay in the
same positioning. It doesn't change, for example, not too close of the camera
from one picture to another. And you stay exactly
in the same position, but striking different poses. If for example
this picture here, I will select only my subject, I can click here to
select my subject. Or I can use the context
task bar and select the object you will select and make the difference from the subject,
from the background. Then if I drag and drop it here, you see that it doesn't blend well with
the style of the poster. So we need to have
some effects to make my image more like
an illustration feel. And so this way it will blend better with
this background. I will show you how you can create a sequence of effects that we can use
then automatically, for both pictures. Let's do it.
13. Apply Filters to the photos: Let's now open our profile
pictures for the class. I'm going to use my own. But feel free to take
your own photos or ask somebody to take them for you because it's
very important, the positioning of your photos. Try to take both photos
having the same positioning, so that's why it's
taken by somebody. Or if you have a tripod
you can take yourself, but try to be both at the same size but also the same positioning
in the photos. This way they will not
change from a lot, from one photo to the other. Let's start by this
one here, my photo. Yours will have maybe a different proportion
or different size, but mine has two k size, a little more height than width. But he has 2,500 height
and 2,200 by width. I will start to use this,
use your first one. As you see, if we slide them
over here, it's enormous. If you don't want
to, I advise you to change before adding the effects that we are
going to do this way. They will not be enormous
in your poster file, but also the size in
terms of the size that will take in your disk space and the
resolution of the file. It will be too big, so it's
best to change it right away. How we can do this, I right
click over the image. You remember this
one has a height of 1,350 I want the photo
to be more or less here. I want to occupy the space here. It will be smaller
in height than the 1,350 I put it here. I was going to put it at. Leave this on this way, it will affect both sizes. I will change it to
1,000 and click okay. Now I have my photo
at a good size. Because if I now, if
I slide them over here, it looks better. Sorry about this.
Slide over here. Yeah, you have to
organize it in front of everything for now, like this. Okay, It seems like a good size. I can delete it for now. Now, what we are going
to do with the photo. Remember we have two photos
each in the same position. So the first thing that I advise you to do
is to transform, right click and convert this
image to a smart object. This way when we are going
to change the second one, we will use all the effects
that we already used. For this one, we just have to change the picture
that we are doing, the effects, converting
it to smart object, you will see it will be a fastest way to
have the results. I changed it. I click two times over the image here and
I open a new window. I'm inside the picture now. I will use one of
these tool bars. Like I told you before, he recognizes it's an image. And propose you an option
like select object, select subject myself
the character, or I've removed the background. And you will see that it's
very useful automatically, you don't have
background this way. When you put the image
in over the poster, you right away we will see the poster behind
the character. Now that I close this window and it will ask me
if I want to save, and I say yes, and it will
update the smart object. With that done, now I can
start adding the effects. The first effect
that we are going to do is a non sharp mask. I go to filter sharpen
on sharp mask. I already have the values directly on my filter because
I already done this before. But if you want to change, you just have to click in one of the spaces
and add your number. The number that I
found out that works well are for the amount 250, the radius six, and
the threshold 15. Let's continue adding
more filters now. I will have a
stylized oil paint. I will have this at 2.5 You
see this distorting a lot. But you will see by the next filters that I
will add on over this, you will start to look
more like I want. I give it okay? 2.52
0.50 point 1.0 Next one, you will see right
away the effect in the filter gallery I
will look for cut out. And you see right away
this look of illustration. I can maybe 33.1 Now to end it, I will do a filter blur. Yeah, surface blur. Those soften the edges. Some are really sharpen and this way it will
sharpen the edges. Okay, remember if you want to come back to the
filters, you can do it. You just have to double
click the filter. For example, oil paint, you have this window opening
up. You say, okay. You will accentuate the
defect that you want to do. For example, this
one right away. It will update all
the effects together. For example, I think
this one could be better for what I want to do.
I will keep it like this. If I check again the
values, okay, I did a five. But with them all
together, it looks good. I prefer this one.
Now I will save this. Don't forget to
save this as okay, can have the same name. But I would just like
I put a use to know to distinguish from the photo
with the picture done, you see that the ear,
maybe it disappears. Some of the details if you
want to go back again, maybe not this one, Maybe it's more
like the cut out. Maybe? Yes. Yeah, exactly. If I change the cut out, I have more detail, more lines to it, but I'll
leave it like this, you know. Okay, I'll save it again. And now I just have to drag
and slide it over my poster. I just need to position it. Well, I want to be
behind the bender. Here it is. Behind the bender. I just need to control
Z. I just need to size it and done it changed
a little bit, my effect. So what I need to do, maybe I will go to
again, oil Panther. I have to. Yeah, have
to lower it again. Yes. To finish this, I just
want to do a ni light of my silhouette to have a look more cartoonish.
More illustration. With that selected, I
will select stroke. The color will be this one. Here. There you go. Because it isn't exactly
like it is here. If you want to go back
and do the same changes, it was in the oil paint, it has 2.5 like it was before. 2.5 and safe. You see the effect changes because since changing its size, it will adapt the values
here because it's smaller. I can see the
details in the here. This image doesn't
keep exactly the same, but it keeps the filters
and that's what we want. When are going to use
the second photo? Save this now. I will open the second
photo, photo B. What I have to do, I
have to go inside. Double click my smart object. I will slide the picture. I need to change its size. Remember height 1,000 Now
I slide it over here. I can change maybe the opacity
to know exactly like this. Now this one will
remove the background, I will hide this one
can close the image, I hide the first one. Now this smart object
inside the smart object, I can now I have the second
photo that I will save. A photo B save. Now I have to do the same. I just need to select the
picture and slide it over here. Also, change its size and added the highlights. Also, maybe I can
change my olive paint, baby. Let's see. Yes. Yeah, I leave it like this. So now I have, I
changed its names, pose one and pose two. I can save this, I can close, and now you have both poses.
14. Harmonize Filters: If somehow the colors in
which you are in the photo, the clothes that you
are in the photo, doesn't match very well
with the background. Because now we have the
style that matches a little bit more the style that
I'm trying to achieve. But for example, imagine
if I had a green shirt, maybe didn't match
very well with the color palette that I
have in the background. There's a trick for
you to harmonize this, and the name of the filter
is exactly harmonized. But before we do that, we need to have the flattened
version of our poster. The filter can gather all this
information one at a time. We have to transform
to make a copy of all these layers that makes the poster into
one flattened layer. How you do that, we want to
now let's hide this one also. Now I can only see all the layers that
make up the poster. To choose all the layers, you can control and
select one by one. Or you can simply select
the first one and shift, press Shift in the keyboard
and select the last one. Then you just need to slide, duplicate everything
over the plus. Okay, now you
duplicate everything. And now we're going to transform all this into a flattened image. For that you select, you press in the
keyboard control plus E. Now you have a
flattened poster. I name it flattened poster. I'm going to put it under, for example, under this pose, I will turn it on. Select the pose. Now we're going here
in the neural filters, also in the last
versions of Photoshop, you have these options, neuro filters and the one
that we are going to do to use its harmonization
like the name says, you will try to harmonize the image that we, the
layer that we chose. Layer of the pose
with the background, with the other layer that
we also will choose. We have to turn it
on. Normally you have to download, I
think the plug in, but I already have installed it, but we are going to select it. If it doesn't appear like this, it will ask you to install, but we will see the
harmonization filter. Then we have to choose the flattened
poster that we just did. Now, automatically,
you see processing. It will try to match the colors, the colors of the poster
or the look of the poster. As you see here, there's a lot
more yellow in my picture. If I accentuate, rely 100%
there's a lot more yellow. This filter, it automatically gathers the information
of the layer that we want to harmonize with
the layer that we chose. I will leave it at 75 for now. Now I can click. Okay. This is a quick way for you to harmonize the
photos that you took, even if you are dressed in
a way with a lot of colors that doesn't match pretty
well with the poster. So this is a quick way to fix that right away in the best way I save this next chapter.
15. Organise Layers: Before we pass to the
animation of all our layers. Like I told you in the
beginning of the tutorial, it's very important to organize
very well your layers. If you want to show the layers, you just have to
drag it from here. Put it way up this way
we can see more layers. Try to organize it this way. The way that you position the layers one over the
other or under the other. You have to keep this really
well like I did here. Then we can pick one by one, the ones that we are going
to animate in relation to the ones that are over it and
the ones that don't move. It's very important
to name that in a way that you can find right away
what you're looking for. Even this, I can
transform it to a group. For example, your name. Oh, okay, sorry, I forgot to
hide the flattened poster. You can delete it for now. Will keep it here. Now I have my group of text. I can changed its name to text, so that allows me
to organize better. Okay, it looks good. Naming exactly like
I wanted to look. It seems good. Seems okay. And I'm ready to start animating all my layers of my poster,
but forget to save.
16. Open Timeline: Let's now work in our animation. We are going to
animate each layer, or the layer that we choose
to animate independently. To do this, we have to go to
window and select timeline. Now you have a new
window here that you can move or you can position
it where you want. I advise you to put it
lower on the image. You can change its size. You can put it around here. You can also minimize it. You can position it here. You see it's highlighted. You can put it down here, for example, in the bottom. Maybe it's better to put it
here in the Barto like this, stay fixed, it doesn't move. You just have to pick
it up if you want to see all the timelines that you are heading
to your animation. Before I explain to
you how this works, I advise you to create a
backup of your poster just in case something wrong
happens and you don't lose everything that
we did until now. I advise you to save a copy
and name it poster back up. Okay, this way we
have a backup of this poster here we continue
working in the poster, in the final poster where we're going to have
the animation.
17. Timeline introduction: Now we're here, the first
thing we are going to do is create a video time line. You have another
option that we are not going to use for our project, which is create frame animation. For example, if I
want to my images to start at the left and stops
at the center of the poster, it will be easier to do
it with a video timeline instead of the frame
animation which I had to do. First frame, it will be here, second frame here, three frame. It's best if you want to
animate like for example, real animation
character animation. I suggest you to use
create frame animation. But for this example, we
will create video timeline. Don't worry if it takes
some time to process because it's gathering all the
information in all layers. That's normal. If
you have a window popping up, you just see it. Okay. Now we have a very
simple looking new window. This window has very few
options because it's very straightforward
the way we are going to work here, very intuitive. It will be easy. The worst part is really you have to keep
up with organizing your layers and think ahead how you are
going to animate them. For now, I open this window
and I have the tools so I can pre visualize what I'm
doing here in this timeline. I have my play. I
go to next frame. I can go back to
previous frames here. This one I go to the first
frame of my timeline. I can also cut and
control transitions. I also have already two layers
here inside the timeline. The first one corresponds
to the art part. If you look here in
the right art part, it has all our
layers inside here, exactly the same thing. I click here and I access
all my frames For now, it looks like everything
is at the same time, appearing at the same time. Exactly how we have prepared
in the layers poster image. First thing that I'm
going to do first is I want to extend this
so I can visual exactly how long does this
timeline takes for now. I just need to go here. It is a way to navigate
in your project. For example, if you have
a very long duration, you just play with this. It's just visual, really
not changing the timeline, we're just changing the way
it looks for you to work. And you see that inside
we have all the layers, the layers that correspond
to my final project. It's here that we are
going to use them in a way so we can create
an animated animation. For example, if I change
it in my timeline, see that when it starts to play, for example, I will
take the star. See at the beginning,
the star is not there. And then it will appear. Everything appears, depending
the way I want to animate. I put them very far and I will create a
very short animation, so I don't need all this long. Again, if I play, and now I have myself appears, this is very abrupt. If you see my image
appears very quickly. I want to do, like I
said at the beginning, it's a video time line. I want to do smooth transitions
between the elements. Another way though,
I'm showing you how each layer appears again. For now, as you see, I have access to each folder exactly like
it was made in the poster, but now I have modifiers in it. For example, in the text, your name, I can
transform how I do that. Let me we are working with
your name. I selected. I wanted to create an
animation or a sequence of this layer where the name is invisible
and then it's visible. How I do that here
the clocks here. If you click this, you enable
the key frame animation. This will be the first frame, the first key frame where
it will be invisible. Then I'll decide at, at the right time here
like half a second, I have created another. The clock will activate the key frames and
then you will click, you add or remove a key frame
depending of your need. The second frame, you
will be completely 100% opaque and he will be
transparent in visible. How I do that, I click here, I change what I want to do. For example, this
is the transform. I'm working in the transform
and not in the opacity. I erase them. You just have
to click one by one and suppress raise back
again opacity. At first I click in the
first frame of the opacity, This one I want to have zero. This one I wanted to 100% same for the
other modifiers, the principle stays the same. You select one key frame that
starts in a certain way, and you select another key frame that will change its position, its size, its opacity. You have several
possibilities of changing your layer one. I would like to tell
you that a way to go right to the key
frame that you want, It's to press shift
key with the cursor. It right away automatically goes the blocks in the key frame
that you are sliding over. In this case, this
one for example, if I did another one here, if I was here in the timeline, and I want to stop
exactly at this point, I just click Shift
with my keyboard, and automatically it will
attach to the key frame. I can delete this one and I can come them over here
again, I save. As for the duration
of your animation, you have down here a
timer that says to you, in what time are you in
your timeline right now, My time line has around
4 seconds and a half. If you want to change the
duration of your timeline, you just need to
extend your layer. For example, if I grab the edge of this layer here and
drag to the right, you can see that now my
duration has 24 seconds. It's easy to, to change the
duration of your timeline. Also if I have a
bigger timeline. But I want to reduce the time that the
sequence will be exported. Meaning my timeline
duration has 20 seconds. But if I want my film to
stop at, for example, eight, I can put this element here exactly where
I want it to end. Now, the timeline.
If I play my movie, even though see it stopped, even though it continues
further from here, you will, you will stop here. Because this indicates the
ending of my film this way. When you export, you export
the film until it arrives. At this point, if I want
to put it all until here, I just had to put it here. If I want to stop
the film there, it would stop the film there. Going back, control z. One last thing, before the beginning of the
animation of each layer. I will just change the
frame per second for a format considered
standard in the business. I will change my set
timeline frame rate, the three dots here. Set timeline frame rate to 24. We have several
at your disposal. And I will choose 24 and
click Okay. Now we're ready.
18. Animate triangle and frame: I will start by first
sliding this over here. If I pick this here, I'm picking all the art board with all the layers
that it has inside. I put it around here, I want to do an animation
of it will be a very short, you can extend it
after if you want. But for now it's enough
for what we are trying to do here in our
animation poster, animation I have here. I'm now going to start
with the first layer. The first layer will
be my background. This, I will put it
here from the start. This element will be static, meaning that it's what we see at the beginning of the
animation already. We have the background. The second thing that I want to see appears
in our animation. It will be moving. It's the hero. You remember the triangle, The very large triangle that
we have in the upper part. I want it to be also the first animated element
to appear in my scene. One thing to have
in consideration when using heart parts, you remember this is
a night art board, is when you are animating
an object and you want the object to start from outside the out part,
you have to lock it. This option here,
you need to use it. If not, when you will position your triangle
outside of the art part. For example, if I change its vector mask position
outside the art part, it will position the triangle outside the art part in
the layer stack position. And we don't want
that control Z. To avoid that, I want it to stay in the same
layer position stack. I will block it. You
came here in this lock. In front you have
this icon here. You click this for the triangle or for any other element
that you're going to start with the beginning of its position
outside of the canvas. You have to do this when
using art parts. Of course. Now my first position I'm going to do the second
layer, second key frame. So it will be at six. This one is correct because I want the sequence of the animation
of triangle to finish here. But I wanted to start outside. I select that key frame, now position my triangle
outside my artboard. When I click play here, I have my animation done. I can uncheck this. I'm not going to need it
from the second frame. I want to, my frame appears, coming back here, I want this rectangle that does the frame of our
poster also appears. I have to choose
rectangle center, it will start to
appear exactly here. I just have to
slide it also with the shift key if you want to be quicker to grab this
reference here. This one. I also want to do an opacity turn my key
friends on first frame. Second frame can be here
at ten. I had a new one. Now the first one I
wanted to be invisible, I just need to choose
opacity, lower that number. Now we have the two animations, The triangle and then to end the rectangle. Don't
forget to save.
19. Animate circles: Let's now work on the circles. So I want the first circle
to appears when the triangle finishes its sequence
circle center Here, I will have to transform
this into a smart object. So I can access modifier. The transform
modifier, because you can see it's not
accessible here. I will transform it
to a smart object. Now I have a trans modifier. I will end my
sequence at yeah, 13. And I want to turn it, this one will be at
the end the opacity. Also, I want it to appears when the
triangle stops here, it will be zero there. It appears at the same
time as the frame. I also wanted to
move like a wheel. I wanted to move, I already
create the transform, now I just need to done, there you go. For the second circle, the one just behind this one. I will do the same, transform
it into a smart object. Back to transform, this one will be till the end. And I will the other way. This one I will not use opacity. I want it to
quickly, it appears. Okay. Now safe my radio waves. I want them to
appear also at 13. Here they are. I can grab
the group. Put it here. Unfold. Now I want them to
appear in two by waves, one by one with two
frames of difference. 13, 15, 17. For? For the third. No. 15, Yes. 17, 1921, 2031. Okay. And I wanted to stop
at 1 second 14, so I can put them
all right here. Since I want to do this several times until the end
of the sequence, I just need to duplicate this group position in one after the other third one. There you go.
20. Animate Banner and Star: Let's now animate the banner. I wanted to start, I wanted to start at one. Once the first sequence of the
circles waves are settled. Now I'm going to
search for my banner. I wanted to stop here. What I will do, I will key frame here with
a vector mask position. I will give it a like seven. And the first frame I want
it to be outside this. Don't forget to also lock this. There you go. It doesn't get out
of the hard part. Now, the first key frame, I want it to be out
now to stop it here. Once this one stops, I also make my triangle the one at the bottom to
appears this one here. Also lock it. They go and my star also to appear. There you go, can save it. I will also add the small
turning wheel here, the circle here, from a
line with the banner. Maybe a little bit earlier, like 22 here, my circle. Put it there, since
I want to spin it, I want to access
different attributes. Convert it to Smart object. This layer first key frame here, another one near of this one. I will then move it later,
transform this one. And I will just move
it here, Enter. It was spinning. And now I
can put my key frame here, change it, this, now I
have this spinning wheel. I can also have the small star at the middle of this circle, more or less at two, I will find my star. There you go. And I can put it around here. Everything stops here. This one too, and this one, also aligning every element till the end of the sequence. There you go, we can save it.
21. Animate Lightning Bolts: I will now have the lighting
lighting bolts over here, so I want them to start. The first one to
start at the left, maybe so at 1114. Yeah, around here. So this is the first. There you go, this is
the first to appear. And a couple of moments later I will have this
one appears here. What I will do now, it's play. So as you see, if I click Play,
they will appear. But I want this to
last for a while. This effect, I wanted to treble, to tremble, to make it
appear disappear very fast. To make this, that is
lighting going on. For that, I will play
with the opacity. Starting with this
one in the left, I will add my key
frame for the opacity. I will then add another
key frame around here, and another one, just
one frame after. It stays on until here. Then in this frame,
it will disappear. For that, we have
our layer selected. And now it will disappear. I put the opacity to zero. I want to do this over and
over along the sequence. What can I do? I copy
this, two key frames. Then right click copy. I put the marker exactly when I want to put my copy to two. For example, right click again over them and I'll do paste. Okay, now I have my sequence, and I have to do this
along the timeline. I will choose where
to position it, ten, it can be at 02:10 Once again, paste the other 1218, paste 33, paste, and to the end, paste. There you go. Now I have the first sequence for the
lightning just at the left. You save this. That's too exactly the
same for the other. I selected my key
frame, it's here. My opacity keyframe there. I will put it around here. Yes, another key frame, 100. Just one frame after I will put another key frame at zero, and I will do the same. So I copy and paste it at 22. Paste the other
one at 02:10 Paste the other 1218, Paste 33, paste. And around here, Paste. So that you go, you have, so they are blinking
at the same time, and I wanted to have
the different timings, so I'll put it around
here like this. There you go. Save it.
22. Animate Photos: As for the images of myself, I want them to first
appear from behind. The first one to appear
behind the banner, like popping up the image that it will be first that
I will use as my first. I think this pose here will
be the one that I will use. I will start it at
17, exactly here. I will shorten this,
I have to turn it on. I will do a first
key frame here with my first pose, a transform, and another key frame, because this one will be the one that will be Eden
behind the banner. And the second one will stay
exactly as it is like this. Before I will
transform anything, I will already have a key frame. This key frame will be at 01:15 The second one is this one that I'm going
to transform control. This message says that it will temporarily turn the
effect off on my filter, cartoonish filter. Don't worry. Once we finish the action
to transform, it will stay. It will come back
to the same state. Now with my shift, I will press Shift. While they do this, I will
hide it behind the banner. The first frame, I
will click Enter, and you will now
have this effect of appearing behind the banner. As you see, we have our effect, our filter again over our image. My first image at some
point will disappear. So then it gives place
to the second image. This sequence for this
image will stop at at 02:15 and the other one starts at 02:10 There we go. This one will start with opacity from here to 14. The first frame will be at zero. It will appear over
the other one exactly here at 02:10 This one also will start to
disappear and finish here. Just a little one frame after, we will start with full on
and here will disappear. There you go, and this
one will stop here.
23. Animate Text: Let's now work on the text. I will start by the banner. I want to appear
to show my work. First I select a time
where we will appear. 115. Good, show my work here. It will last four, I don't know, like 23. I want to use the banner as a button for our
augmented reality poster. I know that when I want to warn the visitor or the person that's
seeing this animation, that he can click on the poster to start opening it
up to show my work. For that, I have to
have another text saying click here, for example. I can duplicate this. I just do control C, control V. This one
I'll say click here. I can move it now
here, put it inside. But this time I will change to click all in capital letters. Click here. I just centered around here. So as you see, Show
my work. Click here. Okay. This one goes
until the end. Show my work. Click here. Since I want to draw the
intention to click here, I will make it appear and
disappear a couple of times. I can put around 213. I will have a key
frame in the opacity, and this key frame just
after it will disappear. So it will be at zero. I can go to 3.1 add another key
frame just after, add another key frame, and once again it will appear until the end
of the sequence. You click, click
here, save this. I can now work on
the other text. So this will be straightforward, I won't give any effect. So name and aligned with this one here, your name hits at 100%
Say this. I see that. Almost finished. So I'm just going to
put this here exactly. This one also here. Now I have two other elements. The turbine, that I will
put in both corners here. Around here. I will make them spin. I want to make it appear. Yeah, just before the banner
around one. It's okay. So the first one to
appears is the one in the left and then the
one in the right. Just a couple of frames
and it will appear. So I want them to spin. So I will transform this
convert object key frame here, stay exactly in
the same position. Key frame here, Control. And I have enter and I'll do the same for the right convert
to smart objects, access the attributes
key frame here, and another key frame there, Control and then enter again. And now I finish my sequence
with all my elements.
24. Export Sequences and References: Let's also save for reference an image of the
poster. Try to stop it. During this click here part. Try to have all the
elements visible. It must be at this spot here. Click here in the manner
all the elements visible. And this photo here. Now I just need to save a copy. I will say it will be J pack. And I will have this
image ready to be used. I will now export
all my sequence, all I did in my time line, I can use it after to do that. I personally prefer to export
it save for web legacy. Here we have in this side, the preview of our
animated poster. I will change my format. Then down here you see you have animation
looping options. We leave it at forever. You can have a preview
of the animation. If you click Play that you
have the animation you choose. Now you select the place where
you're going to save this and save now you have an independent file
that you can check. It's here. We can open
it and see the results. This sequence, sequence,
complete sequence, will be used at the beginning of our
augmented reality project. At some point, it will stop exactly with this
text. Click here. This will have an
action that will take us to a second
part of our project, meaning that this is the video. And then we click here. We
will show some of our work. In this case, for this tutorial, I will use three D objects. When I click here, it
will appear this object, but I can elements of this sequence that I use
the same graphic elements to create another poster that will reference
this three object. Instead of having
your name here, you will have the
name of the object. We will not need any
character or photo, we will not need any banner. It will be a simplified version, still animated but
simplified just to introduce this object that
make part of your work. Let's do this. I will save this to be sure I
will not lose it. Then I will save again
with another name. But this one I will call
it reference robot. Okay, like I said, some things I don't need
for this animation. I will not need the
images of myself. I can just erase. Choose the ones and erase. I don't need the turbine. I don't need the banner. I will keep the radio waves, the circles, So what else? Yes, this I don't need I
don't need the banner. I don't need the text, and I
don't need a small circle. I don't need the lighting. Maybe I don't I don't need
the circle, the center. Yes, the waves. I also erase it. I also erase the triangle. The low triangle. And
I'll keep it simple. White star bottom also. We could these layers and
just take it from the file, but I prefer to do a copy so I can play around as I want to do, not be afraid to lose information or elements
along the way. Now, I have this animation. There are still waves.
Yes. Can you erase? Can erase this. There
you have a mistake. I raise the text
and I shouldn't. Not all the texts exactly. Once again, center,
small up circle behind this lightning
triangle low. Yet that I can erase. It's show my work. Click here. Small star, white
star at the bottom. And the waves they go. So I will change the names. I will put, I will write robots. This is just for the
sake of the tutorial. Of course, if you have another
type of object to show, you will write a
different thing here. I will put version one, version one, this animation. I want my text to come earlier. This time we don't need to
wait for other elements. So my animation comes. There you go. Maybe
even earlier. I can stop it earlier too. There you go. Save it. So I have now this animation that's presenting my project, in this case a robot. I will also export it. Save for legacy. Same attributes, that less time. Okay, save it and save. Okay, now we have to
animated sequence. The first one completed, and this second
one the reference.
25. Introduction to Adobe Aero: Now we are going to use
all these that we created, these animations that we
created in Photoshop, and create an augmented
reality experience through the use of Adulp Arrow, this software that allows you to create augmented
reality experience. You can find it through
Creative Cloud Desktop. If you have an account
here at the left, three D and E, R, you
can find it here. You need to download
it, I already did. And then you open it. You can also get the software directly from the add up site, and you can download
it for free. When we launch Adobo, we arrive at this home screen. Here you have a quick
access to the files that you created before you have deleted or you can
create a new file. Let's start by exploring
this by clicking in Open. Find the file that you have at your disposal here
for discourse. As you can see here,
the file real, this is the adobal extension. We are going to open it. This scene has only
one element, a robot. If you click on the robot, it will highlight it and you can control to center the
robot on your viewport. Let's now explore the workspace to understand how
to work with arrow. This button here, home will take you back to
the Home screen. Here you have added and
preview here in edit mode. It's where we create our scene, we add our elements, we compose everything
that we are going to do for our project. Now you have the preview mode. It's a way to experience
the scene as a viewer, so we can see how
everything works together. The behaviors, the
interactivity, the sounds, the animation. So it's like we are the viewer. It allows us to see how
it will be at the end. Similar like a play button. So we are always, when working in arrow, we always go from edit
to preview to see how everything interacts and it
will be in the real world. Back to edit here at the center. It's the name of the file
of your scene that you are creating here at the
right, the under button. Then we have the shared button. It's here where we
are going to share this augmented reality
experience to the others. Once you click it,
you can create a link or you can
generate a QR code. Some possibilities. We can also change, for example, you can change the thumbnail, the title, and the
author of the project. Back to this left side menu, we have the Import button. If I click it, I have access
to several files that I want to import,
The files available. The extensions that you
can import are here. It comes from Jpeg
object three D, several types of files. Just beneath we have the Select
tool we're already using. Select my object. We move right away. We have the axis where you can move your character
in all three axes. I control C to come back
to this first position. If I click on the
middle of the axis, I can move my object
wherever I want. Below that, we have rotate. Also we have this gizmo that
appears with all three axes, we can move in any
direction desired. We have our scale. Once again, the same principle. Choose an x, x, you just have to move,
slide your mouse. Now, the three last
commands that you see here affect the way we see
the object in our Viewpart. If this ones affect the objects that we have in our added
mode in our Viewport, this one is the way you
look to them on your scene, for example, this one orbit. If you push your mouse button, you can see you can orbit
around your object. If you select the move, you can see from side to side. If select the dolly, you can distance yourself from the objects or
get close to it. If somehow you get
lost in this movement, you can always go back to
camera and you have to frame. All right, away you get back to the point of view
that you were before. Down here we have our
behavioral builder. Just click here to
have access to it. It's here where we are going to construct all our interactivity. And the way where we
want our objects in our components to behave and
to be seen in our project. If you don't see it, you just
have to click right here. Back here to the left. Here are all the assets that
come with the software. You can use it in your
scene, For example, this robot is one
of these assets. You can find different
ones in each category. Abstract shapes,
directable characters, animation, letters, et cetera. In this right side, we
have our scene graphic. Here we have all the objects that we've been
heading to our scene. In our case, for this scene, we only have the robot character and we can select it here. Imagine if I have
several other objects. I could select one
by one if I want. I can also change visibility, I can hide them, or
I can lock them, so I can't change them. In the Viewport down here, we have the actions
that will affect the elements of these objects that we have here
in a sine graph. For example, I can delete it. I can duplicate it. I can group a selection
of several objects. I can stick it to the ground. For example, if I move here and I want to quickly stick it to the ground, I just
have to do this. This is the automatic rescale, so we put it back to the
original scale here, revert to the original size. Here we can replace the selected object
to a new one quickly. You can replace this, keeping the position, with
a new object down here. Here we use it if
you want to add more control over
your object selected. For example, I can
select it and change its rotation specific
to specific number, the scale, also all the
properties in the object.
26. Overview final project: So before starting the
project from zero, I wanted to give you an
overview of the final project. This way you understand
the thought process before starting a project in
adopt ero in this case, for this project, what I did, I created a new project. I imported all the elements
I created beforehand. I imported the
references that I did, the static image, the JP that
I did, the final animation. And the animation
that will present the object that I'm going to show in this case is this robot. So everything is already
visible in the viewport. It's then up to us to decide
how they will going to appear one by one or at the same time that we
control everything. All these actions
and interactivity here in the behavior builder. For now maybe you don't
understand right away, but I'm just going to
explain this process, what I'm showing on my project. I'm going to put preview. Maybe it's better for you to
realize what is happening. If I go to preview, I have the first
animation that appears. It appears in the specific way, then I'm repeating the final
part of the animation. Then it stops right
here in my reference. It stops right at that point, what it says click here. When you click over the poster, you will then start
a new animation with this new sequence that shows the name of what we are going to show,
in this case the robot. Back to edit mode. Here I have everything
put together hidden. If you see here the high, okay, I chose not to
show these two elements. Do not confuse myself
while I'm working. But it's here that I'm
dictating all the actions, starting with the
first animation as you see in the preview. It will show in this way. First action, it will show. Then it will play. The robot is already here. But it's even, so I hide it. This is understood
by the program, by the software as the first
things that will launch. Then after all this is finished, you will pass to the same
animation that I have here. But in this time,
I will say that the animation starts just
from the point that I want. Meaning that once that
first part is played, now I want it to start one more time from the banner
already in place. It will then stop
with the poster. And this is my reference to click to pass to
the second animation. Because if I used the animation
as the click the trigger, it will have some problems. Once this first
part is finished, Everything in this first
part as it's shown, stops with the poster. That is, that will
serve as our trigger. Everything stop and is waiting for me to click
over here to trigger. The second part is this second part that shows
that in the second part. I don't want to
show the animation. You will understand when
we will start doing this from zero that you need
to have this understanding. You have to always
think about showing and hiding what's already
in the view part. Don't forget that the
poster will disappear also now because I trigger
this sequence. Now I'm showing, this
new sequence is showing, I'm choosing how to show it. And then I'm saying that, okay, play it now, once this is finished, then we launch the
robot element. It will also show the robot
if I come here preview, first thing, then I click here
and down my robot appears. Something is missing here. The robot animated sequence. I want to show it, but now I also want to show
it's animation. How I can do it. I've
come here animation. But this time I will. The subject is the robot. When I now do the preview, waiting until it
comes to that part, I click here, Now the
animation has the robot. But moving, remember that at the beginning I
have show animation. But that animation as I
need to show the object. But then that object
has an animation. So I have to give them, give it that order if this
seems really complex. But you will understand, I just wanted to show
you the entire project. We are going to work around it. Another thing that's
very important before we start this from zero, it's that for this project, I decided the anchor to
be a horizontal one. Meaning that I want to show this augmented reality
experience in a flat surface, a table or a desktop. But you can decide,
let's for example, if you wanted to make a frame and the viewer to seize your
experience in the wall, we would have to change this anchor type to
a vertical surface. If you wanted to trigger
through the use of an image, we would use an image
type of anchor. But for the sake
of this tutoral, I will not talk about all
these types of anchors. We will do the one
that is most used in the majority of the cases
which is the horizontal one. And it's the one we are going
to choose to this project.
27. Start AR project and Imports: Let's open a arrow and
create a new experience. I click here, new file, I will name it R
poster. I click okay. First thing that I'm
going to do is to import each element into my viewport
and my scene graph file. Import I have my timeline. Don't worry, it will take
some time to load it. I have my timeline in my scene. I'm just going to frame all. Okay. Now what I want to do, I don't want it to
be in this position because disposition would be perfect if I wanted to have an anchor,
a vertical anchor. And I will model and
position everything in my scene in constraint
to this option. But I want to do a
horizontal mode. Just going to put a little back. Yes, horizontal mode, I have to rotate it before rotating. I'm just saying that I'm
changing the pivot right now. The pivot is like a line at
the bottom of the animation. I want it to be at the center. Change this at the center. I will rotate it, 270. I want it to be
stick to the ground. My position is already
in the 000 axis. First one, it's okay. Now I'm going to import
my second animation. The second part animation. This one also. I can,
I leave it here. I can leave it center pivot. I will change the rotation. Also, stick it to the ground and it's already well positioned. I can hide it for now
from the viewport. Now, I need to import my poster. The poster is bigger
than all my reference, all the other elements, but I want it to be
exactly the same size. For that, I will just
change its rotation. Also, I will first see the size of
another reference. This one is 28. I just need this one because
it's locked the constraints. When I choose this one, I need to have the same
size here, control. Now I have the same size, now I just need to
stick it to the ground. It will have the
same positioning that everything else. This one. I'll also hide it. The other element that I want
to add to my scene, it's the robot. To
have the robot. This element, I just came here in this library that you have at your
disposal for free. I put the robot, but I could
also put another element. It's your choice
if you want to do, to put another element, in this case a three D element, you search in your computer. What you're going to do, just be careful to have something
with this extension. For example, if you
have a three D, another three D object, you have to be BG
or FBX or GL B. Be careful to exactly what the format that you
have at your disposal. I want to click here,
it's really big. I want something smaller,
robot character. I'm going to choose
maybe 0.2 in scale. Now I put it back to the
center, Now you have it. I have everything in my scene and I'm ready to
start my behaviors.
28. Behaviour Builder actions: For now. When I press Preview, nothing happens except showing everything that is in the
scene that I imported. There's no interactivity, there's no animation,
there's nothing. That's just the elements that
I chose to put in my scene. Still, I'm not showing
everything because I to hide the two elements because
they are one over the other. It was important for me to hide them and to decide them to appear only when I'm deciding
here in the behavior, what we're going to do first. The first thing that we
are going to do is to show this first object appears and then say that
we want the animation to roll here, this button trigger. We are going to decide. We're going to say that, okay, I want to start, I'm going to start with showing
the time line animation. I want to tell you that if
you choose something here, you are giving an action. Here in the behavioral,
you will add to the action the
element that you chose. Here. In this case, I've chosen the timeline and is already
adding that to my action. I can access some properties
in this effect of showing. For example, I will say
that will last 2 seconds. It will have an effect of
dimension, scale it out. Let's see how it will
appears in my preview. As you see, it will
show in this way, but we're not seeing any
animation to start animation. At the same time, I will
add another action. I will say play images because we have a sequences of images to show
in this animation, I will choose the same timeline. I will say play
images. There it goes. I can leave it as it is, 15 frames per second. Now when I click Preview, I also have the animation. We can hide the robot because
we don't want it to appear. We don't want the robot to
appear in the first sequence. Back to edit mode, I will say that the robot, I will choose it here
in the Seno graph. I will say that he
will hide the robot. Back to preview, no
robot is shown. For now. My animation stops here. But I wanted to repeat
again this final part. Once all these actions that
will start the sequence, they are finished
right after this. I will say that I want to
play again the images. Sorry, I forgot to choose here. I will say play
images this time I wanted to play from
the second part. You can have a
preview like this. See, I wanted to start
from around here. Keep the same frame per second. Let's just see how if
it's working good. It will appear,
finish the sequence. Restart again one more time. The second part of the sequence,
and it will stop here. To access my second
part of my experience, I want to add a new action. This time I want to use one of the reference that
I made in Photoshop, the poster stop to be a trigger
for the second sequence. I can't use the same timeline as a trigger because
it will all the time repeat this,
this animation. And also because of the size, I prefer to use an
image as a trigger instead of the animation itself. With the poster stop chosen, I will give an action saying that it will show at the
end of all the sequence, it will show the poster.
Let's see the preview. I don't want to poster to
appear with an effect. So I want to take it, this
out. It's okay for now. I don't want to scale.
I wanted to fade, but with the duration at zero, it will just appears. And that's what we want. Now, with all the
first sequence done, I want to already pass
to the second one. All the first sequence is
made and it's finished with the poster waiting for the trigger which
will be the trigger. It will be to tap over this image to start
a second sequence. I will say that my trigger
will be to tap the poster. The poster is
already chosen here. I'm saying that when
I tap the poster, or this reference that
I leave at the end, he will start a second sequence. In this second sequence, I can say this timeline
will disappear. I will hide it. I will also say that the poster
will also disappear. The poster hide. Now I have a second animation. This animation, I will
say that it will show, I can leave it with this effect. It will also play images. I can also say that the robot, after the start of the
second sequence will appear. Let's use the robot
first. It will appear. It will also its animation. Because remember
this robot that is part of the library of Adoburu? He has an animation
incorporated. Besides showing it, I will also want to
show the animation. I will say animation now, when I had to do a preview of everything play in
the second sequence. Now it's stopped. Let's see
now if everything is okay, I'm going to click
and it's now working. Why is now working? This
is because my reference, the one that works as a button
where I'm going to tap, has to be a little bit higher
than the animation for now. They are all stacked
one over the other. I want it to be just
a little bit over. For example, if I
put 0.2 for example. Let's see if it's not too much. I elevate a little bit the poster over the
other elements, so they're not stacked one
over the other, we don't see. Now I click and I have
my animation simple. If they are all one
over the other, there's no space between them. They will not work well. The trigger, we need
to separate them even if it's just a little
bit so that the trigger work. There's a little error
that we can correct. In my preview, I see
that at the beginning the robot is already in the scene and disappears
like this very quickly. But it's not good. It's because in this
action here where I say the robot,
there's an effect. There's still some fractions of seconds that's disappearing. So I need to put this to zero. Now that I do the previews,
not in the scene. There you go. There you go. This is
a simple example also. I mean simple and complex
at the same time. But you have to understand
how everything works. It's always straightforward, meaning that import everything, everything will be visible. But be careful in the way that you make them appear
in the viewport. Because, for example, if I leave this on and I leave the preview, you see everything is
one over the other. For me, it's better
to hide some of the objects to be easier to preview and think
about how I'm going to organize my timeline
in this AR experience.
29. Export AR: Once you finish
with your project, you can export it if you want to work with
it in another computer. Or if you want to share with somebody that's
working with you, you can give it a name and
save it where you want. Now it's time to
share our experience. I want this to be
enjoyed by other people. For that, we can here
in the Share button, I have my estimated
project size. Always try to balance and
do not very heavy project. Because remember, people
will be seen this normally from the telephone,
from their smartphone. If you have a very
heavy experience, it will take time to load, it will take time to be shown. Now I will, I will change, for example, the image. I can change this portfolio, for example, I leave
my name in it. So now you just have
to create your link. It will give you a link
that you can copy and share whoever you want by mail, by message, or you can, and this is the one
I'm going to use. I'm going to print this ker code and put it
over a top desktop or table. We will see how we will
work with our phone. I will download it
and I will save it.
30. Share AR Experience: I printed the Ker code
generated for my project. As you can see, I then glue
it to a piece of cardboard. I will put it here centered. I will then use my smartphone, or in this case the tablet. I will point to the care
code and you see it recognizes the care code
and it gives you a link. Don't forget to install it before using your
tablet or smartphone. Or you have to install it after
it will open the project. As you can see here, it recognizes the project with the thumbnail that
I chose before, the title that I had, the author of this project. I continue then you will
search for a flat surface. You just go from side to side so it will be easier for
the software to identify. You will found it now I
just need to accept it. Okay, Now I see my animation. The first part. It will
stop at some point. I tap it. Now I have
the second one. Now you are free to circle
around this project. You can see your augmentedality
experience from any side.
 Studio Wander