Transcripts
1. Introduction: Welcome to the first
class in my new series, where I show students
how to animate more advanced text animations. In this first class,
I'll show you how to animate three D text using Cinema 40 Light that comes for free with your
Adobe subscription. Can't wait to see the
animations you create.
2. Getting Started & Class Project: For this class, you'll need
an Adobe subscription to access the free version
of Cinema four D Light. Your class project is to create a three D text animation
using Cinema 40 Light. Be sure to post your projects
to the project gallery. I love seeing the
animations you create.
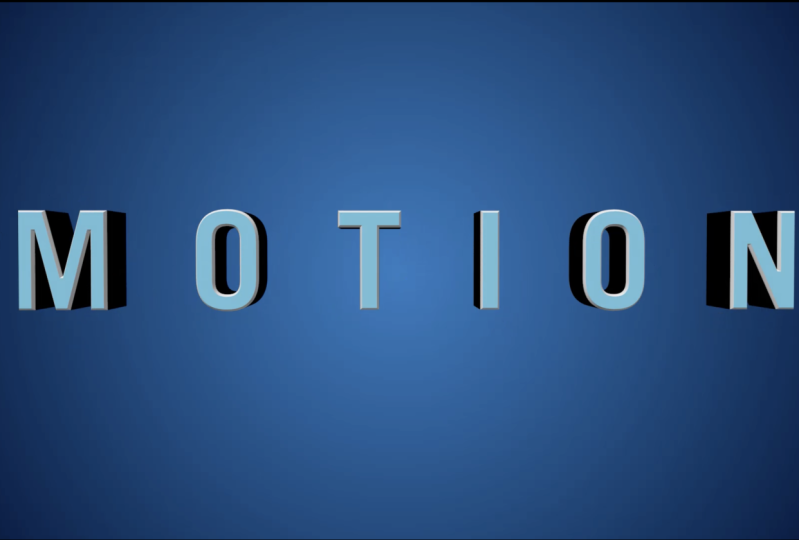
3. Create the 3D Text: So here we are inside
After Effects. You can create any composition settings that you
would like for this. To create our new
Cinema four D file, we're going to go
up to File, New, Maxon Cinema four D Light file. Here we can choose where
we're going to save our file. We can give it a name. And what it's going to do
is it's going to go ahead and create our new
Cinema four D file. As you can see, now
it's in our menu, Cinema four D Light will
begin to load for us. If it's your first time logging
into Cinema four D Lite, they might ask you to
create an account. So go ahead and
create that account. So once you've got your
account signed up, to create our text,
we're going to go over here to this T icon. We're going to click
on it. It'll create a default text outline for us. And over here on the menu, we're going to click Middle to get our tech center aligned. Up here, we can change
the angle of the view by rotating This hand icon can help us move
around the screen. And this icon here is
the toggle active view. When you click that button, now you'll get four
different angles. We're going to go
back to the front of our text using the
default camera. In our text Blind field, we can type in
whatever text we want. I'm going to stick
to something basic, but you can type in
whatever you would like. I'm going to choose a font. I'm going to go with
Monster At Black. So as you can see, this is
just the outlines of our text. To get some actual three D text, we're going to have to
go down to this icon here and we're going to
have to click on Extrude. Now we're going to drag our
text spline into Extrude. And there we go. Now we've
got some three D text. If we head back
to after effects, we can take our text file, drag it into a new composition. And inside our new composition, it should display our
cinema four D text. First, we're going to
have to go over to the renderer setting and
change it to current. This will give us an
active view of what our file looks like
in Cinema four D. The reason it's not
showing up is because I didn't click the Save
button in Cinema four D. So make sure you
click the Save button in Cinemaur D in order for
your text to show up. There we go. And if this is all you wanted to do was to create some three D text, then this tutorial is
basically over for you. I would suggest skipping
to Lesson three, where I'll show
you how to change the color of your font
and add a stroke. If you want to learn how
to animate the text, continue to Lesson two.
4. Animate the Text: In this lesson,
we're going to add some animation to our text. The first thing
we're gonna do is we're going to go
over to fracture, and this fracture is
what we're going to use to drive the
animation of our text. Now let's drag our extrude
inside the fracture. Now to add some animation, we're going to use
the effectors. An effector works
essentially the same way as text animators work
inside after effects. First, we're going to
select a plane effector. With our fracture selected, let's go over to
our effectors panel and make sure that our
plane effector is listed. If it's not, you
can just drag and drop it inside the
effectors panel. Now let's go back to
our plane effector, and I'll show you how
to animate the text. We'll go over to our
perimeter panel. In this panel, we can type in coordinates for position,
rotation, and scale. I'm going to get
rid of the position by unchecking the box. And I'm going to
select the scale. Select the uniform scale. In the scale menu, I'll type
a value of negative one. Now let's head over to
the effector panel. By changing the strength value, this is how we're going
to animate the text. As you can see, as I change the strength value,
our text animates. So to add some animation, we'll have to put some
keyframes on our timeline. Head over to the window panel, select timeline dope sheet. This is what they call a
timeline in Cinema four D Light. At the beginning
of our timeline, let's click this icon
to put a keyframe. Now let's drag our playhead over to frame 20
on the timeline. Let's change our effector
strength to zero. Click the keyframe button
to place another keyframe. This would be a great time
to mention that anytime you want to create a keyframe
in Cinema four D Light, you have to press the icon. The program doesn't
automatically create keyframes like After Effects does,
something to keep in mind. So now let's click Play
to preview our animation. There we go. Now
our text scales in. To make our text animation a
little bit more interesting, I'm going to add some overshoot. I'll drag these keyframes to around 30 seconds
on the timeline. Now let's head
back to 20 frames. And in the effectors panel, we'll change our strength. Try a value of negative 25%, and of course, we'll
remember to press our keyframe button
to place a keyframe. So let's preview
our animation now. There we go. We have a
little bit of overshoot. It makes our animation a
little bit more interesting. This icon here, we can click on it to head into
the graph editor, and we'll drag these
handles to give our animation a
smoother animation. The graph editor inside
Cinema 40 Light works essentially the same way as the value graph works
in after effects. There we go. I think that
looks a little bit better. And remember, you can always animate your own text
anyway you'd like. So now I'm going to show you how to do a different type of animation using a different type of effector called
the Random effector. We'll head over to our
effector panel again. We'll choose the
random effector. Now let's head to
our fracture to make sure that our random is listed
under the effectors panel, and it looks like it's not. So this will be a
good time to show you how you can simply drag and drop the
random effector into the effectors panel. Now let's head back to
our random effector and we can start animating. On the perimeters tab
of our random effector, we can turn off position. On this one, I'm going
to animate the rotation. So let's click on rotation. And in the rotation values, you can type in any
value you would like. I'm going to start
out by typing 25% into each value just to
see how this turns out, and later on, we can
always change it. One thing we're
going to have to do to make this animate
the way that we want it under the object tab, we're going to have to
choose Explode segments and connect. There we go. Now our text will animate
the way that I wanted it to. We'll head back to our random effector to add some animation. Now we're going to have to add some keyframes to
add some animation, just like we did on
our plane effector. We'll head to the
beginning of our timeline, place a keyframe for
the strength at 100%. We'll head to 20 frames
on the timeline, put a strength of negative 25. And of course, make sure you
press the keyframe button. Now it's head to 30
frames on the timeline, and we'll change our
strength to zero. Press the keyframe button. Just like our plane effector, we'll head into the graph editor and we'll smooth
these key frames out. A good shortcut to know is that if you hold shift and control, you'll be able to drag
these in a straight line. And, of course, we'll have
to tweak our animation and refine it to get it to look the way
that we would like. So I'm going to go
ahead and do that now and I'll get
back to you later. Alright, so I finished
tweaking my animation, and I'll go over with you all
the things that I changed. The first thing I did was
on the random effector. I changed all the rotation
perimeters to negative 180. I think that adds a little bit more of exaggerated animation. On the plane effector, I changed the strength
down to negative ten on the second keyframe, so it doesn't scale in as much. Over on our text layer, I changed the horizontal
spacing a little bit. The text still
overlaps a little bit, but it's nothing I'm
too worried about. And then I went inside
the graph editor, and I tweaked it a
little bit to get it to animate a little
bit differently. And I spaced the keyframes out a little bit
on the timeline. So now the whole animation
takes about 40 frames. And once again, I would
like to remind everybody that you can animate your
text however you would like. Mine is just an example. So you can get as creative
as you would like. I would love to see your
projects once you're finished see all the great stuff that you guys might
come up with. I'm going to head back
inside after effects. And as we can see, the text
is a little bit off center. So this would be a
good time to point out that whatever your
camera is pointing at inside Cinema 40 Light is what's going to show up
inside after effects. I'm going to go back
into Cinema four D and straighten out my camera. I. And we'll click the Save button to make sure
it updates inside after effects. There we go. That looks better. Sometimes it takes a little bit
of time to load. And this is essentially it for the animation portion
of this class. If you want to learn
how to add some color to your text and add a stroke, head to the next lesson
on stylizing the text.
5. Stylize: Here we are back inside
Cinema four Lights. To create our color, we're
going to have to create a new material in the
material manager. We'll click this cylinder icon to bring up the
material manager. As you can see, I made
some materials earlier. I'm just going to delete these, show you how to
create a new one. We'll press this plus button
to create a new material. Now that our color
panel is open, we'll go over to Basic, and we're going to
turn off reflectants. As you can see,
there's a whole list of different types
of materials that you can create in Cinema
four D. For this tutorial, we're just going to
stick to basic color. We'll head over to
our color menu, click here to bring
up our color picker, and you can choose
any color you like. Maybe you'll go with
an orange color. We'll drag our new
material right onto our text, and there we go. Looks like our material
dropped onto our fracture. What I want to do is drag
that onto the extrude. There we go. So what if you
wanted to create a stroke? Well, to do that, we're going to have to create a new material. First thing we're going to
have to do is on our extrude. We're going to go over
to our CAPS menu, and we're going to
have to make sure that our layer has a start
and end bevel turned on. Round, solid, step or spline. It doesn't matter
which one you choose, but I'm going to
stick with spine. I'm going to stick
with 3 centimeters, three subdivisions, keep
the tension at 100%. We'll go over to
our selectors tab, and here is where we're
going to have to pay attention to these coordinates. We're going to want to
know our start bevel. We're going to have
to remember that start bevel is R one. I'll just copy R one. So let's create a new
material for our stroke. Go over to the material manager, click the Plus button to
create a new material. We'll go over to the basic
tab, turn reflectance off. We'll go back to the color tab. I'm just going to make
my stroke pure black. Drag it onto my text. And as you can see, it went on to the fracture object again. I'm going to drag it
down to the extrude. Remember that coordinate
that we saved earlier, we're going to go
over to our tag tab, and under selection,
we're going to paste that R one,
and there you go. Now our text has a stroke. And what if you want to change color of the side of your text? Well, to do that, we're again going to create a new material. I'm just going to
change it to black. Turn the reflectant off again, drag that onto our text layer. Drag it down to
the extrude layer. We'll head to our Extrude. We'll go to the selections tab. And for the side of our text, we're going to have to
know the shell coordinate, which is S. Let's go over
back to our material, and the selection, we'll
type S, and nothing happens. This is because it's
case sensitive, and I need to types. Just something to keep in
mind when you're doing this. So now that I typed in at S, you can see the side of
our text turned black. And if you ever want to change the color of your text again, you can just go into
the material manager, choose the material that
you want to change. I'm going to turn my text
to a different color. I'm going to change
it to a purple color. I think that looks better. And, of course, you can go up to the Tile tab, click Save, and it should update inside
of after effects. Here we go.
6. Using the Text : Alright, this is
our final lesson, and it's going to be a
short one because I just want to show you that now that
you've created your text, you can now use
it like you would any other layer
inside after effects. Go to go back to my
main composition, drop in the text comp. And now I can edit it just
like I would any other layer. I'm going to create
a background. Bring up the scale,
scale it down. Bring up the
position, center it. Maybe I'll create a
gradient background. I find three D text always looks great with a
gradient background. And keep in mind, you can pack on any effects that you
would like to this, just like you would
any other composition. But for this example,
I'm just going to keep it simple and
create a background. Of course, you can
export it like you would any other after
effects composition, but that pretty much
concludes this tutorial. So don't forget to post your projects to the
project gallery. Love seeing the stuff
you guys create, and that's just about it. Thank you for taking this class. I look forward to people
taking my next class.
7. Outro: Congratulations for
completing this class. Be sure to post your projects
to the project gallery. I love seeing the
animations you create.
8. Quick Tip Render Settings: Hey, there. It's your
teacher from the future. Just thought I'd throw in
a little quick tip here. I think it's always good measure that when you're in
Cinema 40 Light, to go up to your render
settings tab up here. And just make sure that
your render settings match your composition
settings inside after effects. I don't think it's
mandatory that you do this, but I do think it's
good measure just to save yourself from
any complications you might have going
to change this to 1920 and 1080 frame rate of 30. So as long as those settings
match inside Cinema four D, everything should match
inside after effects. Again, I don't think it's
mandatory that you do this, but I do think it's good measure just in case you run
into some issues.
 Tyler Bennett, Motion Graphics Designer & Photographer