Transcripts
1. Introduction to the Course: Hello and welcome to the wonderful world of
foam flag crafting. My name is Maeve, and I'm
here to guide you through the process of making beautiful and realistic
flower or the folds. Flat grafting is a versatile
and enjoyable graph that allows you to create standing floral arrangements
that will last a lifetime. You are a seasoned
crafter or a break. Now, this graft is perfect
for anyone who loves flop. Want to add a touch of
beauty to the home deco, special occasion,
or even as a gift. This course, you will learn how to create
a form class Bye, shipping and loving
form sheets together. With a little bit of
creativity and patients. You can make a wide
variety of Flask, such as roses and move in any
color and size you resides. So get ready to explore the
boulder form flag crafting, and let's get started on
creating some standing glute.
2. Materials List: Hi everyone. In this video, we'll see what are
the materials needed for creating the form floss. 0.8 M form sheets. Hot glue gun. Floral t lands. I invokes a heat gun. Seem rival. Guizhou. Reading farm. Let's get started.
3. Foam Flower Template Creation: Hello everyone. In this video, I will
show you how to create a template of petals and leaves for making
the phone class. Creating templates
is necessary for grading form flat's
because it helps ensure consistency
and accuracy in the size and shape of
each flavor component. Templates are essentially
guided that can be used to trace and
ketones four pieces in a precise manner
so that they fit together to form a
realistic looking flop. Start by drawing a flat
template on a piece of thick. It can be a code book or
book cover or Chaffey, but you can draw any shape you like, such as daisy petals, rose petals, or leaves. You can also take a
printout of the petals and leaves and trees it using
the carbon paper and cut it. Easy to create a template, you have to follow
two-step process, draw the desired shape and size of your pattern and cut it. Teeny. Plants are typically made by cutting out multiple layers of various sizes and shapes and then assembling
them together with flu. Each layer may need to be slightly smaller or larger
than the previous one. Depending on the
shape of your flap. Templates can help
ensure that each layer is cut out karaoke and matches
a corresponding layer. In addition, the
blades can help save time by using templates that can easily trees and cut off
the necessary shapes without having to measure and mark each pieces individually. This can help ensure that
the pieces fit together properly and reduce
the likelihood of mistakes that would
require starting a war. Or without creating templates is an important step
in the phloem plot. For the foam flower
making process to ensure that each flat is consistent and
accurately represent the desired shape and size. Yeah, we go, one of the flat
end plate is steady now. Thanks for watching.
4. Creative Flower - 1: Hi everyone. In this video, I'm using this template
for petals and leaves. For this flower. I'm using
a pink formula sheet. You can select a formula sheet in the desired color
for your project. Make sure it is clean
and free of task. Please the petal template
in the formula sheet. And use a tool like this to trace the petals sheep
in the formula sheet. You can't use a pencil or
pen because the pencil and pen will leave a
permanent bark on the finished product.
We wouldn't want that. But you can use some
sharp edge spins are other tools to trace the shape of the template into
the formula sheet. Make sure you press firmly enough to leave a visible
light on the formula sheet. Likewise, do use a very sharp
object like a paper cut up. It will pack the formula sheet. Once you have the petals, you need, you can
stack cutting it. Now. It's time to
cut the pedals. Use sharp scissors to carefully cut the formula and
patterns along the line. To make clean and precise cuts. Amy Jack H will be visible
in the finished product. When cutting the former and
she used sharp scissors, scissors with Karsh,
the formula sheet, rather than cutting it teeny. Make sure your scissors
are sharp and use them one leaf or cutting for Medina
to maintain the sharpness. Slowly. Formula sheets
are thin and cutting them weekly column because the edges to become
jagged, uneven. To get a clean cut, slowly and steadily falling the line you have
drawn caffeine. If you are new to
working with formula, it can be helpful to practice on a scrap piece before
working on your final project. This will give you a
chance to get a fee for the materials and adjust your cutting
techniques as needed. Almost completed. The first one is ready, and we need four more petals. This same process
has to be followed. Once you have all the petals, you need to make those black
lung to the next step. Gently unfold the way I'm
doing and drag the edges. In this way, the heat generated between the fingers
to ship the formula. This will give you the
buttons a more natural. You can create goods weight of folds by pinching and twisting the formula
and with your fingers. Be careful not to
all of the formula. Or it may become the ship
and automotive texture. Once you have heap the
formula of your desire, you have to allow
it to pull and sit. This will maintain its
shape and texture. The next method I'm going
to show you is by using the inbox is one of
the heat source. To warm up the formula. You can use a heat gun or
hairdryer on a low settings. B-sharp. Just keep
the heat seals in low settings and don't
overheat to avoid melting. Yes. Too much heat can cause
the material to melt. Once a woman has one, use your finger to shape
it into the desirable. If you're creating
a larger sheet, you may need to use a font or more to help
support the formula. When it pulls and said. You can use objects
such as balls or carbs as moles and
create your own custom. More using the
medieval such as why? Remember to walk
slowly and carefully. Using agenda to avoid
damaging the materials. Because from Iran is
a delicate me to get that gamma or the phone that's exposed to
pipe the breaches. User low heat settings on your hindgut or
hydronium ion box. And keep moving. The heat source such as
he'd good or hairdryer. Moving is to avoid
overheating at one spot. Once you have jammed with
all the five petals. Now it's time to expand it. Touch the edges of the petals. Please a finger below the edges and expand
it a little bit. Repeat the steps for
all the five petals. Do it gently and slowly. Make sure you're not
adding the petals. Now, we're done with
all the five petals. Look at the H's. It looked
nice. Keep the petals. Now it's time to meet
the needs for our flop. The green formula sheet
and your leaf template. The same process
has to be followed. Please watch the video carefully and notice
how I'm doing it. And follow the same
process for your project. I'm repeating myself again. There's different
theories, the sheep into the formula and
using that template, ensure the consistency
in shape and size. Big each buttons
and cool the ages. This will give the buttons
are more naturally. Expand the petals a
little bit in the center. Once you are done, keep
the font and leave. Now it's time to be the
center of the rose. I'm picking the aluminum
puzzle. People. Roll off a small piece of
aluminum for Xofigo and pressure pipe horn sheep flocks. The central federal makes you the size of the code as little smaller
than the petals size. His finger and middle finger inserted into the cone shaped aluminium positive people and
secure it. In the center. The blue to security type stuff attaching the petals and the center hub due to
the bottom of the petal. And placing it on the center. You can add new, gradually, increasing the size until
you reach the desired size. When adding details
to the blank, then that's something
to keep in mind to ensure that your
flower look beautiful. Please stop. It attaches to the stem in the natural and staged pattern. The better should not
be too symmetrical. As the scan week this
blank look artificial. We can try reading the signs of the brush to create
more realistic shape. Some petals should be
larger than others, and they should gradually become smaller towards the
center of the flower. Again, try to gently pull the edges of the petals using your finger.
But offensive. To add diamond shapes
and lift the flask. Look more realistic. Slightly overlap the bezels
as you attach them to the step to give the
flavor that I mentioned. Slightly rotate each
petals as you attach it to this tab to create your
more natural looking sheet. To make sure that the petals are similar in shape and size. To create a more
realistic looking flat. Continue adding one
on top of each other, slightly rotating them
to create. Not sure. We have all the buttons. Now it's time to, please. Once you have added all
the petals and leaves, user Waikato to gender Florida, What does that stand? This is a lot of people standing by cutting a piece of Florida to
the desired length. The length, well depends
on the size of the item. But typically 4 " is a good
length to plug in one-half. And this Jeff, you are
happening in the other hand, begin dropping the
floor and I don't just stand starting into
law, blocking your way. Reshow. To stretch
the deep slightly. As you'd wrap, to
activate the adhesive. As you wrap, overlap the slide so that it
sticks to itself. Does it, you can do wrapping
it until you have cupboards and then you read the UK that are conductive
and precedence a good lead. Ensure that the team
starts to slip off. Come loose. Price judging it more as you wrap to
activate that Huizu. Floating big gaps in
verity of Palace. So choose the color
that matches of a beautiful rose black.
Thanks for watching.
5. Creative Flower - 2: Hello everyone. In this video, I will show you how to create the second type of plot
using a low formula sheet. For this, we need six
centimeter circle template. Please. The circle template in the formula entries the circuit. Make sure you press firmly enough to leave a visible
line on the formula sheet. Now it's time to cut them. Use sharp scissors to Catholic cutout of Homer and circle along the tracer blind. To me clean and precise cuts as any jagged edges will be visible
in the finished product. Now the so-called
form around she does really all the foam
sheet in half, bringing two opposite
edges together. Now the guide dog
hop into quieter. Know that along the corners, I'm dividing the clutter up the circle into
four equal parts. We have 16 pieces in this layer. Each part of the petal
and curved the edges. First, do it in clockwise and followed
by the opposite Zac. Cutting and shaping form floss, get done and require patients. Take your time and
book gasoline to create the desired shape
and look for your flower. Full Vlassa delegate. So handled them with GAD
to avoid pairing them. Please watch the video carefully and do it the same week, please. This is in the center
and cut curvy. Now the opposite side. There are many ways
to create form floss. So don't be afraid
to experiment with different techniques to find out the one that
works best for you. Do not rush the cutting process as this can result
in inaccurate. The first layer is ready. Likewise, we need for
more layers to create a flower leaves via using phi layer of petals
to create the slop. Heat edges of the petals
using a heat gun RNAi inbox. Be careful not to burn
the formula sheet. Just heat it enough to
slightly curved edges. This way. It's also smooth. The edges. Next immediately plays the a in your palm and
press it to make a code. Again, how to
please a plateau in the sponsor phase and
firmly press the center and repeat the process
for all the petals. Make a note, you must set your ion to a low to
medium heat setting. Do not use high-heat as the skin burn or melt the formula petals. Olga, phi layer of
petals are ready. The green color formula sheet for this same process
has to be followed. The lines are visible in this
green color formula sheet. It's curved edges. That's the straight cut. Slowly and gasoline. That's the heat setting on a small piece of formula
before starting the project. Strike the petals
before it goes down. Novel lethal strategy. For creating the center five, we need white formula, sheet one plus 15 centimeter. And color the white
formula using the black oil pastel color. You can select the oil phase, a color that you want to
use to color your formula. You can use one color or multiple colors to
create a gradient. Definitely. The color Jenny, at the one. Taking care not to press too
hard or damage the formula. You can use oil, Faisal or soft paisley colors. Other color pencil,
wax, crayons, or watercolor will either Dam is a material or will
not blend properly. It just slightly and drill it to greet the
center of the flower. Speaker, Florida string. Length. And I've asked the
center part of the flower ruling though, white foam rubber sheet with a metal strip to
grid center button. Now look center
part as a rainy day shipping it a little bit to
make a more natural look. Now it's time to add the petals. One big one, leading
them on top of each other and slightly rotating them to create a more natural. Finally, add the leaf. Begin dropping the Florida.
I don't understand. At the top and
working your way down slightly as Euro. If the paint starts to slip or come loose, try
stretching it. As you wrap to
activate the adhesive. Floral tape comes in
variety of colors. So choose a color that matches. So again, very flat, steady now, to
decorate your home. Thanks for watching and
see you in the next video.
6. Creative Flower - 3: Hello everyone. In this video, I'm using this template to make the third video flask using
the red and yellow formula. And if you watched
my previous videos, you will know the steps. For those who are watching
this for the first time, you must follow the few
simple step process. Trace the shape of your petal into the formula sheet using the template to ensure the
consistency in size and shape. And use sharp
scissors to carefully cut out the formula and patterns
along the TreeSet lines. While making this type of law, you need at least when is it similar size of patterns
to create the fluff? For creating the center
part of the plan, you need to dig a
little formula sheet. When putting inches
crossed 1 cm, you can choose a
phone ranching that matches the color of the
center of the plank. You want to use sharp scissors to
cut form around sheets because one will
crush the material instead of cutting it neatly
to keep the scissors shops made sure they are well blade and one Lee
used for cutting formula. Before beginning
your final project, it can be helpful to practice your cutting
method on a scrap piece. If you are new to using formula, you can use this opportunity
to get a fee for the substance and warfare you're cutting
method as necessary. Now, cut a small strip of formula from the
sheet using scissors. The size of the strip will depend on the size
of your plant. I'm getting very smart. Once you have done
cutting the end Berlin, please take of water by and folded and insert
the foam sheep. As I'm doing in this video. By doing this week, The Florida and Florida will not separate lake loop and start drawing the form sheet to create
the center part of overflow really tightly as possible. Once it is done to secure it, I'm cutting a small piece
of circular formula sheet. And I've actually eat in the bottom of this center
point. We have greed. The formula and stupas
too long for your flower. You can trim it down to the desired length
using scissors. Keep in mind that the specific steps for
creating the center part of the formula and flop may vary depending on the type
of law you are making. Your personal preference
for shipping and detailing. Experiment with
different techniques and tools to find out the
method that works. Best point. Followed by the next step is to
warm up the formula. Here, I'm using my inbox as a heat source to
shape the formula. Make visible lines with
the stool and expand the petals a little bit to give the better young
naturally appearance. You can also use other tools to gently heat the
former and stuff. This will soften the material and make it easier to shape. You can also use other shaping tool to add texture and details
to the petals. Once you're satisfied
with the shape and size of the centerpiece
and the petals. You can attend the center
of the flower with the kids are popular for making artificial flowers because they are lightweight, durable, and can be shaped to create realistic looking
petals and Bloom's. They're also
relatively inexpensive and easy to work with. Making the map a popular choice for practice of
all skill levels. Keep in mind while layering the petal to the center
part of the form flask Jager to place the petals evenly and some entity around
the center of the flower. The petals should be
phased out equally and overreact slightly to create
natural looking clamp. Ensure that each pedals is securely to the
center of the flower. Make sure that it has a set completely before
adding the next layer. Gradually, lay the
petals one-by-one, making sure to create a smooth transition from
one layer to the next. Dried to avoid any gaps or an evenness in the
petals placement. Next, add the leaf, the bottom of the flower. This kind of leads are readily
available in the market. You can use them if you want, as you can create it using
green formula sheet. Once all the petals and leaves
are attached to the wire, you can start dropping
the stem that the Florida as you spiral. So I overlap that beat so that in bonds to
itself and form them. Continue wrapping until you
have covered the entire stem. Choose a color of the Florentine that complements are matches the flask because it comes
in a variety of colors. Finally, ival Flores, reading. Thank you for watching.
7. Creative Flower - 4: Hello everyone. In this video, I'm going to show
the final flaw of this course using the red
foam sheet and read Poland's. Use a tool like this to trace the battleship in
the formula sheet. After placing the
petal template, they be careful to press
down firmly enough to leave a line on
the formula sheet that can be seen along
the lines drawn. Gently cut out the petals of the formula using a
pair of sharp scissors. Since formula sheets
are relatively thin, cutting them rapidly may
result in Jack unevenly, just slowly, steady while paying close attention to the lines we have drawn
to get the teeth. Again accumulate on the
phone floss over time. So it's essential
to keep them clean. You can use a soft
bristle brush, cannot compose g and to remove
the dust from the floss. Properly, keep your phone floss avi from dark
sunlight in a cool, dry area when not in use. The first petal is ready. Now we need formal petals
to make this flat. You must do the formula
in order to molded. You can use a hairdryer or
heat gun for few seconds. Hold the formula sheet over
the heat tools to make it a little closer sensitive to heat. So a wide exposing them to high temperature or direct
sunlight for prolonged period. This can cause the form
to melt or default. Add some texture to the
petals and stretch it. Once you have sheep the formula
into the desired sheet, let it cool and set
for few minutes. Use caution when
handling heated formula. It can become very hard and
make cost or other injuries. For beginners, I always suggest
them to consider wearing gloves are using a dual to hold the formula while
heating and cooling. The formula sheet with
a low heat setting, a white overheating
the material as this can cause it to melt
or become deformed. A formula sheet before
eating it by cutting a small sample piece and heating it to see
how it responds. This will help you
to get a feel for the heat settings to shape the formula
without damaging it. All the five petals
are ready now, this artificial polar as
lightweight and durable, making an idle for use in
Florida and making remove a leaf from the Poland and start attaching the
petals to the Poland. In fact, artificial flowers
can be an ideal option for people who are allergic to pollen or have
other sensitivity. Natural class. Artificial flask also offer
the advantage of being long-lasting and
durable as they do not weld or die like
real flowers to Daphne layer the phone plans or deleted and can be easily damaged if not handled gasoline, a wide banding or crushing the flower and be gentle
when arranging them. Gradually layer the
petals one-by-one, making sure to create a smooth transition from
one layer to the next. Try to avoid any gaps or
unevenness in the petals. Placement. Finally, attach the leaves at the bottom of the flower. Florida is ready now. Thanks for watching.
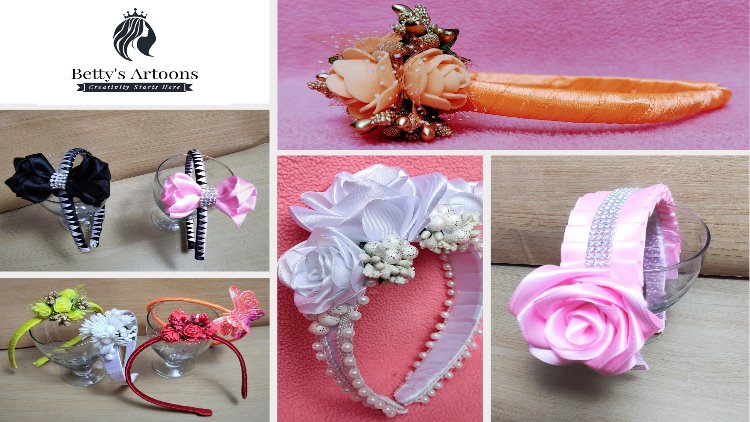
 Betty Dalmi, Artist that specializes in Art and Craft