Transcripts
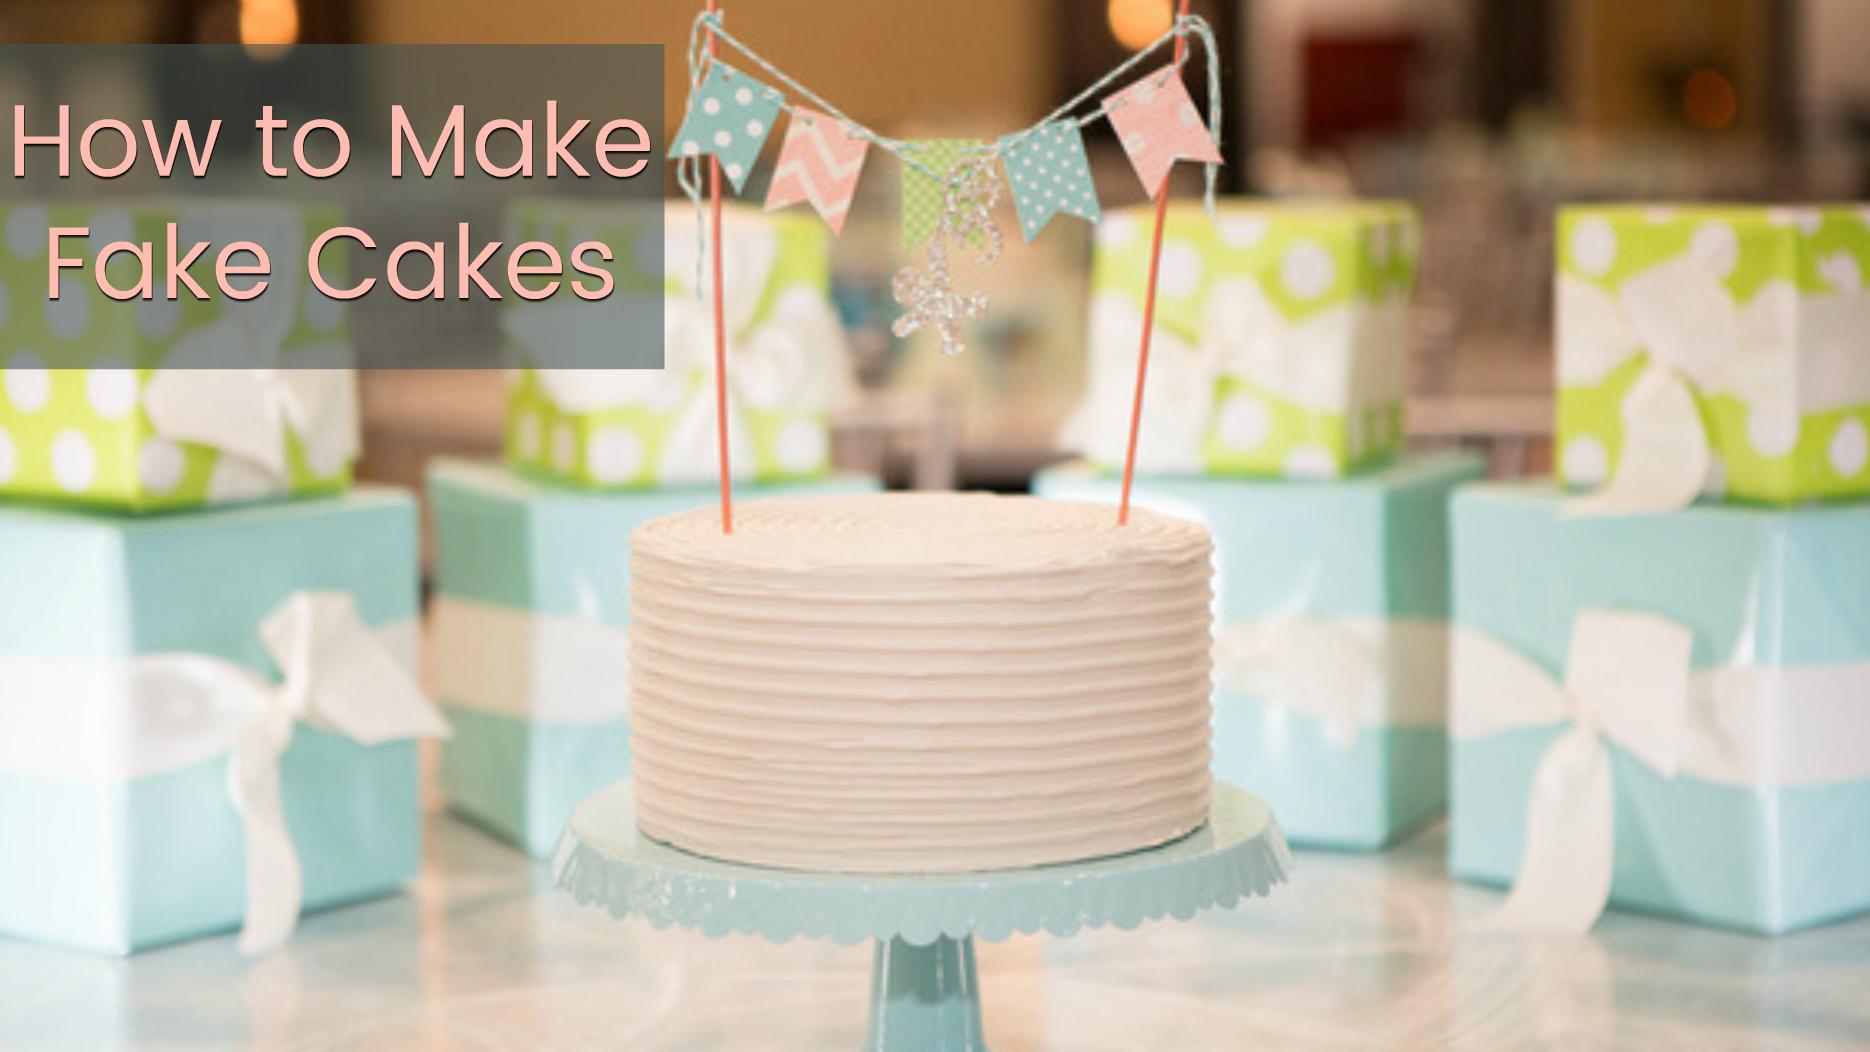
1. Introduction : making fake cakes is so much fun. If you've ever wondered how these cakes are made or want to try your hand at making a nicely frosted fake cake to display in your kitchen, this class is for you. No previous experience is necessary. Materials you will use in this class are easier to handle. Then riel ingredients. You won't need to turn on your oven, and you don't need to worry about keeping the frosting cool for refrigerated. I will share tips n tricks to help you create a cake that's beautiful, looks really and has zero calories. You will also make a cute bunting to finish off your creation. As an added bonus, I will share the industries that are looking for fake cakes and just how to get started and sharing your new talent. Gather your supplies and follow along as you make these delicious looking fake cakes. I'll see you in class
2. Tools and Materials: Hi. Welcome to the class In this segment, I'm gonna go over the different supplies needed so that you can start making your first bake cakes. In this class, I will be demonstrating with an eight by four foam cake ground. You confined a cake ground at your local craft store or online simple tools. Some simple tools that you could use are a fork, a butter knife, a spatula and a tall base. Next level tools. These would include a spatula, a knife, a fork tape and a lazy Susan. Professional tools. Professional tools would include a turntable, a pronged pivot. Insert a baker's edge of fork, a spatula and a sturdy piece of cardboard frosting and toppers. We will be using joint compound as our frosting, actual paint and a paintbrush, and we will also top off our cakes with a decorative banner. Be sure to download a pdf template
3. Let's Get Started | Simple Tools: If you want to try your hand at decorating bake cakes and you only want to get the mineral supplies, you'll need a sheet of paper to protect the surface you're working on. You'll also need your faith cake ground. A butter knife that's gonna ask, has your candles a spatula to spread the frosting or the compound around the cake? And finally, a leader for to help decorate the cake. Once your cake is fully decorated, you want to place it on top of a base for tall object. Let that rest for 45 minutes and then you're ready to paint.
4. Next Level Tools: If you want to take your cake decorating to the next level, you lean a lazy Susan phone cake. 70. We'll have to take to the bottom of your case. You need paper to protect your lazy Susan a spatula just for the compound on the top on the sides of the cake before to create the designs around the side of the top. Or you could even use a butter knife if you wanted to create a wave design. Once your cake is fully decorated pieces of paper let your cake drive for at least 45 minutes and then you're ready to paint.
5. Professional Tools: If you're planning on making several these cakes, it would be a great idea to get professional equipment. This term table's gonna make the job a lot easier. It does come with a spinning top, but I would recommend removing this time and instead using the three prominent swivel Top this. Just go into the base of your cake thin. Your cake would go back. This will. You would need your spatula to apply the component to the sides and the top of the cake. You could use a fork or a knife for the decorating. Or you could use a sturdy piece of cardboard and a hole punch to create a nice decorative designs that you would venues to decorate the entire side of the cake all at once. Or you could buy a baker's edge. It does come with a straight edge or a decorative edge, and this way you can clean up the sirens, or you can create a decorative side or top. Once your cake is fully decorated, you could let that grass for 45 minutes and then you're ready to decorate
6. Techniques | Frosting: so I'll start out with a nice layer. That compound I'm just gonna spread it over the top. Turn the cake as I go. I had two pretty thick layer. Move on, just spreading it to the side. As you can see, the ideas just to cover the cake doesn't really matter. It's perfect because you will go over and smooth it out. And it does take quite a while to drive. So even if you don't like your results, you can always go over the top and thin it out, or I have more to the to the top layer. Once you have most of the cake covered, you want Onley turn the cake from the bottom. This is gonna blow you to keep your hands clean. So now I'm just gonna go down in a spiral fashion and hopefully this is just gonna distribute the frosting all on the cake. I'm calling it frosting, but you know it's compound. So, as you can see, it has a pretty nice layer all the way around the cape. Start in the center and just hold the fork in the middle and start to give it a late turn and then move your fork out towards the edges, trying to follow that nice little lying that is left by the end before, as you can see what that one gives you more texture. That the original of the very 1st 1 The spring out, the knife ever so slightly towards the edges. And make sure your light handed so that you're not completely removing all of the frosting or the compound. So there's that the Bakers. I just just going to give you a smoother cake so you can see this is going to give your cake more of that like rustic finish. Look, I know a lot of times people use this look, and then they add to the floor the tappers, so they put really flowers on top of the cake. So there is that look. It's a little bit more rustic, and lastly, if you wanted to use the notch edge, that's just going to allow you to make the lines like we did with the fork. But it will do it much faster, since it's like using the width of two forks. So with this, you just want to go ahead and start in the center of the cake, start turning and then start pulling. Also, pull the baker's edged towards the edge of the cake. Once you get to the edge, you'll continue doing the same thing about the sides. This gives your cake the finer design.
7. Paint & Glitter: your cake still feels a little bit. What? You might want to just wait overnight, and that way you're not gonna mess up any of your frosting. So basically, do this like you would any other painting job? I started in the center of the cake, and I just follow along the frosting lines just to make sure I'm getting inside every little group. So for this once and just painted it who hadn't some of the glitter to the top of the peak . And it really does give it that Really pretty sure. Look, once you've applied a quitter, you want the cake to drive for at least 15 to 20 minutes.
8. Cake Topper: you may want to finish off your cake with a bunting to commemorate a special occasion, print out your pdf and cut out the flags to create your bunting bunch of tiny holes for the strings and tie them to your dollar arts. I chose to paint mine to coordinate better with my cake. Insert the rods into the cake, and while you're fake, cake is complete.
9. Final Thoughts: if you're thinking about making these fake cakes to sell, there are many industries that are looking to use fake cakes. Photographers use them for photo shoots. Bakeries display them in their windows. Your local event planner could purchase or rent thes for a birthday party. I've made them for brides that wanted a nice looking cake but didn't want to pay thousands of dollars for a real one. They typically purchased an inexpensive sheet cake that is served at the wedding, but they have their fake cake to display at the reception. Big grocery stores that make cakes also rent out for weddings. Crafters that make custom cake toppers need fake cakes to display their toppers. Lastly, bloggers purchase these cakes for their lifestyle photo shoots. Please tell me how your fake cake experience Waas. I would love to see pictures, so be sure to post them in the projects
 Maria Laurin, learn | teach | grow