Transcripts
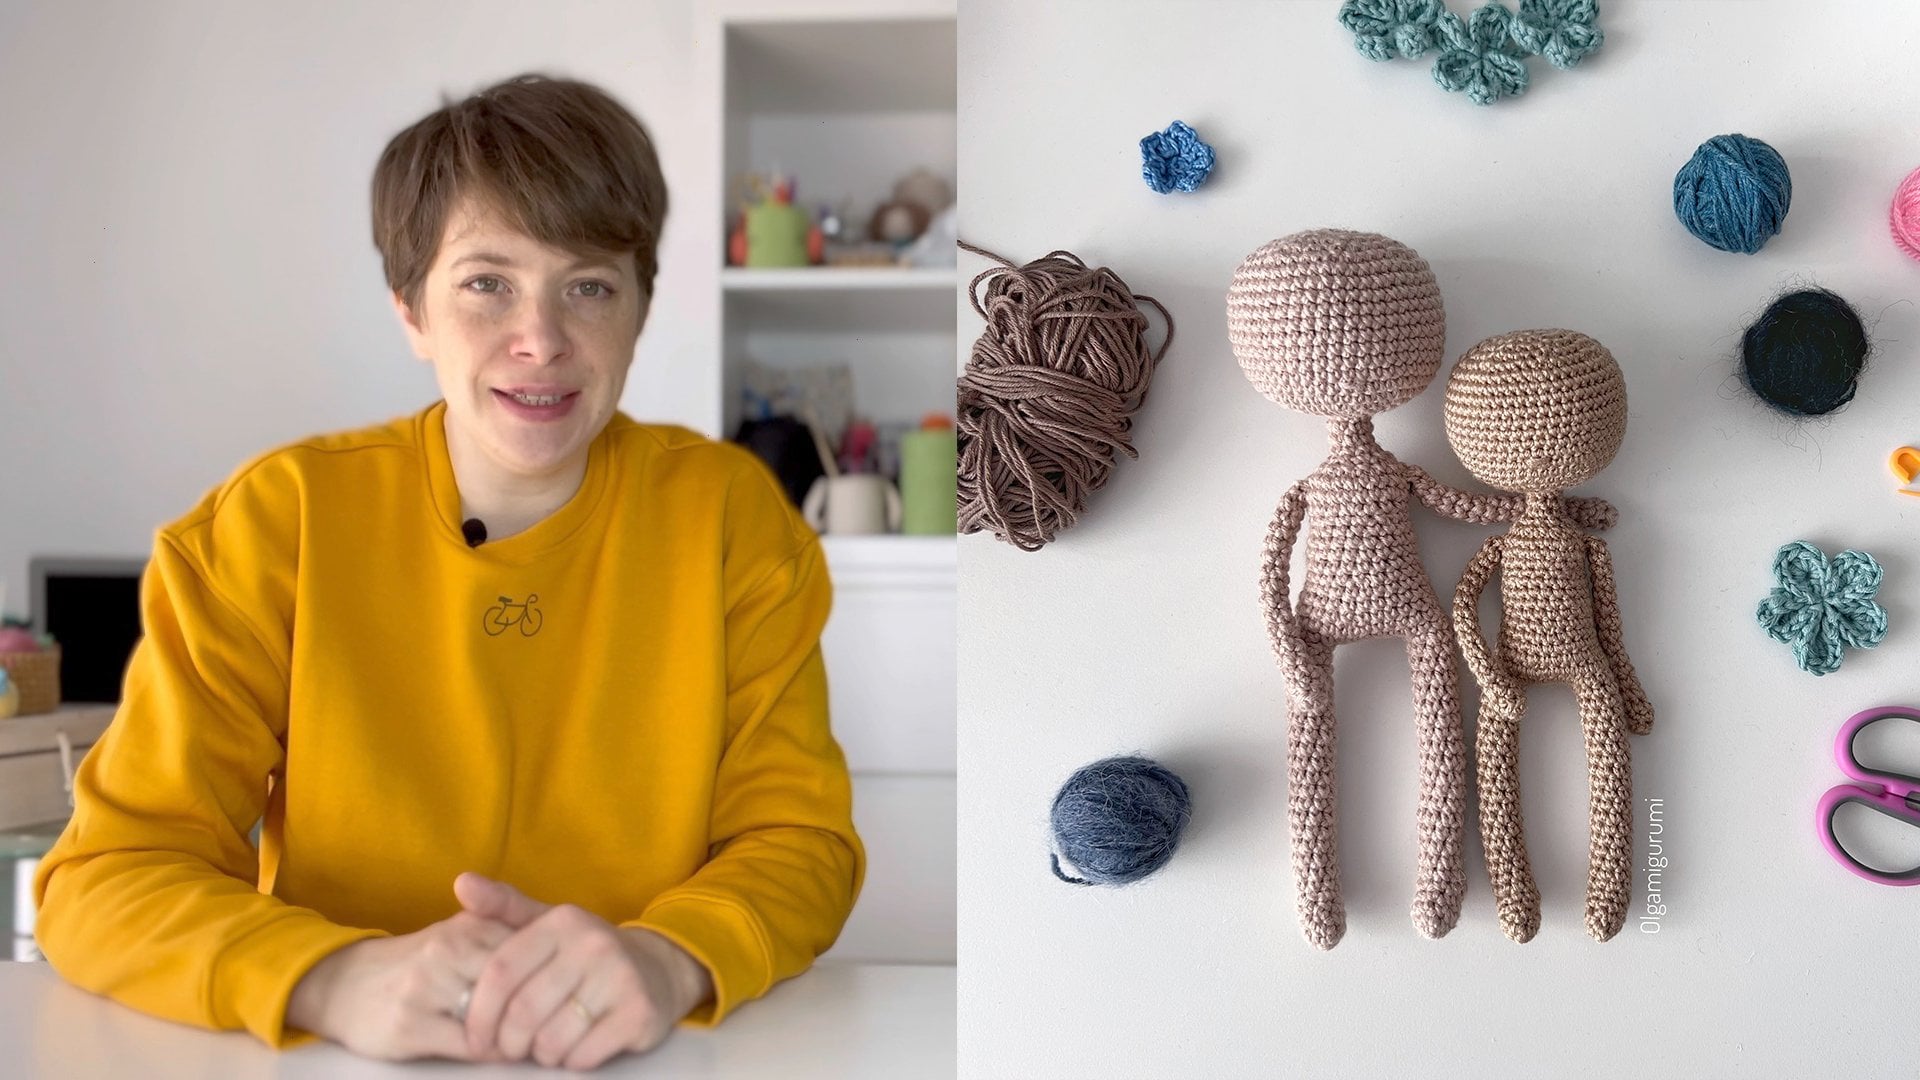
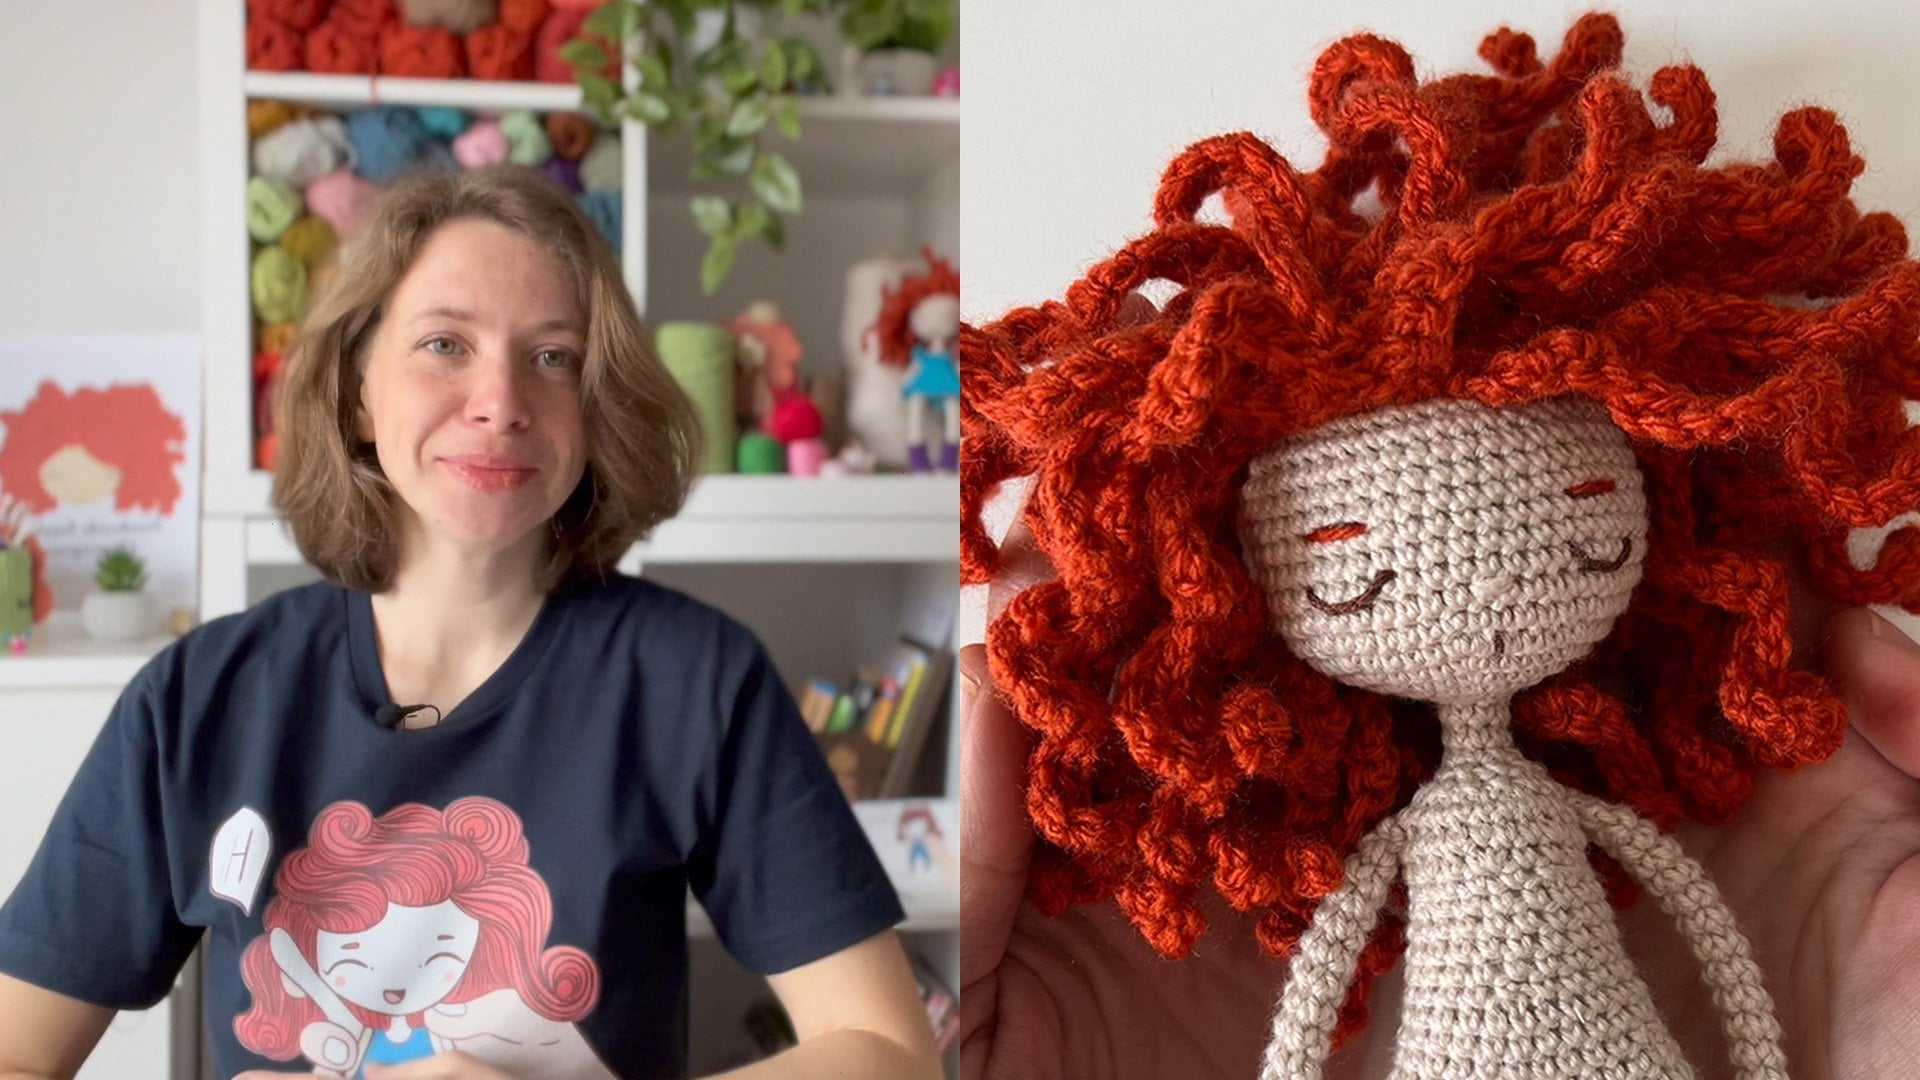
1. Introduction: Hello, my name is Olga. I make dolls with
clothes and accessories, border design crochet patterns, and share my knowledge
with other crocheters. I have been making Dolls
since my childhood. When it was a little girl. I was making and their clothes and
accessories with paper. I was having so much FUN. I started my journey
in the world of amigurumi dolls with
the amazing books have experienced greater than I started to practice and
make my own designs. Now, I sell my crochet patterns
on different platforms. I make dolls for their, for people from around
the world and create tutorials on YouTube
and SkillShare. Amigurumi is amazing. You can create your own world
using just a crochet hook and you can discover so
many wonderful creations. You can remain indifferent. You can feel yourself as a child grating tiny or big characters, and designing their clothes, accessories, anything
that you want. In this class, you'll
learn how to make clothes and accessories
for your amigurumi doll. Immerse yourself in the
tram on doll making and enjoy creating adorable
characters with your own hands.
2. About the Project: In this class, you'll
learn how to make clothes and accessories
for your amigurumi doll. I'll guide you through the process of
inspiration, sketching, choosing the color
combinations so you can create a unique
and adorable doll. We'll start by searching for the inspiration
for our character. You can follow my
instructions to practice, or you can make your own design totally different from mine. You can use your own favorite
character for inspiration. We will sketch our
doll and her clothes, thinking about the
color combinations, classical and alternate,
you can make a lot of different color combinations
and choose the best one. You can make sketches
by hand or on a tablet or use both ways. We will break the
project in parts. What clothes we will
make for our character, which pieces will
have the outfit, which accessories we
would like to add. Then we'll prepare
necessary materials and tools to make our project. I will show how to make a
dress with puffy sleeves, with a false bottom skirt
and a neck and accessories, we will make a hair
band and an apron. And finally, we will
make a pair of shoes. As a little bonus, I added instructions to make
cute panties for your doll. To help you follow along, you can download my sketches and the written instructions for making all the parts
of the outfit. And you'll need to enter a
password to open the PDF. You can see the best word
on the screen right now. I can't wait to see
all the amazing dolls, outfits, and
accessories you create.
3. How to Find Inspiration: Let's find some inspiration. You can use Pinterest
to find ideas, but also you can use your favorite books or
even known greeting cards, your favorite websites with
imagers, artworks, paintings. You can even Find
Inspiration going outside. The world is full of different shapes and
colors. Let's ketchup it. Your sketch absolutely
shouldn't be perfect. Just play with shapes. Just make some marks. I want to make my doll will
be curly hair, a hair band. Let's look like rabbit ears. And I want simple dress with puffy sleeves and
a simple Apron. First, I want to try the
classic color combination of our character that we use for inspiration to know how
many colors I will need. And then I want to try
some different colors. You can make your
sketches using paper and pencils or any drawing
tools that you like. Now, I want to try different
color combinations. You can make one classic
color combination, and you can play with
different colors to make your own unique TO your
own unique character. Here I have some
color combinations. I will choose one to
personalize my toe. You can make so
many combinations as you want and choose the best. I will share in the image
with my color combinations, with my sketches so
you can look at it, have it as an example, and at your own
color combinations. You can find all the files in the Project and
Resources section. The next lesson, I will
show how I plan and prepare all the necessary
information and materials to start the project
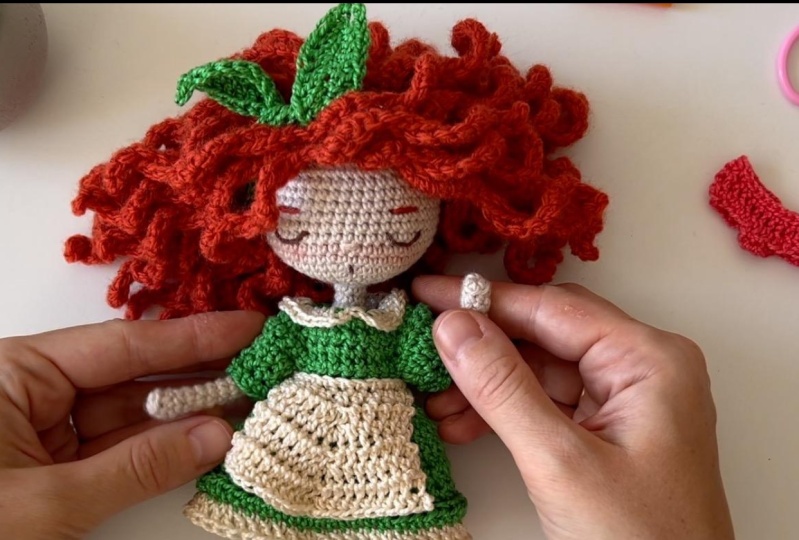
4. Breaking the Project in Steps and Preparing the Materials: I have this red haired girl
that I want to personalize. I chose the first
color combination with the red hair
and the green dress. Now, I will prepare all the
materials to be able to start shedding or her
body or use this Yarn. So for the clothing
and accessories, I prefer to choose the Yarn of the same thickness
or a thin and yarn. Normally, it is easier
to find the Yarn of the same brand and thickness with lots
of colors to choose. So you want have to
figure out where to find the other colors and
if the thickness of them will be suitable
for your main yarn. With more experience,
you will find your favorite brands
and types of yarn. And you will be able
to combine yarn with different thickness
without any problem. Just try them and practice. When I start a new project
in New crochet pattern, I prefer to write it down
by hand in my notebook. It doesn't totally beautiful. Sometimes it is messy, but I really love
to do it this way. As some sketches raise
if I make a mistake, you can use your favorite
medium to do it. It's can be a smartphone, a tablet, a computer. Doesn't matter if you do
it in a digital form. It is a lot easier to
convert it to crochet, pattern or sharing with
your followers are to prepare a PDF file for
selling it for my project, I choose this beautiful green for the dress and the hair band, the cream color yarn for the details of dress
and the Apron, and for the Shoes, I will use the yarn that I used her body to make the soul, and this dark navy blue for
the Top Part of the shoe, I will use my favorite
crochet hook. The size of the
hook that you need, you can find on the label of your yarn to start the project. I like to break it
into smaller parts. We need to make a dress, a hair band, and an apron, and the parents
shoes for the dress, I need to crochet the main
part of the Dress, the Neck. And I would like to make a button raffle as a
false bottom skirt. You can even break it into
smaller parts if you want. The Top Part of the Dress, the Skirt, the Sleeves. In the next lesson, we will start shedding the Dress
5. The Top Part of the Dress: We will start from the
top part of the Dress. You can start making several chains and then
measure it on your doll. You need to be able to put the Dress and Utah
from the bottom. So the Neck Part should be wide enough or should have
buttons to open it. I want to make the Top
Part with buttons so I can start with less chains and
it will look more accurate. How do I calculate the number of chains to start? Use this? I need Teachers for the
back and front Part, two times each of them. And white teachers called the Sleeves two times two
because we have to sleeves. And I need false teachers between the back,
front and slip. I will use them to
increase the Dress. In my case, X equals three. Y equals to indict can calculate the total
number of the Stitches. You can add more stitches
to make the back of the front part bigger or
to make the Sleeves wider. You can adapt this
formula to your doll. Make twin chains
and one chain up, which we always keep. You can try it on the doll. It shouldn't be too
big or too small. Now, I will increase this part around the
Neck round by round. I make three single
crochet stitches. And increase to single crochet. It's teachers for
the first sleep. And increase. And three single
crochet stitches. I have made hop on the row and now I repeat the
same. To finish it. You can find the
full redone carbon in the resources on the class. So you can download it and
follow the instructions. You can try it on the doll. In the next row, I want to increase the
Sleeves part of the Dress. I'm make it chain up
and turn the work. This role I work, taken them back,
whoops, over stitches. I'm make for single
crochet stitches. Now I make point, grazes. The first tha Making the
back loop of the stage. And the second in the fromm
flow for the same stitch. And for single crochet stitches. I repeat the same instructions
to finish the well, always I try it on the doll. It shouldn't be too small
or too big to be able to put it on the toe
and take it off easily. In the next row, I keep increasing
the Sleeves part because I want to make it puffy. I'm make it chain up
and turn the work. We still keep working in row. This row, I work in the
frontal lobes and I make the increases in the same
way as I showed you. Want stitch in the frontal
and one in the backlog are the same stitch I make for
single crochet stitches. Here we have for increases for eight stitches and I will make eight increases
in the Stitches. You can see how this
part is increasing. And for single crochet stitches, I repeat the same instructions
to finish the world. Now it looks like the next row, I just work single
crochet stitches in the stitches of
the previous row. Europe 48 stitches to make. I work in the back. Whoops. So the stitches in the next row, we will form the arm holds, make three single
crochet stitches, and then increase. Two trains teachers and skip
16s Tetris what asleep. Then make an increase. And three single
quotients, teachers. Try it on your doll. Let's finish the row repeating the
same instructions. In the next lesson, I will show how to add and
bottom hole on the bag. And we will call shed
the Skirt of the Dress
6. The Bottom Part of the Dress: We made five rows of the Dress. So now I will work around the edges of the roles
to make it cleaner, finishing up the back
part and then neck, and add a button hole. On the age of the rows, I make a single cautious stitch. I make three stitches. Then I make two trains
teachers and skip one for this will be buttonhole. Then I make 20 slips
teachers around the neck. And then I make five single crochet stitches
on the edges of the walls. On the other side. You can mark the first
teacher cholesterol to find it easily. We will need it later. Now during the first and the list teachers on the previous fall
making asleep stitch. We are ready to make the Skirt. You can remove the marker, make it chain up and
start to work in Denmark. Stitch. Work in brown. The first round or the Skirt, I worked single
crochet stitches. In the stitches of
the previous row. There are 20 false
teachers to make. My work in the frontal lobes on the stitches in the
chains teachers work taken the
slope only for me, even the slope to
crochet to sleep. I finished this round making a slip stitch into the chain. I want to make a simple skirt. So the next round
I will make 24 and quizzes of half double
crochet, It's teachers. And then the rest of rounds, I will crush it
straight round of 48 half double crochet
stitches I make to have double crochet stitches
on each of the stitches. To finish the round. I repeat this 23 times more I'm make asleep stage in the first stitch of the
mountain, the chain. Now I will make rounds. Each of 48 have double
crochet stitches. To know how many around the
you need to finish the Dress, Dress, try it on your toe. In the process, you decide what land of
the Skirt you want. I want to add six more round. You can make it
shorter or longer by adjusting the
number of rounds. I recommend you to alternate
the rounds this way. The next round, I start
from the second stage, and in the last stitch, I make an increase. Even rounds, I start
from the first stitch. And in the list CHA make, once teachers normal, this way, I will maintain a pretty
straight joining line on the back of the Skirt. If you don't do it, the line will deviate. I think it doesn't look nice. When you are happy
with the length of the Skirt, cut the yarn. In the next lesson, we will make Sleeves
7. Attaching the Sleeves: Sleeves are optional. You can add them if you
want or leave it as is the yarn in the arm
hole in the first chain. Make a chain up. Make one single crochet
stitch and the same stitch. Then one single
crochet stitch in the space between the arm hole. And this keeps teachers then
worked 16 single crochet. It's teachers into the stitches that we skipped from there. Take the front loops only. Then make one single
crochet stitch in this space between the
arm hole in this keeps teachers and one
single crochet stitch in the second chain
on the arm hole. Make a slip stitch
into the chain in the start of every round. Make a chain stitch in
the end of every round. Make a slip stitch in the
chain for the next round, make twin to have double projects teachers
working in the front groups on the try and turn them doll. I think it is enough for the puffy sleeves so I
can finish the sleep. I will decrease this way. I make one half double
crochet stitch, then keep one stage. I make one half double crochet, teach, and keep on stage. At the end of the round, they have tens
teachers in total. To finish asleep. To finish the sleep, I make one around ten half
double crochet. It's a trust. Try to and get all. If you are happy
with the result, the yarn make the second
slip in the same way. In the next lesson, we will add a neck to the Dress
8. Let's Decorate the Neck Part: We have 20 teachers, so VNET, so I will divide
it into two parts. The Neck will be very simple and will have only
one row to work. I want to use double
crocheters teachers. The Neck won't be too small. I joined the Yarn of a
second color here in the last slip stitch and
make three chains teachers. Then I work till the
middle of the Neck, making towel cautious
teachers and increasing them to make the
Neck not to be stretched. You can experiment with different stitches,
make it bigger, wider, make it as onlys, skip and stitches and
loopholes between. In the first chance
teacher some the Neck. I work to double
crochet stitches and increase then to
increases of three. Any grieves. We double crochet stitch trust. We changed teachers and slip stitch in the last teacher. In the last ten stitches
of the Neck, I worked, we changed the truss,
readable crochet stitches and increase then to increase the rename and increase to double crochet. It's teachers. We chains teachers. And the sleep stage in the
first slip stitch, open it. If you are happy with the
result, cut the yarn. Try the Dress on your toe. In the next lesson, we will make a
False Bottom Skirt
9. Adding a False Bottom Skirt: Join the yarn on the penultimate round and
work double crocheters, teachers surrounded
making an increase on niche six stitch. You can make it longer
or make more increases. For example, you can make
an increase on each stage. You can just work without
increasing always teachers. When you are happy with
the result, cut the yarn. The next lesson, I will
show how I Hide the Ends
10. Let's Hide the Ends: Here is the Dress. It is ready, but it doesn't look great because it has a
lot of unsecure Ends. I will show you how to secure
it and hide them carefully, turn it inside out. And the Sleeves to earlier, I used to make knots and
it didn't look pretty. So. I found this way to
secure and Hide the Ends. I will use a needle suitable
for the yarn I used. I'm in that you should be able
to insert into the needle. The needle shouldn't be
thicker than the yarn. For example, this yarn, I will need a thicker needle. They did is to insert
the needle with the end into the thread
of the crocheters piece, basin it several times
in different directions, then cut the remaining tail. So it will be difficult to
pull it and unravel your work. So let's practice and
start with this one. First, I insert the needle into the part of the same color. You should feel some
resistance of the fibers. Then I insert the
end into the needle and facet with the
needle and pull it out. Then I make the same button
in different direction. You can repeat this
several times. And then God, remaining tailed. The next one. Know these green one. Now on the Sleeves? The Neck and the dress looks much burden. It just needs a
button on the back. By the way, if you don't
have any tiny button, you can crochet at it. You can find instructions in the PDF file with the
Dress on your doll. In the next lesson, we will make a Cute
Hair Band for her
11. A Cute Hair Band: I want to make it as
simple as possible, and I would like to
make it pretty narrow. So I will make the Ends bigger with the
shape or per leaf. And the main part
is simple strap. To make it, I need to start with a long chain of chains teachers. And then for the leaf
shape on the edges, I make six T trains teachers and try it on the
head of the doll. I think it is okay
because because we can stretch the band if you think that you need more chain stitches or
your doll has bigger hair, head, make the
starting chain longer. Make one chain up and start
to form the first page. I just play with the hate of basic crochet
stitches to form it. I start with a smaller
single crochet stitch. I'm make a hub double crochet stitch that is a bit taller. Then I make several
double crochet stitches. And then I go down making a hub double crochet stitch and
a single crochet stitch. And the main part is 40
single crochet stitches. Let's start to work. I make a single crochet stitch, half double crochet stitch, six double crochet,
That's teachers. Hmm, double crochet stitch
and a single crochet. Now I work 14 single crochet
stitches till the last. Dan, chains teachers. In the last tends teachers, I make the same combination
of the Stitches. Single crochet stitch have
double crochet stitch. Six double crochet stitches have double crochet stitch and
a single crochet stitch. Now I make three chains and work on the other side
of the starting chain, I make a single crochet stitch. Hot double crochet stitch. Double crochet stitches. Have double crochet stitch. Single crochet stitch. Now I work 40 single crochet, It's teachers till the
last ten chain stitches. If you don't want to
count 40 stitches, just mark the first of the
less tense teachers using a stitch marker or a piece of thread of
different color here, rather less tense teachers, I can remove the
thread and I make the same combination
of these teachers, a single crochet stitch. I have double portrait stitch, six double crochet stitches. They have double crochet stitch and a single crochet stitch. Now I make three
chains and finished the work making a slip
stitch in the first chain. The hair band is ready. Just cut the yarn
and Hide the Ends. Hide the Ends and to
the starting chain. Hair band on your doll. Isn't she beautiful? In the next lesson, we will make an apron,
finish her dress
12. The Apron: Let's make the April. I want to make it pretty simple. It will consist of two pieces. The waist part. In the main part. This part I will make as a long and thin strip to be able to tie the chromosome
that their coffee. And I will attach
the main part in making crazes in the center
to achieve the shape. You can make this part as
long and wide as you want. I will just make a long
chain and then I will make a single crochet stitch
into each chain stitch. I start with 60 trends Tetris
plus one to stitch up. And then I will try
it on the doll. I think that is enough. Here. I will attach
the main part of the bronchi and the rest will be used to tie it on the back. I worked 60 single
crochet stitches, taken two loops. Which chain stitch? I don't need to come down
this time, just corruption. I make him the last
single crochet stitch. And now it looks like they tried to me tonight
as much as possible. But the yarn and Hide the Ends with a needle as I
showed you before. Let's try out strip on the top. I want to use tense teachers in the center of
the strip to start forming the main part of the to know how many
stitches should I skip? From the start, I
use this formula, 16 minus ten, I have 50, and I divided them by two. I should skip 25s
teachers from the start of the strip and work ten
single crochet stitches. You can adapt this
calculation for your doll. I skipped 25 stitches and join the yarn in
the next stitch. Here you can see the remaining loops on
the starting chain. And here you see both groups, the stitches, I joined the
yarn at the same color. By the way, you can experiment
with different colors. Make it chain up and ten
half double crochet. That's teachers taking
the front loads only all the stitches. You can leave this
tail and secure it and hide it at the
end of them work, or you can do it right now. I prefer the first option
because it is more comfortable. Let's try it on the doll in follow-up
calculations, self-care. I think it is perfect. So now we will work
in roles of PUB double crochet stitches with increases in the
center of the shape. Here we have tens teachers and I want to make increases
in the center, five stitches here and here, I make false teachers and
in the last time make an increase and does
a reflection and increase and false
teachers working this way, I will form the shape. Let's practice. I'm make it
chain up and turn the work. I work in rows. I will work even rows in the
backlog Sunday and odd rows. I will work in the front loops, only two Hide remaining ***** on the wrong side of the Apron. I make for half double
crochet stitches and an increase in make once
stitch in the backbone. And the second in the frontal
pole, the same stitch Now, as a reflection, I make any one stitch in the front loop and the
second in the back loop, all the same stitch. And then for have double
crochet stitches. Make it chain now
and turn the warp. We can see how our
shape this problem. Let's practice the next row. For the next row, I will make to increases in the
center to this row. I will work in the very
front of the stitches. I will work for the next
rows in the same manner. Making to increases in
the center and trying the Apron of the
doll to know when to finish the even rows. I work in the backflips and the odd rows I will confront
loops are the stitches. You can find the
full written button in the resources of the class. If you have any troubles
with downloading it, feel free to reach me out. I finished the last
row and cut the yarn. I Hide the Ends into the
interests of the Apron. This thread, I will hide into the other edge of Apron
in the same manner. The Apron is ready and
let's put it on the tongue. Right now, I'm thinking that things would be better
with large pockets. In the next lesson, we will make shoes for
our adorable doll.
13. A pair of Tiny Shoes: I will start with these yarn that I used
for the body of the doll. I'll make the soul, and then I will make
the Top Part of the shoe with this dark navy
blue yarn to make the soul. First, I make it chain and
I make an oval around it. And then I increase the front part of the
soul. Let's do it. I make five chance teachers and measure it on the
foot off the top. It shouldn't be too small. You should be able to put
it on the doll easily. I skipped one chain stitch
and walk around the chain. Three single crochet stitches. In the next teach, I make wheat single
crochet, That's teachers. Then I make to single
crochet stitches. And in the last one, I make an increase. I make a slip stitch to finish the route and a chain up
to start the next one. I work taking both
lobes are the Stitches. The soul will be
stronger and harder. I make an increase. Then to single crochet stitches. Niche one of the next
Teachers, I'm make query, travel cautious teachers rehear point here. And three here. Single crochet stitches. To increases. Now I need to make a slip
stitch in the chain. I insert the hope
this way I can cut this yarn leaving a tail that I will secure
and height later, I attach the new yarn, finishing the slip stitch. Titan, both fans and
make a chain up. The next round, I work
in the back loop. So this teachers and make single crochet stitches in each of us teachers of the soul, I make 19 single crochet
stitches around the soul. I finished around and make
us slip stitch in the chain. These threads you can
secure and Hide later. Alright, now if you
want on this tab, you can try the show
and it should be Finger and her foot. Let's form the Top
Part of the shoe. I make five single
Conscious teachers at the start and at
the end of the round. And I will make
several decreases in the middle of the
ground to cover the food. This round, I walk in
the front groups only. I make five single
crochet stitches. Now I start have
double crochet stitch, but I don't finish it. I have three loops on the whole. Then I start a double
crochet stitch. In the next stitch, I pull out the hook to whoops, but I don't finish it. And now I pass the yarn through all
the loops on the code. I made a half double crochet. I made a half double crochet and the double crochet
stitches close together. Now I'm make a double
crochet stitch. In the next three stitches, I make three double
crochets teachers, those together, I start
a double crochet stitch. I plug the hook
through two loops, but I don't finish it. Then I start a double
crochet stitches. Next stage, I pull out the hook, two loops, but I don't
finish it as well. And I started double
crochet stitch. In the next stitch, I blew out the hook R2, Whoops, but I don't finish it. Now I have followed
some the hook and I best the yarn through all
the loops on the hook. Now I make a double
crochet. Let's teach. Now I start a double
crochet stitch, but I don't finish it. I have two loops on the hook. Then I start a half
double crochet stitch in the next stitch, but I don't finish it. And like best the yarn through all the
loops on the whole, I made a double crochet and helped our coaches,
teachers close together. I finished the round making
five single crochet stitches. Make us slip stitch ended chain. Let's make the last
round of this show. I make three single
crochet stitches. And I make six change teachers
and skip lines teachers. The full list, three
single crochet stitches. Make a slip stitch in the chain. Try this shoe on the doll
before cutting the yarn. If you're happy with
the result called the yarn and secure
in Hide the Ends. Make the second shoe in the
same way the outfit is ready. In the next lesson, I will show how to make
cute panties for Your Doll.
14. Bonus Lesson. Panties for Your Doll: Use the yarn any color. You can make a lot of
them in different colors. In the magic green, make a chain stitch them. Six single Conscious teachers make a slip stitch in the
chain and the chain up. This round, I make
one single crochet. Let's teach ten. Trains teachers. For the first lag, you can make more changes
to transport bigger toe. Skip one stage, make to single
crochet, That's teachers. Then ten, change the
trust proper. Second leg. Skip one stage. One, single portraits teach. Make us slip stitch in
the chain and chain up. This round. Make 24 Hall
double crochet stitches. Finished the round with the slip stitch in the
chain and chain up. This round make 24 single
crochet That's teachers finished the round with a slip
stitch in the chain and it trained and in the last round make six, have double-quotes. Shifts teachers. Once single crochet,
stage, sleep state truss. One, single crochet stitch. Six have Doll
crocheters, teachers. And finished the rounded with
asleep stitch in the chain. Got the yarn and Hide the Ends. Your doll is ready
15. Wrapping Up the Class: Congratulations. Now you know how to
use inspiration from classical characters and
make your own unique dolls. You know how to try
different colors, play the shapes and stitches to create technique and
fashionable character, you can use the classical
color combination and make your own one. You can play with different stitches to
adjust the shapes. Just practice and experiment,
enjoying the process. Feel free to write me if
you have any questions or suggestions about new topics
for my future classes. Thank you for learning with me.
 Olga Bortniak, Crochet designer, dollmaker Olgamigurumi