Transcripts
1. Introduction : Hello, I'm Shanan Subhan. If you are somebody
new around here, then I am an artist and an art educator who
is passionate about painting nature landscapes in my own semi-realistic approach. I mainly work with and
also teach watercolors, gouache, and acrylics. On Skillshare, I have put up various classes all ranging from beginners to advanced
level proficiencies covering basic to
advanced level concepts. You can check out my
Skillshare profile for more information. I love teaching detailed art
classes, group sessions, and one-on-one sessions where I share my tips and
tricks that I have learned over the years along with the syllabus
covering the class. I take pride when my student testimonials
mentioned that I break down complex objects into simpler and
actionable steps, achieving a pitcher
perfect painting, which they initially
thought was difficult. I personally believe that art is a skill and if you're truly
passionate about learning, then you can master it
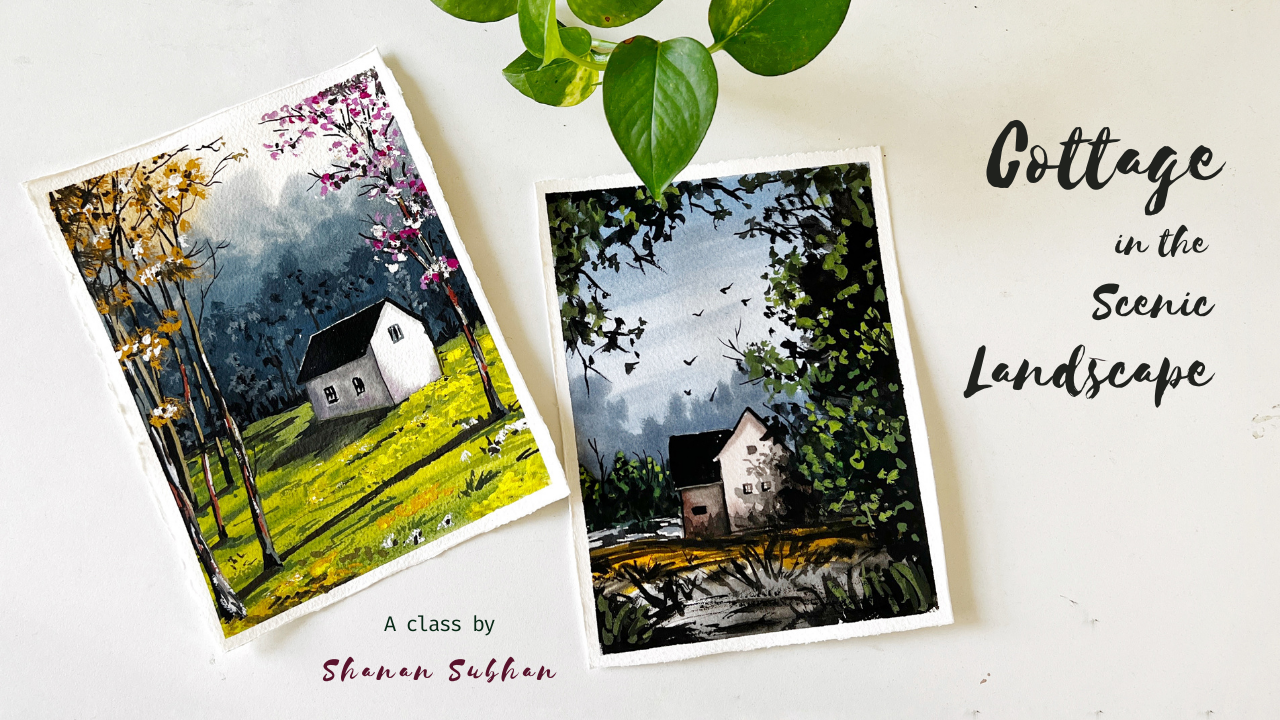
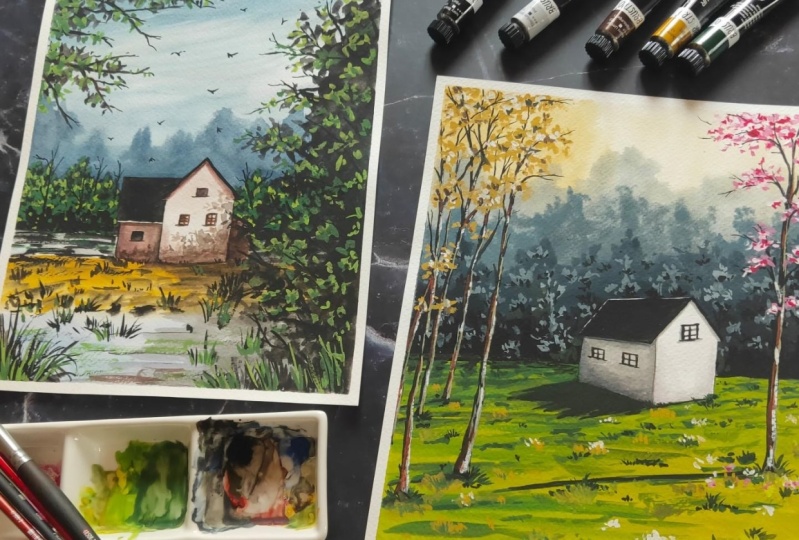
with regular practice. Welcome to my class on painting cottage in
the scenic landscapes. In this class we will be
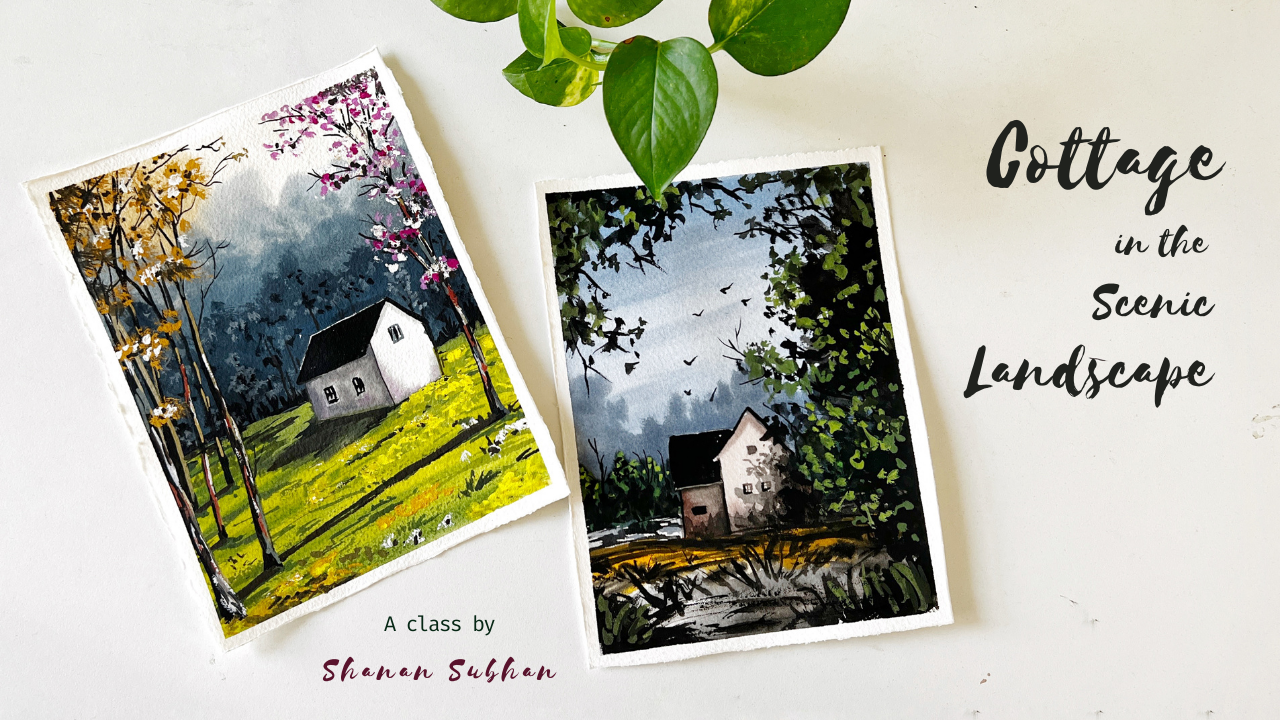
painting two class projects, so these are the class projects. Along with the class projects, we will be learning
about their composition, the techniques
involved in the class. I'll walk you through
my approach of painting all these
complex subjects, so that it is easier for you to attempt any other
paintings as well. We will be learning
about painting concepts like layering
and achieving depth, adding shadows and highlights. Painting tree foliages, grasses, and many
other elements. Each project will be painted
in a step-by-step manner, so that it is easier
to follow along. Come join my class, and let us together create
these stunning masterpieces. I'm much excited to
see you in my class.
2. Art Materials: [MUSIC] Welcome to the class.
I'm glad you're here. Before we begin, let
me walk you through the art supplies that I'm
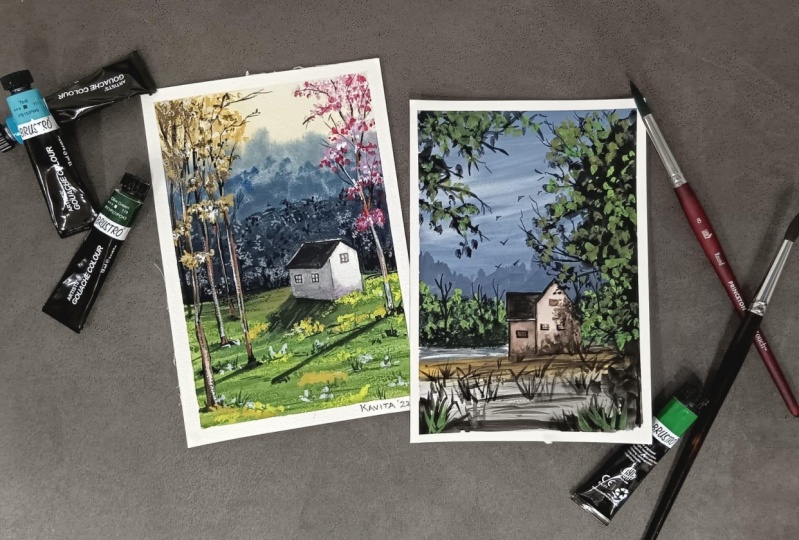
going to use for the class. I'll be using Brustro
gouache paint. You don't need to have
all these shades. I'll be using some of the
basic shades for the painting. Next we have paper. I'll be using the
[inaudible] 300 GSM, 100 percent cotton paper. It has cold-pressed texture, which makes it very easier for us to perform watercolor
techniques as well. Next, let's talk
about the brushes. I have this three
fourth inch flat brush, size nine round brush, filbert brush, fine liner brush, and size two round brush. I also have the size 000
round brush with pointed tip. Then we will need
a pencil, eraser, ruler and kneading eraser
for the sketching part. Then we would need masking tape and cardboard to
tape down the paper. Next, I have ceramic palette
for mixing the colors. I also have a water spray bottle for wetting the
paints and also to wet the surface of the paper for watercolor techniques
like wet on wet or so. Then two jars of water
and an air dryer. You need not have the
exact same supplies. You can go with anything that is readily
available with you.
3. Composition: In this step though, we will talk about the
composition of the painting. The first painting comprises
of a deep forest area in the background
that we use a pure hazy due to the mist
and atmospheric vapor. There is this tiny house which
is reflected by the light, partially on the front side. The other side is darker. There is the shadow of
the house on the ground. Similarly, the grassy area has a partially sunlit effect and behind the house,
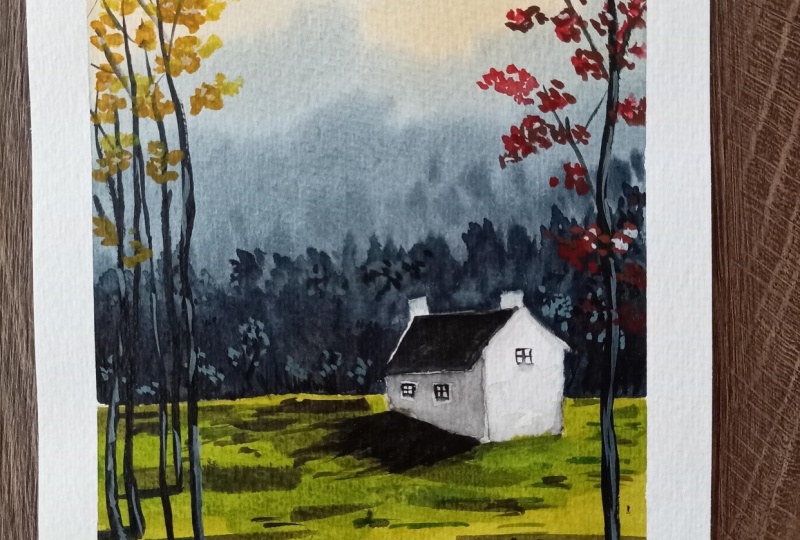
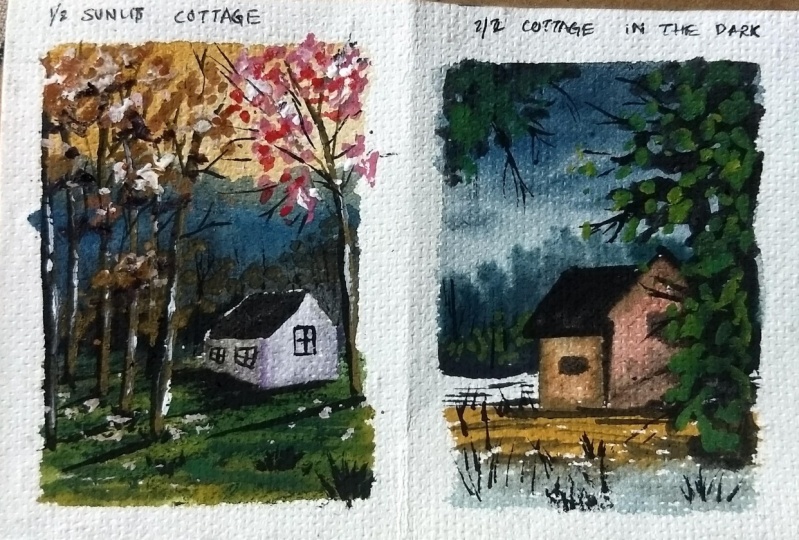
it appears darker. In the foreground area, there are these lovely trees. Here are some thumbnail images I did before painting this. Making these smaller
thumbnails really helps to get a better idea of how
to go about the painting. The second painting comprises of a hazy distant tree line. In the midground area we have the spatially sunlit house, and there are shadow
areas as well. Towards the foreground area, there are some dried
grasses loosely spread, more like an abstract painting. The foreground area is covered
with the tree foliage. Here is a rough thumbnail
painting I did. I hope you are clear with
the composition part. Please feel free to reach out to me to clarify your doubts.
4. Techniques: [MUSIC] Before starting
the painting process, we will have a look at the techniques that will
be used in the class. First, let me show you
how I paint the trees. My approach to paint the trees is usually very
easier and simple. You can take any color and dab the paints to create
the impression of foliage. Next, we will add some
darker color as the shadows. Here the basic idea is to have a balanced or contrast or
tonal values of lighter, darker, and mid-tone colors. For the lighter highlights, we will apply white color. Now, you'll see there
are three tonal values. Once you have painted this, then you can add
some branches using a thin brush or
any pointed brush. This gives the tree
an organic look. Here, you can either
paint the foliage first or you can paint the tree
trunk and the skeleton, and then add the foliage
using any desired color. Now in order to add the foliage, you need to first
dry the base layer. Once it is dry, then you can add the foliage. Here I'm mixing crimson and white to achieve a
lighter pink color. This is going to be
the mid-tone color. Next, we will add darker color. Here, if you add
on the wet paint, the brush will start
picking the base color so you have to be careful
of the wetness factor. You can add it on the dry area, but if you are trying to
add on the wet surface, it will pick up the
paints from there. Let it dry first, and then you can add the
different tonal values. Next, I'll be using
white as the highlight. Next, we will learn to paint the distant forest in
the background area. Here here, pick any blue color. I'll be taking portion blue. Then we will mix a bit of brown, and some white to it. We have to take a very
lighter tonal value for the distant area. This is the farthest
point from the viewpoint and it appears very hazy
and lighter in color. Then we will take a
mid-tone color by adding more of blue and
brown and less of white. Just by adjusting white, we can get different
tonal values. Here, you can paint as
many layers as you want. This will add a sense of
depth in the painting. Lastly, we will add this darker color as
the midground area. You can add details once they're dry using different
tonal values. Next, let us learn to paint the tree foliage from
the second painting. This area in the
foreground is darker, so we will start with the
base layer as black color. Once you have applied the
black paint, let it dry. Once this black layer is dry, you can add different
tonal values of green in order to achieve highlights
and darker shadows. In Gosh, some colors appear darker when they are
wet and after drying, it looks much brighter. You can swash the colors in
order to know their behavior. So here, I am using lighter green by mixing yellow
and olive green. Paint the foliage using
mid-tone and darker tones. Once we have the foliage ready, we can add the branches
using a thin brush. [MUSIC].
5. Project 1 - Sunlit Cottage: [MUSIC] In this chapter, we are going to learn to paint
this beautiful painting. Let's get started
with the painting. I'm taping the paper
using masking tape, and this is an
half-inch masking tape. The paper is home, 300 GSM, 100 percent
cotton paper. Once we have taped
down the paper, just run your fingers
over the edges, just to make sure that
it is tightly sealed. Next I'm going to take a pencil and mark the composition
of the painting. Somewhere in the lower half, I'll be marking
this horizon line. Next, I'm going to
draw this house here, so draw parallel lines. Then we will draw two diagonal lines
intersecting at the midpoint. Now we will paint the
sides of this house. Draw two horizontal lines. Draw two parallel
horizontal lines adjacent to the front part. Now draw a rectangular shape. Notice that these vertical lines are all of different height. Erase all the unnecessary lines, and using a kneading eraser, I'll remove the darker
graphite marks. We are done with
the sketching part. The rest of the details
we will add as we paint. I'm going to take the
colors on the palette. I have yellow ocher and white. We'll start with
painting the sky. I'm going to use the spray
bottle to water the paper, and this will be wet
on wet technique. You can even use a large
brush to wet the paper. Now take yellow ocher and white, mix it in a yellow-ish
pastel color. Apply this mix on
the leftmost part and a very watered down
version on the right side. This is the sky. Next we will be printing a distant blurry forest
in the background. We will take ocean
blue and black. Next, take these two colors, a bit of black and
Prussian blue. Mix a white to it to make
a very lighter blue color. Take the same mix and
add a bit more white to it to make a little lighter
version of the same color. Now I'm applying this right
below the painted sky area. This is the distant misty area. Apply a bit darker tone
for another layer. I'm dabbing my brush to create the impression of three foliage. Next, we will paint
slightly darker layer. This time we will add less of white and more of
blue and black. [MUSIC] Leave the blank space for the house and gently
paint around that area. [MUSIC] Dab the brush gently to create
the impression of foliage. [MUSIC] Here to add a sense
of dimension, I'm taking a darker blue or
more of black-ish color, and I'll add the foliage
shapes in-between. This will make it look
over dimensional. Next, we will paint the grassy land from
mid-ground to the foreground. I'll be using olive
green and mid yellow, then we'll mix them together to achieve a yellowish green. We will be painting
the base layer of the ground with this
yellow-green color. [MUSIC] Towards the right
right of the painting, the grasses will appear bright due to the
reflected light. On the left side, it is going to appear darker. We will add shadows using
darker green color. [MUSIC] Moving on, we will
add some trees and some tiny shrubs in
the mid-ground area. Here, I'm using a black color. [MUSIC] Next, we will be
painting the house. So here I'm going to paint the darker shadow
part of the house. So I'll mix a little
muted dull color. The light is reflected on
the front part of the house. The backside of the house
is going to appear darker. So apply a grayish tone. [MUSIC] Applying a slightly
darker tone on the edges. Now for the front
face of the house. We will retain the white areas, so I'm going to apply
clean water and then apply this gray tone
only on the edges. So this way we will achieve the reflected part of the house. [MUSIC] Next I'm
going to take purple and apply a very watery
washing on the shadow part [MUSIC] Adding shadows under the roof using darker color
and also on the bottom part. Next, we will mix olive green with black and
Prussian blue mix. So this will be a
very darker mix. We will use these to create
the shadows of the house. [MUSIC] Moving on, we will use a gray mix
to add some foliage in the distant or
mid-ground trees use a fine tip brush to
achieve this tiny foliage. [MUSIC] Using the same color mix. We will add some foliage
and the distant blue layer. Now I'm adding some
black on the same layer. So here when we have
different tonal values, it makes it look over realistic and makes it more dimensional. [MUSIC] Next, I'm going to paint
the roof using black color. [MUSIC] We will first paint the outline and then fill in
the inner areas. Leave a tiny whitespace over the roof so that it stands
out from the background. Adding some tiny windows [MUSIC]. The shadow part of the house
still looks so bright. So I want it to be
a little darker. So I'm adding a
darker color again. [MUSIC] Painting a window on the
front side using gray color. [MUSIC] Moving on to the grass part. Now we will add some
dimension on the grasses. So mix a mid-tone green color and add some tiny lines
and dots on the ground. This will make it appear
like an uneven surface. [MUSIC] Use various tonal
values of green color. Let's say lighter green, darker green, or any mid-green. This will add a sense of variation and depth
to the painting. [MUSIC] You can glide your
brush to create this random texture
on the ground. [MUSIC] Moving on, we will
paint the tree trunks. So I'm using black color and painting these tree trunks
of different heights. Notice the area where the
tree trunk originates, this decides the distance of
trees from the viewpoint. The one that starts from the mid-ground area is
far from the viewpoint. [MUSIC] Okay so we will leave it here for drying. [MUSIC] Next, I'm going to darken
the shadow of the house on the grassy area. Here, I have mixed
green with black, right now it is appearing
like a black color, but after drying, you will see those shades
of green in it. Add some more grasses
near the base of the trees and some grasses
closer to the foreground. [MUSIC] Since the light source
is on the right side, the shadows of the trees will be accosted on the left side. So I'm painting the shadows
here using darker color. [MUSIC] I'm randomly adding some grass texture
in the foreground and mid-ground areas. [MUSIC] Next we will move on to paint the highlights
on the tree trunk. Here I'm using a mix of
yellow ocher and white. We'll be adding
the highlights on the right side because the
light is on the right side. [MUSIC] Extending this tree trunk, I'm making it a little more
closer to the viewpoint. [MUSIC] Once we have
painted these tree trunks, we will add the tree branches. Paint the branches in
different directions and paint them irregularly so that they
appear organic and cheap. I find it comfortable
to add these branches when the paper is in
tilted a position. Next I'll take a
thick white paint to add highlights
on the tree trunk. [MUSIC] I'll also use burnt
sienna on the tree trunk. I'm adding this brown shade on random areas of the tree trunks. There is no fixed part such
that I want to achieve, I'm just randomly adding the
colors on the tree trunk. [MUSIC] You can add colors
of your choice, there is no restriction, but the end result should
have a variegated pattern. [MUSIC] We're done painting the
trunk of the trees. Let us move on to paint
the tree foliage. I'm taking crimson and white. Mix these two colors together to form a
lighter pink color. Now with the help of
a Size 9 round brush, I'm dabbing the colors
to form the foliage. The tree on the right side is more like a cherry blossom tree, so I'm painting it
with pink color. If you want, you can use
any other color as well. Make sure you're using a damp brush when
you're performing this because if it
has water in it, you won't be able to achieve the foliage or leafy texture. Moving on to the trees
on the left side, we will use yellow ocher
as the tree foliage. Use thick paint with
a damp brush and dab it on the trees to
suggest the tree foliage. You'll need to wait
for this layer to dry and then you can add any other color or any lighter
or darker tonal value. Going back to the pink tree, the base layer has dried, so now I'll add the
highlights using white color. Again, I'm using
thick paint here. The tree foliage should have a nice balance of lighter
and darker colors. Right now we have added a
mid-tone and a lighter tone. For darker tones, we will add darker paint or black later on. Similarly for the tree
on the left side, I'm adding some white
highlights now. [MUSIC] Also dabbing the brush on the grassy area depicting
the fallen leaves. Next I'll be adding darker colors on the
cherry blossom tree, so here I'm using crimson. Next we will take
a darker mix and dab it on the tree foliage, depicting the darker
shadows in the tree. [MUSIC] Also, I'm darkening the shadows that I
had already painted. [MUSIC] In gouache, some colors dry lighter
and some dry darker. After drying it might
look a bit different, so it's okay to go back and add darker colors as per
the outcome you want. Next, let us add some more
fine branches on the trees. I'm using my fine liner brush to add these tiny
twigs and branches. Use any darker color, mostly black or darker brown, and add tiny twigs at
the ends of the foliage. Even though we painted the foliage using
a loose approach, but adding these tiny
stems and twigs makes the whole painting beautiful and adds a realistic
touch to it. This is the trick that I use
to paint the tree foliage. [MUSIC] Adding some distant trees in the background and also
outline for the house. Next we will add some
lighter highlights in the foreground area. I'm using yellow ocher to dab the foliage or the grasses
in the foreground. I'll also be using
lemon yellow for the lighter highlights
in the mid-ground area. [MUSIC] I'm using darker brown to add
the shadows on the trees. [MUSIC] You can go back to
the elements to add some shadows and highlights. [MUSIC] We are done with the painting. Now let us remove
the masking tape. [MUSIC] There you go. This is how the painting looks. I hope you enjoyed
painting this with me. Do share your class projects
under the projects gallery, I would love to see
your recreations.
6. Project 2 - Cottage in the Dark: [MUSIC] In this chapter, we are going to
create this painting. Let us get started
with the painting. I have already tapped down
the paper using masking tape. Now, let us start
with the sketching. I'm marking two
horizontal lines. One is for the horizon
line and the other one is to create a separate section
in the ground level. Now draw two vertical lines. This will be the house
in the painting. I'm marking this mid-area to connect the intersecting lines. This will be suggested as
the roof of the house. Then we will draw
the backside part. You need not draw the exact
same shape of the house. You can come up
with your own shape for the house in this painting. We are done with the sketching, now let us move on to
the painting part. I'm using the spray
bottle to wet the paper. The colors that I'm
using for the sky are; cobalt blue, burnt
umber, and white. We'll mix these three colors. Take a very little
amount of brown. Apply this color mix on the wet surface starting
from the upper part. Here it is not
mandatory that you apply same brushstrokes or
choose the same colors. You can change it
as per your choice. Carefully apply the
paint when you're raw painting around
the roof of the house. If you're getting any
sharp edges in the sky, then you can use clear water. It will soften it out. Next I'm going to apply
slightly darker tonal value. To achieve this color, I have added a very
little amount of white to the cobalt blue, and burnt umber mixture. Here I'm running my brush
in a diagonal motion to achieve these angular
diagonal strokes in the sky. Next we would paint the street
trees in the background. For this, I'm going to take the same mixture
which is cobalt blue, burnt umber, and a
little bit of white. Now to make it a
little darker I'll mix a bit of black to this. You can see we have achieved this really dull and
pale blue color, more like paints gray. I'm applying paints in
the shape of green here. You just have to dab your
round brush to get this shape. I'm adding trees of
different sizes and shapes to avoid that uniform
look in the background. Next we will be painting
the mid-ground trees. I'll take olive green
and cobalt blue, mix it together and add a bit
of black and brown to it. Basically, we want a darker,
greenish-blue color. To avoid the confusion, you can simply use
a black color. Here, I'm just dabbing the brush to achieve the
shape of the trees. In the next step,
I'm just applying some random horizontal strokes. This will appear like a random bumpy surface
on the ground level. Now let us allow the
paint to dry completely. The colors have dried. You can pause the video if
your colors are still wet. Next, I'll take olive green and dab it on
this darker layer. At this point, the colors appear darker because
they are wet. Once they dry, you will
see the actual shade. Here we will be working
layer by layer so each layer needs to dry before
we apply another layer. If you are applying
colors on the wet layer, then you will end up picking
up the existing paint. Next, I'll be mixing
lemon yellow and olive green so this will give
us a lighter green color. I'm using this for the
highlights in the distant trees. [MUSIC] Moving on, we will paint the elements that are
closer to the foreground. Here I have taken yellow ocher. Take the paint in medium consistency and apply it right in front of the house. [MUSIC] This will be depicted
as the dried grasses. Towards the foreground, we will apply these slant lines. [MUSIC] Next, we will take black and apply
some random lines. [MUSIC] Next apply clean water and we will apply
this bluish tone. [MUSIC] At this stage, we need not add all
the details as it is going to be covered with
the foreground elements. [MUSIC] Apply the
same bluish tone inside the blank
spaces here, [MUSIC] in black and draw the
shape of grasses. [MUSIC] The distant trees
here doesn't have enough shadows so I'm
adding some black. [MUSIC] Whenever you paint
with gouache or acrylic, it is okay to go back and fix the elements that you feel
need some correction. [MUSIC] Next with the
help of fine liner brush, I'll be adding some branches at the crown part of the trees. [MUSIC] This is just to add an organic for
effect in the painting. [MUSIC] In the foreground area, we will paint some grasses
and some random texture. [MUSIC] I'm adding those because I do not
want this area to be blank and simply flat. [MUSIC] Add some tiny grasses
here and there. [MUSIC] We will leave it here and move on
to paint the house. Let's take vermilion red. You can take any red color, mix it with the brown
and the black shades. [MUSIC] I'm going to paint the back side of
the house of it darker. Considering it has
the shadow part. [MUSIC] We will paint the mid
area in the next layer. right now we will paint this darker layers
and allow it to dry. [MUSIC] The paints have dried. Next I'll be painting
the front part. I'm applying clean water. [MUSIC] Make sure you are not using excess water. Now, I'll be using
the same tone, but in very watery consistency, so that we have a very light
tone on the upper part. In the bottom part, I'm dropping some darker shades. [MUSIC] Again using a blow
dryer to dry the paint. [MUSIC] Moving on, let us paint the roof. I'm using black color
and a filbert brush. [MUSIC] Paint the windows
and the outlines. [MUSIC] Here you can use a fine liner brush
for better precision. [MUSIC] At this point in the
painting process, you might feel like the
painting is almost complete. We can just wind it up here. But we are going to
take a very bold step. Take a large round brush and
load it with black color. Here we will dab the brush to create an impression
of tree foliage. When you apply this black color, the painting might
look ugly initially. But all I would say is trust
the process and keep going. Once you have painted
this foliage, we need to add some branches in order to make
it look organic. I'm switching to my
size 2 round brush to add the final branches. When I was painting
the darker foliage, there was this inner voice
that kept telling me, "No, you cannot do this. Just stop, else you will
spoil the painting. But I had to ignore
that fear and allow myself to take the
risk of painting this. I'm adding some grasses in
the ground area as well. Next, we will be
adding the shadows of the foliage on the
walls of the house. Use a darker color and add
the shape of the foliage. Here in the middle ground, I'm covering up the yellow
area with some black strokes. I want the right side
of the painting to be dark due to the shadows
of the tree foliage. I'll be applying some
more darker color using wet on wet technique. Apply clean water on the area, so you want it to be darker. I've applied it on
the right side, on the white and the low areas. Now I'm applying a very
diluted version of black. The overall idea would be only the left part of the
painting will be bright, and sunlit, and the
right side would be covered with the tree
foliage and the shadows. Next, I'm dabbing the
brush very gently to create this tiny
impression of foliage, and the outer ends of the
whole tree or the foliage. Next, I'm painting all partially visible tree
branch and the foliage. It is the same technique, you paint the branch
first and then dab the brush to create the
impression of tree foliage. Adding some darker colors at the bottom of the distant trees. Paint the tree
branches irregularly, so paint them in different
directions and angles. If you're not comfortable
with a large brush, then you can use a fine
liner brush as well. Here in the foreground area, I'm adding darker grasses. Next, we will be painting the highlights in
the darker foliage. I will be using olive
green and lemon yellow. You can mix these colors and
dab it on the black layer. Since it is going to be the
shadow part in the painting, it's okay if it is
not that vibrant. Do not completely
cover this black area. Apply the shade on
the grasses as well. Next, we will take a
mid-tone green color by mixing a bit of
red to olive green, and again, we will be
dabbing the paint. In order to have
a nice contrast, you should have darker, lighter, and mid-tone
values in any composition. Switching to my fine
liner brush and adding these tiny twigs at the
end of the foliage. Do this only if you have
a fine liner brush. If you're using a thicker brush, then you might end up getting
very thicker branches. Here, I'll be adding
some final details, some shadows and highlights. You can add some free-flying
birds in the sky. We are done with the painting. Let us remove the masking tape. There you go, this is how
the painting looks like. I hope you enjoyed
painting this with me. Do share your class project
under the projects gallery. I would love to see
your recreations. [MUSIC]
7. Conclusion: Thank you for
watching this class. I hope you guys enjoyed it as
much as I did creating it. Do leave your
valuable review and also post your artworks
under project gallery. Thank you once again, happy painting and bye-bye. I'll see you in my next class.
 Shanan Subhan, Watercolor/Gouache | Art Educator