Transcripts
1. Introduction: Hi, there. Are you looking to develop your drawing an observational
skills within new character full and
interesting sketching technique. Perhaps you're
looking for ways to loosen up or new bits of inspiration and
motivation to get you finding joy in
sketching the everyday, the things around
you that you see. This is the class for you. My name is Toby, known as Toby
urban sketch on Instagram, YouTube, and of course
here on Skillshare. I use continuous line drawing as a key part of all
of my sketches. Often in architectural sketches, but also in my portraits, in my pet portraits and the
still-life things around me. Continuous line drawing
is a wonderful technique. It, it is what it sounds like. You put your pen on the page or your pencil and you draw your entire scene without
taking the pen off. What that forces you to do
is observed really closely, find key outlines, and
draw what you see, not what you think you see. We'll be talking about all of these concepts as we go through a series of guided
sketching exercises which will take you
from simple and slow through to gestural and
character full sketches. The other advantage of
continuous line drawing is it's an exercise which finds joy and creativity in the most banal, most boring of images. We'll draw a little park and we will find
some fun in a bin. And the rubbish lying
around it will draw some swans and we'll
get a little bit of joy from looking at their feet. And that's the kind of
thing which developing your skills and your
techniques can do. You can find something
new which reignites that fire and just gets you sketching and filling
up a sketchbook. And of course, continuous
line sketching is quick. During one pink line, you can't spend an hour doing it because at some point
you're going to want to move. In fact, you'll end up
doing them in two or 3 min, maybe ten or 15 for longer,
more complicated scene. But it means that you
can create loads of art. You can explore the
world around you and do it in your
style, in your voice. And that's the other key to
continuous line sketching. It's Character panel. It's not perfect. You will
make mistakes and you won't be able to correct them because you're
doing one big line. But that's the point that
humanness bit of you, that, that sort of error which we all make is there on
the page forever. And it looks amazing
and it makes it so much more than the
sum of its parts. So if that sounds
like fun to you, and let's get started. If you want to find
more of my classes, then you can look me up
on my socials as well. Toby Rowland sketch and do
follow me on Skillshare. If you enjoyed the class,
please do leave a review. It means the world and rehab spread the word and
more importantly, spread continuous line
sketching to the masses. So without further ado, Happy sketching, Let's go.
2. Supplies and Tools: So this applies now, there really aren't
many for this lesson, and I'll show you
what I'm using, but I don't want you to get
too focused on exactly that. This is really having a pen and some paper and what
you can do with that. And it doesn't matter what
kind of pen and paper. Now for me, I love sketching with my fountain pen, so
that's what I'm doing. I'm using my Lemmy all-star
fountain pen with a fine nib. And it's got some carbon black, so platinum and that's
some waterproof ink. So when I add my sketch, I can splash on some
color off if I want. Without worrying that
the ink will run. You could use any paper
and normal printer paper. You could do some sketches
over newspaper and provide that really fascinating
contrast between the background texture of all
that text and your sketch. I'm going to be using a really,
really cheap sketchbook. And this is the one I feel
with all of my examples, sketches, my thumbnail sketches, my loose sketches,
my experiments. It cost a couple of
pounds from a budget, aren't retailer in the UK. And it's fine. It's filled with stuff
I really enjoyed doing. I will also at the end demonstrate a couple
of touches of color. And I'll just do that
when two different media, I'll be using these. These are Faber, Castell,
Pitt Artist Pen. A pen with some lovely
bolting because HE colored India ink. And a really nice way of adding illustrative block graphic
colors, two sketches. I've just got them
in a few colors and we'll explore those,
as I said at the end. The other thing that
I'll be demonstrating is very briefly a little
bit in my watercolors. This is my normal
watercolor palette. I'll put all the colors in the project description so
you know what I'm using. But again, the colors aren't
the aim of this lesson. We'll explore them for sure, but knowing exactly
what colors isn't important and having exactly these colors
isn't important. Knowing you can apply them and they can be fun is important, but you don't have to. And that's it. I'll talk
about an economy lesson. A few other things you
might want to try. If you do want to add colors, things like pencils,
alcohol, markers, whatever you have really, because it's more
about how you apply the color than the exact
media that you're applying. And that's everything we need. So without further ado, let's just get on
decent sketching.
3. Class Project: So the final project, the final project will be, of course, a page full of
continuous line sketches. That might be one sketch, but it might be one very
careful contour drawing. Or it might be a page
full of just real quick, fascinating and loose strings. And anything goes. In this class we'll
be doing still lives, self portraits,
architectural scene. But whatever you have
around that you want to draw that inspires you in that moment and that you
want to capture on a page. Go for it. Don't be afraid of mistakes. Don't rub out mistakes. Just go with the flow
and see what happens. Remember, when you're
drawing your hand, e.g. no one knows exactly what your hand looked
like in that moment. It could have been
in any position. So don't judge
yourself too hard. Certainly don't judge
yourself harder than someone else
will be charging you, which is probably not a tool. Let's just be thinking,
it looks quite cool. So have a go, fill a page, consider
adding color if you want, but you feel pressured to add color and then share it
in the class resources. I'll make sure to leave a
comment, give some feedback, and ask a few questions so we can start a discussion
on here as well. Anyway. With that, let's get
sketching into the, into the lessons, the
demonstrations themselves.
4. Contours - Slow and Meditative: Now in this first lesson, we'll be looking at the
idea of contour drawing. Now, contour drawings where we get the outline or something. So instead of drawing
the handle digits, we get the outline
and the suggestion of the hand more about
the total mass, the total volume than
every little detail. What that means is we're being quite slow and careful
and it's really lovely and meditative and calming way to get into
continuous line drawing. I'll be using a flower, something I've picked out of
a vase this afternoon and pop straight back in after.
You'll be pleased to hear. But you could use
anything across on anything that's on
your table, a cup. All of these things
are lovely ways to demonstrate contour drawing. Fundamentally, just
remember, simplify and go slowly and gently and focus
on what you are saying, not what you think
that you're seeing. And before you know
it, you'll have something interesting
on the page. So a lovely place to start. A continuous line
drawing journey is with a contour drawing. A contour drawing just means
where we take the outline, we take the shape, the
whole of an object. And that's the art,
not the details, not do all the other bits, but just the, the
volume, the mass. So if I took a
really simple idea, we take this pen and we could
simply draw it and then we are finding the
outline of our Penn. And that's what's
making our art, not the details, nothing else. And then you go
before you know it, you've got a really
interesting and lovely sketch, and obviously it's very simple. But let's take that a level up. Let's do a flower. So we've got this
lovely flyer here. And I'm going to draw from my viewpoint a contour of this. And I'm going to take those principles
we've talked about of simplification and we'll talk through what I'm
thinking as I do it. So I'm actually going to
focus on this middle flux. It's got the nicest shape and there's a lot of
noise going on elsewhere. We just need to be able to focus and sort of meditate
down on that one area. Then go nice and slowly. And remember, we're just doing
a really simple drawing. So I'm starting with
the outer leaf. I'm just following
its outlining. Grabbing the next one. And all we're doing
is taking time. We're not drawing any
faster than we can look. Because this is all
about observations are about yes, keeping that flow. But more importantly,
we need to be constantly observing what
it is that we're sketching. I'm now down onto the stem. We got this little sort of
slightly pull this bit, will be overlapping leaves and we just kidding
that outline. So just accidentally
nudge my pen up there so I'll just pop it
back down and keep going. And then this leaves fascinating
because it curls over. But you'll find you can
describe things like that actually remarkably easily. As long as you are
observing very carefully. And also forgiving
yourself mistakes. When we get to about
here we get to the overlying leaf which
is sort of coming around. This other little leaf
is going to bring us back to the beginning
and onto our stem. And that little bulb and spit. Then we can sweep up. And again, I'm just
taking my time. I'm looking and looking
and looking again. My eyes are constantly
flicking between the flower and my
pen and my page. And also having to
challenge my head because it's easy to think you're
drawing the outline. We're in a time,
you're shown actually, you need to work out
exactly where is the outline going
because it's not actually as easy as you think. You think you see a lot
of things released. I often think this is
fair of all humans. We think we see things. But we're actually
drawing what our brain is interpreting, not actually what's there. Then I can keep coming
nice and slowly around. And then we aren't there
back to the beginning. And we can add on
a little bit here. We can add on the rest
of the stem coming down. We can even, let's just
go for it and we'll keep this continuous
line going and just show doesn't matter
if we crossover. It doesn't matter if we
decide to come back and keep the continuous line going somewhere else,
that's fine as well. So that's what I've
done this time. But when you do that, again, it doesn't matter if you
create these crossover points, if you create a little bit
of noise and randomness. And for me actually There's a lot of beauty in that. And then aligned can just come, we just end it somewhere. The couple of little
bubbles on the stem. Then why not? I'm
enjoying myself, so let's keep going. And just constantly thinking, am I really getting it right? And when I say right, we don't mean literally
100% accurate, but I want to be able to trace. I've got the right
number of petals. I had nothing about the
right place at the end. The shapes look about right? I want it to be a
little bit reminiscent. My object, but not
perfect, not perfect. I want people to recognize
it's an interesting flower. But not necessarily in a day. They have to think a
little bit and they recognize the intelligence which has gone into creating it. And then we give it that
soft first contour, continuous line drawing. What if we wanted to add
a bit more detail though? We've done our outline,
what we could have. Let's say we could have
kept up Panama and going. So it'll be finished,
we finished here. So let's say I'd kept
my pen line going. And we can find some of
these inner contours. So we can start now outlining a few of
these other petals. I'm describing these petals and a bit more detail than
what we've already done. And there's a few which are overlapping and under lapping. And this is a lovely
chance to just find all the other contours, the ones that are describing the inner shapes rather
than just the outer shapes. There's also contours
describing the inner shape. We can dance around the
page and move back and forwards and again create that lovely bit of
beautiful chaos. But it's not total
chaos what it is, it's just 3D, character, full way of drawing. And a kind of meditative
experience where you really observing as your number
one most important thing for those few minutes. And that's it. Now we've already
added some nice details. We could keep going
on our leaves. We could describe here
how they fold over. So now we've got that
fold and the leaf. We could describe how
this one twists around. Always simple, simple linework. And we can even
describe the shape or texture of the stem. Now what we've got
this really beautiful, simple continuous line sketch of this flower simplified down. We've removed a couple
of the flowers, but we've taken our
image down here, and yet it took me three lines, but there's no reason
why I couldn't have kept my pen
down and kept going. I would also argue for me, continuous line
sketching is about the feel and the process. If I want to have a
break for a coffee, I will have a break for coffee. Then I'll come back and
I'll find my line again. And that's what I'd
encourage you to do. Especially if we're
doing longer things. There's no need for you to feel stressed that you have to sit here and keep
sketching for ages. So the free with yourself
and enjoy the process, but use that observation, that simplification to
create something beautiful. We're going to come
back to this later in the color episode. What we're gonna do
before then is move on and keep trying a few
different things. Having a few different
looks at ways of sketching and
different objects and different things
that we could sketch to enhance your observation and to enhance a continuous
line drawing skills.
5. Adding Detail - Handy Sketching: So we've done the
contour drawing, and now we're going to take it up a notch and
we're going to be adding a bit more detail
in a bit more challenge. So a lovely challenging thing which we all have to
hand is our hands. The reason hands challenging is because they can
be in any shape. They can be a fist, they
can be classic handshape, but they have all sorts
of foreshortening. They can be all sorts
of awkward angles. And so we need to
really observe. And that's what this
lesson is all about. Observation, drawing
what we see, not what we think we see. And focusing on a little bit
of comparative measurement, whilst also just accepting
mistakes are going to happen and they're fine.
It's not a problem. In fact, mistakes or
that human beauty, which is really important in
continuous line sketching. So what is next in our journey? Well, we've got our hands and
our hands or something we can create a really
fascinating sketch of. Hands are scary. They come in all shapes
and sizes of course, but all kinds of
different movements and foreshortening
and perspective. And they can do all
sorts of weird things. They can hunt sharp, you can lose a couple
of fingers and it's really a scary thing to sketch. And you'll see it even in
the best portrait sketches or figure sketches or painter's. If you look on them,
if you've watched e.g. portrait artist here, you
will see how hands often get simplified and that's okay, but let's break
that barrier today. So what we're gonna do,
we're gonna take one hand. I suggest your non drawing hand, and we're going to
hold it in a position. Let's start nice and simply
can pop it down like this. And I'm going to draw it and I'm going to
fill up this page. So I'm going to draw up here. And we're going to
just take my angle of view and we slightly
different from yours. Um, but we're gonna have a
go at just sketching it. What I'm going to encourage
you to sketch your own hand. So pop your hand like
this for one movement. Then we're going to move
it and we're going to join them up and create
something interesting. So let's just start again
with a nice contour drawing. Can not moving the
pen faster than you can see. With this time. We're not just gonna do a contour drawing
at the beginning, we're gonna be coming
backwards and forwards and describing a bit of
the shape and detail. The shape in detail
in hands of course, includes things like the
knuckles so we can come back and we can provide
those knuckle shapes, lines which come with them. So all these lovely
skin markings. There's a lot of interesting
flow to hands as well. So we end up having fingers
sort of flow over each other. And this is what
makes observation really important because
as much as you can learn all the proportions
in the world, when you put your hand
in new and odd position, the proportion states stand
up so easily anymore, but we can always observe. So that's what this
technique is teaching us. We move around and
we come back again so we can keep just
comparing those key points. So I'm looking at the
knuckles as I come along and the joints and looking at where it should be
relative to the one before. So I just have my pen
off briefly, e.g. I'm looking at the angle here of this knuckle tonight on
this joint to that one, my fingernail to the
next finger now, I know in my head that I'm
aiming for fingernail to be just picking up my
line again about here. And then I'm going to get
it again about right. About. It's good enough. We're forgiving
ourselves mistakes. This techniques entirely
Designed to forgive mistakes. You're kind of setting out
almost to make mistakes. There's no way that you're
gonna get 100% right. And then we can find the firm. You can have a few guys look, i'm I'm I'm moving
my pen around, creating all that those lines there because I'm trying
to find the right spot. I'm trying to find the right
area to get my feminine. Then when we find it, we can start creating that
lovely little loose sketch. We can get the thumb. And now I've got the
hands of chlorine. So let's do something
different. Let's get a fist. I can put my hand here, getting the shadow
off the page and then let's get that
fists are joining in. So I'm going to start
with the bottom now. I'm gonna get the
thumb and the knuckle, the first joint of the thumb, and then find the
nail and come around. And now this is where
it gets interesting. It starts overlapping. And I sort of the way
my hands shown to me, I will say my, my index finger looks kinda like a slug or maybe a
football or rugby will, depending on your
your continent. Lucky I find myself
funny, isn't it? But it looks very funny and fat in it. That's what
I'm trying to say. It's got a really odd shape, not a shape I would have
drawn without observation. Then we can still come
and find the knuckles. We can find these
important lines which describe the structure
of the skin as well. There's another knuckle
up here which comes down. In this view, I'm
noticing that when my hair is a rather
prominent as well, actually, that's something else that I can start thinking about. This knuckle, I can barely
see the finger tool. Again, that's not if I wasn't observing for observation wasn't in the name of this game. I probably wouldn't
have noticed. I would have tried to
draw a far more of a finger and got it
essentially wrong, incorrect. Whereas all this
observation helps us recognize when we don't
really know what we're doing. What's last, let's do
something different. Again. I'm going to put
my hand out as a palm. More, let's say more
classic handshape. But I'm still dealing with some interesting
shapes and shadows. So I'm going to
start with a firm. This is cubic, basically eating a contour and then coming round. And then although it's
classic, my word, There's a lot of foreshortening going on here because
of the angle. So from where I'm looking, my fingers are actually fairly higher in my
vision and my thumb, even though they're
stretched out, it's probably on the camera. Quite different for you. But for me, the fingers
are surprisingly short. So I'm going to have
to factor that in. I gotta get a better idea of perspective in here
as well as if we're shortening because my fingers
should be getting in fact, they are getting wider as
they come close to me. There's a lot of
shape to the palm as well as a lot of
bumps and movement. So he can use our continuous
line to grab that. And again, lots of shape here. We can even describe some of this awkward shadow lines on the wrist and
then we can bring our line off and just finish it. Now we go another interesting
observational exercise. We've got my hand
and then your case, it'd be your hand in three
different or could position, but it really works. Hers with careful observation. And because of these funky lines and how we're drawing
it all as one line. It also makes it
really interesting. It's a fascinating
study released. Maybe it's just me being odd, but I find this kind of
drawing really interesting, loose, interesting, fun
to look at, fun to do. Again, we'll have a look later if we want to add
a bit of color to that. But for now that's my
observational exercise number two, where we're starting to
think a bit more about those details and
shapes and things. And the power of observation.
6. Gestural Self-Portraits: So we've done a couple of
quite careful, less than fair. And careful contour
drawing is a beautiful art and it's a lovely way of being
very meditative and calm. But there's another side to
continuous line sketching. There's hundreds of
others, but there's another sort of opposite side. And that's the gestural drawing. And the gestural drawing
is classically done in portraits, self-portraits,
life drawing. So what we're gonna do
is a self portrait. So you're going to
see me talking to me, looking at me and you'll
see just how much. I'm looking up and down
at the page and at my own face as I sketch. So you could do the same with
a tablet in front of you, or you could get your mirror, put it in front feet,
or just take a photo. I felt to be a little
bit easier to work from. But only easier if
we're thinking about accuracy as our aim
rather than fun art. If we think about fun
art as array and then actually having that movement
as we change positions, will change your drawing. It will make it
more challenging or make it less accurate. But maybe that will bring
us something which makes our continuous line
drawing really interesting as well.
So let's have a go. Let's see what happens
when we draw ourselves. This time, we're gonna be using our self portrait sketches. An opportunity to be more gestural and gestural
drawing as much quicker. It's where we do big lines describing flowing shapes
and describing movement. And what we can do is we can pop another sketch
on this page will fill up this whole page and interesting sketches where
we sketch ourselves. So this is all about
looking as well. And we're going to do,
Let's do a couple, because these are really quick, quick, and agile and
loose with our lines. So I'm going to start
by trying to a pose. So I'm going to just have
a quite neutral pose, this one, which
you can hopefully see slightly looking down. So I'm going to now have
to just keep my head still and look up
and down at my page. So as we draw, we can just flick our
eyes up and we just grab big shapes and then
grab another shape. And we look up and down. We got another shape that's kinda trying to get the
idea of my hairline. And the oval shape of my head. My other ear, which is a little bit higher than the first one. And then the sort of
shaped down to my chin. There's no reason we
can't go up and down. There's no reason we
can't come back and correct is and things like that. Then I've got this
very fortunate feature which are my glasses. Glasses are great because
they're a fixed shape. Yeah, they change
with proportion, not proportionally change
with them perspective. But they're a really
lovely thing which sits over that key
region of your face. And you can kinda measure
everything off them. Just because they're
there for me. Life gets easier because I
can look at where my eyes are relative to my glasses rather than having to
do it the hard way. But we all have
features like that. So looking at whether
corner of the lipids compared to the pupil
is a classic one. Looking at where
the nostrils are, looking at where the tip of the nose is relative to
the bottom of the eye. These are all options. So just because
you're not wearing glasses, my disability finally, coming to my rescue doesn't mean that you can't do
an interesting sketch. You can use some
comparative measurements. And then you go, There's my quick gestural
drawing self portrait. So can you see here that the difference instead of this
slow controlled movement, we went grab a shape, grab a shape, grab another. Doing that, we get the key bits. We will look at ourselves
and we see a really key. But if hairline we see a
big year or the glasses, we don't then spend ages looking at all the little wrinkles, whether it has line
up exactly with top. We don't do that,
which might have been what we did with the
contour drawing. Now, we're grabbing
these big shapes. Now let's try
something different so I can take up another pose. And very sorry
that you will have to stare at me for so long. I'm just going to choose something I can actually
look at myself, but also sketch and
also hold come today. So I'm going to
take this potent. Why not join the two together? So let's do that. I'm
going to join it together. So I'm going to start with
my shoulder coming in there. And then we're going
to actually start with the close here because that gives me a neat way
working out where my jaw line, when neckline me. Because I can measure this, we'll compare to this
leaf with my clothes. So picking up my line again, we'll come back up and find
my other call it big here. Let's get the meatus
or the ear in as well. I'm going to cross over my other drawing habit,
but that's fine. This is interesting page
full of, full of fun. Then the hairline again, the hairline is not just
a maze in most people, quite a defining feature. So worth using IOS think using one of our gesture
lines to grab that. And then certainly for me, my nose is a defining feature. So grab that as well and
come back to the classes. And then lips. I'm going to finish there. And you see we've left it. Half-done me. The sketch half-done. Haven't done the eyes, haven't done this side of the face. Well, this side of the
face swollen in shadowing. We've left out loads,
but is it a person? It's most definitely a person. Does it look like me? Well, I guess it doesn't
not look like me. And I think someone who knew I'd sketched this would know when to catch myself. Probably a total
stranger wouldn't recognize me, but that's okay. So this is our third exercise. So we've gone through that
basic contour drawing. We've gone to the
complexities of observation. We've moved on to
being less careful, more gestural and flowing. So the next thing we're
going to have a go, It's the same idea, bit flowing, bit of fun, but with some animals and we'll see what we
can do with them.
7. Making a Scene: So the next thing I want to talk about is how
we actually take these little snippets of drawing and we turn them
into more of a scene. I said in the last lesson
we are going to be drawing some animals and we
are indeed say we're going to start off by
drawing some birds. And after the bird,
we're going to draw another little
invented park scene. And in both of these,
It's the idea of getting multiple things fitting together so that we're not just
doing one object, but perhaps will work
all the way up to during a panorama or the whole of
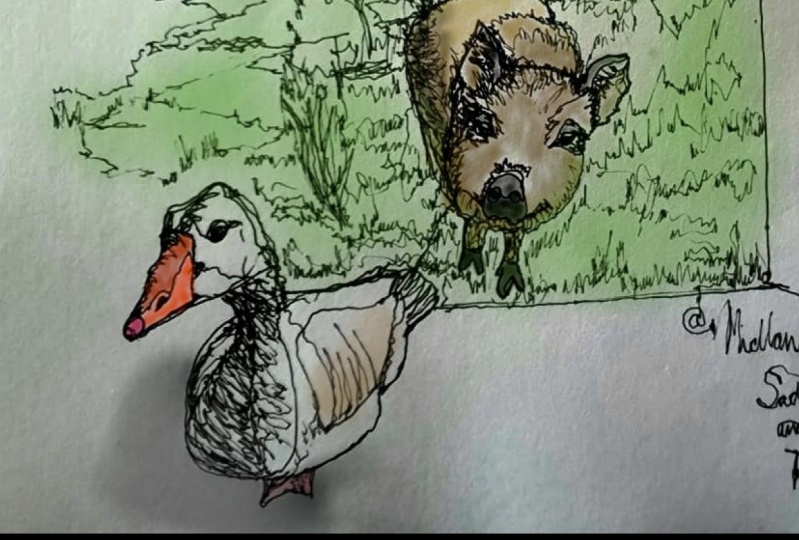
our living room or whatever. But in this instance, a little family of swans. So a different subject,
a similar idea, slightly chest roll,
but we're going to be limiting the line
work a little bit more. What would make sketching, of course, is some birds. So we got this family of swans. I love this little family
of swans because they're on my work that I try and do every day around my little town. So I sort of saw them grow
up from that very cute, ugly duckling phase
right through to being the slightly scary group have used that you see here with
that parents, of course. So let's start. For me. It's easiest left, I'm right handed, so
we go left or right? I'm going to start with the
tail of our first little s1. And we're gonna get some accuracy in this
contour in terms of getting the feathering
of the sworn in. And we can get some
of that shadow in as well to come down
between its wings. Then we can chest
Yuri, get the head. We can treat aspects
of our bird is loops. And that helps with
the gesture and the smoothness of
our whole scene. And now we've got a
swan hat looping round. We can come down to our, I'm sure there's a
better word than swans, but we're coming
down to the foot and we can just join
up to an expert. And our next one we can
start again at this time, probably the first as well. And then again, some accuracy in this idea of feathering and the complexity of
the layers of feathers. Before getting that
sweeping gesture or naked. By getting in that extra line, it's displaying that this is
a sweeping over structure, not something which
is just sort of flat. Now we come down
to the foot here. And then we can come
all the way across to mommy or daddy. And we can get there again, feathered feel and that
sweep of the bird around. And let's leave out the inner line and just
see what it looks like. But doesn't mean we don't come back and add the inner
line of the neck. But let's see what happens. If we play a bit
with simplification. Can now we can grab this for ten to this for and
you know what? I like. I'm going to leave it as that simple because he
then got on expert. He's just behind and
overlapping a lot. And I sort of got their wings are puffed up, haven't they? They kind of having a
little pre and underneath. And they've got their head
in a different angle, says cheek that again
as a little loop. And we can get their beak, which is a key detail, isn't it? So the details that
we're making sure to get in and that feathering,
that swooping neck. And then the beaks
when we see them. And then we're on
to our last bird. We've got mommy or daddy
again in the back. And again it's all about that through sweeping
contour of the neck, the loop for the
head and the beak. And actually we can give
another leap there. And then we can just
trail the line off. And there we go. A really interesting way
to get a sweeping feel. A kind of continuous line that joins everything up
in a really similar, in a way to our hand sketches. But this time describing
a whole scene. Now there's lots of
other ideas for this. I'm just going to do one
from imagination to give you an idea of something you
could do. Sat in a park. So a nice way of doing this
is if you sat on a bench, you can observe the park in
front of you and you can find perhaps as a tree, you can find that tree. You can bring that line
all the way round. You can bring it down. And then maybe this
person and the person you find them just as they walk in
front of that tree. Their outline, and all people
in parks walking dogs. So here's their dog, which you can also get
as a continuous line. And even with a wagging tail, which then joins up
to the half again, maybe there's a little bend. So we can get our
painting and we can go really accurate on
the detail if we wanted. We could carry on
contrast as well. We're adding in lots
of little lines. We could have. Now a few bits
are rubbish lying around. You can go and find
real interest in the LDL and the
phenol if you like. Then there's the bench
which is opposite you because often there's
a couple of benches. So we just go back and
forwards and up and down. And we'll soon have a bench just by simplifying our shapes. And then someone comes in
and sits on that bench. So we'll get them. Then they're reading
a newspaper. You see how we can
layer on lines, so it doesn't have to be that pre-planned way that
I drew out our first bird. We can lay our lines, we can do tiny little things. Maybe this is more birds
sitting on top of this bush. We can do them. We can find a few leaves, or perhaps these are berries within a bush which are
particularly interesting. So have fun and have a
play with this idea. It's one of my favorite, I'm
going to call it Horizon. Horizon sketching. And it's a great way
of simplifying what's in front of you and capturing these flowing linear
scenes going across. It's also a great
practice for what I find most enjoyable with
continuous line sketching. And that's what we'll be
doing in the next lesson.
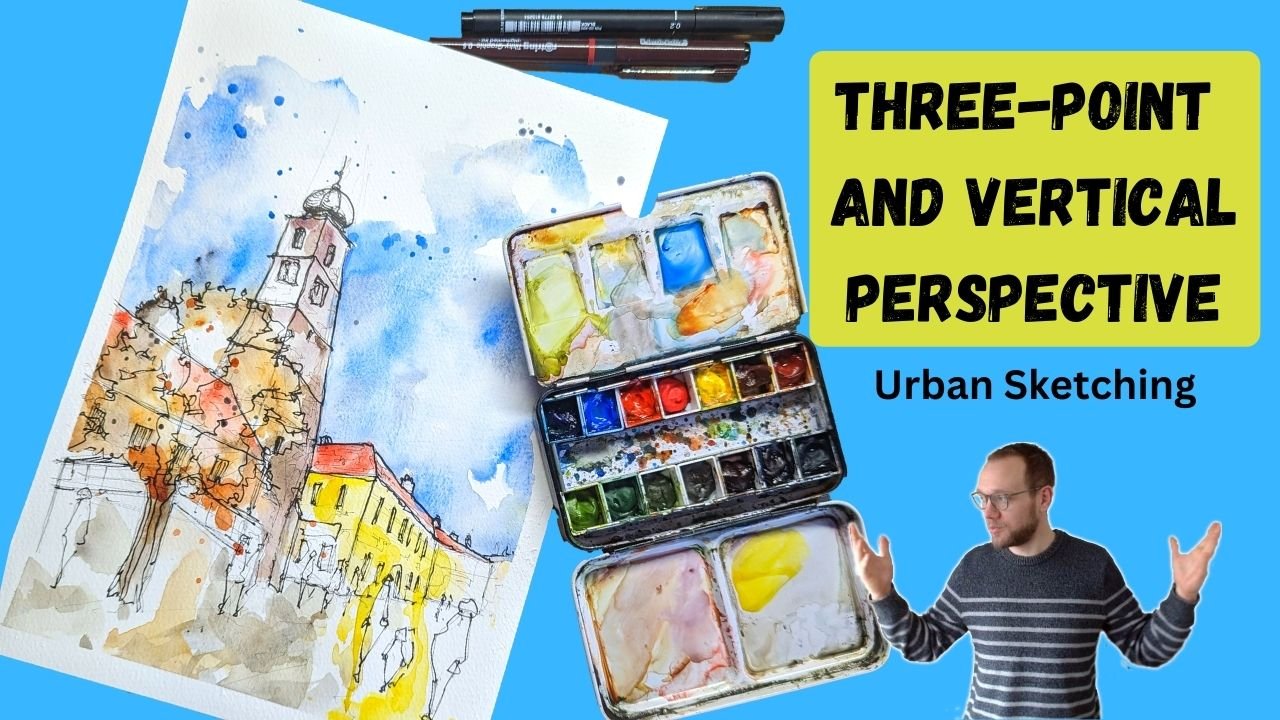
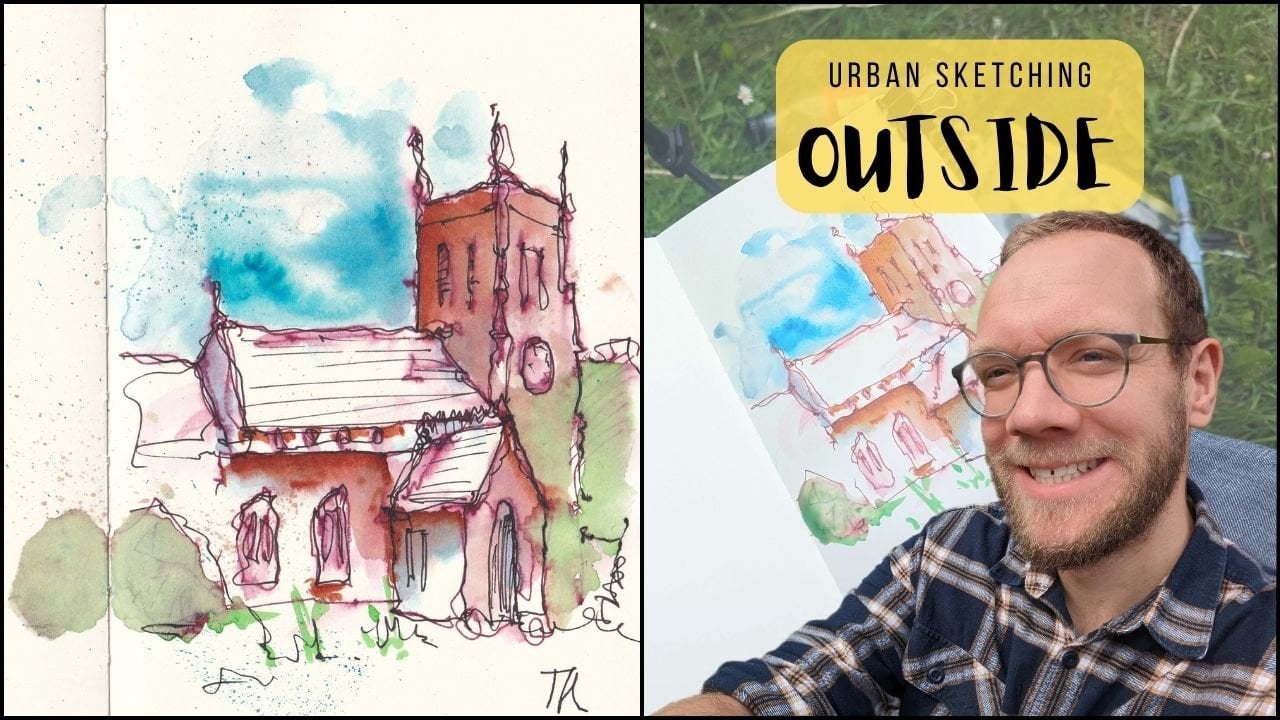
8. Architecture and Buildings: Now the last of our
linework lessons is about architecture
and urban sketch. Toby, urban sketch. That's where I got my
name and I love doing continuous line drawings
with architecture. I think it's a fascinating way of taking something
really complex. Well, you could be
drawing every brick, every tile, counting
every window. But actually you don't, you find the silhouette. And then you choose
the details you like. The detailed drawing you there, which will make it interesting. And you put them in, and they might not be in exactly
the right place, but they'll look
good and you'll have enjoyed the process and
it will have been fun, and it won't take forever. And so we're going to
have a look at that now. How do we find an
architectural scene? Grab its silhouette,
and then find these shapes underneath
that were drawn to. The last time I'm getting my pen out today
for this lesson. And what we're gonna do, we're gonna be doing a continuous line
architectural sketch. And I've got this corner of the corner of the market
square, my hometown. And it's got some
lovely shapes and let's just do a flow in one line sketch of it and I'll talk you through principles. So I'd like to start my
architecture 19 sketches by focusing on that silhouette. As I build the silhouette
of fine little details, save some power lines
coming across and they'll provide a nice loop
into the other buildings. Sometimes we just add these details like chimneys
on top straightaway. But we're mostly focusing
on that silhouette line. That's still about
is really what describes the whole image. Sorry, I just got to
refresh my reference there. It doesn't matter if you
come off your your paper because you can come
back just like I have, then what we'll do next time it gets dark because of
course I use my other hand, which would have
been more sensible. Now, we almost come to the
edge here of our reference. So we're starting to think about the next stage and what
is that next stage? The next stage is
finding those shapes. So what are the shapes
within our scene? Well, if we come down, we can find that there's a triangle here from
this roof line. And then there's some squares
which are the windows. And then there's actually
a very complex shape, or just series of shapes,
which is this one. So we can turn the van
into a series of sort of kind of parallelograms
with some rectangles, circles on the front, more parallelograms
or rectangles, and some wheels underneath. Now we've got a
van, no problems. So everything in our
scene is simply shapes. We can continue this. We go back to my triangles, another triangle
and a rectangle. We don't have to do
everything though, so we can leave stuff out. So it's come down, Let's find something else more interesting. We've got this kind of shop front here and
we can comment, we can find all the rectangles which make up the
windows and a door. And then I always
love a little sign or something at the front, and that's what we've got here. Then we're working our way towards this sort of
Paddy Power shop, which sort of comes
in about here. And it's gone a bit. I've probably missed some of the details and I've
stretched other bits out, but that is fine. And that's the nature
of this whole process. The nature is to get
the essence and you're moving and finding
what's interesting. And making it, making it fun and making it your
version of your world, not someone else's version and not a photo and not
a perfect version. We can keep working around
finding these little details, the little bits
which interests you, these little wires which
lead us to other loops. You can do just quite abstract
shapes as well with phi, just come and just create
a few leaps over here. They'll, they'll work. They really will work. Or at least you can
certainly make them work. So if you've made a mistake, you never need to feel like you're stuck with it because you can make things work just
by going with the flow. Let's just do one
more window here. And then loop off.
And there you go. Got a really fascinating
architectural scene. I've got the key bits
which I found interesting. The front of this restaurant, the front of this
shop with this sign, the van and this lovely
silhouette line. I've got an abstract in places. I've gone neat and
sensible in places. And I hope what you
can see from this, from this page that
there's loads of mistakes, but there's loads of fun. We simplify and we explore
the world and we can create fascinating art using
continuous line drawing. And continuous line drawing
doesn't have to be perfect. In fact, it won't be
perfect unless you are the most skilled
person in the world. But what it will do is it
will free you up to have fun. It will enhance your
observation skills, and it will allow you to explore the world in a different way. Anyway, that's the end
of my line lesson. So the next lesson, which is going to be dusting
around and looking at different ways which you
might want to consider. Adding a bit of color would turn to our various
sketches here.
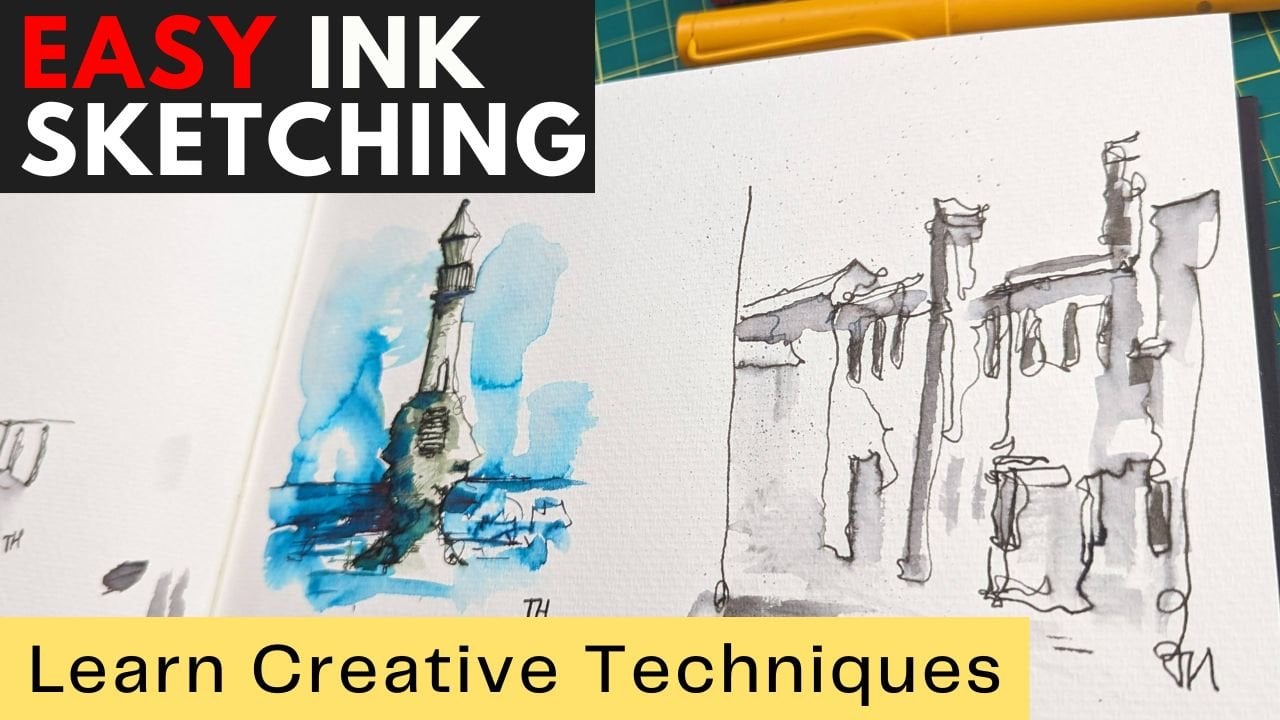
9. Colours - Different Techniques: Continuous line drawing, ink
drawing is an art in itself. And I leave a lot of my sketches
on painted or uncolored. But I know that sometimes what I really want
to do is add some color, just some forms, something to brighten it lifted,
add some life. So that's what we're
going to be doing in this little lesson. And these are just ideas. We're gonna look at
each of the drawings and touch bit of color here, splash of color, they're
using a couple of different mediums I mentioned
in the supply lesson. Don't feel you have
to use these things. This is ideas for
how to apply color, loose or specific, or in just a couple of
places or everywhere. These are ideas which
you can take away an experiment where you
could use a colored by row. You could use one of
those buyers with four or five
different colors and just hatched different colors. And you could take a pencil and gently color in every way. You could do whatever you like. Just experiment and
have a bit of fun. So we filled our
sketchbook pages with all sorts of fun little
bits of our fun shapes, different ways of being more slow control boards,
gestural, self portraits. And what if we want
to add some color? To start with a
tool that all of us have in various
forms or marker pen. So here I've got some Faber
Castell, Pitt Artist Pens. And what these are, are quite vivid, Interesting,
bright colors. We can take just a couple. So let's, let's, for
the sake of argument, we're going to take a
light blue and let's take an orange because
there are a couple of colors I enjoy. I'm going to take a
green for another sketch and pick something at
random for another one. Let's see what we end up. There we go an apricot, which is quite a nice So the pale pink. So let's start by exploring
the green and the pink, which are obviously really
nice flower colors. So what can we do to
offline with these? Well, let's find
these little lines and just gently block in
a few areas of color. This is similar to what
you might do on say, an iPad or a sketching program, where you just drop in
some chunks of color. Instead of coloring
the whole thing. We provide that essence idea of color with a few little
hints. And let's do it. Let's do a couple of leaves. So where the leaves crossover, that can be a point
that we highlight just by popping in this
nice little block of quite dense screen. And there we go. So that could be
all the green I do. Let's pick this pink and
then we can do the pink where the leaves crossover
this bright bold pink. This way. We've gone beyond just the lines describing form. And we're describing
the form with intensity of color as well. And we just again do a
few spots here and there. Let's just do one more up here. Just an interesting
way to draw the eye. Since we've got that random
apricot, let's, let's use it. So let's pop some apricot as
a slightly different color. And again, only in
a, in a few places. Now, what you could do
is you could keep going. You could do really
neat illustration and you could fill in all
of this with color, get the shape and the
shadow really interesting. We could also take our pen. I did say it would be the
last eyes touching my pen, but you could use your pen and create super dark contrast. So let's get these
features really dark and then leave one
of them nice and white. And by doing this, you're just changing things up a little bit. Creating a little bit of Juno, say Qua, some things. Just take your sketch
to the next level. Now, I love blue and did pick blue on purpose
because I think it's a really nice way
of highlighting just a couple of
features and portrait. So you could take a nice light blue and literally just go look. These are glasses. Just by blocking
in those patches. You sort of explaining a
lot more about your sketch. You can then use
our orange just to pick a couple of other areas. And let's go with the lips. That's a nice area which
is normally bold and so it won't it won't look too wrong if it's an area which is
sort of standing out. And we can just take
it to the edge there. And if you wanted even drop
in a bit somewhere else, which is that we know is dark. Let's do maybe. I'm gonna I'm gonna leave him alone,
leave him as he is. But I can come back
to as well with this. And maybe you do, people leave a little reflection
and the pupil, and the same on this pupil. There's nothing to do that here. So I could do
nothing or it could come back and just
make one element of the linework much bolder and make it
really stand proud. What I'm going to do. So. Having made the pupil so bold, I can see that actually
it's a bit too garish. It's standing out too much
for my liking at least. So maybe what we should do is come and re-explore the idea
of using another bit of color in a couple of places to just pull back a little bit from that really dark
and punchy color. The nice thing is, I could hate this, but it doesn't matter
because I have not. I've expanded my energy
on this one project. Lots of little things I can do and I can always
redo it and redo it and redo it and have fun
exploring that concept. Next one I'd say is perhaps using watercolors
as another idea. So I've got just a size
eight round brush. I'm going to show you e.g. release way of applying watercolors to this
kind of sketch. So what we can do is celebrate the line work by applying
a loose glaze of color. So what I'm doing is I'm coming
in with just some water. I'm going to describe
the shadows with my with my watercolors. So I've got lots of
water on the page. I'm going to pick up
a nice shadowy color. In this case, it's going to be indigo with a bit
of perylene violet. I'm going to let that shadow
color just drop around. And it should sort of move
around and paint itself. Remember, this is just normal. It's actually very
cheap cartridge paper. It's from the works in the UK, which is a sort of
a budget brand, great for picking
up really cheap sketching supplies to
experiment and play with. And so it's going to respond differently to really nice
quality watercolor paper. Differently isn't bad,
differently is different. I can punch a couple of
nice colors on there, get a glow inside some
of these windows. And then you write, remember
a couple of these signs I found interesting and
they were nice red, so I can put some red
in there as well. By doing this, we just got these interesting touches
flowing around the page. We can drop a little
bit of blue in and maybe use a blue to
just give an idea of some reflections in
these windows which we've popped in
and she splashes. Now what we've got
is a celebration of linework with a
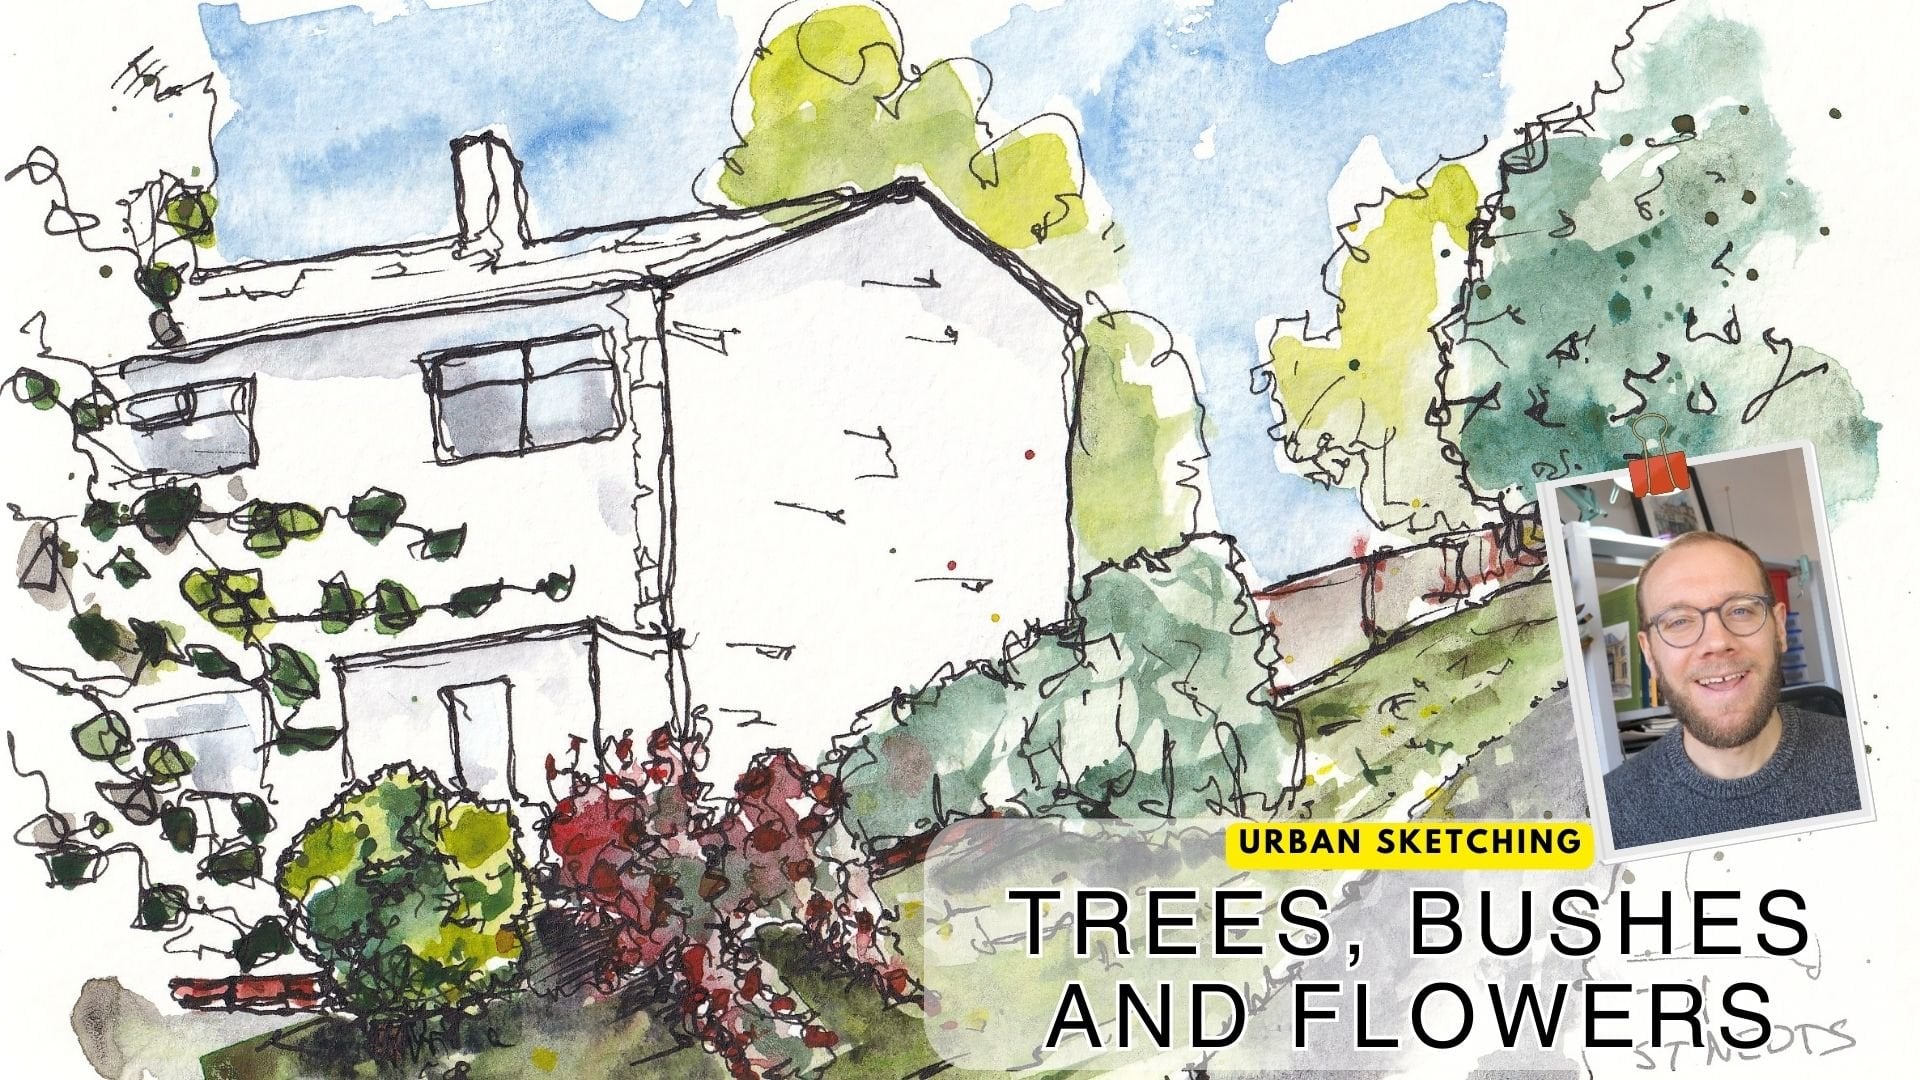
really loose touch of a few colors here and there. On top. You could use the same kind of watercolors to do a
similar technique to this. So we could come in and
we could just decide to just gently give a
tree a bit of green. We could do the same
with these sort of bush over in this corner. Remembering that we've
got these little birds on top and the
berries in the bush. Berries, maybe the
barriers are a nice red. Red comes back in, just touching it around
this little berry marks. Maybe our birds, I don't know today they can be a sort of
fallow blue and bright blue. The blue is going to leak into our other picture
and that's fine. That's all part of the
fun, interesting process. I look pick up a little bit. So if we want to move
our watercolors, just dry my brush off screen. There we go. Now we've got a
join between our sketches, which for me is really fun. I love having joined
and feels like that. Just gonna do one more
similar touchdown here and get a nice. So the orange, certainly muddy orange peek
too are all swans. And again, it's
this tiny touch of color which can elevate
your one line sketch. And that's all the beaks, Diane, and why not give them
some orange feet as well? I don't know if their
feet are really orange, but it fits the idea that
we were going around. And actually I didn't
notice as I was doing it, that I was going on and
on about their feet because every time we
move from bird to bird, we found their foot in a
really interesting position. And there you go. So that is now some
color applied. That was a bit of
a longer lesson, but hopefully gave you
a few different ideas, really simple things to try. And I've used bold colors, I've used felt pens, but instead of days
you could use pencils, you could use colored
ink, alcohol markers. You could pick up your tablet, take a photo and drop
fill it so you can have a digitized
color form of art. I hope you've
enjoyed this anyway. The last, last bit we've got is just the summary
and Roundup lesson. There'll be off to do
hopefully your own projects.
10. Thanks and Summary: So thank you everyone, well done for getting
through all those lessons. I hope you've enjoyed it. I hope you found it a combination of
meditative and relaxing, but also just enjoyable and inspiring something
to either develop your art style or to
develop and improve your skills with some
observational drawing exercises. Please do, join in and share your project in
the class gallery. Remember, just fill a page with drawing anything.
Asks what I did. I drew the things around me, places from near me, things which I enjoy, or bits of me of course as well. If you do that, please share
it in the class gallery. I'd love to give some
feedback or some questions, start a discussion with you. I'd also love to connect
outside of Skillshare. You can find me on my socials. Toby urban sketch. Finally, if you
do have the time, if you enjoyed the class,
please do leave a review. It means the world and
it really helps spread the word and get my class out there and hopefully get continuous line sketching
out there even more as well.
 Toby Haseler, Urban Sketcher, Continuous Lines