Transcripts
1. Introduction: [MUSIC] Perspective. Now, if you're an urban
sketcher or a sketcher looking to improve
your skills and three-point perspective
and vertical perspective are two techniques you'll
definitely want to understand. Not only do they help
create enticing, captivating, and 3D images, they're also really
interesting challenges to apply ourselves to you
as aspiring sketchers. In this class, I really
want to give you my framework for understanding these concepts and how I
think about them and apply them to my art and give you all the tools you need to
go out and immediately start feeling happy in
this world of perspective, particularly with these
interesting vertical perspective. My name is Toby and I'm known as tobyurbansketch on Instagram, YouTube, and of course
here on Skillshare. My style of art is loose, it's splashy, it's
got wobbly lines, but I enjoy myself and it's
based in a grounding of theory by having that
little grounding theory and knowing just enough. I can manipulate things and
I can ignore the theory and I can do things which
are pretty experimental, but that still work because I understand
why I'm doing them. In this class, I want to show you
how I do that. We'll start by looking at the basic theory of perspective. We'll then apply that to three-point perspective
and analyze some photos to work out where the
perspective is coming from and where their different vanishing
points are and of course, we then have our final project. Now we'll do this through
four different stages. Firstly, looking at a pencil sketch to get
those structural lines in, and again, how we find and simplify perspective down
to just three points. We'll add some ink on finding
the bits which interest us working out a
little bit more about our composition before
splashing on the colors. Colors doesn't mean we
stop thinking about perspective and I'll talk to you about exactly what I mean. How on earth can we use colors
to enhance perspective? Finally, we finish off
with a few splashes and a nice little
bit of old pen work. I'd love you to get involved, to share your project, to ask any questions you have and I'll make sure to come
back and answer them. Please do also find me on
Skillshare, follow me, and join in with other classes if you like the look of them, or find me outside on Instagram, YouTube, or on my website. Most of all though, let's
have a little bit of fun with this class three-point
perspective sketching, and let's see what we
can do with it. [MUSIC]
2. Supplies: Hello everyone. Now, it is time to have a little
think about the supplies. Don't worry, there's nothing too clever and nothing too
fancy, and be flexible. You don't need to go
out and buy a lot of things just to do this class. What I happen to
be using today is a mechanical pencil and
a couple of fine liners. Now, the fine liners
are waterproof. That's quite important
because I'll be adding watercolors after, and I got them in a thin size 0.5 and a quite thick
size, 0.5 millimeter. It's quite fun to have a
couple of sizes because it gives you a bit more variation
in your line quality. The paper I'm using is a
simple part of A4 paper, which is cold pressed 300
g/m² watercolor paper, as you can see by Daler Rowney, and it's just student
grade and for sketching and making love
fun experiment with things. Student grade paper is
plenty good enough. My watercolors are here. Now, these are the
same work colors I always use for
almost everything. There's 14 colors in here, but we're not using 14 colors. The ones we will use are
a bit of cobalt blue, a bit of a man orange, which is a nice red color. Some Hansa yellow, little bit of quinacridone
gold as well. Then we'll just be using a
couple of darker colors. I happen to use a CPR, a indigo and the moon glow
and eat Perlin violet, today. I will talk you through these
colors as I use them for my final project and
they're just ideas. So again, don't need
these specific colors, but use your own. Do some mixing, experiment
and have a bit of fun. Lastly, there's just the
bits that we always forget, but obviously quite important. I've got a really
big jug of water. I use a one liter pot so I've got loads of
water to play with. I use a towel or some kitchen roll just to mop
up the water from my brush, keep it nice and clean. I also put things on a
drawing board as when I paint so that I can masking tape down the edges and
keep it nice and flat, and in case you're interested, I'll do some demos just in a
normal A5 sketchbook today. And that is literally everything
that I'm using today. With that, let's get into
the lessons in proper.
3. Key Concepts: [MUSIC] Now, this first
lesson is very short and it's a revision of
theory type lesson. We're going to have a look at basic principles of perspective to make
sure that we've got a grounding going forward
where we're going to make things more complicated
and more fun by thinking about that
vertical perspective. In this first lesson, we're going to cover
three key points really quickly and they are the
key points of perspective. Horizon line, vanishing points, and lines of perspective
or structural lines. Now, the horizon
line is a line which is level with our eyes. Everything at eye
level in a scene will be on this horizon line. The vanishing points for horizontal perspective will
then also sit on this line. Now, they might sit on
this line on your page or they could be a long
way off your page. It could be miles off your page. It depends on exactly how
steep the perspective is. From these, if we say that our vanishing points are on the page just for
demonstration purposes, you can build up a box for
example or a 3D object. If we draw in a vertical line
in the middle of the box, we could then build in our structural lines or
our lines of perspective. They are straight
lines which come from the vanishing point
and go outwards. This is two-point perspective. The vertical lines in the
scene are all vertical. What we could now do is instead
of having this as a box, it could suddenly
become a block of flats or house or
something like that. What's going to happen is as we go up and up the windows
and things like that, we'll angle so these tops of the windows are all sitting
on lines of perspective. They'll be another line
coming down like this. All of these lines
of perspective are coming down to the
vanishing point. Like that, you can build
up using horizon line, using structural
lines, or vanishing. At your vanishing points, you can build up your scene. That is the basics
of perspective. In vertical perspective,
things start to change. So we still have these
vanishing points but now our vertical lines
are no longer vertical. In the next lessons we're
going to look at why that is, we're going to look at
how to work with that, and then of course
we're going to do an example or two. [MUSIC]
4. Adding Vertical Perspective: [MUSIC] With that basic
grounding out of the way, we can now move on and start thinking about
three-point perspective. With three-point
perspective, we're going to take our two vanishing points in our horizon line and we're going to add a third vanishing point, which is somewhere up there,
somewhere off our page, usually, and above us. To have a look at this, we're going to do
it practically, so there's a
reference photo that is in the class resources and
we're going to have a look at that reference
photo and I'm going to annotate and scribble
on it and we're going to see exactly where we find a third point
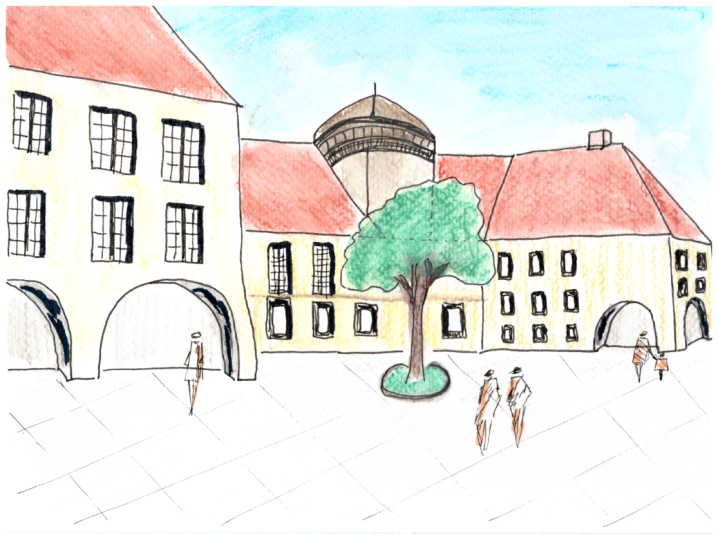
of perspective. Let's have a look
at this photo and workout where we can find our
third point of perspective. Now, to show you it's got
two points of perspective, let's just first start by mapping that out
really quickly. We can find our horizon line by tracing all of these people's
heads through the scene. We know if we can draw a line
and hopefully you can see that that quite comfortably
covers everybody's head. That's our flat horizon line. Then we've got all
of these lines in the scene so we can trace these, and just by finding
a few of them, we'll be able to find
our vanishing point. Our vanishing point,
as we discussed, may not be on the page, so on this side it's
probably just here, isn't it, just off the page. On this side, it's going to be probably
a long way off the page. But we can still see these lines are slipping
down and probably what, 50, 60 centimeters over that way will be our
vanishing point. We've also got other
sloping line somewhere. We haven't actually got many
vertical lines in this scene which are actually vertically
going straight up. If we actually start just tracing out some of these lines, we can see that one's going
to slightly to the left, this one slightly less, so this one's going
a long way off to the left, really angling. If I just taken the photo wonky, or maybe I've taken this
photo a little bit wonky, but then if we look
up at this side here, it slopes off to the right. What becomes evident is
actually we're going to have all these lines meeting
somewhere way up here. Way up off the top
of the screen. That's because we have
another point of perspective. We have a vertical point of
perspective way up here. I've got another
example to show you so that we can see
that this isn't just in this photo and actually you'll recognize it in
all sorts of photos. In this scene, we've got a
tall building and again, we trace all these
vertical lines. We find the slope up
and then we can take a step back and if we just simplify those
lines a little bit, we can find sure enough
what we've got is a vertical point of
perspective which is some way up the page. [MUSIC]
5. How Position Affects Vertical Perspective: [MUSIC] Now I want to
have a little chat to you about how our position affects vertical perspective
and just how that might relate to how we
choose to compose our image. We're going up for
a close-up view of something or distant view. How does that feel
and why does it look different and
feel different? I really quickly again, wanted to just explain and
show you why sometimes vertical perspective is so obvious and sometimes
it's really not. A nice example would be to take, let's say, a horizon
scene from a city. If we just doodle ourselves a little horizon and let's say we're looking at this
from miles away. There are classic prints
and sketches that you get. What you'd find is
basically all of the walls, all the skyscrapers are looking basically vertical so there's not really any
perspective at all. Certainly not going up. But suddenly you get
really close to one of those buildings and it
looks more like this. You could probably not even fit the whole thing into
your field of vision and all the windows going up are really steeply angled as well. Up here, really thin
windows, down here, thick but with really
steeply angled sort lines. Why is that? Why
is this happening? Well, it's all to do with the angle of vision,
different angle, so confusing but
bear with me and I should hopefully
make this clear. Let's say we've got this scene. If I just draw one
of these skyscrapers here and we're looking at this. When we're looking
at this scene, we're standing here,
absolutely miles away. The angle of vision, so the angle from our eyes
to the top is quite low. This is the angle that
we're worrying about. It's what? Ten degrees. It might even be one degree if you're looking at something 100 meters high from five
kilometers away, for example. But when we're close like this, if we're all the way up here, our eyes are still
at the same height. But suddenly this angle
of vision is enormous. This is almost 90 degrees. The closer you get so
the more this angle of vision changes, the steeper the
perspective will be. The further away you get, the flatter that that
perspective becomes. That helps us think about
how we are framing a scene. For example, if we're
doing a lighthouse, if we want to draw it as
a flat distant object, we think about how we frame
it within our scene and we frame it as a small object. If we want it to have
loads of perspective, it's going to feel
claustrophobic because to be really angled, to have massive perspective, you have to be
really close to it. It has to feel your vision. Suddenly we've got
this lighthouse which maybe can barely
fitting into our page. We certainly can't see
the top and the bottom. We just see there's
a small window here and it becomes this huge
part of our vision. Using perspective is changing
the feel of the scene, especially with something
like vertical perspective, where it implies being close
or being far away from it. Hopefully, now we've covered the basic theory
ideas understanding, which means we can
jump straight in to doing a couple of
examples sketches, and then our final
project. [MUSIC]
6. Warped Perspective - A Quick Sketch: [MUSIC] We've talked
a lot now about perspective, how to do it. Why this? Lots of theory and a little bit
of practice as well. But this lesson, I want to just turn it on its head and go, now that we understand vertical
three-point perspective, what happens if
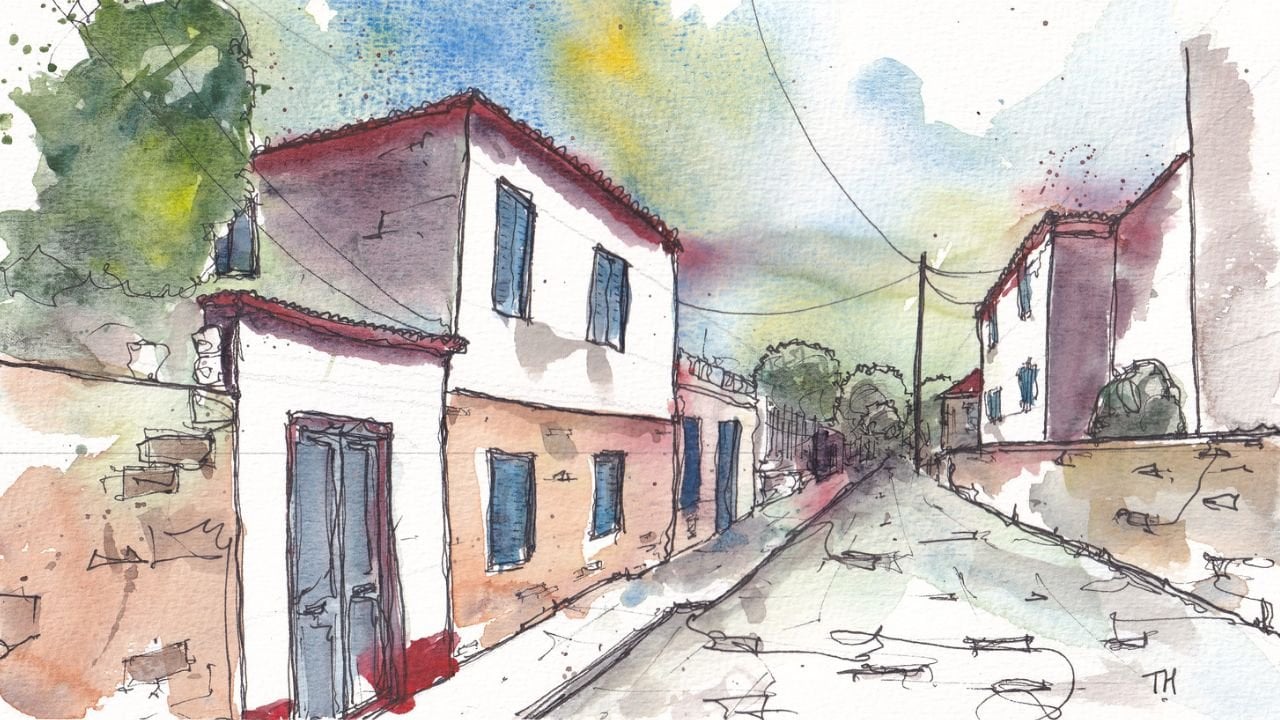
because we know it, we change it, we make it wrong. Actually just show you really quickly with a little sketch. Again, there's a
reference photo in the class resources which
you can have a play with. But what happens
if we invert it? We can do this because
we understand it. Now we can make it have more
character, have more fun. Let's have a little play. Before we get started
with our final project, which will be about
three point perspective, about creating a lovely sketch from
three-point perspective. As with all other forms
of perspective and everything in art and
certainly my style of art. To think of vertical
perspective as your friend and your tool to do what you would like to enhance your
art it's not a rule, but as soon as you
are aware of it, you can use it, manipulate it. I'm going to do a little
sketch with you now to the reference photo is up here and it's in the class
resources fall. This is not the reference I'm
using for my final project, but I would welcome you to join in and play with
this photo with me as well. I'm just in a normal
little sketch book here. Not waterproof paper just can do a lovely ink sketch here. We're going to play
with the perspective, and we're going to see
what we can do with it. Manipulate it to make it wrong, but make it interesting, and see what that does and see how much character that adds. Let's just start by
bringing in the scene. We've got, if I come
across a one-page, got a little tree here. Then we got these
houses and things. This is going to lead us up
very nicely to our church. You see really loose, really quick sketch the
edge of our churches here. What we can see if we just have a look at it,
what we sketch, we've got a definite bit of horizontal perspective and we the streets
disappearing off here. Then with the church
you can see it's got its own vanishing point
off over there somewhere. We've got definite horizontal
perspective and we can probably just make all
these vertical lines flat. What we've done, we turn this background into a
really quick for fun, loose one-point perspective, background to our focal point. Hopefully you can see
that everything through sweeping off, going that way. Now if we look at the church, we can see the churches definitely got some
vertical perspective. If we draw this line in, it's quite straight, but
as you can over and over, it gets narrow in it
means that the top, it's narrower than the bottom. But what if we don't want
that to be the case? What if we want to make a feature even more
so if this church, there are lots of lovely
ways of doing this, but I'm going to say, what if we reverse perspective
rather than ignoring it, rather than making it a
two-point perspective or a one-point perspective
scene where all our verticals come strange. Why don't we do
something different? This line can stay strikes
already turned it in, and then these
ones can come out. Suddenly, instead of
what should happen, so this should be getting
narrower and narrower, but it's not at the top. What's happening is we're
getting wider and wider. We can make a real
exaggeration of that. Now, as you would see
in reality at the top, it's more exaggerated, but we're exaggerating it the wrong way. We've got suddenly this building just getting wider and wider instead of
narrow and narrow. Hopefully if I draw my
little structural lines, they're doing
something like this. We've always got
a vanishing point down here instead of up there. It's not quite done here because the lines
are bending because we're keeping the church some
way in reality down here, but we could even do
it with the doorway. We can bring that
doorway and make it wide and just kept couple of these pillars in and they
can have that same flow. We just get that
flow going outwards. Finding these key features. In some ways are
going to have to invent things because we're drawing in a way
that doesn't exist, but it isn't totally not exist. All we're doing is taking perspective and stretching
and bending it. Which is fine. Why is that fine? Because what we always do, even if we do three or four or however many points of
perspective we find, we're still simplifying reality. Reality is we walk around with a constantly shifting
perspective as we move. We've got a fisheye
vision because we got spherical eyeballs. Everything we do to sketch
is a simplification anyway. Warping it one way or another. It's still fine. We're
still doing the same thing with a different
decision-making process. What's the field? Just as we sketch this, or certainly as I sketch
it and please do join in and have fun with this
idea as well, if you like. What do you think
the feel of this? Churches now that it's
coming out of this, instead of being a flat object, instead of being a real
hard and fast sketch, then we've got this out feeling. For me, it's adding character
is drawing the eye. It's perhaps a little
cartoony or illustrative, but it doesn't have to be. That's partly because
I'm doing it so loose. What we've done is we've
taken our awareness of perspective, understanding
of perspective, and that has enabled
us to manipulate it, to create something really
interesting, really fun. We could do the same
and warp some of these lumps as well. We've already got
a lump coming in this side which is bent
and warped anyway. Then we do the same in the
background, these little ones. Now we've got this field. The long and the short of
this little example sketch. I hope you have fun joining
in with that as well. Do share your warping and
you're having fun with things. The long and the short
is it doesn't matter if you get perspective wrong. But understanding it
and being able to do it does mean you can play, make those decisions and
know what you're doing and create really
interesting fields. This is my little example
we've looked at catching it. Look forward to seeing
your class projects if you want to do them. But without further ado, let's move on and we can start our final project
together. [MUSIC]
7. The Final Project - Our Task: [MUSIC] So the
final project will, of course, be a three-point
perspective sketch. What I'd love you to do, if
you're feeling up to it, is to join in and share yours in the class
gallery at the end. To do that, you will find the reference photo that I'm using in the class resources. Of course, you're welcome
to use another photo or go out a real own planner, on location urban sketcher and sketch your scene
somewhere around you. I'll show you my whole
process step-by-step, fully in real-time and talking about every decision I'm
making as I go along. I'll start with a pencil sketch, getting those lines
of perspective, getting those vanishing points, and analyzing how we're
simplifying our scene. I'll add on some ink, little wiggly wobbly lines
that outline the scene, but don't say too much
and don't overdo it. We'll add on loose
washes of color, keeping drama and
variation, but again, not over complicating things and working out how we are
using our colors to tell our story and to enhance that perspective before
the finishing touches, some bolding and those little final touches
of brighter color. Of course, adding our little
signature at the end, being proud of what we've done, loving the mistakes
as much as we love everything which went well. As I said, it will be amazing. When you're done, just
take a quick photo, share it in the class gallery, and let me know how it
went and let me know your thoughts and
what went well and what you would like
to try again or what you would do
differently in the future. I'll make sure to
come back and give you some feedback,
some encouragement, and also answer any
questions you might have either there or in
the class discussion. So without further ado, let's get into the
lessons and see how we're going to start thinking about our
perspective. [MUSIC]
8. Step One - Pencil Structure: [MUSIC] Now it is in fact
time for our final project. Now, this first section
of the final project, I'm going to be doing
a pencil sketch. Now, the reference photo, as ever in the class resources, so open that up and
have a look at it. I'm going to be firstly
focusing, with my pencil, on where are the
vanishing points, or at least where are the key lines that
we're constructing. If we just take a little moment before I get my stuff up, I can show you a digitally
annotated version of the reference photo here. What you can see when
we're looking for the vertical perspective
is there's loads going on. If we just simplify
that a little bit, we can get a feel for where our vertical vanishing point is. It's probably a page height away from the top of the tower. Keep that in mind as we go
through this little sketch. That's the easy way of
thinking about how high, how angled are our
walls going to be. Let's just see how we
do with our sketching. The first step is going
to be a pencil sketch. I'm using a 0.7-millimeter
mechanical pencil. I love a mechanical pencil
because it's always sharp. As long as it's got leaded and
we can always make it nice and sharp. You don't
have to use a pencil. You don't have to
start with this step, normally, we just go
straight with the ink. But I think for
learning perspective, for analyzing
perspective, actually, it's really useful to start
by using a pencil sketch. With our pencil, let's
start mapping in some structural lines and
seeing what we're going to do with our sketch to
make it interesting. The first thing I'll do is turn this into a portrait
because with the portrait sketch we
will be able to make more of the vertical
perspective. You can see the reference photo, we have a tower in
the middle of it. Something in the middle
of the focal point creates a little tension, and for me, not that enjoyable. So I'm going to shift it over. If we just squeeze our
reference ratio a little bit, this is the composition
I'm going to go for. Then from having
worked that out, we can start by sketching
in our key lines. We've got horizon line
which is down here. You might notice
that lots of people don't fit on that horizon line. The reason for that
is two things. One, there's a
very slight slope, but also a lot of
those people in our reference are children and the children are
shorter than me. Their heads are below the
horizon line and it means that they are not fitting
our horizon line rule. That had to be lower than it. But if you look at the
back near the house, you'll see most
people's heads and all the adults' heads
in the foreground as well do fit on a nice line.
There's our horizon line. We then got a slightly complicated
horizontal perspective. We've actually got
a vanishing point, which is this
building on the left, and that's going in like this, something like that anyway. We then go to our tower
which is about here, and we can get in
that line there, there's another one about there, and the vanishing point
as we looked at before, somewhere at the top. Then we've got another building. This building is on
a different angle. We got the building on the
left is on this angle, facing down there,
building on the right is going this way. We got a vanishing point
somewhere over here. We can find approximately that. We can sketch that in itself. Then the building back here is again back on approximately
and it's not exactly, but we always simplify things, so it's approximately on
the same vanishing points. We can use the same
vanishing point or the same structural
lines to build it in. Now, just a word of note, why is it not on exactly
the same vanishing point while it's not on
the same plane? This building is
facing like this here. This one here is about this
angle, sloping slightly. The one over here is more like this so its vanishing
point is on a different plane. It exists in a
more complex world than our simple
three-point perspective. It's got its own vanishing
point somewhere a bit closer. We're
going to ignore that. We're going to simplify
things as we always do. Manipulate them, making
our sketch our world. We're going to use about
the same structural lines. Then we've got another one
back in the distance here. For the same reason, because it's on a
different plane, its vanishing point is slightly different but we
can ignore that. We've got basically our
structural lines and we should also have
a vertical one here, give or take vertical. From there, we can start doing a quick pencil sketch
of the scene itself, so I'm going to come in and start just getting the heights of
things a bit right. It doesn't have to be perfect, but just approximately right. We can find again, from all these lovely points that we've mapped in already, we can quite quickly just
put in the important lines, and we can just find that our perspective-laden
scene as complex as it is, just quite quickly and relatively accurately
emerges without much fuss. Because all we're doing
is we're creating boxes. Then we've got this one
which comes across. Just have a look at how far
the roof line comes across. It comes across this line here, comes across this vertical line, and so it goes up to the middle, this one then comes
across, comes down, and then we've got this canopy which is also on its own
lines of perspective. Remember, keep things simple. There's no need to
draw everything perfectly. That's a photo. What we're doing
is we're creating our world up at the art. At the top, we've obviously
got this little dome-shaped popped out in as
high as possible. I've not even done enough
perspective in these lines, but we can change that when we come in
later with our pen. Now we've also got all
these windows and things. They can be on their own
lines perspective as well. If we map those in, that makes it very
easy to just add them. All of these little
horizontal lines, we can just scratch here. Remember, they're also going to be heading down
to a vanishing point. Again, approximately the
same vanishing point as these other horizontal
lines we've got. Somewhere over here, all these horizontal
lines will meet. Just find these
little details that we want to not
forget the window, little clock faces,
another window. Remember the size of
these windows are on those vertical lines of
perspective as well. The lowest window is
going to be on here. We don't have to
draw them all in. Just enough to remind ourselves. What I have forgotten to
do is the bottom here of our building and the bottom of the clock tower that
probably needs to come down. This is where you can find
little mistakes you made. Perhaps you can spot
the mistake I've made, which is this canopy is too low. The canopy for some reason is at the bottom of the church, which isn't right, so that's
great, we move it up. We just redo our canopy. This is why it is nice to
have done a pencil drawing. Now our canopy makes sense
in the rest of the scene. A little line for our tree here, and that is my
pencil sketch done. Hopefully, you can see
this scene already just starting to emerge with just a few little
structural lines, followed by
reinforcing those ones which seem right and building
our scene around it. Next, we're going to be
adding in some pen. [MUSIC]
9. Step Two - Adding Ink: [MUSIC] We've got
those key lines and we've got the structure
in place with our pencil. I'm not pretending everything
is perfect or correct. But with our first pen lines
which we're adding now, we have the opportunity
to move things around and change
things if we want. Everything doesn't have
to be correct either. Certainly doesn't
have to be accurate. But let's just see as we make these firsts of
bolder pen lines, how we decide to change things, how we decide to keep
things the same as we move through to creating more
of a finished final image. Time to add in our
pen, as I said. I'm going to start off
with just a fineliner. This happens to be a 0.05
millimeter Fineliner and we're going to be contrasting
that later with a much bolder 0.05
millimeter fineliner. But using a little
gentle fineliner first let us change things, move things, get things wrong. I'm going to start
with our focal point. Remember, I felt perhaps I hadn't angled this
perspective enough. I'll start on the
outside of this line, land up in the inside of it. Now I know I've increased the
angle of the perspective. I might even just
do the same here, start just on the
inside and angle down. It's fine, I'm allowed to exaggerate the
perspective of the scene. It's my art and my little world, so I can do what I want. Don't be afraid to
make changes which you think are creatively
or visually appealing. We can add in the
fill line which is not perfectly vertical
in the reference, but it may as well be vertical. Again, that just
simplifies things. Then we can start building
other key parts around it. We've got this roof line, which is partly hidden
behind the tree. Then we've got the edge of the house underneath
of the roof line. Then we can start
in on the windows. By force of habit, I tend to do little continuous
lines and link things up. There's no reason that
you have to do that. I just love the fill
lines, I enjoy doing it. I think it looks cool. That's why some of
my lines join up. Then we can come and
we can do a canopy, that we were happy we had any pencil sketched in
because we got it wrong. Then we can come on to this building and
start adding that in. If we look it, it
feels right already. This building feels goods
so we can stick with it. Remember these vertical
lines are also sloping and as I was sketching
them in earlier, I wasn't thinking
that hard about it. Again, just angle that
line a little bit more. That exaggerates our
perspective a bit more, and shows that
we're dealing with a real three-point tool and character full three-point
perspective scene. As we go off to the side here, just losing a bit of detail because we don't
want to overdo it. We can just start
adding in a couple of suggestive lines of
what might be going on off the edge of the scene. Then let's just start
finding little details. We can find these little windows and there's a blackboard here. I think this is a blacked
out window down here. Then some more and more windows. Remember these
vertical lines, again, they're fitting our lines with all these vertical lines fitting up different lines
of perspective. Getting more and more
angled as we get over. It doesn't matter if
they're not perfect, but just remember the feel. Remember the feel
because that keeps the character of the scene
feeling right basically. You can see I've
simplified pets. I've cut out these
windows at the top. I've made the roof simpler. That's again, our
prerogative as artists, we do what we want. Here's our chimney which again, all pointing at but all fitting that feel
of the perspective. Having done a bit of background, let's go and let's
make a bit more of our lovely Clock Church
Tower, Clock Tower. You can find all these
other extra lines. We can find these
little details. The clock faces which sit in
a little recessed square. Let's even do the clock
hand because, why not. Then we can suggest some
numbers around the outside, and we can get that
window in as well. With the window you can just see a really big
frame can't you? Don't forget to make things 3D. We got big frame here, a tiny bit of window. On the other side,
it's the reverse. Little frame and
a bit more window we can draw some little
frame lines in as well. We've got the same clock face, so that's a try and remember to make it
about the same time, because that'd be a bit of a continuity error
I wouldn't know. We can add in all these little
lines and they actually, we've got 123 here. There's one more that we
can add in and it doesn't matter if you counted them
right or wrong or minor, obviously in slightly the
wrong place, but that's fine. I imagined very few people, even people who live next
to this lovely church. No, we're just off-hand how many of those
lines there are. This also means we're perfectly fine getting
it a little bit wrong, not quite getting it
correct, perfectly. Going to move up to
the top here and this is a very complicated shape, so take it easy and
make it gentle, see how it looks and
then come back to it. We can just get an idea of it now and we can come back later and see if we like our idea, if we think it needs to move. That again is the advantage
of very thin pen. In the background, we've
got more of these chimneys. Again, having them slopes, here everything's moving
in the same direction. We're almost there with our key lines is what
I would say at least. We can start adding in a few more of these little details, and perhaps still making
this little touches, as things like
little brick marks. There were bits of carabiner on the wall is just a
few texture lines finding things we
hadn't first paid attention to so the PSP like a tiny sort of roof edge here, little chimney here, and then we can even get
texture lines on our rooftops. There's another
example, few marks to suggest to the
viewer that there's a tiles on the roof rather
than something else. Here, we can come
back and just see, do want to change
anything, modify anything. Then we've got our
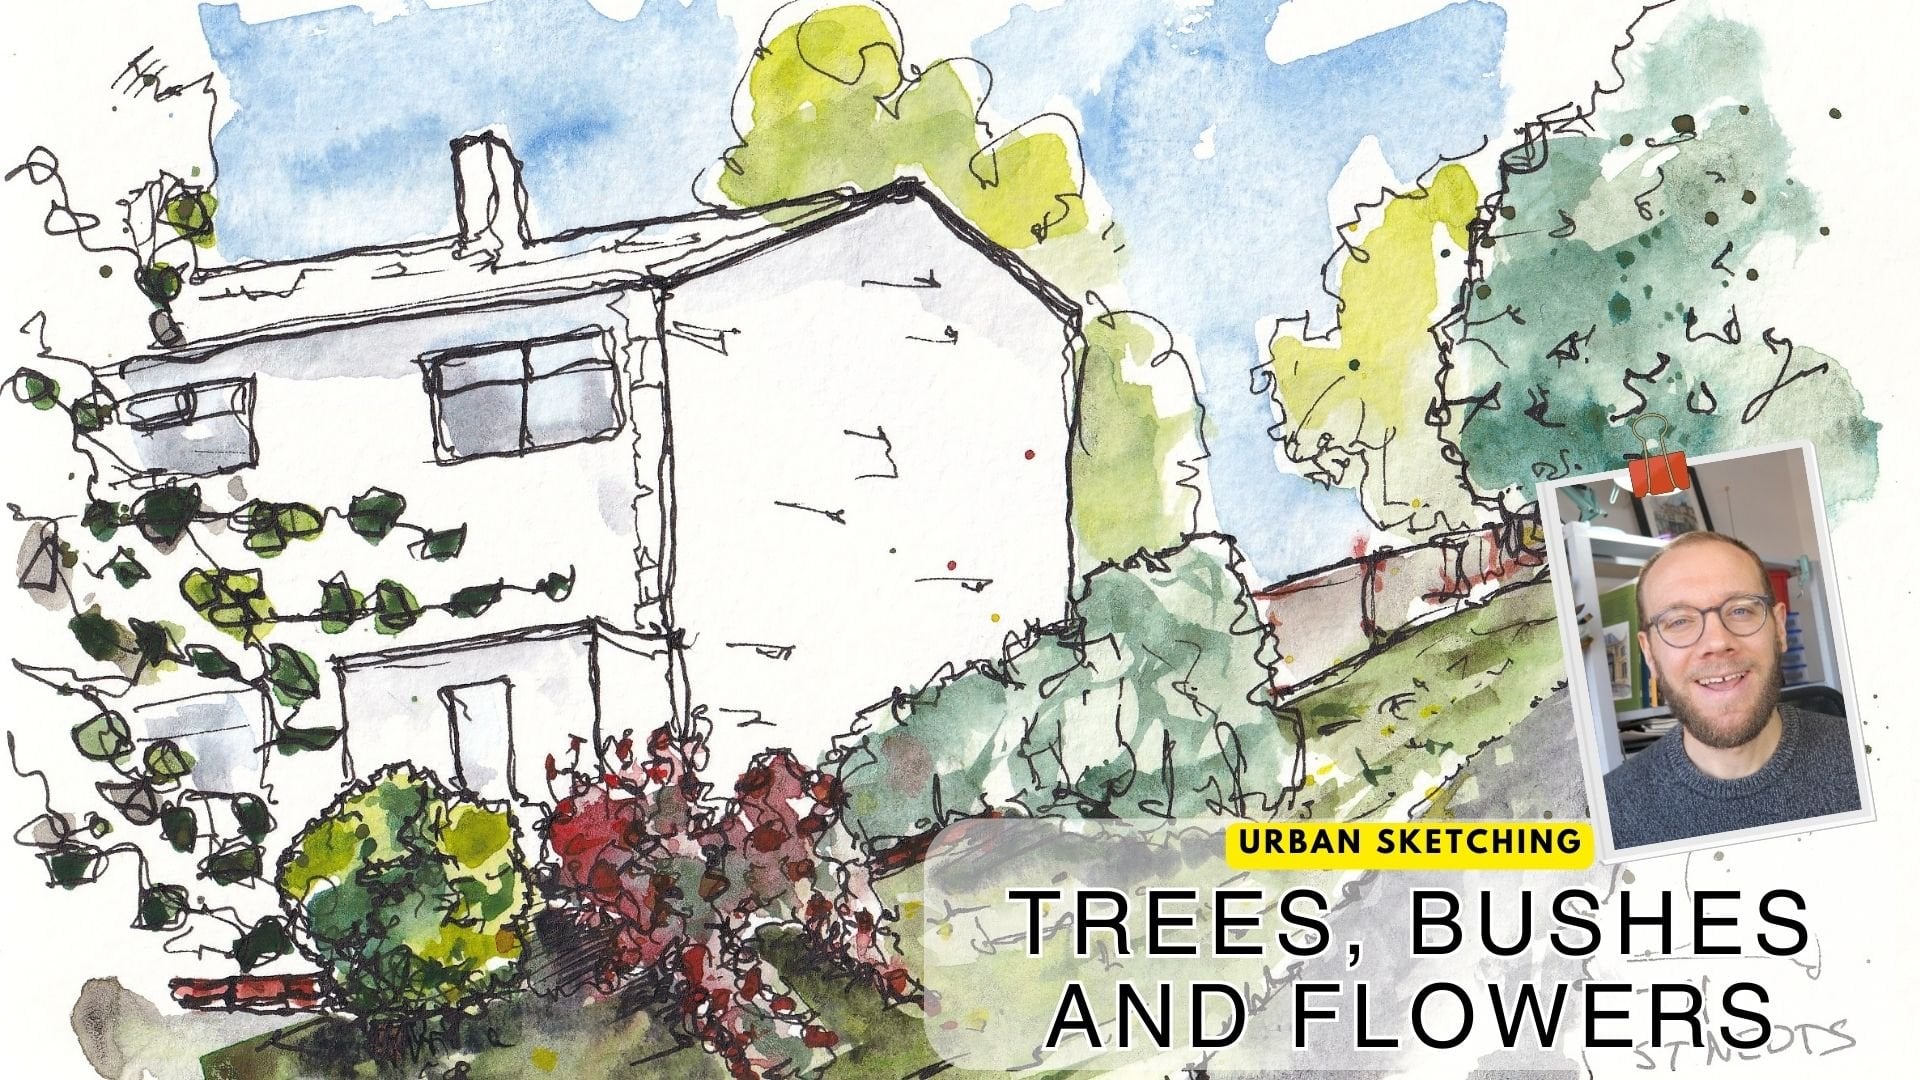
foreground features, we've got our tree. I'm going to do
is basically make the tree a bit of an outline. The nice thing about trees and natural objects when it comes to perspective and
architectural scenes like this, is that they, they do have perspective
but they are so natural in their
shape flowing that actually they
often feel like they're breaking that perspective,
they're unpredictable. Having something like
this in your scene is a nice counter foil towards
these straight lines, it stops everything
feeling like it's just having to flow up. Suddenly we've got this
object which isn't, it's got this different feel. What I've done, I've just
a really gentle outline, lots of random leaf-like shapes, and we can do few more in
the middle of the tree. But it's quite
transparent, isn't it, and it really it's got a few golden leave
mostly on this side. But you can see
through it a lot, and it's more about the
branches and things. Rather than drawing
all the branches as a line and wash sketcher, what can be nice is to draw
the outline and have it as just a slightly more abstract
thing in our sketch. Now what else is that? We've got all these
people haven't been so we have our horizon
line, which is great. We can start just loosely adding in the people where
we want them. We can find people
in the scene and add people from the
scene into our sketch. We can add these younger people and just remember to
make them appear young, change that and the proportion. A younger person, as well as being below
the horizon line, will have a bigger
head to body ratio. Just by doing that, it
makes them appear younger. Then we can come back and we can start adding in more people. We can add an adult to
the foreground just to show that these really
are our people. I want to say add a look at these shapes I'm
making are very loose. I'm certainly very
lose, but that's fine. That's not what the
scene is about. The scene is showing it's
busy with these people. It's great, but it's
about the perspective. It's about more than just trying to draw
people already perfectly. I think we're pretty much there
as well now with our ink. I'm going to stop that
before if done too much, and then we can come
back and we will come back and add some
more touches at the end. But now what we're going to do, just stop and add a
little bit of watercolor, splash on some loose colors
to bring the scene to life before reinvigorating
with some bolder lines, that perspective and getting control of the scene
again. [MUSIC]
10. Step Three - Loose Colours: [MUSIC] With all that
lovely ink work done, it's time to add our color. This first layer of color, which is going to be
the main color we add in this lesson, is going to be loose. But we're going to be thinking
still about perspective. How can we apply our color in a manner that highlights the
key feature of this image, which is that
vertical perspective? Now, it is time for some color. Color may not feel like
necessarily part of perspective, but actually, it really
is a part of perspective. I'll try and talk
you through as we go why I think that is. It involves, for example, using colors to reinforce
the feel of lines, but also making sure
that things which are distant in perspective are
paler or less intense, less saturated, things
which are more important or closer are more intense,
more saturated. Now, the first thing I'm
going to do is the sky. I'm going to apply
lots of water, and I'm going to
apply this water to either side of my little tower. I'm going to leave
the top for now; I'm going to leave the
top and see what it looks like because by applying
that water either side, we're going to be accentuating
this upward feeling, and we're not going to be
enclosing the top of the tower. I'm hoping that what we
get is this feeling of the tower breaking
through the sky. That's the first way that we're thinking with our colors
about perspective. How to put the color in,
I don't have to paint it. What do I mean? I mean I
just put the color down, and look, it paints itself. This is a bit of cobalt blue. Watercolors are more than
happy to paint themselves if you give them the
right environment. You can see with all that water, the fascinating shapes it makes. We can come in, we can
squish around with our brush so we can
make more shapes. Look at the reference
photo for a moment. You see how dramatic some
of those colors are, see how dramatic the
gaps in the sky are. Also, have a look at
how the sky also feels. It does have perspective as well, everything
has perspective. You can get a feel for that just by having a quick glance at it. You can see how it's got
this field of perspective. We're trying to emulate that activity
interest in the sky. Next, I'm going to just get a little bit more drama with
a couple of dark colors. First, some indigo. Indigo is a lovely, I'm sure
you know what indigo is, is a nice, lovely, dark blue. Almost a bit Payne's
gray in color. We can just touch that
in in a few places. Do you see how it's settling, how the paint is settling
into the image already? We can already see
that actually, we could take a bit more
blue or something like that. I also keep my towel nearby
so I can dry off my brush, and I can use that
to lift up a bit of water and manipulate the
sky a little bit more. Again, that's just trying to get that dramatic feeling going. Having done that, let some
blue paint itself again. Well, let's paint
a bit more blue, touch a bit more
blue into that sky. There are lots of
choices like this that we can make as we keep moving. We could keep working on this
sky for ages if we want it. We keep making it more
and more dramatic. Of course, we're going to
have to stop at some point, so just a few more touches here. Then I said a couple
of darker colors, so I'm also going to
add a bit of moon glow, which I think is a really
wonderful, dramatic color. Then I'm going to soften
some of these edges where we've got these really hard obvious edges everywhere. The edge of our sky. I'm just going to soften
them and see what happens. I think a few touches of
color above the tower. But I want it to have that
breaking-free feeling. Now, next, we've got
these lovely roofs. What I want to do
is just get rid of a little bit of that water
at the bottom of the sky. Now, I like colors
bleeding together. If you don't like that, then I would let
things dry a bit before moving onto the roof. If you don't know if you like
that or if you do like it, I'd encourage you to
experiment and just try adding a little bit of painting
where everything's going to be running
together and bleeding. I'm taking a bit of red, this happens to
you Mayan Orange, I'm going to touch
into the roof, and it will go into the sky. Just by touching it in, letting it touch the blue, we'll get this lovely mix of red and blue
which, of course, form a neutral to
purple-type color. The closer we get to orange, the closer it will
get to neutral because orange and blue colors which neutralize each other, they are complementary colors. You see this subtle soft
blending and bleeding of colors. I'm going to continue, I'll wash down the page. Look at this really
bright house. I'm going to use a Hansa Yellow, a really bright
yellow to get that. As we get into the distance, so as I said, with atmospheric perspective,
the further back you go, the more washed out colors
are, the less saturated. There's some color in
these distant houses, but I'm making sure
it's less saturated, so it's not as in your face, and that helps make
it feel distant. Along with this
linear perspective, that is the distance. This building over here is
much more mellow color, so using a little bit
of Quinacridone Gold mixed with a little bit of
indigo from my palette. Again, you may not like these
effects, but I love them, so I'm going to have these colors just
come down the page. A little splash here
of our lovely yellow. Just the pooling down in the
corner over the other side, if I get a little bit
more Quinacridone Gold, I can get that pooling down. Much like with the sky, whilst this is still wet, we can still fiddle
and play and let it paint itself, as I say. Just move things around. I'm going to come in to do
our see-through and tree now. Remember how we sketched
it as an outline here? Well, I'm going to come
in just with sepia, initially, kind of mellow,
lovely mellow brown. I'm going to get that outline. I'm going to leave this middle blank and just see how it feels. Then come down the tree trunk. Again, just try and get
these lovely soft color to mingle where the
tree is see-through, this feeling of mingling
with the background colors. Also, we talked
about lovely gold, so let's get a bit more of that Quinacridone Gold and see what it looks
like mingling in. Just taking it step by step, keeping things wet means
we've got it all to play for. We can edit it, we can have fun. I'm going to keep these sweeping feelings
going with that color, we're just building
it up and seeing how much we want to do really. I'll leave it there for now. We can come back and we
can do more with the pair, more of the colors,
or whatever in a bit. Now, the lovely tower is
obviously our main point, but it's also not got a huge
amount of obvious color, so what it does have is shadows. I'm going to start by using just a little
bit of indigo from the corner of
my palette here, and I'm going to add a bit
of shadow to this side. I'm going to exaggerate
the difference in shadow between the two sides. Actually, to make it a
little bit more interesting, I'm going to add a little
bit of Perylene Violet to that murky purple. Then we can still bring that in under all these horizontals, and again, to see how it feels. But I also want plenty of white coming through underneath. You can find then that actually it's more
convenient to have this tree gold over this white because it
explains a bit more. I think we're almost there. Last little bit.
Just this foreground feels quite empty, isn't it? Just a gentle bit of
tone popped in there, a little bit of indigo. Again, we can bring it to
the lines of perspective. We can make it follow
lines of perspective. By doing so, it enhances that
linear feel going around. I'm going to let this dry now and then we're going to
have a look at it and see. I think a few finishing touches, and suddenly, this will
all come together. [MUSIC]
11. Step Four - Bringing it All Together: [MUSIC] With that color done, it's time to do the
finishing touches. The finishing touches
today include both some pen work and this
second little touches, the second layer of color. In the next few minutes,
what we're going to do, add a slightly, but
a much bolder line. Again, we're trying to think, where do we reinforce
perspective? Where do we break perspective and where do we add a little bit of extra detail? Then with the color, just
having seen these bold lines, how do we make things feel
colorful, bright, and alive? We're back and we
are pretty much totally dry. What
are we going to do? We're going to finish this off
with a few little touches. I'm going to start with my pen. Reason I start with
my pen is because that will bring
everything together where these colors got mad or loose or not quite within the lines. We can re-evaluate our lines. We can also re-focus those lines which are
important for our perspective, and then we can
add highlights and deeper shadows and things with our watercolors if we want. Let's start up here
with a focal point and that will let us know how
bold our lines are looking. That will let us in
turn workout how bold our less important
lines need to be. This is a very bold pen. This is a 0.5 millimeter pen. Much bold than I often use, but it's fun to experiment and change up often
what you're using. Also, when we do such
a drawing as this, something where lines
are really important, then having a bold line to emphasize it might
be more interesting. What I'm doing, just going
to find those key lines. Not every line, but
those key lines, including things
like these chimneys we found in the background. There's ones which define
the perspective of those certainly the key lines. It doesn't matter if
I go a bit wrong. This one is a bit wrong,
isn't it? Doesn't matter. We can just play
it fast and loose. Have a bit of fun anyway. This doesn't matter. Here are a few mistakes
here and there. That's the humanity of the art. As we get further out, again, just making those lines
a little bit loose, a little bit scratch here. We can come down here and got most of complex
shapes going on, but we can find them and
just loosely add them in. With a nice bold pen, we can very easily create
these very dark areas, create very bold contrast. Let's find again this
hand, things like that. Perhaps some of the
final areas like these little frames inside the windows we want to leave
and maybe come back to with a fine pen if it feels
necessary in a moment. Now might be the time
where we start just defining this bold
a little better. Now that we can see it in
comparison to everything else, we can add a few little extra
pen details, for example, and maybe just this hard to see, but it's hard to see
in the reference. Let's block it in, get a real
deep contrasting shadow. Then let's come in. Just look at this lovely tree and find some of these shapes. Now we can get this overlapping
thin pen, thick pen, find the colors and the edges of the colors
have got to and use that to define the translucent or see through
transparent even tree. It can extend it past where
the colors have gone as well. It didn't have to be limited
to what's happened already. We can redefine things. Get a nice bold
trunk coming down. Test run the trunk if we want. It is after all in
the foreground, it's an important part of
the foreground as well. I'm just making these
semi-random leaf-like shapes and bringing them in towards the tree trunk in this scattered pattern imitating the branches that we've gotten in the reference
without copying them. Influenced by rather than necessarily directly trying to copy or get the
exact tree across. In the background, reminisce
with these windows, you can do a little
bit of hatching to get the idea of the
depth of color in them. Same here. Do you see how now this translucent
tree is working? It's there, but not there. The house behind it is, again, there with a building there, but not quite there. But that's the
same effect we get in the actual reference. I'm not going to try and
overdo the drawing either. We've got these very
bare-bones bits, for example, this canopy. I'm not going to
try to overdo it. I'm just going to take the lines we have
got and make them into something which
represents the idea. There's a lot of shadowing
confusion underneath, but we don't even have to do this shadow.
We can just leave that. So let's leave it as
essentially negative space and just see how it
feels at the end. I think that's going to be fine. It's complex, but
uninteresting for me at least, uninteresting part of
the reference photo. Again, these are
just the decisions that we make as artists, as sketchers, drawers,
painters, whatever. We're making our own decisions about what we want to include, and then see how that impacts
our world, our vision. Again, just using these
basic shapes we already got. We can add little
details like couple of hands and things like that. But essentially just very loose sketched people,
suggestions of people. [NOISE] My advice is don't spend too
long in one place, so moving around the image. I did this house second, I think originally and only just coming back to
finish off the windows, but by jumping around, moving from place to place, we ensure we never really
overdo it too much. What I'd love to do is add a few more little touches
with this fine pen now. Just like in some of these
rooms getting a bit more, we did a few bits
of roof texture, but they've
disappeared a bit now. Just coming in and
doing some real scratchy lines of texture, could do the same in
the foreground here. It felt a bit empty and
then we added this color and I think turned out
to be really great idea. We do the same. We can invent breaks and things. We can just find ways to increase the
density of line work, which increases
the complexity of the image and makes
it more interesting without having to
exactly copy details. Just where did it
feel a bit empty? Where does it feel like we could just make it a bit
more interesting and then add that texture or just add what you you at
that point is needed? Then we can come and I said we might perhaps do a little bit more of these framed
details with our thin pen. That's our time to do it now. There we go. I think actually
that's our pen work done. Then it's just those last
little touches of color. What can we do? I'm going to use a slightly smaller brush here. This is a size 12 round brush, but it's much smaller. It feels more like
a size 8 really. I'm going to take some
of our bright colors. Got our hands a yellow medium. By touching it in
a few places we create a bit of
variation in our wash. This is where we can, again, just get these drips
and give them, again, another punch of color. We can come in to where we had this quinacridone and
we can do the same perhaps this time just bringing
in the edge of the tree, but also maybe splashing
in so that it's got this natural field and
it feels like it's spreading into the environment. You can take a bit of indigo, do the same to give it
a two tone variation. Maybe up in our tower, just this purple is actually working quite nicely,
the Perylene violet. Just a few little touches, not too much, but a few touches, especially as we
get lower and it feels like it's more
enclosed and in shadow, so we can enhance
that field with a few just touches
more of the paint. I think not much
more to do really. Last thing I'm going to do, just to increase the
interest in our sky. Just a few splashes
and then we do some more concentrated
splashes as well. Maybe the same, just a little something in the foreground. Not too much, just a little
touch here and there. We can ground some
of these people with little suggestions of
shadows. There you go. I'm going to call that my
rather loose in terms of color, but quite tight in
terms of perspective. Sketches a line and wash, sketches of urban
sketch style sketch using three-point perspective, using loose colors
to enhance that, but mostly using our
pen work to really get that upward feel and that push over those
linear perspectives. I hope you've enjoyed
that. Let's move on to the final lesson. We're going to do a
little unveiling and we will talk about
next steps. [MUSIC]
12. Conclusion and Thank You: [MUSIC] Thank you
everyone for joining in and getting all the way
through these lessons. I hope that you've enjoyed
it and I hope it's given you something to think
about and a new tool, a new little weapon
you're sketching arsenal. This is my finished sketch and as you can see,
I can unveil it, take off the masking tape off, and we're left with this, which I think is
worked rather well. Good bit of fun. That vertical perspective
pointing high up into the sky. What it really does is it just accentuates and
exaggerates and just really shows off the
height of the buildings and it makes a scene feel
more real and more 3D. Now, have a play because
one of the lessons we looked at taking a vertical
perspective and warping it. You can also do other things instead of doing a
three-point perspective, you can do a one-point
perspective but the only point of perspective
is up in the sky. Now that you have all these
tools at your disposal, there's lots of
ways that you can manipulate them and have
fun and enjoy yourself. Now, I'd love you to share your final project in
the project gallery. I'd also love you to share any experimenting you do
in the project gallery. Do ask any questions you have
in the discussions as well. More than happy,
I love responding to questions and things as well. Of course, having
done this course, I'd love you to have
a look at my profile, perhaps follow me on Skillshare and see if there are any others, which you feel cool out to you. You can also find
me on my socials, on Instagram, and YouTube
@tobyurbansketch. I'd love to connect with you
as well as on Skillshare. More than anything
though, I hope that you just have a
little bit of fun, get a little bit of
inspiration and go out or stay in and
do some sketching.
 Toby Haseler, Urban Sketcher, Continuous Lines