Transcripts
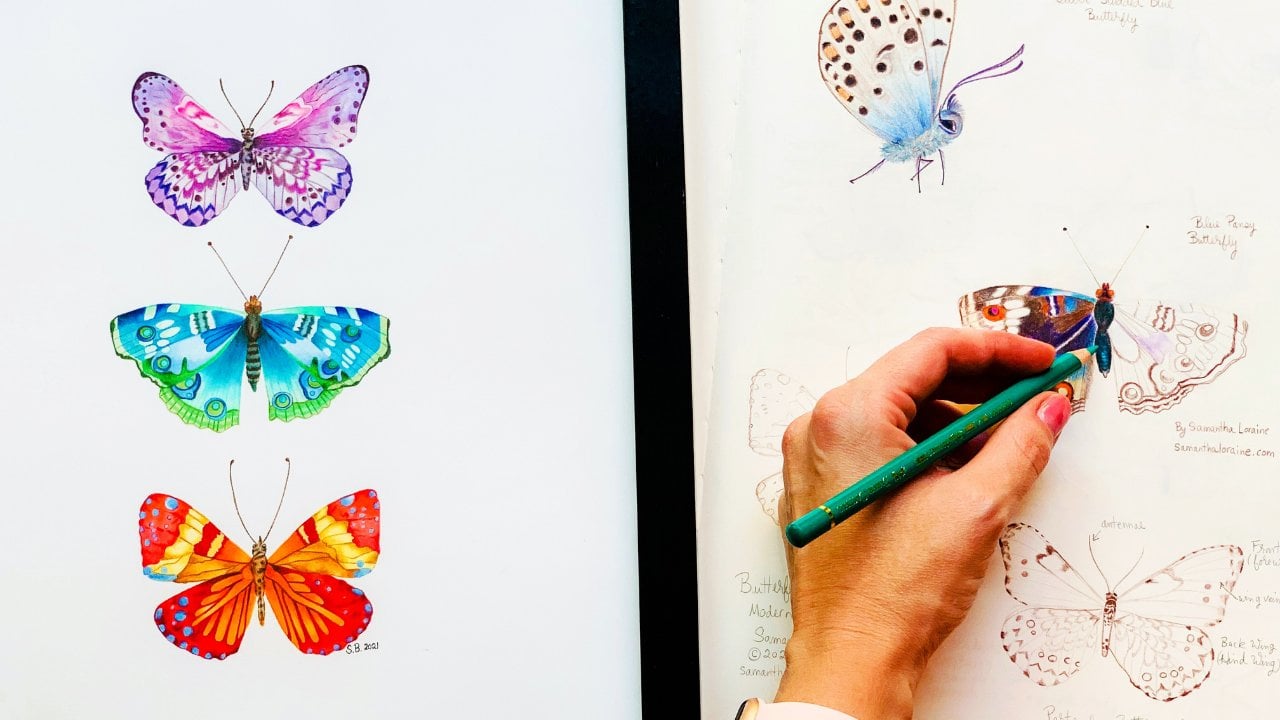
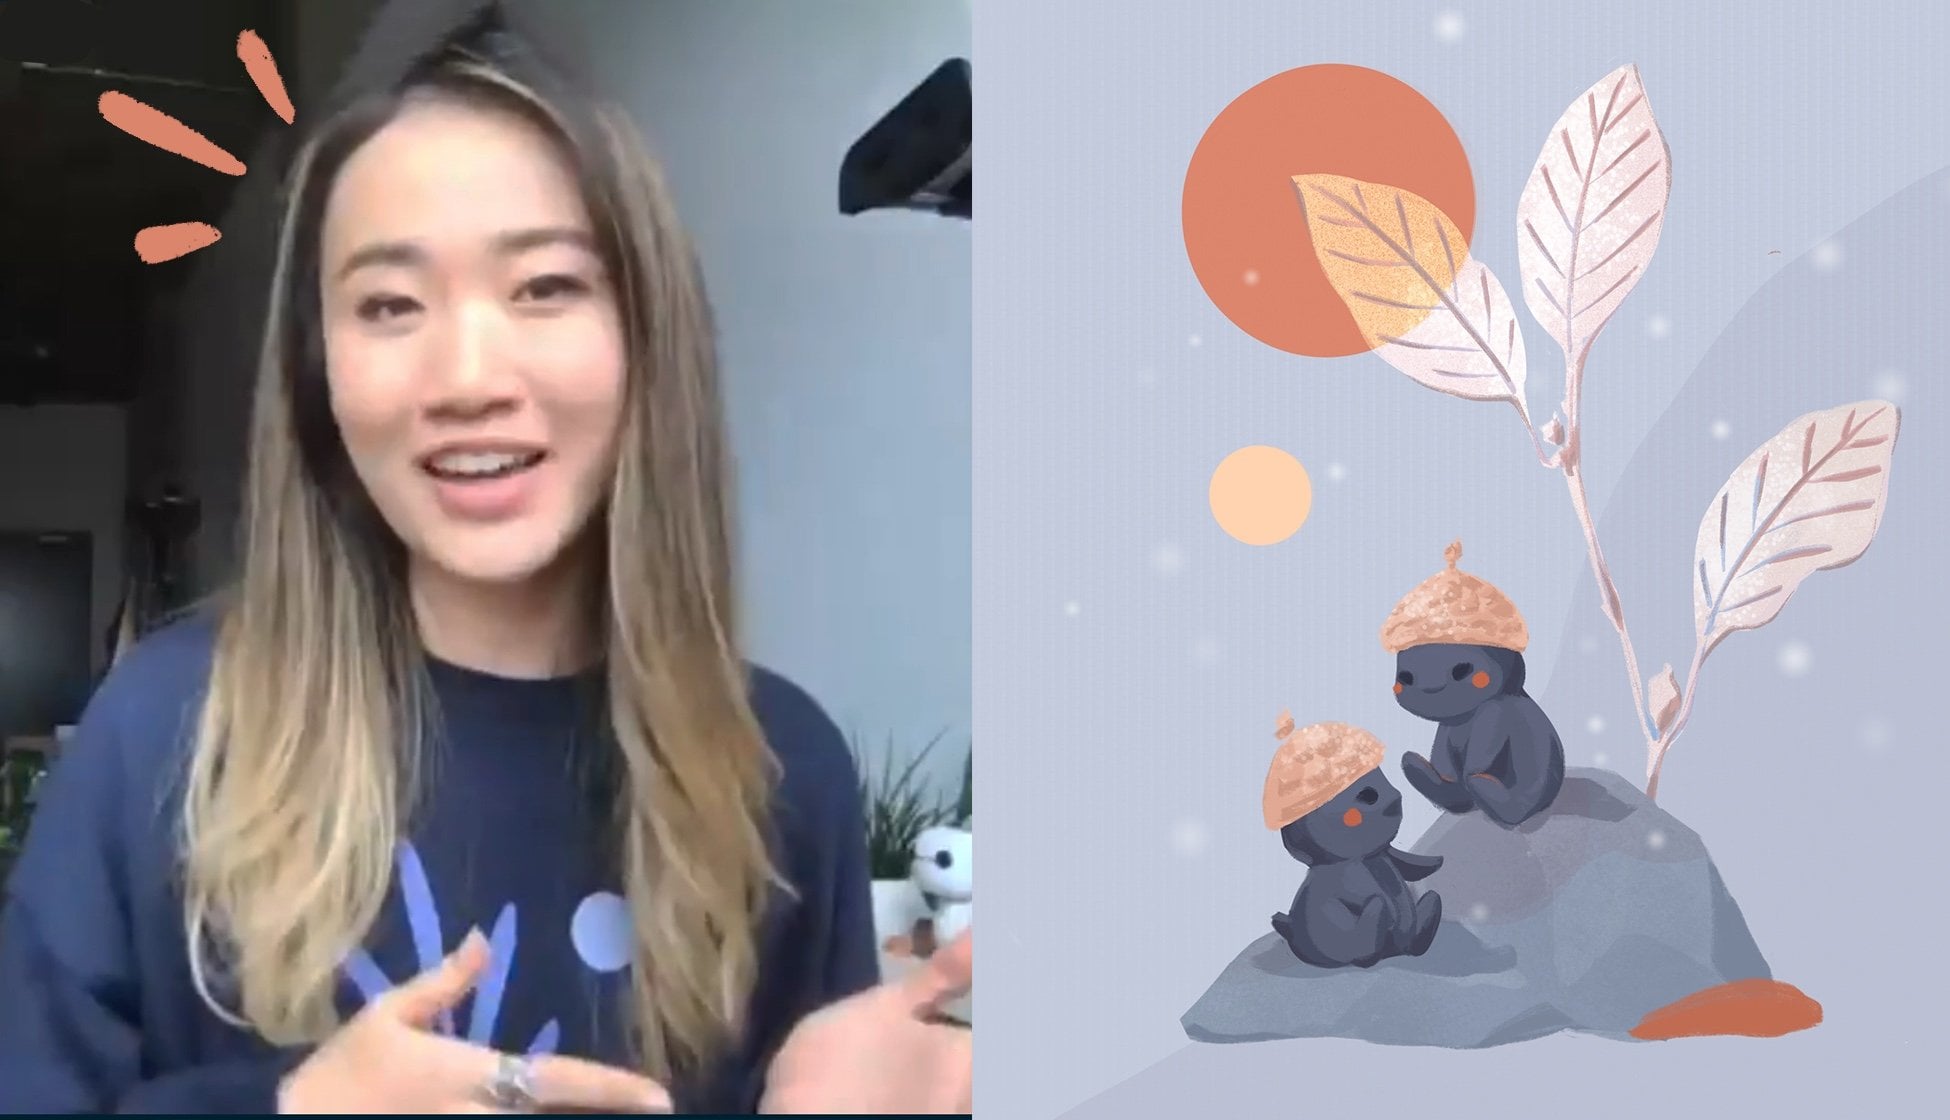
1. Introduction: Effort looked at colorful illustrations and thought, wow, I wish I could tell her like that. As a young child, I'd stare at picture books and botanicals wondering how the artist made the elements so vivid on a flat piece of paper. I practice, get frustrated and tirelessly tried different methods. Understanding coloring by hand and digitizing can be overwhelming. With endless hours have tutorials available and the daunting possibilities of digital art programs, you might be so overwhelmed and give up altogether or eventually conclude, I'm not an artist. I'm here to show you that that's not true. Hi, I'm Samantha, an artist, illustrator and YouTube blogger. I really love the hand colored book and all the personalized stationery stickers and paper products that I create, start with hand-drawn illustrations. In this class, I'm showing you an intuitive and fun approach to making your own hand colored stickers while prior coloring, drawing, and procreate skills can be helpful. They are not required for this class. This class is broken into three main sections. First, you'll learn basic sketching and how to see shapes and values and nature. This will help you create your own floral illustrations. Next, you'll practice the secrets to coloring and blending by using a variety of shades within the same color family. Adding color tones and layers will give your work depth and really make your colors pop. Lastly, you'll learn a simple way to digitize, clean up, and enhance your hand colored work in Procreate. By the end of the class, you'll have a beautiful sticker sheet that you can print and use in various ways. This class is designed for you, whether you're a total beginner or someone wanting to perfect your coloring and digitizing skills, you'll be able to learn and apply the class concepts to any hand colored medium. Pencils, paints, markers and more. If there's one thing I hope you learn from this course, It's to keep creating and coloring by hand because there's nothing more exciting and satisfying when giving life to your own hand colored illustrations. Once you understand this process, the possibilities are endless. So get rid of the frustration, create more and finish more. Let's get started.
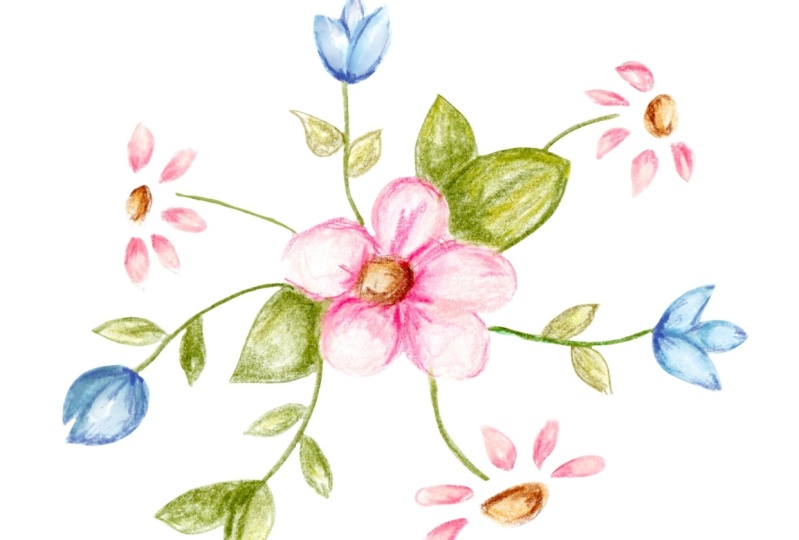
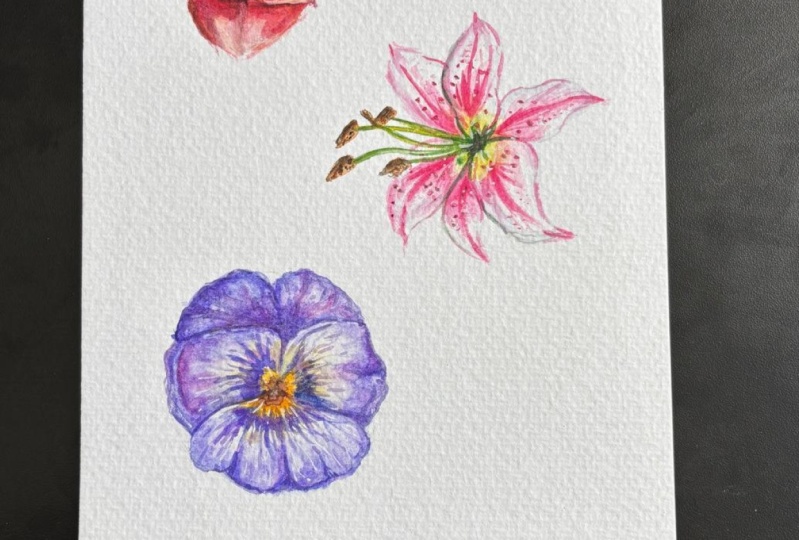
2. Project: In this class you'll be making your own flower illustrations, coloring them by hand and turning them into a sticker sheet that you can use however you like. I'll show you the coloring and blending skills that I've developed in order to get rich tones into your artwork. First, we'll practice some basic coloring and blending skills with the square and circle shape. Then we'll apply those concepts to some leaves and eventually try them on our flowers. I'll be using favorite pastel colored pencils and Copic markers. If you don't have Copic markers, you can do this entire project and colored pencil as well. I'll show you an example using Gulf techniques. Don't panic about the drawing aspect of this class. While this class emphasizes coloring techniques, I'll show you some simple ways that you can create beautiful flowers from simple shapes. After this segment of the class, you'll have the ability to start spotting basic shapes in nature and the objects around you. No matter how complex something is, we can always break it down into a general shape and further segmented into its individual shapes. Once you're comfortable with the coloring and basic sketching process, you'll create your own illustrations. You can create six illustrations with the same design and practice coloring them in different shades and different ways. Or you can create six unique illustrations and color them all differently. Keep in mind that your stickers do not have to look like mine. In fact, I hope they don't make stickers that appeal to your own style. Once you've colored the final version of your illustrations, I'll dive into the digitization process starting with some simple scanning techniques. If you don't have a scanner, you can use your smartphone and a tripod to take a nice clear picture of your work. Next, I'll teach you all my favorite tools in the Procreate app so you can clean up mistakes, add some color if you need, maybe add some text if you want. And show you an easy way to duplicate your stickers and be able to arrange them on your 8.5 by 11 sheet. Printing your sticker sheet is the most rewarding part of this class. So please don't forget to post pictures of your project in the student gallery. You could post some pictures of your circle and square and leaf-shaped practice with the geometric shapes. Then you could post a second picture when you come up with your illustrated sketches. A third picture when you've colored your final illustrations. And lastly, a fourth picture to show us how you're using your printed sticker project. I'm so excited to see the beautiful stickers that you create and the fun ways that you are using them. Up. Next, we'll talk specifically about the supplies you need for your project so you can get started.
3. Supplies: Let's talk about the supplies that you'll need in order to create your art project for this class, you'll need a gummy eraser. Gummy erasers are great because you can mold them into the shape you want, which helps you erase small areas. And they're great for lightening of dark outlines because they can pick up the lead pencil from your page. I'll be using a 0.5 fine tip mechanical pencil, but any lead pencil will work. You'll also need a good sharpener, either manual or electric. Since this class is all about coloring, we'll be using a variety of colors. I'll be using Copic markers for all of my base colors. I suggest Copic markers that are in the lightest shades I like doing. My base was Copic markers because it gives a really nice smooth foundation to my drawings. And it also helps speed up a lot of the layering process. If you don't have Copic markers, you can easily do this entire project and colored pencil as well. I love using Faber Castile pencils, Prisma colors, or other pencil brands can work too. Faber Castile is my favorite because I love the way the colors blend easily without leaving any pencil flakes on my page. Strathmore 500 Series paper is excellent for all of your blending practice and colored illustrations. So I highly recommend this paper for all of the videos will be going through in this class because the smooth texture will really help you blend your colors together easier and it'll eliminate a lot of potential frustration. You can use a light box like this one or any bright window when you're transferring your outline sketches to fresh art paper. I have a portable Epson scanner that I'll be using to scan my completed artwork. A wind cloth like this one works really well for keeping the glass clean. If you don't have a scanner on hand, you can also take a clear photograph with your smartphone. If you choose this option, just be sure to put your phone on some sort of tripods. You get a crisp, clear image. For the digital cleanup process, I'll be using my iPad Mini and Apple Pencil and the procreate app. If you don't have a tablet, you can also do this on your smart phone. And it's possible to use your finger instead of a stylus or an Apple Pencil, but it might be more challenging if you do it that way. You can also clean up your artwork in Photoshop if you're more comfortable with that. But be aware all the tips and techniques I'll be showing in these videos will focus on using Procreate to print your stickers, you'll need some matte sticker paper. Any brand is fine and a good printer. I'm using my Canon pro 100 fine art printer as standard pendular will also work, but it may not capture the color as vibrantly and accurately as your original hand colored illustrations. So if possible, I highly suggest using an art print or to achieve a perfect color match on your printed stickers. At the minimum, be sure to set your printer to the highest quality print. Before moving to the first lesson, be sure to gather all of your supplies so you can start coloring with our first practice and actually color along with me. All of the materials I've mentioned in this video are also listed in the course description. When you're ready, I'll meet you in the next lesson. Hi.
4. Practice: Color Mixing and Blending: Hello. In this lesson, we're going to work on our first coloring practice using a square and circle shape. Working with a simple shape is going to help us really focus on the actual coloring process. Instead of worrying about a complex design, you can download and print the color practice file from the resources section for this class. Or just simply draw any square or circle shape on your paper. I'll be using the Strathmore 500 Series paper for this exercise, which is great because it has a nice smooth surface and it really helps you be able to blend and mix your colors easier. So once you've got that set up, you're ready to start coloring. The first thing you need to do is pick one color family. I'll be using the pink family to color my square. Choose one Copic marker and a light shade. Then select for color pencils in similar but different shades. You should pick to light shades when medium shade and one medium dark shade. If you don't have any Copic markers, that's okay. You can still color beautifully without them. And that case choose a very light pencil shade for your base color to replace the Copic color. I suggest creating a color card with the names of the colors you're using for your project. So you can use it as a reference while you're coloring. Make sure to keep your pencils sharp. The best technique is to rotate your sharpener around the pencil while holding the pencil still. If you feel like the lead pencil outline on your sketch is a little too dark, you can use a gummy eraser to blot away some of the lead pencil from the page. Start with the colored pencil color that is closest to the color of your Copic marker. Outline all four sides of your square, and this will give you a nice clean edge. If you skip this step, your marker may run out a little into the page. So now you can fill in your entire square with your Copic marker. Notice how smoothly and blends and doesn't leave any streaks on your page. This is exactly what I love about Copic markers. Again, if you don't have Copic markers, just use your lightest shade for your base color. And this step. Now that you have the base color, you can start adding more tones with your four colored pencils. Notice that I'm moving my pencil and small circular motions. This gives a smoother appearance than using a heavy back and forth motion. You want to color each corner of your square with the different color to give you practice with the color mixing and blending. Start with your lightest color and then add a layer of that shaped the corner where you want it. And then add a different color to each of the remaining three corners of your square. Keep those layers light at first, in the place where the two shades meet. You want to slowly blend the colors back and forth together. And you can do this by adding the lighter shade into the darker shade and vice versa. So keep adding more layers of color until you're Square has the color and the depth that you want. If there's one piece of advice I can give you, it's to enjoy this learning process. Try your best to not judge yourself negatively. Just allow yourself to learn an experiment. It's just you and your art supplies. If you don't like something about your coloring, you can just start a new image. Feel free to pause this video here to finish up coloring your square. Come back when you're ready and we'll move on to the next step. For our circle shape, we're going to follow the same process that we did with the square. But this time I'd like you to choose a new color family to work with just you can get some practice with blending and mixing another shade. I think I'm going to use the blue family for my circle. So I'm going to make my color card first and then I'll lighten up my lead pencil outline with my gummy eraser before I put any color down. Now I'm ready to start doing my colored outline with my lightest pencil shade in your line does not have to be perfect here. Just try to keep it smooth, but don't worry too much if it isn't seamless. So here I'm just going to fill in the entire shape with my copic base color. And now I'm ready to add my color pencils to create that depth. I think I'm going to have the darkest shade at the very bottom on this LAN. And then I'll slowly work up to the lightest color at the top of the circle. So this means that the two sides will both have the medium shades that are similar but slightly different tones. Don't be afraid to work with your colors together. Just really mix them in those areas where they meet. And you'll probably have to switch back and forth between your two color shades to get them nicely blended. This simple circle has so much depth and character compared to a plain flat image like this one. Color mixing and blending does take time, so please be patient with yourself. It's okay to make mistakes and start again. You might have to color a full-page before you really get the hang of it. In summary, keep your lead pencil outlines, light coloring with those circular motions, starting with your light color first and then working up to that darker color, adding layers of color until you get the shade that you want. And mostly practice, practice, practice. It's good idea to repeat this process over and over. So it starts to become second nature. Going to make you so proud when you see your progress from this exercise compared to the stickers that you are I'll be making at the end of this class project. Don't forget, please post your recoloring practice from this exercise and the class project gallery so you can look back on your progress and we can all enjoy seeing your work.
5. Learning to See: Shapes and Values: Now my practice color mixing and blending. Let's apply those concepts to some leaf shapes. Make your color card just like you did with the square and the circle exercise. Since you have two leaves, I want you to select different Copic base colors and different colored pencils for each leaf so they look distinct from each other and we can really see their unique shading. Just like the square and the circle start by outlining your leaves and a color that's similar to your Copic base, and then fill in the shapes with your markers. Before we add the colored pencils, Let's just pause here and look at a real life example. This is a picture of some apple blossoms from my garden. And when we look at this image, we just got first notice the green leaves and pinkish white flowers. But actually there are so much going on in this photo. So let's take a deeper look at that. Look here. We can see some dark areas and here's the central vein. But then notice we have some patches that are lighter here as well. This leaf has a linear series of actual circular light patches with the darker portions on the edges. And then here we have the center of the vein. So we can find the same light and dark areas if we look at this flower blossom, Here's the dark patches. Here we've got a couple of medium colored tones. And then the lightest tones filling in the rest of the space. That concept of adding the light and dark shades is exactly what we're gonna do with our colored pencils. You're probably wondering where you should put your light and dark tones on your illustrated leaf. In general, it's just a good idea to make your background leaf, the darker leaf and the foreground, the lighter shade. It makes sense to do it this way because anything that's overlapping, something else often creates a shadow, making the leaf behind appear darker. So let's go ahead and do that here with our leaves. As you're coloring, I don't want you to be afraid to touch her pencil to the page. Just think about where you want to place your colors of light and dark shades before you start coloring. There are no right and wrong choices here. If you're just not sure where to put your colors, try looking up some images on Google or Pinterest in general, leave tips, edges, leaf bases, those are all good places to add. Your darker tones, brown and golden tones are going to be good around your edges or unselect spots maybe where the lease might be drying out. And in the center portion of the leaf, That's where you want to add your leaf vein on the side of your page. Practice making a few leaf veins before you do the line on top of your colored illustration. So look here, I'm going to start with just a little pressure as I draw the curved line upward and then slowly release that pressure. That's gonna give me that nice thin looking tip instead of having that blunt edge. So keep coloring your leaves and shapes until you feel comfortable with this process. Try drawing a full page of leaves so you can practice making color choices and working on your blending skills. Make every leaf unique. So you can really see what happens to the leaves as you mix the colors and different areas. Think about your illustrations and asking yourself questions about what you like and what you don't like is going to help you really increase your ability to select colors because you'll start training your eye to look deeper into your artwork and you will naturally start to follow us and color patterns that you see within nature. So observe as much as possible, put that into your drawings and really start thinking about how you're using color. You've got a good understanding of some shapes and values. So now we're going to work on some simple ways for you to create some flowers, sketches. Get out some fresh Strathmore series 500 paper. Get your favorite lead pencil, a gummy eraser. I'll see you in the next lesson.
6. Sketching: Breaking Down Shapes: It's time to start thinking about the actual shapes that we're going to use for your sticker illustrations. When we look at all of the objects around us that we can summarize everything according to its general shape. So what exactly do I mean by that? Look here. Even though this daisy has lots of individual petals, the overall shape is a circle. So we can summarize the head of the flower as a circle shape, break it down further. And we noticed that each petal has an oval shape with a slightly pointed tip. What do you notice about the center? What shape is it? You've got it. It's another round circle. The stem is a slightly curved line and the petals are another type of oval shape with some pointed tips. Finally, shapes like this within flowers will give you a starting place for sketching them onto your page. Let's try another example together. Here we have a five petaled flower. We can break down the image into geometric parts. Ask yourself about the general shape of the whole flower head. Here again, we see it's a circle. We'll examine the individual parts and categorize each one into a shape. The five petals are circle shapes. And so as the center, the leaves are oval shapes with a pointed tip. Now that we have a good idea of the overall and individual shapes within our flower. Let's sketch it out. The first thing I'm going to do is draw a large circle to represent the oval shape of my overall flower. If it helps, you can mark the center with a tiny dot and then draw a smaller circle around that dot to create the center of the flower for the five petals, I'm going to draw five circles, shapes that stay within the two circles I have drawn here. Just try to keep the petals evenly spaced around your center as much as possible. But remember that in nature, imperfections can actually help your flower look more realistic if you have a ruffled edge or a little overlapping your leaves and your petals, that's okay. Don't worry about all of these extra little lines yet. We'll work on our final shape in just a minute. But for now we still need to add our leaves for single flowers like this, I like to add two to three leaves. One leaf can look a little odd to leaves, help balance out the shape. If you have a flower cluster, then shoot for an odd number because odds are just aesthetically appealing and art, let's draw some oval shapes to Martha general placement of our leaves for these two shapes, I'm going to put one leaf behind and one leaf in front to help give the flower a more natural appearance, just like the shape that we had in our previous color practice when we did the leaves. So go ahead and draw both oval shapes completely at first. Then go back and add in that pointed tip. When we look at our flowers, we can see a rough image. But to fully capture the flower, we'll need to define the lines that we want and we don't want. Let's start by removing these unwanted lines for our petals. Pebbles have a rounded edge, but they are not perfect circles. They have to attach to the center of the leaf. So to give that idea, I'm just going to erase the lower half of my circle shapes and only keep the outer edges curved. Let's do the exact same thing for these leaves here. For this pair, you need to decide which leaf is front and which leaf is back. I always put the larger leaf behind to keep the smaller leaf in front because this is just the typical way that we see it in nature. And visually it is more appealing to have a smaller shape in front. Since this leaf is in front, that means I'm going to keep the whole shape here and I'm just removing this portion of the line behind the leaf so it looks like it is behind. Leaf tips are going to be the same as petals. These tips are pointed so all you race all of that unwanted, oval-shaped and with all of the unwanted lines removed. Now you should clearly see that defined flower shape. If you're not happy with your flower, do not erase it. I'll say it again. Do not erase. Instead tried drawing a new one. The reason that I don't want you to erase it is because I want you to start noticing your mistakes and learning from them. When you have a whole page of stickers in front of you, you have the opportunity to spot specific elements that you like and don't like about your drawings. Noticing areas that you want to fix as such, a great way to teach yourself how to see with an artistic, I try moving your hand differently. Make a line more curved or less curved. Keep your pencil light on the page. Make whatever adjustments you need in order to get the shape that you want. It takes practice, so be patient with yourself drawing over and over and over until it feels like second nature. That's exactly what I want you to do with this exercise. Up next, get ready to start your sticker sheet. We're going to select your favorite drawings from these illustrations that we've just created in this exercise. So it's really important you feel comfortable with this process before moving on to the next lesson, take your time with us when you're ready. I'll meet you there. Don't forget to post your work from this project in that class project gallery. It's okay to post drawings that might not be perfect. The idea is to share what you're learning and share what you're working on. It's about trying, learning from our mistakes than drawing. Again, there is absolutely no judgment when it comes to learning and creating.
7. Selecting Your Illustrations: Congratulations. You have already learned so much about coloring and shapes, and we're not even through with all of these lessons. So I really hope that you take just a bit of time to kind of stop and reflect on all of the skills that you've already developed. The more time you invest in observing, seeing, practicing your sketches, the more you're going to see the progress and results starting to come out into your illustrations. It takes time, but really, once you start feeling comfortable with this drawing and coloring and shaped process, the more you really start to enjoy creating illustrations and coloring them and coming up with new ideas. It's time to select six of your favorite drawing so that you can create your illustrations for your sticker sheet. I'm going to choose two different individual flowers because I can color these in different shapes. Well, I really like this combination here. I think the leaves spaced around the flower looks really appealing for my project. I want to have a few illustrations that I can use to decorate my journal pages are used on the back of greeting cards. And I do also want to make a couple labels. It's really nice to have some clusters as well. So I think I'll go ahead and use this one. And I actually, I just, I really love this little cluster of mushrooms. So I'm going to use that one for sure. I know this class was about flowers, but I couldn't resist strong some mushrooms, which makes me think of fairy forests and whimsy stuff which I had absolutely love. So for me the mushrooms are going to be a must. And for these here I think I want to experiment with some text on my stickers for the labels. So I'll go ahead and pick out these two linear shaped illustrations. And we'll talk about how to use those in Procreate. Just take your time with the selection process. You might notice that you still need to redraw something that happens to me all the time. I will redraw, try it a little different until I get exactly what I want. So redrawing is always a positive thing. Don't feel down if you decide to redraw everything. Once you've got your six diggers, it's time to start transferring them to some nice clean drawing paper so we can start coloring them when you're ready, just grab that fresh sheet of paper and your light box, if you have one or a window, works fine. And I will see you in the next lesson.
8. Draw and Color Your Illustrations: This is an exciting lesson because we're going to take all of the skills that we've learned so far, put them all together and we're going to create the final version of our illustrations. To get started, you'll need a fresh piece of art papers, uh, six illustrations you want to use for your sticker sheet and either a light box or a bright window so you can transfer your designs onto some clean art paper. Keep your tracing light. You don't want to see that pencil coming through your colored illustrations. You can remove it with some gummy eraser, but it is harder to remove if it's dark and heavy. I'm ready to start selecting my colors just like we did and the coloring lessons, make sure that you have a color card for reference. Keep in mind to use one light color copied for the base and for colored pencils to add color tone in details. Keep that same coloring process in mind that you learned in all the previous color lessons. Don't forget to use your gummy eraser to pick up any of that lead pencil before you start coloring your flower. Start out with that nice smooth pencil outline and then fill in with your Copic marker or your lightest pencil shade if you're using all colored pencils. Take your time. These illustrations will be the final version that you'll be using to scan and turning into your stickers. So you want them to be as beautiful and as rich with color as possible. Mistakes happen. You might be wondering, what do I do if I make a huge mistake? The answer is simple. You're going to keep right on going. This happens to me all the time. I am also famous for drinking tea or coffee or a snacking on something while I'm coloring. And then later I realize that I dropped something right onto my page or right on top of the actual illustration I'm working on. Don't worry, you can fix up all of these mistakes and procreate. I'll show you some really simple ways that you can erase all of those unwanted marks on your page will learn how to clean up the edges of our flowers. And I'll show you some, many other helpful tricks. If you're really concerned about one of your flowers, just draw a new image and start coloring. And again, there are no mistakes that can't be fixed up in either Procreate or with a redo. Make sure you're in a comfortable place. You can really enjoy the coloring process. Sometimes I put on some music or listen to an audio book. If the weather is beautiful, I often take my illustrations and coloring supplies outside where I can sit in my backyard and enjoy some beautiful fresh air and my flower garden. So go to your favorite place, take your time and really make your illustrations beautiful and finished coloring all six of your drawings before you move on to the next lesson. If you have it posted in the project gallery, get now is the perfect time to do it. So be sure to take some pictures and post them in the gallery so we can all enjoy your beautiful coloring. Once you're ready to go. I will meet you in the next lesson for scanning. See you there. Okay.
9. Scanning: You did it. You've got your colored illustrations in front of you and you're ready to prep them for the digital process. I have a standard size scanner. This one is a portable Epson scanner and it just plugs into my computer so I can easily transfer my drawings. Be sure to keep that glass clean so you don't have any dust coming up on your illustrations. I don't do anything to adjust the color. I just want to capture that natural color of my illustration. The only thing that I do is I make sure that I have my setting such to 600 DPI so I get a nice crisp, clean image. Okay, so let's see. I'm just going to set this down here and close the lead. You can hit Preview just to make sure that you like your image. Yep, that looks good. So I'm just gonna go ahead and hit scan here. So I'll just name this one is Skillshare stickers. I'm going to click Save and then just double-check here on my desktop to make sure I see it. And there it is. And that's it. Now you've got a digital version of your colored illustrations. You're ready to start cleaning them up in Procreate. So let's head on over to the next lesson.
10. Procreate Basics: Cleaning Up: We have officially reached the digital clean up phase of this project, which means that we're almost done. The skills that I'm going to teach you and this section are going to be the basics of Procreate. Just the essential things that you need in order to clean up any hand-drawn illustration. So hopefully it will make this complex program very tangible and symbol so you won't feel overwhelmed. And really once you've learned these essential procreate skills, you'll be able to take anything that you've drawn are colored by hand and be able to clean it up and put it on any project that you want to print. I've broken this segment into two videos to help you feel more confident and less overwhelmed. In this part, we'll focus on how to remove the white background from our illustrations, clean up edges, and make simple color corrections. The first thing we need to do is load our scan file into the Procreate app on my iPad Mini. I'm going to go to the Procreate app, open it up. And when I bring up the app, it looks like this. Up in the right-hand corner. I'm going to tap on the plus icon and look in that drop-down menu and select a science for an 8.5 by 11 sheet of paper, or using the screen size will work to, to upload our scan file. We're going to look up in the left-hand corner and find a wrench icon. Click on that and then click Insert File. I'm saved my files for it to my desktop. So I'm going to click on the desktop folder here. And then in there I can see that I have the scan file called the Skillshare stickers. Click on that and it's going to pop open onto a blank white canvas. When you look at the image, you can see it has a bounding box around it. Right now our image is facing vertically, but our canvas is horizontal, so we want to make sure that we rotate them so they're both in the same direction. Link above that green dots are on your screen. Keep your pencil down and draw a line upward. Then slowly rotate the box and the direction you want it to face. Once it's in the place you want, you can release your pencil. You can also make your image bigger or smaller by clicking on the blue points on the edges and dragging those outward or inward to grow or shrink. This size looks good to me, so I'm going to leave it here. Now we can start removing the white background from an image. Go up to the upper left corner of your screen, click on the squiggly icon. Now look down at the very bottom of your screen and you want to make sure that the automatic button is selected. Watch carefully here I'm going to touch the screen with my Apple Pencil and keep it there and see how the screen instantly turns black. That means that I'm erasing the white background, which is exactly what I wanna do. To erase more, I'm going to slowly drag my pencil to the right just a little more. What you're trying to do is remove as much of the white background as possible without removing any of the color from your illustration. So let's take a look at what happens if you go back the other direction to the left. You can see that here the white is coming back, but the goal is to find a balance where you can remove as much of the white as possible without losing any color. When you look here, you can see that the actually lost a portion of my white in my mushroom, which is actually okay, I think I'm going to leave it like that because it'll give me a chance to show you how to fix this kind of problem. So everything else looks good. Now I'm going to lift off my pencil to clear the background. We're going to go up to the right-hand corner of the screen where your two squares are, this is your layers. And you're gonna click on that. And then over to the side in the pop-up window, click on Clear. Now you have your white background removed. Right now our image is placed on top of a white canvas, which means that's going to be very hard to see exactly what we're erasing. So let's change our background to black. You can go up to that same icon, that Layers icon, click on that and click on the Background Color and select a black or any dark option will also work. This is going to make your clean-up work so much easier. Next, let's take a look at some of the essential tools that you'll need to use before we start our work, you're going to be using the eraser tool a lot in this section, you can easily adjust the size of your eraser by going over here to the top tab, raising and lowering this bar, you can adjust the size. The one below it deals with the opacity for erasing. You wanna make sure you have all the way up to the top so it has a full solid eraser. You don't want it to be opaque. If you make a mistake, Let's say you have a line on your page or maybe you've raised something by accident. You can easily use your forward and backward arrows to get back to the place you want. We're ready to start cleaning up the edges of the flower, so make sure that your opacities all the way up to the top so it's full. And adjust your tip size to a medium fine point. I'm going to start by slowly dragging this line downward to the edge where the leaf meets the pedal, makes sure you erase all of the white from the side as you go down. If you have any extra on the outside, just go back and erase that. Keep working around your entire flower until you've gone in and cleaned up every line. You want to do this for all six of your illustrations. This is also great for areas where maybe you had a bleed out and your ink went out too far into the page. You can erase areas where you don't want as much color to make your lines look nice and smooth. Or over here where I dropped this cake, I am going to erase all of those smudges from my cake piece. It's very, very easy to clean up any unwanted lines, so keep going until all of your illustrations are cleaned up and you've gone around every line of all your flowers. I was just looking at this flower and I noticed that I actually erase some of this color on the petal by mistake, which probably happen when I was erasing the white background and the beginning click on the brush at the top right, it hinder box. I'm going to tap here and when I hold my finger down, it's going to show a circle that pops up. Now my brush is loaded with that color. I'm going to tap and another area of the leaf That's a little darker. Lift my finger off. Now my brushes loaded with the new color and I'm gonna go over and add a little darker shade. So keep working until you get the shape you want. You can also zoom out and check your other petals. I noticed there's some white in these other two petals. I'm going to tap on the light from that section so I make sure it matches. Now I'm going to go back over to my other petal and I'm going to add some white on top of that as well. Just like we did with our color pencils, we're going to keep switching back and forth between our colors until it looks blended and everything looks seamless, just like we did with our pinky purple flower. Keep working the same way until every line of all six of your illustrations looks beautiful. Don't forget, you can use your back and forward arrows if you have any race line or a mark that you put down by accident that you don't want to be there. Just keep tapping back until you erase it. When you're six illustrations are ready to go. I'll meet you in the next lesson for Procreate Basics Part 2.
11. Procreate Basics: Final Details: In Procreate part two, I'm going to add white back to the mushroom where I erased it. And I'll also arrange all the stickers onto my sheet and duplicate them so I can have a full sticker sheet as an optional bonus. I'll also show you how you can add some text. Let's start by filling in these white areas, going to our brush tool, and then underneath inking, select a brush that a solid like this LAN on your drawing. Go ahead and outline around the entire circle and keep your pencil there while you're holding it in place. And notice that the shape will automatically turn to a perfect circle shape. Okay, so now we can go ahead and add color to the edge spaces. So go back up to your right-hand corner and click on the two squares layer panel again. Then click on the plus icon so you can add another layer. You want to put this layer underneath your top layers. You're going to drag it down below that top layer that has your illustrations. This will let us color behind the illustration instead of on top of it, we're going to go ahead and we're going to outline this area following the edge of our mushroom. And then we're going to fill that whole space. And now we can go back up into our layers panel and we're going to pinch the two layers together. This puts everything onto one layer. So now what we can do is see this edge here that's not quite as smooth. We want that to look as beautiful as our center dots on our mushroom. So we're going to do the same thing we did originally, tracing around and filling in the top of the circle. Do that to all the remaining outer edges of the mushroom where you have whitespaces. Now to get a nice smooth edge, we're going to click on our eraser tool and we're just going to go around and erase all of the unwanted whitespaces. So if we just add some white back into our drawing here and procreate, it'll add that pop back to our image. It's time to start arranging our stickers exactly where we want them. So we're going to go ahead and go up here to the background layer and change your background to white because we're all done with the cleanup phase. In your top left corner, click on that squiggle button again and this time and the bottom section, make sure that the free hand is highlighted blue. I'm going to draw a circle here around this flower. And then after that, I'm going to click on the arrow button at the top left-hand corner of the page. And this will put a bounding box around my illustration. Now I can click some are to this side of the illustration and I can move it to the place where I want it on the page. So let's do that same process for all remaining five illustrations. And I want you to put them in a vertical line going down your page because that's going to make it easier for us to duplicate the stickers and the next step. So follow that same process, clicking on the squiggle button, circling around your image with free hand, tapping your arrow to the side to create the bounding box and then moving it to the place where you want it. We're going to duplicate this row sticker. So go back up to your Layers panel and press on the first layer and swipe it to the side. And two, you see the word Duplicate. Click on that. And it's going to put a duplicate layer directly on top of that bottom illustration layer. So now what we can do is go back over to your squiggle tool. Make sure it's on free hand. Circle around the images that you want to duplicate, and then click on the arrow to create the bounding box. Now, drag them to the right. Once they're in the place you want, you can go ahead and release them. So now we have a copy of our illustrations. I'm going to circle all four of these pinky purple stickers. Then I'm going to click on that arrow and drag all four of these to the right. So now I have a total of eight stickers for the mushroom and the blue flower cluster. I only want to have three copies of each, so I'll just circle one copy of each year and then drag those to the right. Sometimes you might have to use your green dot at the top of your bounding box to adjust your illustration to the left or the right to go to a little more room. Just keep working with your stickers, duplicating, arranging them exactly where you want them until everything looks perfect. This looks good to me. So now I'm going to go back into my layers panel and I'm going to pinch the two layers together to make sure everything is all on one layer again. Remember if you make a mistake in this process, it's okay, just keep clicking that back arrow or click the forward arrow, whatever you need to do to get back to where you want. As an optional last step, I'm going to show you how you can add some text to your stickers. If you don't want text, you can skip this part, but it might be helpful for future projects. I'm going to go back into my anchor tool and the top left click on that and then click where it says Add text. A text box will pop up, click with them the textbox and another box will come up with all of the text options. If I click the keyboard icon down in the left, I can type. So I'm just going to click here for the text and scroll through all of the different font options. Yeah, that looks really pretty. I'm going to go with this one. I'm going to follow the same process for adding text to my other two labels. If you need to move your font around, you can do the same thing we did with the flowers just by clicking on that arrow and then click to the side of your illustration and move it exactly where you want it. Let's take a look at this page. I'm really happy with how everything turned out. I think the flowers are beautiful. I love the elegant writing style for the labels. Take your time with your digital file. Remember this is your final version that you're going to save and print. Before we move on, let's just take a moment to look at everything you've learned and these two Procreate lessons, those are a lot of useful skills. Keep working until you've cleaned up all your images and you've got them exactly where you want them on your 8.5 by 11 sides digital page. Once you've done that, get ready for learning how to save your file and print it.
12. Print and Save: It's that time. This is where you, my friend, are ready to save your digital file and print it. You're going to see all of that hard work coming together. And when you see that actual printed version of your hand-drawn illustrations, it is so motivating. If you're anything like me, your mind is going to be really with all kinds of possibilities, thinking about all of these different things that you can start creating in this same way. Go to the sticker Canvas you've been working on in Procreate. And the upper left-hand corner click on the wrench icon. Sometimes I accidentally call this the anchor icon. I don't know why, but hit the share button beneath that. And here two options. You can either save this as a JPEG or as a PNG file. I'm saving mine as a PNG. Save this to your files. Then click on the area where you can see the title of your immature and I forgot to nameless, so I'm gonna do that now. I'll just call this Skillshare stickers. I'm going to save mine to my desktop again and then I'll hit that Save button in the upper right corner. Now I can go to my computer and check the file. Before I print anything. I'd like to make sure I haven't missed any unwanted errors. Okay. Just double-checking here. Everything looks good on the gray and white screens. I'm just going to expand it to the full view to put it with the black screen behind to give me a different viewing perspective. Yep, everything looks good here. So I'm going to go ahead and close this and let's set up the printer. I'm using my Canon pro 105, our printer and some matte sticker paper, just a standard 8.5 by 11 size. Let's go back to the computer. I have two different printers, so I'm going to make sure that I have my Canon fine art printer selected underneath my settings. And making sure that I have the right paper size, 8.5 by 11, and 600 DPI. I always use the normal fine option. Print it your highest quality, whatever that is. And then I'll double check here to make sure that I have my matte photo papers setting. Hit print. And let's wait for the magic to happen. We'll look at this. I love it there. So pretty in a doesn't matter how many years I've been coloring and creating. I could so excited when I see my finalized illustrations being printed and going on to products. It's just a thrilling process. There is no way to say it. So let's just pause here for a moment. We're going have a little mini celebration in honor of all of your hard work policies video if needed to find a room where nobody can see you do whatever you need to do and take 15 to 30 seconds to do a celebration dance. I know what you're thinking. You're just going to skip this section, go to the next part and avoid this activity. Don't do it. Because letting yourself go for a minute is going to get you laughing. It's going to pump up those endorphins. So you can really feel good about all the hard work that you've put into this. Here's the deal. If our isn't fun and it isn't motivating the really there is no point in doing it. You have enough stress in your day-to-day life dealing with all of that junk that you don't want to deal with. So the last thing you need is for your art time to be stressful too. So try their best to just stay relaxed. Enjoy this process. This is your art time. It's supposed to be fun. And I want you to feel relaxed and feel good about yourself as you're drawing and creating. So print that page, do that. Happy dance. Upload your pics to the project gallery and gear up for the next lesson because we're going to be cutting out those stickers and using them.
13. Cut and Use: The time has come, my friends. Yup. Get out your paper and those scissors because we are going to start cutting out your sticker project. There are a couple of ways to do this. If you want your stickers to be perfectly geometric, you can draw some lines around them. You can use paper color, edge rounder, cut out by hand. I'm going to be showing you a bunch of different ways that you can actually cut things out and kinda play around and experiment. So let's get to it. If you want your stickers to be perfectly geometric, you can lightly trace out a shape with pencil. If you have a circular stencil, you can use that for square and rectangle shapes. Drawing lines with a ruler works well. You can also cut out everything free hand style. I'm gonna do a little bit of each so you can see what I mean. Cut inside of your lines. If you do make any marks, you don't want to have any of that lead pencil coming out onto your stickers. So if you do make any kind of mark on your page, just be sure to cut inside so you don't see it. They should be nice and pretty and white. For rectangles. I think it's easiest to use a paper cutter here, so I'll do that quickly. And then just to make these look a little extra fancy, I'm going to use my rounded tip cutter and just round off the edges on my four corners here. A lot of stickers that you see how a white border and I really liked that look. So instead of cutting right up to my colored illustration, I'm going to leave about an eighth of an inch of white border around my sticker shape. When I cut them out free style. That looks perfect. And that's it. We've got our stickers out, we're ready to use them. I'll be putting these into my journal to liven up my pages. I'm really looking forward to see the ideas that you come up with. So please share your pics with the rest of the class. There are so many ways that you can start creating now that you have these skills, it's really motivating when we can all see each other's projects and progress. It gets us more ideas and that's just fun to share our work, especially after we've put all of this effort into creating these stickers. We want to share them with the rest of the class, so please post often and we're not quite done yet. So post suspects in the class gallery and then head on over to the next lesson.
14. Create More: Are you feeling motivated? Seeing the beauty of these stickers come to lyse, breaking down an image and to general shapes than finding the smaller individual shapes within it. Sketching until you get an illustration that you love and really taking your time to add all those layers of color and lots of different tones in your illustration so that it pops off the page and have a lot of interesting color to enjoy. Clean up work and procreate is the same whether you're making stickers, greeting cards are posters. You've learned how to digitize your hand colored illustrations so you can print them out and use them on products. The possibilities are as big as you want them to be. You'll even learn how to add text to your illustrations if you do create something else, but their newly acquired coloring abilities, I would absolutely love to see it. Don't be shy about it. Post the US takes on the project gallery so we can all enjoy seeing different styles and motivate one another with fresh ideas up next to join me for the final lesson.
15. Final Thoughts: I really hope that you've enjoyed learning about coloring and illustrating this way. If you've gone through all the steps in this course, then you now have the ability to be able to use essential coloring skills to color any project that you want by hand. You also understand how to break down objects into basic shapes to make them easier to draw. And you know, some simple ways to use Procreate so you can clean up your artwork. You can digitize it for digital platforms and social media, or you can print it out on products. Beyond all of those physical skills of this class, I really hope you feel inspired to keep coloring and keep creating by hand. And I hope you see how valuable and rewarding it can be. The rich quality and the depth and texture of hand colored medium is so addictive and appealing to look at. So whether you're staying cozy at home, exploring the wonders of nature and a garden. I hope you start observing objects as basic shapes and continue to practice your coloring skills because you'll keep perfecting and improving your own blending techniques over time. This is my first class of many plans Skillshare classes. And I also invite you to join me on my YouTube Studio vlogs, and also on Instagram where I post weekly and daily inspiration, all of my links are posted and my teachers profile and down below, please share your feedback about this class. Anything that you can mention that was helpful or something that you enjoyed. Not only does it help other students, but it also helps me prepare better classes so I can teach you even better in the future. The project gallery is always open for you to share your work. If you have any questions, feel free to ask me. Thanks so much for watching and coloring with me. Keep coloring and keep creating by hand. I'll see you next time.
 Samantha Loraine, Illustrator, Artist, YouTube Vlogger