Transcripts
1. Class Introduction: Hi, I'm Freya. I'm an artist
and surface patter designer. And today I want to
walk you through how to create a
unique color palette. When you're starting
out as an artist, one of the most
important things that you can do is to create a cohesive color palette that you use across all
of your artwork. It makes your artwork
look sophisticated, cohesive and it builds
brand recognition. What colors do you want to
see more of in the world? Do you want your art to be
bright and poppy and vibrant? Or maybe it's more of a calm and muted feeling that you're
trying to project. Whatever your color style is, it's really worth the
time to hone in on. And when you've finished
your color style, the color should feel
uniquely like you. The good news is, you
don't need to know any color theory to
do this exercise. And you'll come out on
the other side with a gorgeous color
palette that will be the foundation of your color
style for years to come. This exercise takes some
time, but it's so worth it. So make yourself a cup of tea. Settle in, and
let's get started.
2. What is a Signature Color Palette?: Creating a signature
color palette eliminates the guesswork and it saves you time when you're trying
to pull together colors. A signature color palette has about 30 or so colors from
that master color palette. You can then just choose colors that you need
for your artwork, knowing that every single one of those colors is going to
work together, don't worry, it won't feel like
you've limited to your color choices too much because you still have all the colors in the rainbow
work presented. It's just that they're
now in the tints and hues that make up
your personal style. And remember, you're not tied to this color palette forever.
You can always change it. And it's going to naturally
evolve over time. As you realize which colors
are working best for you and which ones maybe don't fit quite as perfectly
into this system. As you go through this exercise, don't be too precious
about trying to create the ultimate perfect
color palette that will evolve over time. But we're trying to
do here is to really discover what your
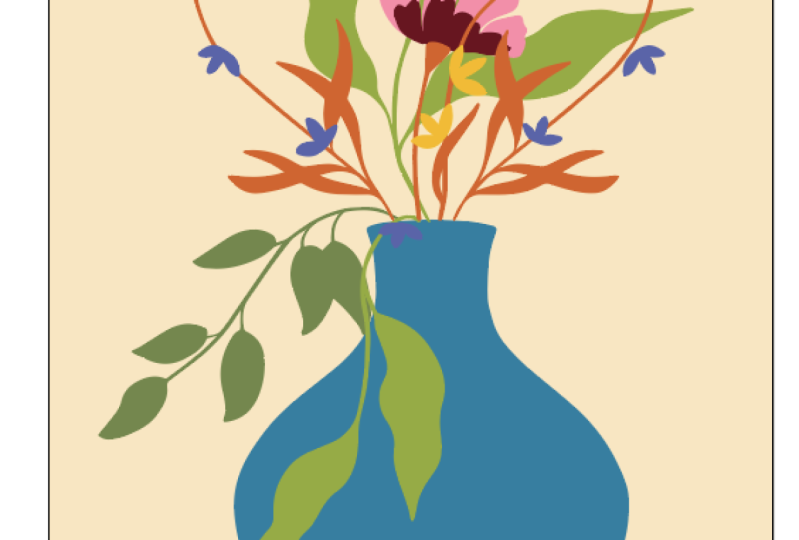
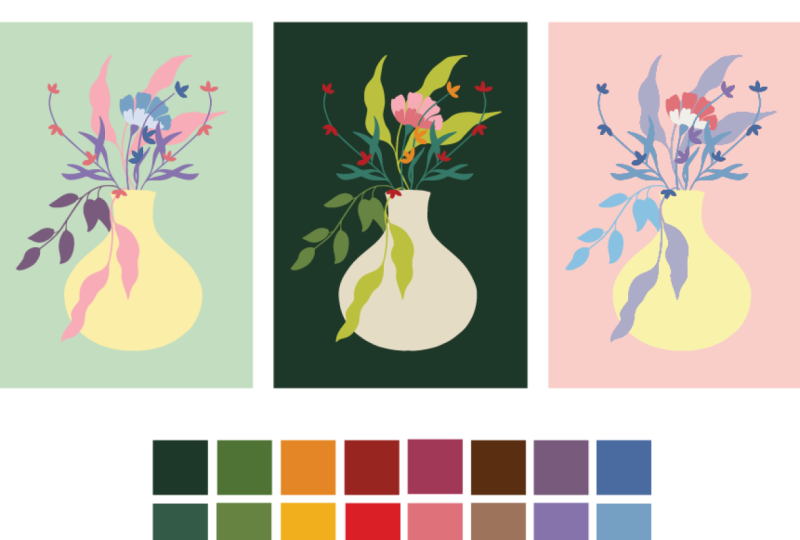
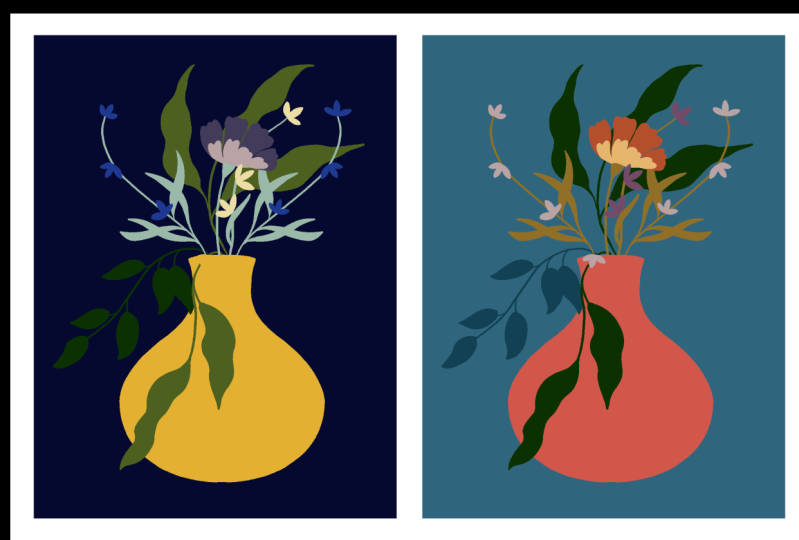
color style is and to create a foundation for your color style that is going to continue to evolve over time. For your class project,
I'd love for you to share some artwork that features
your new signature colors. Bonus points, if you upload
several pieces of artwork that feature different
color combinations from your signature palette. Okay, with all of that, said, let's go get inspired.
3. Collecting Inspiration: Okay, first things first, as you find inspiration, it's really important
that you're not just copying
another artist's work. It's okay to be inspired by
another artist's colors, but it's not okay to copy them. So that's why we're going
to find as many sources as we possibly can of
colors that inspire us. Then we're going to pull lots of colors
from those images, and lots of different
tints and shades. And then we're going to assemble our own color
palette from all of these different sources to make sure that it is uniquely ours. Here are a few other
guidelines to keep in mind as you're going
through this exercise. You'll want to save photos
with a lot of variety. Don't just focus on
one style or artist. We're not worried about
matching colors up yet at all. And we want to make
absolutely sure that we're not just copying
the color palette of an artist we love focus on
how the colors make you feel, not the form or fashion
or composition. You'll also want to capture all of the colors
of the rainbow. Since this will be your
master color palette, you want to make sure you end
up with all of the colors represented in it so you have
a full choice of colors. You'll also want to spend at least one to 2 hours
just collecting images. This is the most important part. Collect images with colors you love and really hone
in on those colors. Nothing else about those
images matters, right now. One of my favorite places to search for beautiful
reference images is Unsplash.com Unsplash provides
copyright free images that you can use for any
of your art projects. It's searchable. You
can do any search here. For example, I'm
just going to put in colorful houses and
see what pops up there. If there's something that
we might be inspired by, you can just continue
doing searches like this. Then you can just copy and paste these images
into your mood board. Let's talk about a few places where you might want
to find inspiration. Besides Unsplash.com you can
scroll through Pinterest. You can look at fashion blogs and interior design websites if you feel like your wardrobe reflects the mood and style
that you're going for. You can also take
pictures of your clothes. You can look at architecture, search through travel blogs. If you're really
inspired by landscapes, maybe you really love the colors that you see in the
mountains or at the beach. Then you can also, of course, go on nature walks
and take lots of pictures of botanicals,
of flowers. Scroll through your camera
role on your phone and see if there are any
pictures that you would want to draw
inspiration from. Let's set up that
moodboard so we can get started with collecting
all of our images. There are two different apps
that I use for Moodboards. The first one is called Padlet. Padlet, just go into the top right corner and
click Make a padlet. Then I like to use
the canvas format. You can change the background. It just automatically
put in a background. I like to use one
that is off white or maybe a dark gray just
so you have that contrast. Then you can just get started. In the bottom right corner, you can click the plus sign, then you can either upload images or you can
drag and drop images. You can copy the
image, then control V, paste the image, hit Publish, then you can make this image larger or smaller
on your mood board. You can move it around
however you want. You can just keep
going in that way. The other software
I like to use, this comes on newer Macbooks, is an app called Free Form. Here again, you just go to the top right corner
and create a board. You can just paste any images in here and move
them around however you like. So I'm just going
to go ahead and start adding images
to my mood board. Here are a few search term
ideas just to get you started.
4. Extracting Colors: Now that we have a nice
collection of colors and photos, let's take a screenshot so
that we can import it into Adobe Illustrator and
get started and picking colors in Adobe Illustrator. I'm just going to select
a standard new file. I'm going to take this
letter size artboard. It really does not matter what size your
artboard is here. We just want to have something that we can get started on. Then I'm going to go ahead
and grab my screenshot. Just click and drag it and
drop it into a P Illustrator. I'm actually going to move
this up above the art board so that we're not
irritated by these lines. And zoom out just a little bit. I'm going to lock this by
hitting control or command. And two, now it doesn't move around
anymore and you don't see these irritating lines, it is left into place. Let's get started creating
a little grid for us. I'm going to tap the
letter M on my keyboard, which allows us
to create shapes. And then I'm going to
click and drag and hold down the shift key so that
creates a little square. And I'm going to go over
to the Swatches panel and just click a
color to fill it. That's just temporary. We have this one
square ready here. And now I'm going to want to
duplicate this into rows. I'm going to tap bolt,
click, and drag. And hold down the shift
key so that it stays aligned. Then I'll release that. Then the really cool thing
in Adobe Illustrator is that now I can just hit
Control or command D, It's going to
duplicate that action. We'll have these perfectly
spaced squares here. Then I can click and drag to select all of these
squares at once. Again, I'm going to tap Alt. Click and drag and hold down the shift key to pull this
over so we have a second row. Then again, I'm going
to tap on my keyboard, command control and D, and it's going to duplicate
these really quick way to set up your grid for
selecting colors. This is probably more
than we're going to need, but we want to really have
as many options of colors available as we can if you're using Photoshop
for this process. I've provided a sample worksheet for you that you
can download from the Project and
Resources section that already has the
grid set up for you. Now we can get started
picking colors. What we want to do
is click on one of these squares and then tap on our keyboard
for the eye dropper. Then we're just going
to click around in this image until we see
colors that we really like. The key here is that we
really want to select as many shades and
nuances as we can. Don't just stick to one
beautiful shade of green, We really want to have
lots of different nuances. Because as we're putting
together our color palette, we're going to want to make sure that shade works with each
other shade in that palette. And sometimes that means going
just a little bit lighter, or a little bit
darker, or a little bit more muted of a tone. We want to make sure
that we have as many of those shades available as
possible to choose from. I'm just going to
keep doing this. I'm going to tap V so that I
can select the next square. And then tap for the color
for the eye dropper. And then I'm going
to click around until I see a color
that I really like. You'll notice that the colors when you have them here
in the square sometimes look very different
to the human eye than they do when they're in context
in these photos, right? Because they're so influenced by all the other colors
that are in that photo, this shade of green
might look more gray to you once you
see it in isolation. I'm just going to go
through here and pick as many colors as
I can from the, from this collage of photos. And what I'm going to do
is make sure that I have every color of the rainbow represented in multiple shades. We want to make sure
that you have your red, your blue, you're green,
your pink, you're purple, your yellow and orange, all represented as
you're pulling these out so that we have everything we need to pick from in the end. The other thing that you
want to make sure is that you do select
some neutrals. Something that is
very close to white, and something that is
very close to black. In fact, I would recommend doing several
of these where you have several very light
neutrals in different tones. You might have a white that goes slightly into pink or
into a yellow shade, and maybe one that goes more
into the cooler shades, like a very light gray or a very light bluish
tinge to the white. Because those shades are going
to be important as you're creating background colors for your illustrations and patterns. And you'll want to do something
similar for the blacks. We never want to
really out right, use a stark white or a stark
block when we're designing. But you'll want
something that is very close to it that will also
work with your other colors. So keep that in mind as you're
selecting colors as well. So I'm going to go
ahead and speed this up and then I'll meet
you in the next lesson.
5. Let's Get Organized!: Now that we've finished
sampling colors, we're going to
sort these colors. What we want to do here
is sort them into groups. By the closest color, I'm going to put all
of the reds together. I'm not going to really
do very much in the way of sorting within the color yet. For now I just want to
pick everything that is related color and
put them all together. Don't overthink this at all, just kind of go
with your gut and group them together loosely, and then we'll take
it from there. Now that we've done
the basic sorting, I'm just going to do a
little bit of sub sorting. So I want to sort within
each of these colors, things that are very, very light, put all of those
together within that color. And then the
midtones separately, and then really dark tones here. I think these actually fall
more into that category. Again, this isn't
an exact science. Don't spend too much
time thinking about it, because you can make yourself
go a little bit crazy. Just go with your
gut and sort them like as close as you can, because this will
be really helpful later when we're trying to put together a color palette and one color doesn't quite work, we're going to go back to
these little groups and try to find something that
is really similar to it, but might work better in combination with
the other colors. Let's just go ahead
and sort all of those together and then we'll be almost ready to start putting
together our color palette.
6. Putting it All Together: Okay, now that we have
the basic sorted, we're going to start
assembling our color palette. I really like to start
with midtone values, because those are
going to be some of the most prominent in
your illustrations. And you can always go lighter
or darker if you need to. But you want to make sure that those midtone values are right. So the first thing I
want you to do is to go to each of the groups that have midtone values and pick out your
favorite colors. Just pick out one and
put them all together, and then we're going to see
how they work together. Okay, I've picked out a
couple of my favorite colors and just put them in
a row here already. I can tell that they probably aren't going to go
perfectly with each other. Some of these colors, like
the greens, are more muted. This blue is a little
too bright, I think. But what we want to do now is focus on how
they work together. Then go back to the drawing
board if we need to, and find other colors that
work with each other. I like to grab one of these squares and just put it behind the other colors to see
what the contrast is like. Because the contrast is
a pretty good indicator, a lot of the times of how well these colors
work together. You want to make sure that the contrast doesn't
hurt your eyes, and also that the contrast
is strong enough. Because sometimes it'll make you squint a little bit to see where the lines cross
this yellow and green. The contrast isn't great. I think they're a little bit
too close in total value, but I'm just going to hold
on to that for the moment. This yellow actually works fairly well with all
of these colors. I'm just going to keep
that here for a second. This blue, I think, is
a little too bright. So I'm going to go back to the drawing board with this one, maybe try this darker blue. I do like that contrast. I'm not sure about the blue
and the brown together, but it works with
the other colors. I'm going to keep it for now. I think the contrast between these two
grains is not great. The green and the red together
hurts my eye a little bit. You just want to go
back and forth here. I'm going to go grab these greens and see if
there's something in here that might work a little bit better. Here's one more thing
that I always forget, and I want to make sure
to flag it for you on some computers in
Adobe Illustrator. When you are in GP view. If you click under view, the colors are duller and more bland than they are in
other computer programs. Or when they print,
you want to go under view and change it
to CPU preview, which will make sure that it has the most accurate
color rendering. Okay, back tire color palette, you might want to take two
shades of the same color too. And just take them both to the other colors and see what
they look like together. This color I'd
picked as a purple. But now that it's neck
to the other colors, it actually looks
like a shade of gray. I'm going to keep it because gray is always
a good color to have. But I'm just going to test it against all these other colors. And you see the contrast with the green and gray
just does not work. It plays fairly nicely
with the other colors. But let's see if there's another purplish thing
we could use here. It's going to pull
up my purples again. We think this purple
works quite a bit better. So we're going to keep
this purple and put this one back. Okay. You see that this, this brown and this red
are quite similar. And this is what
I mean when I say the contrast is hard to tell. You have to zoom
in quite a bit to see where these lines
are crossing clearly. If you squint and you can't really tell where one color starts
and one color ends, that's usually a sign that
this is not quite working. So let me see if I can
find a different brown. Once you've assembled
your basic color palette with most of these
midtone values, you're going to want to add a and a darker shade
for each of these. A light yellow and
a dark yellow, light orange, dark orange. Some lighter tones of blue here, because this is
already fairly dark, Just work your way through and find those shades that work with other colors
in the palette. One helpful trick as
this color palette grows in the number of
colors is to take one of the squares and transform it into a larger
rectangle that we are going to click and send behind the
existing color palette. Now we have a background
for the palette, where we can just
change the color. And we can see at a glance
whether there are any colors that do not work with
that background color. Then we keep just
changing the color of the background to test it against all of the
colors at once. Press Eye for the eye dropper and click it to
change that color. Then I can click on this
large rectangle and click through some other
colors to see what works well with what
already exists. You really want to play
around with that for a little bit and see
what you can make of it and how you can make the most
cohesive color palette. Make sure when
you're doing that, in that process to add a couple of these
neutral colors to it. The light white, the dark
blues and greens and grays. So that you can have
some variation to play with when you need those
dark and really light notes. I think I've gotten
pretty close here. I'm going to just reorder
these a little bit, then we're going to
do one final test with the background test, and then we can put it
into our color tester. You'll notice as you're
doing this final testing, that some of the colors aren't going to work
perfectly together. That's the light colors with each other and the dark
colors with each other, just don't have enough contrast. But you usually
wouldn't be using those together in a design anyway. I'm not going to get
too hung up on that. I just want to make
sure that most of the main colors work together. And this is going to continue
to evolve over time anyway. I want to have a solid
foundation to work from. You'll also notice that some
of the very light colors, the neutrals, not
every single one of them is going to work
with every single color. That's also fine. You
just want to have a couple of different
neutral options that are close to white that will work with
most of your colors. It'll give you a little
bit of options for slightly different moods when you need a light background. Okay? I'm really happy with the
colors that I've chosen so far, and I think that they're
working pretty well together. Let's put these
colors to the test.
7. Palette Tester: All right, we have
a color palette ready to go. It's
time to test it. Let's open the palette
tester that I've provided for you in
the resources section. When you open the palette
tester and Illustrator, you'll see it's
still in gray tones. Let's click back into
the other file to select our color palette command C
to copy command V to paste. This is pasting much larger. With this still selected, I'm going to hit the
S on the keyboard. Just click and drag
towards the center. That's going to make
it much smaller. Press D on the keyboard so that we can select
and move it again. Now that all of these
colors are selected, I'm going to go over here to the swatches panel and add the bottom click on the folder
for a new color group. And then just hit okay. It's going to save all
of these colors into a folder as a color
palette for you. Now we can delete
this from here. We can just go ahead
and click into each of these elements and recolor them. I'm going to start
with the background. I'll select one of these
light colors here. Again, I'm going to go under
review and preview on CPU. And I'll just change
each of these colors and see what this looks like. So you can just click around and try different backgrounds maybe. Or if there's a color
combination that you'd like. You can also select all of this and go up
here to the color wheel. With this tool, you can
recolor your artwork. You can illustrator, do
all of the work for you. You can just go down
here and click on those button that says
randomly change color order. That's going to just
use the colors that are currently in this illustration. You can click around
a little bit and see how this
recolors it for you. Sometimes the color combinations won't work in the way
that it selects it, but usually there should be
several that work quite well. I'm going to cancel that.
You can also keep it all selected and go into
recolor artwork and click on the color group. And then it's going
to draw from all of the colors in your
color palette so you have a whole new hundreds of combinations that illustrator
can test out for you. This can be really fun to play with and discover new
color combinations. And also discover if there
are certain colors that just do not work together
in this combination. Because once you have a certain concentration,
for example, the background takes
up a lot of space, but then there are very
fine lines sometimes that can upset the balance of how
those colors work together. Okay, so now you
have a color tester. You can go back and forth and make any tweaks to your
palette that you want to, or you can keep it as is
and go forth and create.
8. How to Export Your Color Palette: Okay, now that we have
finalized our color palette, I just want to show you
how you can export it. The first step that
you have to do, again, is to add it
to the watches panel. I'm going to make sure I have the selection
tool selected up here. You can also press V on your keyboard to make sure
that you have that selected. Then you click and drag
over these objects. Go into this watches panel and click on the file
folder in the bottom. You'll get this new
color group pop up. You just hit okay.
And it'll auto populate all of these swatches
here in this file folder. From there all you
have to do is go to the hamburger menu and say
save Swatch library As ASE. E means Swatch exchange files. It means that you'll be able
to use these files with any Adobe application and
can easily import them. I'm just going to
name this file 2023, Signature Palette. Hit Okay. Now I'm going to
pull up Photoshop to show you how easy it is to import it in
the swatches panel. I'm going to click on
the hamburger menu again and say Import Swatches. And then all I have
to do is select the palette that I just
saved under that same name. Click open and it shows up in the swatches
panel beautifully. With that, you're ready to go.
9. Concluding thoughts: If you enjoy the class, I would love it if you would
leave a review. It's really helpful for other students to
find this class. Also, make sure to
share your project. If you want to keep learning, check out my other classes
here on skill share. And make sure to follow me
so you won't miss a thing. You can also follow me on Instagram or sign up
for my newsletter. I'll see you again soon.
 Freya Riedlin, Designer, Illustrator, Plant Lady